
Fine line and ornamental spine pieces look delicate in photos and demand different choices in the chair. Trends push narrower scripts and stacked symbols, but what holds up on the spine depends on spacing, needle depth, and whether the design crosses joints. Read on for practical spine-specific ideas, what to say at consultation, and wardrobe hints that make your new back tattoo sit right now and years from now.
1. Vertical Script Along the Spine
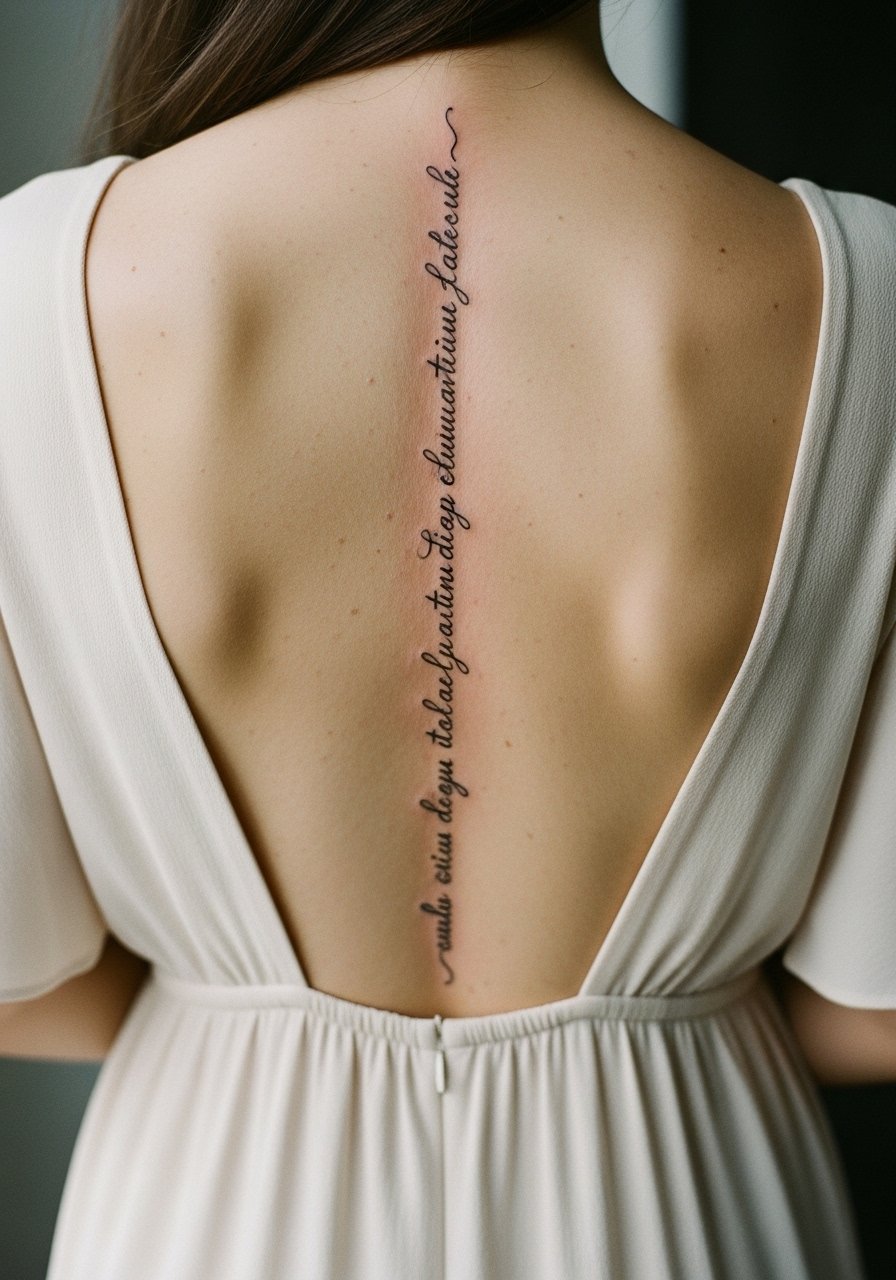
I recommend vertical script for people who want text that reads as a spine-line element rather than a separate chest piece. Tell your artist you want slightly increased letter spacing and a medium lineweight so the letters do not merge as the skin settles. Expect a moderate pain level where bone is close, and plan for a single 60 to 90 minute session for short phrases. A common mistake is asking for ultra-tiny lettering; that looks crisp fresh but blurs into an unreadable smudge by year three. For showing it off, an open-back midi dress keeps the focus on the line without competing prints.
2. Botanical Vine That Follows the Spine
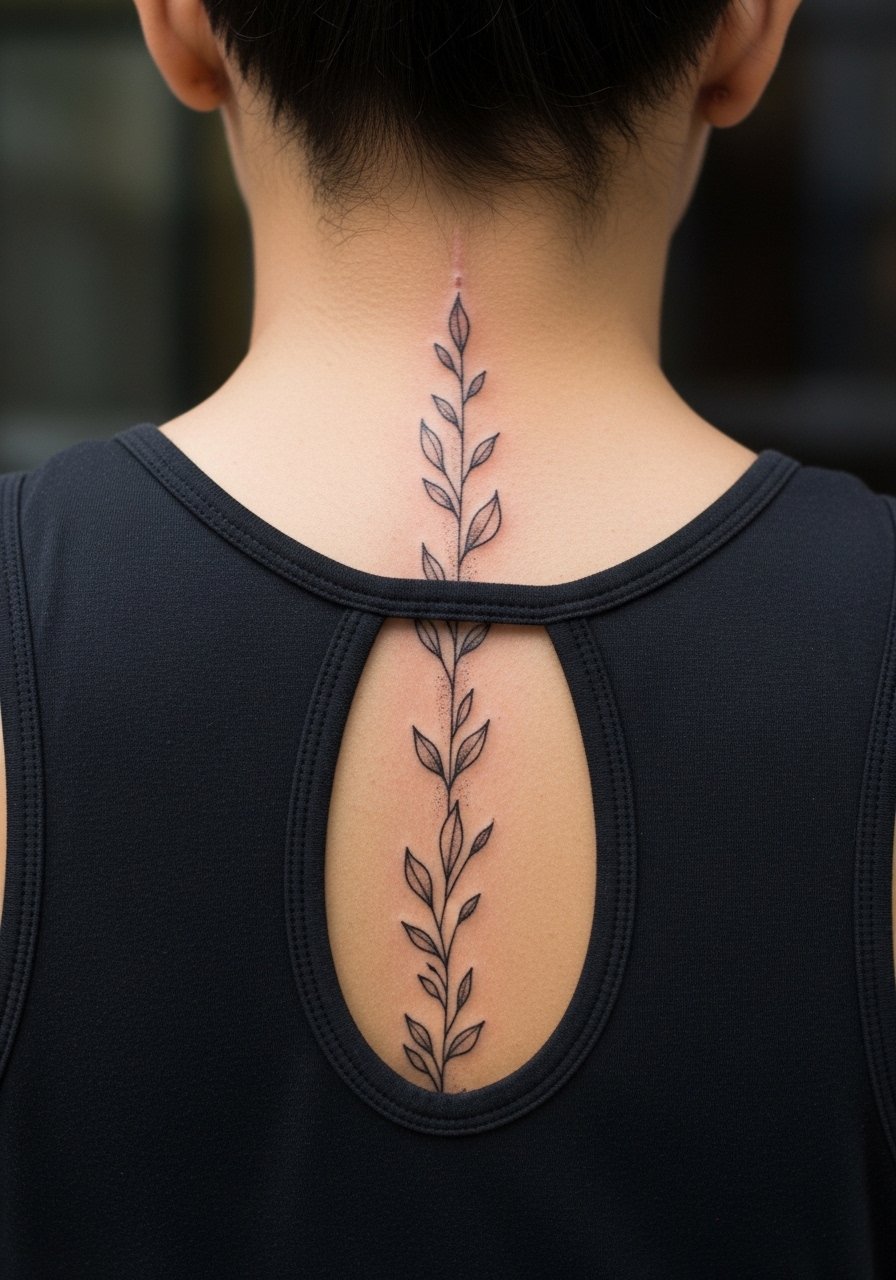
This style suits people who want movement rather than a single focal image. In consultation, ask for alternating leaf sizes and low-saturation green washes if you want subtle color. The vine looks best with negative space between elements so each leaf reads at six months and still reads at two years. A real mistake is packing too many small leaves along tight spine curves. Session time can be split into two 90-minute sittings to let swelling subside. For session comfort wear a racerback tank top so the artist has full access without you being cold.
3. Ornamental Mandala at the Upper Spine
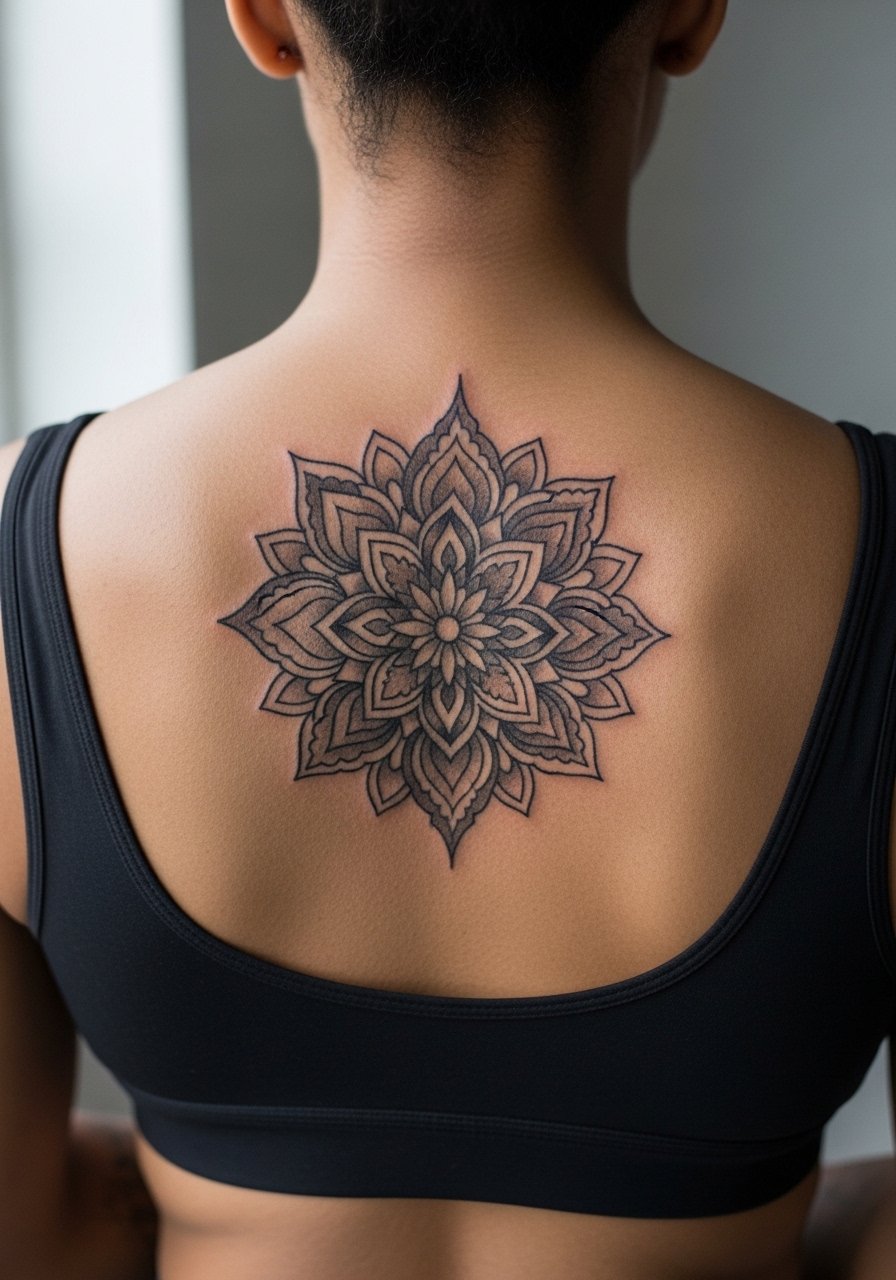
A mandala centered at the top of the spine frames the shoulder blades and reads like jewelry. When you consult, specify where the mandala should sit relative to the shoulder blades and whether you prefer dot work or stipple shading for texture. Artists debate whether extremely fine stipple holds on the spine. One camp says dense dot work near the vertebrae compresses and softens quickly. The other camp argues that careful spacing and conservative dot sizes keep the design readable. Expect 2 to 3 hours for a medium mandala and plan a touch-up option at year two. Pair it with an open-back bralette for evenings when you want the design to sit like a centerpiece.
4. Column of Tiny Stars or Dots
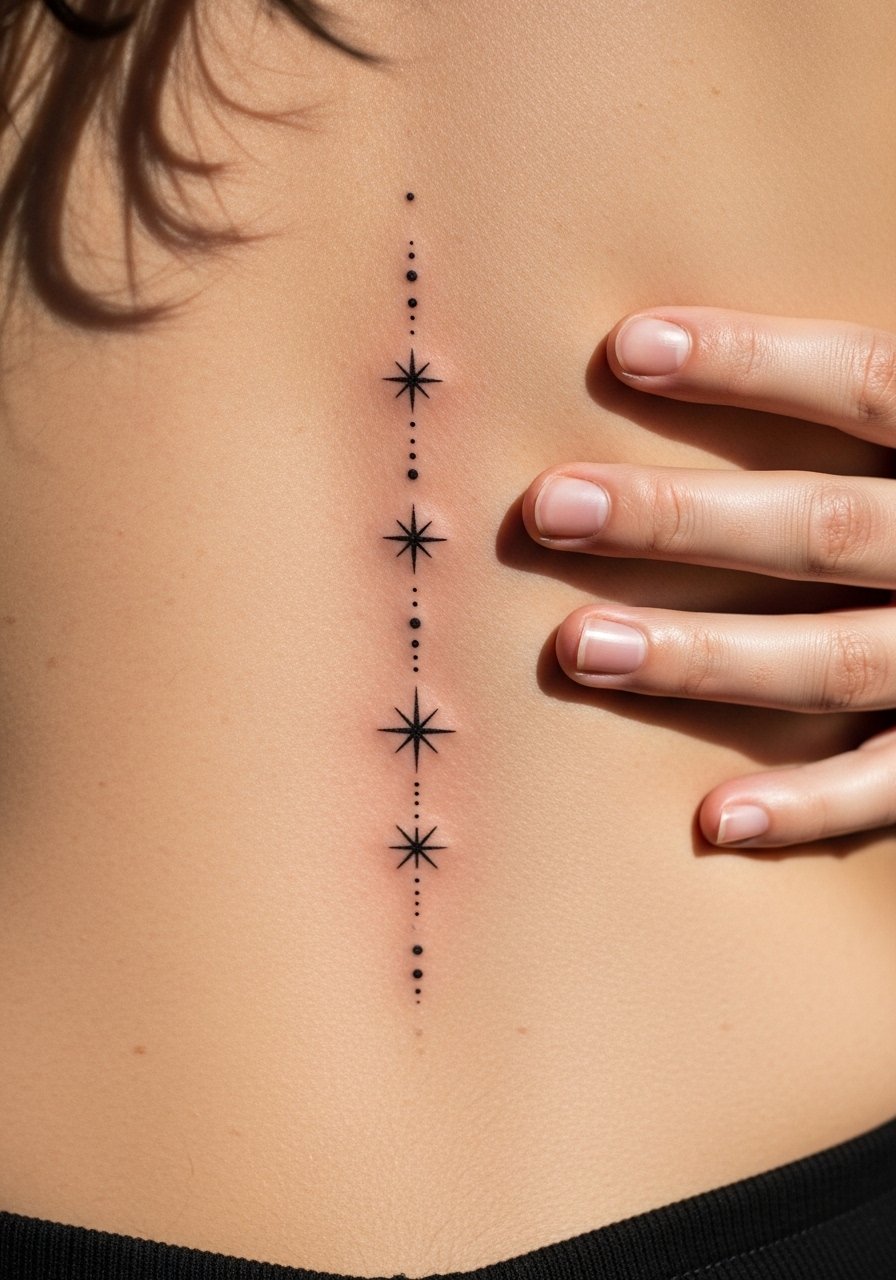
This minimalist column reads like a subtle accent. A clear consultation note: ask for regular spacing and a standard needle that avoids feathering. The spine has thin skin in places and blowout risk increases if dots are placed directly over bony protrusions. Many people expect these to be virtually painless, but the upper and lower spine can be sharper sensations. Most of this work fits in a single 45 to 75 minute session. If you want to show it off casually, a racerback tank or a low-back swimsuit keeps attention on the vertical line.
5. Micro-Realism Moth Centered on the Spine
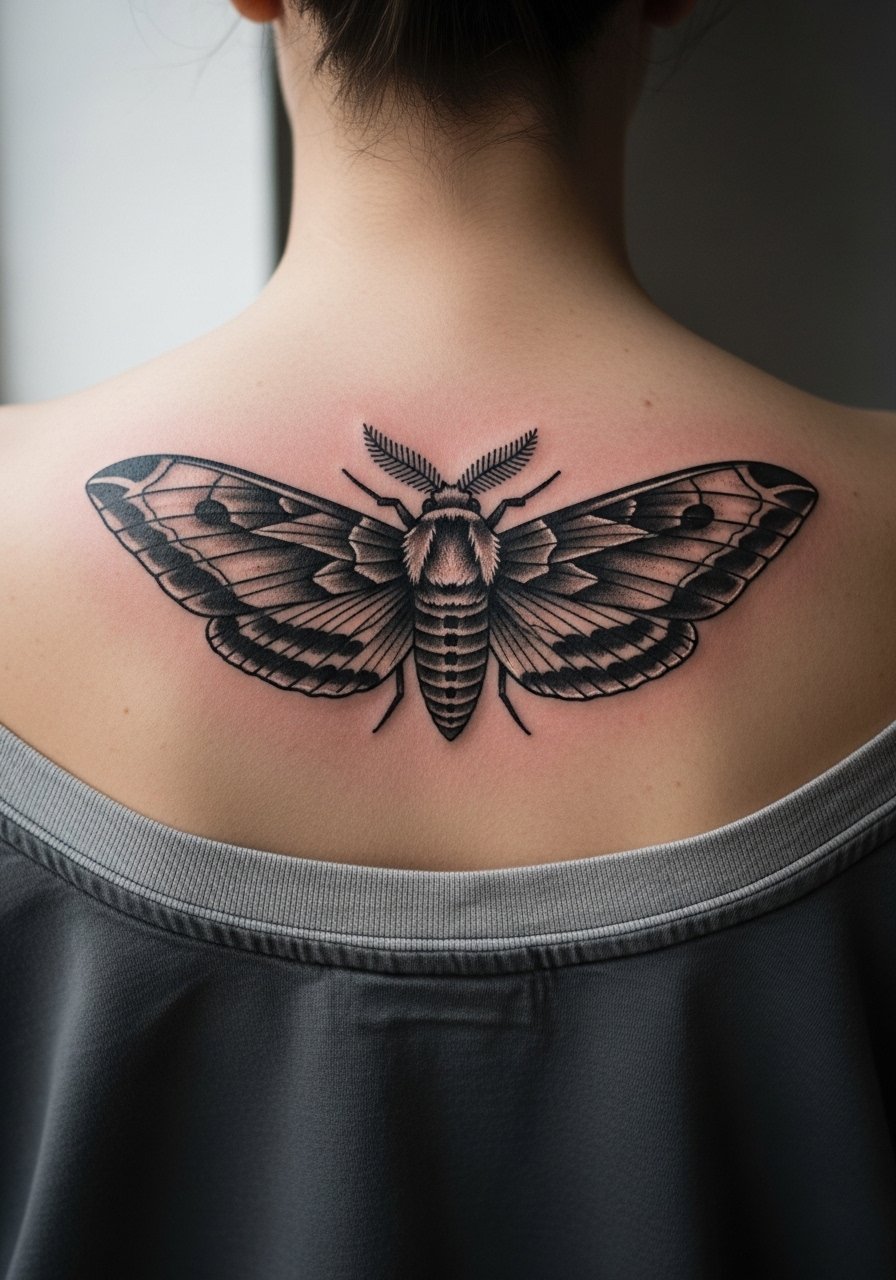
Micro-realism on the spine looks highly detailed when fresh but needs spacing and modest contrast to keep form after healing. Tell your artist you want defined wing edges and conservative gray saturation rather than dense black fills. The common mistake is packing extreme micro-detail into a small plate. At six months the detailing softens and by two years some subtle contrast will have left. Expect a two-hour session and a likely touch-up at year two. For appointment ease wear a loose button-down shirt you can pull to one side so the shoulder blades stay covered while the artist works.
6. Geometric Spine Column with Negative Space
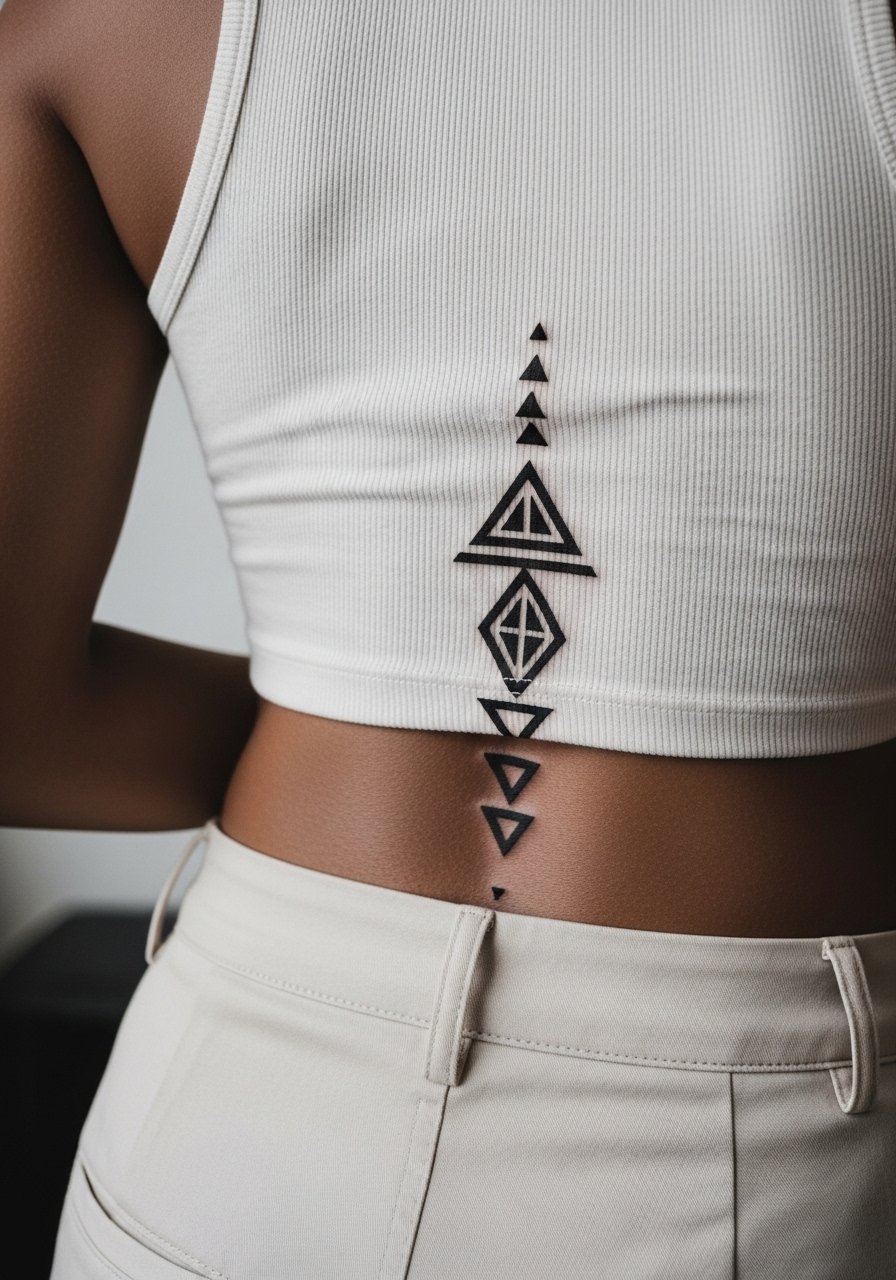
Geometric spine pieces read as modern architecture on the body when they have breathing room. Tell your artist you want crisp linework with intentional gaps so shapes do not merge as ink spreads slightly. A common error is requesting too many intersecting fine lines near the vertebrae. Pain varies along the column with lower back generally less sharp. This work usually fits in 90 to 150 minutes depending on complexity. For show-off looks pick an open-back top that frames the central column without competing textures.
Studio Day Picks
The upper and mid-spine pieces above need different prep than broad back panels, and a few items smooth out the session and the first week.
-
Stencil transfer paper kit. Lets you test vertical placement against your spine line so the script and geometric columns sit where you expect.
-
Topical numbing cream. Applied per instructions before a session makes vertebrae-heavy zones more tolerable while preserving the artist's linework.
-
Thin protective film roll. Useful for lower-back and waistline placements that might rub against clothing during the first days.
-
Fragrance-free gentle body wash. Cleanses healing skin without irritating fine-line details on spine scripts and micro-realism.
-
Aquaphor healing ointment. Thin layers in the first 48 hours help keep small linework from drying into tight scabs that can pull pigment unevenly.
7. Soft Watercolor Wash Behind the Spine
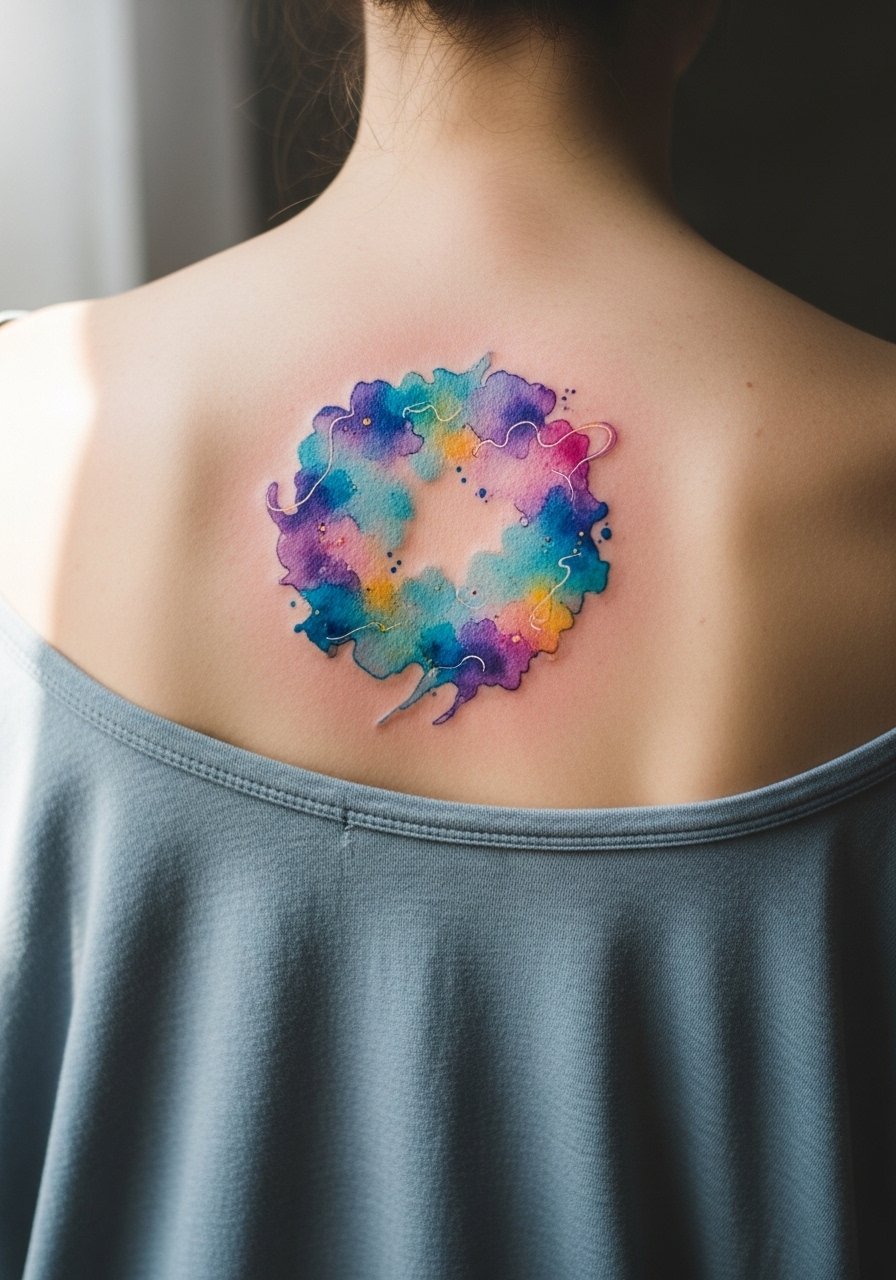
Watercolor washes behind the spine read painterly but come with longevity caveats. If you want this look, ask the artist for muted saturation and a few anchoring lines so shapes age with form. The controversy here is clear. One group warns that watercolor fades faster on the back because large washes lose pigment. The other group says anchored line elements prevent wash drift. The middle ground is to plan for touch-ups at year two to retain vibrancy. Sessions vary from 90 minutes to multiple sittings depending on area. For showing it off, an open-back dress will let the soft color read without busy patterns.
8. Bold Blackwork Spine Stripe with Negative Space
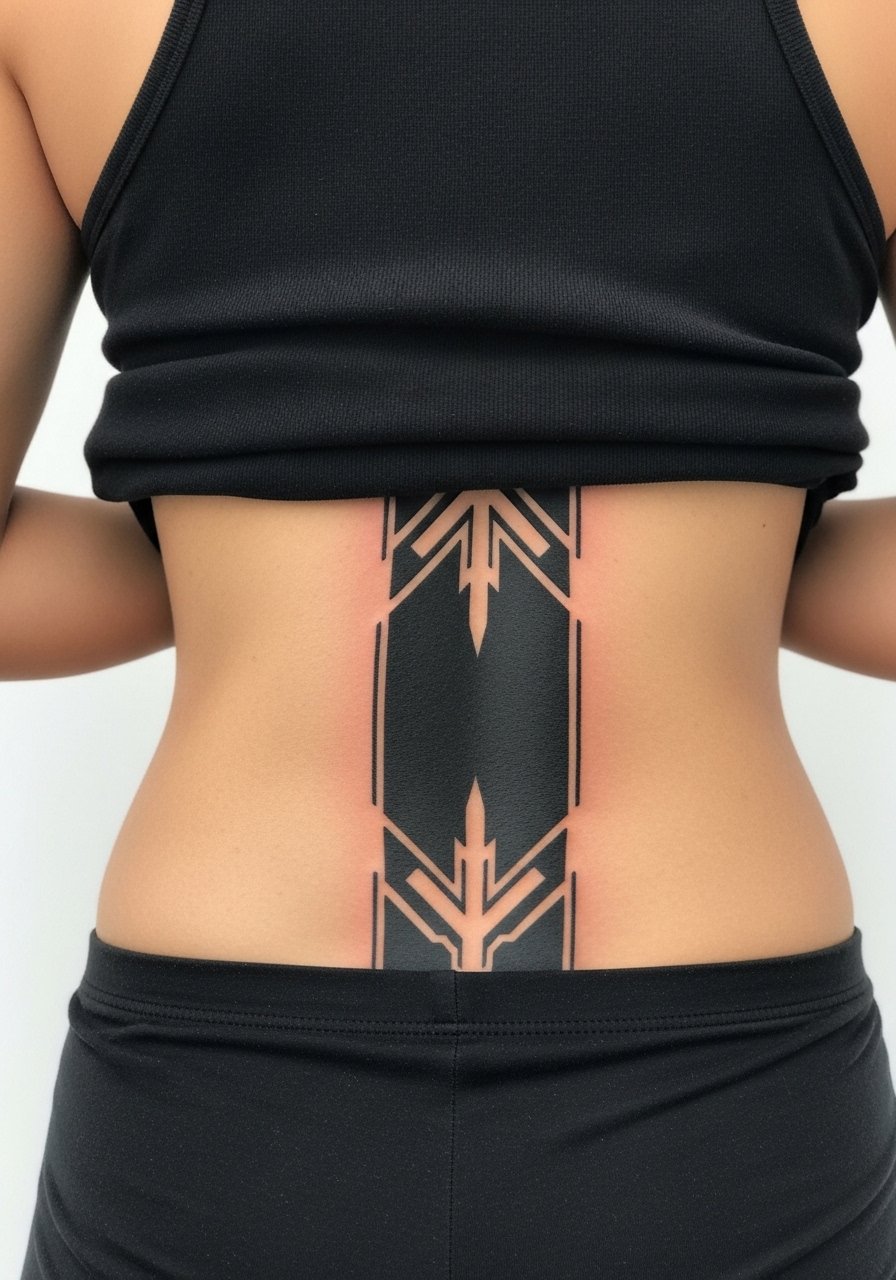
Bold blackwork fares well on the spine because saturation ages into a solid graphic. Tell the artist you want strong saturation but deliberate breaks so the piece never feels like a single blob. The biggest mistake is asking for a single, dense block with no breaks, which can look heavy against natural curves. Blackwork sessions can be more painful in long runs and may require two sittings. Expect touch-up in year three for any fill inconsistencies. If you plan to show the lower portion, a low-back top keeps the silhouette clean without masking the carved negative spaces.
9. Small Portrait or Cameo Between the Shoulder Blades
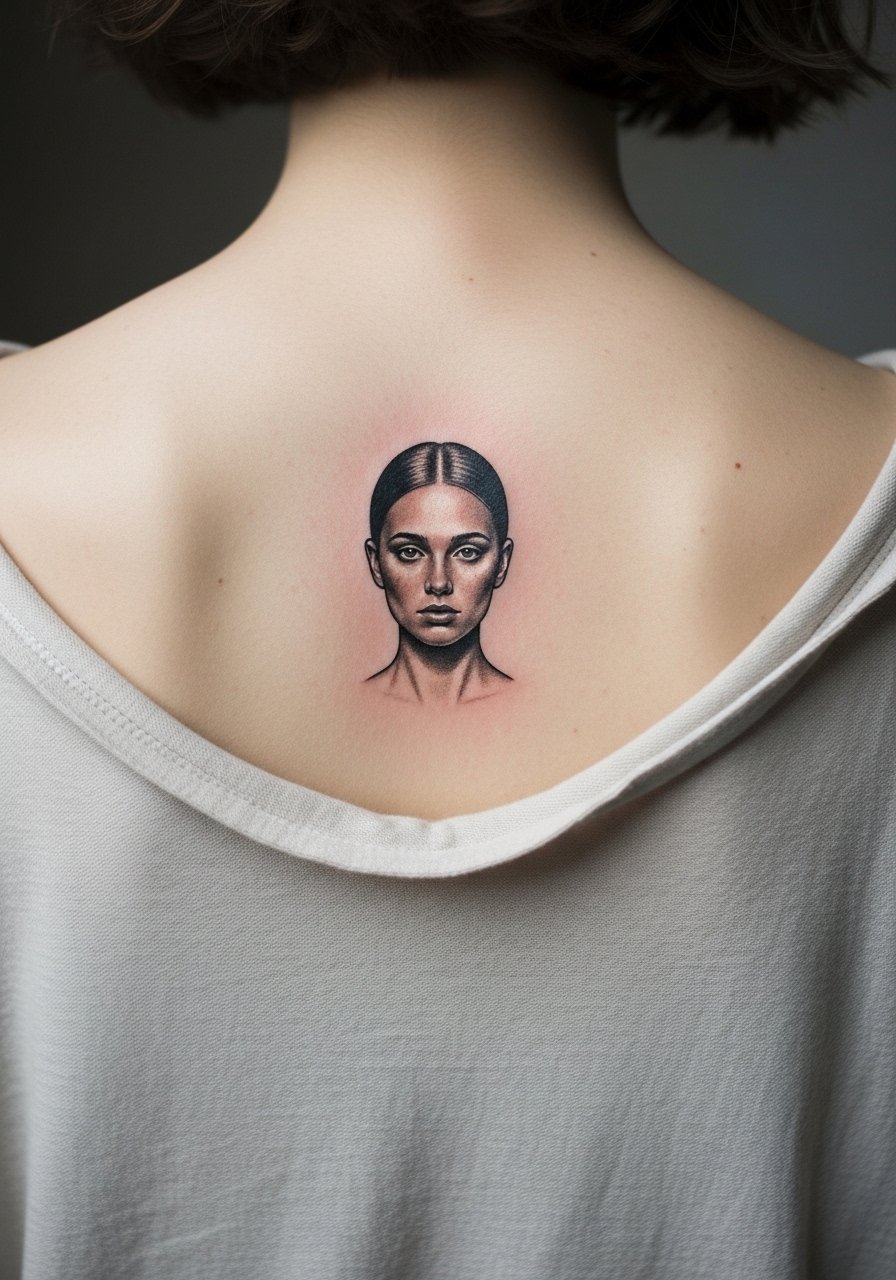
Portraits between the shoulders read intimate and framed by musculature. For this placement, request slightly larger proportions than you think you need to preserve facial features after healing. A common error is choosing a tiny portrait that loses expression at six months. Expect a careful two- to three-hour session and a likely touch-up at one year for contrast. During the appointment wear a loose button-down so you can keep warm while giving the artist clear access.
10. Koi or Irezumi-Inspired Flow Along the Side of the Spine
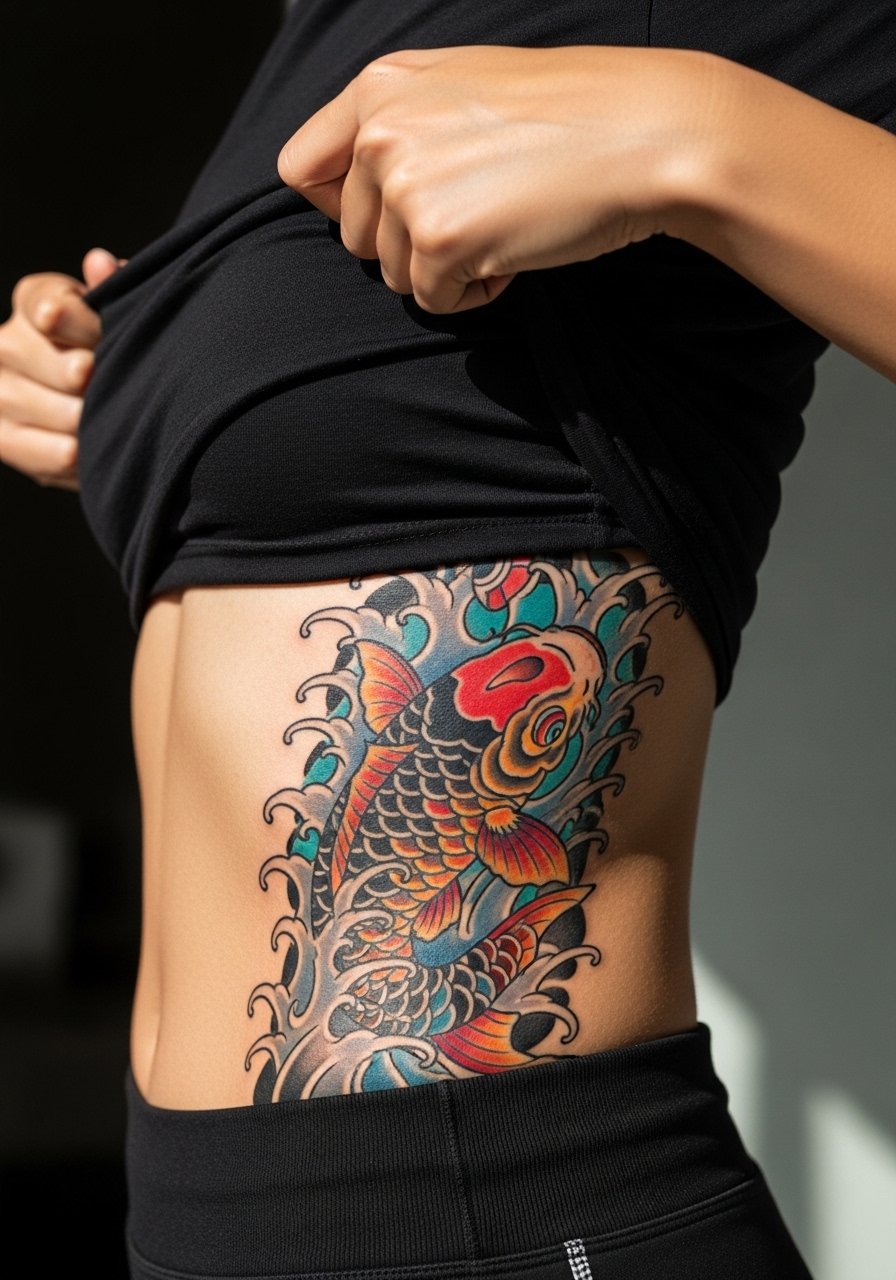
Large Irezumi-inspired pieces require cultural sensitivity and a conversation about motifs. This style draws from Japanese tradition, so consider slight personal modifications rather than direct cultural replicas. Side-spine placement crosses a high-movement zone and may need more spacing to prevent blurring at the edges. Sessions are longer and you should expect multiple visits. Pain can be higher on the rib-side of the spine and touch-ups are common. For appointments, wear a cropped athletic top that you can lift for access without exposing more than necessary.
11. Celtic Knot Column Down the Spine

Celtic knots look cohesive as a vertical spine motif when the knots have consistent spacing. Mention to your artist whether you prefer closed knots or open patterns so they can plan line weight accordingly. Small, dense knotwork near bone risks softening into an indistinct texture over time. If you love dense interlacing, budget for a touch-up at two years. Typical sessions range from 90 minutes to multiple sittings depending on length. For show-off outfits, an open-back top elegantly frames the continuous knot column.
12. Constellation Map Tracing the Spine
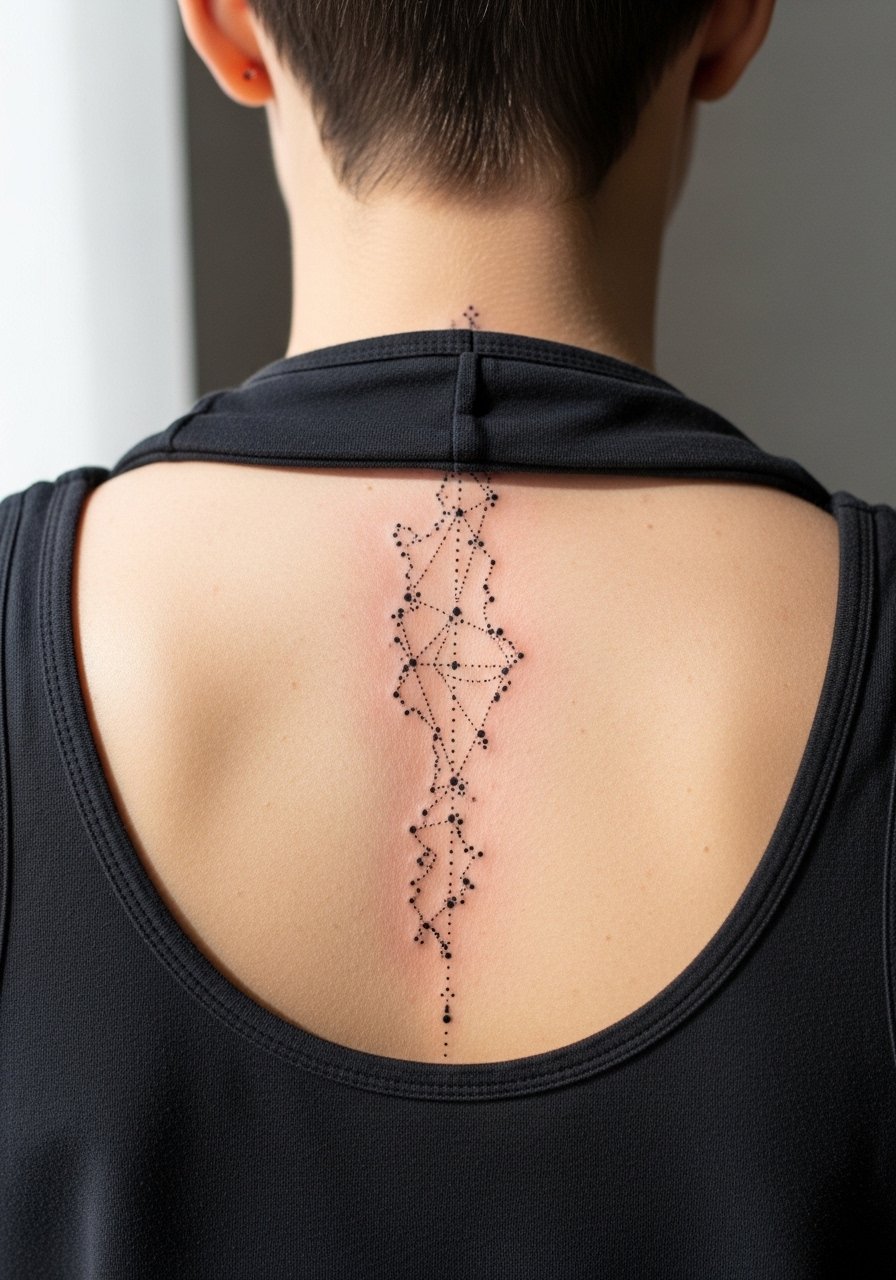
A constellation map reads like a personal map down the spine. Ask your artist to space primary stars slightly larger than secondary ones so the hierarchy survives low pigment loss. The spine presents blowout risk with dense dot clusters right over vertebrae. If you want permanence, plan slightly larger dots and fewer connecting lines. Sessions are usually short but may be split to allow for swelling. For casual showing, a racerback tank or halter pairs well.
13. Floral Cascade from Spine to Lower Back
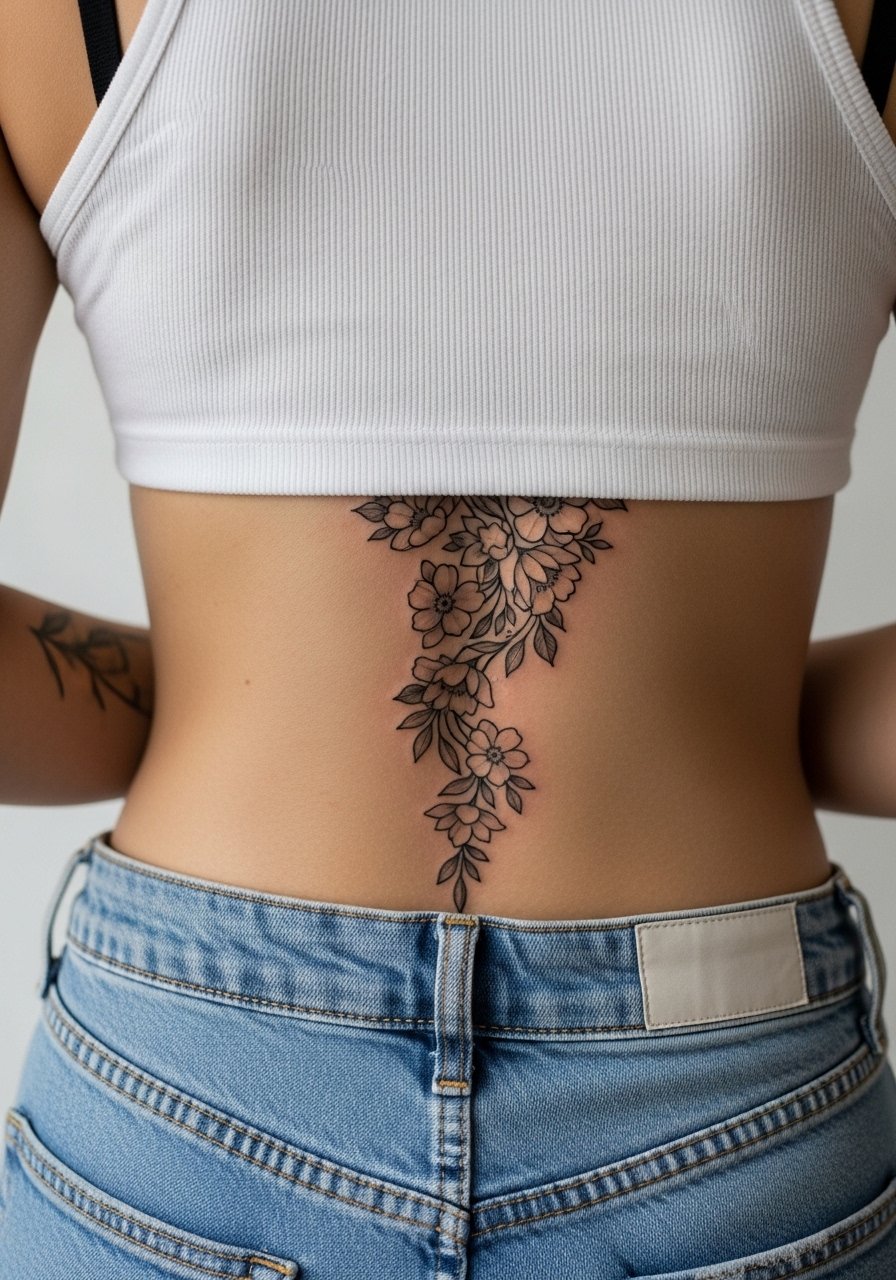
A cascading floral along the spine suits those who want an elongated feminine shape. In consultation, note which flowers are focal and request stronger linework on petal edges to maintain silhouette as the shading softens. Common mistake is packing too many small filler flowers which vanish into texture after healing. Expect two sittings for longer cascades and touch-ups at year two for the softer shaded sections. For a night out choose an open-back dress that lets the cascade fall against skin without heavy fabric rubbing it.
14. Single-Line Continuous Back Piece That Runs the Spine
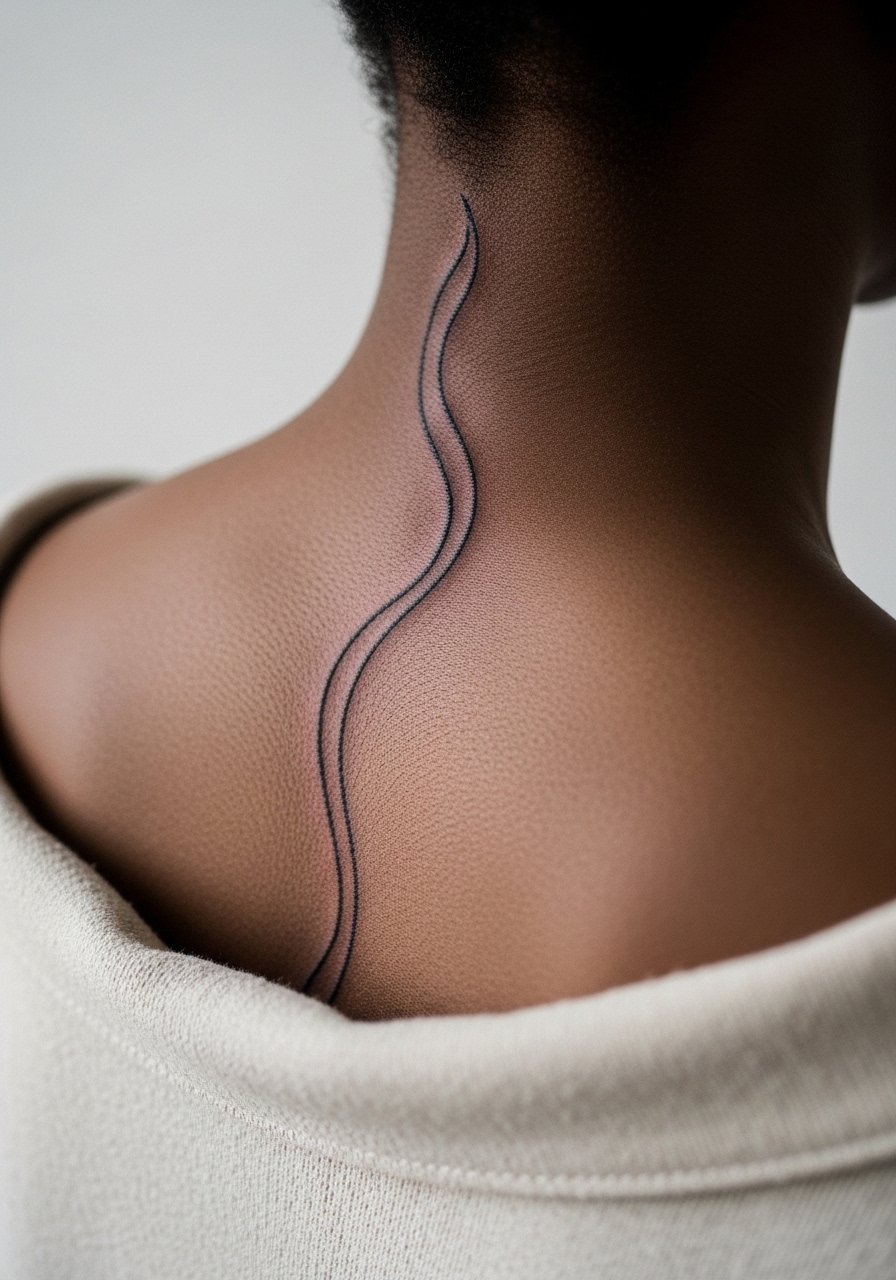
Continuous single-line pieces make a bold statement while remaining minimal. Tell your artist you want steady line pressure and deliberate pauses rather than a rushed single pass. The spine challenges steady hand speed near bones. A frequent error is asking for an ultra-thin single line that lacks enough depth to remain visible beyond one to two years. Expect a single long session of 90 to 180 minutes. When showing it off, a wide-neck blouse frames the line without swallowing it.
15. Stacked Chakra Symbols Along the Spine
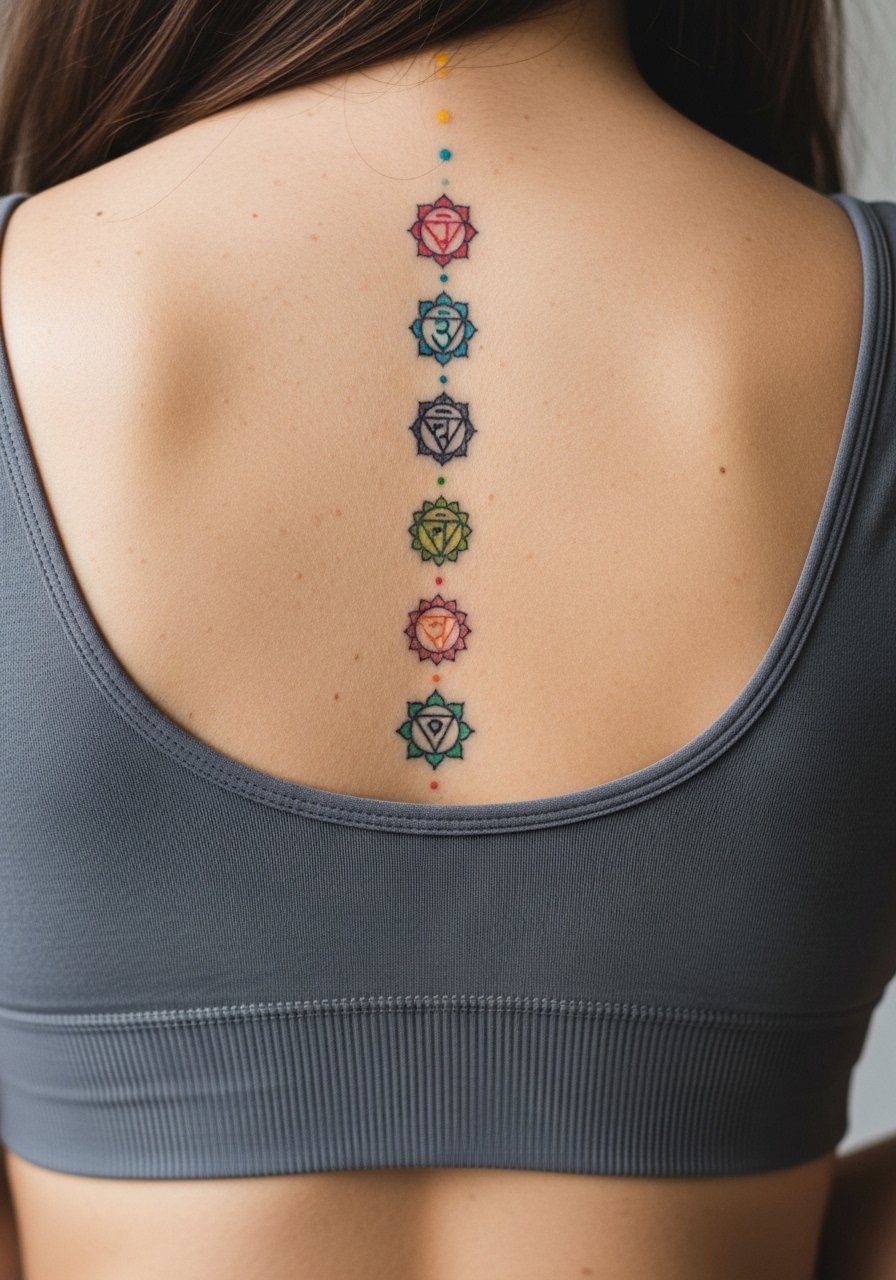
Chakra stacks are symbolic and map naturally to spine anatomy. Ask the artist to space symbols to match your torso length and to use modest color patches to avoid heavy washing out. The spine moves and stretches, so debate exists. One side cautions that small colored symbols fade quickly on high-movement zones. The other side says conservative color with crisp outlines holds. Plan for annual touch-ups for color refresh. For studio comfort pick a fitted sports bra you can wear and still grant the artist access without full exposure.
16. Delicate Lace-Inspired Lower Spine Piece
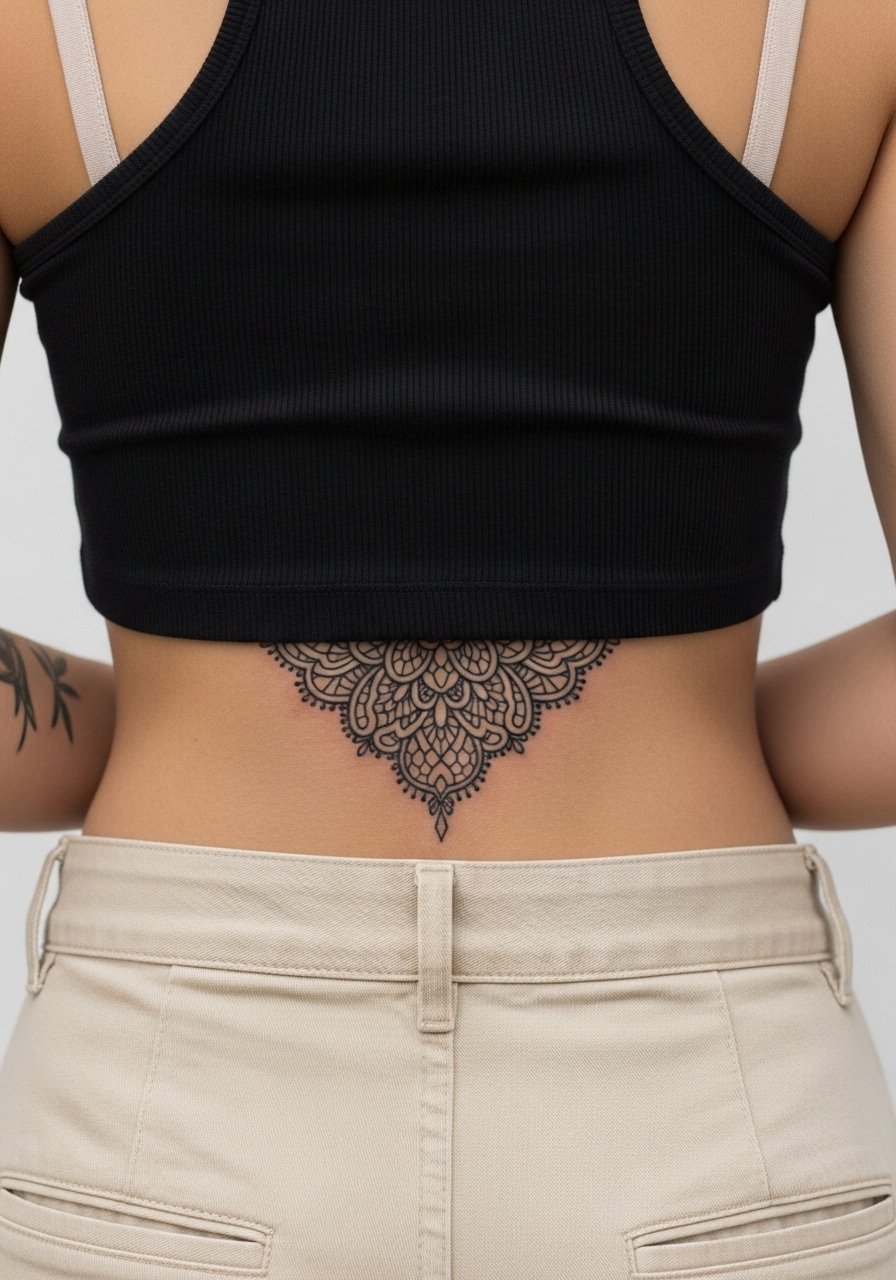
Lace motifs read like lingerie on the lower back when spaced with negative areas and supported by slightly bolder anchor lines. Tell your artist you want the lace to maintain a silhouette rather than be purely tiny fill. Mistakes happen when clients request ultra-fine filigree with no anchors. Lower back is softer and generally less painful but also rubs against waistlines, so avoid tight waistbands for the first weeks. Sessions vary from one to two sittings and you should anticipate a small touch-up where friction was highest.
17. Minimalist Arrow Column for Directional Energy
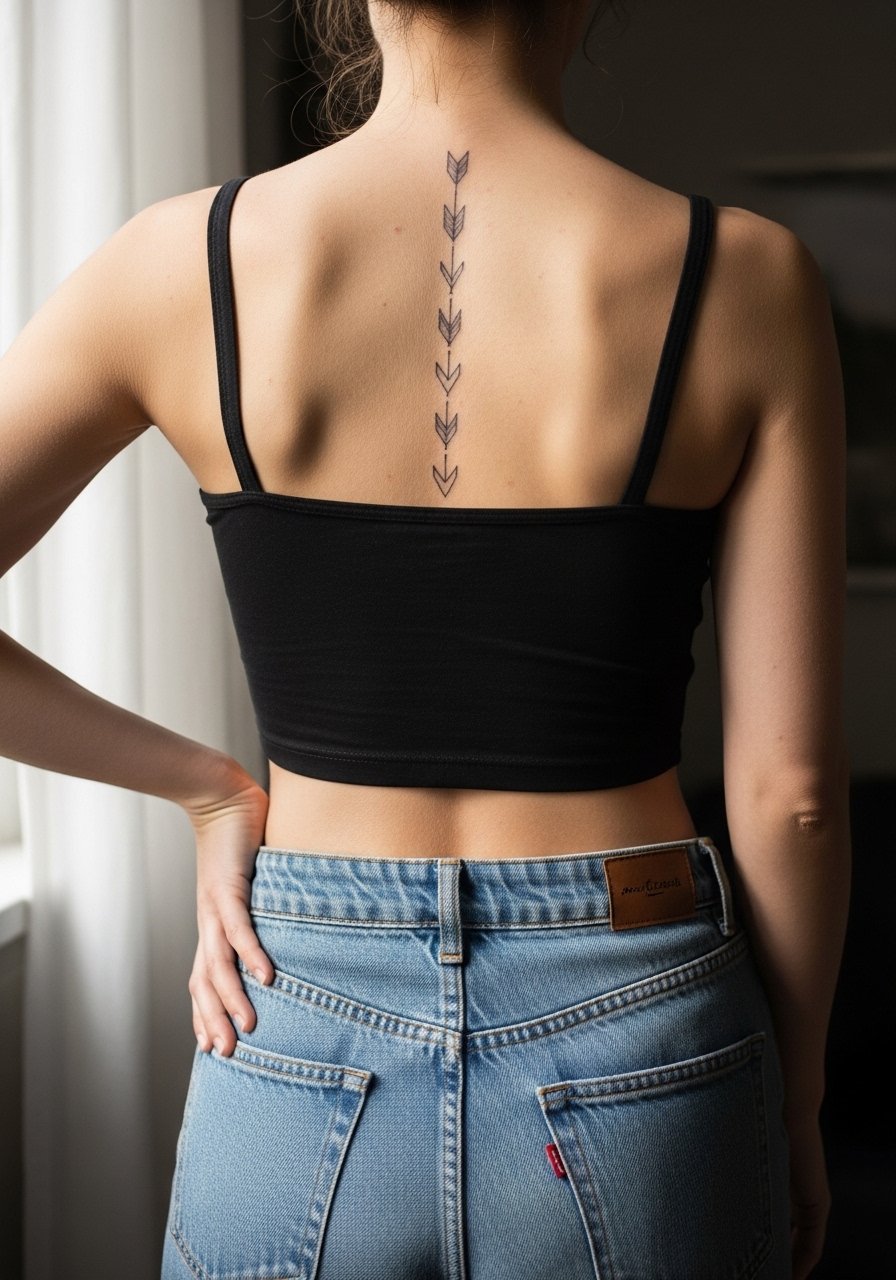
Arrows stacked along the spine are a clean way to signal movement and intent. During consultation ask for clear spacing and consistent arrowheads so each unit reads separately as ink spreads. The common mistake is stacking too many tiny arrows close together which leads to line merging. This is usually a shorter session under an hour for small repeats. For showing it off, a racerback tank keeps the back visible and simple.
18. Script Quote with Roman Numerals Down the Spine
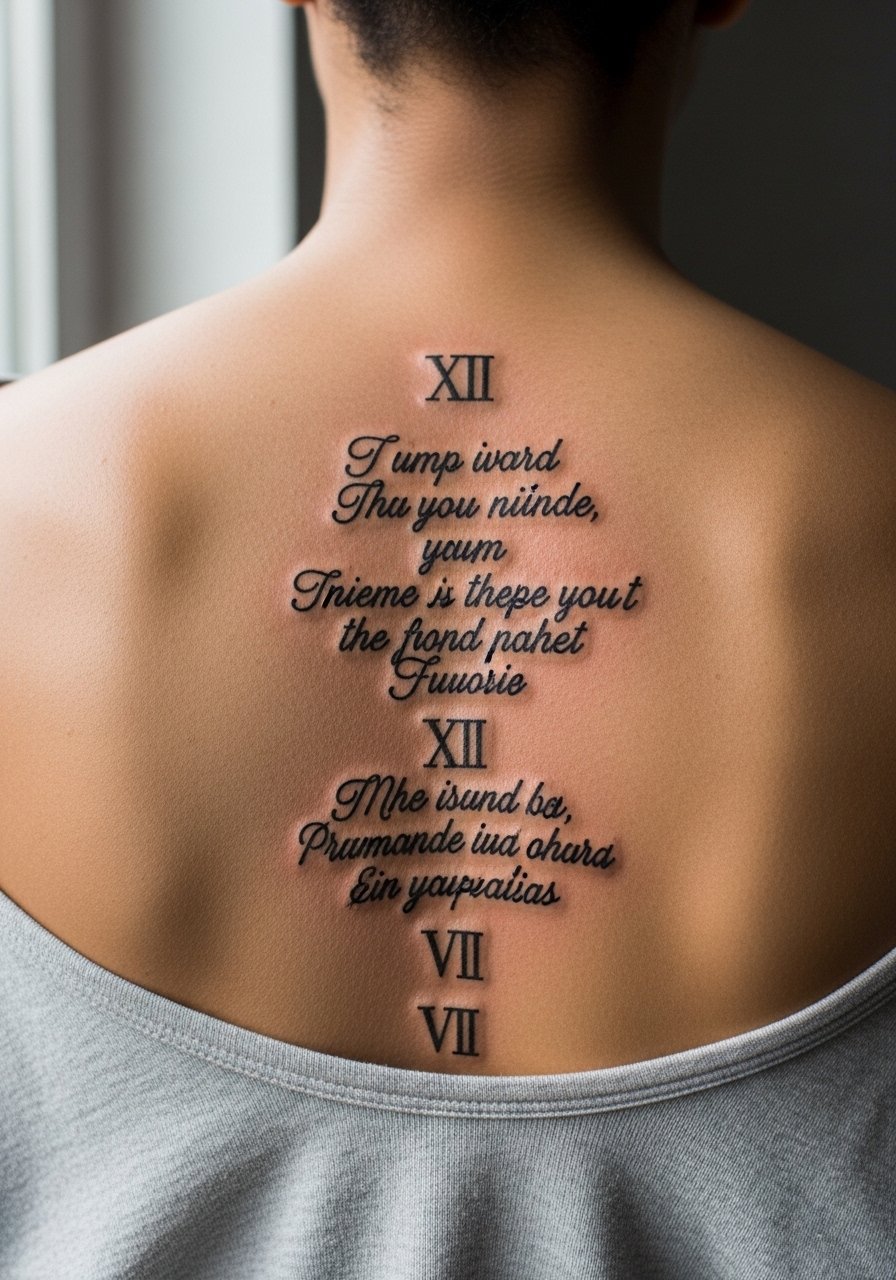
A quote with Roman numerals reads like a timeline on the spine. Ask for moderate letter spacing and a consistent baseline so the numerals remain legible as the skin shifts. Tiny script is the main error here; if you want longevity pick slightly larger proportions and stronger counters. Plan a session of one to two hours depending on length and a touch-up option for contrast restoration. For going out pick an open-back top that lets the vertical script read without neckline interference.
19. Abstract Slashwork and Stipple Shading
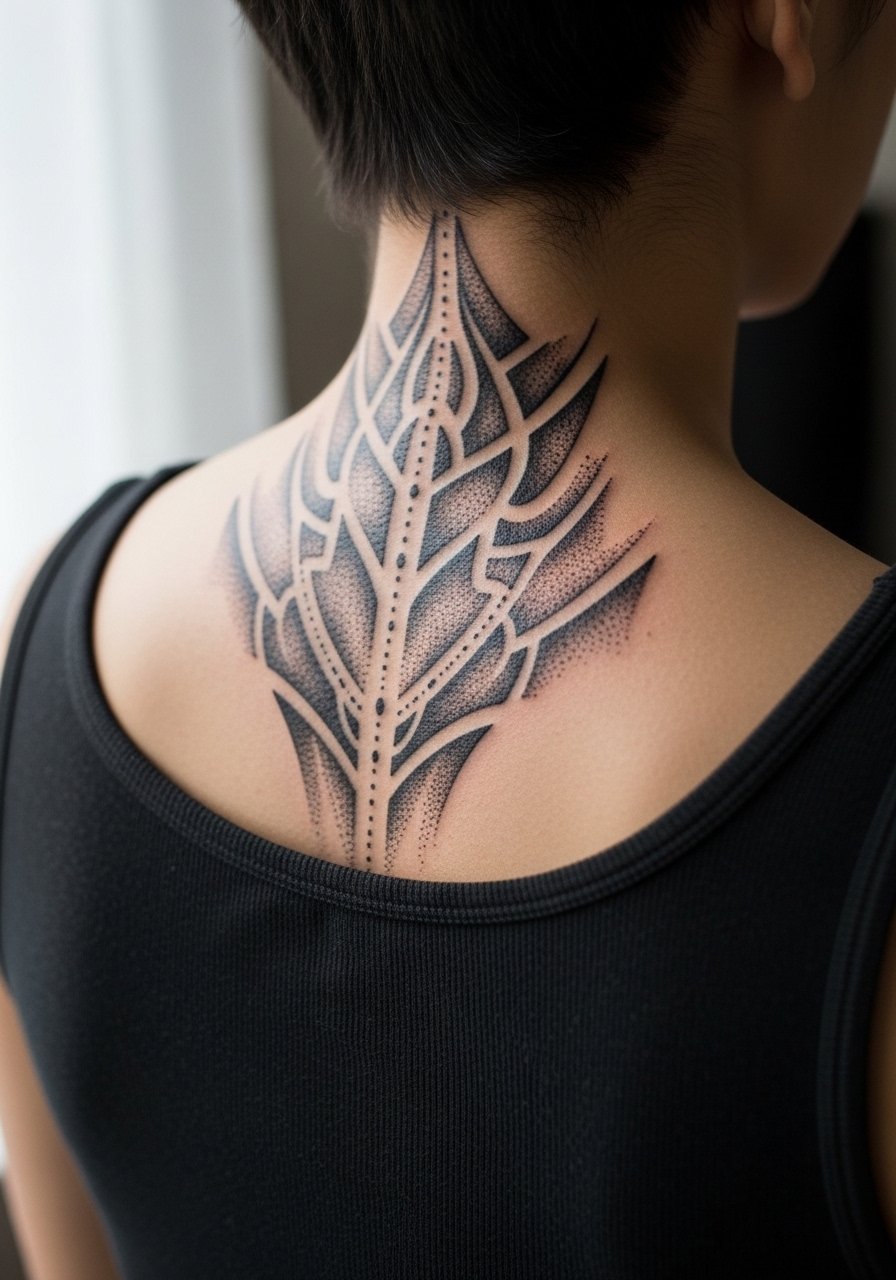
Abstract slashwork uses contrast and texture rather than representational form. When booking say whether you want crisp slash edges or diffused stipple textures because they age differently. Dense stipple near bone can soften into texture over time and may need retouching to maintain separation. These pieces often feel more bruising than sharp. Sessions are typically two hours or split for comfort. For easy access wear a loose button-down you can shift without exposing more than necessary.
20. Traditional Rose and Dagger Centered Near the Spine
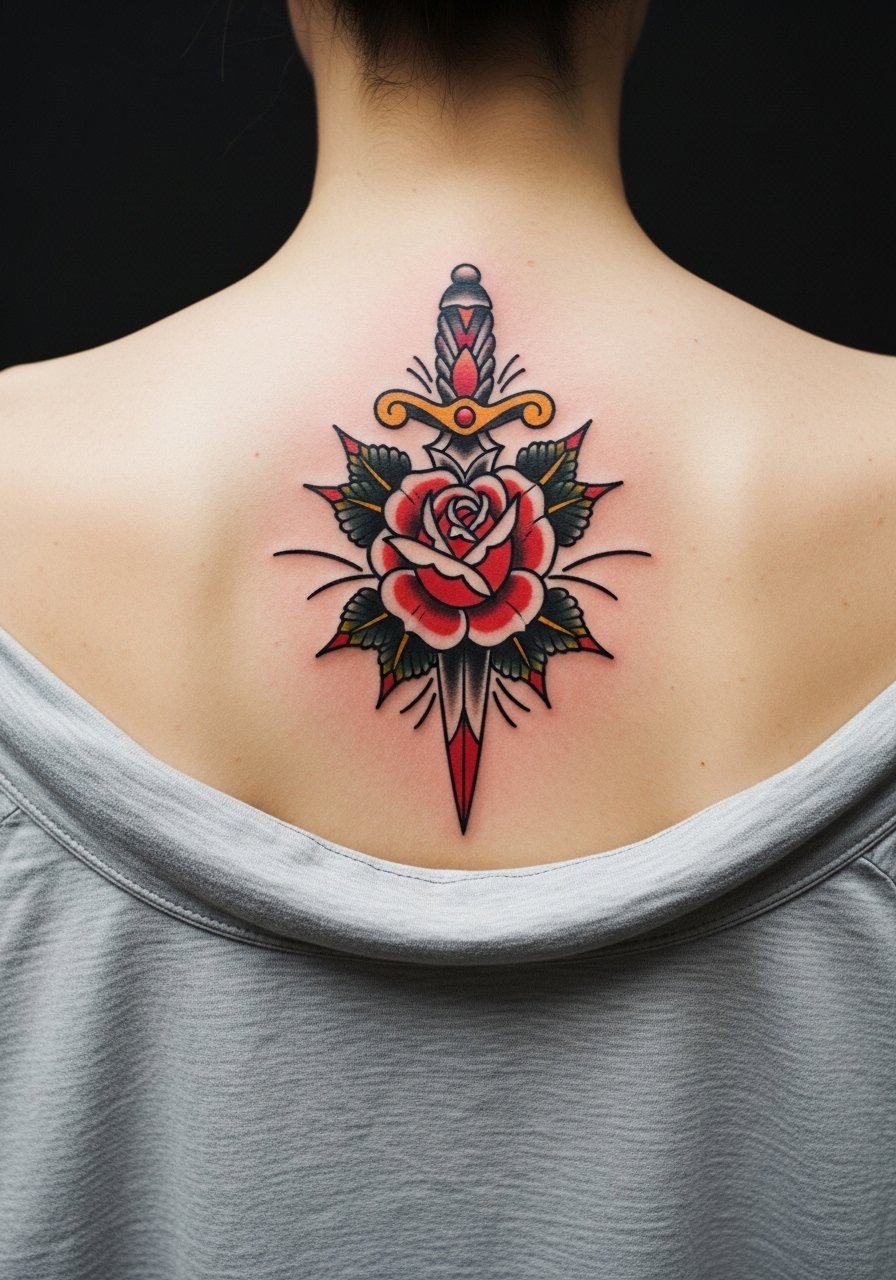
Traditional motifs resist blurring because of heavier outlines and saturation. If you want longevity choose bold outlines and solid fill rather than micro-detail. The main mistake is mimicking traditional color palettes at tiny scales; when small, these colors can lose definition. Expect a single to two-hour session and touch-ups as colors soften at year three. For show-off moments pick a wide-neck shirt that exposes the upper spine like wearable art.
21. Feather with Whip Shading Down the Spine
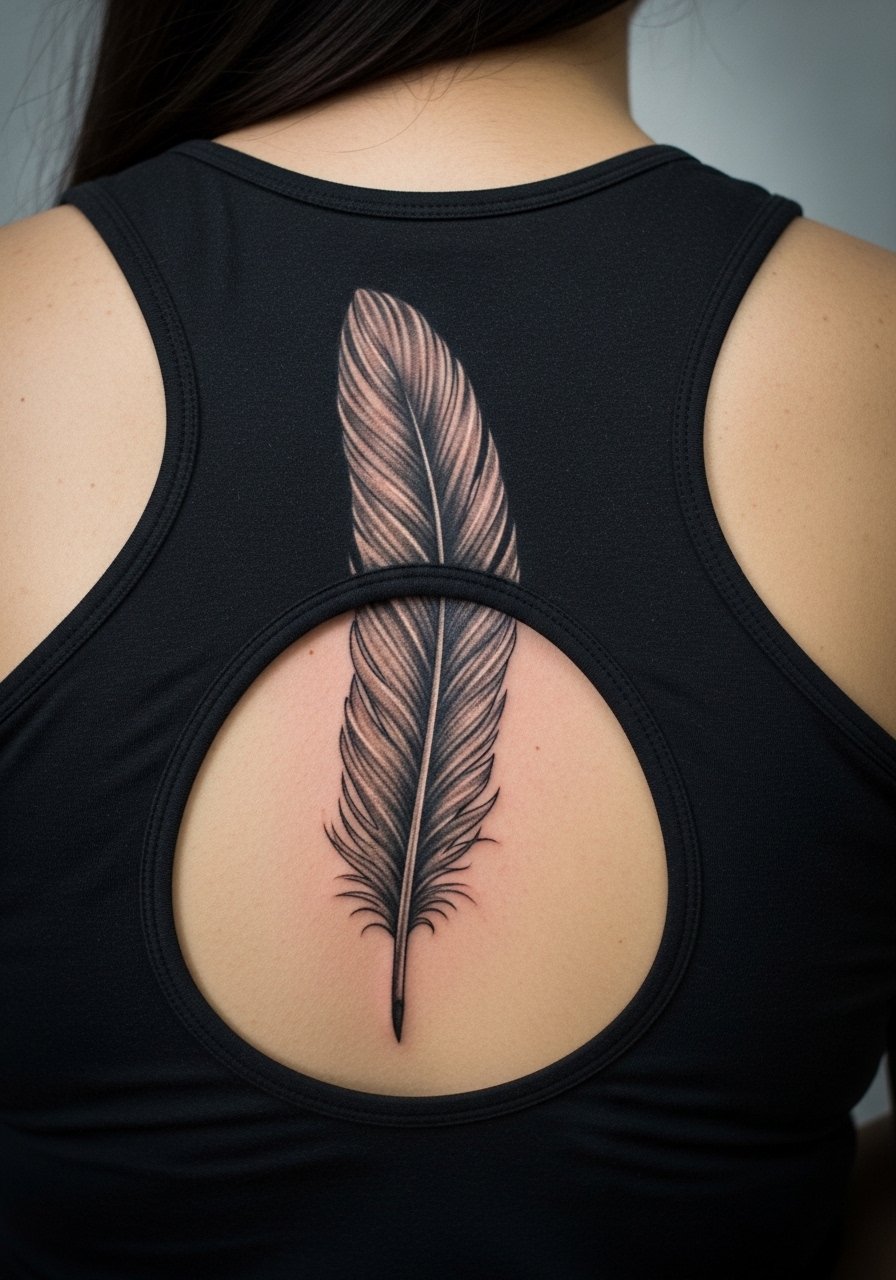
A feather with whip shading gives a soft vertical texture along the spine and suits those who want organic motion. Ask the artist to use moderate spacing between shaded passes so the feather stays airy after healing. The common error is asking for ultra-fine whip lines that blend together into a gray block as it ages. Sessions usually last 60 to 120 minutes and you may want a light touch-up to restore contrast after two years. For the appointment wear a racerback top so the area is reachable without chill.
Frequently Asked Questions
Q: How much does a spine tattoo cost and how long will it take to heal?
A: Costs vary by studio and artist skill, but expect a range depending on size and complexity. Healing usually follows a pattern: initial scab phase for the first week, settling at six weeks, and more stable appearance by three months. Fine-line pieces may need a touch-up within two to three years while bold blackwork can last longer without refresh.
Q: Will a fine-line script down my spine blur faster than a bolder design?
A: Fine-line scripts are more susceptible to blurring, especially when placed directly over bone. Bolder outlines and slightly larger lettering improve longevity. If you want the script look but worry about durability, ask for modestly increased spacing and a touch-up plan at your consultation.
Q: Are there career implications to a visible upper or lower back tattoo?
A: Most back pieces remain easy to conceal with standard work attire. Lower back tattoos are hidden by shirts and high-waisted bottoms. Upper spine work can peek out of low-back or open-back garments, so pick placement with your daily wardrobe and workplace norms in mind. For showing it off at events, an open-back dress does the job.
Q: Which placements on the back hurt the most and how should I prepare?
A: Areas directly over the vertebrae feel sharper than the fleshy parts beside them. Nape and lower spine are commonly described as more sensitive. Prepare by booking shorter sittings if you are nervous, using recommended numbing protocols discussed with your artist, and wearing clothing that allows easy access without full exposure.
Q: How do cultural motifs like mandalas or koi affect my choice for a spine piece?
A: Cultural motifs carry historical meaning, so many people opt for respectful adaptations rather than direct replicas. If you love a style from another tradition, discuss with your artist how to incorporate personal elements or modify motifs in ways that acknowledge origin while fitting your body shape.
