
Fine line watercolor florals look effortless on a scroll. The reality is that what photographs best the day after a session does not always age best. Placement, spacing, and a sensible color mix matter more than chasing the exact filter-ready palette. Read on for 21 small flower tattoo ideas that balance the fresh, painterly look with real-world wear and realistic touch-up timelines, starting with a forearm piece that sets the tone.
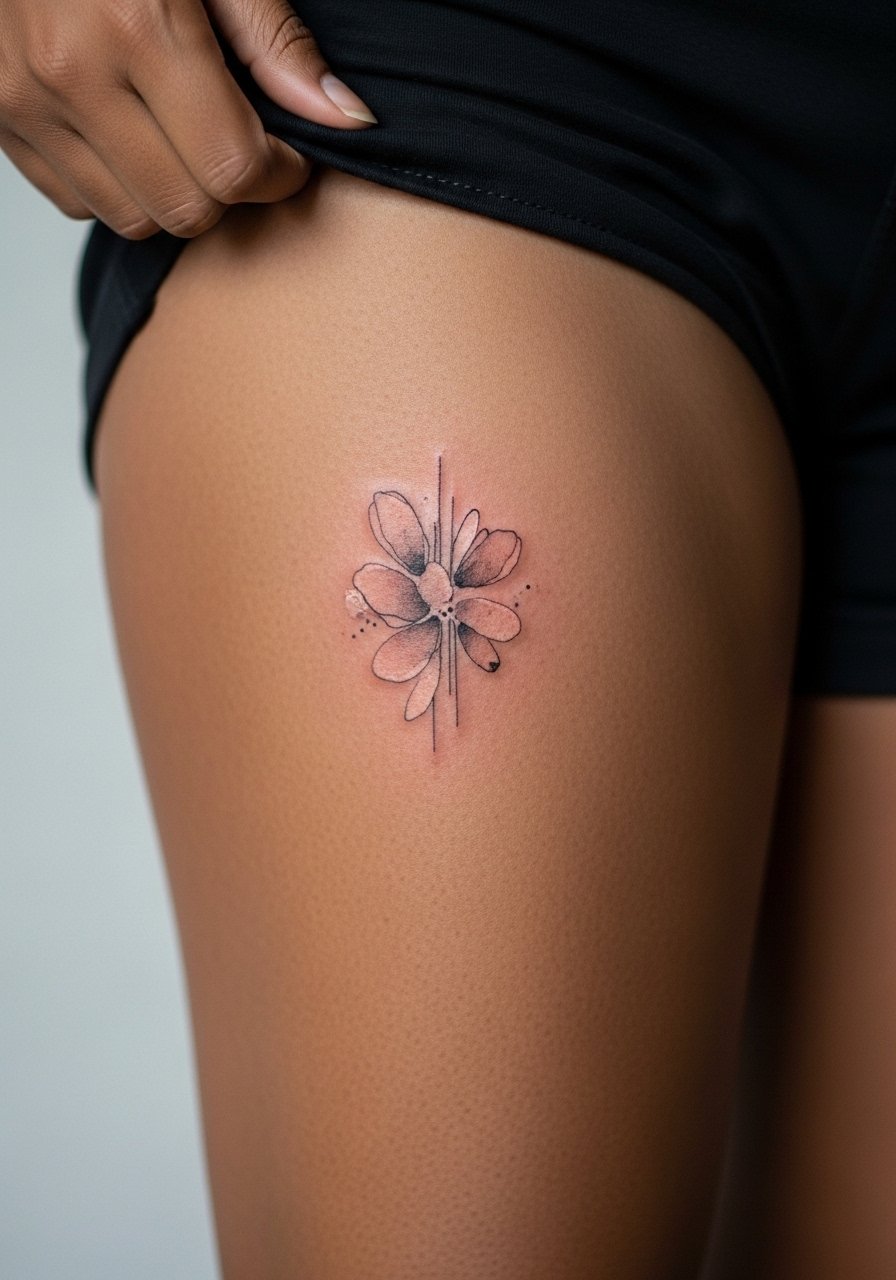
1. Loose Single Bloom on the Inner Forearm
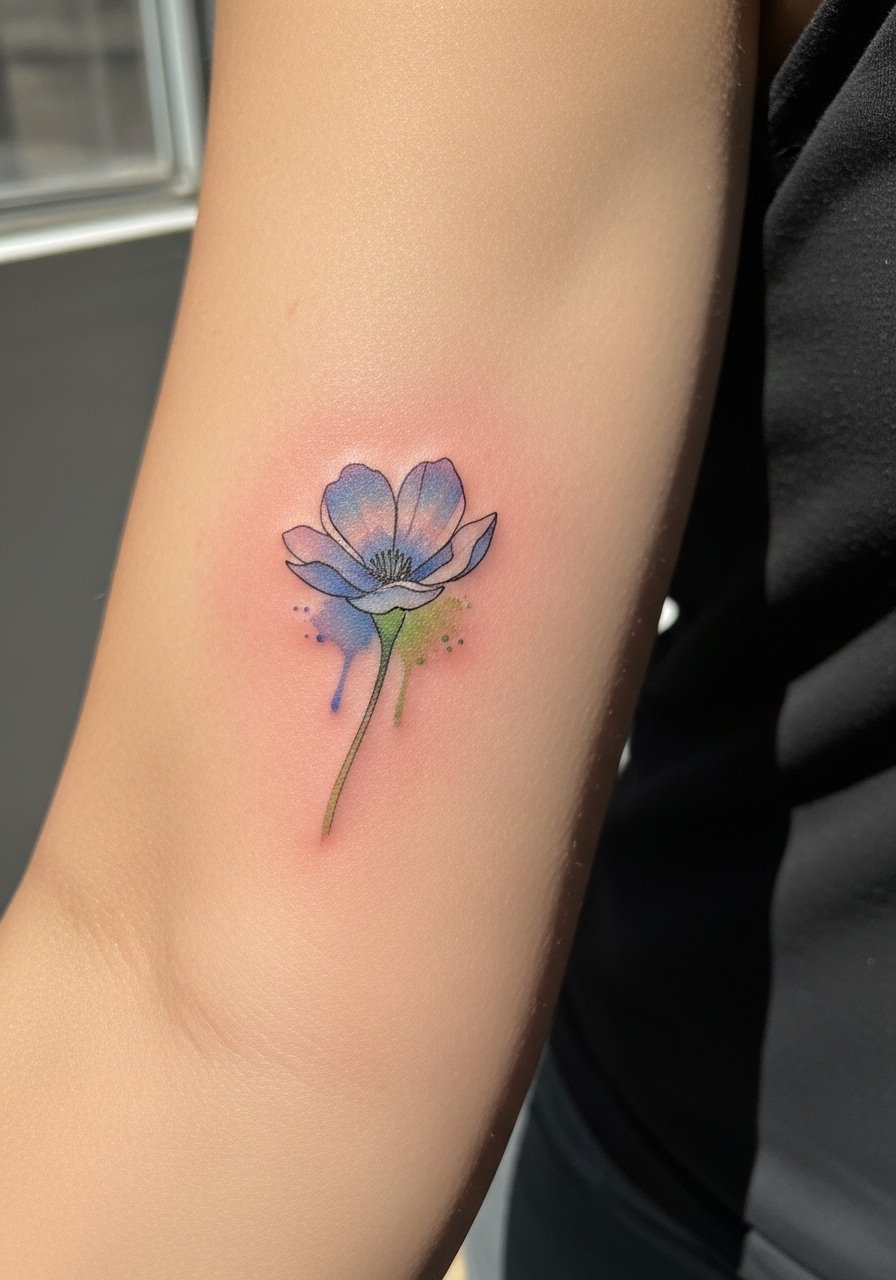
I recommend this if you want a piece that reads like a small painting but still stays legible over time. Ask your artist for a thin outline around the bloom to protect the petals without heavy blackwork. Fair warning the inner forearm tans and stretches, so expect lighter saturation at year two compared with month six. The session is low to moderate on most pain scales and usually finishes in under an hour. For the consultation bring a few mood photos and say you want "watercolor fill with light contour linework" so the artist knows to leave some white space. For showing it off, roll sleeve cuffs or pick a loose button-down shirt that frames the forearm without covering it.
2. Tiny Cluster at the Wrist with Petite Stems
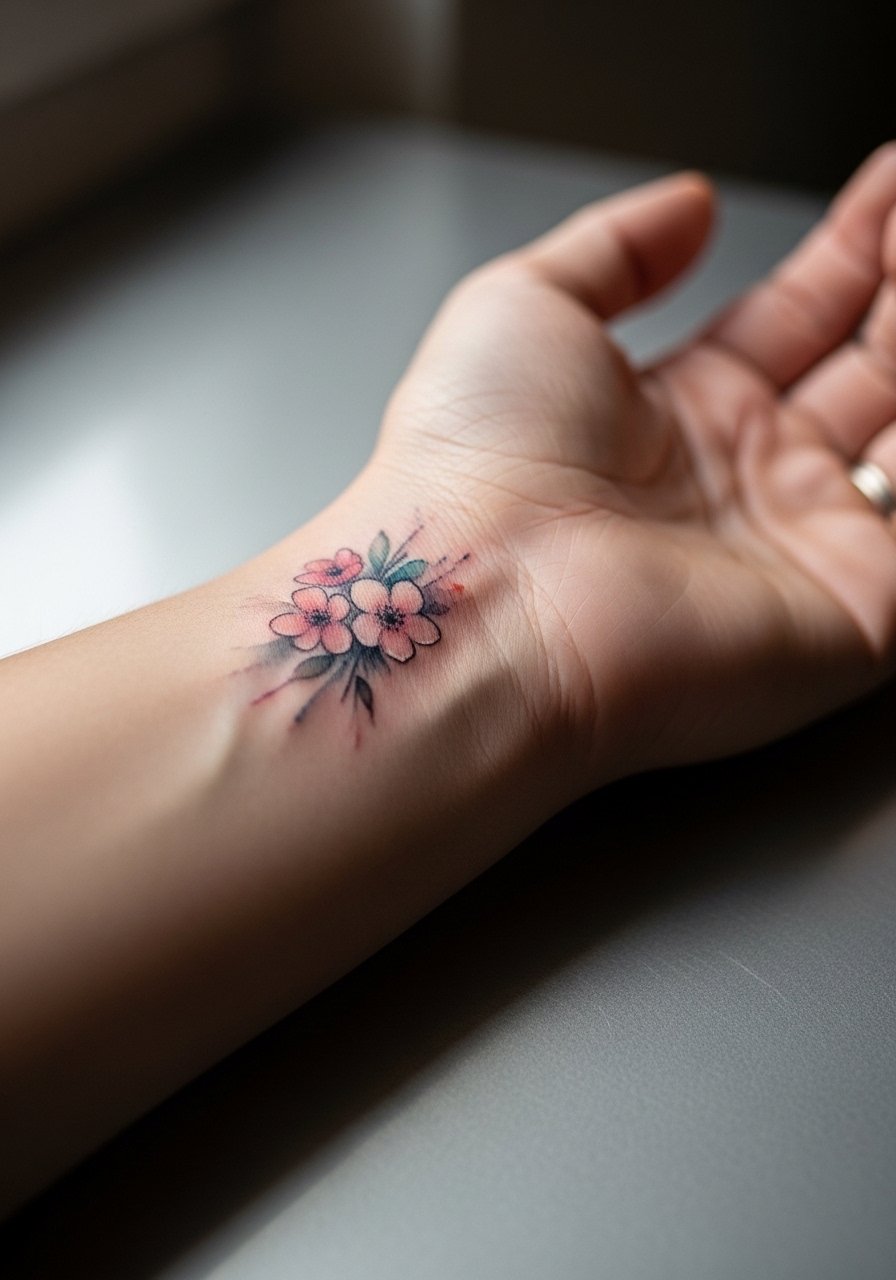
This wrist cluster looks delicate but has unique risks. The wrist gets a lot of friction from bracelets and watches, which accelerates fading. I tell clients to avoid tiny dots packed too close together because the lines can merge into a soft blur by year three. A common mistake is asking for everything "micro" without room for the pigment to settle. The session feels ticklish and quick but expect sensitivity over bone. For showing it off pair with a thin chain pendant necklace and remove bulky wristwear for the first few weeks so the area heals evenly.
3. Ankle Sprig in Soft Blues and Lavenders

Ankle pieces weather differently because of shoes and socks rubbing. The biggest mistake is placing intense color too low on the ankle without accounting for repeated abrasion. For this sprig, I suggest lighter saturation with sparse dots of pigment so the outline and negative space keep the design readable at year two. Pain is moderate for most people and the session time is usually 45 to 75 minutes. For session comfort wear jeans you can roll up or sandals that let the artist work without pressure from tight footwear.
4. Collarbone Cascade with Subtle Washes
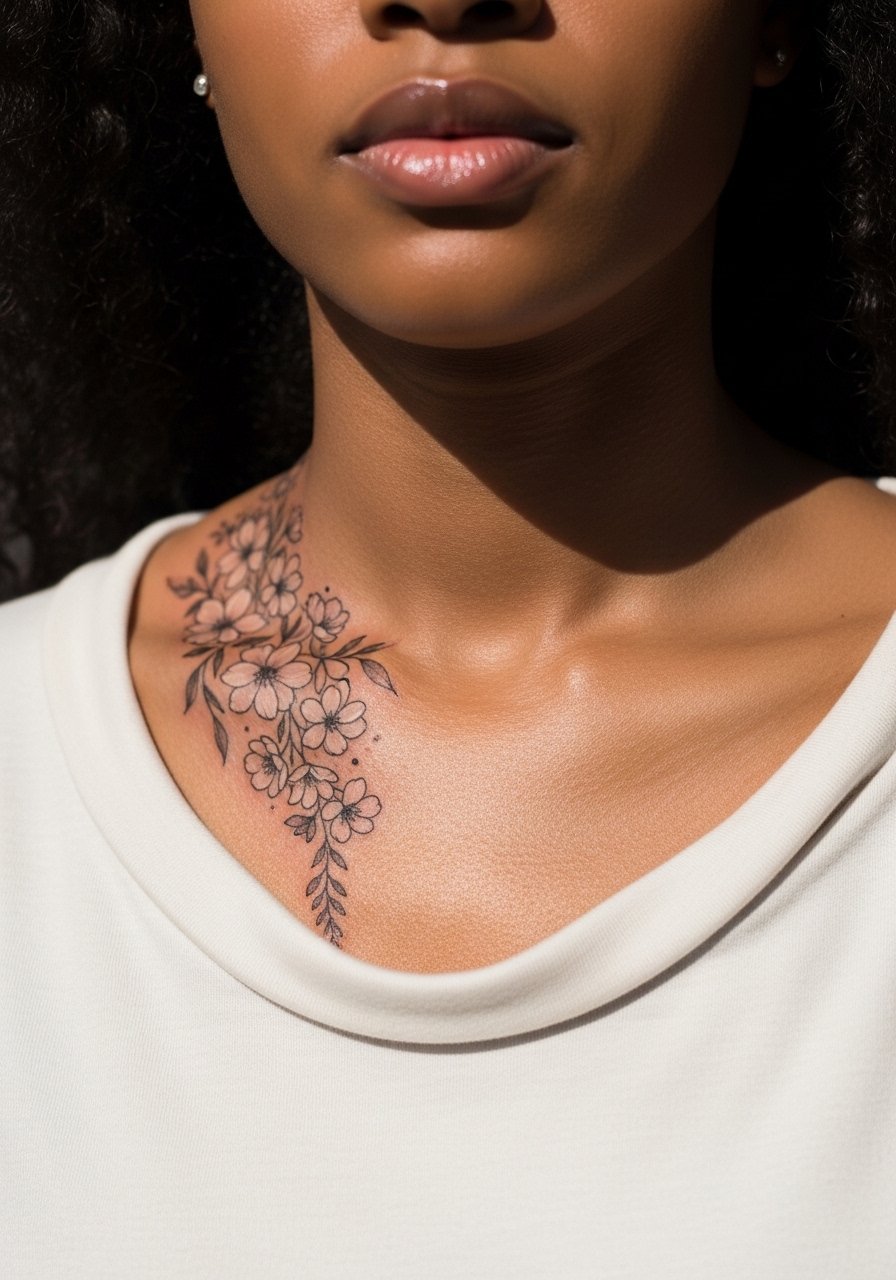
Collarbone tattoos photograph beautifully but age based on sun exposure and clothing friction. One camp thinks minimal color and thin lines are best here. The other camp argues slightly bolder contour lines give the piece longevity. Name both camps in the consultation and ask which approach your artist prefers. For placement, wear a wide-neck shirt on appointment day so the artist has clean access. For evenings pair the piece with an open-back midi dress that shows the cascade without competing with necklaces.
5. Tiny Bouquet on the Side Ribcage
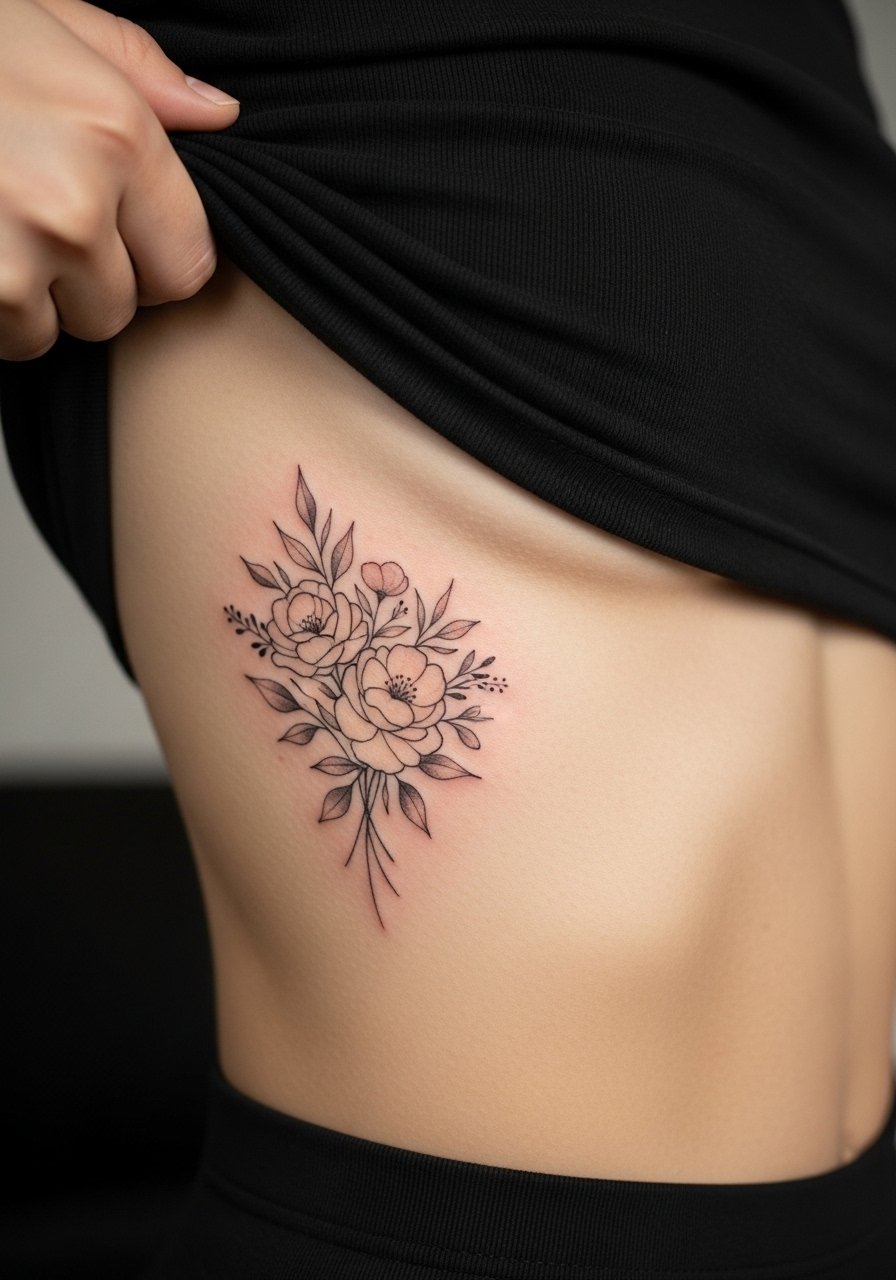
Ribcage work is notoriously sensitive. Pain can be high and sessions take time if you want color nuance. The common aging issue is that thin watercolor washes can migrate and read like bruising on softer skin. One group of artists avoids fine line in this zone. The other group says spacing and slightly deeper placement will hold linework fine. Decide which camp you trust before booking. For the session wear a cropped top you can lift easily so the artist has full access without you being uncomfortable.
6. Tiny Single Stem Behind the Ear, Visible but Discreet
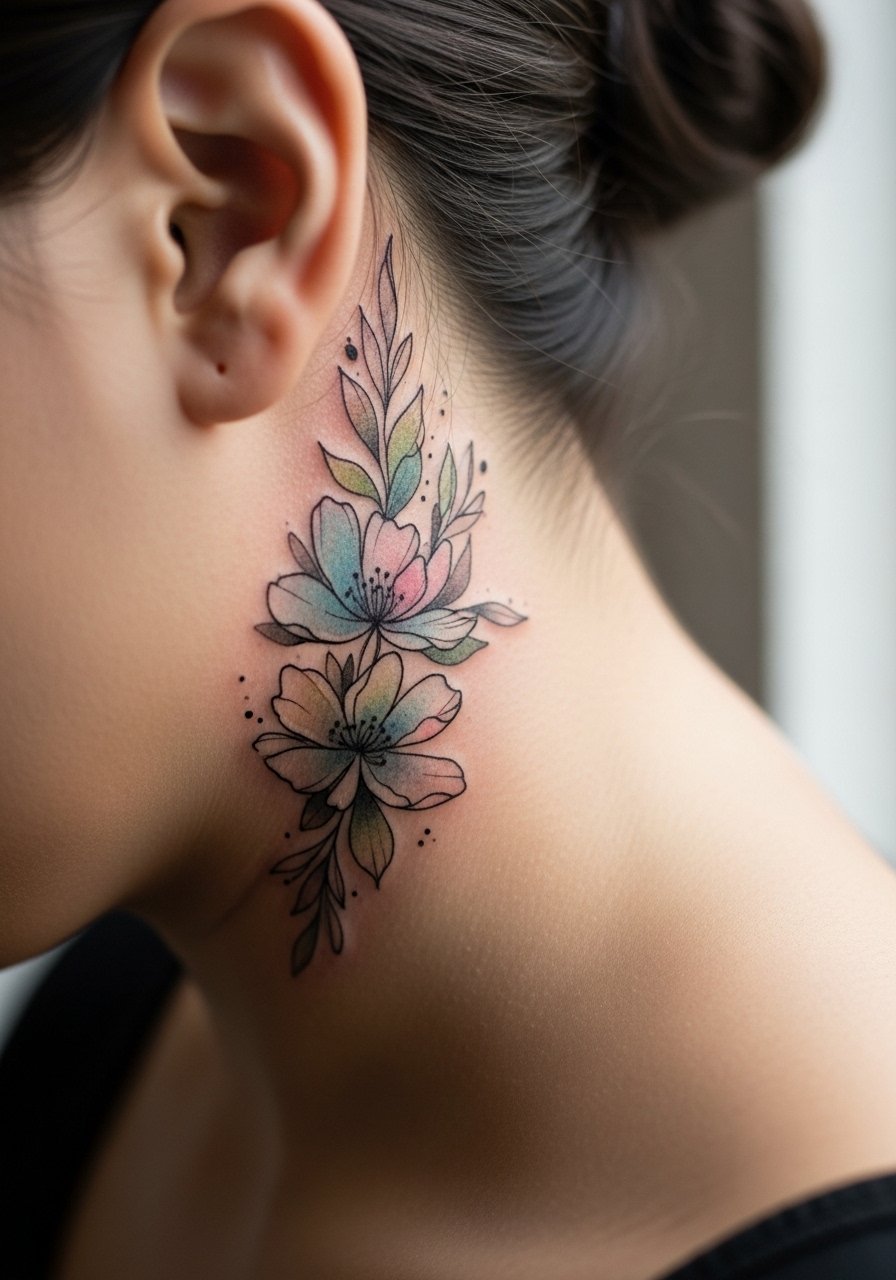
Behind-the-ear pieces remain subtle and often suit someone who wants a hint of ink that peeks out with hair up. The area can blur if the design is too dense, and the skin there is thin so the session feels brief but sharp. Ask for a clean, airy composition and avoid heavy color saturation. Because the spot is intimate and near the hairline, mention to your artist any tendency to scar or keloid. For the appointment you can pull hair into a high bun so the artist has clear access.
Studio Day Picks
Those first six designs cover wrists, forearms, collarbone, ribs, ankles, and behind the ear. A few small items smooth the session and the first week of healing.
-
Stencil transfer paper kit. Lets you preview the line placement on skin for the forearm and wrist pieces so you can adjust scale before the needle touches you.
-
Topical numbing cream. Applied about 45 minutes before the session eases sensitivity on rib and collarbone work without dulling enough to harm line precision.
-
Thin protective film roll. Useful for ankle and wrist tattoos that face constant rubbing from socks and watches during the first week.
-
Fragrance-free gentle body wash. Cleanses healing areas like the forearm without stripping pigment or irritating delicate watercolor washes.
-
Aquaphor healing ointment. A thin layer for the initial days keeps fragile color from drying into scabs that pull at the pigment.
7. Micro Bouquet on the Side of the Finger
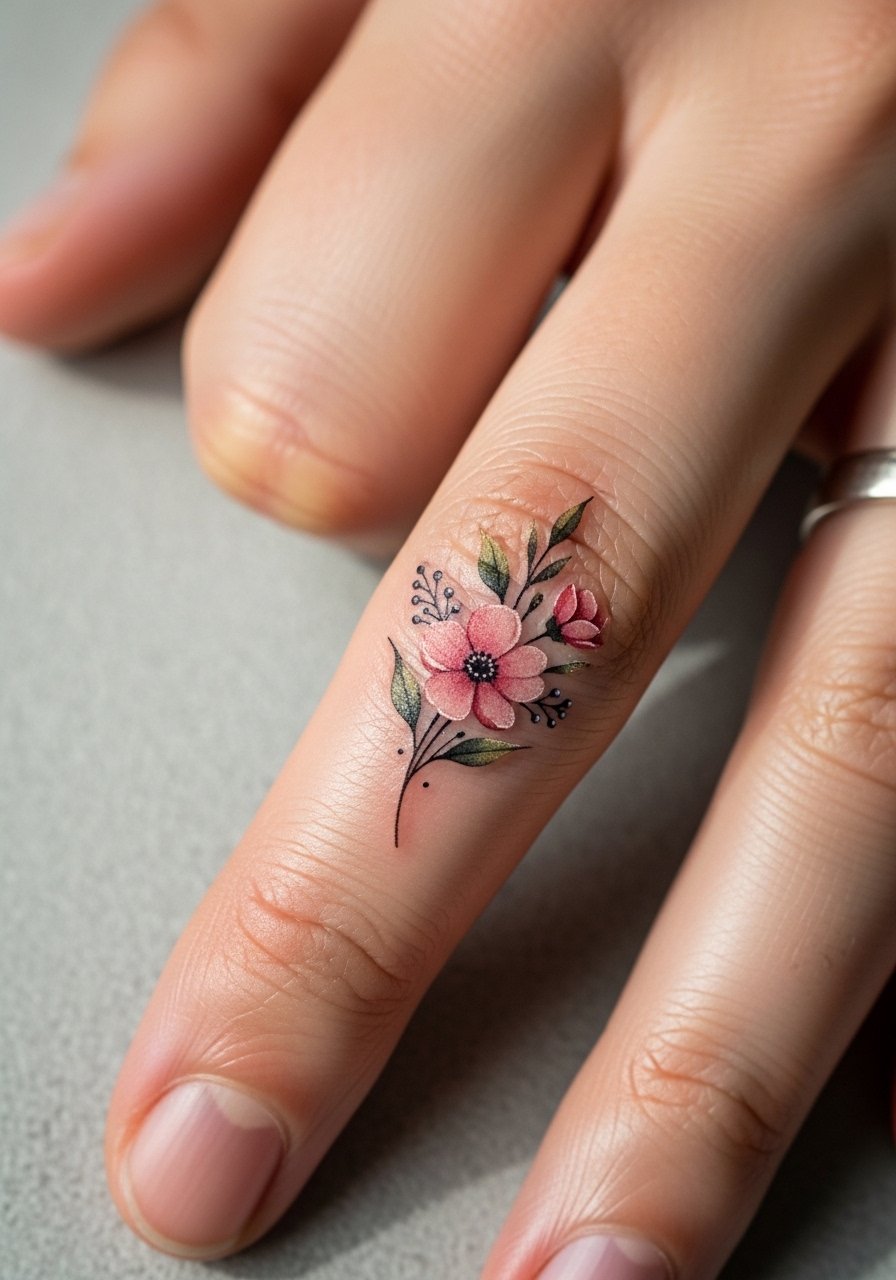
Finger tattoos are high maintenance because of constant washing and use. The biggest mistake is asking for watercolor saturation like a forearm piece. For fingers pick sparse color and simple silhouettes so the design survives daily abrasion. Expect touch-ups sooner than for arm work. The session is quick and painful over bone. For the appointment wear short sleeves and leave rings off to let the artist work without obstruction. For showing the piece choose a minimalist ring stack that complements without rubbing the tattoo.
8. Tiny Watercolor Rose on the Upper Shoulder
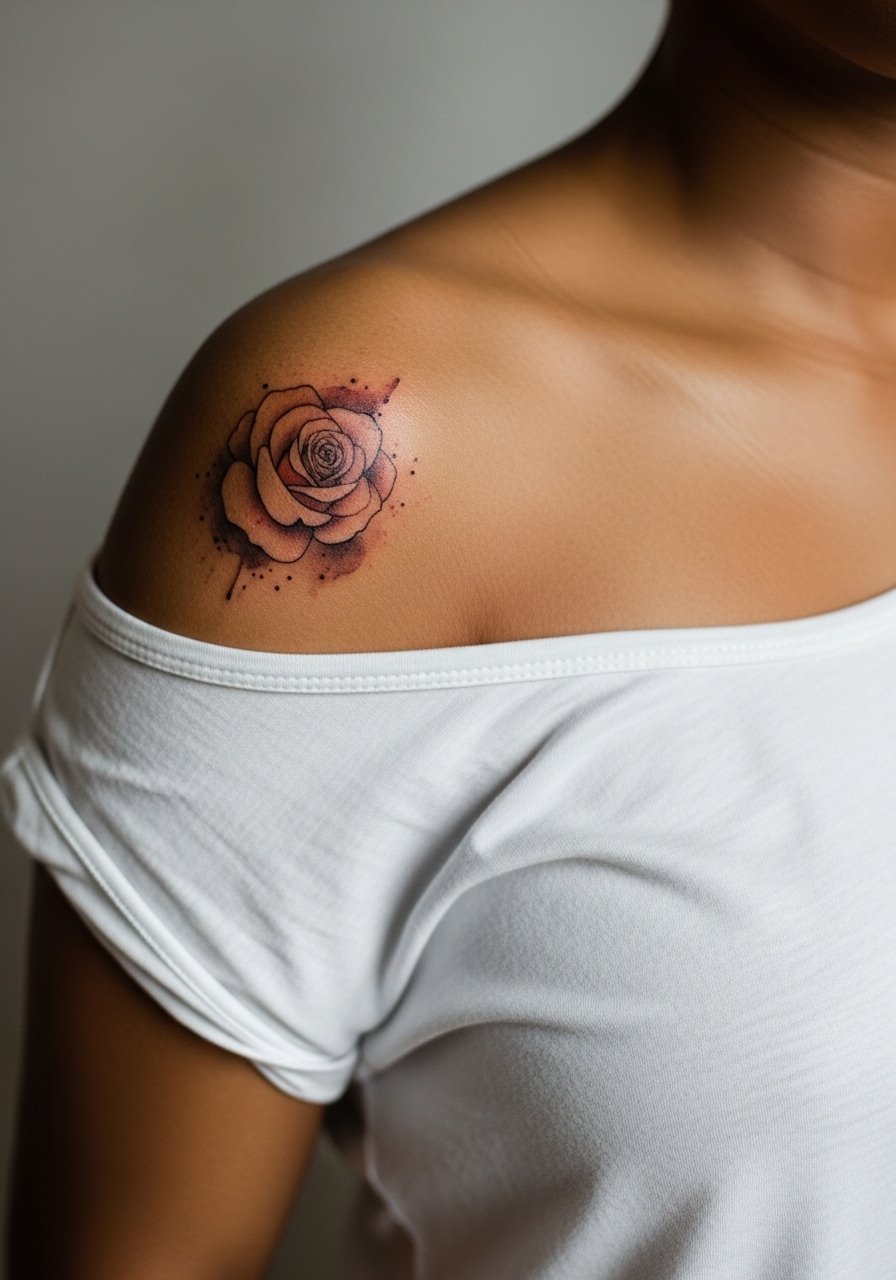
The shoulder tolerates color and looks good with watercolor washes because it avoids constant friction. A common mistake is crowding the bloom with too many small details. Ask your artist for relaxed edges and a soft transition from linework to wash. The session is moderate and often under an hour for a small piece. For the session wear a loose tank top so the artist can reach the area without you having to undress.
9. Nape Bouquet Under the Hairline
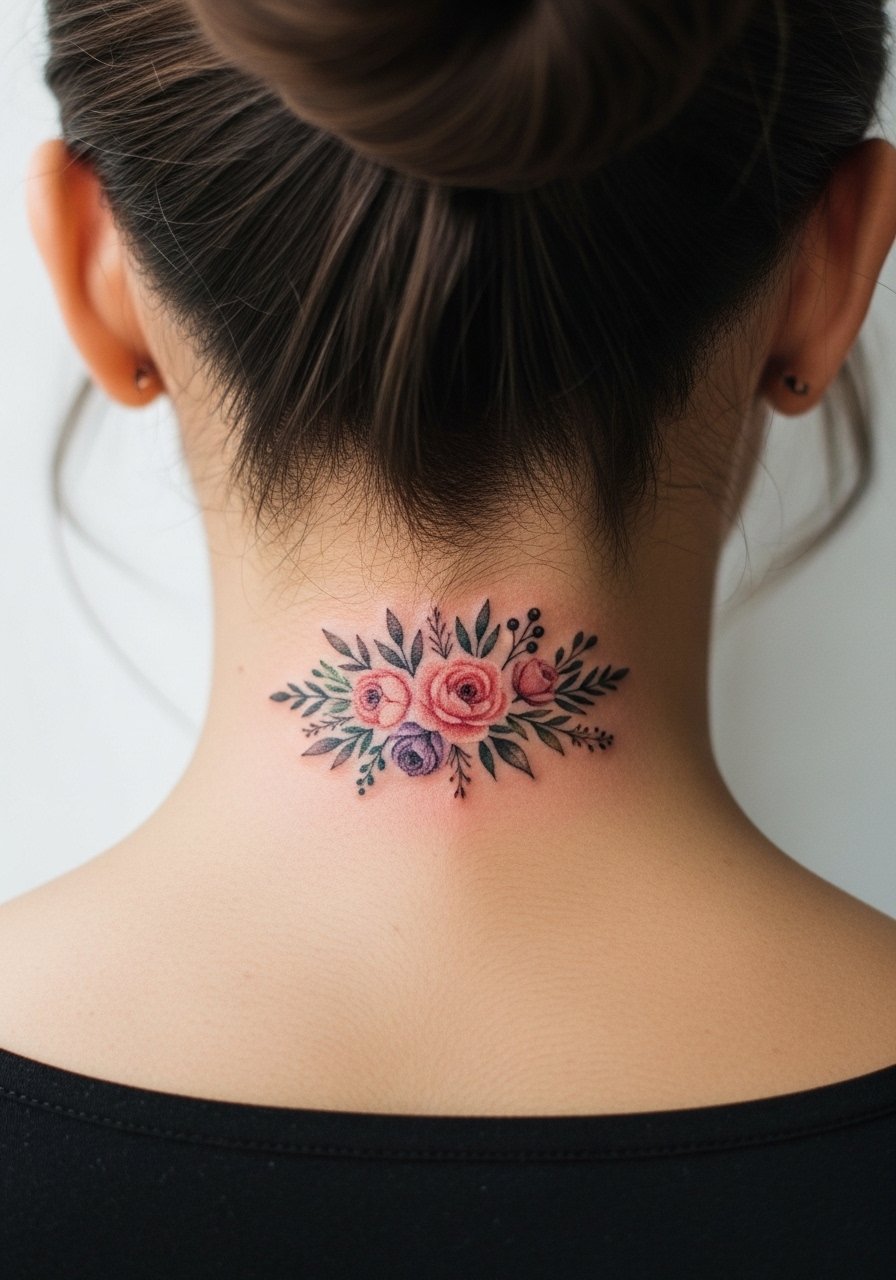
Nape tattoos are discreet and revealable with certain hairstyles. The skin sits on an area that can stretch with movement. The common aging issue is blurring when petals are too close. One camp prefers bolder contour for longevity. The other camp keeps the wash airy and accepts earlier fade. For the appointment put hair in a bun or clip so the artist has clear access. For showing off, pair with a wide-neck sweater that dips just enough to reveal the nape.
10. Tiny Hip Flower Near the High Waist
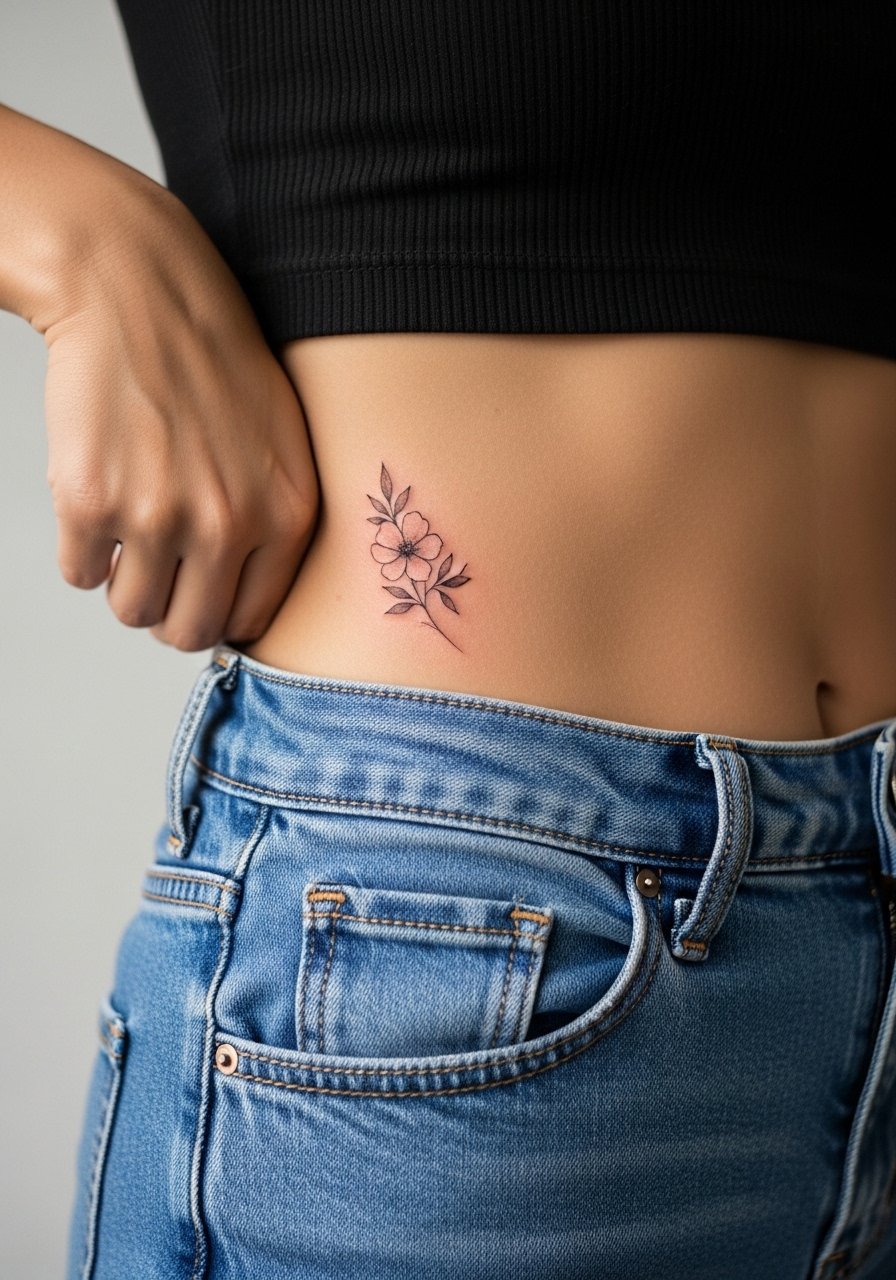
Hip tattoos sit in a friction zone where waistbands meet skin. People often forget tight clothing will rub the fresh ink and speed patchy healing. I advise slightly higher placement toward the side so the edge avoids seams. Expect the session to be moderate in discomfort and a short appointment. For the session wear high-waisted bottoms you can shift easily like high-waisted denim. For showing it off a crop top and high waist look frames the piece neatly.
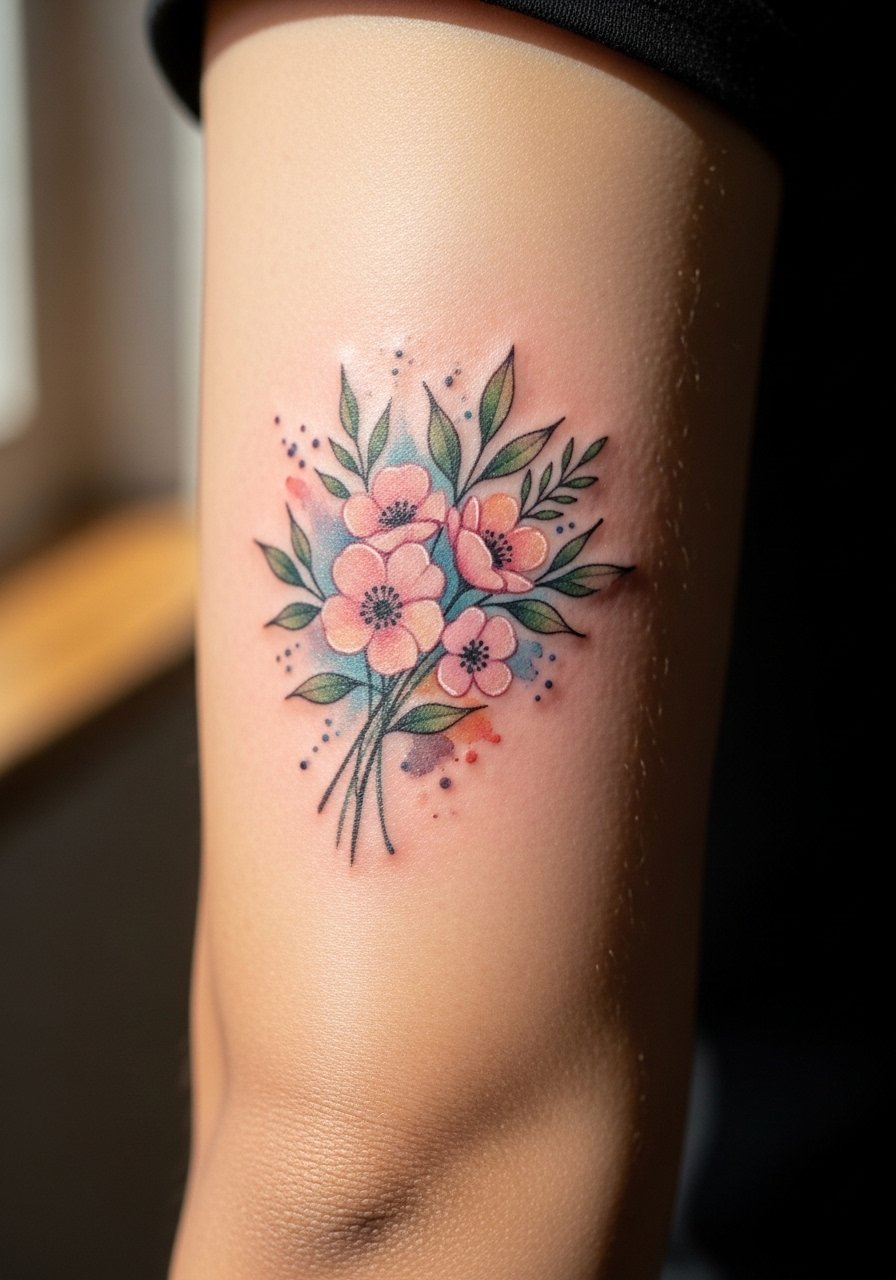
11. Inner Bicep Petite Garland
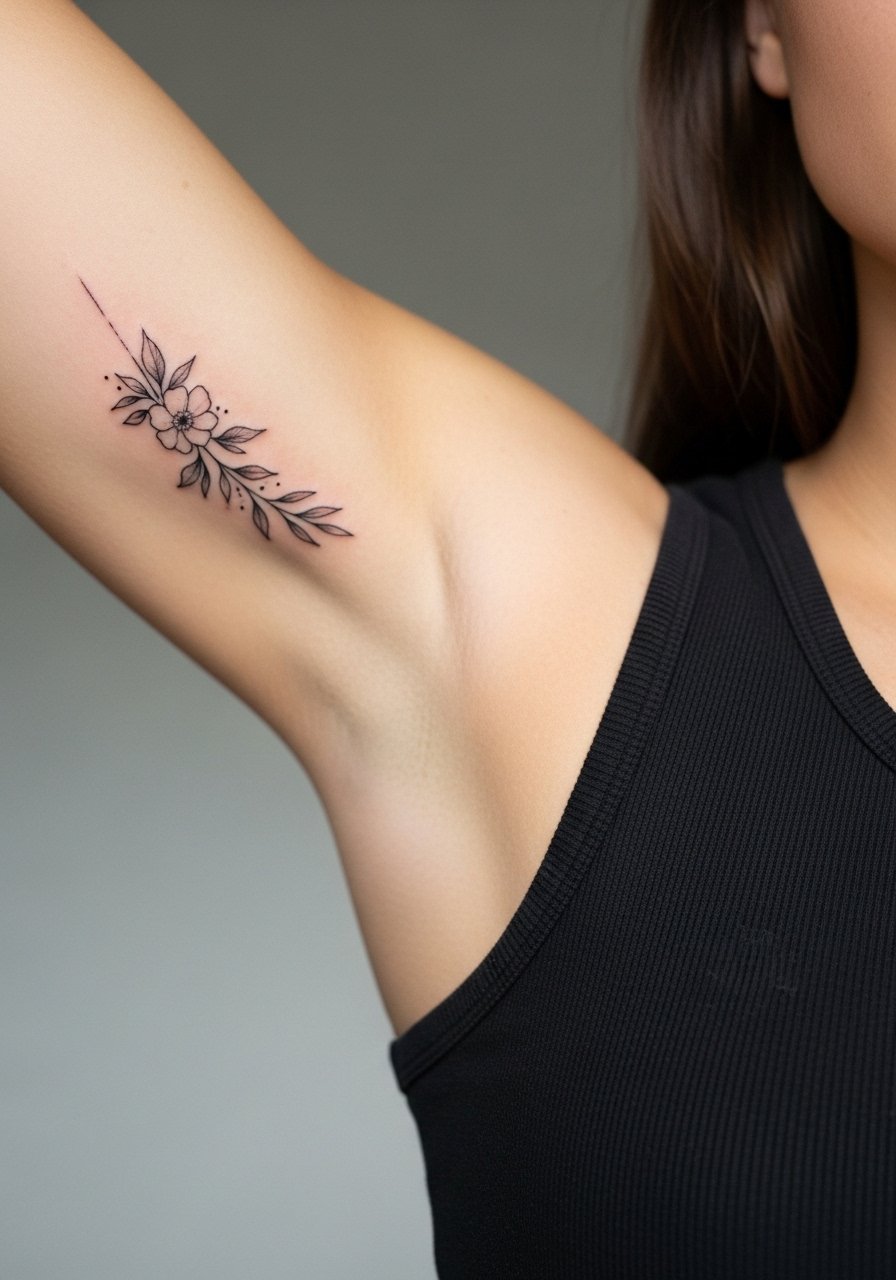
The inner bicep hides nicely but heals slower due to less sun exposure and skin movement. Many people ask for dense watercolor here and then wonder why it feathers. Ask for fewer pigments and slightly stronger outlines to maintain shape. Pain is moderate to high depending on sensitivity and the session can feel long if you fidget. For the appointment wear a tank top you can lift easily. For showing the piece off roll sleeves or wear a sleeveless blouse that keeps the arm shape visible.
12. Petite Calf Sprig with Delicate Dots

Calf pieces endure less daily abrasion than ankles but show up in summer wear. The common mistake is going too small and losing the stem structure at year three. I suggest slightly longer stems and sparse dots of color to keep the silhouette clear. Sessions are low to moderate in pain and often completed quickly. For the session wear shorts you can sit comfortably in. For nights out pair with strappy sandals that reveal the calf.
13. Tiny Watercolor Flower on the Sternum Edge
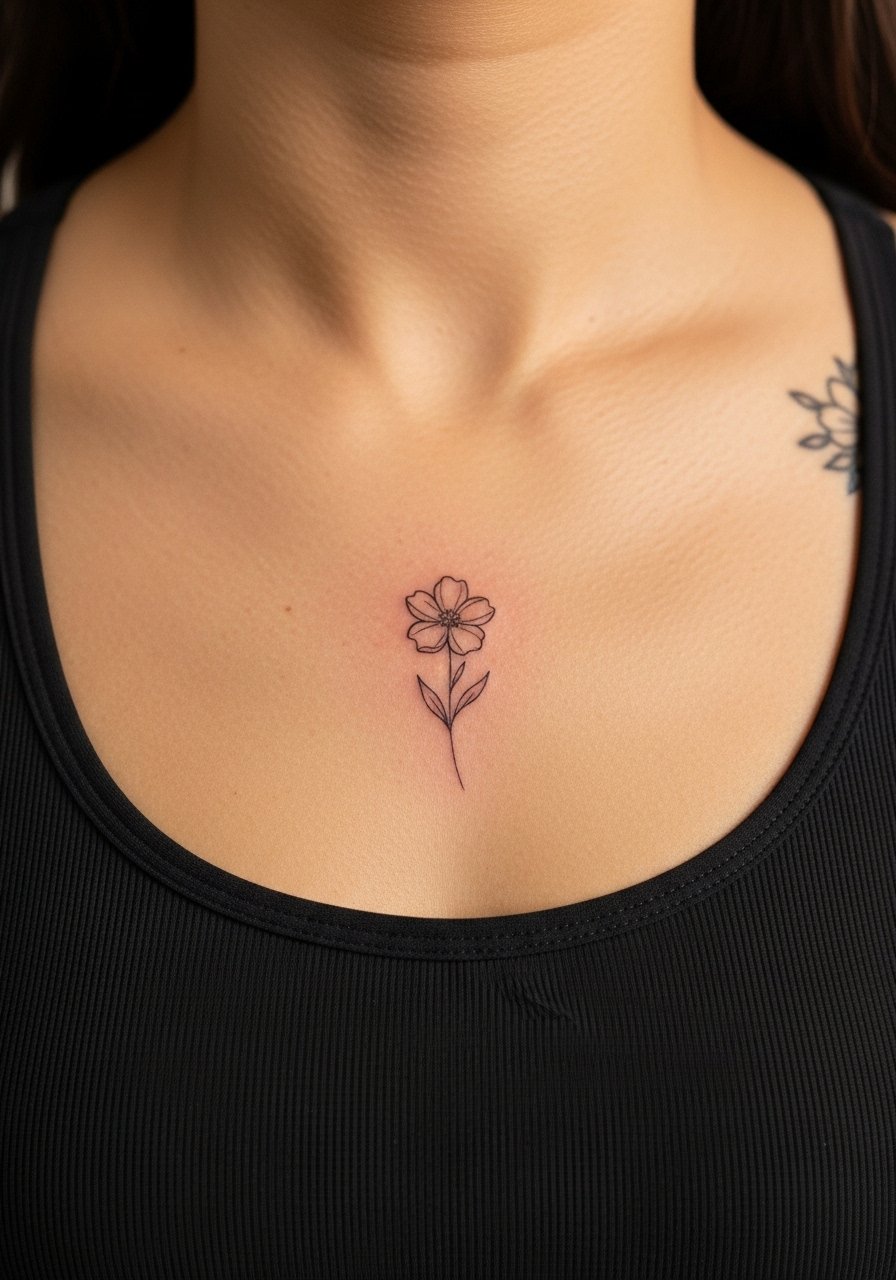
Sternum placements are intimate and require careful planning. The skin there moves with breathing and can blur very fine work. One group warns against tiny watercolor spreads in the sternum area. The other group says slightly denser pigment with thoughtful spacing can last better. If you choose sternum, find an artist experienced with chest anatomy. For the session wear a fitted sports bra so you stay comfortable and the artist has clear access. For showing the piece use strapless tops or a bandeau.
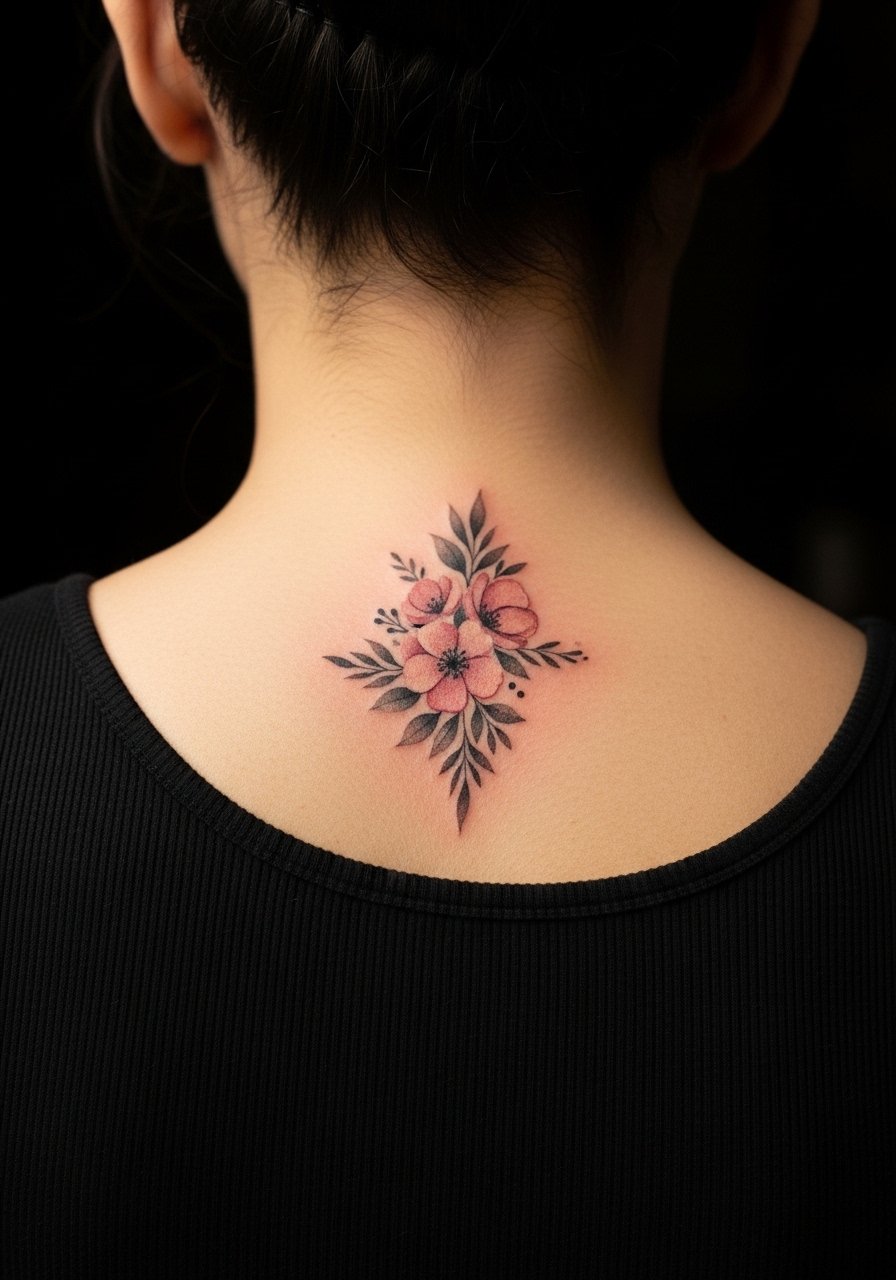
14. Petite Sunflower on the Back of the Neck
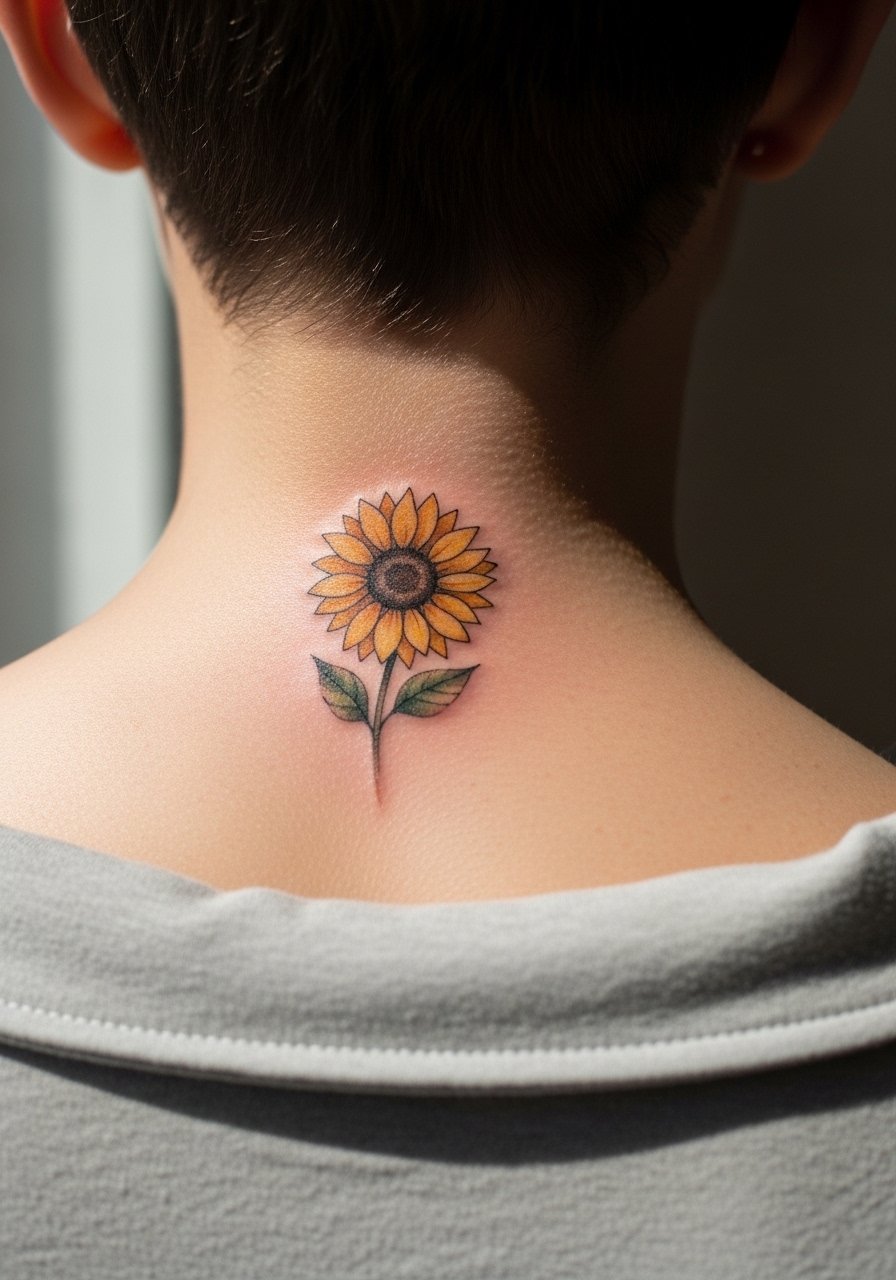
Back-of-neck tattoos sit where collars and necklaces can rub them. Many people ask for bold petals that later soften into a smudge. To avoid that, keep contrast moderate and allow whitespace between petals. The session is quick but can be sensitive. For the appointment wear a shirt with a low back or wide neck so the artist can access the spot easily. For showing off try a crew neck tee that you can pull down slightly to reveal the detail.
15. Tiny Thigh Cluster Near the Outer Hip
Outer thigh pieces take color well and tend to age gracefully because of less sun. A common mistake is packing too much tiny detail into a small area. If you want texture ask for stipple shading and soft washes rather than many discrete colors. Sessions are generally low pain and can be extended if you add layering. For the session wear shorts or a skirt that you can shift and a wrap skirt works well for privacy and access.
16. Miniature Bouquet Above the Elbow
Above-elbow placement lives on muscular skin that moves. The mistake is placing light, airy washes without a protective line, which lets petals drift as the muscle changes. Ask for a clean outline with soft interior washes. Pain is low for most and the session time is short. For the appointment wear a short-sleeve top you can adjust. For showing it off roll sleeves or wear a three-quarter sleeve blouse that stops right below the design.
17. Tiny Watercolor Daisy at the Base of the Thumb
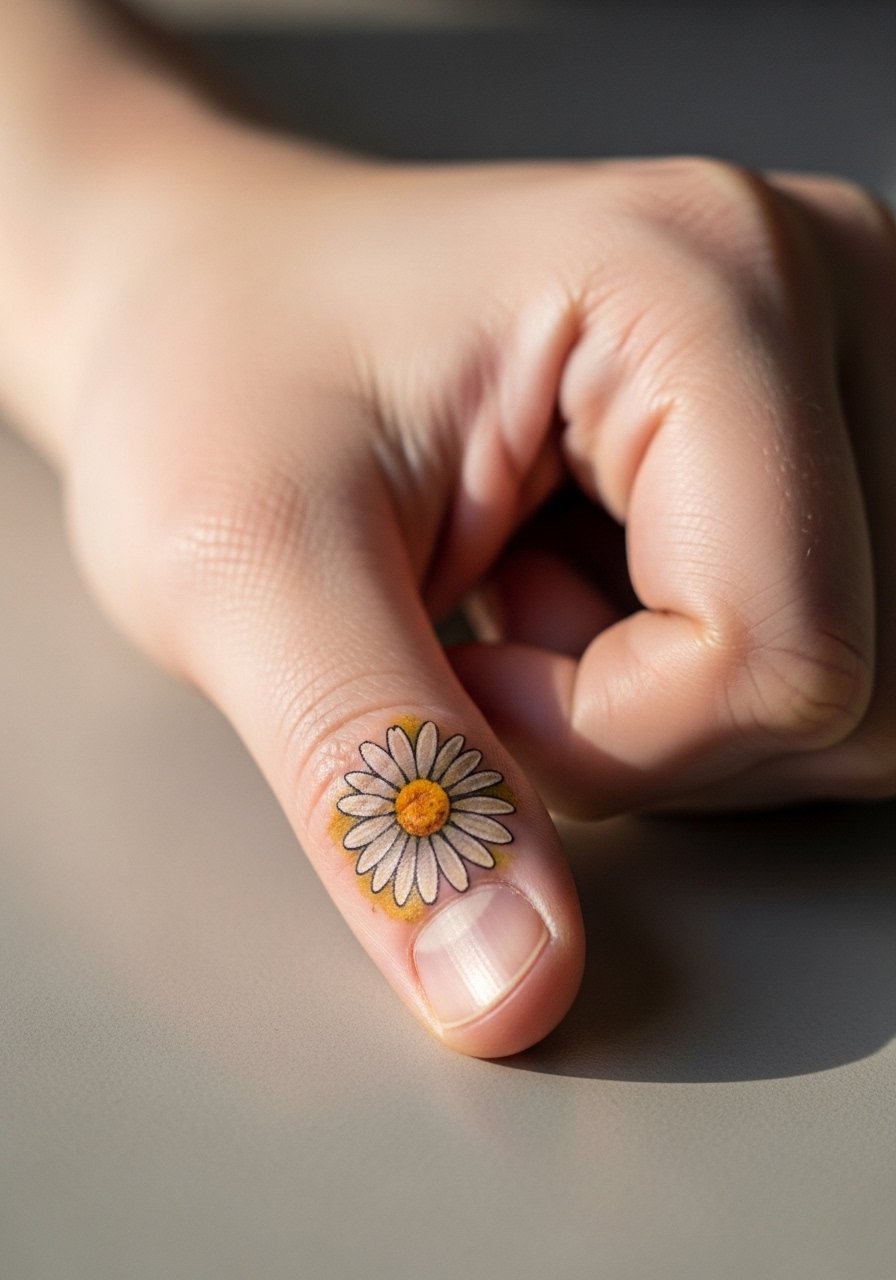
Thumb-base tattoos face constant use and washing. The common error is asking for a full wash of color like a forearm piece. Keep color minimal and use bolder line anchors so the shape remains readable. Expect touch-ups earlier than with arm tattoos. The session is quick and can feel stinging on the thumb. For the session remove rings and keep the hand free. For showing the piece a delicate bracelet complements without covering the design.
18. Petite Floral Cluster Along the Spine
Spine pieces look striking when spaced vertically, but tight watercolor clusters can blur as skin stretches. Ask for a vertical rhythm and leave breathing room between flowers. The session on the spine can be uncomfortable and takes steady breathing. For the appointment wear a top that allows the artist to work on the upper back without you removing much clothing. For nights out, an open-back dress frames the cluster without competing.
19. Tiny Poppy on the Lower Back
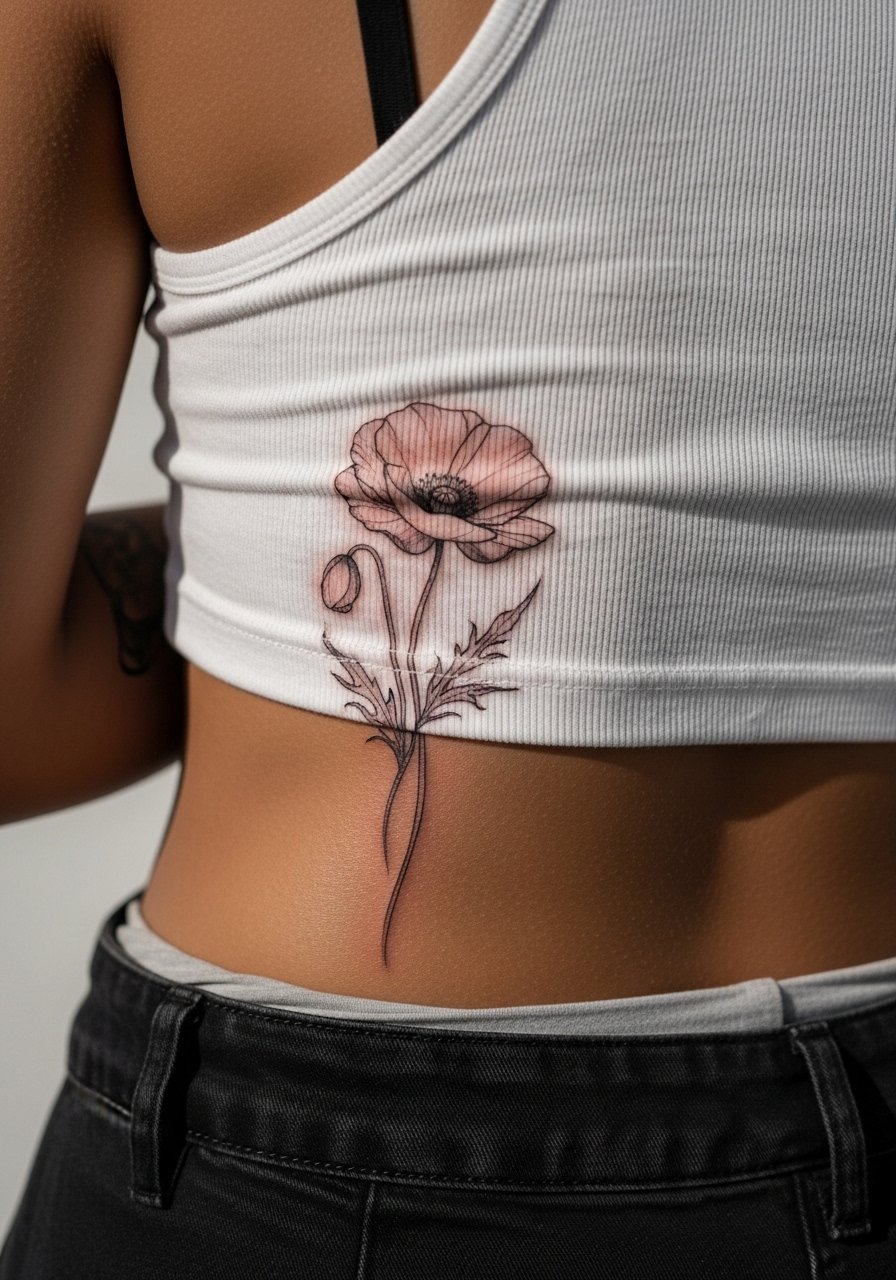
Lower back ink might be less visible daily, which helps color last. The main mistake is heavy color right on a seam line from clothing. Place the design slightly above or below waistbands to avoid constant rubbing. Sessions tend to be low to moderate in discomfort. For the appointment wear pants you can shift easily. For showing the piece pick a low-rise skirt or a cropped top and high-waisted skirt combo that reveals the area stylishly.
20. Tiny Forget-Me-Not on the Inner Wrist
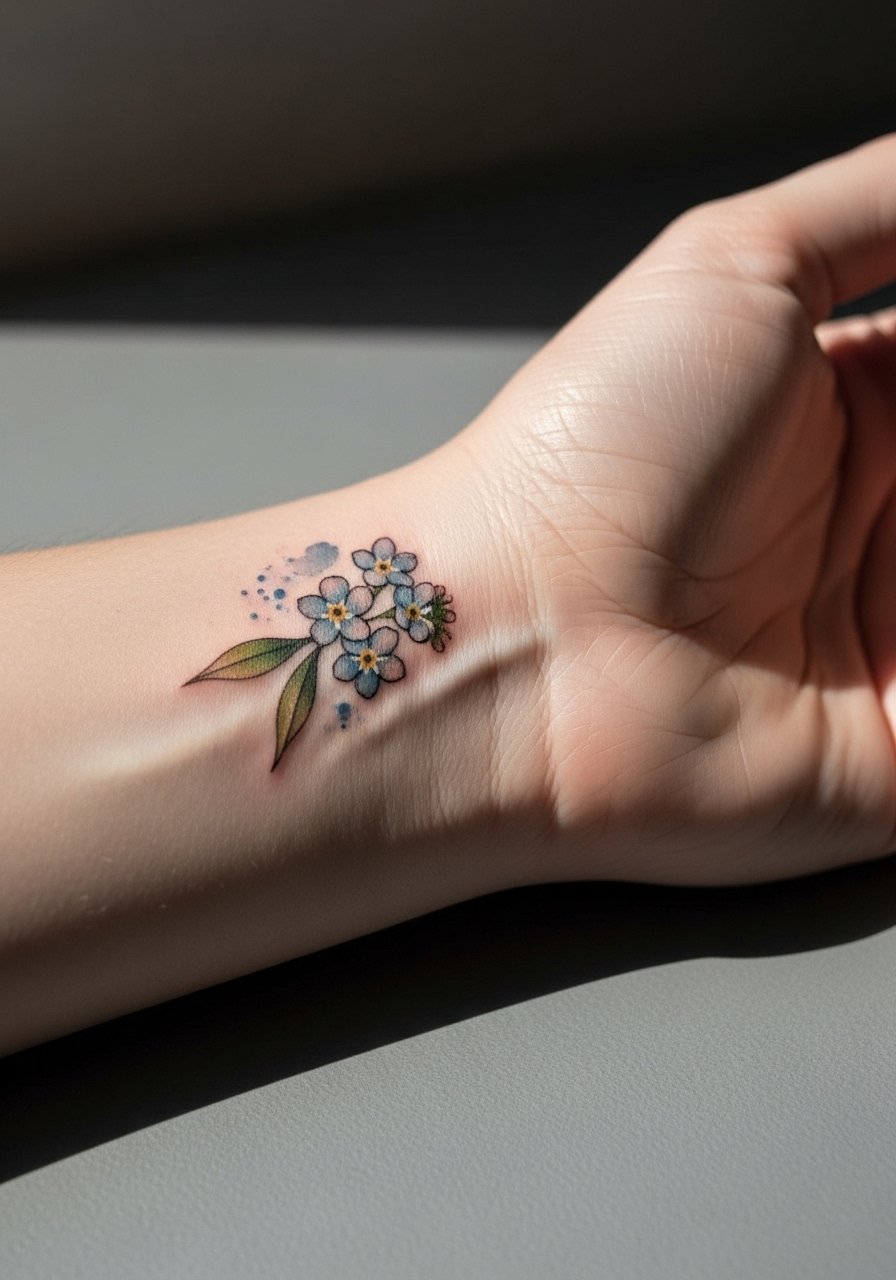
Inner wrist tattoos are clearly visible and great for small florals. The risk is over-detailing in a small space. I recommend keeping petal shapes simple and using a soft wash for color so the silhouette holds. Expect fading from sunscreen and frequent handwashing. The session is short and sensitive. For the appointment wear a shirt with sleeves you can roll up. For showing the tattoo pair it with a minimalist watch that avoids heavy straps touching the area.
21. Petite Wildflower Cluster for the Back of the Hand
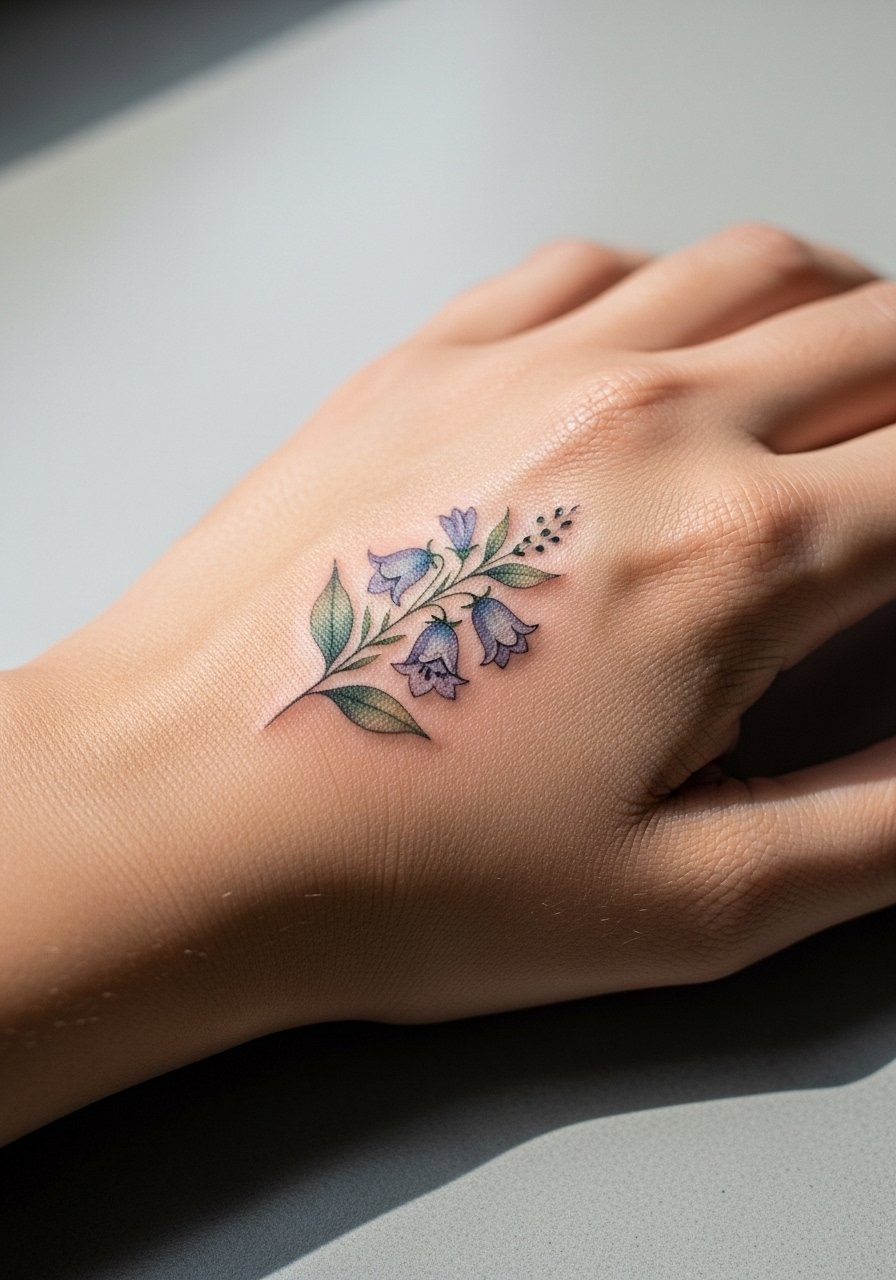
Back-of-hand tattoos are candid and make a statement quickly, but they fade fast because of constant exposure and washing. The controversy here is clear. One camp says skip watercolor on hands because the color disappears quickly. The other camp recommends shallow color with strong line anchors and accepts regular touch-ups. If you choose a hand piece, budget for touch-ups and pick a design that reads well in low saturation. The session can be quite painful. For the appointment leave jewelry at home and wear a short sleeve top.
Frequently Asked Questions
Q: Will watercolor-style small flowers need a different touch-up schedule than traditional linework?
A: Yes, watercolor fills generally fade faster than heavily saturated traditional color. Expect touch-ups sooner, often around year two to three depending on placement and sun exposure. If you want longer intervals between touch-ups ask for slightly stronger contour lines or a cautious amount of saturation during the initial session.
Q: Can fine line watercolor hold up on the ribcage or sternum?
A: Artists split into two camps on this. One camp warns the ribs and sternum stretch and thin the lines. The other camp says careful needle depth and spacing can make fine line settle well. My suggestion is to discuss both approaches with your artist and look at healed photos of their chest work before committing.
Q: What should I wear to the session for a collarbone or sternum floral?
A: Wear something easy to adjust without being fully undressed. A wide-neck shirt or fitted sports bra works well so the artist can access the area. For showing off later, an open-back top or strapless option highlights collarbone and sternum pieces without covering them.
Q: How soon will a wrist or finger watercolor piece need a touch-up?
A: Fingers and wrists face more abrasion and washing. Many people need touch-ups as early as 12 to 24 months. Keeping friction low and avoiding heavy jewelry during healing helps. Choose simpler fills and stronger anchors to lengthen the interval.
Q: Are there discovery pathways to find artists who specialize in watercolor small flowers?
A: Yes. Use local shop directories, tattoo convention listings, niche Reddit threads, and targeted hashtag searches to find artists who show healed photos of watercolor florals. Look for recent healed images rather than only fresh photos so you can judge how the style ages.
Q: Do dark and medium skin tones change how watercolor small flowers should be designed?
A: They do. On medium and dark skin tones higher contrast and selective saturation help shapes read. Ask to see healed work on skin tones similar to yours. Artists who work across tone ranges will adjust pigment choices and line strength to preserve detail.
Q: Should I budget differently for a hand, finger, or ribcage watercolor piece?
A: Yes. Those placements typically require more frequent touch-ups and sometimes faster initial fading. Think of the price as covering initial placement plus maintenance. Ask your artist about expected touch-up windows during the consultation.
