
Fine line Daruma has been plastered across mood boards for months, but what looks effortless on a screen often needs different rules in the chair. The designs that age best are the ones planned with spacing, needle depth, and placement in mind. Below are 27 vintage Daruma doll takes that pair classic iconography with real-world advice on how they heal, what to ask at consultation, and the wardrobe choices that actually help the piece last.
1. Neo-Traditional Red Daruma on Upper Arm
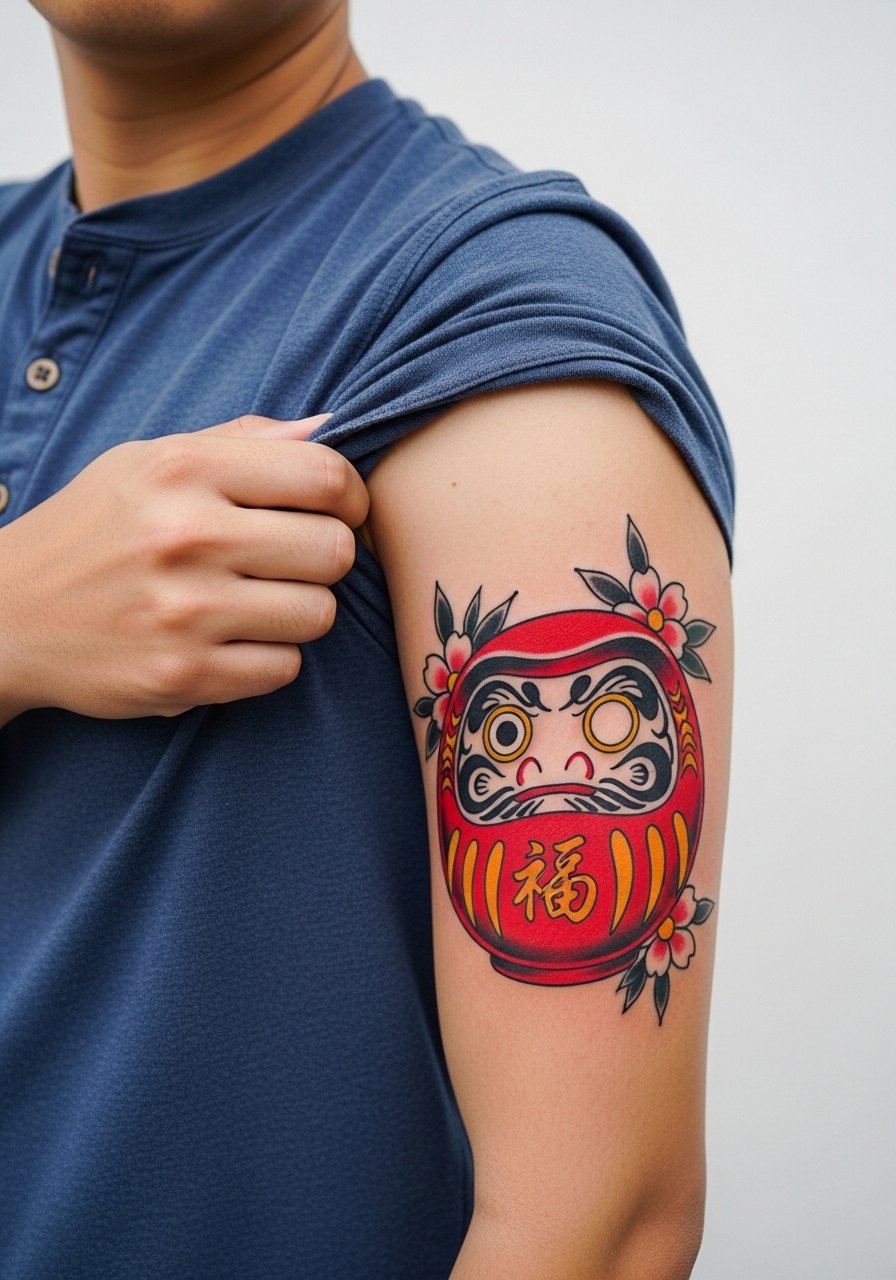
I see this version in sleeves and standalone spots because the upper arm masks motion and keeps saturation intact. Pain is moderate, session time about two hours for a 4-6 inch piece. Tell your artist you want bold outlines and saturated red with gold accents, and ask them to map negative space so the flowers do not crowd the Daruma. A common mistake is cramming tiny florals into the face area which muddies the eyes as the piece heals. For showing it off, pair with a fitted tank top black or a rolled short-sleeve henley for quick reveals at summer gatherings.
2. Minimalist One-Eye Daruma on Inner Forearm

Inner forearm is forgiving for fine single-needle work but it still needs room to breathe. Expect one session of roughly 45 to 90 minutes and a low to moderate pain level. Tell your artist you want slightly heavier lineweight than you see on screens so the single eye that is filled reads after a year. Mistakes include going too thin with linework and assuming touch-up is optional. For the appointment wear a linen short sleeve shirt so the artist has clear access and you stay comfortable during the session.
3. Japanese Irezumi Daruma with Waves on Shoulder
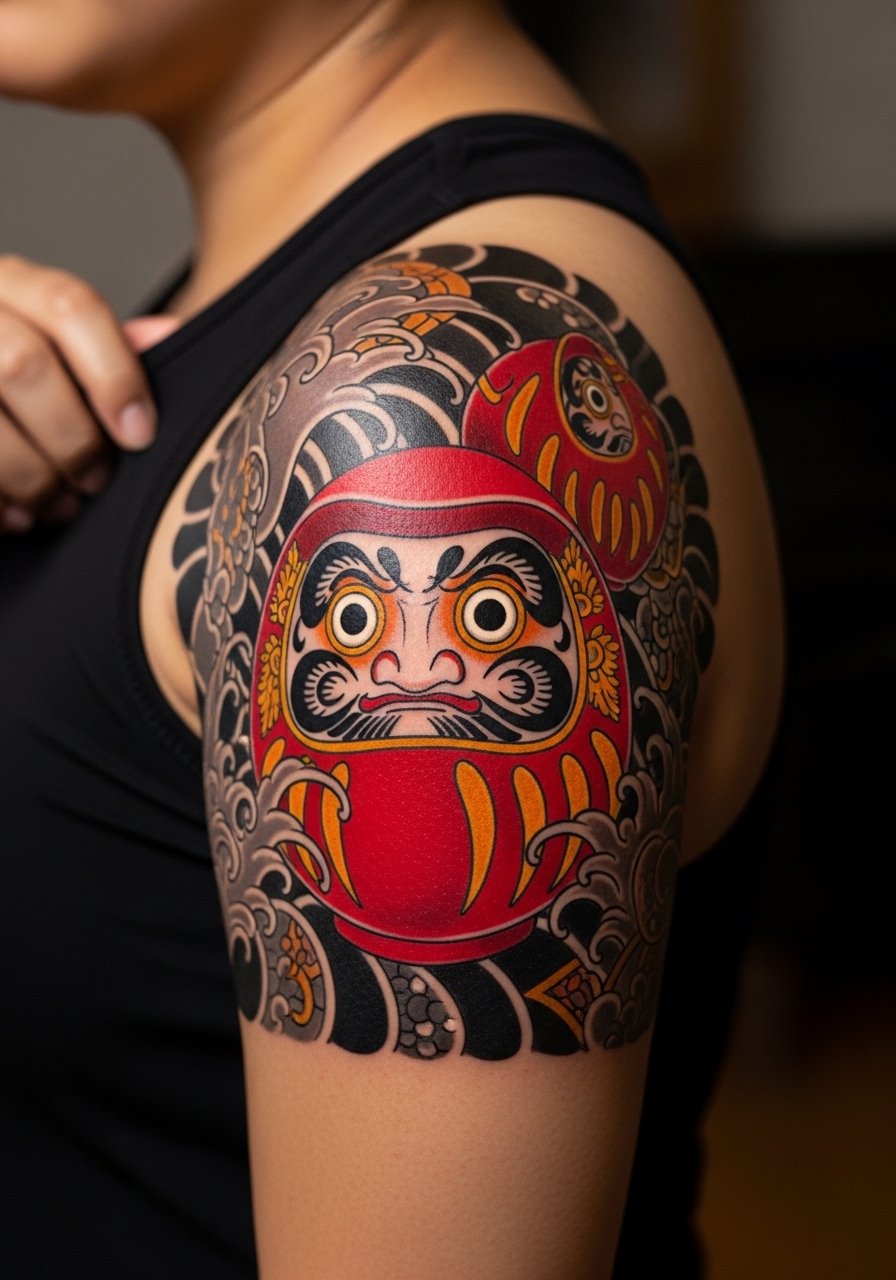
This is a multi-session commitment with heavier saturation and large black backgrounds. Pain is low to moderate on the shoulder, session times vary from two to four hours depending on coverage. Ask your artist to plan how the Daruma will sit when your arm is relaxed so the robes do not warp when you move. One camp argues this style is best done by an artist steeped in traditional irezumi. The other camp says modern neo-traditional approaches bring better color longevity. If cultural origin matters to you, mention Bodhidharma respectfully in consultation and look for portfolios in regional tattoo directories or hashtags rather than naming artists directly. For the session wear a racerback tank black for full shoulder access.
4. Blackwork Daruma Silhouette on Calf

Calf placements let blackwork breathe and they age very well because the skin there moves less. Expect two to three hour sessions and moderate pain when the needle hits muscle. Tell the artist you want dense saturation and stipple shading around the edges for texture. A frequent mistake is leaving too small a border between silhouette and background, which can make edges bleed into clothing friction zones. Show it off with cuffed joggers or cuffed joggers men and leather Chelsea boots for a casual, framed look.
5. Vintage Papier-Mâché Texture Daruma on Thigh

This is one of the fresher creative angles where artists layer fine crackle texture into the fill to mimic real Daruma dolls. Thigh pieces are relatively low pain and sit well under mid-thigh shorts. Sessions run two hours for medium-scale work. Ask for stipple shading and muted reds rather than flat blocks so the vintage effect reads after healing. The common error is over-detailing the crackle at too small a scale, which blurs with time. For the session keep it easy with mid thigh swim trunks or loose shorts so the artist can position the leg without strain.
6. Red Daruma with Gold Accents for Prosperity on Thigh

This thigh placement gives room for color saturation and larger decorative elements. Pain is low to moderate and sessions typically spread across two sittings for brighter saturation. Tell your artist you want gold leaf hints and ask how they plan to place highlights so the metallics do not flatten over time. A frequent mistake is using metallic ink that does not photograph well or fades fast, so discuss pigment choices. Pair this look with mid thigh swim trunks when you want the piece visible and a high-waisted short for framing in summer.
Before You Book
The upper arm and thigh pieces above need different prep than wrist or ribcage work, so a few targeted items make the session and first week smoother.
-
Stencil transfer paper kit. Lets you preview linework on skin, especially useful for the detailed papier-mâché and neo-traditional faces in ideas above.
-
Topical numbing cream. Applied before the session eases the edge on sensitive zones like ribs or forearms during longer fills.
-
Thin protective film roll. Keeps tattoos on high-friction areas like the calf and ankle clean during the first week.
-
Fragrance free gentle body wash. Cleans healing zones without irritating fine line or watercolor work.
-
Aquaphor healing ointment. Thin layers during the first days help keep fine line pieces and saturated color from drying into scabs that pull pigment out.
7. Purple Daruma Wrist Charm for Health

Wrist pieces are highly visible and subjected to lots of washing and movement. Pain is low but the wear makes touch-ups more likely. One session of 45 to 90 minutes will usually do a 2 inch piece. Tell the artist you want a slightly denser fill for the purple so it survives frequent hand washing. The controversy here is about wrist sizing. One side says small is fine and can be retouched as needed. The other side says size up slightly for longevity. For showing it off, a white cuff shirt men or a thin leather wrap bracelet opposite the tattoo keeps attention on the design without overcrowding.
8. Dotwork Daruma with Geometric Halo on Shoulder Blade

The shoulder blade tolerates dot work because movement there is limited, which helps dots hold. Expect a three-session plan for a five inch piece. Request stipple shading and clear spacing between the Daruma silhouette and halo so dots do not merge as they settle. A common mistake is compressing dots too tightly for high contrast photos, which leads to early softening. For session comfort wear a off shoulder tank top you can adjust without affecting the stencil.
9. Watercolor Daruma Splash on Ribcage

Ribcage work can be painful and it moves as you breathe, so expect a multi-hour session and a higher pain rating. Watercolor looks amazing fresh but can fade faster in this area, so plan touch-ups around year two. Ask your artist how they will anchor color with subtle outlines to prevent bleeding. A mistake is asking for overly diffused watercolor with no anchor lines, which can wash out quickly. For the session wear a sports bra or cropped top so the artist can access the area cleanly.
10. Traditional Red Daruma on Outer Forearm
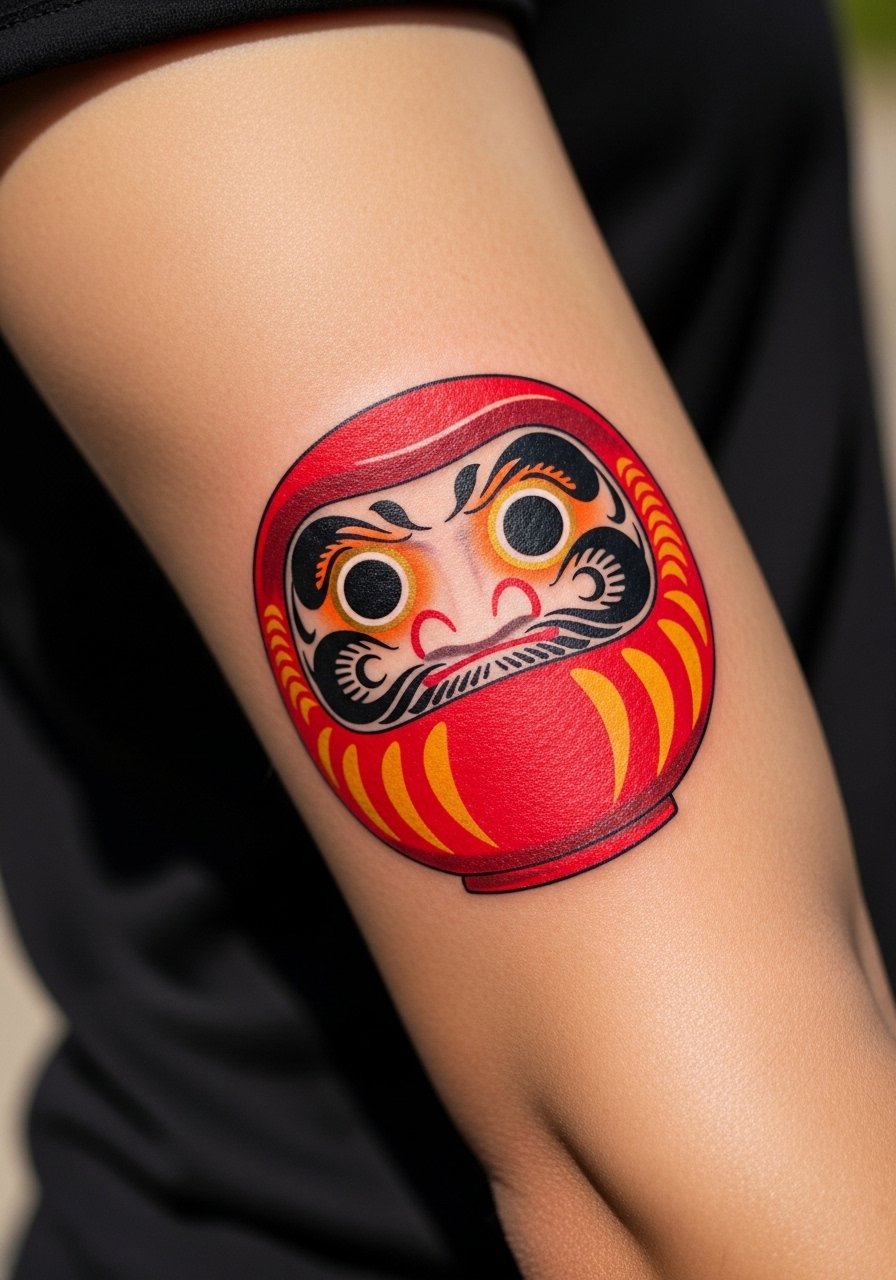
Outer forearm is a classic placement for bold color and it photographs well. Expect two to three sessions for a 6 inch piece and mild to moderate pain. Tell the artist you want high saturation and a clear black outline to help the red hold. The main mistake is making the face too detailed at small scale which ages into muddiness. For finding an artist, search local Japanese tattoo studios via location tags or Tattoodo for irezumi specialists rather than relying on a single portfolio.
11. White Ink Daruma Ankle Accent

White ink reads differently depending on skin tone and it often needs contrast outlines to hold up. Ankle placements face friction from socks and shoes, which increases the need for touch-ups. One session of 45 minutes usually suffices. Ask for a black outline around the white fill to keep the shape visible. A common mistake is assuming white alone will stay bright on every skin tone. Wear cuffed jeans or sandals to show the piece without constant rubbing.
12. Yellow Arm Plate Daruma on Upper Chest

Upper chest pieces sit near movement zones and can be affected by shirt straps. Expect moderate pain and a two to three hour session for a five inch piece. Discuss how the yellow will contrast against your skin so highlights do not flatten during healing. Artists sometimes overuse pale yellow which disappears quickly, so ask for stronger pigments and precise outlines. For the session wear a wide neck shirt you can pull aside without exposing more than the tattoo zone.
13. Irezumi Daruma as Sleeve Starter on Inner Bicep

Inner bicep starts are great for building a larger narrative but the skin there is softer and can cause blowout if needle depth is inconsistent. Expect multiple sessions and moderate pain. During consultation ask how the artist plans to integrate the Daruma into future waves or florals. One mistake is starting with too much fine detail in a small starter piece which does not match later large-scale work. For the session wear a tank top so the artist can reach the inner arm without compromising the stencil.
14. Fine Line Daruma Collarbone Profile with Script

Collarbone is delicate and line retention varies with movement and clothing friction. Expect one to two sessions and a moderate pain level. For longevity ask for slightly increased spacing between strokes and minimal script kerning so letters do not merge. A mistake is packing script too tightly beneath the Daruma which leads to blurring. Show it with a thin chain pendant necklace that sits just above the script for a composed look.
15. Black Dotwork Daruma Pocket on Shoulder Cap
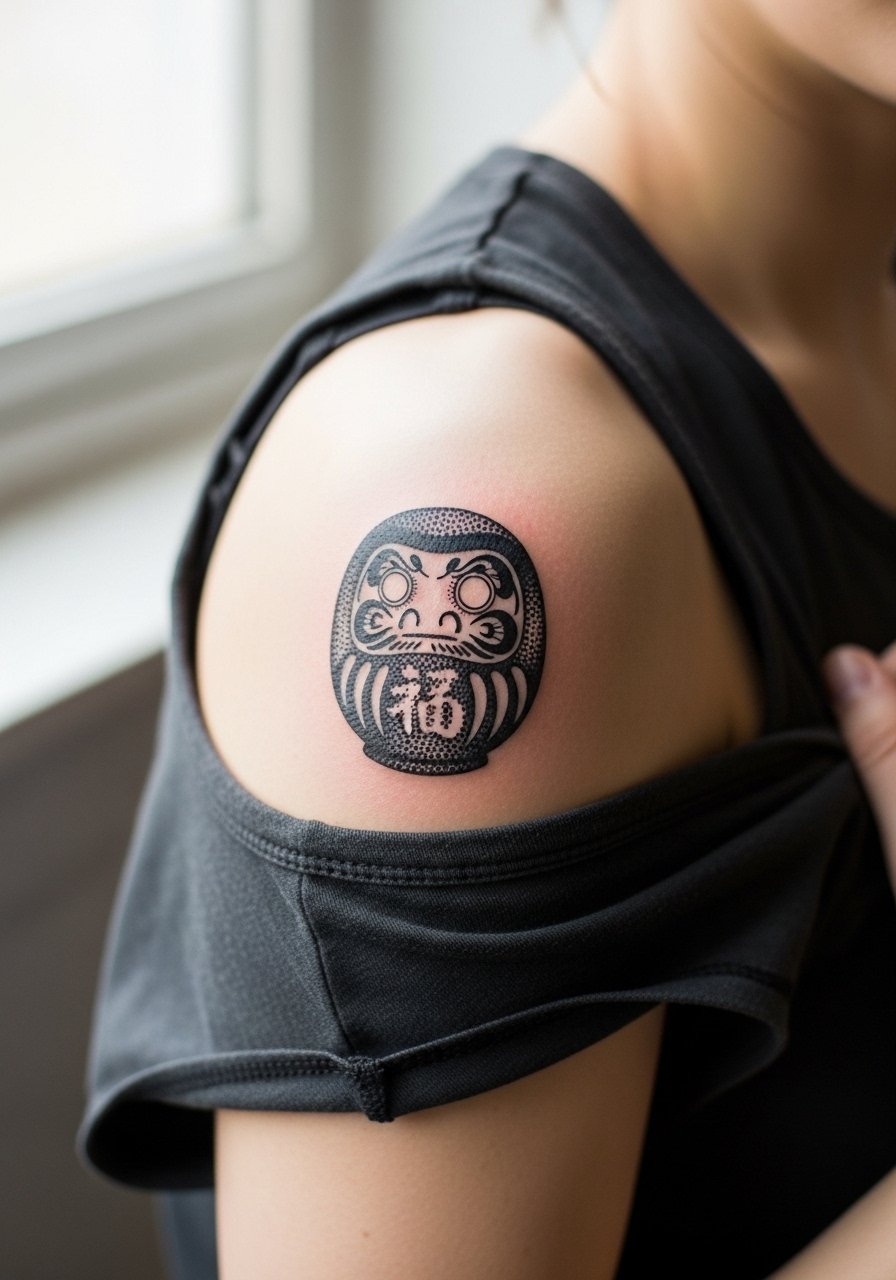
This placement takes dotwork very well and it reads as a pocket piece when paired with larger back work later. One to two sessions handle a compact five inch design. Mention stipple shading and ask the artist to space dots so they do not pack into a blur at two-year mark. A frequent mistake is starting dot density too high for small-scale work. For the session wear a sleeveless tank top so the artist has unobstructed access.
16. Watercolor Splash Daruma with Blank Eyes on Sternum

Sternum work demands careful placement due to movement and clothing contact. Expect high pain and two sessions for balanced watercolor spreads. Ask for defined anchor lines that will help the watercolor retain its shape after healing. A common mistake is overextending watercolor into areas that get constant friction from clothing seams. Note that many artists advise specialized experience for sternum pieces, so ask where they have done comparable work before booking.
17. Micro-Realism Daruma on Inner Wrist

Micro pieces on the inner wrist look intimate but are highly exposed to sun and washing. Expect one session under 90 minutes and a low to moderate pain level. Tell the artist you want slightly bolder contouring so the small features last. A frequent mistake is pursuing tiny facial details that blur into indistinct marks within two years. For the session wear a sleeveless tee and remove jewelry from the tattoo side to limit transfer.
18. Geometric Daruma with Dot Work on Back

Back pieces allow larger geometric treatments and they age steadily due to low friction. Sessions can be long and multiple, pain varies by depth over the spine. Tell your artist you want clear spacing between geometric lines and dot fields to avoid future merging. One mistake is packing geometry too densely without accounting for stretching. For the session wear a button-down you can move aside or wear backwards so the artist can access the mid-back easily.
19. Small White Daruma on Ankle with Anklet Styling
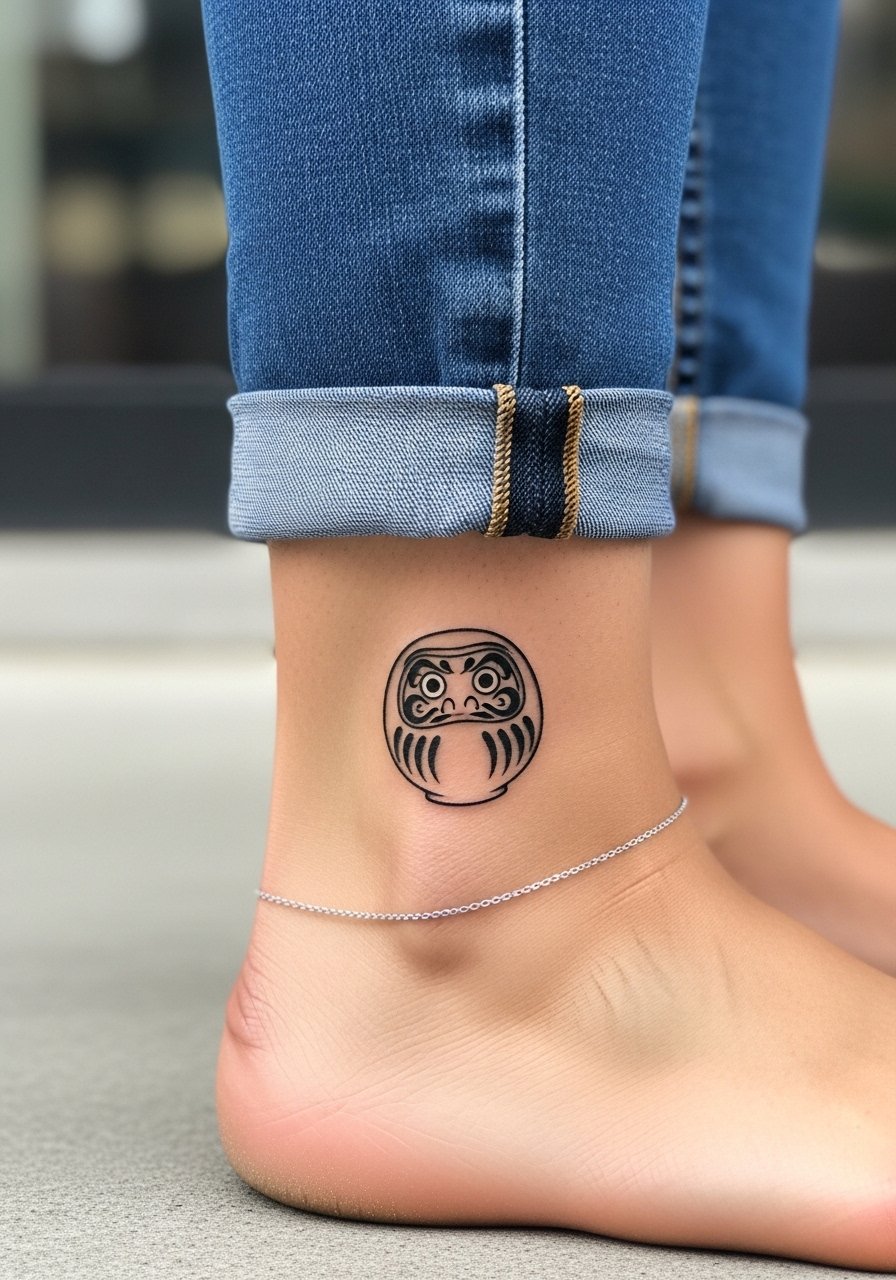
Ankle tattoos contend with shoes and socks, so touch-ups are common. Expect one session and low pain except where bone is close to the surface. Ask for a black or dark outline around the white fill to keep the shape visible after healing. A mistake is placing white-only work without contrast. When showing it off, pair with cuffed jeans or a delicate chain anklet for symmetry.
20. Stipple Shaded Vintage Daruma on Lower Back

Lower back pieces are less visible daily but they can hold detail well if protected from constant friction. Expect moderate pain and one to two sessions. Ask for stipple transitions rather than harsh shading to avoid solid patches that can look heavy after a few years. Avoid overly tiny facial elements that will soften. For session access wear a tank top with high-waisted jeans you can lower just enough to expose the area without full torso exposure.
21. Thigh Patchwork Daruma as Sleeve Starter

Thigh works well as a canvas for future sleeve expansions and the skin there holds saturation. Sessions range from two to three hours and pain is generally low to moderate. During consultation, discuss how the Daruma will serve as a focal point as you add complementary pieces. A common mistake is starting with too small a focal Daruma which gets lost when the sleeve fills out. During the session wear high waisted athletic shorts or loose shorts for comfort and access.
22. Pocket-Sized Daruma Behind the Ear
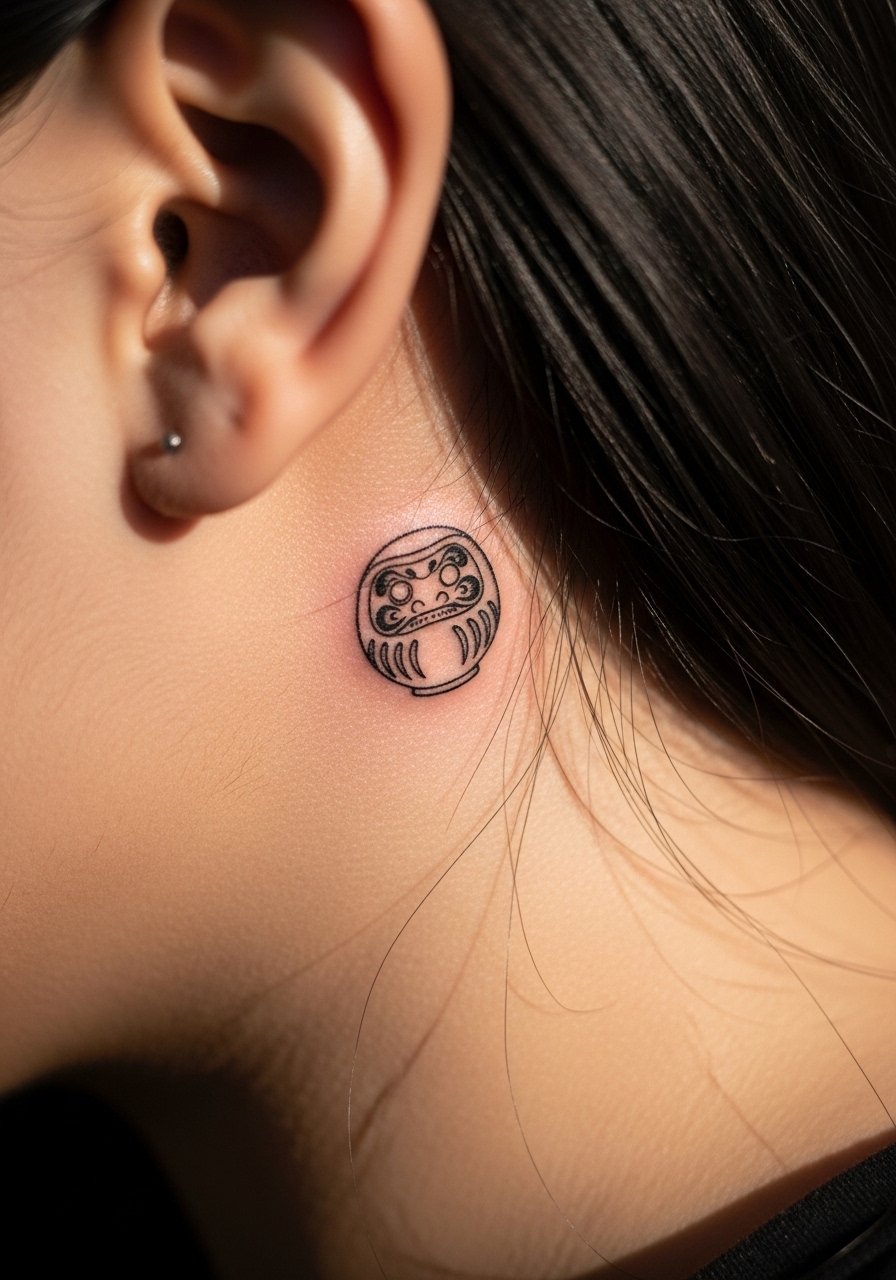
Behind the ear is a tiny spot that needs expert precision and discreet aftercare. Expect low but sharp pain and one short session. Make sure the artist frames the tiny features with slightly heavier anchor lines so the piece reads in photos and at distance. If you choose this, note that hair growth and shampooing will require careful drying during the first week. For discovery, search style-specific hashtags to find artists experienced with small ear-adjacent work.
23. Bold Outline Daruma on Outer Calf

The calf is great for bold lines and classic silhouettes. Sessions are comfortable and span one to two hours for a five inch piece. Request reinforced outlines and ask the artist to avoid hairline details that will soften with time. Many clients make the mistake of asking for thin lines on the calf thinking they will stay crisp. Pair this with khaki straight leg chinos cuffed at the ankle so the silhouette reads in motion.
24. Purple Daruma for Longevity on Wrist

Purple choices are underused and carry specific personal meanings for many people. The wrist is a high-contact area which increases fading risk and touch-up needs. Expect a single short session and low to moderate pain. Ask for a slightly denser pigment packing and a small outline so the purple does not sink into surrounding skin tone as quickly. Avoid overcomplicating the face with tiny dots that will soften. Style it with a thin leather wrap bracelet on the opposite wrist.
25. Vintage Red Daruma as Chest Starter

Upper chest placements show on many outfits but they can catch shirt seams during healing. Expect moderate to high pain and two sessions for solid color. Ask for armor or robe details to be spaced so the design does not crease with motion. One mistake is positioning too high where shirt collars will rub constantly. Prep with a wide neck shirt you can adjust during the session.
26. Dotwork Daruma with Geometric Lower Arm Wrap

Lower arm wraps are visible and they face sun exposure, which affects dot contrast. Expect two sessions and low to moderate pain. During consultation ask the artist how they will protect dot gradients from early fading and whether they recommend touch-up timelines. A common error is shallow dot placement which leads to quick loss of contrast. For showing it off, a rolled sleeve henley shirt frames the design without crowding it.
27. Micro-Daruma Finger Accent for Subtle Tracking

Finger tattoos suffer the most from wash and wear, which makes longevity a trade-off for placement. Expect a quick session and sharp but intense pain where skin is thin. Tell your artist you accept that touch-ups are likely and ask for slightly bolder silhouette weight to extend clarity. The biggest mistake is expecting a micro face to last without refresh. If finger work matters for daily reminders or goals, plan check-ins at year one.
Frequently Asked Questions
Q: Will a watercolor Daruma on the ribcage need touch-ups sooner than a neo-traditional Daruma on the arm?
A: Yes, watercolor on cartilage-adjacent areas like ribs tends to soften faster because of movement and thinner skin. Neo-traditional pieces with bold outlines on the arm usually keep contrast longer. Plan for a possible touch-up around year two for watercolor, and discuss pigment saturation with your artist.
Q: How should I ask an artist about cultural origin when booking an irezumi-style Daruma?
A: Ask where they learned traditional motifs and whether they have done Bodhidharma-inspired work before. Mentioning Bodhidharma respectfully signals you care about authenticity. Use hashtags and location tags to find studios that list Japanese irezumi in their specialties rather than naming individual artists.
Q: Do fine line Daruma tattoos blur faster on the collarbone than on the forearm?
A: In my experience collarbone lines face more friction from clothing and sharper movement, so they can blur quicker than forearm pieces. If you favor fine line at the collarbone, request slightly more spacing and a stronger anchor line from the artist.
Q: What should I wear to a thigh session that includes a Daruma starter and floral fills?
A: Wear loose shorts or high-waisted athletic shorts you can move without tugging at the area. That way the artist can adjust the leg and you stay comfortable during multi-hour sessions.
Q: Are white ink Daruma designs visible on darker skin tones?
A: White alone often reads as a highlight, so pairing it with a dark outline helps the shape stay legible on darker skin. Ask for contrast planning in the consultation so the piece does not vanish over time.
