
Bold color and confident linework often outlast the delicate trends that look best on an iPad. I've seen bold traditional moths keep readable wings at year five while ultra-fine neo-traditional pieces called for touch-ups much sooner. Booking confusion, artist availability, and how a design heals on darker skin come up in nearly every consultation I sit in on. Below are 27 distinct moth directions you can take, with what to ask for in the consult and which placements hold up over time.
1. Classic American Traditional Moth on the Outer Forearm
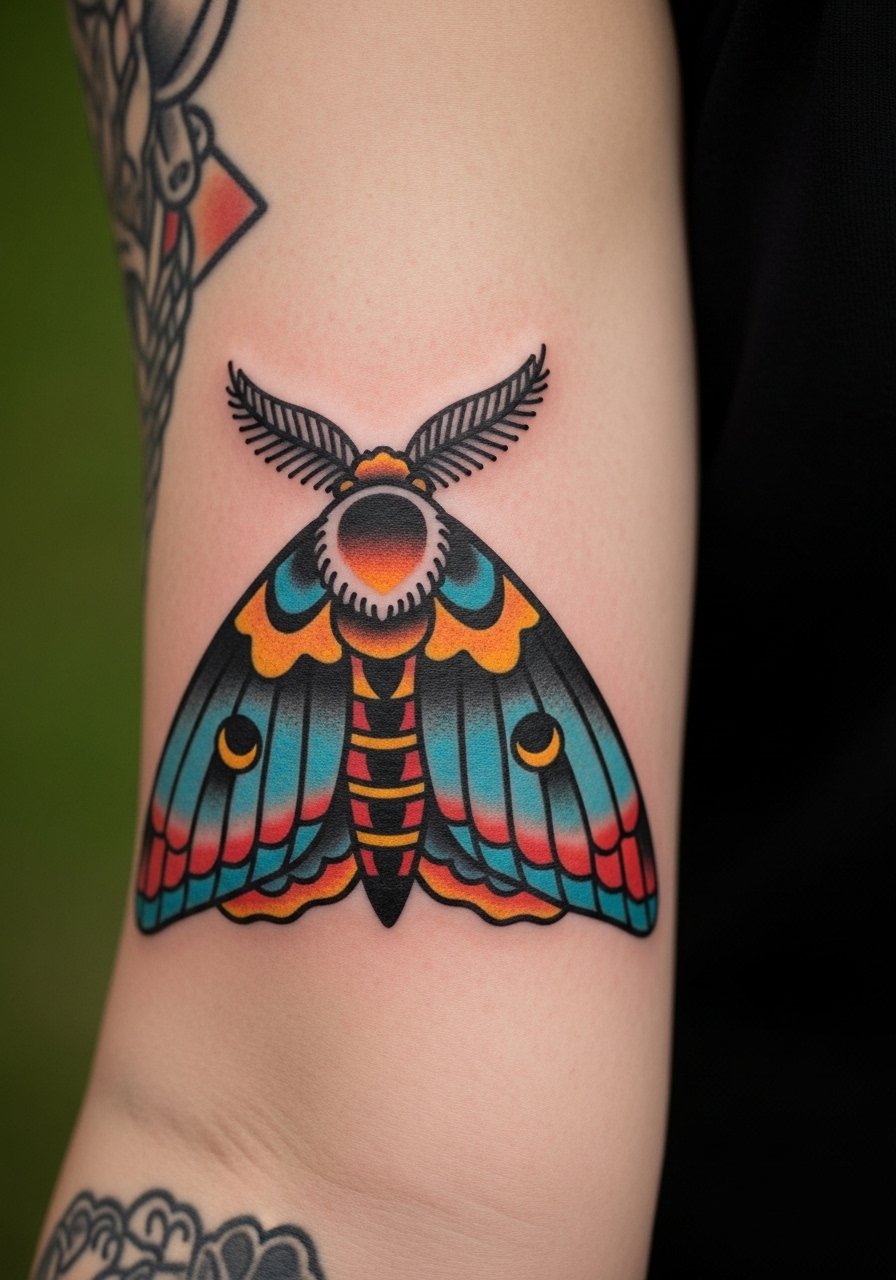
The outer forearm is a workhorse placement that shows off strong traditional linework and color. I recommend this for a first moth because the area tolerates saturation well and touch-ups are straightforward. In consultation, ask your artist for increased spacing between thick fills and delicate inner lines so the wings do not blur together as they age. Expect a single long session for a small to medium piece and moderate pain. A common mistake is shrinking the wing details too much. For showing the piece off, roll sleeves up or wear a rolled cuff chambray shirt to frame the forearm without crowding the composition.
2. Neo-Traditional Floral Moth Across the Shoulder Blade
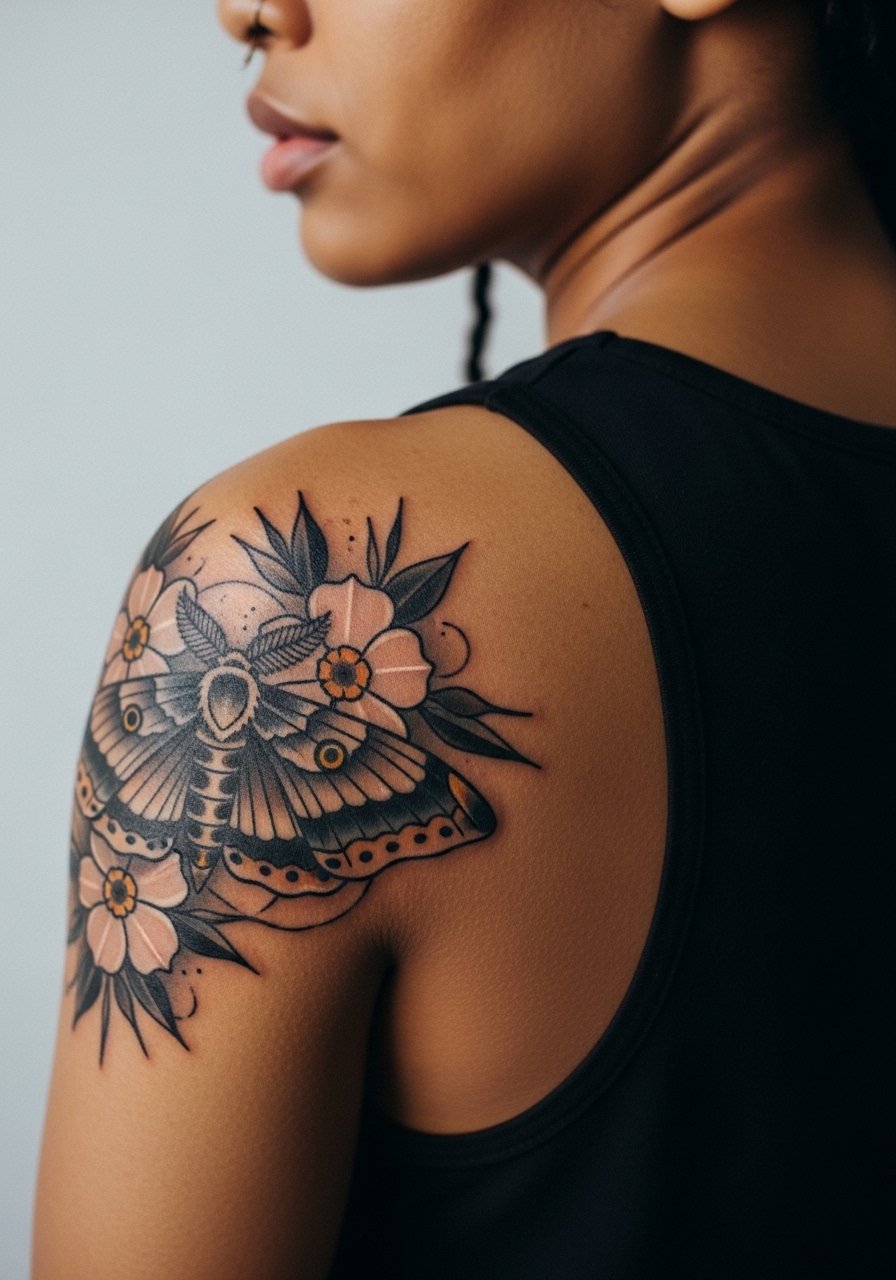
Shoulder blade placement pairs well with a floral neo-traditional moth because there is room for the wingspan and complementary blooms. Bring flower references and specify that you want saturated color blocks with crisp outlines rather than tiny micro detail. The skin here stretches less than ribs, so bold outlines age gracefully. Session time is often one to two sittings depending on scale and saturation. Avoid asking for ultra-detailed stippling inside the wing at small scale. For session comfort wear a sleeveless button up shirt so the artist can work without fabric bunching.
3. Luna Moth Chest Piece Emphasizing Moon Spots
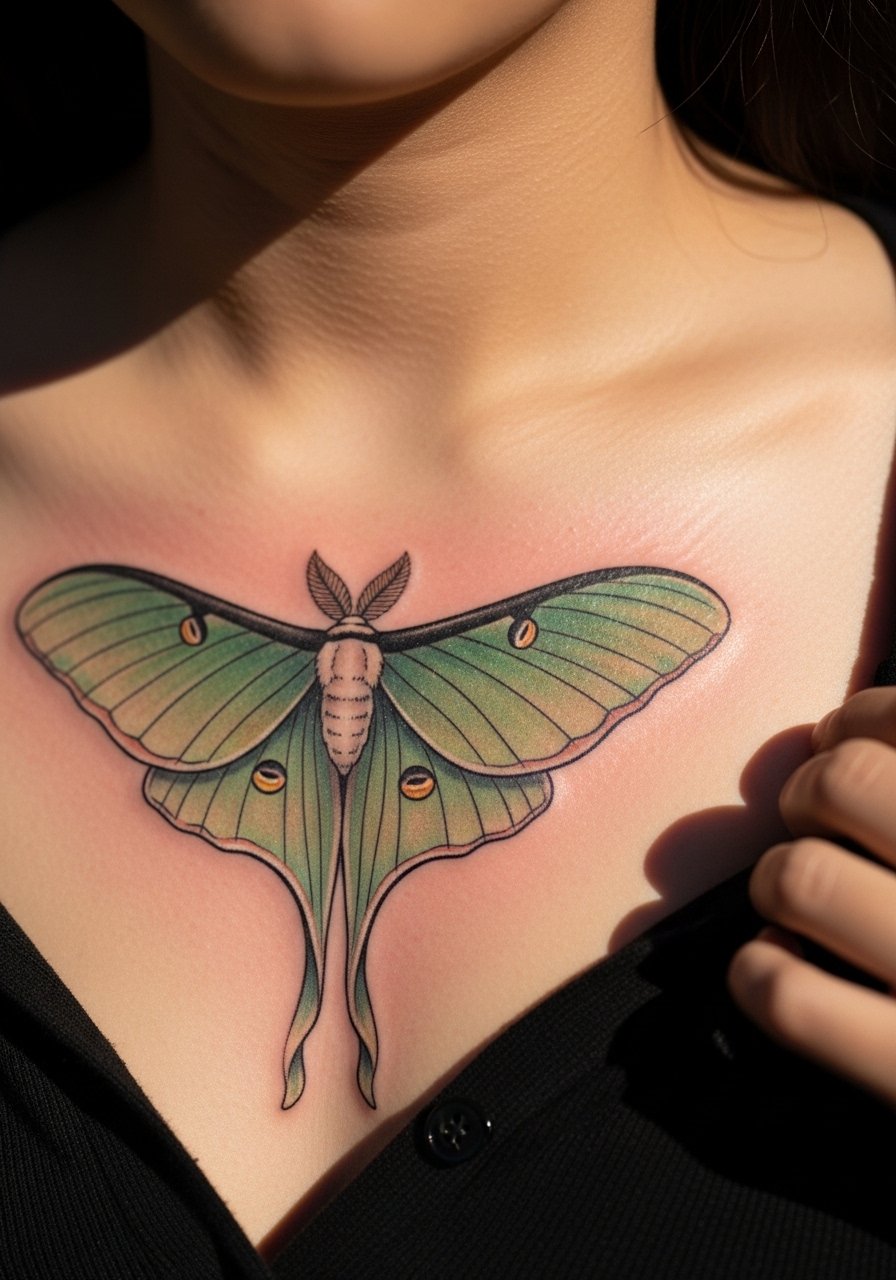
A chest moth lets you play with lunar symbolism by mirroring crescent moon shapes in the wing spots. Tell the artist you want late-night contrast with muted green fills and subtle black-gray shading around the moons. Pain on the upper chest is moderate and sessions can be interrupted for breathing breaks. A frequent error is cramming too many tiny moons into a small chest piece. Over time expect some softening in delicate lines at the clavicle edge, so ask for slightly bolder wing edges up front. For showing it off, pair with a deep v neck tee that lets the top of the moth peek through.
4. Small Micro-Traditional Moth Behind the Ear

Behind-the-ear pieces feel intimate and subtle. Keep the design small and request slightly bolder primary outlines than you might for a purely fine line plan so the motif reads after healing. This area heals fast but is fussy with blowout risk if needles go too deep. During the consult, ask about stencil placement and have the artist press the transfer on while you move your jaw and tilt your head. Expect low session time and sharp but brief discomfort. If you want to hide it for work, the hairline makes concealment easy. For session comfort plan a loose hairstyle that stays out of the way.
5. Geometric Moth on the Inner Forearm With Negative Space
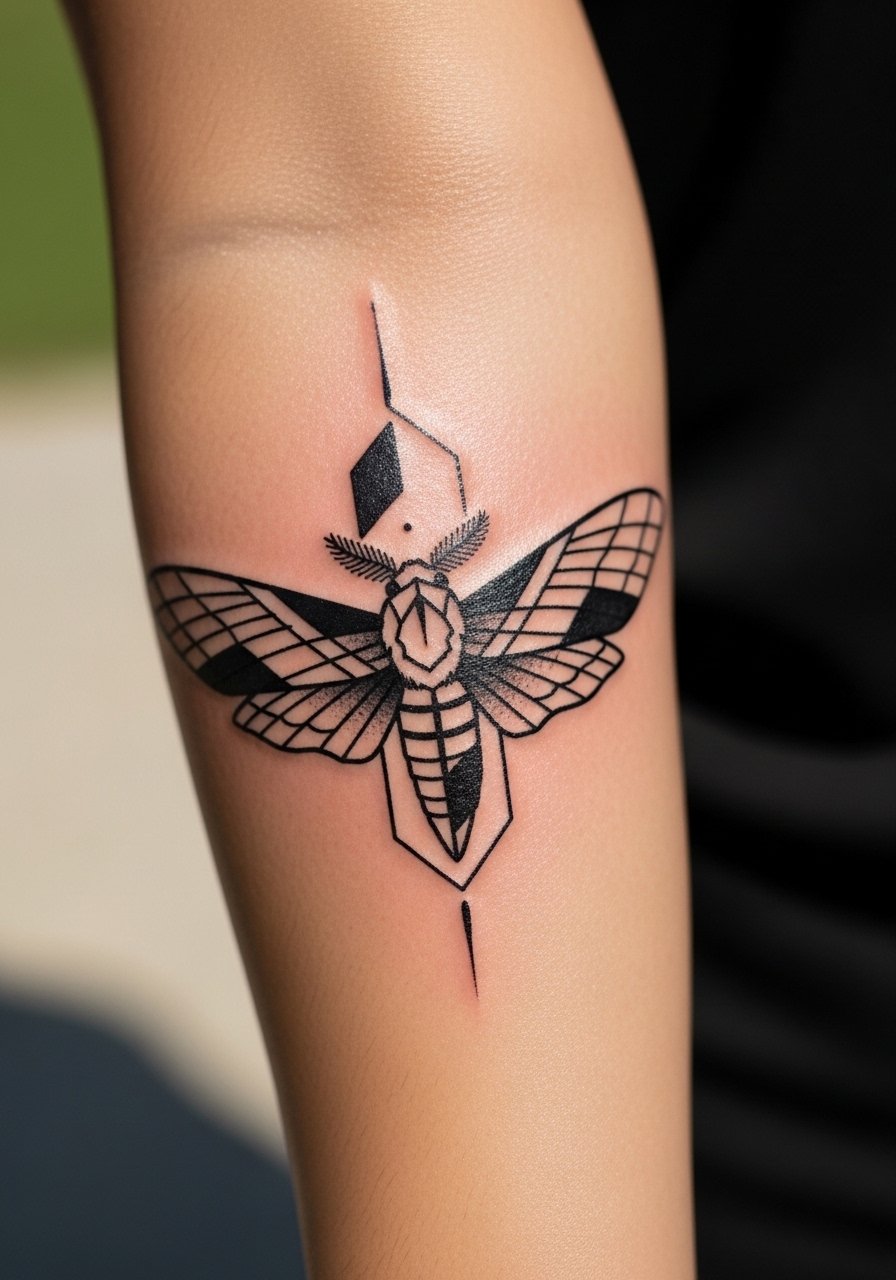
Inner forearm gives the geometric approach room to breathe. I advise asking for deliberate negative space and fewer intersecting lines so density does not merge as the tattoo ages. Pain is low to moderate and the area tolerates crisp linework when the artist spaces elements well. A mistake is packing too many fine parallel lines into a narrow band. Discuss a touch-up timeline at the consult because dense blackwork can need a session at year two to keep crisp edges. Wear a short sleeve button down to the appointment so the artist can easily access the inner arm.
6. Dotwork Moth on the Shoulder Cap
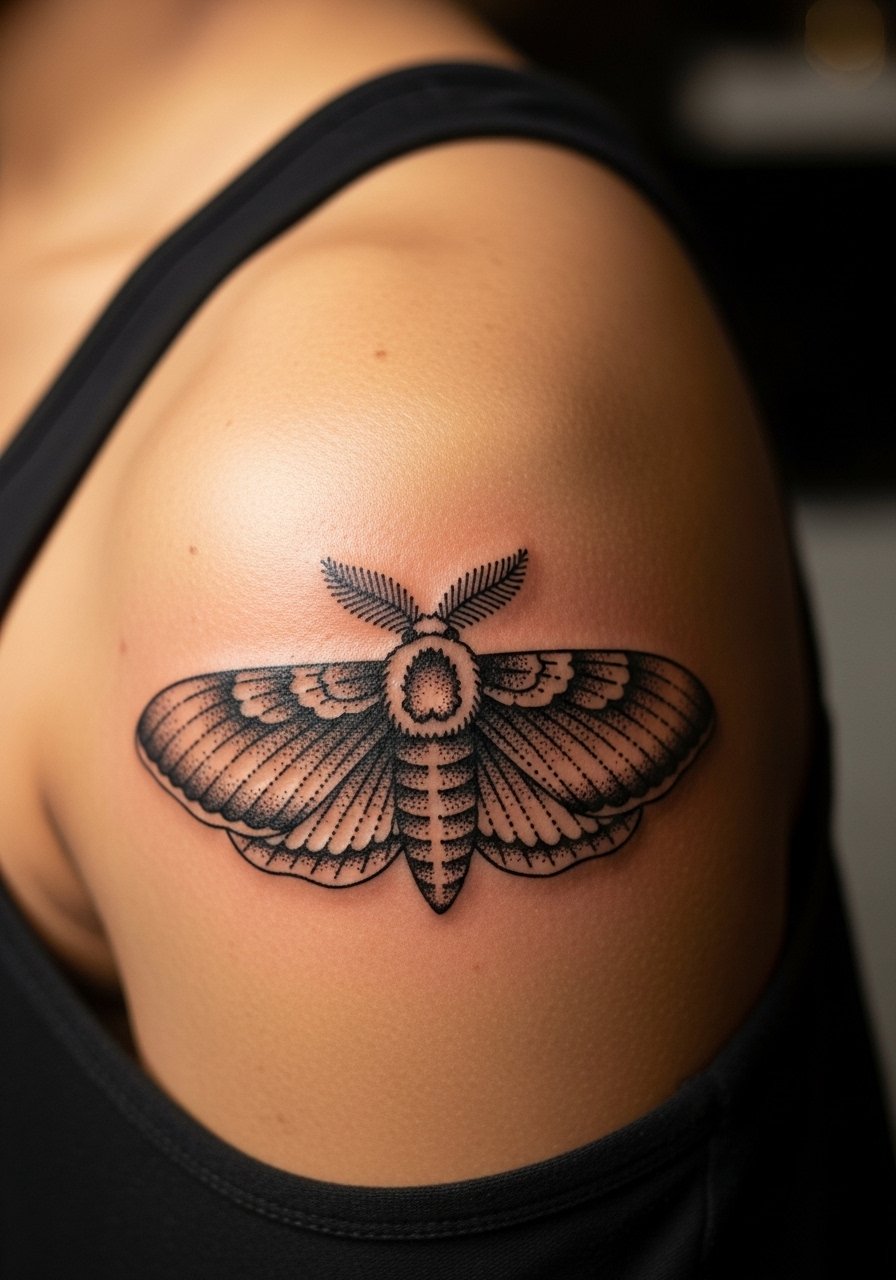
Stipple shading on the shoulder cap reads well because the skin does not shift dramatically and the dotwork holds depth over time. Make sure your artist uses consistent dot density and avoids clumping, which is the common mistake that causes muddiness as the piece ages. Expect two sessions for medium-large scale, with moderate discomfort while the shoulder is worked. If you want to show this off, a fitted tank emphasizes the rounded placement. For the appointment, bring a fitted black tank top you can pull slightly aside so only the shoulder area is exposed.
Studio Day Picks
Those first six ideas include a mix of wrists, forearms, shoulders, and chest work. A few studio-day items make those sessions and the first healing week smoother.
-
Stencil transfer paper kit. Lets you preview exact line placement on the arm and chest pieces so tiny adjustments happen before the needle hits skin.
-
Topical numbing cream. Helpful for sensitive back or chest sessions when nerves spike and you want to stay still for cleaner linework.
-
Thin protective film roll. Useful for shoulder and forearm pieces that will rub clothing in the first 48 hours.
-
Fragrance-free gentle body wash. Cleans the area without irritating the linework on delicate placements like behind the ear or inner forearm.
-
Aquaphor healing ointment. A thin layer for the initial days keeps small-scale traditional lines hydrated without smothering the needle channels.
7. Luna Moth with Tiny Starfield on the Upper Arm

Upper arm pieces balance visibility and longevity, which is why adding a small starfield around a luna moth reads well. Ask for modest star sizes and bright accents that sit outside the wing margins. Artists often compress stars into the wing area and that causes crowding as lines soften. Expect a one to two hour session for medium detail and manageable pain. Over years the stars will fade faster than the moth so plan a touch-up by year three if you want them to remain bright. For show-off wear, a sleeveless button up shirt keeps the arm visible without looking forced.
8. Minimalist Watercolor Moth on the Collarbone
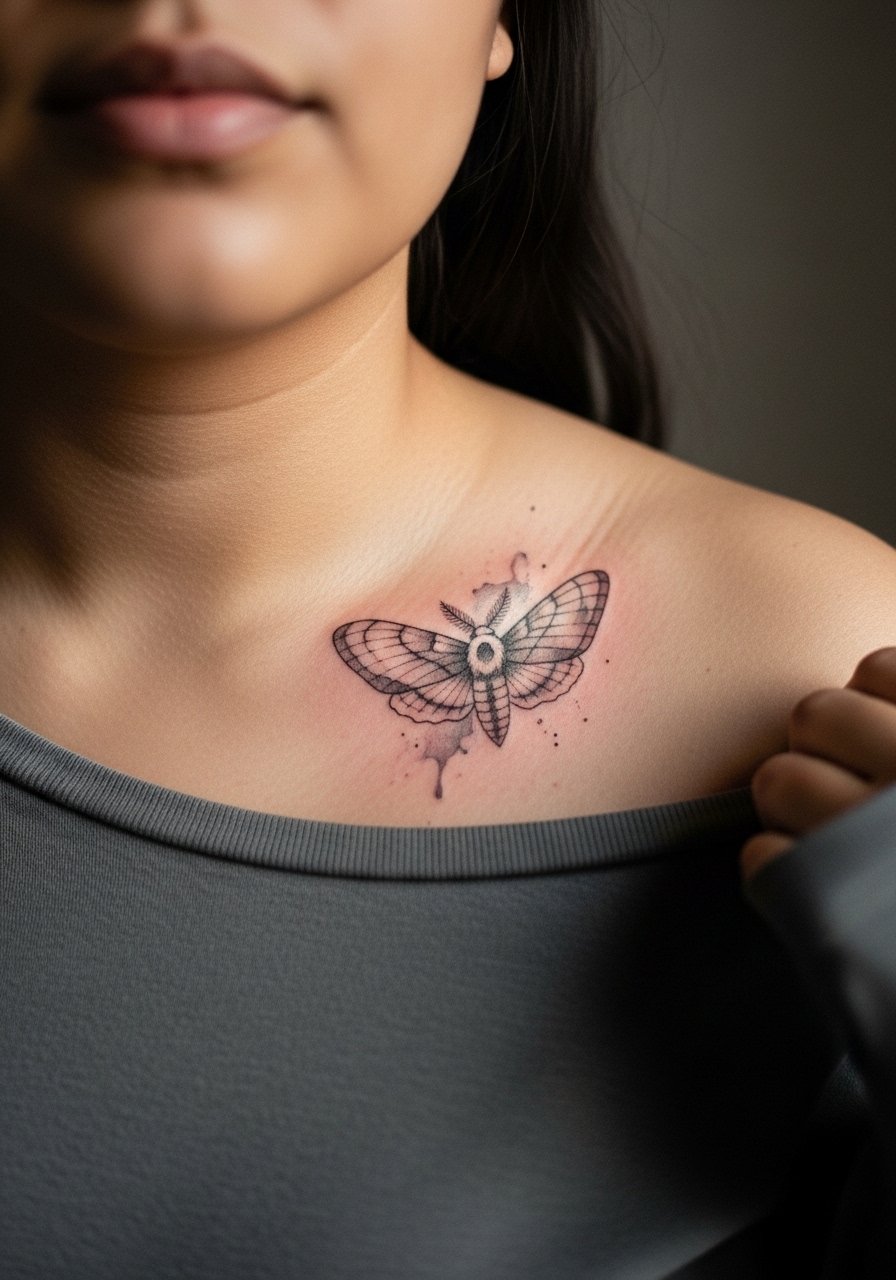
Collarbone watercolor pieces look soft and painterly when the wash does not try to mimic fine details. Tell your artist you want loose washes that stop short of the bone so the ink heals evenly. The collarbone can be sensitive and session pain is higher than the arm. Common mistakes include asking for too many color layers at small scale which can lead to patchy healing. If you want to show it off casually, pair with an open flannel shirt or a wide-neck tee. Expect touch-ups for vibrancy after a couple years.
9. Realistic Moth on the Thigh With Soft Shading

The thigh is spacious, which suits realistic moth work that needs scale to render lifelike wing texture. Ask for reference photos of the species and request a contrast check so light and shadow read on your skin tone. Pain is moderate and sessions can last several hours across sittings. A frequent error is starting too small for realism which forces artists to exaggerate details and leads to muddied texture. For the session wear comfortable high-waisted bottoms you can move slightly and still expose the area without pressure on the tattoo.
10. Bold Blackwork Moth Centered on the Spine
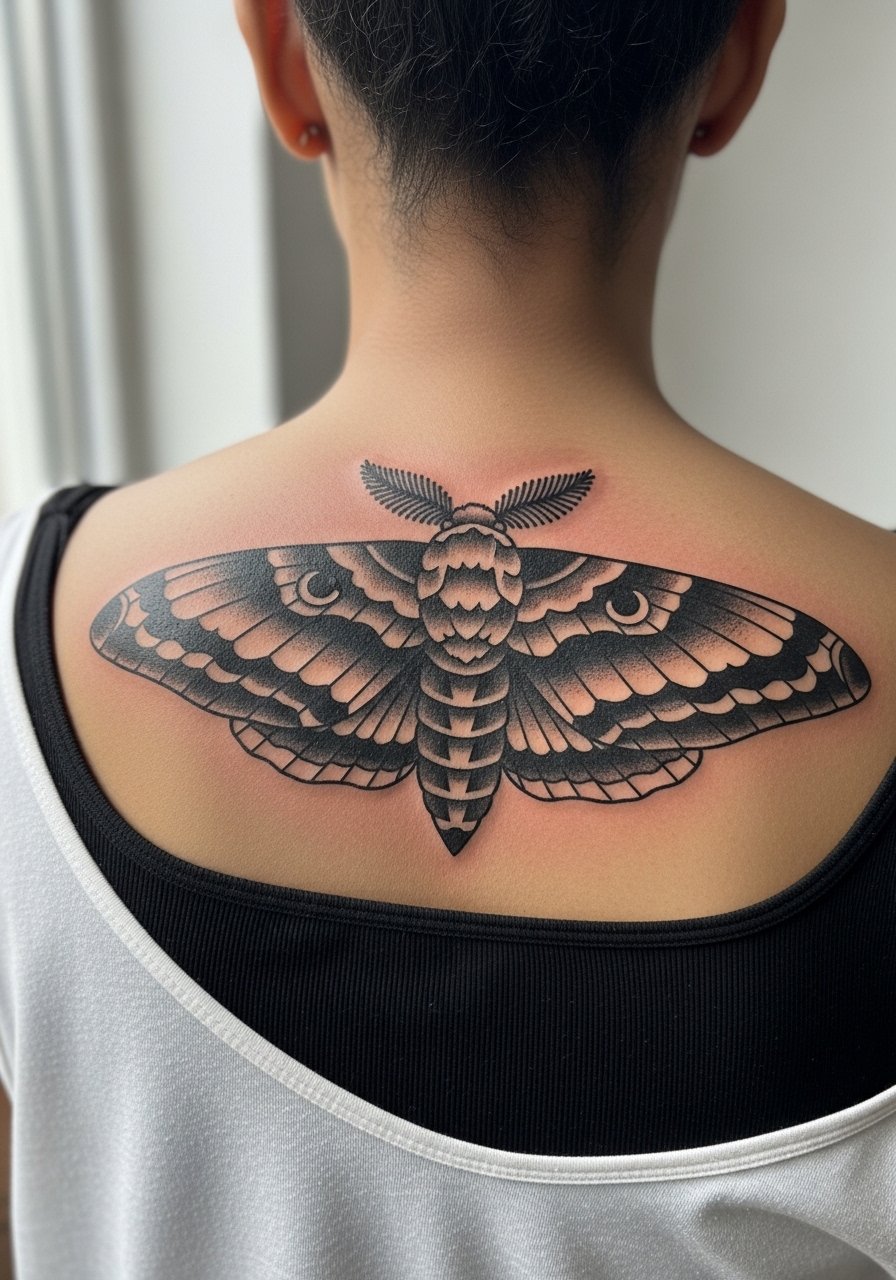
Spine-centered blackwork moths carry a graphic presence that reads even from a distance. Tell your artist you want dense saturation and clean negative space to keep the silhouette crisp. The spine can be painful, expect breaks. A common mistake is over-detailing the central band when the silhouette is the main statement. Over time dense fills hold better than fine internal work, so blackwork is a longevity-friendly option. For showing it, low-back or open-back tops reveal the composition effectively.
11. Tiny Finger Moth for Subtle Symbolism
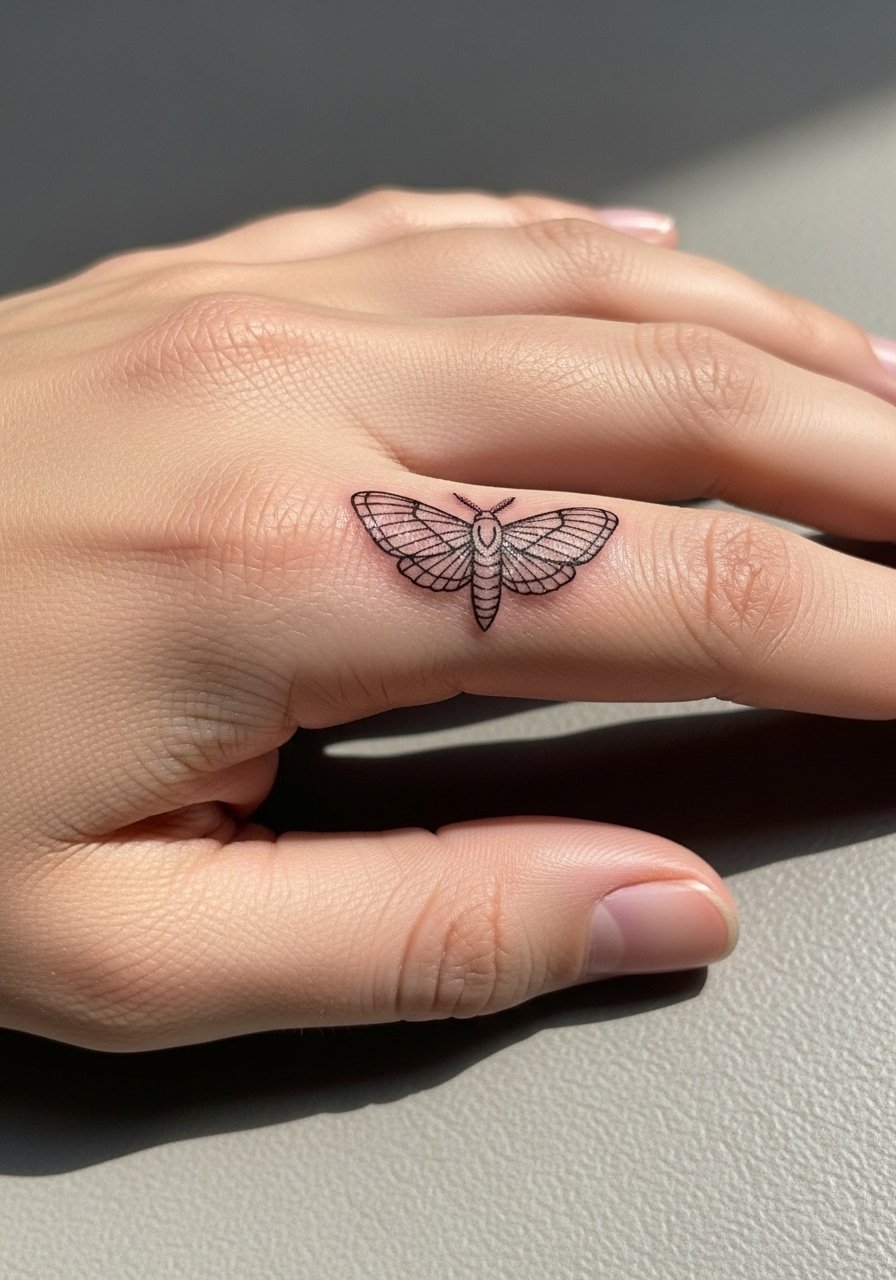
Finger tattoos are intimate and fade faster due to washing and friction. If you want a small moth here, ask for slightly bolder outlines than a typical micro design so the shape endures. Pain is sharp and quick. The biggest mistake is expecting micro detail to last; the skin on fingers does not hold tiny hatch marks. Plan touch-ups earlier, often inside 12 to 24 months for line refresh. If you want to accessorize, a thin leather cuff on the opposite wrist balances the minimal finger moth without covering it.
12. Neo-Traditional Moth With Angel Motif on the Outer Bicep
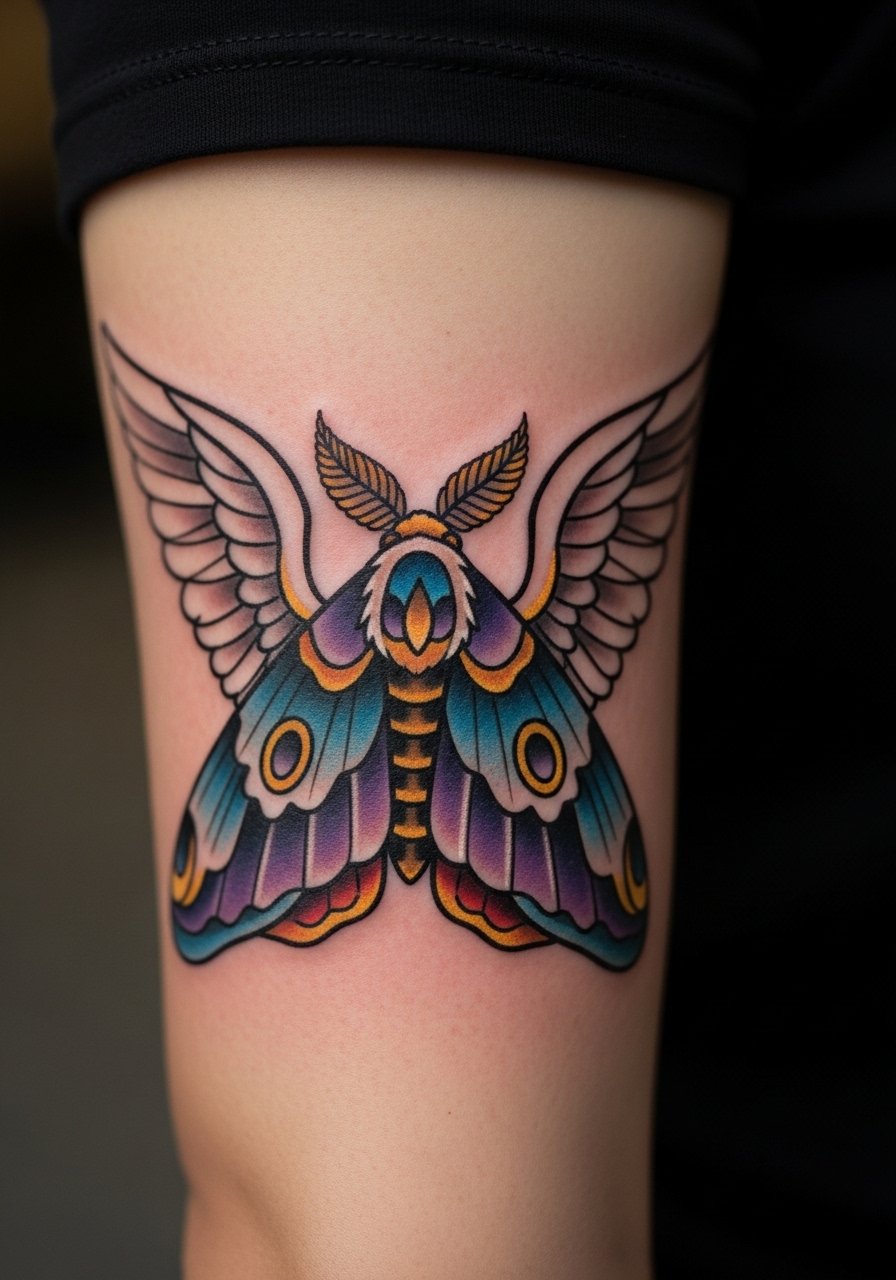
Outer bicep is a forgiving canvas for a moth paired with angelic elements like subtle halo lines or soft feathering. In the consult, specify that halo lines sit outside the main wing to avoid overcrowding. Pain is low to moderate and sessions are usually comfortable. A common error is asking for too many tiny highlights that dissipate after healing. Over time, the bicep preserves most color saturation because it has thicker skin than the forearm. For an outfit that complements the motif try a slim fit henley shirt with elbow-length sleeves to frame the upper arm.
13. Geometric Moth Across the Calf

Calf placements suit bold geometry because the elongated canvas lets lines run without crowding. Ask for larger spacing between lines and fewer intersections so the shapes do not fuse over time. Pain is moderate and sessions tend to be quick. A mistake is mapping a dense mandala-style center onto a narrow calf area which causes merging in a few years. For showing the calf piece, rolled jeans or a midi skirt with a side slit work well for visibility. During the appointment wear loose shorts or pants that slide down easily.
14. Moth With Contrasting Nature Elements on the Upper Back
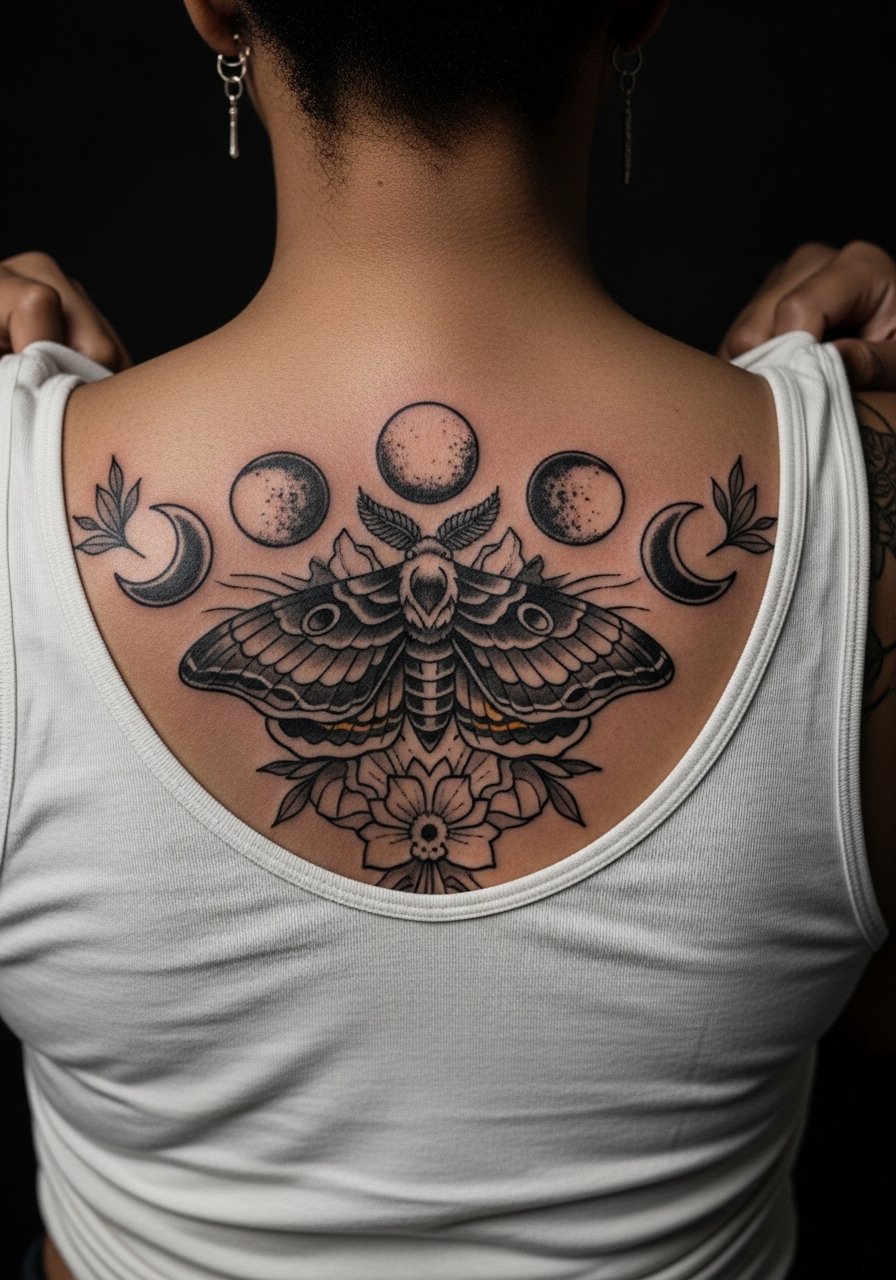
Upper back gives room for juxtaposition like moons on one wing and flowers on the other which creates narrative in the composition. Be explicit in the consult about which side carries which element so symmetry reads as intentional. Pain is low while lying prone and sessions can be split across two dates. Artists sometimes cram both elements into the moth body which looks cluttered later. For evenings out wear a low back crop top to let the piece peek above high-waisted jeans.
15. Watercolor Moth Along the Ribcage
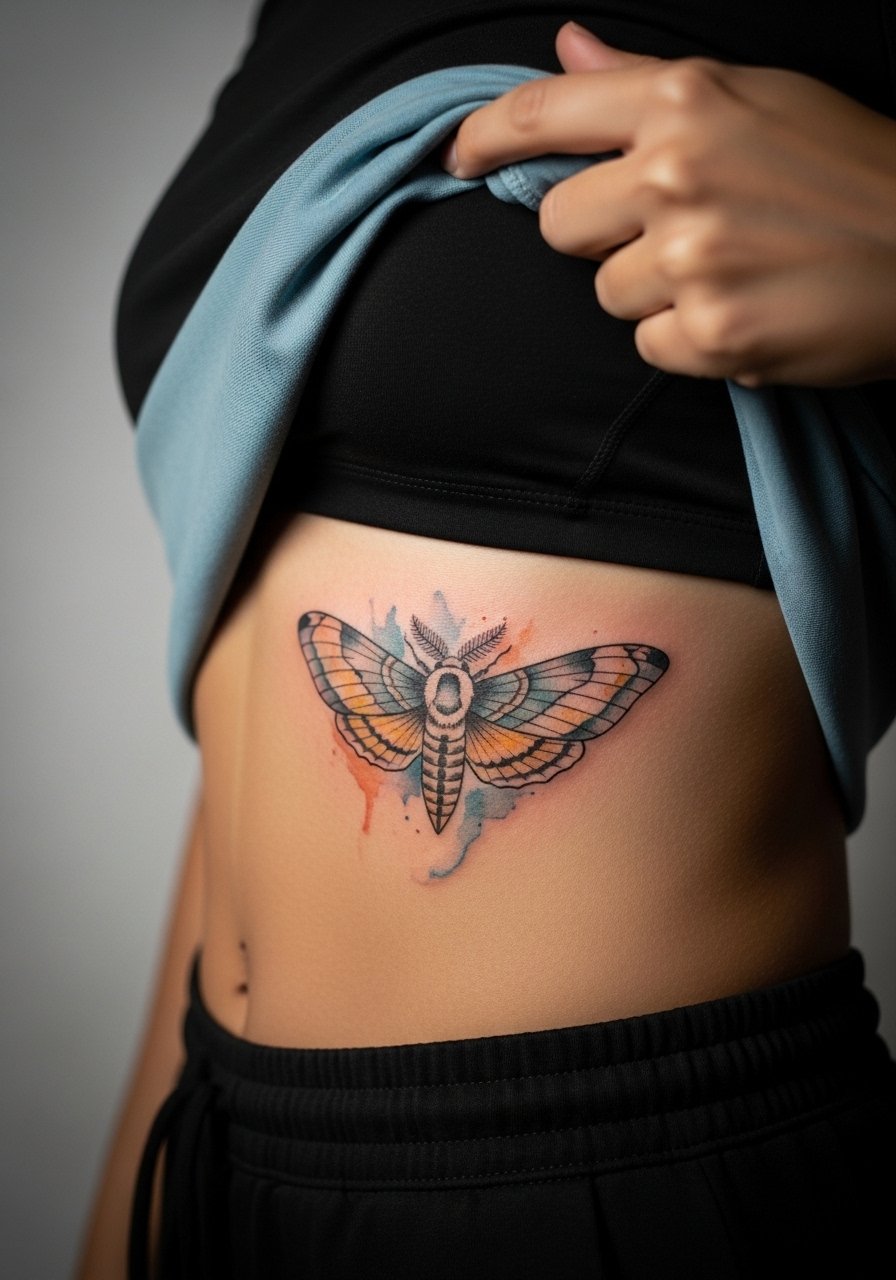
Ribcage watercolor is dramatic but the area moves a lot which affects pigment retention. Tell your artist you want softer washes with minimal layering and that you accept touch-ups if the pigment settles unevenly. Pain on the ribs ranks high and sessions are usually shorter with breaks. There is a controversy among artists about fine line on ribs. One camp argues that skin stretch and movement blur thin lines within two years. The other camp maintains that with correct depth and spacing fine line can settle well on ribs. Ask your artist where they stand and check healed photos of similar placements before booking.
16. Stylized Moth With Script Banner on the Upper Thigh
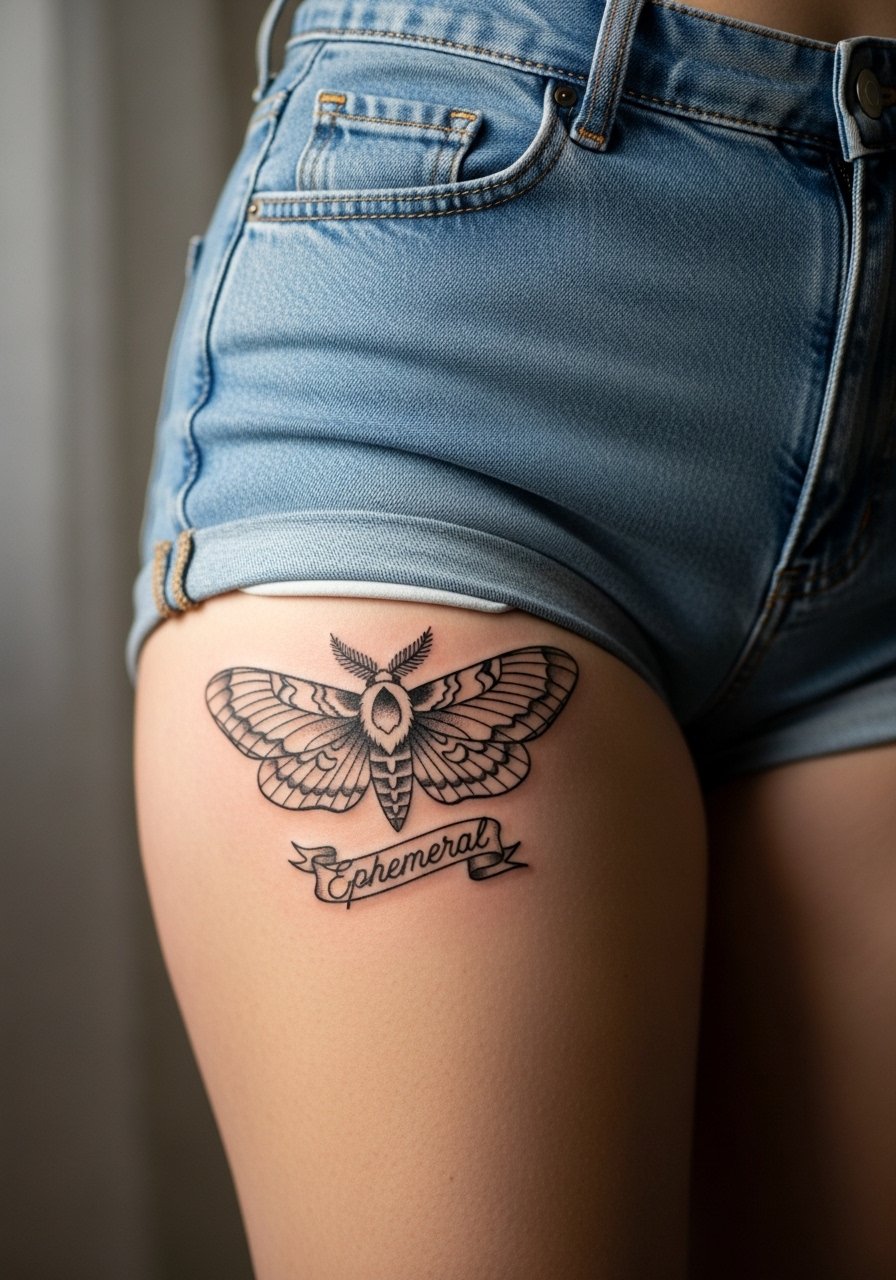
Thigh pieces allow comfortable scaling and a banner adds narrative without overwhelming the wings. In the consult bring the exact script text and font sample so lettering renders correctly in the skin. Pain is low to moderate while seated. A frequent mistake is choosing a tiny script size that blurs; ask the artist to keep letters legible at your chosen scale. Over years the inner thigh is less exposed to sun so color retention is strong. For the session wear loose shorts you can shift slightly for access.
17. Small Ankle Moth With Delicate Linework
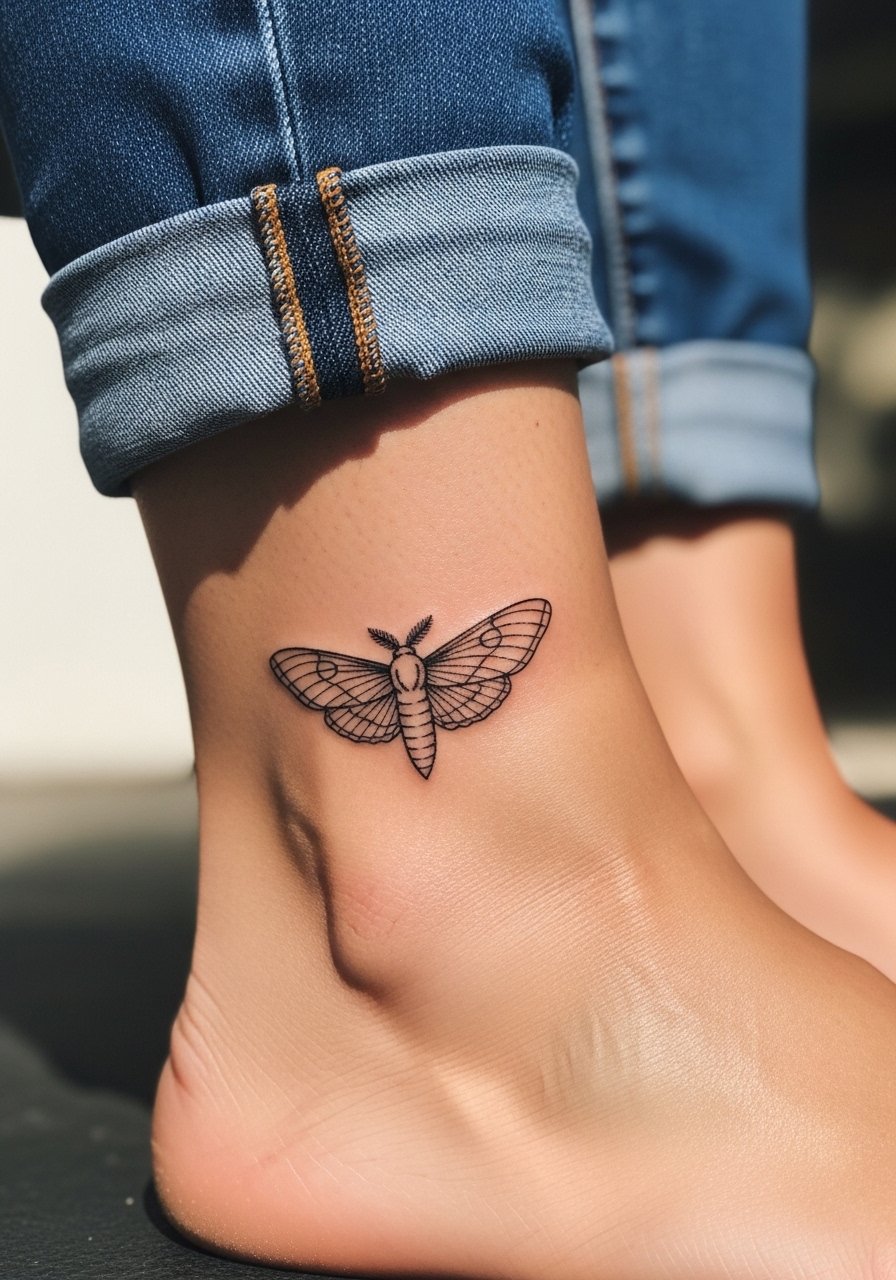
Ankle tattoos face constant friction from socks and shoes so plan for earlier touch-ups. Request slightly heavier outlines than a pure fine-line plan so the silhouette holds against wear. Pain here is sharp and localized. The common error is expecting micro textures to persist; the ankle is a high-friction zone. For show-off moments, rolled jeans or sandals reveal the piece nicely. For the appointment wear shoes easy to remove and pants you can roll without binding the area.
18. Moth Paired With Bold Florals on the Lower Back
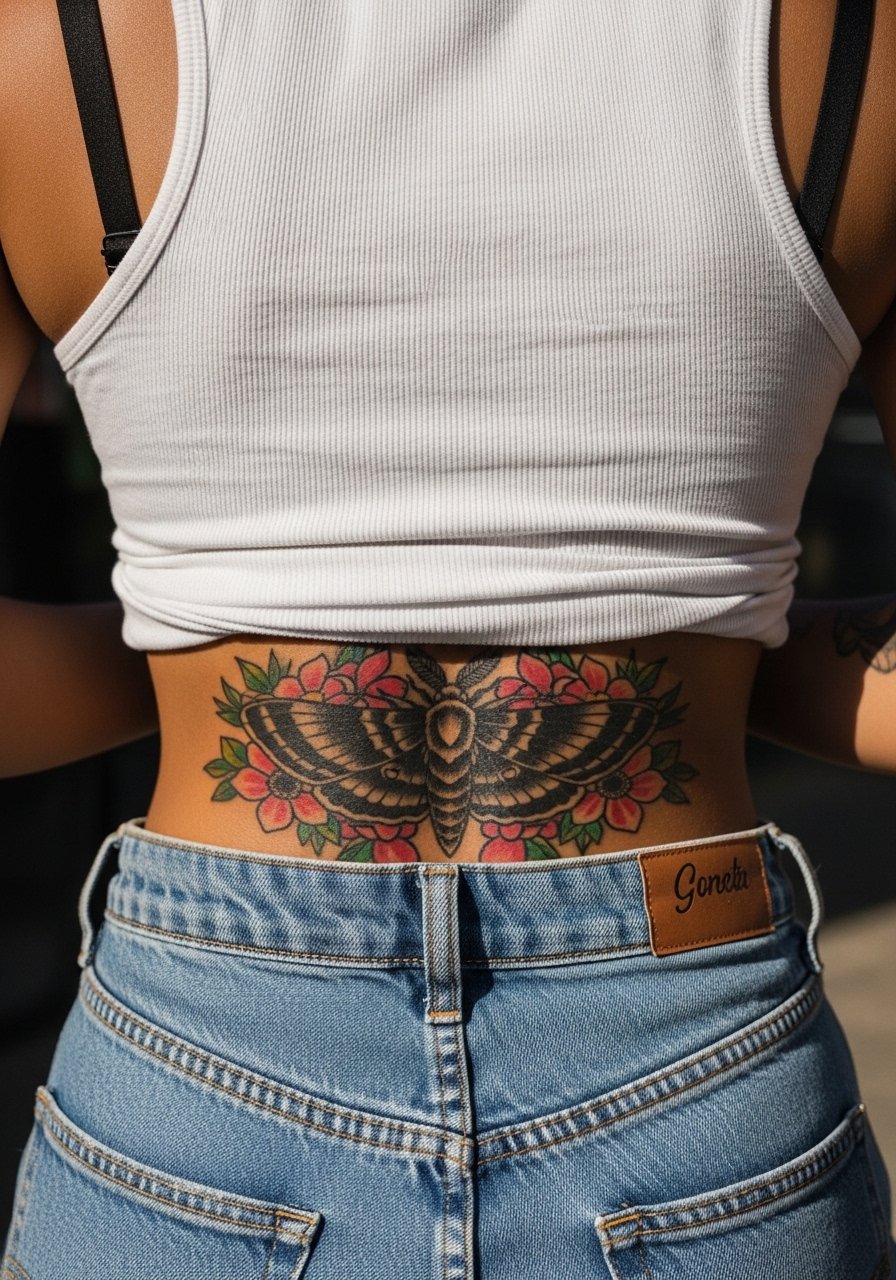
Lower back gives a horizontal plane for combined floral and moth compositions. Ask for a clear negative space around the central moth so the blooms do not swallow the wings. Artists sometimes compress petals into the wing margins which leads to loss of clarity later. Pain is low and session time is moderate. If you plan clothing that shows the lower back, a halter or low-back crop top frames the piece well. Wear a loose button-down to the session so you can lie prone without fabric pushing on the area.
19. High-Contrast Black and Gray Moth on the Chest Sternum
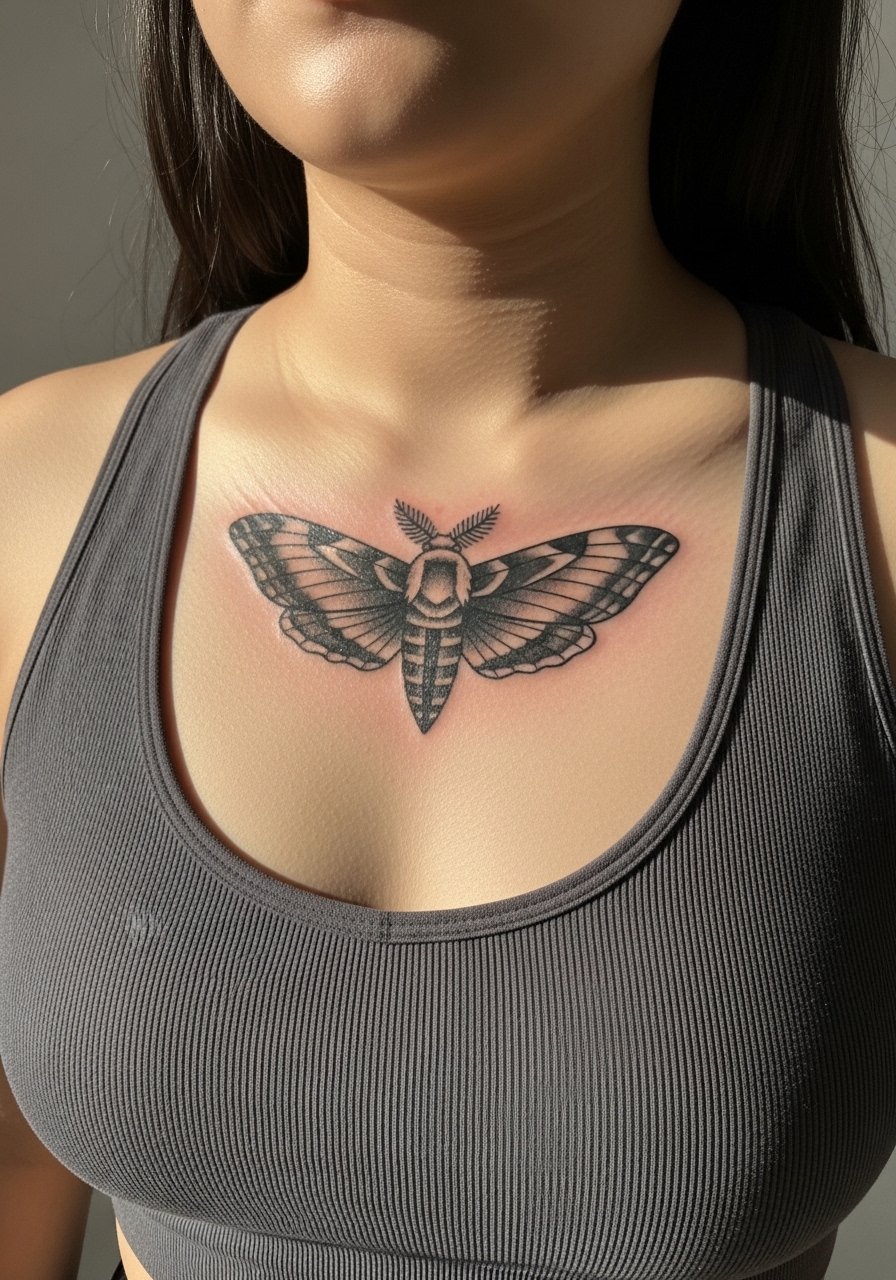
Sternum placements call for strong contrast because the area can wash out subtle midtones. Ask for bold midrange values and reserved use of tiny highlights so the piece reads after healing. Pain is higher near the bone. A common mistake is over-detailing the center which crowds the composition as lines soften. For session ease wear a zip-up or front-open top so the artist has straightforward access. If you layer for show-off, an unbuttoned flannel over a deep v tee makes the top of the moth peek through.
20. Realism-Influenced Moth on the Upper Arm With Wing Texture

Upper arm realism benefits from scale so ask for a slightly larger wingspan to let texture suggest scales without micro grooves. Pain is moderate and sessions can be medium length. The error to avoid is packing realism into too small a layout which forces the artist to fake texture and leads to muddiness over time. Expect touch-ups for delicate midtones after a couple years if you spend a lot of time in the sun. For the session wear a short sleeve button down you can roll without constricting the bicep.
21. Stylized Tribal-Inspired Moth on the Calf
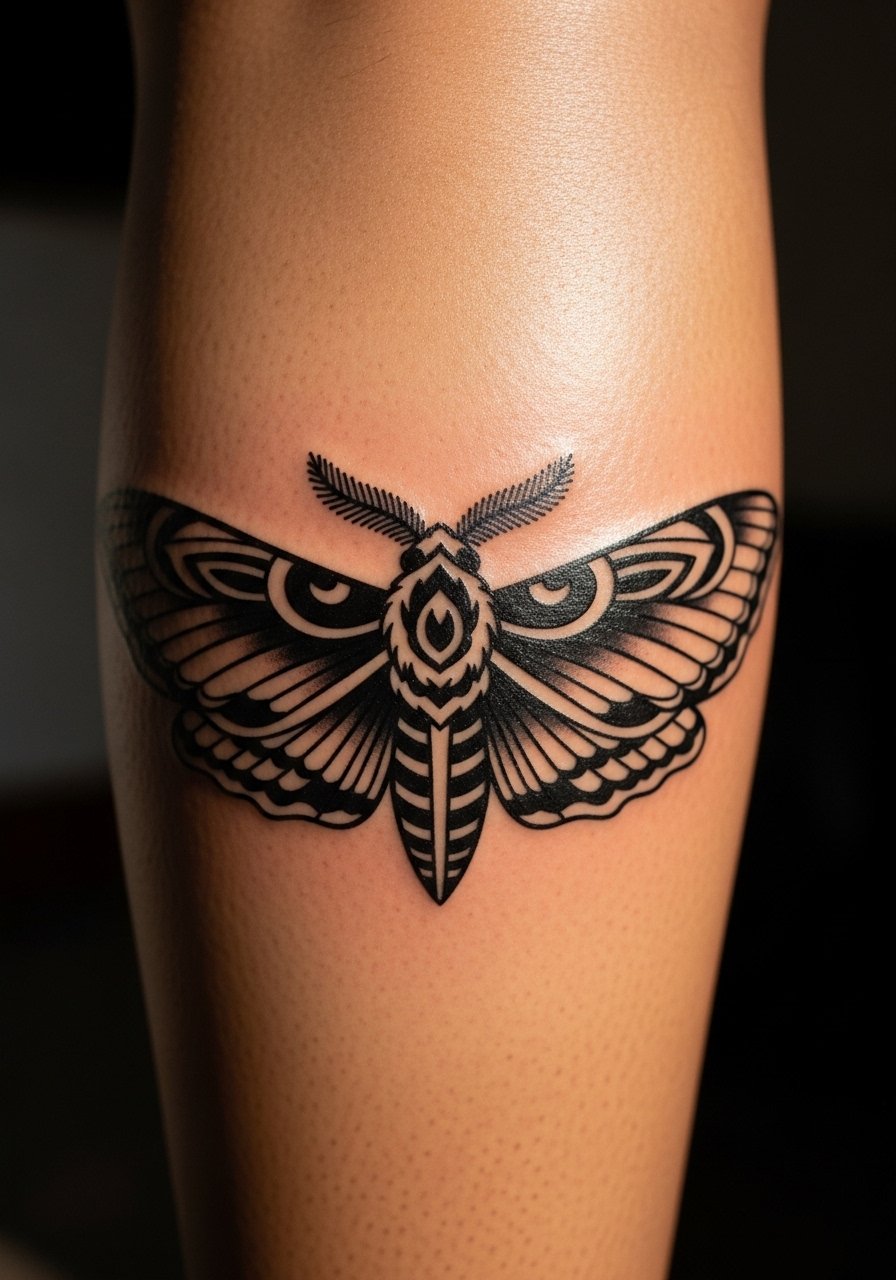
Tribal-inspired moths rely on bold graphic marks which age predictably if left uncluttered. In the consult ask for simplified interlocking shapes and avoid tiny inward curves that become soft with time. Pain is moderate and sessions are usually efficient. A common client mistake is asking for too many tiny filigree shapes inside the core design which blur. For visibility pair with midi skirts or shorts. During the appointment, wear shorts that slide up easily so the artist can access the calf without fabric pulling.
22. Micro-Realism Moth Over the Collarbone Edge
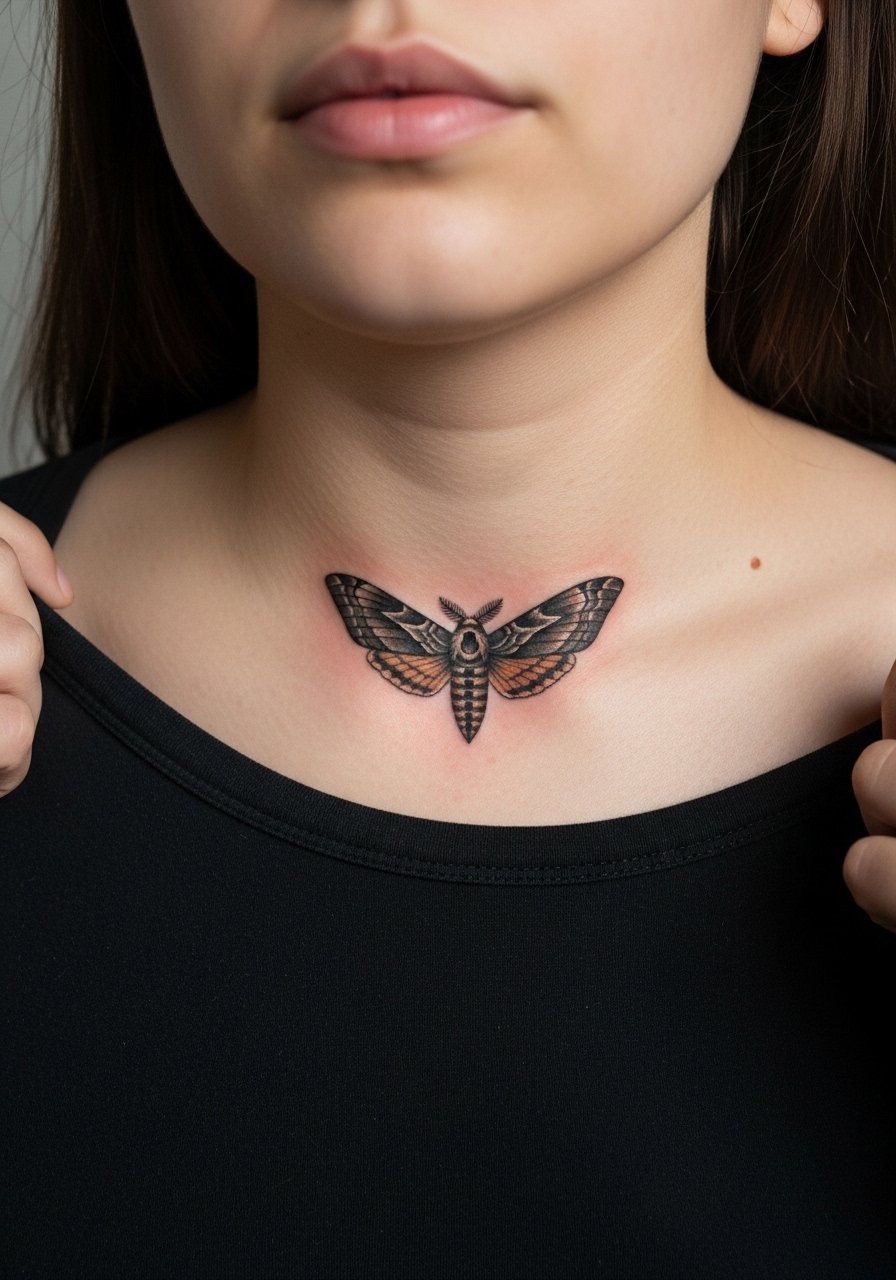
Micro-realism near the collarbone looks refined but is unforgiving for spacing. Ask your artist to test a scaled stencil on your skin to confirm legibility. The collarbone is a sensitive area and sessions can be brief with breaks. A common error is requesting too many micro gradients which can fade into an indistinct gray. If you want to show it off casually, a charcoal v neck shirt gives a layered look without overshadowing the tiny piece.
23. Moth With Crescent Wing Spots on the Upper Shoulder Near Collar
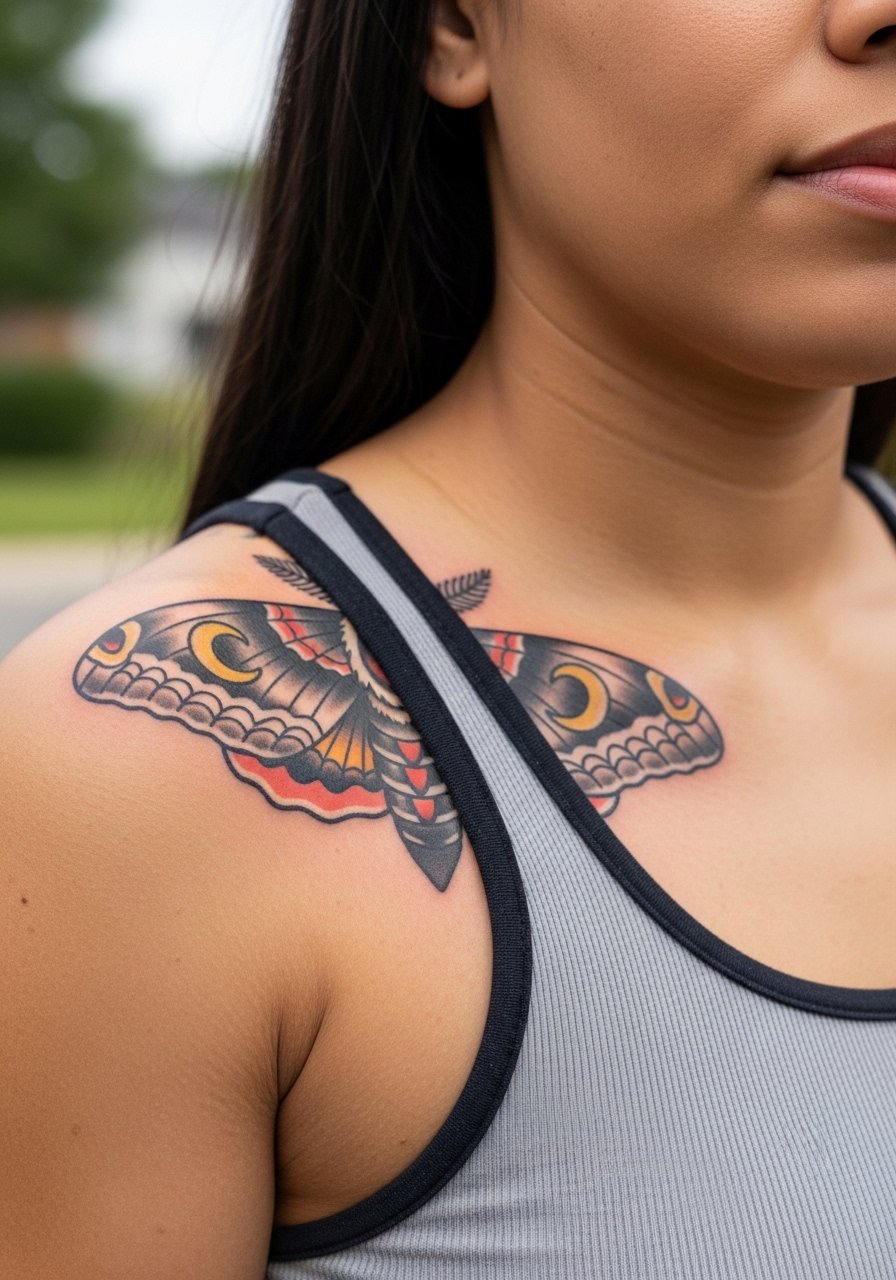
Placing crescent spots near the collar emphasizes lunar themes and gives the moth a narrative flourish. Tell the artist you want the crescent shapes slightly separated from dense fills so their negative space stays clear as the skin ages. Pain is low. A mistake is packing tiny crescents too close to wing veins which can blur. For session apparel bring a fitted black tank top you can shift for access while still covering the torso.
24. Moth With Angelic Halo Accents on the Outer Thigh
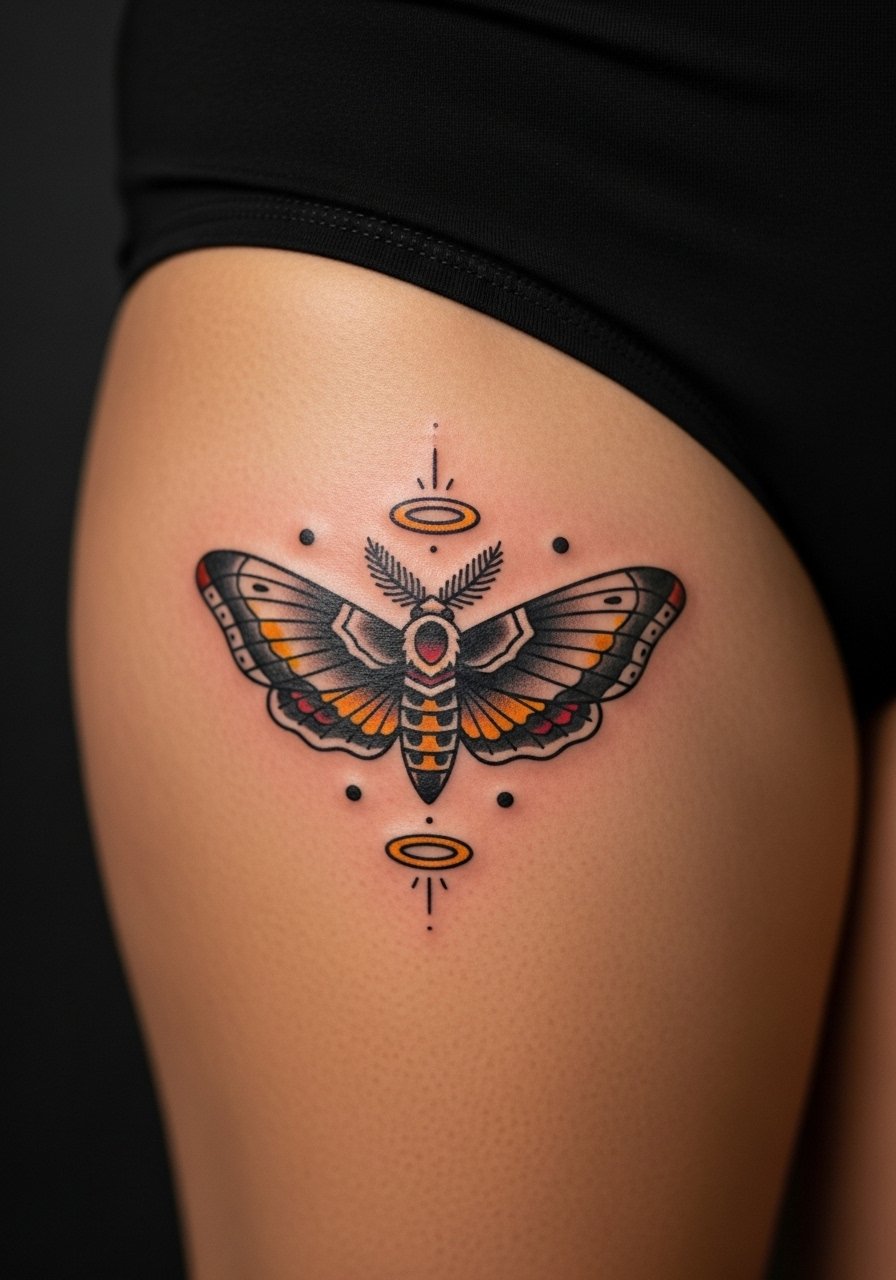
Outer thigh pieces take well to soft halo motifs that sit outside the main wings. Ask the artist to keep halos thin and airy, positioned beyond the wing tips. Sessions are comfortable and pain is generally low. The usual mistake is crowding the halos into the moth body which diminishes separation. Thigh placements hide easily and retain color well because of lower sun exposure. For the appointment wear loose shorts that shift without pressure so the artist can access and you stay comfortable.
25. Low-Key Moth Behind the Ankle With Minimal Shading

Behind the ankle is subtle and delicate but practical issues like shoe friction accelerate fading. Ask for bolder contour lines but minimal interior detail. Pain is moderate. A frequent error is asking for shaded gradients that will wash out with footwear and walking. Plan touch-ups sooner for ankle placements. For the session wear slip-on shoes and pants you can roll so the artist has full ankle visibility.
26. Moth With Geometric Frame on the Upper Chest
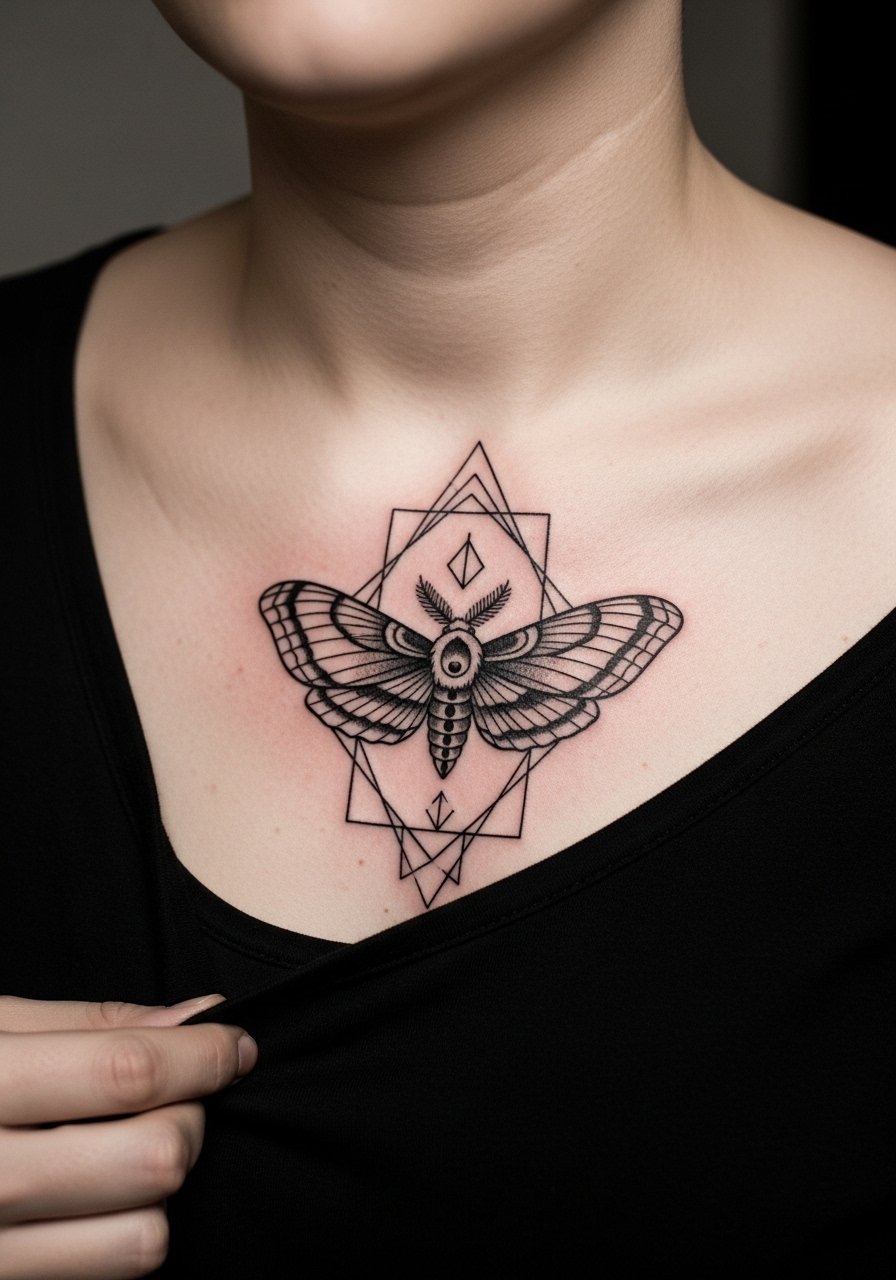
An upper chest moth inside a geometric frame gives a modern edge to traditional motifs. During the consult discuss spacing between the frame and the wings so neither element competes. Chest skin movement influences small negative spaces, so err on the side of breathing room. Pain is moderate and sessions are often split. The common misstep is squeezing the frame tight which makes it look crowded after healing. For show-offs choose an open flannel shirt layered over a tee to reveal a glimpse of the framed moth.
27. Bold Traditional Moth on the Calf With Accent Stars
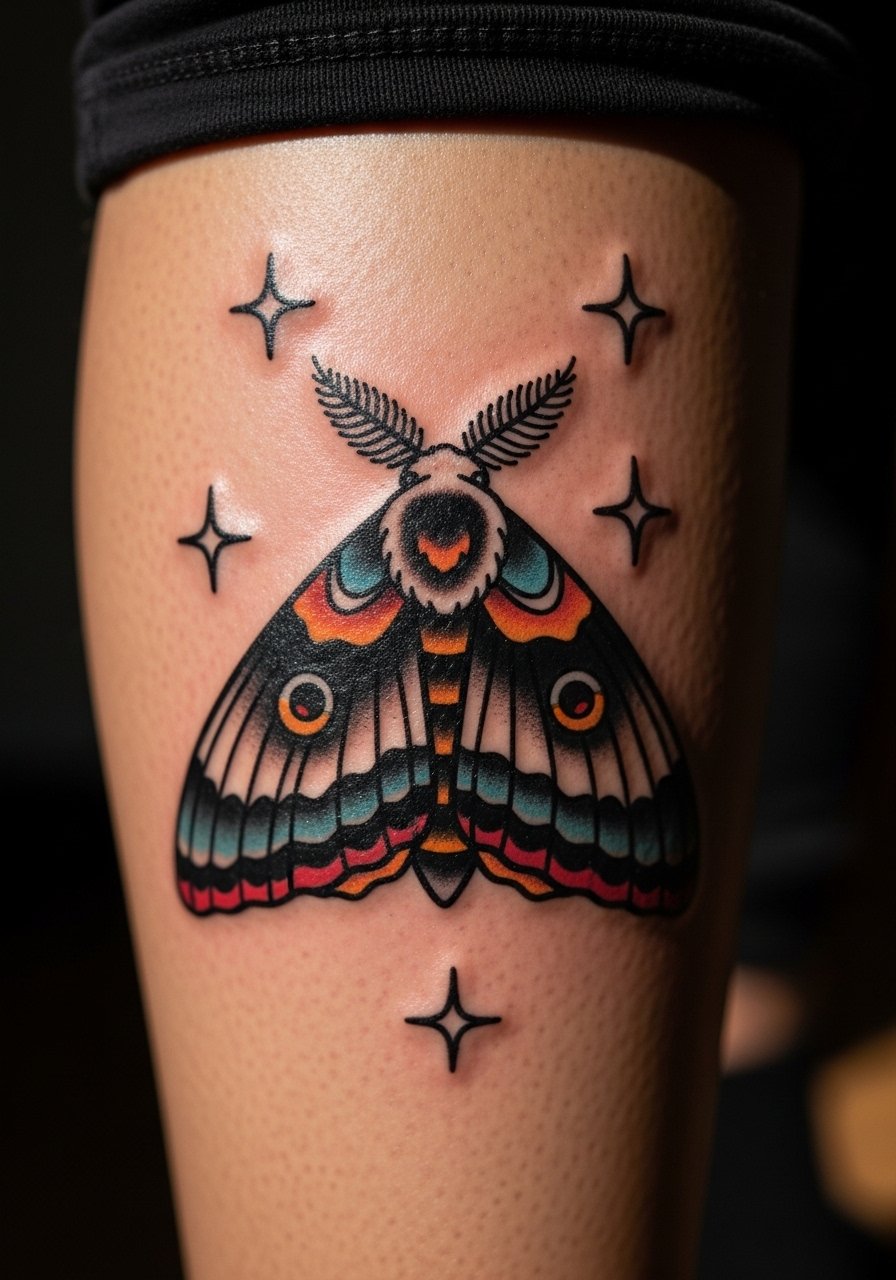
End with a tried-and-true bold traditional moth that reads from a distance and ages well because of strong outlines and saturated fills. When you consult, request slightly thicker wing edges and separated star accents outside the wing margins so the design keeps its silhouette as it softens. The calf is forgiving for saturation and touch-ups are straightforward. A common client mistake is shrinking stars too small which leads to early loss. For dressing pair with rolled-up jeans or a midi skirt to show the motif without making it feel loud.
Frequently Asked Questions
Q: How do I choose the best moth tattoo for my forearm if I want it to last?
A: I recommend prioritizing bold outlines and spacing over tiny internal detail. On forearms the skin tolerates saturation but lines that are too fine will blur. Ask your artist for slightly heavier inner linework and plain color blocks where possible. If you want to show the piece often, plan for a touch-up at year two to keep saturation consistent.
Q: Will watercolor-style moths fade faster on the collarbone than traditional color work?
A: Watercolor washes near the collarbone can appear softer with time because the bone area reflects light differently and shows less pigment density. The fix is to ask for a modest wash with selective color layering rather than full saturation. Expect touch-ups sooner than for dense traditional fills, especially if you spend time in the sun.
Q: Are there special considerations for getting a moth on darker skin tones?
A: Darker skin can make some muted colors read differently, so bring reference photos that match your skin tone and talk about value contrast with your artist. From what I have seen, bold blacks and strong midtones translate best across tones. Ask to see healed photos of the artist's work on similar skin before you book.
Q: How does placement affect pain and healing for ribcage versus shoulder moths?
A: Ribs tend to be more painful and the skin shifts more as you breathe which can influence fine lines. Shoulders are less painful and hold saturation better. If you are sensitive choose shoulder placements for larger pieces and reserve ribs for designs where you accept potential touch-ups later.
Q: What should I wear to my session for an upper back or shoulder moth?
A: Bring a loose tank top or a button-down you can pull aside so the artist can access the area without bunching fabric. Comfort and clear access keep you still which results in cleaner linework.
