
Fine line stingray pics flood feeds, and the aesthetic is irresistible. The trend versus reality gap matters here. Fine line and watercolor look ethereal fresh, but they interact with placement, skin tone, and daily friction in ways most saved posts gloss over. Read this list for real options that account for aging, where blackwork beats color, and how to dress the tattoo so it actually gets noticed the way you want.
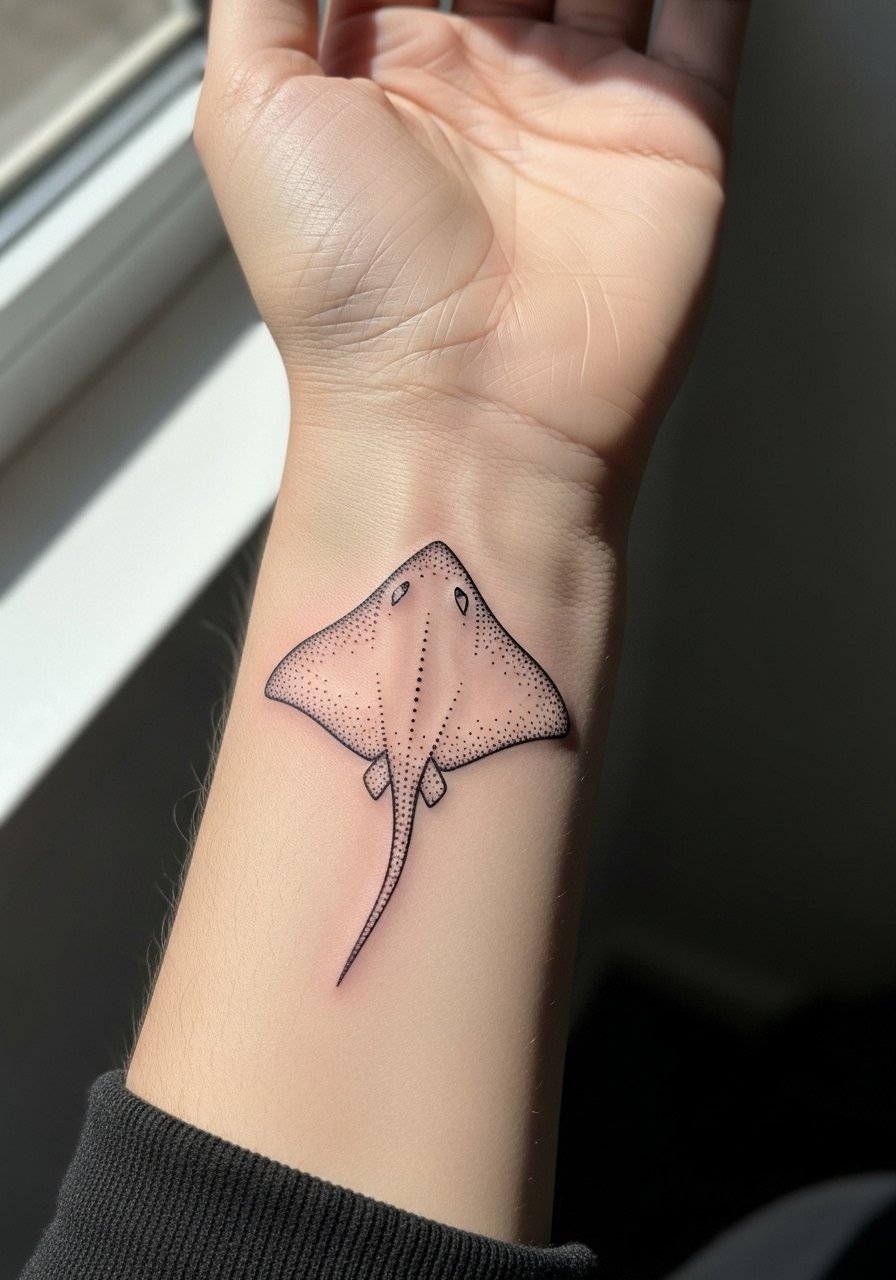
1. Minimalist Dotwork Stingray Outline on the Wrist
I've seen tiny dotwork rays on wrists that read like jewelry and others that smudged into a gray blur within a year. The trick is spacing the dots slightly wider and keeping the overall size around 2–3 inches so the stipple has breathing room. Mention to your artist you want slightly heavier anchor dots along the wing edges so the silhouette survives touch-ups. Fair warning, wrist work is higher on the friction scale because watches and sleeves rub the area during daily life, so plan a touch-up at 6–12 months. For showing it off, pair the design with a thin leather cuff bracelet that sits opposite the tattoo rather than layered over it. Image below shows a healed small wrist piece for reference.
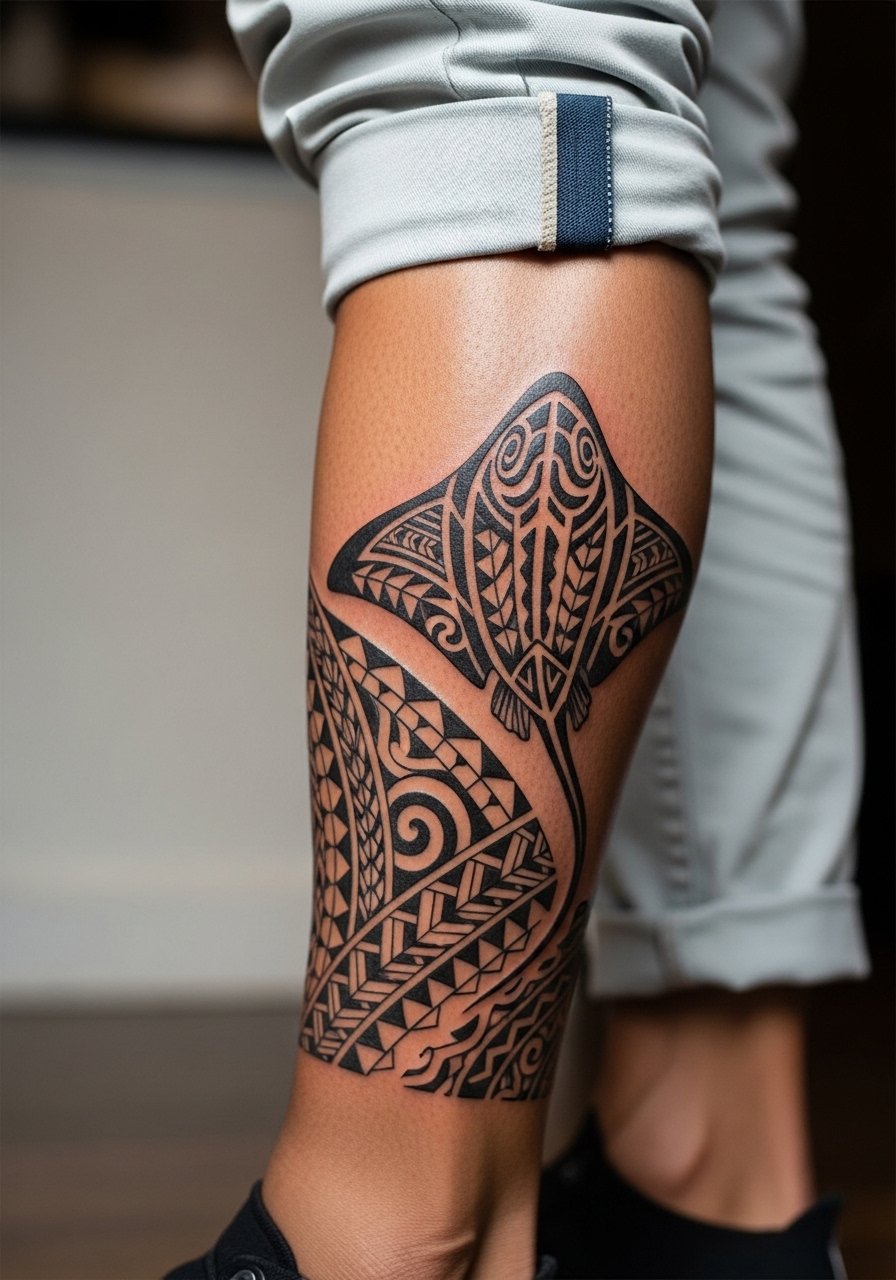
2. Polynesian Tribal Stingray on the Calf
Polynesian stingray patterns are bold and protectively themed around navigation and guardianship, and they really belong to a specific cultural vocabulary. When you commission one, say you want traditional geometric fills that respect pattern placement rather than a direct replica of sacred motifs. Expect medium pain on the calf and a multi-session cadence if you want a 6–8 inch layout. One common mistake is shrinking intricate motifs too small. Ask for clear spacing between motifs so the geometrics hold at year five. For summer wear, this placement pairs with slim athletic shorts that let the pattern show when you walk. Note: if you plan to hunt guest spots for Polynesian specialists, search hashtags and guest-spot listings rather than naming artists.
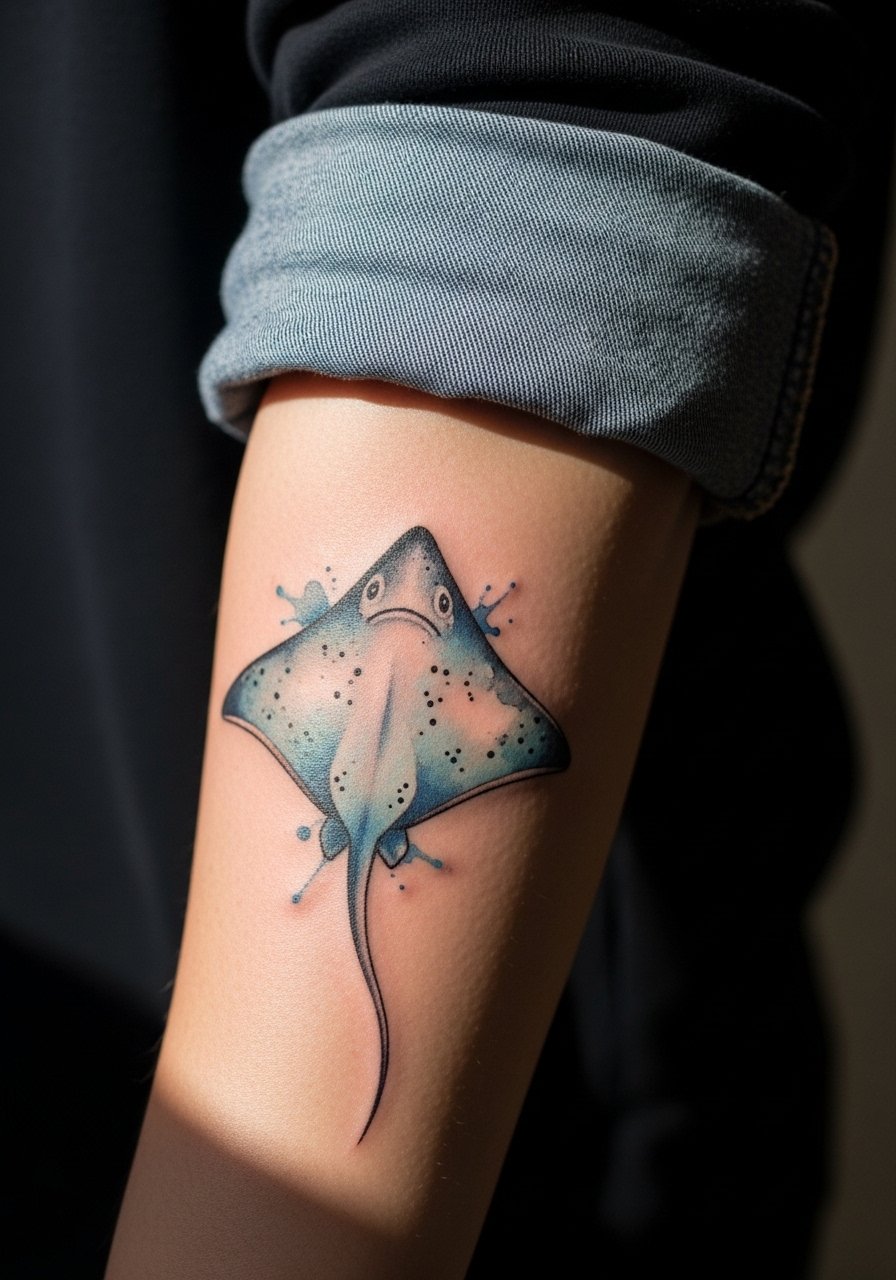
3. Watercolor Stingray in Blues and Grays on the Forearm
Watercolor rays on the forearm read like a painting in motion, and the forearm is one of the easier places to show color. Most failures happen when artists lay thin color over fine line without saturation, causing patchy healing in sunny months. Tell your artist you want layered gradients and ask how they plan to protect saturation during healing. Expect moderate session time, typically split into two sittings for a clean blend. Color tends to soften at year two, so schedule a color refresher if you want vibrancy to persist. For outfits, roll the cuff of a rolled cuff chambray shirt to frame the work while keeping the skin protected from harsh sun when needed. Image prompt shows a healed specimen, not fresh ink.
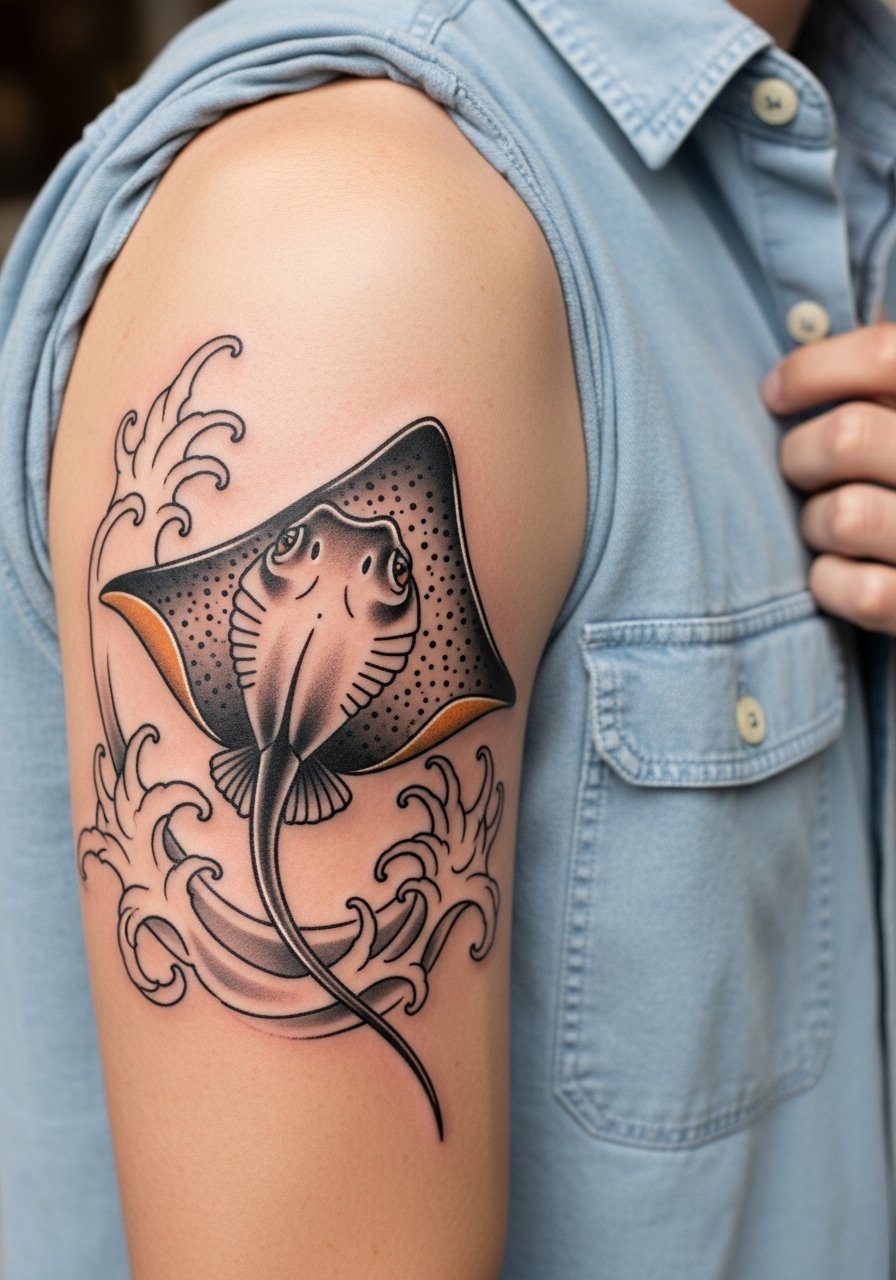
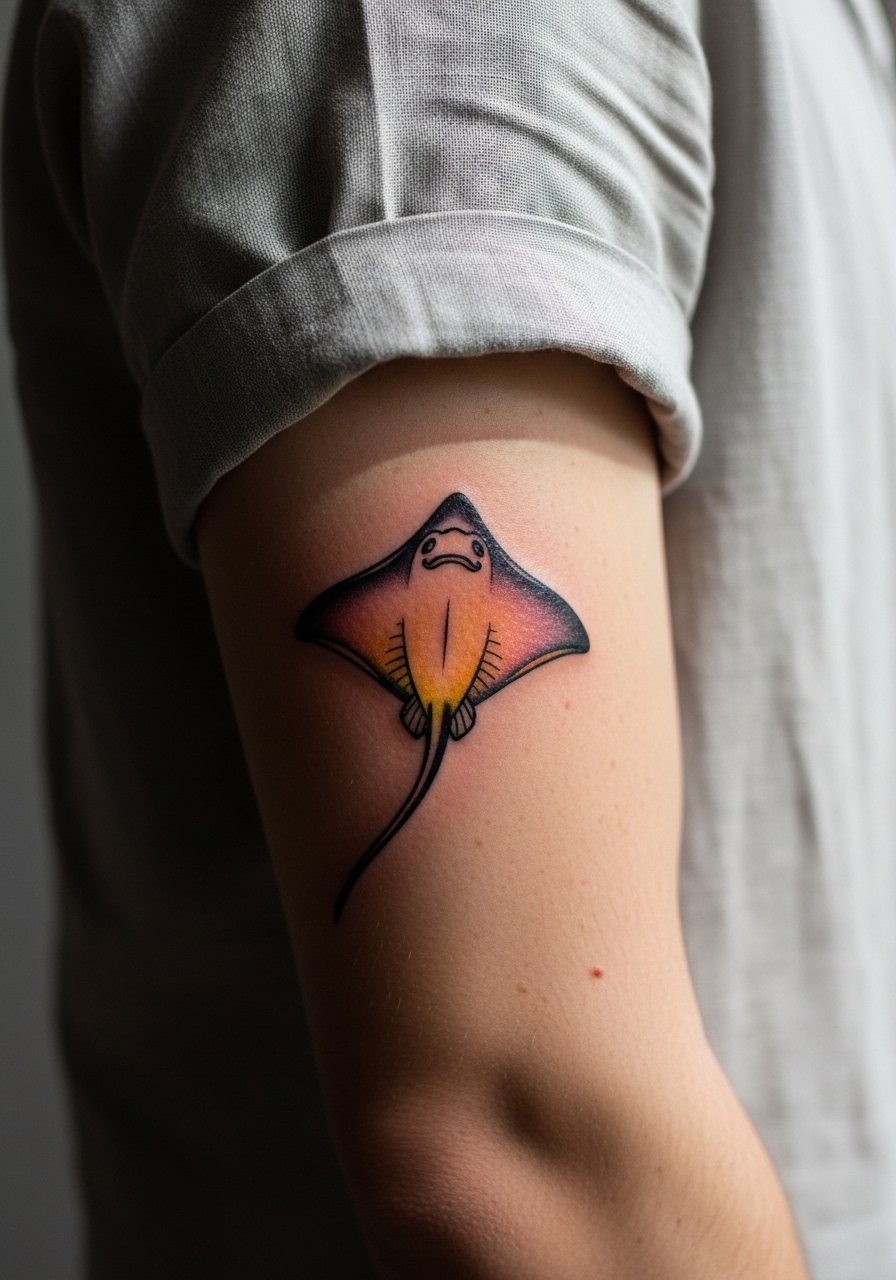
4. Neo-Traditional Stingray with Waves on the Upper Arm
There is visual punch in neo-traditional rays with bold outlines and wave accents, and the upper arm is forgiving for saturation. This is a good choice if you want color that ages into depth rather than disappearing. During consultation, ask the artist to keep the outlines bold and the color blocks slightly larger than your reference art so the pigment settles without blurring. Pain is lower on the fleshy upper arm, and sessions can stretch to three hours for a 7-inch piece. The common mistake is tiny, crowded details that look great fresh but merge after healing. For the session, wear a button-front shirt you can slide aside so the artist has clean access to the shoulder. Image prompt shows a healed, saturated outcome.
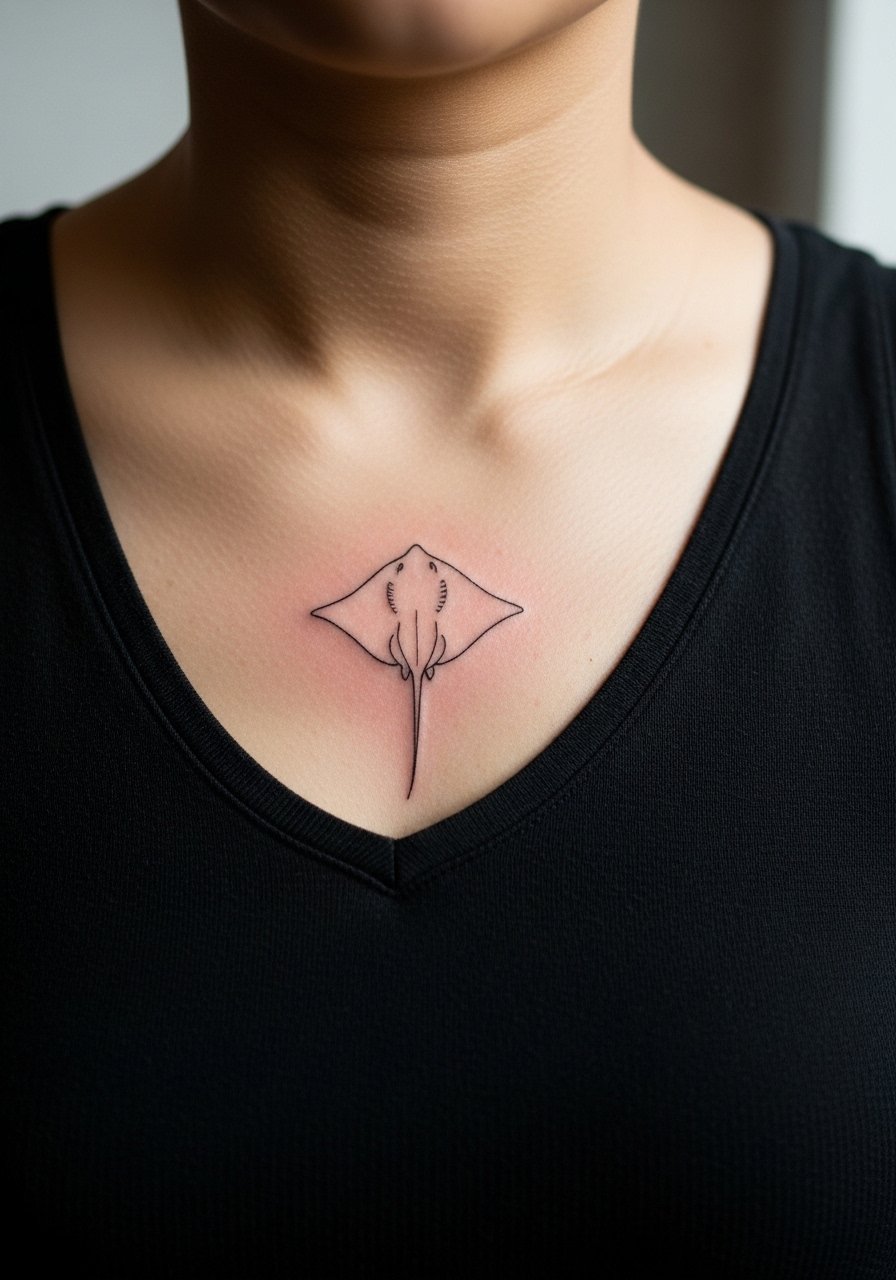
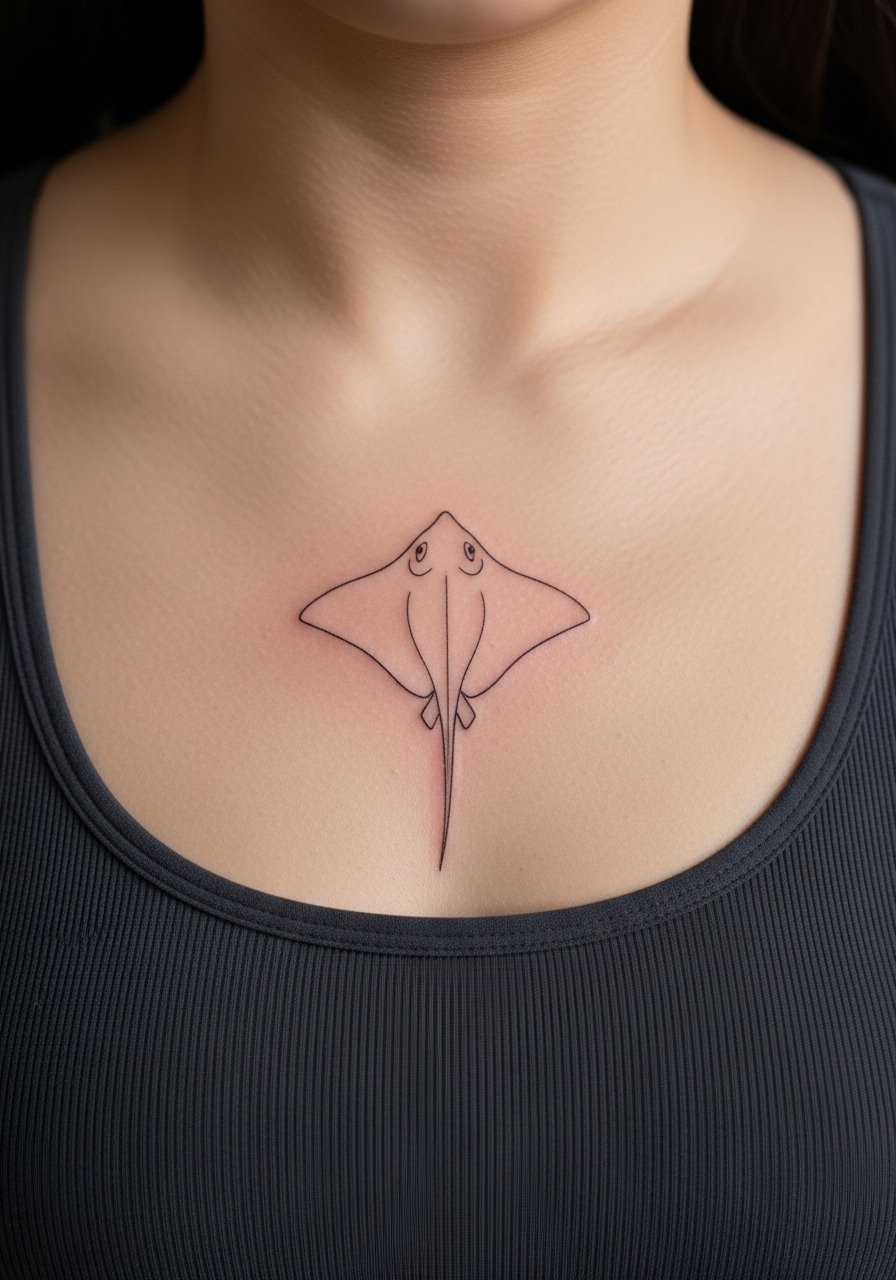
5. Fine Line Realistic Stingray Silhouette on the Collarbone
Fine line silhouette on the collarbone reads elegant when sized right, but collarbone is a thin-skin area that shows changes in weight and posture. Some artists split into two camps about fine line in delicate spots. One camp says the skin there stretches and softens lines within two years. The other camp argues that with precise depth and spacing fine line can settle perfectly. Ask the artist where they stand and whether they recommend slightly heavier primary lines. Expect more sting on the collarbone than on the arm, and be prepared to book a touch-up at year two if you want crisp edges. For styling, a v neck tank top frames the silhouette without covering delicate lines. Image shows the healed placement in wearable clothing.
6. Blackwork Geometric Stingray Mandala on the Back
Blackwork mandala-style stingrays make a dramatic meditative piece, and back placement gives the design room to breathe. Back work is often done over multiple sessions because the density can be fatiguing for the skin and the client. The common error is compressing a mandala into a small rectangle; these designs need 8+ inches to keep symmetry without blowout. Expect significant saturation to age well, and plan four sessions for a large back piece. For showing off with outerwear, throw a vintage leather jacket over the shoulder in cooler months. Culturally sensitive note: if you pull patterns from sacred geometry traditions, opt for respectful variation rather than direct copies. Image prompt shows the healed mandala on a wide back.

Studio Day Picks
The wrist, collarbone, calf, forearm, shoulder, and back pieces above each present different prep and healing needs, so a few specific items smooth the chair day and the first week.
-
Tatt2Away balm. A lightweight, non-greasy balm many people use during the transition from ointment to lotion, useful for fine line wrist pieces that need moisture without clogging.
-
InkSafe tattoo spray. Thin protective spray that users in dry climates appreciate for quick coverage on fresh forearm or calf work before layering clothing.
-
TattooHeal rice-based lotion. A gentler alternative for sensitive skin on the collarbone or sternum area where heavy petroleum products can feel heavy.
-
Fragrance free gentle body wash. Use this for showering the first week to avoid irritation on color pieces and delicate dotwork.
-
Aquaphor healing ointment. A thin layer for the first 48–72 hours can help cradle fine line work, especially in high-friction zones like the wrist.
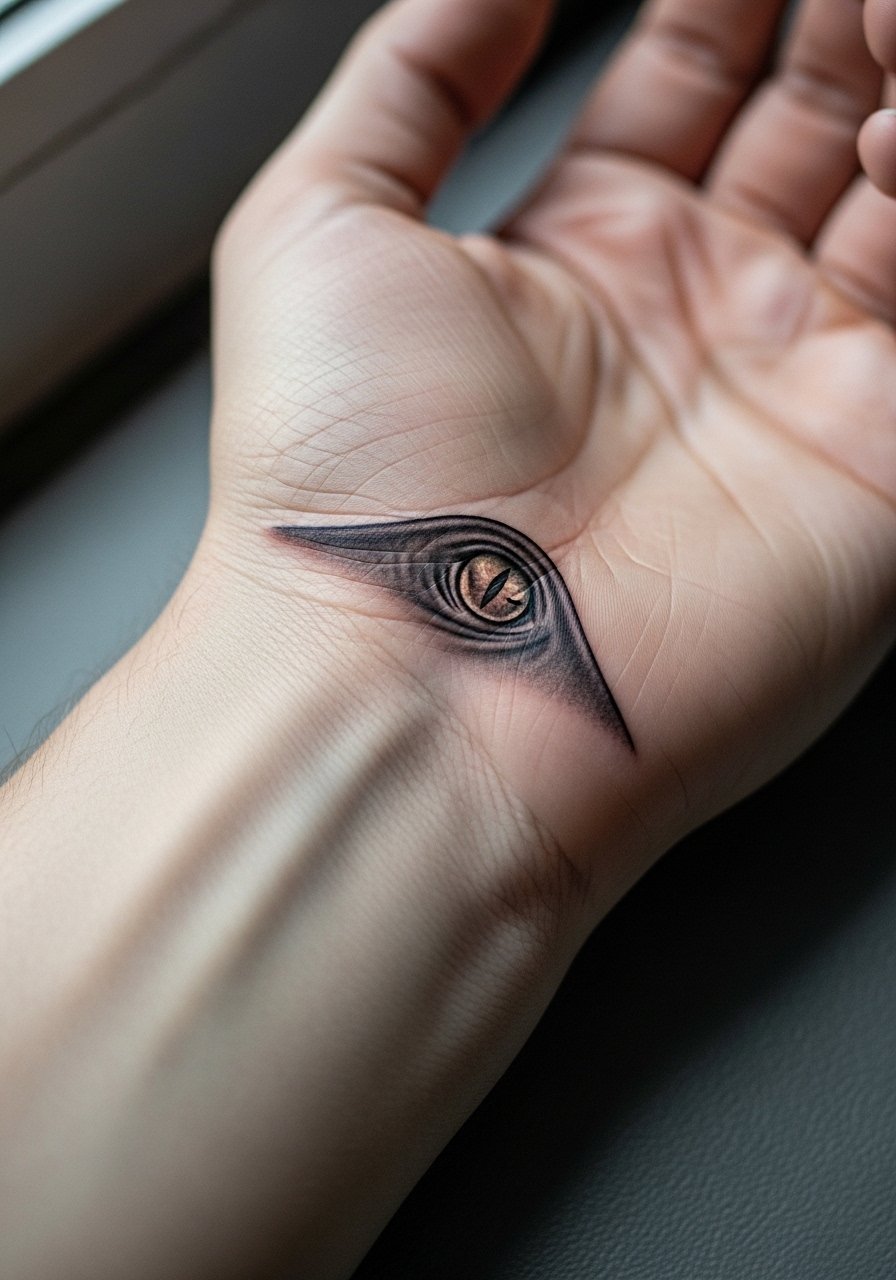
7. Micro-Realism Stingray Eye on the Inner Wrist
Micro-realism eyes are tiny focal points that read intense on the inner wrist, but they demand precise needle control. Inner wrist skin is thin and sits over tendons, so expect higher sensitivity during a one-hour session. A common mistake is asking for an eye smaller than 1 inch; on the inner wrist that compresses detail and accelerates spreading. For longevity, high-contrast black and gray holds up better than diluted color on this zone. Ask for a slightly larger pupil and heavier shadow anchor so the focal detail still reads at year two. For session wear, a sleeveless tank keeps the arm free and avoids jewelry snagging during the appointment. Image below shows a healed tiny eye tattoo.
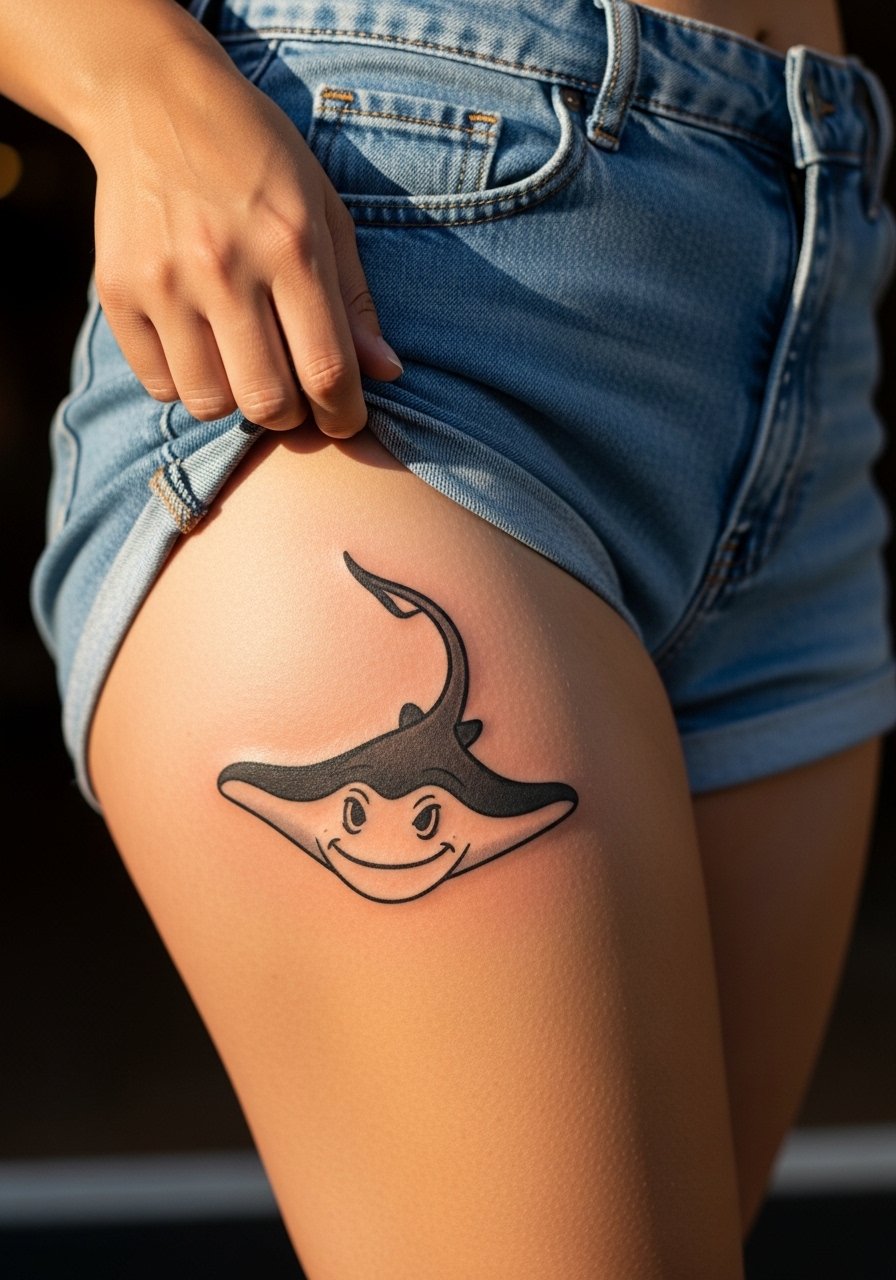
8. Ignorant Style Cartoon Stingray on the Outer Thigh
Ignorant style takes the stingray into playful territory with bold outlines and expressive shapes. The outer thigh is forgiving for humor-driven pieces, and sessions are comfortable because the area is fleshy. The real mistake is over-detailing a style meant for bold graphic clarity. Keep the shading minimal and the silhouette chunky so the cartoon reads at distance and ages cleanly. Thigh tattoos will stretch more with body changes, so consider sizing up 15–20% if you expect fluctuations. For easy show-off vibes, pull on high-waisted shorts that stop above the piece. Image prompt frames a healed playful ray on the outer thigh.
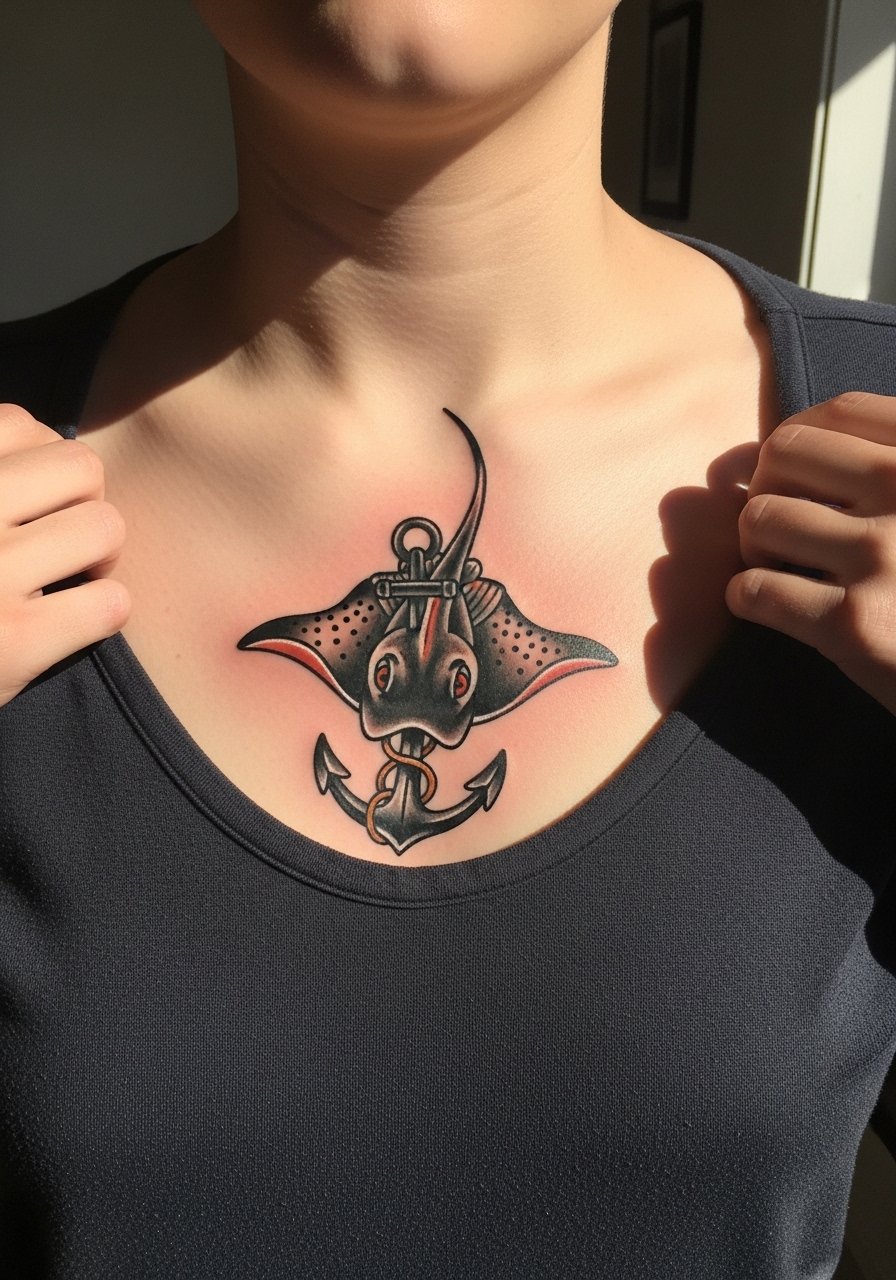
9. Traditional American Stingray with Anchor on the Chest
Traditional sailor motifs translate well into chest pieces if you want color that reads against clothing. Chest skin can be sensitive near the sternum and collarbone, so wear a wide-neck shirt you can pull aside for access. The usual mistake is packing too many tiny elements into a medium chest piece; keep the anchor and ray prominent and use color blocks to read from a distance. Expect two to three sessions for full saturation and a touch-up at year two for color pop. Pair this motif with an open-collar shirt to let the chest motif peek through. Image below shows healed chest color work with clear outlines.
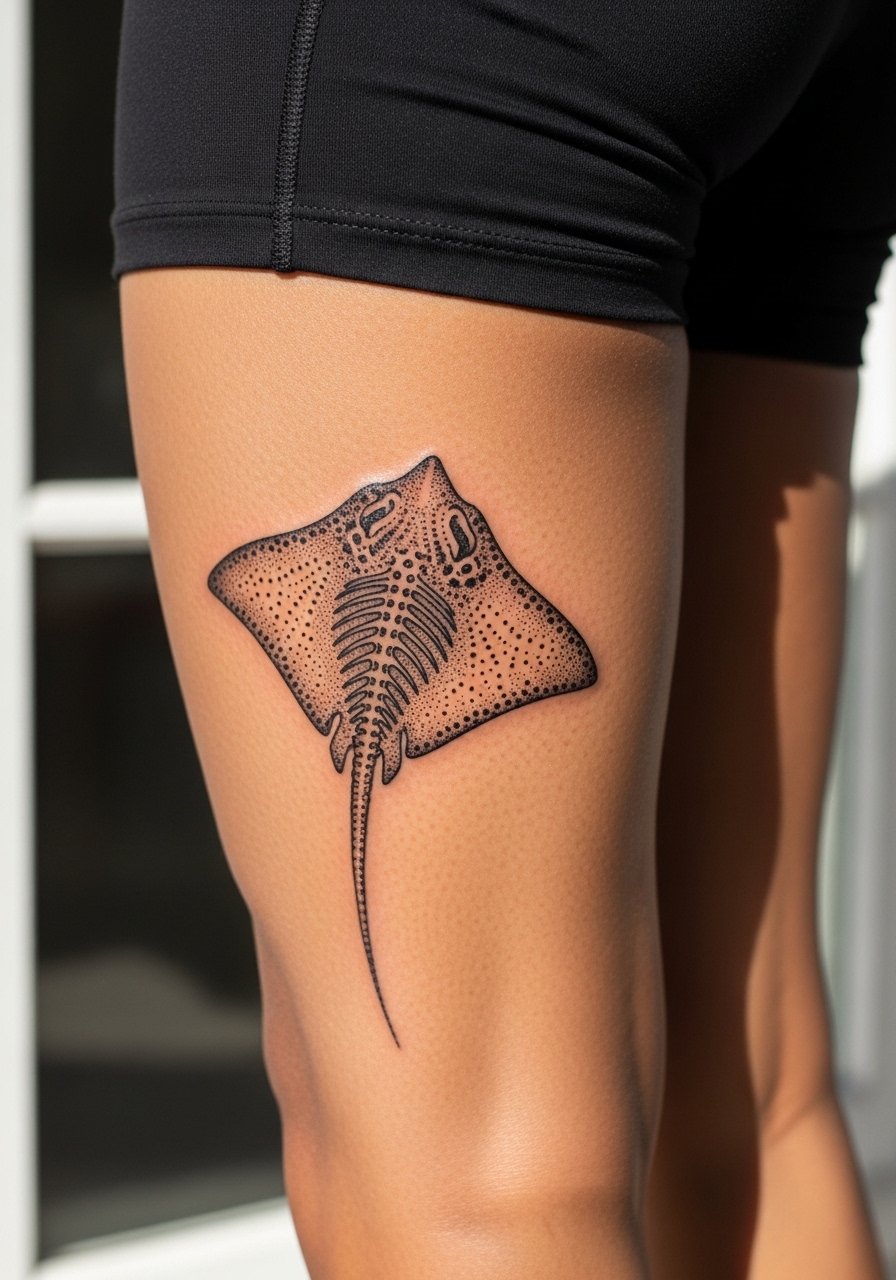
10. Dotwork Stingray Skeleton on the Calf
Dotwork skeleton pieces have a gothic texture that gets more character as dots settle and form micro-shading. Calf placement is ideal because the skin is relatively stable and heals predictably. The frequent error is tight dot clusters too small for the needle size, which leads to muddiness as dots coalesce. Ask for clarified spacing and discuss a realistic touch-up schedule, often at year two. This style benefits from solid black anchor lines around the skeleton so the silhouette remains legible. For walking-around showing, slim athletic shorts keep the calf visible without tugging at the skin. Image prompt shows a healed dotwork skeletal structure on the lower leg.
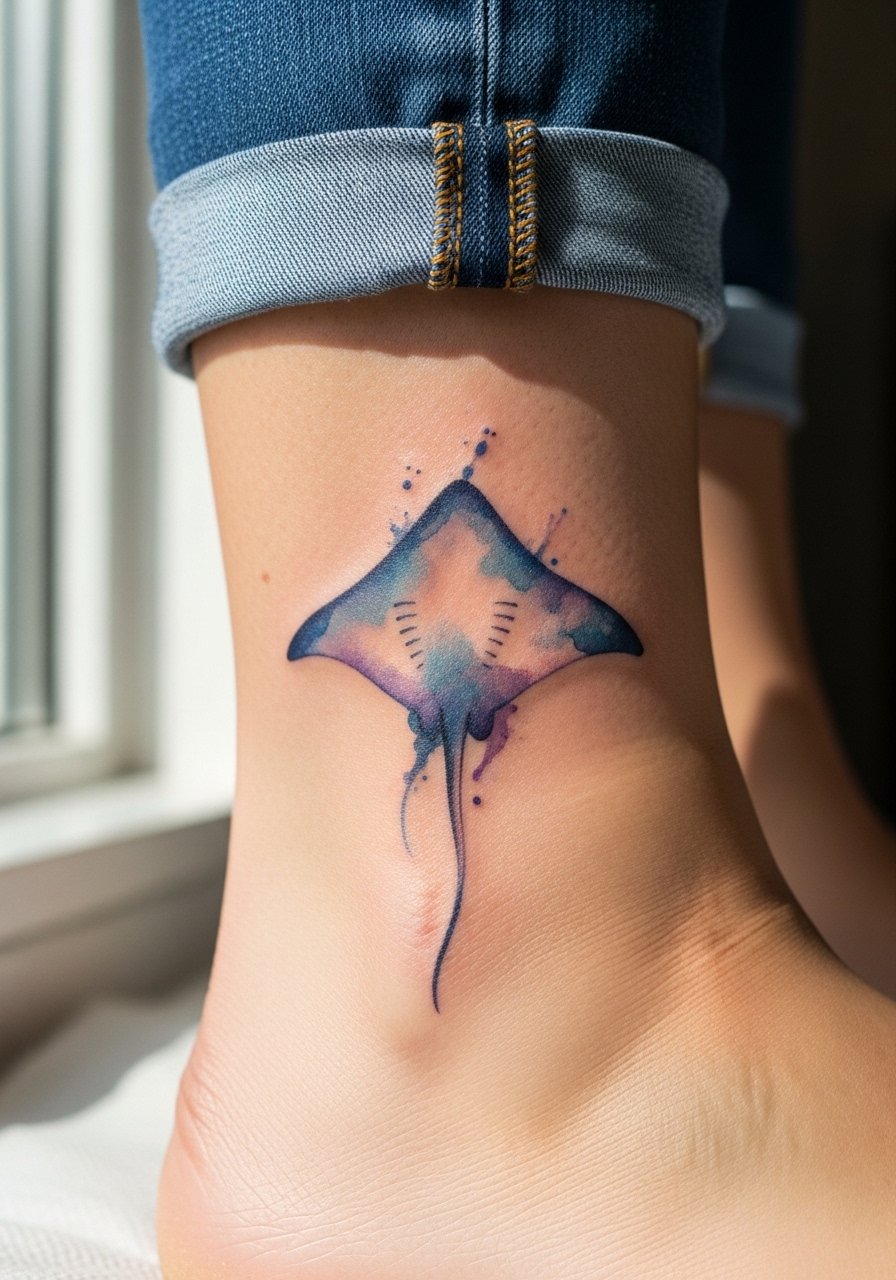
11. Watercolor Abstract Stingray Tail on the Ankle
Ankle watercolor tails look like streaks of ocean when placed carefully, but ankles get lots of contact from socks and shoes. The mistake is placing soft washes right at the ankle bone where friction from footwear accelerates fade. Ask your artist to sit the tail slightly above the bone and to increase pigment saturation near the edges. Small ankle pieces usually finish in one to two sessions and need sun avoidance to prolong color. For showing it off in summer, cropped straight-leg jeans or sandals work best, and an asymmetry trick is an dainty ankle chain on the opposite side. Image shows a healed ankle tattoo with subtle color.
12. Neo-Polynesian Stingray with Florals on the Shoulder Blade
Hybrid neo-Polynesian patterns mixed with florals bring feminine edges while keeping geometric strength. Shoulder blade gives artists a flat canvas, but mobility and bra straps can rub the area during recovery. For cultural sensitivity, ask for a consult about motif placement and whether slight adaptations are more appropriate than direct sacred symbols. Session wise, plan for two to three visits for clean black fills and crisp polygons. The main mistake is crowding florals into the tribal panels; ask for breathing space. For easy sessions, wear a button-front shirt you can slide off or pull aside. Image prompt shows healed shoulder blade detail.

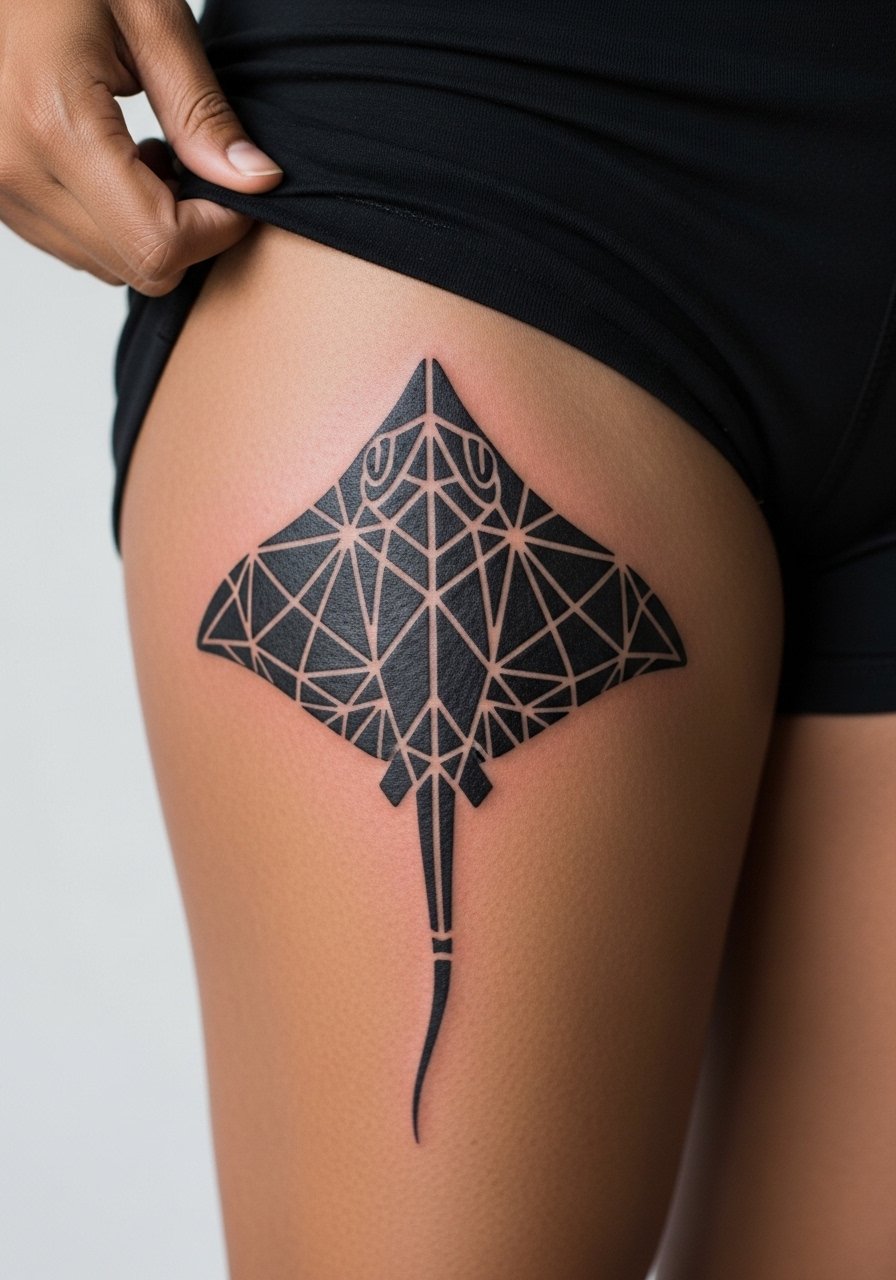
13. Blackwork Geometric Stingray on the Thigh
A thigh blackwork geometric piece can be large and hypnotic, and the thigh tolerates dense solid fills better than limbs. Expect multiple sessions if you want full saturation without skin trauma. The common mistake is going too small with complex geometry. Keep patterns at a scale that allows negative space to hold. Thigh tattoos can shift with weight changes, so discuss sizing and flow lines with your artist. For showing off during warm months, pair the piece with high-waisted shorts in solid black that stop above the artwork. Image below shows healed dense blackwork on the upper thigh.
14. Fine Line Stingray Cluster for a Forearm Sleeve Accent
Clusters of fine line rays woven into a forearm sleeve can give motion without overpowering color work elsewhere. I've seen sleeves where tiny rays were sketched too densely, which creates soft patches after a few years. A better approach is alternating single-needle rays with negative space panels and occasional stipple shading for texture. Forearm sleeves are visible and age under sun, so ask about UV protection strategy during discussions. Expect staged sessions and a year-two touch-up if the sleeve includes several fine line elements. For shopside comfort, wear a loose fit tee that lets the artist work along the full forearm. Image shows a healed cluster that reads at arm length.

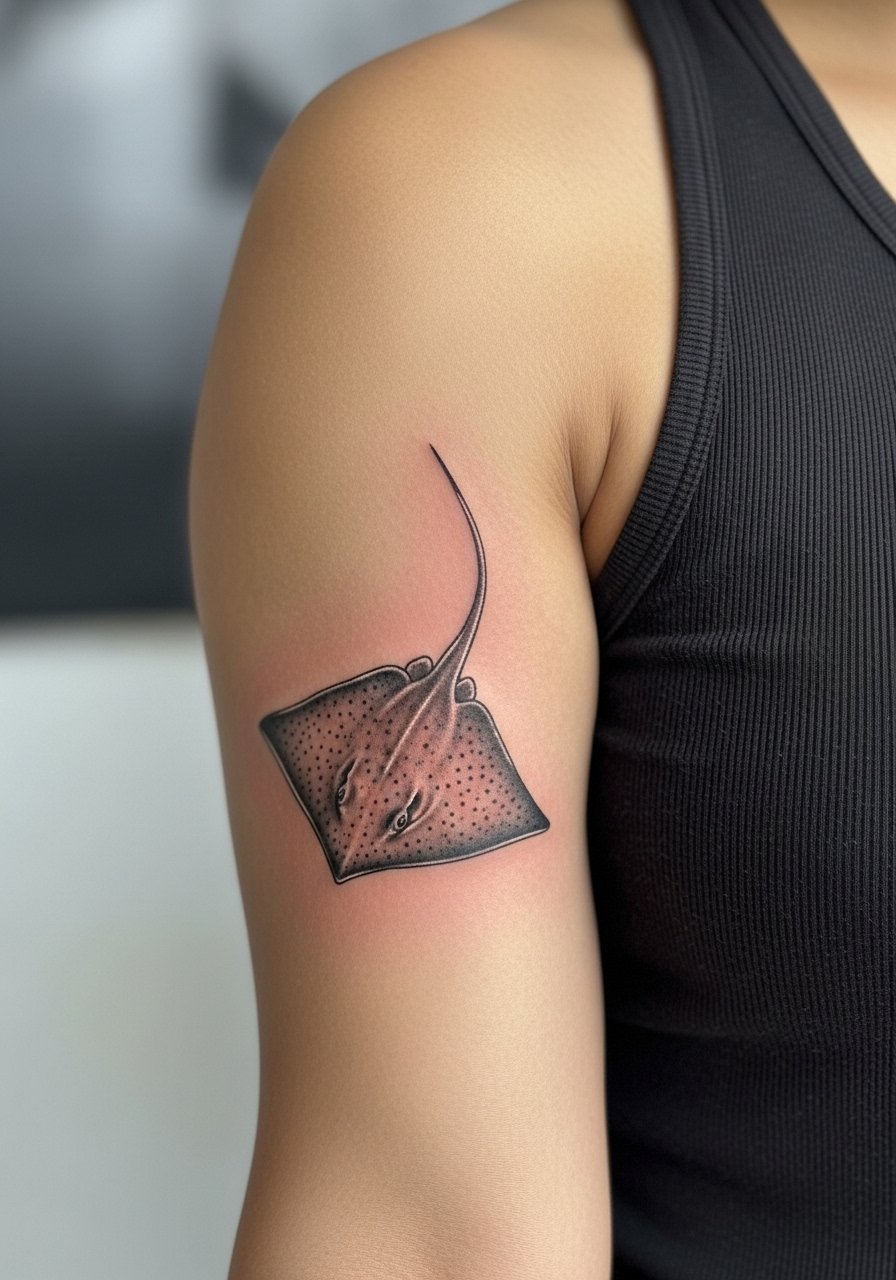
15. Micro-Realism Stingray on the Inner Bicep
Inner bicep micro-realism rewards close viewing but requires a skilled hand and careful aftercare because the inner arm sees sweat and friction. Artists debate whether micro-realism holds on the inner bicep, with one group pointing to the moist environment causing faster diffusion and the other group saying skilled depth control prevents spread. When booking, ask for examples of healed inner bicep micro-realism in person or via tagged city searches. Expect a one to two hour session and consider scheduling in cooler months to minimize sweat during healing. For session comfort, wear a tank top so the artist can raise the arm without tug. Image shows a healed micro-realism placement.
16. UV-Reactive Stingray for Nightlife Accents on the Outer Arm
UV-reactive ink is rare and playful for night scenes, but it fades differently and is not visible in daylight. If you want nightlife glow, discuss pigment longevity and whether the artist mixes UV with conventional black outlines to preserve the silhouette. Expect one session for small pieces and touch-ups more frequently if you wear sun-exposed clothing often. The mistake is relying on UV alone for the whole piece. Combine it with blackwork anchors so the design still reads after the UV softens. For showing off club nights, a short-sleeve linen shirt rolled back keeps the arm on display. Image prompt focuses on the healed outer arm under neutral light.
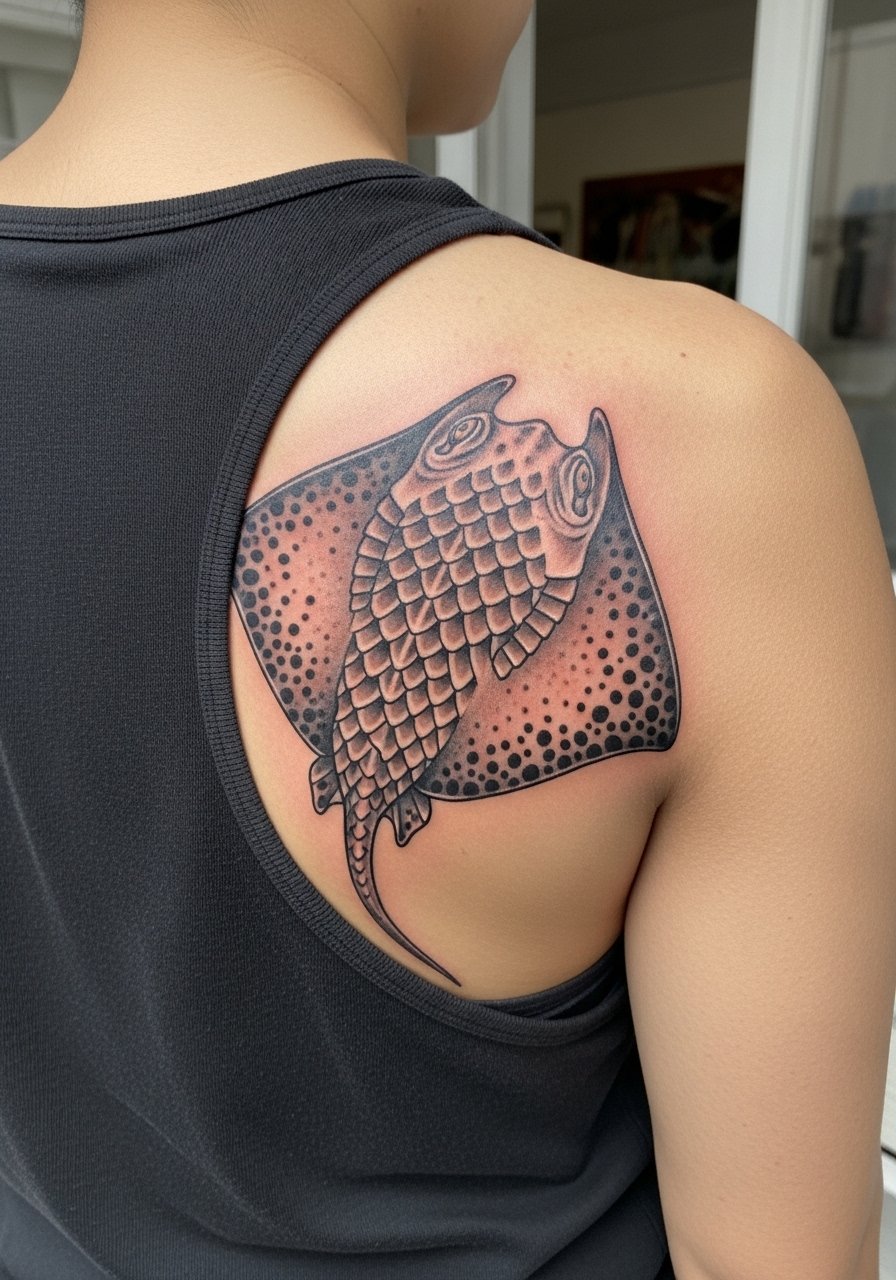
17. Hybrid Stingray-Manta Scale Back Piece
Mixing stingray and manta forms creates a sweeping back piece that reads like an ocean scene. Large-scale hybrids need careful composition so fins flow with the spine and shoulder blades. The typical error is forcing a single stingray design into a back-scale without rethinking flow lines. Book a consultation focused on movement and ask the artist to sketch the negative space around hips and scapulae. Expect multiple sessions and plan recovery time between them. For post-session comfort, bring a loose robe or a tank top you can step into so clothing changes are clean and gentle. Image shows a healed hybrid spread across the upper back.
18. Finger-Webbing Stingray Accent
Finger webbing is an under-covered placement that mimics how rays glide between fins. The skin there is thin and moves a lot, so small designs must be simple. Common mistakes include adding fine detail that disappears within months; instead, opt for bold single lines with small negative-space accents. Expect fading faster than wrist or forearm and a higher chance of touch-ups, sometimes annually. For appointment-day practicality, avoid rings and wear a loose button-down or a sleeveless top you can slide over the shoulder to keep hands free. Image prompt shows the finger-webbing area only.

19. Sternum Stingray in Fine Line Under a Sports Bra
Sternum placements read intimate and central, and they demand care around clothing and bras during healing. For sensitive zones like the sternum, artists recommend specific techniques and more conservative line weights. The debate over Saniderm versus dry healing comes into play here because one camp favors protective film to reduce friction and the other camp prefers natural scab breathability. Name both camps when you consult and ask which method the artist uses for sternum work. Wear a fitted sports bra on chair day so the artist can expose only the needed area. Image prompt follows placement safety rules and shows a healed sternum piece.
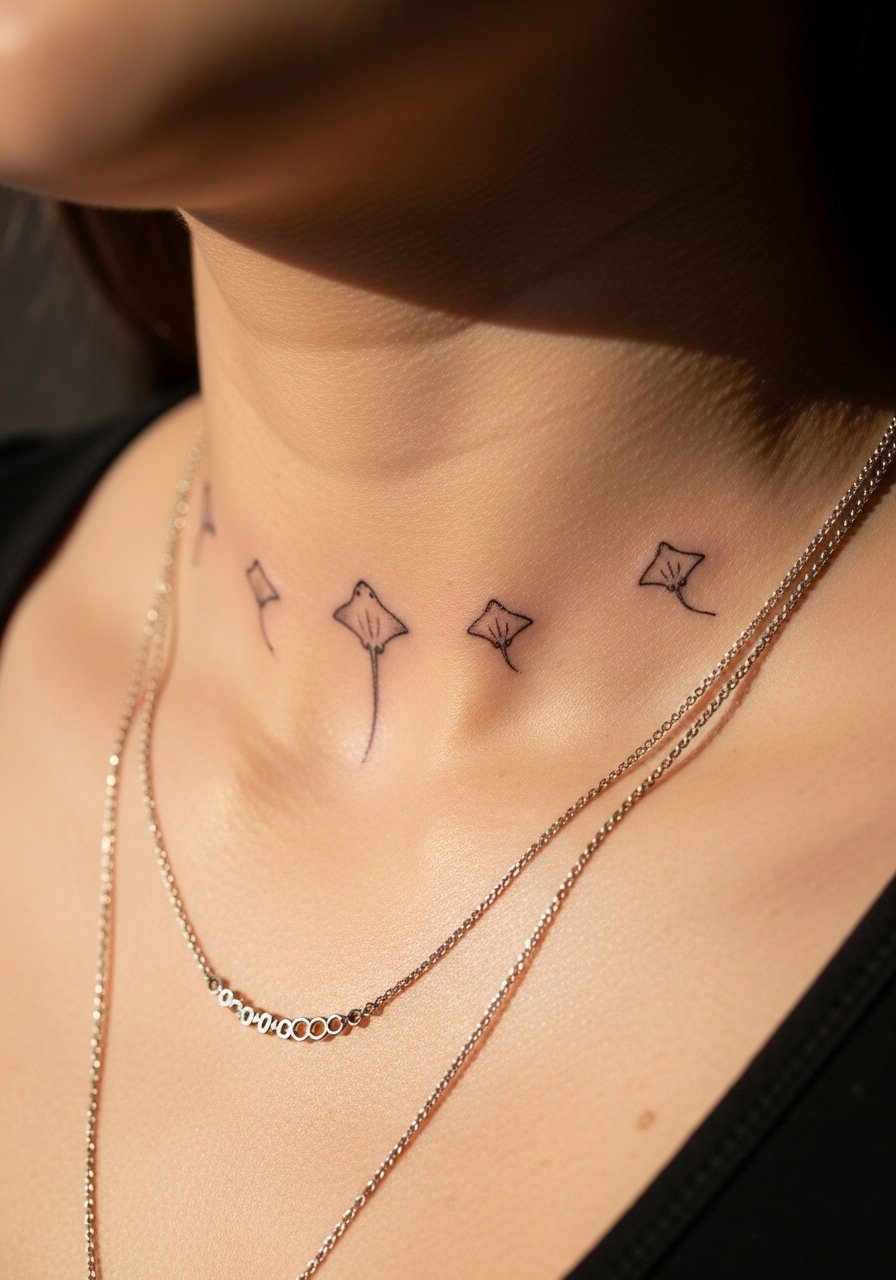
20. Collarbone Chain of Tiny Rays
A chain of tiny rays along the collarbone has jewelry-like rhythm but needs spacing to avoid merging over time. Collarbones are bony and sting more than fleshy areas, so short sessions or numbing may help. The typical error is packing rays too tight to look dainty; dainty often equals too small on the collarbone. Aim for slightly larger motifs with negative space. For outfits, pair the line with a delicate layered necklace that sits below the row rather than competing on top. Image shows a healed collarbone string.
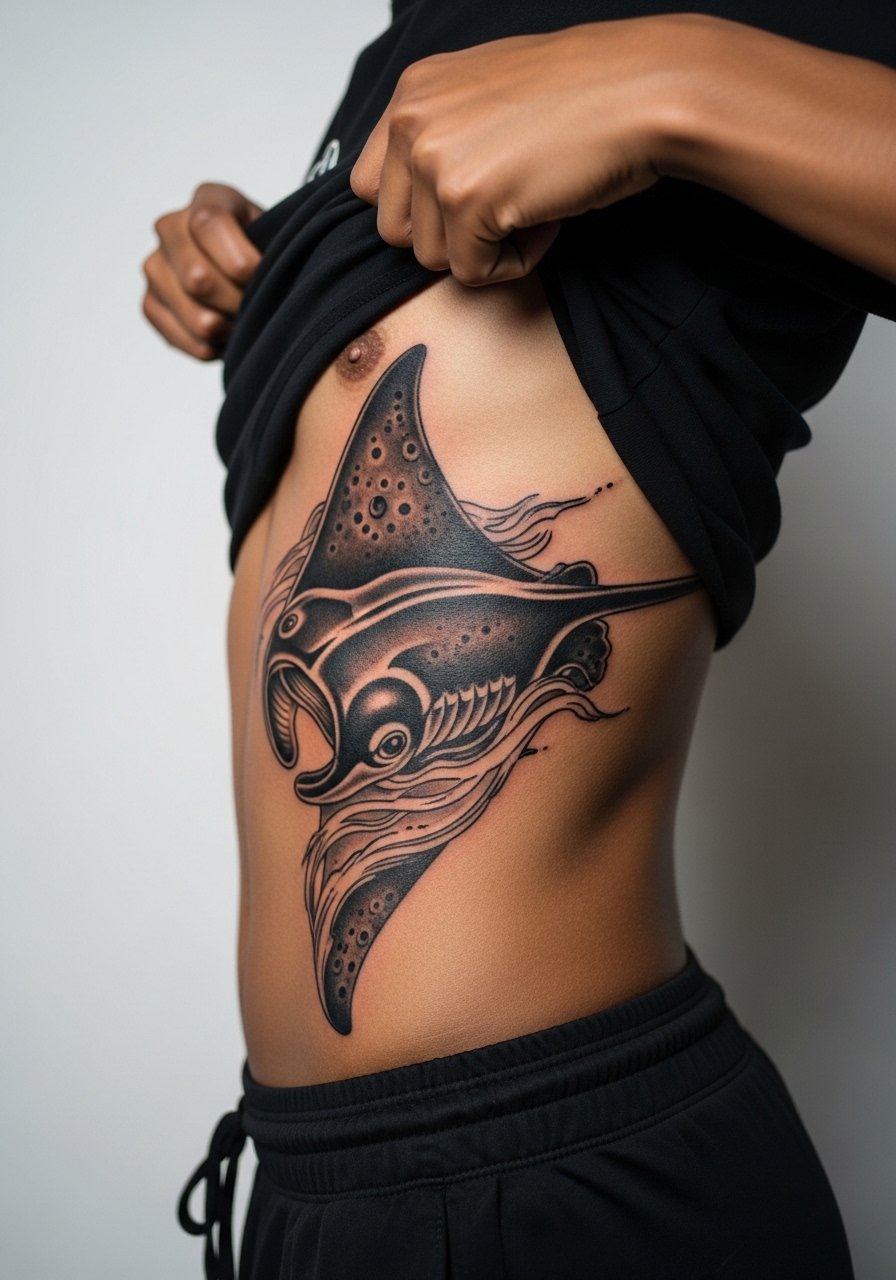
21. Cover-Up-Friendly Manta-Sting Hybrid on the Ribcage
Ribcage pieces can cover old work if the new design uses large shapes and dense blackwork. The ribs hurt more than most other zones, but a skilled composition that follows rib curvature can both conceal and rejuvenate an old area. The mistake is trying a micro-realism cover-up with thin lines; use bold blacks and large negative shapes for success. Discuss pain management and consider numbing if you expect long sessions. Because ribs are tricky, bring loose bottoms or a cropped top for easy access. Sensitive-placement note: ribcage prompts must show the area lifted or cropped so the image is focused. Image below shows a healed cover-up-friendly design.
Frequently Asked Questions
Q: Will a fine line stingray on the wrist blur faster than a blackwork piece on the same spot?
A: In my experience, fine line on the wrist tends to soften sooner than bold blackwork because of friction and thin skin. If you want longevity, ask for slightly heavier primary lines and plan a touch-up around year one. If you prefer a softer look that you can refresh, fine line still works well as long as you accept periodic maintenance.
Q: Are Polynesian stingray patterns appropriate for a hybrid design, and how do I source the right artist?
A: Hybrids can be respectful if you avoid copying sacred motifs verbatim. Use hashtags like #PolynesianStingray and search guest-spot listings or Booksy filters for "Polynesian" in your city to find artists who post healed work. Ask about the artist's approach to cultural elements during the consultation.
Q: If I want a watercolor ankle tail but I wear shoes a lot, what are realistic expectations?
A: Ankle watercolor will fade faster because of sock and shoe friction. Sit the color slightly above the ankle bone, request stronger saturation at the edges, and plan for touch-ups if you expect heavy shoe wear. Sandals in summer reduce friction, and rolling jeans help when healing.
Q: How does skin tone influence whether I pick color or blackwork for a stingray?
A: Darker skin tones often show high-contrast blackwork more reliably in photos and at distance, while lighter tones can display subtler watercolor blends. If you love color, ask for test patches or temporary ink photos and request stronger saturation or black anchors to protect visibility.
Q: Can I wear a button-down or jacket to the session for a shoulder or back piece?
A: Yes. For shoulder or upper back appointments, a button-front shirt is ideal because you can slide it off without stepping out of clothes, making prep cleaner and more comfortable for both you and the artist.
Q: What should I ask about healing method when my sternum or ribs are involved?
A: Name both camps during the consult: those who prefer protective films for color pieces and those who favor dry healing for scab breathability. Ask your artist which method they use for sternum or ribs and why, and request clear aftercare steps tailored to that method.
