
The trend right now is for softer Oni masks that read mysterious without the glare of full-on ferocity. People want the folklore weight without scaring family or losing detail after a year. These pages collect 21 soft Oni mask tattoo options that lean toward subtle linework, floral framing, and placement choices that age better, so you can pick a direction and know what to ask at the consult.
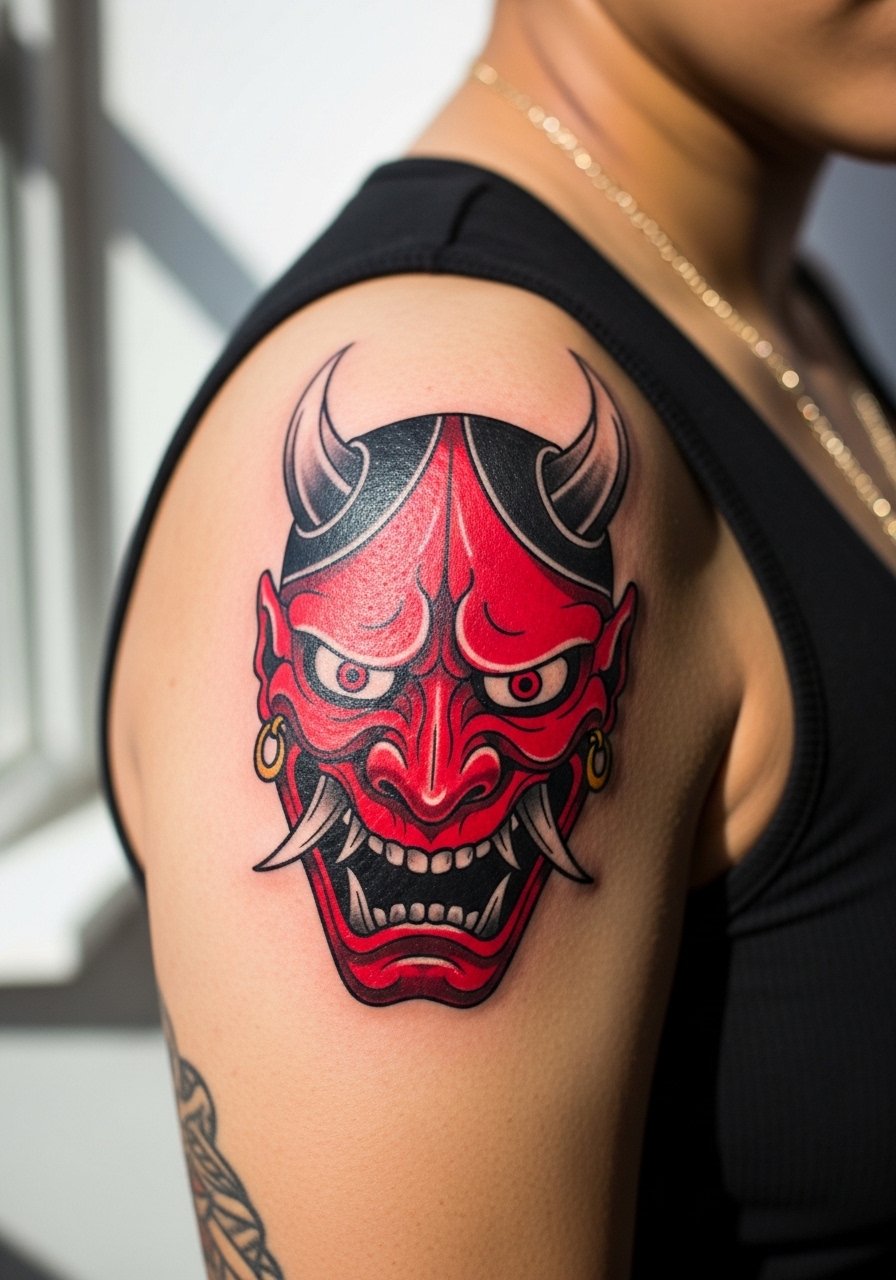
1. Forearm Red Oni with Soft Petals for Wearability
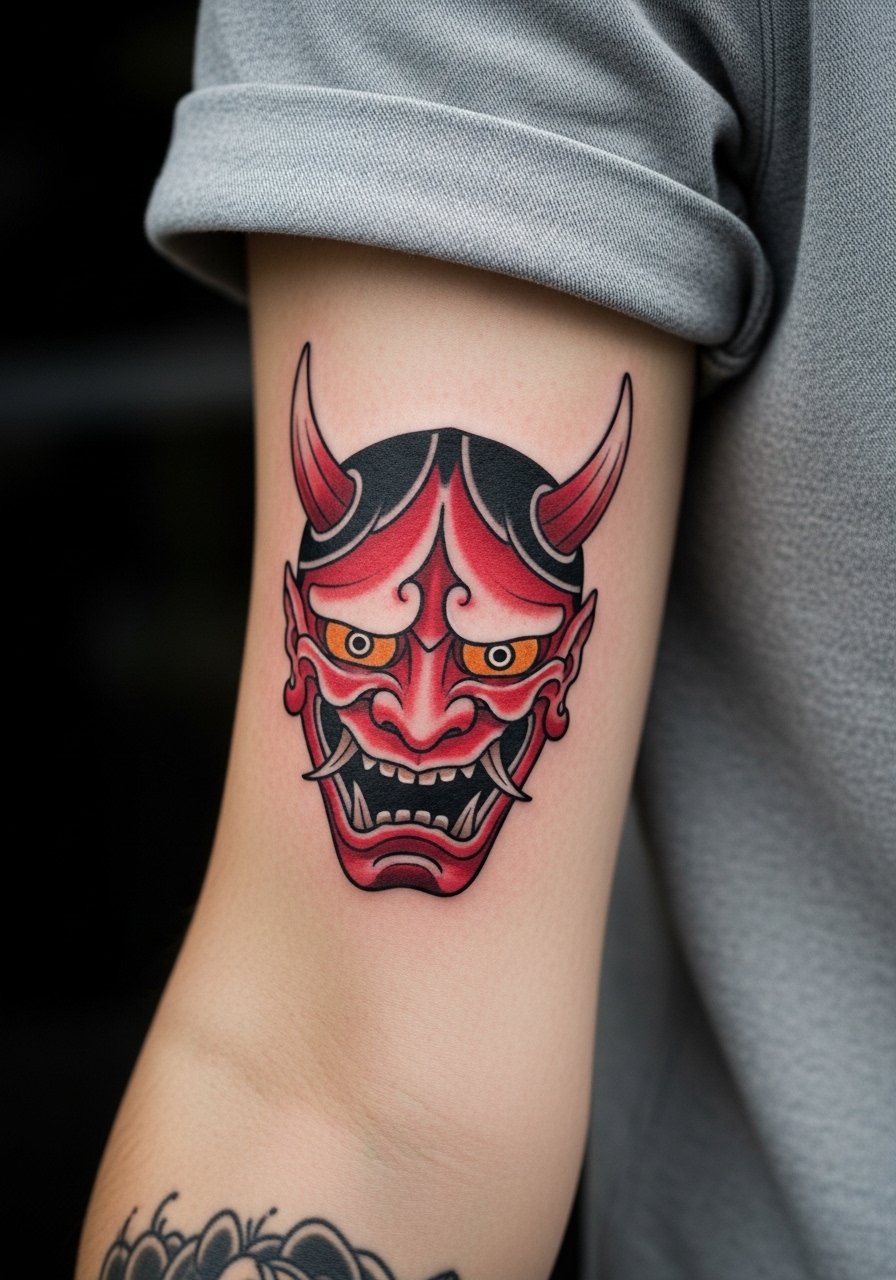
I recommend this when you want that classic red Oni presence but prefer a gentler impression. In consults I tell people to ask for softened facial features, thinner horns, and floral frames so the mask reads protective rather than aggressive. The session feels like a steady two-hour block on the outer forearm with medium pain and a low blowout risk because the area is low movement. For showing it off, pair the placement with a fitted black tee and rolled sleeves to keep attention on the mask without competing patterns. Expect touch-ups at year three for saturation refresh, and avoid overly fine filigree too close to the main outlines.
2. Upper Back Black-and-Gray Oni with Sharp Teeth, Toned Down
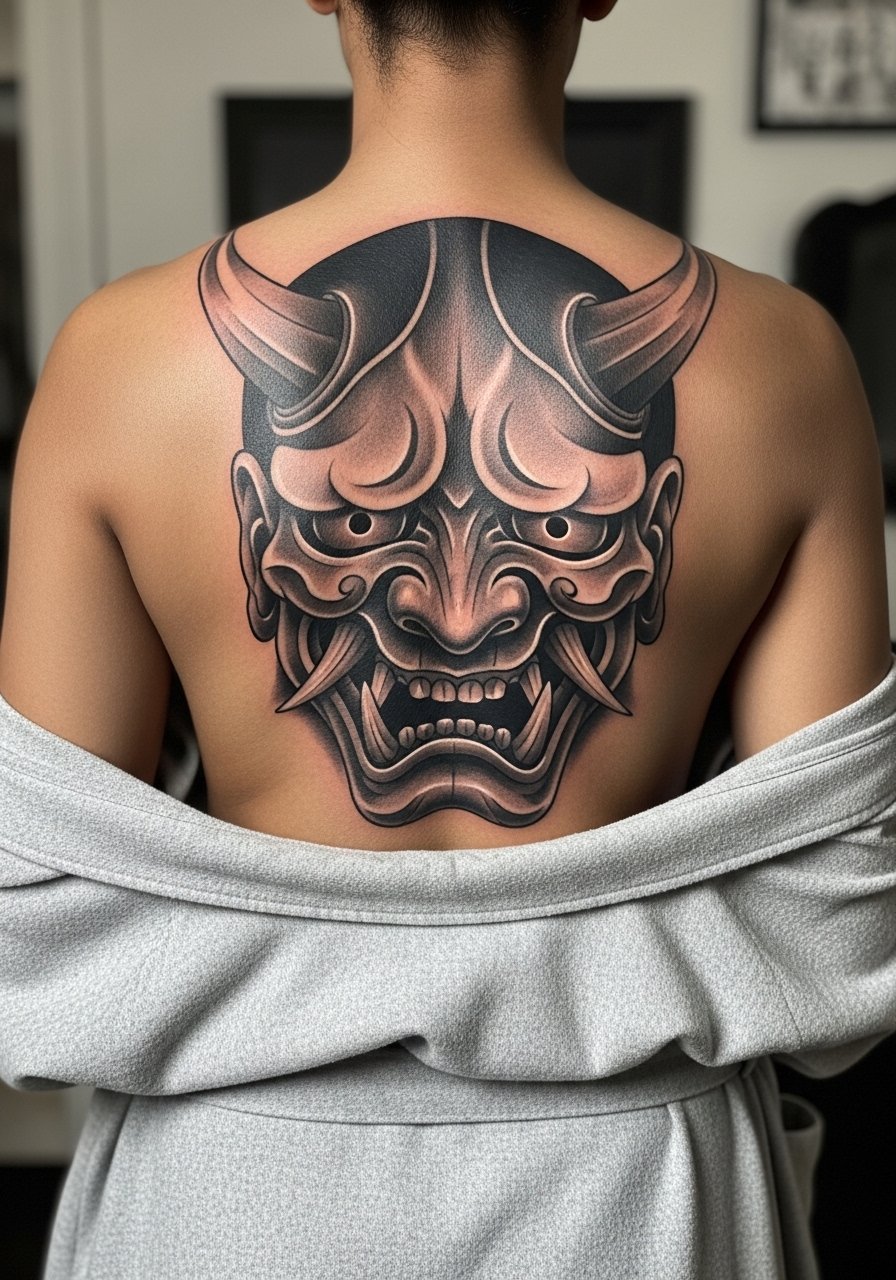
The back gives room for depth without crowding. I often recommend black-and-gray saturation for upper-back Oni because it keeps the mysterious vibe and resists patchy color fade. This is a two-session piece for most people and it wears well at six months, then at two years it reads as a deep tonal illustration. For summer show-off, try a backless crop top or low-back halter. Since this design traces to Japanese visual language, be intentional about motifs and ask your artist how they adapt Irezumi elements respectfully.
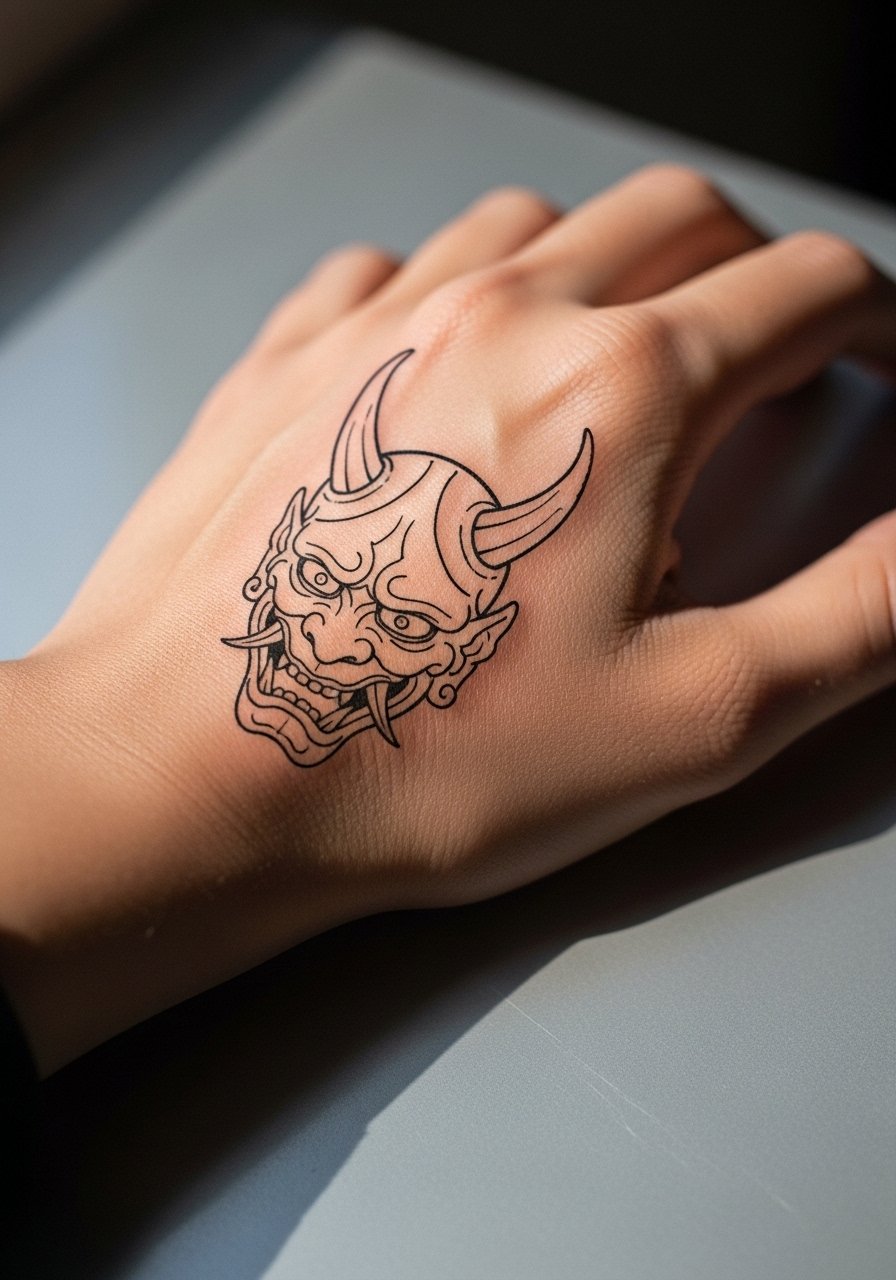
3. Minimalist Outline Oni Face on the Back of Hand
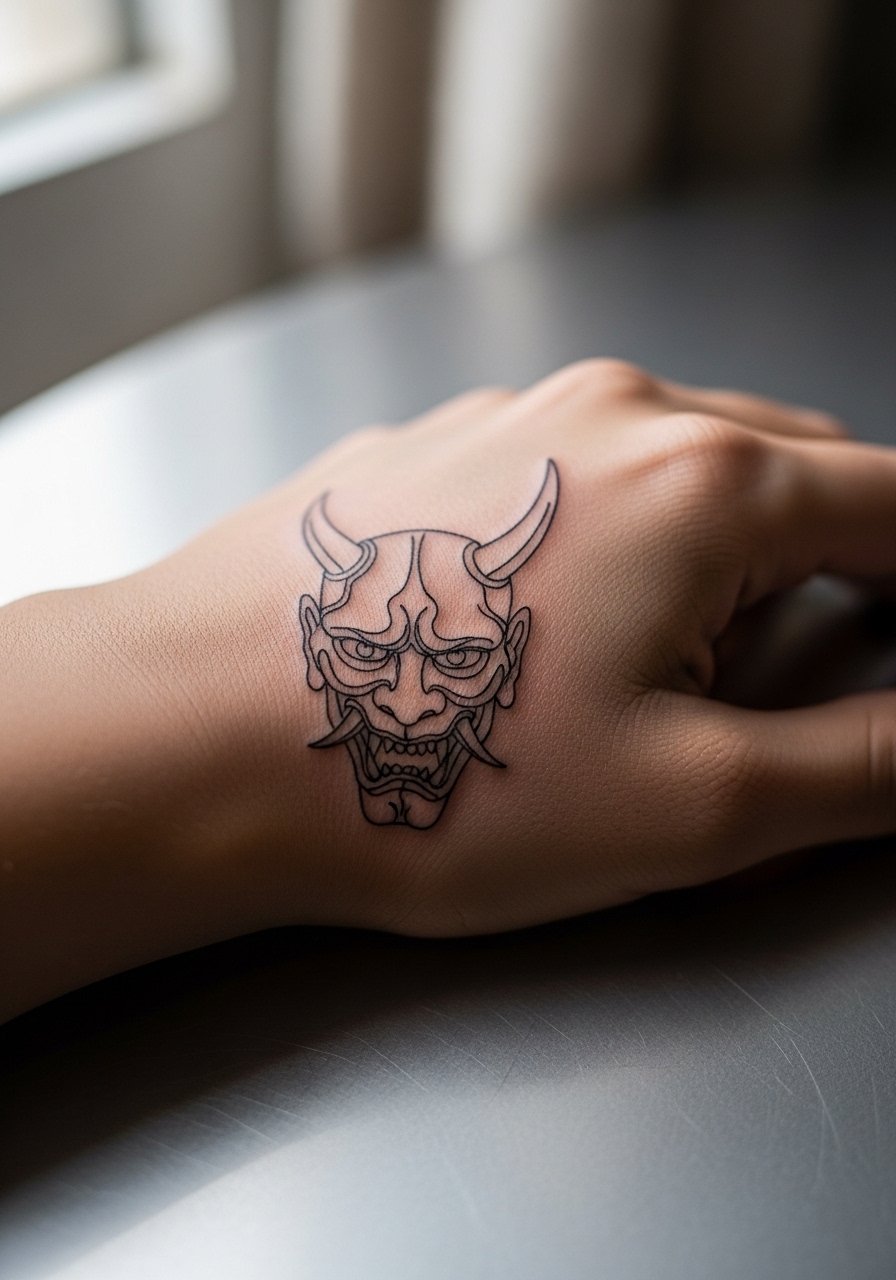
Fair warning: hands move and see sunlight more than most spots. One camp favors fine line hand pieces for their subtlety. The other camp argues bold outlines are essential for longevity. Both positions have merit, so ask your artist which approach they use for hands and what their touch-up timeline looks like. The session is quick and sharp, and blowout risk is higher than on the arm. For a matched aesthetic, consider wearing fingerless leather gloves when you want an edgier look. Expect an annual touch-up on hands if you choose the finer approach.
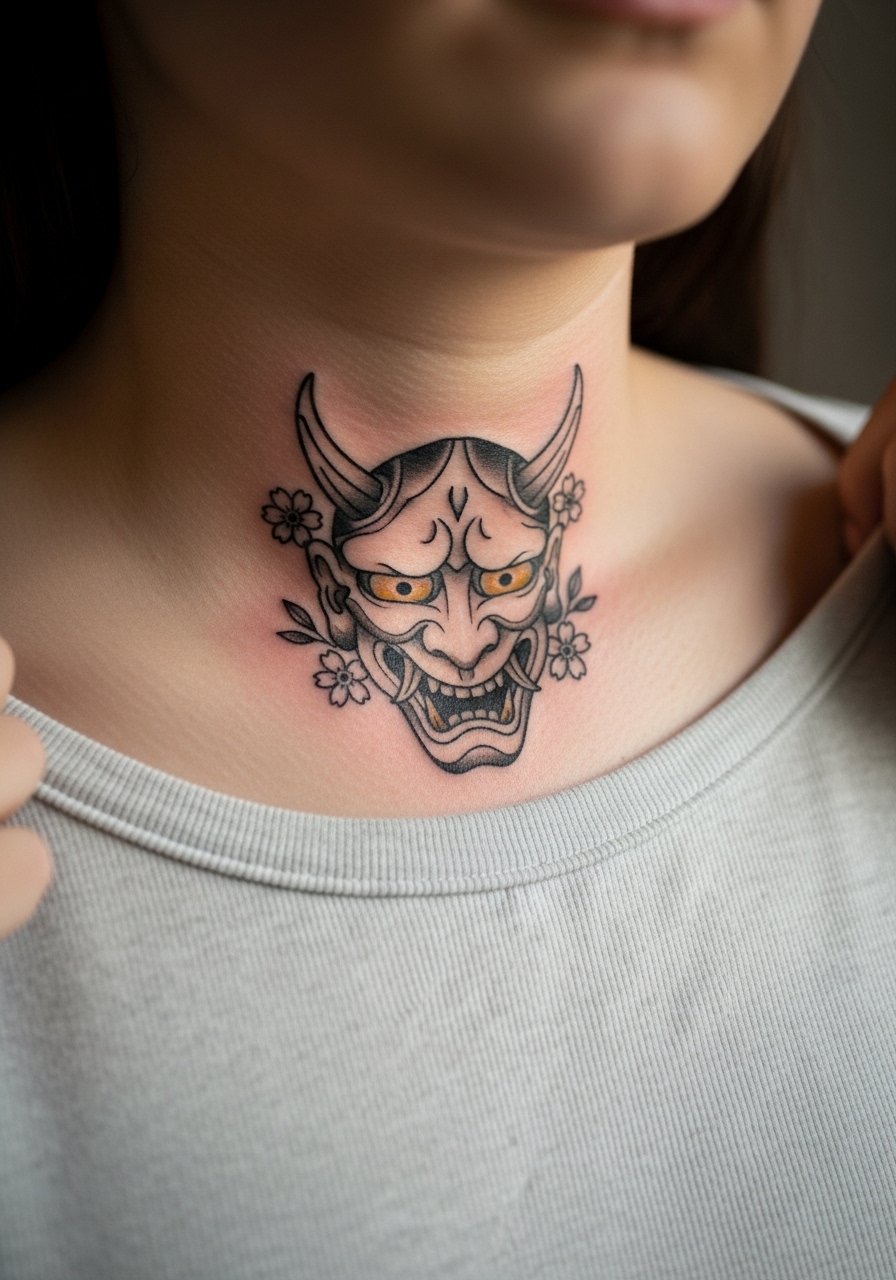
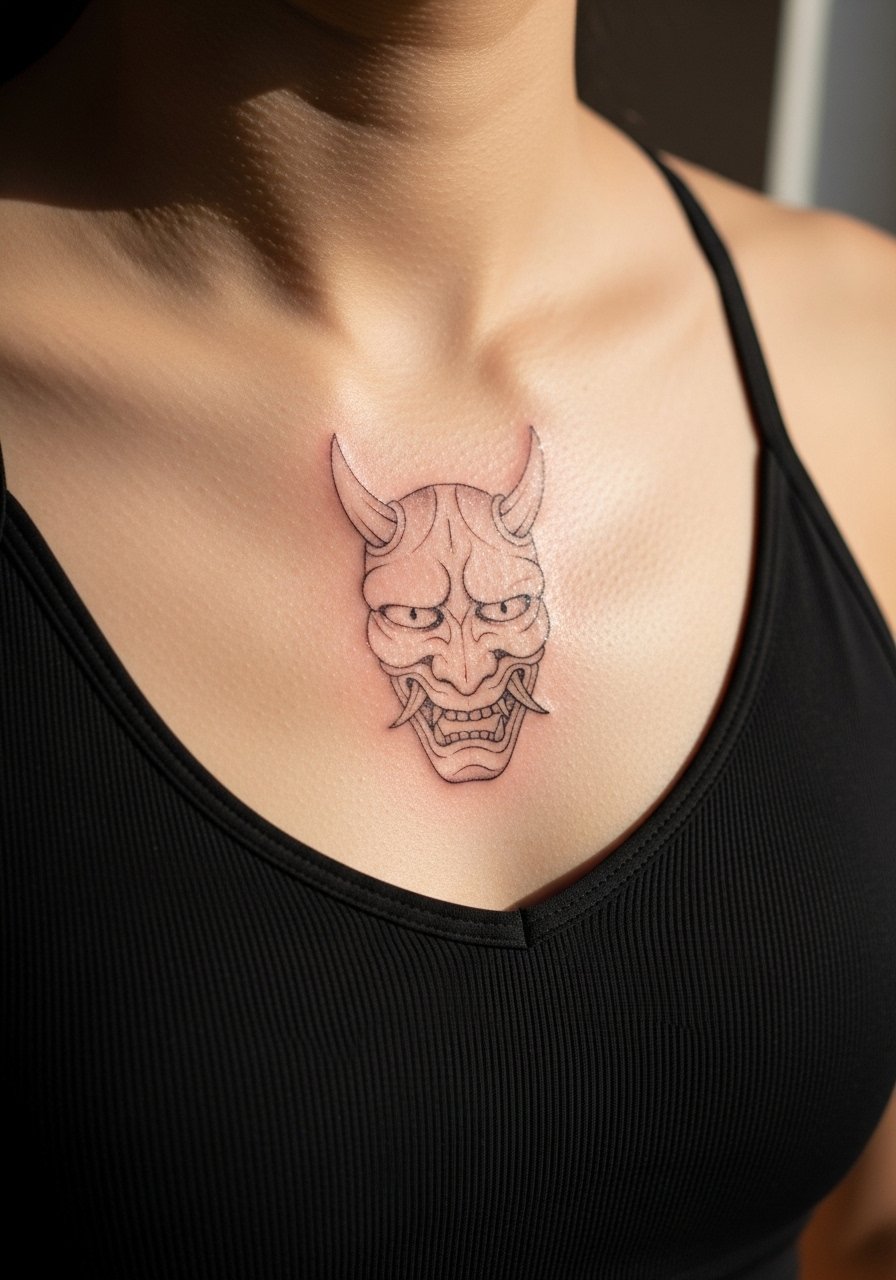
4. Neo-Traditional Chest Oni with Flowers and White Highlights
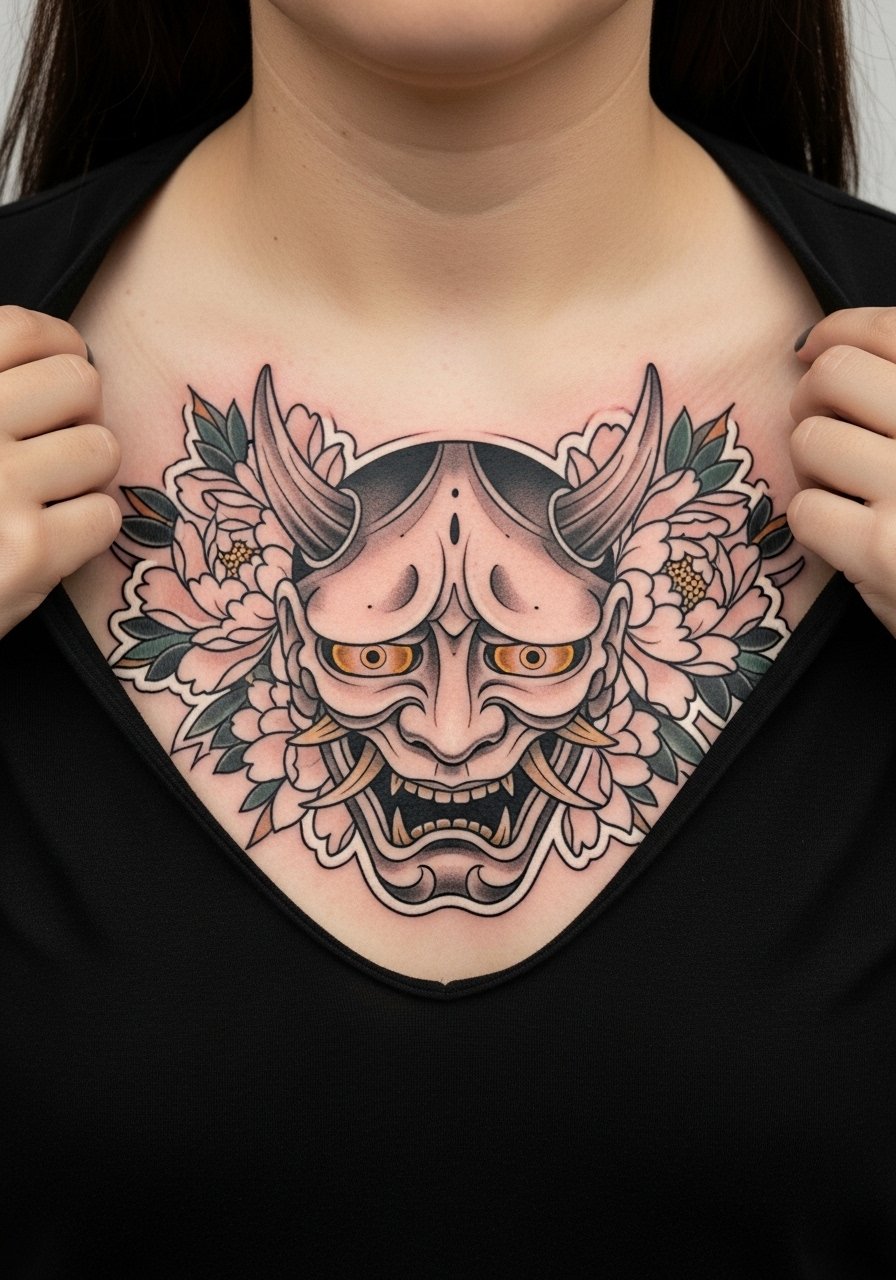
This one works if you want controlled ferocity framed by blossoms. Tell the artist to add white highlights along the mask edges for implied 3D depth, and to scale the flowers so they breathe around the cheek and jaw. Chest sessions feel more intense because ribs and skin stretch can make linework sensitive, but the result photographs well under a deep V or unbuttoned shirt. For session comfort, wear a loose zip-up hoodie you can pull aside. Be mindful that chest tattoos can distort with major weight or muscle changes, so size the piece with that in mind.
5. Shoulder Red-and-Black Oni Cap That Reads Bold at Distance
There is something about shoulder placement that reads powerful across a room without feeling overwhelming in close. Choose a slightly larger scale, five to seven inches, so the red and black balances and shading does not turn muddy. The session is usually one to two hours and the shoulder handles saturation well, so touch-ups are less frequent than on wrists. For evenings out, an off-shoulder sweater frames the piece without covering it. If culture-specific motifs are used, ask how your artist will adapt them sensitively rather than copying sacred imagery.
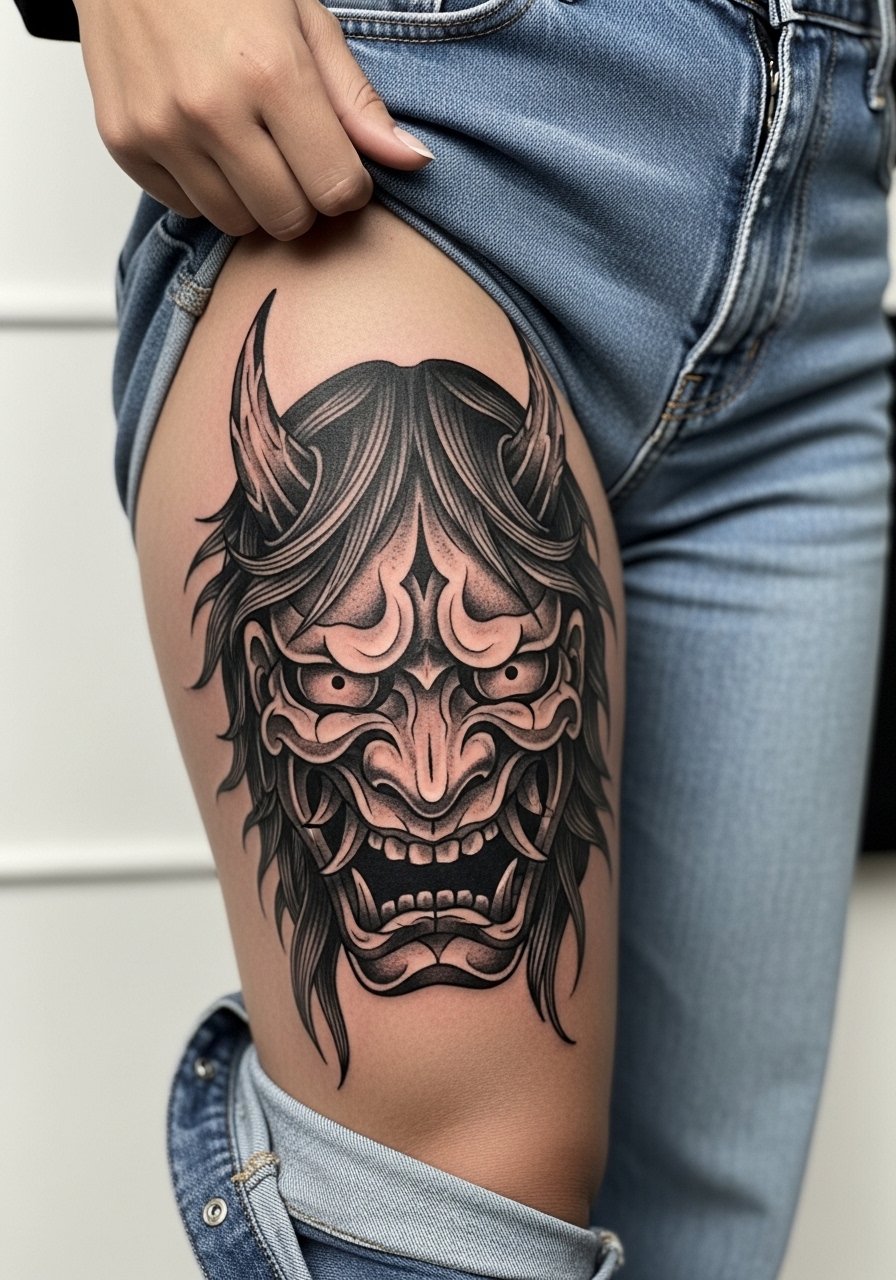
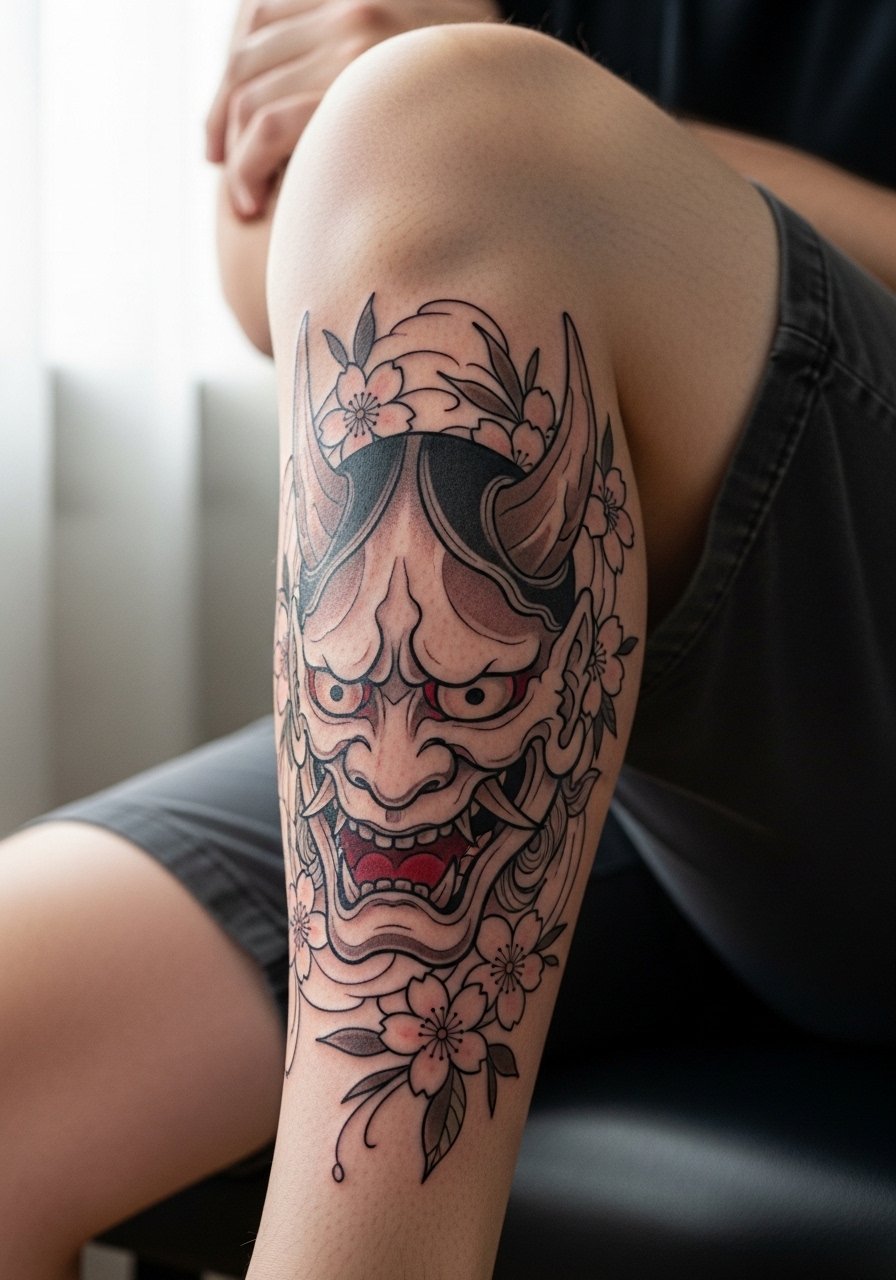
6. Thigh Blackwork Oni with Unkempt Hair for a Dramatic Silhouette
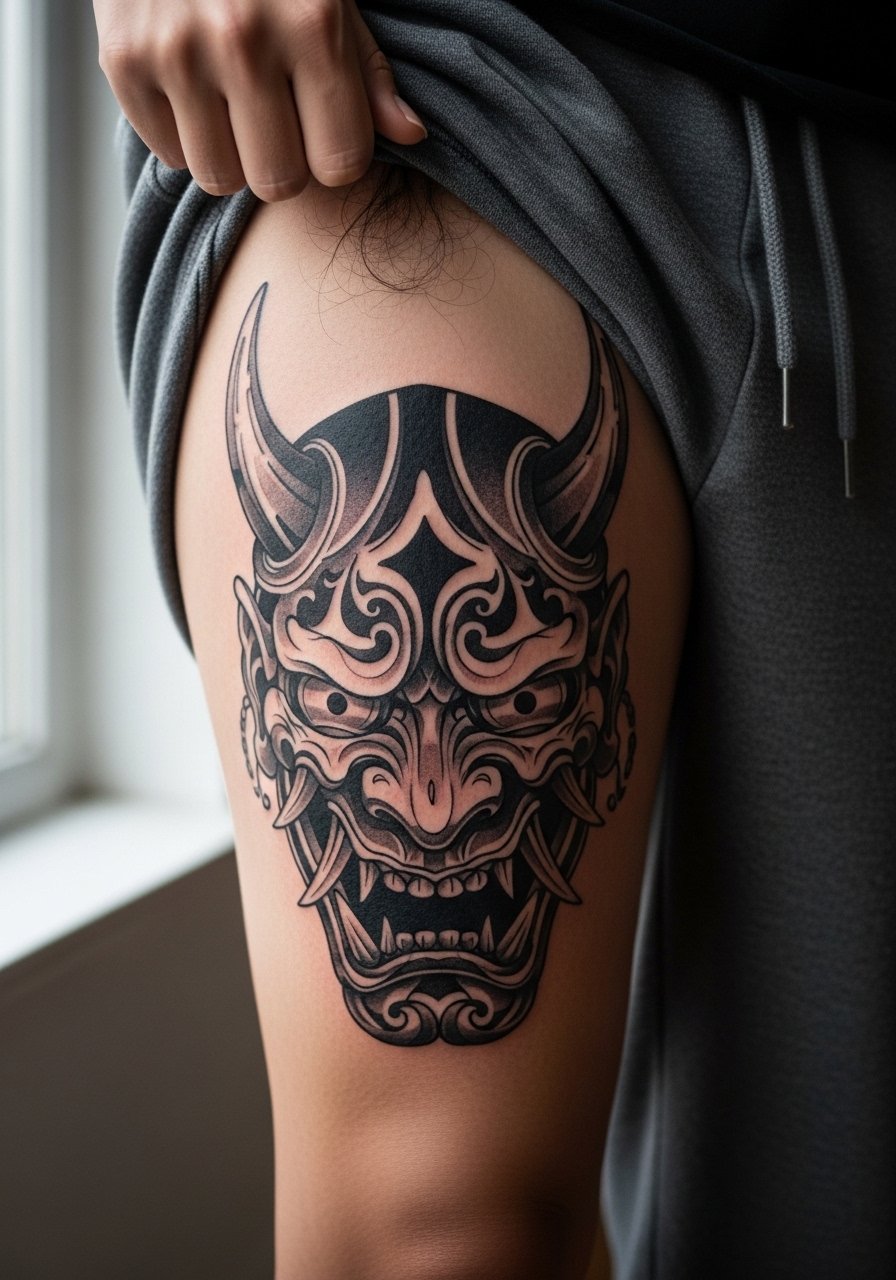
The thigh is ideal when you want a bold, private statement that can be shown selectively. Outer thigh work offers a nine-inch canvas for heavy shading and hair texture, and the lower friction there helps saturation hold. Plan for two sessions for layered shading and expect moderate pain with long needles near the bone. For session comfort wear loose jogger pants that you can pull down an inch without pressure on the area. This style is great for collectors who want dramatic dark reads without constant sun exposure.
Studio Day Picks
The first six ideas above include both exposed arm work and inside-the-clothes placements, so these picks smooth the session and early healing across those spots.
-
Stencil transfer paper kit. Lets you test how the mask scale and line weight look on skin before the needle starts, useful for forearm and hand placements.
-
Topical numbing cream. Applied as directed before shoulder or chest sessions can make longer blocks more bearable without changing shading work.
-
Thin protective film roll. Helps finger and wrist pieces survive early friction from washing and typing during the first week.
-
Fragrance-free body wash. Gentle cleansers reduce irritation for chest and back pieces that need careful rinsing while healing.
-
Aquaphor healing ointment. A thin layer in the first days locks moisture for fine line and color work without clogging the skin.
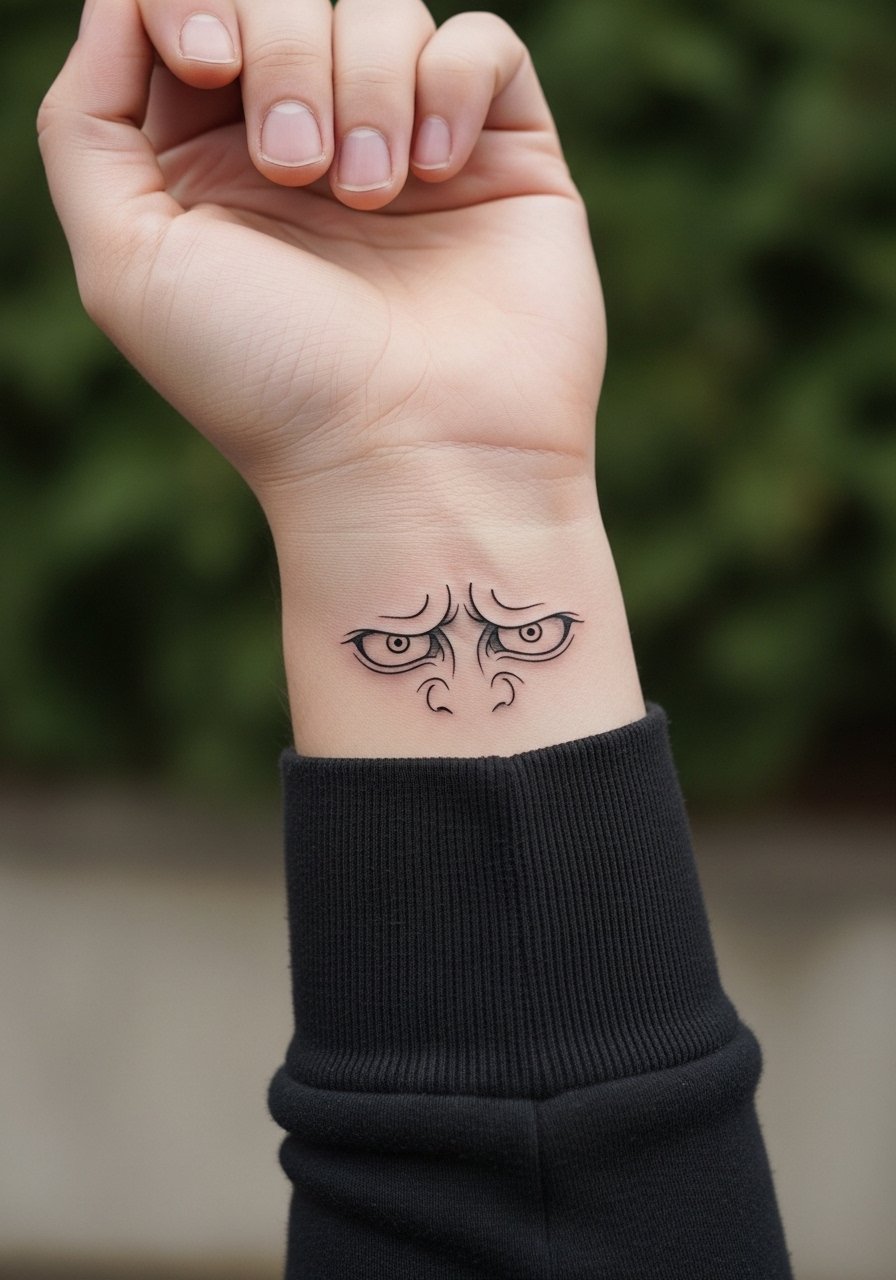
7. Simplified Calm Oni Eyes on the Inner Wrist

This smaller option plays to daily wearability and subtle symbolism. Because the wrist is a high-motion, high-sun spot, opt for distinct blackwork outlines with deliberate spacing rather than ultra-fine maze-like details. The controversy over fine line on wrists is real. One camp says fine line gives the aesthetic of calm subtlety. The other camp points out that thin lines on wrists blur faster and need earlier touch-ups. Ask your artist which method they use and plan on a touch-up at year two if you choose delicate linework. For showing it off, a thin cuff bracelet on the opposite wrist keeps attention balanced.
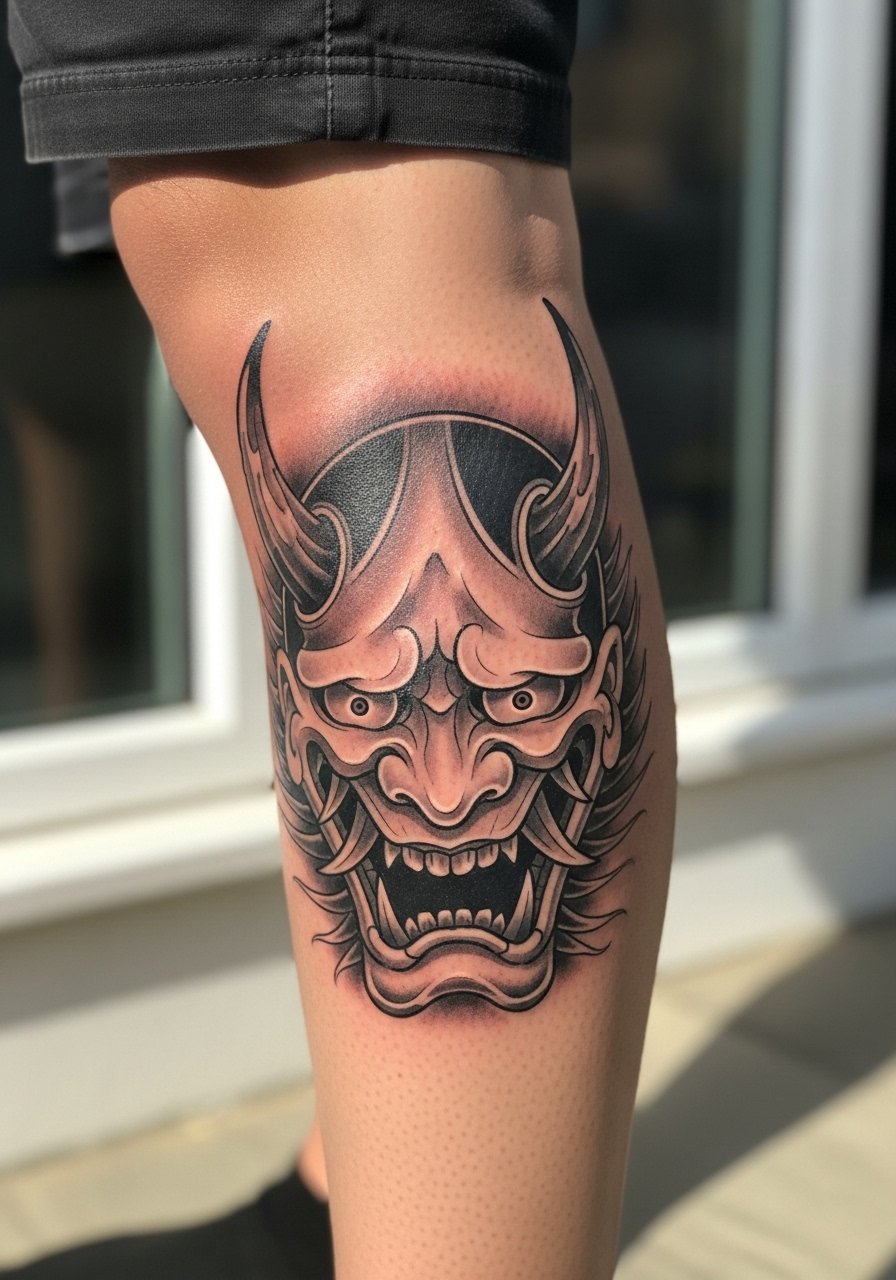
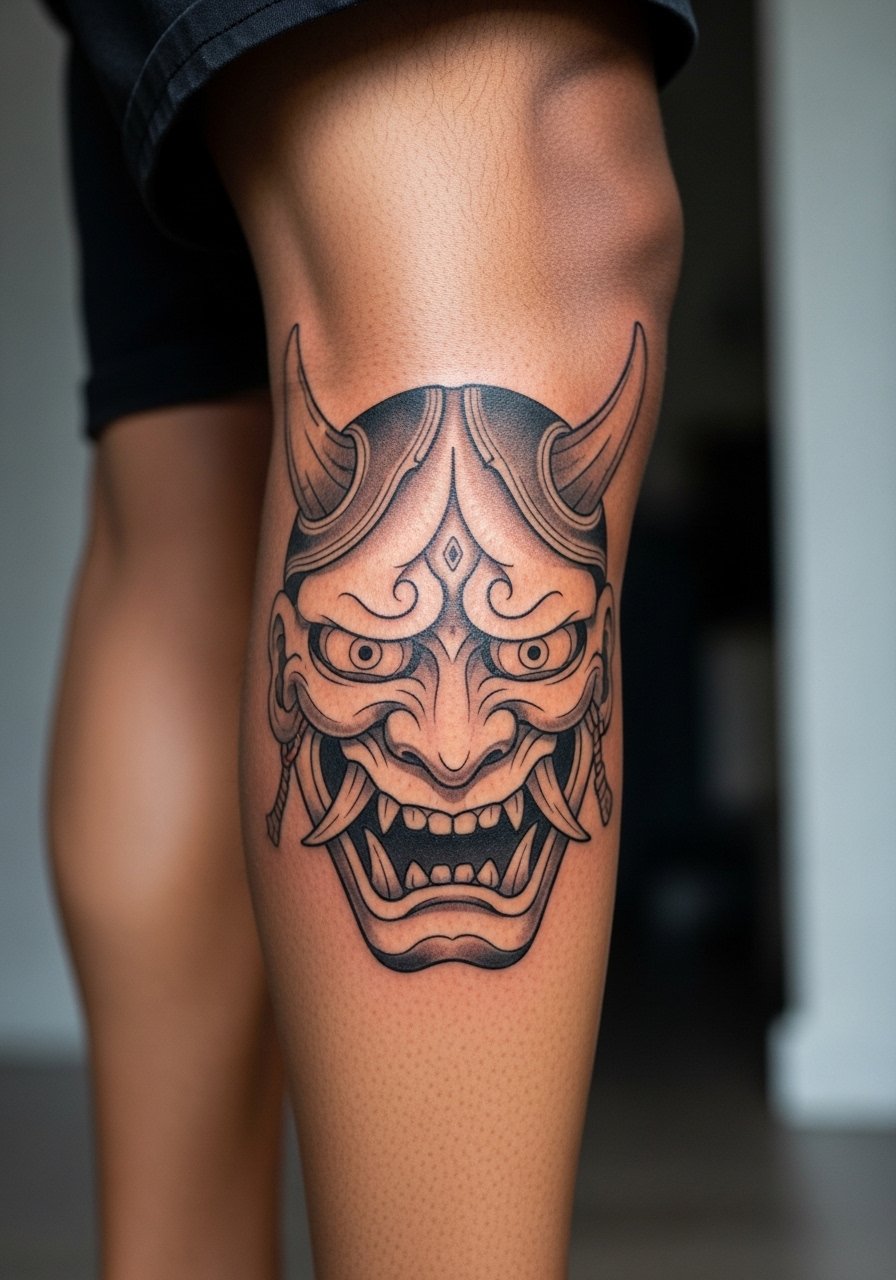
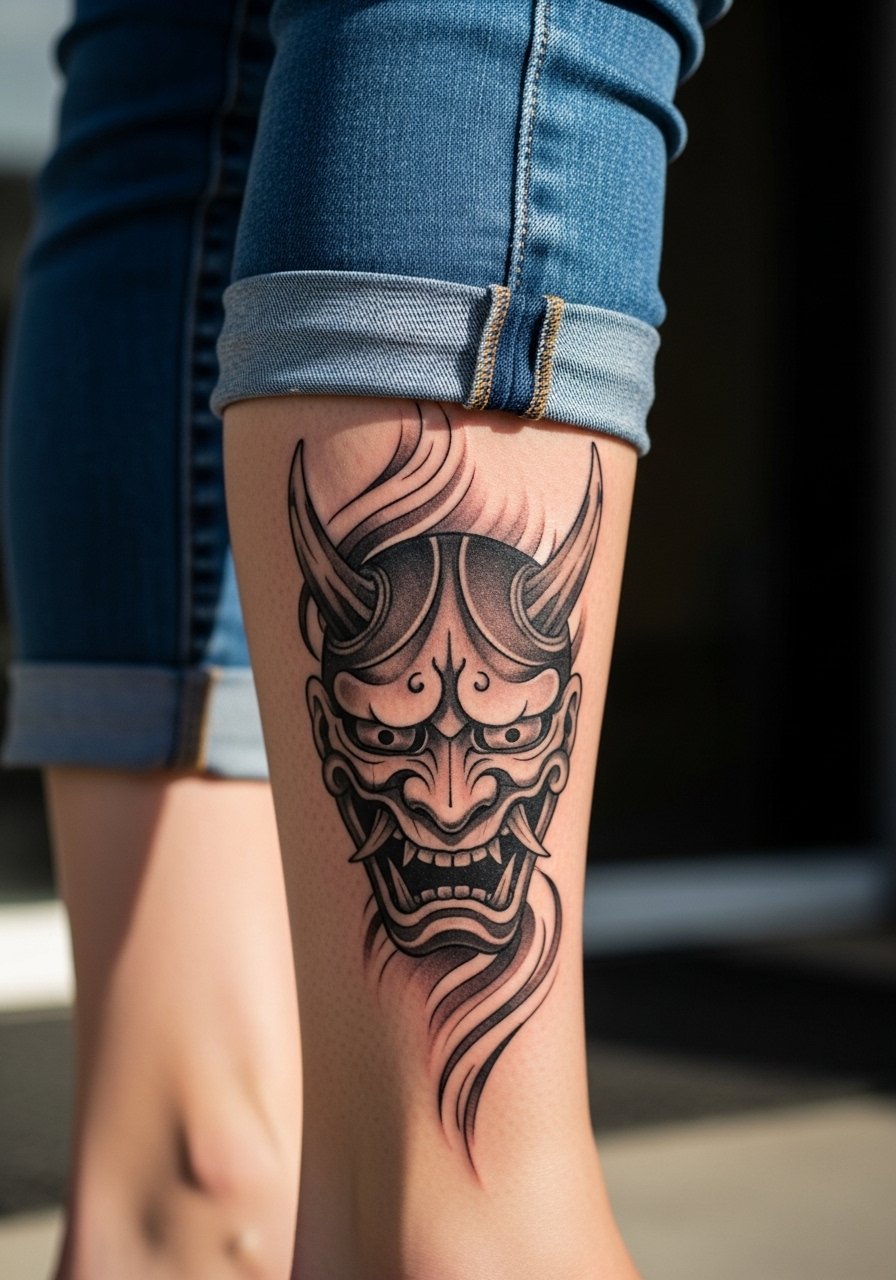
8. Calf Illustrative Oni with Horns for Collectors
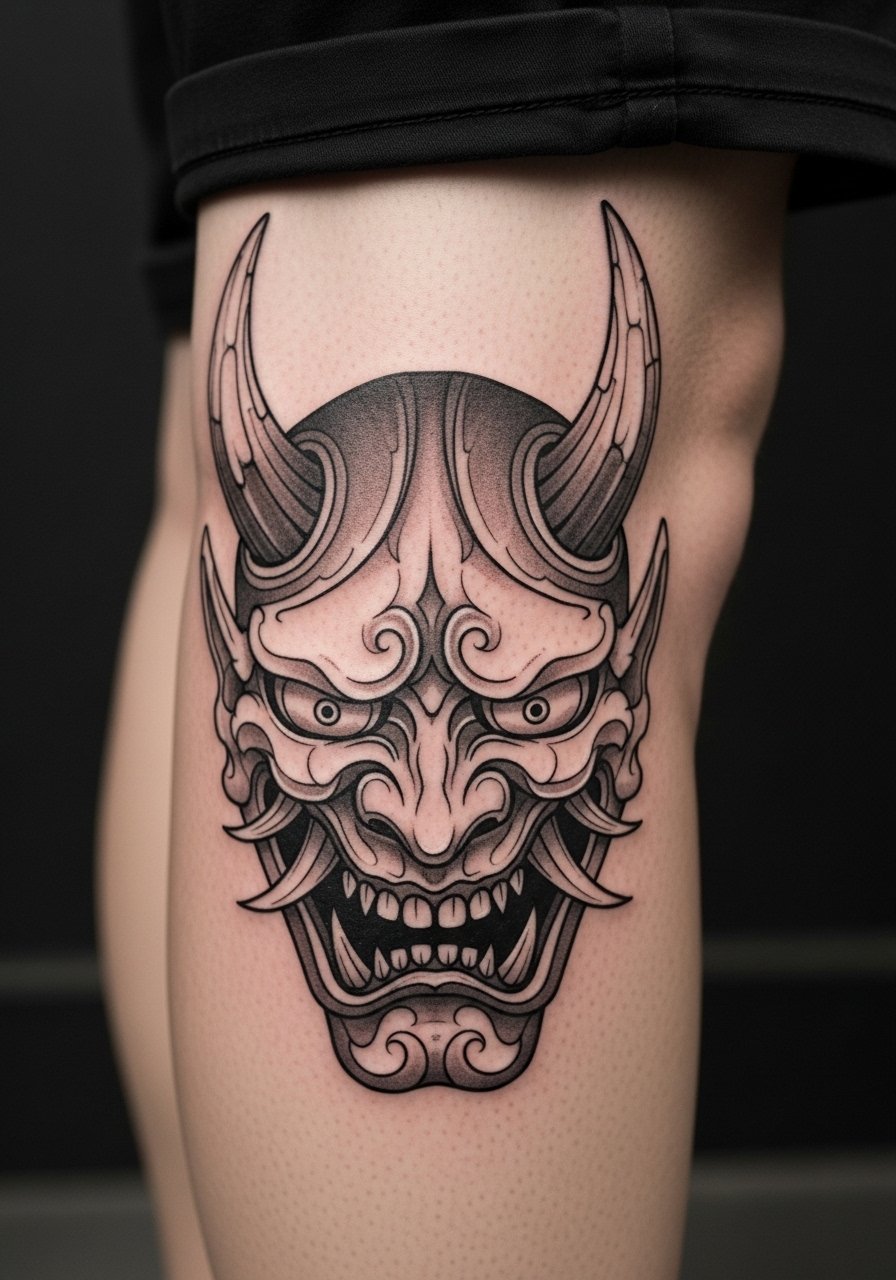
Calf pieces are comfortable to sit through and photograph cleanly. I suggest the illustrative realism approach when you want horn detail and texture without heavy color. Session time is usually two hours for seven-inch work and pain is moderate because muscle cushions the needle. For summer wear, pair it with high-cut shorts or slit denim skirts to let the silhouette show. The calf ages nicely as long as you avoid repeated abrasion from tight pants.
9. Micro Realism Sternum Oni Framed with Peonies
Sternum work reads intimate and needs respect for the anatomy. Pain is high and sessions are usually split. Tell your artist you want breathing room between mask edges and florals so the piece does not compress with chest movement. Session wear matters here, so bring a fitted sports bra or bandeau that exposes only the area needed. Avoid tiny, dense details near the sternum center because healed compression can blur them. Expect this one to look delicate at six months and slightly softened at two years.
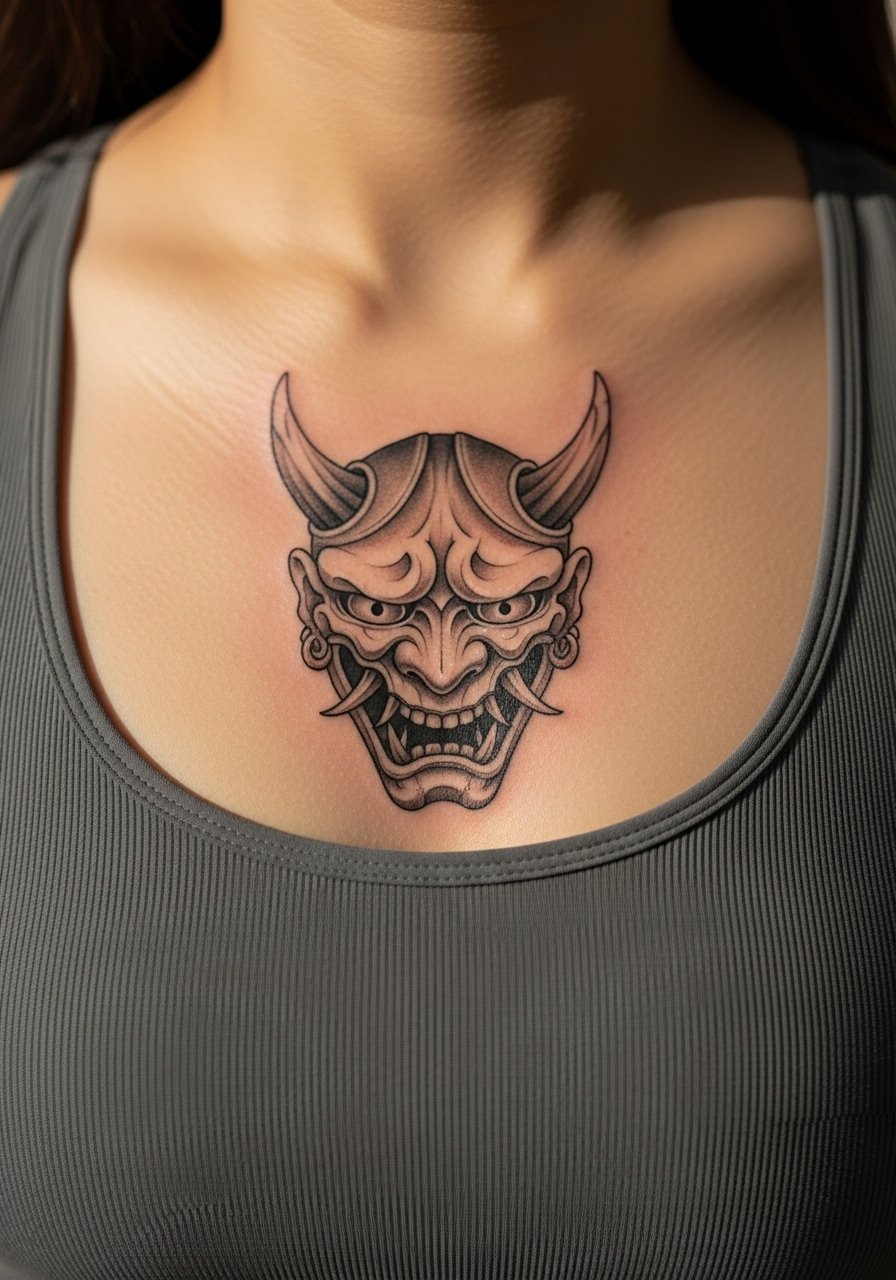
10. Collarbone Neo-Traditional Oni Wreathed in Small Flowers
Collarbone placement is visible and stylish when framed correctly. Ask for a neo-traditional approach with medium-weight linework so the piece photographs cleanly across different outfits. Pain can spike over the bone, but sessions are brief. Show-off pairing works well with a deep V-neck tee or textured fabrics that let the flowers sit against a simple backdrop. For collectors, this spot complements larger chest pieces if planned in the same session.
11. Minimalist Calm Oni Eyes on the Ankle
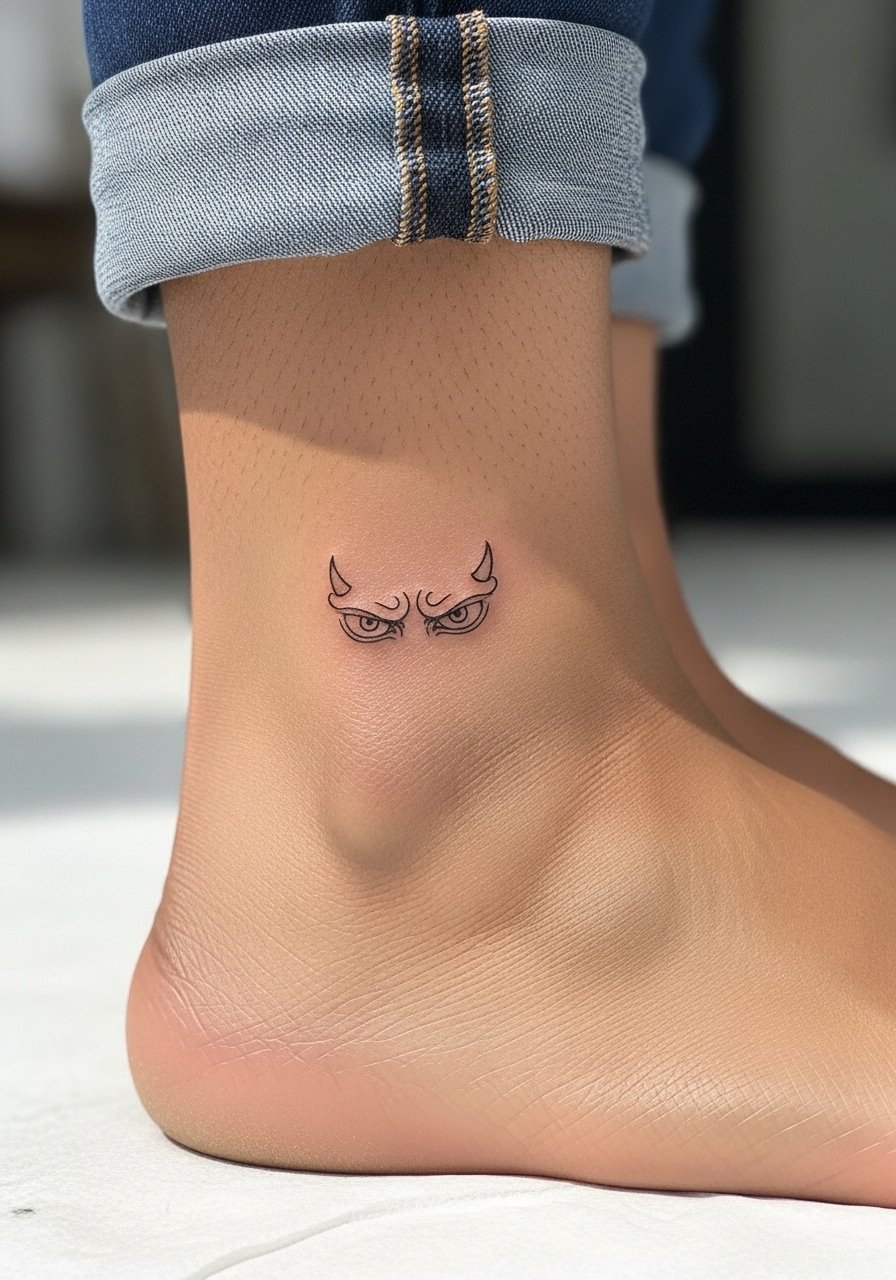
An ankle piece is low-key and easy to hide when needed. The biggest mistake is going too small in dense areas. I tell people to choose a size that keeps the eyes spaced at least a quarter inch apart so the lines age separately. Session pain is mild to moderate and healing depends on footwear choices for the first two weeks. For summer, wear high cut athletic shorts or sandals to show it off without rubbing the area.
12. Calf Black-and-Gray Oni with Subtle Glow, Collector Grade
This is for people who want collectors-level linework and controlled saturation. During consultation request stipple shading around the jawline and whip shading in the hair to avoid blocky fills. The controversy about color versus black-and-gray comes up here too. One camp prefers bright reds for folklore fidelity. The other camp favors black-and-gray for mysterious depth and longevity. Both approaches work if the artist plans saturation and touch-ups accordingly. Wear shorts for session access and choose pieces that let the calf sit as part of a larger leg plan.
13. Inner Bicep Calm Oni with Whispered Linework
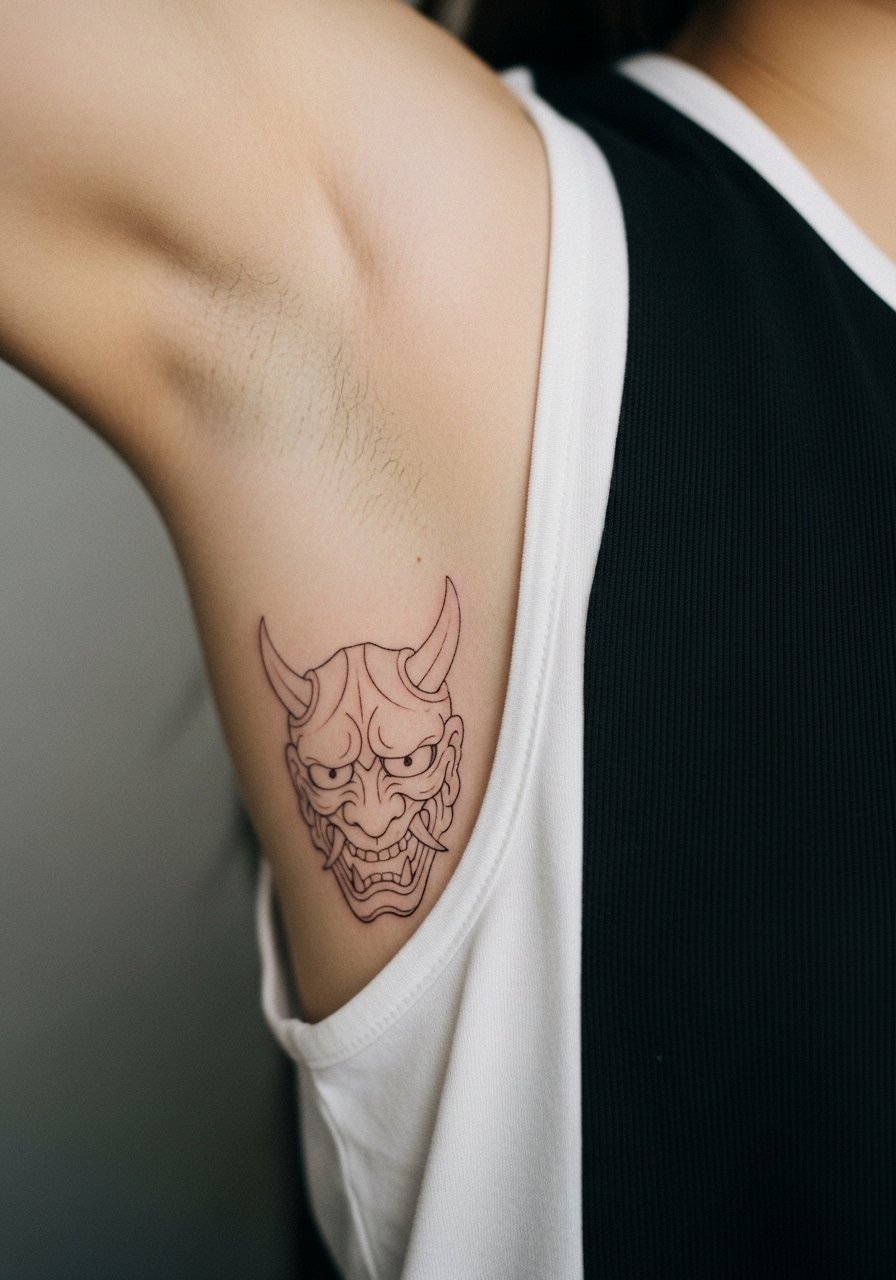
Inner bicep gives privacy and softness but it is a sensitive area. I often recommend slightly bolder linework than the client expects because the skin there can blur more under tension. The session feels tender and shorter than chest work. For comfort, wear a loose tank top you can lift and drop without strain. If you plan arm muscles changes, discuss sizing and flow with your artist so the mask does not distort.
14. Thigh Black Ink Oni with Heavy Contrast and Hair Details
This design favors bold blackwork and silhouette readability. The thigh is forgiving for heavy saturation and holds contrast through seasons. The common mistake is crowding too many tiny facial details into one compact mask. Instead, ask for defined negative space in the hair to avoid muddying. For show-off looks, pair with high-cut shorts or a slit denim skirt. Sessions may be split to let heavy black settle without overworking the skin.
15. Back-of-Hand Minimal Outline Oni for Micro Expression
Back-of-hand pieces are bold statements in small real estate. The aging reality is that lines here soften faster because of washing and sun. If you want this spot, pick thicker outlines and plan on annual touch-ups. The session is quick but uncomfortable for some. For styling, stack matte rings on the other hand rather than crowding the tattooed fingers. Be ready to discuss career and visibility since hand tattoos can still have social consequences in some fields.
16. Sternum Minimal Oni with Spanish "Mascara" Twist
This is an under-covered angle that brings a linguistic twist to the mask motif. Keep the lines spare and ask the artist to avoid dense fills near the sternum center. Sessions are intense and usually split. For session-day wear bring a fitted sports bra so the artist can work without fabric interference. A one-sentence cultural note helps here: if you lean into Spanish visual language, be clear about tone and references so the final reads like an adaptation rather than an appropriation.
17. Calf Half-Mask That Wraps Toward the Knee
This wrap-around composition gives movement without needing full back or chest space. Describe to your artist how far toward the knee you want the mask to travel so the negative space remains balanced. Session time varies but expect about two hours. For showing off, high-cut shorts reveal the flow without compressing the piece. Because this is a leg composition, it integrates well with future leg work if you plan a themed collection.
18. Small Wrist Observant Eyes for Everyday Wear
This is a scaled-down take for first-timers who want a daily wearable symbol. The mistake I see is choosing ultra-thin lines that vanish on darker skin. Tell your artist you prefer slightly heavier linework for contrast and test with temporary ink first. For session comfort wear sleeveless or pushed-up sleeves. A minimalist chain on the opposite wrist complements without obscuring the tattoo.
19. Calf Traditional Oni with Subdued Red Wash and Floral Border
If you like traditional palettes but want a gentler finish, request a muted red wash instead of saturated candy red. The floral border softens the mask edges and prevents the expression from dominating. This approach ages better than full-saturation red when the wash is well blended. Sessions are one to two blocks depending on size. Pair with seasonal shorts to display the floral border.
20. Lower Back Oni with Floral Flow
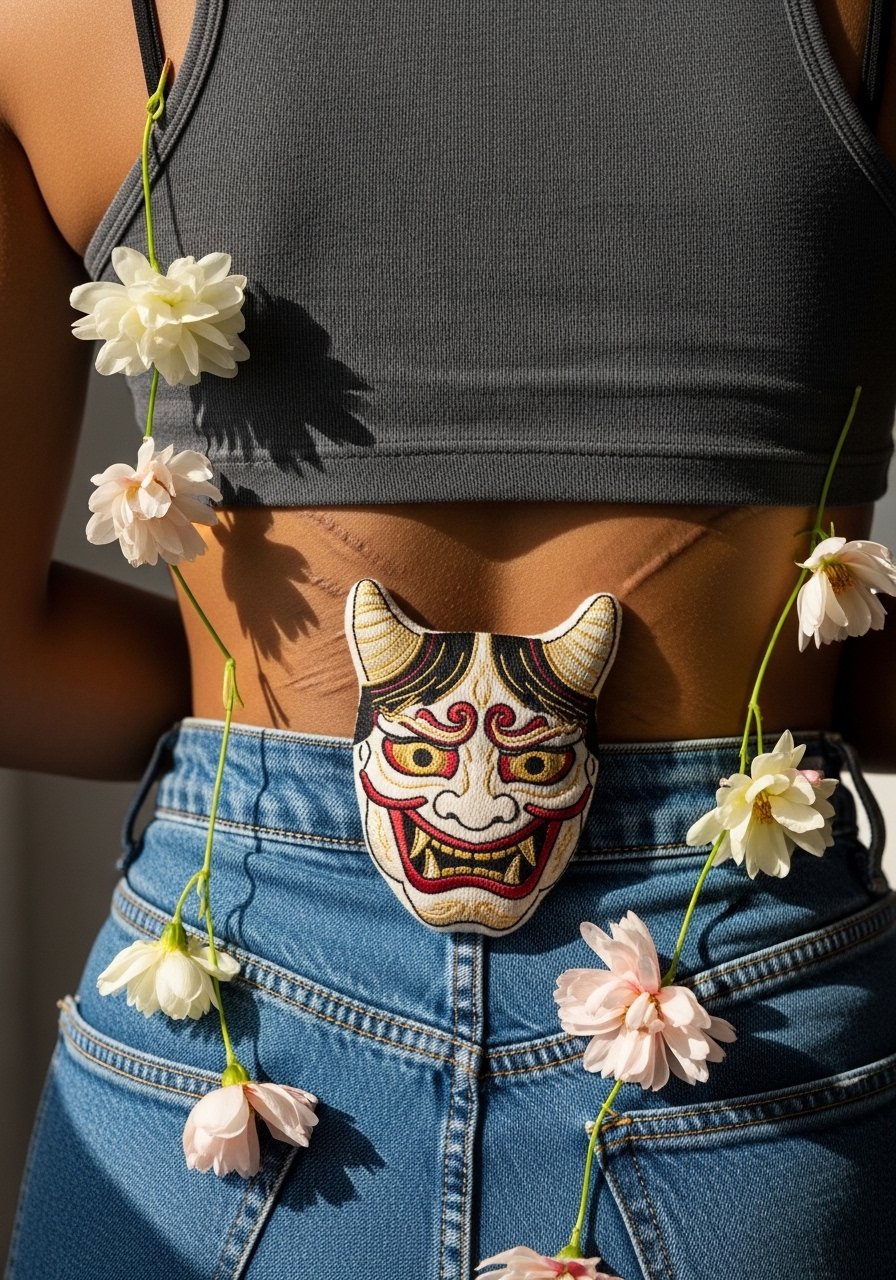
Lower back placement lets you make the mask an anchor for a floral cascade. The practical note is to use clothing that avoids tight waistbands sitting over the tattoo during early healing. Wear a tank top and jeans you can lower an inch for the appointment. The area tolerates saturation well and the flowers help break up any heavy darks so the mask appears softer in motion. This is a private-but-displayable choice.
21. Calf-to-Ankle Vertical Oni for Dramatic Movement
For visual drama without a full sleeve, the vertical composition reads like a spine of color and shadow. Specify how much negative space you want so the eye can follow the mask from top to bottom. Sessions might be split for comfort. For footwear choices after healing, sandals and rolled jeans show the piece without rubbing. This design scales well into longer leg narratives later.
Frequently Asked Questions
Q: How does a soft Oni mask tattoo age differently if I choose color over black-and-gray?
A: Color, especially red, tends to soften faster in high-exposure spots. Black-and-gray holds depth longer but can lose some contrast as skin settles. If you want color, ask your artist about layered saturation and an early touch-up plan. For visible placements pick UV protection routines to slow fading.
Q: Is a hand or wrist Oni a bad idea for longevity and career reasons?
A: Hands and wrists fade louder and need more touch-ups because of washing and sun. Career impact depends on your field. If visibility is a concern, place the mask on the inner wrist or choose a design you can partially cover. Also use thicker linework for better long-term readability.
Q: What should I say in my consult to get a softer Oni rather than an aggressive mask?
A: Bring references that show softened facial features, floral frames, and subtler horn shapes. Ask the artist to sketch with reduced fangs and to avoid heavy saturated reds unless you plan for touch-ups. Mention how you want the piece to read at arm's length and in photos.
Q: Where can I find artists who specialize in respectful Japanese-style Oni work?
A: Look through #OniMaskTattoo and #JapaneseOni on Instagram, search "oni mask tattoo [city]" on directories like Tattoodo, and check Pinterest boards with saved portfolios. Community forums like r/tattoos and r/tattooadvice also help for local recs without naming specific handles. Review healed photos and ask how the artist adapts traditional motifs.
Q: Can I get a small Oni eye or mini mask on dark skin and still have the detail show?
A: Yes, but the trick is contrast. Ask for solid black lines and slightly larger negative spaces between features. Testing with temporary ink helps preview scale. Expect touch-ups sooner if you choose very fine linework.
Q: How soon can I wear show-off clothes after a chest or sternum session?
A: Wait until the initial scab stage passes and the area no longer leaks, typically a week to ten days. For chest or sternum pieces, lightweight layers like a loose button-down or a wide-neck shirt are safe early options. During the first days pick fabrics that do not stick to healing skin.
Q: Do I need special clothing for thigh and lower-back sessions?
A: Yes. For thigh work bring loose shorts or joggers you can shift without pressure. For lower-back pieces wear a tank top with high-waisted bottoms that can be lowered an inch so the artist has clear access while you stay covered.
