
Fine line tattoos are everywhere on inspiration boards right now, but the reality is they behave differently depending on placement, skin tone, and aftercare. I've seen delicate gladiolus wrist wraps blur faster than expected, small poppies charged up on day one but look different healed on darker skin, and people surprised by price changes at the table. Read these practical ideas and prep notes so your August blooms still read like good decisions years from now.
1. Fine Line Gladiolus Wrist Wrap
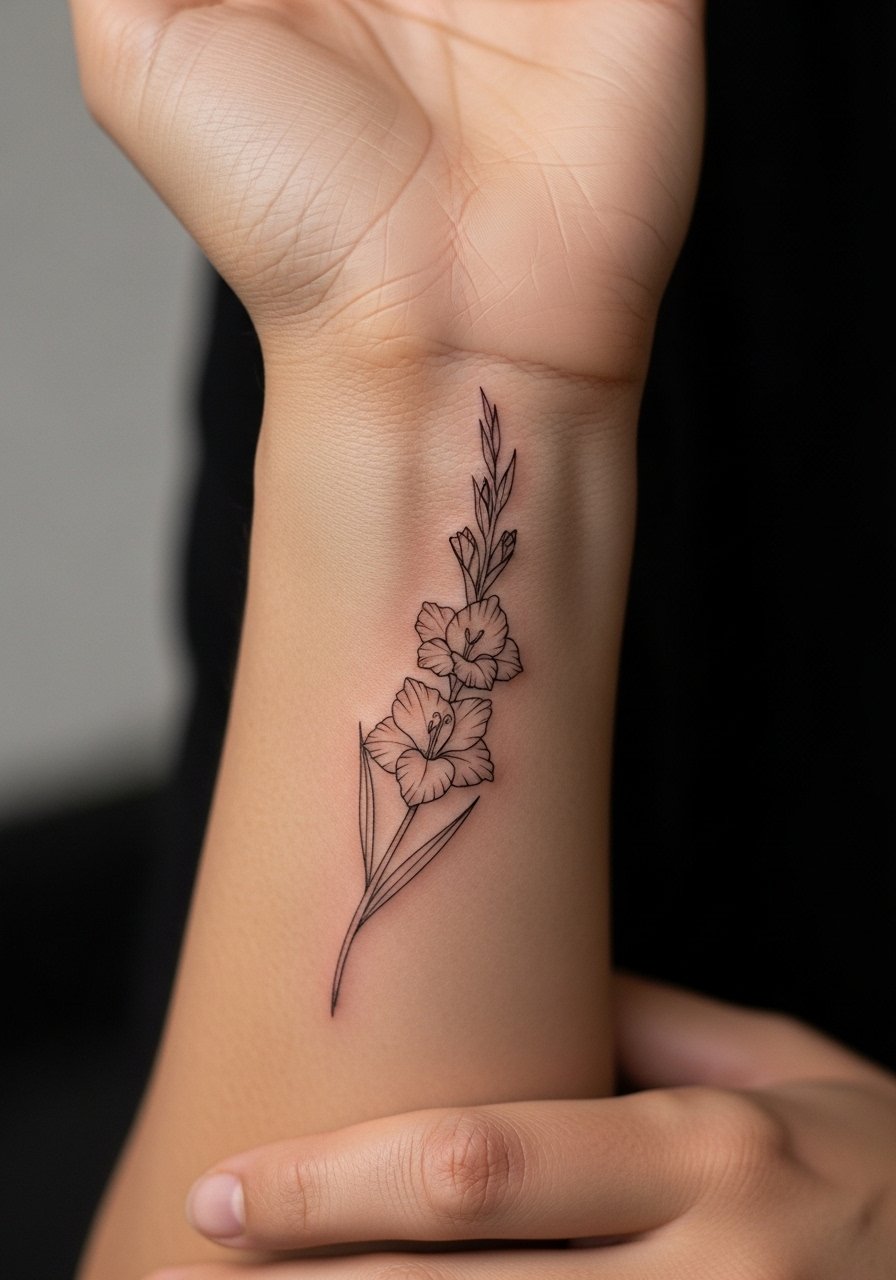
I recommend this when you want a linear piece that follows the motion of the wrist. Ask your artist for a single-needle outline with slightly increased spacing between key contours so the stem does not blur together in two years. Fair warning, the wrist is moderate on most pain charts, about a four out of ten. The common mistake is asking for the tiniest possible stem and expecting it to hold. Expect a short session of under an hour and plan a touch-up at year two if you love the original thinness. For showing it off, roll a cuff and stack a thin silver bangle set on the opposite wrist so the wrap reads intentional.
2. Minimalist Poppy on the Inner Wrist
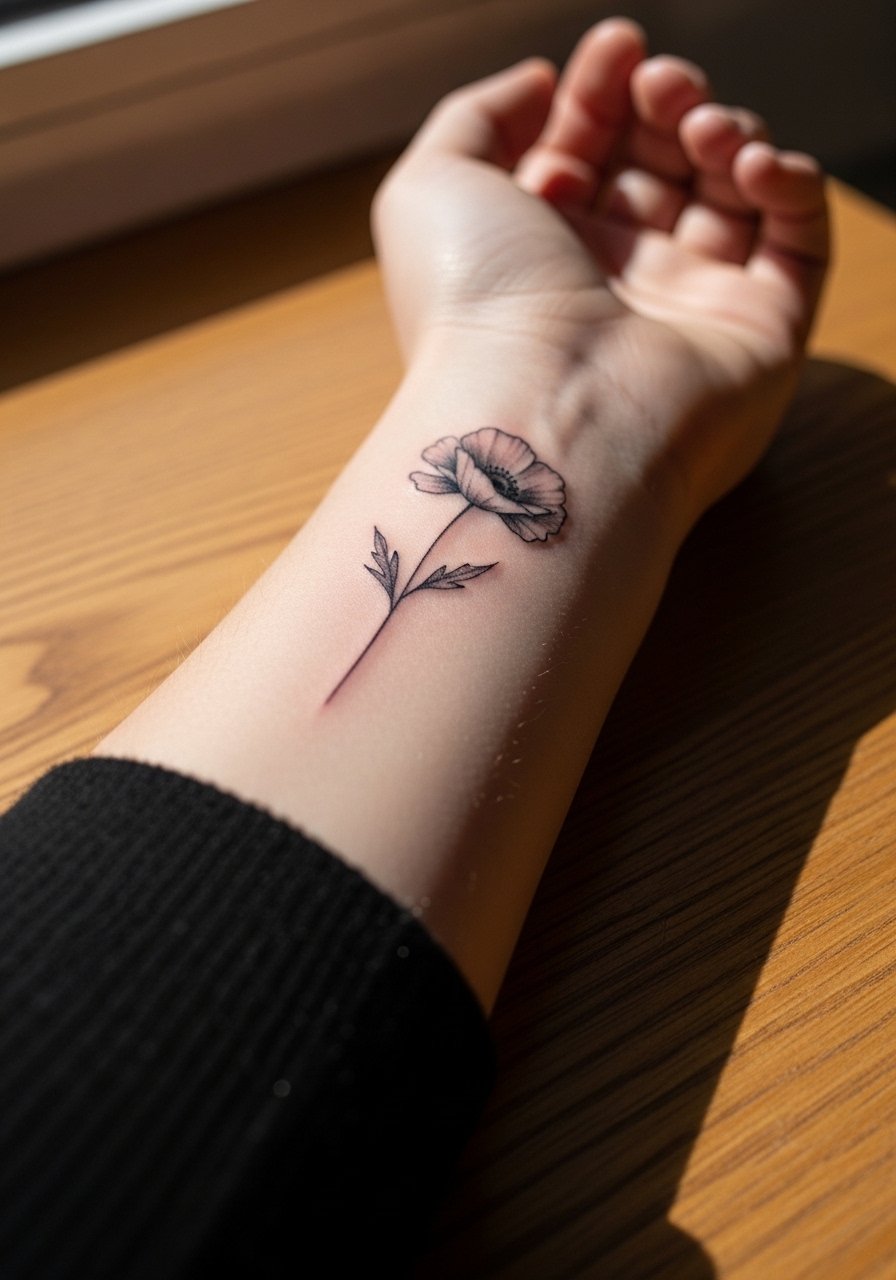
Most first-timers pick this because it reads discreet and meaningful. Tell your artist you want a small bloom roughly one inch in diameter with soft gray shading around the center so it does not sit as a hard dot that can spread. The inner wrist has similar sensitivity to the outer wrist, so expect a sharp buzzing for twenty to forty minutes. A common aging issue is that gray fill turns patchy if placed too close to the crease. For the appointment, wear a short sleeve tee you can push up easily and later pair the finished piece with a linen short sleeve shirt so the linework stays visible.
3. Watercolor Gladiolus Bouquet on the Shoulder

If you want painterly color without heavy outlines, this sits well on the shoulder where sun exposure is avoidable. Bring color swatches and say you want transparent washes in pink-red tones rather than saturated blocks so the piece ages into soft color rather than muddy patches. Shoulder sessions are forgiving on pain, often a two-part visit for a 4-6 inch composition. The outdated mistake is cramming watercolor into a tiny footprint. Larger scale lets the color breathe. For showing it off, choose an off shoulder sweater or a strapless top so the bouquet can peek out without competing jewelry.
4. Blackwork Poppy Outline with Geometric Accents on Forearm
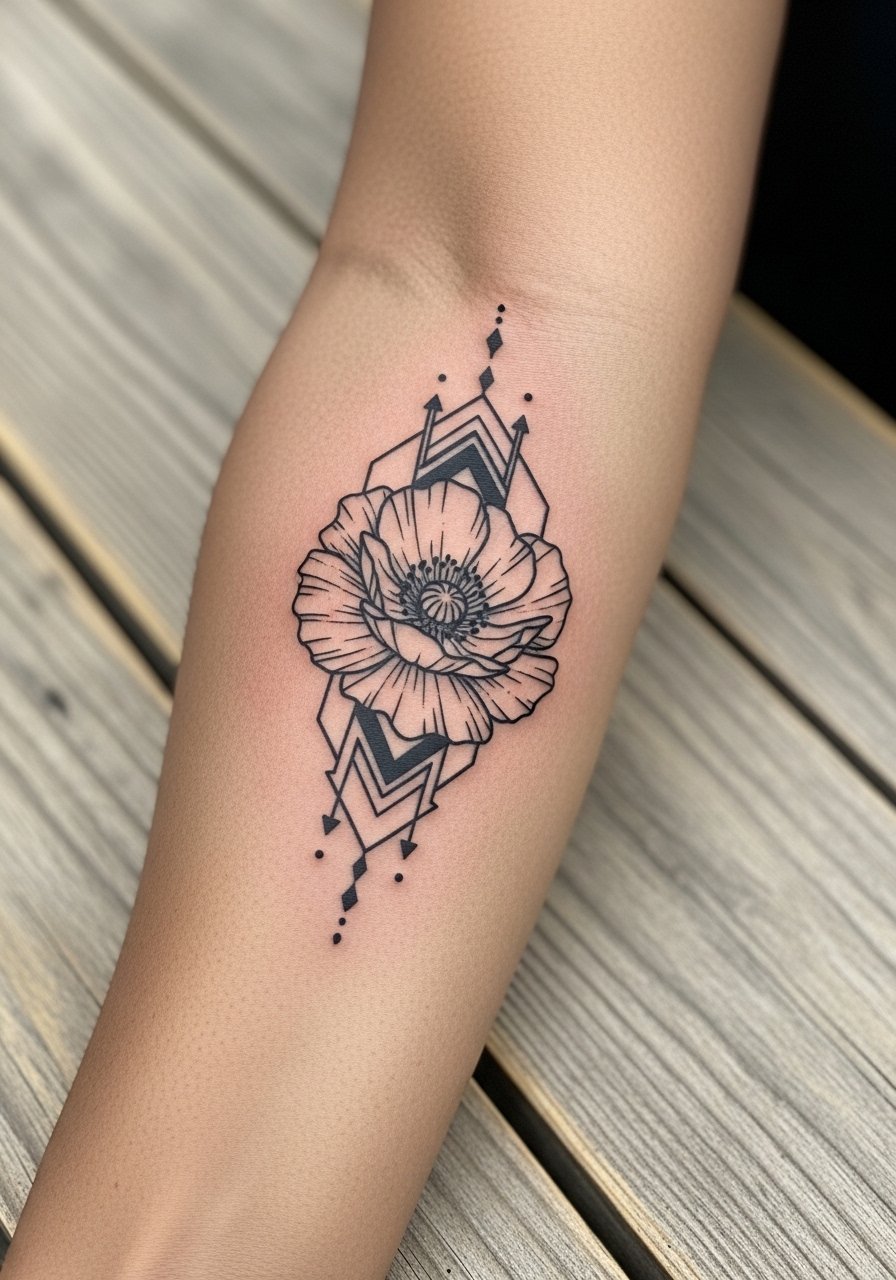
This is a good option if longevity matters more than a fresh washed look. Bold blackwork holds well on varied skin tones and the geometric elements give structure that survives stretching. In consults, specify solid fills and clear negative space so the shapes do not merge as the skin ages. Expect one to two sessions depending on size, with the forearm being low on the pain scale. A common misstep is requesting tiny geometric detail that looks crisp at first but blurs quickly. For wardrobe, wear a loose button-down shirt you can roll up during the session and later cuff to frame the piece.
5. Micro-Realism Gladiolus Petal on the Collarbone
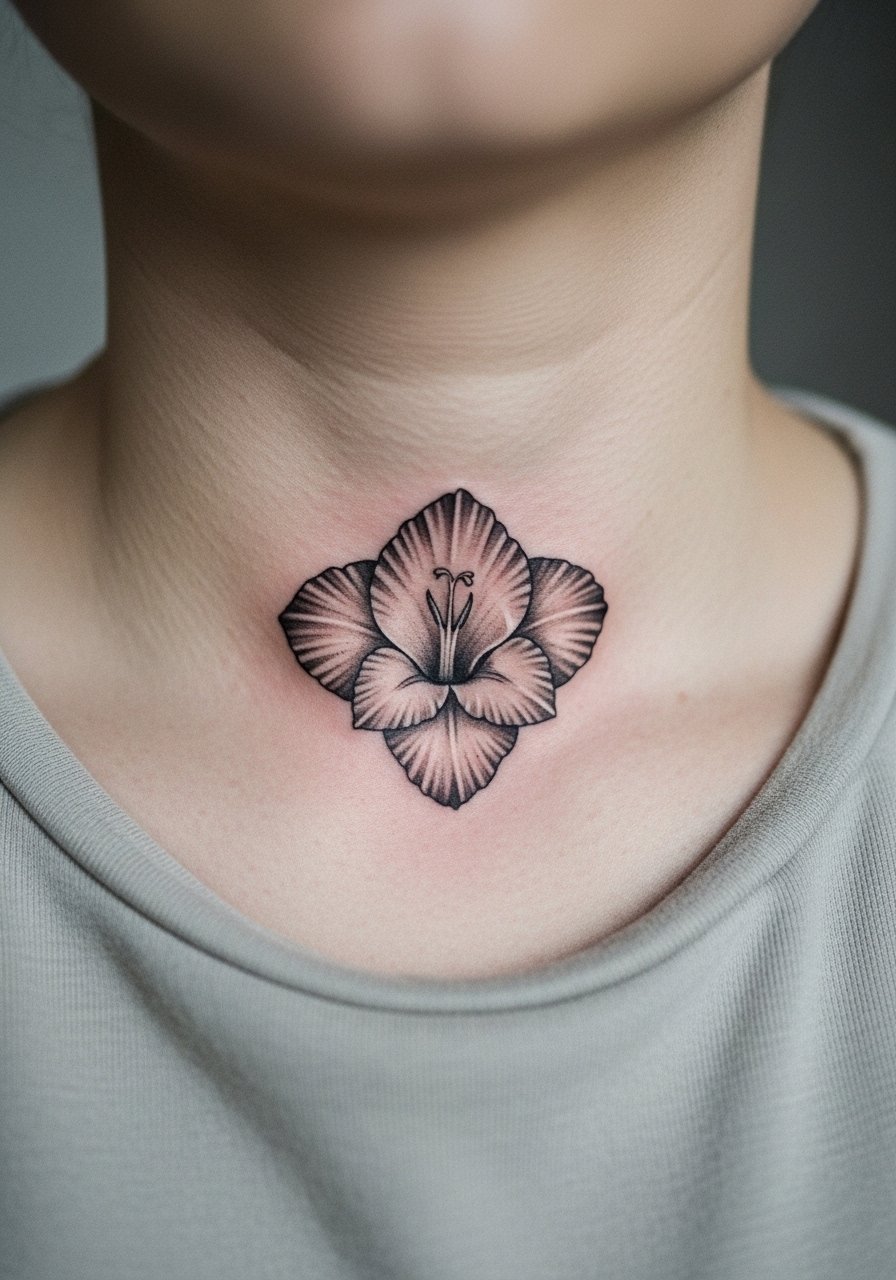
Micro-realism works well on the collarbone because the curved surface lets tiny texture read as three dimensional. Tell your artist you want grain and tiny vein work in the petal rather than a heavy outline. Collarbone sessions are low to moderate in pain and brief for a small petal. The mistake I often see is trying micro detail too small, which vanishes as it heals. Expect the look at six months to keep most texture, and plan for a touch-up at year three if you want to maintain the original crispness. Pair the healed piece with a v neck silk blouse that lets the petal sit above a pendant.
6. Ornamental Poppy Mandala on the Ankle
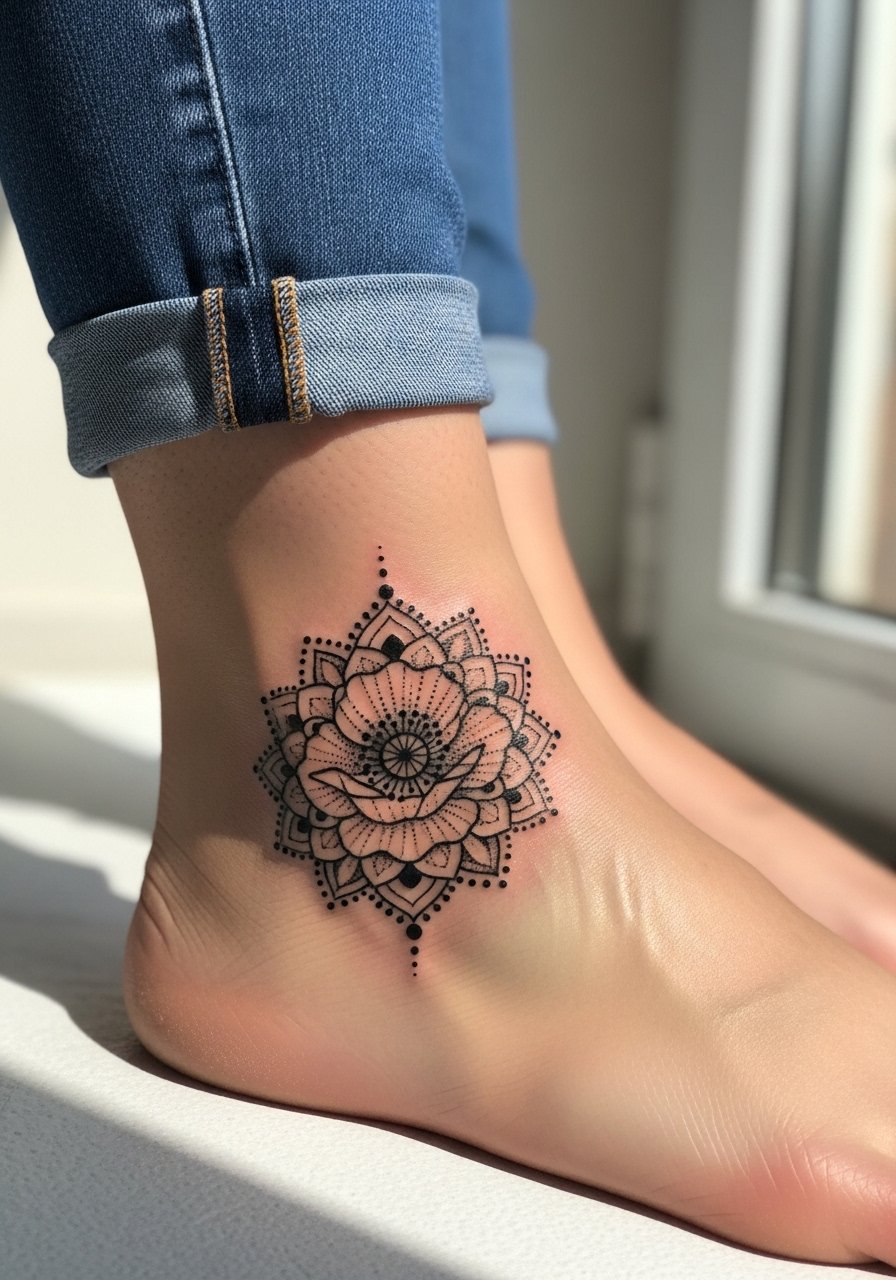
An ankle mandala turns the flower into a meditative cuff that reads like jewelry. Ask for dotwork spacing and heavier outer rings so the mandala maintains contrast as hairline dots soften. Ankle sessions are quick but the area can feel scratchy because of thin skin. Friction from shoes is the main aging factor, so plan placement on the outer ankle instead of the high friction zone near the shoe seam. For show-off outfits, cuff wide-leg linen pants and layer a delicate anklet chain on the opposite leg. Expect two sessions if adding complex dot shading.
Studio Day Picks
The wrist and collarbone pieces above need different session prep than the shoulder and ankle work, so these five items smooth the process and the first week of healing.
-
Indie tattoo balm thinner than Aquaphor. Lighter texture helps fine line pieces avoid clogged channels while still locking in moisture during the first two days.
-
Australian aftercare spray for dry climates. A spray can be less greasy on small wrist and ankle tattoos and reduces the need to touch the area.
-
UK botanical oil blend for floral tattoos. Gentle oils add a sheen that keeps color saturated in the months after initial peeling.
-
Fragrance-free body wash. Use a gentle cleanser in showers to avoid stripping the tattooed skin, especially on shoulder and collarbone pieces.
-
Aquaphor healing ointment. A thin layer in the first 48 hours soothes the area and keeps very fine lines from scabbing heavily.
7. Fine Line Gladiolus Up the Spine
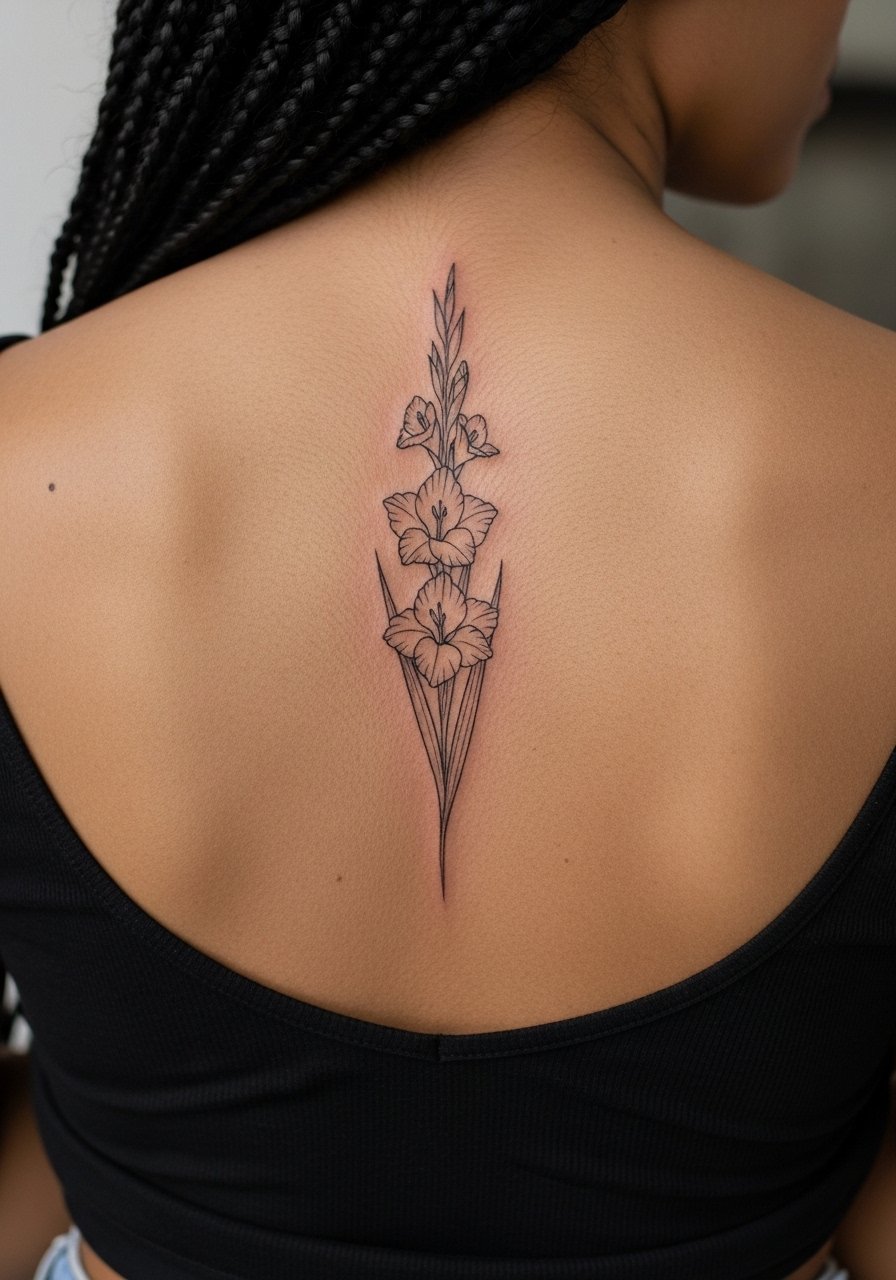
Artists split on fine line for vertical spine pieces. One camp argues the skin movement along the back blurs single-needle work within a couple of years. The other camp says with proper depth and spacing it settles fine. I advise asking the artist where they land on that debate before booking. The spine gives a graceful vertical read and suits slightly larger spacing than a wrist wrap. Pain runs moderate to high depending on proximity to bone. The frequent mistake is compressing too many blooms into a narrow column. Ask for measured negative space and expect a touch-up conversation at the consult.
8. Neo-Traditional Gladiolus and Poppy Thigh Cluster
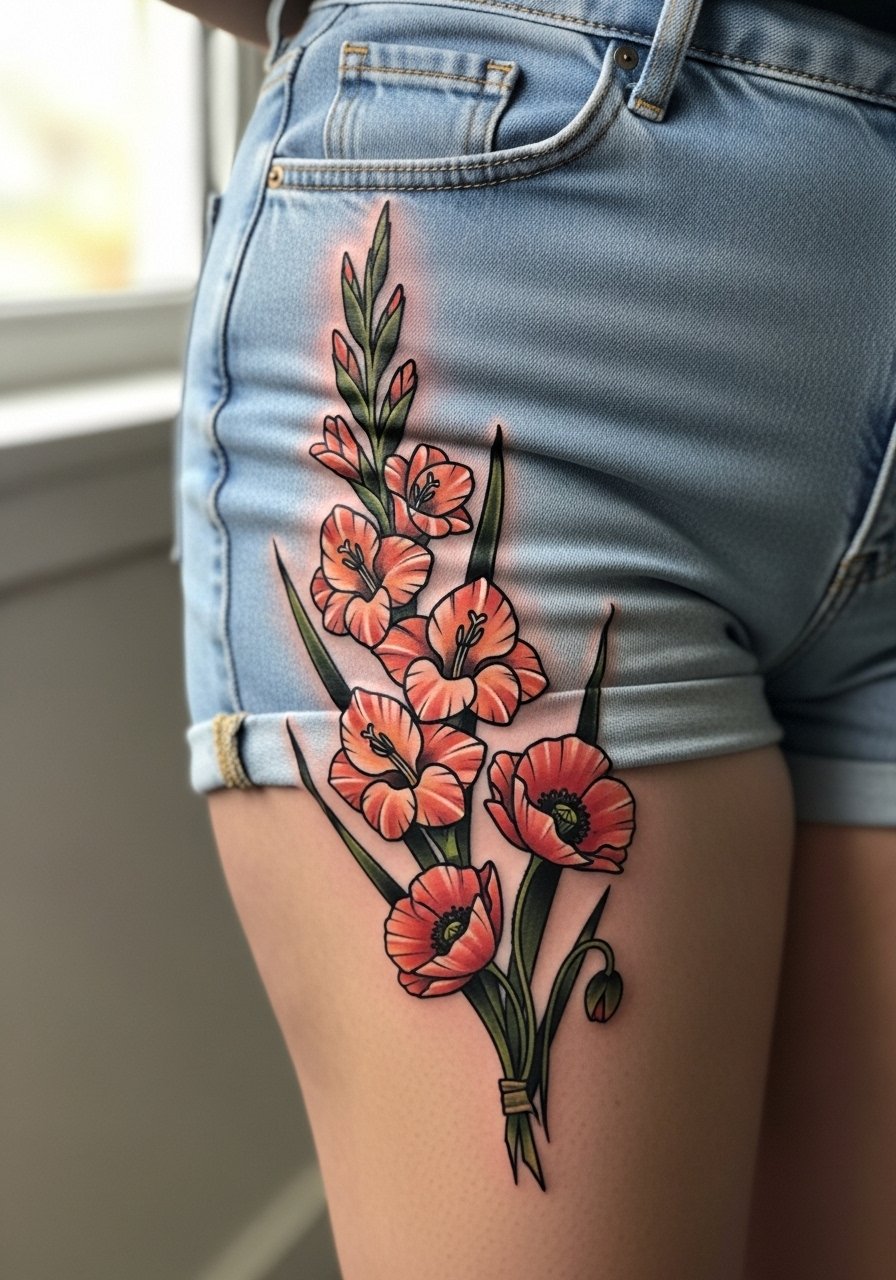
Thigh placement is forgiving for scale and color transitions, and neo-traditional shading maintains saturation over time. If you lift weights or plan major size changes, keep in mind stems can distort with large shifts in body composition. Ask your artist for bolder outlines around key petals so the composition survives mild stretching. Sessions are comfortable because the area has padding, but this style often needs two to three visits for saturation. For show-off outfits, high-waist shorts in olive or denim frame the piece, and thigh-high socks give an edge for winter looks.
9. Ignorant Style Poppy Burst on the Calf
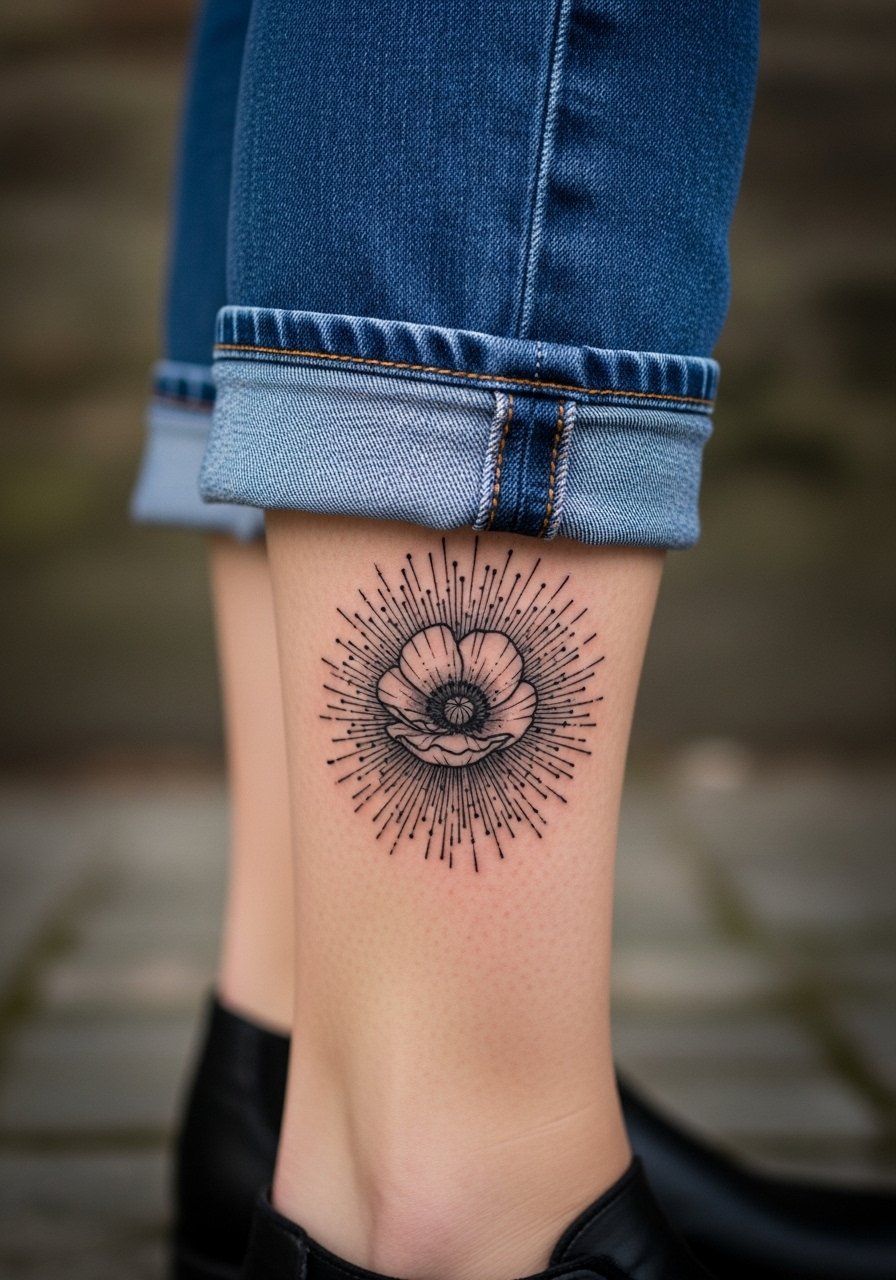
Ignorant style trades precision for energy, and the calf is a great canvas for loose, playful strokes. Tell your artist you want expressive scribbles that read as intentional, not accidental. The calf has low sensitivity and sessions feel steady, with standing breaks to stretch. Common errors include asking for micro detail in this style that contradicts the aesthetic. For outfit pairing, roll a pair of rolled bootcut jeans so the burst peeks out above footwear. Expect minimal touch-ups if the strokes are kept bold.
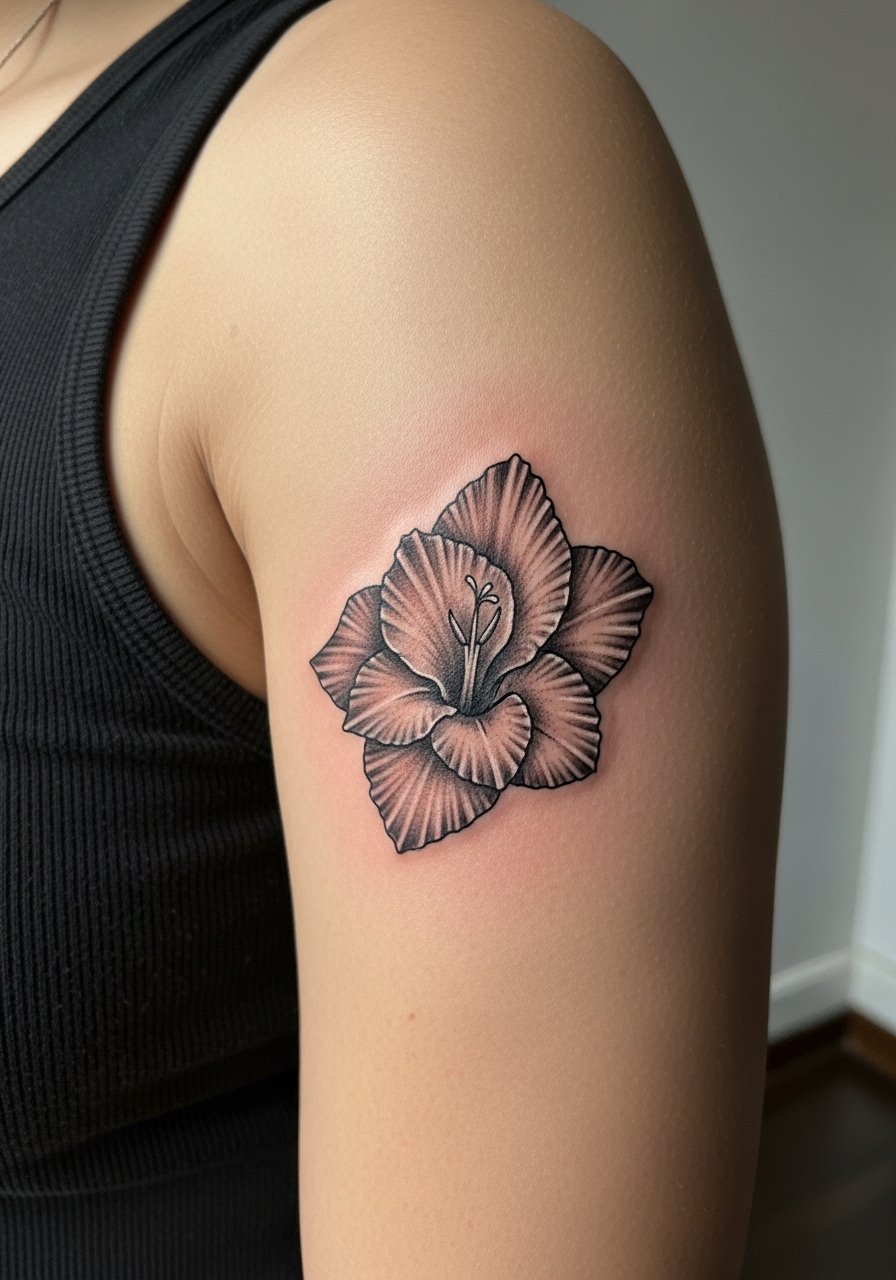
10. Traditional Gladiolus Sword Motif on the Upper Arm
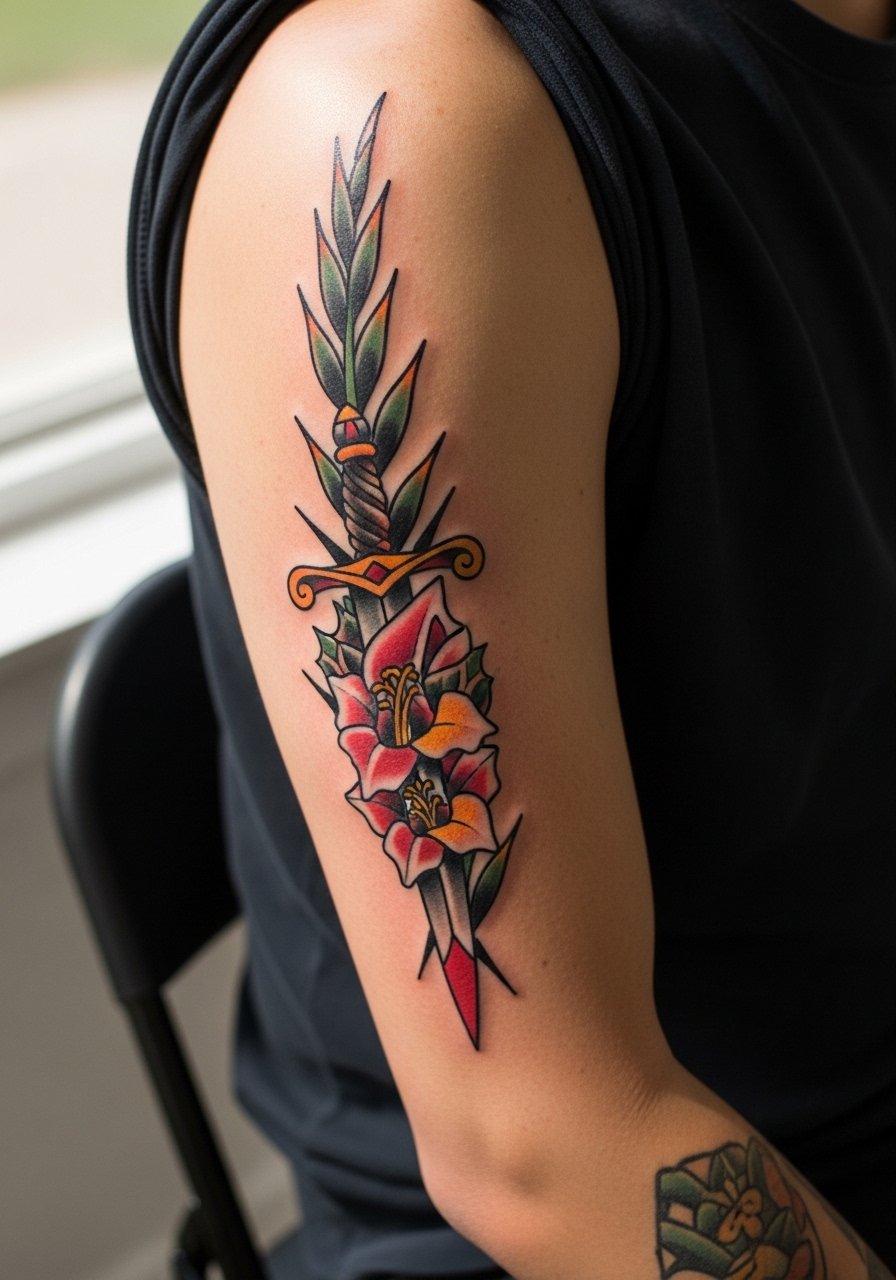
If you want a design that ages into a strong silhouette, traditional saturation and heavy outlines are reliable. Specify saturated reds and clean black outlines and avoid tiny interior linework. Upper arm is forgiving for color intensity and the session can span multiple hours across visits. Mistakes happen when clients request micro shading inside thick outlines, which can muddle with age. For session wear, throw on a loose tank so the artist has clear access and the movement of the arm during healing does not tug at fresh ink.
11. Minimal Stem Gladiolus on the Inner Forearm
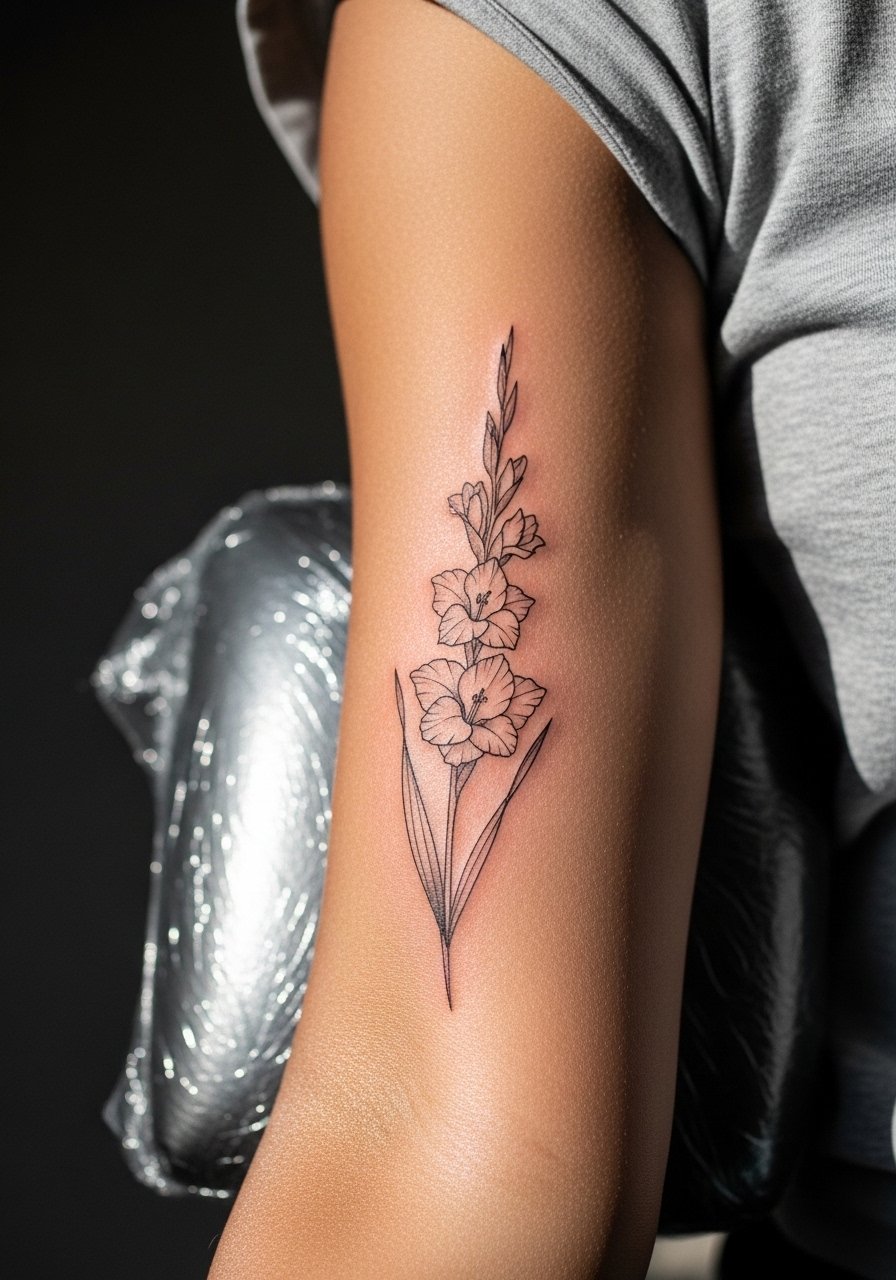
A minimal inner forearm stem reads clean when the line weight is slightly bolder than single-needle work. My consultation tip is to request a steady line rather than the faintest possible trace. The inner forearm is tolerant but constant sun exposure can wash delicate lines by year three. The session feels calm and usually takes under an hour. A common error is matching the line weight to a photo taken in studio lighting that gave the piece unnatural crispness. For apparel, a loose button-down shirt pushed up on one sleeve shows the stem without covering it.
12. Poppy Center Dotwork with Negative Space on the Collarbone
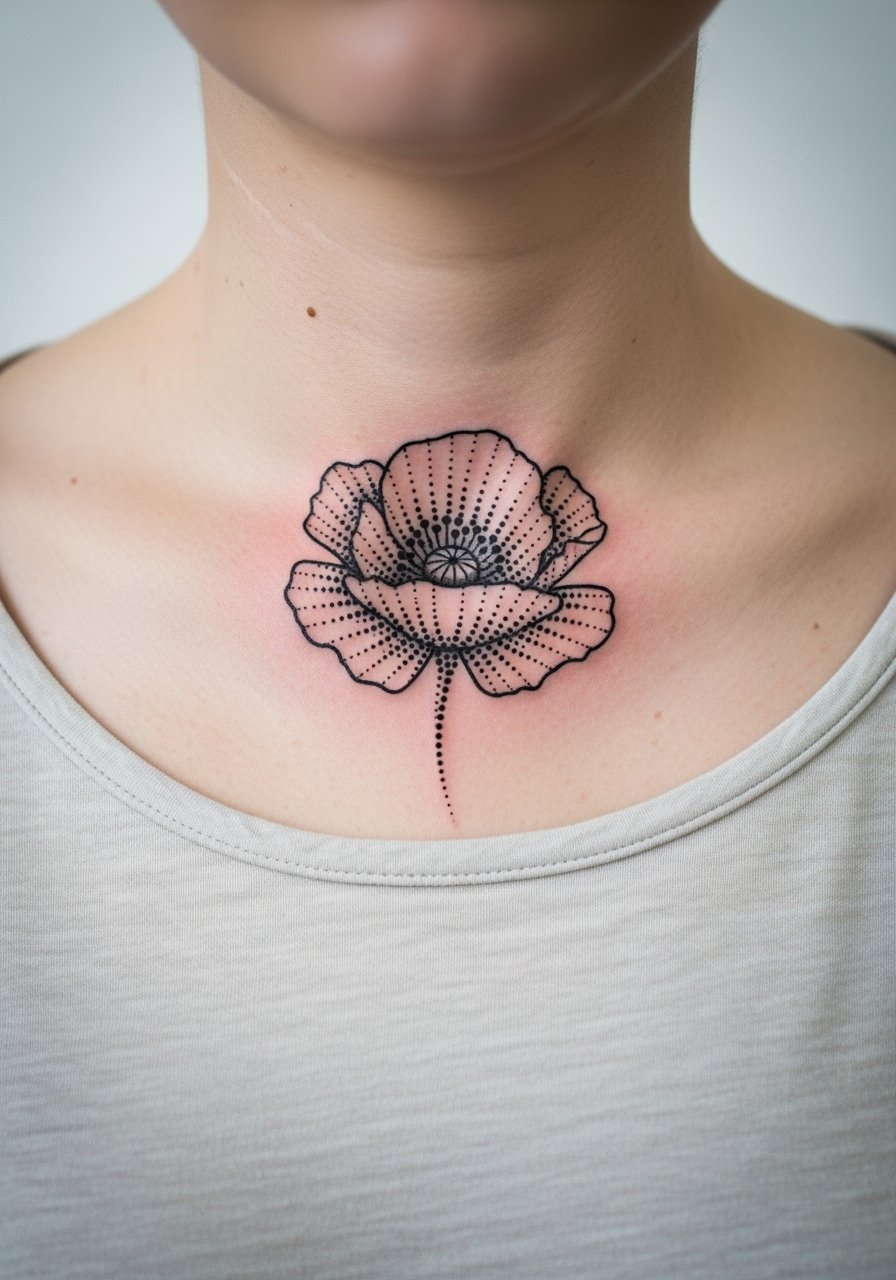
Dotwork centers create optical depth without heavy color fields, which helps the collarbone keep crisp contrast over time. Tell the artist you want graduated dot density that fades into negative space around the center so the illusion persists as the skin settles. Collarbone is a visible yet delicate zone, so plan for brief touch-ups at two to three years. A design mistake I see is packing too many central dots into a small area which then softens into a single tone. Pair the healed piece with a dainty pendant necklace that sits beneath the negative space.
13. Compact Poppy Mandala Behind the Ankle
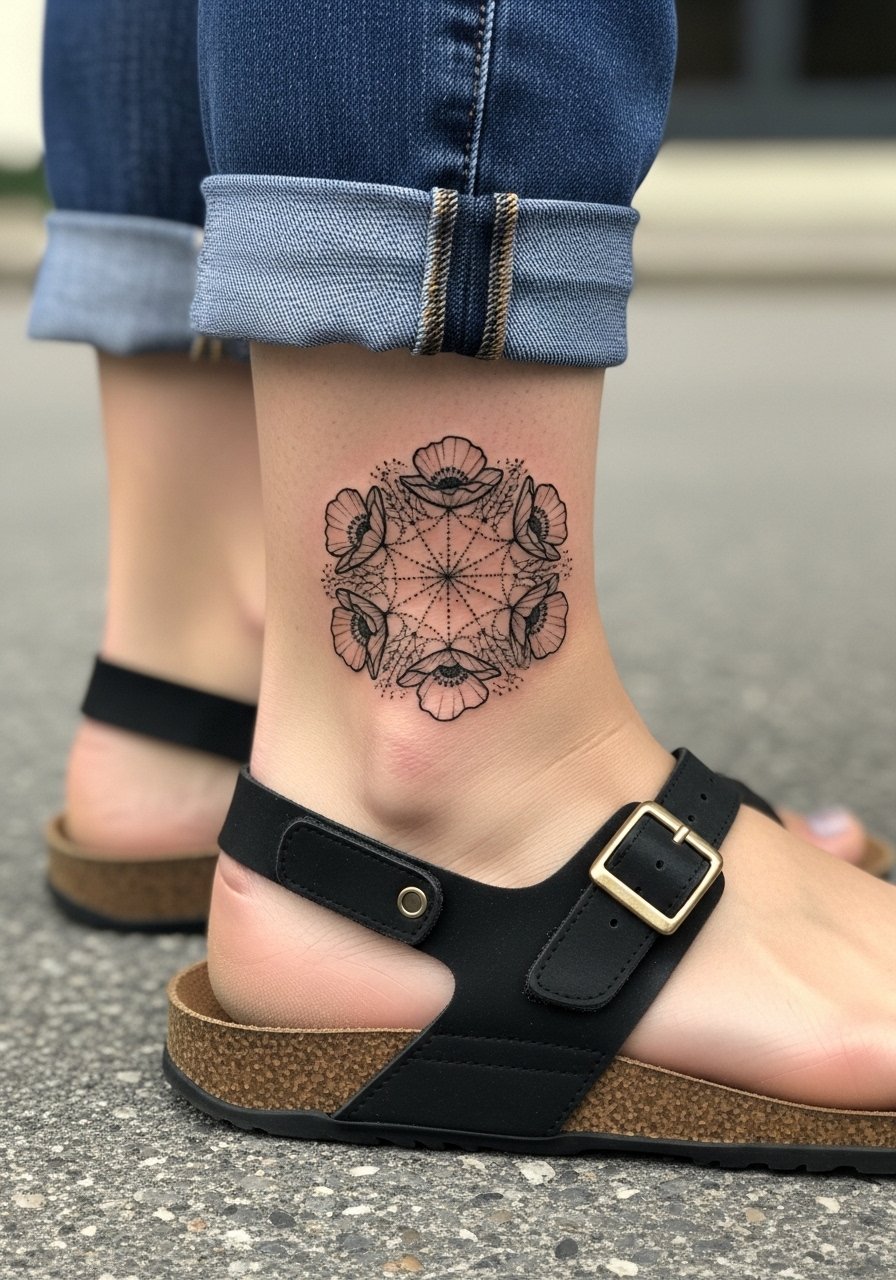
Putting an ornamental poppy mandala near the ankle reads like a seasonal cuff. The key is keeping the overall diameter big enough that dots and inner rings maintain separation. The Achilles area can be sensitive during movement while healing, so expect irritation from socks and shoes if not managed. A usual oversight is placing the mandala too close to shoe seams where friction erodes detail. For showing it off, cuff wide-leg linen pants or choose sandals that let the design breathe on summer days.
14. Micro-Realism Gladiolus Petal on the Inner Bicep
Inner bicep pieces heal in a protected pocket and micro detail can last well if scaled correctly. A consultation instruction to share is to request slightly heavier texture so veins and grain do not disappear into healed softening. The inner bicep is more painful than the outer arm but less than ribs, and sessions are short. Mistakes include pushing photorealism into a space too small for it. Ask your artist about expected touch-up windows because friction from clothing can speed fading.
15. Single Poppy Dot on the Finger
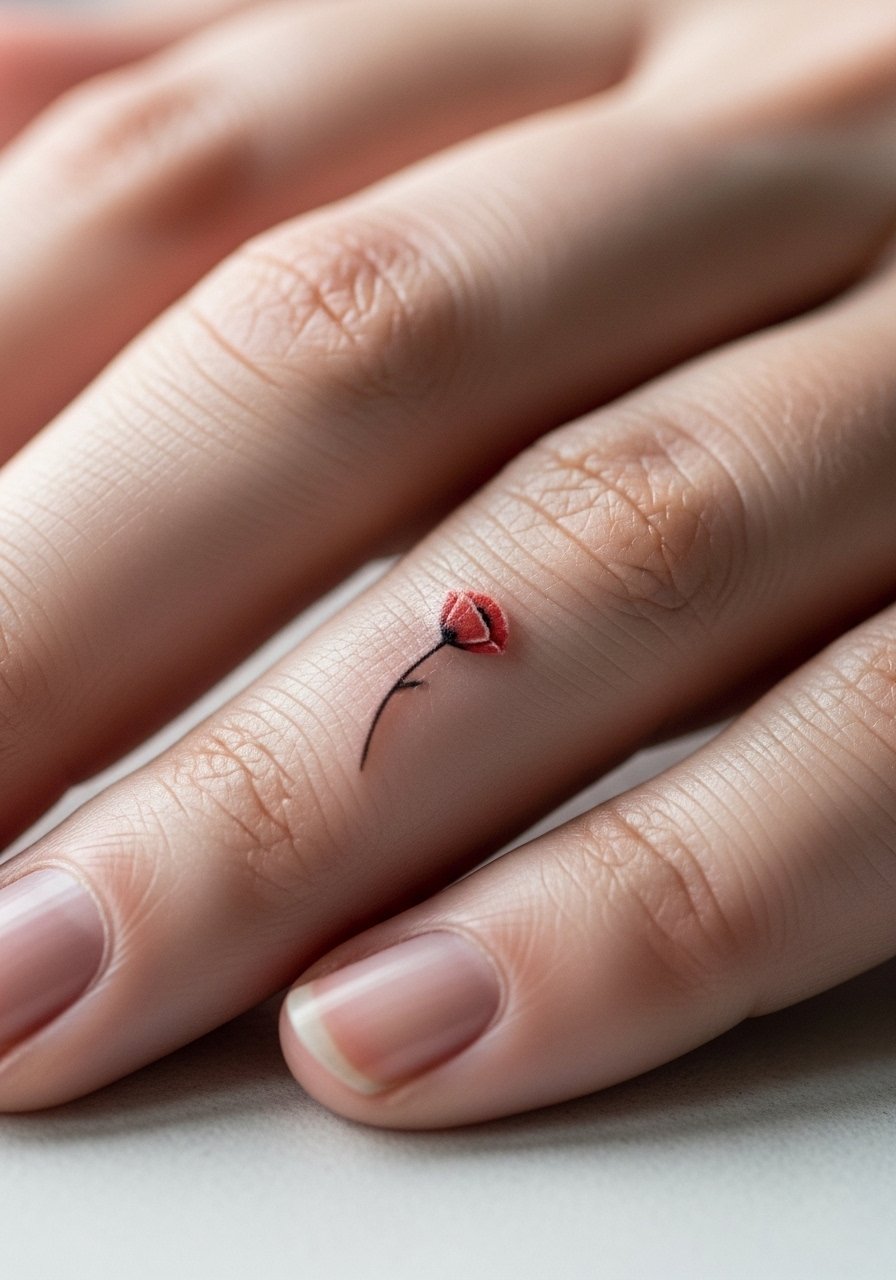
Finger tattoos are bold commitment because they face constant washing and friction. For a small poppy dot, recommend the artist place the pigment slightly deeper and use a simple, sealed silhouette rather than many tiny strokes. The healing timeline is fast but long-term touch-ups are common. A typical mistake is expecting a finger piece to hold like an arm piece. The session will be quick and sharp, and you should plan for a yearly touch-up if it is in active use.
16. Sternum Gladiolus Accent
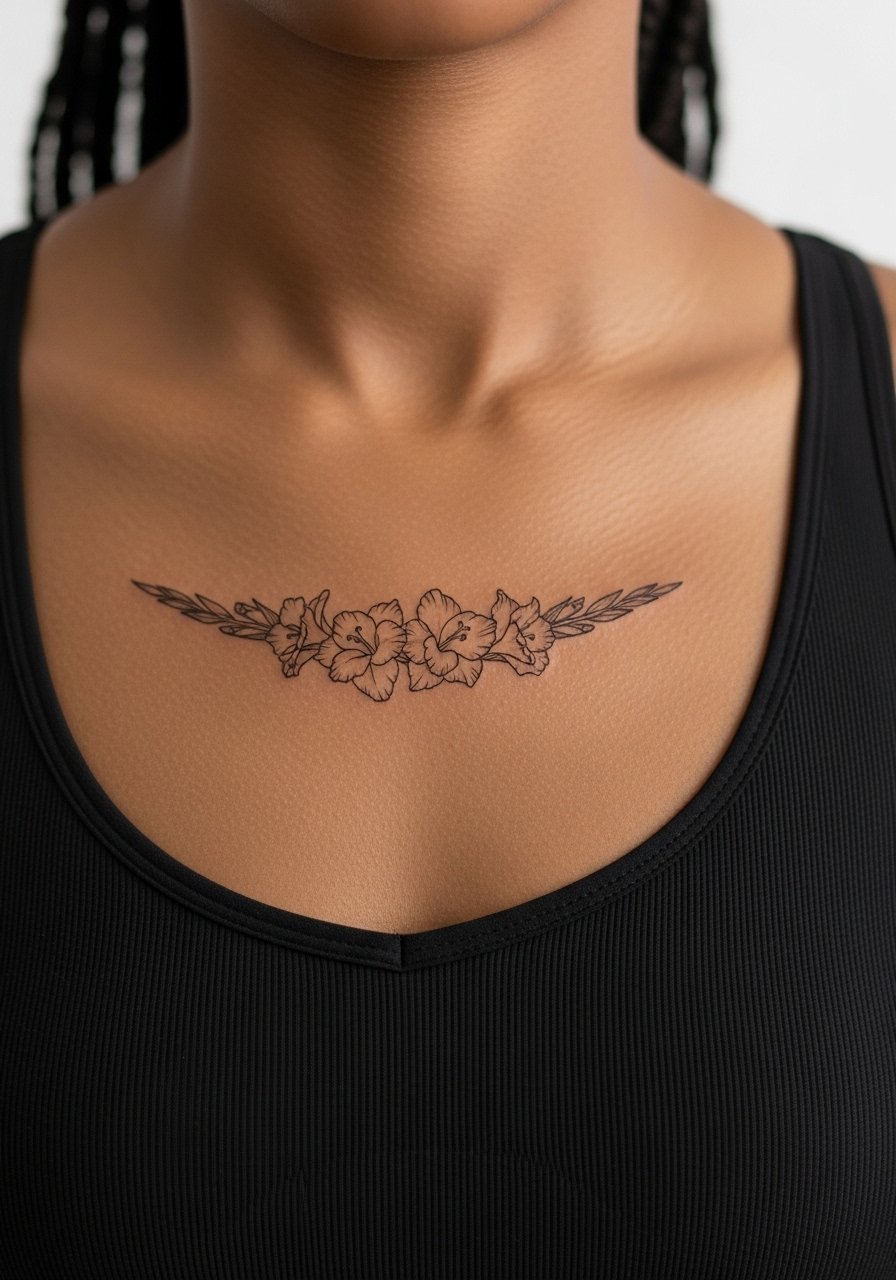
Sternum work needs an artist familiar with central chest curvature because lines can warp if they do not follow the rib flow. This placement is more intense on the pain scale but sits flat and reads well under certain tops. For consults, request the stencil be viewed in a mirror while standing to check symmetry. One common complaint is choosing a stencil that looks fine flat but skews with breathing. If you want to show it selectively, wear tops with a fitted neckline or a bandeau that frames the piece.
17. Hip and Upper Thigh Gladiolus Cluster
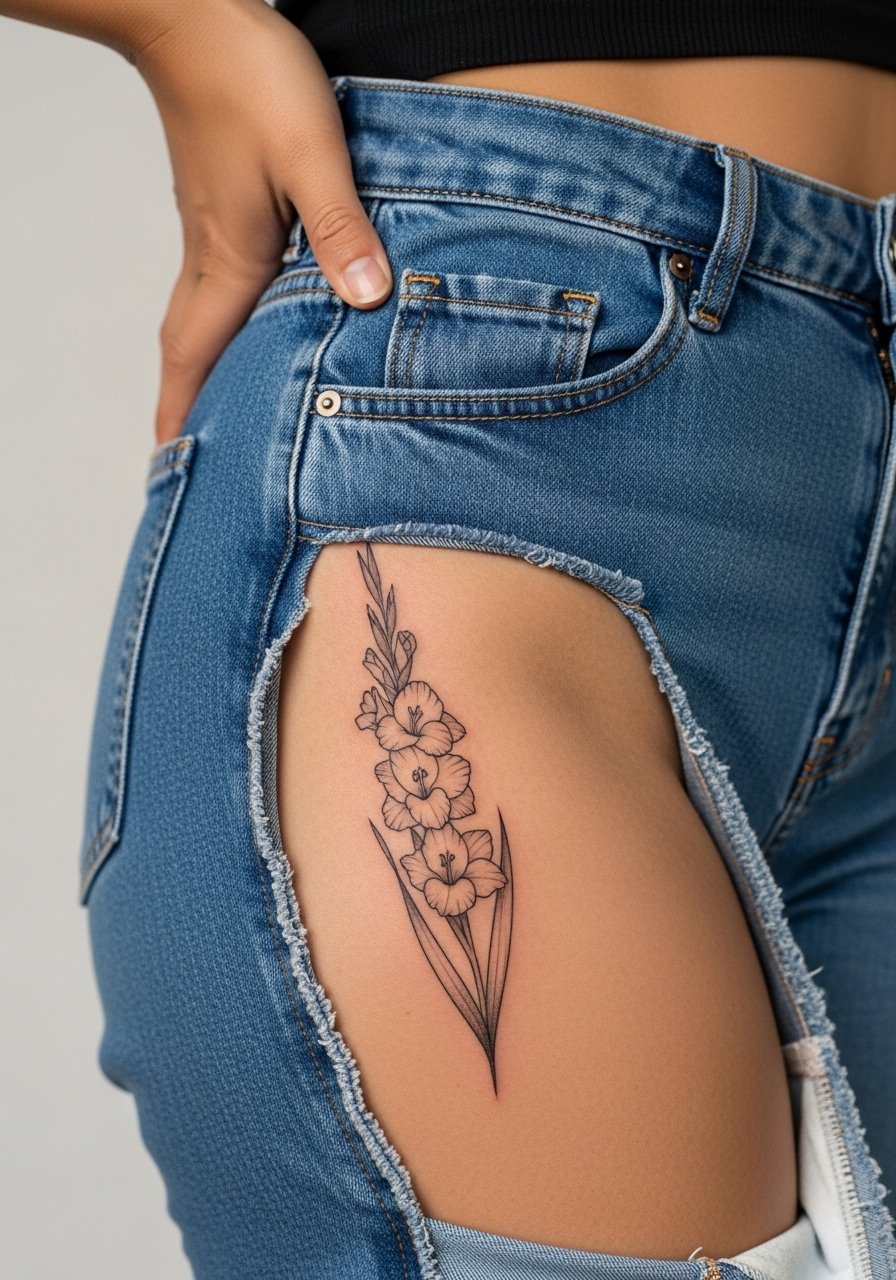
This placement is discreet and ideal if you want scale without daily visibility. Ask for slightly bolder stems where the hip curves so the piece keeps definition through movement. The hip area can be sensitive near bone but the upper thigh portion is forgiving and comfortable for multi-hour sessions. A frequent mistake is compressing a large composition into a small hip patch. For session wear, choose high-cut shorts you can shift so the artist has clear access and the area recovers without fabric pressure.
Frequently Asked Questions
Q: Do fine line gladiolus pieces fade faster than bold-work versions on wrists and forearms?
A: From what I have seen, fine line tends to show softening sooner on high-movement zones like wrists. Bold blackwork holds contrast longer. If you want the fine look, plan touch-ups at year two to three and protect the area from sun as much as possible.
Q: How should I avoid surprise price increases at the studio?
A: Ask for a written estimate that includes session time and a scope note about detail. Clarify whether color changes or added shading will be billed separately. Booking a consult with the artist and confirming the plan ahead usually prevents sticker shock at the chair.
Q: Can gladiolus or poppy designs stretch badly on the thigh after weight change?
A: Thigh skin can expand with major weight shifts and that affects long vertical stems. If you expect large changes pick rib or collarbone anchoring points instead. If the thigh is essential, ask your artist to plan bolder outlines and slightly more spacing so the design can tolerate mild stretching.
Q: Do poppies and watercolor pieces show differently on darker skin tones?
A: Yes, some color palettes translate differently across tones. I recommend asking to see healed examples on similar skin when possible and lean toward stronger contrast or blackwork accents to keep the shape readable. For appointment day, consider a top you can pull aside, like a strapless bralette, so the artist can place and view the stencil accurately.
Q: Are there placements to avoid if I want fewer touch-ups on fine line work?
A: Avoid high-friction and high-sun zones for ultra-thin linework. The inner forearm, upper spine, and collarbone tend to hold detail better than fingers, hands, and the top of the wrist. If you pick a sensitive spot, accept touch-ups as part of maintenance.
