
Fine line crosses are everywhere online right now, and the reality is they do not age the same way on every body. Some pieces that look incredible fresh will blur into soft patches in a couple of years, while bold blackwork can remain readable for a decade. Expect trade offs between look, placement, and maintenance, and read the first idea to see a wrist-ready version that holds up.
1. Minimalist Outline Cross on the Wrist
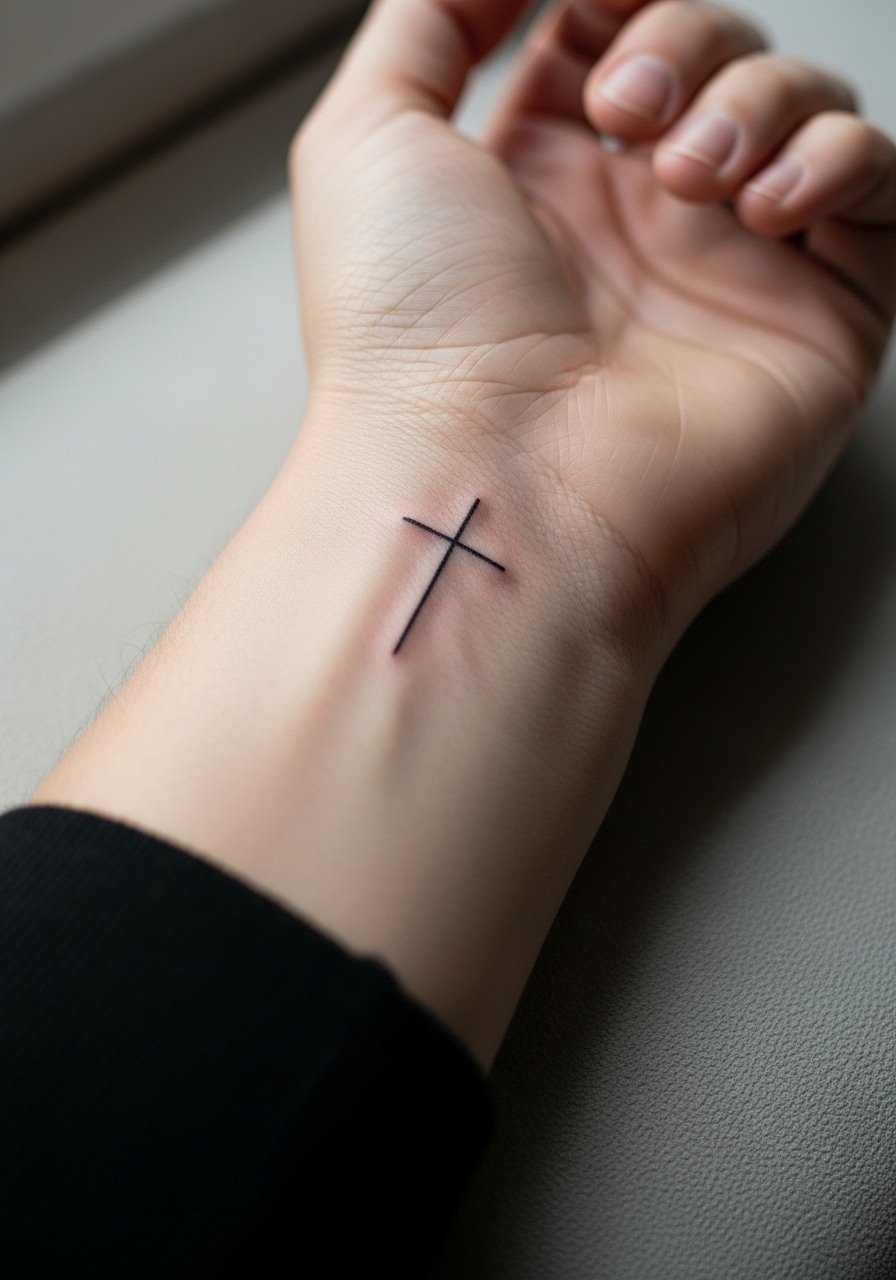
I recommend this for a first small piece because the linework reads crisp and it is fast to heal. Tell your artist you want a single-line outline at roughly one inch, and ask for slightly thicker lineweight than a hairline so the cross does not vanish after a year. Common mistakes include asking for the absolute thinnest line and then needing a touch-up at year one. The wrist bends a lot, so expect a moderate sting during the session and plan for a short touch-up window at 12 to 18 months. Pair it with a thin chain bracelet on the opposite wrist to show the piece without crowding the spot.
2. Fine Line Celtic Cross on the Inner Forearm
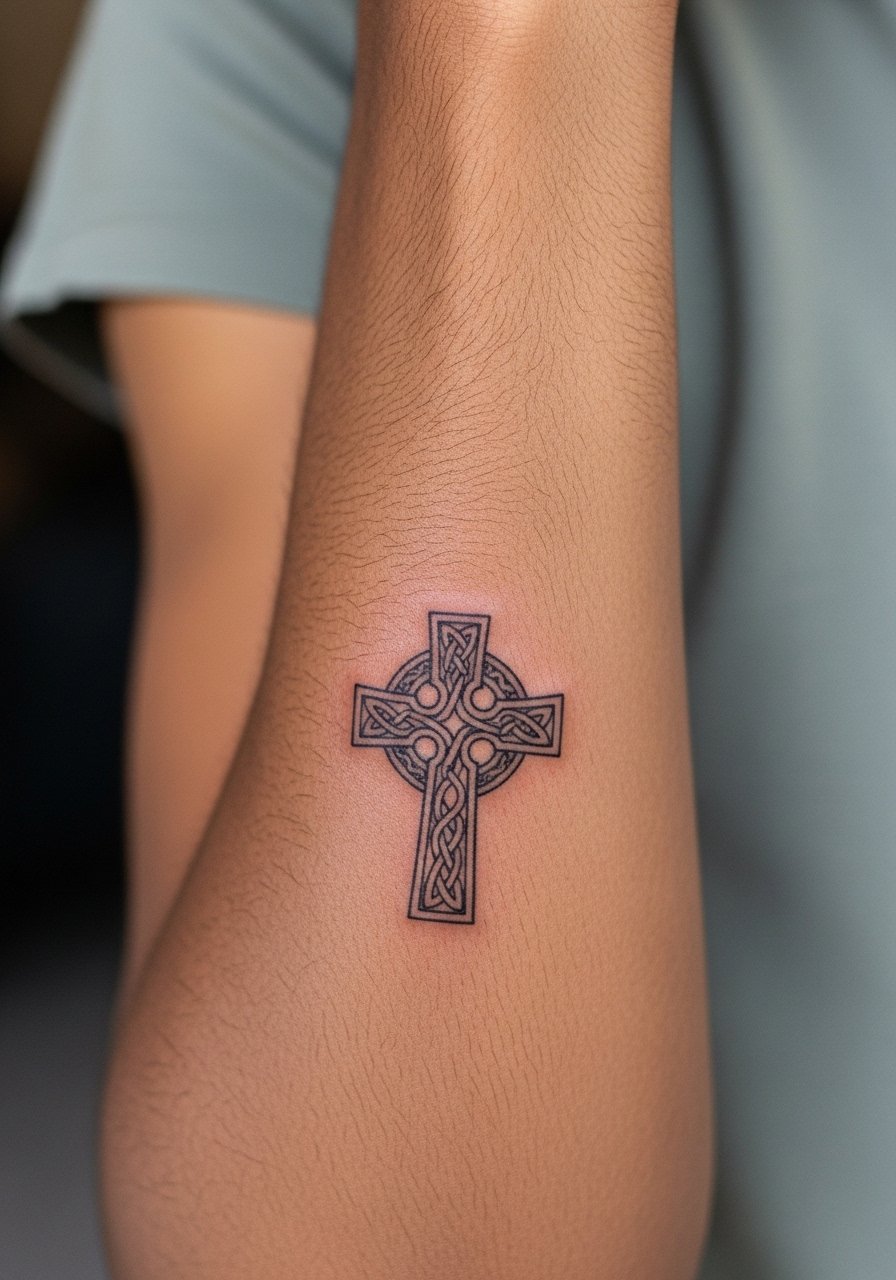
I've seen this one age well when artists give the knotwork a bit of breathing room. In consultation ask for simplified knot details and slightly heavier primary lines so the interlace does not fill in years later. There is a real split among artists on fine line durability. One camp argues fine line blurs too fast on high-movement areas and recommends bold outlines. The other camp says proper depth and spacing keep the work stable. Name that debate during booking and ask the artist which side they build from. Expect a two-hour session and mild discomfort on the forearm. For display, roll up a chambray button shirt to frame the piece.
3. Blackwork Geometric Cross on the Collarbone
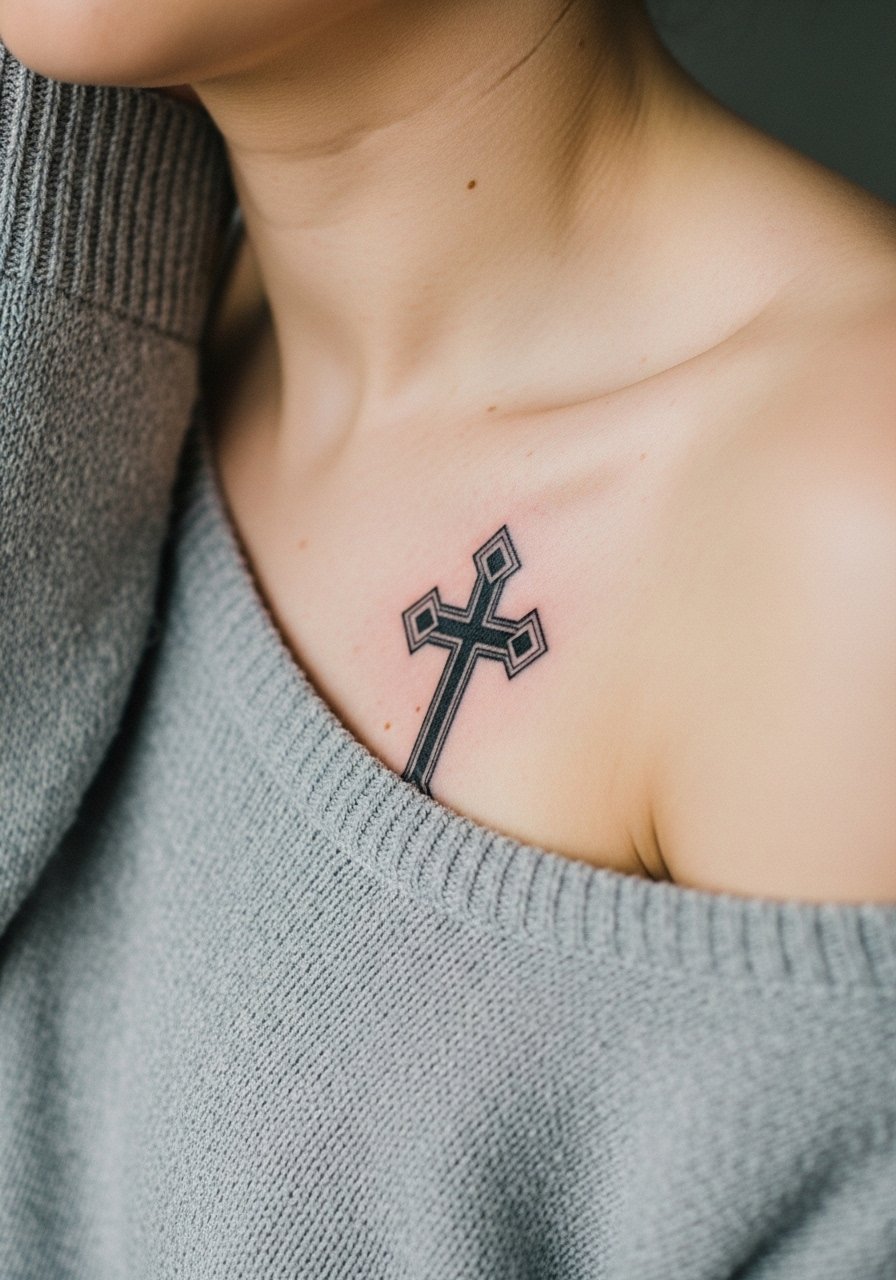
There is a strong visual impact from solid black shapes on the collarbone and it photographs well at a distance. Tell your artist you want bold saturation and clear negative space so the angles remain distinct as the skin settles. A common error is packing too many tiny angles into a small two-inch area, which creates merging over time. Expect light to moderate pain and a single session for a simple geometric piece. For showing it off, an off shoulder sweater or a low-V tee keeps attention on the design without distraction.
4. Micro-Realism Crucifix Behind the Ear
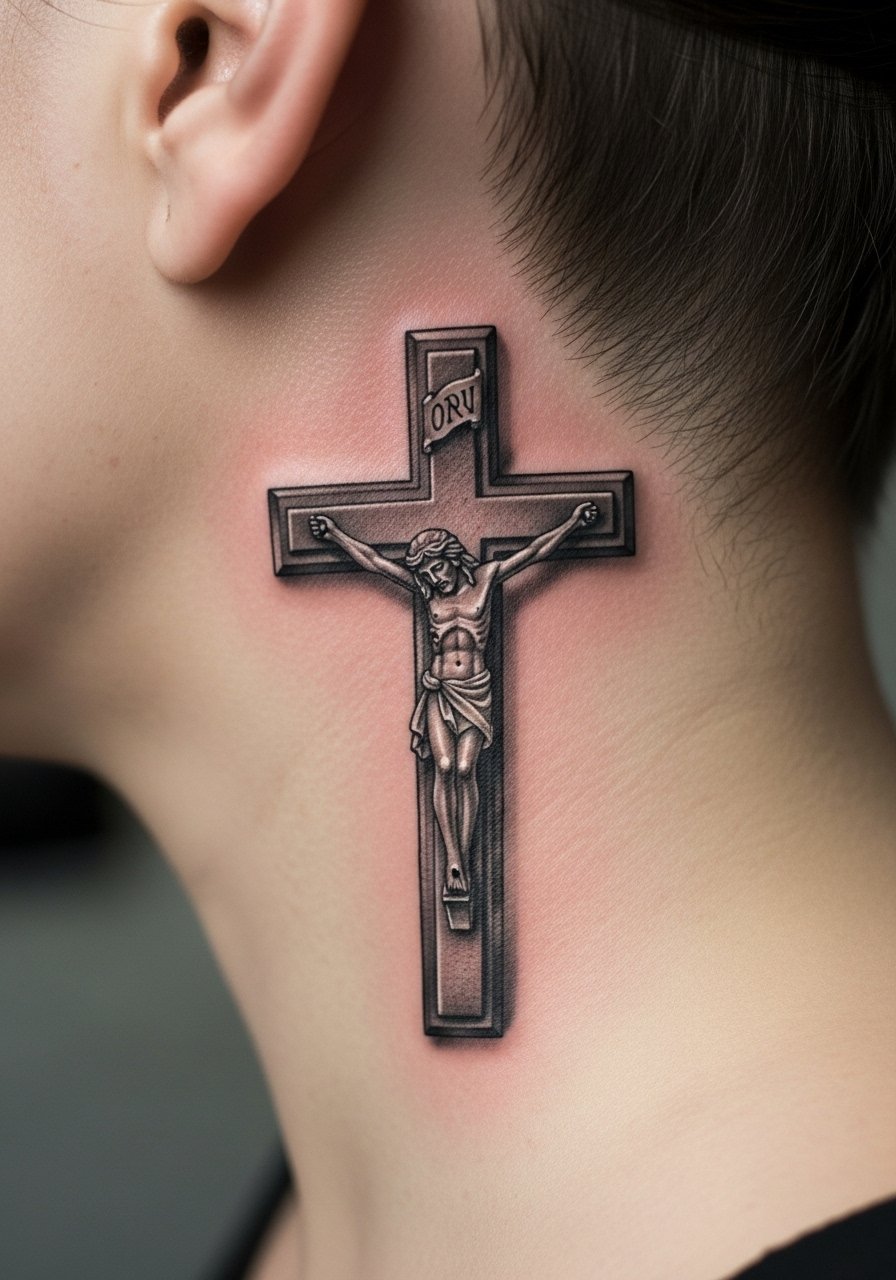
Fair warning, behind-the-ear work needs tight stencil placement and a gentle hand because there is very little room for correction. Ask for a one-inch scale proof taped onto the skin so you can judge the size before the needle touches you. Micro realism looks incredible fresh but the smallest blur shows quickly in tiny religious iconography, so opt for simplified shading rather than ultra-fine crosshatching. Sessions are short but the area is sensitive, expect a sharp sting. Keep hair half-up for the session so the artist has clear access.
5. Ornamental Cross with Vines on the Ankle
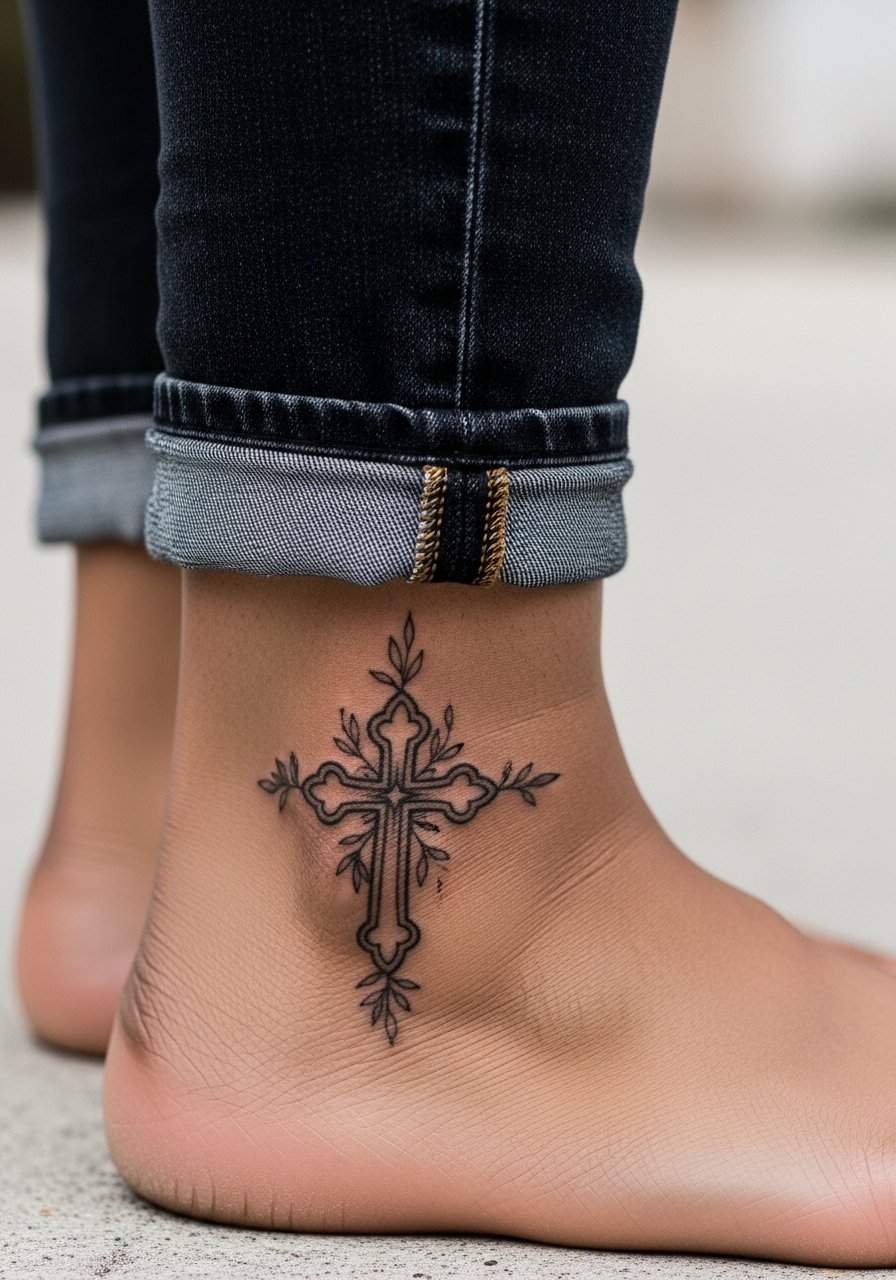
Ankle placements live in a high-friction zone so line durability matters more than micro detail. Ask for clean single-line outlines with light vine shading, and avoid tiny dot clusters near the bone where blowout risk rises. Expect the session to be under an hour for a 1.5-inch ornamental piece. For showing the design off, cuffed jeans or cuffed ankle jeans and sandals work well in warmer months.
6. Traditional American Cross with Banner on the Outer Forearm
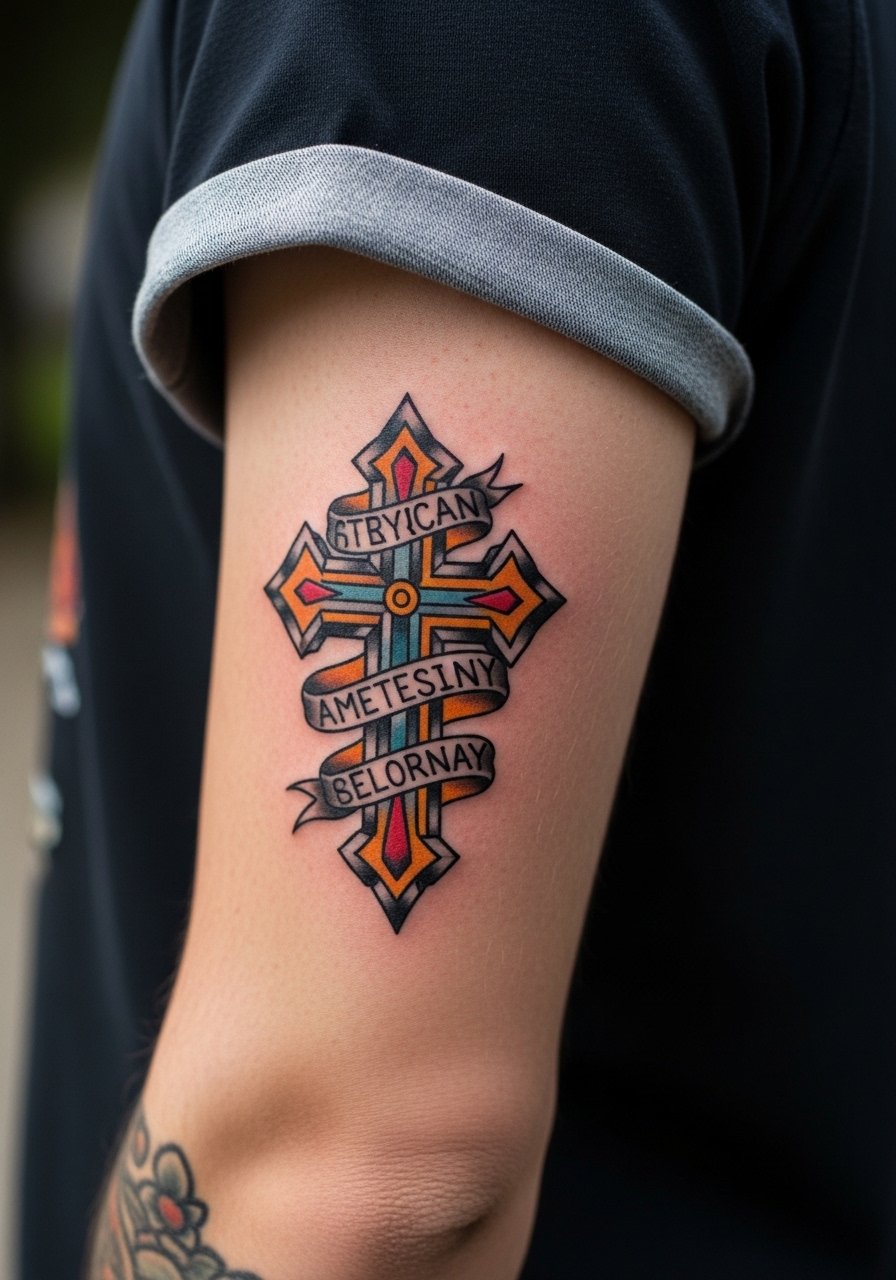
There is an old-school durability to saturated black and limited color in traditional flash. Ask for classic bold outlines and a modest banner width so the script remains legible as the ink softens over time. The common mistake is overloading the banner with tiny script. Expect a medium session length and a bit more battery from the machine on colored areas. This placement is forgiving for aging, and touch-ups are usually cosmetic and infrequent.
Studio Day Picks
The wrist and forearm pieces above heal differently from behind-the-ear and ankle work, so a few practical items make sessions and the first week easier.
-
Stencil transfer paper kit. Lets you preview exact placement on skin and test scale before the needle, which is handy for inner wrist and behind-ear ideas.
-
Topical numbing cream. Applied before the session it can reduce the initial sting on sensitive spots like the collarbone or behind the ear.
-
Thin protective film roll. Useful for ankle and wrist pieces that face friction from socks and watches during the first week.
-
Fragrance-free body wash. Gentle cleansing helps preserve fine line work while the skin seals.
-
Aquaphor healing ointment. A thin layer for the initial days can lock in moisture for delicate linework without clogging.
7. Watercolor Cross with Soft Glow on the Shoulder Blade
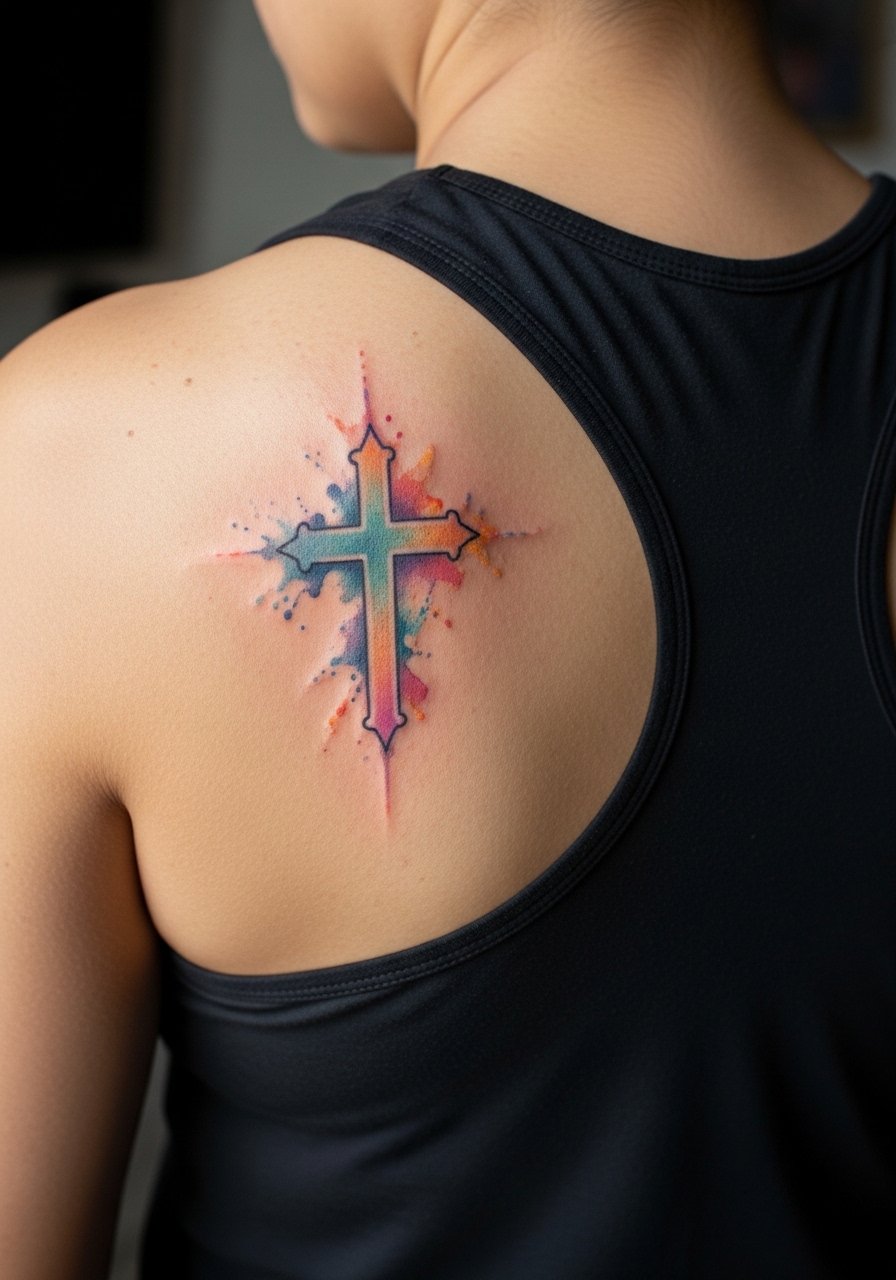
Watercolor effects look painterly but they require more color saturation and careful placement to age gracefully. Ask for soft pigments that fade into a dark anchor line so the shape endures beyond the first year. A common issue is too-sparse color fields that disappear on darker skin tones, so request sample patches or artist examples on similar skin when possible. Session time is usually one outing for a small two-inch wash. For the appointment wear a racerback tank so the artist can access the shoulder blade without fuss.
8. Ignorant Style Cross with Doodles on the Ribcage
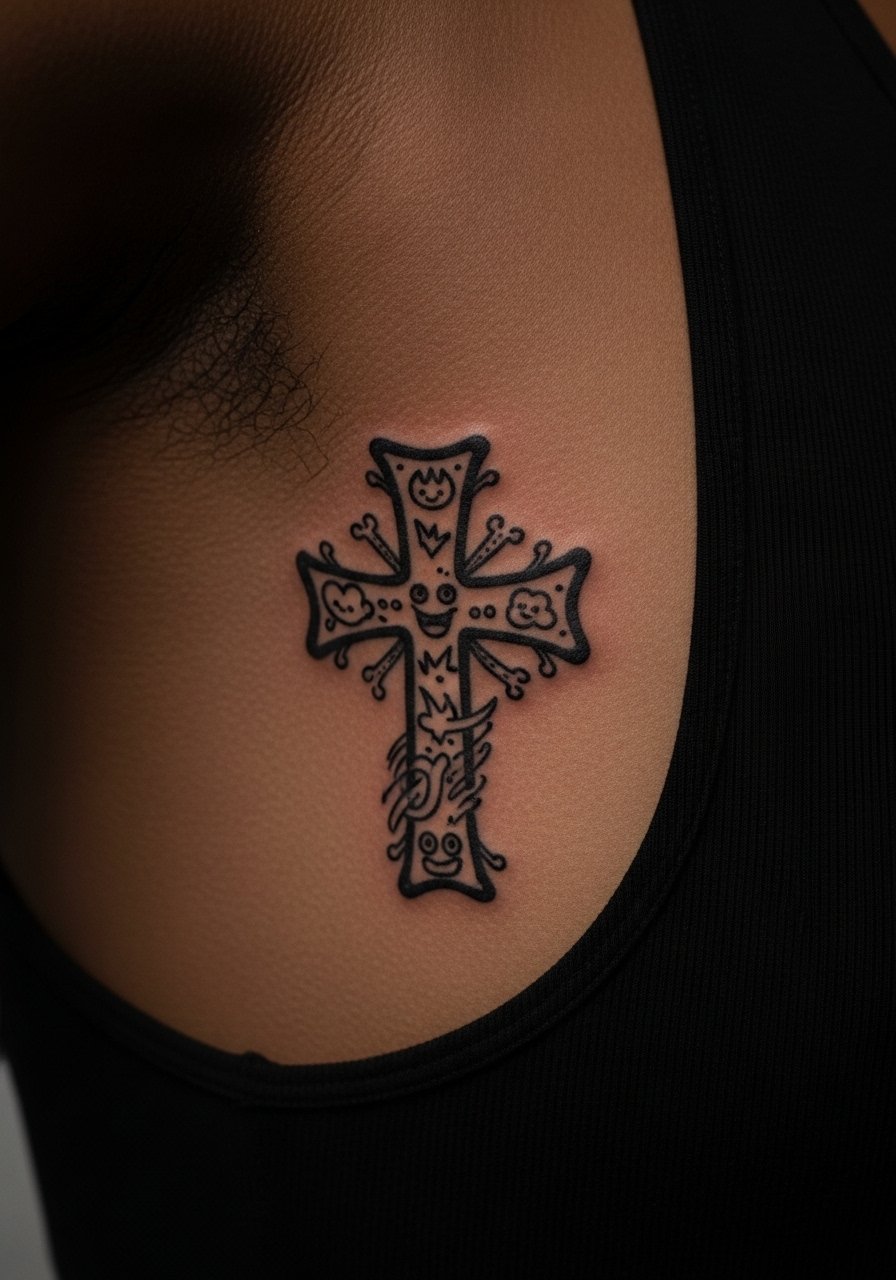
Fair warning, the ribcage is one of the more painful spots for small pieces because the needle is close to bone and the skin stretches a lot. The ignorant style benefits from imperfect lines, but the biggest mistake is asking for ultra-fine detail in an area that moves and breathes. Tell your artist you want bold improvised strokes and that you are okay with slight asymmetry. Expect a 1 to 1.5 hour session depending on doodle complexity. Consider topical numbing if pain tolerance is a concern.
9. Neo-Traditional Cross with Florals on the Upper Arm
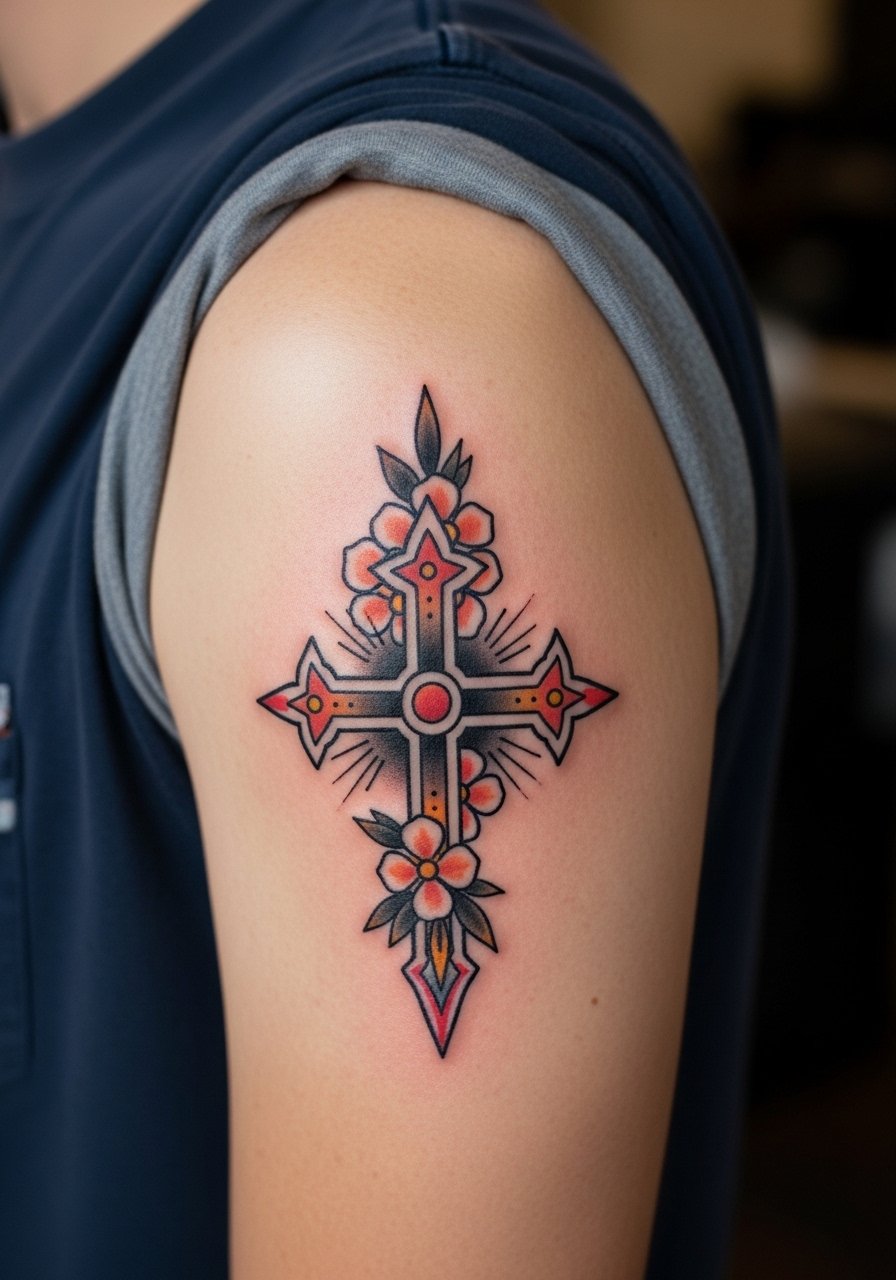
Neo-traditional mixes bold outlines and saturated color, which helps longevity on upper-arm placements. Tell the artist to keep primary outlines solid and to use color accents sparingly around the cross so the motif remains readable in five years. A common mistake is oversaturating fine petals, which can blur into the central cross. Expect a one to two hour session and moderate discomfort. Add a thin leather cuff on the opposite arm to balance the look, try a thin leather cuff bracelet.
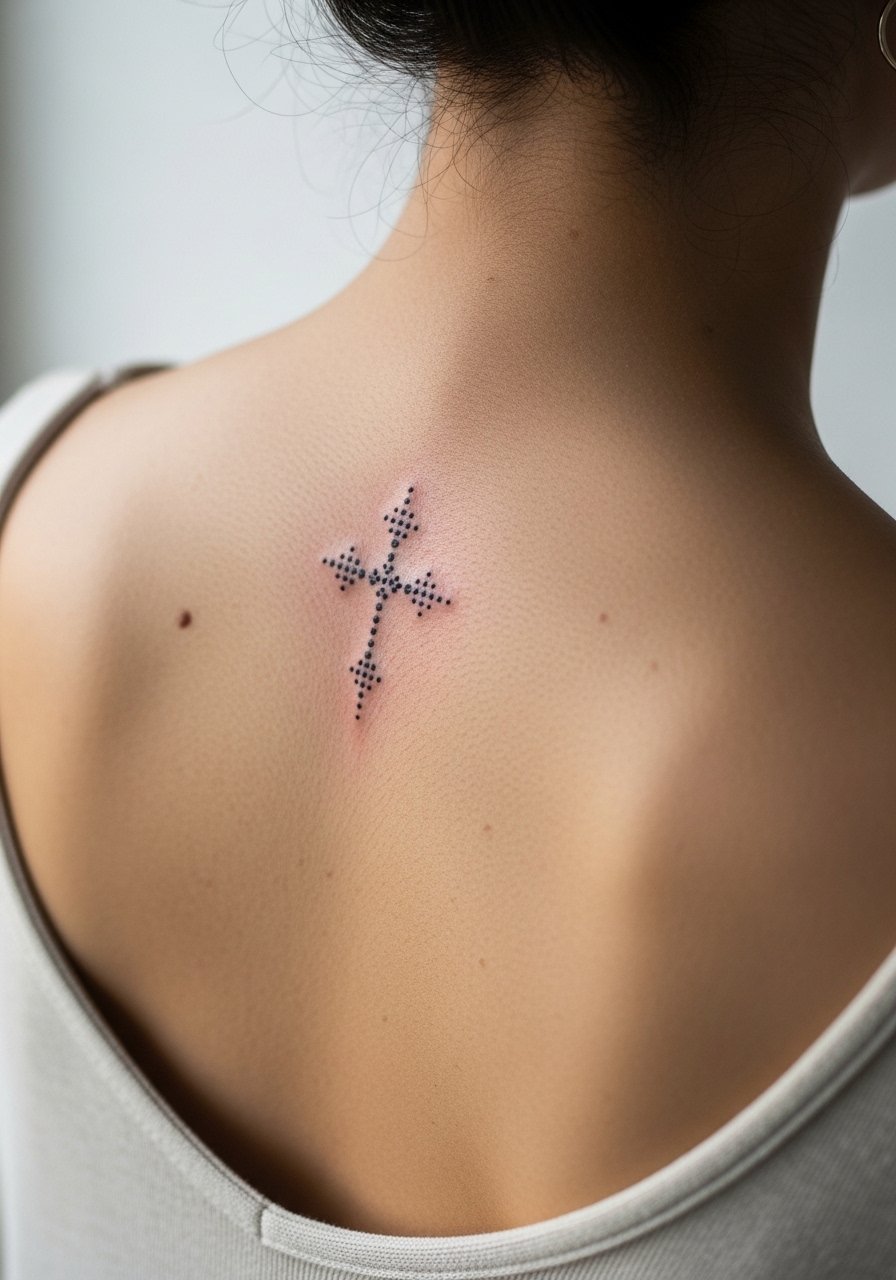
10. Dotwork Cross Mandala at the Back of the Neck
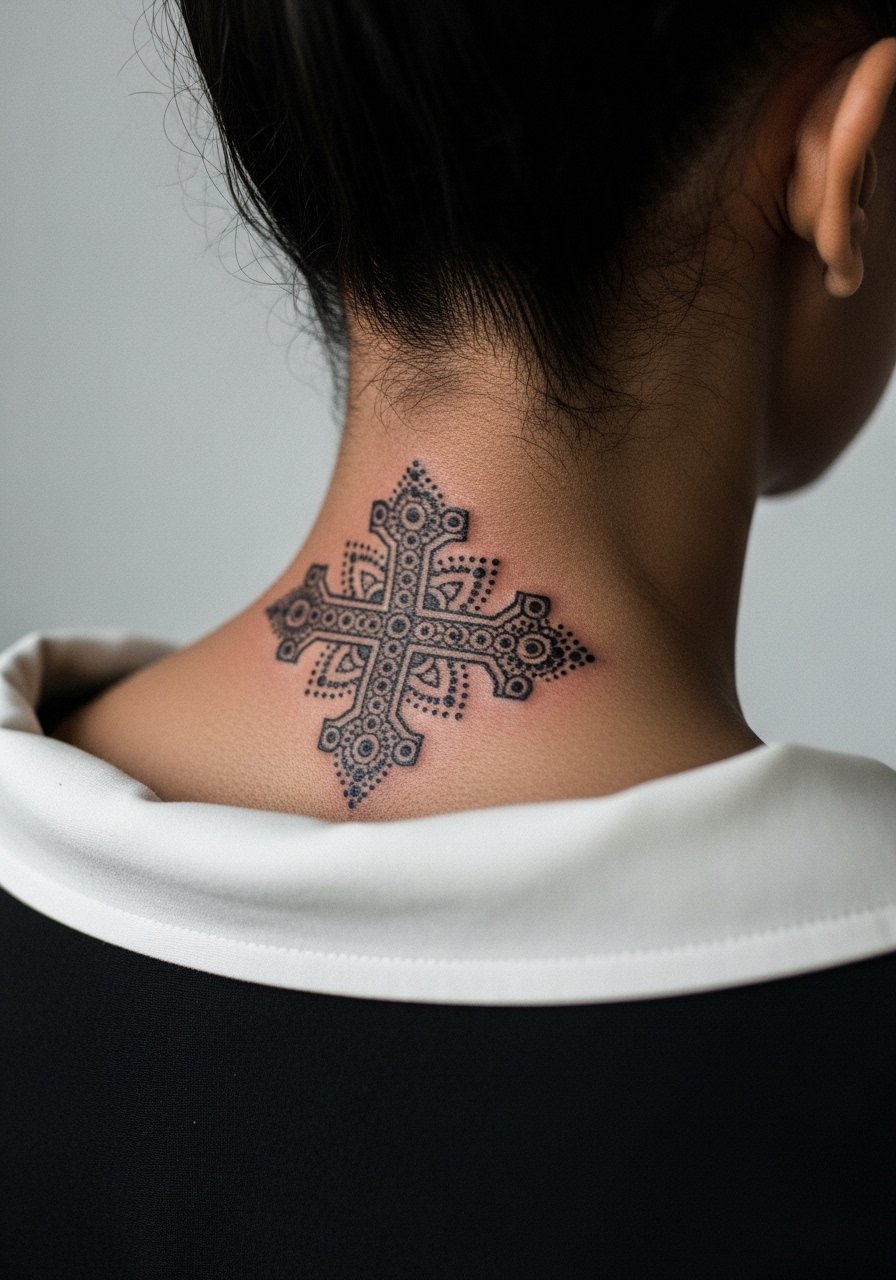
Dotwork needs spacing to avoid the tiny stipples blending together as the skin ages. When you consult, ask for a slightly larger diameter and prominent negative space rings so the mandala keeps its geometry. Expect a short session, but the area is sensitive to clothing friction while healing. A common error is compressing too many dots into a small one-inch circle. For session comfort request the artist to seat you slightly reclined so you stay still and the stencil does not shift.
11. Silhouette Cross at Sunset on the Calf

Silhouette pieces with a subtle color wash lean into memorial vibes and they tolerate a little fading without losing shape. Ask for a solid black silhouette with the color applied as a soft wash so touch-ups can focus on the silhouette if needed later. The calf is low movement and usually heals cleanly in a single session under an hour. Avoid tiny landscape detail inside the silhouette since small shapes can smear. For summer show-off, pair with cropped pants or sandals and cuffed jeans to keep the silhouette visible.
12. Script Cross with Coordinates on the Inner Wrist
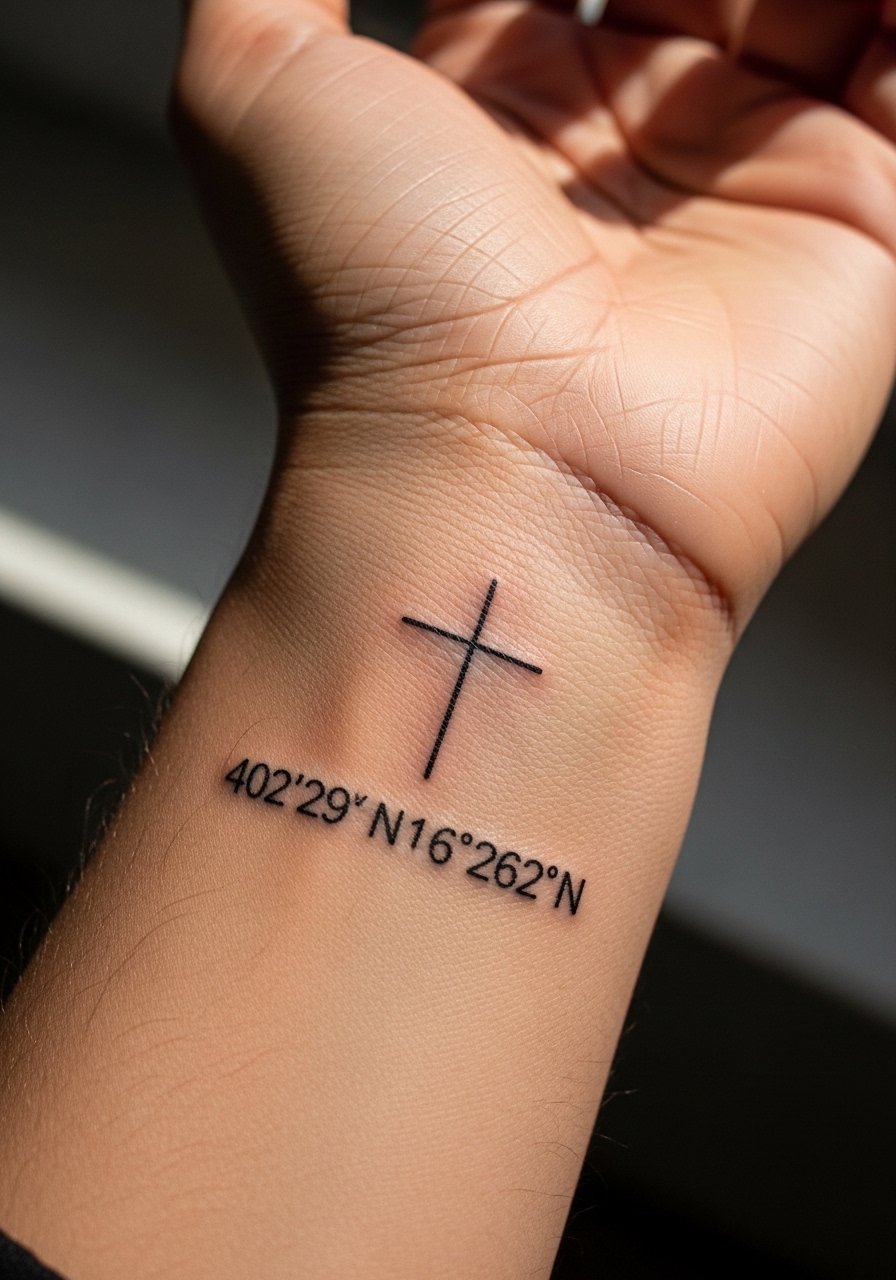
This one personalizes a cross with a place and date, and it reads as a quiet memorial when done at one inch. Tell your artist you want a monospace or thin serif for the coordinates and request the exact numbers on a printed stencil to check clarity. Fine script near a wrist cross is vulnerable to blur because the wrist flexes; the usual error is cramming too many digits into a tiny banner. Expect a brief session and light to moderate pain. For placement testing print the stencil and wear it for a day to see how the scale feels while you move.
13. Tiny Finger Cross Between Knuckles
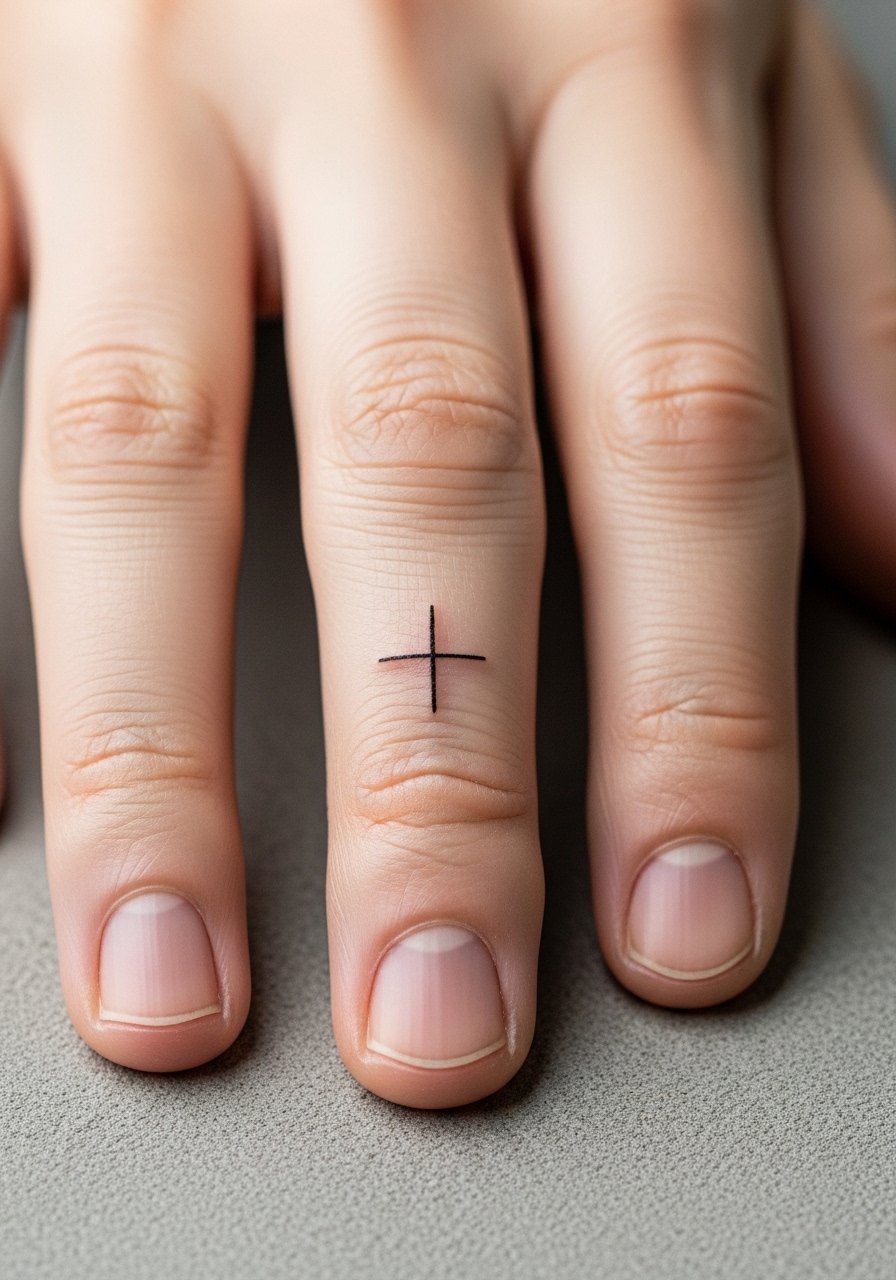
Finger work is intimate and high maintenance because the skin there renews quickly. The best approach is to ask for slightly heavier primary strokes and simplified negative space so the cross remains legible as the skin regenerates. Expect a short but sharp session and a higher chance of touch-ups at year one. A common mistake is requesting micro detail on a knuckle where daily bending distorts thin work. Consider offsetting the small cross with a slender ring and try a thin chain pendant necklace when showing wrist or hand pieces to keep the focus upward.
14. Negative Space Silhouette Cross for Darker Skin

For darker skin tones negative space or a thin colored outline can make a cross pop more reliably than a dense single black fill. During consultation ask for an outline with interior negative space or a colored edge rather than tiny contrast shading. A common misstep is choosing ultra-fine gray shading that simply disappears against deeper tones. Expect the session to be quick and a touch-up at year one can restore contrast if needed. Artists who have worked across skin tones will have sensible placement and lineweight suggestions.
15. Micro Dotwork Spine Cross
Spine pieces require an artist who understands how skin tension affects dot spacing. The micro dotwork cross looks meditative when dots are spaced to accommodate mild spreading over time. Ask for a slightly taller vertical measure so the dots do not compact into a blur. The spine area is moderately painful and you may need brief breaks during a single session. For showing it off afterward consider open-back dresses or tops like an open-back midi dress so the placement reads cleanly.
16. Ornamental Cross with Birth Flowers on the Upper Arm
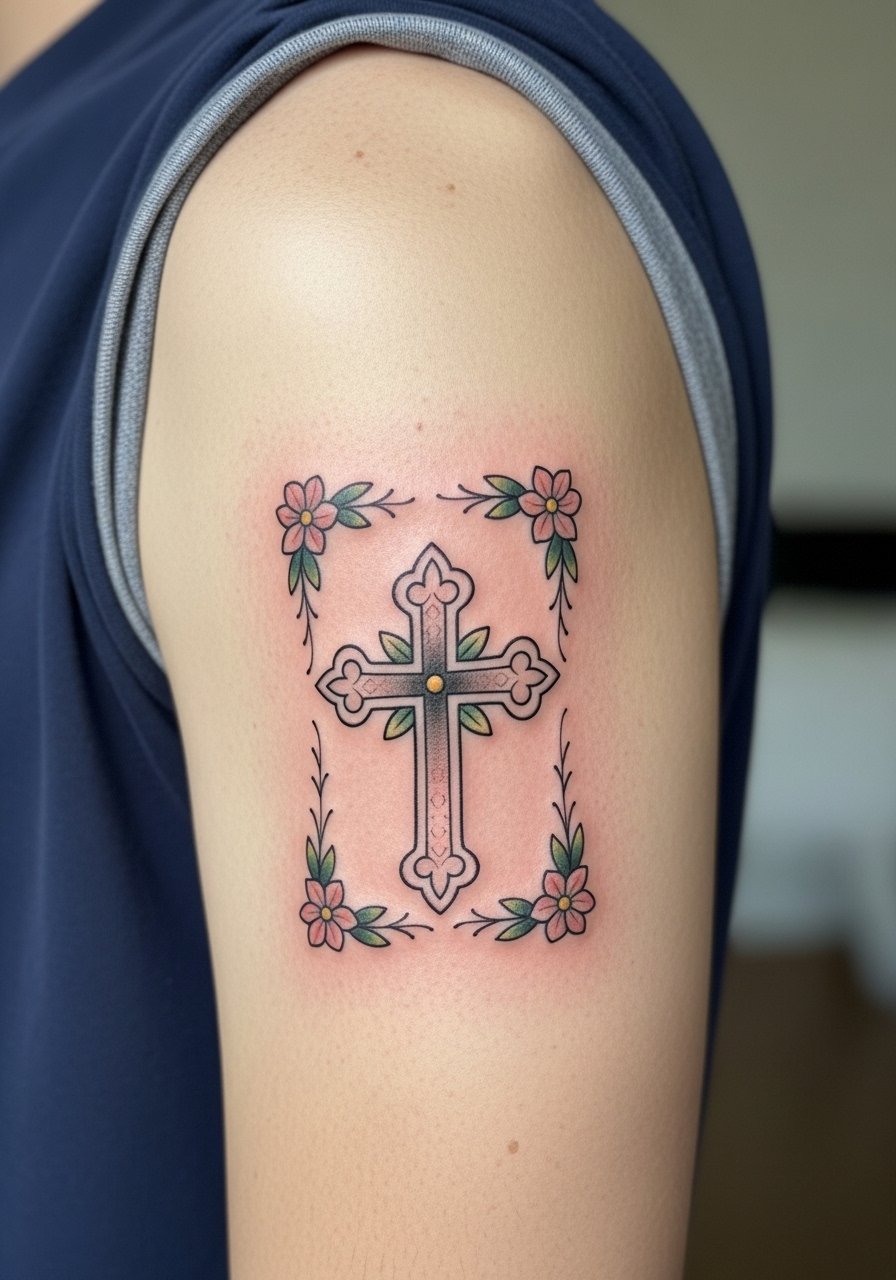
Combining a cross with birth flowers creates layered symbolism without crowding a small canvas. During consultation specify which flowers and ask the artist to scale petals to match the cross height so the botanical elements do not overpower the main motif. A common error is over-detailing the petals on a one-inch layout. Expect a one to two hour session for color accents and a straightforward touch-up timeline if any color fades unevenly.
17. Geometric Stacked Crosses on the Sternum
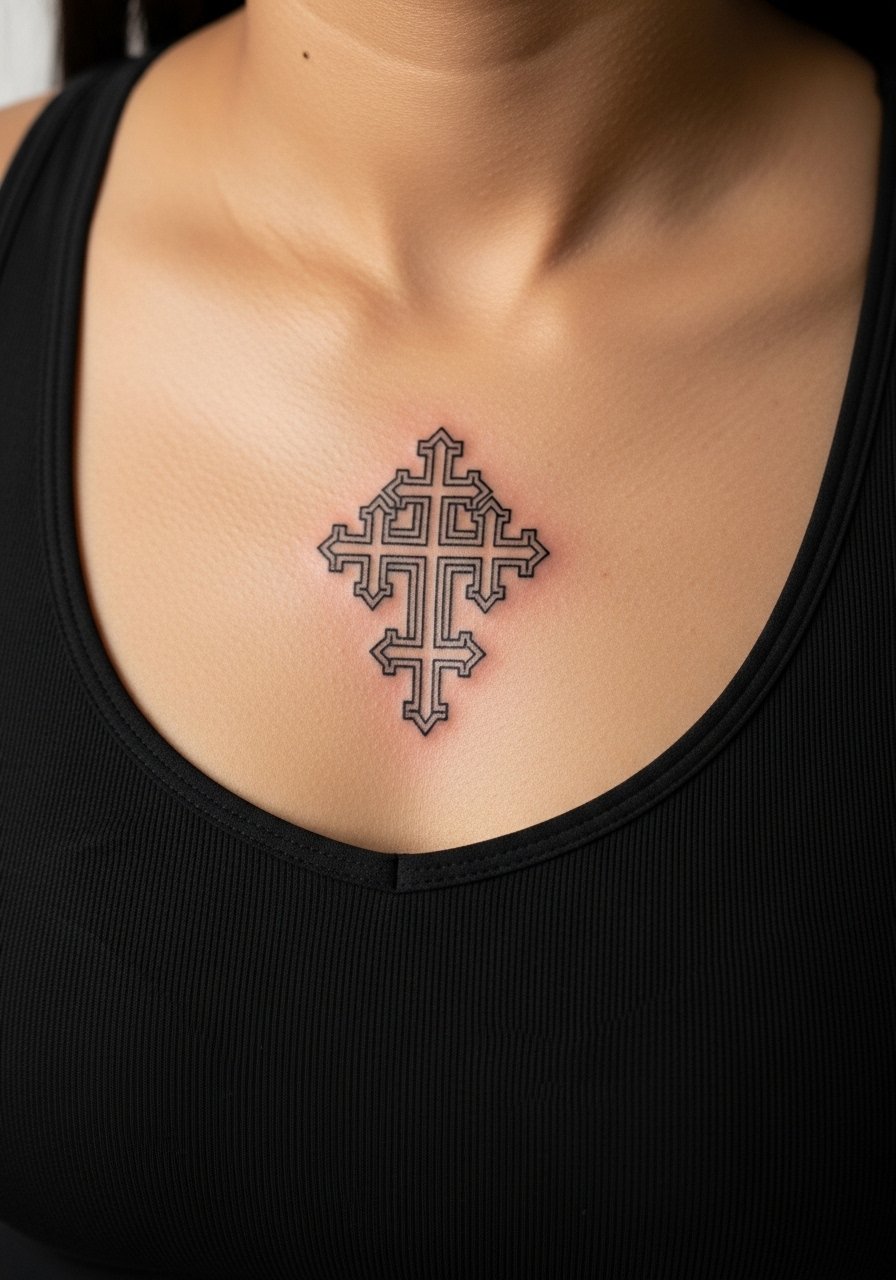
Sternum work is a commitment because the area moves with breathing and can be sensitive to pressure. Ask for clear spacing between stacked crosses and a strong primary outline that will help the cluster read as it ages. The usual mistake is crowding multiple small crosses into a tight vertical column which merges after a few years. Expect moderate to high pain and one solid session for a neat small cluster. For the appointment wear a fitted sports bra or a wide-neck top so the artist can access the area without exposing more skin than necessary.
Frequently Asked Questions
Q: Will a fine line wrist cross fade faster than a bold black one on the same person?
A: In my experience fine line pieces typically need touch-ups sooner because the ink sits in narrower channels. Bold blackwork resists washing out and still reads clearly after several years. Discuss lineweight options with your artist and plan for a touch-up around year one to three if you prefer the ultra-fine look.
Q: How should I decide between a watercolor cross and a black silhouette if I want lower maintenance?
A: Choose a black silhouette for lower upkeep since color pigments fade faster than black. If you love the watercolor look, ask for a dark anchor line so the shape remains distinct when the color softens. For display, wear a racerback tank or wide-neck top to let the area breathe and avoid rubbing.
Q: Is the ankle a bad spot for tiny ornamental crosses because of wear from shoes and socks?
A: The ankle sees a lot of friction and moisture so simple outlines with modest spacing age better than intricate dot clusters there. If you want ornament, keep the detail at a scale of 1.5 inches or larger and plan for seasonal visibility so you can protect the area in winter.
Q: Are behind-ear cross tattoos appropriate for professional environments?
A: Behind-the-ear pieces are small and easily covered by hair when needed, but they do peek out with short hairstyles. Consider your typical workplace dress and whether a hidden placement like the inner forearm or upper arm might be safer for career flexibility.
Q: How do I find reasonably priced artists for a small cross without sacrificing quality?
A: Look for guest spots, apprentices supervised by senior artists, or smaller reputable shops that publish clear portfolios. Print the stencil and ask about a single-session fee so you know what the appointment covers before committing.
