
Fine line tattoos dominate boards right now, but the pieces that keep reading strong over years are often the ones planned with longevity in mind. Think placement that avoids constant friction, line weight with room to breathe, and consultation notes that force spacing where needed. Below are 27 realistic tattoo ideas for men that look strong now and stand a better chance of still looking sharp after a few seasons of wear.
1. Micro-Realism Wolf Head on the Bicep
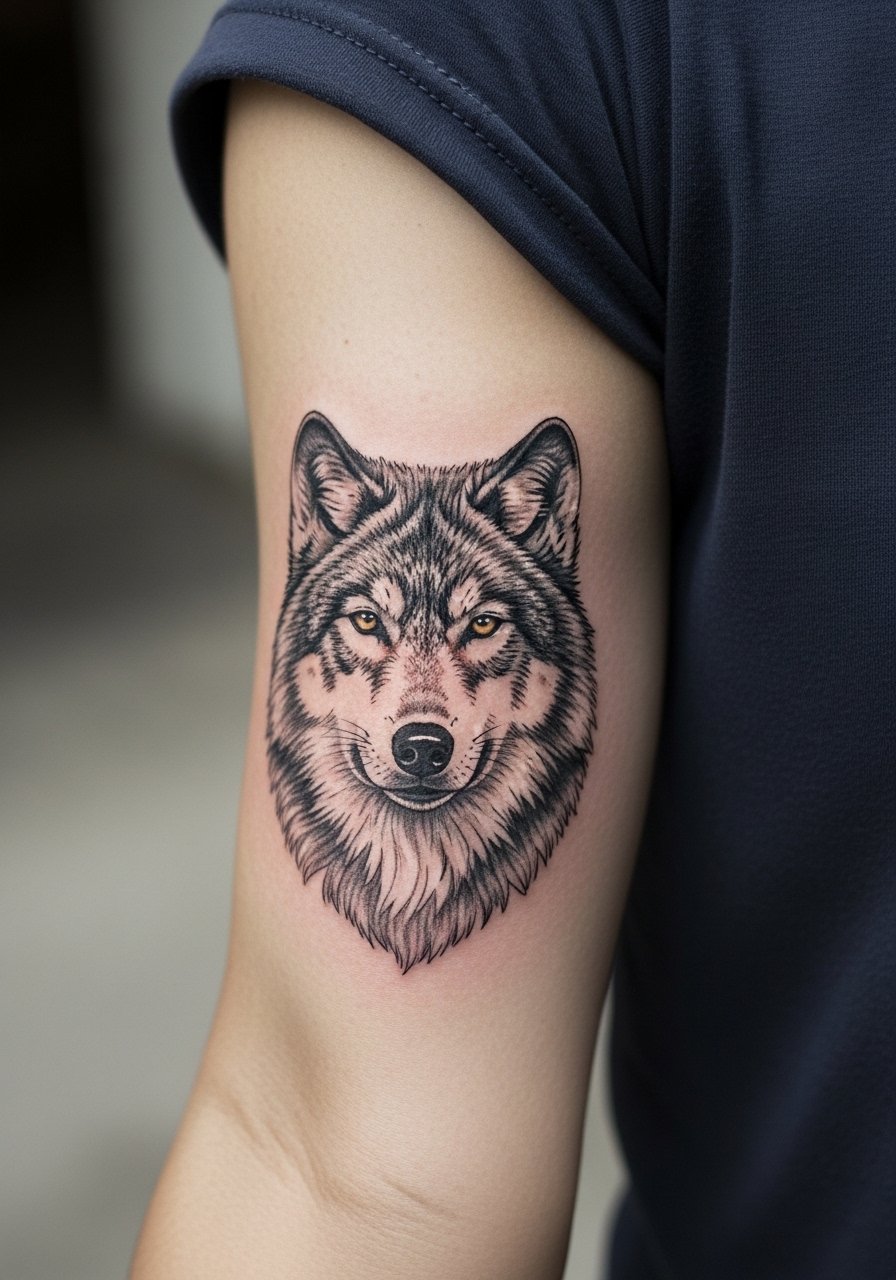
I have seen this placement hold up best when the wolf is scaled so the fur texture reads from a foot away. For the bicep, expect a medium pain level and a one to two session commitment for shading and touch-ups. Tell your artist you want stipple shading for the fur and moderate saturation so it does not look muddy after two years. A common mistake is asking for ultra-fine fur detail crammed into a pocket of skin. The bicep gives room to breathe. For showing it off, roll up the sleeve and pair with a loose linen short-sleeve shirt that keeps attention on the arm.
2. Hyper-Realistic Portrait on the Upper Chest
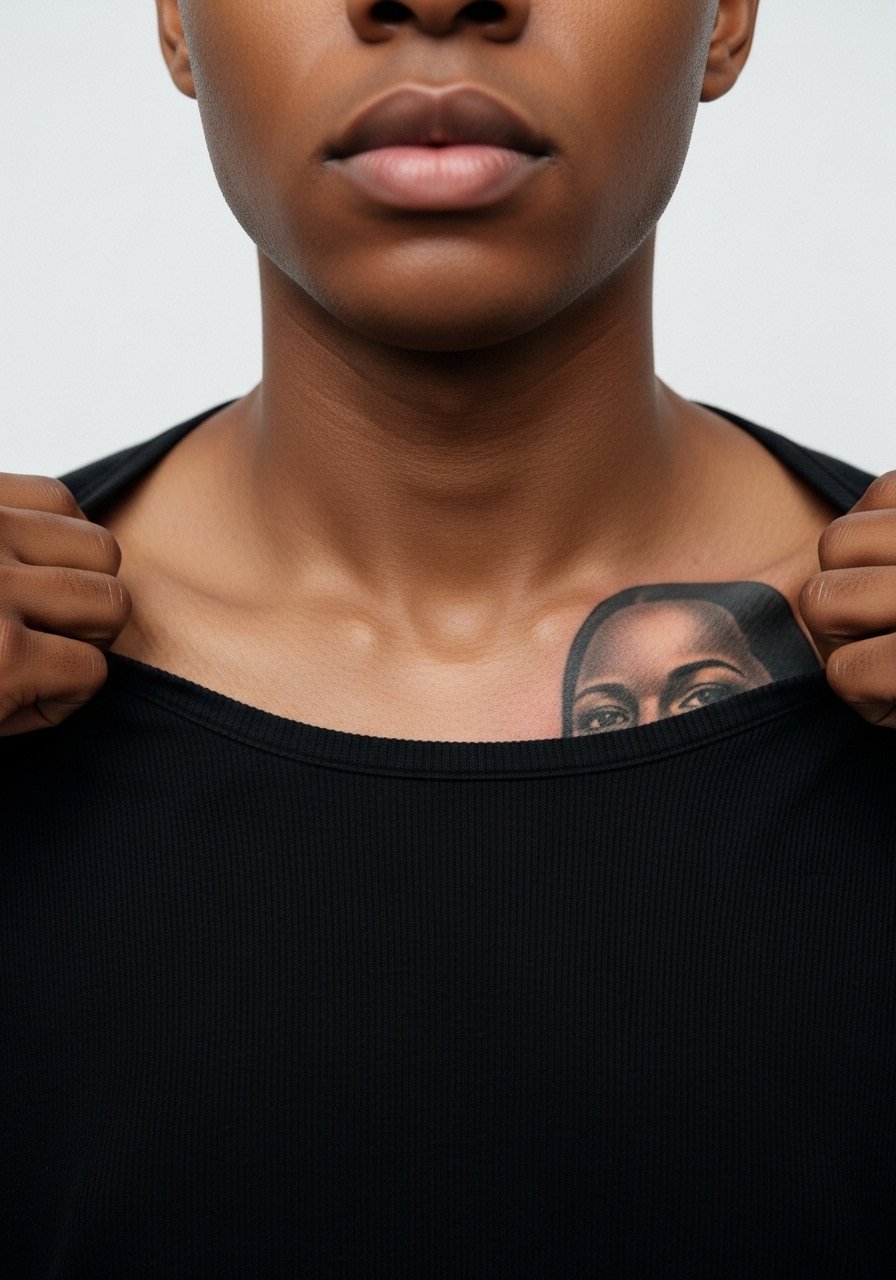
Most portrait work on the chest requires a strong stencil and careful depth to avoid blowout. Expect a higher pain score than the arm and a session that can run multiple hours. In consultation say you want black and gray with gradual saturation so highlights can breathe. The main mistake is shrinking the portrait too small near the collarbone where movement and bone make fine detail fail. If you plan to reveal it, a wide-neck shirt frames the piece without overexposing the area.
3. Spartan Helmet in Heavy Black on the Shoulder
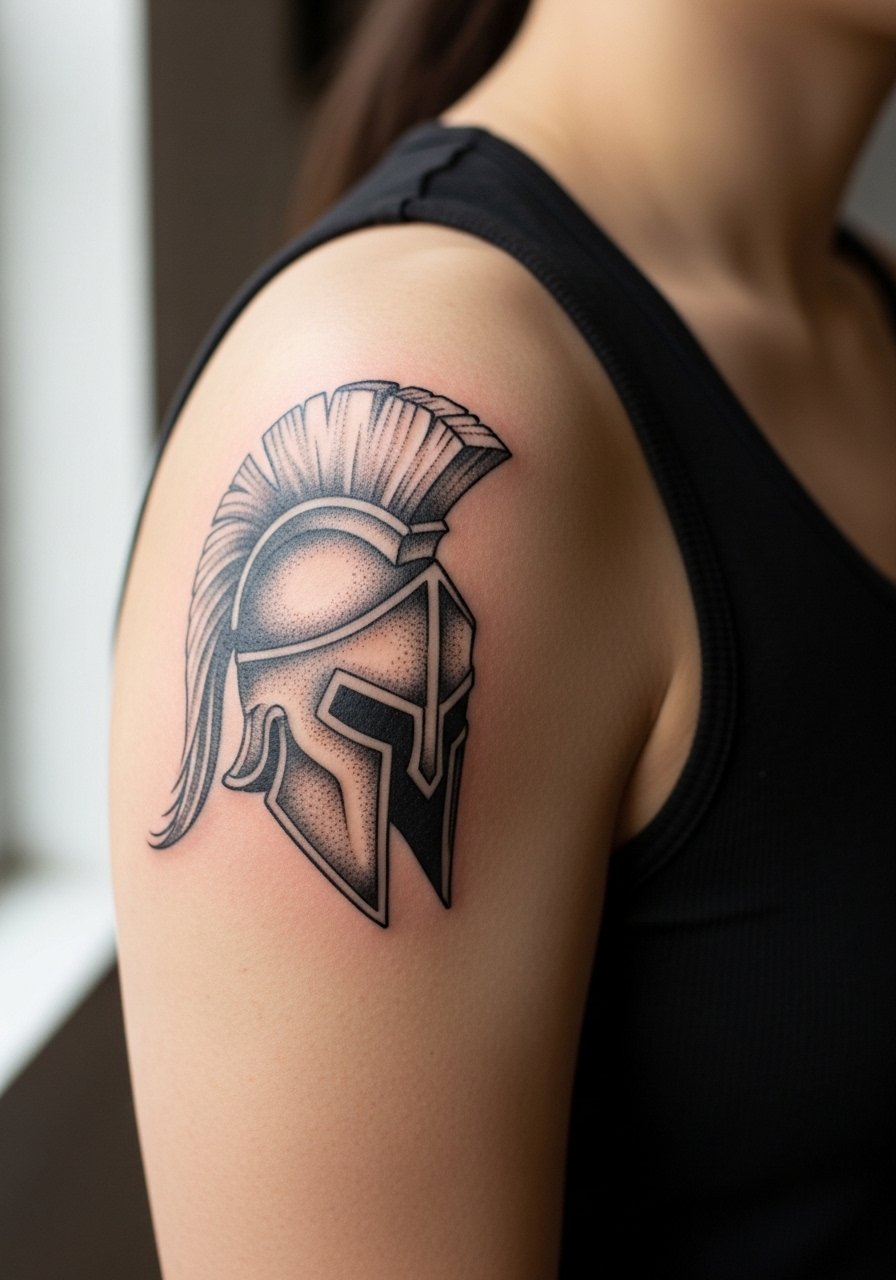
There is something about strong silhouette pieces on the shoulder that reads from across a room. Pain is moderate and sessions are usually a single focused block of three to four hours. Ask your artist for bold outlines with saturated fills so the silhouette holds when shirts rub against it. A mistake I see is over-detailing the cheek and plume in a way that creates small islands of ink prone to blowout. For the session, wear a loose tank top you can pull aside so the shoulder is fully accessible.
4. Lion Face Across the Upper Back
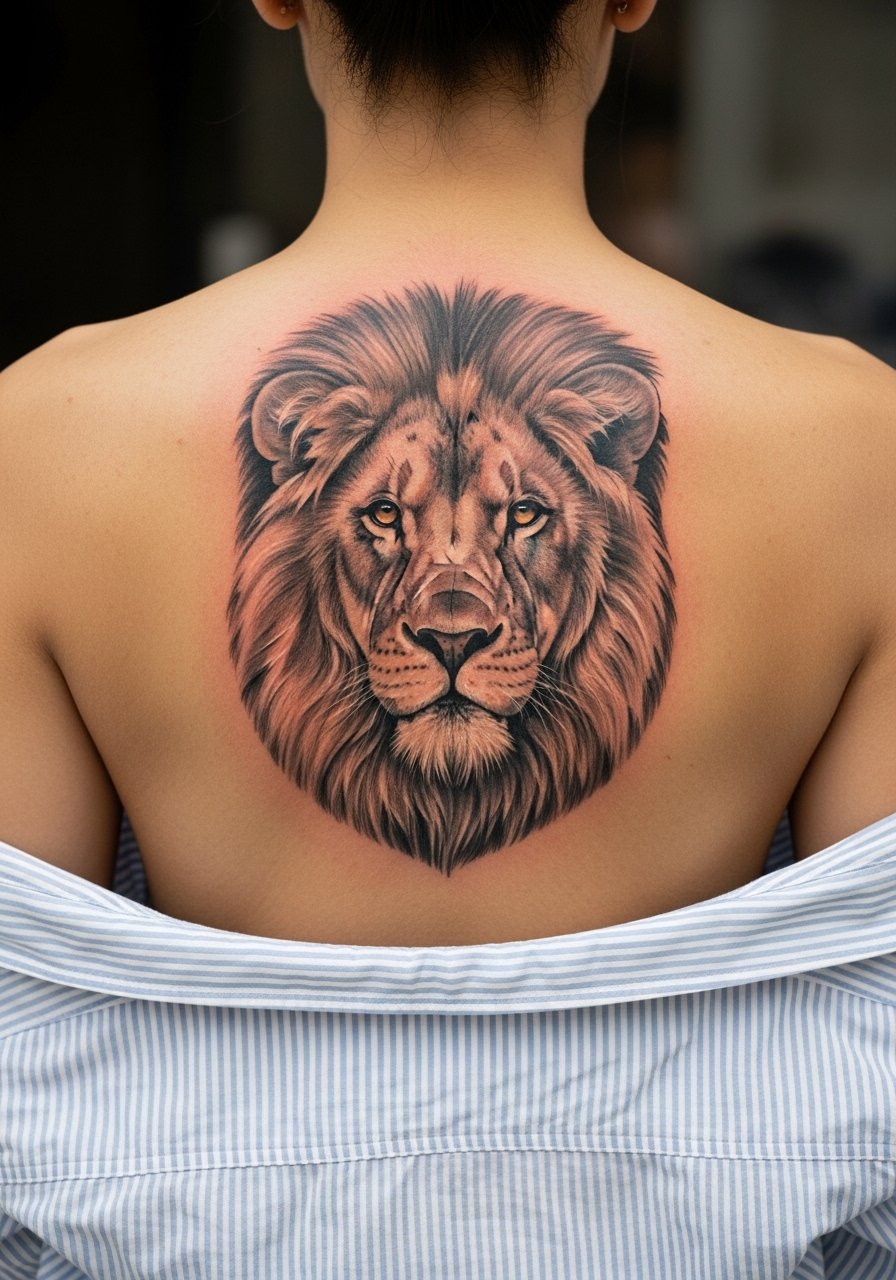
Upper back pieces age well because they avoid frequent sun and friction. The session feels long but tolerable since the area is broad and allows the artist to shift angles. Tell your artist you want a combination of whip shading and stipple for mane texture. A common error is compressing too much facial detail into a small central patch, which ages into a gray mass. For nights out, leave the top two buttons open on a linen button-down so the lion peeks through without being obvious.
5. Photorealistic Skull on the Forearm
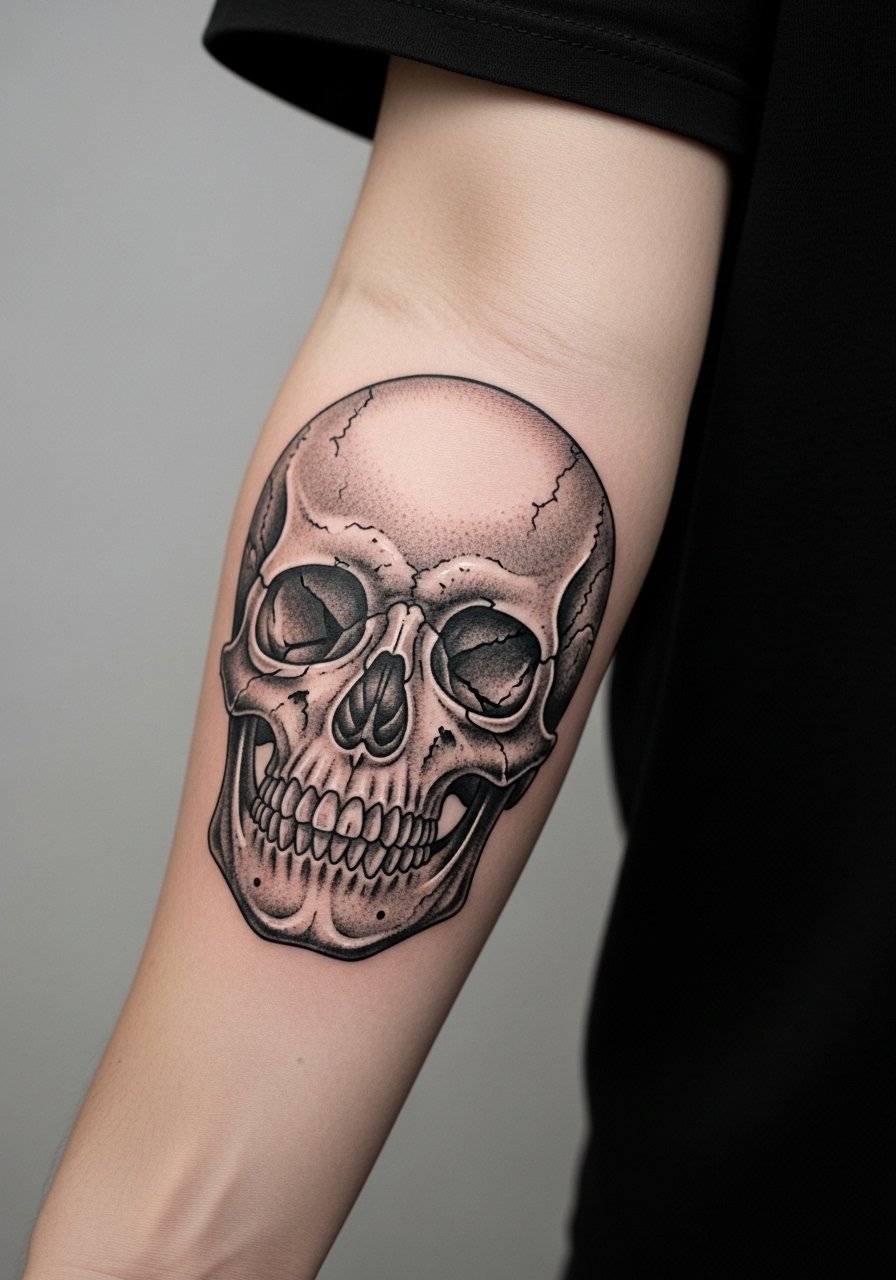
Forearm skulls work because the arm offers stable canvas and shows the piece well. Pain is low to moderate and most artists finish a forearm skull in a single long session. Tell the artist you want heavier saturation around shadow planes and softened highlights so the skull still reads at two years. Avoid asking for pin-thin highlights in the deepest shadows since those vanish first. For everyday wear, rolled sleeves and a short-sleeve henley let the skull sit in the visual center of your look.
6. Realistic Eagle in Flight on the Calf

Calf pieces have a predictable healing pattern and tolerate bold saturation. Pain is low and the session runs a few hours depending on wingspan. In the consultation, specify contrast between the wing edges and the surrounding negative space so the eagle keeps its shape from a distance. A common mistake is blending wings into a background of gray that ages into one tone. For cool-weather showing, pull up a pair of cuffed jeans so only the calf reveals the flight.
Studio Day Picks
Calf, forearm, shoulder, chest, and back pieces above each have different prep needs. The right small items smooth the session and the first week of healing.
-
Stencil transfer paper kit. Lets you preview line placement on skin before the needle starts, which matters for symmetries and chest pieces.
-
Topical numbing cream. Applied as directed before the appointment can soften rib and sternum sensitivity for clients who need it.
-
Thin protective film roll. Keeps wrist and finger pieces shielded from daily friction in the crucial first days.
-
Fragrance-free gentle body wash. Cleanses healing skin without stripping pigment or irritating fine line work on exposed arms.
-
Aquaphor healing ointment. A thin layer locks moisture without clogging needle channels during the initial healing window.
7. Fine Line Arrow on the Inner Forearm
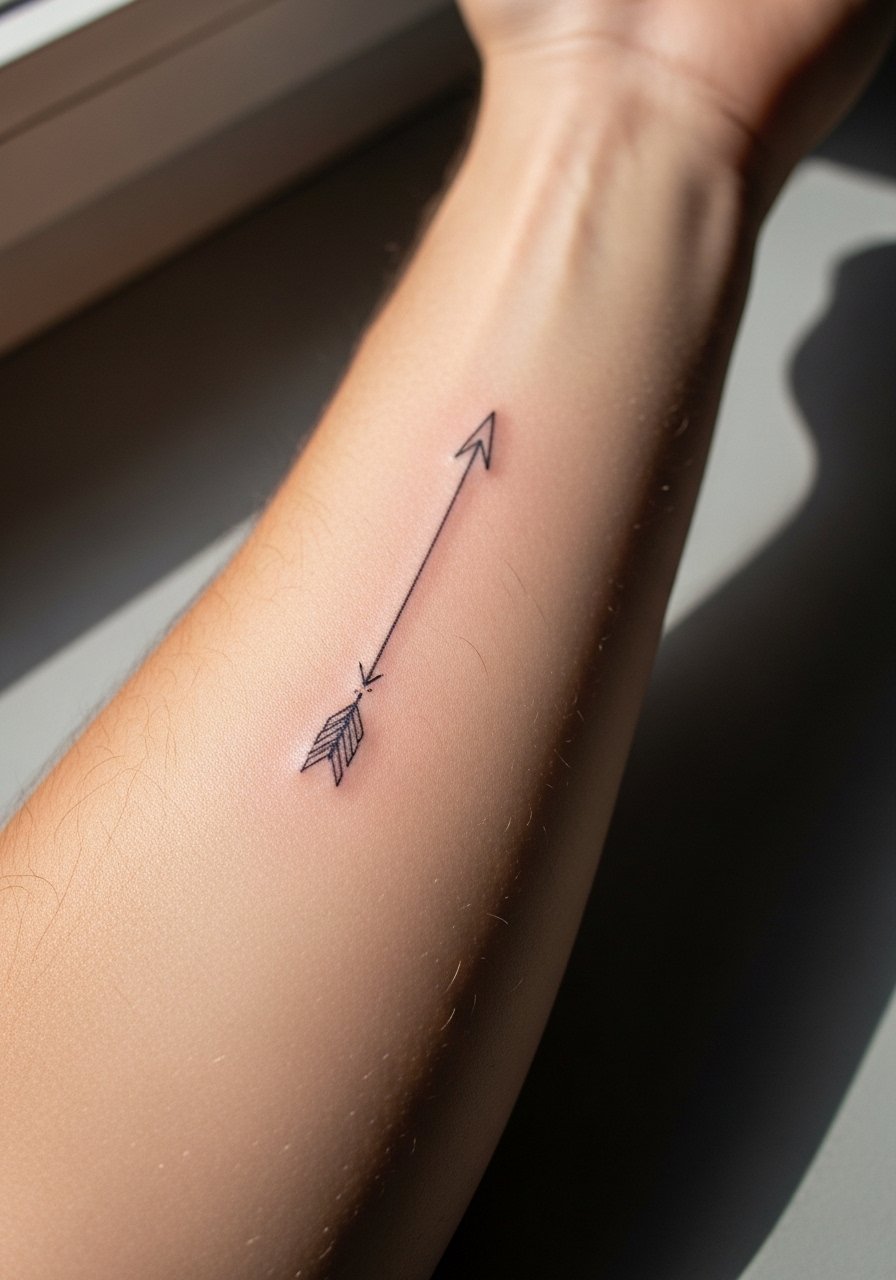
Personal observation: inner forearm is where fine line often looks most deliberate if spaced correctly. Pain is mild and sessions are short. During consultation say you want slightly heavier line weight than the thinnest reference so the arrow does not blur at year two. The common mistake is insisting on ultra-fine lines with no breathing room. For session wear, roll up a long-sleeve button-down shirt so the artist can access the inner forearm cleanly.
8. Coiled Snake Around the Wrist
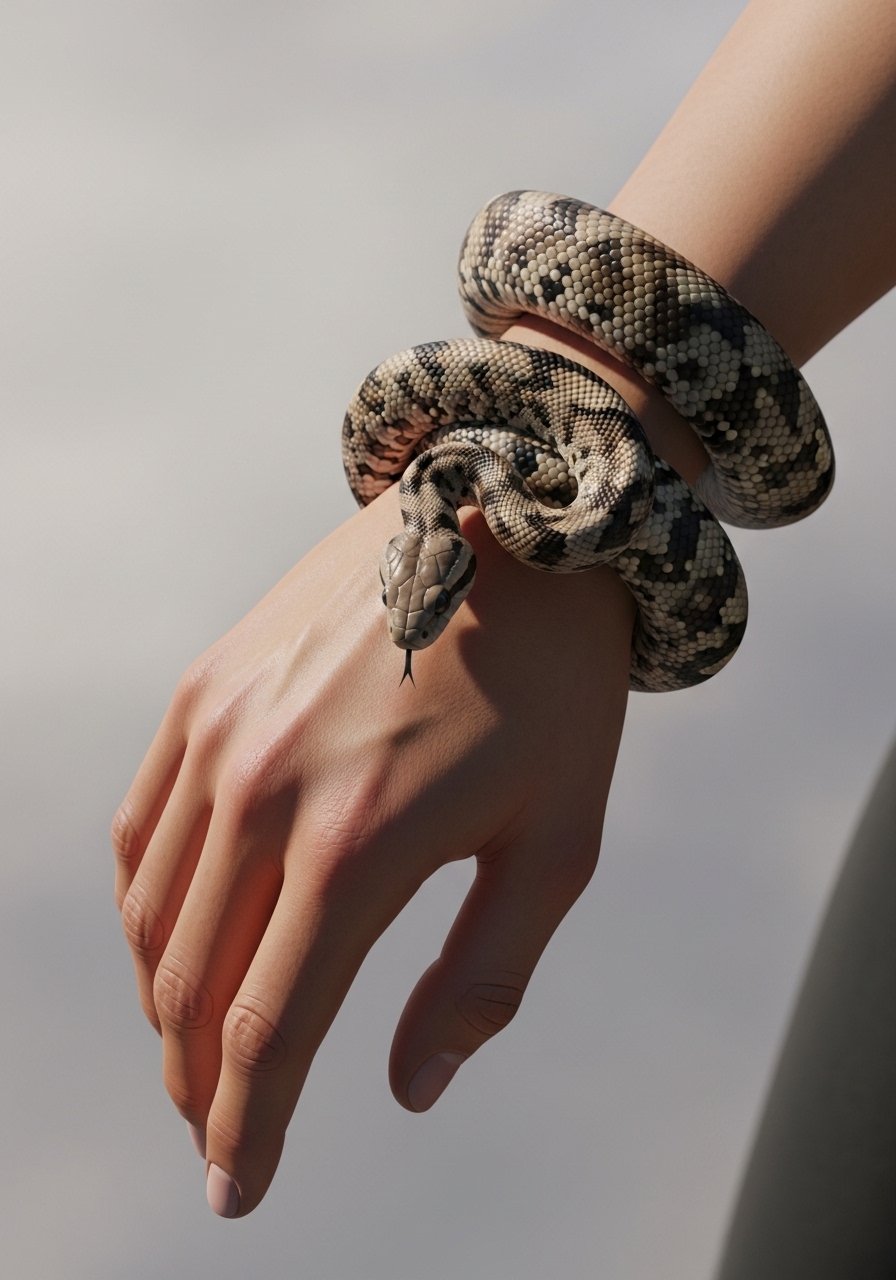
Mistake lead: wrist designs are vulnerable to constant washing and friction. Expect touch-up sooner than on the forearm. For a snake wrap, request bold outlines where the body crosses itself and moderate saturation in the scales. The session feels quick but the area is high friction. For showing the coil, slim stacked bracelets can complement without crowding, for example a thin leather bracelet that leaves the pattern visible.
9. Weathered Sailor Portrait on the Outer Upper Arm
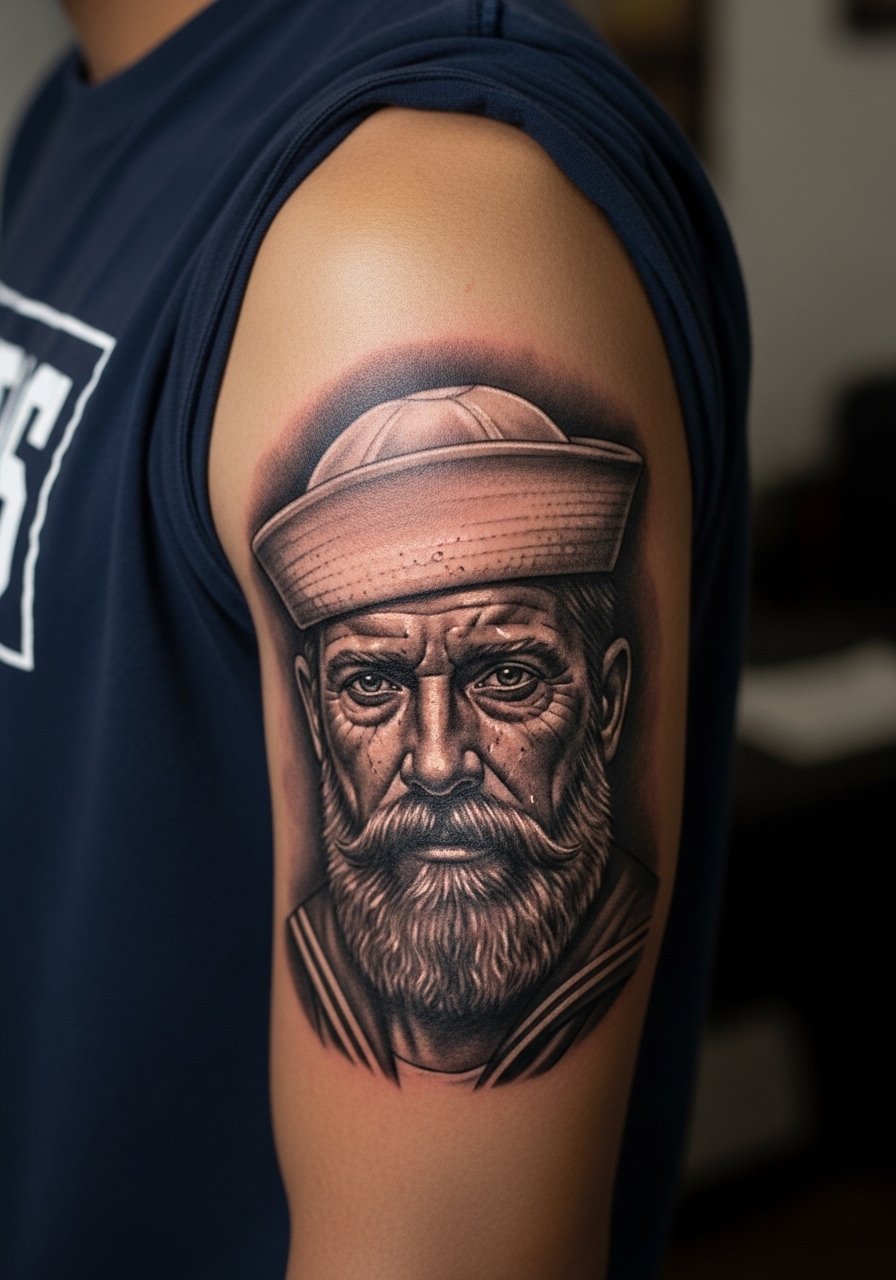
Consultation lead: when you bring references for a sailor or vintage portrait, bring multiple lighting angles so the artist can match skin tone contrast. Upper arm absorbs detail well and tolerates heavy saturation for shadow planes. A frequent issue is misaligning the face angle with muscle flow which then distorts when you move. For session comfort wear a soft cotton tee you can move up over the shoulder.
10. Geometric-Realism Mountain Cluster on the Outer Forearm
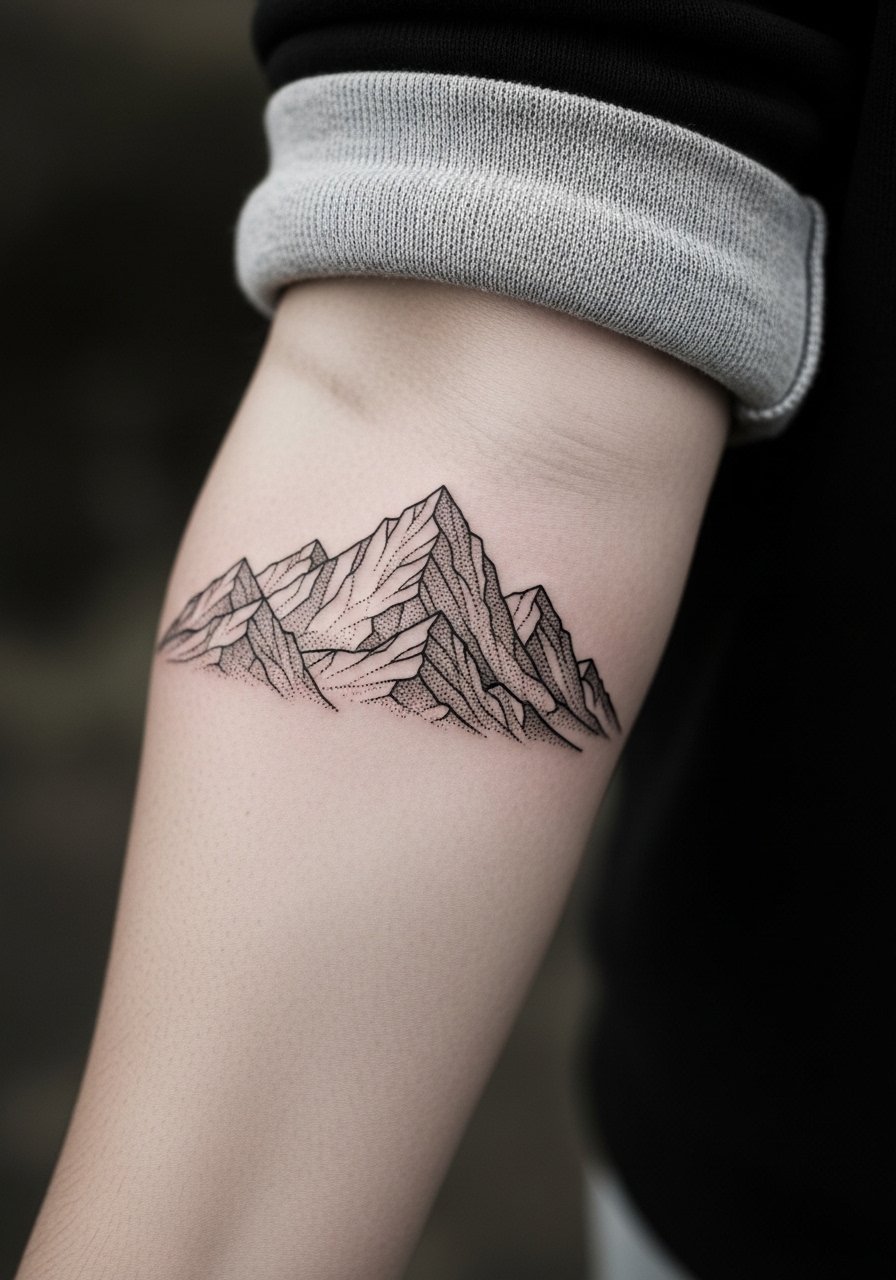
Visual impact lead: combining geometric framing with realistic shading keeps the piece both modern and grounded. The forearm is forgiving but do not crowd the peaks into fine stippling that will merge over time. Ask for wider spacing in dense dot work and for stipple shading that transitions slowly. The session is medium length and touch-ups may be needed at year three for the tight dots. For styling, a rolled sleeve chambray shirt frames the cluster without stealing attention.
11. Sternum Anchor in Black and Gray
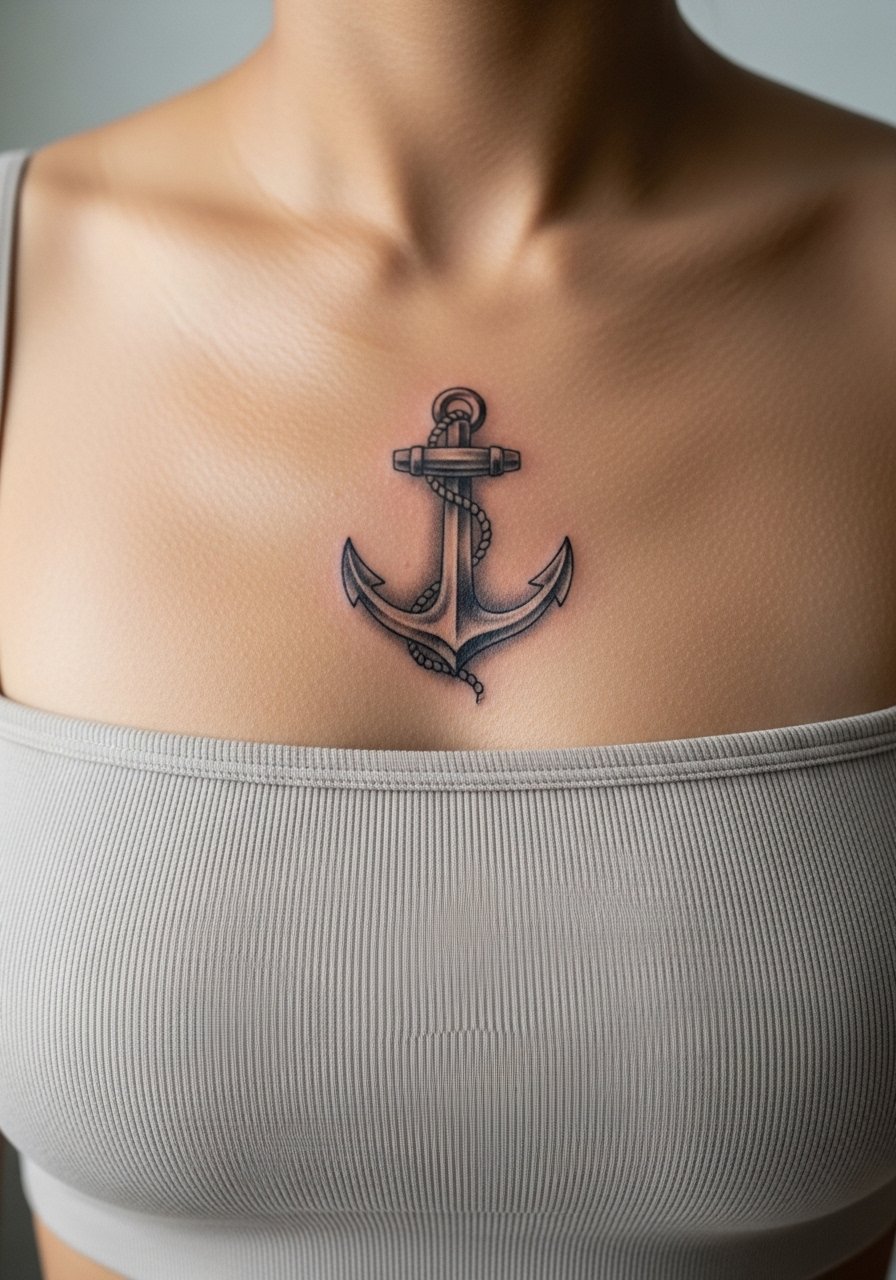
Pain warning lead: sternum sessions rank high on most pain scales but can be done in shorter passes. Artists diverge on technique for this area. One camp argues dense fine line over bone blurs quickly. The other camp maintains that with steady needle depth and careful spacing, detail can last. Ask your artist directly which method they use before committing. For session wear, a fitted top you can unclip or pull down slightly helps the artist work without excess shifting.
12. Worn Compass on the Ribcage

Controversy lead: fine line on ribs splits artists into two camps. One group says the skin stretch and breathing blur lines within two years. The other group says that with proper spacing and needle depth fine line can settle well. Be explicit in consultation about how the artist plans to space the compass points and at what depth they will lay lines. Expect a higher pain rating and plan for a short session with breathing breaks. For appointment comfort wear a cropped athletic top you can lift slightly so only the tattooed area is exposed.
13. Micro-Realism Pocket Watch on the Inner Bicep
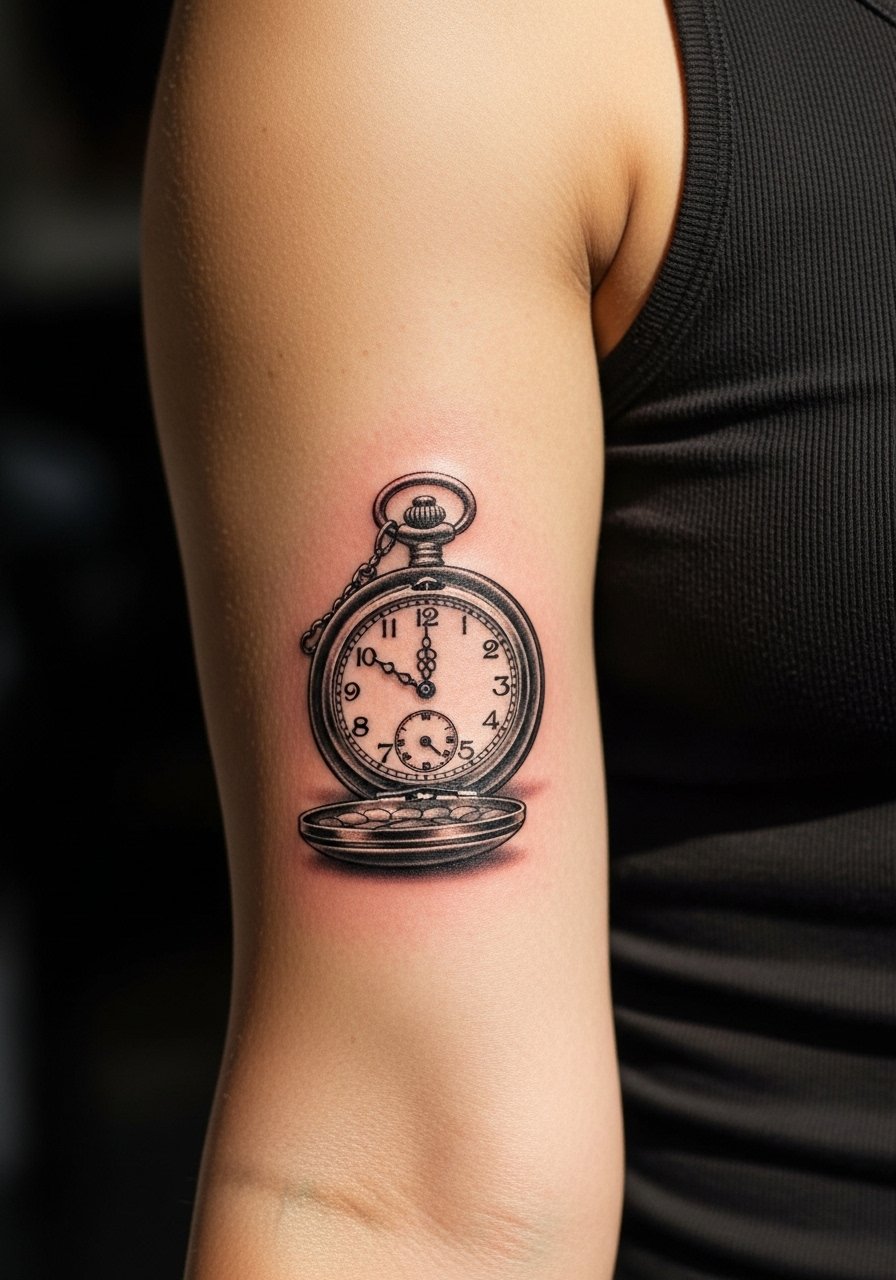
Pain warning lead: inner bicep and the crease can be sensitive, but the area takes micro detail well when spaced. Tell your artist you want the numerals slightly bolder than reference so the face reads after six months. The usual mistake is crowding numerals into a tiny dial which washes out. Session feel includes a ticklish stretch when the artist repositions the arm. For access, wear a sleeveless tank that can be pulled aside easily.
14. Mechanical Gear Half-Sleeve on the Upper Arm
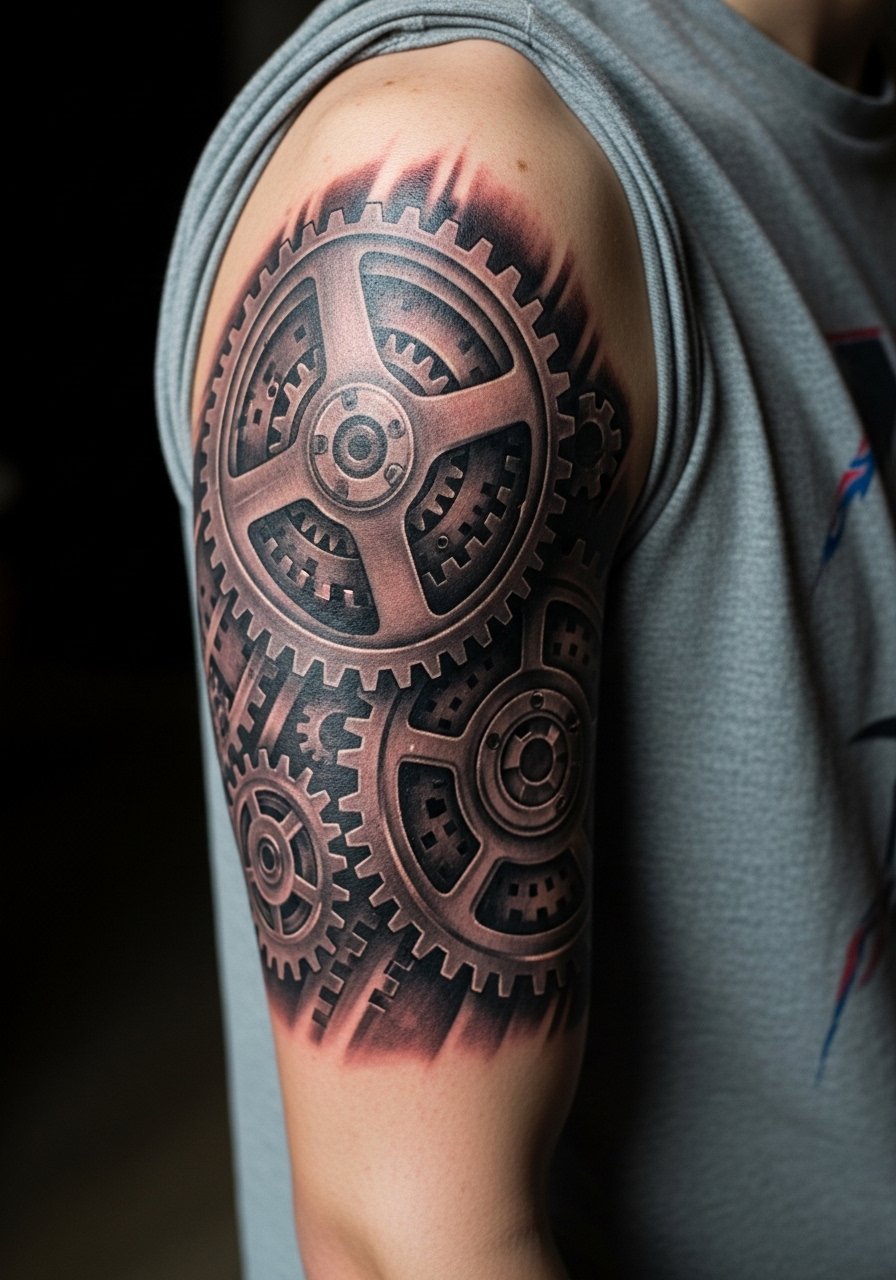
Mistake lead: half-sleeves fail when the gears are drawn without negative space, which makes the whole block muddle after a couple of years. For mechanical realism, ask your artist to plan larger gaps between parts and to use stipple for midtones. Sessions are long and often split into two. For showing the sleeve toss on a short-sleeve work shirt and roll the sleeves for a casual reveal.
15. Rope and Hand on the Dorsal Hand
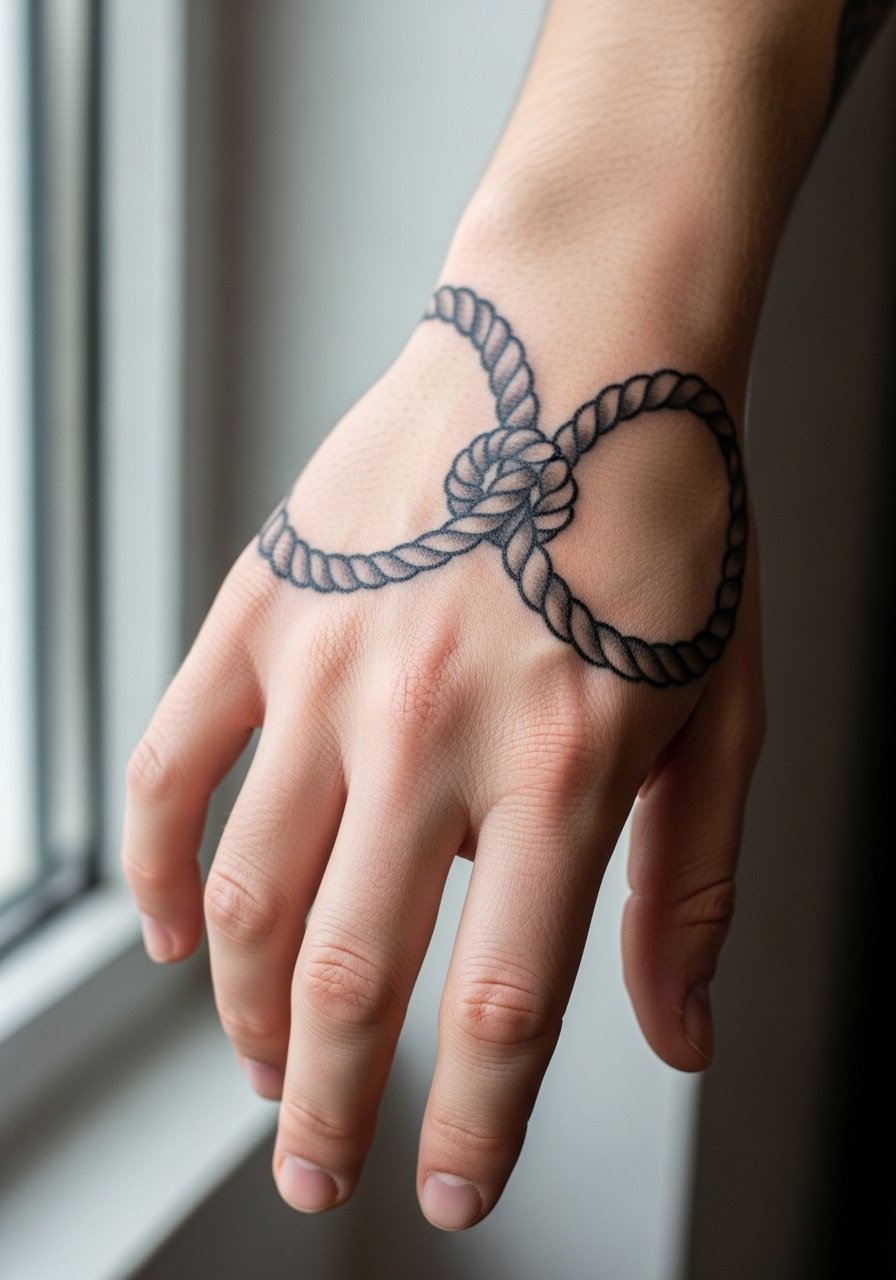
Aging/healing lead: hand tattoos carry a higher fade risk because of washing and sun exposure. Expect touch-ups more often and know many workplaces still view hand tattoos conservatively. The frequent mistake is cramming a detailed scene into the small flat of the hand which blurs. If you choose this, ask for bolder linework and higher contrast. The session is short but the aftercare window is intense.
16. Equestrian Horse Head on the Upper Thigh
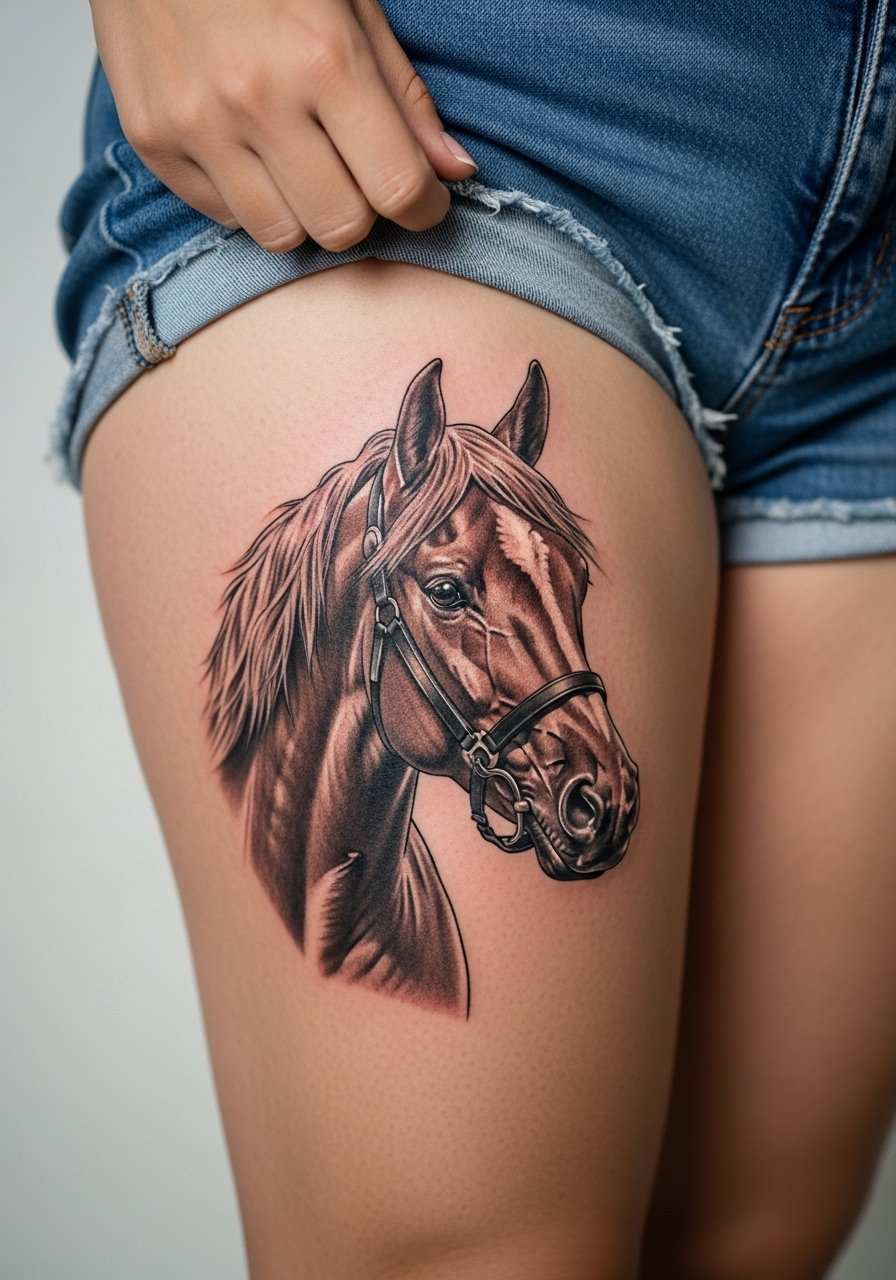
Styling lead: the thigh tolerates large realistic pieces and heals with less sun exposure. Pain is moderate and sessions can be long depending on mane detail. Ask for satin shading on the muzzle and slightly stronger outlines around the jaw so the silhouette reads through clothing. For the appointment, wear high-waisted shorts or loose gym shorts to allow the artist to access the area without pressure on the skin.
17. Bold Cross on the Collarbone in Blackwork
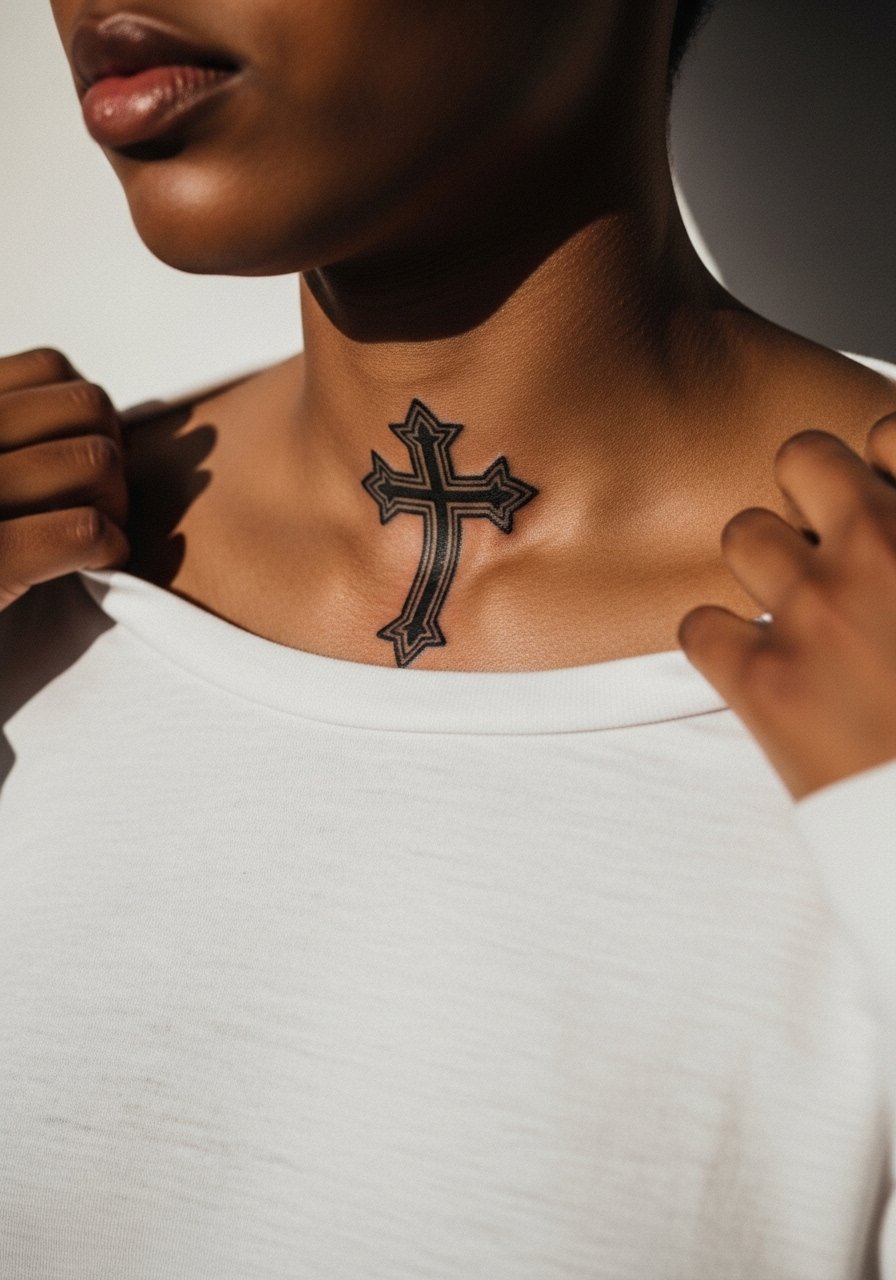
Visual impact lead: collarbone pieces read strong because they sit near clothing lines. Expect a sharp sting over bone and a short session. Tell the artist you want the edges crisp and the fill solid so the cross keeps its silhouette as shirts rub. A mistake is asking for thin filigree right on the bone which fades into gray. For nights out, a wide-neck sweater frames the cross neatly.
18. Wolf Howling on the Mid-Back
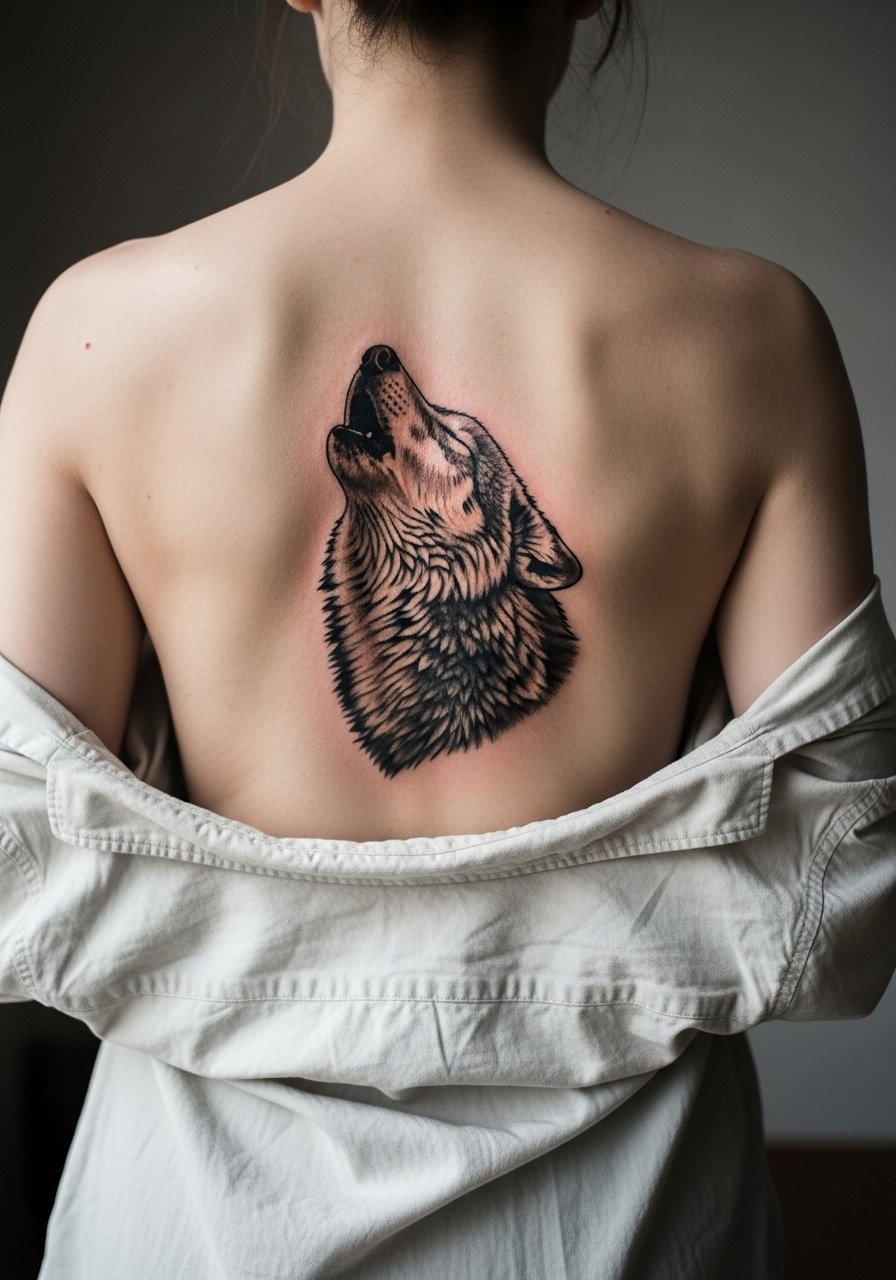
Personal observation: mid-back pieces survive years because they avoid frequent sun. The session can be long and requires flipping and repositioning. Ask for deeper contrast in the snout and softer stipple in the fur to keep depth. The most common mistake is squeezing too much sky detail behind the head which makes the piece visually heavy. For comfort pick a button-down you can slide aside with minimal tugging.
19. Photorealistic Eye on the Side Neck

Controversy lead: neck work divides opinion on employability and longevity. One camp says side neck tattoos limit job prospects and blur faster due to movement. The other argues placement and scale can keep work crisp and still be wearable in many professions. Ask your artist how they handle movement lines in the stencil stage. Pain is high and session lengths depend on the amount of shading. Consider the career angle before committing.
20. Minimalist Anchor on the Ankle
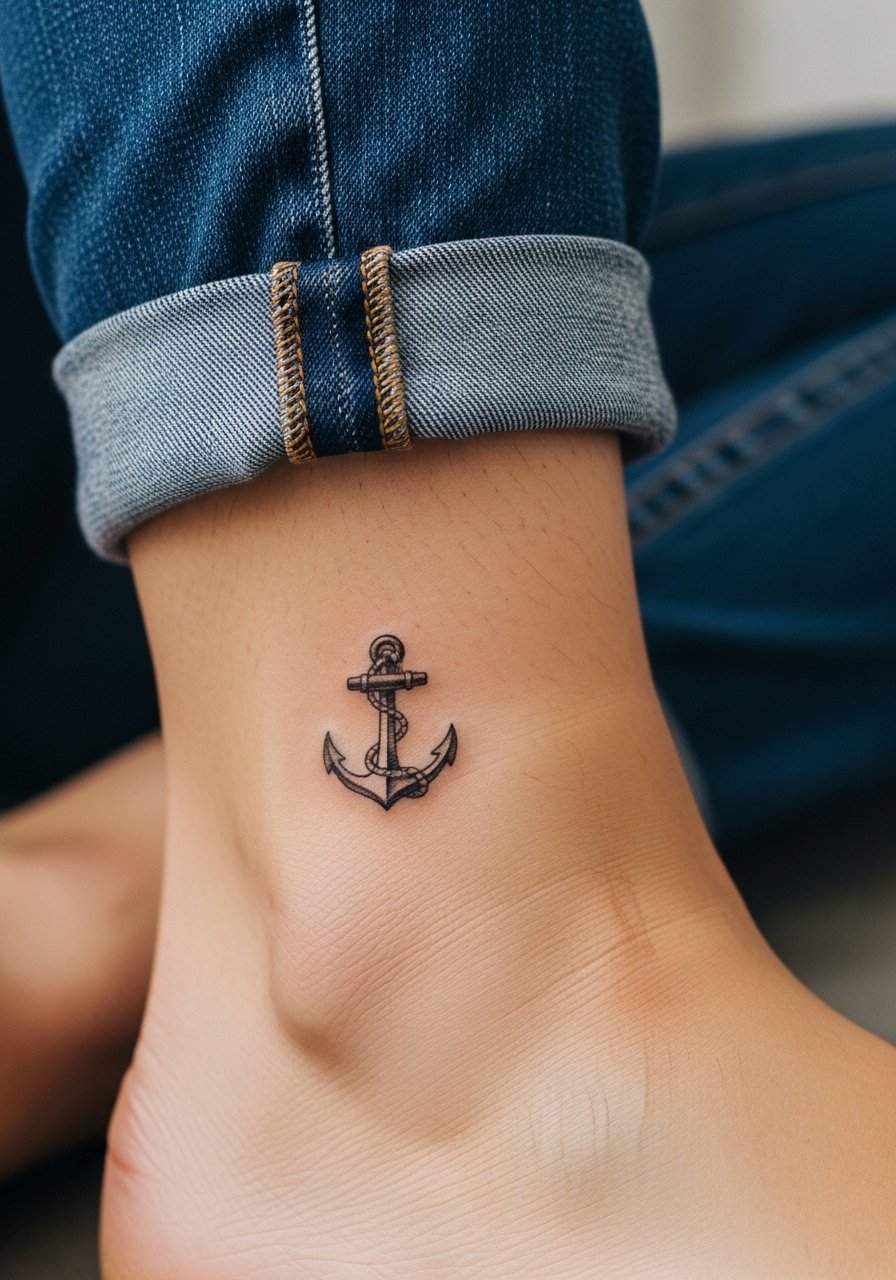
Pain warning lead: ankle pieces hurt more than they look because the skin sits close to bone. For a small anchor keep line weight slightly bolder than the thinnest reference to avoid early blur. A common mistake is insisting on micro-strokes at the tip of the anchor which disappear first. For showing with shoes, cuffed jeans and a pared-down canvas sneaker keep attention on the ankle without overcomplicating the outfit.
21. Tiny Crescent Moon on the Finger

Mistake lead: finger tattoos are notorious for early fading and loss because skin there regenerates rapidly. Expect frequent touch-ups and fewer sessions with light passes. If you want longevity, push for slightly bolder contour lines and accept that fine interior shading will soften. The session is short but aftercare must be strict. The trade-off is a very visible piece that ages faster than forearm work.
22. Dragon Wrap Along the Shin
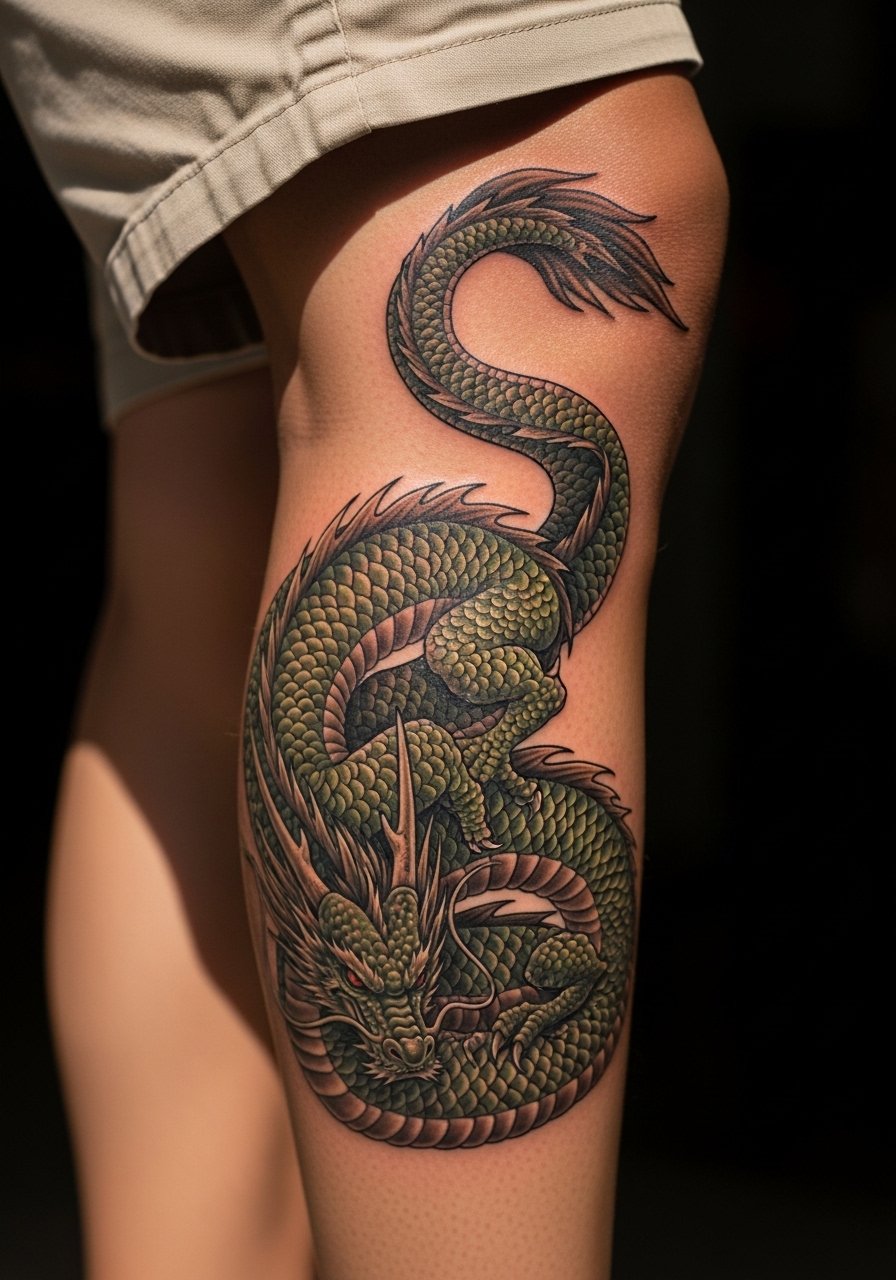
Consultation lead: shins are good for vertical compositions like a dragon. Tell your artist you want alternating scales of heavier and lighter saturation to maintain motion at a distance. The pain is moderate and sessions depend on how far down the ankle you extend. A common error is tight micro-detail at the tail which loses definition faster than the head. For showing, shorts that hit mid-thigh keep the piece visible and balanced.
23. Oak Tree on the Lower Back
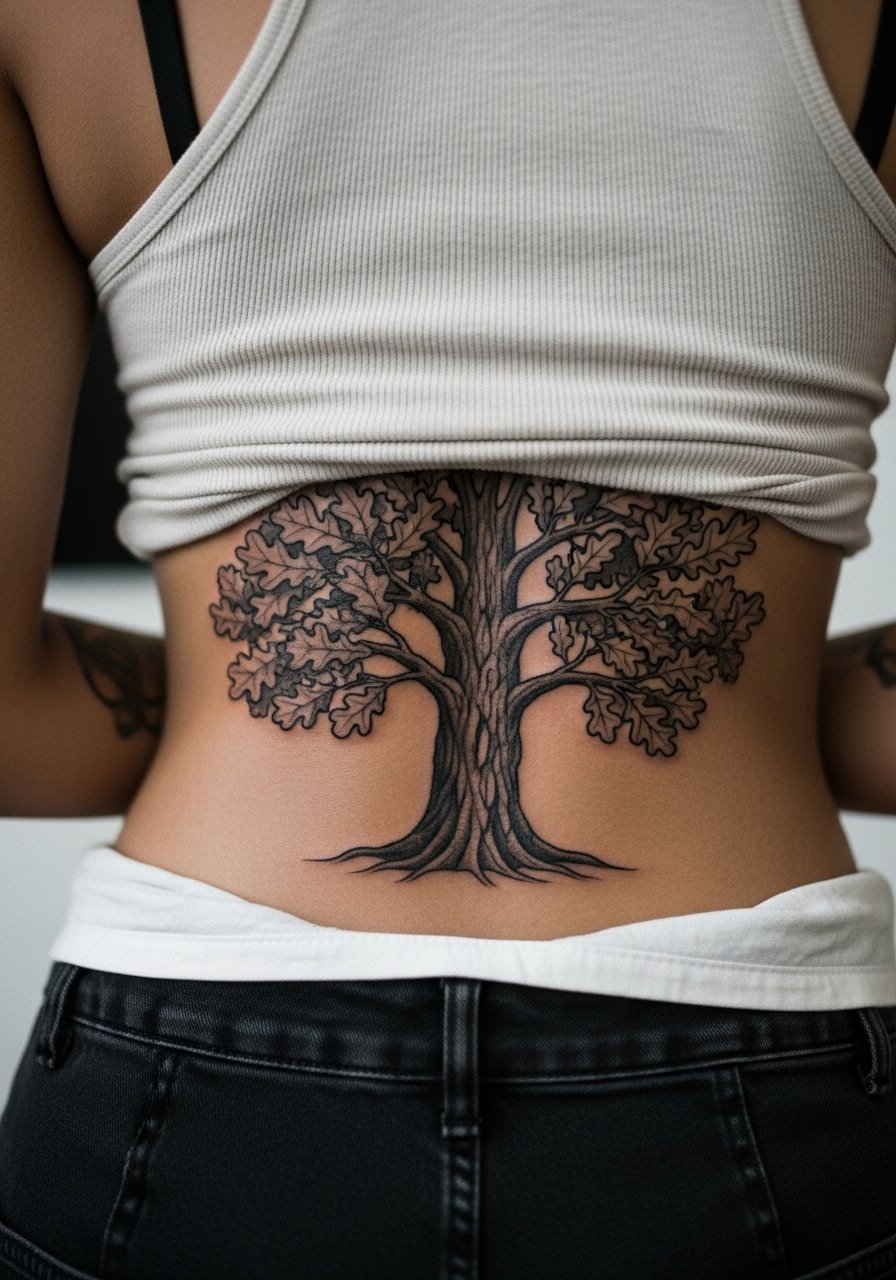
Aging/healing lead: lower back tattoos get less sun but can be affected by waistbands. Plan the trunk so it sits above where belts normally rest to avoid abrasion. Ask your artist for a slightly bolder trunk outline and softer canopy stipple. Sessions are medium and healing is straightforward if you avoid tight waistbands. For sessions wear a tank top and high-waisted pants so the artist can lower or raise fabric with care.
24. Lion Paw Near the Heart
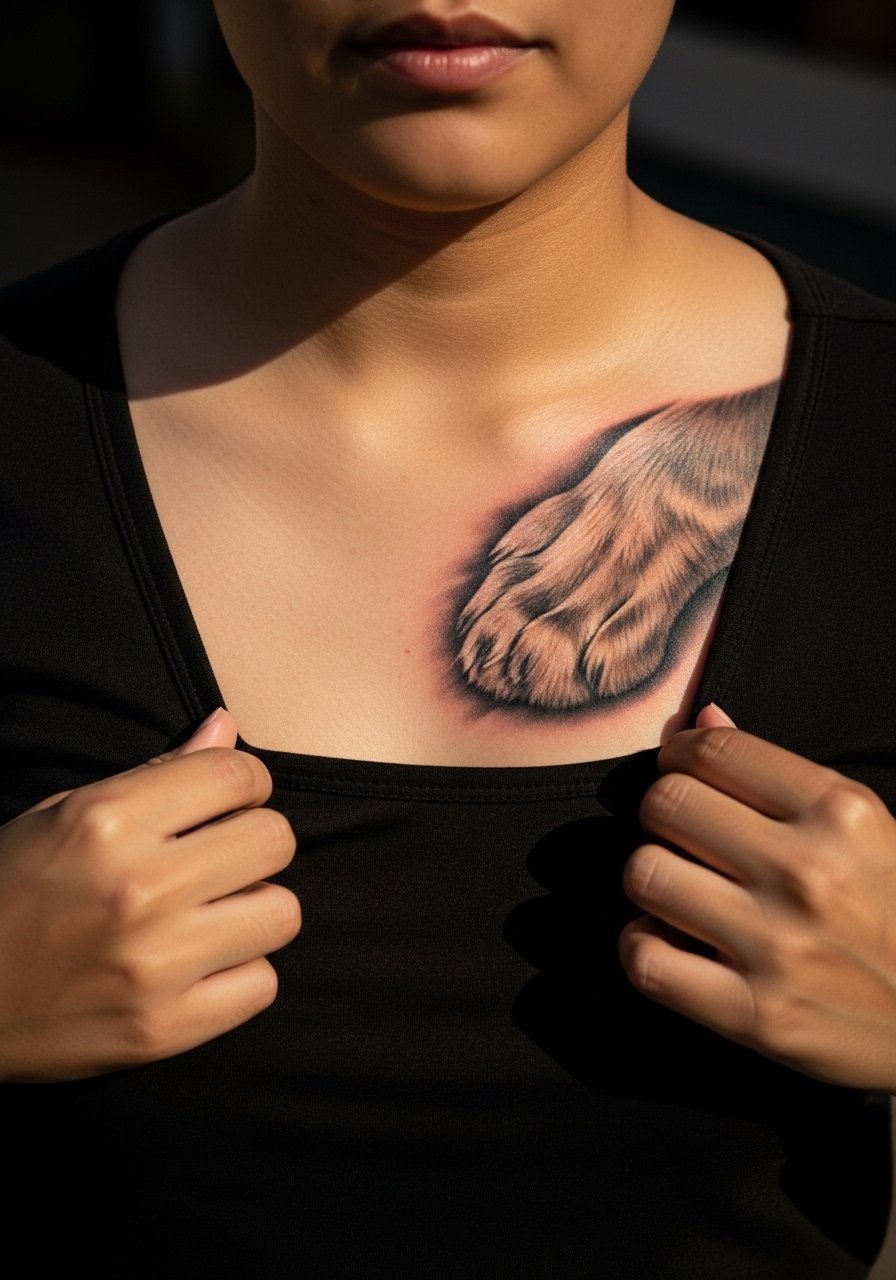
Visual impact lead: chest placements near the heart read as personal statements and age predictably if you avoid thin filigree over bone. Pain is moderate to high and sessions may be split. Ask for a mix of stipple and solid shadow so the paw keeps dimension as the skin settles. A common mistake is tiny claws rendered with the same detail as the pads which wash out. For showing pair with a v-neck tee that partially reveals the chest.
25. Photorealistic Rose on the Shoulder Blade
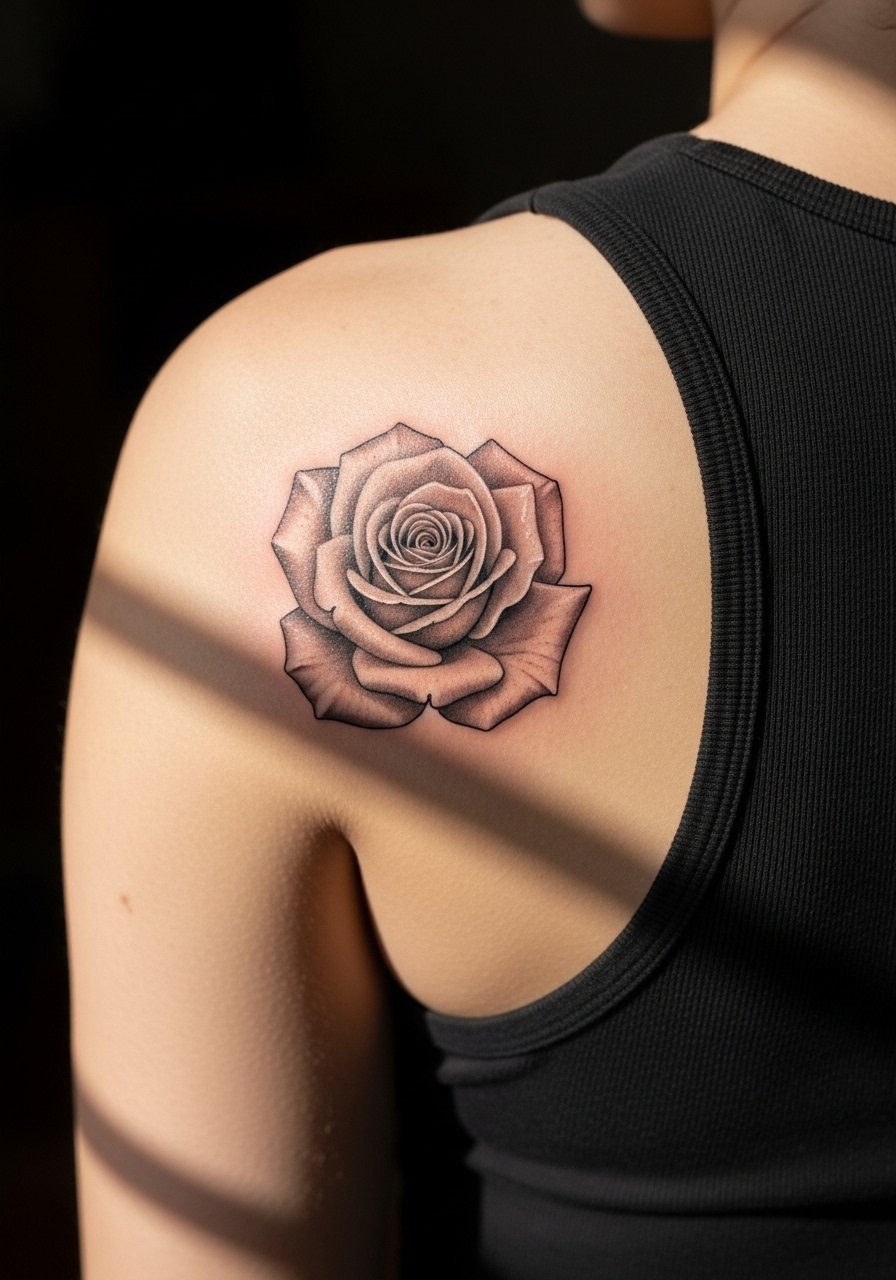
Styling lead: shoulder blade tattoos benefit from being revealed by tank tops and open-back shirts. The area tolerates shading and holds detail for several years. Tell your artist to plan petal layers with negative space so the flower does not become a flat blot. Sessions are medium length. For evening looks try an open-back shirt that frames the rose elegantly.
26. Photorealistic Scapula Eagle Wing
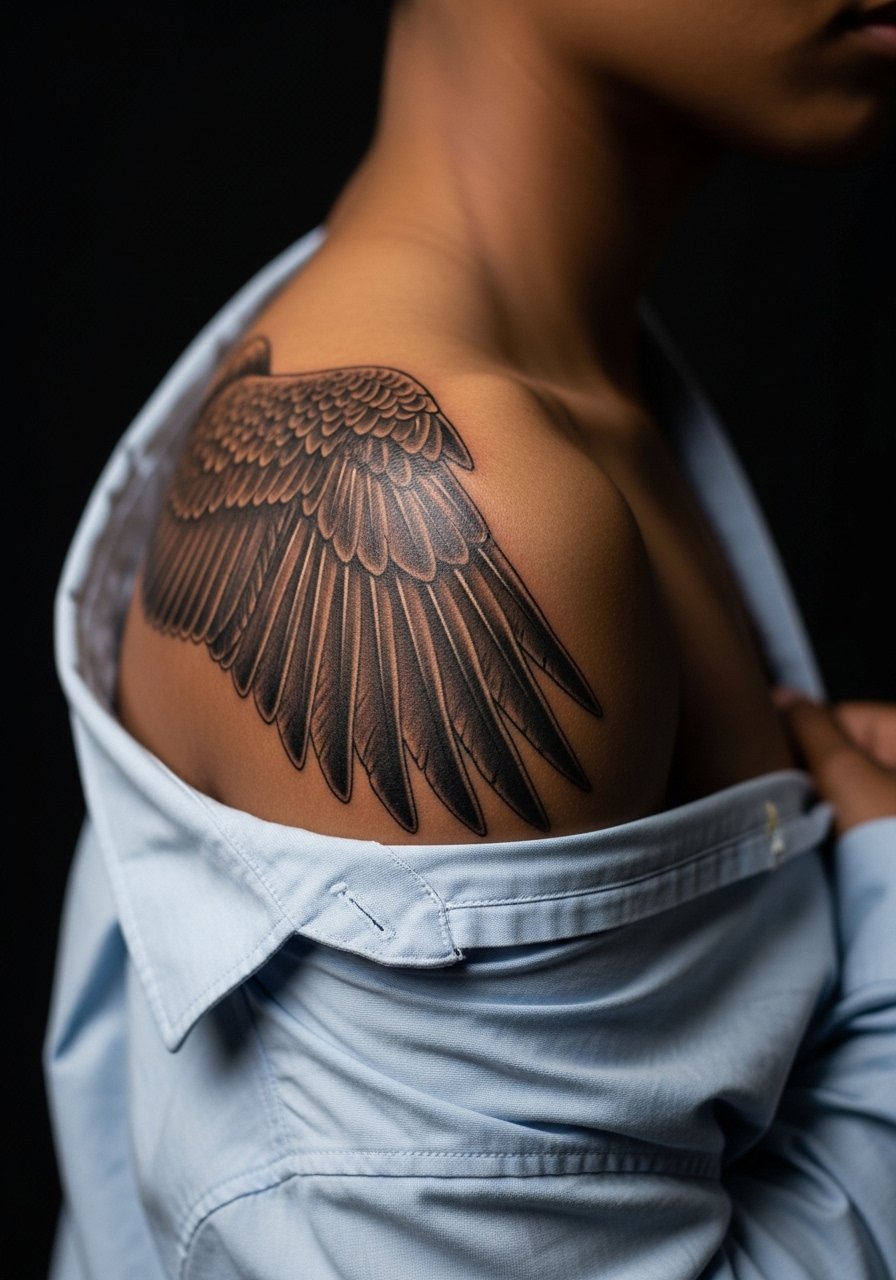
Mistake lead: scapula pieces can look stretched if the design follows muscle bands poorly. Ask the artist to map the stencil while you move your shoulder so the wing sits correctly. Pain is moderate and sessions can be long because of shifting positions. For after sessions, a loose button-down keeps fabric from rubbing against the healing area.
27. Clenched Fist Motif on the Forearm Sleeve
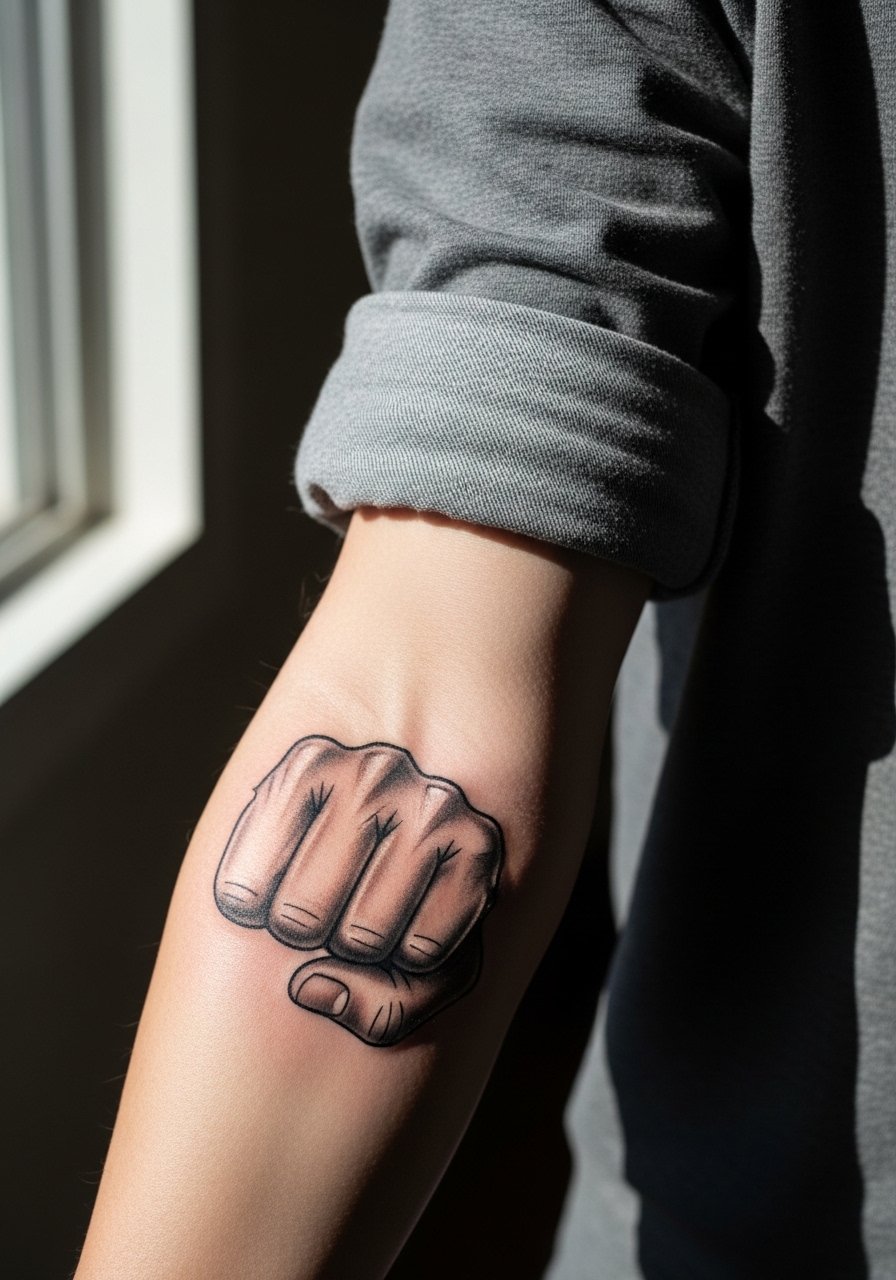
Consultation lead: sleeve integration matters here. If the clenched fist is the focal point, ensure the surrounding negative space allows it to read when you move. Forearm sleeves take multiple sessions and are higher on the commitment scale. The common error is packing additional motifs too tightly which makes separation difficult after a few years. For a casual reveal, roll a long-sleeve henley and let the forearm do the talking.
Frequently Asked Questions
Q: Will fine line portraits blur faster than bold blackwork on my chest?
A: It depends on placement and how the artist spaces the lines. Fine line in high-movement areas can soften sooner while bold blackwork often becomes a stable silhouette. Ask for slightly stronger line weight on the smallest details if you want a portrait to last longer.
Q: How many sessions should I expect for a photorealistic half-sleeve?
A: Most realistic half-sleeves take two to four sessions depending on coverage and the amount of fine shading. Expect each appointment to be several hours and factor in a touch-up window months later.
Q: Are hand and finger tattoos worth it if I want longevity?
A: Hand and finger tattoos require frequent touch-ups because those skin areas see constant washing and abrasion. If longevity matters more than immediate visibility choose forearm or calf placements instead.
Q: What should I wear to a sternum or ribcage appointment?
A: Wear something you can shift without exposing your whole torso, for example a fitted sports bra or a zip-up hoodie that you can move aside to reveal only the tattoo zone. Comfort and access matter for long sessions.
Q: When should I plan a touch-up for a fine line forearm piece?
A: From what I have seen, many fine line forearm pieces benefit from a touch-up at year two to refresh the lightest strokes. How soon depends on sun exposure and your skin type.
Q: Do realistic color pieces fade faster than black and gray?
A: Color can fade faster in exposed places because UV breaks pigment down more quickly. In my experience, strategic saturation and aftercare slow that process, but black and gray often keeps a clearer silhouette over longer periods.
