
The tattoos that still read strong at year ten often looked plainer on day one. Overly detailed pieces that score saves on social media tend to soften fast. I see three recurring headaches: patchwork sleeves that read mismatched because multiple artists stitched pieces together, blackwork that photographs oddly on darker skin tones, and sticker-sleeve budgets that balloon between sessions. These picks start with sleeves and move into practical choices that avoid those exact traps.
1. Patchwork Skull and Dagger Sleeve, Outer Forearm to Shoulder
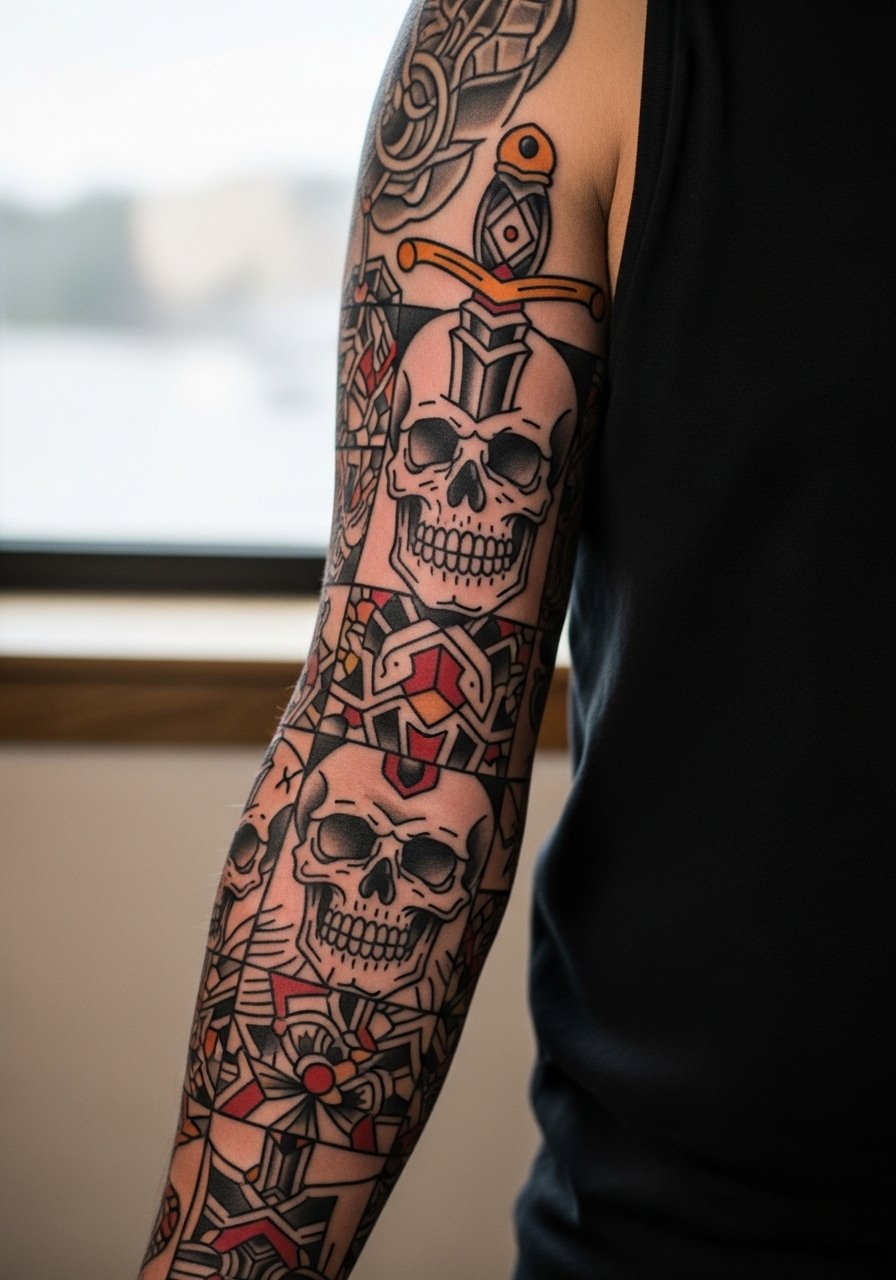
I recommend this when you want aggressive motifs that still read from across a room. For the consultation, ask your artist to map core outlines first so future guest pieces can tuck into the negative space. A common mistake is starting with too-fine interior detail instead of locking in thick outlines, and that causes early softening and mismatch later. Expect four to six sessions and plan touch-ups at year three if you sweat gym friction. For the session wear, throw on a fitted black crewneck tee you can roll to give clean arm access, and take a leather jacket for later if you want the sleeve to pop in photos.
2. Animal Patchwork Collection, Upper Chest into Bicep
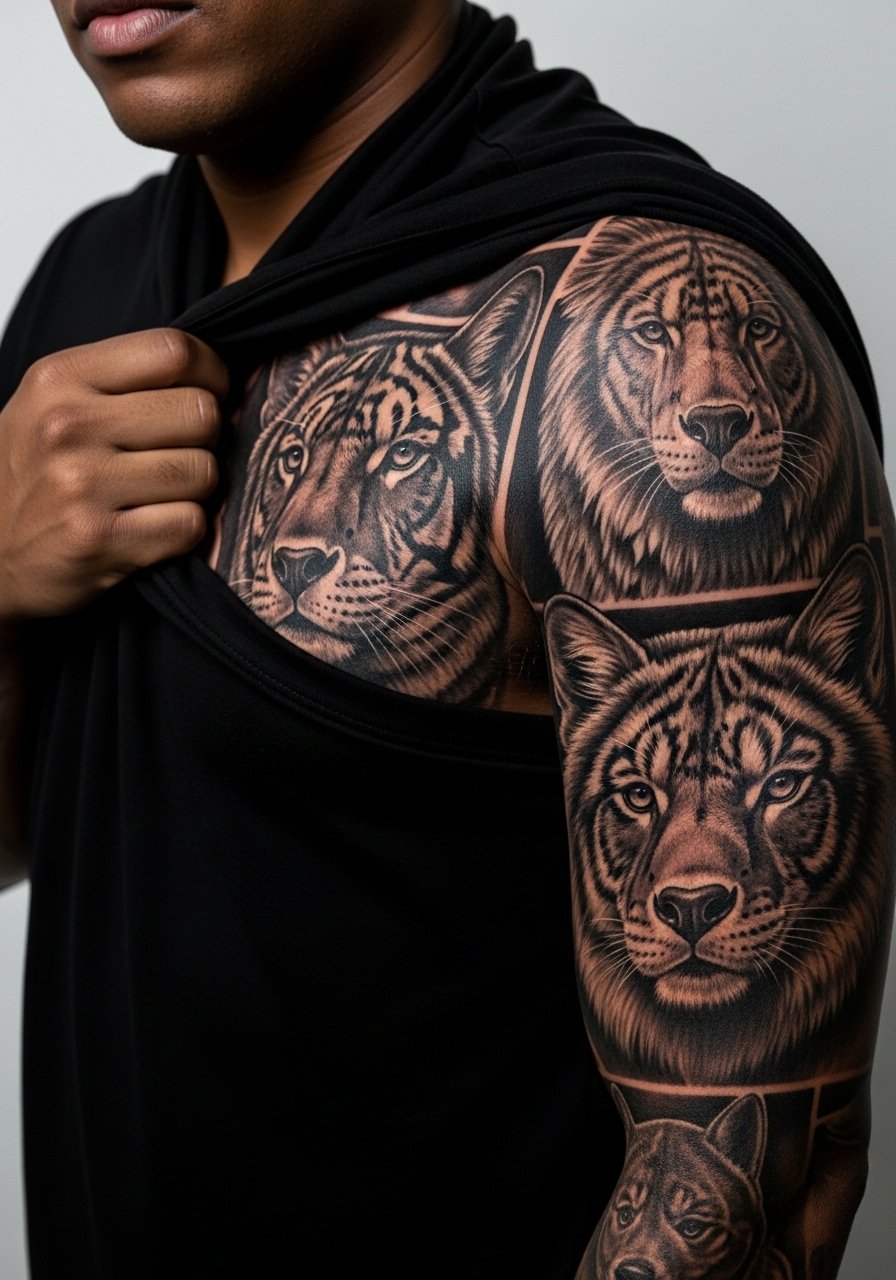
Chest portraits require space and restrained contrast so the faces hold. Tell your artist you want reduced high-contrast highlights in the dark realism sections, because overly bright white dots can yellow and migrate over time. The ribcage to chest transition can feel like a long session, so expect soreness and short breaks. On darker skin tones, prefer stronger saturation and slightly thicker linework so details remain legible in photos. For showing this off, pair with an open-collar henley that frames the chest without covering the bicep.
3. Mechanical Gear Patchwork, Outer Forearm Blackwork
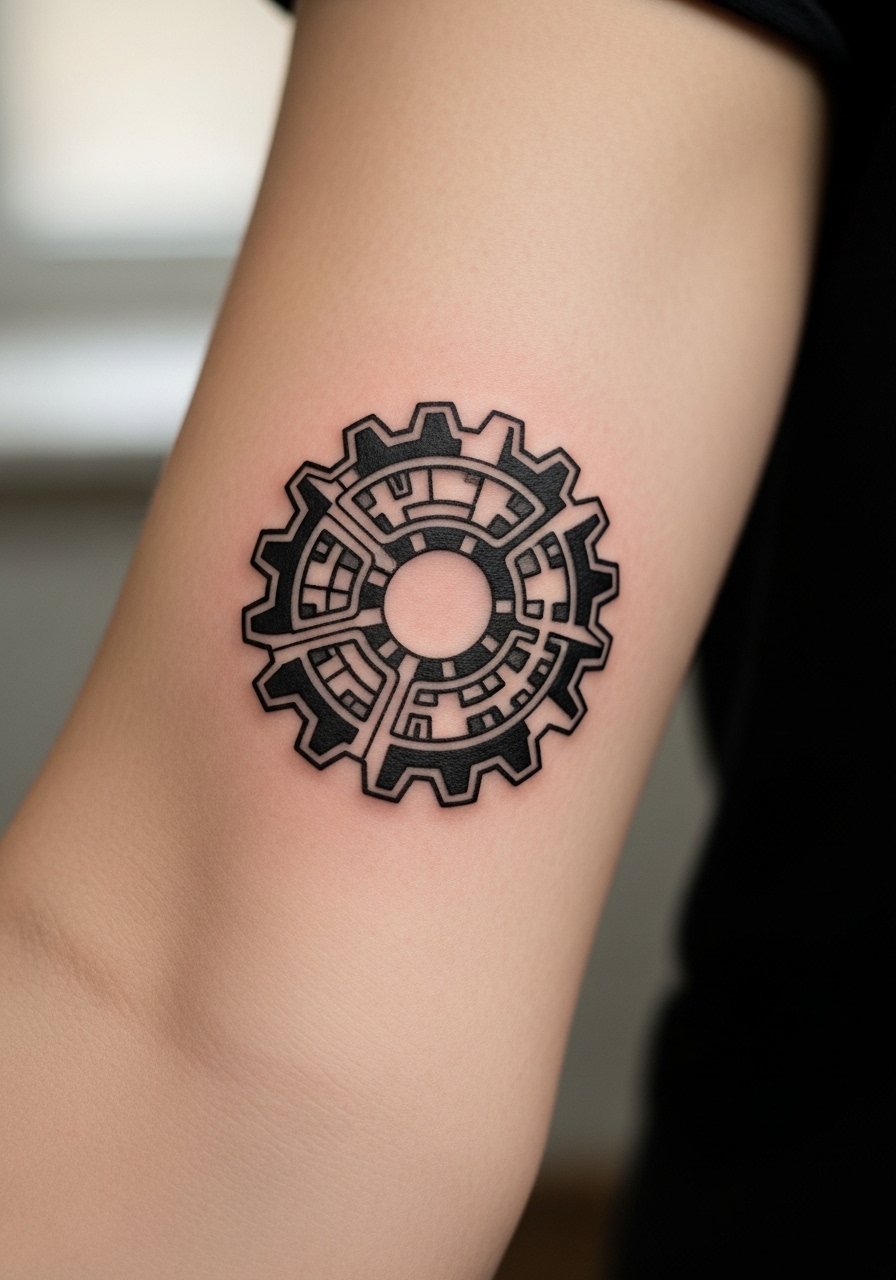
This is a smart pick when you want modular pieces that slot into a sleeve over time. Ask for bold blackwork with strategic negative space so later artists can add parts without crowding. The forearm sits low on blowout risk, but thin concentric detail can muddle by year two. Sessions run medium length and are tolerable for most guys. For session day, wear a loose short-sleeve athletic shirt so the artist can access the outer forearm without tugging fabric.
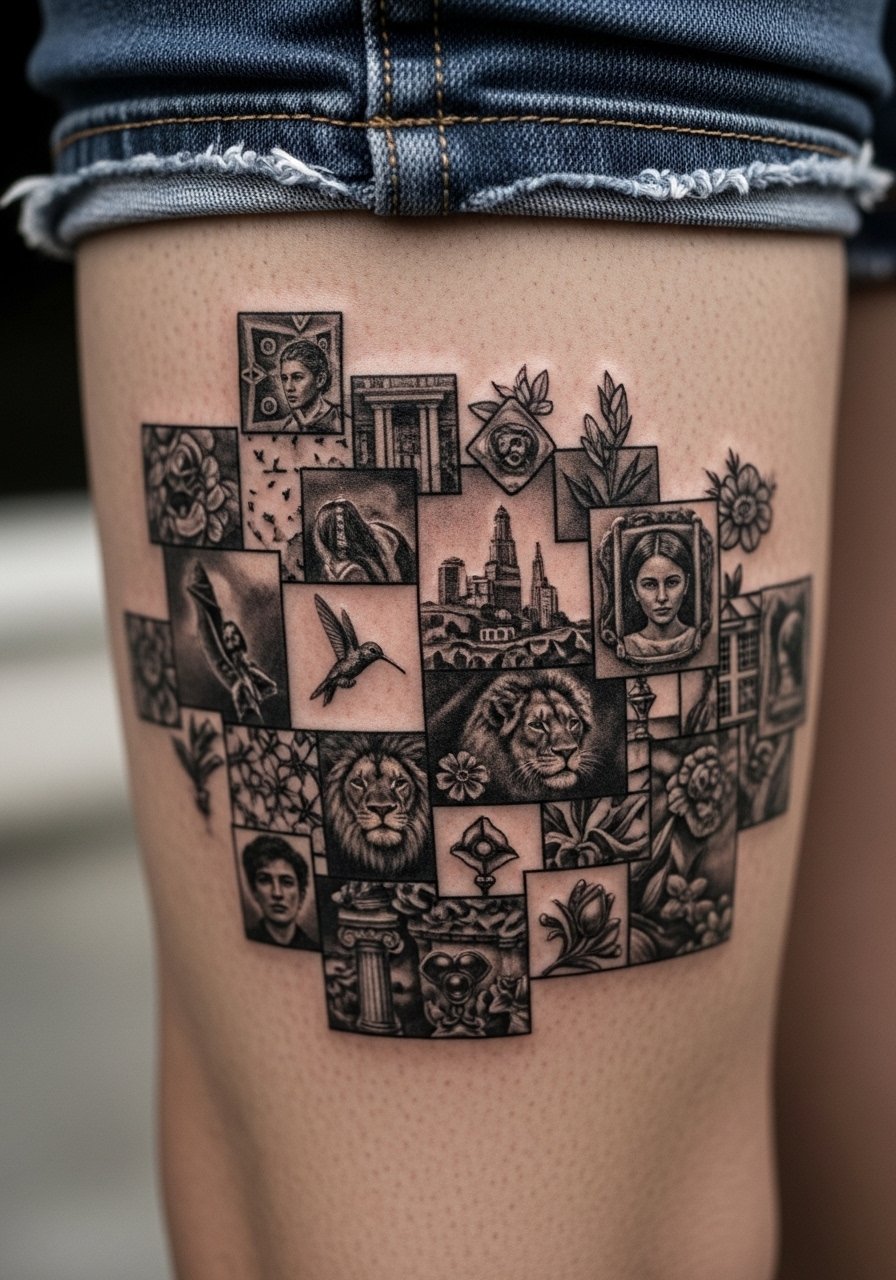
4. Traditional Flash Patchwork, Outer Thigh
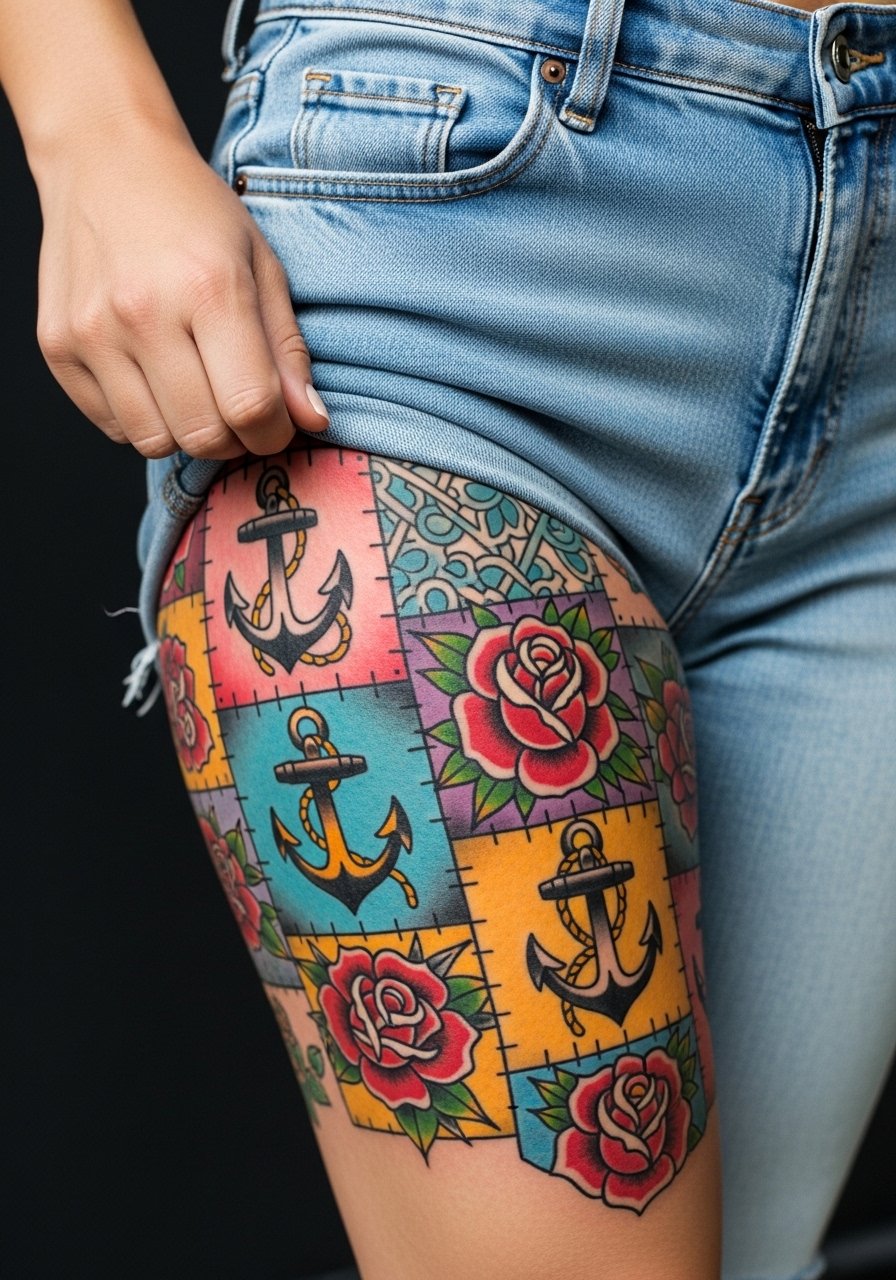
The outer thigh is forgiving for large flash pieces and great if you plan to add over years. The common error is buying tiny flash meant for wrists and scaling it up without adjusting line weight. Thigh sessions are long and sit-down heavy, so bring water and expect soreness when walking the next day. For summer show-off, slim joggers or cargo shorts in khaki frame the piece without competing with color.
5. Japanese Dragon Patchwork, Upper Back
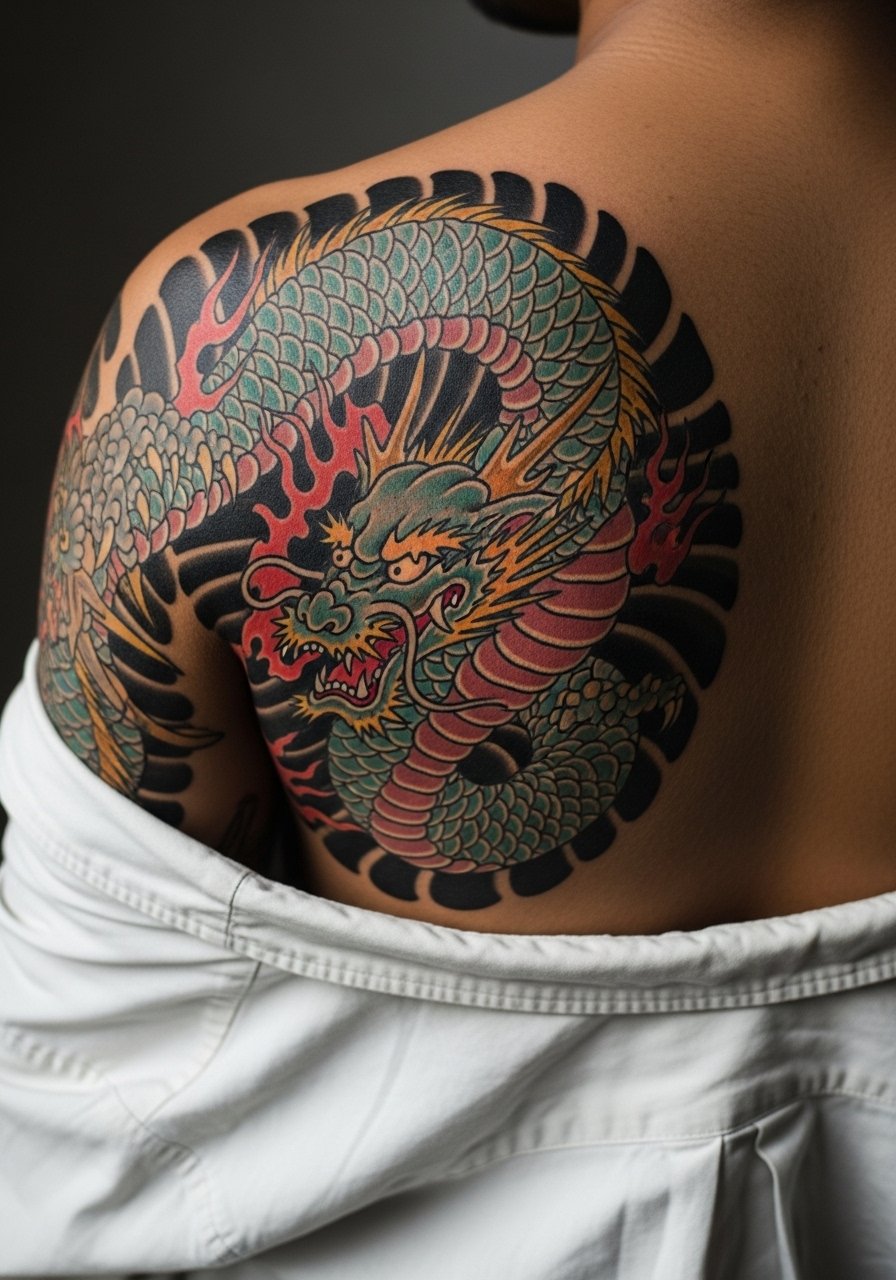
I suggest this when you want a single anchor piece that ties smaller patches later. Be explicit in consultation about scale so the dragon's flow complements spine and shoulder shapes. Big back pieces take multiple long sessions and healing demands are higher than arm work. Artists debate traditional processing and placement details, so ask where an artist places their black flats for longevity. For session day, a loose button down shirt you can slide to one side makes access easy.
6. Sacred Geometry Mandala, Shoulder Cap
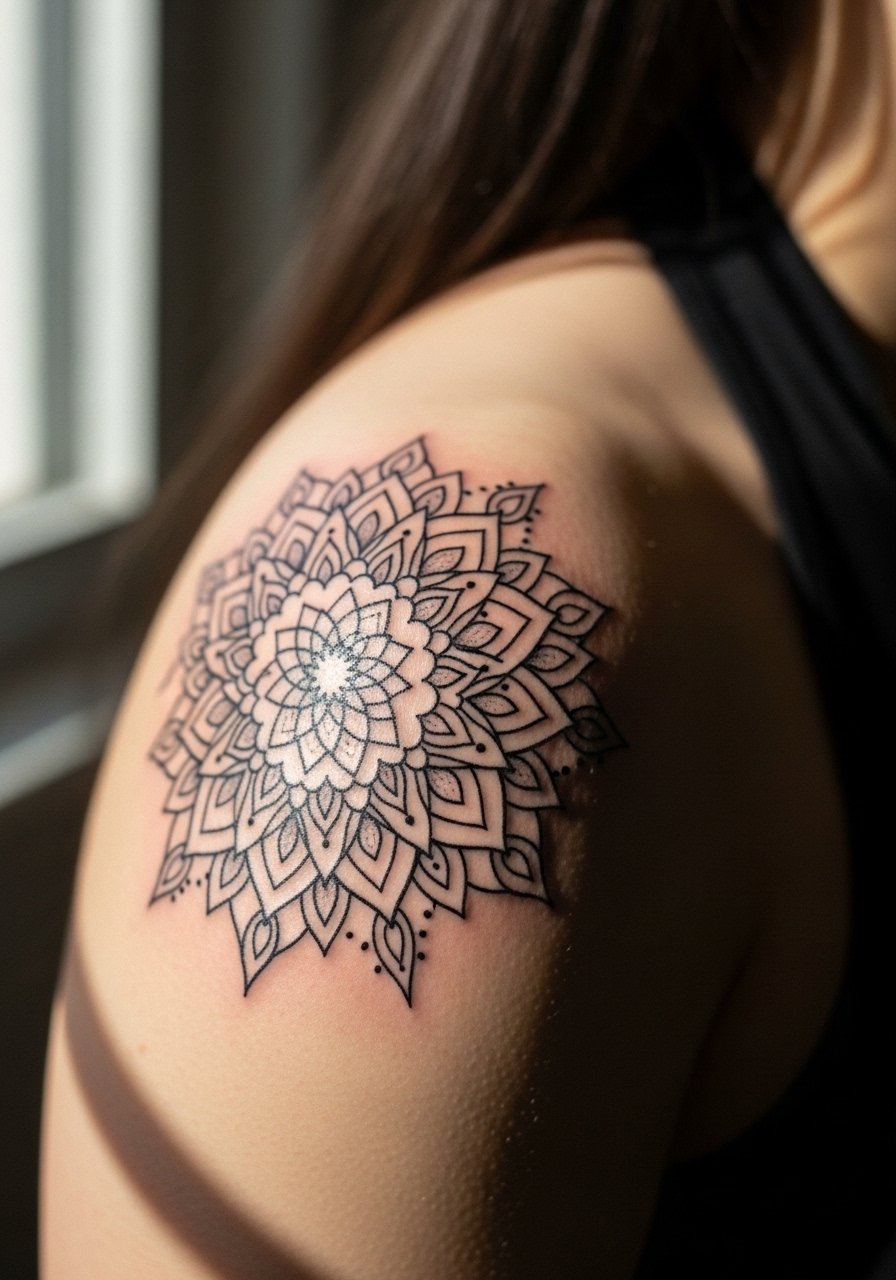
This one suits guys who need professional-friendly coverage with a modern edge. The big debate here is fine line versus bolder linework. One camp argues delicate geometry holds if spaced and sized properly. The other camp insists thicker lines age far better on men, especially with frequent sun exposure. My take is to size mandalas generously and keep negative space, that preserves crispness at year five. For a clean session, wear a v-neck tee so the artist has shoulder access without full undressing.
Studio Day Picks
The chest and shoulder pieces above demand different prep than forearm work, and a few targeted items smooth the session and early healing.
-
CeraVe Healing Ointment fragrance free. Thinner than some balms, it keeps color stable on arm and forearm pieces without creating greasy residue that traps dirt.
-
Indie Butter Tattoo Balm. A lighter winter balm some artists recommend when heavier greases feel too occlusive for large back or thigh work.
-
Green Sheep Tattoo Goo. Good for humid climates and for chest pieces that need a breathable layer during showers.
-
Hada Labo lotion. A low-shine option to keep realism portraits on the chest hydrated without smearing highlights in early healing.
-
Aquaphor Healing Ointment. A thin initial layer for small areas like wrists helps lock in moisture during the first 48 hours and protect fine line detail.
7. Photorealistic Portrait Patchwork, Outer Calf
Calf portraits wear well if you space sessions and avoid too-small faces. The outer calf has moderate pain and low blowout risk, so artists can pack fine shading. A frequent mistake is requesting maximum tiny detail in a single session. For long portrait work, plan staged sessions to monitor healing between passes. At six months you should see more depth; at two years expect slight softening and possible touch-up spots. For showing off, cuffed chinos or athletic shorts slim make the calf visible without cutting into the design.
8. Bold Outline Animal Patchwork, Outer Bicep
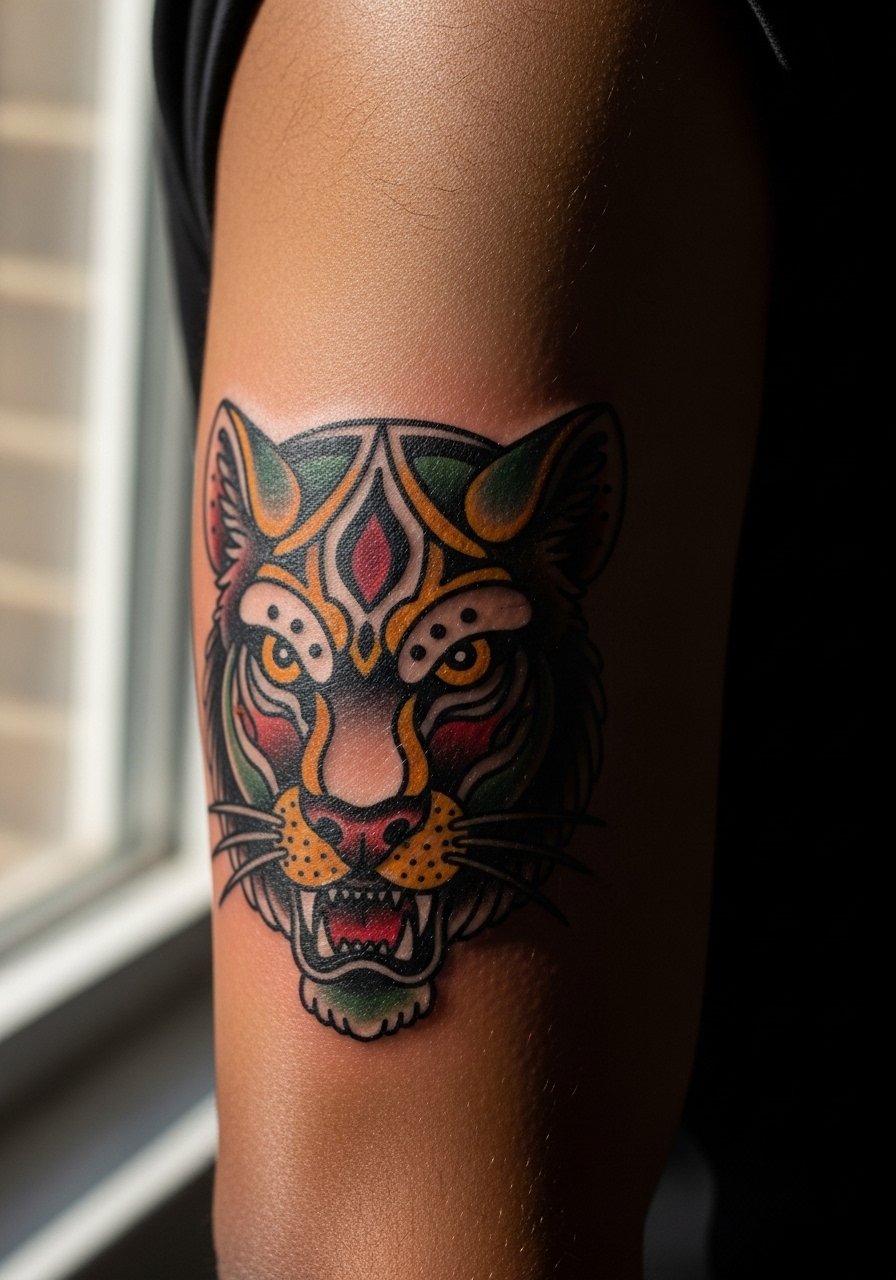
The outer bicep is a classic spot for pieces that read at a distance. Tell your artist you want a limited color palette and a strong outline so the animal reads even after sun exposure. A common error is crowding too many motifs on the upper arm early, which forces future additions into awkward filler zones. Session pain is low and touch-ups are predictable around year three. Pair with a short sleeve polo fitted when you want the arm to pop without showing everything.
9. Architectural Geometric Patchwork, Ribcage
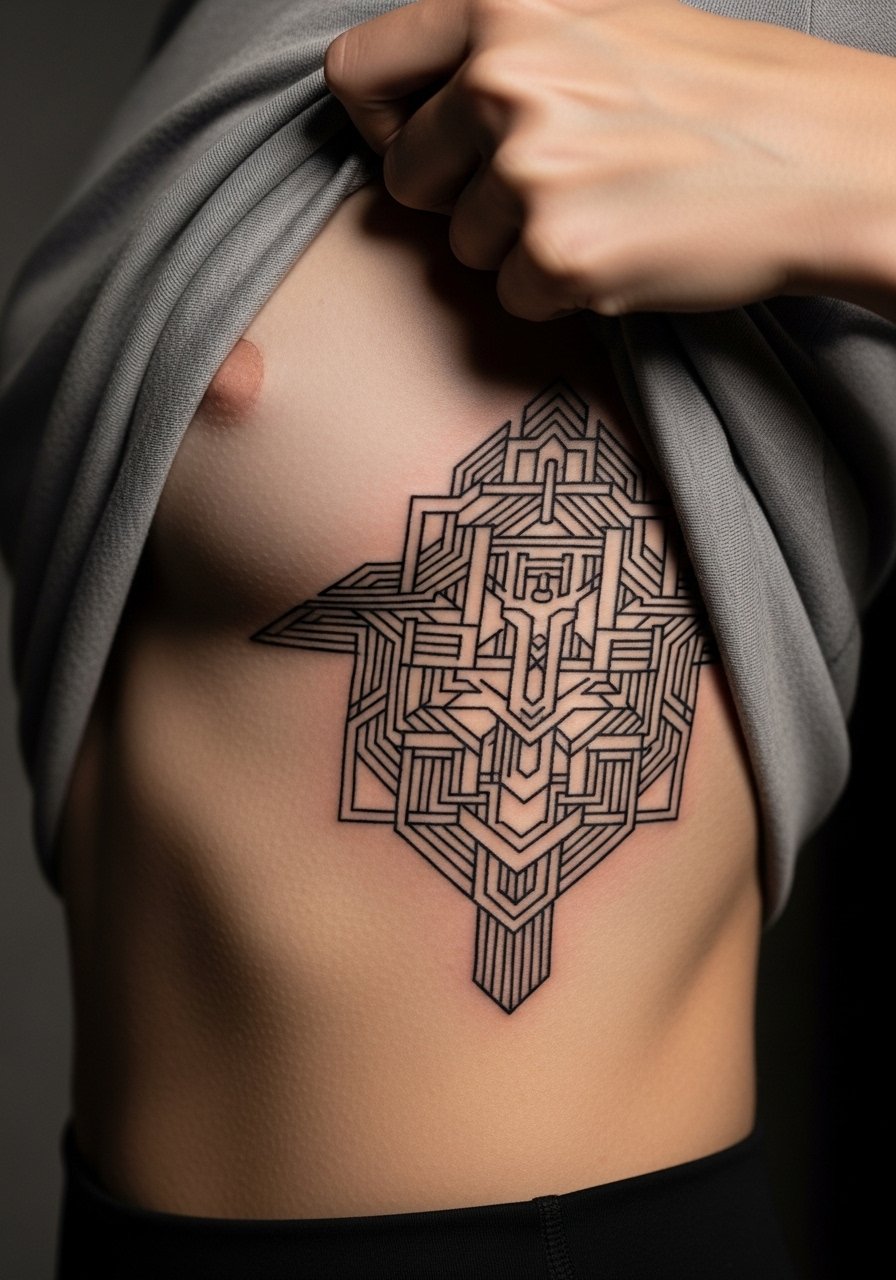
Fair warning, ribcage is higher on most pain charts, but the result is a striking side piece. Artists split on fine line here. One camp warns skin stretch and breathing blur dense lines, the other says careful depth and spacing settle well. My advice is to scale elements and build negative space into the architecture so the piece breathes as you age. Expect four sessions and stagger them to let the ribs settle. For session wear, a side slit loose tank you can lift makes access simple.
10. Skull and Mechanical Patchwork, Neck into Upper Chest
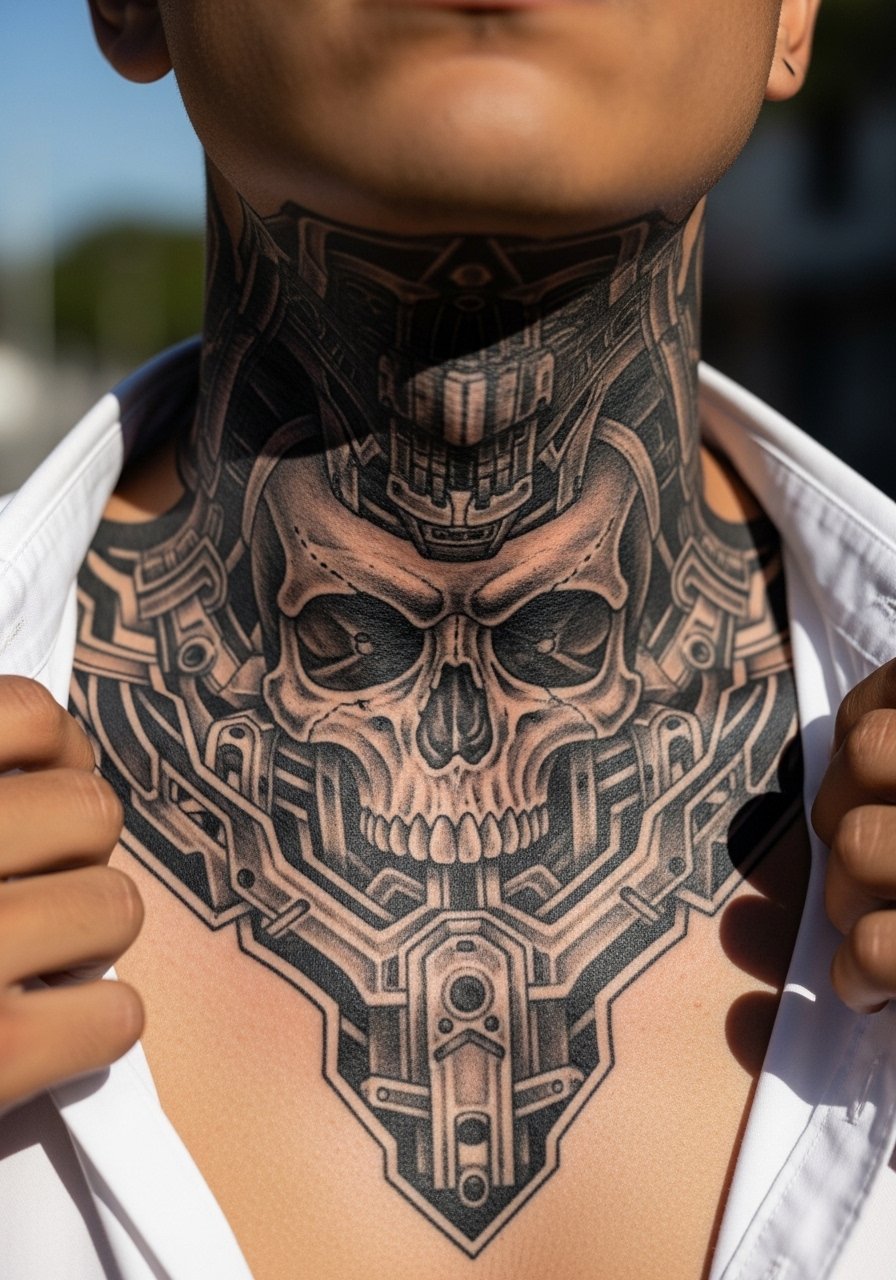
Neck-to-chest pieces are bold and often visible in professional settings. If you want this, ask for transition elements that soften the jump from neck to chest so future additions sit easily. A mistake I see is committing to very dark chest fills without accounting for future portrait or realism additions. Sessions are intense and require breaks. Keep in mind some workplaces react to neck visibility, so weigh the visibility before starting. For the appointment, an open collar henley black gives the artist access and keeps you comfortable afterward.
11. Traditional Rose and Dagger, Wrist into Forearm
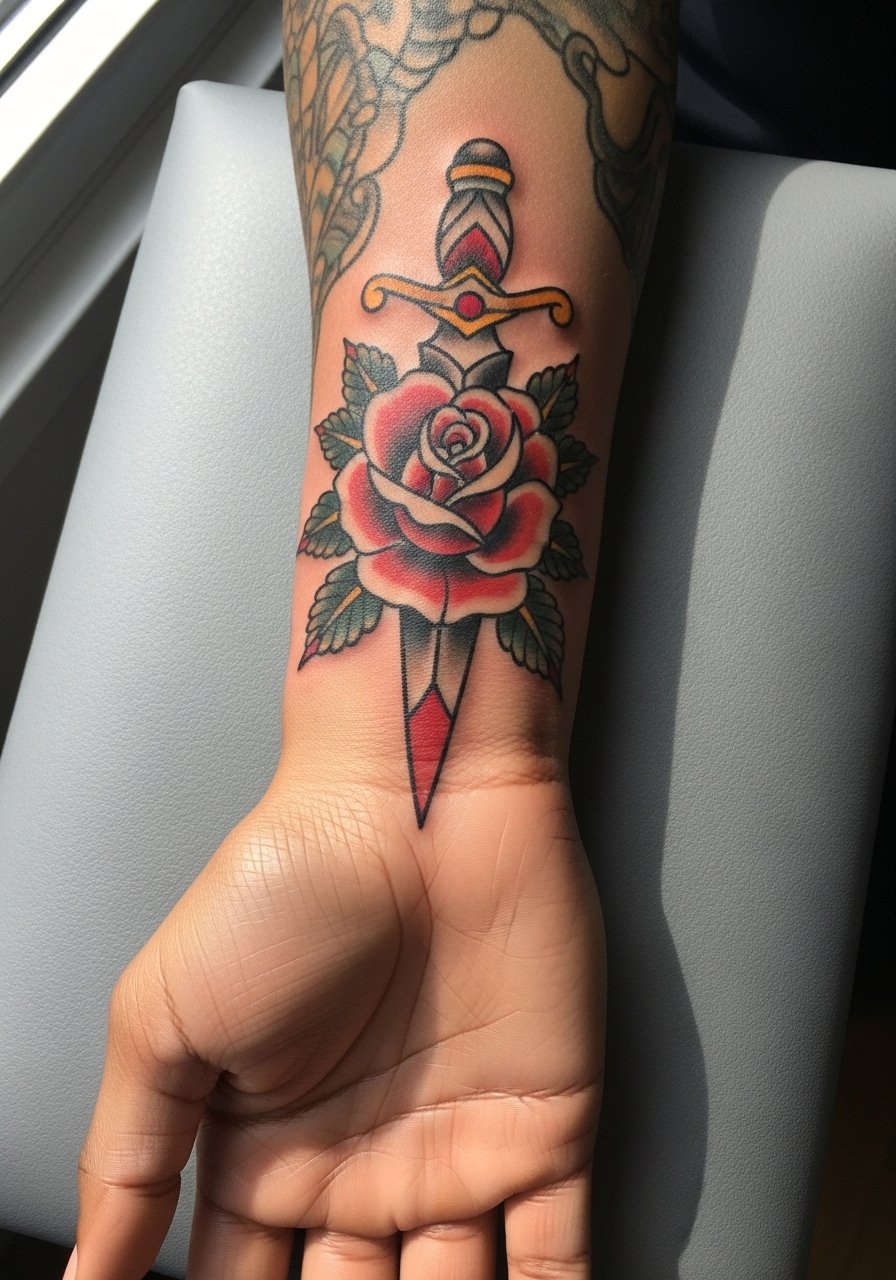
Tiny starts at the wrist are how many sticker sleeves begin. The inner wrist has high motion and friction from watches and straps, so ask for a slightly simpler dagger and robust outlines to avoid premature fading. A frequent mistake is cramming fine shading into the wrist where it scuffs easily. Expect quick sessions and a possible touch-up at one year if you wear watches daily. For session day, wear a rolled sleeve henley so the artist can reach the wrist without sleeve tugging.
12. Mandala and Wolf Patchwork, Upper Arm
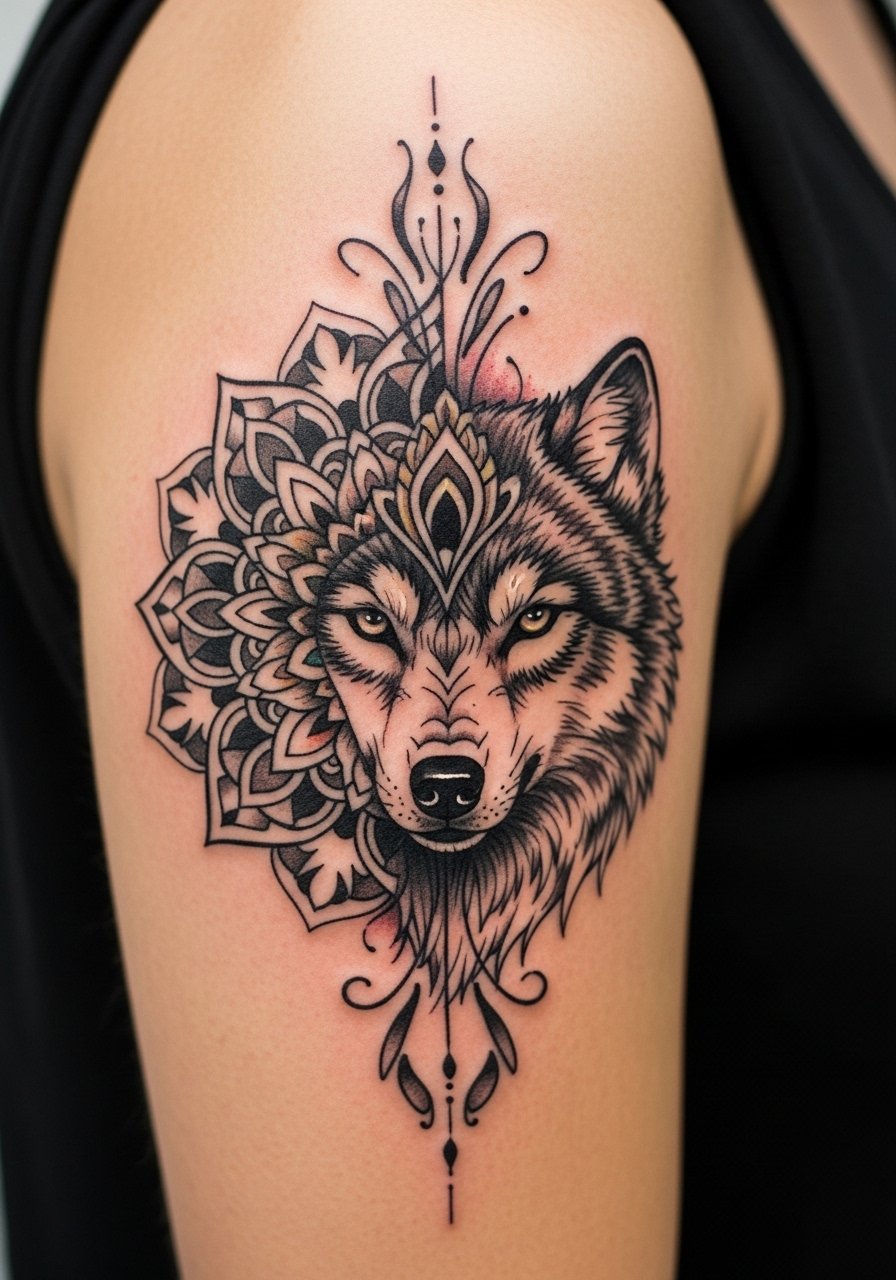
This hybrid balances ornamental geometry with a primal focal point. In consultation, specify how much negative space you want between the mandala and the wolf so both elements read independently. Upper arm sessions are comfortable and heal predictably, but tight shading can merge if spread too densely. Plan for a touch-up around year four for selective saturation spots. For outfits, a bomber jacket slim over a sleeveless tee shows the upper arm in motion while keeping office-appropriate coverage when needed.
13. Gear and Eagle Patchwork, Full Sleeve Fusion
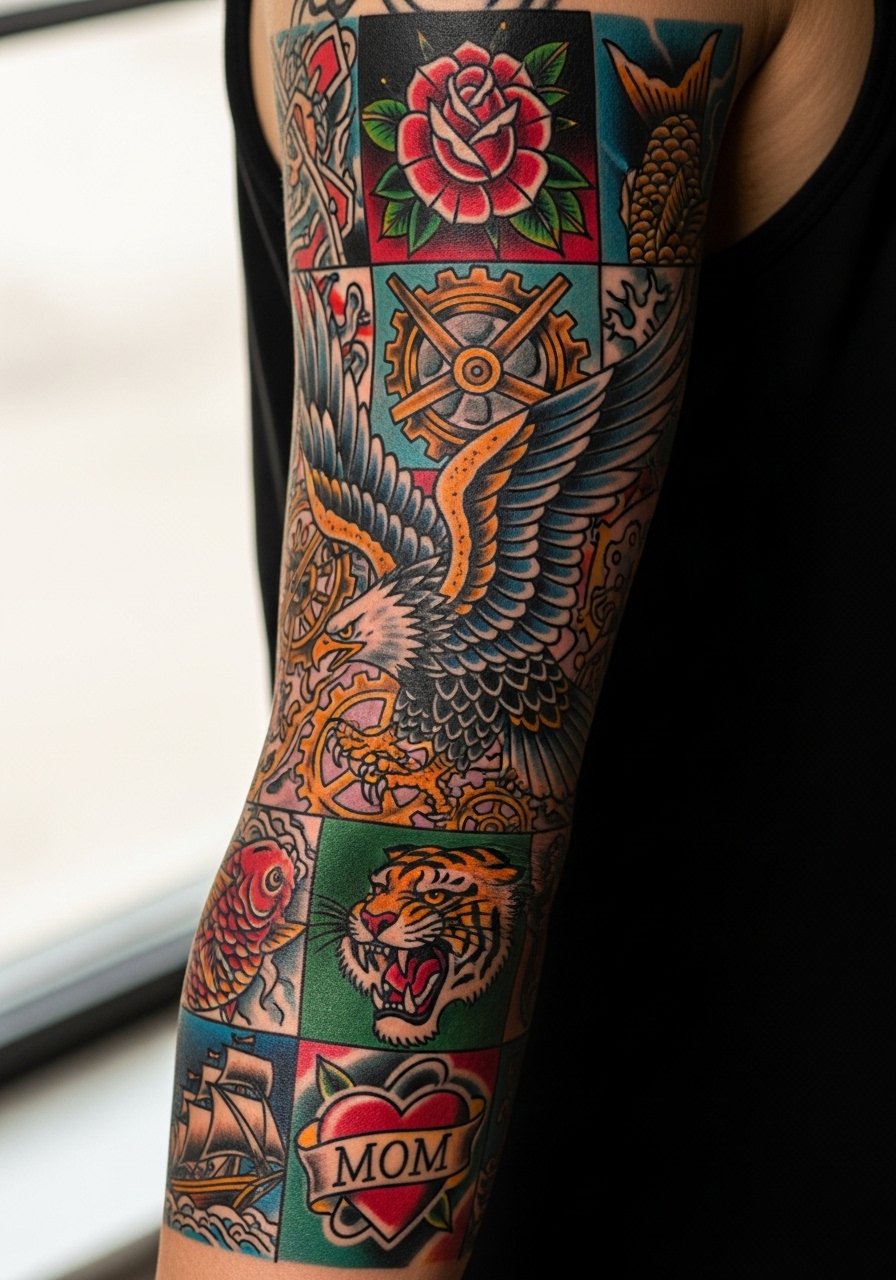
Full sleeve fusion asks for a master plan from the start. I advise a lead outline session that anchors eagle and gear placements so later guest artists can fill between anchors. The common misstep is accepting mismatched line weights from different artists without a unifying outline. Full sleeves take many sessions over months to years and tipping norms vary across shops. For show-off looks, toss on a rolled long sleeve flannel or muscle tee to let the arm dominate.
14. Strategic Negative Space Geometric Forearm
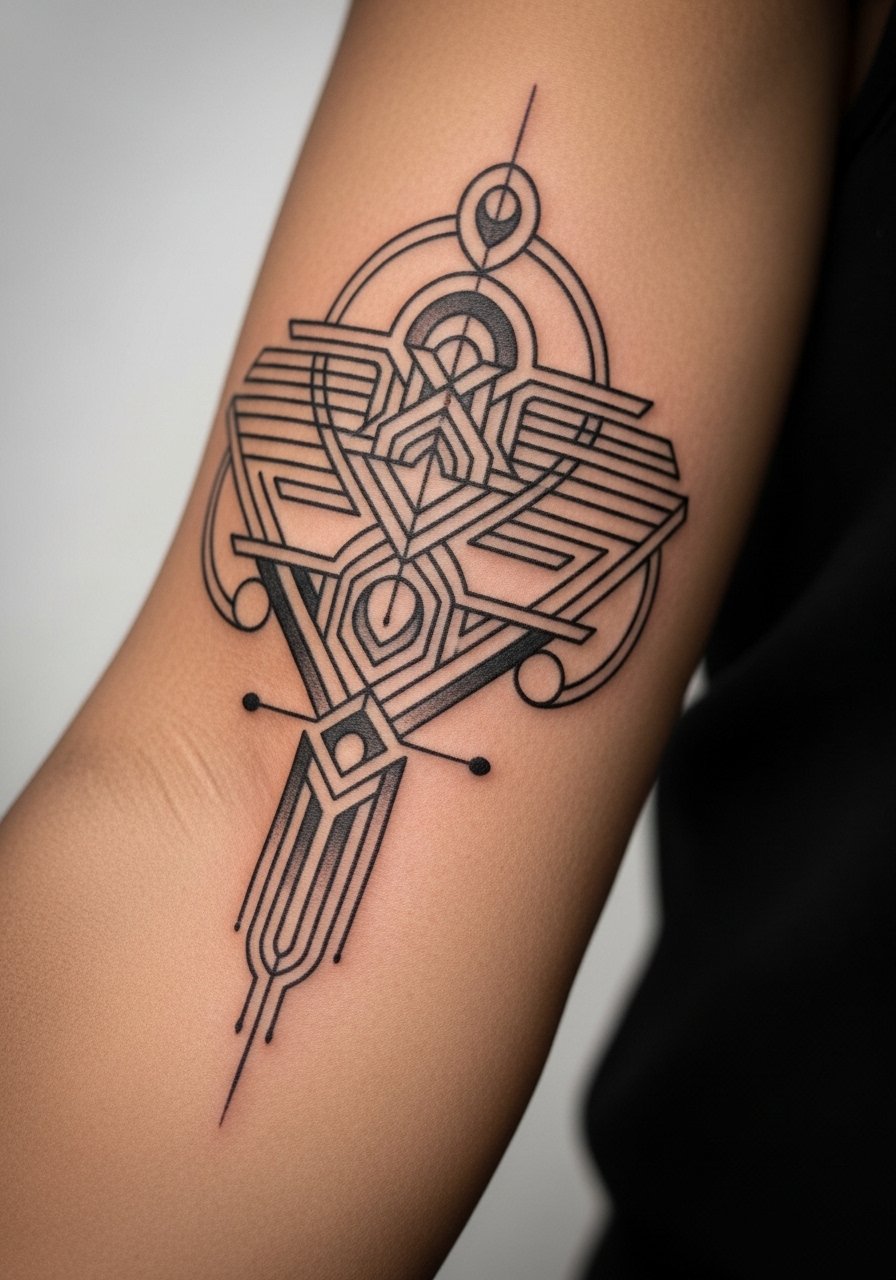
This one fills a gap most guides skip. Planning negative space up front lets you add flash pieces later without overcrowding. Tell your artist you want reserved voids the size of a sticker flash so future work tucks in cleanly. The forearm tolerates linear detail, but avoid ultra-fine lanes that the skin will soften across. For the session, a fitted black crewneck tee is easy to roll up and keeps attention on the geometric edges when you show it off.
15. Sticker Sleeve Starter, Outer Arm Modular Plan
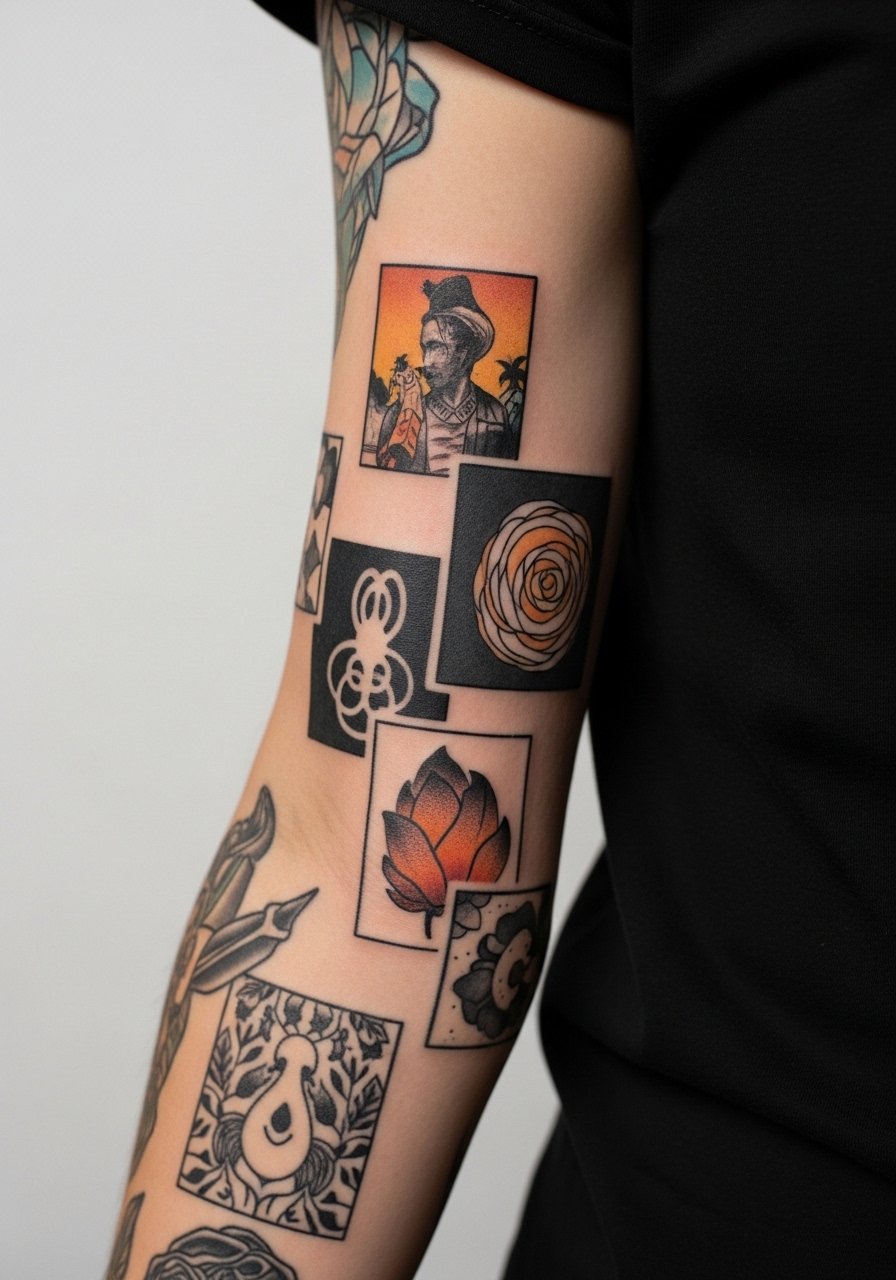
If you plan a sticker sleeve built over years, start with a cohesive color story and set of anchor pieces. Bring photos that show scale and ask for a rough map from the lead artist so guest spots slot without clashes. A trap is picking motifs from wildly different eras or line treatments without a unifying outline. This approach reduces the ghosted-deposit risk by letting you book smaller guest spots at conventions. Wear a sleeveless tank to the appointment so artists can orient the outer arm precisely.
16. Aging Simulation Realism, Forearm or Calf Placement
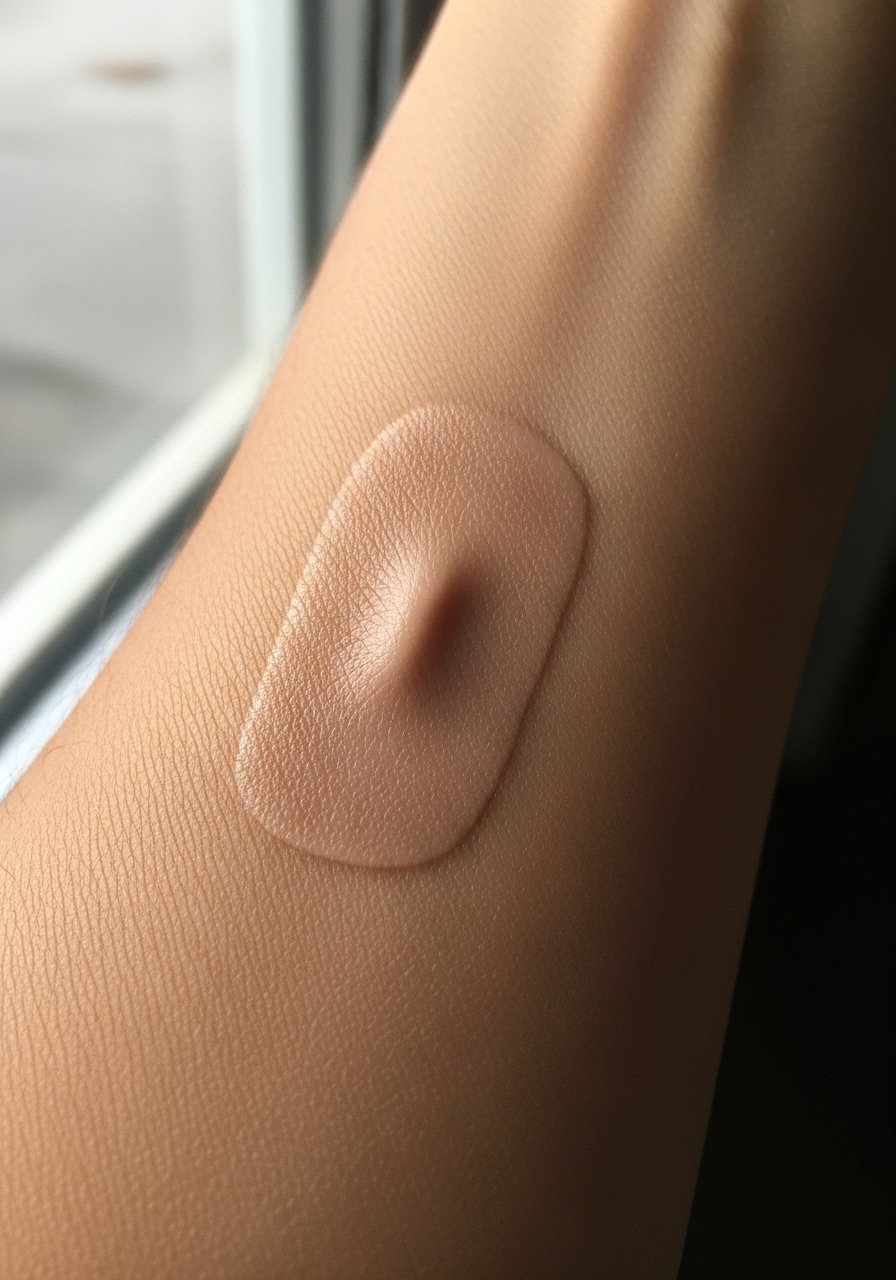
This under-covered idea tests how a realism piece will look as skin texture changes with time. Some studios will do a small aged-simulation swatch so you can preview long-term legibility. In consultation, ask whether your chosen portrait style needs more spacing or larger highlights to survive changes in skin. Sizing up modestly often prevents early touch-ups. For session wear, a loose short sleeve athletic shirt gives the artist unobstructed access to the test area.
17. Geometric Blackwork for Office Guys, Inner Shoulder Band
This low-visibility pick suits professionals who want bold-looking work that hides under shirts. Ask for a band width that remains legible when you move and avoids tiny details that compress with arm motion. The inner shoulder costs moderate pain and heals well when spaced. A typical mistake is making the band too narrow, which blurs in two years. For the session, a tank top loose you can raise makes the inner shoulder accessible without full undressing.
Frequently Asked Questions
Q: Will mixing multiple artists on a patchwork sleeve always look mismatched?
A: No. It often looks mismatched when the initial pieces lack unifying outlines or a shared spacing plan. Start with one lead outline or agree on a consistent line weight and color story. Track guest artists via hashtags like #PatchworkTattooMen or apps such as Tattoodo when you hunt for compatible hands.
Q: How do I plan a patchwork sleeve on darker skin so details stay legible?
A: Opt for slightly thicker outlines and bolder saturation rather than ultra-fine detail. Ask to see healed work on similar skin tones in the artist portfolio. Expect touch-ups earlier for micro-detail, and tell your artist you prioritize contrast during the consultation.
Q: Does Saniderm speed healing for patchwork better than dry healing?
A: Artists split into two camps. One camp swears by protective films for less mess and short-term cleanliness. The other camp prefers dry healing to let scabs form and fall naturally, especially for bold outlined work. Your best move is to ask your artist which they use most for the style you choose and why.
Q: How much should I factor in for touch-ups on a mixed-style sticker sleeve?
A: Plan for a touch-up round two to four years after the core sleeve is done, more often if you have many fine-line elements. Regions with friction like wrists and ribs need earlier attention. Budget sessions spaced across seasons so healing is controlled.
Q: What should I wear to a session that covers chest, shoulder, and back areas?
A: A loose button down shirt or a wide-neck tee you can slide aside is ideal. It keeps you covered and lets the artist access different zones without you getting cold or having to fully undress.
Q: Are there red flags when hiring artists for long-term patchwork builds?
A: Yes. Red flags include inconsistent line weights across their healed portfolio, a pattern of last-minute cancellations in reviews, or refusal to map a basic outline plan for multi-artist work. Favor artists who show healed photos over time and who can explain how they plan to hand off spaces to guest artists.
