
Fine line olive branches dominate saved boards, and the same artists booking them quietly schedule touch-ups at year two. The trend looks flawless on a phone screen but behaves differently on wrists, collarbones, and ribs. Read these 21 approaches with placement, how they age, and what to ask at consult so the design you pick now still reads clearly a few years down the line.
1. Minimalist Olive Wrap on the Wrist
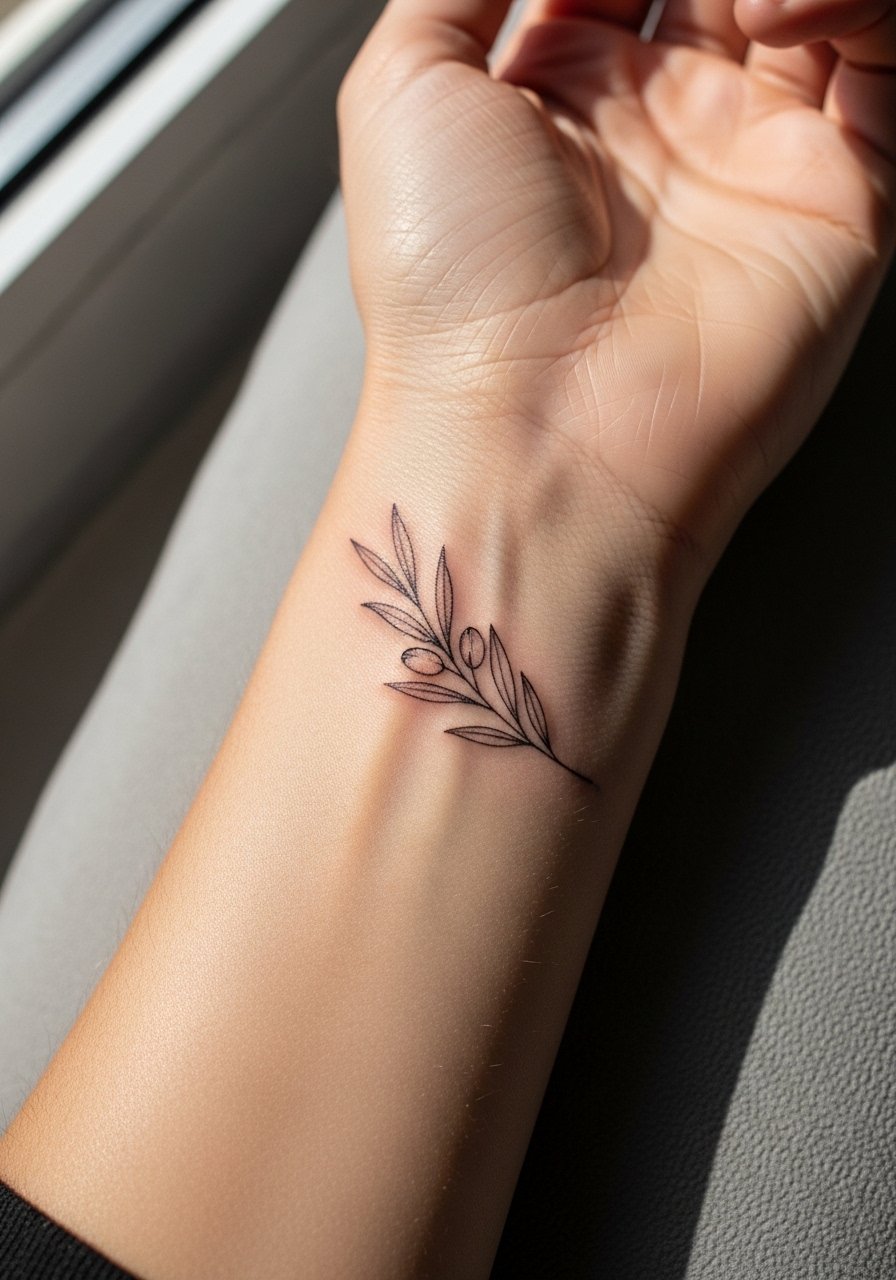
Personal observation: the tiny wrist wrap reads like a quiet charm for daily wear. Pain is low and a single short session usually does it. Tell your artist you want slightly bolder anchor nodes rather than feather-thin continuous hairlines, because ultra-thin lines on the wrist tend to fade into an unreadable scratch after a year if you spend a lot of time in the sun. A common mistake is asking for a continuous wrap too small to breathe. For showing it off wear a dainty silver chain bracelet opposite the tattoo and avoid heavy watches during the heal.
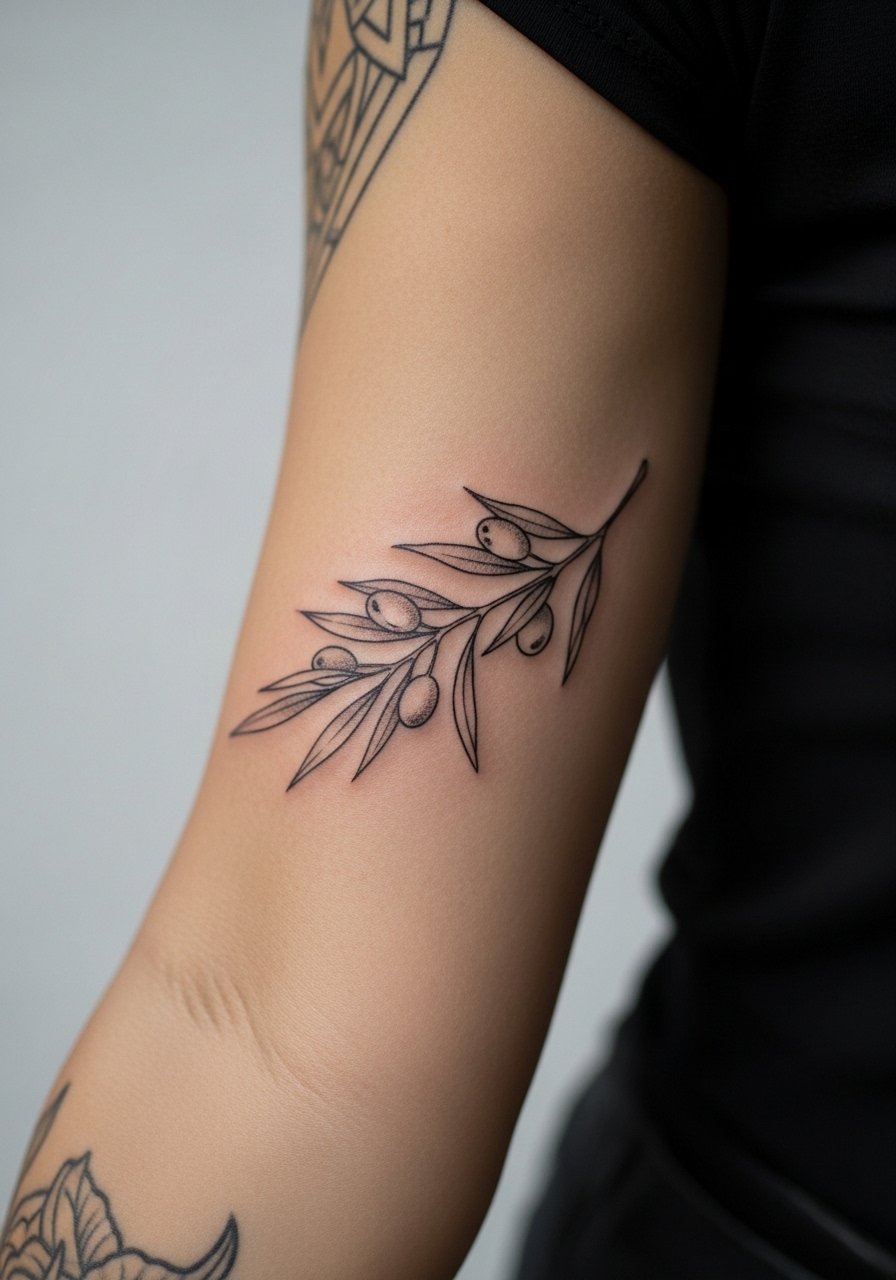
2. Fine Line Laurel on the Inner Forearm
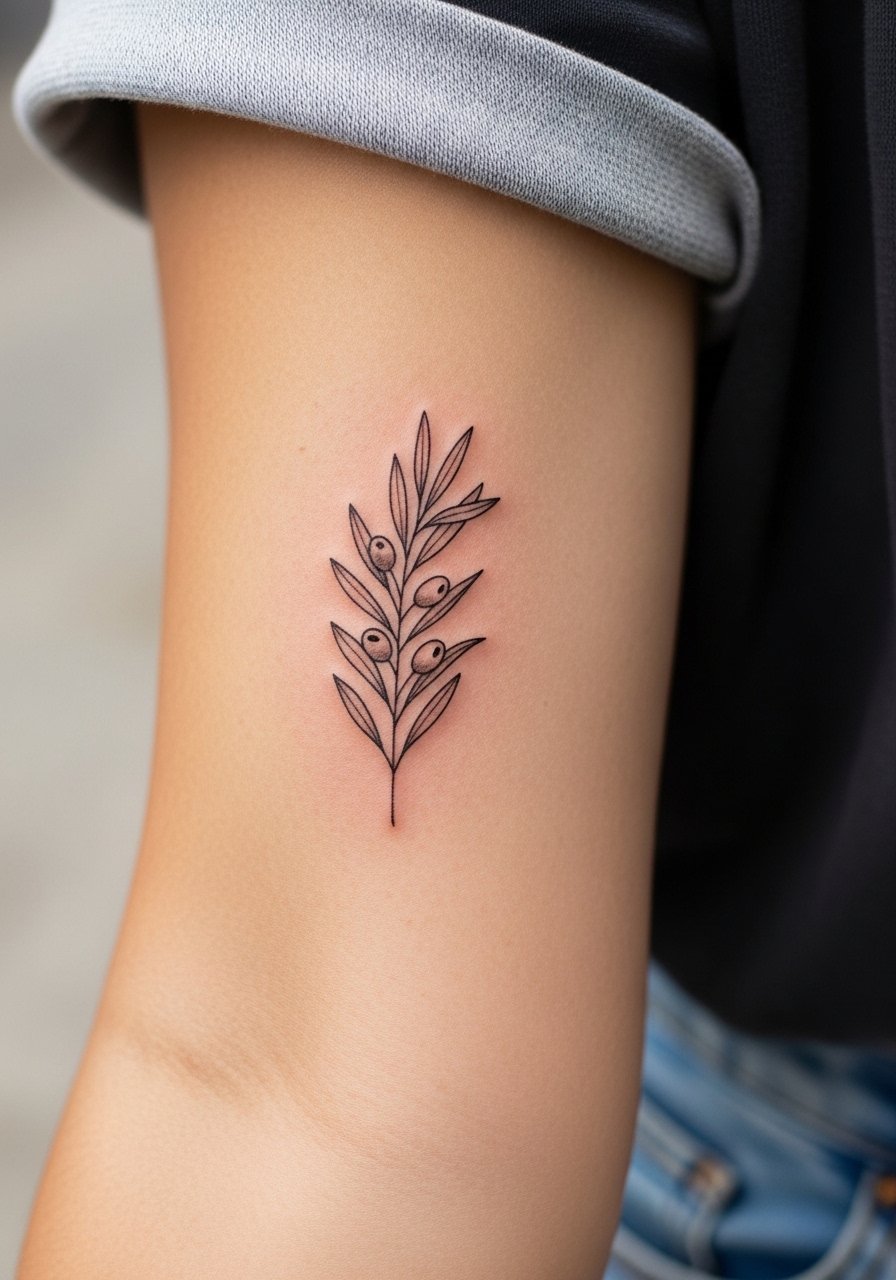
When I watch consults at shops the inner forearm is the most-requested canvas for fine line work. Pain is moderate and sessions typically run 45 to 90 minutes depending on spacing. Artists split on whether fine line holds forever. One camp says it ages into a soft, whispery mark that still looks elegant. The other camp argues bold lineoutlines last longer without touch-ups. Ask your artist where they land and request slightly heavier main stems with single-needle leaf details so the design keeps structure at year three. For a casual frame try a cream linen shirt with rolled sleeves and a thin gold cuff bracelet on the opposite arm.
3. Micro Olive Sprig Behind the Ear
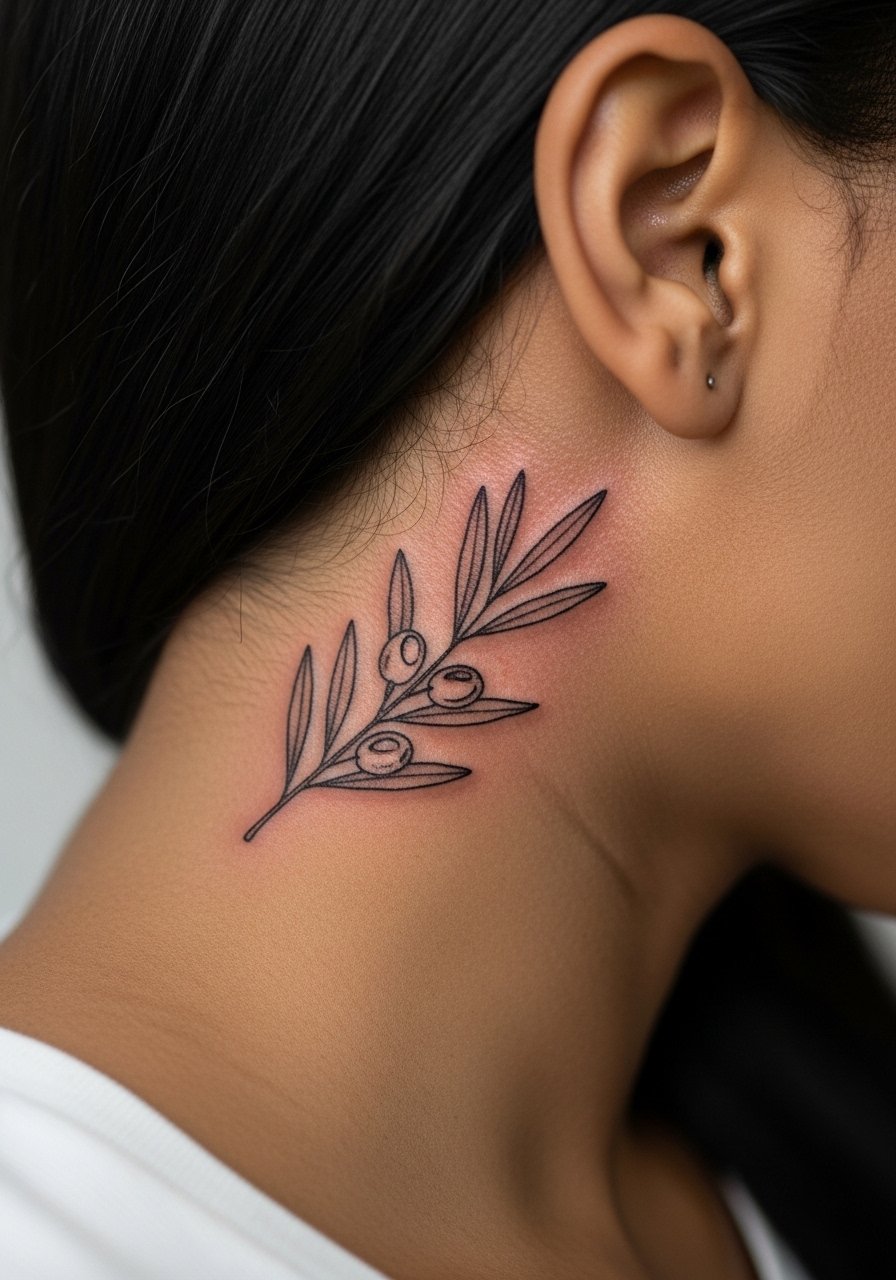
This is a first-timer favorite for being private and subtle. Session time is short and pain is mild because the area is flesh, not bone, but the spot is easily hidden by hair changes. Tell your artist you want simple stem movement rather than clustered leaves so it stays legible as hairlines shift. A common mistake is asking for dense shading behind the ear. That tends to look like a blob after six months. Behind-the-ear pieces can be touched up at 12 to 18 months if you notice softening. For booking tips search community tags and guest-spot threads rather than copying one random flash.
4. Realistic Olive Branch Extending Into a Dove on the Shoulder
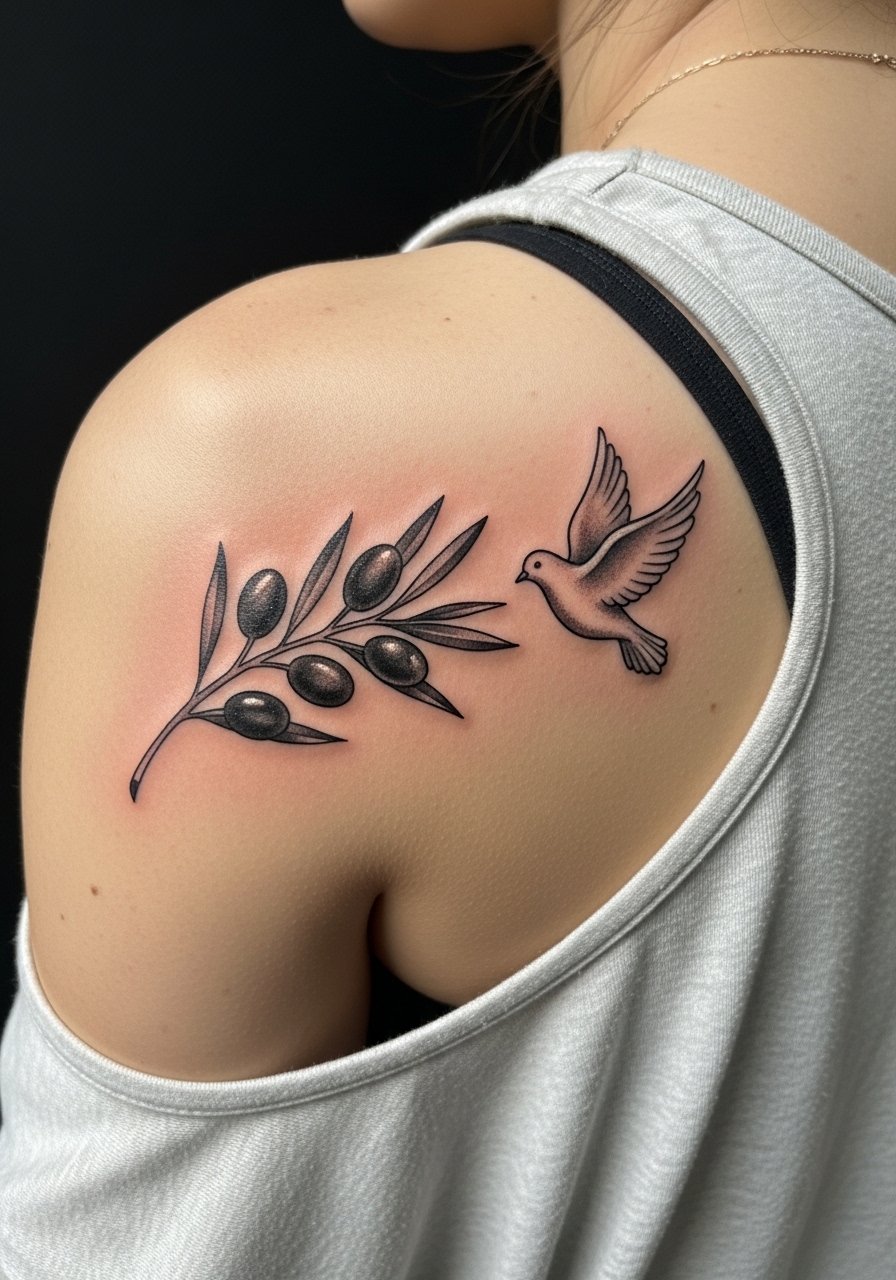
Fair warning: shoulder blade work gives artists room for detail but the session can stretch to two hours. If you want the bird to read clearly across time, request a slightly larger composition with mid-tone separation between feathers and leaves. The mistake is packing micro-feather detail into a space that can't hold it; that detail softens fast. For showing it off pick an off-shoulder linen top on warm days and wear a loose tank for the appointment so the artist has full mobility.
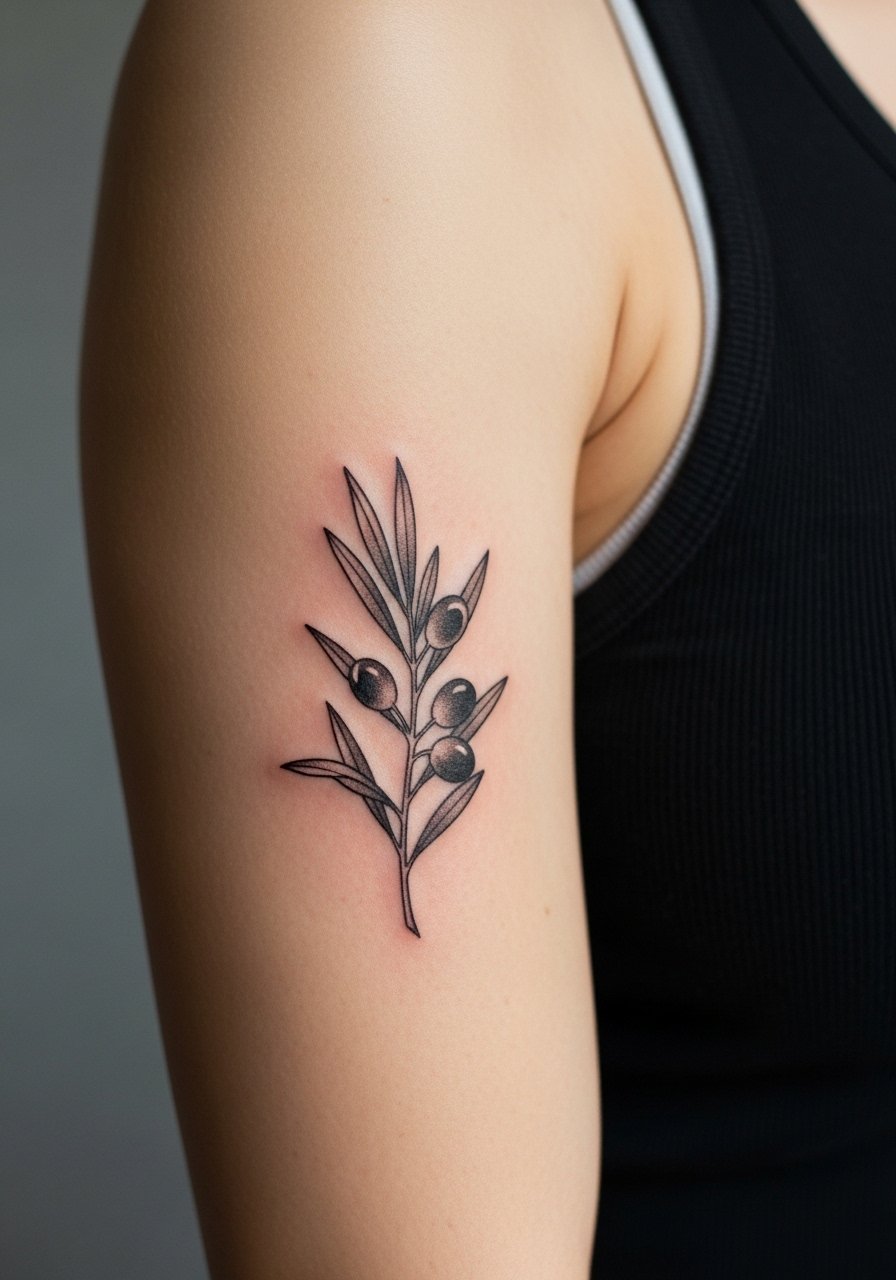
5. Neo-Traditional Olive Wreath with Berries on the Upper Arm
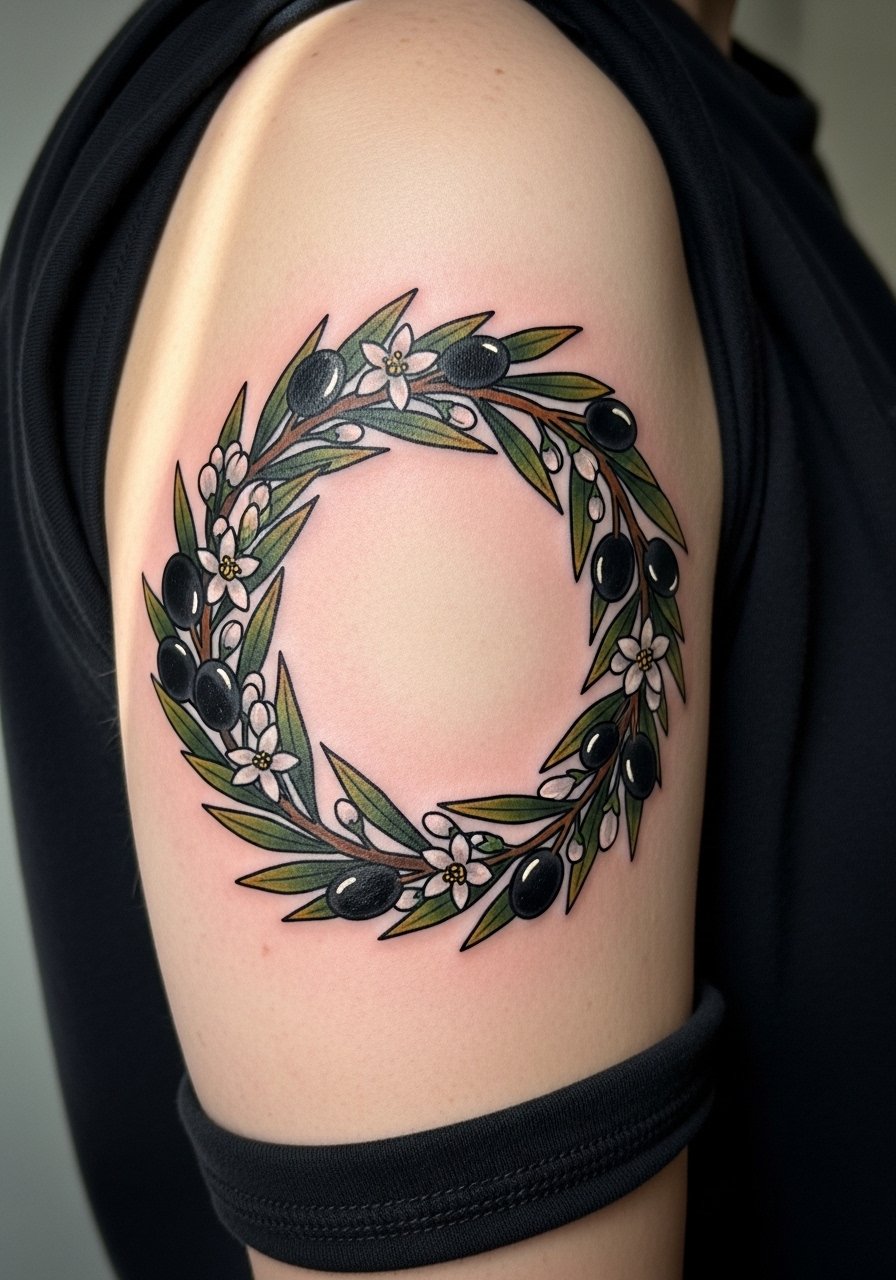
There is real charm in a wreath that balances bold color with crisp outlines. Expect two sessions if you want saturated berries and clean fills. The common mistake is over-detailing the interior leaves. Neo-traditional benefits from breathing space around motifs, and spacing keeps saturation from turning muddy with time. During consult bring reference photos that show the exact leaf shape and color palette you like. For the appointment slip on a loose button-down shirt so you can roll a sleeve without tugging at fresh ink.
6. Blackwork Olive Column Along the Spine
A spine column is dramatic and it ages well because heavy saturation resists fading. Expect multiple sessions for a crisp vertical piece, and honest talk about pain is necessary. There is a debate in the community about whether dense blackwork on the spine needs more sessions or simply deeper packing to last. Name both camps and ask your artist how they plan touch-up timing. For nights out pair the design with a backless black dress to frame the column without rubbing the area while it heals.
Before You Book
The wrist and forearm pieces above heal differently from larger work, so a few compact items smooth the session and the first week.
-
InkGuard thin balm. Lightweight balms like this absorb quickly and are useful for fine line wrist work that clogs under heavy ointment.
-
H2Ocean saline spray. Useful for gentle cleansing of watercolor and wash-heavy pieces without leaving a heavy residue on color washes.
-
Green Sheep thin balm. A thinner option favored in humid climates for smoothing watercolor and delicate linework without forming a thick barrier.
-
Aftercare oil from Japan style blend. An oil-style finish can prevent cracking on dense dotwork pieces during extended healing.
-
Aquaphor healing ointment. A thin layer is still a standard first-night option for small pieces to lock in moisture without suffocating single-needle channels.
7. Watercolor Olive Splash on the Ribcage
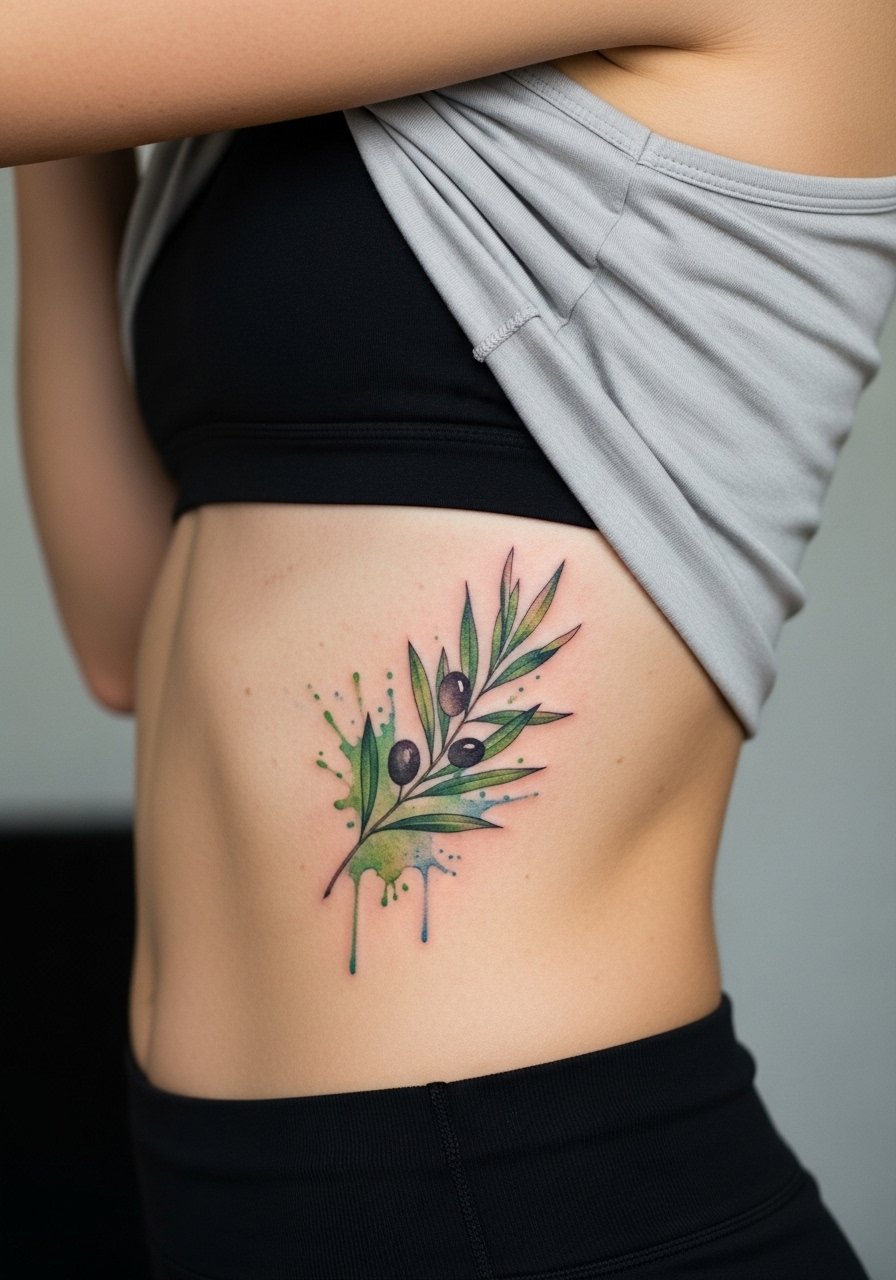
Fair warning: the ribcage is one of the higher-pain spots. People often pick it for its intimacy and the way watercolor spreads with breath. The biggest mistake is asking for fine-splatter washes too small to hold as the skin moves. Ask for larger, intentional washes with open stems and request a brief pause between passes if the artist needs the client to catch their breath. Touch-ups for watercolor usually happen at year one or two, especially after heavy sun exposure. For the session wear a cropped athletic top you can lift without rubbing the area.
8. Ornamental Olive Mandala on the Ankle
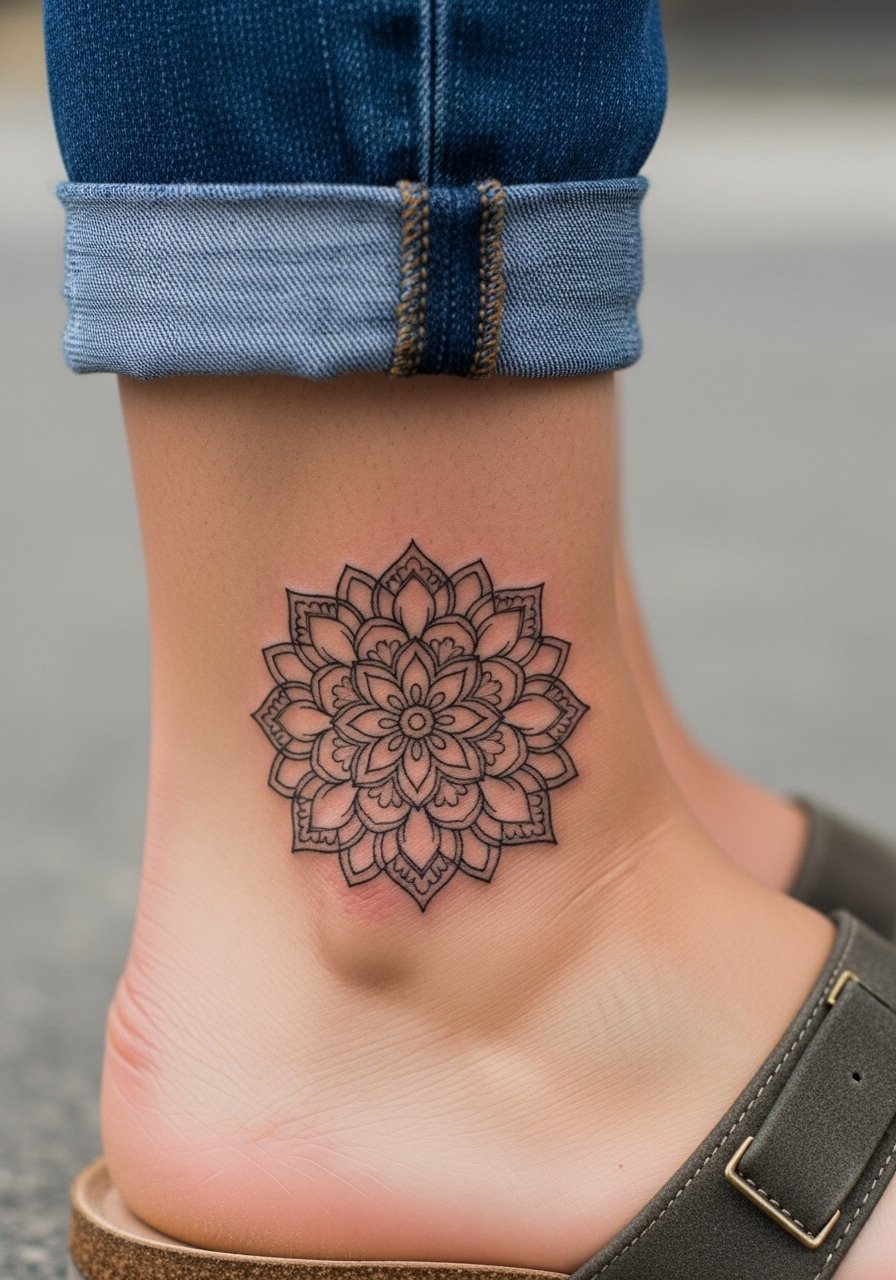
This compact ornamental piece reads like jewelry and heals fast in a single session. The error to avoid is packing a dense mandala too small for the ankle's curvature; the center will blur. Ask for slightly more negative space in the center so the pattern keeps its geometry over time. For show-off style pick strappy ankle sandals and cropped pants so the piece sits deliberately in view while you heal.
9. Ignorant-Style Olive with Jagged Leaves on the Calf
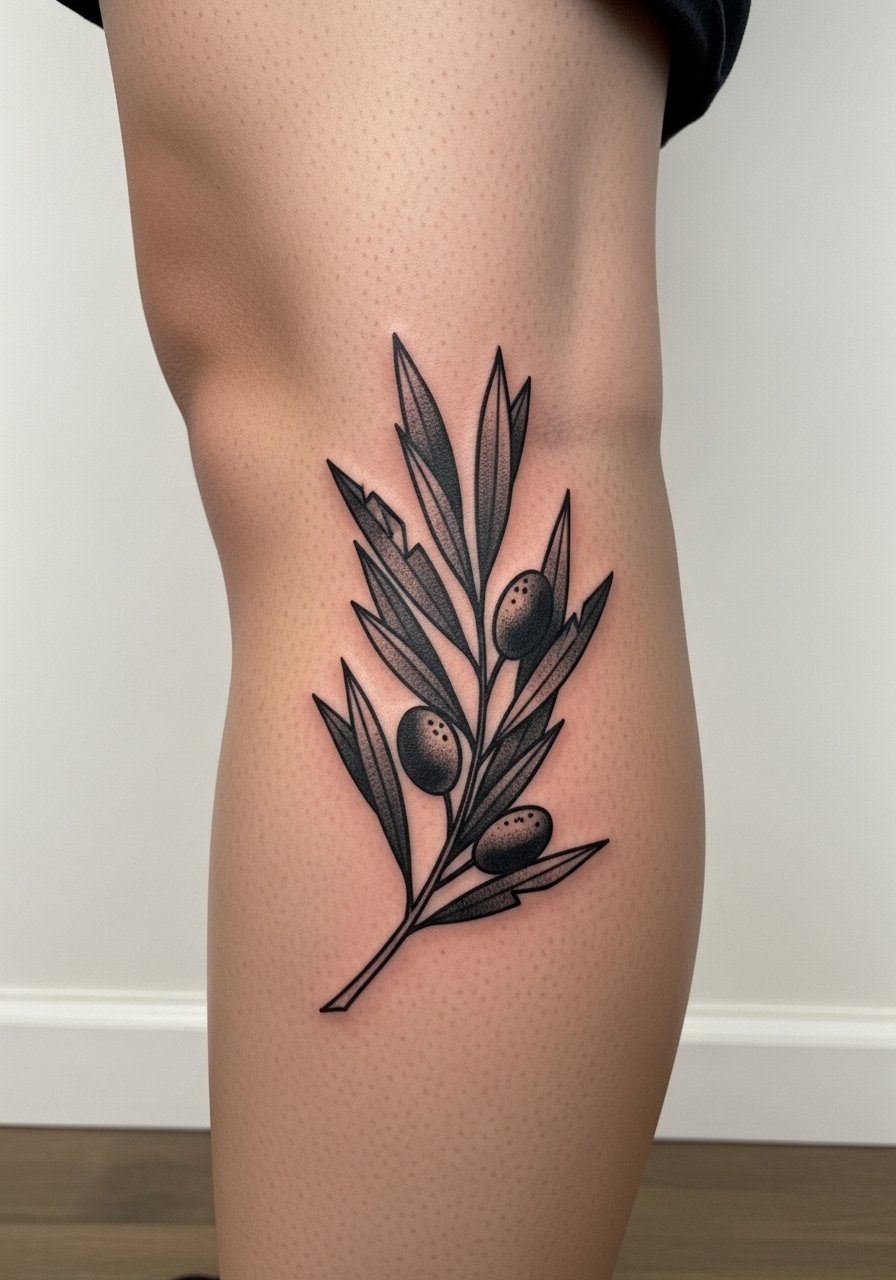
There is a raw energy to ignorant style that reads like a hand-drawn protest sign. Calf work tolerates larger, bolder lines and that helps longevity. Expect one to two sessions depending on size. Mistake to avoid is asking for too many small leaves inside heavy outlines. The negative space gives the jagged leaves room to sing. For summer fits roll your jeans and pair with fitted athletic shorts while you show the piece off.
10. Traditional American Olive Banner on the Outer Forearm
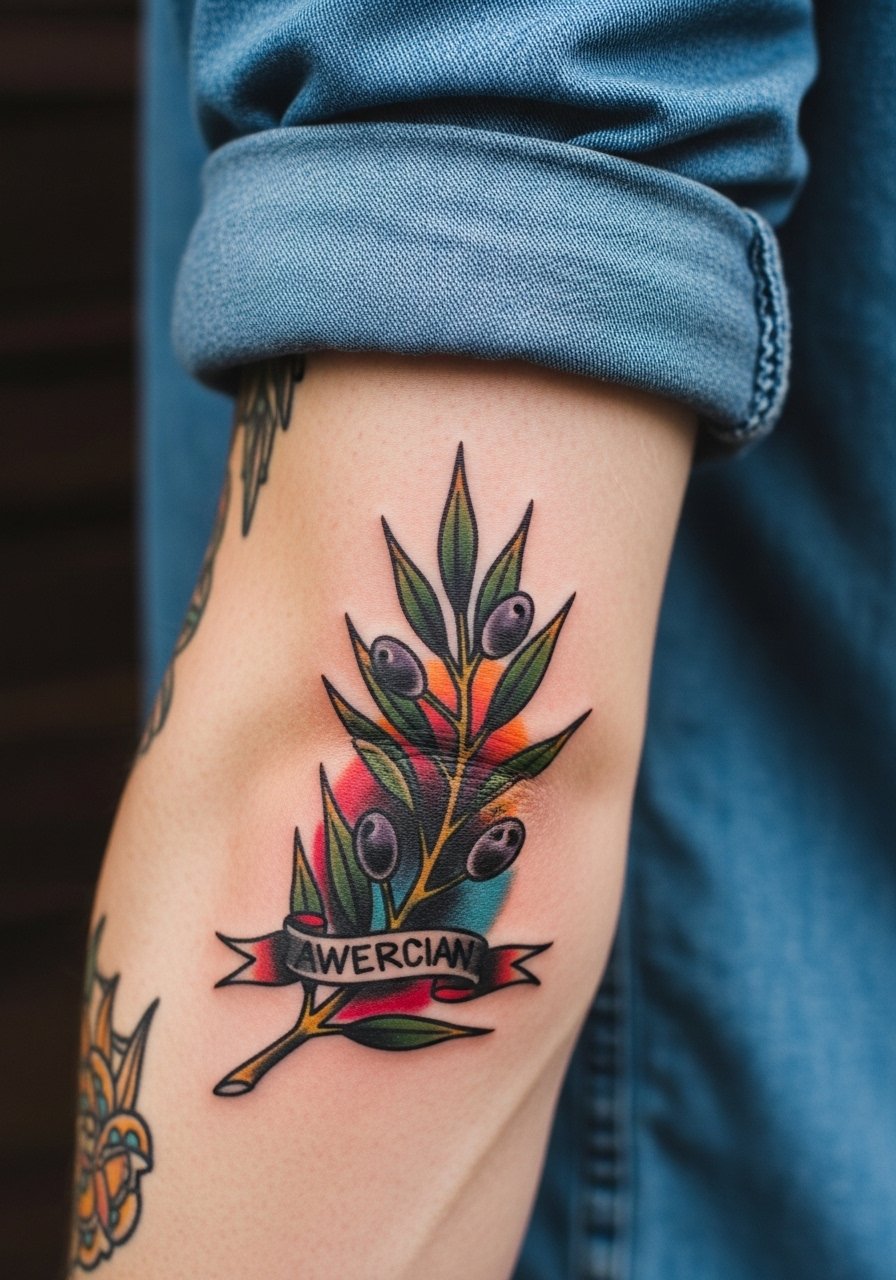
There is a reason traditional palettes and bold outlines last: saturation and contrast age well. Sessions usually take two to three hours with color fills. The typical mistake is shrinking a banner down so the script becomes unreadable. Ask for scale that keeps banner letters roomy and choose stronger contrast for photos on darker complexions. For a casual frame wear a chambray rolled sleeve shirt so the forearm becomes a deliberate reveal.
11. Dotwork Olive Tree Trunk on the Thigh
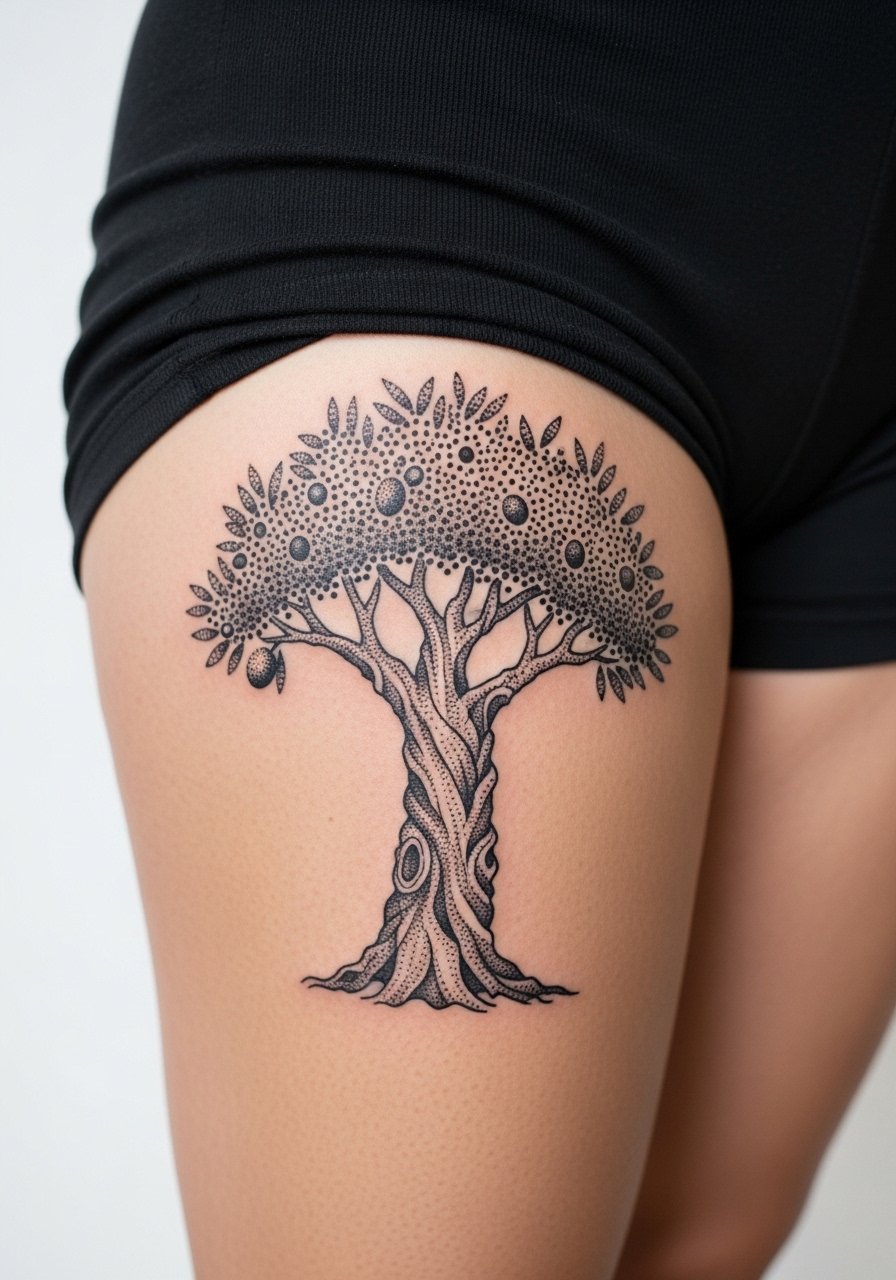
Dotwork thrives on scale and time spent stippling, which means longer sessions and a few sittings. Most people pick the outer thigh for dotwork because it tolerates dense texture. The common mistake is compressing too many tiny dots into a narrow band; distance between dots helps the composition breathe and prevents bleeding together as the piece settles. For showing the textured trunk pair it with high-waisted shorts and earth-tone skirts to let the pattern hold visual weight.
12. Geometric Olive Lattice at the Collarbone
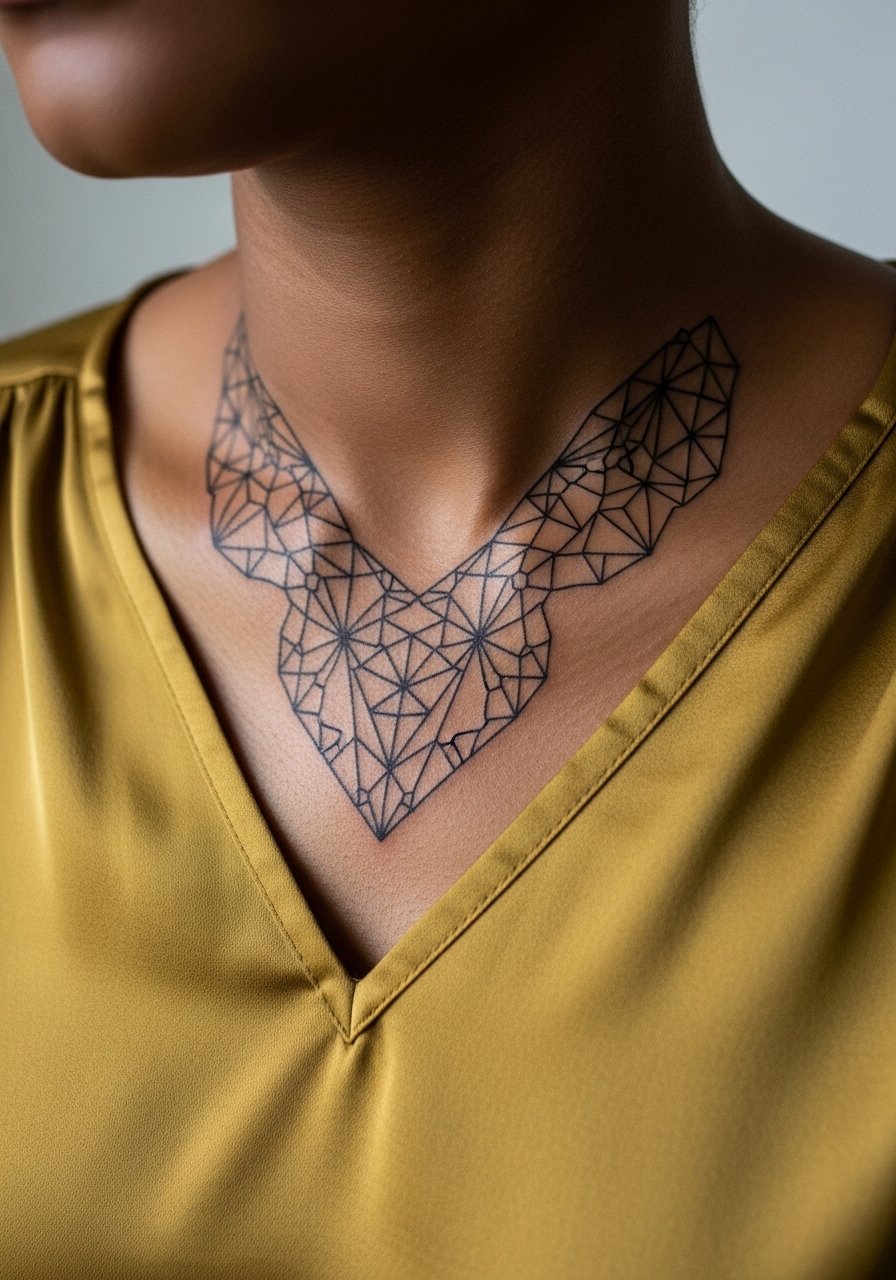
Collarbones are visible and demanding. Make sure the artist plans spacing carefully because geometric lines need room to avoid merging. The usual mistake is crowding the lattice into a three-inch band; that densifies into a blur by year three. For consults show photos of healed geometric pieces on the collarbone so the artist knows your spacing needs. Pair the design with an olive green V-neck silk blouse and layered thin necklaces sitting below the lattice.
13. Knuckle Olive Letters for Constant Reminders
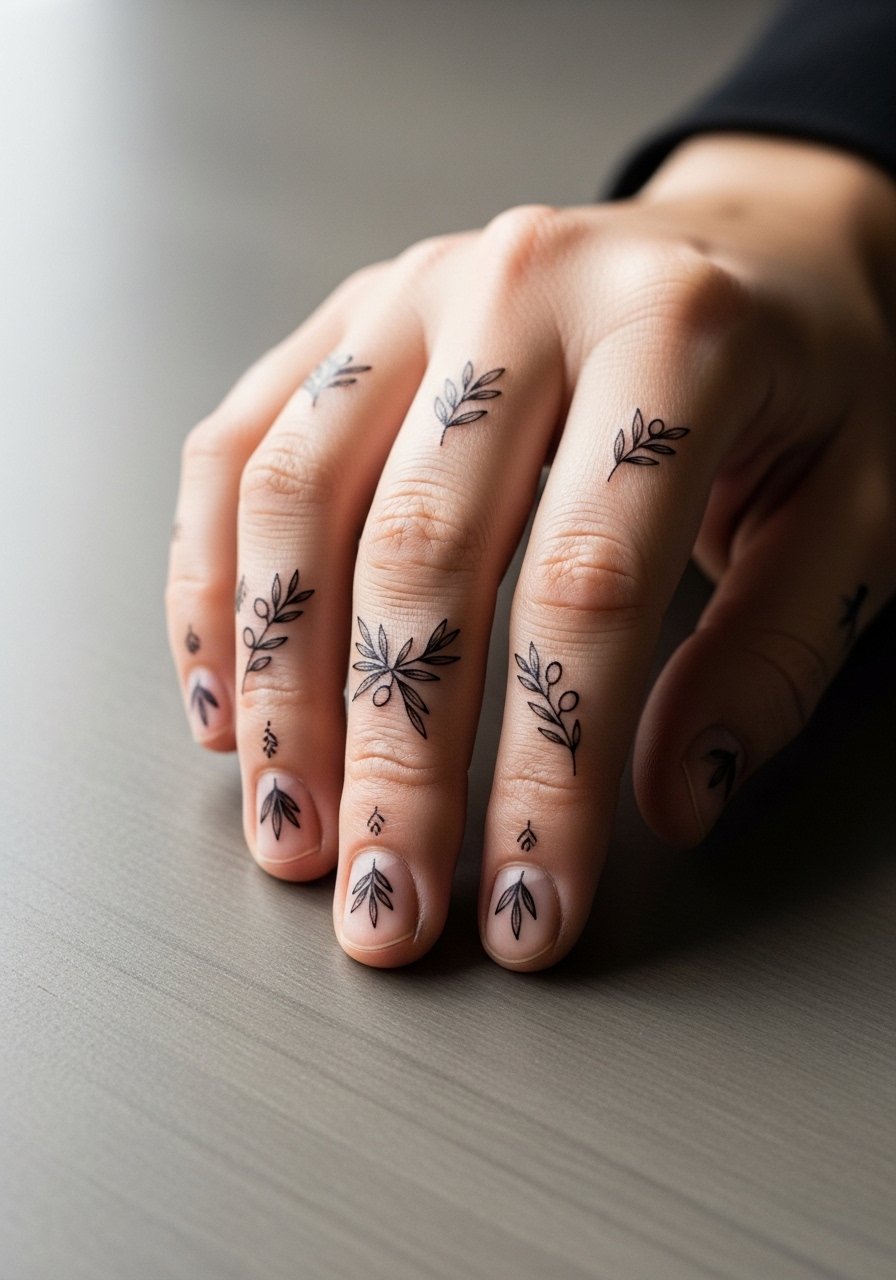
Knuckle tattoos are bold promises and they wear differently because of constant washing and friction. Expect touch-ups at year one or sooner. The mistake is going too tiny or adding fine shading between letters. For longevity ask for small anchors with thicker tip points rather than filigree. Also consider placement on the side of the finger if you work in a setting that still frowns upon knuckle ink. Search community threads for guest-spot tips since walk-ins for small knuckle work can save costs.
14. Olive Branch as a Patchwork Connector in a Sleeve
This is one of the under-covered ideas that actually helps sleeves read as single bodies. The consultation note is crucial. Bring healed photos of the existing pieces so the artist can map vein lines and muscle curves. A common mistake is asking for an over-busy connector with tiny leaves that clash with bold neighbors. Instead ask for stem thickness that echoes the existing linework so the branches sit naturally between larger motifs. Discovery pathways like tattoo forums and guest-artist searches will surface artists who specialize in patchwork connectors.
15. Olive Branch Paired with Modern Runes on the Forearm
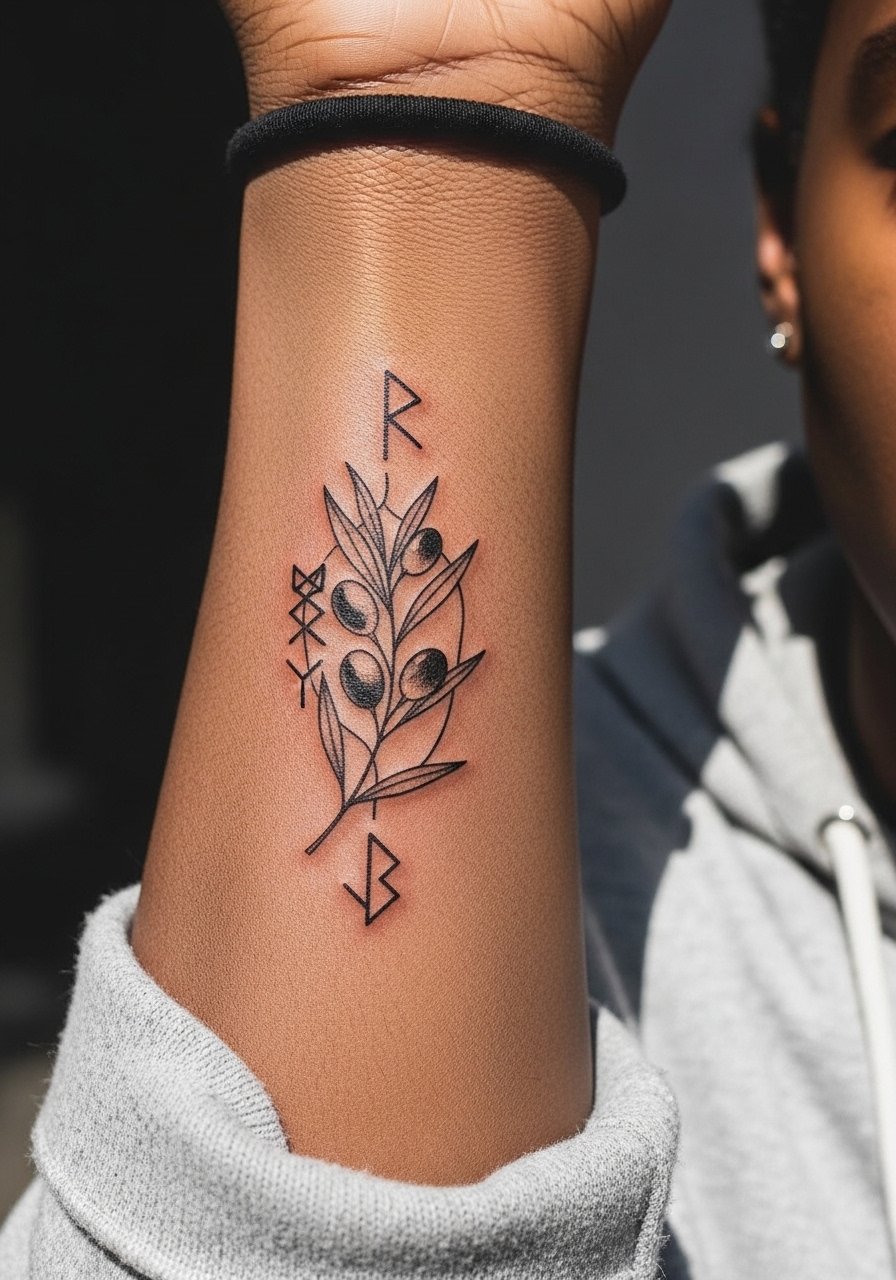
Pairing modern runes with an olive branch makes for a hybrid that reads as victory and private code at the same time. Session time varies but plan on at least 60 minutes for crisp rune spacing. Mistakes happen when runes are lettered too small; they lose readability as ink settles. When you consult, bring exact rune images and specify line weight for both scripts so they age similarly. For showing it off fold up a short sleeve button-up and keep the forearm visible for the first few weeks.
16. Minimal Olive Sprig on the Sternum
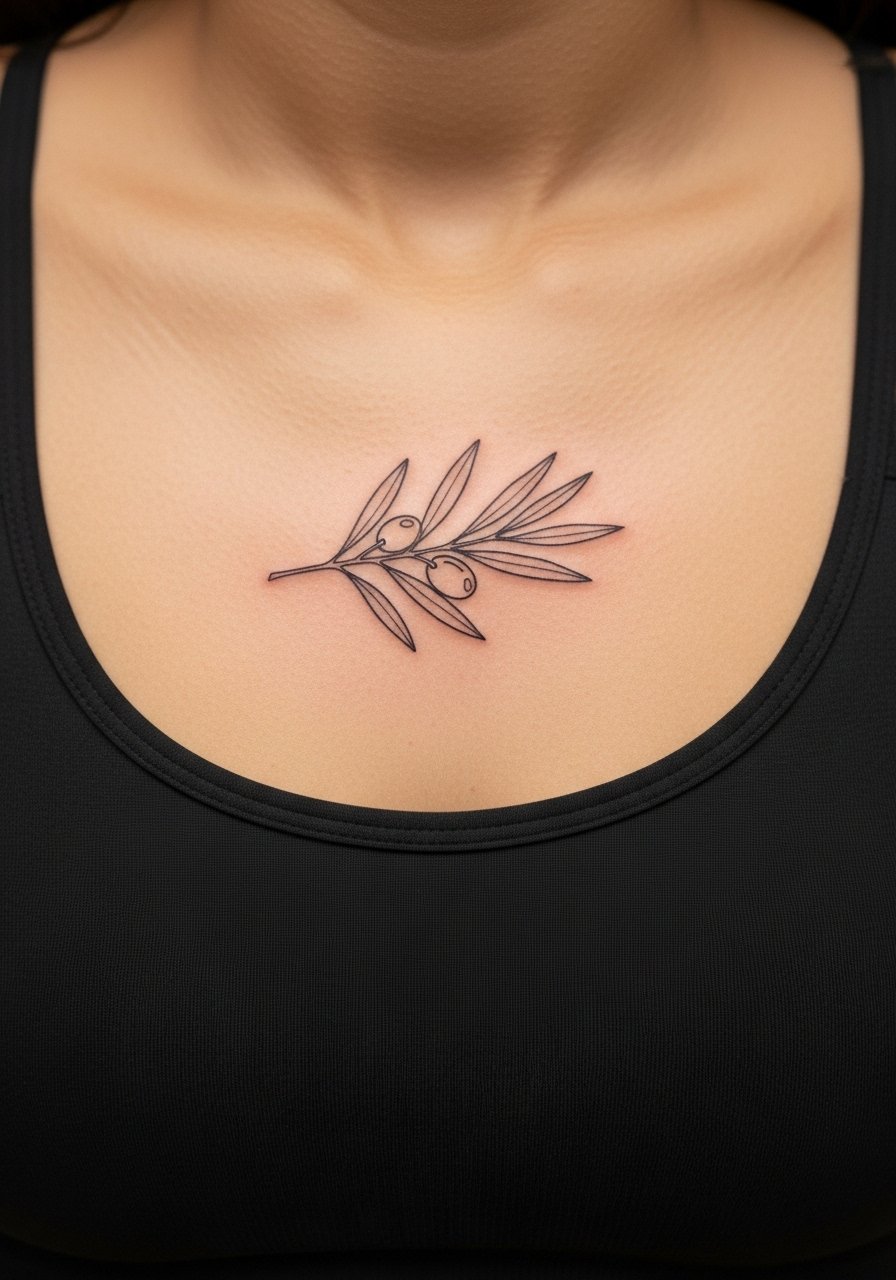
Sternum work is intimate and can be tender during the session. Pain tends higher near the bone but the center placement reads well under chest lines. Artists debate whether single-needle work on the sternum holds as well as heavier lines. The practical step is to ask for slightly more defined stems and to plan a touch-up at year two. For the appointment wear a fitted sports bra so the artist has access and your clothing won't rub the healing zone.
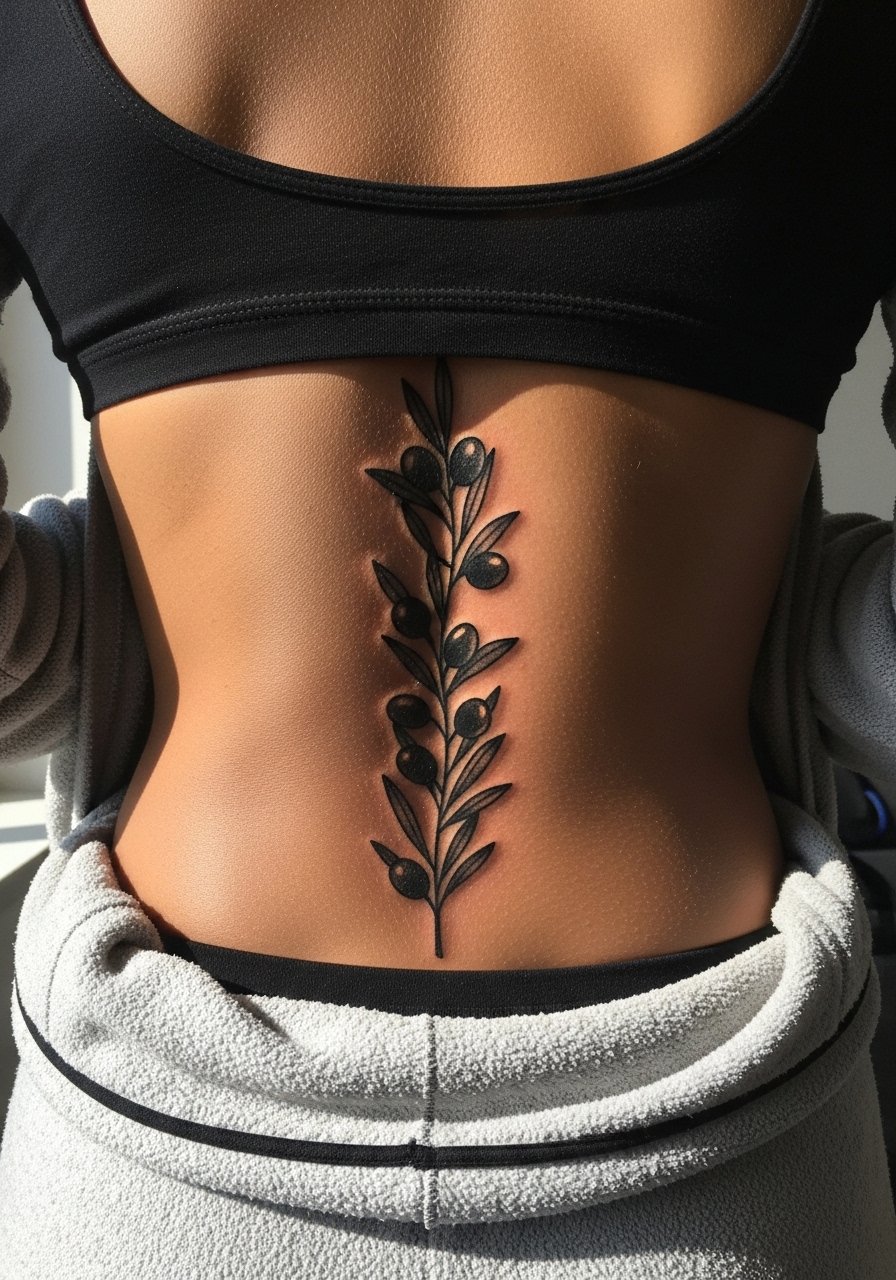
17. Lower Back Olive Column

Lower back pieces age reliably because clothing usually avoids constant abrasion if you choose the right outfits while healing. The common mistake is placing a dense cluster where waistband friction will occur. Ask your artist to plan the bottom edge above your usual waistband and book a consult showing the exact clothes you wear. For evenings choose a backless top or low-back crop to highlight the column without stressing the area.
18. Crescent Hip Olive Near High-Waisted Jeans

Hip placements are playful but require planning for clothing rub. Session pain is low to moderate depending on fat distribution. A frequent mistake is setting the design under a waistband line that will constantly rub during the first two weeks. Ask to preview the placement with the jeans you plan to wear so the artist can adjust the vertical position. For sessions pick high-waisted bottoms you can lower just enough to expose the area without uncomfortable pinching.
19. Inner Bicep Olive Sprig for Subtle Framing
The inner bicep can hide or reveal depending on arm position, which makes it a fun choice for subtle pieces. Pain is moderate and sessions are short. Mistakes include asking for heavy shading in the crease area where sweat and friction slow healing. Tell your artist you want clear stems and spaced leaves to keep blowout risk low. For the session wear a loose tank top so you can lift and move without tugging at the tattoo.
20. Tiny Finger-Side Olive Sprig
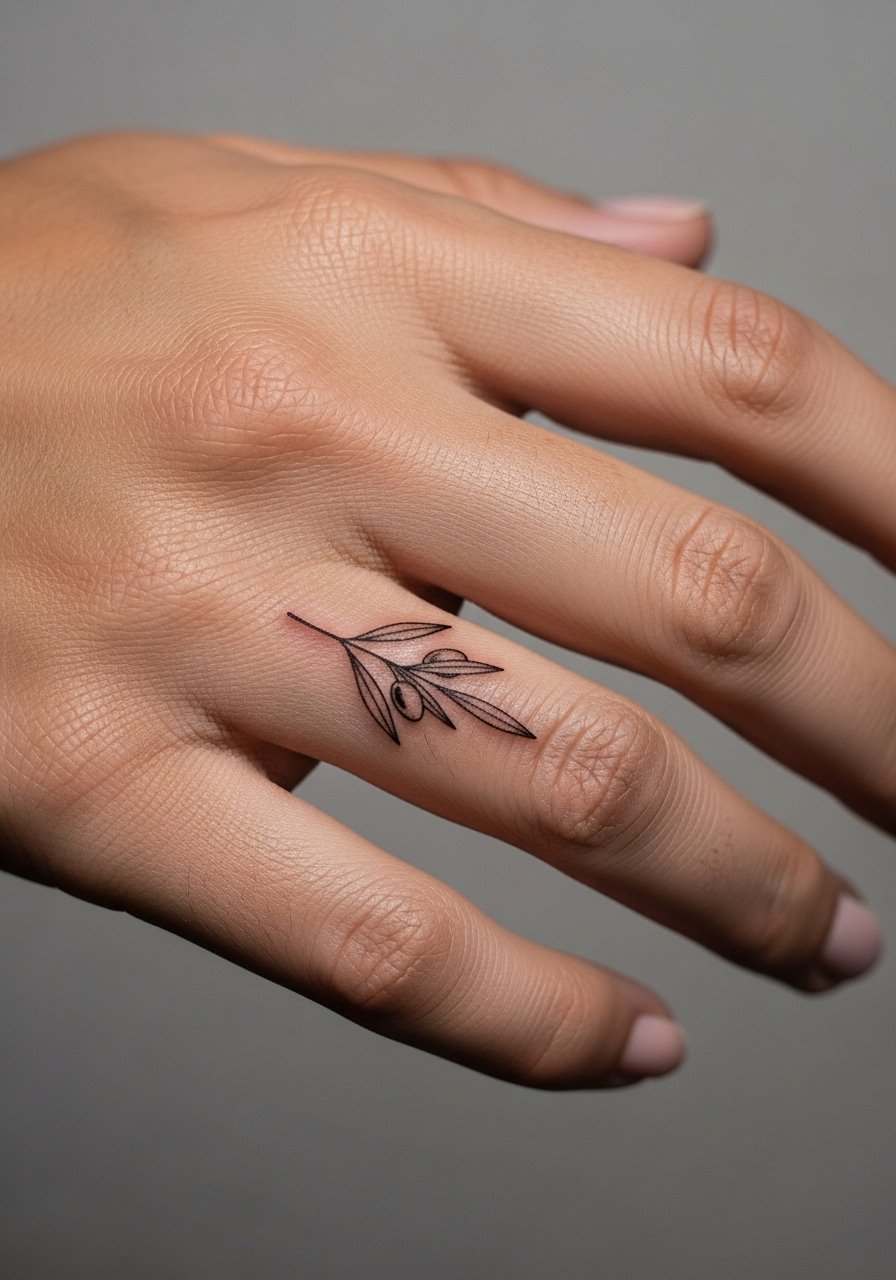
Finger-side placements are discreet but high maintenance because of constant washing and friction. Expect touch-ups much sooner than with arm or thigh work. A common error is choosing a single-needle stem with no anchor; give the artist permission to thicken tiny roots so the piece survives daily wear. For job-sensitive environments place the sprig on the side of the finger rather than the knuckle. Rings and hand care routines will affect heal time more than placement alone.
21. Olive Branch Over the Collar of an Open-Back Dress
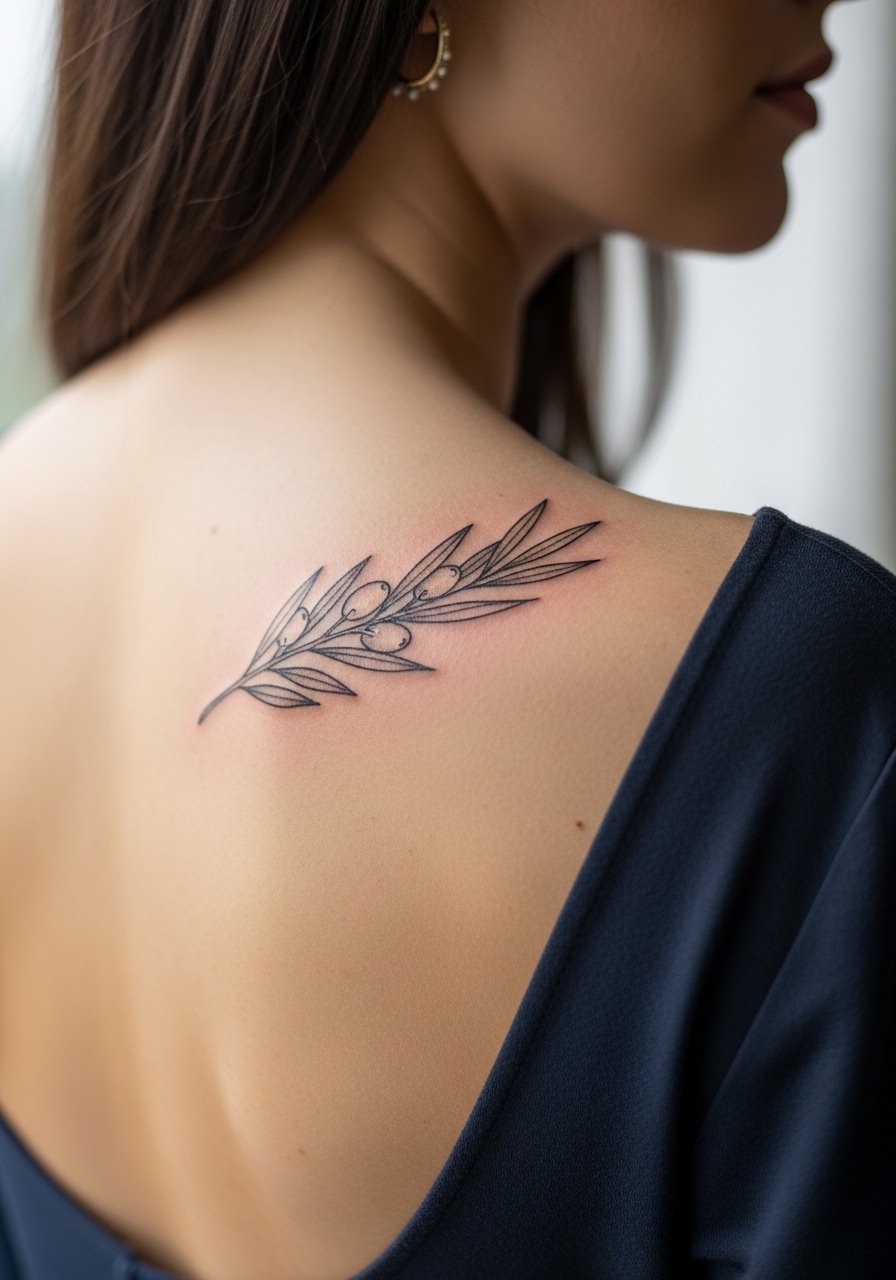
There is a graceful way to place a branch so that dresses and evening wear frame it naturally. Expect one to two sessions when you ask for precise curvature that follows the shoulder blade. The mistake is centering the design too low where straps or fabric seams will rub. Ask your artist to mark placement while you stand in the outfit you plan to wear. For maximum effect pair the piece with a backless midi or open-back top so the branch sits intentionally in view.
Frequently Asked Questions
Q: How long before a fine line olive branch on the wrist needs a touch-up?
A: It depends on sun exposure and hand use, but expect to check in around 12 to 18 months if the area sees frequent washing or friction. Ask your artist for heavier anchor stems at the session if you want longer readable life between touch-ups.
Q: Is blackwork better than watercolor for darker skin tones?
A: In many cases blackwork provides stronger contrast on darker skin and photographs more consistently. Watercolor can still work if the artist adjusts saturation and contrast, but plan for slightly bolder outlines or layered washes to keep the colors visible.
Q: Will an olive branch on the forearm stretch weird if I gain or lose weight?
A: Forearm skin can shift with significant body changes. If you expect large fluctuations pick compressive placements like the wrist or collarbone, or design with flexible stems and spaces so the composition moves without distortion.
Q: Are there wardrobe tips for showing off a collarbone lattice without risking the heal?
A: Yes. Wear a wide-neck or strapless top for the first two weeks when swelling is present and choose V-necks for show once healed. A v neck silk blouse sits well under jewelry and does not rub the collarbone area.
Q: What should I ask in a consult for a sleeve connector olive branch?
A: Bring clear photos of existing healed pieces, describe which motifs you want linked, and ask the artist to sketch the stem path on your arm before inking so you can approve overlap and negative space.
Q: How do I find affordable spots or guest artists for small olive sprigs?
A: Use app filters, community threads, and convention guest lists to find walk-in friendly artists or apprentices offering shorter appointments at lower cost. Search social tags and local Reddit threads for current guest-spot announcements.
