
Fine line florals have taken over feeds, and the split between what looks amazing on screen and what lasts on skin has never been clearer. Some people chase micro detail that glows for a week and requires touch-ups by year two. Others choose bolder contours that mellow into a comfortable presence. Below are small flower tattoo ideas that balance the trend moment with real-world wear so you pick something that still reads as you age.
1. Fine Line Single Daisy on the Wrist
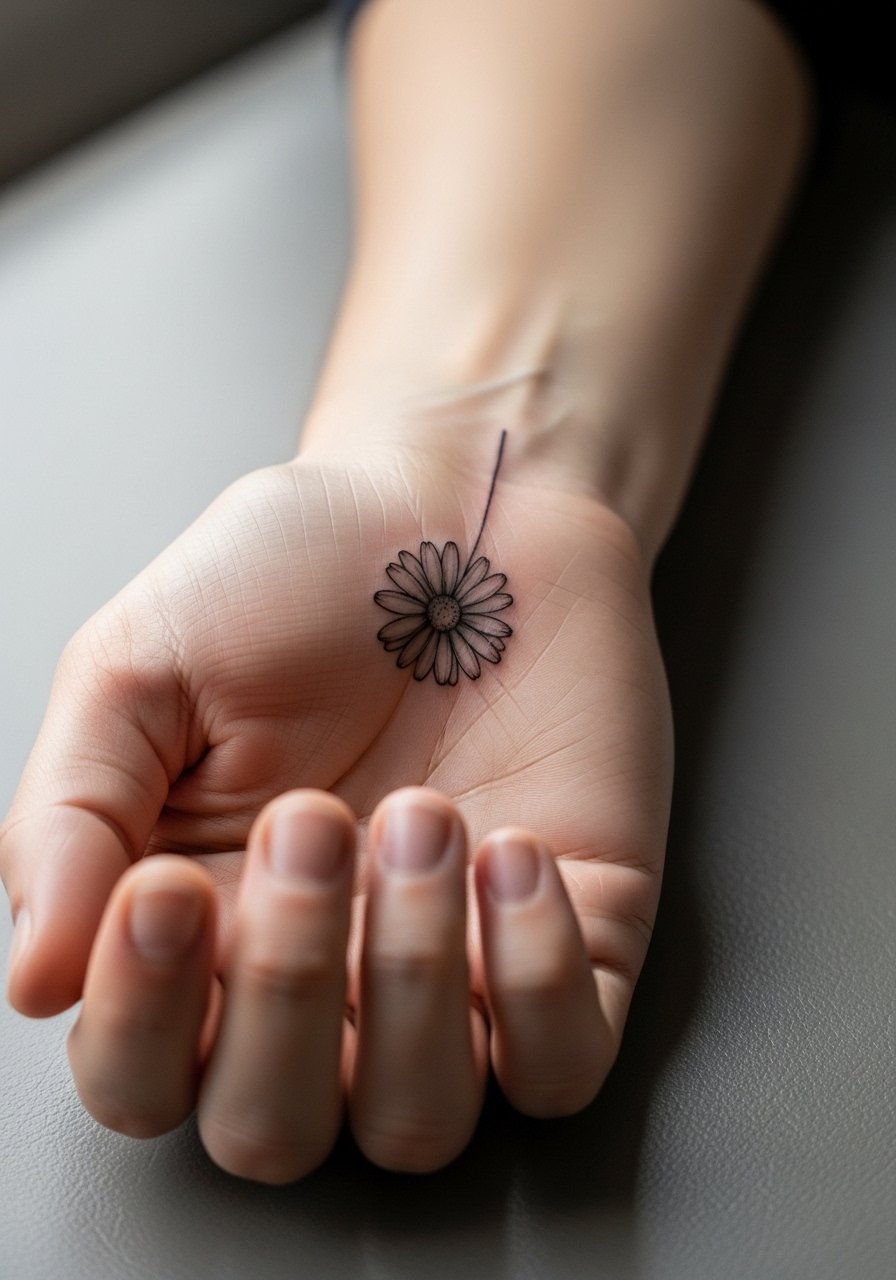
I've seen this tiny daisy on wrists for years and it stays readable when the lines are spaced and not hairline thin. Fair warning, the fine line camp and the bold-line camp are at odds here. One side says fine lines need yearly touch-ups to avoid blur. The other side insists that proper needle depth and spacing let fine work last. Tell your artist you want a slightly heavier single-stroke outline with open negative space in the petal tips. For the session, wear a sleeveless tank so the artist has clean access. Expect low pain and a short single-session appointment. The common mistake is asking for hairline petals that merge after a year.
2. Minimalist Poppy Bud Cluster at the Ankle
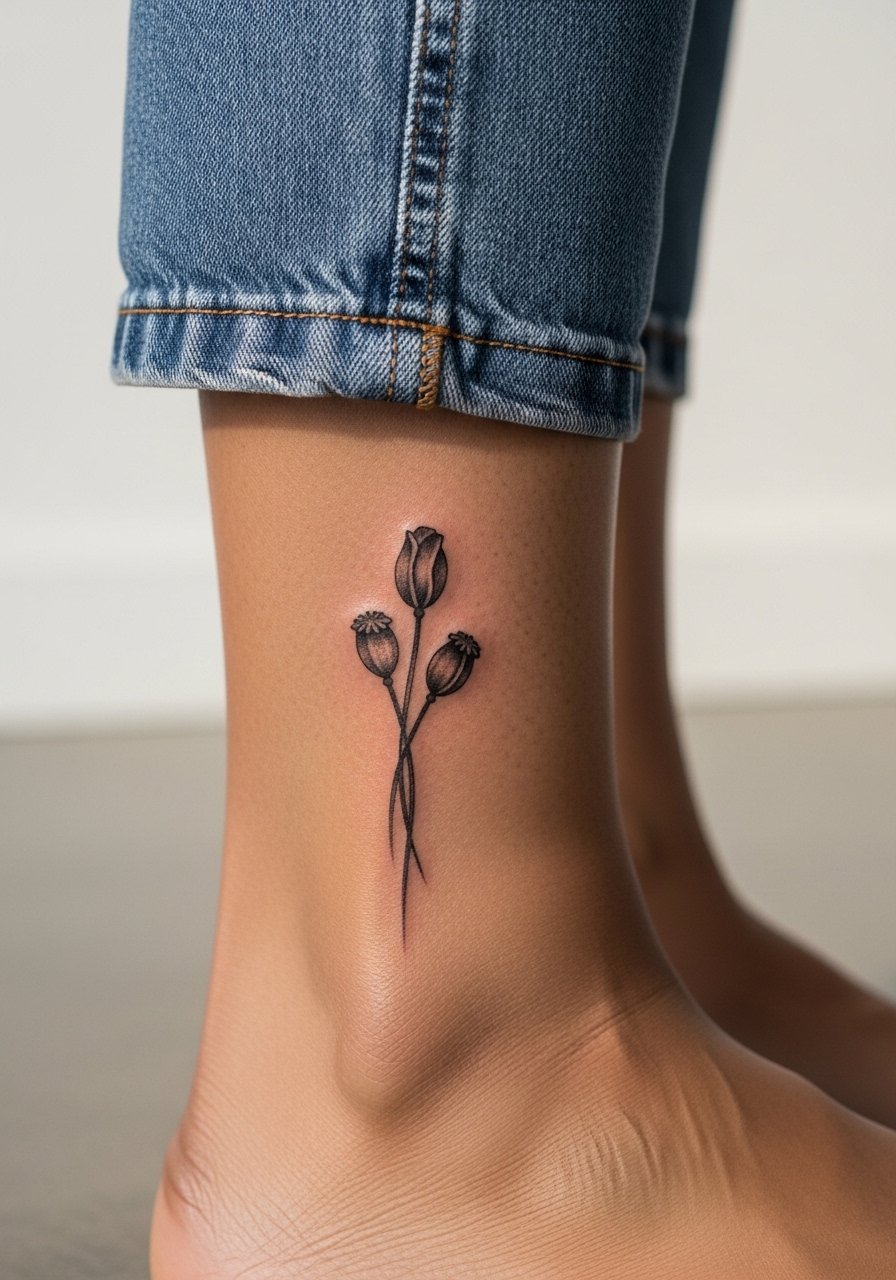
When you want growth symbolism without a loud palette, a small cluster of poppy buds on the ankle reads like a personal talisman. The ankle sees friction from socks and shoes, so ask for strong black outlines and light gray shading rather than fragile single lines. For showing it off in summer, pair it with strappy flat sandals and cropped jeans in olive tones. Session wear is loose pants rolled up or shorts. Pain is moderate. Overly tight detail is the usual mistake here because the area moves and the ink can blur in narrow spaces.
3. Neo-Traditional Mini Rose Along the Collarbone
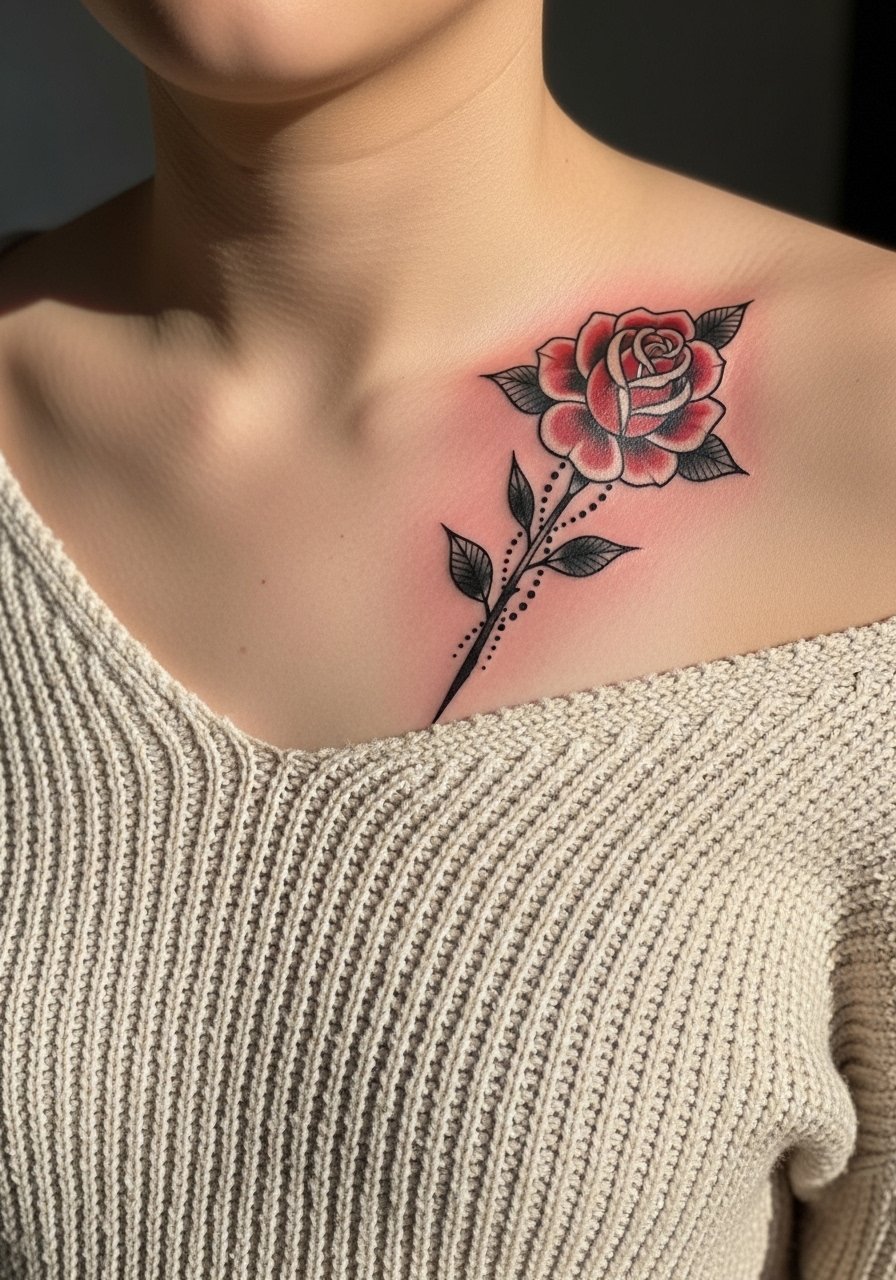
There is a scene of heads turning when a saturated micro rose sits low on the collarbone, and neo-traditional weight helps it read from across a room. The dotwork stem adds texture that ages into a pleasant grain rather than blotch. Bring reference images that show exact saturation and the pendant necklace spacing you want. For showing the piece, try an off shoulder knit top with a thin pendant that drops nearby. Expect a single session under an hour. A common error is placing it too close to the clavicle bone where motion can stretch the span and cause early softening.
4. Micro-Realism Lavender Sprig Behind the Ear
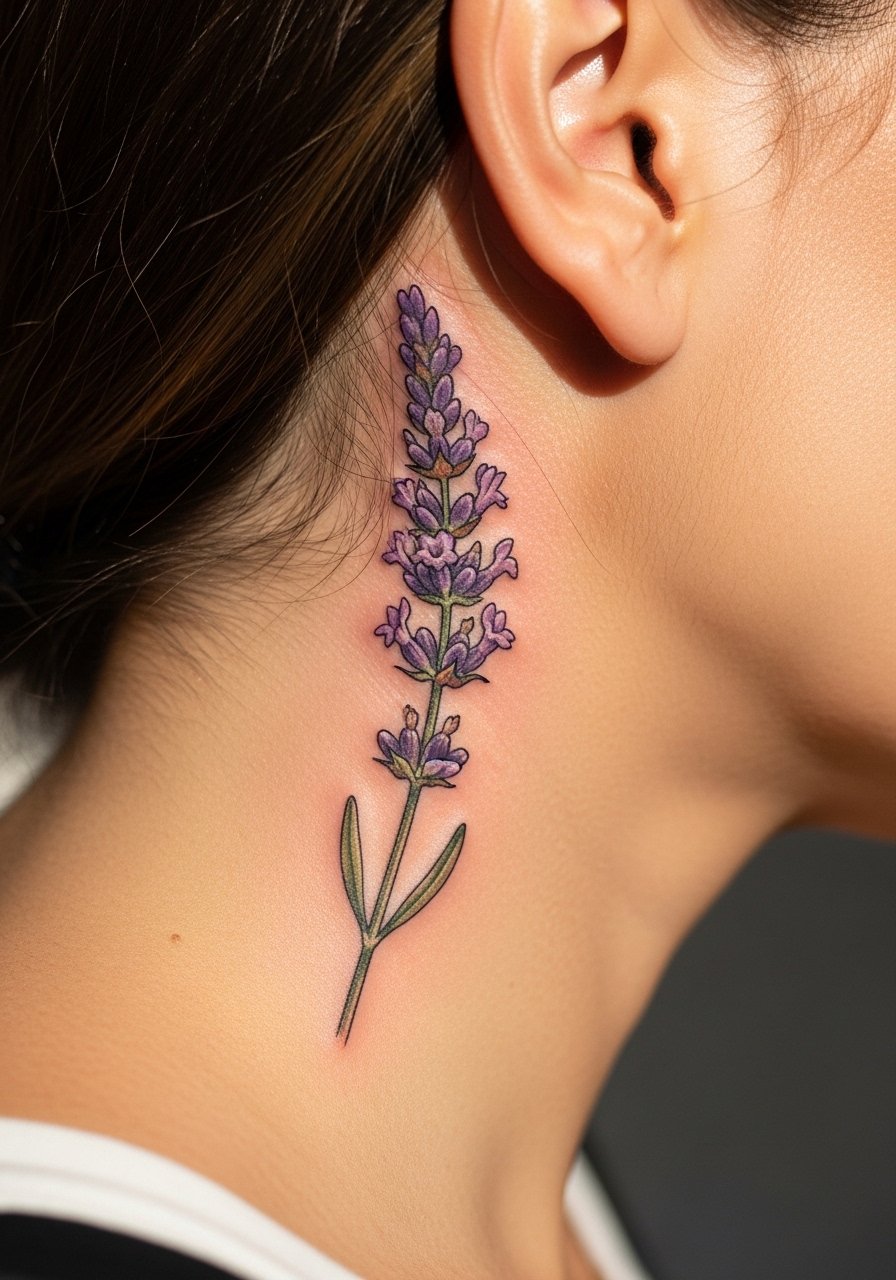
Most people underestimate how small micro-realism can be and still keep detail. A tiny lavender sprig behind the ear works because the area is sheltered from UV and abrasion. Artists disagree about numbing and dressings for sensitive spots. One group favors topical numbing for comfort. The other worries numbing creams can slightly change skin response. Ask your artist how they handle tiny color work behind the ear and whether they recommend a touch-up timeline. For the session, tie your hair up and wear an open neck blouse so the artist can see the placement. Expect minimal pain and a short, focused session. The real mistake is requesting extreme photorealism at too small a scale.
5. Blackwork Aster in a Geometric Frame on the Outer Forearm
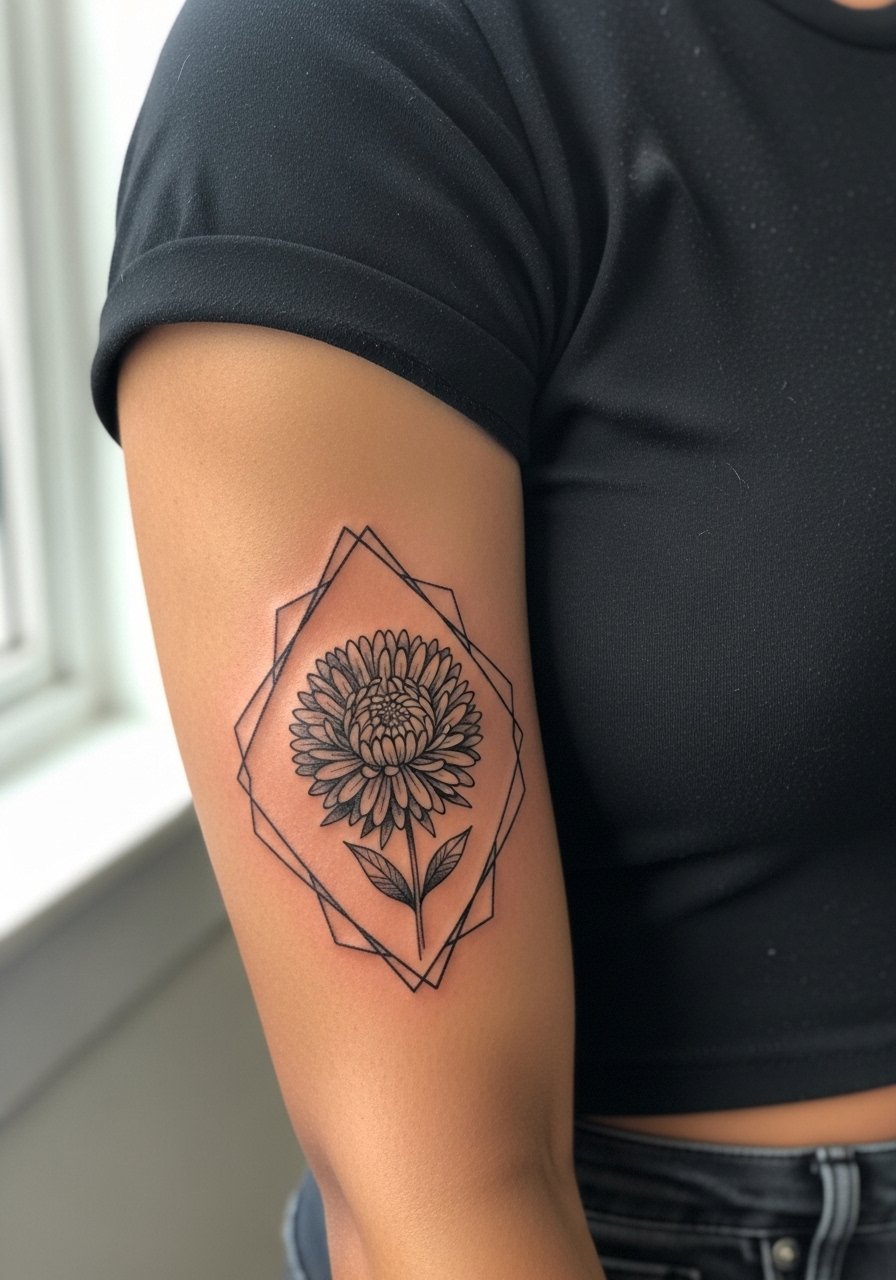
There is something resolute about a solid black aster framed by geometry. It holds up because saturation resists fading and the frame gives negative space to prevent line merging. During consultation say you want bold linework and clear blocks for the frame so the piece can be expanded into a sleeve later. For evening wear, a fitted black tshirt and a leather cuff on the opposite arm frame the design. The outer forearm is low pain and fast to tattoo. A common mistake is crowding the frame with tiny filigree that blurs into the solid areas over time.
6. Watercolor Marigold on the Shoulder Blade
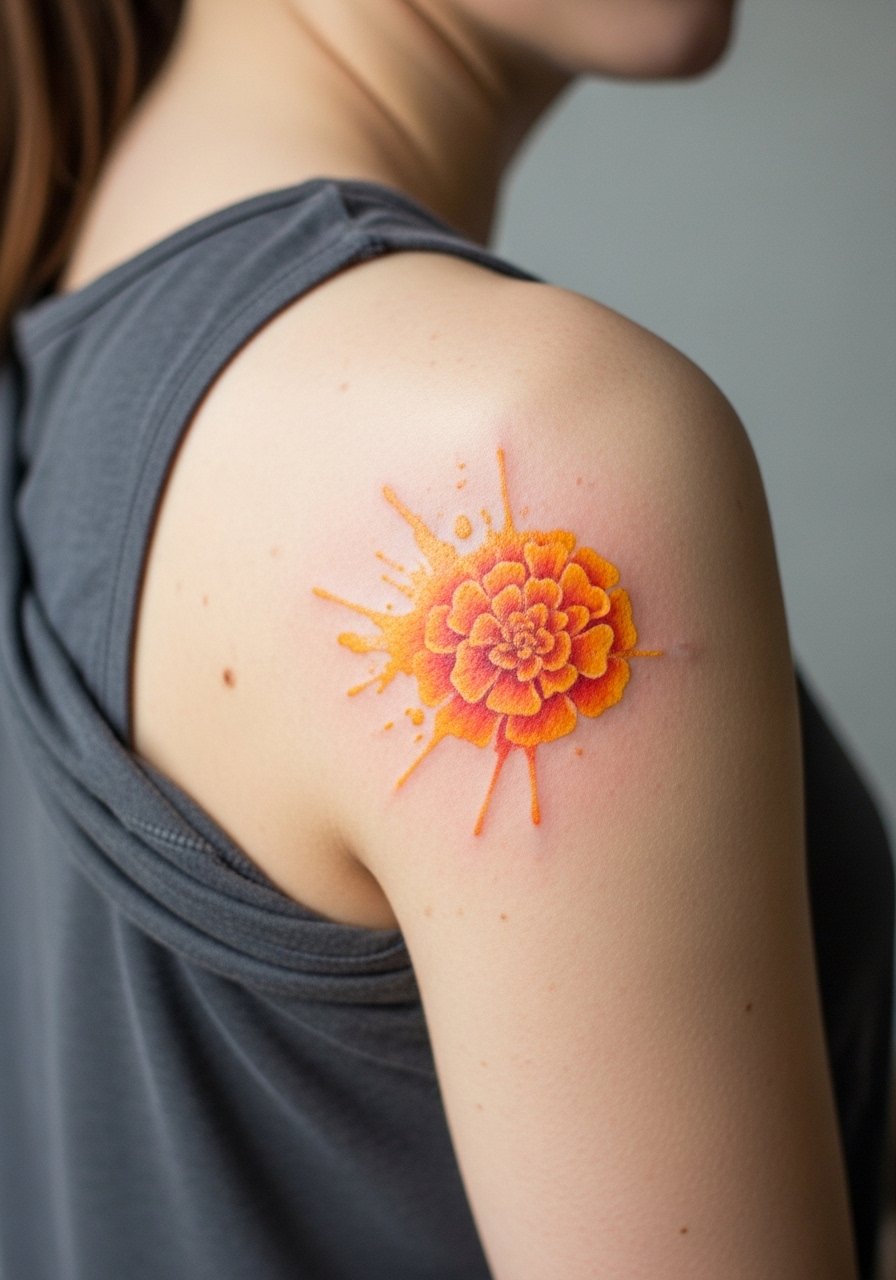
Watercolor marigolds read like a painterly accent and the shoulder blade is ideal because it avoids constant abrasion. The controversy around watercolor longevity is real. One camp favors watercolor for its soft painterly effect. The other cautions that pastel pigments fade faster in sun-exposed spots and recommend blackwork alternatives. If you pick watercolor, ask for slightly stronger outlines or pigment anchors so the shape does not wash out. For showing it off try a sleeveless sundress or a backless tank. Session time is short to moderate and pain is low. The biggest mistake is choosing pale pastels on very sun-exposed skin without planning for sun protection.
Studio Day Picks
The wrist, ankle, and collarbone pieces above need slightly different prep than larger arm work, so these small items smooth the session and first week.
-
Stencil transfer paper kit. Lets you see exactly where the small motifs land on curved areas like the wrist and ankle before the needles touch skin.
-
Tattoo numbing cream. For sensitive spots like behind the ear or the ankle this can reduce the initial sting and make a short session more comfortable.
-
Thin protective film roll. Useful for small wrist pieces that endure hand washing and constant friction during the first days.
-
Fragrance free gentle body wash. Cleans the healing area without scented irritants that can inflame delicate linework.
-
Aquaphor healing ointment. A thin layer in the initial days locks in moisture for tiny fine line work without suffocating the area.
7. Ignorant-Style Periwinkle Doodle on the Inner Wrist
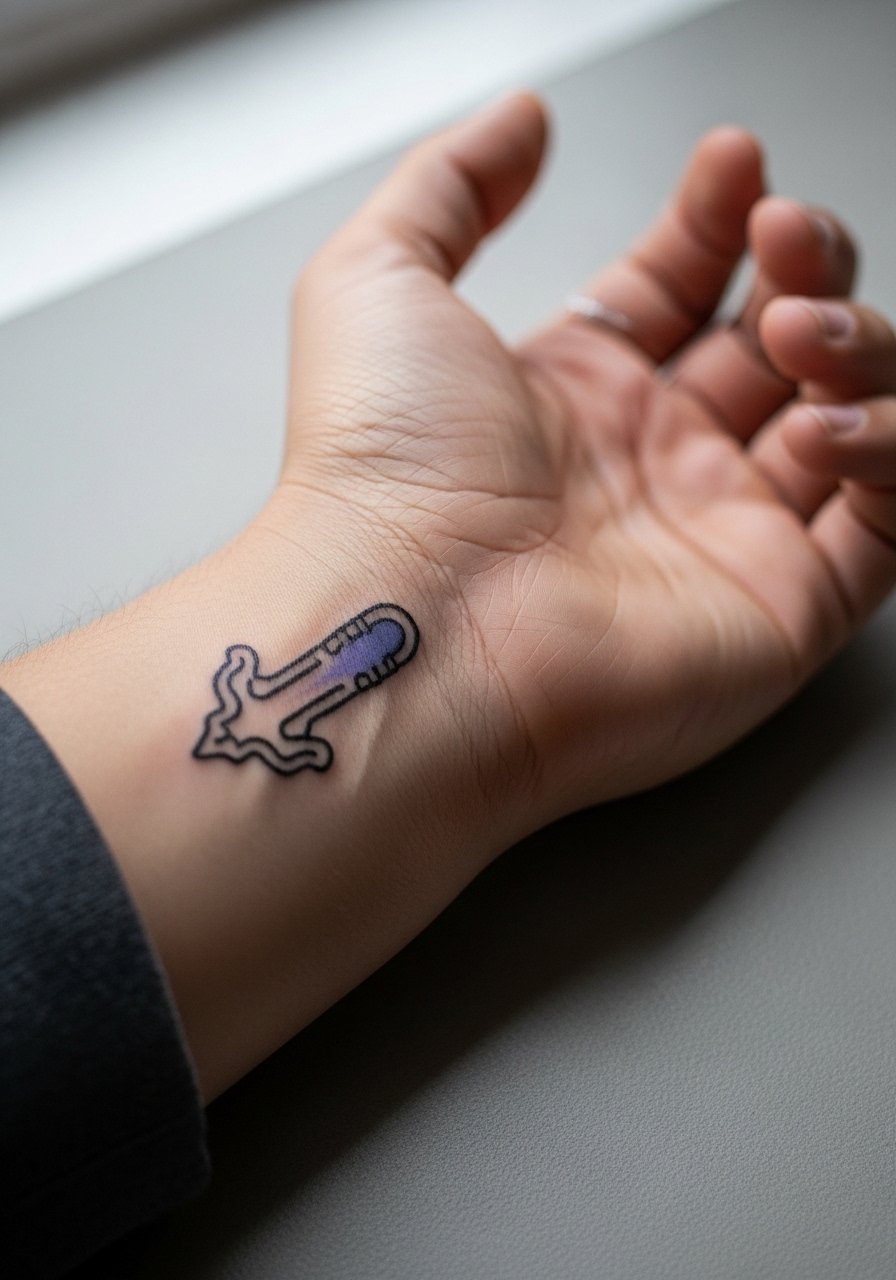
The ignorant style sells a raw hand-drawn look that suits the inner wrist perfectly. It reads as personal and slightly rebellious because the lines retain a sketchy energy rather than polished precision. For the session, skip jewelry and wear a linen cuff bracelet on the opposite wrist if you want an editorial stack after healing. Tell your artist to keep confident single-stroke lines rather than tiny cross-hatching that can fade into texture. The inner wrist is moderately sensitive. The common mistake is asking for ultra-tiny cross-hatched shading which tends to muddle after a couple of years.
8. Ornamental Larkspur Mandala at the Back of the Neck
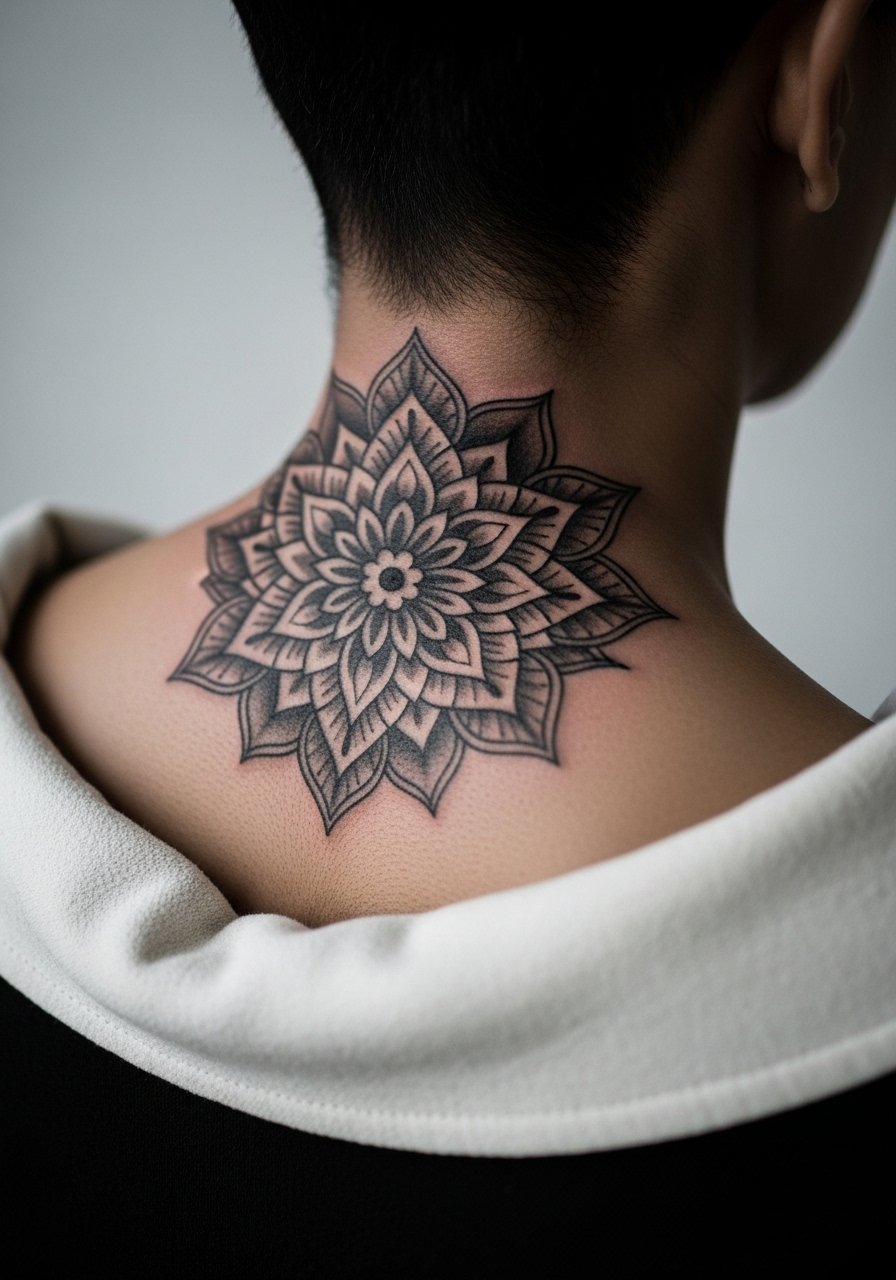
This mandala-style larkspur plays with symmetry and hairline spacing, and it works best where hair can casually cover or reveal it. When you talk to the artist, ask for slightly more spacing between concentric lines so dense areas do not blend with movement over time. The back of the neck can require a specific touch because the skin moves with the head. For the session, wear a wide-neck shirt you can pull to one side. This placement is low to moderate pain and invites quiet expansion into upper back work later. Avoid packing too many tiny petals into the inner rings.
9. Fine Line Allamanda Vine on the Ribcage
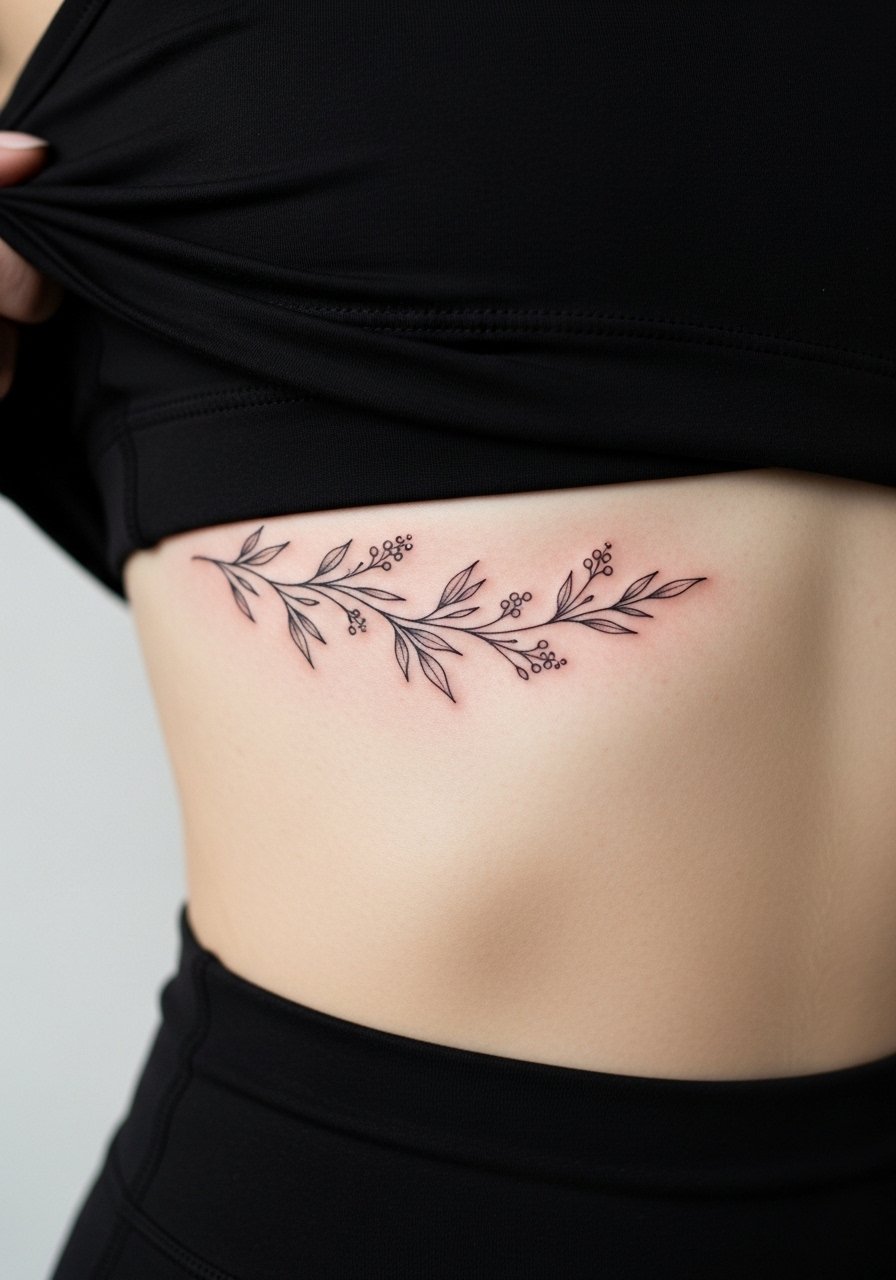
Fair warning, the ribcage is one of the higher entries on pain charts. People choose an allamanda vine here because its elongated flow complements the torso curve. There is a split among artists about fine line on ribs. One group says skin stretch and movement blur hairline work within a couple of years. The other group argues that with controlled needle depth and mindful spacing fine line can settle cleanly. If you want the vine to age well, ask for slightly bolder primary stems and open spacing between leaves. Session time is moderate and you should plan for breaks. The usual error is insisting on ultrafine hairlines along the entire vine.
10. Traditional Poppy Bold Outline on the Calf
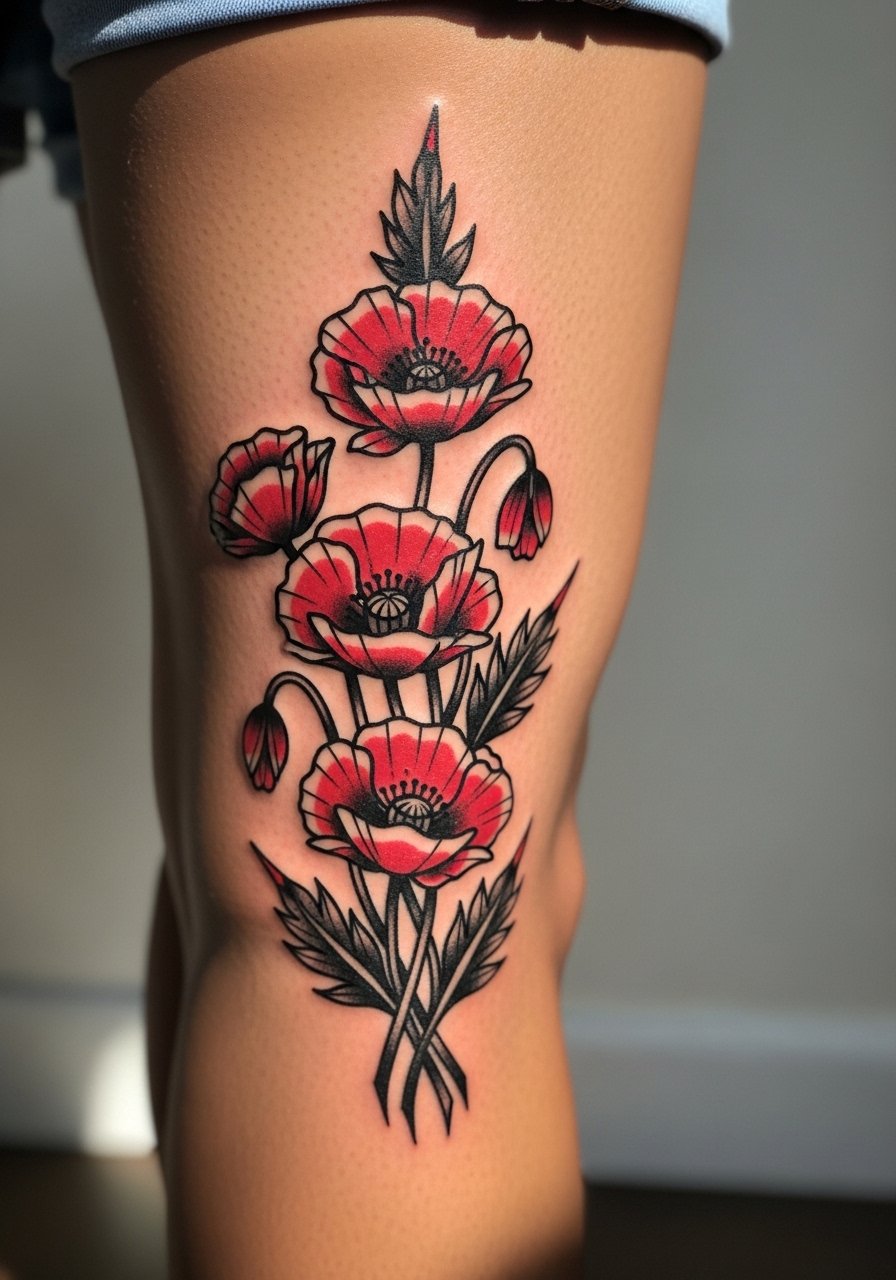
Calf pieces are forgiving because they rarely face constant abrasion, and a traditional poppy in bold outline ages into a confident presence. The larger silhouette helps the red saturation keep its shape for longer. For casual show-off looks wear strappy flat sandals and shorts. Session time tends to be short, and pain is mild to moderate. The common mistake is shrinking an old-school design down too small and expecting the color to retain the same impact. If you plan a future leg piece, leave buffer space around the motif for expansion.
11. Botanical Line Art Peony Half-Bloom on the Upper Arm
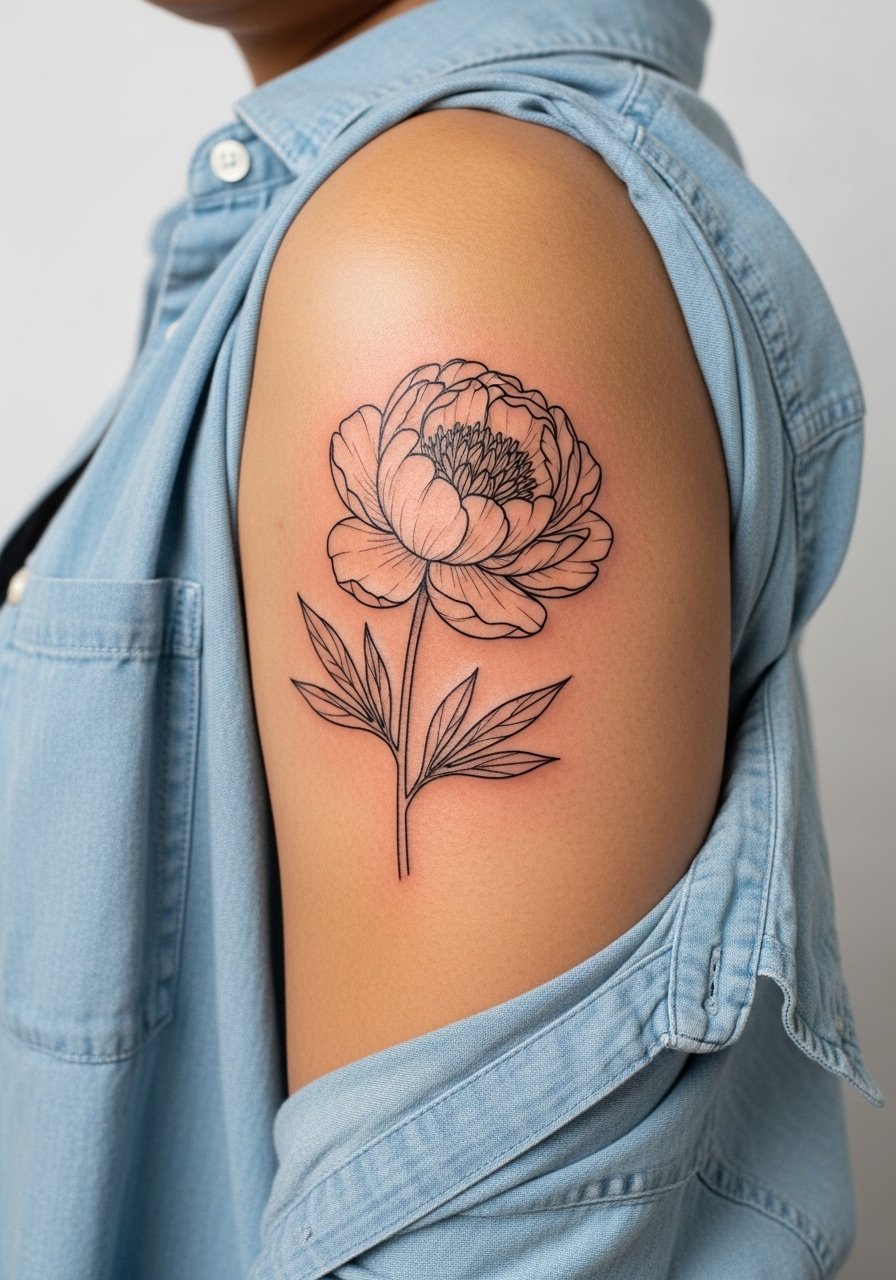
I've seen collectors add peony half-blooms as sleeve building blocks because the half-bloom leaves a clear edge for adjoining pieces. Tell your artist you want strong contour linework in the bloom and lighter internals so the petal depth reads at a glance. For the session, wear a loose button down shirt you can pull aside easily. Pain is low on the outer upper arm and sessions are brief. The usual mistake is requesting dense interior shading that competes with the petal contours and makes later additions awkward.
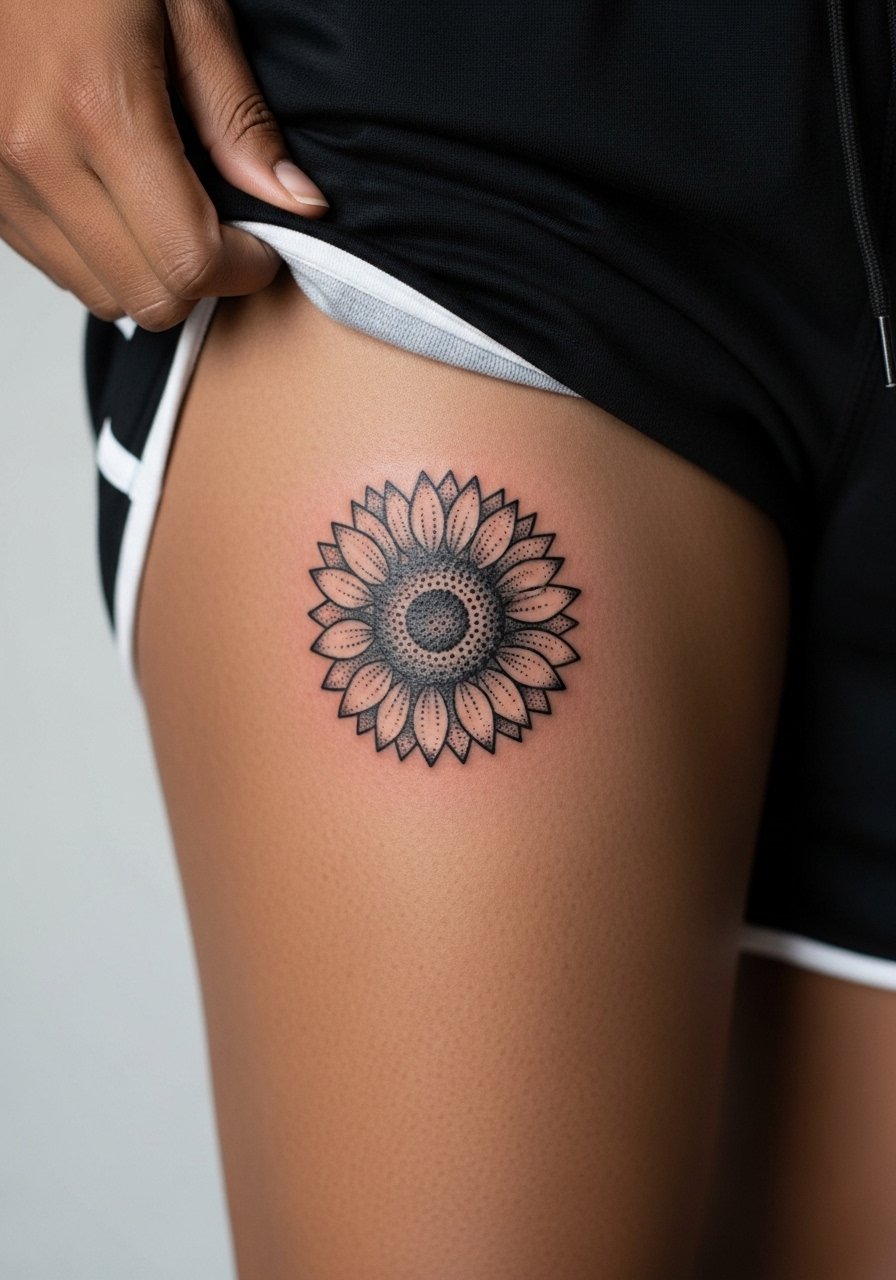
12. Dotwork Sunflower Core on the Thigh
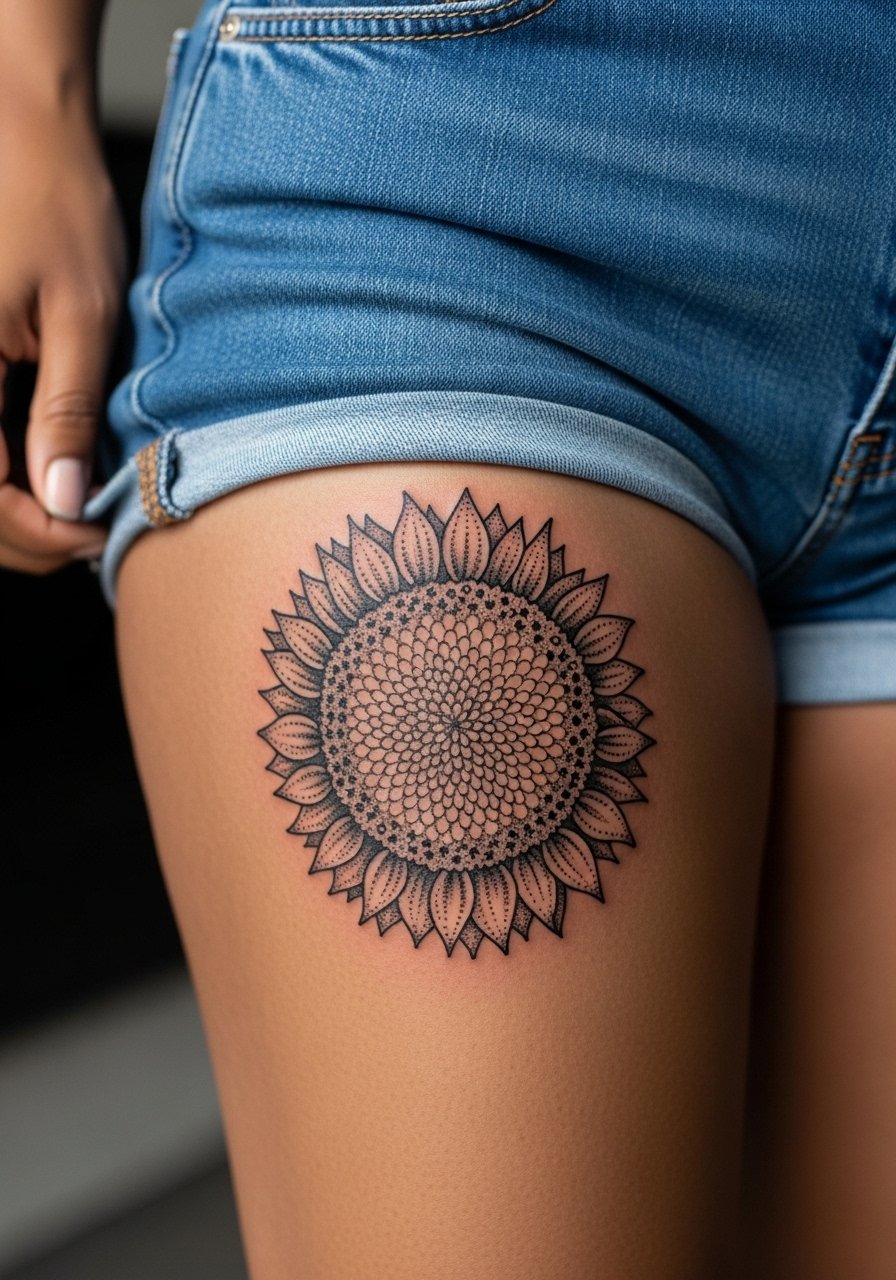
Thigh placements give room for texture. Dotwork in the sunflower center builds depth without relying on color that fades. If you want longevity, ask for dot spacing that creates gradient without tiny packed dots that blur. Session wear is loose shorts or a wrap skirt. Pain is mild and healing is usually uneventful. A common error is pushing for dense stippling too close to the edge which can read muddy with skin movement.
13. Micro-Realism Bluebell Sprig Behind the Ear
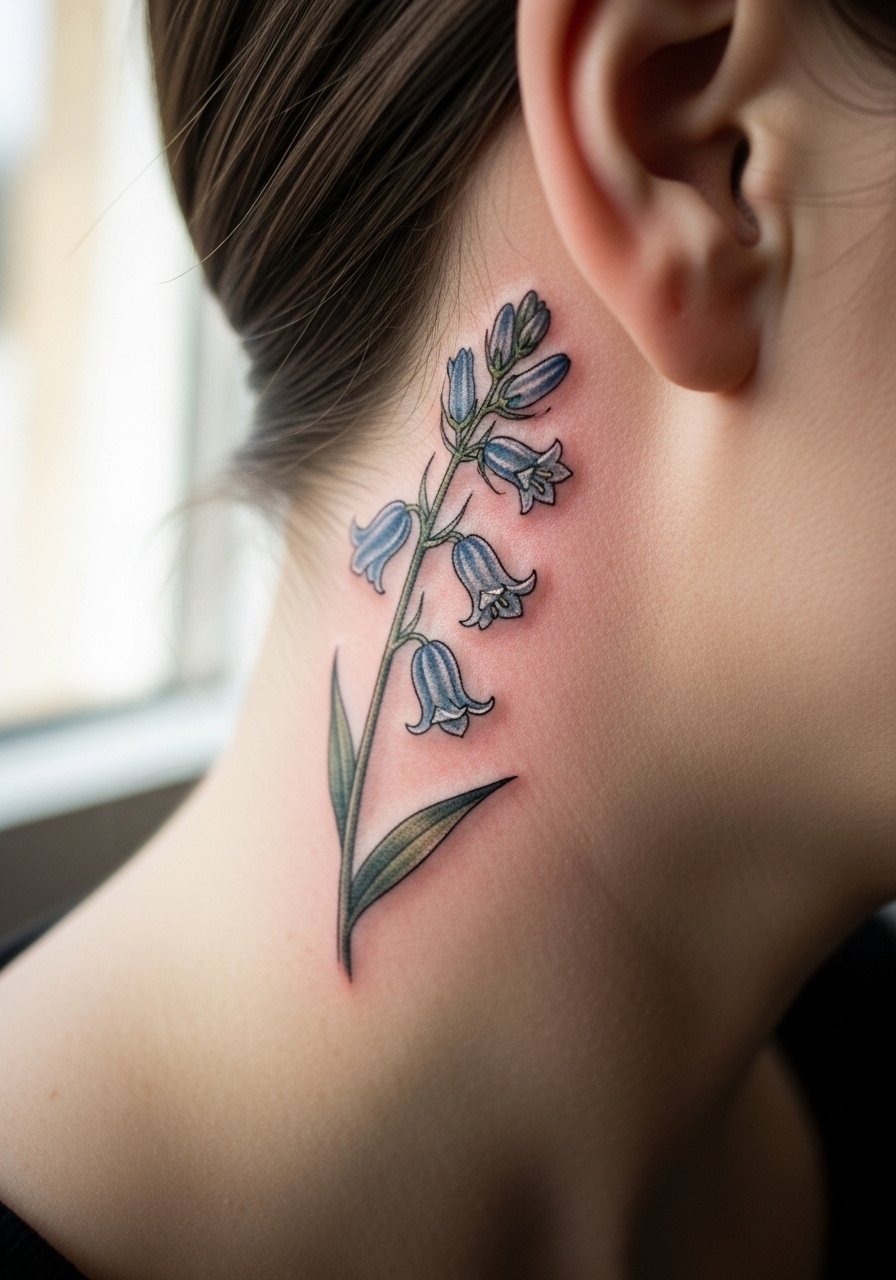
A tiny bluebell behind the ear feels private and becomes a small secret when hair falls differently. Micro-realism here succeeds because the area is sheltered and touch-ups are straightforward. For session comfort tie your hair up and bring a small hair ties silk so the artist can work without stray strands. Pain is minimal. The mistake is asking for excessive surface shading that hides the fine silhouette. If you want color longevity, discuss pigment anchors or a subtle outline to hold the edge.
14. Blackwork Aster Cluster on the Outer Forearm Accent

The outer forearm tolerates saturated blackwork and is visible enough to enjoy daily. Ask for clearly separated solid areas and crisp negative space so the cluster does not merge into a single block as it heals. Wear a rolled sleeve tee to the session so the artist can work without fabric interference. Expect a quick session and low pain. The typical mistake is packing too many small dots into the design which can flatten visually at year two.
15. Fine Line Vine Around the Ankle

An ankle vine looks delicate but needs breathing room. When the vine wraps, spaces between leaves prevent lines from running into each other as your skin moves. For after-session styling try cropped straight jeans and sandals to show the curve. Session time is short and pain is moderate. The common mistake is requesting micro leaves with no spacing, which can bleed together in the first couple of years.
16. Dotwork Core Sunflower on the Thigh Inner Edge
Inner-thigh placements benefit from textured approaches because the skin there is softer and private. Dotwork gives a tactile depth and reduces reliance on color. Session wear should be shorts you can pull slightly for access. Pain ranges from moderate to tender depending on placement. People sometimes forget the friction from clothing when choosing inner-thigh spots. The mistake is over-detailing a tiny center that needs space to breathe.
17. Botanical Sprig Along the Rib to Sternum Edge
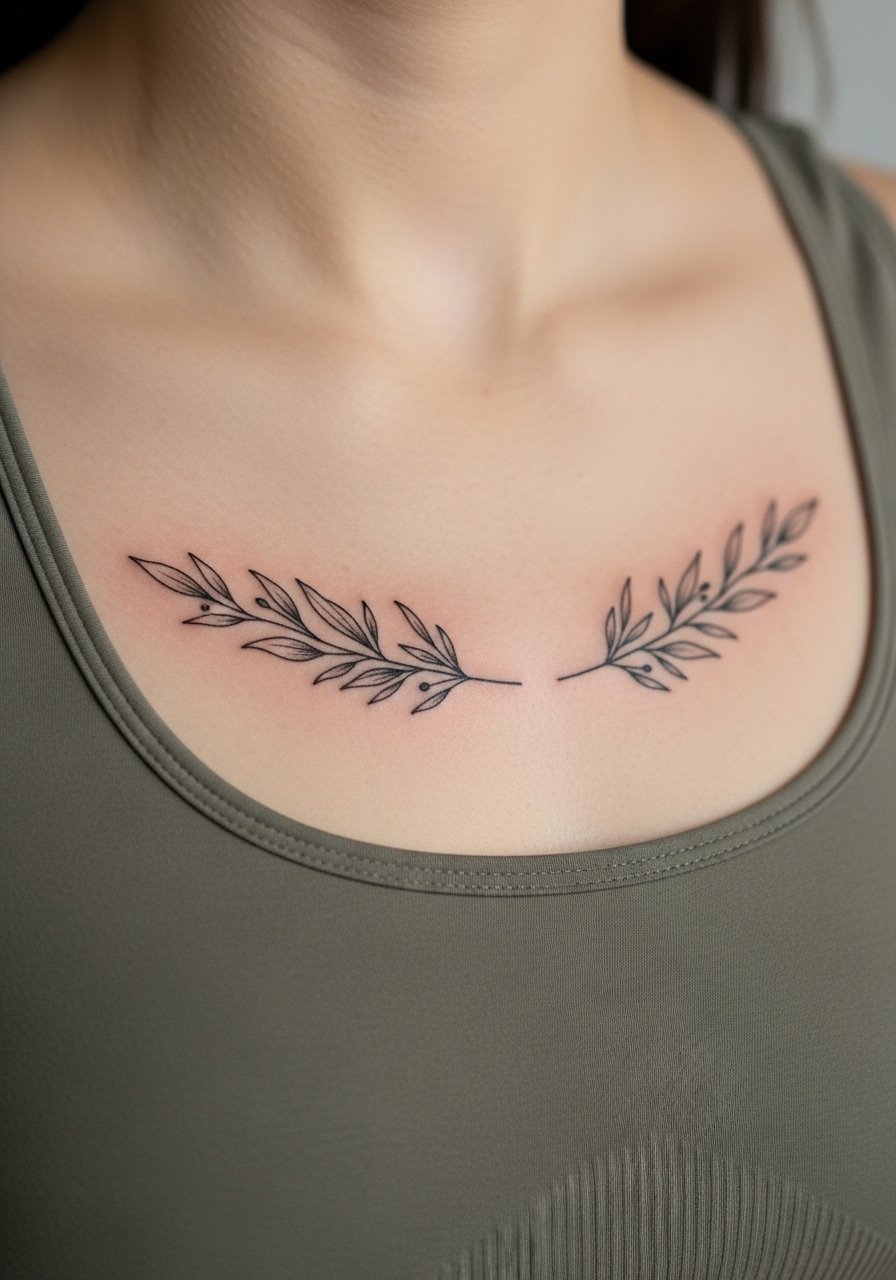
Sternum-edge sprigs sit at an intimate intersection of contour and motion, and a clean single-stem approach keeps the design readable. There is a debate about adhesives and protective film in sensitive chest areas. One group argues protective dressings cut infection risk and help fragile pigment settle. The other prefers minimal covering so natural scabs form and fall off. Ask the artist which method they trust on chest skin. Session time varies and pain can be higher here. The common error is trying to cram dense foliage into a narrow sternum strip.
Frequently Asked Questions
Q: Will fine line tattoos like the wrist daisy need touch-ups more often than bold pieces?
A: Fine line ink generally needs more maintenance because hairline strokes can soften with sun and friction. It depends on placement and your skin. If you want less upkeep, request slightly stronger primary strokes or choose a placement with less abrasion.
Q: Do watercolor-style marigolds require different aftercare than a blackwork aster?
A: They can benefit from extra sun protection because pastel pigments fade faster. In practice the basics are the same, but plan for sunscreen and periodic touch-ups if you prefer soft color. Ask your artist about pigment anchors for small watercolor pieces.
Q: Is behind-the-ear micro-realism practical for dark skin tones?
A: Yes. Micro-realism can work across tones. The key is contrast and pigment choice so the colors read against your skin. Discuss color selection and contrast with an artist experienced in working on darker skin.
Q: What should I wear to a ribcage session to stay comfortable and give the artist access?
A: Pick a cropped athletic top or a loose button-down you can lift aside. Comfort and easy access make breaks smoother and reduce session time. Bring a friend for support if you expect multiple breaks.
Q: How do I find portfolios that show healed work rather than fresh photos?
A: Look for portfolios with images labeled as healed or older and search community channels for #SmallFlowerTattoo or #FineLineFloral. Spending time in local studio photos and community boards helps you see how styles age.
