
Fine line is everywhere online, but the designs that still read clean after years are not always the ones that trend today. Modern forearm sleeves that age well balance line weight, negative space, and placement on the outer forearm where skin stretches less. Read these 27 forearm sleeve approaches with practical notes on what to ask your artist, how they heal over time, and the wardrobe choices that actually make the work sing.
1. Fine Line Botanical Full Wrap
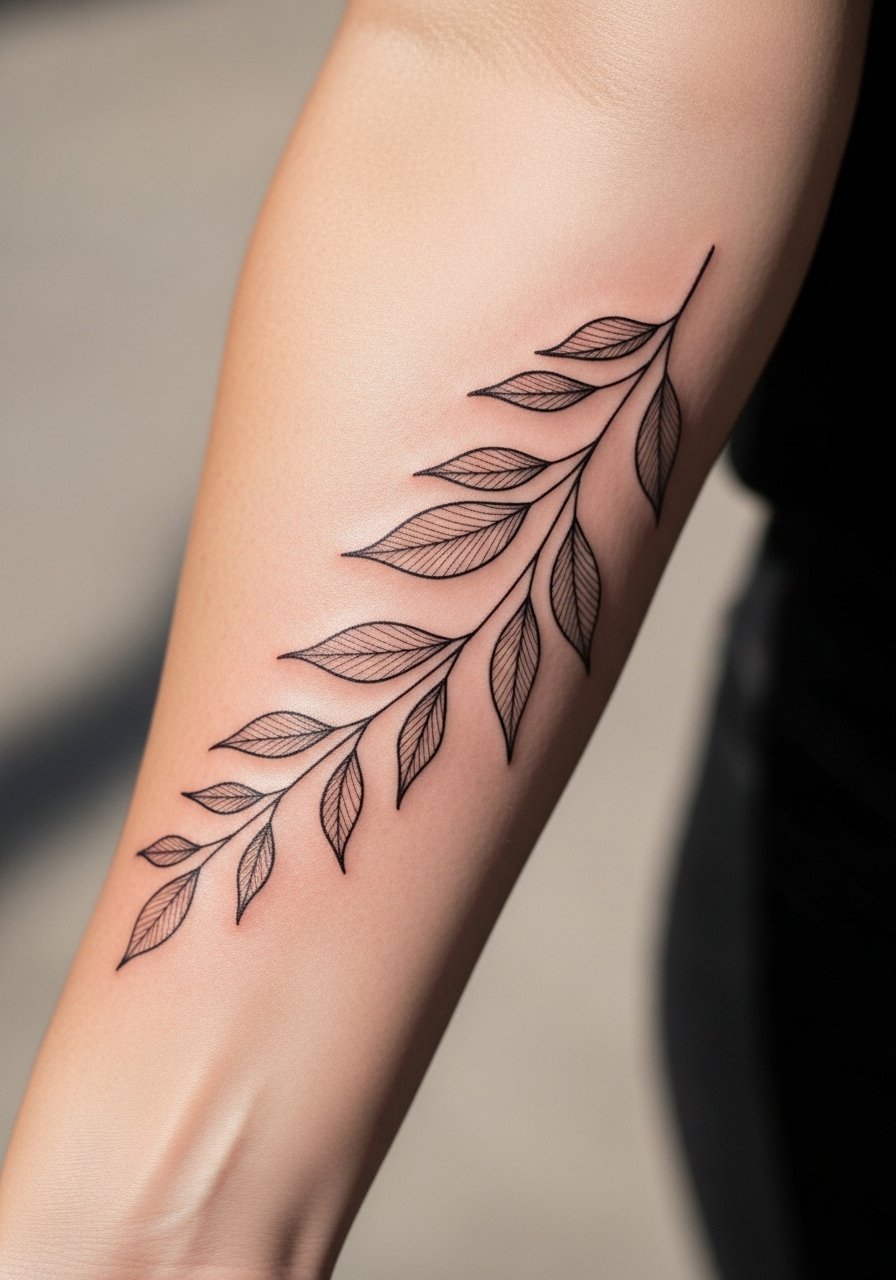
I see this style on guys who want a sleeve that reads subtle up close and controlled from a distance. Ask your artist for slightly thicker linework than true single-needle flash so the stems keep definition at year two. A common mistake is packing too many tiny leaves into a narrow band, which merges with sweat and friction over time. Expect a gentle fade at six months, softer edges at two years, and a touch-up around year three if you want crisp lines again. For showing it off, pair the work with a loose linen short sleeve shirt rolled to mid-forearm so the linework sits against neutral fabric.
2. Blackwork Geometric Animal Hybrid
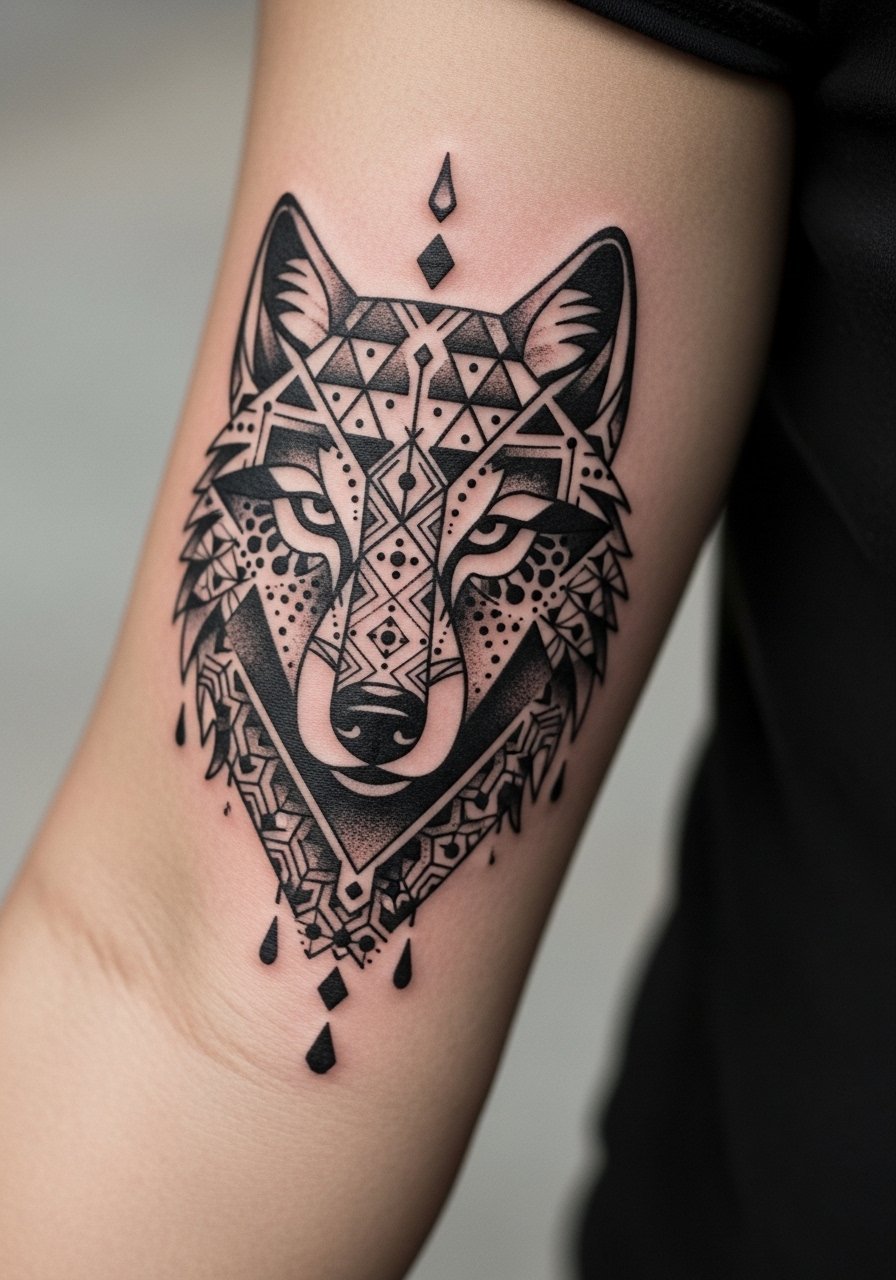
This is the sleeve for someone who wants pattern framing a focal animal without color. Tell your artist you want heavy saturation in the solids and lighter stipple in the transition zones so the geometry reads at a distance. The most frequent error I notice is under-saturated black fills that patch out after a year. Blowout risk increases if the geometry is too dense near the wrist, so allow breathing room and bolder shapes. Sessions run longer because of fill areas, expect multi-hour sittings. Pair it with a fitted black tee and a leather cuff bracelet when you want that rugged frame on display.
3. 3D Optical Skull Forearm Sleeve
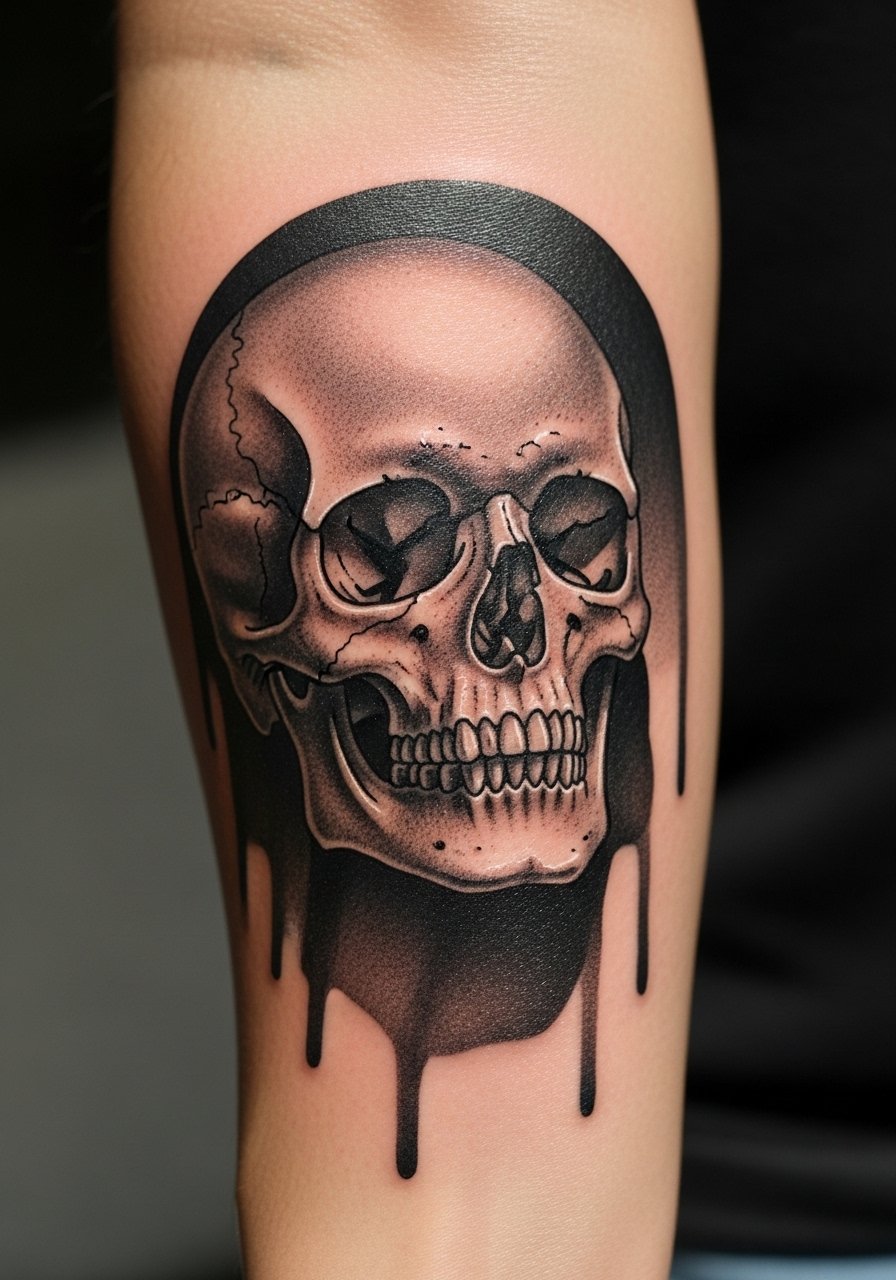
If you want drama that reads like sculpture, specify forced perspective and heavy drop shadows at the edges of the piece. The outer forearm is ideal because the flat plane helps the illusion hold up. Commonly, people bring tiny references scaled down for the wrist and lose depth, so insist on full-size placement mockups during consultation. Expect four to six sessions for the depth and layering. Pain is moderate on the outer forearm, heavier if the wrap crosses the inner side. For session comfort, a sleeveless hoodie makes rolling the arm easy.
4. Biomechanical Gear Wrap
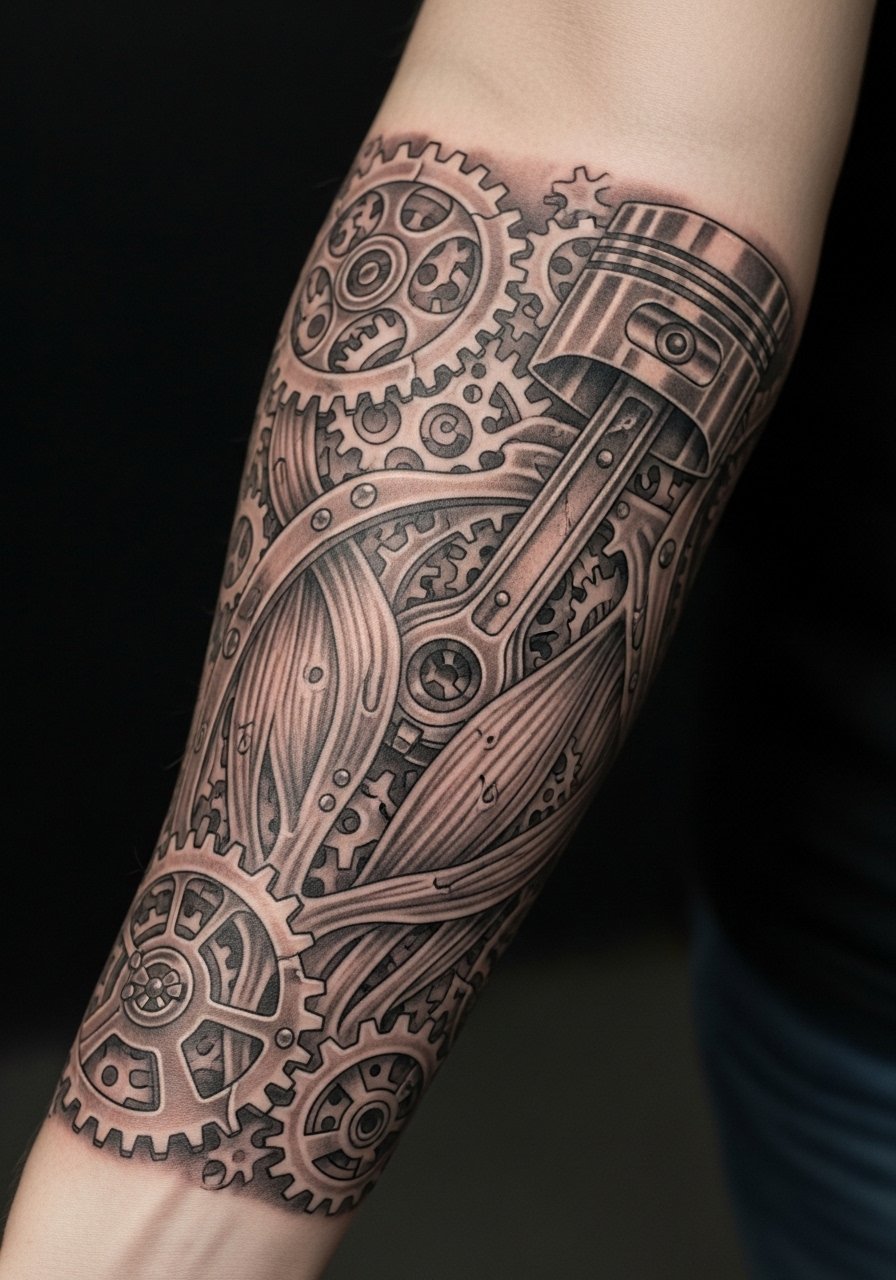
This futuristic look benefits from strong contrast between metal plates and shadowed joints. Tell the artist you want crisp negative space edges to separate gears so they do not merge over time. A mistake I often see is tiny micro-etching in shadow fields that blurs by year two. Expect five or more sessions because of layered shading and detailed illustrative work. The inner forearm sections feel sharper during sessions so plan for breaks and a hearty meal beforehand. Show it off with a sleeveless tank when you want the full wrap visible.
5. Neo-Traditional Lion Focal Half-Sleeve
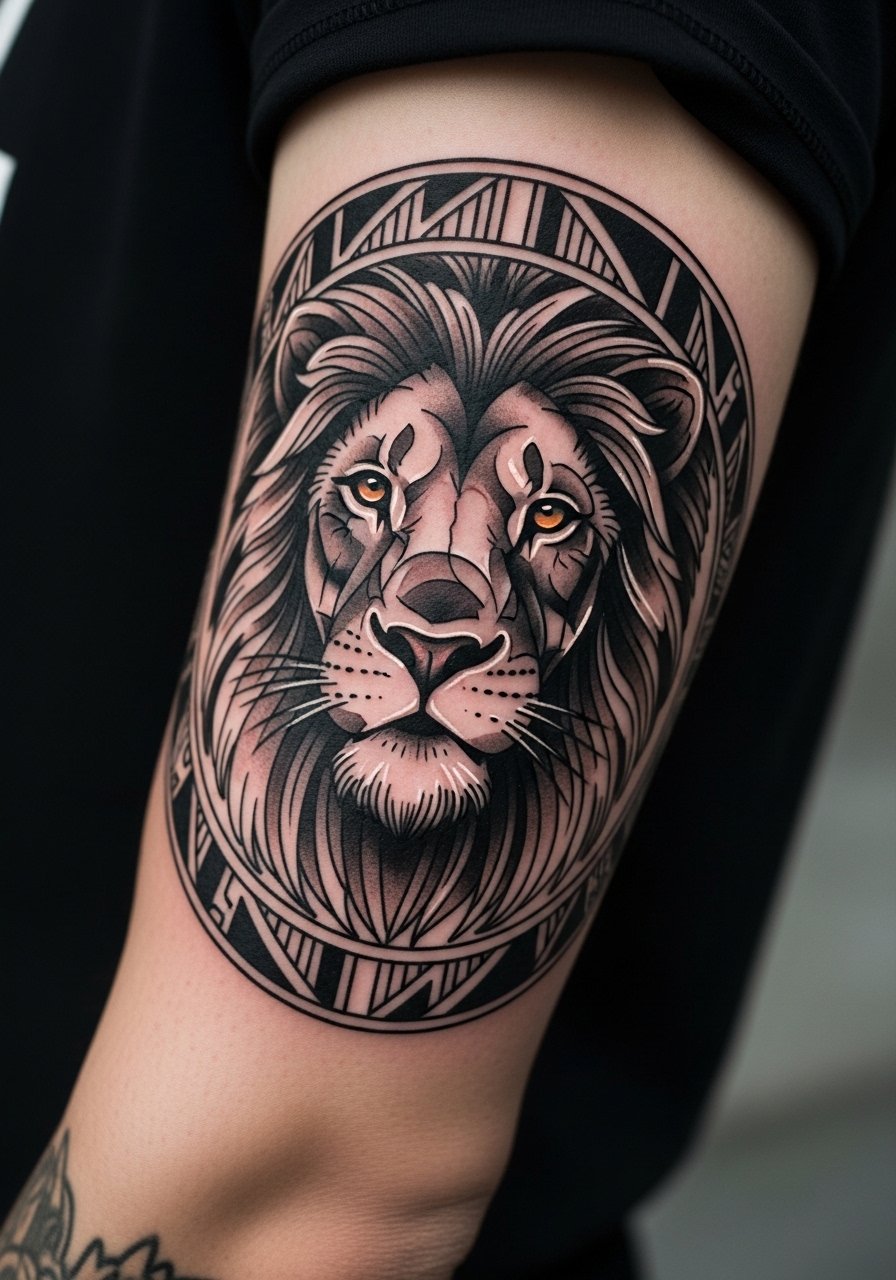
A lion makes a strong centerpiece without relying on color if you lean neo-traditional linework and controlled saturation. Ask for slightly wider outlines around the face so the features keep contrast as the piece ages. The usual mistake is layering too many color accents in the mane on a forearm that tans and sweats, which causes uneven fading. This placement expands well into a full arm later if you start with a central focal piece. Touch-ups at year three are normal for facial detail. Pair with a chambray shirt rolled twice to frame the upper forearm.
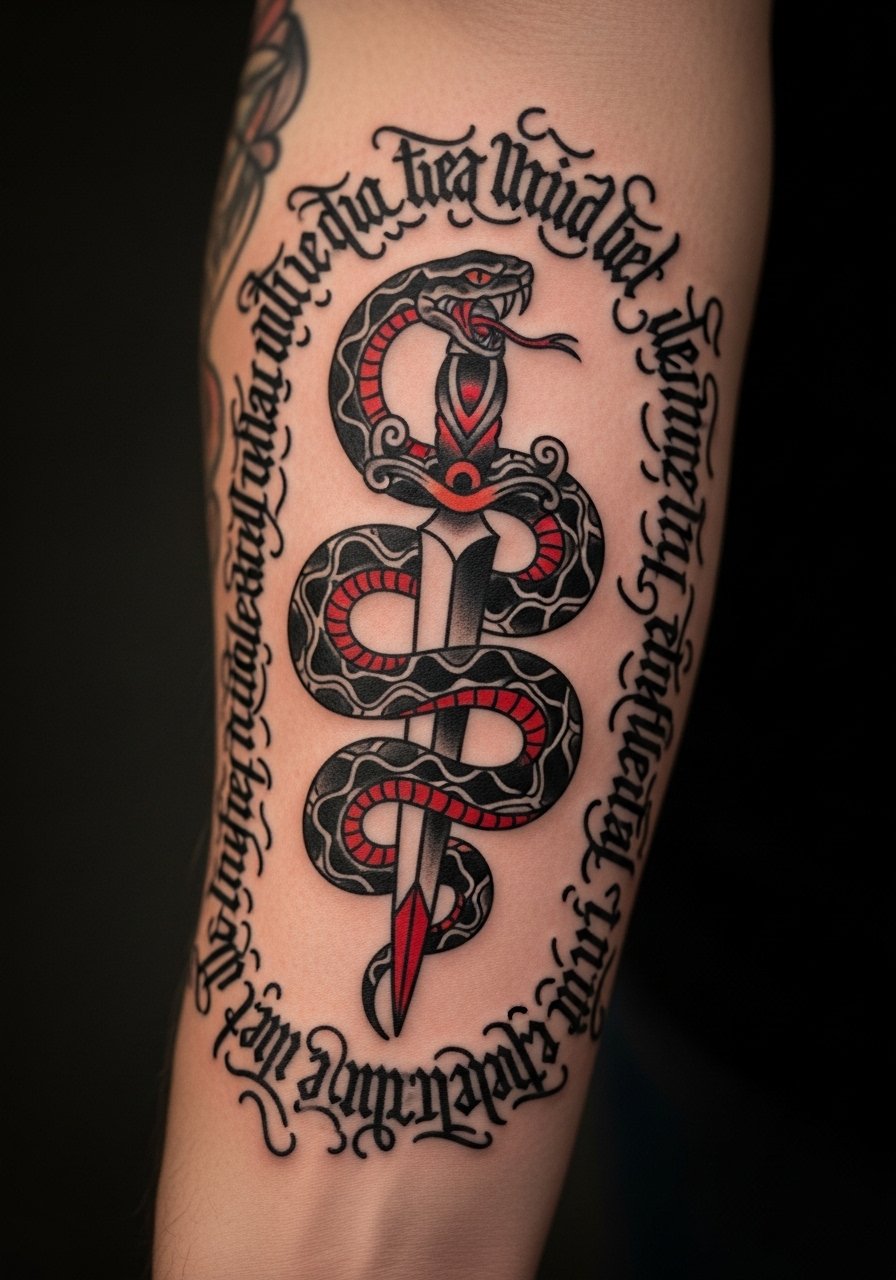
6. Snake and Dagger Linear Sleeve

This is classic forearm territory where bold lines age the best. Tell the artist you want consistent line weights in the dagger and stronger fill in the snake scales to avoid patchiness. A common error is cramming script under the dagger in tiny font that becomes illegible later. Sessions are straightforward and relatively quick compared with realism pieces so you can expect two to three sessions. For showing it off, vintage band tees and cuffed jeans pair well with a wide leather watch on the opposite wrist.
Studio Day Picks
The six forearm approaches above cover outer, inner, and upper forearm work, and a few small accessories and prep items make the session smoother and the first week less fussy.
-
CeraVe Healing Ointment. A thinner, non-greasy option many people use instead of heavier balms during the first few days to reduce ointment buildup on fresh linework.
-
Ink-Ichiban Balm. Thin absorption helps forearm sleeves that receive frequent friction from clothing stay clean without forming sticky residue.
-
Australian Gold Aftercare SPF 50. Useful for forearm pieces that get sunlight in summer, it combines moisturization with sun protection once the skin has fully healed.
-
Tea Tree Soap Bar. Gentle pre-session cleansing on hairy forearms can reduce surface oils and help stencil adhesion.
-
Second Skin protective film roll. Useful for large wraps to protect from friction the first night and keep the area clean during initial healing.
7. Floral Smoke Transition Half-Sleeve
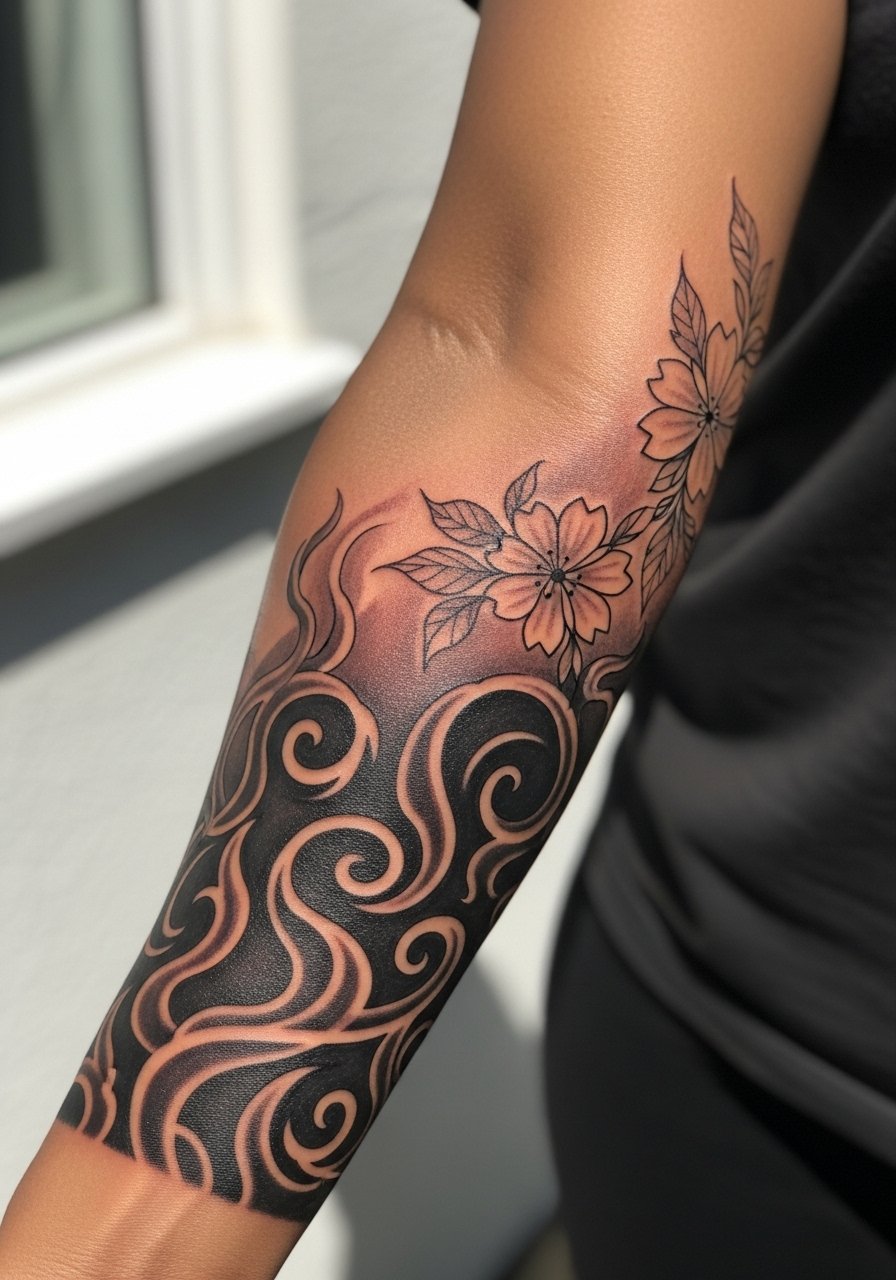
If you plan to link to an existing upper arm piece later, use smoke and fine florals as soft connectors. During consultation, ask for flow lines that move toward the upper arm so the expansion feels seamless. One common mistake is making the smoke too busy near joints which then blurs with motion. Heals nicely on inner forearm but the fine florals need slightly bolder line weight if you have darker skin. Wear a loose button-down shirt to the session for easy access and comfort.
8. Patchwork Realism Extension
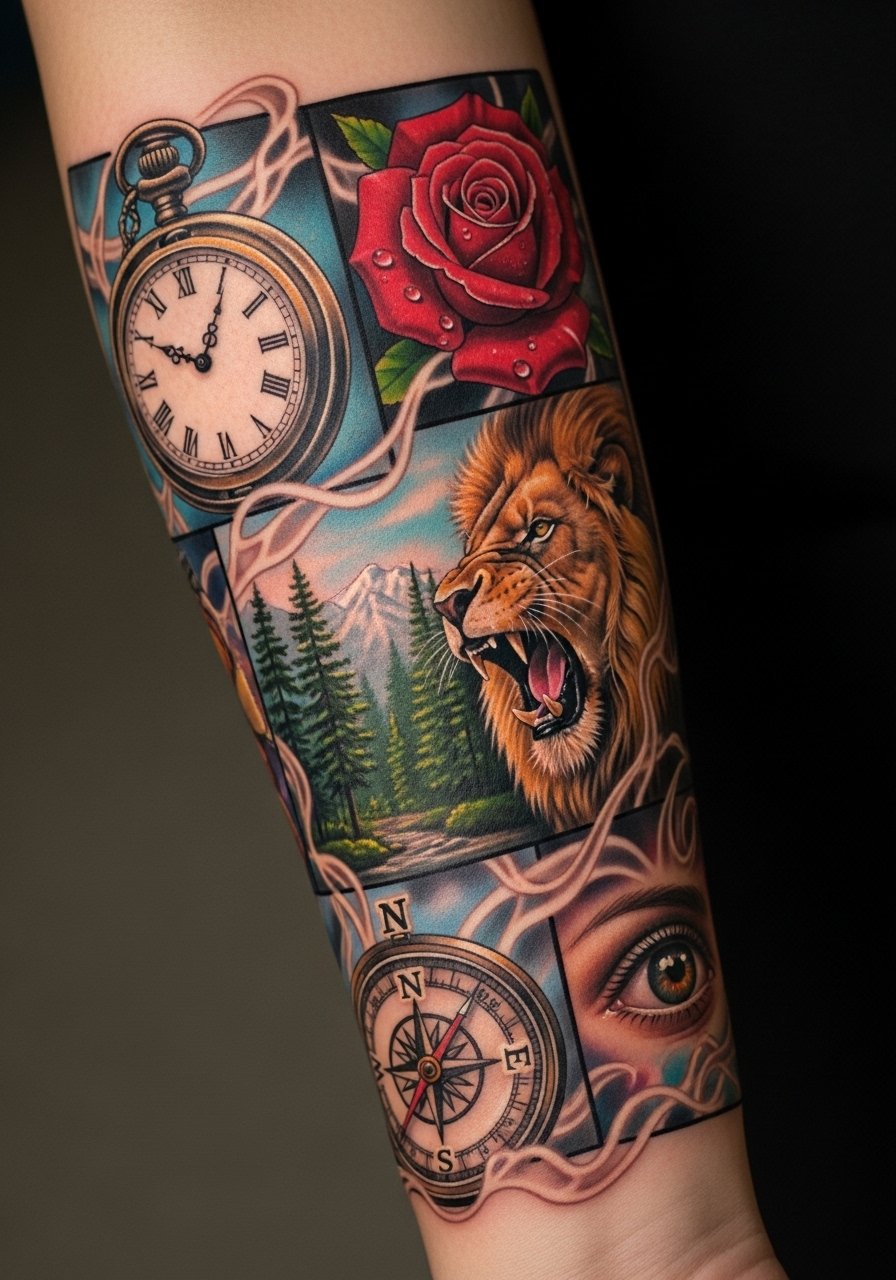
Patchwork sleeves let you build over one to two years and keep each motif readable by separating pieces with negative space or smoke. Tell the artist you plan future inserts so they leave connector zones rather than crowding the area now. A frequent error is trying to fit too many small realistic portraits without dedicated spacing which creates visual noise later. Expect touch-ups yearly if you add high-contrast portraits. For session wear, a sleeveless hoodie is practical for repeated multi-hour sessions.
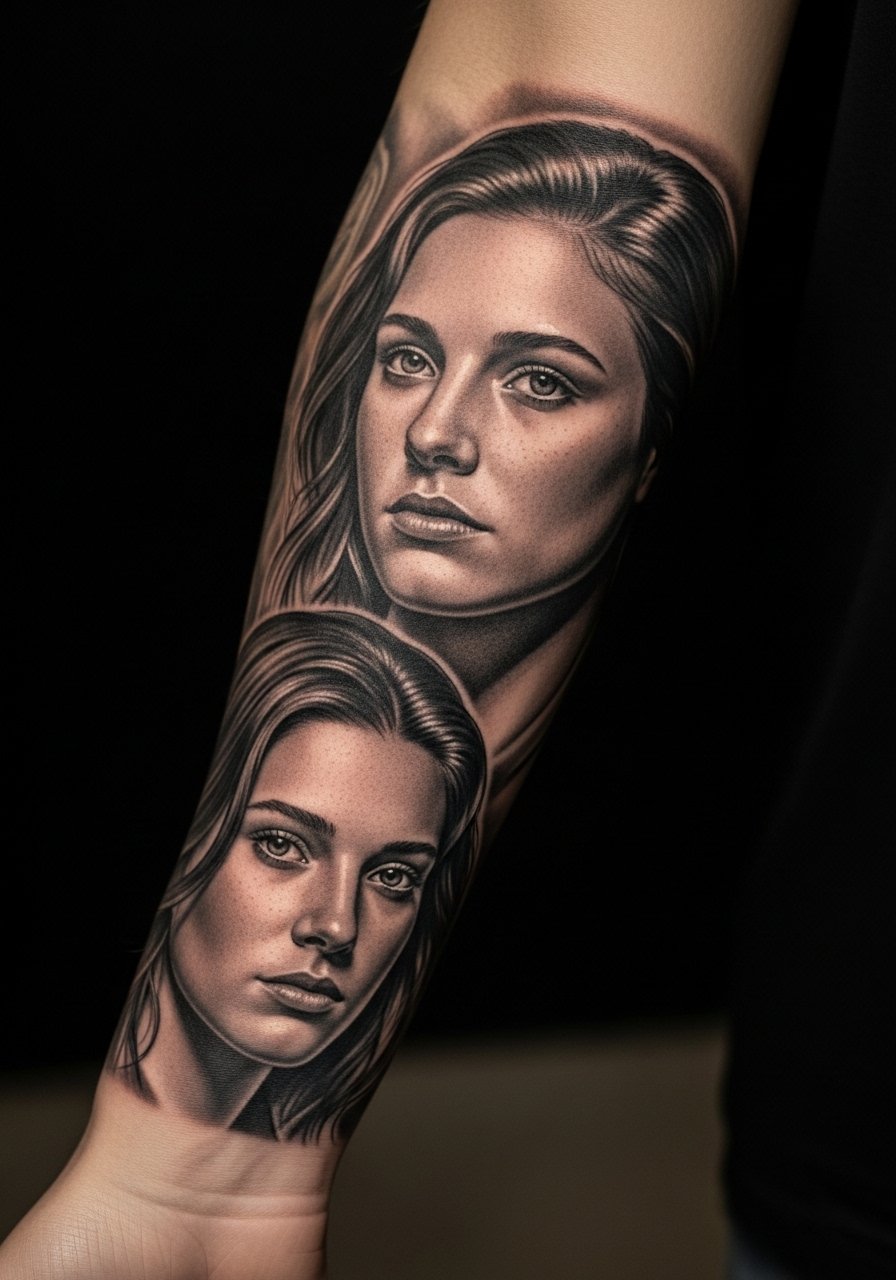
9. Micro-Realism Inner Forearm Portrait
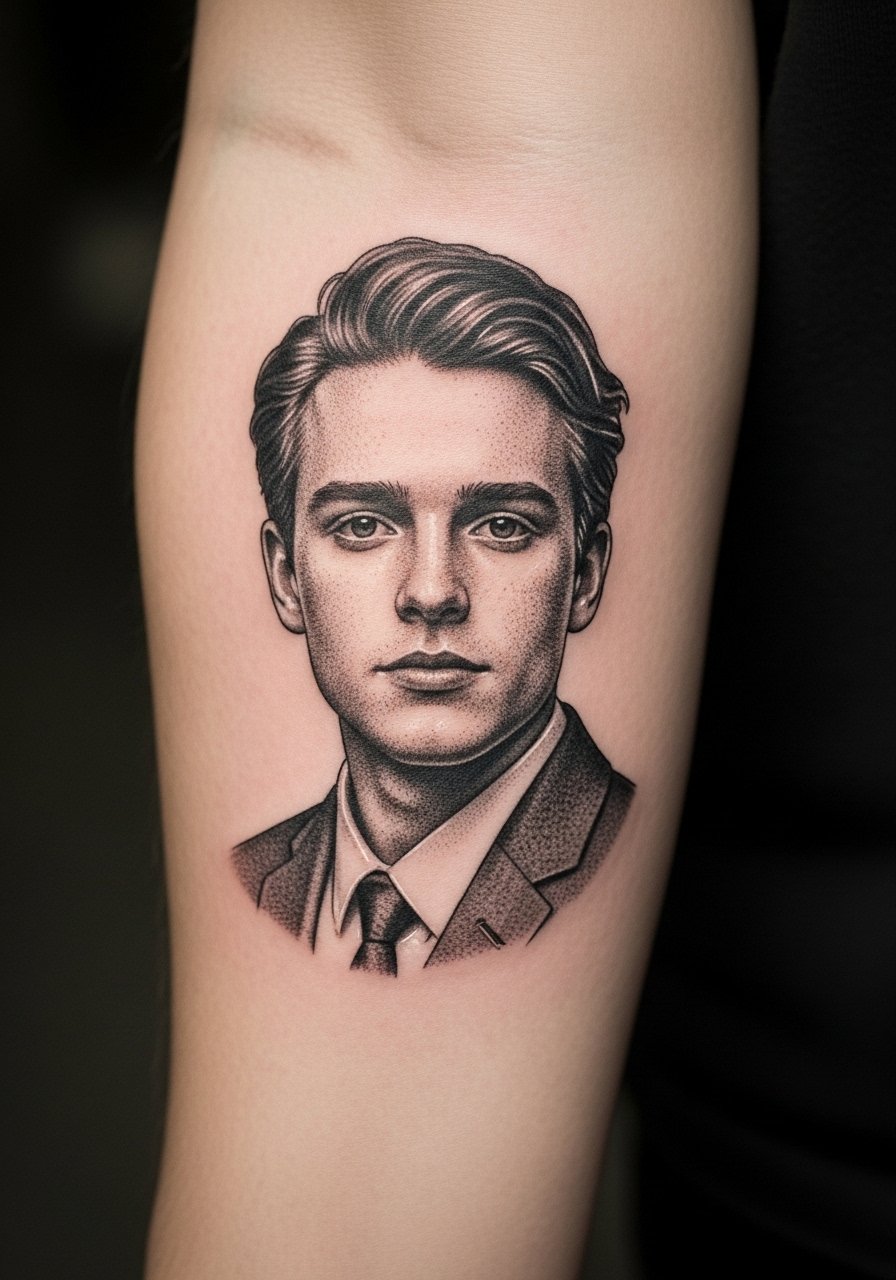
Inner forearm flatness is ideal for portraits but it also carries more sensation for some people. Ask for a healed portfolio on similar skin tones so you can judge detail retention. Mistakes I see include asking for portrait detail at wrist scale which loses features quickly. Healed at six months the portrait reads clean, but fine highlights often need touch-ups by year two. Expect two to three sessions for shading and refinement. For showing it off, a minimal silver ring set on the opposite hand keeps attention balanced.
10. Ignorant Style Bold Black Wrap
Ignorant style trades precision for immediate impact so make the intent clear in consultation. Tell the artist you want purposeful unevenness rather than shaky technique. The common misstep is copying a quick social reference without communicating where deliberate rough edges should sit. This style hides small blowouts because the thick lines read uniformly but it also needs bold saturation to avoid early patching. Sessions are shorter but plan for multiple sittings if you want layered fills. Pair with a black fitted tee and rolled sleeves to show contrast.
11. Ornamental Band Pattern Sleeve
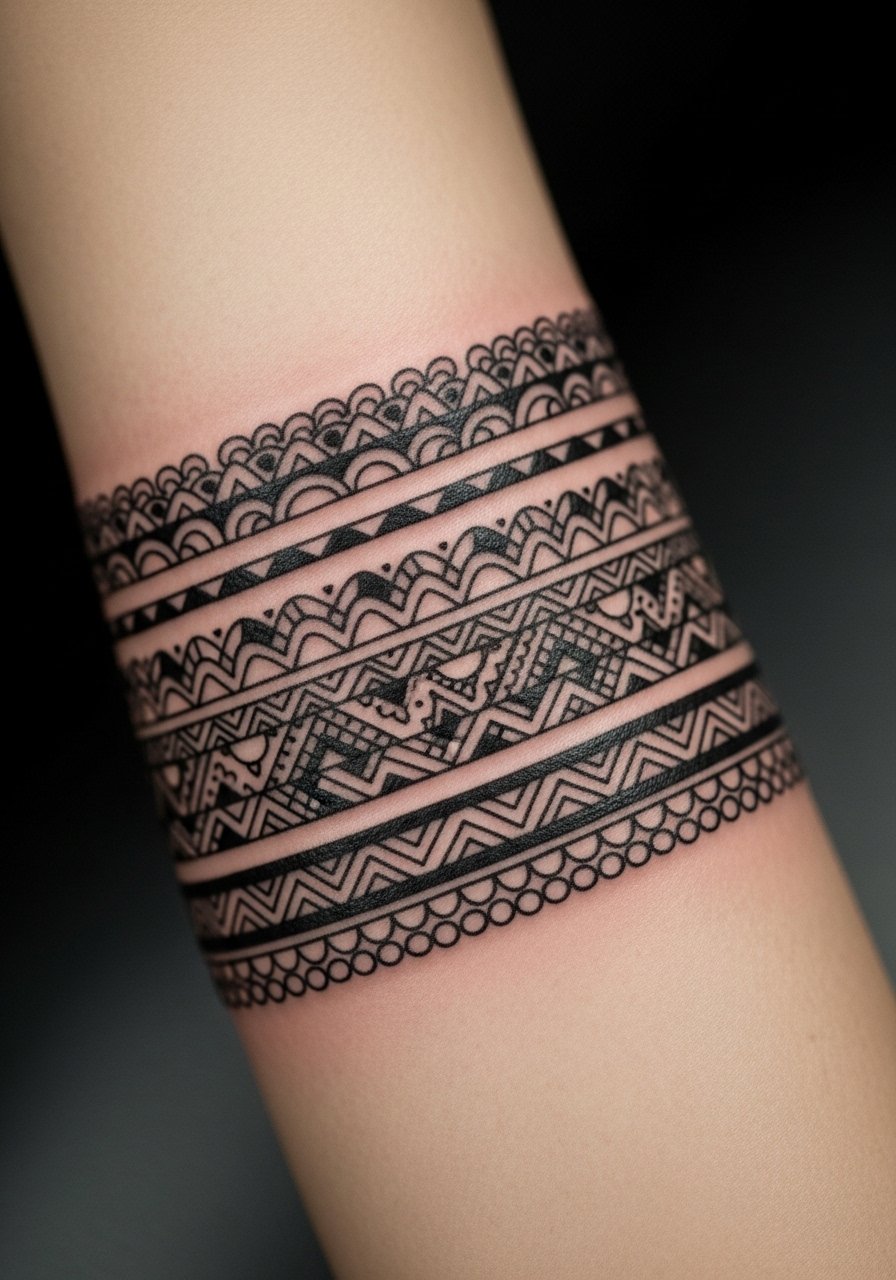
Band patterns work well on the outer forearm where the skin is less prone to stretching. Ask for consistent spacing and a mockup wrapped around the arm so the bands line up when the arm moves. A frequent mistake is starting bands too close to the wrist where repeated washing causes quicker softening. This style heals predictably and usually needs a touch-up only if edges soften after heavy sun exposure. For display, wooden beaded bracelets or a simple cuff keep attention on the bands.
12. Full Black and Gray Realism Sleeve
Black and gray realism ages well on forearms if saturation and contrast are right. Tell your artist you want layered shading and strong mid-tones to maintain form as the skin ages. The main mistake is underbuilding mid-tones which flattens the image over time. Expect multiple sessions and a realistic touch-up plan after the first year. For session comfort, wear a muscle tank men or sleeveless option to make access easy.
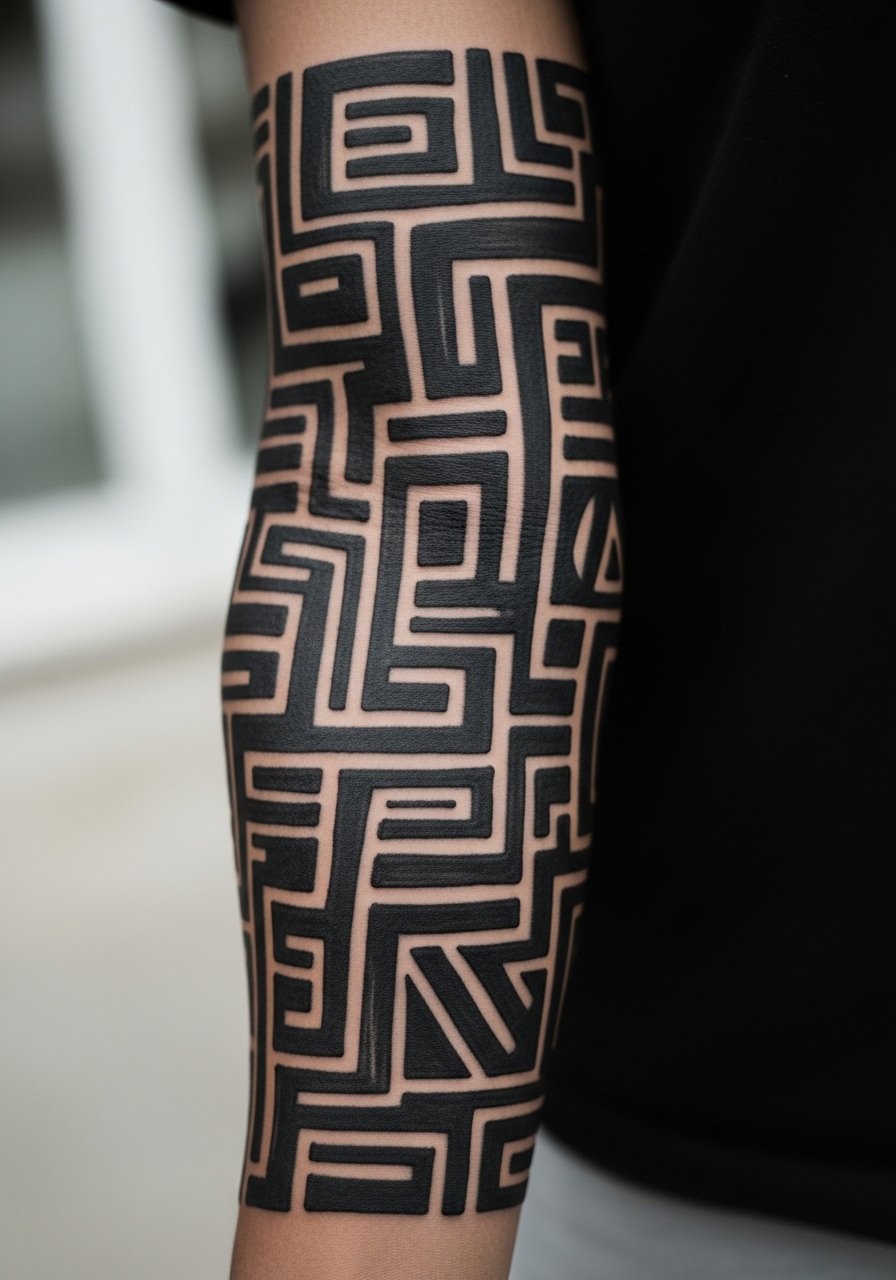
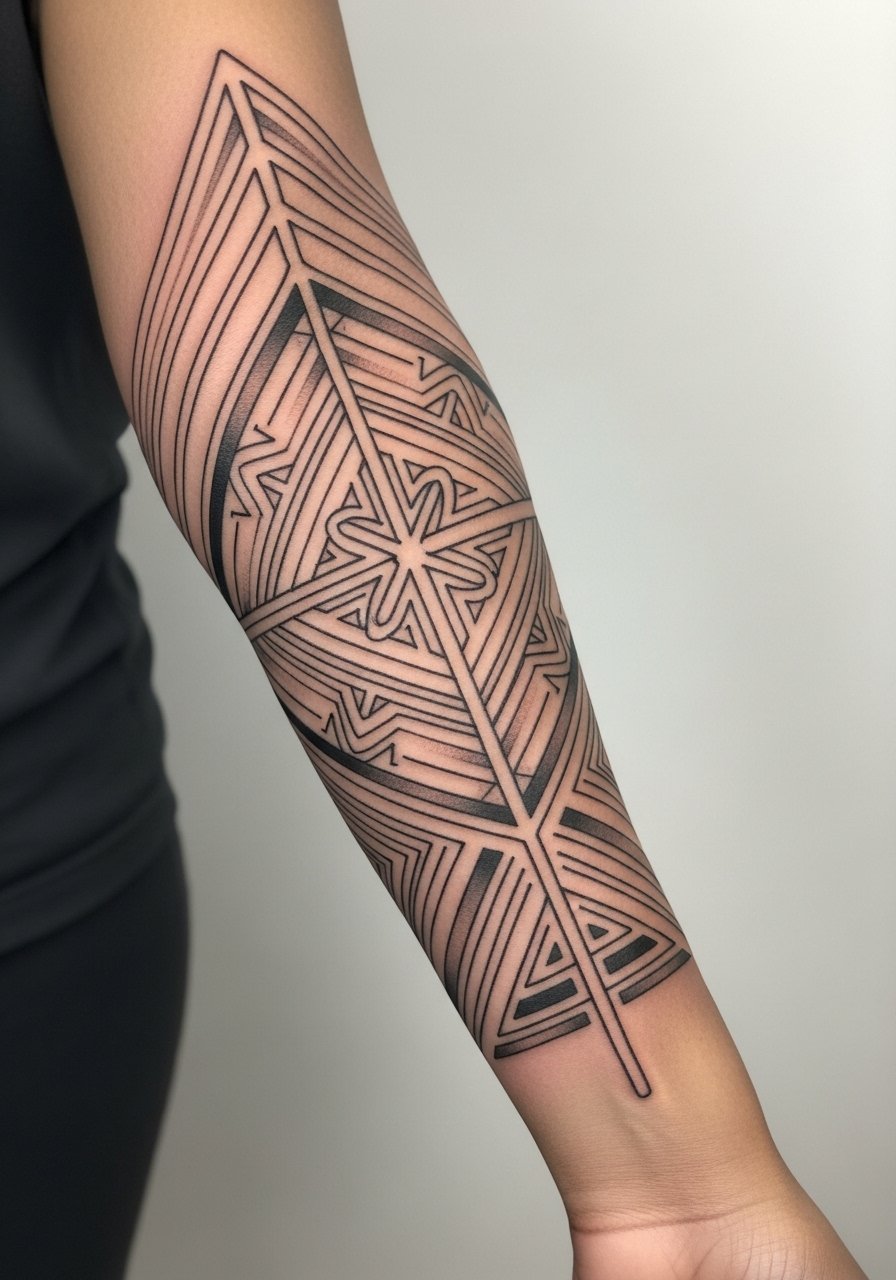
13. Geometric Sacred-Shape Sleeve
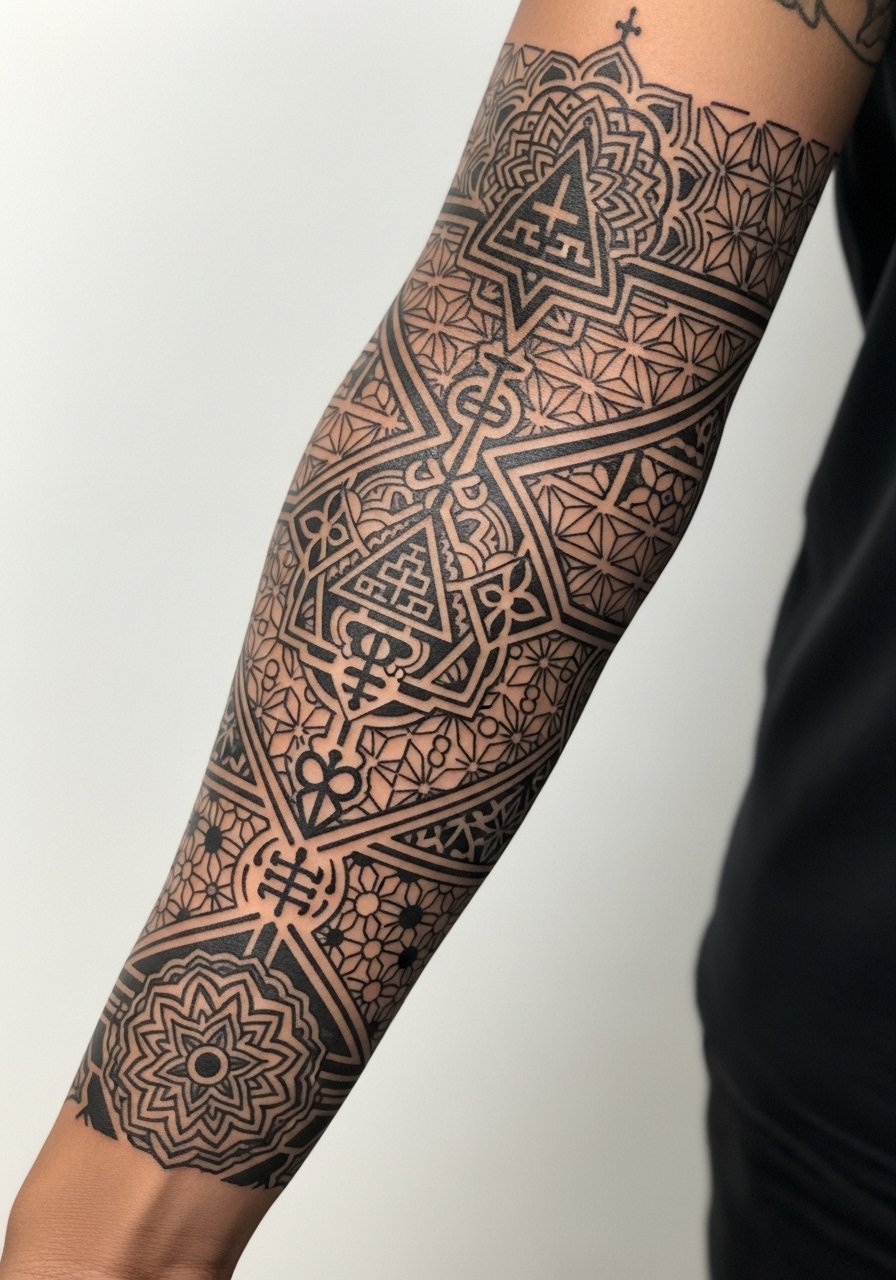
Sacred geometry is trending but density matters. Tell the artist you want spacing between repeating elements so the pattern keeps clarity at year five. The common error is shrinking the pattern to wrist size which causes line merging. Expect three to five sessions depending on coverage. Some artists argue these shapes must be tiny and precise, others say a bolder line weight keeps longevity. Name the camp you prefer in consultation. For show-off pairing, roll sleeves of a black fitted tee to put the geometry on display.
14. Traditional Wrist-to-Forearm Linear Script
Linear traditional layouts age predictably because of heavy outlines. When adding script, request larger, spaced lettering that sits apart from heavy fills so the words remain legible. A typical mistake is choosing narrow script that thickens into blobs with time. Wrist areas face friction from watches and sleeves so expect touch-ups sooner than on upper forearm. For session wear, avoid wrist accessories and wear short sleeves for unobstructed access.
15. Fine Line Arrow Cluster on Inner Forearm
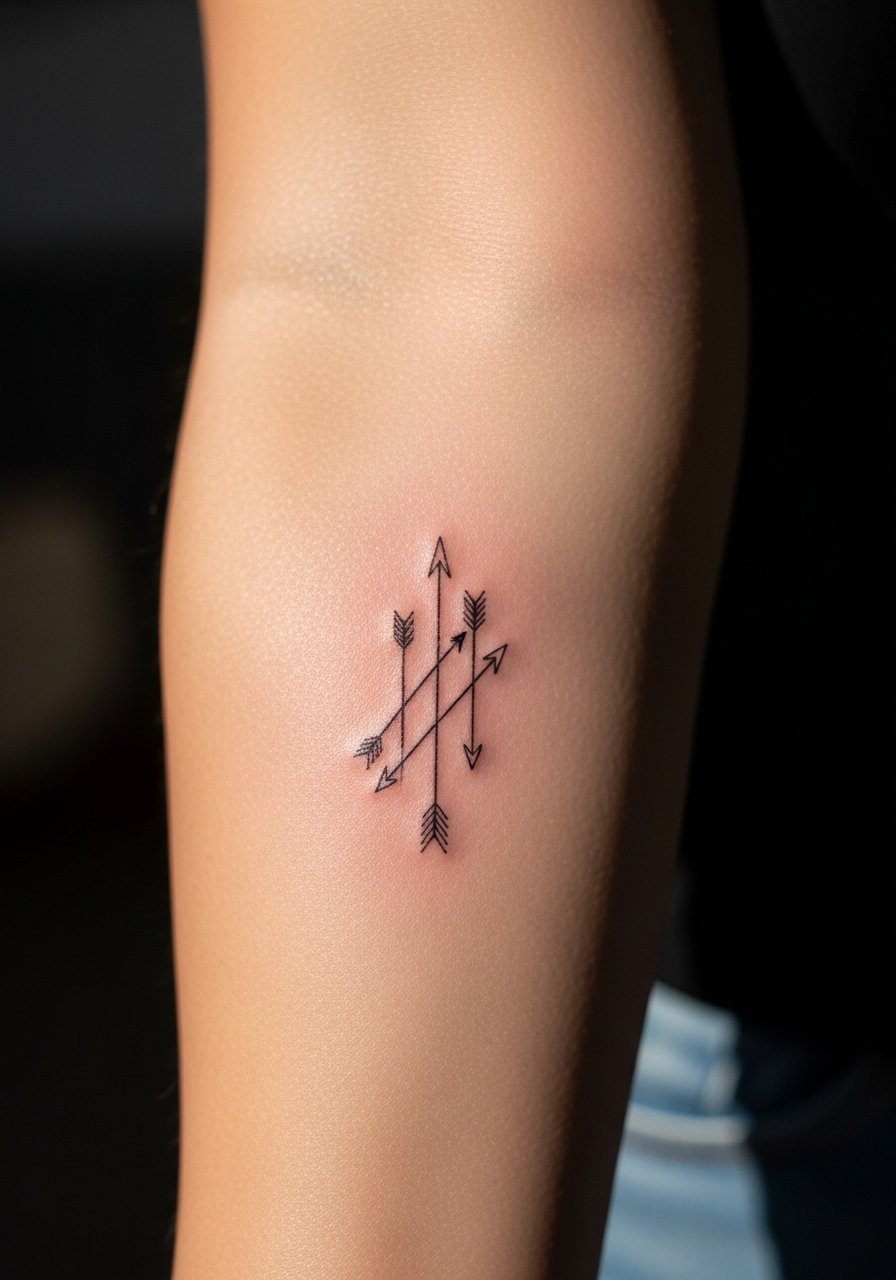
Fine line arrow clusters are low-commitment and scale well as add-ons, but they need slightly bolded shafts for resilience. Tell the artist you want the shafts at least one gauge thicker than ultra-single needle. The mistake is scaling multiple tiny arrows too close, which blurs under sweat and sun exposure. Healed at six months they look delicate, but expect subtle softening by year two. Wear a linen short sleeve shirt unbuttoned to mid-forearm when showing delicate inner work.
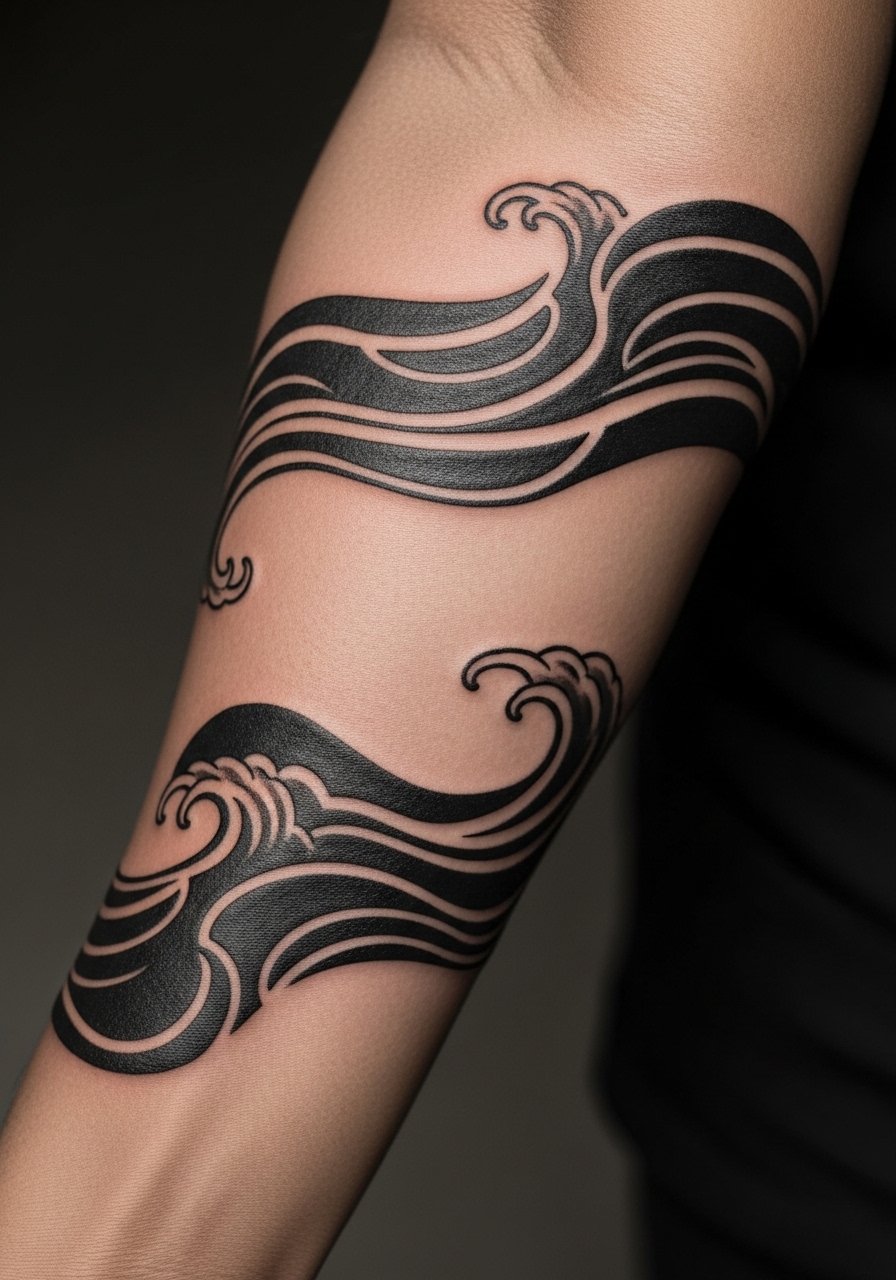
16. Japanese Wave and Koi Forearm Flow
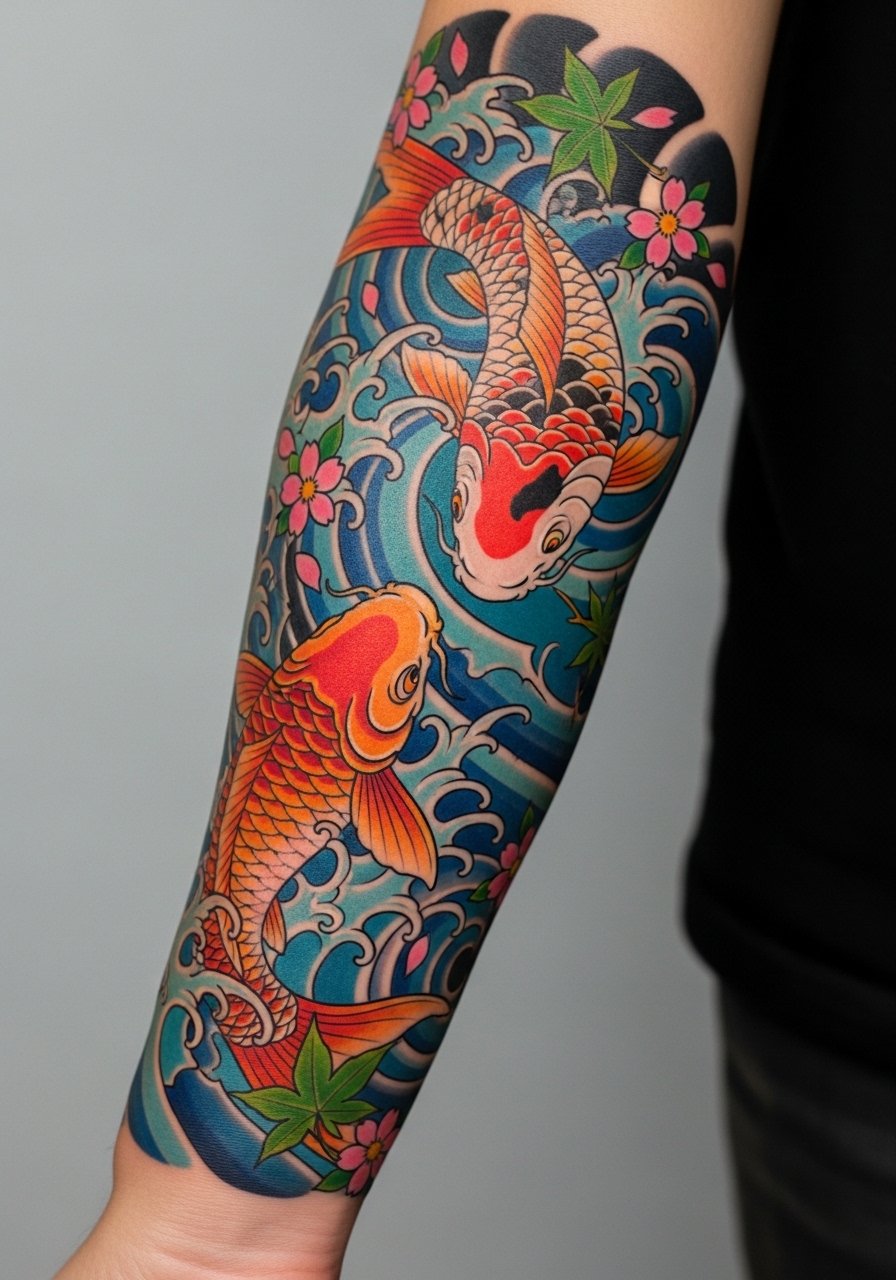
Irezumi-style motion reads well on the forearm because waves can follow muscle lines. If you want color, ask for saturated outlines and strong contrast so the hues do not patch unevenly. The common regret is starting with tiny koi that lose fins and detail after a year. These pieces usually need multiple sessions and a long-term plan to connect into a full arm. For display, slim athleisure joggers and a muscle tank men let the color breathe in gym settings.
17. Micro-Realism Lettering with Date
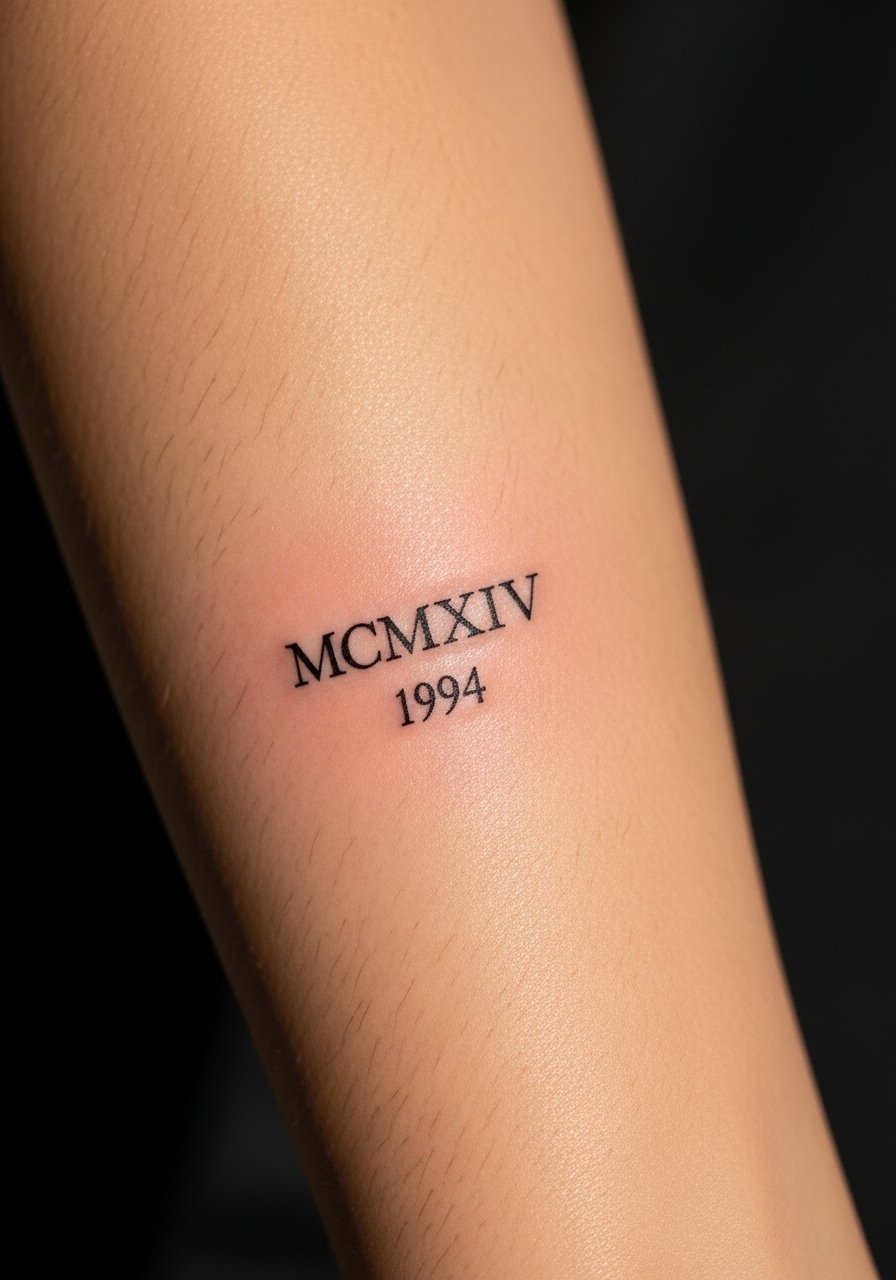
When text is the focus, specify exact typography and size in the stencil so nothing becomes illegible later. A mistake I see is picking ornate scripts too small for forearm skin texture. Heals nicely if spaced and placed on flatter inner forearm. Expect a touch-up within two to three years if you want razor-sharp serifs. For session comfort, wear a loose button-down shirt you can pull aside without risk.
18. Bold Fine Line Hybrid Sleeve
This hybrid keeps the aesthetic of fine line but uses deliberate heavier anchor strokes for longevity. Tell the artist you want a two-tier line plan so delicate details sit beside stronger lines. The error people make is asking for pure single-needle on forearms that get heavy abrasion. Expect the hybrid to need fewer touch-ups than pure fine line. For showing it off, roll a chambray shirt and add a wooden beaded bracelet for texture.
19. Ornamental Geometric Elbow-Edge Halo
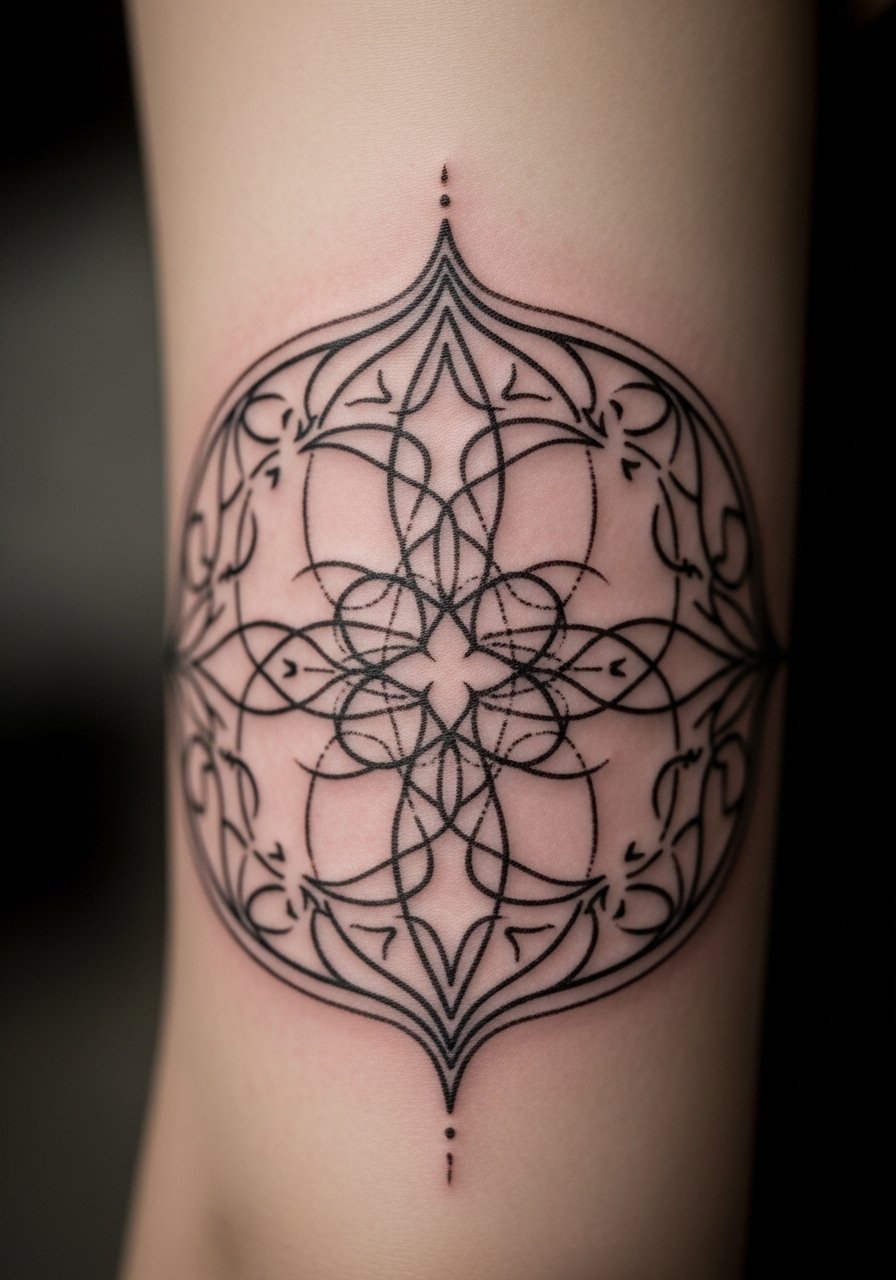
Edge pieces that sit near the elbow should leave breathing room so bending does not compress dense linework. Ask for larger modules on the bend and finer connectors away from motion zones. A common mistake is over-detailing the fold area which distorts with movement. These pieces heal predictably if spacing is respected and usually only need light touch-ups when the skin stretches. For session wear, choose a button-down with a sleeve you can roll easily.
20. Black Band and Negative Space Contrast Sleeve

Solid black bands anchor a sleeve visually and age well because saturation holds. Tell the artist you want clean borders and consistent saturation so the negative space patterns remain crisp. The error I see is uneven saturation that leads to patchiness in a year. Sessions involve heavy ink packing but shorter sitting frequency. Pair bands with cuffed jeans and a vintage band tee to keep the look cohesive.
21. Minimalist Constellation Forearm Cluster

Constellation clusters can be charming as small additions but need adequate spacing and slightly bolder dots for longevity. When you consult, show the exact star spacing you want on the arm so the composition flows with veins and muscle. The main mistake is compressing constellations into a narrow wrist band which blurs. Heals fine at six months but expect softening at two years if exposed to sun. For showing it off, roll a short sleeve or wear a loose linen short sleeve shirt.
22. Stipple Shaded Geometric Sleeve
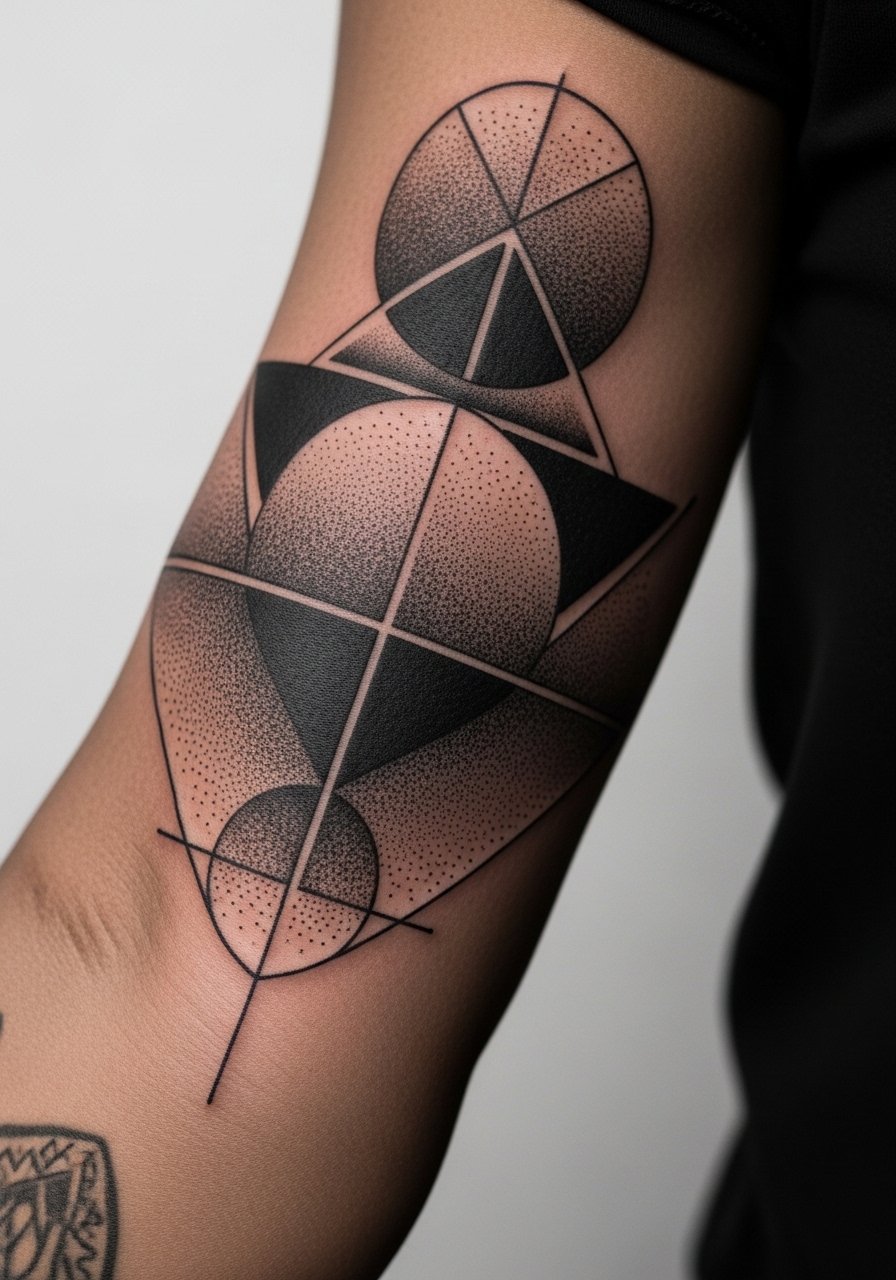
Stipple shading gives texture without heavy fills so it can age gracefully when spaced well. Request clear separation between stippled gradients and solid elements to avoid muddying. A routine error is overpacking stipple near joint areas which loses definition with motion. Sessions take time because stipple is slow work, expect multiple sittings for full coverage. Pair this with rolled sleeves of a black fitted tee when you want the pattern to read.
23. Patchwork Neo-Traditional Mix

Neo-traditional motifs work as discrete patches that can later connect via smoke or geometric fills. Tell the artist you plan additional motifs and ask them to reserve connector zones. The typical mistake is making banners and roses too small which causes loss of visual hierarchy after healing. This approach lets you expand over a year or two without remaking older pieces. For session wear, a sleeveless hoodie keeps access easy for multiple sittings.
24. Scripted Motto Along the Forearm
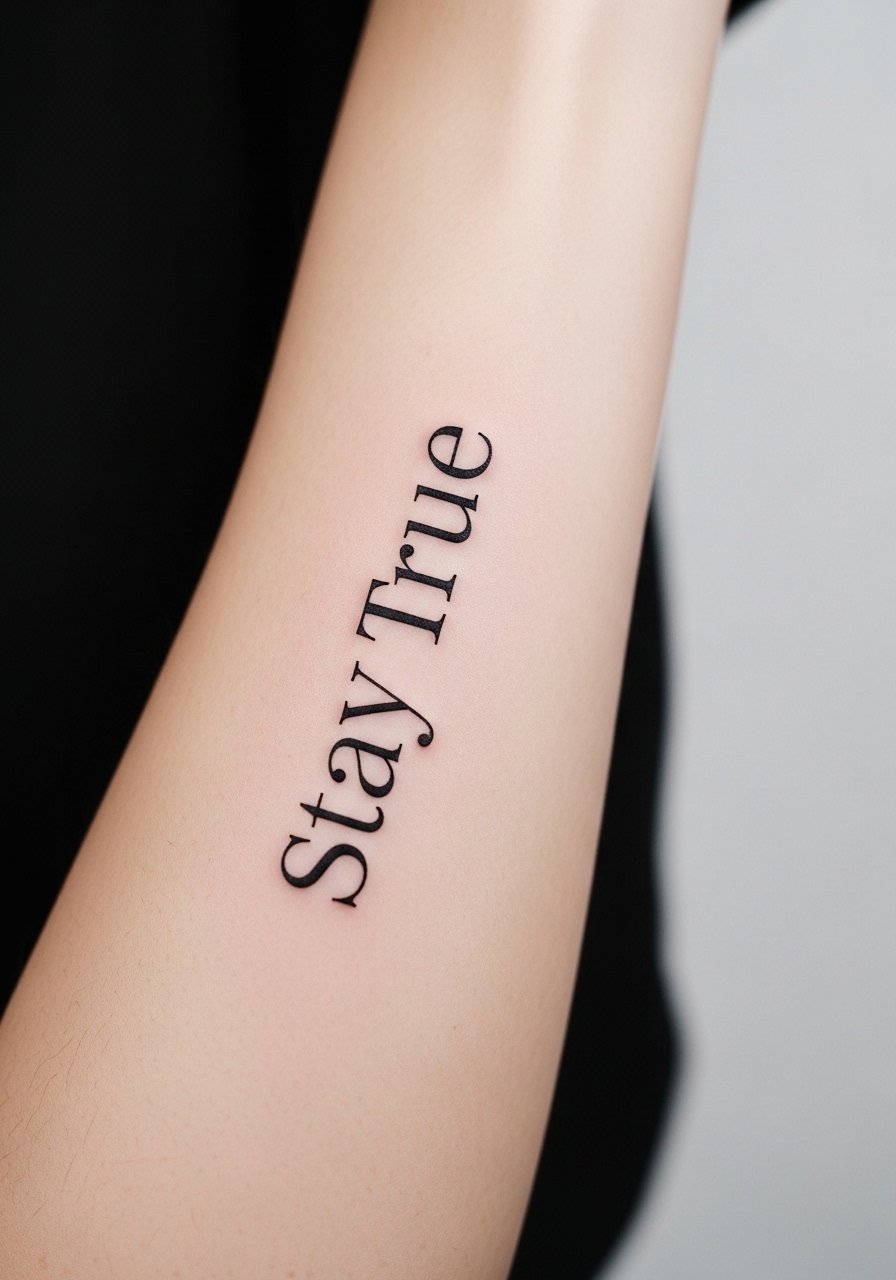
Script is personal and needs exact lettering choices in the stencil. Ask for the phrase in multiple font options on skin before committing. A big mistake is choosing ornate flourishes that clog in small scale. Healed script reads clean on the forearm but requires a touch-up if it lives near high-friction spots like watch straps. For display, a wide leather watch on the opposite wrist keeps the script visible without crowding.
25. Wave-Filled Negative Space Sleeve
Negative space work relies on crisp borders to maintain shape over time. During consult, insist on solid black saturation adjacent to the negative lines so the waves do not fill in. The main mistake is thin borders that soften with sun exposure. These pieces usually need touch-ups at year two if you want the negative edges sharp. Pair with slim joggers and a muscle tank men when you want the whole composition visible.
26. Black and Gray Floral Cluster on Inner Forearm
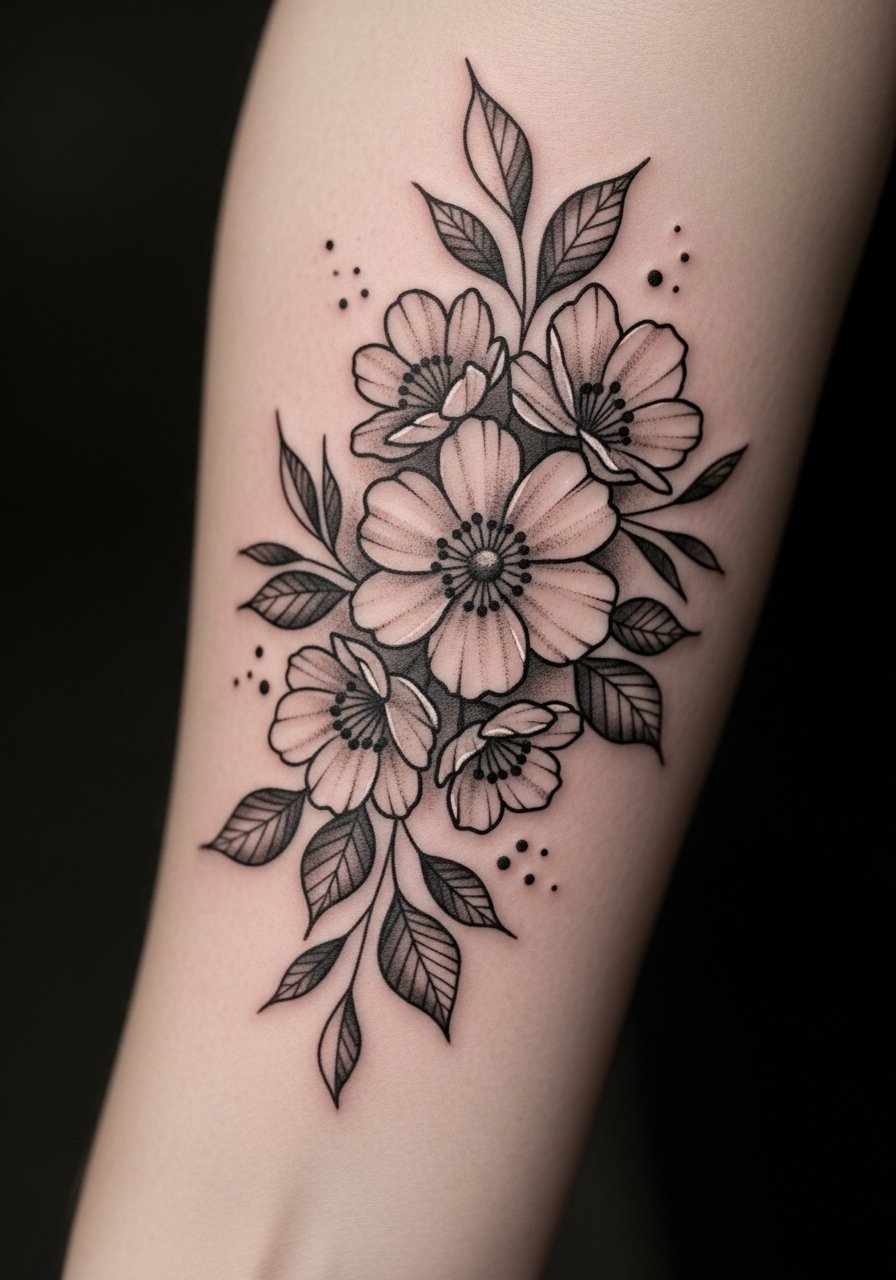
Inner forearm florals read well because of the flat surface but delicate petals need stronger contrast to avoid becoming a blur. Ask the artist for softer petal edges but bolder centers so the structure survives tanning and movement. A common mistake is detailing petal veins too finely which fades. Heals nicely at six months and usually needs only occasional touch-ups. For session wear, bring a loose button-down shirt for comfort and easy access.
27. Patchwork Forced-Perspective 3D Details
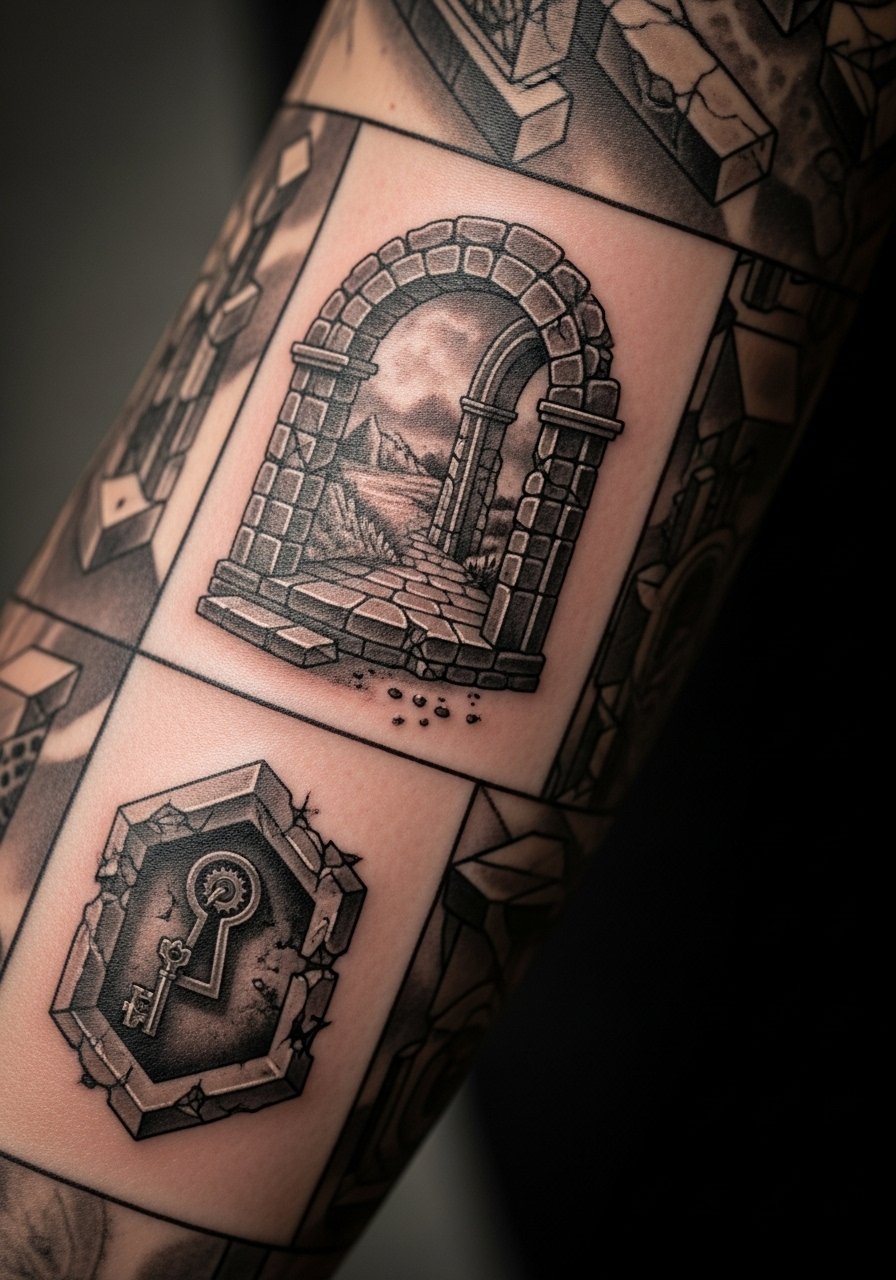
Forced perspective details create optical effects that feel interactive when executed on the outer forearm. During consultation, ask the artist to test stencils on the arm in the positions you will normally see them so the illusion reads from life, not from a flat photo. Mistakes include using inconsistent light sources across patches which breaks the 3D effect. These require careful planning and several sessions to layer depth. Because this is specialized work, look through hashtags and local guest spot calendars to find artists who post process videos.
Frequently Asked Questions
Q: Will fine line elements in a full forearm sleeve blur into one another over time?
A: They can if spacing and line weight are too delicate. I recommend declaring which lines you want razor-fine and which should be slightly thicker during the consultation. The outer forearm holds detail better than inner folds, so placement choices matter. Expect touch-ups earlier on designs that rely solely on ultra-thin single-needle work.
Q: Is black and gray better than color for a forearm sleeve if I want it to look clean after five years?
A: From what I have seen, black and gray tends to hold contrast longer because colors can dull unevenly with UV exposure. That said, strong color saturation and proper sun protection extend longevity. If you want color, plan for a maintenance touch-up schedule and consistent SPF on the exposed forearm.
Q: How should I prepare for a long forearm session so pain and swelling are manageable?
A: Eat a protein-rich meal, hydrate well, and avoid alcohol the day before. Bring a sleeveless or easy-roll shirt so the artist has full access. If you plan to use topical numbing discuss it with the artist ahead of time because opinions vary. Breaks during long sessions make a big difference in comfort.
Q: Do fine line sleeves work on darker skin tones?
A: They can but they need adjusted line weight. On medium and dark skin tones I advise slightly bolder anchor lines and stronger contrast in shading. Ask to see healed portfolios on similar skin tones before booking so you can set expectations about how details age.
Q: How do I find an artist who specializes in a style without relying on one person’s name?
A: Use style hashtags and app filters, check guest spot calendars, and search local forum recommendation threads. Look for process posts and healed images rather than only fresh photos. Book through apps that track guest spots to reduce the risk of last-minute cancellations.
Q: Is the Saniderm versus dry healing debate relevant for forearm sleeves and which side should I consider?
A: Both camps are vocal. One group prefers protective film for the first 24 to 72 hours to keep large sleeves clean and reduce scabbing, while dry heal proponents argue natural scab formation is better long-term. Ask your artist what they recommend for forearm wraps and follow their staged aftercare approach because their technique and the specific piece determine which method works best.
