
The Japanese warrior motif survives cycles of trendiness because it answers a basic question: will this read well when my skin moves, suns, and gets older? The tattoos that still look intentional at year ten tend to use confident linework, clear negative space, and selective saturation rather than tiny detail everywhere. Below are 27 ideas sketched with aging in mind, notes to bring to your consultation, and wardrobe tips for showing them off.
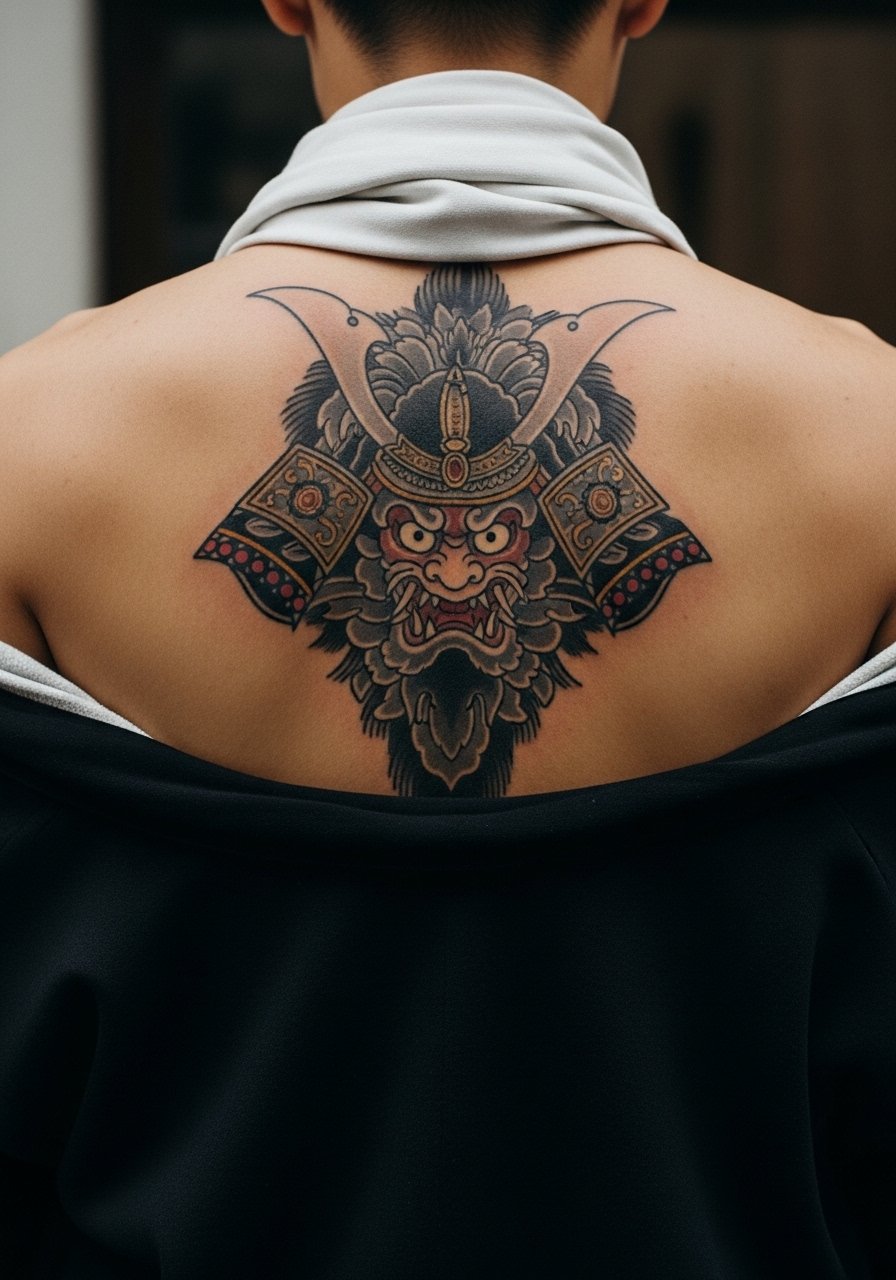
1. Full-Back Samurai in Traditional Irezumi Style
A full-back samurai in Irezumi style reads like a narrative panel. For people who want a statement piece that moves with the body, suggest larger plains of black and negative space rather than tiny facial detail. Tell your artist you want bold outlines around the figure and stipple shading for the armor plates. A common mistake is packing the back with micro-detail that blurs into texture after a few years. Expect multiple long sessions and a realistic touch-up at year two. For showing it off, an open-back dress or button-down pulled aside works well when you want to reveal the panel. Cultural note: acknowledge the design's Japanese roots and avoid religious iconography without thoughtful adaptation.
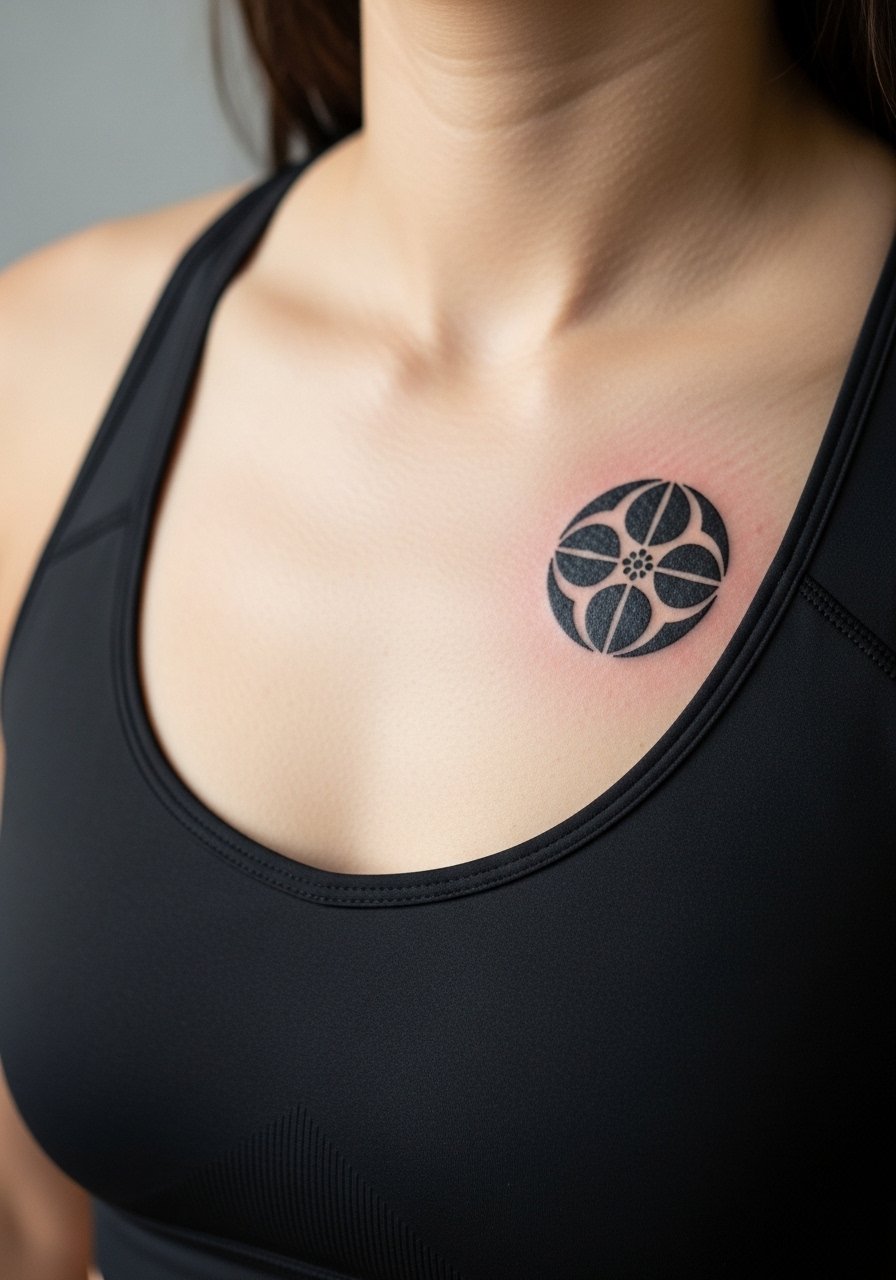
2. Chest Samurai Crest with Bold Blackwork
Fair warning: upper chest work sits on moving skin and breath changes how linework tracks during the session. A samurai crest placed over the sternum benefits from a simplified helmet silhouette and heavy black fills around the margins so the central figure stays legible as it heals. Ask for slightly heavier linework across the outer contours and lighter internal textures. The most common error is trying to cram tiny script and scrollwork into the sternum gap. For session wear, plan a wide-neck shirt or sports bra you can pull aside. Professional note: think about how visible chest pieces are in certain work environments.
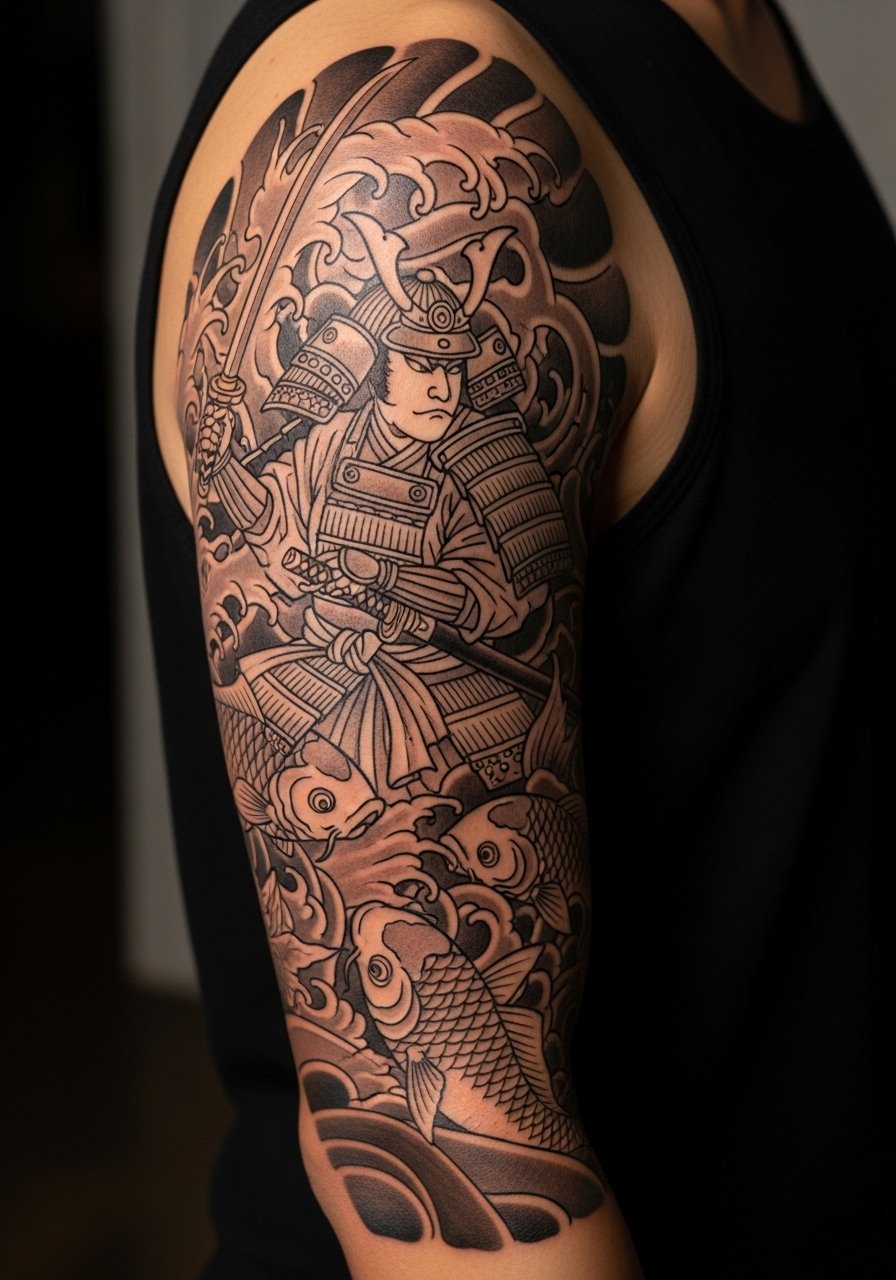
3. Half-Sleeve Samurai and Koi Flowing Into Waves
I've seen half-sleeves that balance motion better when the koi and waves wrap with the arm's contours instead of fighting them. For this sketch, pair a warrior in three-quarter view with a strong wave pattern that frames the bicep and inner elbow. Tell the artist you want movement that reads from across a room, not micro-detail that disappears at distance. Common aging issue: tiny dot work in the waves clusters into gray patches. For wardrobe, roll up sleeves or choose a loose button-down shirt to reveal the wrap without competing with the linework. Session time is multiple hours, moderate pain around the elbow crease, and a likely touch-up at year three.
4. Minimalist Chest Pendant Samurai Helmet
The minimalist pendant helmet sits high on the chest and reads like a talisman. Visual impact lead: when scaled correctly it keeps its silhouette even after years of sun exposure. Ask for a slightly bolder outer contour and interior negative space instead of dense shading. The common mistake is making it too small near the sternum where the skin creases. For showing off in summer, pair with an open-back midi dress or a wide-neck tee pulled aside at the collar. Expect one 1.5 to 2 hour session and light discomfort over the bone.

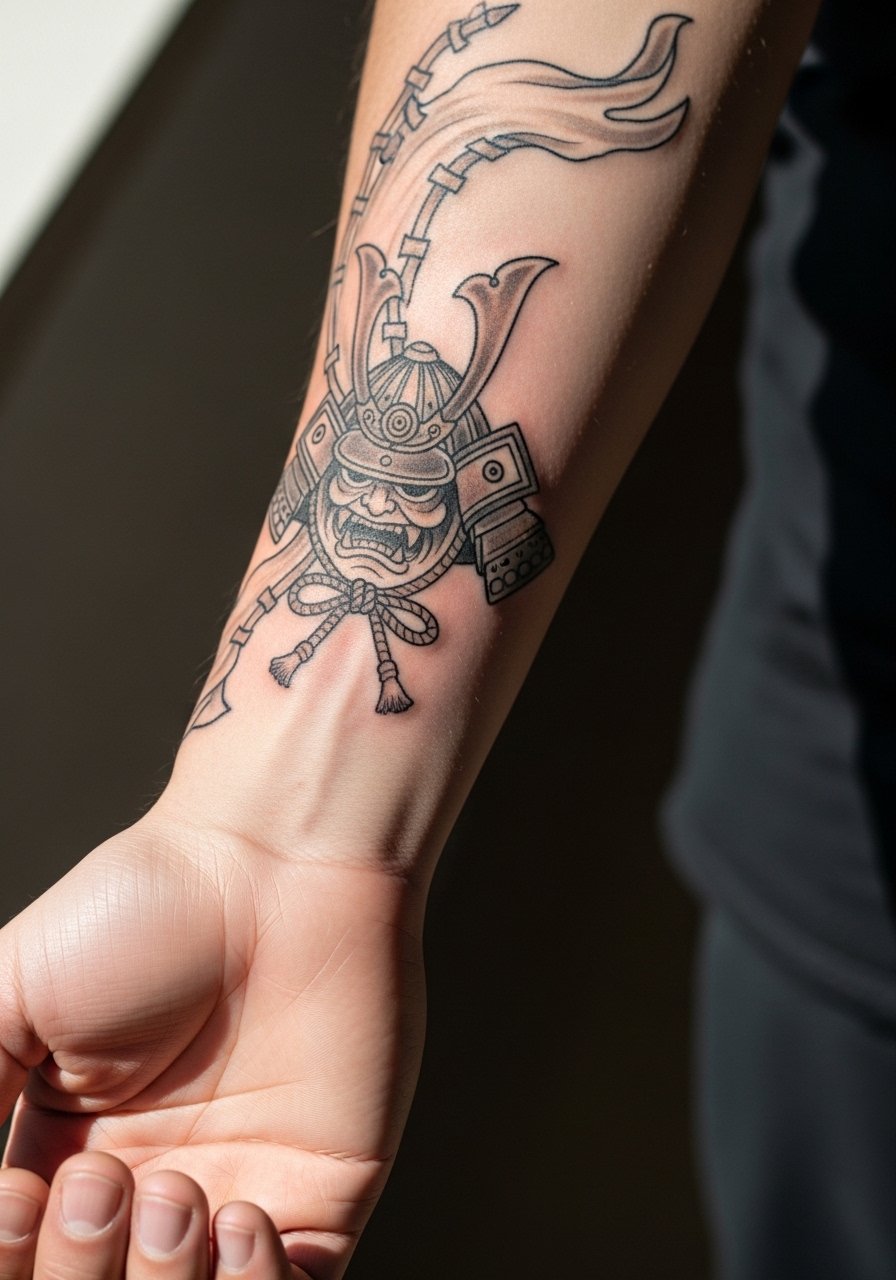
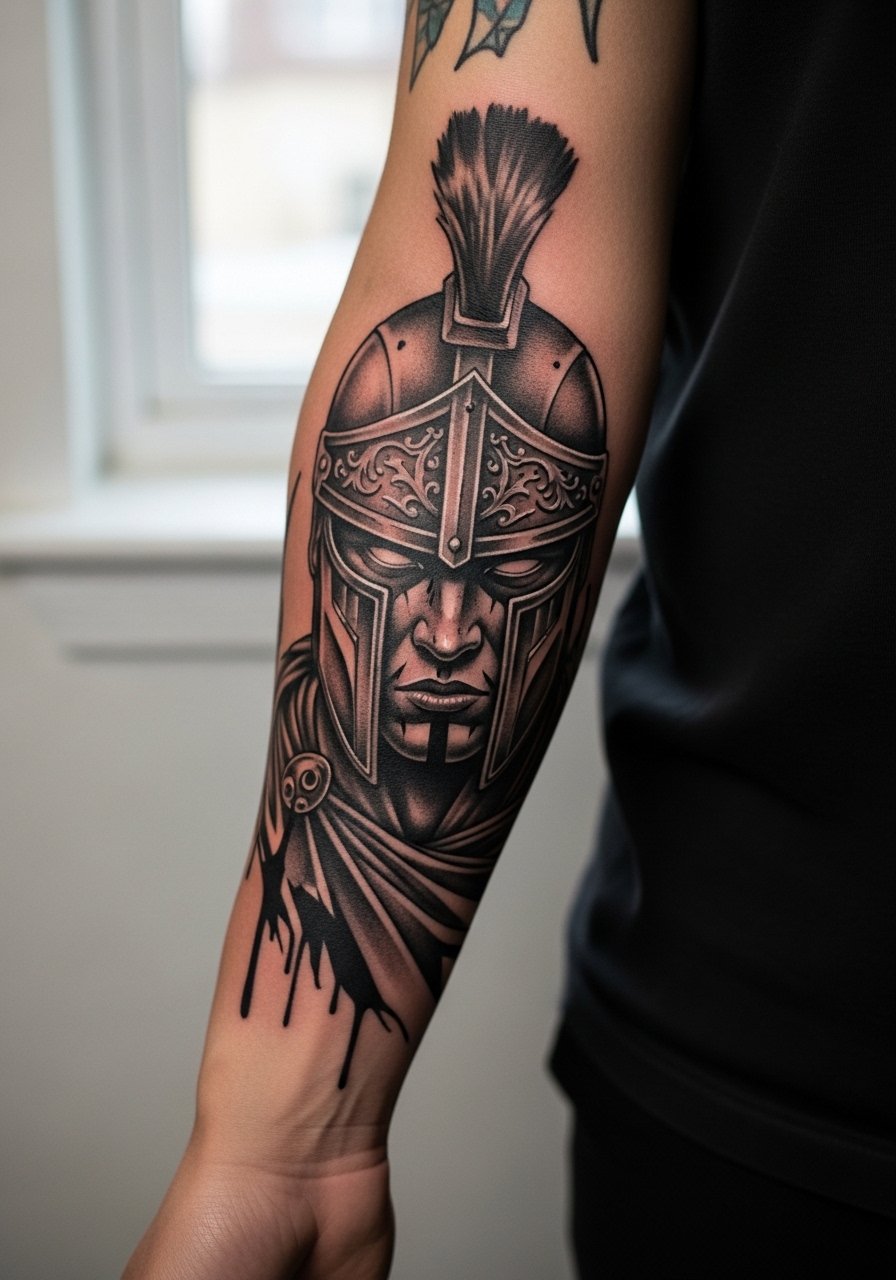
5. Forearm Kabuto with Flowing Banners
Personal observation lead: forearm kabuto helmets still read bold after years if the banners have breathing room and the linework is decisive. Ask the artist to separate banners with thin negative stripes so internal details do not merge. A common mistake is stacking lettering inside the banner where the skin flex causes the ink to fragment. For session comfort, wear a racerback tank so the artist has clear access. This one is moderate pain and often fits into a single longer session.
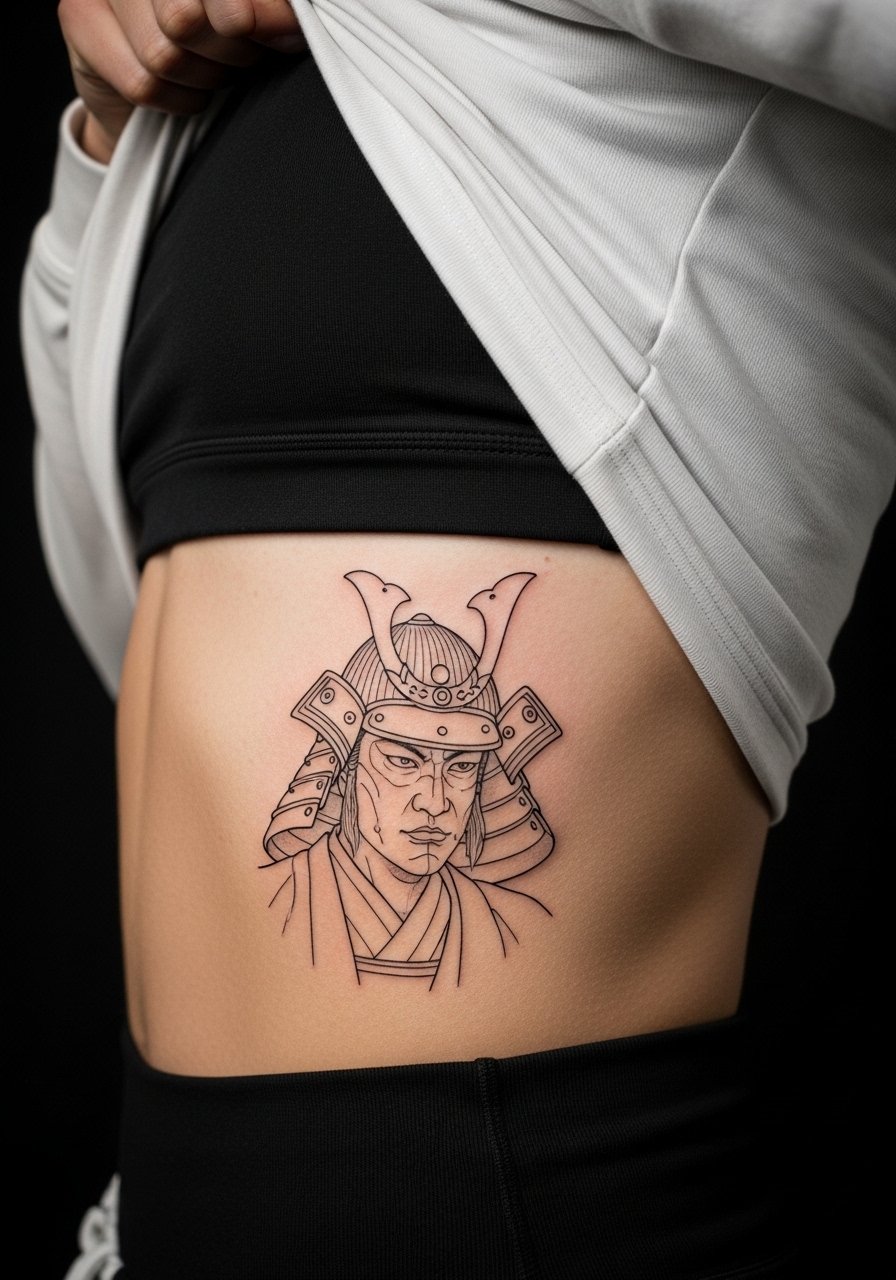
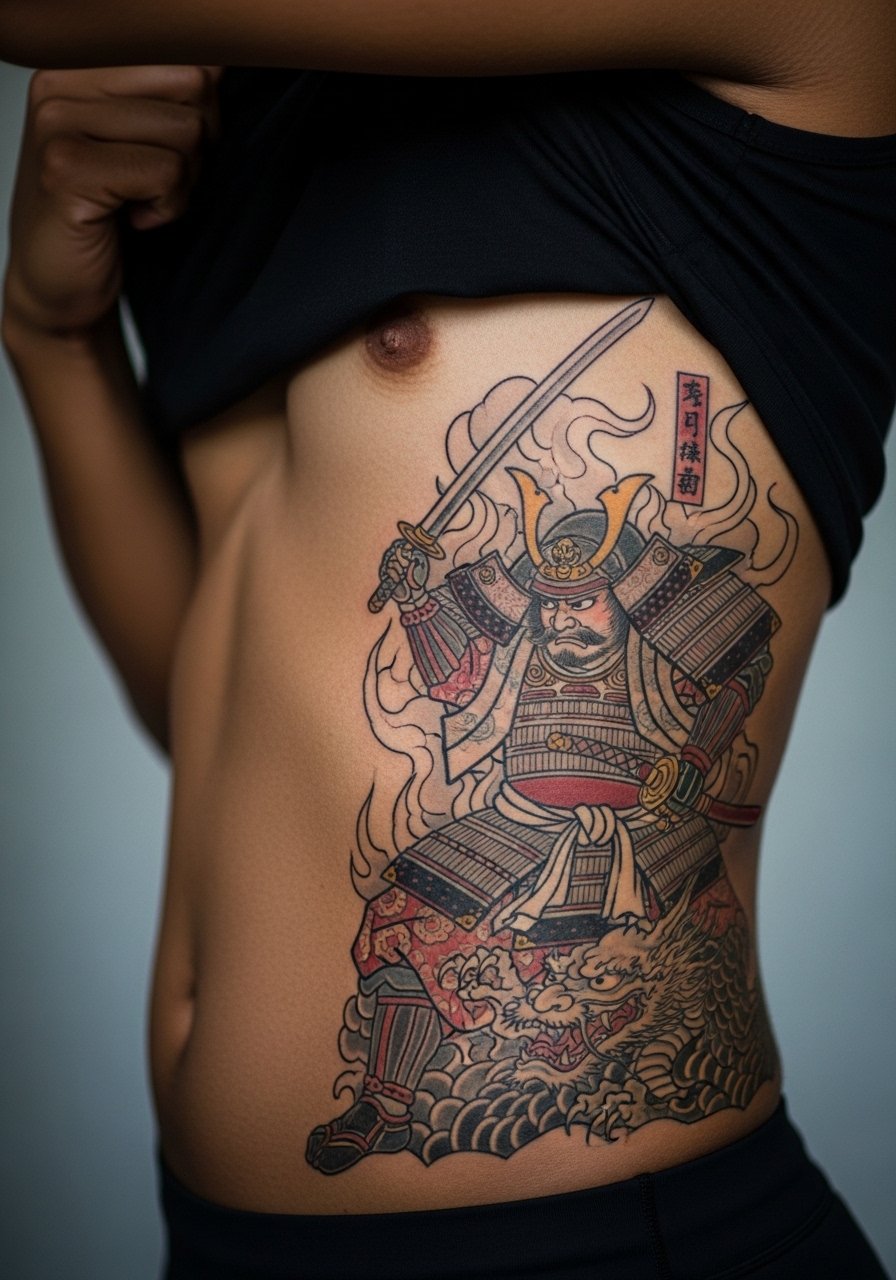
6. Ribcage Samurai in Fine Line Portraiture
Aging lead: fine-line portraiture on the ribcage divides artists into two camps. One group says the skin stretch and breathing blur fine lines within two years. The other group argues that with controlled depth and small negative space the portrait can settle well. Name both camps and ask your artist where they stand. If you still want ribs, scale up the linework slightly and add shadow blocks around the portrait. Expect a high pain session, slower sessions split across days, and a touch-up timeline around year two. Sensitive-note: rib pieces need an artist experienced with curved anatomy.
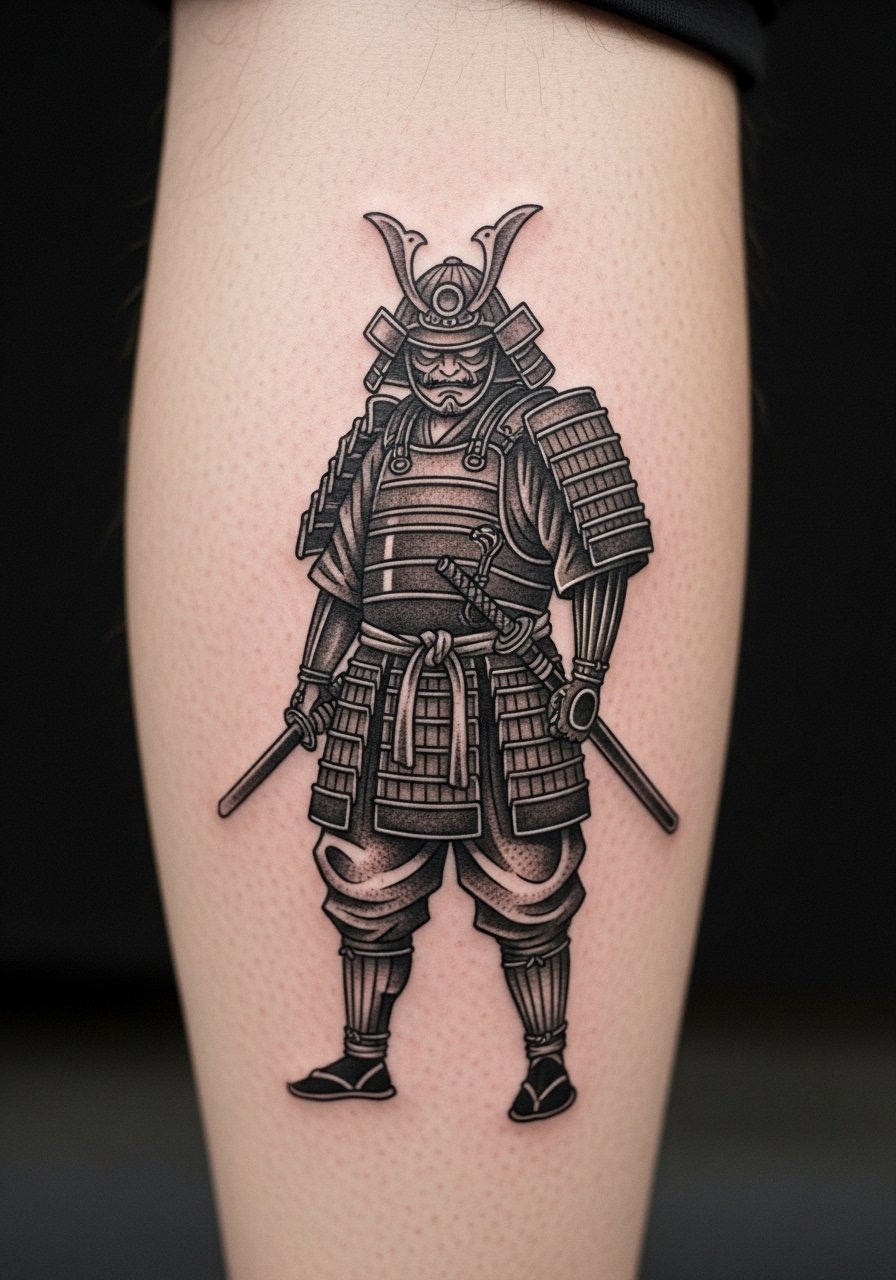
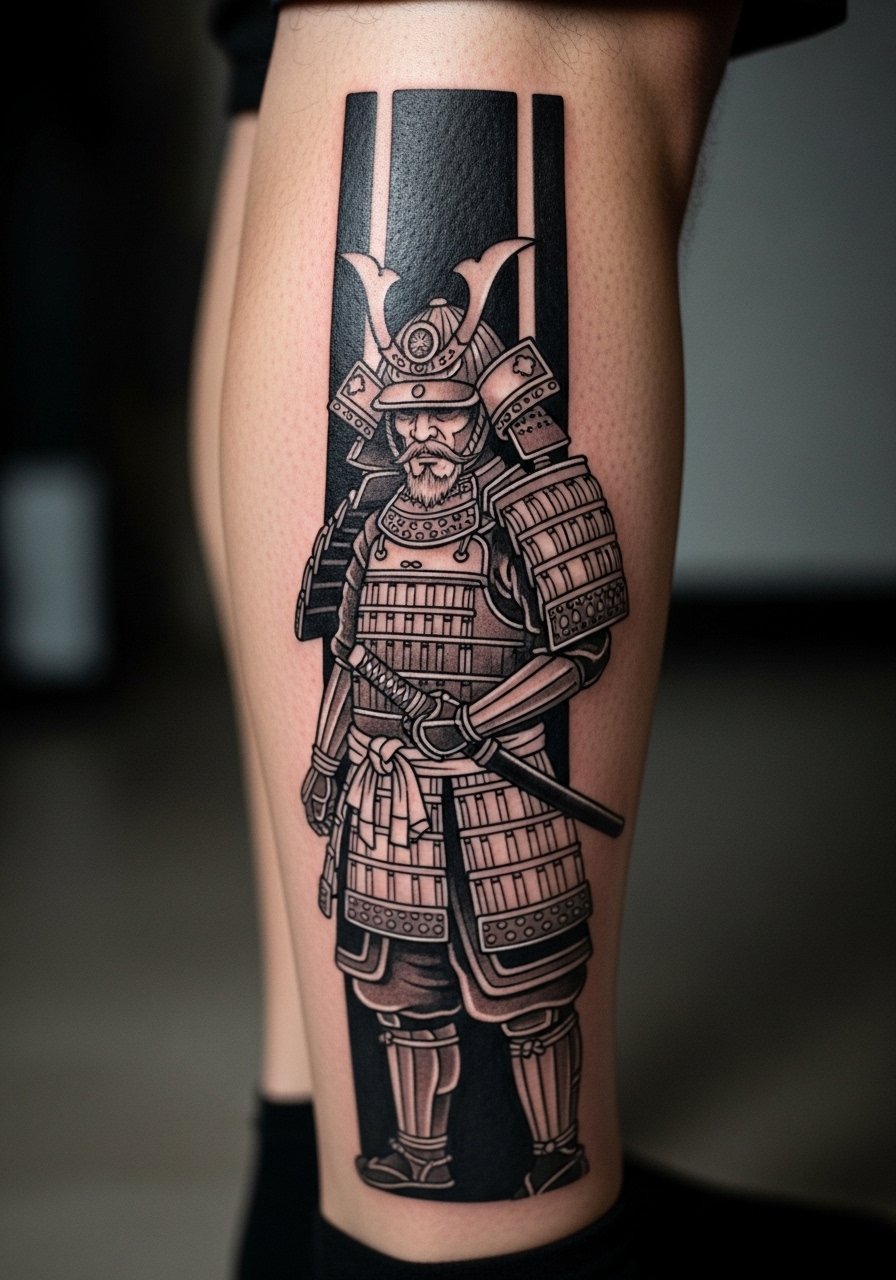
7. Calf Warrior in Blackwork with Negative Space
Visual impact lead: a calf placement carries a design a short distance on the street, so bold black fills and clear negative shapes win. Ask for stipple shading in the armor rather than tiny crosshatching that can cake. The most common mistake is over-detailing the lower leg where friction from socks and boots accelerates fading. For showing off, wear a pair of sandals or cropped jeans to reveal the calf silhouette. Session time is moderate and pain is lower than ribs.
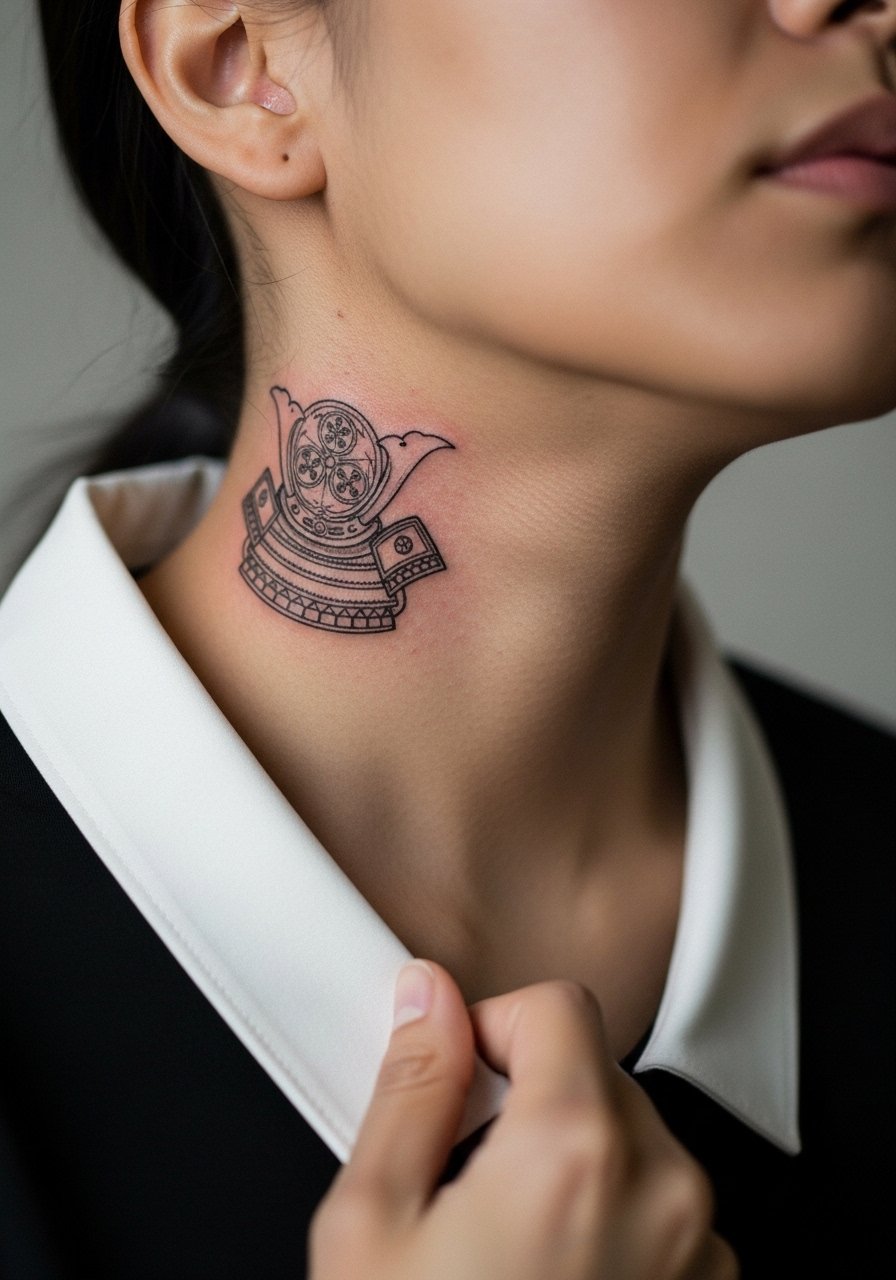
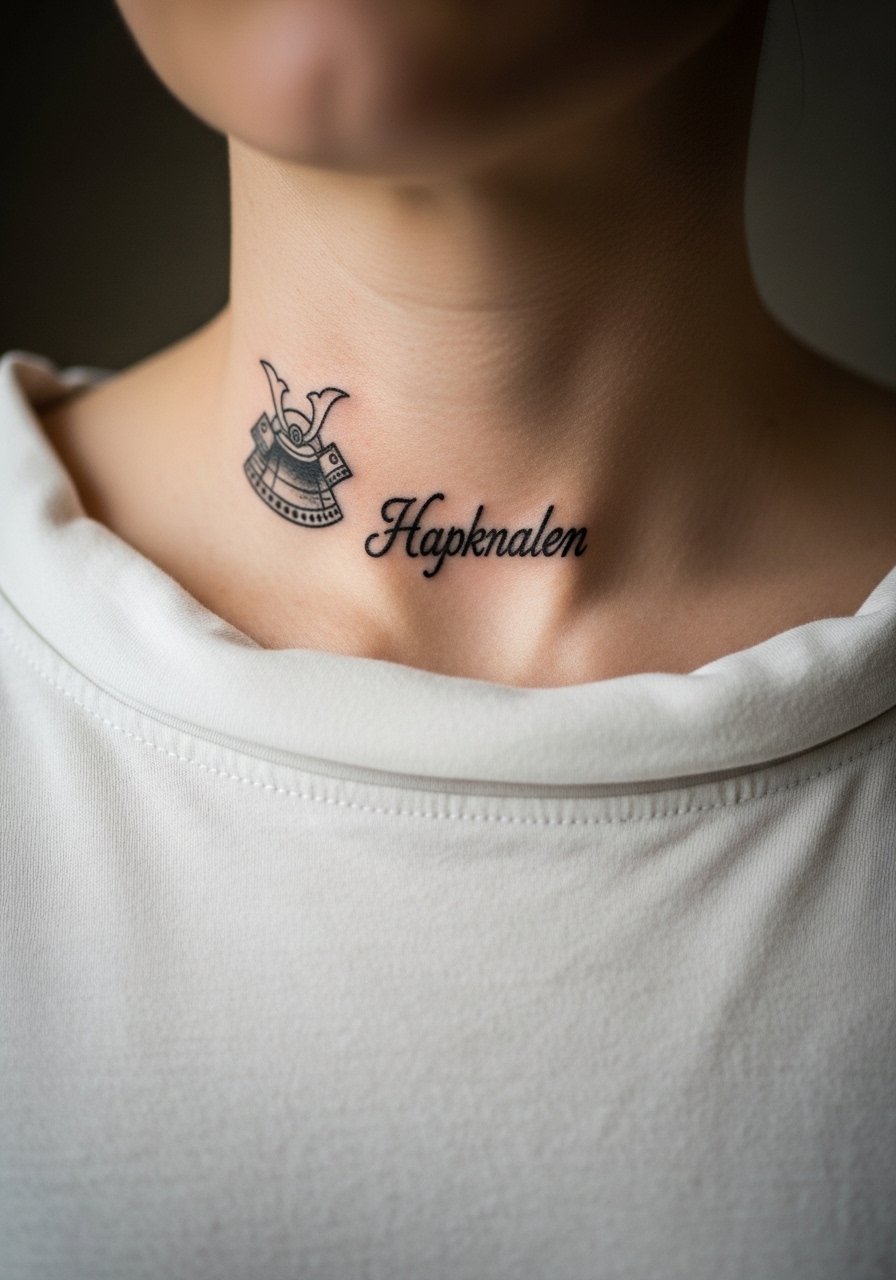
8. Neck-Side Samurai Emblem with Script
Consultation lead: when you ask for a neck-side emblem, bring clear references for exact line weight and script placement. The skin here moves a lot and lines can blur if done too fine. A smart version uses bold outer framing and open interiors. For session wear, choose a wide-neck shirt you can pull to one side. Professional considerations apply since neck tattoos are visible in many workplaces.
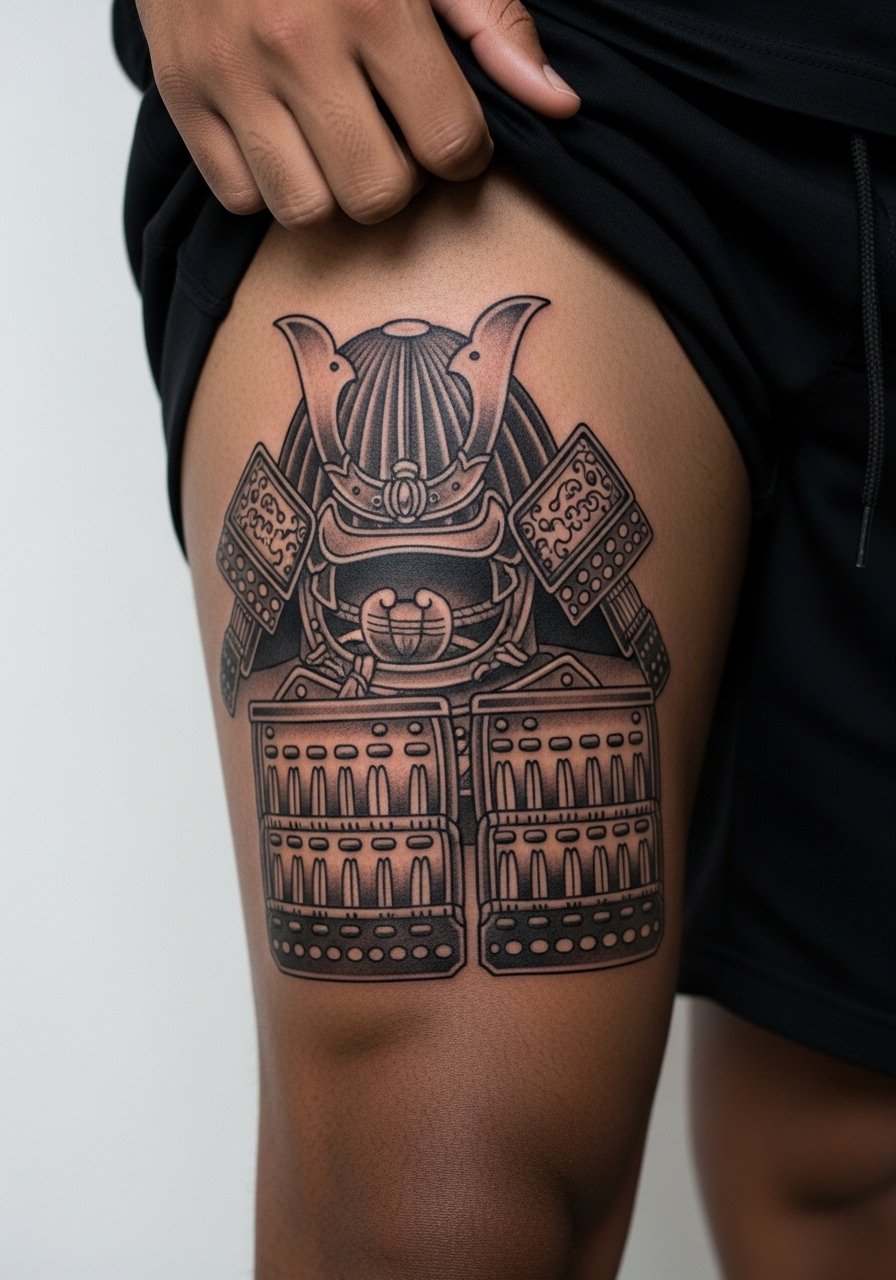
9. Thigh Samurai with Armor Pattern Panels
Visual impact lead: the thigh gives room to combine patterned armor panels with negative space stripes that help the design age. Tell your artist to treat each panel like its own study and keep contrast high between panels. A common mistake is folding the pattern too tightly, which causes the texture to muddy after healing. For the session, wear loose drawstring linen pants or shorts you can pull aside. Expect moderate pain and a multi-hour session.
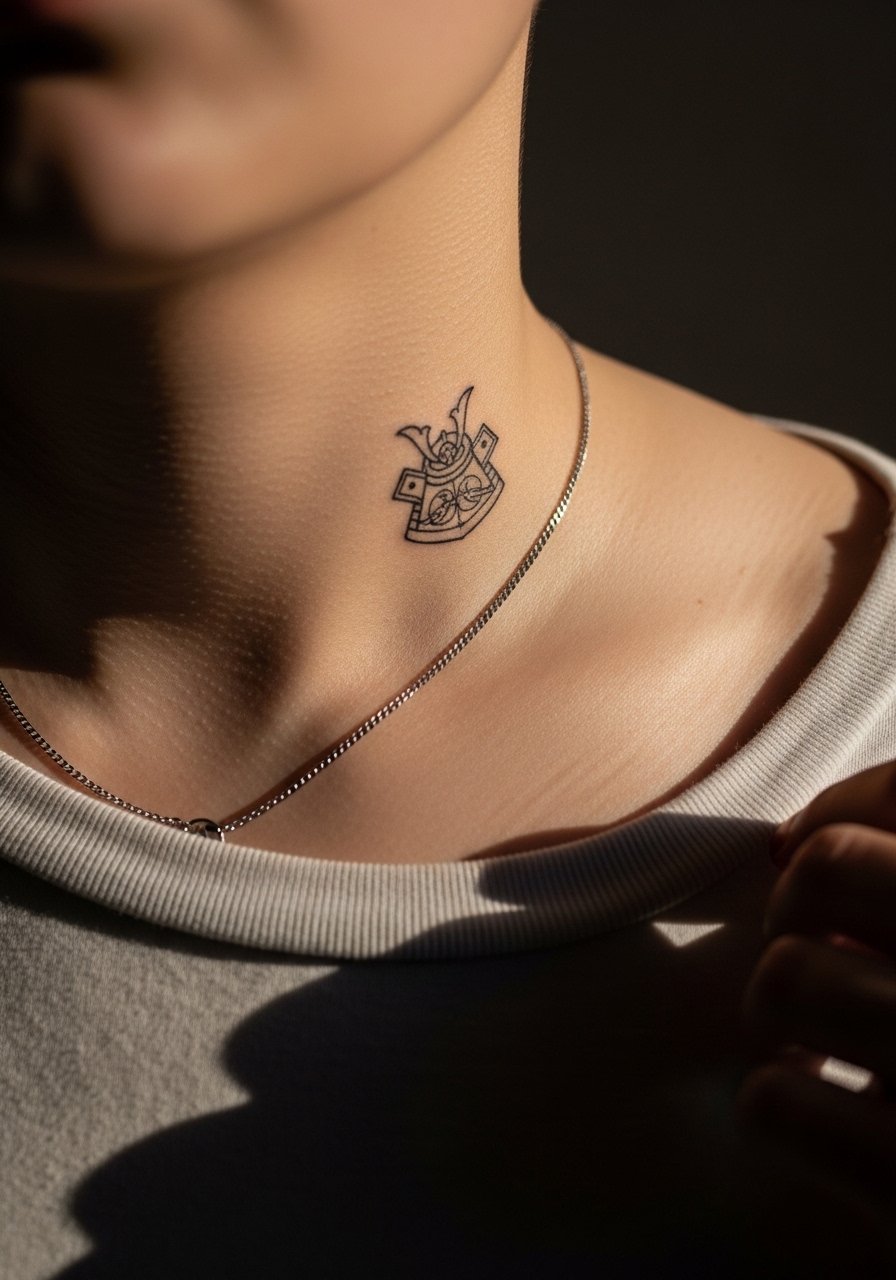
10. Collarbone Mini Samurai Crest
Mistake lead: people often request collarbone miniatures with delicate internal lines that fail under tension from movement. Scale the crest so the outer lines are clear and use interior negative shapes instead of tiny hatching. This placement hurts over bone but photos well under soft lighting. For showing off, a thin chain pendant works because it sits above the crest without competing. Consider a thin chain pendant necklace for framing.
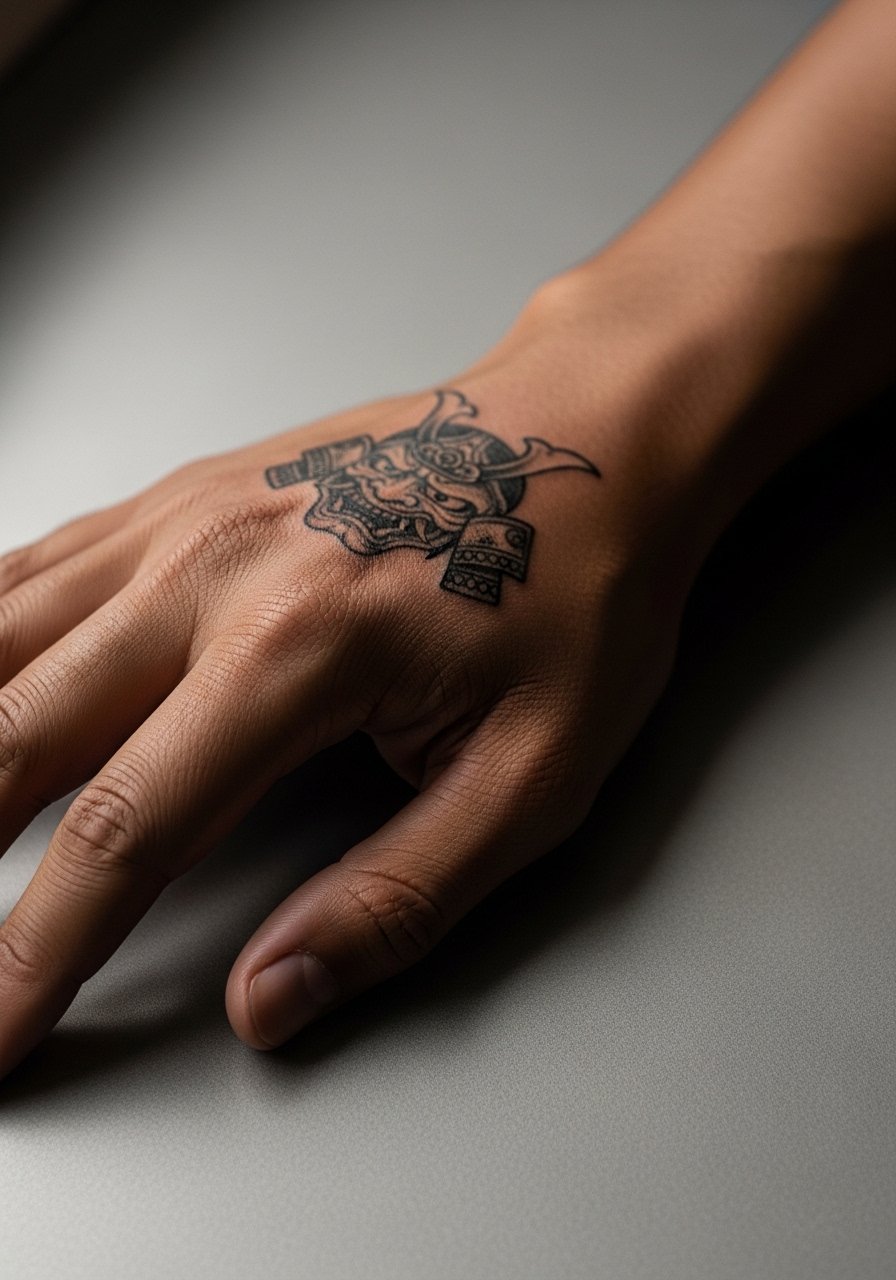
11. Hand-Piece Samurai Mask, Small-Scale Blackwork
Controversy lead: hand tattoos split opinions about career impact and longevity. One camp accepts faster fading for the visual statement. The other advises against hands because constant washing and friction devour fine detail. If you choose this, plan bold, graphic shapes with thick outlines and expect yearly touch-ups. Session pain is high and healing takes longer. Also note many employers still screen hand tattoos, so factor that into placement choice.
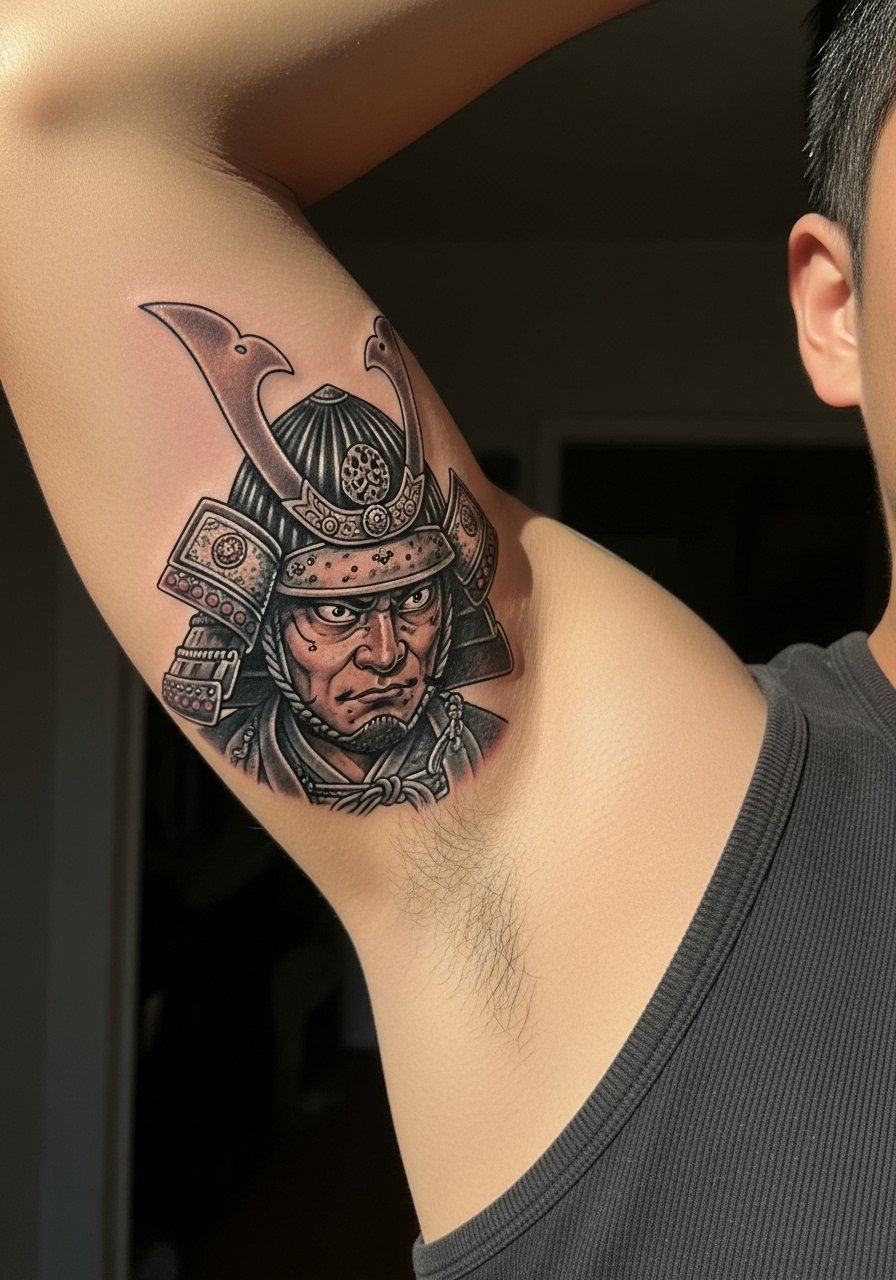
12. Inner Bicep Samurai in Micro-Realism
Pain warning lead: the inner bicep is tender but holds micro-realism well if the artist spaces the tones and avoids overly dense stippling. For consultation, ask the artist to map shading transitions at a slightly larger scale than the reference photos. A common mistake is packing too much micro-detail into the narrow band where blowout risk is higher. For session wear, pick a loose tank top you can lift or remove easily. Plan for one long session and a touch-up around year two.
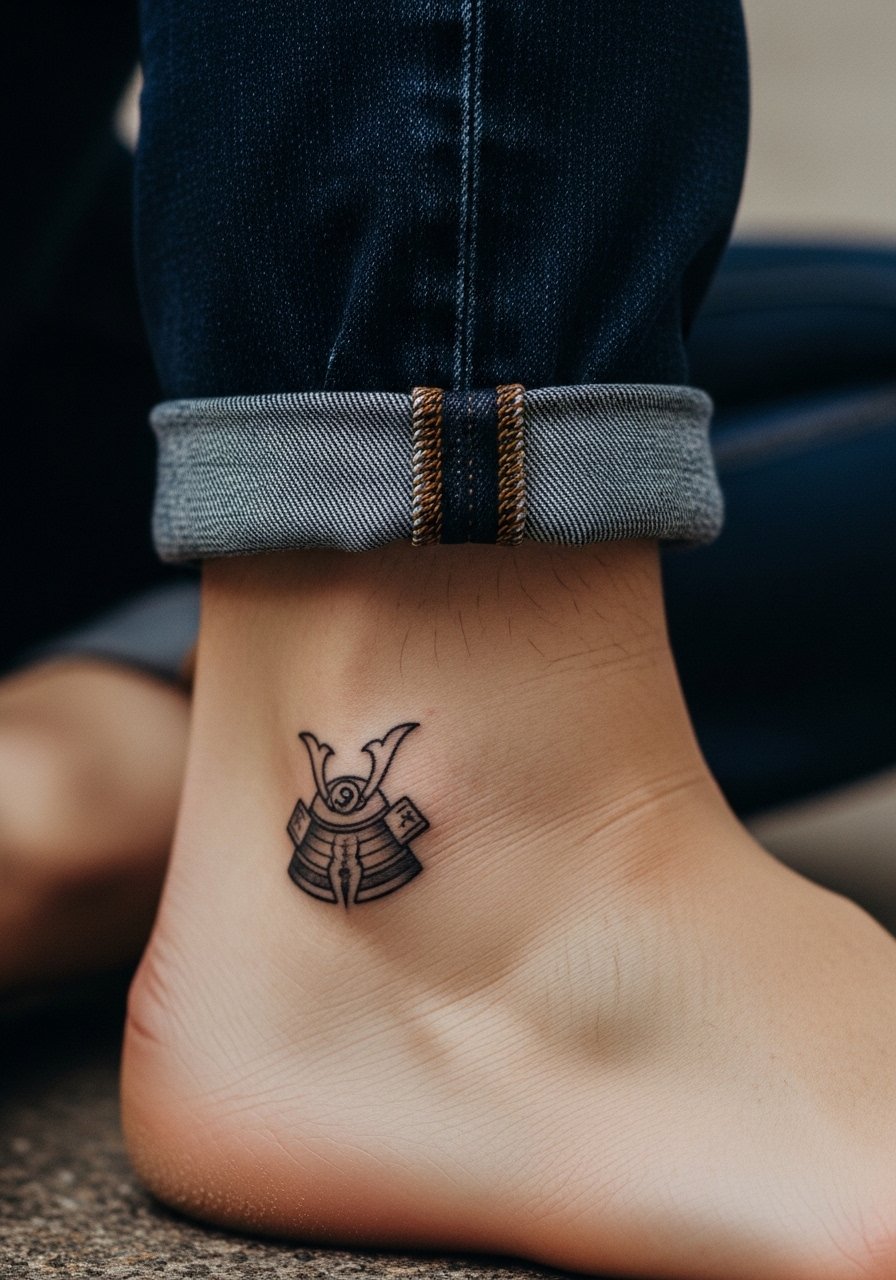
13. Ankle Samurai Symbol with Clean Linework
Visual impact lead: small ankle symbols survive when the linework is clear and the negative space around them is generous. Ask for a bold silhouette and minimal interior strokes. The mistake is over-detailing a tiny area that will blur under shoe friction. For showing off in summer, roll up jeans or wear sandals that let the piece read. A minimalist ankle sandal frames the area without covering it. Expect low to moderate pain.
14. Sleeve Accent: Warrior Face in Negative Space
Mistake lead: sleeve accents fail when artists try to fill every gap. For a warrior face in negative space, ask that parts of the sleeve breathe so the face reads clearly at distance. The session time depends on how much surrounding work you want. Expect touch-ups at year three for saturated panels. For wardrobe, cuffed sleeves or short sleeves work best to reveal portions of the sleeve without showing the whole thing.
15. Throat-Lower Samurai Script and Small Icon
Consultation lead: throat-area elements need careful placement to avoid voice movement zones. Keep icons small and script minimal. One common error is asking for dense lettering across the throat where stretch will distort the type. For session wear, pick a wide-neck shirt you can pull to the side. Expect higher pain and slower healing.
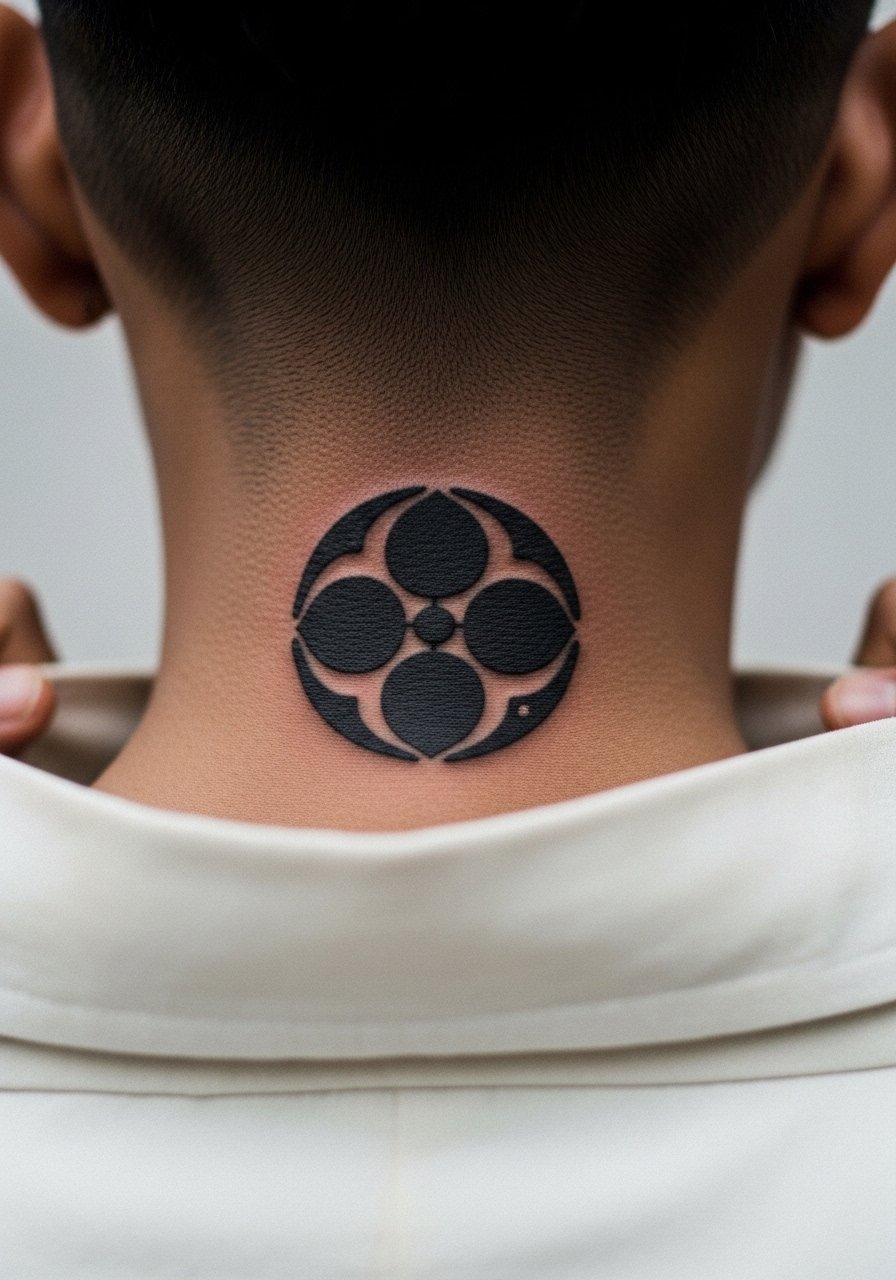
16. Back-of-Neck Samurai Crest in Bold Black
Personal observation lead: a crisp back-of-neck crest ages cleanly when kept bold and isolated. Ask your artist to avoid tiny ornamental filigree in that zone. A hidden placement that peeks from a collar reads well and needs less frequent touch-up than exposed forearms. For career-sensitive people, the back of the neck can be covered with hair or collars when needed. Session time is short and pain is moderate.
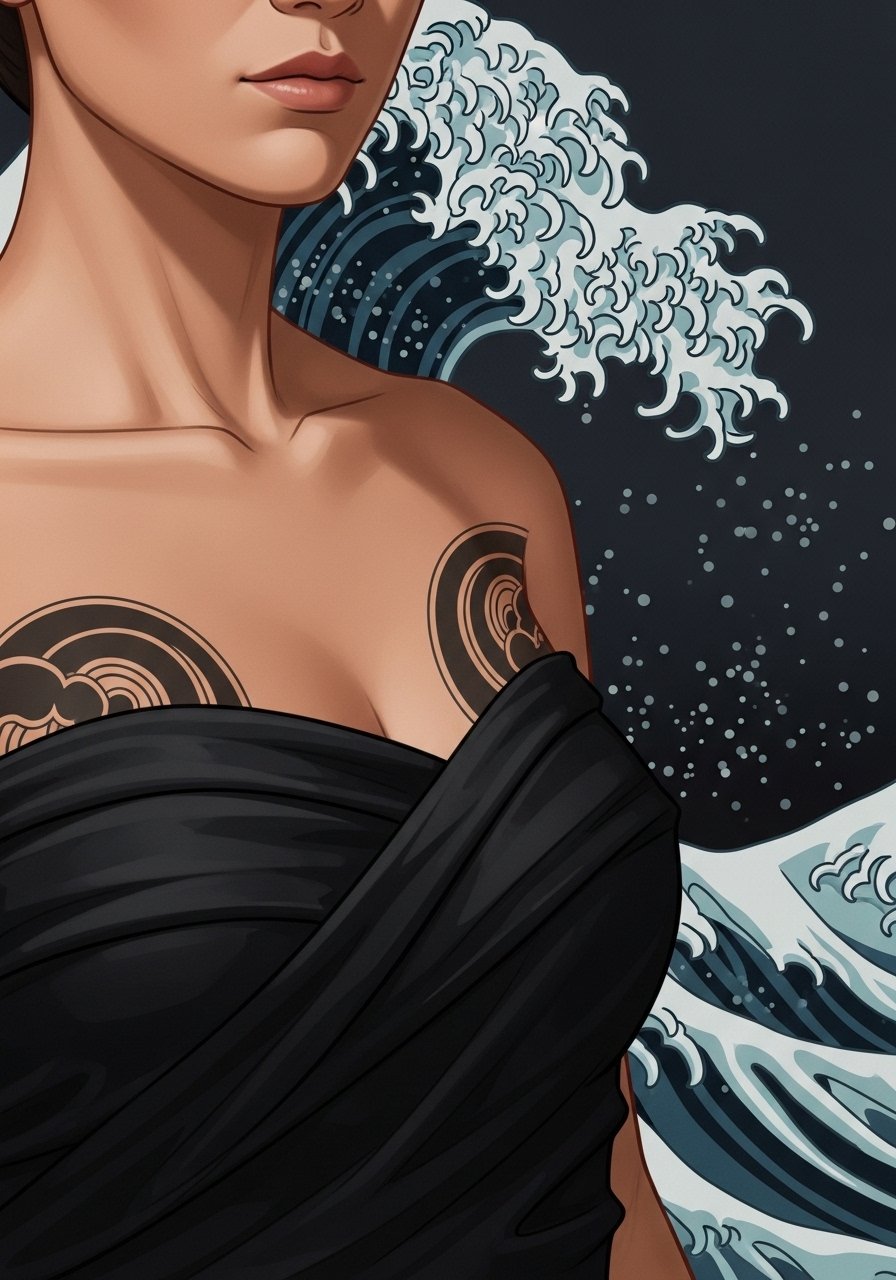
17. Half-Chest Samurai with Wave Background
Visual impact lead: half-chest panels pair well with a wave background that follows chest curvature. Ask for blocky shadow shapes under the armor so the samurai's profile stays legible at a distance. Common mistake: tiny scales in the wave pattern that clump after healing. For showing off at warmer events, a strapless top or open collar shirt works to reveal the half-chest elegantly. Expect a long session and a touch-up at year three.
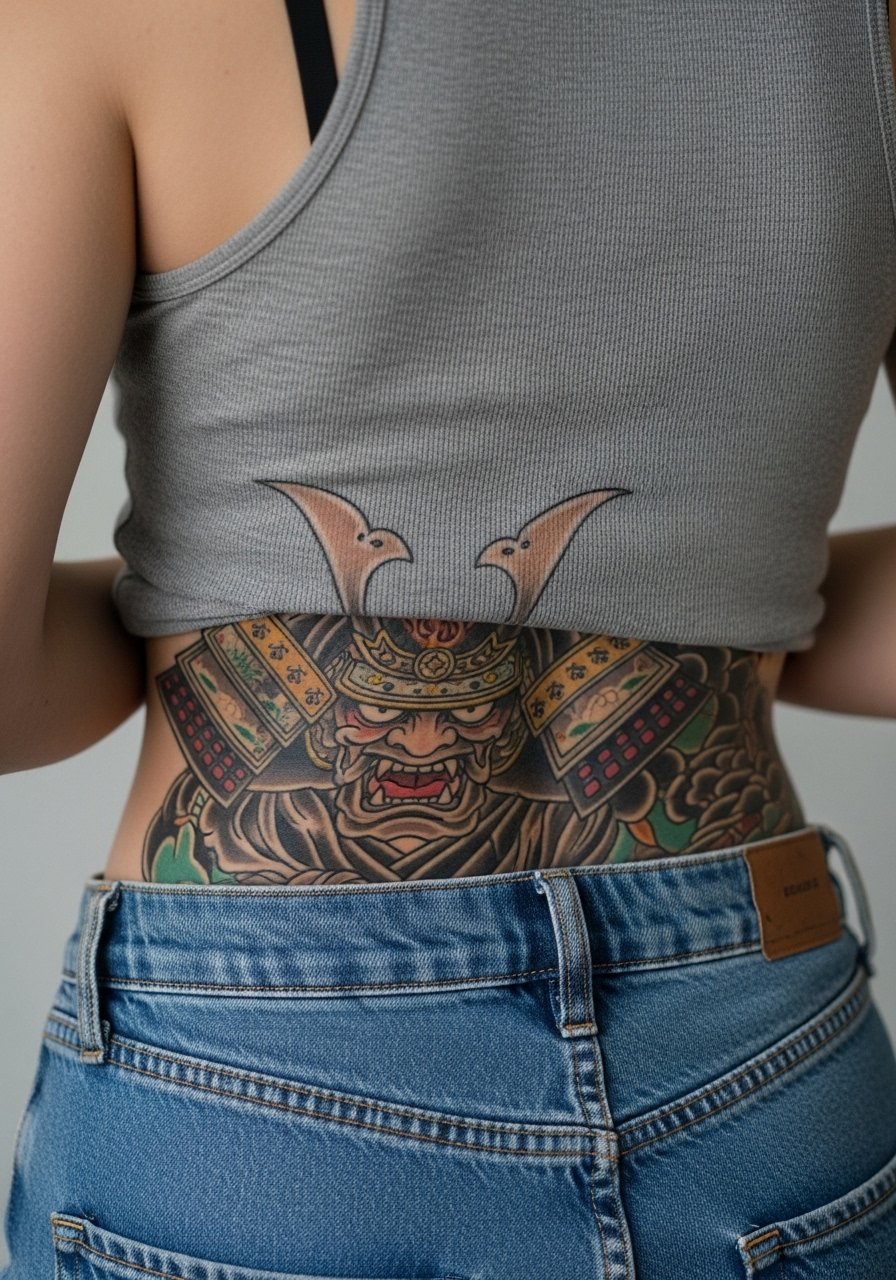
18. Lower Back Samurai Panel with Armor Bands
Consultation lead: lower back panels need clear horizontal bands for the armor to read as you sit and bend. Keep central silhouettes bold and use bands of negative space between armor plates. Sensitive-note: lower back is often hidden, so placement affects how often you will show it. For session wear, bring a tank top you can lift slightly to expose only the area. Pain is moderate and sessions are manageable in one or two sittings.
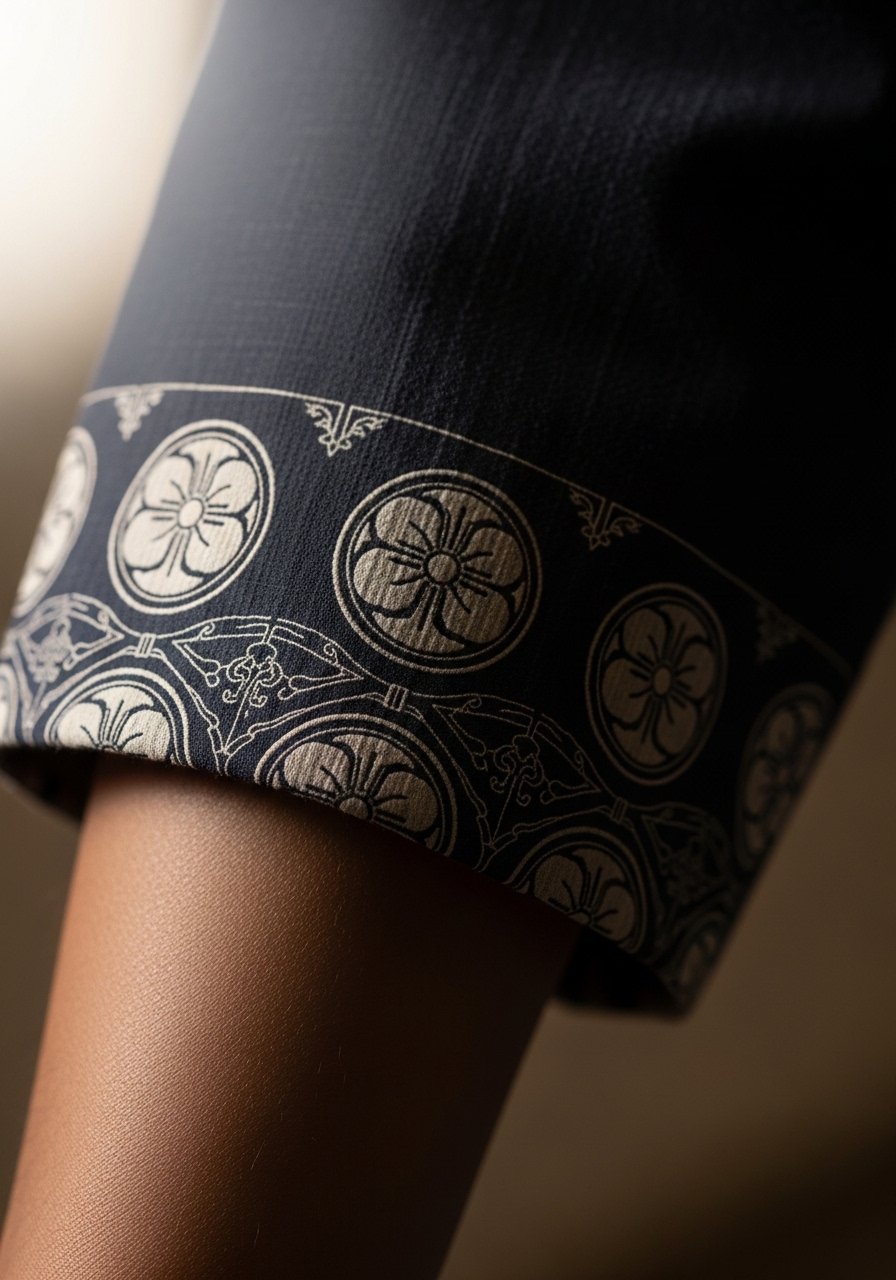
19. Sleeve Cuff Samurai Crest with Repeating Motif
Mistake lead: cuff pieces blur when artists stack motifs too tightly around the arm. For a cuff crest, ask for repeating negative space to separate each motif. This keeps the cuff readable from any angle. For showing off, a rolled sleeve or short-sleeve shirts highlight the cuff without exposing the whole sleeve. Try a short-sleeve linen shirt that frames the cuff. Session time is moderate and touch-ups are usually local.
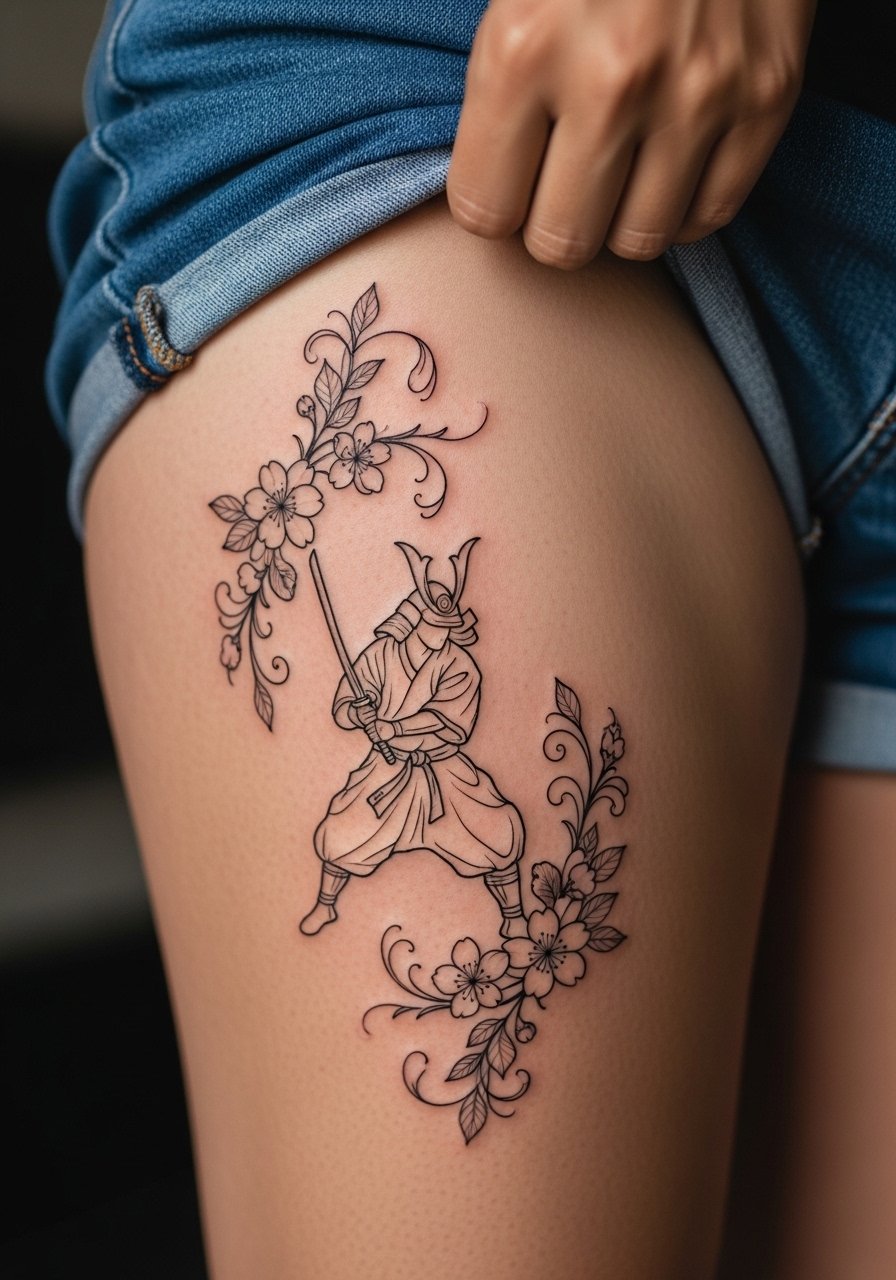
20. Inner Thigh Samurai Silhouette with Floral Border
Aging lead: the inner thigh holds ink well because it sees less friction. For a silhouette with a floral border, let the silhouette be bold and the flowers airy. Avoid packing lace-like detail into the border where it can blur. Sensitive-note: inner thigh sessions require an artist comfortable with intimate zones. For the session wear, pick shorts you can shift slightly or a swimsuit bottom. Expect moderate pain and strong longevity.
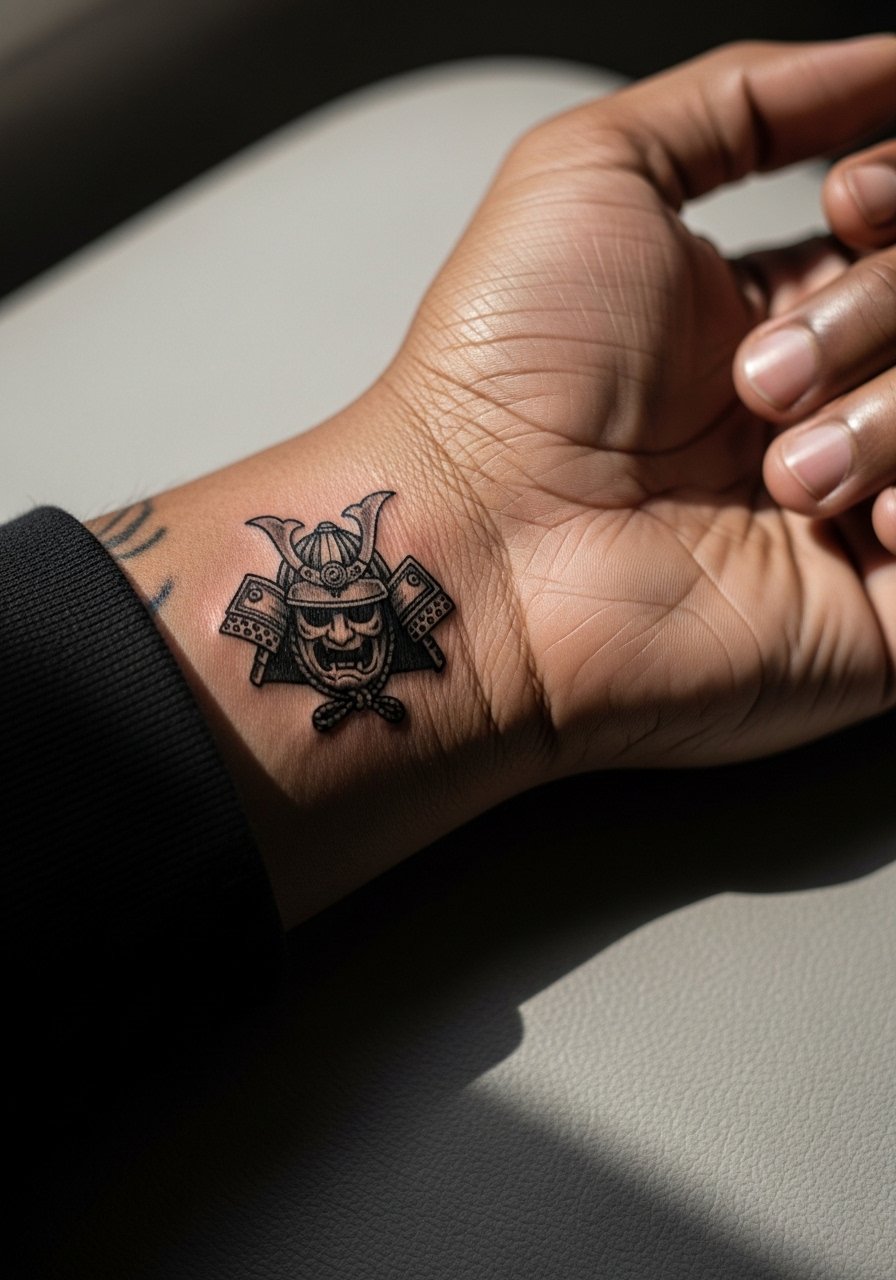
21. Micro-Realism Helmet on the Wrist with Anchored Linework
Pain warning lead: the wrist is unforgiving for micro-realism. If you want a helmet there, anchor it with a heavier outline and keep interior detail suggestive rather than hyperfine. The biggest mistake is requesting photo-real detail in a thirty-millimeter square. For showing off, stack with a minimalist watch or thin bracelet that does not cover the piece. Consider a minimalist watch that frames the wrist without hiding the tattoo. Expect yearly touch-ups.
22. Shin Panel Samurai with Bold Border and Sparse Interior
Visual impact lead: shins show vertical panels well when the border reads heavier than the interior. Ask for bold framing lines and sparse interior shading. A common problem is filling the shin with texture that flattens after healing. For clothing, cropped joggers reveal the panel without making it feel overexposed. Session pain is moderate and varies with shin sensitivity.
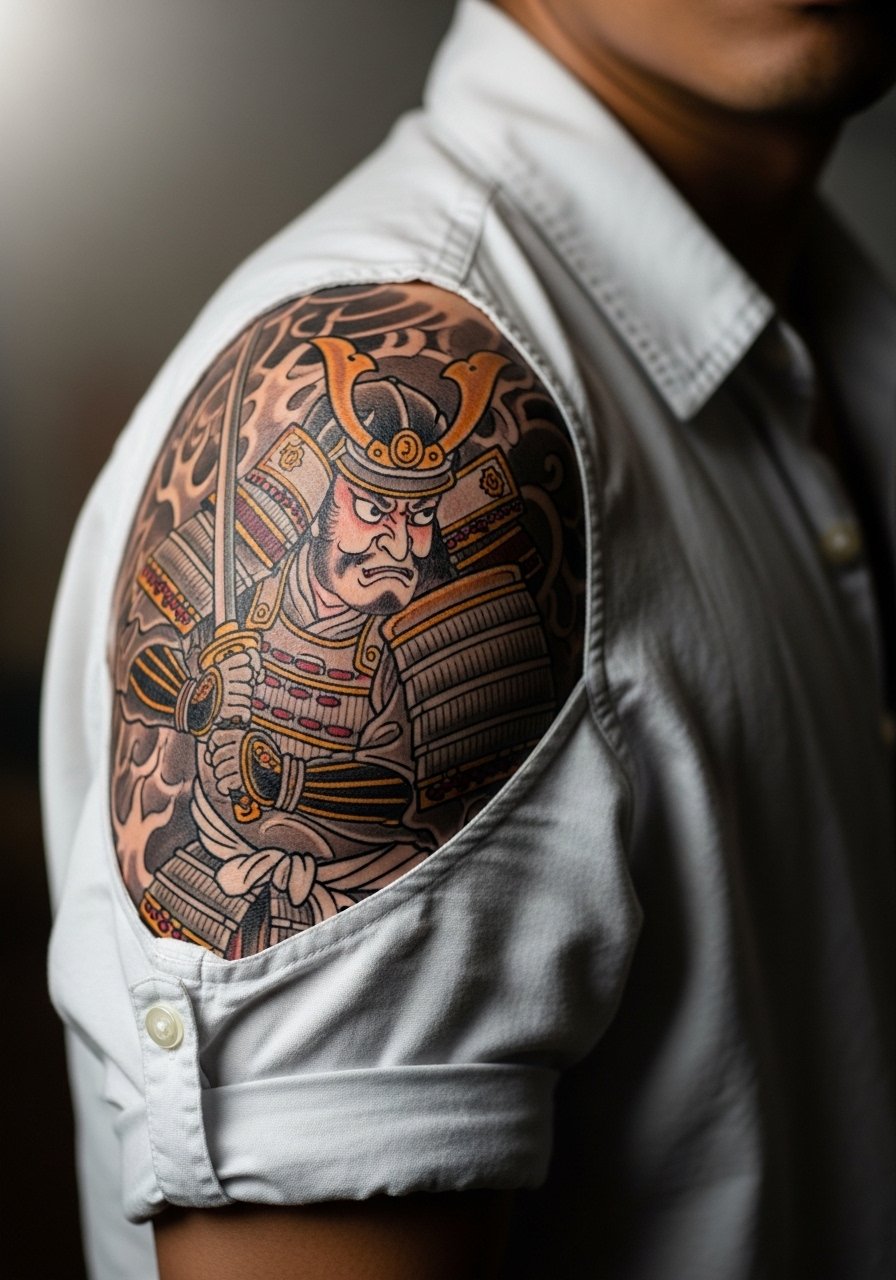
23. Shoulder Cap Samurai Figure in Traditional Style
Personal observation lead: shoulder caps last when they respect the sphere of the deltoid and avoid wrapping too tightly under the arm. Ask your artist to keep the main figure centered and use the shoulder curve to make the helmet silhouette readable. For showing off, a loose button-down shirt with the sleeve pushed up looks effortless. Expect a single long session and a low to moderate pain level.
24. Small Foot-Ankle Samurai with Negative Frame
Mistake lead: tiny foot tattoos wear quickly because of shoe friction and washing. If you want a foot-ankle samurai, frame it with negative space and thick outlines so the piece reads after several months. For showing off during warm months, wear sandals to minimize rubbing. A pair of simple sandals keeps the area exposed without constant pressure. Expect touch-ups sooner than other placements.

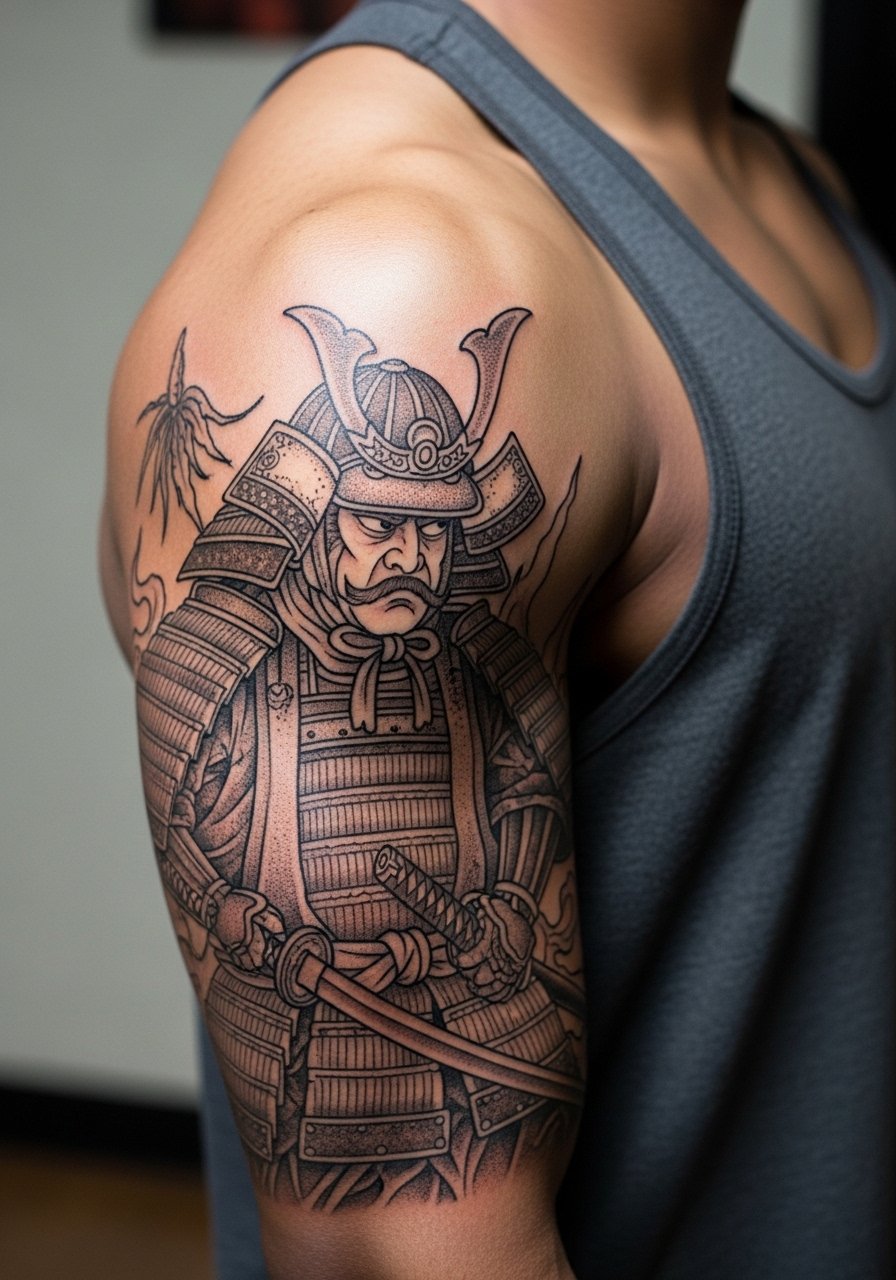
25. Upper Arm Panel Samurai in Stipple Shading
Consultation lead: when you ask for stipple shading, show reference that clarifies dot scale and density. The upper arm handles stipple better than the forearm because it sees less sun and friction. A common error is asking for too-dense stippling that forms a gray block as it heals. For session wear, a tank top gives easy access and visibility during the appointment. Try a racerback tank for comfort. Expect moderate pain and long-lasting texture if spaced correctly.
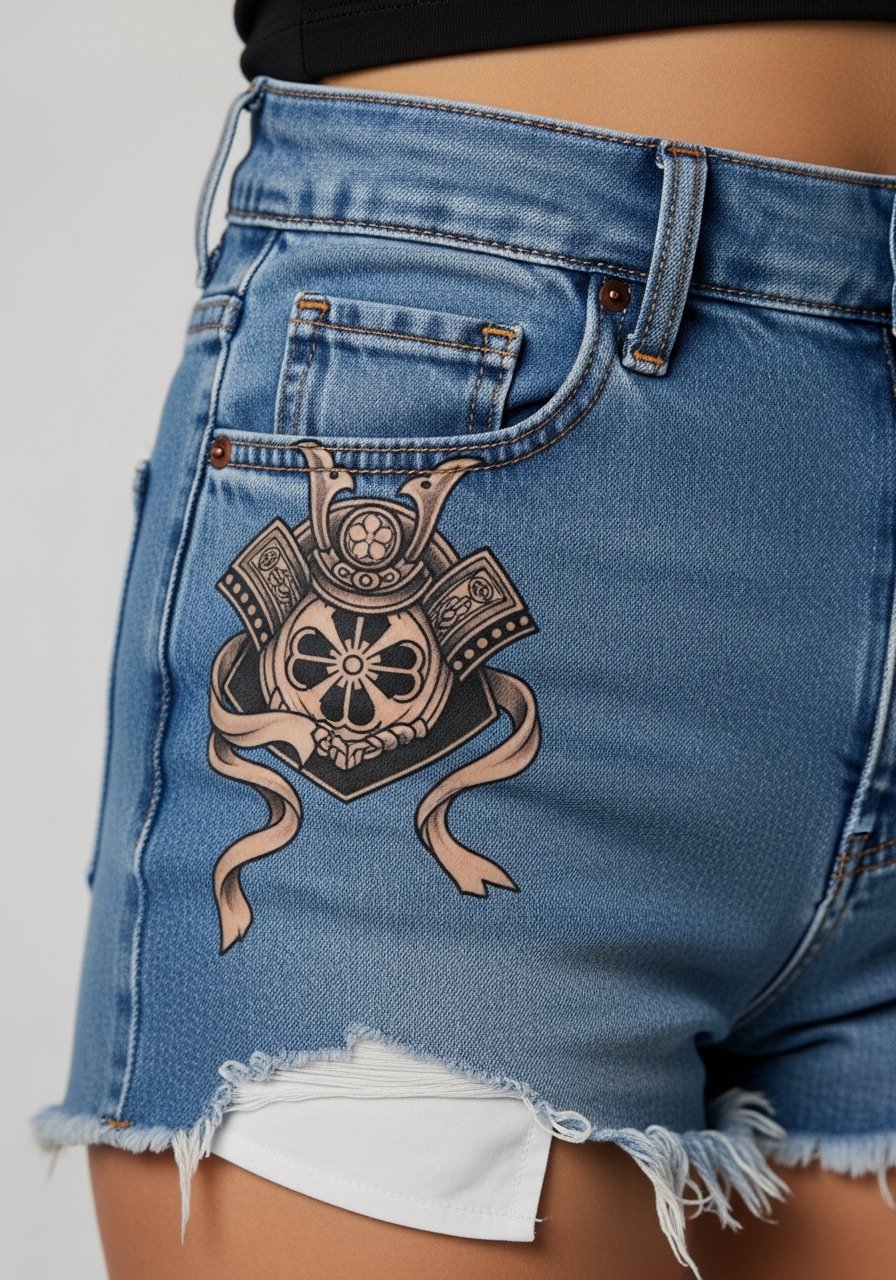
26. Hip Samurai Crest with Flowing Silk Ribbon
Styling lead: hip pieces photograph well with high-waisted denim or swimwear that reveals the ribbon flow. Ask for ribbon negative space that follows the hip curve and keeps the central crest bold. For the session, wear high-cut shorts you can pull down slightly to expose only the hip area. A high-waisted denim short works well. Sensitive-note: hip tattoos sit near common friction zones, so plan for slower healing and occasional touch-ups.
27. Rib-to-Back Samurai Panel That Wraps With Motion
Decision-pressure lead: rib-to-back panels look best when the artist maps how the design wraps as you breathe. For a samurai that moves from the ribs onto the back, keep the central figure simplified and use background blocks of shadow for depth. The common mistake is over-detailing the torso junction where stretch flattens fine texture. Expect high pain and multiple sessions. Sensitive-note: large torso wraps are best with an artist experienced in multi-session planning.
Studio Day Picks
The first six ideas include wrist, forearm, chest, rib, thigh, and back placements with different prep needs. These picks smooth the session day and protect fine line work in the first week.
-
Stencil transfer paper kit. Lets you preview placement and line weight on skin before the needle goes in, which helps with chest and rib placements above.
-
Topical numbing cream. Applied before the session eases the edge on ribs and inner thigh work without changing how the artist reads your skin.
-
Thin protective film roll. Protects wrist and finger pieces from friction during the early healing days when you wash and type.
-
Fragrance-free gentle body wash. Cleans healing areas like thighs and chest without irritating linework that depends on clean scab formation.
-
Aquaphor healing ointment. A thin layer in the immediate days after the session keeps fine-line areas moist and less prone to heavy scabbing.
Frequently Asked Questions
Q: How do I decide between bold Irezumi saturation and a fine-line samurai portrait for longevity?
A: It depends on placement and how often the area sees sun or friction. Bold blackwork and larger negative spaces tend to hold longer on exposed areas like forearms and calves. Fine-line portraits can last well on protected zones like the thigh or chest if scaled up slightly and paired with touch-ups planned around year two.
Q: If I want a ribcage samurai, what should I ask my artist about technique and aftercare?
A: Ask whether they prefer slightly thicker linework for ribs or if they have a method to protect fine lines on flexing skin. Discuss session pacing so you can rest between passes. For aftercare, follow the artist's protocol and plan for a touch-up if lines soften during the first year.
Q: Will a hand or wrist samurai likely need touch-ups more often than a back piece?
A: Yes, hands and wrists face more washing and friction so expect more frequent touch-ups. Back panels are protected and tend to need fewer refreshes. If you want minimal upkeep on the wrist, aim for a bold silhouette rather than micro-detail.
Q: Can I wear specific clothes to show off a half-chest or shoulder cap samurai piece at an event?
A: Yes. For half-chest pieces try a strapless top or a wide-neck shirt pulled aside. For shoulder caps a rolled sleeve or a short-sleeve linen shirt frames the area nicely. A linked example is a short-sleeve linen shirt that pairs well without hiding the art.
Q: Are there cultural considerations I should be aware of when getting a Japanese warrior design?
A: Acknowledge the origins by avoiding direct religious imagery or culturally specific symbols unless you understand their meaning. Many people opt for stylistic nods rather than direct replicas to show respect and personal adaptation.
