
Fine-line phoenix pieces dominate feeds, but the tattoos that still read like birds after five years usually prioritize bold contrast, clear spacing, and thoughtful placement over microscopic detail. Think about how the design sits on your body now and how it will move with you later. The ideas below pair those practical choices with fierce Japanese motifs so your phoenix looks intentional at every stage of healing.
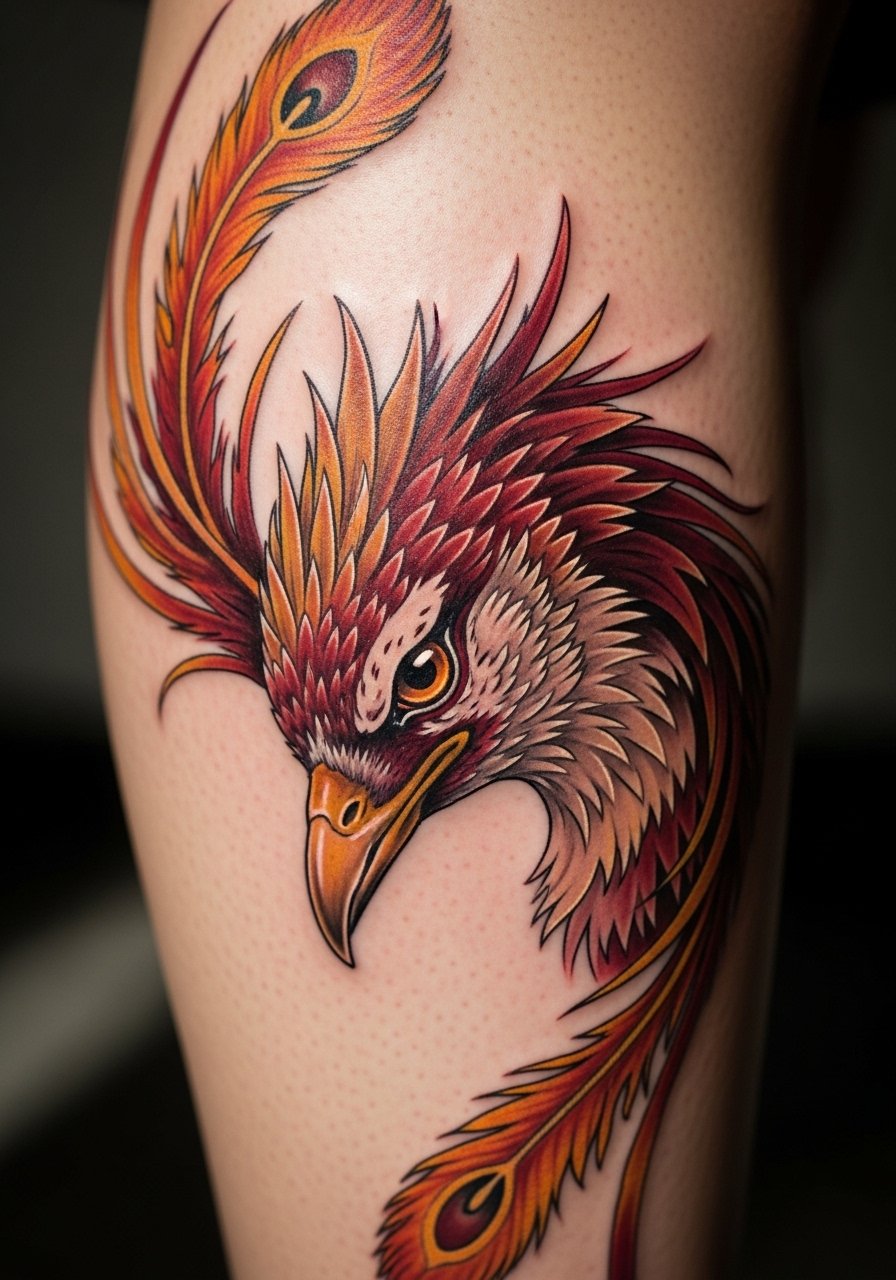
1. Rising Phoenix on Inner Forearm
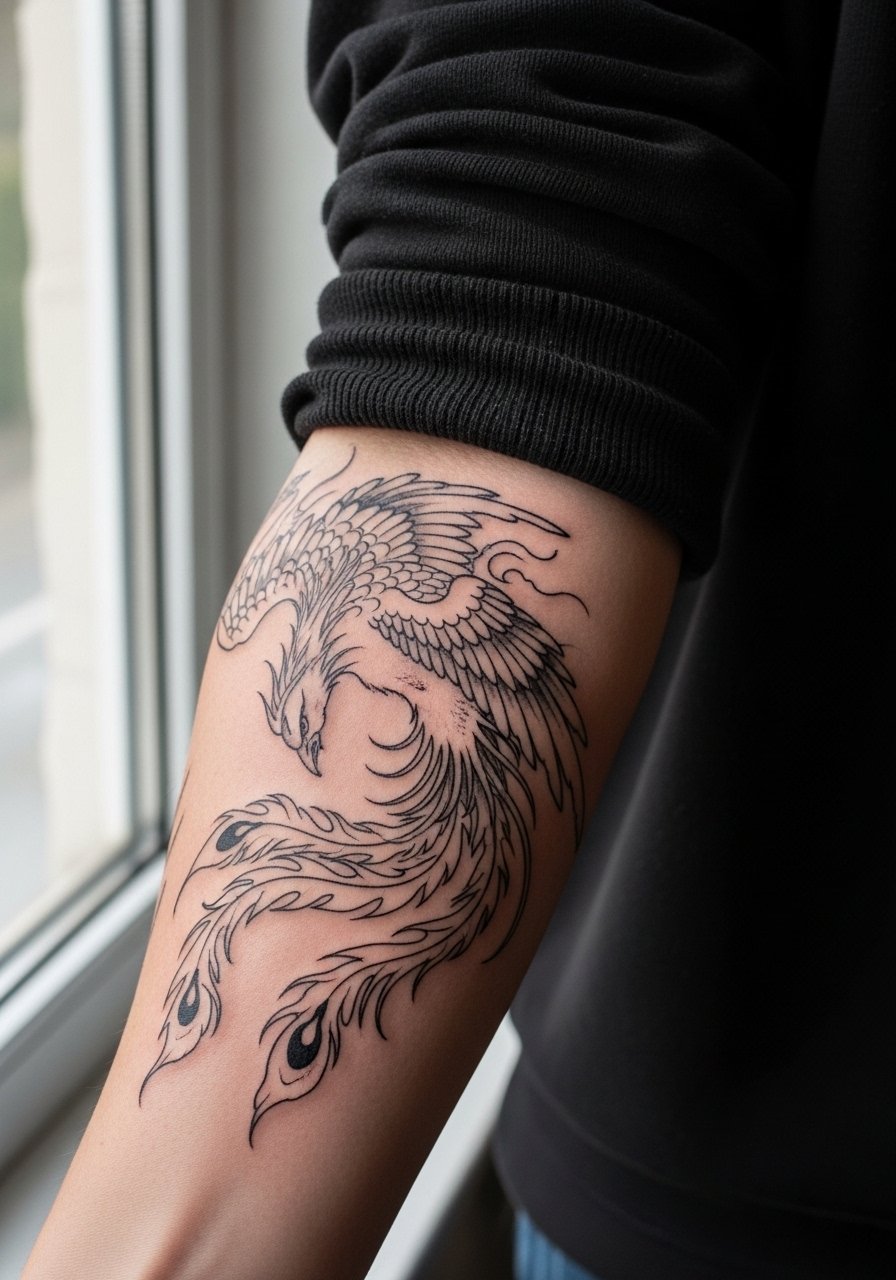
This placement reads well for anyone who wants movement without a full sleeve. Ask your artist for slightly heavier linework around primary feathers and stipple shading in the shadow planes so the silhouette stays clear as the piece heals. Fair warning, the inner forearm gets sun and rubbing from straps, so discuss touch-up plans at year three. For the session wear a loose button-down shirt you can pull aside without tugging on fabric. Common mistake is asking for ultra-fine feathers too close together. Give the composition breathing room and the phoenix will keep its wings.
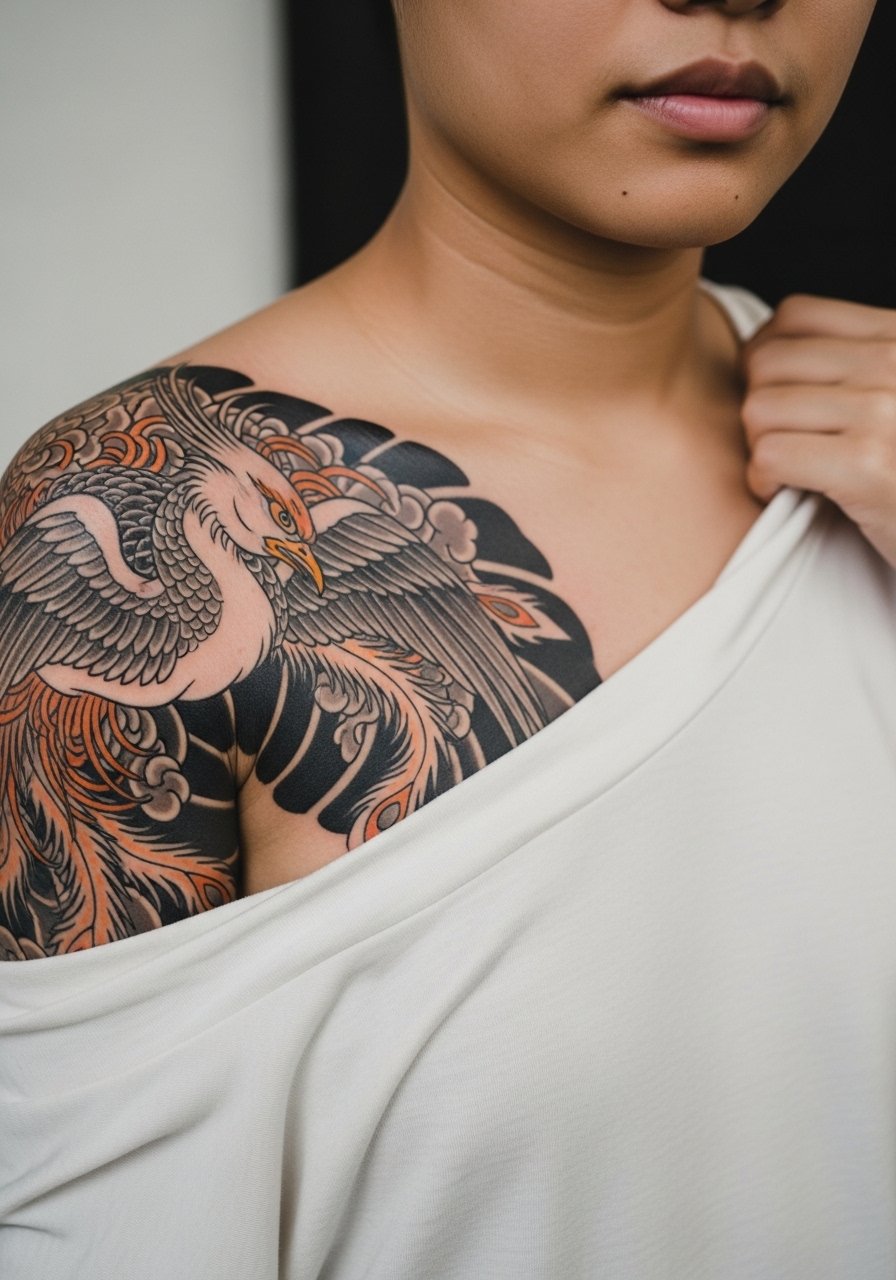
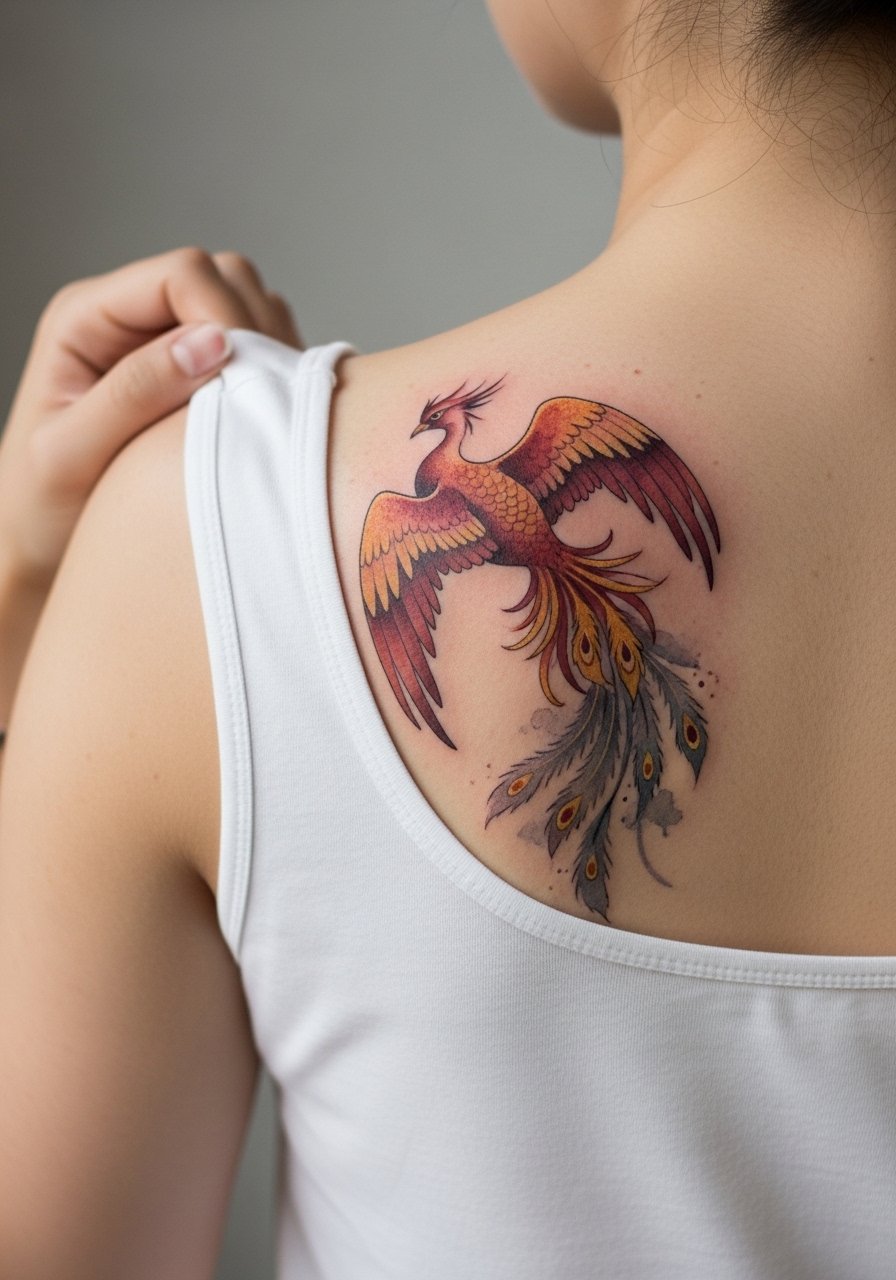
2. Shoulder Blade Phoenix with Wind Lines
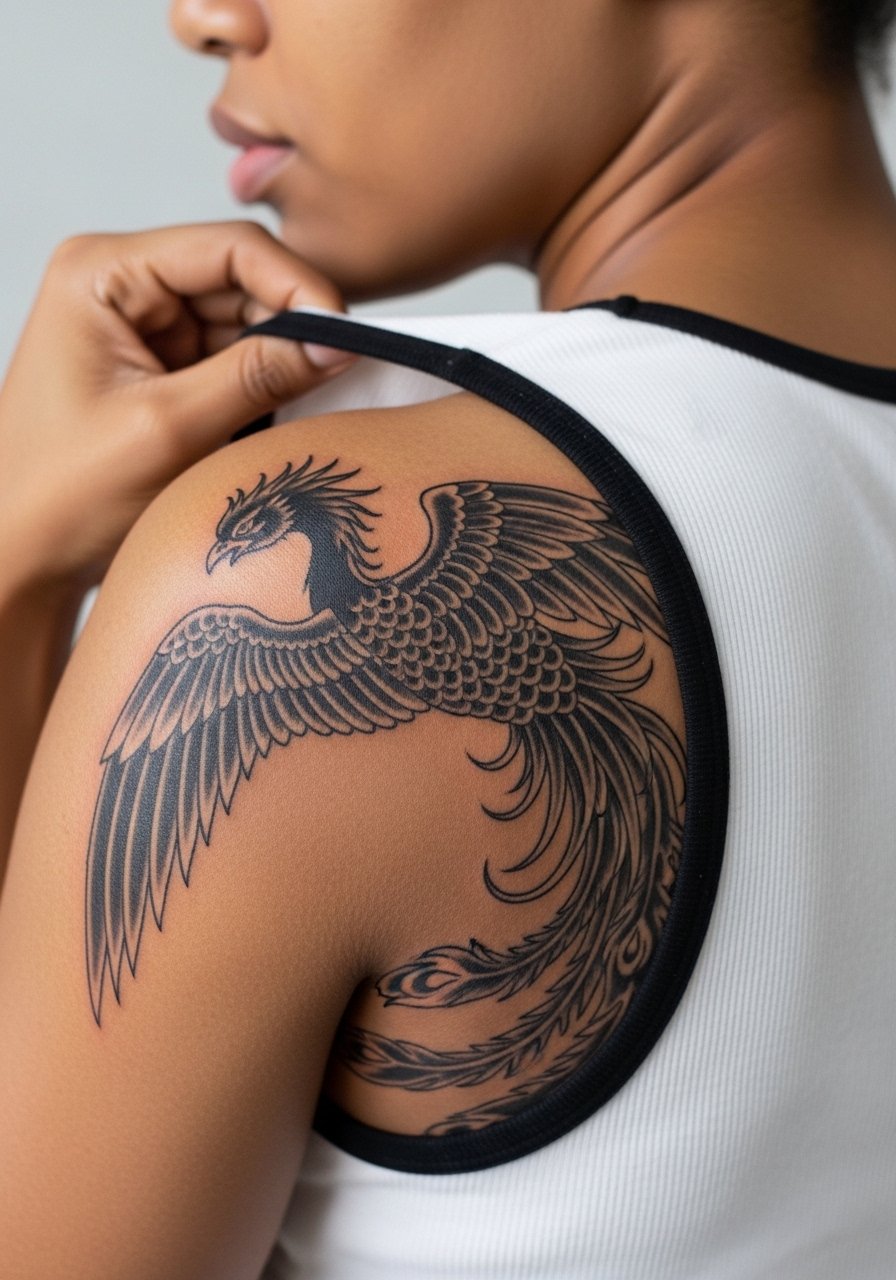
The shoulder blade is ideal for dynamic wings that curve with the scapula. Tell your artist you want exaggerated "wind" linework to imply motion rather than tiny feather detail that can blur. Expect moderate session pain when they work near the bone. At six months saturated color will still pop, at two years the black outlines will anchor the piece even as colors soften. The key consultation tip is to map the feather flows to your shoulder movement so nothing ends up on a fold. This placement also makes it easy to show off with tank tops and layered shirts.
3. Ribcage Phoenix, Fine Line vs Saturated
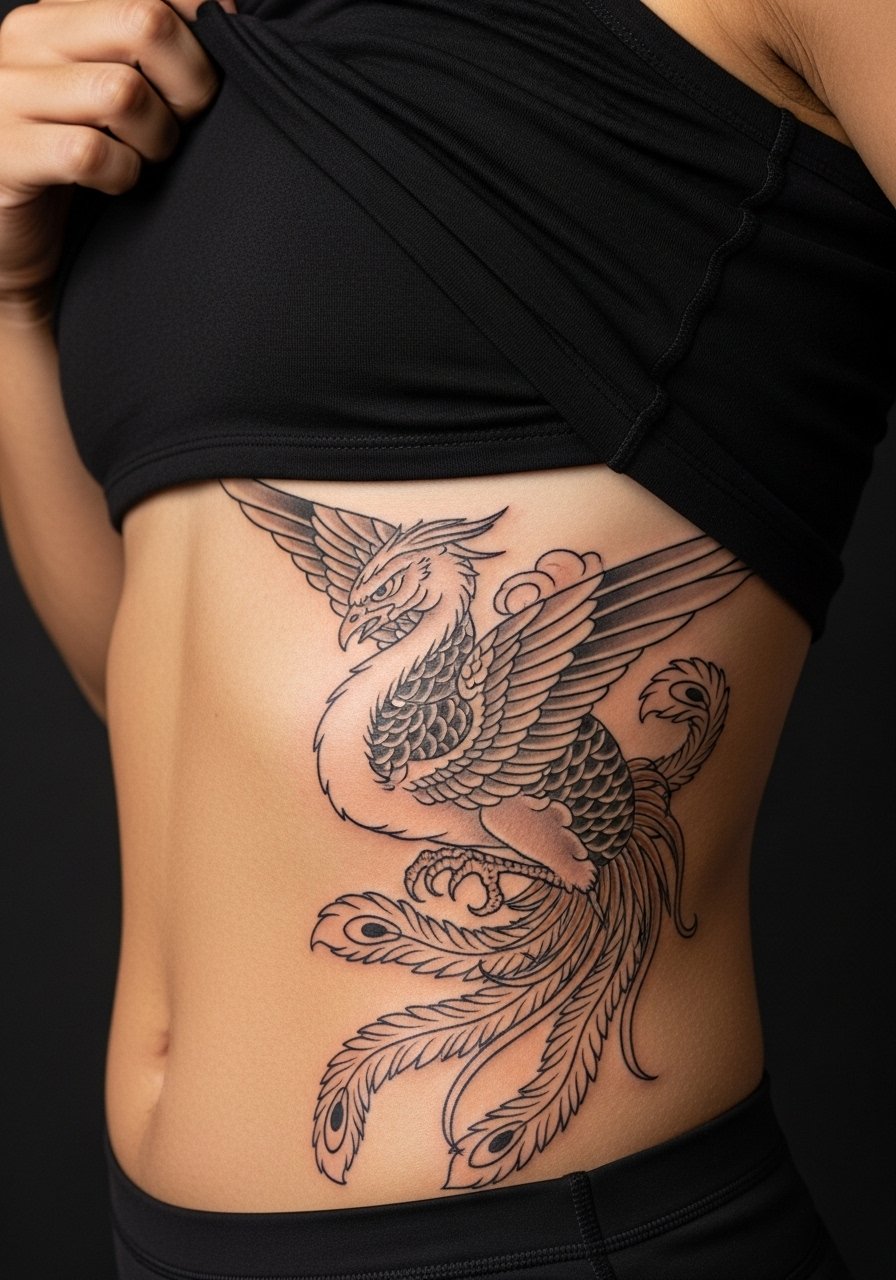
Artists split on fine line on the ribs. One camp warns that repeated breathing and skin stretch will blur ultra-fine lines within a couple years. The other camp argues that with correct needle depth and spacing, fine line can settle cleanly on ribs. Name both camps in your consultation and ask where the artist stands. If you want a longer-lasting read, request bolder primary outlines with delicate internal stipple shading. Session pain is high on the ribs, so prepare for breaks and consider numbing for the first pass. A common mistake is pushing for a tiny composition that ends up distorted by torso movement.
4. Full Sleeve Phoenix with Traditional Color Blocks

A sleeve lets you tell a full phoenix story, from rising to flight, using traditional saturation and heavy linework to age well. During consultation point to where you want contrast and where you want softer stipple shading. The shoulder and inner elbow have different blowout risks, so the artist should stagger line weights accordingly. For the studio day wear a loose drawstring linen pant if you're booking long sessions so you can stay comfortable between passes. Expect multiple sessions and a realistic touch-up at year two to freshen saturation.
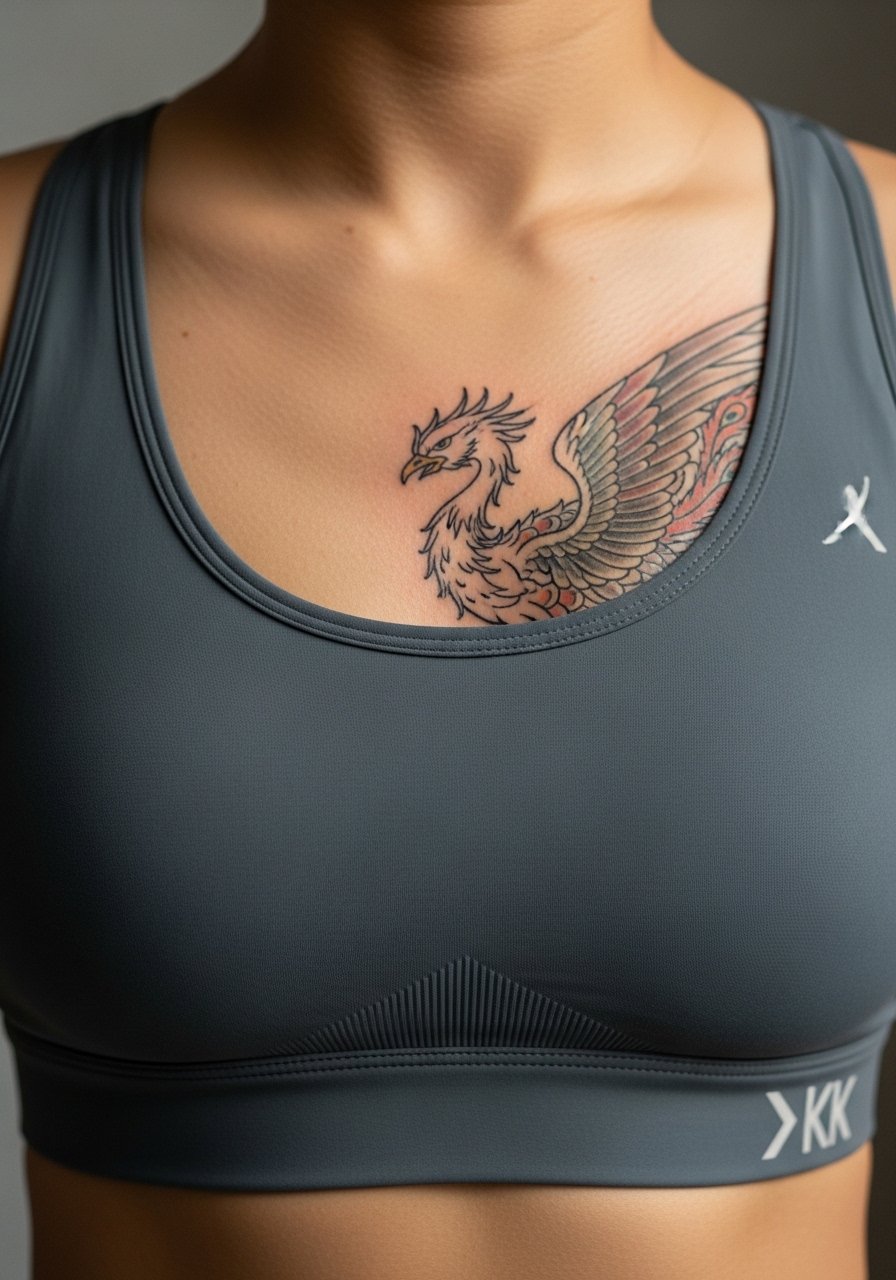
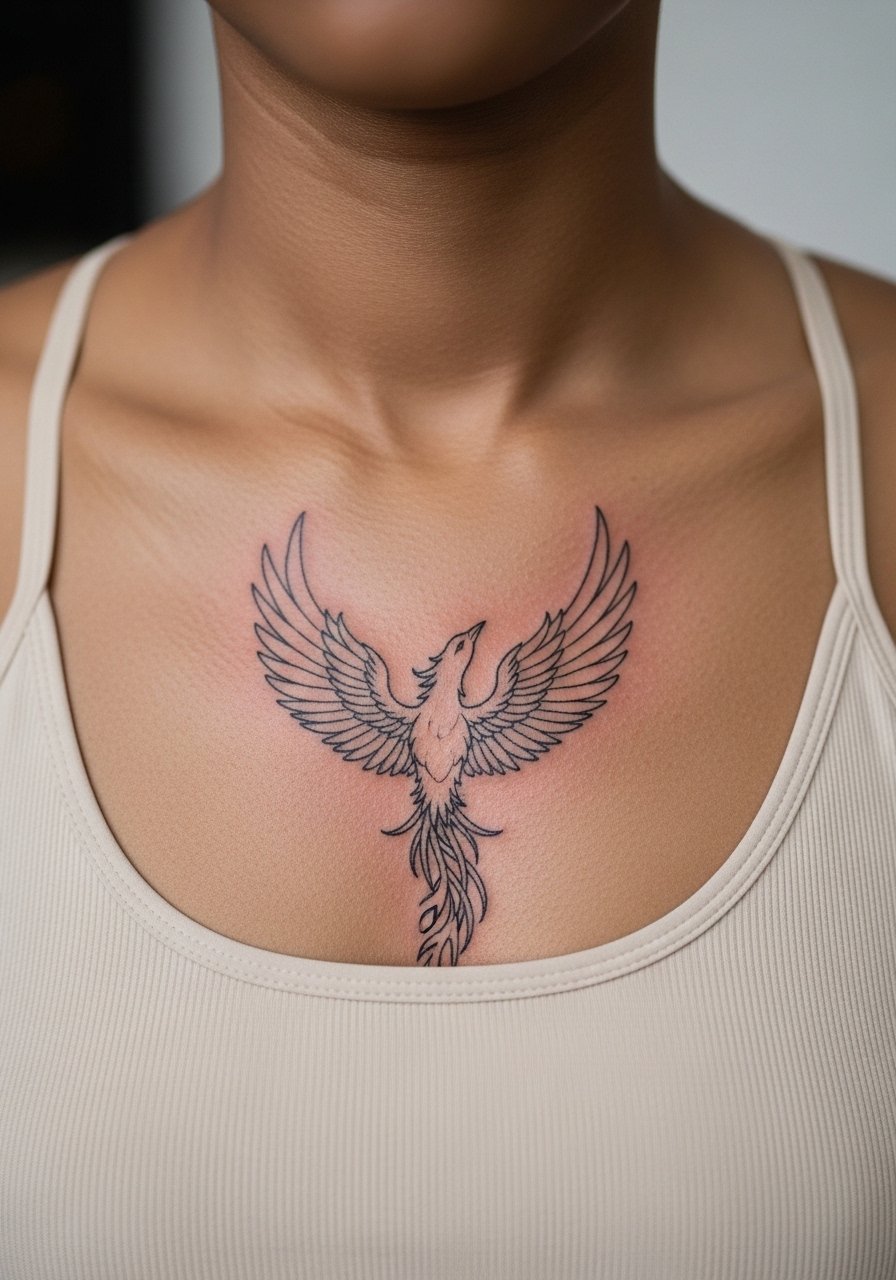
5. Collarbone Phoenix Accent with Minimal Script
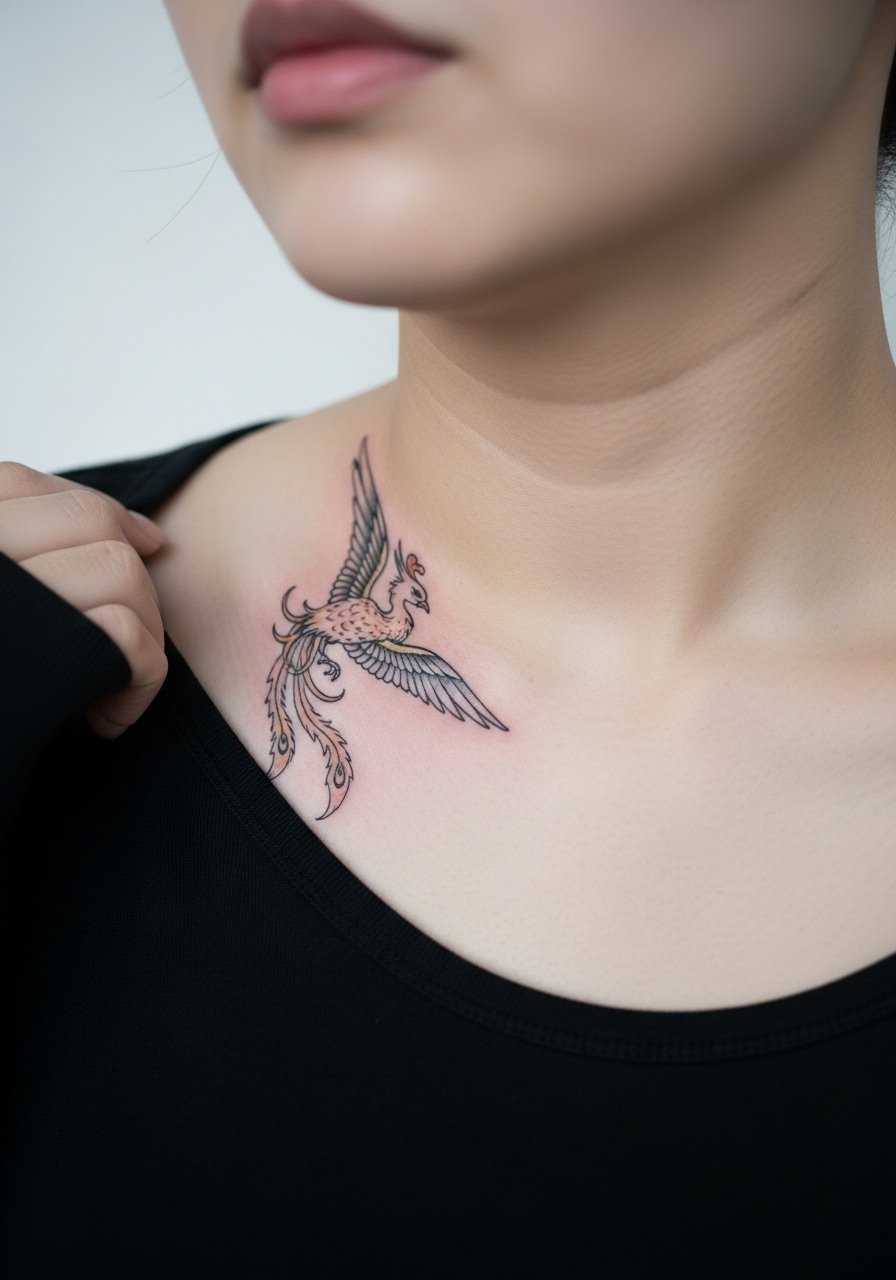
The collarbone frames delicate pieces beautifully but has little soft tissue to work with. Ask for slightly bolder primary contours so the bird reads from a distance. If you want text, bring the exact wording and font reference so the artist can size characters to avoid later merging. This spot is easy to show with open-neck blouses or layered necklaces that sit above the design. Expect a sharper initial sting and brief soreness when sleeping on your side. The biggest mistake is making the lettering too small.
6. Ankle-To-Calf Phoenix Trail
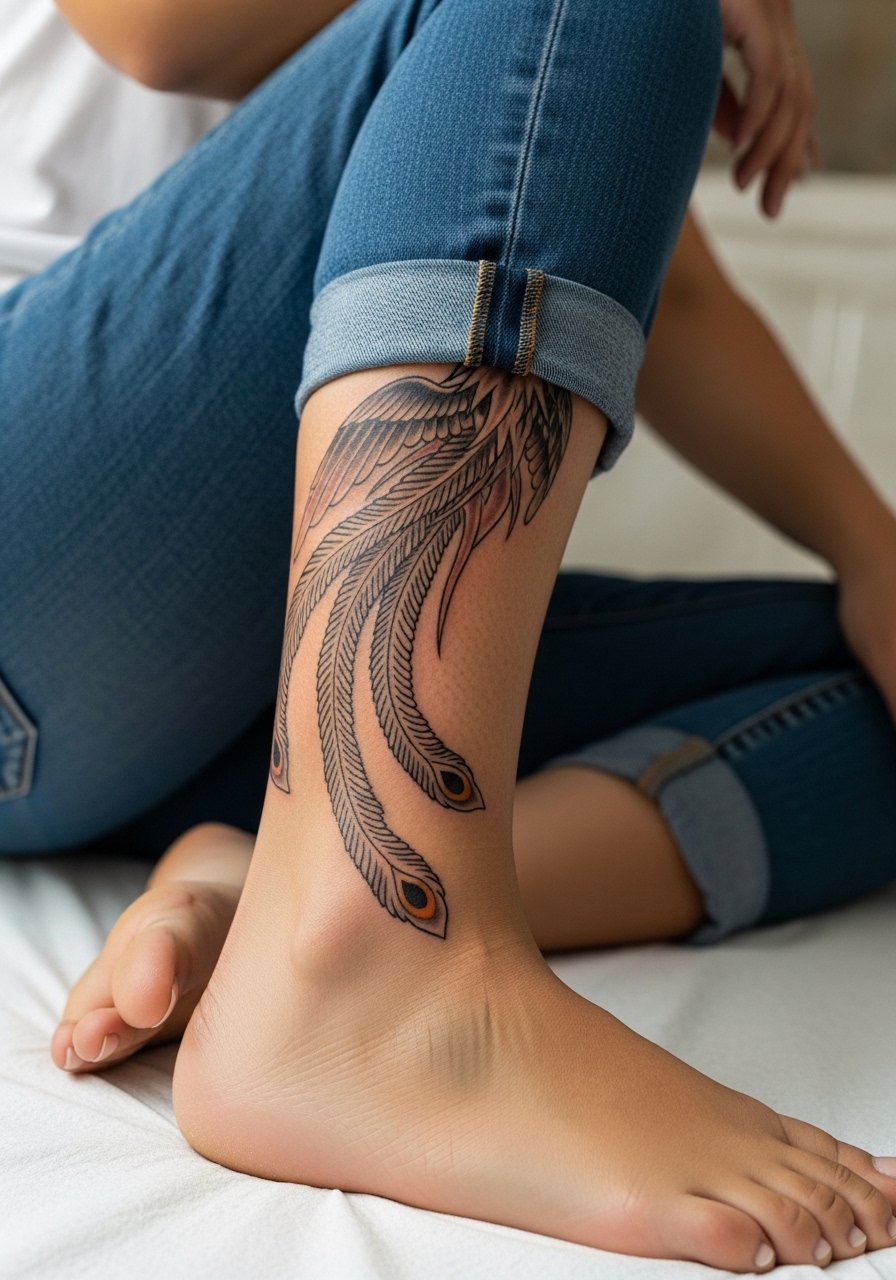
This vertical placement is great for feathered tails and flow. The ankle area sees a lot of friction from shoes, so plan for protective bandaging early in healing and a touch-up if the edge inks thin. During booking ask about session timing since lower leg sessions can be more tolerable in shorter blocks. For the appointment wear shoes you can slip on and off easily and a pair of jeans you can roll up without pressure on the area. Healed at two years the tail should remain crisp if the edges were reinforced during the session.
Studio Day Picks
The ankle and collarbone pieces above have different access needs than sleeve work, so a few studio-day items make those sessions easier and keep the first week predictable.
-
Stencil transfer paper kit. Lets you preview how the phoenix sits on the curve of the body, which is crucial for collarbone and calf placements.
-
Topical numbing cream. Useful for long ribcage passes or the sensitive inner bicep work without affecting ink saturation.
-
Thin protective film roll. Keeps ankle and foot-area tattoos cleaner during the first week when shoes and socks rub.
-
Fragrance-free gentle body wash. A gentle cleanser helps protect fine line collarbone work during showers.
-
Aquaphor healing ointment. Thin layers in the first 48 hours manage dryness and support even healing over detailed feather work.
7. Chest Panel Phoenix, Open-Heart Placement
Center-chest phoenixes make a statement and move with breath. For long-term clarity request heavier anchors in the chest feathers and softer whip shading in adjacent areas. Sessions on the sternum can be sharp in spots, so plan for shorter passes and breaks. If career considerations matter, remember high shirt collars can hide and reveal this placement as needed. A common mistake is packing too much tiny detail toward the center where it can become muddled from torso movement. Ask the artist about expected touch-up timing for saturation refresh.
8. Half-Back Phoenix with Negative Space Flames
Negative space gives a phoenix room to breathe and helps the motif age without muddiness. During consultation point to where you want skin breaks versus saturation so the artist can plan contrasts. The back offers lower blowout risk than the abdomen, but large fields of fine stipple shading will still soften over years. For showing this piece off, open-back tops emphasize negative space. The session will likely be multiple blocks of work and you should expect a multi-session touch-up to restore saturation after heavy sun exposure.
9. Inner Thigh Phoenix with Flowing Feathers
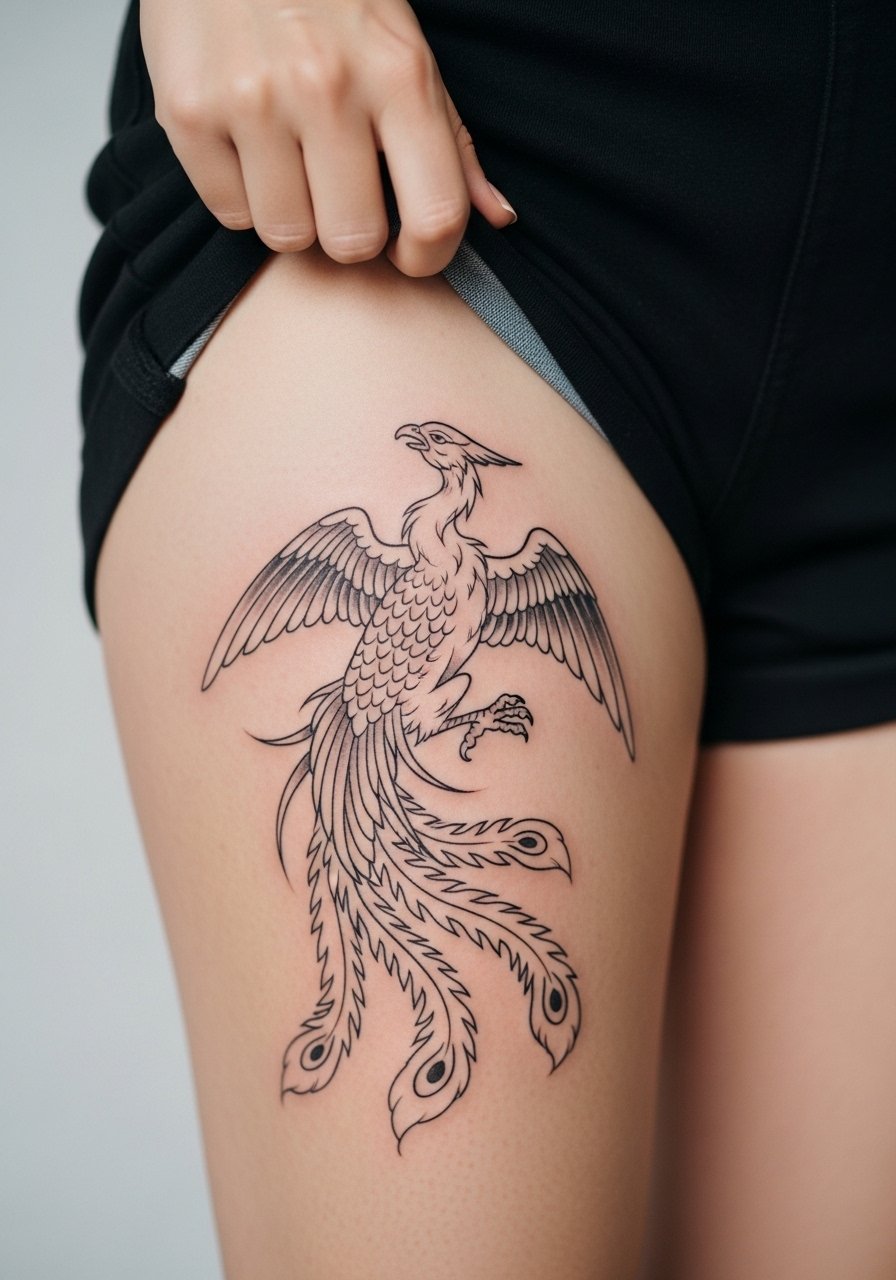
Inner thigh work is intimate and contours beautifully with the body. It heals well when friction is minimized, so plan loose clothing for the first two weeks. Tell your artist how much movement you want in the feather flow so they can orient the composition toward natural motion lines. Expect moderate discomfort during tattooing since the area has softer tissue. The common error is choosing too much tiny detailing that will not hold where the skin stretches. Consider a touch-up at year two if the colors see frequent washing and friction.
10. Calf Phoenix with Micro-Realism Head
The calf is a forgiving canvas for micro-realism in the head while the tail uses broader saturation. Request that the artist reserve tight micro detail for the head and move to stipple and whip shading for the plumage. For session comfort wear a loose drawstring linen pant you can roll up without compressing the area. Over time the tiny highlights in the eye may soften, so expect a small touch-up at year three if you want to keep the micro detail crisp.
11. Shoulder-to-Chest Quarter Sleeve Phoenix
This wrap reads like movement across the torso and lets you balance heavy blackwork with delicate internal lines. During consultation identify which side you want more saturation and which side can be airy. The chest portion will feel sharper than the deltoid, so plan session breaks. For showing the piece, a wide-neck shirt that can be adjusted will reveal the flow without exposing the full design. Age-wise the saturated wing anchors will outlast feather micro-detail, so expect periodic color refresh.
12. Sternum Accent Phoenix with Floral Fill
Sternum pieces require an artist who knows how to work near the center chest safely and with even pressure. Some artists avoid dense color on the sternum because of the curvature and pain, while others embrace it with staged passes. Name both approaches in the consultation and decide how much saturation you want initially. This placement is sensitive during sessions and aftercare needs careful clothing choices so nothing rubs the area. Expect touch-ups sooner if you choose saturated fills over line-focused composition.
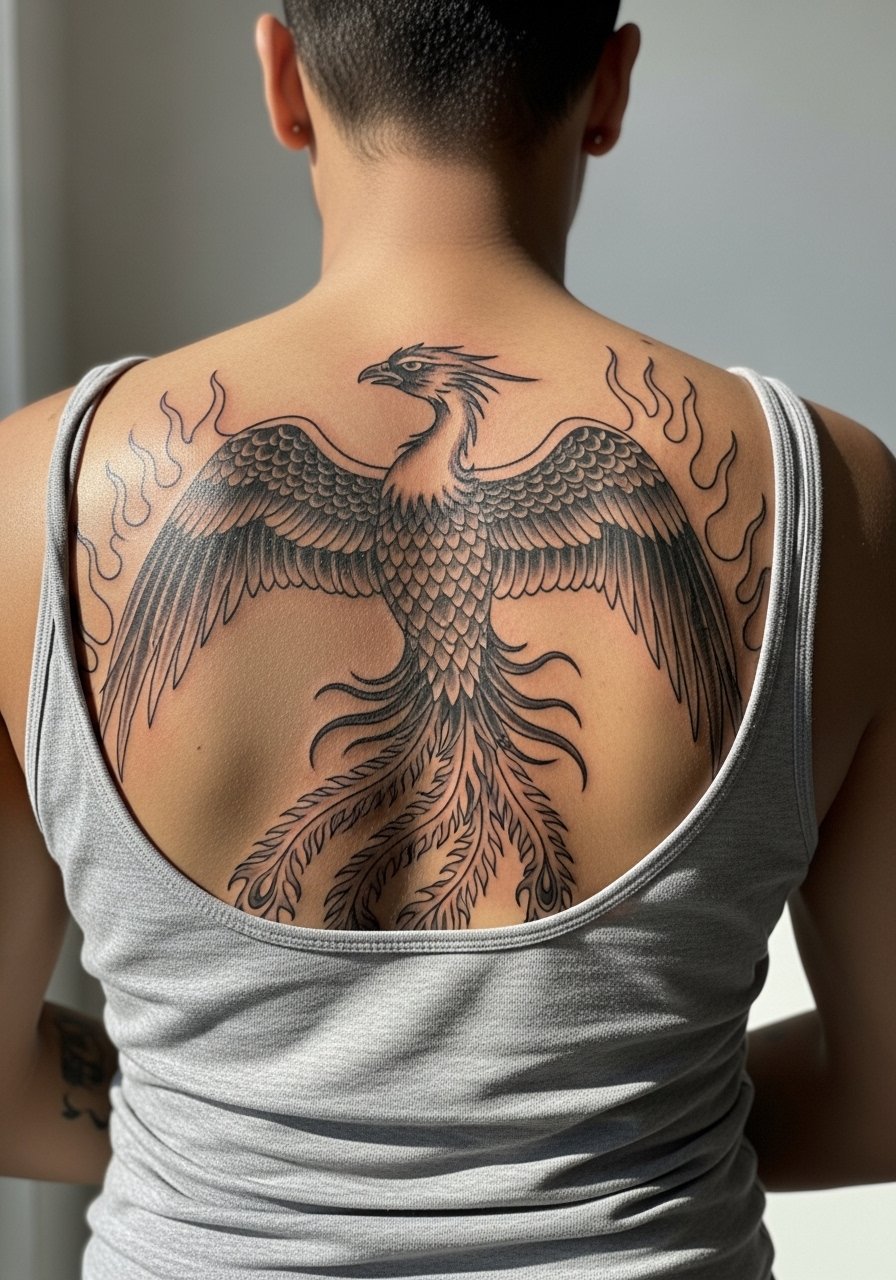
13. Back Panel Irezumi-Style Phoenix
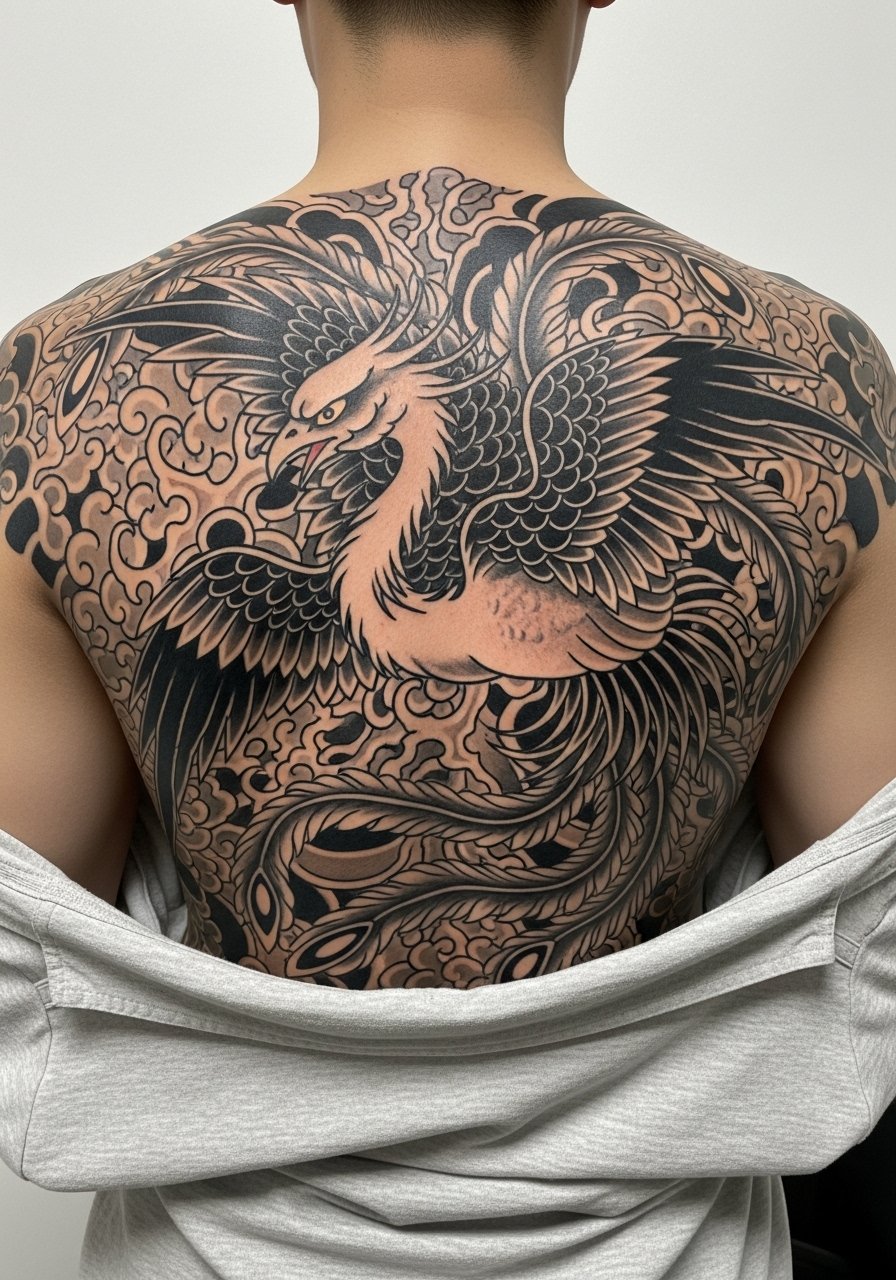
Full back Irezumi-style phoenixes are classic and built to age. Request strong outlines and deep saturation in the primary areas, with softer gradation in the background clouds. A common mistake is cramming too many small motifs into the background; negative space helps the bird maintain its presence years later. These sessions are long and require steady hydration and pacing. For discovery look through convention portfolios, local shop galleries, and curated directory pages to find artists who have handled full-back Japanese motifs without over-detailing.
14. Tiny Finger Phoenix Accent

Finger tattoos need care. The skin there sheds and gets frequent washing, which accelerates fading. If you want a tiny phoenix on a finger, ask for stronger anchors at the edges and accept that touch-ups are more likely. For showing off small hand work, simple stacked rings or a thin chain ring set can frame the design without crowding the icon. During the session the pins and bones make this area sharp, so keep sessions short and plan a maintenance touch-up at year one or two.
15. Watercolor Phoenix Accent Behind the Shoulder
Watercolor treatments add painterly motion to phoenix feathers but spark debate. One camp says watercolor fades faster and needs dense anchors to survive, while the other says careful saturation and sun protection let the washes last beautifully. Discuss both viewpoints with your artist and decide on where to place bolder anchors. For the session wear a tank top you can shift so the artist has clear access. Expect a color refresh if you spend a lot of time in the sun.
16. Behind-the-Ear Mini Phoenix Accent

Behind-the-ear placements are discreet and delicate. The skin there is thin and moves with hairlines, so keep the design very small and ask for conservative line weight. This is a sensitive spot for both tattooing and workplace visibility, so think about career implications before booking. Sessions are quick but the area can feel tingly for a few days. Discovery pathways like local shop walk-ins or festival artist lists are useful to find people comfortable with tiny placements.
17. Full Chest-to-Stomach Phoenix Spread
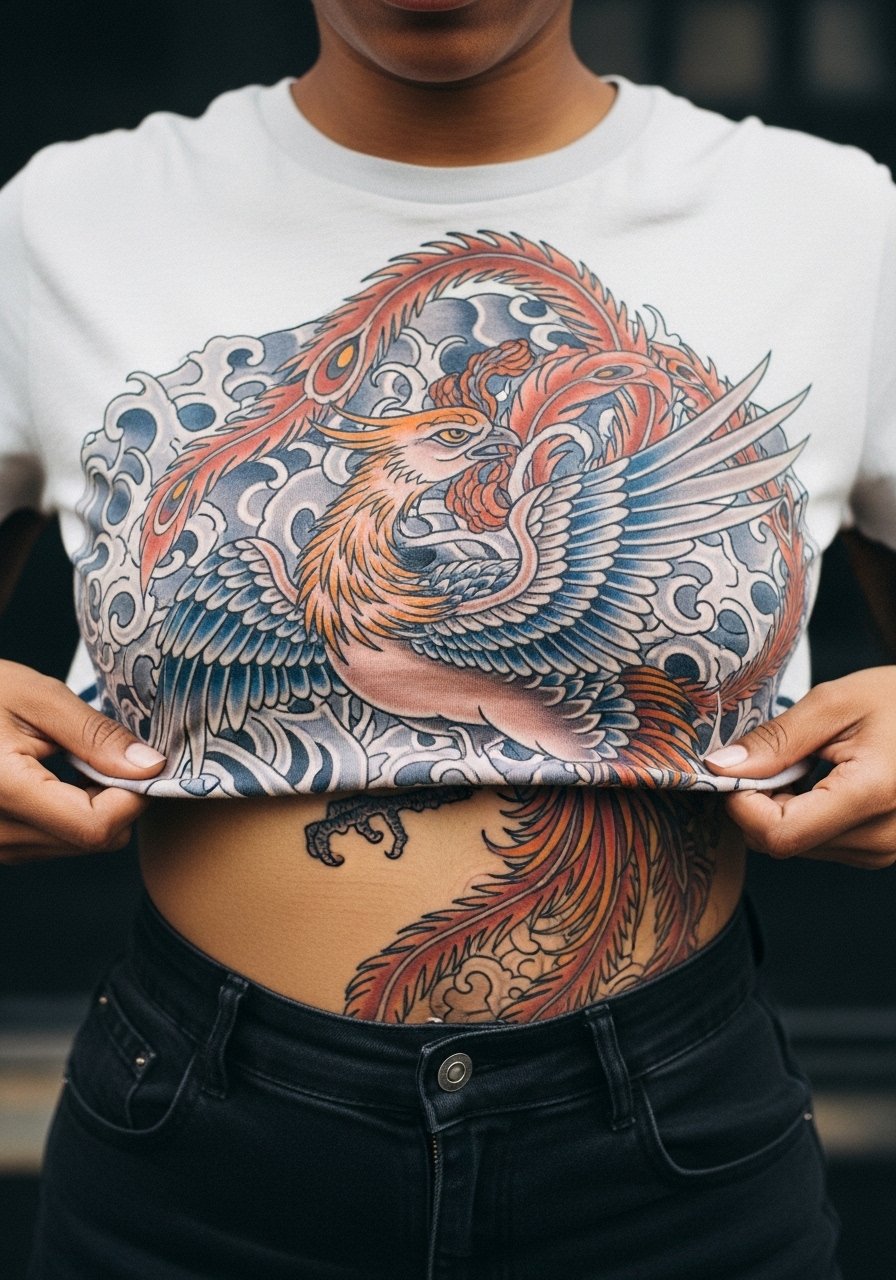
This bold spread reads as a statement and needs a clear composition plan so elements do not collide with natural folds. During consultation mark breathing zones so the artist can avoid packing tiny detail where it will distort. The stomach area will change with weight and movement, so expect a different aging pattern than chest-only pieces. For the session wear high-waisted bottoms you can shift and a cropped tee so the artist accesses the lower strips without compromising comfort. Plan for staged sessions and an eventual touch-up to keep saturation even.
Frequently Asked Questions
Q: Will a fine-line phoenix on the ribs blur faster than a bolder version?
A: It depends on spacing and depth. Fine line can blur sooner on the ribs because of skin movement, while bolder outlines hold longer. Ask your artist whether they prefer to anchor primary forms with slightly heavier linework to preserve shape over time.
Q: How should I prepare clothing-wise for a full sleeve phoenix session?
A: Wear loose layers you can remove without tugging and a pair of pants with an elastic waist for comfort during breaks. A loose button-down shirt or a drawstring pant keeps you comfortable between long passes.
Q: Does watercolor-style phoenix work on darker skin tones?
A: Watercolor can work but it relies on contrast and selective anchors. On darker tones ask an artist skilled in color saturation to show healed examples on similar skin so you can set realistic expectations about vibrancy and touch-up frequency.
Q: How often should I plan touch-ups for a chest or back phoenix?
A: Expect longer gaps for large saturated work, often a touch-up around year two to four depending on sun exposure. Heavier black outlines tend to last longer than delicate internal detail, so plan touch-ups where you want color restored.
Q: Are finger and ankle phoenix tattoos worth it if I want longevity?
A: They are worth it if you accept maintenance. Fingers and ankles fade faster due to washing and friction. Strong anchors and scheduled touch-ups keep them looking intentional rather than patchy.
Q: Where's the best place to find an artist who understands Japanese phoenix motifs?
A: Look through convention rosters, local shop portfolios, and curated directory pages. Reddit threads and hashtag searches also surface artists experienced in Japanese motifs. Prioritize portfolios that show healed work and consistent linework across large fields.
