
Fine line olives are everywhere on saved boards right now, and that popularity hides practical problems most people find out the hard way. Fine line wrist pieces can fade into a blur within a year, artists who specialize in illustrative work sometimes cancel or move guest spots, and darker skin tones often need bolder variants to avoid muddiness. Read the short, photo-ready ideas below and the consult tips that actually keep these designs readable beyond the first Instagram post.
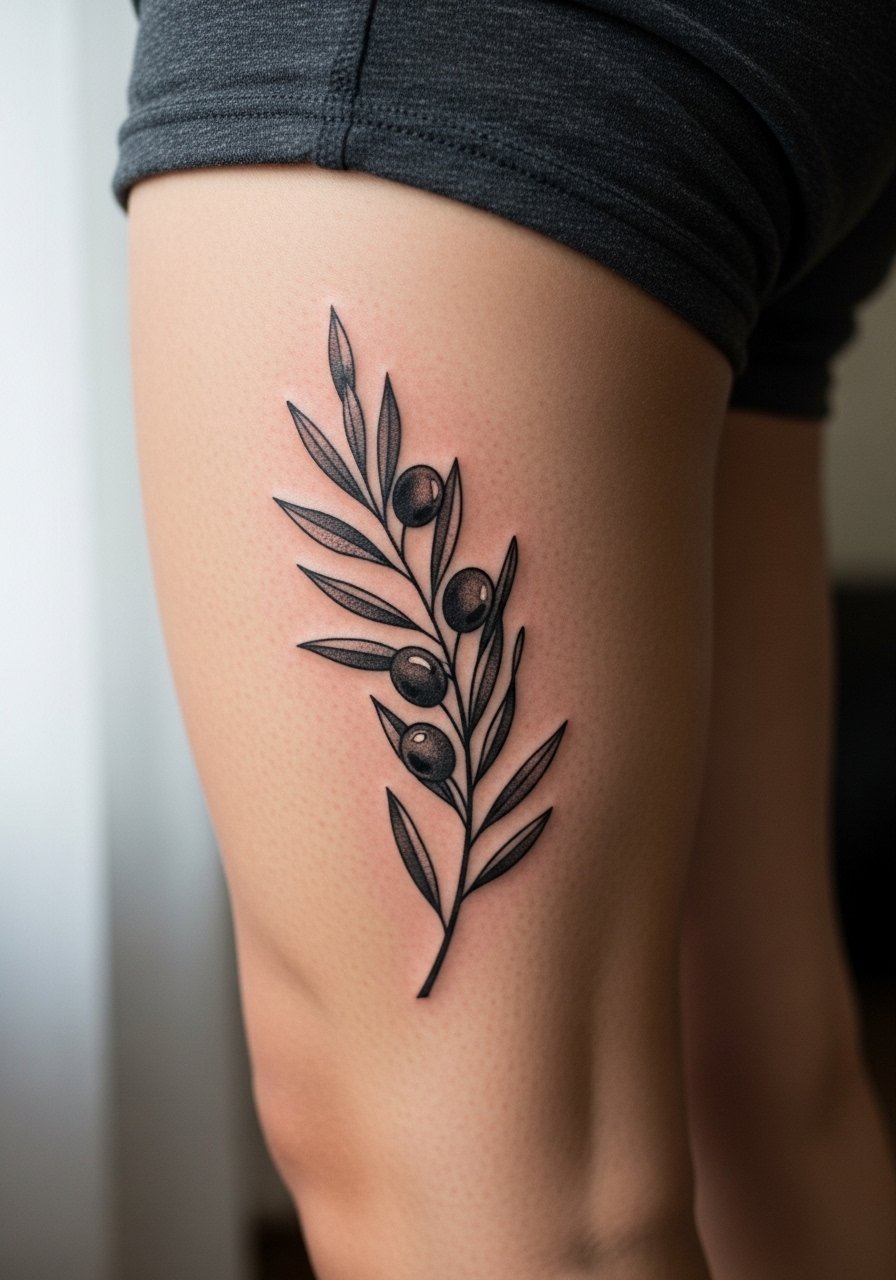
1. Fine Line Olive Branch Wrist Wrap
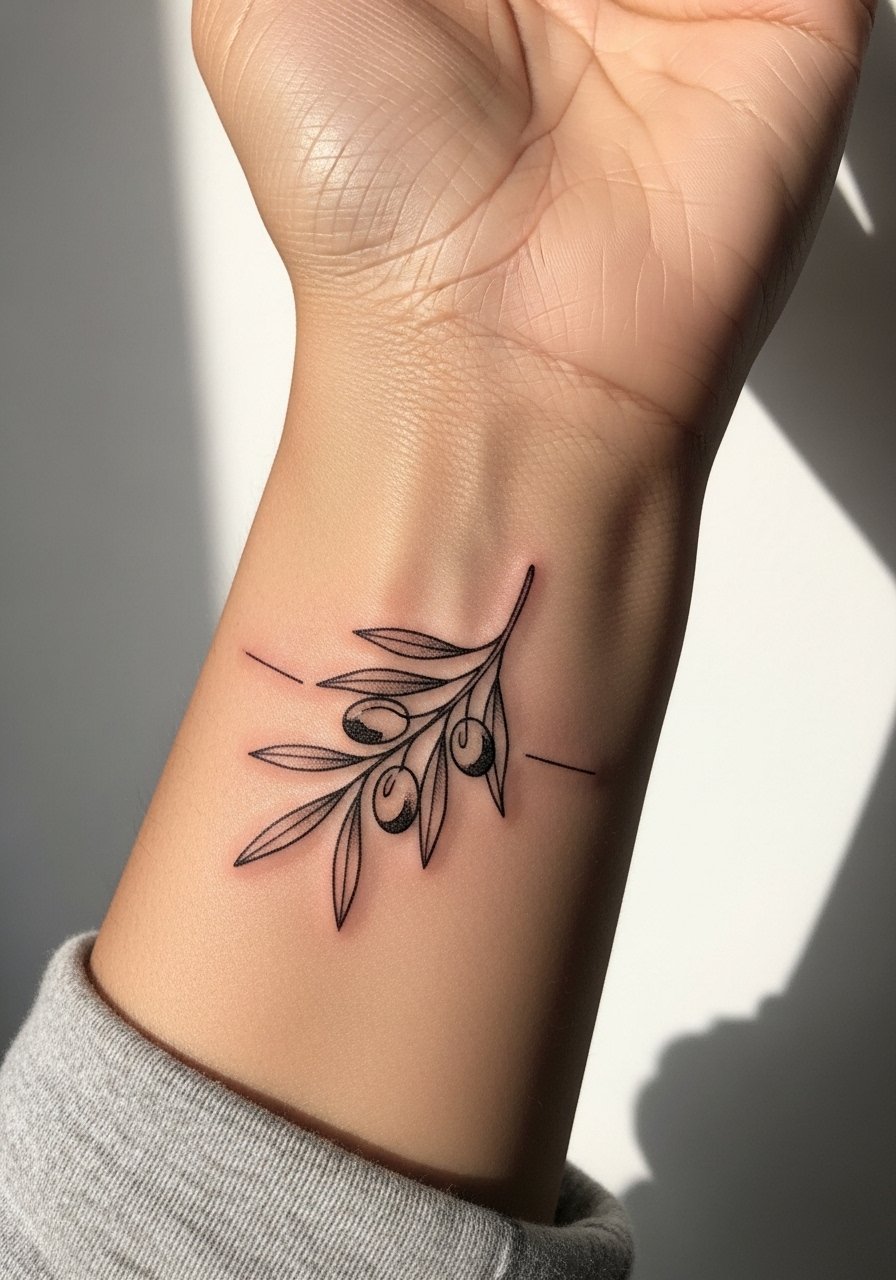
Fair warning: thin single-needle wraps on the wrist are beautiful but they deserve honest expectations. In practice I tell people to ask for slightly heavier linework than the saved photo so the lines read at year two. During the consult, request 2mm+ line weight and ask about touch-up policies up front so you are not surprised if it softens. Pain here is low, session time under an hour, and blowout risk is minor when the artist spaces leaves apart. For showing it off, wear a matte gold cuff bracelet on the opposite wrist to frame the wrap without crowding the linework.
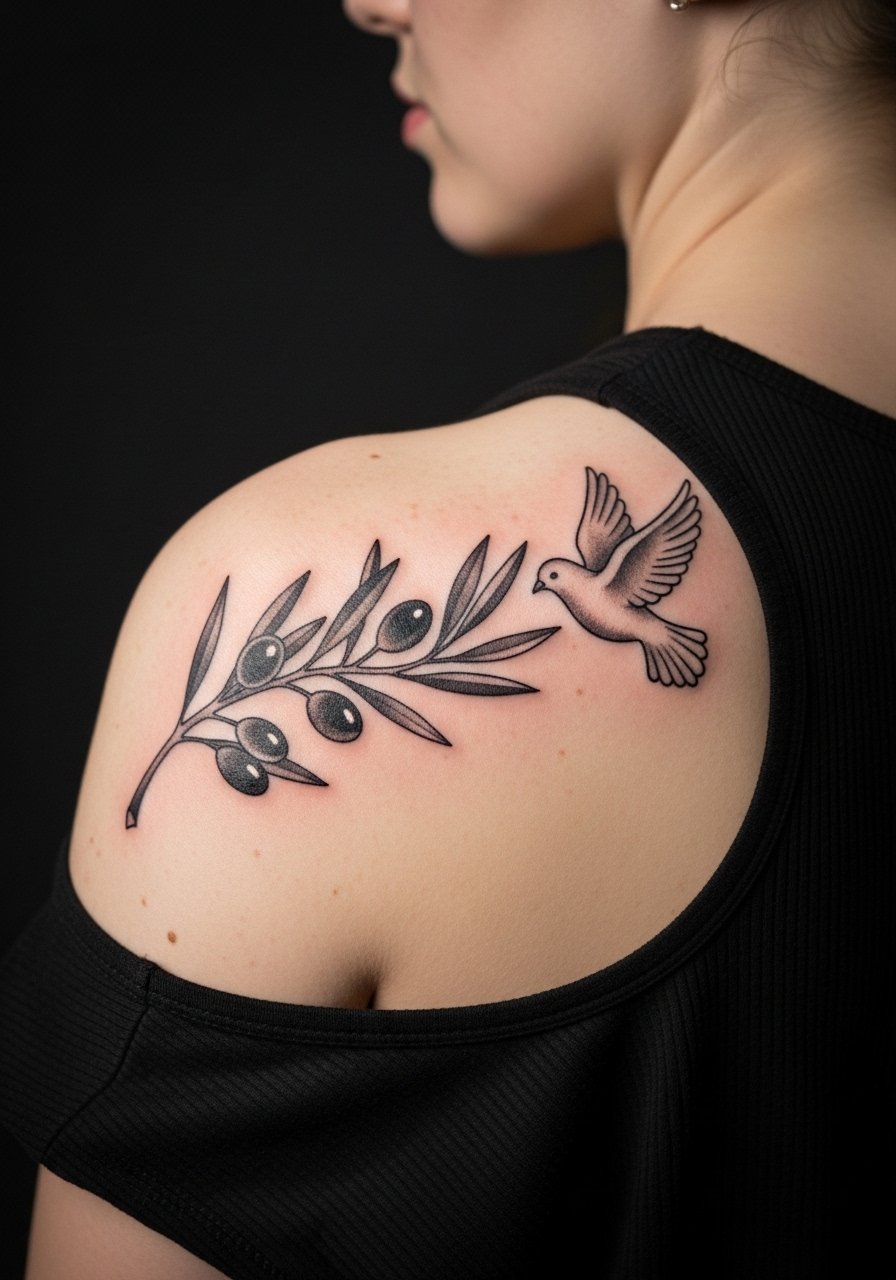
2. Illustrative Olive Branch with Dove on Outer Forearm

There is real payoff to an illustrative forearm piece that pairs a branch with a small dove for narrative depth. Bring reference photos that show the exact dove posture and leaf spacing, and ask for black and gray shading that keeps contrast high so the elements do not merge. Sessions run 1 to 2 hours depending on size and saturation, and numbing cream divides opinion. One camp warns it can mask how much pressure the artist needs, the other camp values it for long sits and anxiety. If you plan to show this in rolled sleeves, pick a rolled cuff chambray shirt for session comfort and casual reveal.
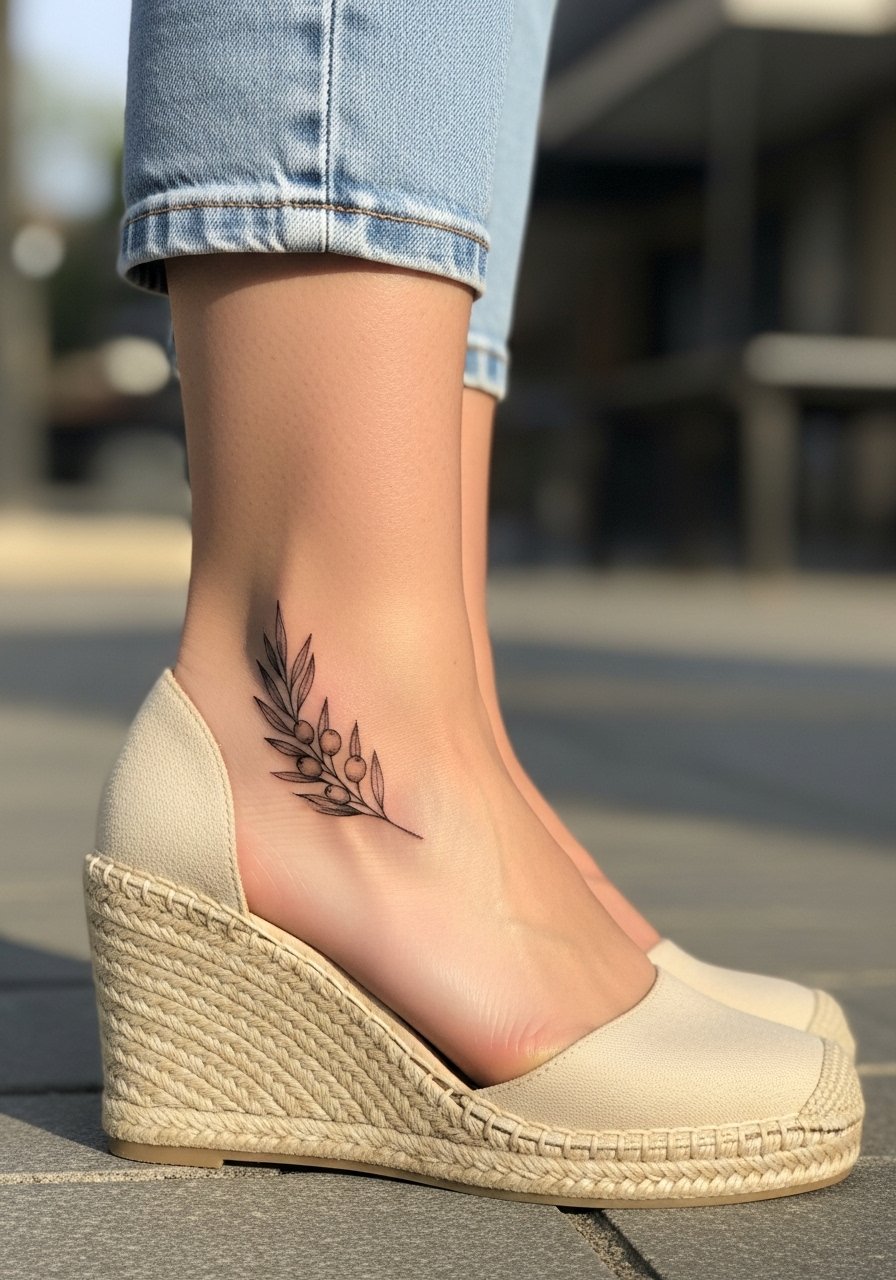
3. Minimalist Single Olive Stem at the Ankle

Ankle placements are seasonal show-offs and they hide well in winter. Expect higher fade if you wear abrasive shoes or socks that rub the area during the first two weeks. For beginners the session is short and pain is modest, but a common mistake is going too thin for a high-friction zone. Ask for a single stem with slightly bolder terminal leaves so the silhouette survives regular wear. For summer looks, pair the design with strappy ankle sandals that let the wrap peek out without bulk.
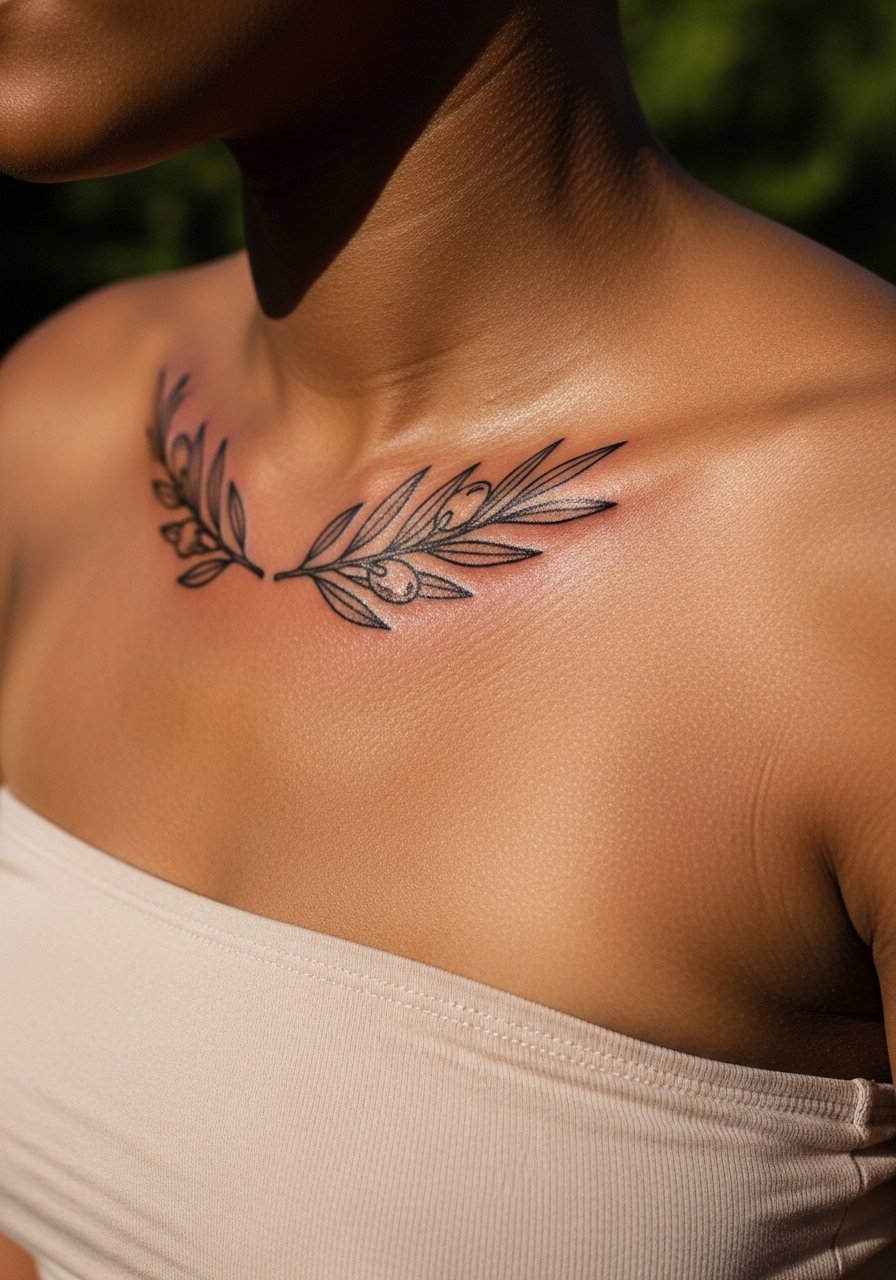
4. Neo-Traditional Olive Arc Along the Collarbone
Collarbone arcs read like clothing to the eye so placement must follow the bone curve. This version uses saturated greens and soft shading to keep leaves dimensional without blurring into the clavicle shadow. Pain varies with proximity to bone and most people rate it higher than arm work. In consultation, ask for a 5 inch arc preview on your skin to test how the curve follows movement. To show it off, an off shoulder linen blouse highlights the arc while letting the color sit against neutral fabric.
5. Blackwork Olive Column Down the Spine
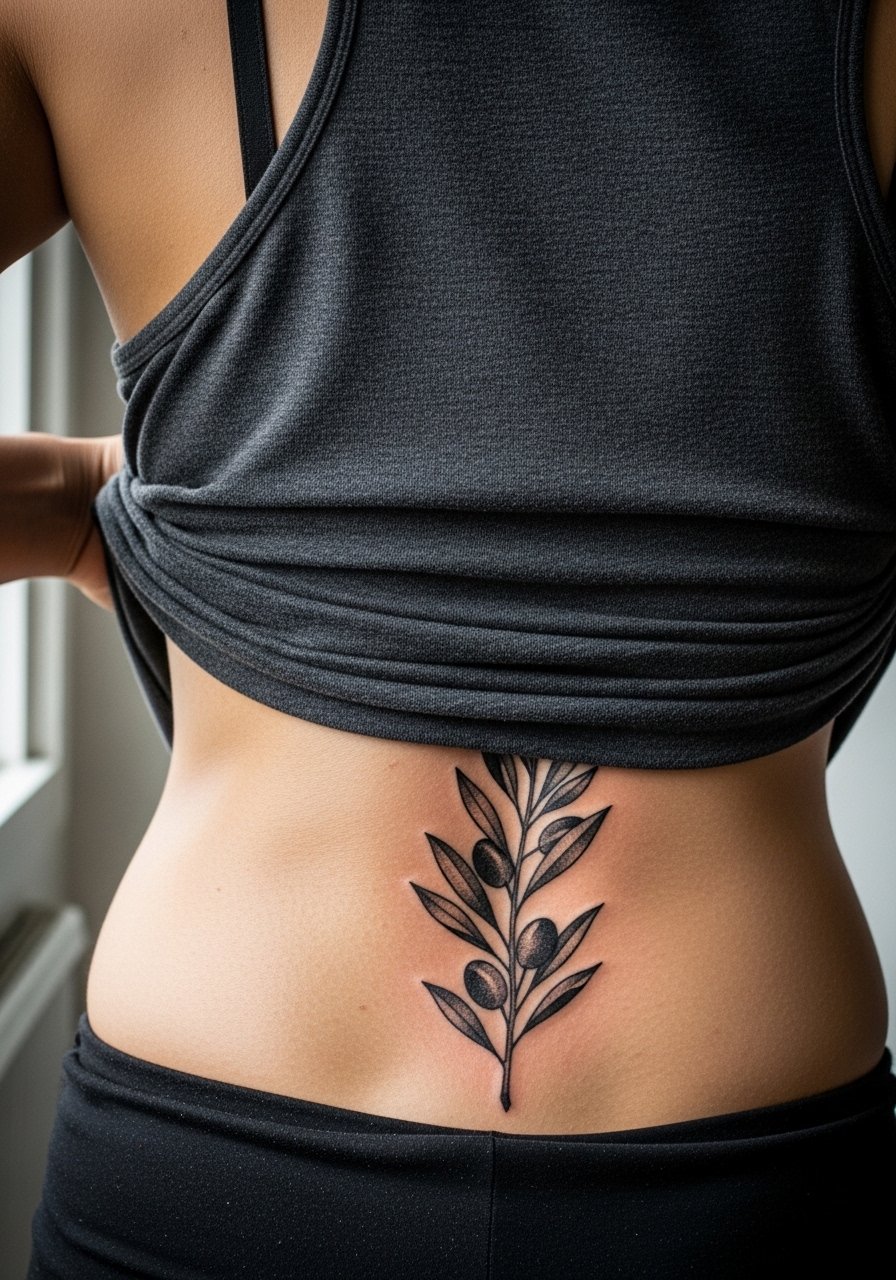
Spine columns are dramatic and age well because solid fills do not rely on hair-thin linework. Pain on the spine is higher and sessions are split into multiple visits for comfort. A common error is crowding too many tiny leaves into the vertical flow, which causes odd shadowing as the back moves. Tell your artist you want bold silhouettes and firm saturation to avoid future touch-ups. This placement pairs with open-back dresses for evenings out but plan multiple short sessions so healing fits your schedule.
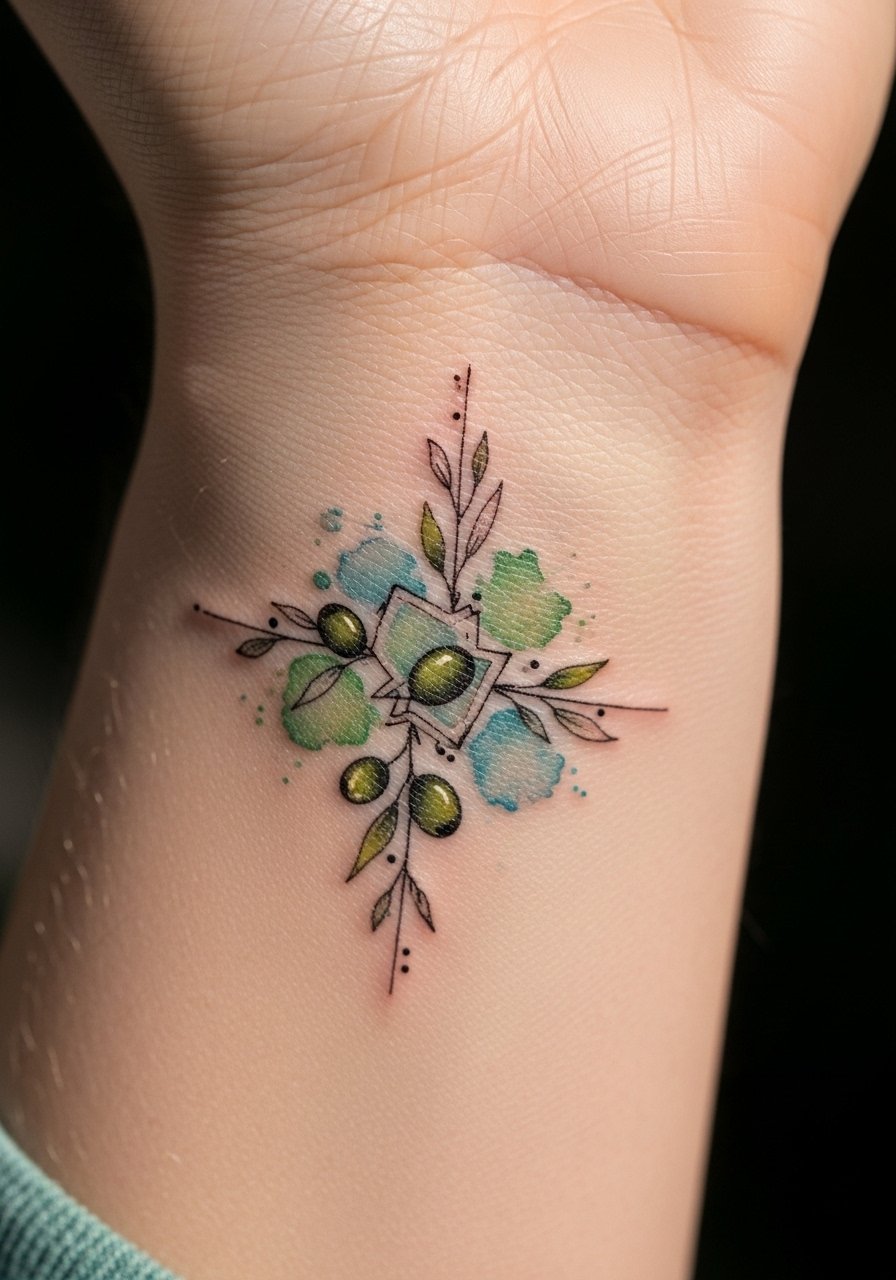
6. Watercolor Olive Bouquet on the Inner Bicep
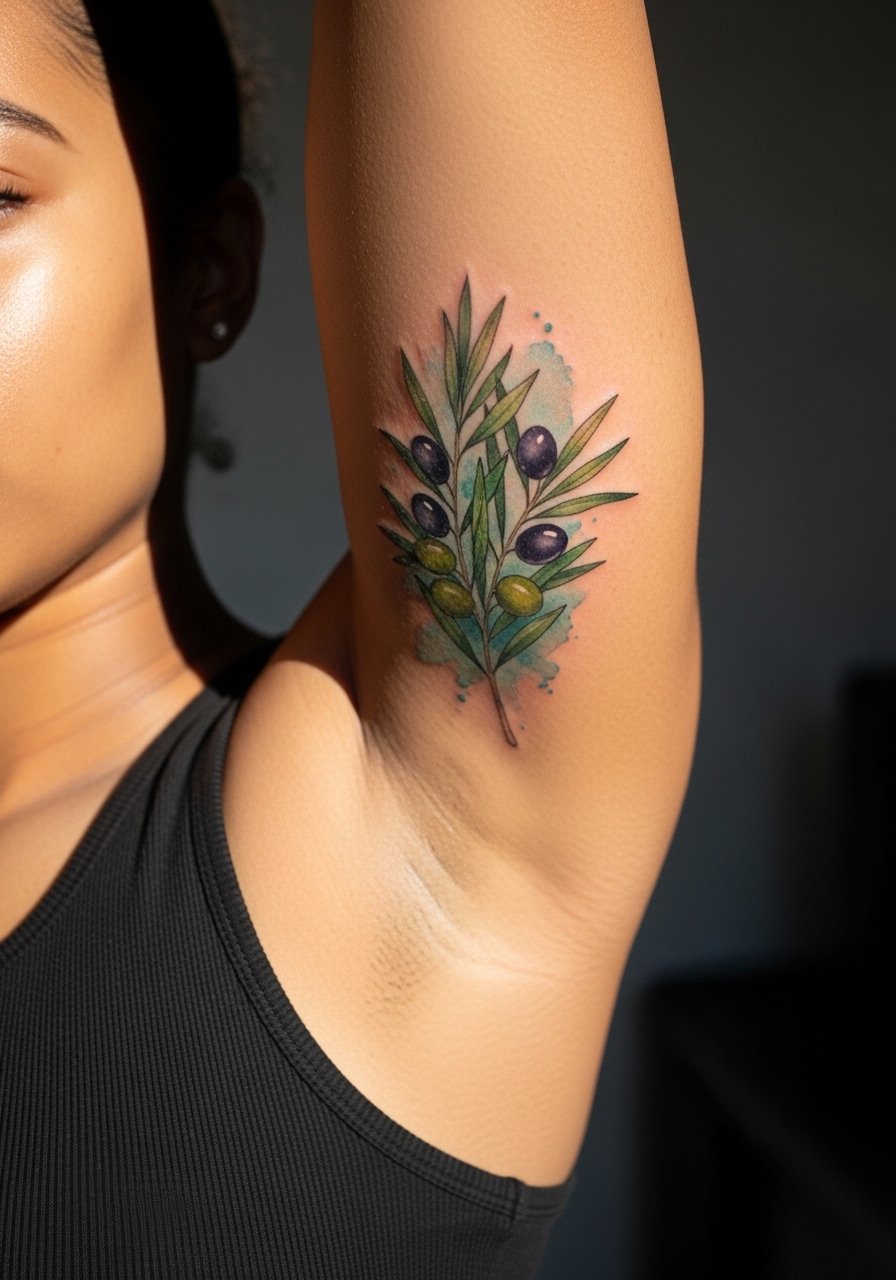
Inner bicep work shows soft washes beautifully but watercolor fades faster in high-sweat zones. Expect a single longer session and plan touch-ups if you want the color to stay vivid. A mistake I see is asking for diffuse washes too close to dense linework; the solution is defined outlines around the washes. For the appointment wear a loose long-sleeve button-up you can roll up easily so the artist has clear access to the inner arm.
Studio Day Picks
The small forearm, wrist, and inner bicep pieces above ask for different prep than larger thigh or back work, so a few specific items smooth the session and the first week.
-
Tea tree salve from indie UK brand. Lightweight salves can calm oily skin without suffocating fine line work during the early healing days.
-
Australian hemp balm. Thinner absorption helps forearm olives in dry winter climates where heavy ointments can sit on the skin.
-
Japanese rice bran oil serum. Use after the initial scab phase to support blackwork saturation retention without clogging.
-
Indie mushroom extract balm. Anti-inflammatory properties soothe ribcage and sternum sessions where swelling and itch can be a problem.
-
H2Ocean Aftercare Spray. A lighter spray option avoids heavy occlusive layers on fine line wrist or ankle pieces while keeping the area clean.
7. Micro-Realism Olive with Berries on the Ribcage
Ribcage micro-realism delivers incredible texture but comes with higher pain and longer sessions. Artists vary on whether fine line belongs on ribs. One camp says skin stretch and movement blur tiny detail within two years. The other camp says properly spaced, slightly bolder micro strokes will settle fine. Ask for a test patch or bring clear photos showing your exact scale so the artist can set realistic expectations. Expect touch-ups in the first 12 to 18 months for such dense detail.
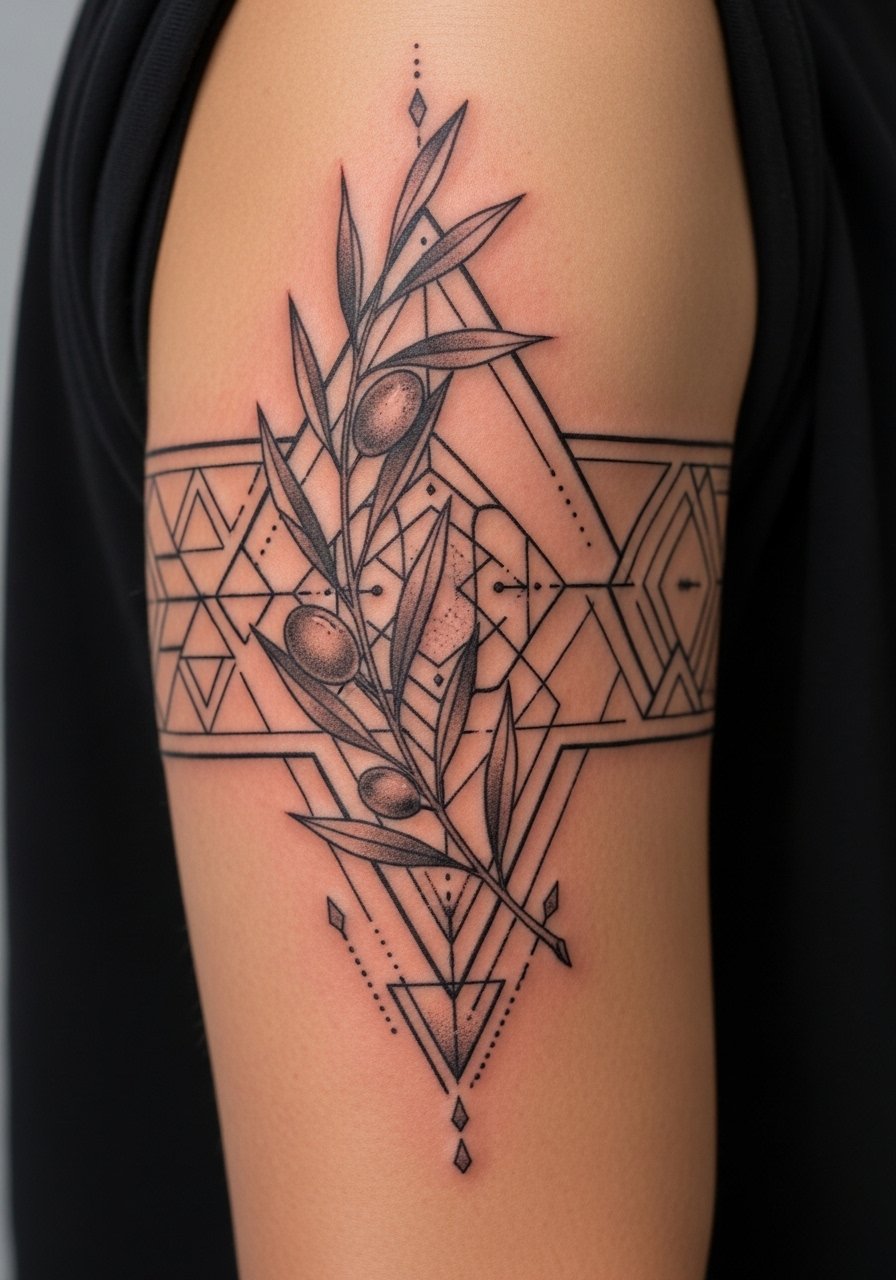
8. Ornamental Olive Wrap for the Outer Thigh

Thigh wraps are forgiving for scale shifts and work well as sleeve connectors. The biggest mistake is ignoring how the piece sits when you move or sit down. During consult, request a wrap mockup that follows your natural curve and test how it looks with common outfits. For session wear, bring loose drawstring shorts so the artist can roll the leg without pressure on the area. Expect two sessions for full pattern fills and a touch-up after weight change if needed.
9. Traditional Olive Burst Shoulder Cap
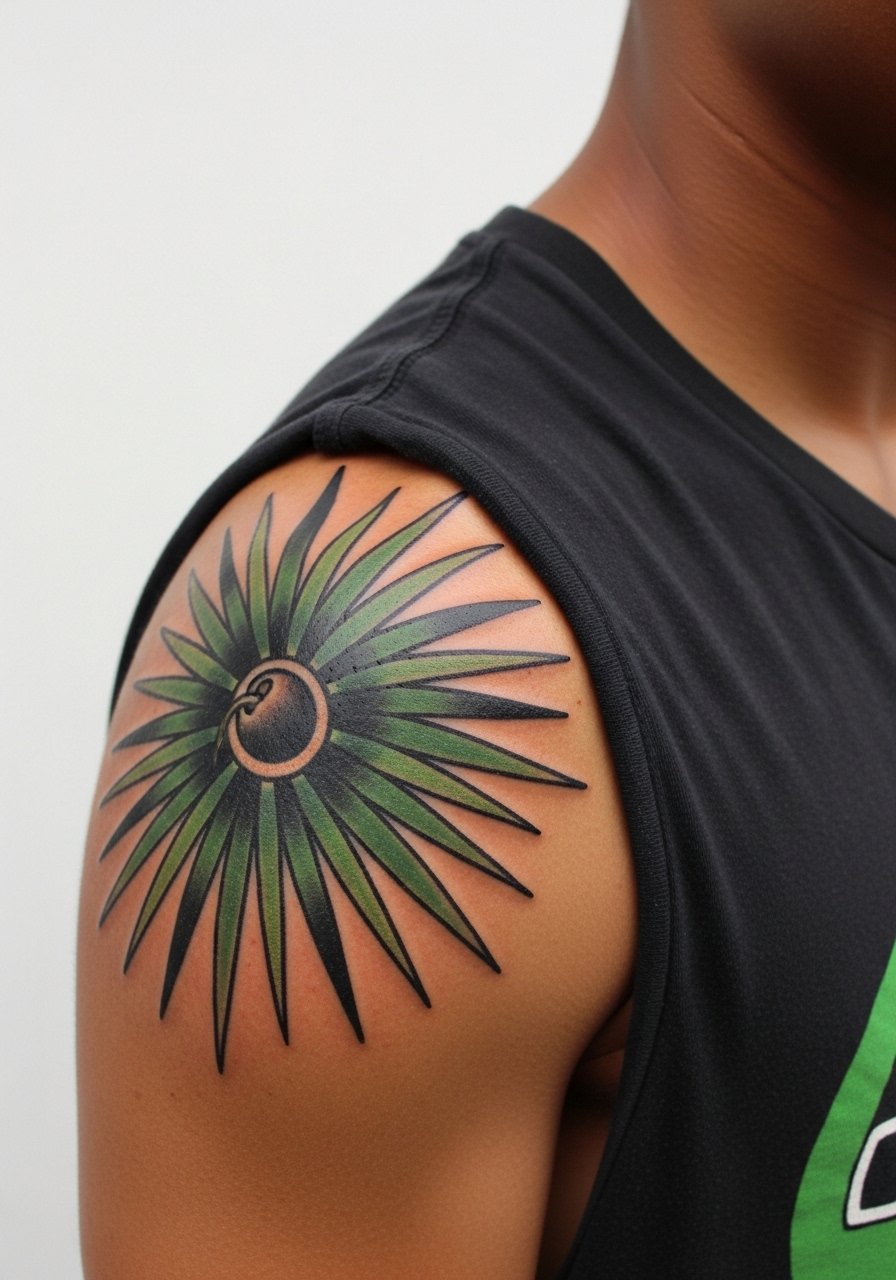
Classic shoulder caps lean into saturation and clear outlines, which makes them resilient over years. This placement reads from a distance because of the color and bold linework, and sessions are usually single visits for modest sizes. A common error is asking for tiny leaves with thin shading in a spot meant for bold shapes. Bring vintage-style references and tell the artist you want strong outlines to anchor the color. Pair the finished cap with a sleeveless muscle tee to frame the work without covering it.
10. Ignorant-Style Olive with Script on the Inner Forearm
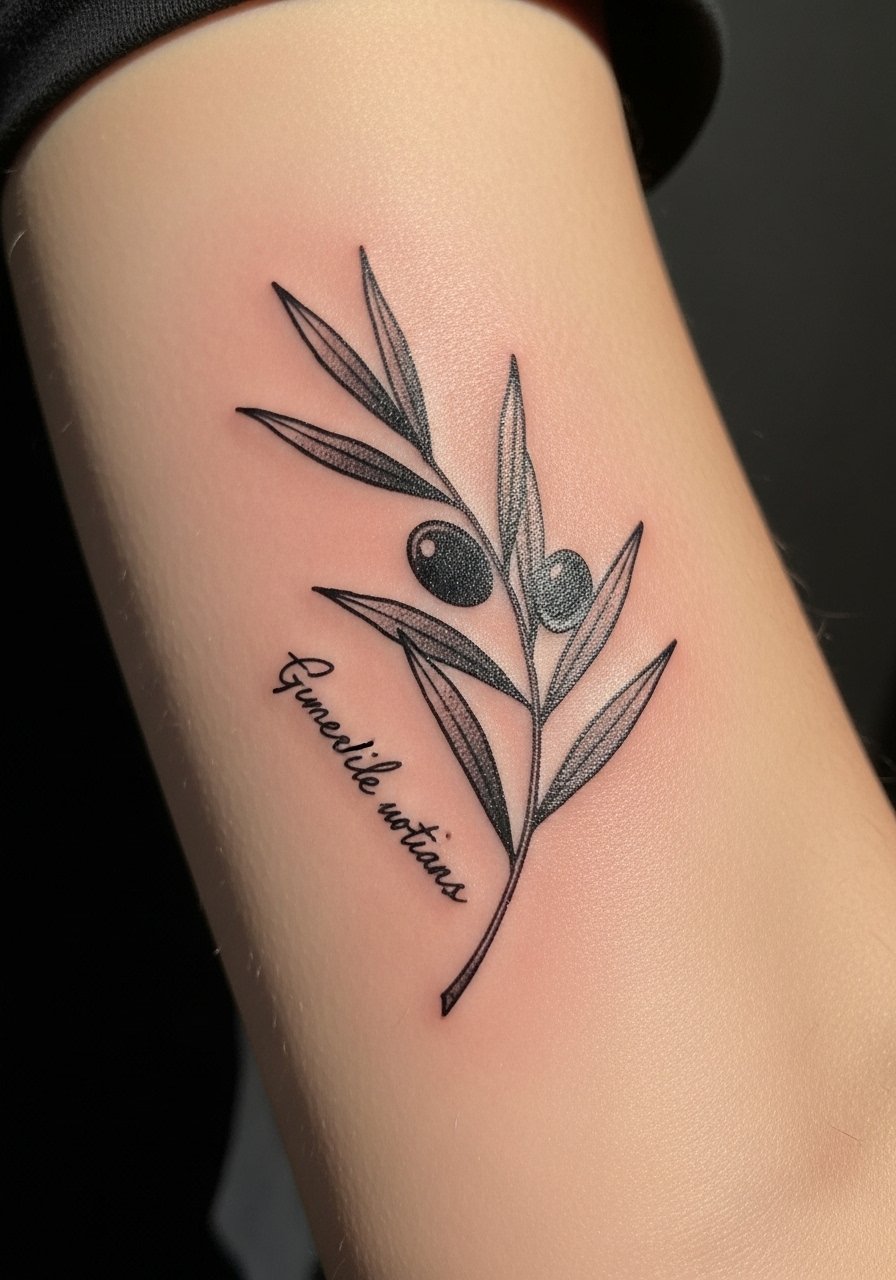
Ignorant style thrives on raw energy and imperfect lines, which is great for narrative pieces that look hand-sketched. The inner forearm gives comfortable access and moderate pain, with quick sessions. A trap is asking for an exact scribble copied from a phone photo that flattens in person. Instead, ask the artist to keep the gestural energy and to space script so the letters remain legible as the piece heals. For everyday looks, roll up a loose linen long sleeve during warmer months to show off the art.
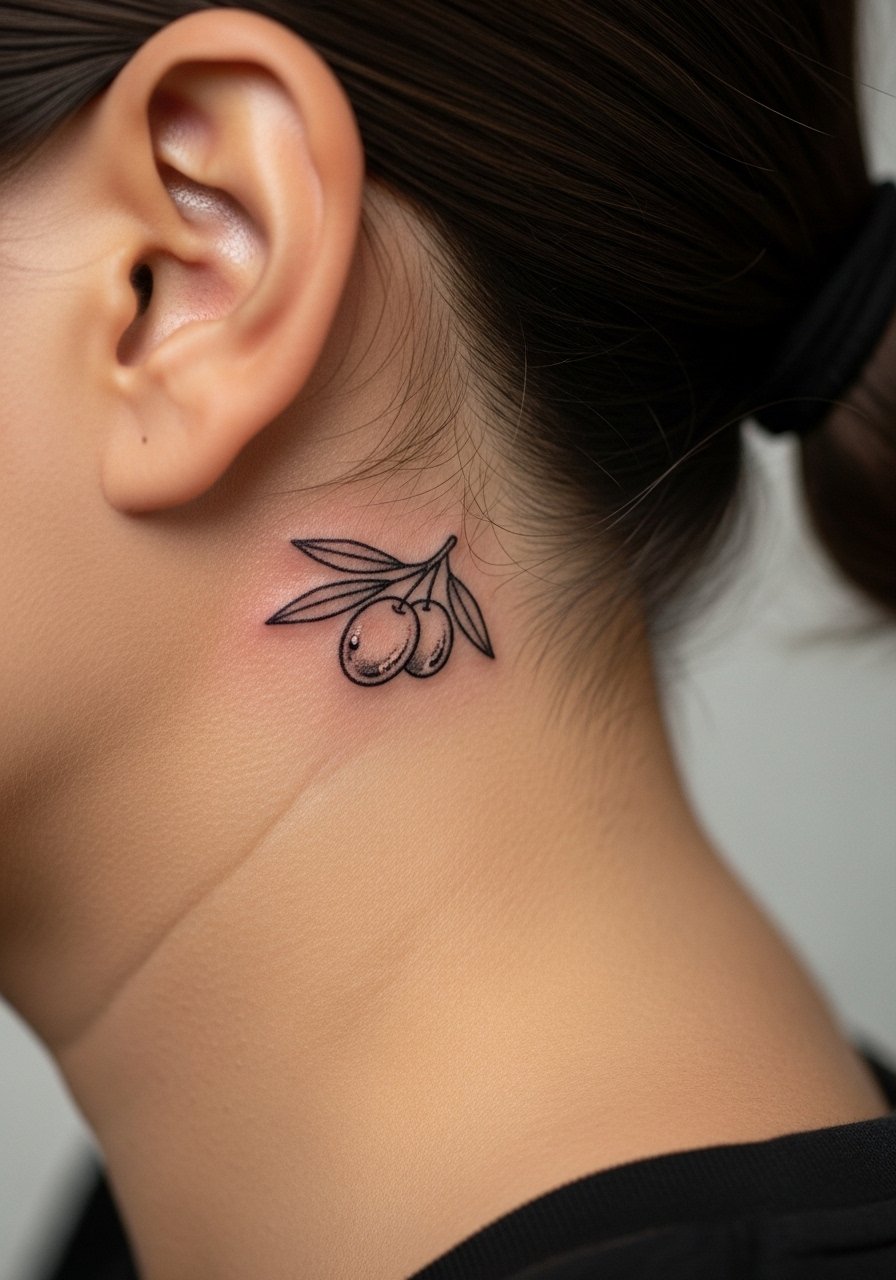
11. Small Black and Gray Olive Cluster Behind the Ear
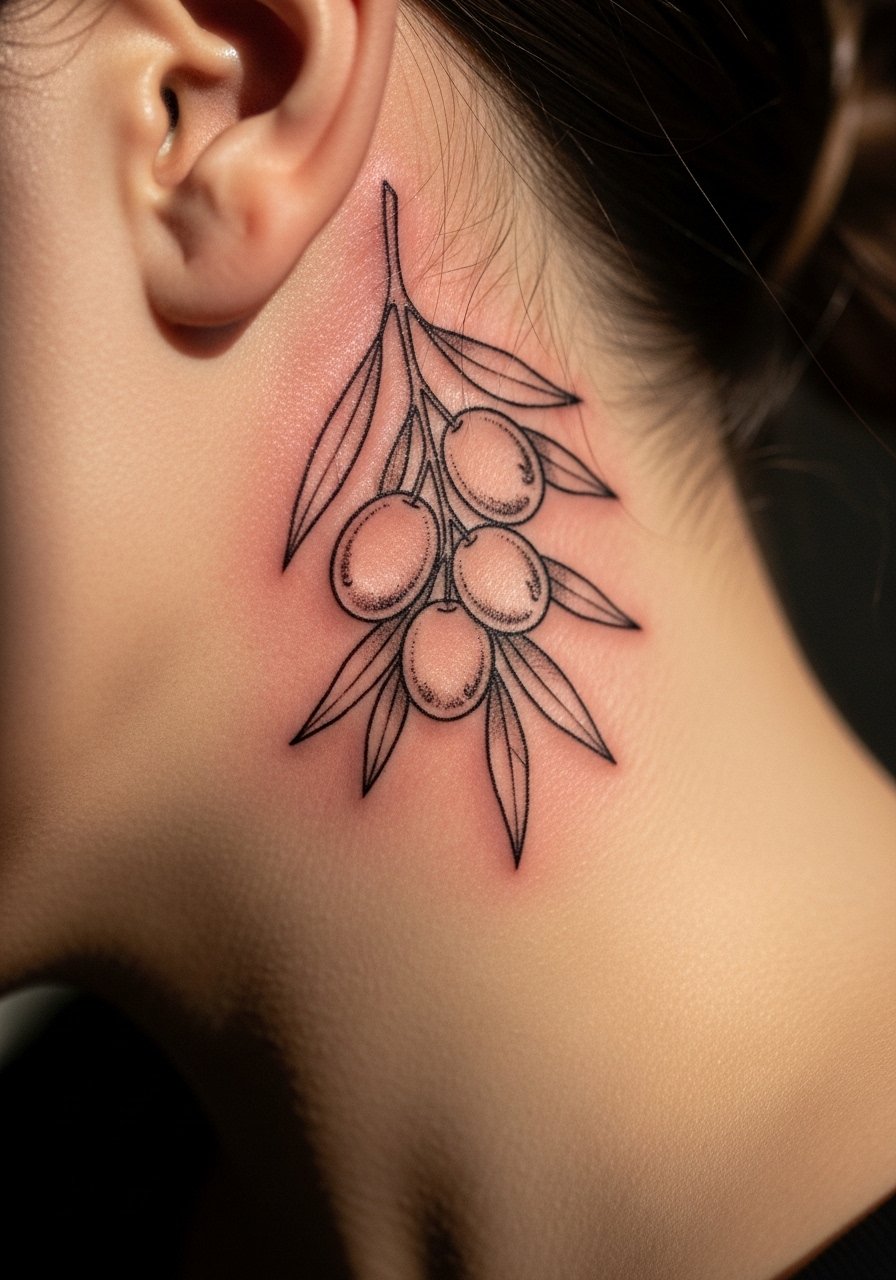
Behind-the-ear placements are discreet and great for little botanical accents, but framing is essential. Keep the design compact and ask for bold leaf tips to prevent early loss of definition. Sessions are short and pain is mild. Because this area sits under hair and near collars, check how the stencil interacts with daily friction. No special aftercare products go in the section, but be mindful of avoiding heavy hair oils while healing. A professional note: this zone needs a delicate touch from someone who has done small head and neck pieces before.
12. Illustrated Olive Branch Ankle Wrap for Seasonal Wear
This illustrative wrap plays nicely with seasonal footwear and is forgiving when scaled for sandals. The common mistake is placing too much tiny detail where straps or socks will rub. Ask for a slightly simplified silhouette on areas that will see friction. For showing it off in summer, try neutral espadrilles and cropped jeans. For the session wear, go sockless and in espadrille wedge sandals or barefoot to let the artist work without strain. Touch-ups are common if you wear tight shoes often.
13. Olive Branch Sleeve Connector for Patchwork
If you are building a sleeve, an olive branch works beautifully as a connector between disparate pieces and scripts. I usually recommend mapping the flow in a consult so the branch supports existing elements and avoids covering important flash. A frequent error is making connectors too busy, which competes with focal pieces. Ask for negative-space planning and spots left for future additions. Session time depends on how much filler you want; expect multiple bookings and a touch-up after the sleeve settles.
14. Micro Olive Sprig on the Side of a Finger
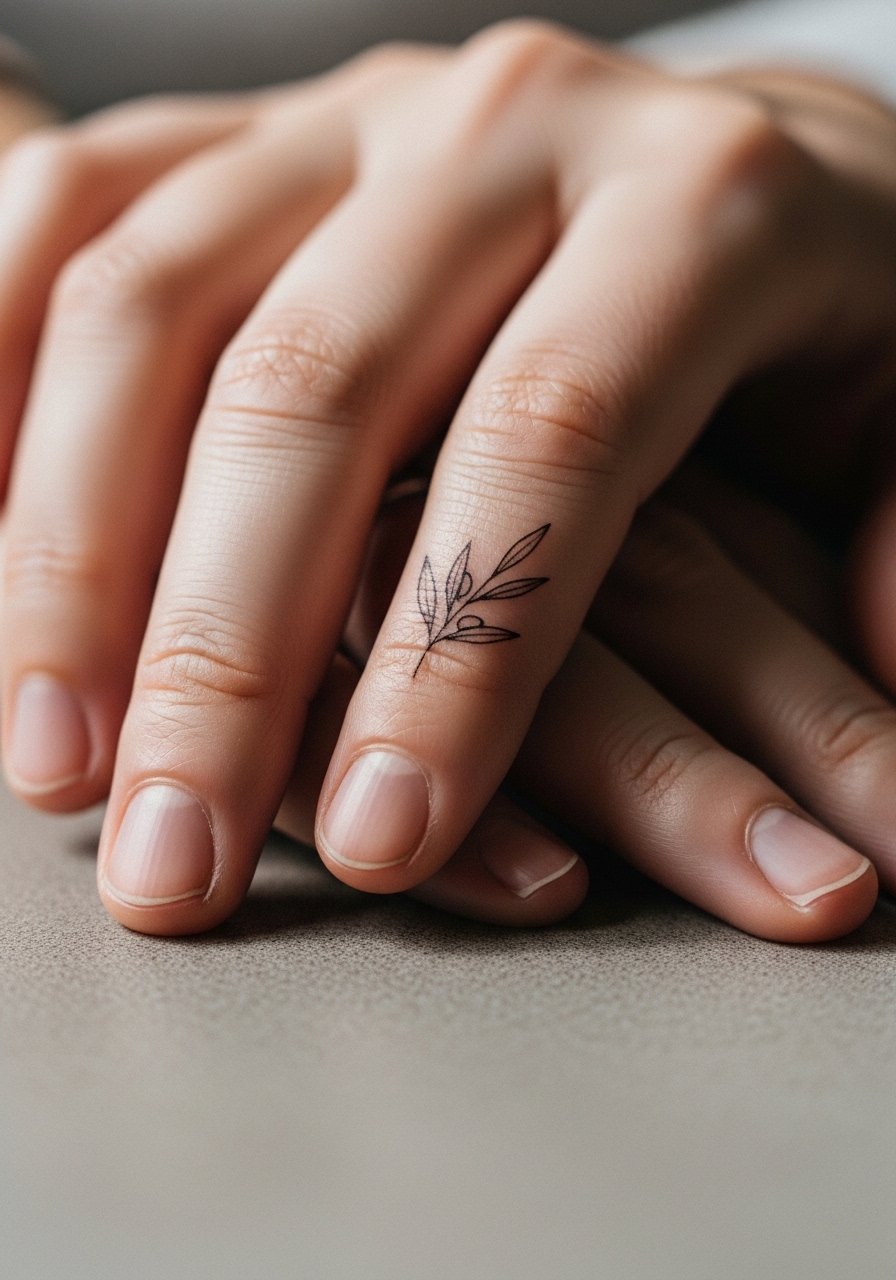
Finger placements are intimate and notoriously prone to fade and blur because of constant washing and use. The realistic expectation is that micro sprigs will need touch-ups sooner than forearm work. Ask your artist about needle depth and that they avoid ultra-thin detail on the pad edge. Pain is high for such small areas and sessions are short. For wearability, choose rings and stacking pieces that do not sit directly over the tattoo during healing.
15. Olive Bough Curving Around the Collarbone Asymmetry
Curved branches are a clever way to balance asymmetry across a collarbone. The design should be mocked up on your skin in the exact pose you wear most often so the arc feels natural. Pain is moderate and sessions vary with color. A common misstep is mirroring a flat reference that does not account for shoulder slope. During the consult, ask the artist to check the arc with your posture and to show the stencil while standing. Pair the healed arc with a strapless bralette for occasional peeks.
16. Blackwork Olive Branch Calf Piece
Calf pieces take saturation well and handle bold blackwork without early softening. This spot is low to moderate pain and ideal for collectors who want vertical flow. Be careful not to over-detail tiny veins and berries in black fills, as the area benefits from strong silhouette shapes. For sessions, bring a portable cushion and expect a one to two hour slot depending on size. Calf olives pair with summer shorts for casual reveal.
17. Watercolor Olive Accents on Inner Wrist
Inner wrist watercolor looks ethereal but is at higher risk of fading from sun and hand use. The realistic trade-off is softer aesthetics for more frequent touch-ups. Ask the artist to keep outlines where color meets skin to preserve definition. Session time is short but aftercare must avoid heavy hand rubbing. For showing it off, a dainty chain bracelet on the opposite wrist highlights the artwork without crowding it.
18. Olive Branch Behind a Small Ear Lobe Accent
Small accents behind the ear are discreet and great for people who want botanical hints that show only when hair is up. The area needs precise linework and a careful stencil because of curvature and hair interference. Sessions are very short and pain is low. Ask for bold terminal leaves rather than tiny inner veins to keep the shape intact over time. Think about how your hair products might interact with the site while healing.
19. Illustrated Olive Branch That Flows Into a Dove Shoulder-Back Piece
This composition uses flow to connect back and shoulder elements and creates narrative motion across clothing lines. Be mindful of the stitch points where the branch meets the dove; ask the artist to keep leaf spacing that reads when you are standing and when you move. Larger compositions often benefit from multiple shorter sessions. For the appointment wear a loose button-down shirt you can pull to the side so the artist has clean access to the shoulder and upper back.
20. Olive Ring Around a Wristwatch Area
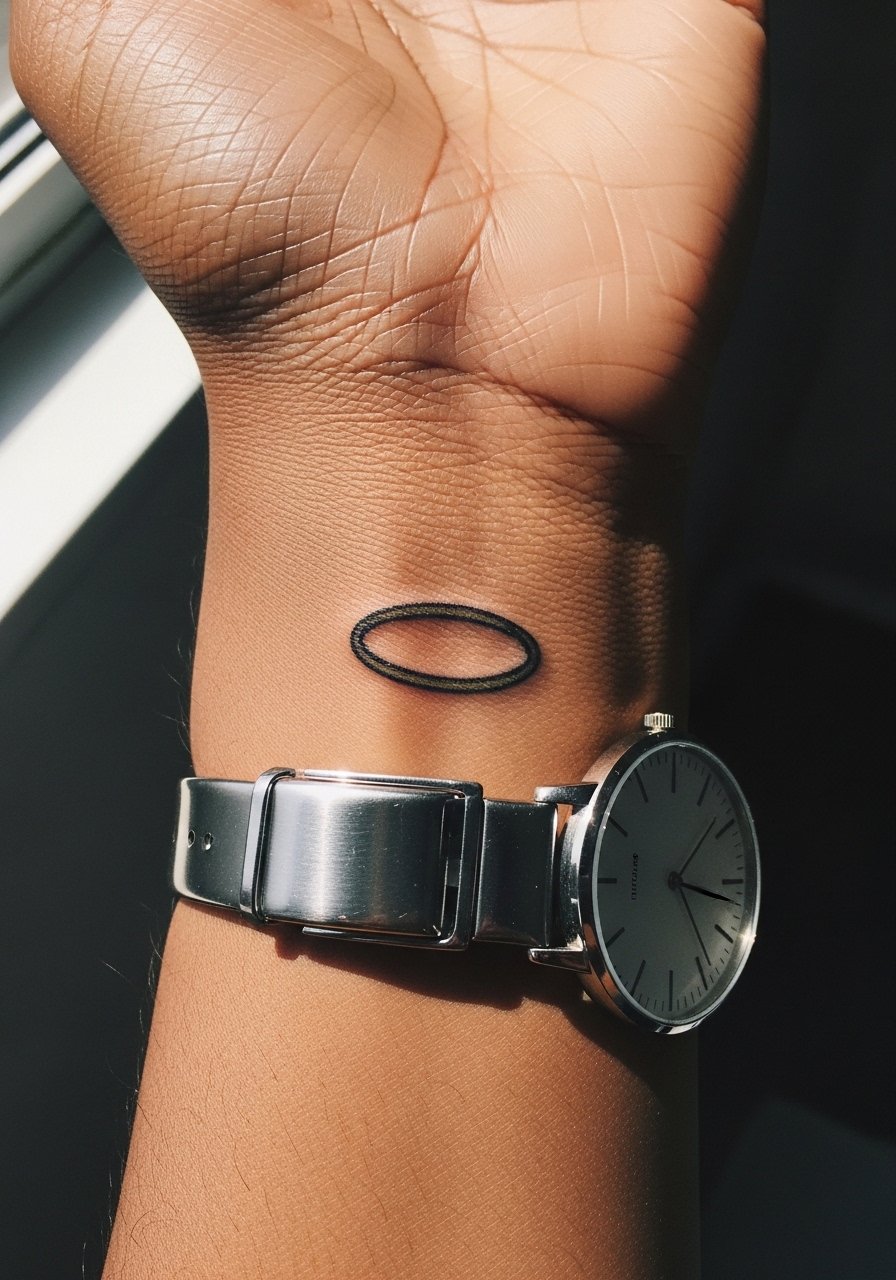
A ring-style wrap around where a watch sits reads as subtle jewelry and works for people who want a permanent accent in place of bracelets. The one mistake is placing too many leaves under a watch band where repeated contact causes abrasion. Ask for leaf placement away from the high-friction band zone and for slightly stronger outlines. Session is brief and touch-ups are straightforward. Style it with a minimalist watch or switch to bracelets when you want the tattoo on show.
21. Thigh Olive Vine with Geometric Fills for Texture
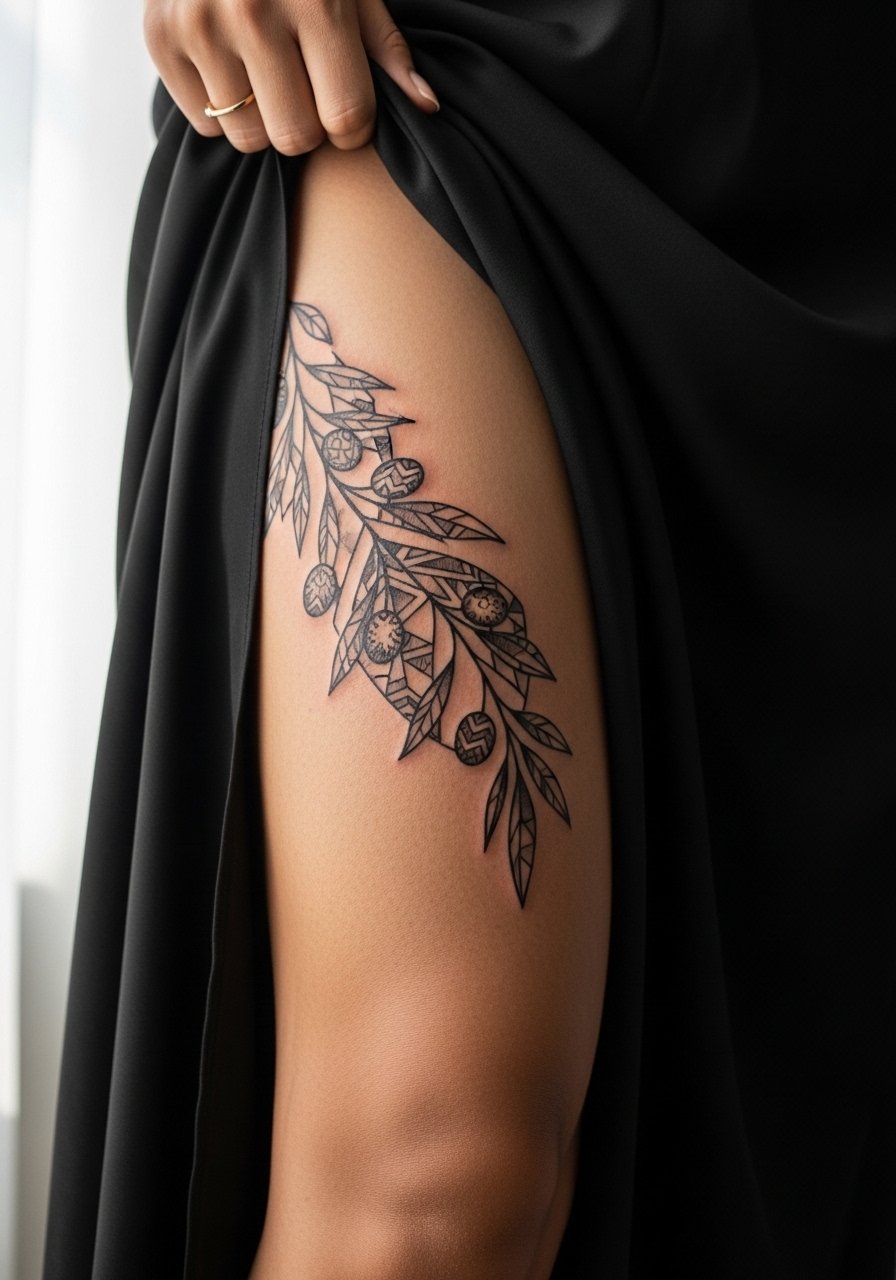
Outer thigh ornamental vines let you mix geometric fills with botanical curves that handle body shape changes. For people worried about weight fluctuation, I suggest leaving more negative space around joints and hips so the pattern breathes. Sessions usually take two visits for full detail. A common error is planning too tight a wrap across areas that expand; ask your artist to mark movement zones while you stand and sit. For show-off outfits, pair the work with high-waist shorts or slit skirts.
Frequently Asked Questions
Q: How do I stop fine line olive tattoos on wrists from fading so fast?
A: Expect some fade with thin work, especially on wrists. Ask for slightly heavier line weight at the consult, plan a touch-up window around 6 to 12 months, and protect the area from sun early on. I've noticed that artists who recommend a 2mm minimum line weight have fewer complaints a year later.
Q: What should people with darker skin know about illustrative olive designs?
A: Darker skin tones often need higher contrast and bolder outlines to keep detail from looking muddy. Seek blackwork variants or ask an artist experienced with medium to dark skin for a test placement. Try a small black-and-gray version first to see how saturation reads on your skin before committing to ultra-fine detail.
Q: Are there real differences between Saniderm and dry healing for these small botanical pieces?
A: Yes, two camps argue this out. One side favors Saniderm for cleaner heals and less scabbing, especially on high-friction spots like wrists. The other prefers dry healing to avoid adhesive pull on delicate lines. Try the method recommended by the artist who has experience with your chosen placement, and consider a short patch test if you are unsure.
Q: If an artist cancels my olive branch appointment, what practical steps reduce rescheduling pain?
A: Book through platforms with guest-spot calendars or clear cancellation policies, and confirm guest dates twice before travel. Keep backup artist options in nearby cities by searching hashtags like #illustrativebranch and checking portfolios. Deposits with clear reschedule windows also limit surprises.
Q: Will watercolor olive pieces look washed out on medium brown skin in photos?
A: Watercolor can appear softer on medium skin tones in casual lighting, which is often why people feel their photos look muted. Plan for slightly stronger pigment and higher contrast edges during the session, and use professional lighting or natural golden-hour light for healed photos to show color depth.
