
Fine line is trending across saved boards, and a lot of those pieces look gorgeous when fresh. The reality is some bicep placements and needle choices age better than others, and what holds up comes down to placement, line weight, and how you move. Below are 27 illustrative bicep directions that read clean now and are planned to stay that way, with what to ask your artist and what to wear to the session.
1. Realism Portrait on the Inner Bicep

An inner bicep portrait reads like a secret flex when you lift your arm. Fair warning, the inner bicep is more sensitive than the outer arm, so plan for a slower session and expect a higher pain rating. Tell your artist you want slightly bolder outlines where the brow and jaw meet, and ask for layered stipple shading instead of super tiny single hairs. A common mistake is asking for the smallest possible eyes; those micro details often blur into a soft spot after two years. For the appointment wear a fitted black tank top so the artist can keep the sleeve out of the way.
2. Geometric Wolf Head Bicep Band
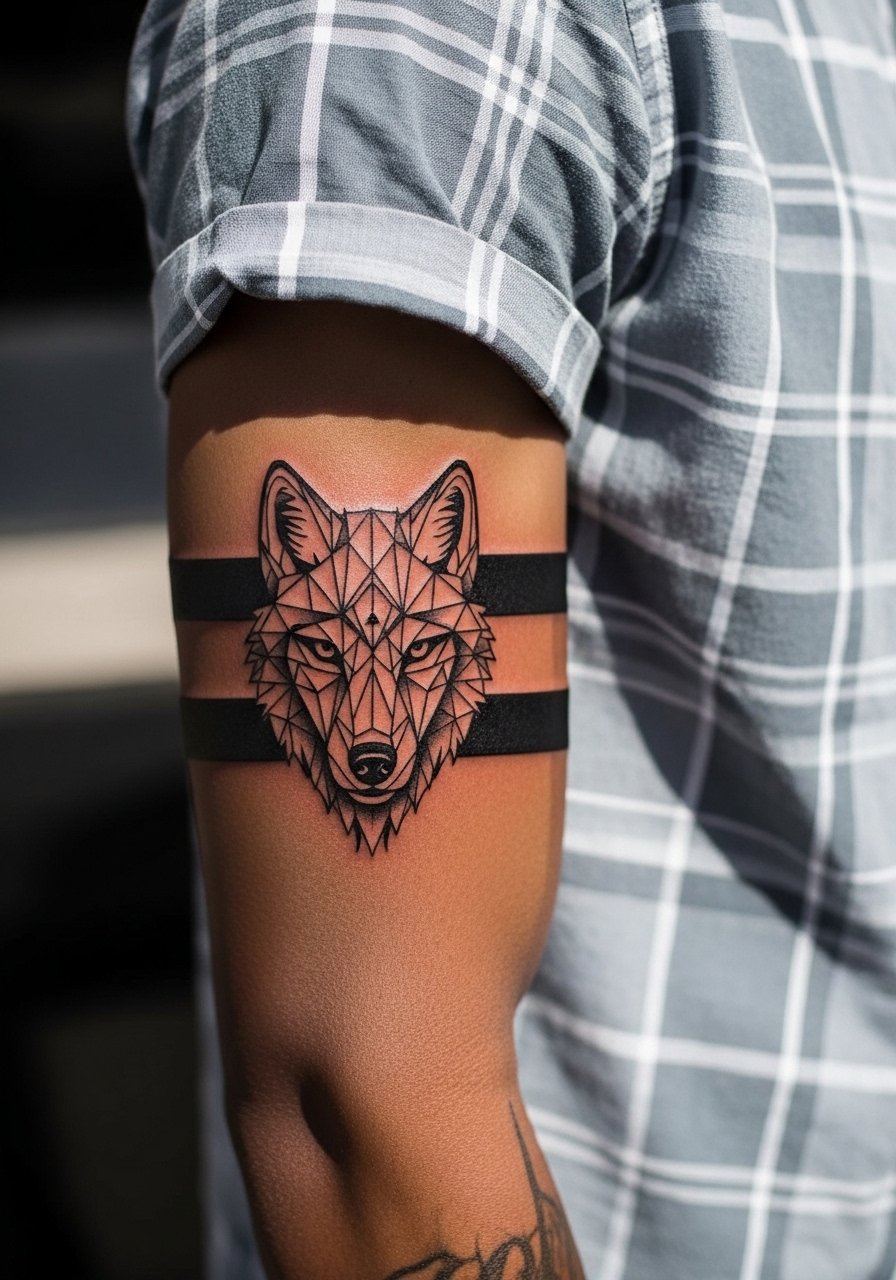
If you want a strong, structured wrap that reads the same whether relaxed or flexed, geometric blackwork is a safe route. The biggest mistake is shrinking the pattern so much the triangles merge as the muscle moves. Ask your artist for a 3×5 inch mockup on the arm and to flex while the stencil sits. Outer bicep placements have lower blowout risk than inner sections, so you can get tighter geometry and clean saturation. Show-off outfit tip: pair it with a rolled-sleeve henley to expose the band without busy patterns.
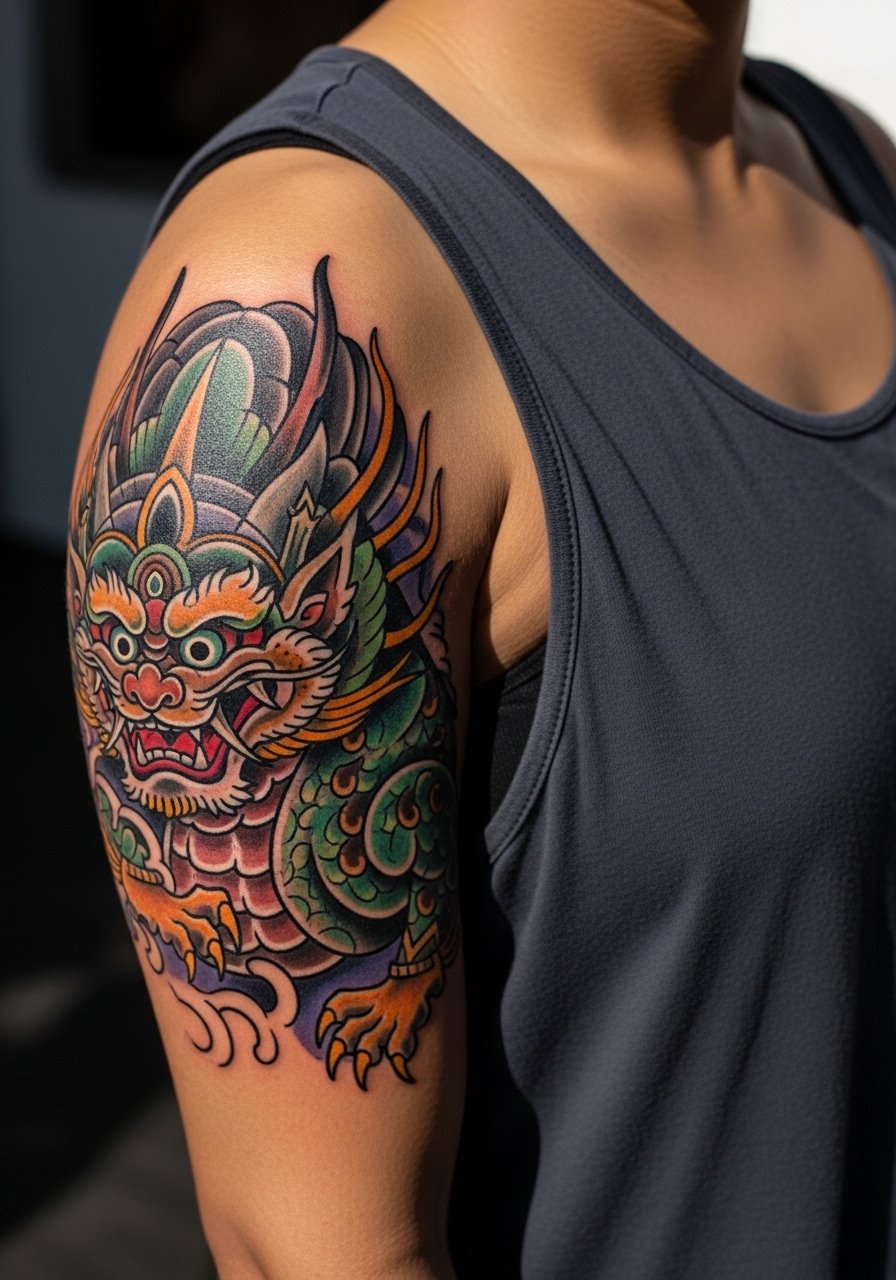
3. Mythological Dragon Curving to the Inner Arm

Dragons make excellent sleeve starters because they scale and curve with the arm. For an inner-arm dragon, ask for slightly thicker outlines on the belly scales so color stays separate as it heals. The inner curve will need touch-ups at the one-year mark more often than the outer shoulder, due to friction from shirts. Session-wise, expect multiple passes for color saturation, usually over two to three sessions. For easy access and minimal irritation on the ride home, wear a black vneck tee you can pull aside without tugging at fresh ink.
4. Bold Anchor with Script Banner on Outer Bicep
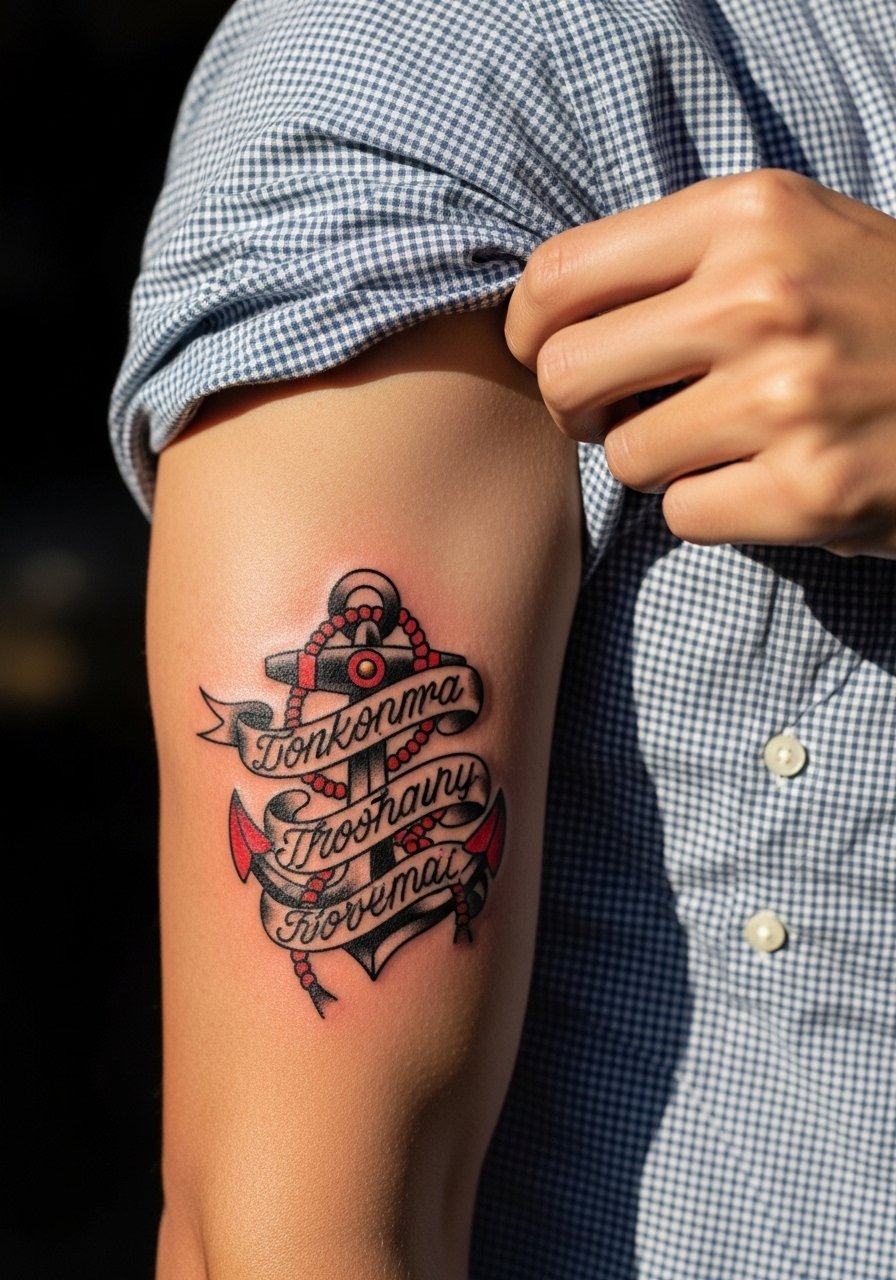
An anchor with a bold script banner reads high contrast on the outer bicep, so it stays visible when you flex. The common error is asking for tiny script in a banner that sits on a curve. Instead, request blockier letters with slight spacing so the text breathes. One session usually does it for a 4×4 inch traditional piece. For a rugged pairing, wear a leather cuff bracelet on the opposite wrist to balance the look.
5. Fine Line Compass Rose on the Inner Bicep
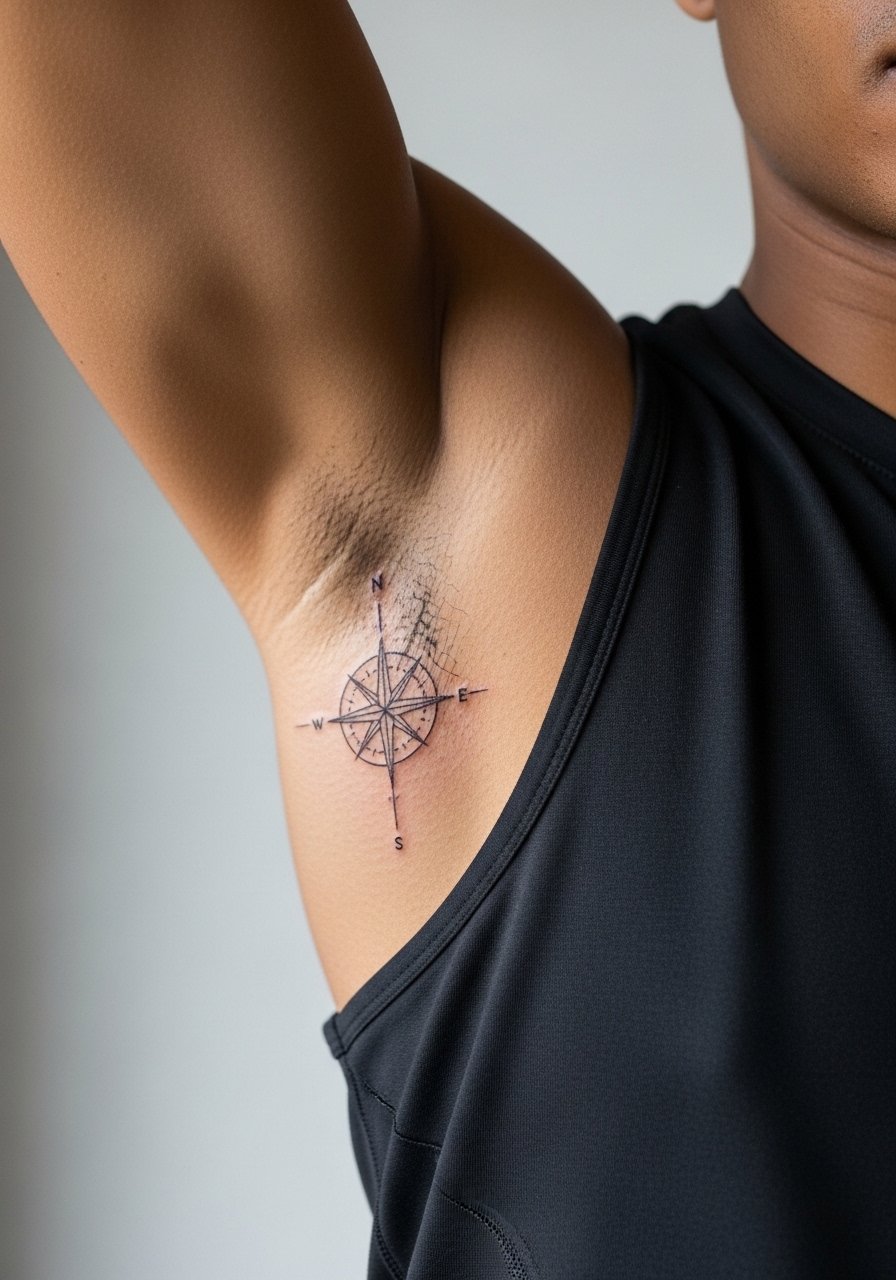
Fine line compass roses look discreet under shirts and pop when the arm is raised. Artists are split on fine line aging on the inner bicep. One camp says the thin skin and movement blur tiny lines within two years. The other camp argues that with correct needle depth and generous spacing the lines settle fine. If you prefer less maintenance, ask for slightly thicker strokes in the compass points and plan a touch-up at year two. The session feels more sensitive here, so bring a friend to drive you home if you want.
6. Black and Gray Lion Mane Sleeve Starter
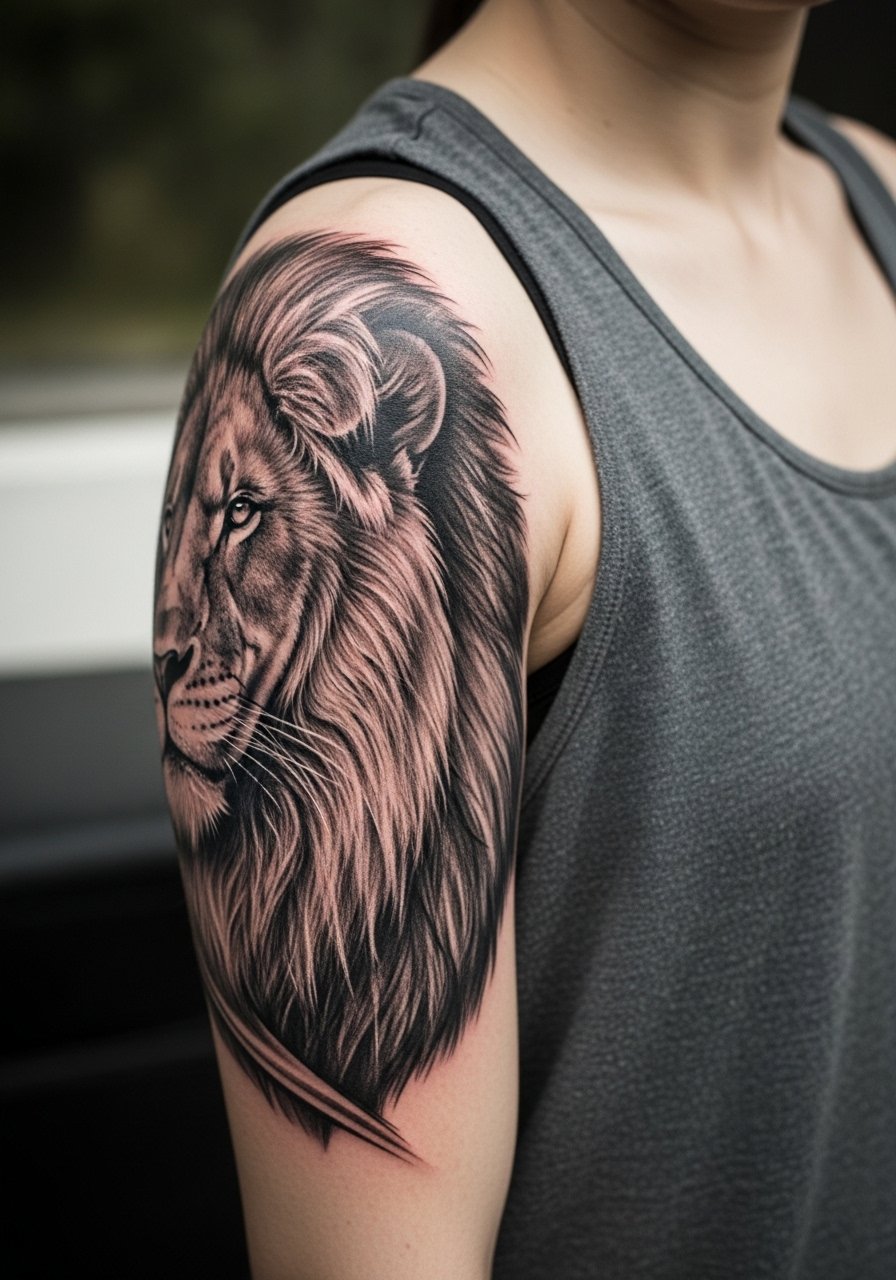
A lion mane with textured stipple and whip shading builds into a sleeve naturally. This placement ages nicely because the outer shoulder gets less friction than the inner arm. Tell your artist you want strong contrasts around the muzzle and softer stipple in the mane. A typical plan is two to four sessions depending on size and saturation. For a clean showing, a v neck muscle shirt in a dark color frames the flow from bicep to shoulder.
Studio Day Picks
The inner and outer bicep pieces above ask for different prep and first-week protection, so a few targeted items smooth out the session and early healing.
-
Stencil transfer paper kit. Lets you preview the exact placement on the arm before the needle touches skin, which matters for portraits and geometric wraps.
-
Topical numbing cream. Apply per instructions before inner bicep sessions when sensitivity is a concern, but confirm with your artist first.
-
Thin protective film roll. Useful for covering outer bicep work that rubs against backpack straps during the first few days.
-
Fragrance-free gentle body wash. Cleanses the area without stripping pigment from delicate fine line pieces.
-
Aquaphor healing ointment. A thin layer helps lock in moisture for the initial wound phase on both portrait and blackwork sections.
7. Ornamental Skull with Roses at the Bicep Peak
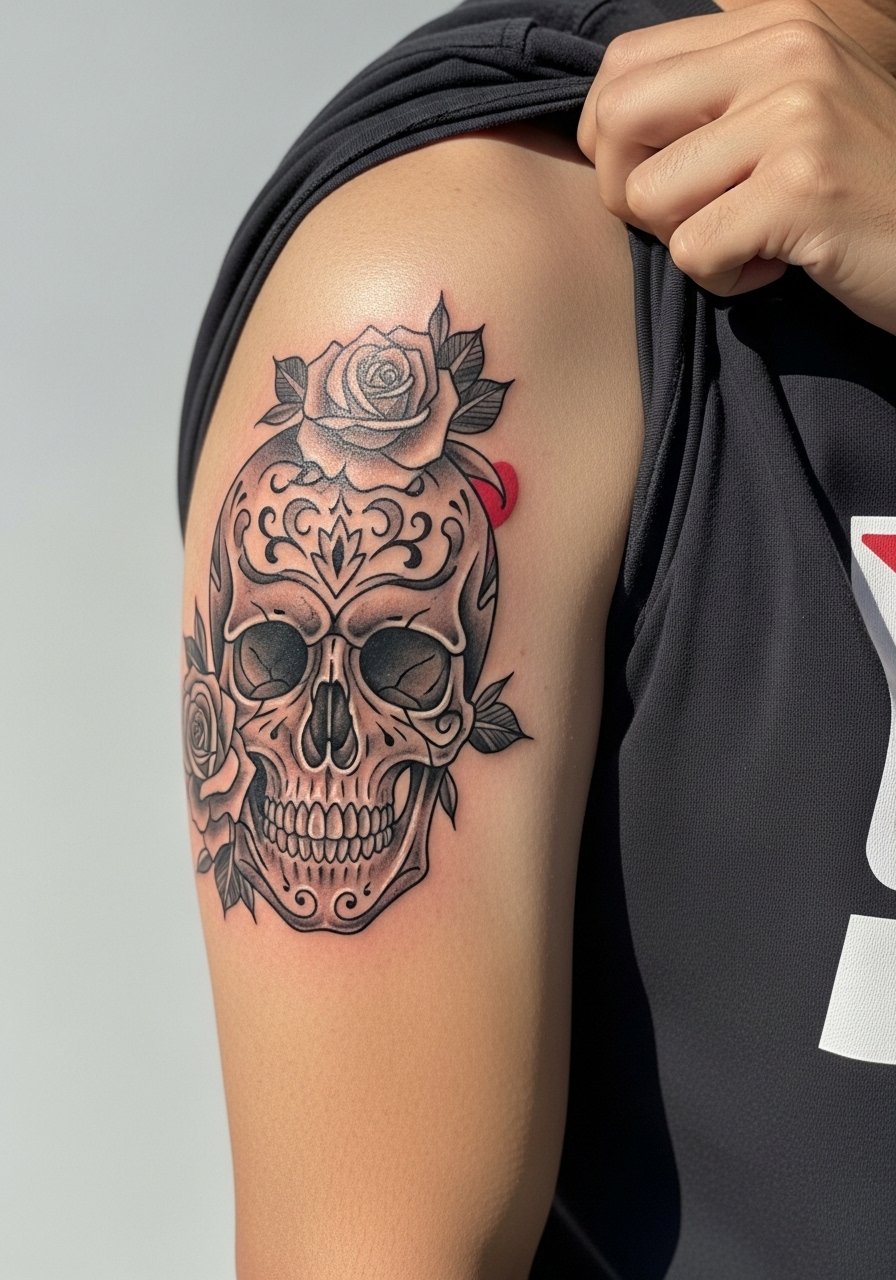
Ornamental skulls with floral framing balance toughness and refinement when scaled properly. Avoid packing the petals too tightly against the skull; that dense fill tends to merge into a muddy shape after a few years. Ask for light stipple in the petals and a stronger edge around the skull so the two elements read clearly as the skin settles. This piece usually needs two sessions for shading work. If you plan to expand later, have the artist leave negative space at the shoulder connection to link future panels.
8. Script Quote in a Curved Banner on the Inner Bicep
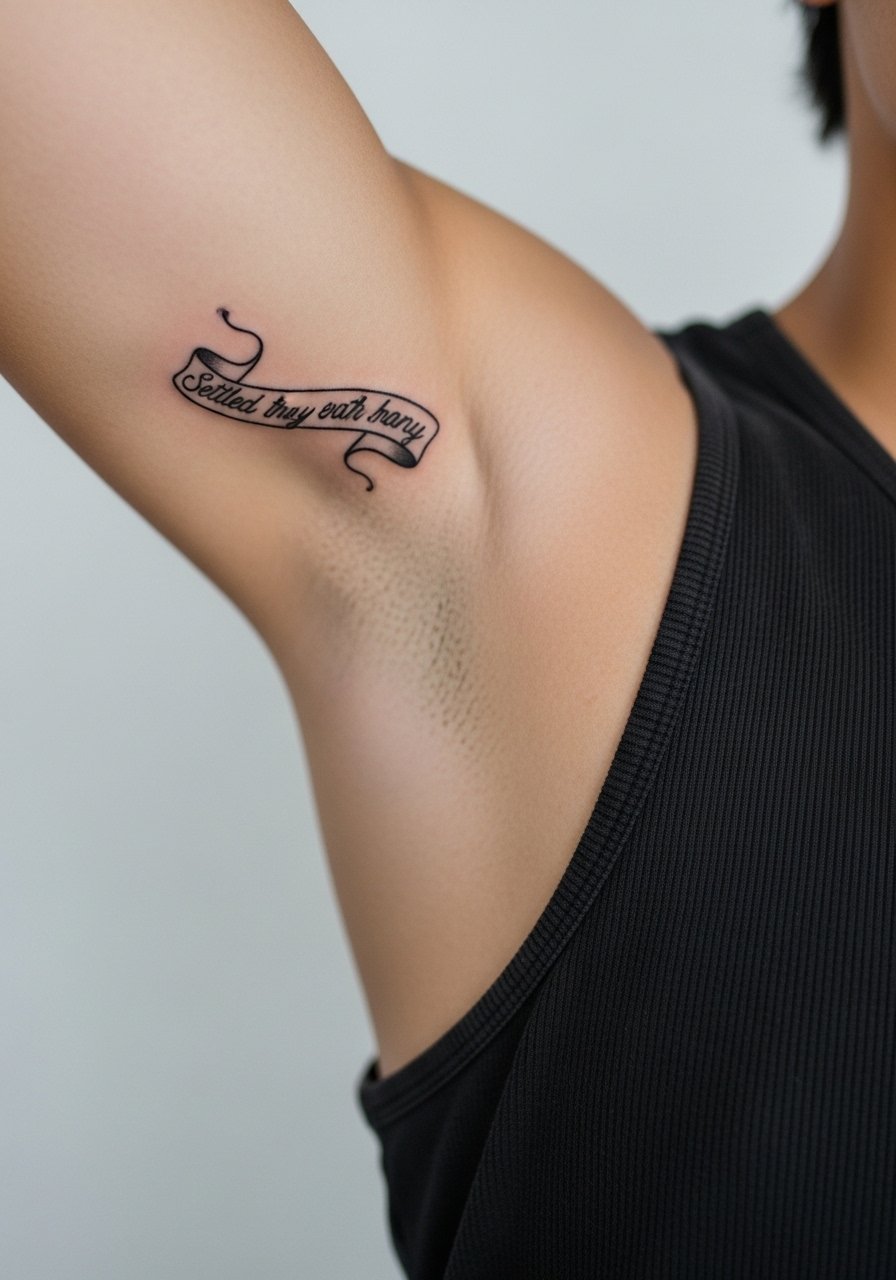
A personal mantra inside a curved banner sits elegantly on the inner bicep if you choose bold lettering. The mistake is asking for ultra-thin cursive that looks delicate at first and then softens inconsistently. Request thicker strokes in baseline letters and ask the artist to show the stencil while you flex so spacing reads right when the arm moves. For session wear, a sleeveless athletic shirt makes access easy and keeps fabric from rubbing fresh ink.
9. Micro-Realism Eye Centered on the Inner Bicep
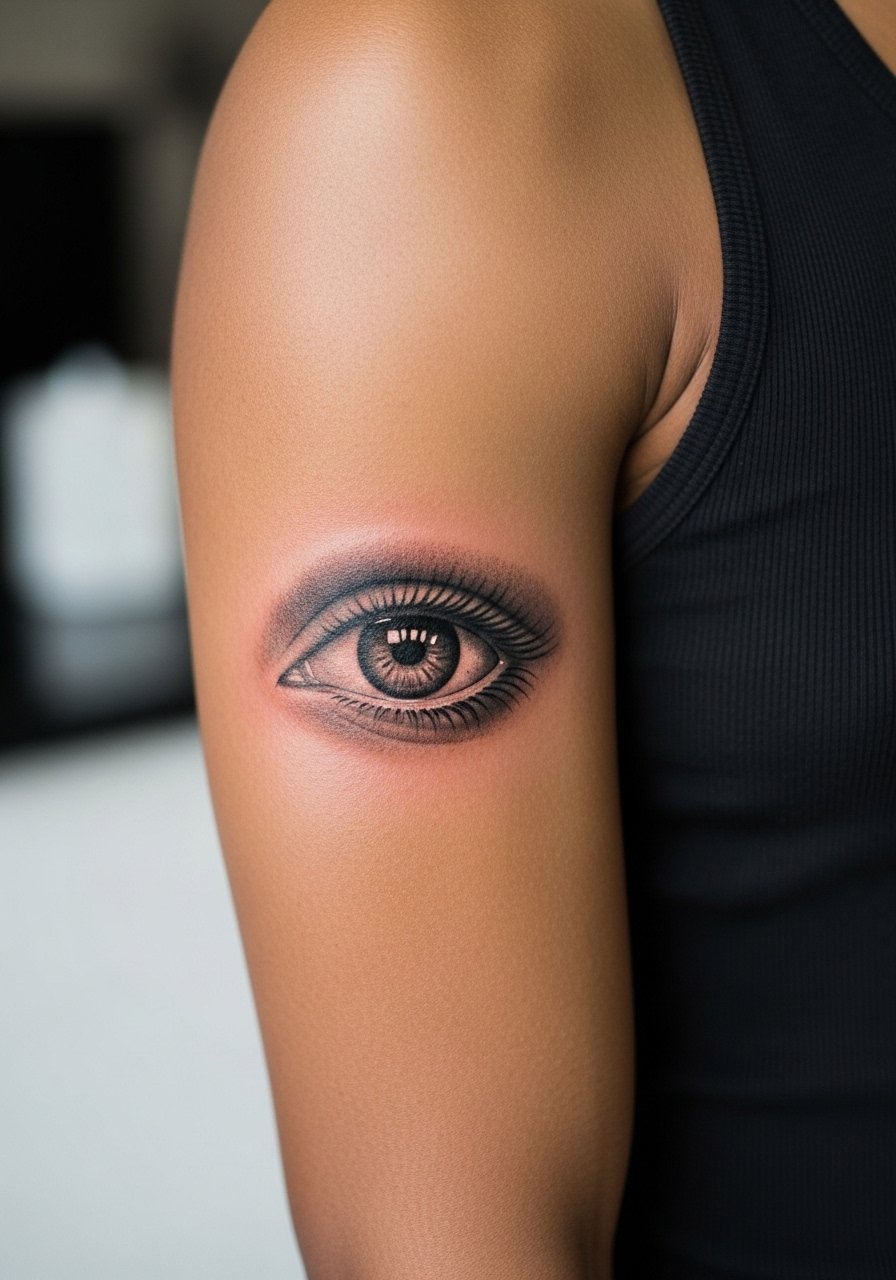
A single micro-realism eye can read intense and private on the inner arm. Because it's small and relies on minute shading, the risk is early softening as the skin moves. Tell your artist you want the darkest blacks in the pupil and slightly more negative space around the iris to preserve the gaze long term. Touch-ups at 12 to 18 months are common for micro-realism on the bicep. Pain is higher than the outer arm but manageable in a single focused session.
10. Patchwork Arrow Mandala Stretching Toward the Shoulder
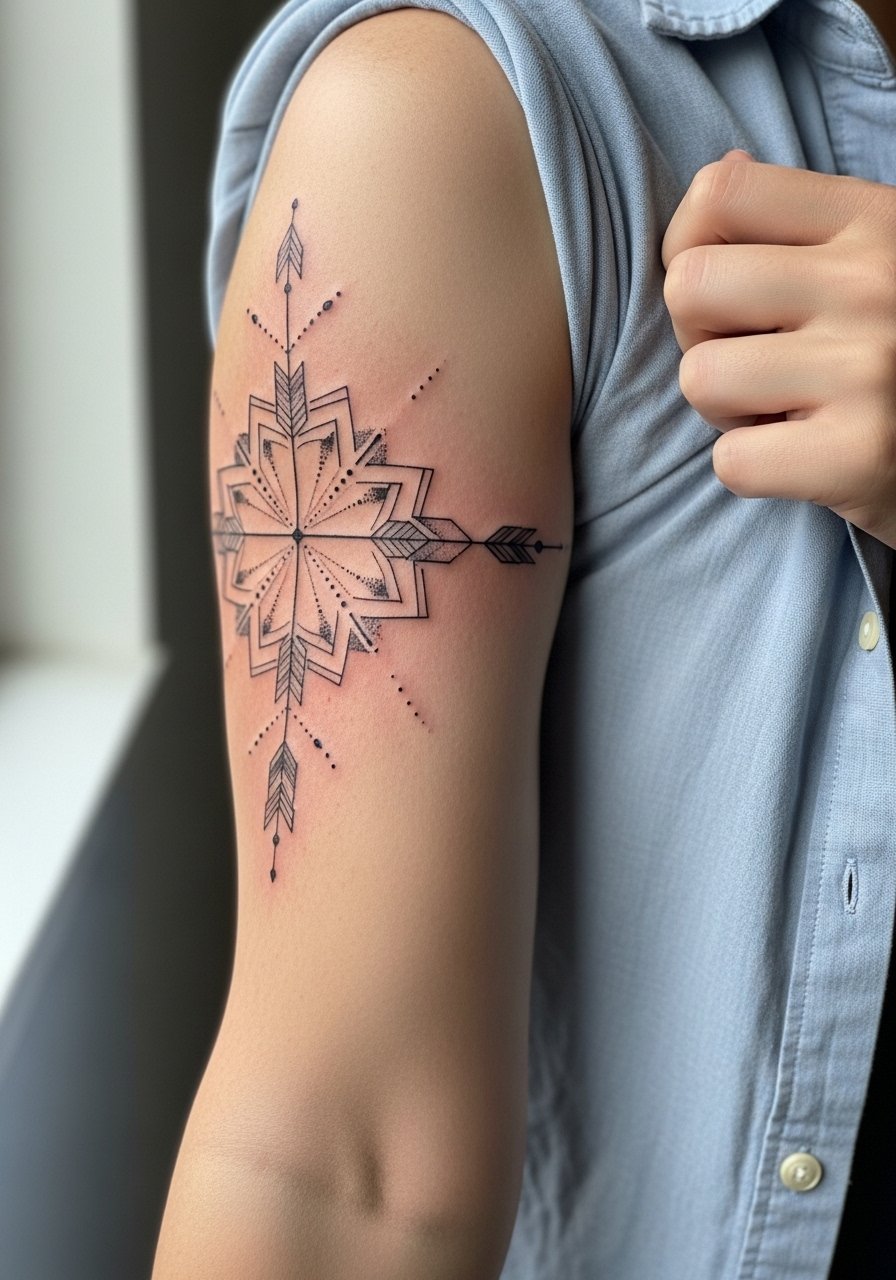
Modular patchwork mandalas make excellent phased sleeve plans because each panel can be added over time. Avoid packing too many concentric rings in a small 3-inch area or the dots will merge. Ask for open spacing and stipple shading that graduates outward. For showing it off, try a loose button-down shirt you can roll to the elbow to frame the pattern.
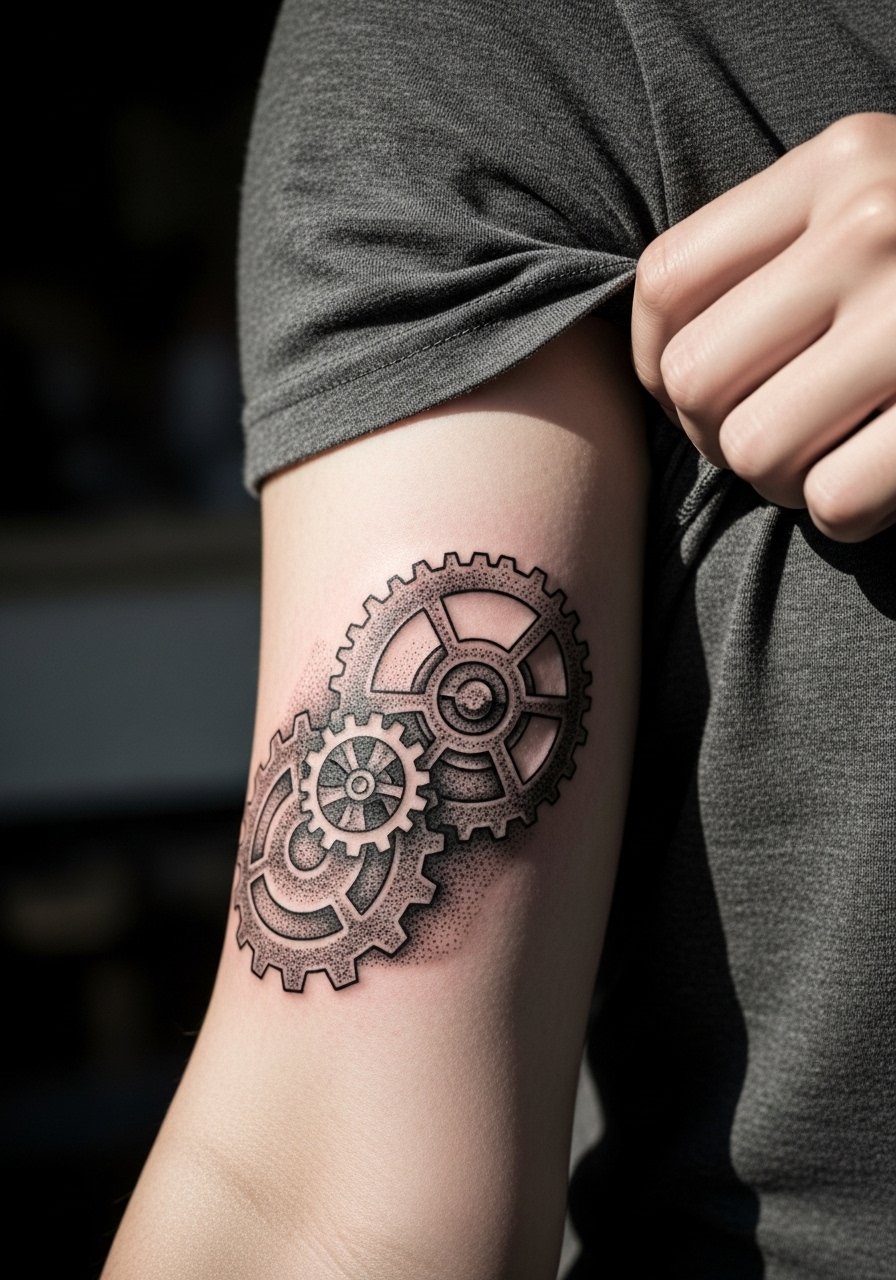
11. Realistic Mechanical Gear Wrap
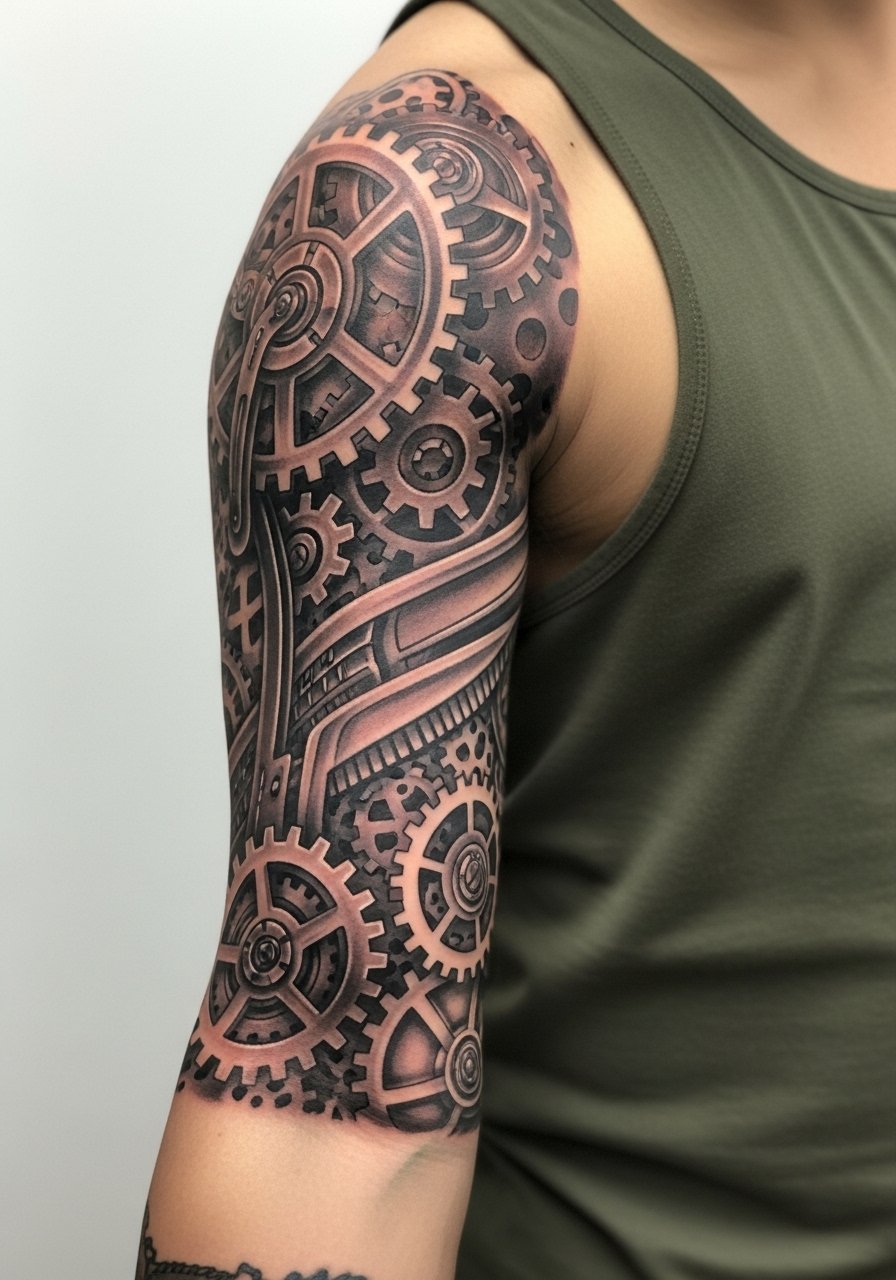
Full bicep wraps that read like mechanical parts need careful overlap planning so gears do not visually collide when you flex. A common error is having gear teeth meet at a joint where muscle movement causes distortion. Ask the artist to map the pivot points before inking and to avoid pairing high-contrast edges at those joints. This style often requires multiple sessions to build saturation. Pair with a minimalist mens watch when you want a polished look that does not compete with the sleeve.
12. Ignorant Style Abstract Drips on the Inner Bicep
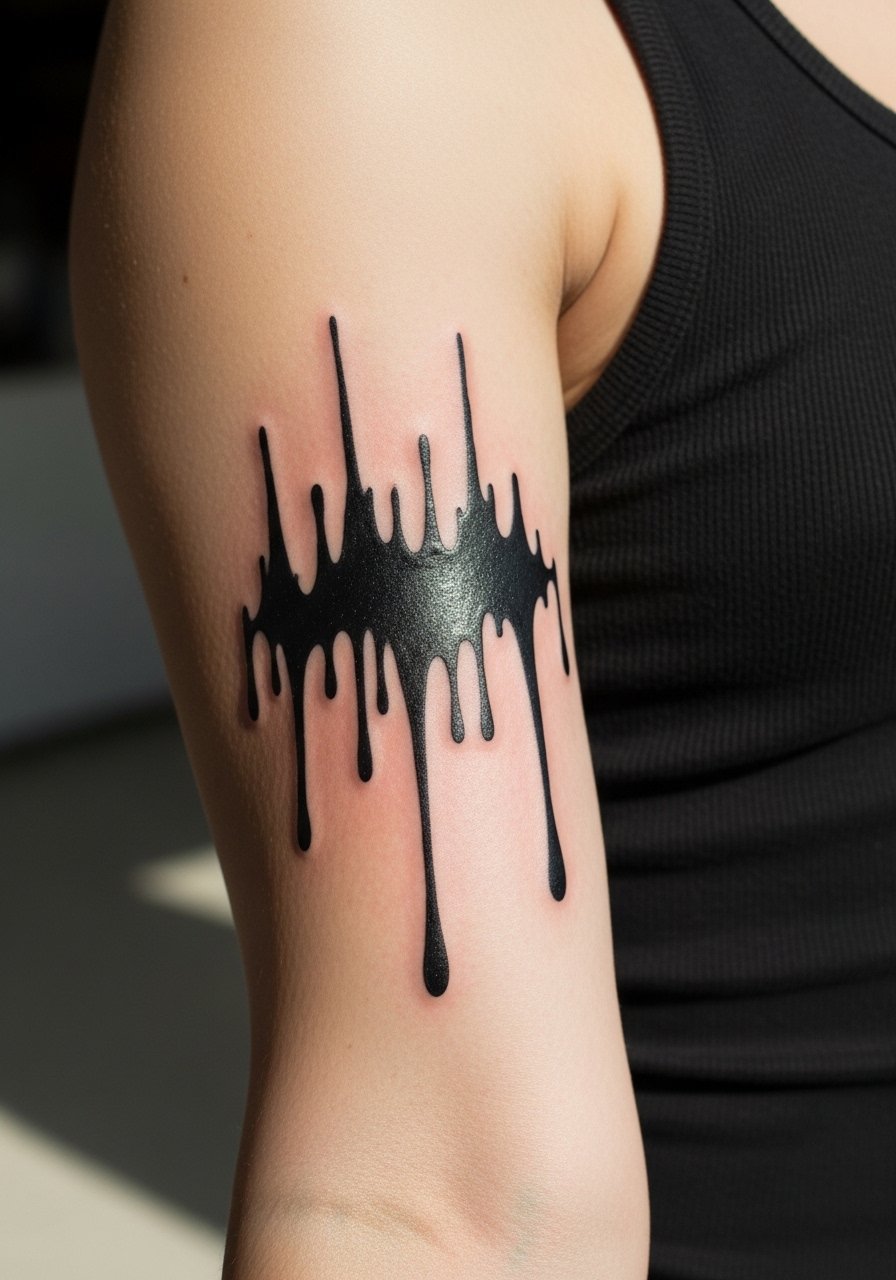
The charm of ignorant style is its deliberate imperfection, but tiny drips done too fine end up looking accidental once healed. For longevity ask for slightly thicker drip stems and a confident hand that leaves intentional gaps rather than shaky ones. One session usually covers this 4×5 inch zone. Expect some friction from shirts early on, so session wear that keeps fabric off the inner arm helps with immediate comfort.
13. Geometric Mandala Framing the Bicep Peak
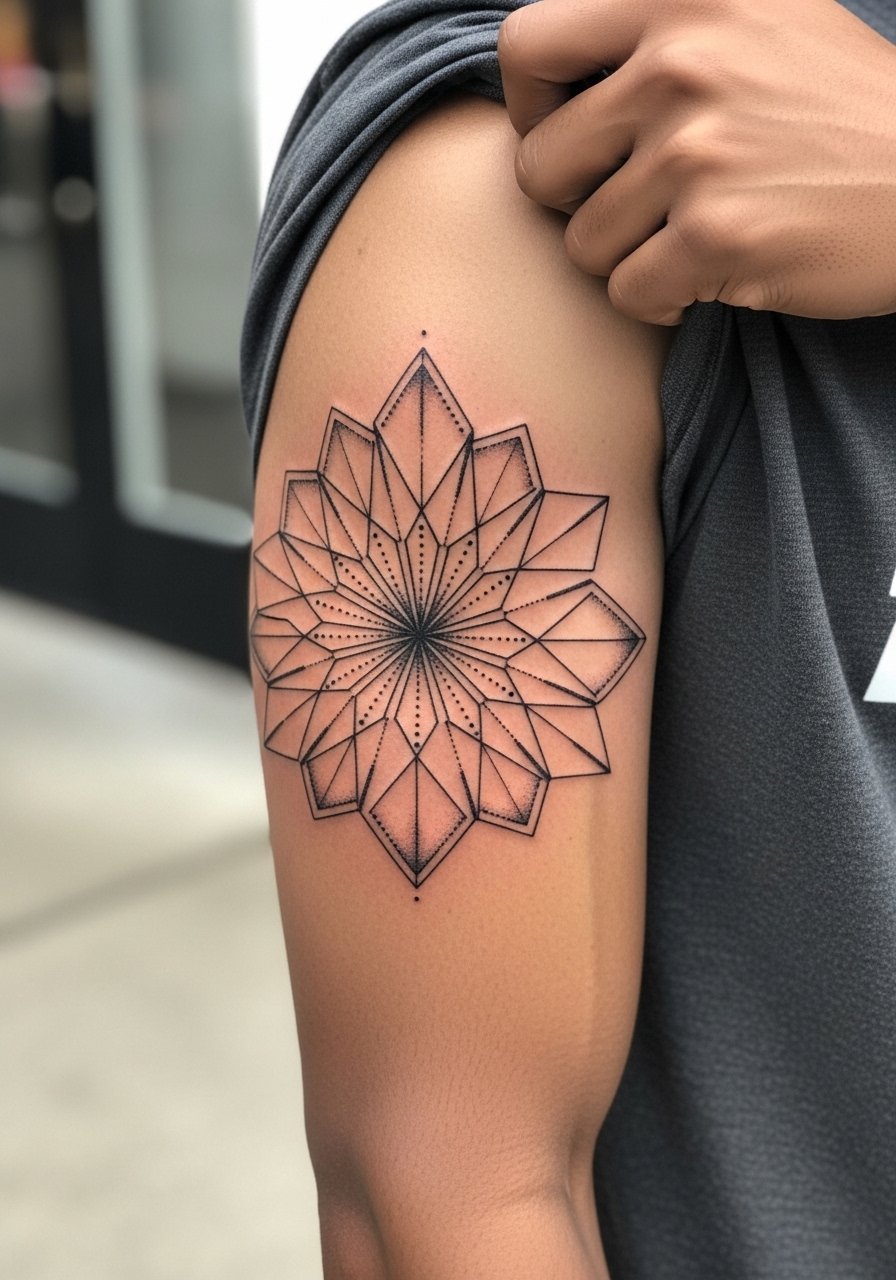
A radial mandala at the bicep peak reads balanced on relaxed arms, but radial symmetry needs breathing room. The mistake is compressing too many fine lines into the center. Ask for a slightly larger center aperture and heavier outer lines so the motif keeps its shape as skin stretches. Outer placements mean less touch-up frequency than inner ones. Wear a short sleeve button up you can roll to the elbow to show the radial symmetry.
14. Scripted Name in Banner with Subtle Ornamental Flourish
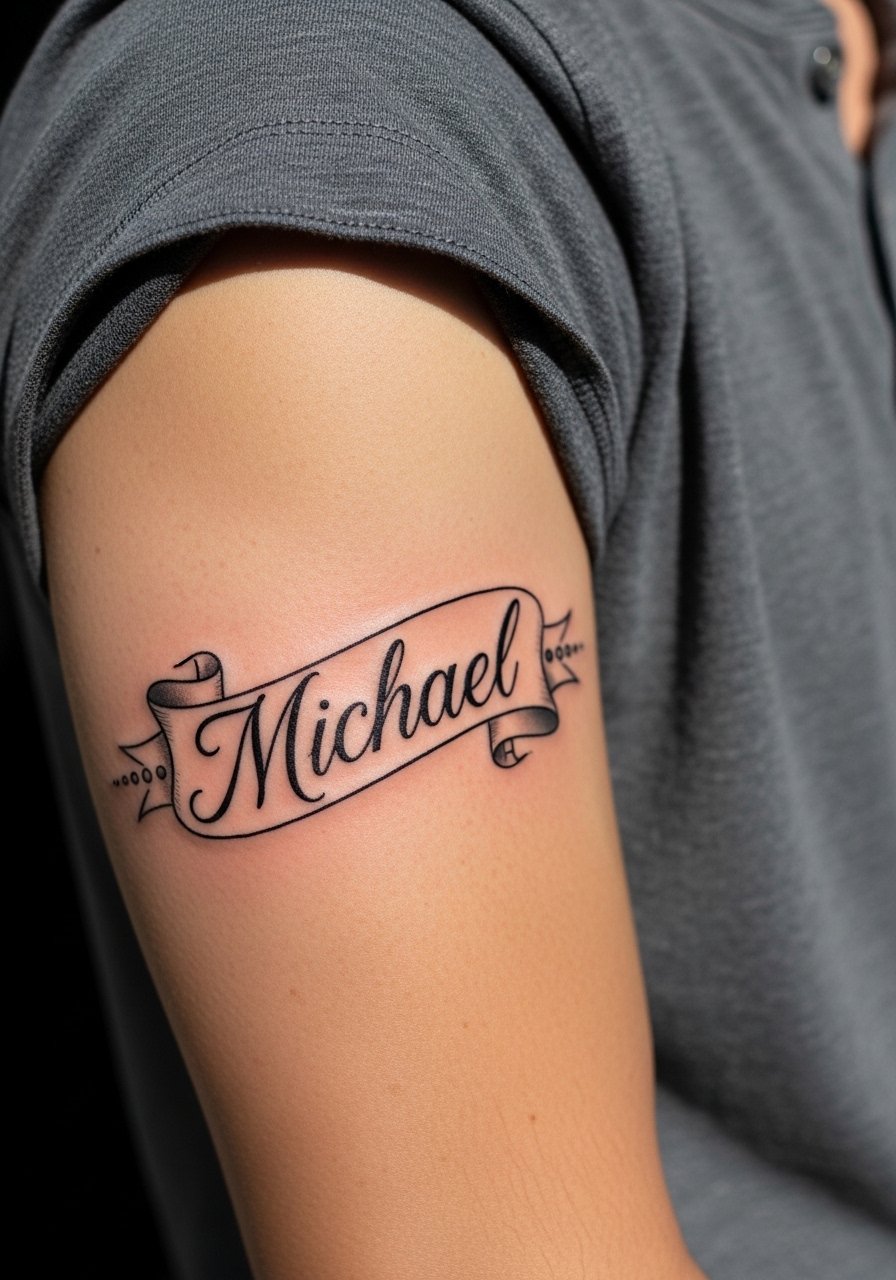
Names in banners are classic and hold up when letters are kept bold enough to withstand skin movement. The common mistake is ultra-fine loops and tails that disappear over time. Tell your artist you want the baseline letters thicker and the flourishes slightly abbreviated. This is a one-session piece for many artists. Pair with a leather cuff bracelet for a matched vintage aesthetic.
15. Botanical Line Cluster Flowing Along the Outer Bicep
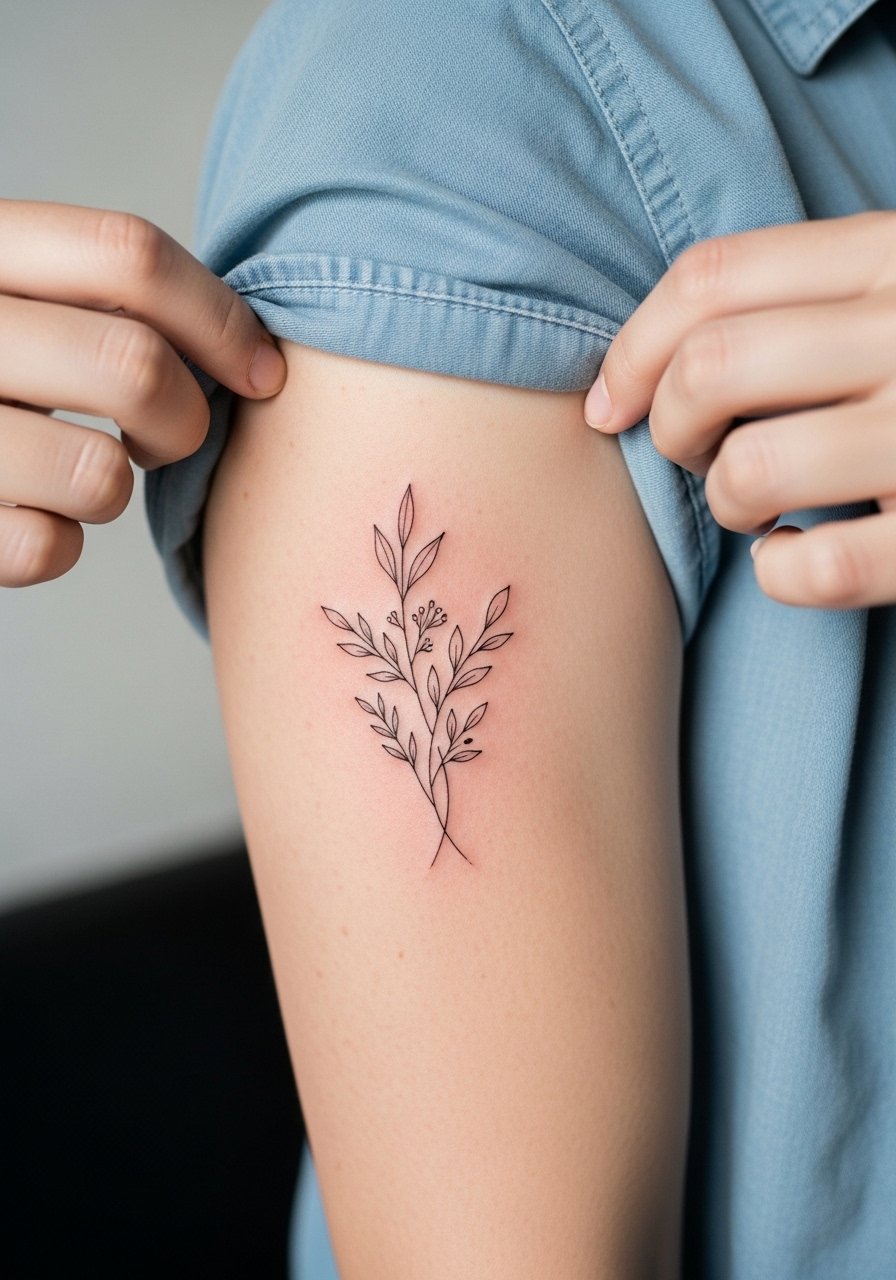
Delicate botanicals on the outer arm can age gracefully if the stems are given breathing room. The error is compressing too many leaves into a narrow band. Ask for fewer, longer stems and soft stipple shading to suggest depth rather than dense fills. One session usually completes a tasteful 4×6 inch cluster. For showing it off, roll your sleeve and wear a henley shirt rolled sleeves to keep the vibe casual and intentional.
16. Bold Neo-Traditional Phoenix Rising on the Upper Bicep

A neo-traditional phoenix uses heavier outlines that age predictably on the bicep. The mistake is adding too many fine internal feathers in the areas that flex most. Ask for bold outer lines and gradient color blocks inside. Expect two sessions when you add saturated reds and oranges. For session comfort and to avoid smudging, wear a loose tank top men that you can easily slide off without brushing the fresh tattoo.
17. Minimalist Compass with Slight Dot Work
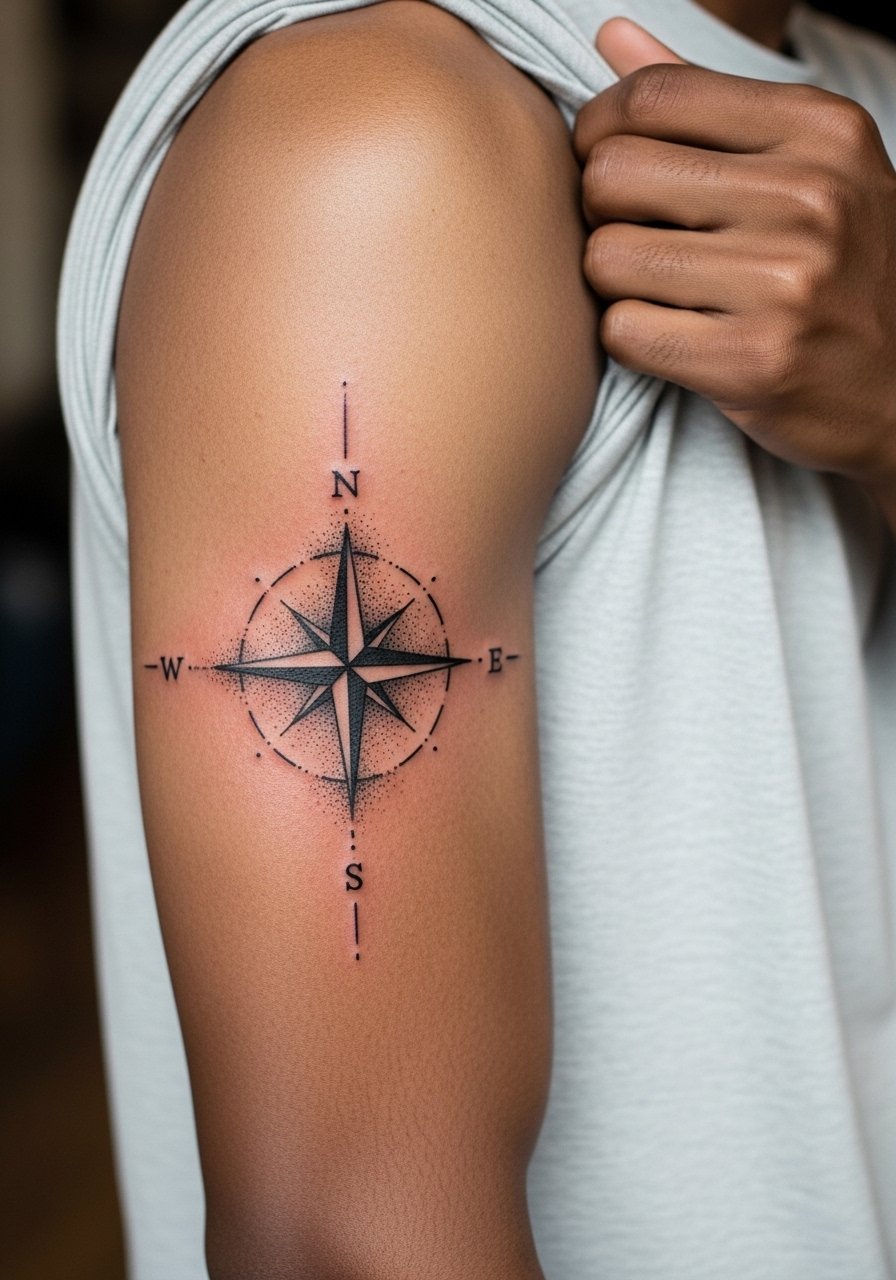
Minimalist compasses depend on crisp linework and measured spacing. A common error is pushing the dot work too close to the main lines, which causes merging after healing. In consultation ask for defined lineweight for the cardinal points and light stippling radiating outward. This often fits comfortably in a single session. If you travel often, a tight-fitting olive muscle tee shows the mark without competing elements.
18. Heraldic Shield with Clean Linework on the Outer Bicep
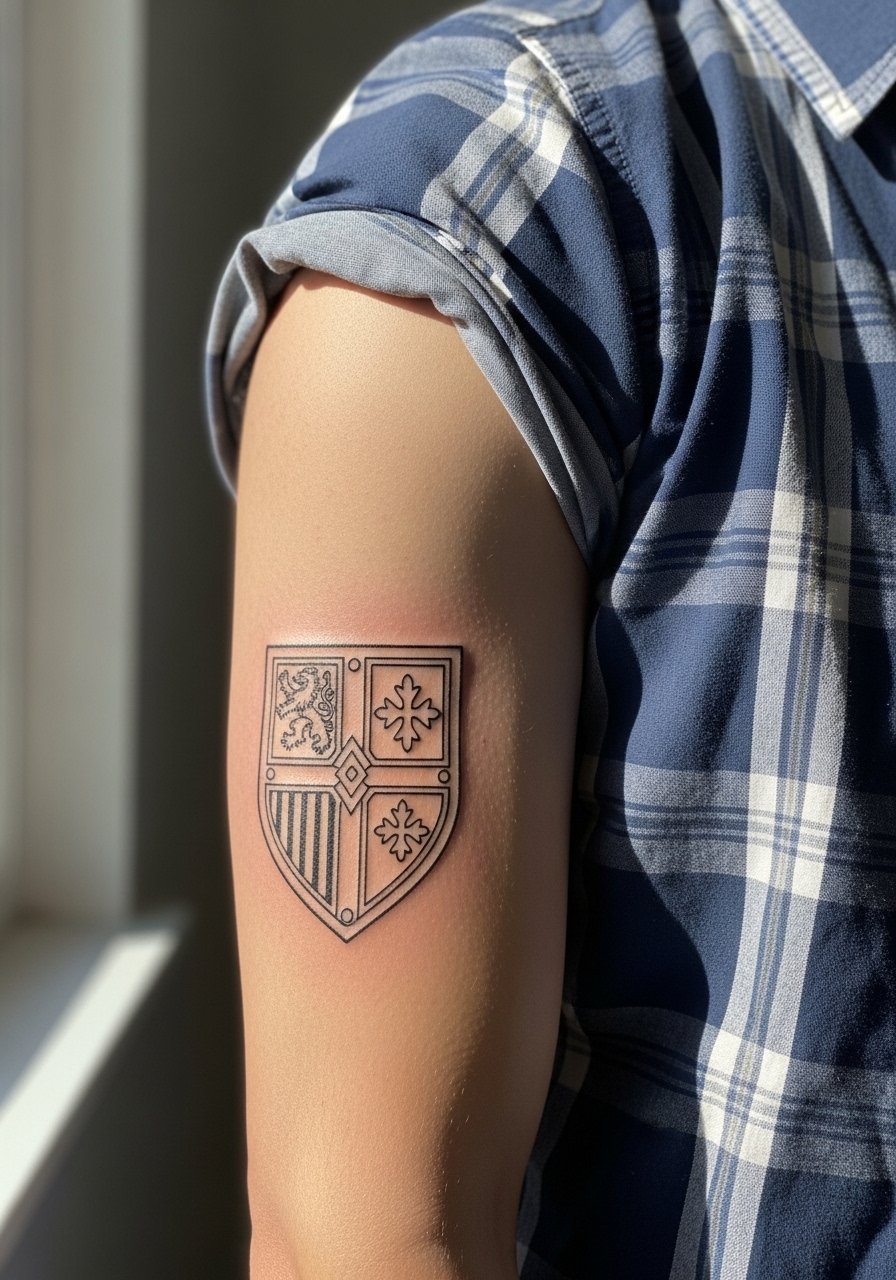
Heraldic pieces rely on geometric balance and clean linework to age well. The mistake is overcomplicating the crest with too many small motifs that lose definition. Ask your artist to simplify the interior symbols and emphasize a strong border. Session time is moderate, and touch-ups are usually cosmetic after two to three years. This design pairs well with a minimalist mens watch for a refined look.
19. Neo-Traditional Anchor with Floral Accents on the Outer Arm
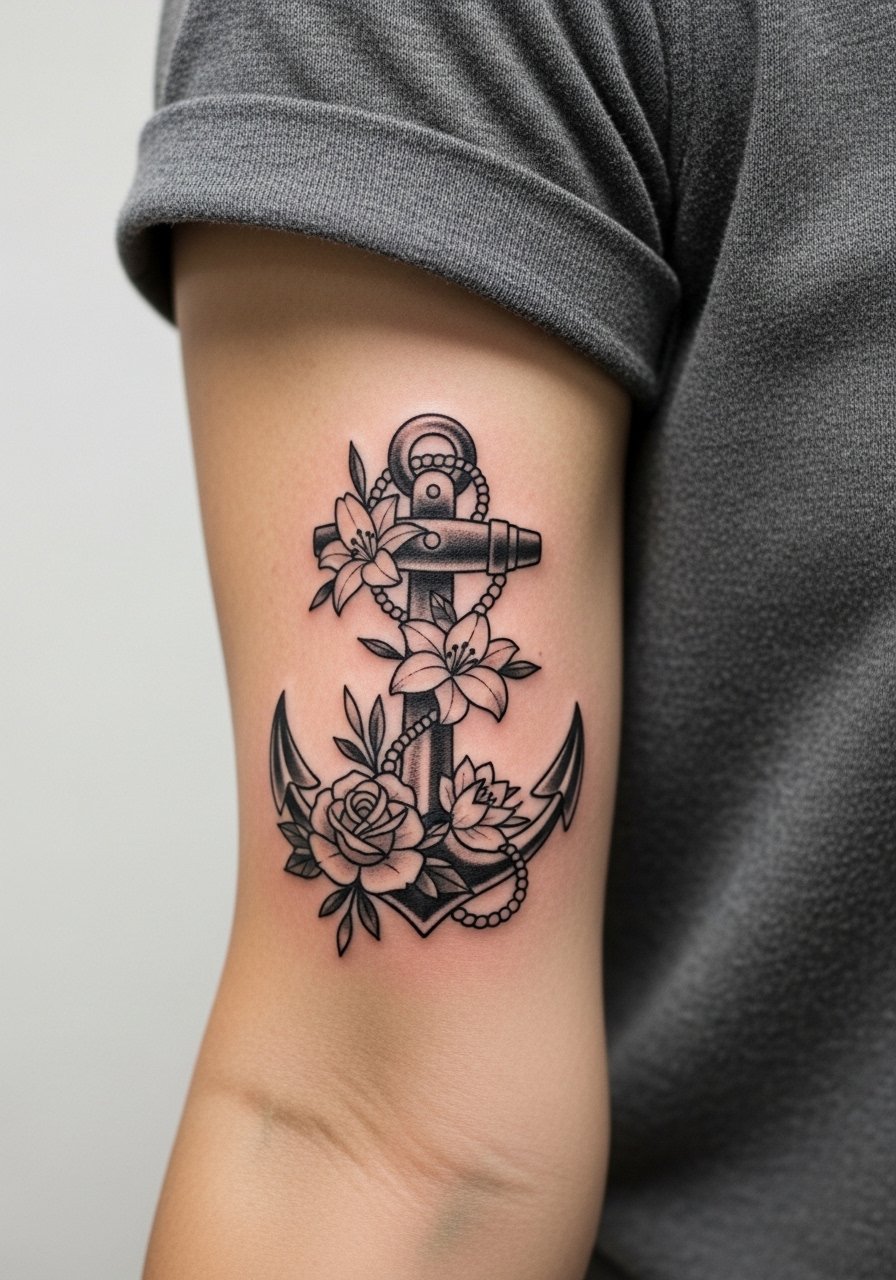
If you want a modern take on a sailor motif with floral counters, ask for saturated color blocks and thicker anchors lines that hold through years of wear. The common misstep is tiny petal details next to high-contrast anchors. Instead, request simplified petals and a heavier anchor border. One session can often complete a 4×6 inch piece. Show it off with a rolled-sleeve henley in white or gray to keep the focus on the color dynamics.
20. Pin-Up Sketch in Subtle Line Work on the Bicep Side

Sketch-style pin-ups can read delicate and modern if the artist uses confident strokes. Avoid asking for super faint hatch marks because they can soften unevenly. Tell your artist you want a confident contour line with selective hatching for shadow. This is a one to two session piece depending on complexity. If you work in conservative settings, remember that upper-arm pieces are easier to conceal than forearm work.
21. Mechanical Cog with Stipple Gradient at the Bicep Edge
A cog with stipple gradients needs intentional spacing so the stipple does not become a gray wash over time. Ask for a defined hard edge at the cog teeth and a softer stipple fade outward. This placement is forgiving because it sits where skin moves less aggressively. Stipple shading extends session time, so expect a longer single session or two shorter ones. Access is simple, so wear a short sleeve button up that you can pull aside.
22. Blackwork Band with Negative Space Chevron
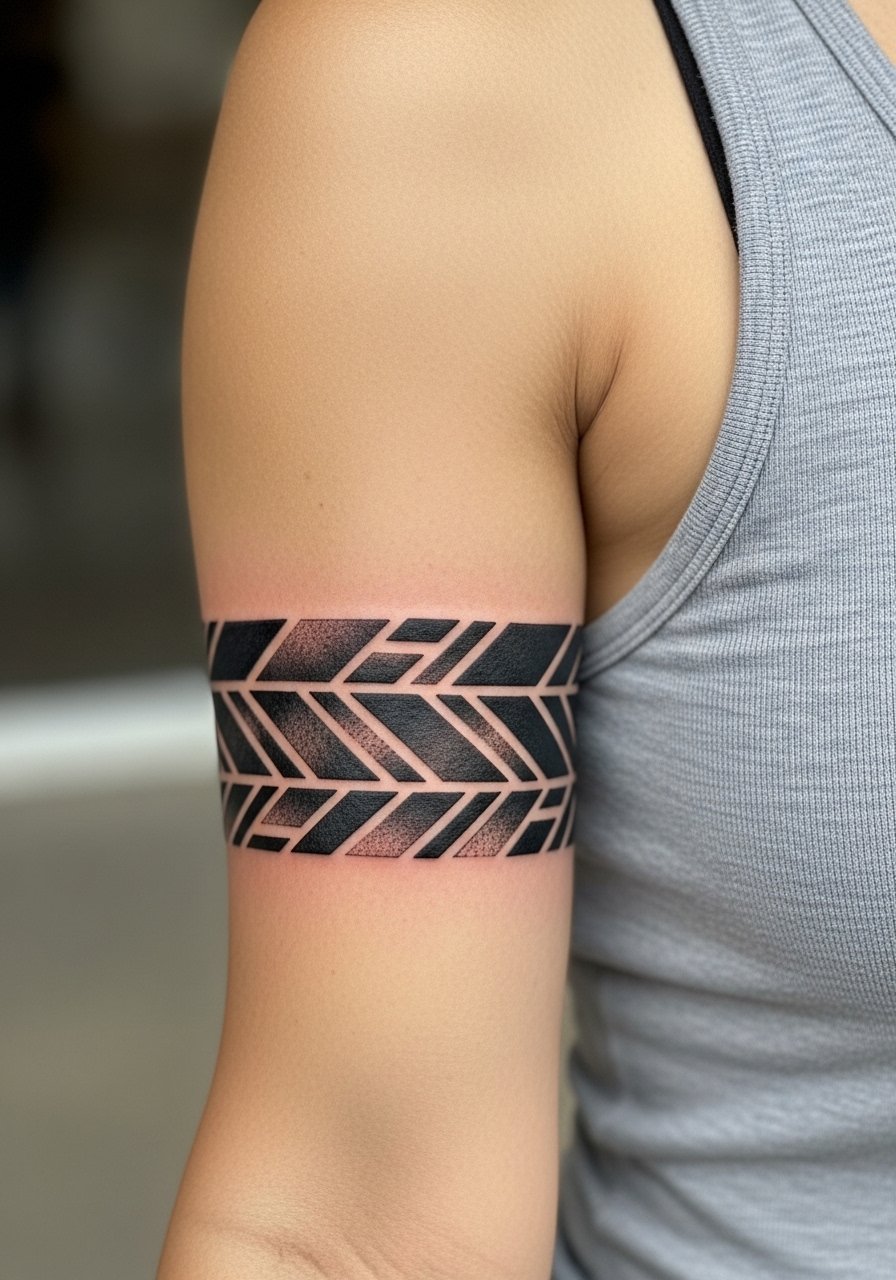
Solid black bands do very well on the bicep when planned with negative space for breathing room. The common error is a continuous dense fill too close to the elbow crease. Instead ask for a chevron negative space that breaks the visual plane and reduces the risk of a visible blob if slight blowout occurs. One session can deliver a clean band on most arms. Pair with an olive muscle tee for a subdued look.
23. Stylized Animal Head with Geometric Backdrop
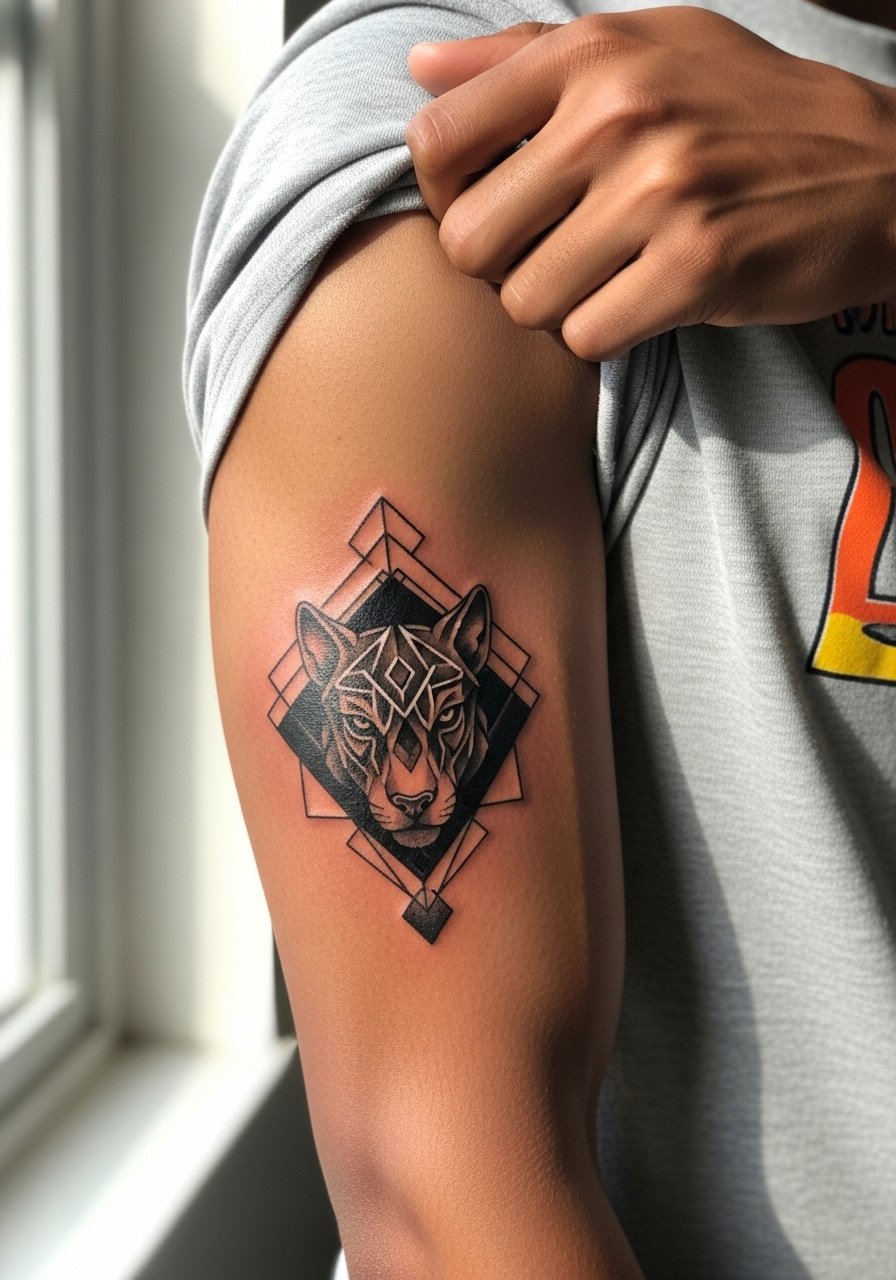
Combining organic forms with geometric backgrounds gives contrast that ages predictably when the animal head has stronger outlines than the backdrop. The mistake is equalizing line weight across both elements. Ask that the animal be the visual focal point with the backdrop lighter and more open. Expect two sessions if you add color accents. For a finished look, wear a minimalist mens watch that keeps wrist attention minimal.
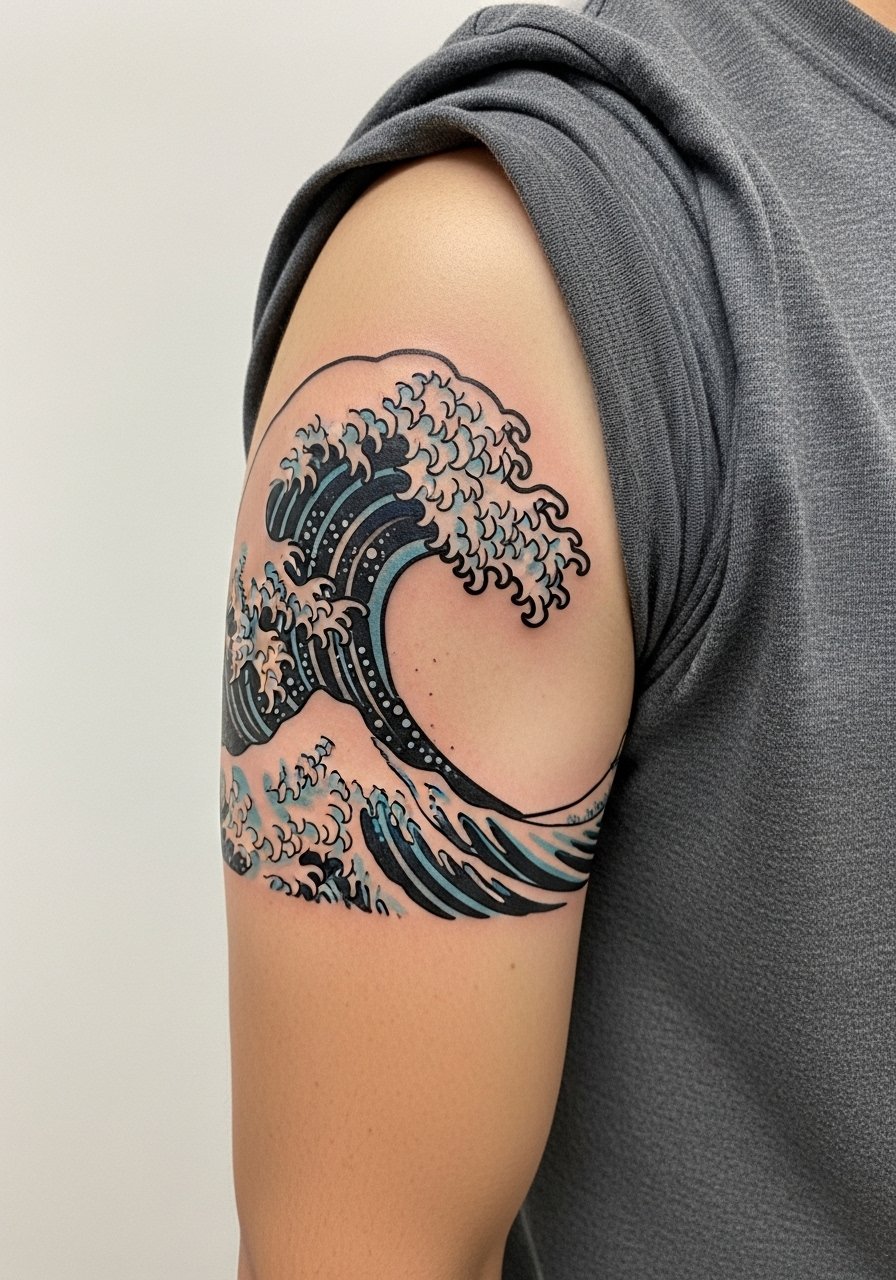
24. Single Line Wave Pattern Around the Bicep
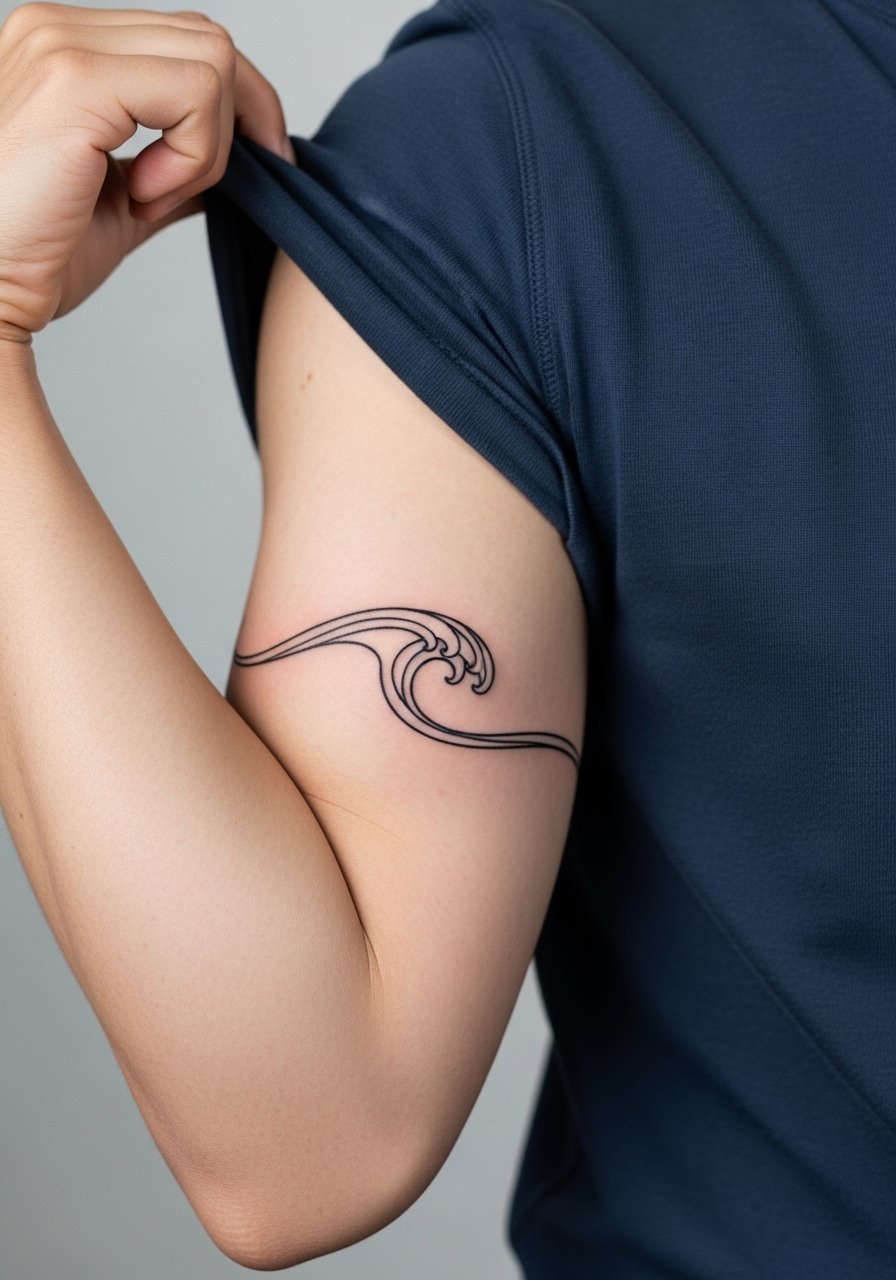
Continuous single-line wraps look elegant but the key is not to let the line become too thin. Thin single-line work on moving tissue can blur unevenly. Tell your artist you want a steady moderate line weight and to mark the pivot points so the wrap flows with the muscle. One tidy session will do this piece. A henley shirt rolled sleeves shows the wrap without distractions.
25. Small Nautical Star Near the Bicep Edge
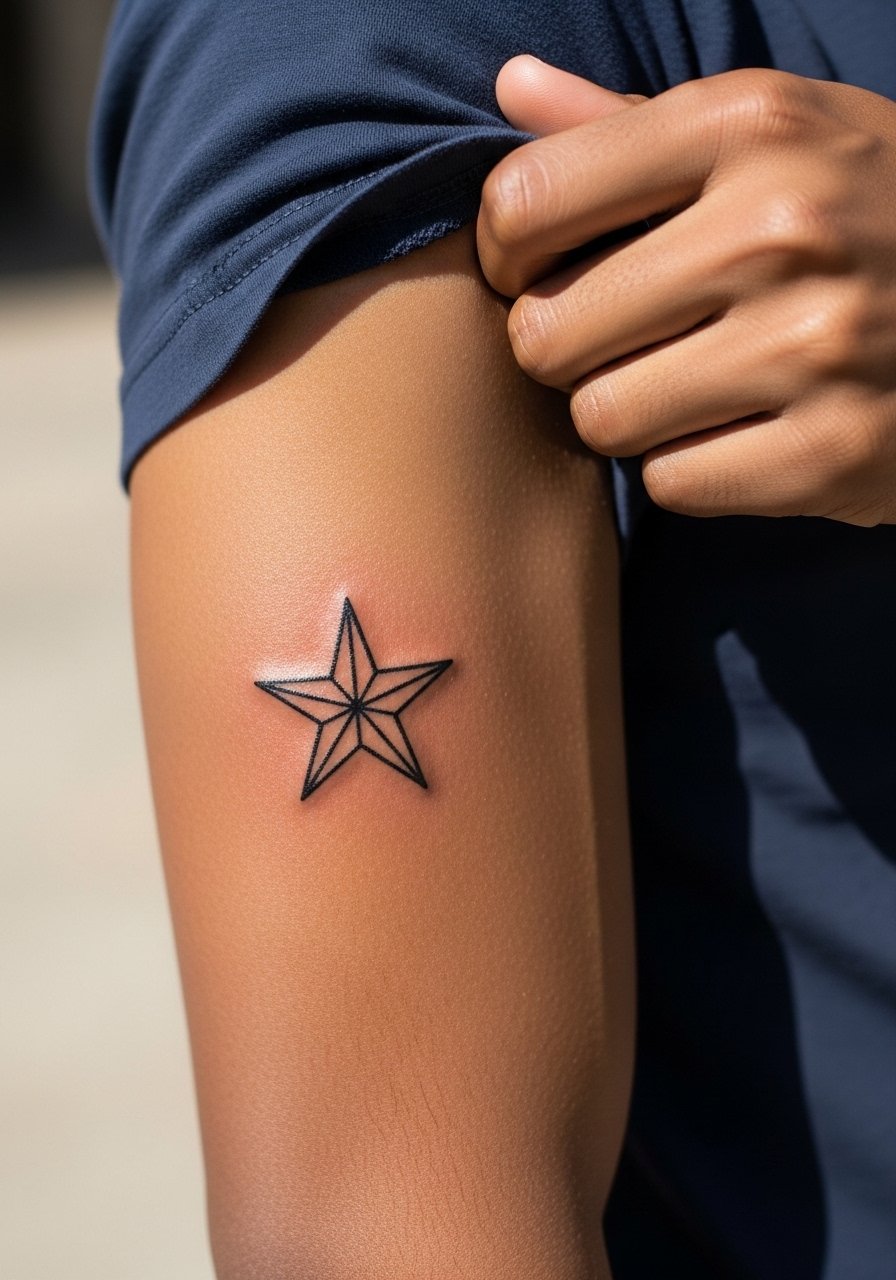
Tiny nautical stars can be classic accents, but tiny points on the bicep will soften if placed on high-movement zones. Place the star where the muscle is flatter at rest and ask for slightly thicker points. This is usually a fast single-session piece. If you want it visible casually, roll sleeves or try a short sleeve button up.
26. Wave Crest with Slight Color Pop on the Outer Arm
A small color pop in a largely black outline design gives a modern twist and tends to age well on the outer arm. The mistake is overusing color that sits under thin lines. Ask your artist to compartmentalize the blue in a single block away from the tightest linework. One session often suffices for a 3×4 inch design. For casual wear try a black vneck tee men to let the blue read without competing patterns.
27. Sleeve Starter: Mythic Creature Blending to Shoulder
When planning a sleeve starter, think modular panels that will connect later. A common planning error is leaving no negative space between future panels, which makes future additions harder. During consultation, ask the artist to sketch connection points and to leave lighter anchor zones at seams. Expect three or more sessions to build a coherent starter that can be expanded to a full sleeve.
Frequently Asked Questions
Q: Will fine line inner bicep work blur faster than outer arm fine line?
A: It depends on movement and how tight the linework is. The inner bicep sees more friction and thinner skin, so asking for slightly thicker strokes and planning a touch-up at year two reduces the risk of early blur.
Q: How should I prepare clothing-wise for a long bicep session that will include color?
A: Wear a loose tank top you can pull aside or a short-sleeve button-up unbuttoned for easy access. A loose shirt avoids rubbing the fresh work when you leave the studio and keeps pressure off the area during transit.
Q: If I want a portrait that flexes naturally, what should I tell my artist during consultation?
A: Ask for micro-realism with layered stipple shading and stronger anchor lines around facial features. Request a 4×6 inch mockup and flex while the stencil is on so the artist can adjust placement for muscle curvature.
Q: Are blackwork bands safer than dense color wraps for long-term maintenance?
A: Blackwork with intentional negative space tends to hold predictably because dense color can age unevenly in high-friction zones. Planning breaks and chevrons in a band reduces the risk of a visible blob if slight blowout occurs.
Q: How do I find artists who specialize in illustrative bicep work without waiting months?
A: Try local hashtag searches like #biceptattoomen and use booking apps such as Booksy for guest spots. Ticketed conventions and Reddit threads often surface guest artists who travel without long waiting lists.
