
Sitting in the chair with the stencil on your back is the moment most people realize they underplanned the placement. The scale of wings looks different in motion and under salon light. Small changes to line weight and spacing made during that five-minute check determine whether geometric elements hold crisp edges or merge into a soft blur after two years. Start with these 21 clean approaches so you can ask the right questions before the needle touches skin.
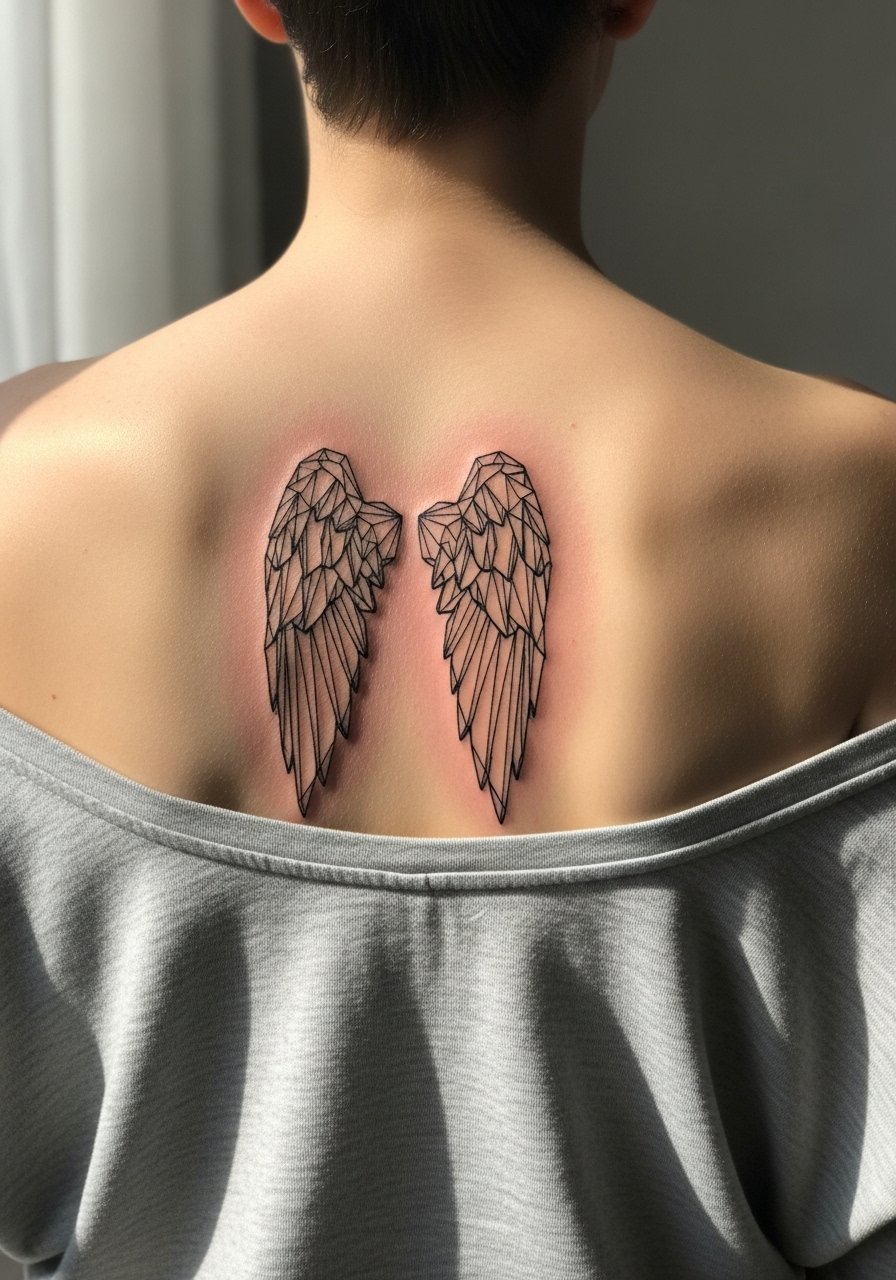
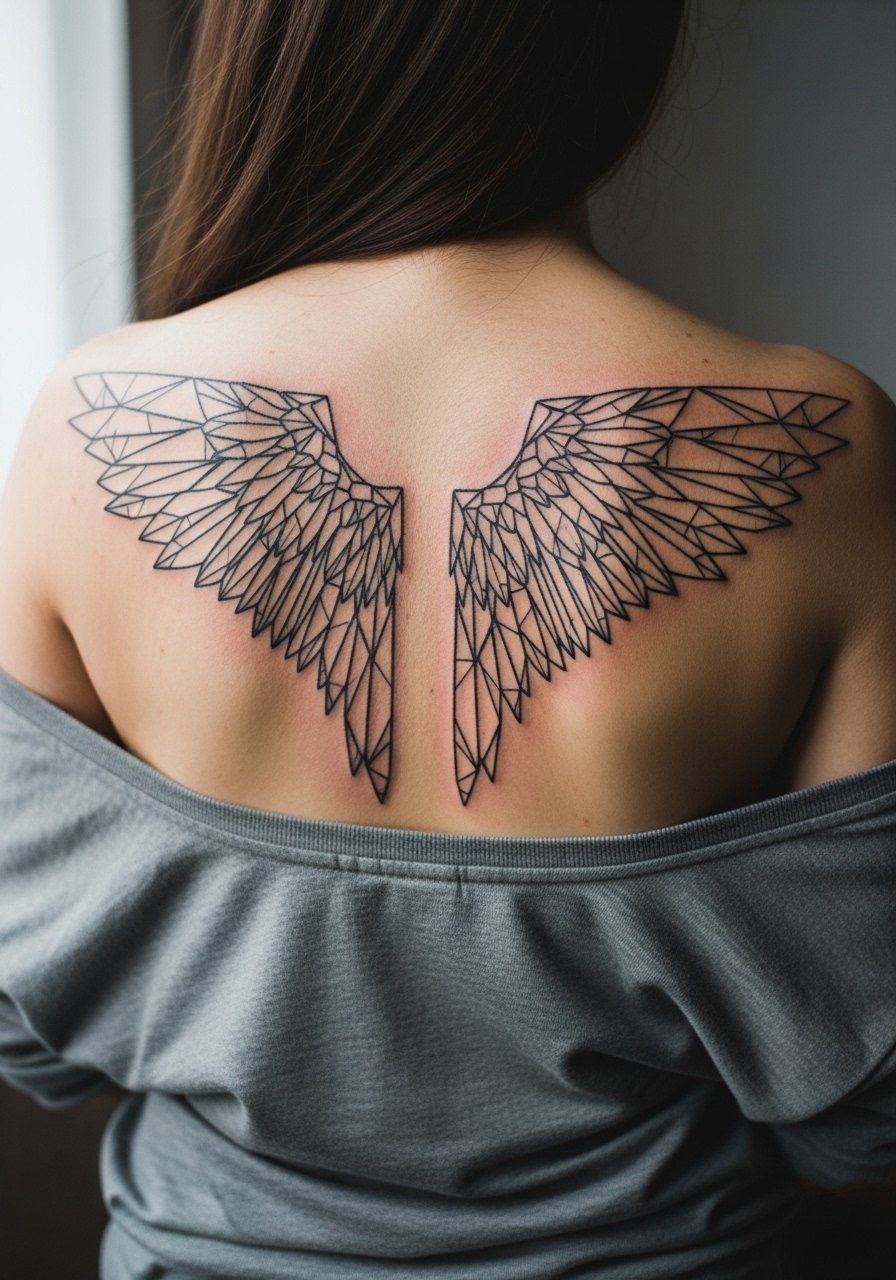
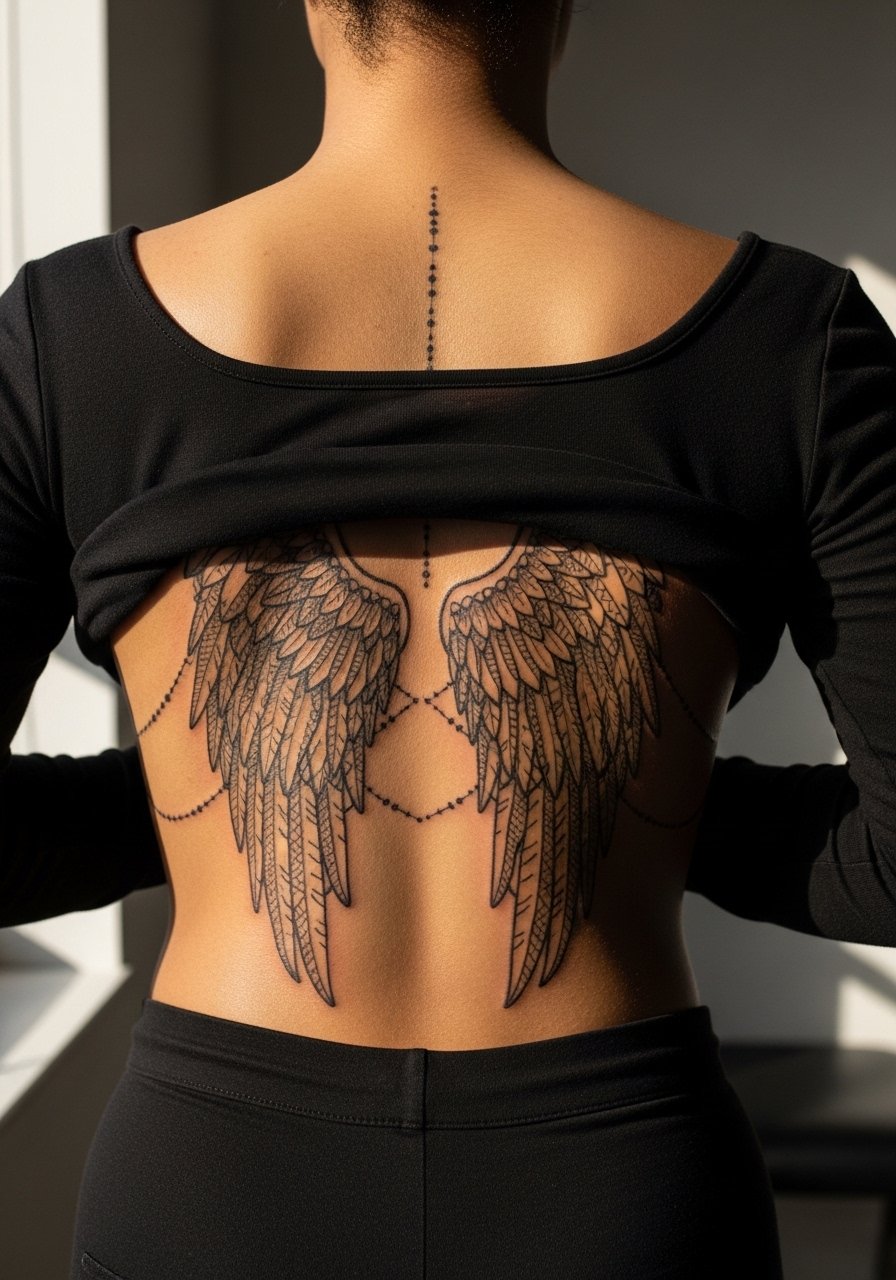
1. Full-Span Symmetric Wings Along the Spine
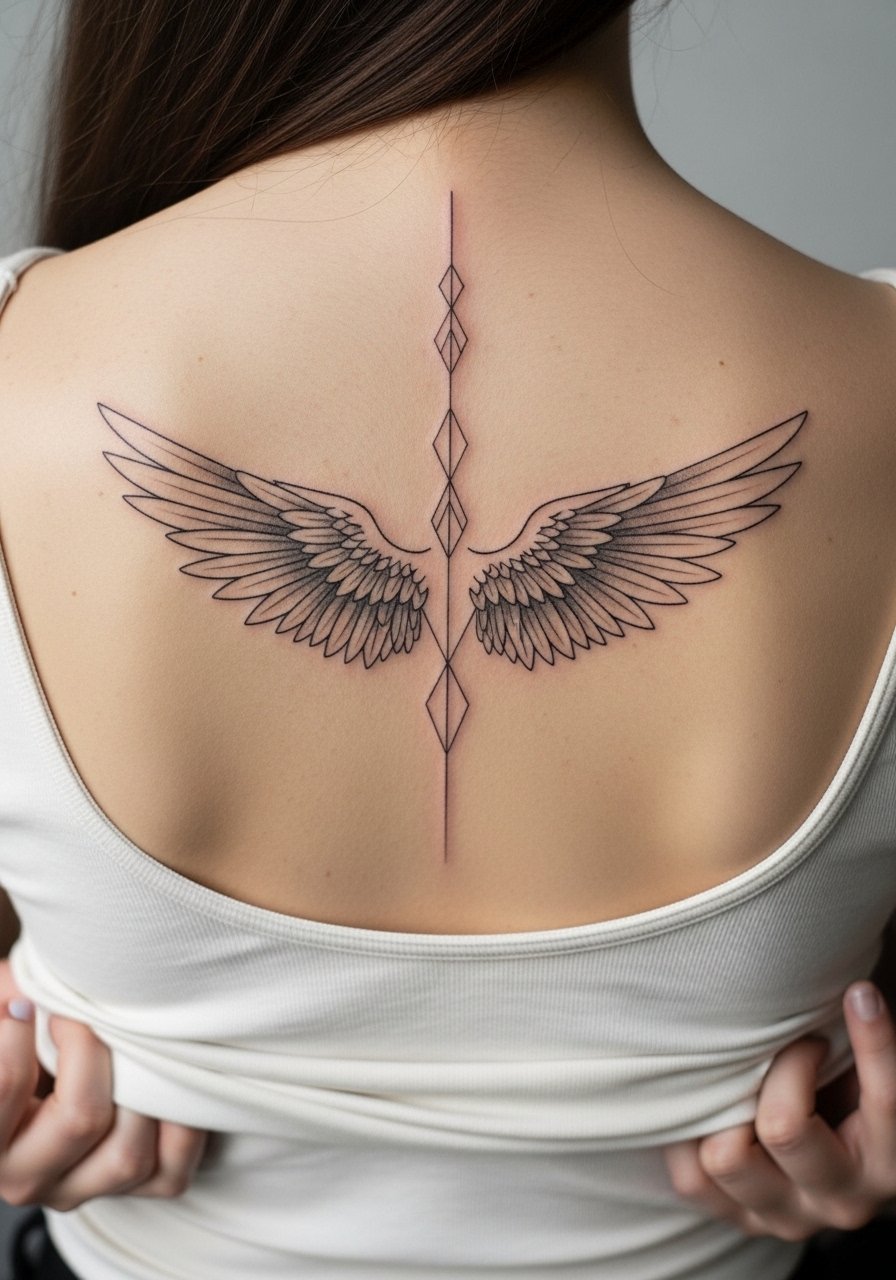
I recommend this when you want symmetry and a strong centerline on the back. Tell your artist to plan the wings around the spine as a central axis so the geometry reads the same when you stand and when you bend. A common mistake is shrinking the design to fit crossed arms, which makes the fine geometry blur over time. Expect the session to feel long, with a medium pain level because the spine sits close to bone. At six months the linework looks clean, at two years thin elements may need a touch-up, and by five years tighter geometry often requires reline work. For showing it off, pair the piece with a scooped-back dress for evening looks, or a button-back tank for casual wear.
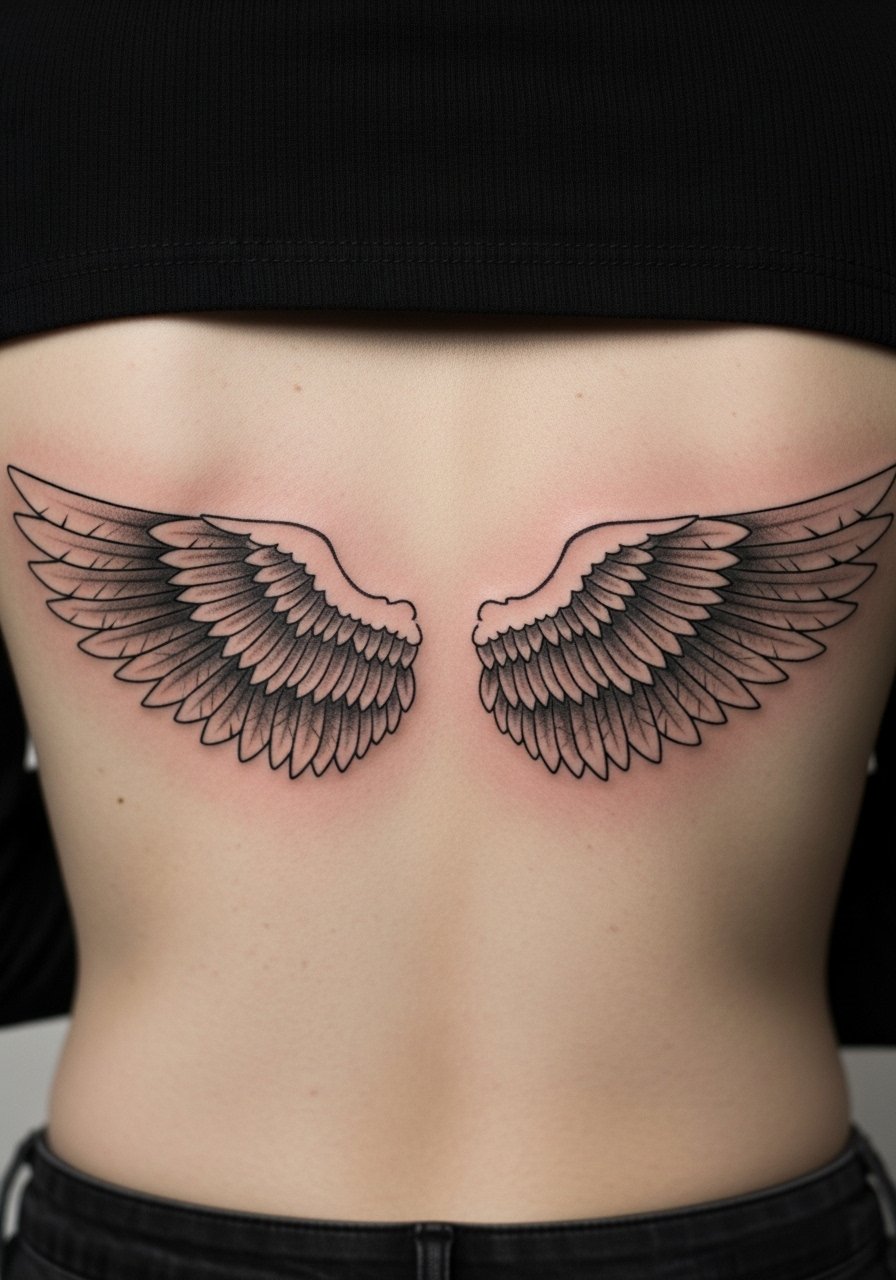
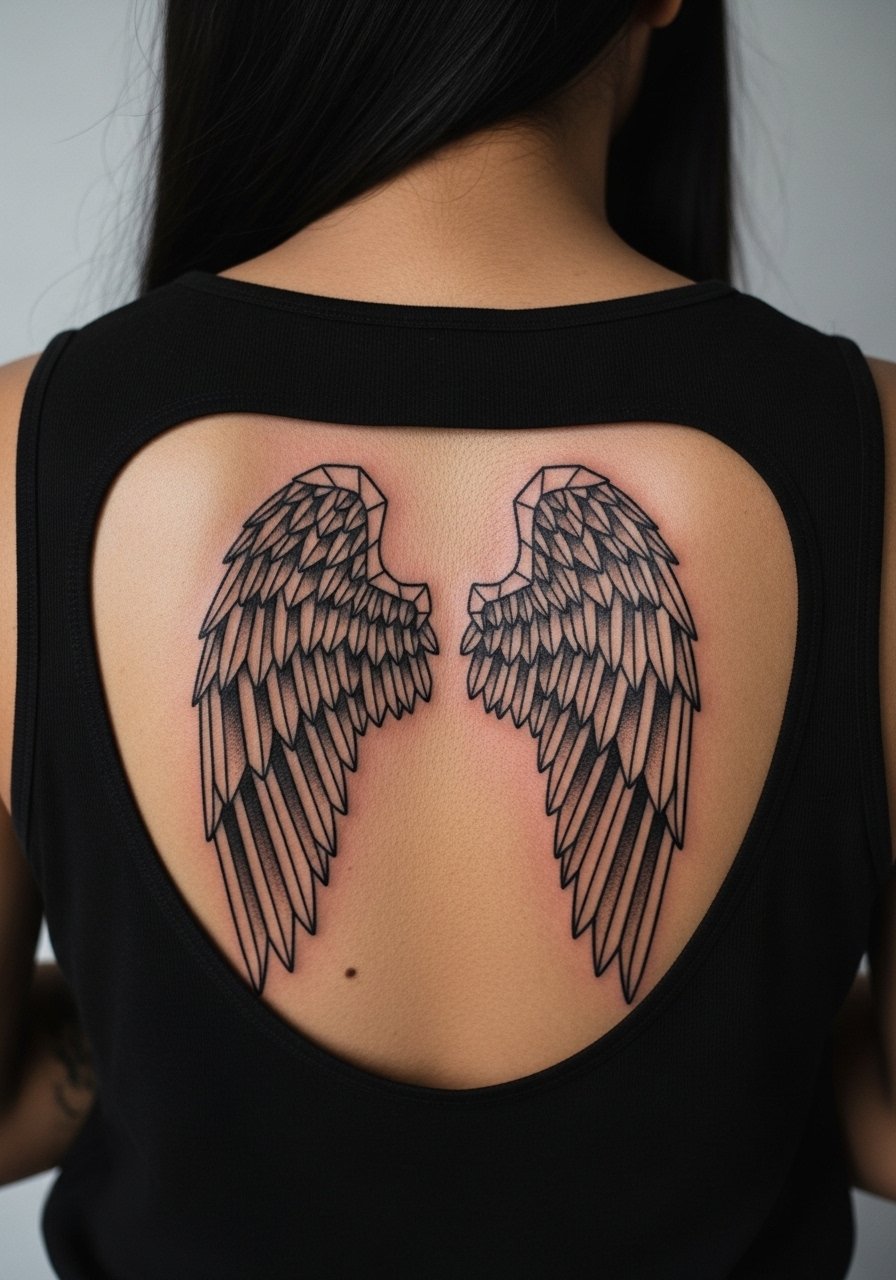
2. Wing Motif Across the Shoulder Blades, Bold Blackwork
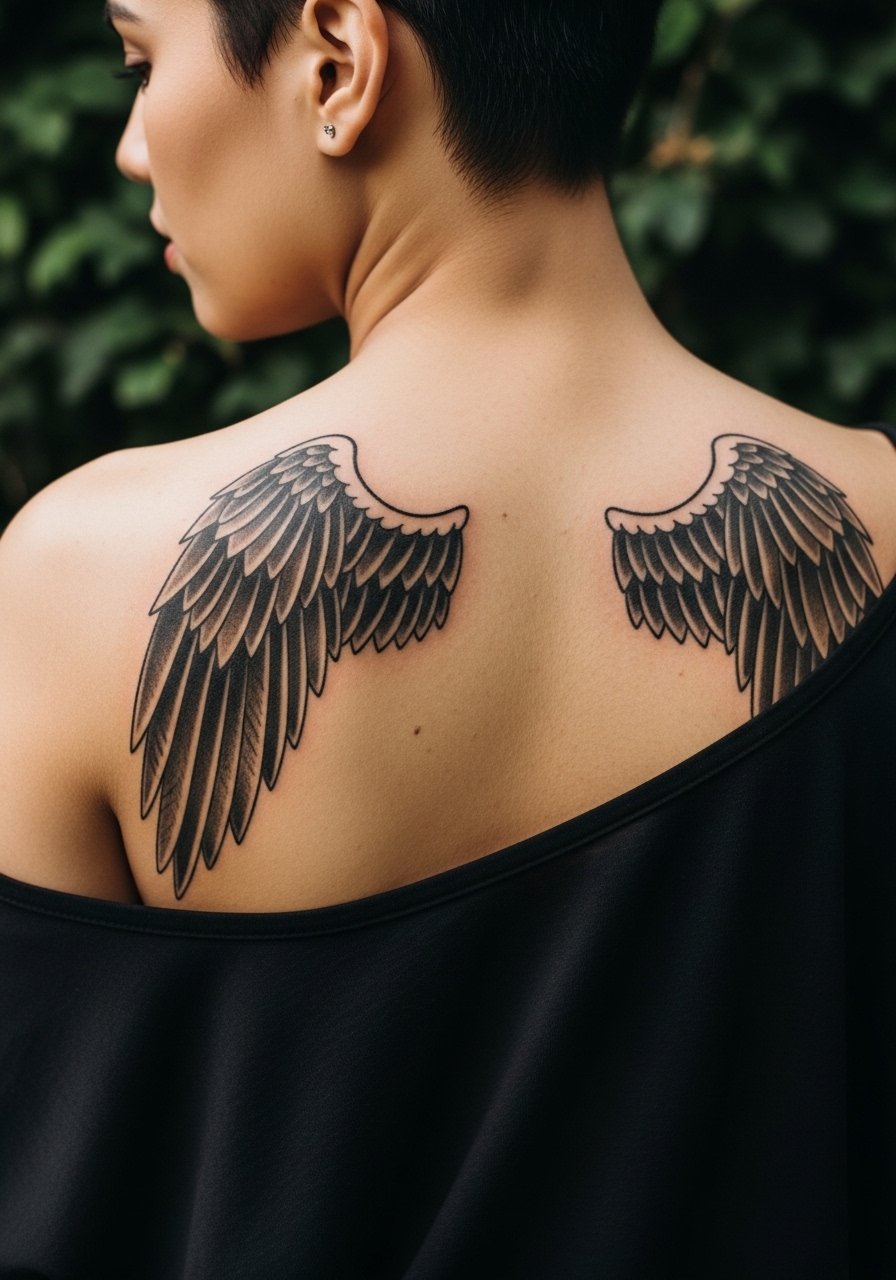
This version favors saturation over tiny detail, so it holds well on oily or sun-exposed skin. Tell your artist you want heavy outlines and solid fills in the core geometric panels. The most common flaw is over-detailing inside each panel, which looks great fresh and then softens into muddiness. Pain is moderate since there is more muscle than bone here, and a single session can often handle the outline and some fill. Expect good longevity from bold fills and touch-ups at year three to keep saturation dense. For outfits, open-back tops or a wide-neck blouse frame the shoulder blades without exposing too much skin.
3. Minimalist Dot-Work Wings Near the Nape
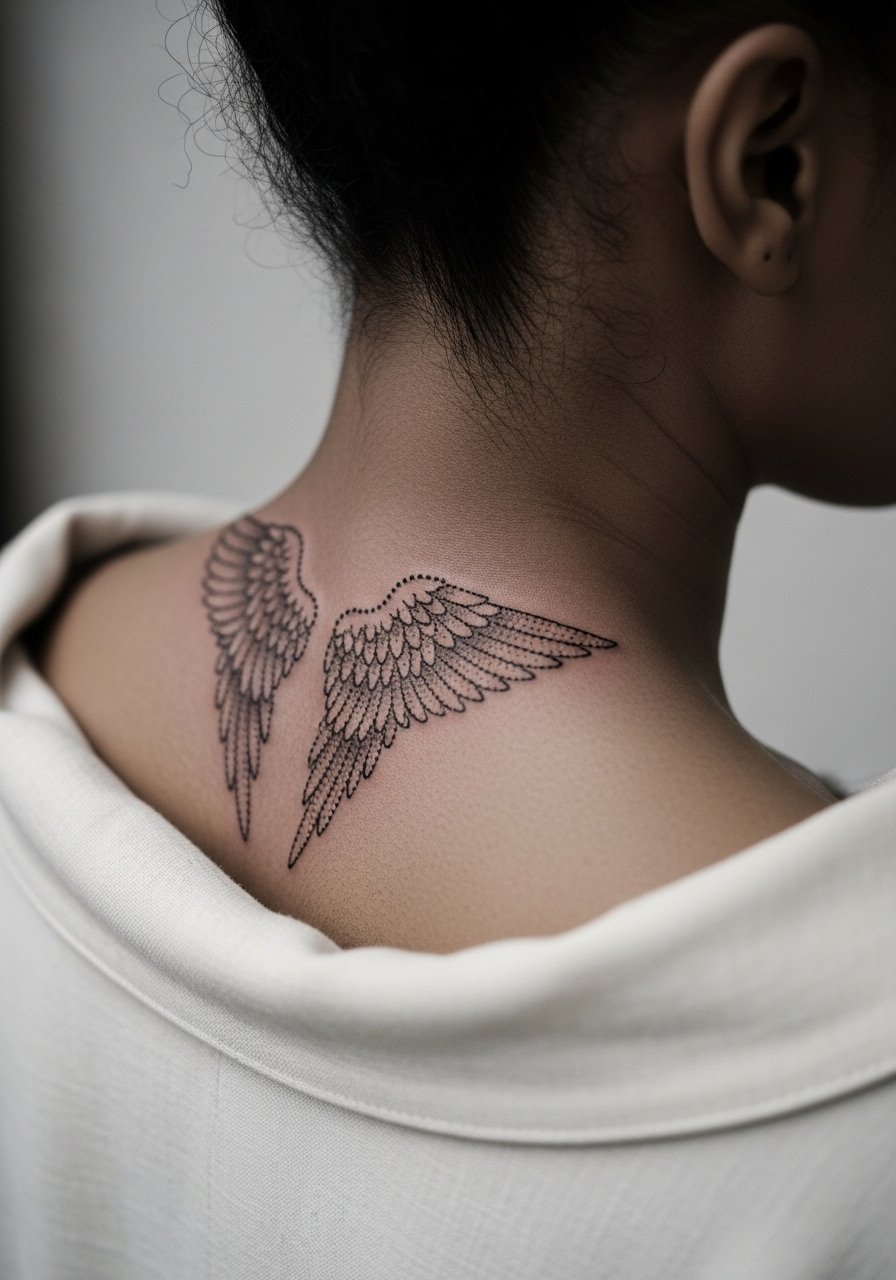
Choose dot work for a subtle, airy take that still reads as geometric. In consultation say you want stipple shading and open negative space rather than continuous fill. The controversy here is that fine dot work close to the neck can fade faster. One camp argues delicate dots lack the saturation to last on moving skin. The other camp says careful spacing and deeper passes make stipple endure. Expect a light session with some tenderness at the nape. At six months the texture holds, by two years the faint dots may need a light touch-up. For showing this off, pair it with a thin chain necklace that sits above the design.
4. Geometric Single Wing Sweeping from Mid-Back to Hip
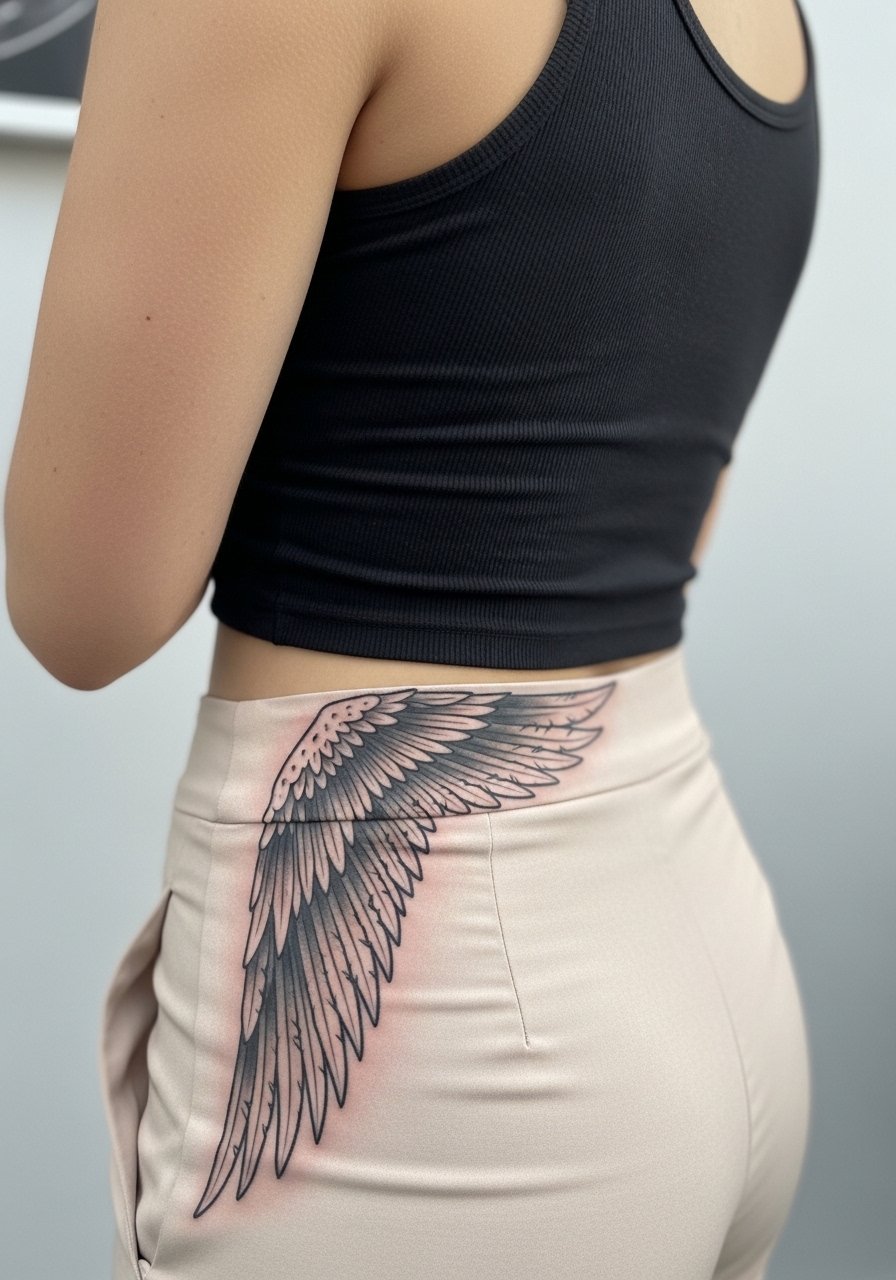
This asymmetric option reads dramatic in photos and in everyday movement. Tell your artist you want the wing to follow natural muscle flow so the geometry bends with the body. A common mistake is forcing perfectly straight grids over curved areas, which causes distortion when you move. Expect varied pain across the piece, higher near the hip bone and gentler over fleshy mid-back. Longevity is good if lines are allowed breathing room. For the session, wear high-waisted bottoms you can lower slightly like high-waisted denim so the artist accesses the lower reach comfortably.
5. Fragmented Panels with Negative Space Across the Lower Back

This design uses gaps to prevent dense areas that commonly blur. Tell your artist to break large fields into separate panels with negative space between them. The mistake to avoid is filling every segment with tiny details, which accelerates softening. Lower back skin tends to stretch with movement, so spacing matters more than line fineness. Session time is moderate and often split across two sittings if you want shading. For evening wear, open-back dresses or a low-back bodysuit keep the panels visible while giving the piece room to breathe.
6. Interlocking Geometric Feathers with Stipple Shading

Interlocking feathers read detailed without crowding the skin if the artist uses stipple shading and varied line weight. Ask for a mix of whip shading and dot work so each feather reads separately. A common aging problem is uniform thin lines across the whole feather, which can all blur at the same rate. This pattern benefits from slightly bolder anchor lines and softer internal texture. Expect moderate discomfort on the mid-back with an average session time of two to three hours. For casual reveals, a cropped linen shirt or a partially unbuttoned blouse keeps attention on the center panels.
Studio Day Picks
These first six back pieces vary from concentrated fine line to bold blackwork, so a couple of practical items make the session and healing window smoother.
-
Stencil transfer paper kit. Lets you preview the exact placement on skin before the needle goes in, which is crucial for spine-centered and asymmetric wing placements.
-
Topical numbing cream. Useful for those sensitive on the hip or lower back, applied per shop guidance to reduce discomfort for long sessions.
-
Thin protective film roll. Helps protect lower back pieces from friction with waistbands and from rubbing during the first few days.
-
Fragrance-free gentle body wash. Cleans the healing back tattoos without stripping oils that support crisp linework.
-
Aquaphor healing ointment. Thin layers during the initial days can protect fine geometric lines while the top layer of skin repairs.
7. Minimal Wireframe Wings for a Clean, Airy Look
Wireframe wings use minimal linework to read as architectural. Recommend a slightly heavier line at junction points so the design keeps shape as skin shifts. A common mistake is going too thin everywhere, which makes the piece vulnerable to blowout over time. Session pain is low to moderate on the upper mid-back. For longevity, plan a touch-up at year two for thin connector lines. Pair this with a wide-neck casual top to show the airy structure without overexposing skin.
8. Mandala-Infused Wings Centered on the Lower Thoracic Spine
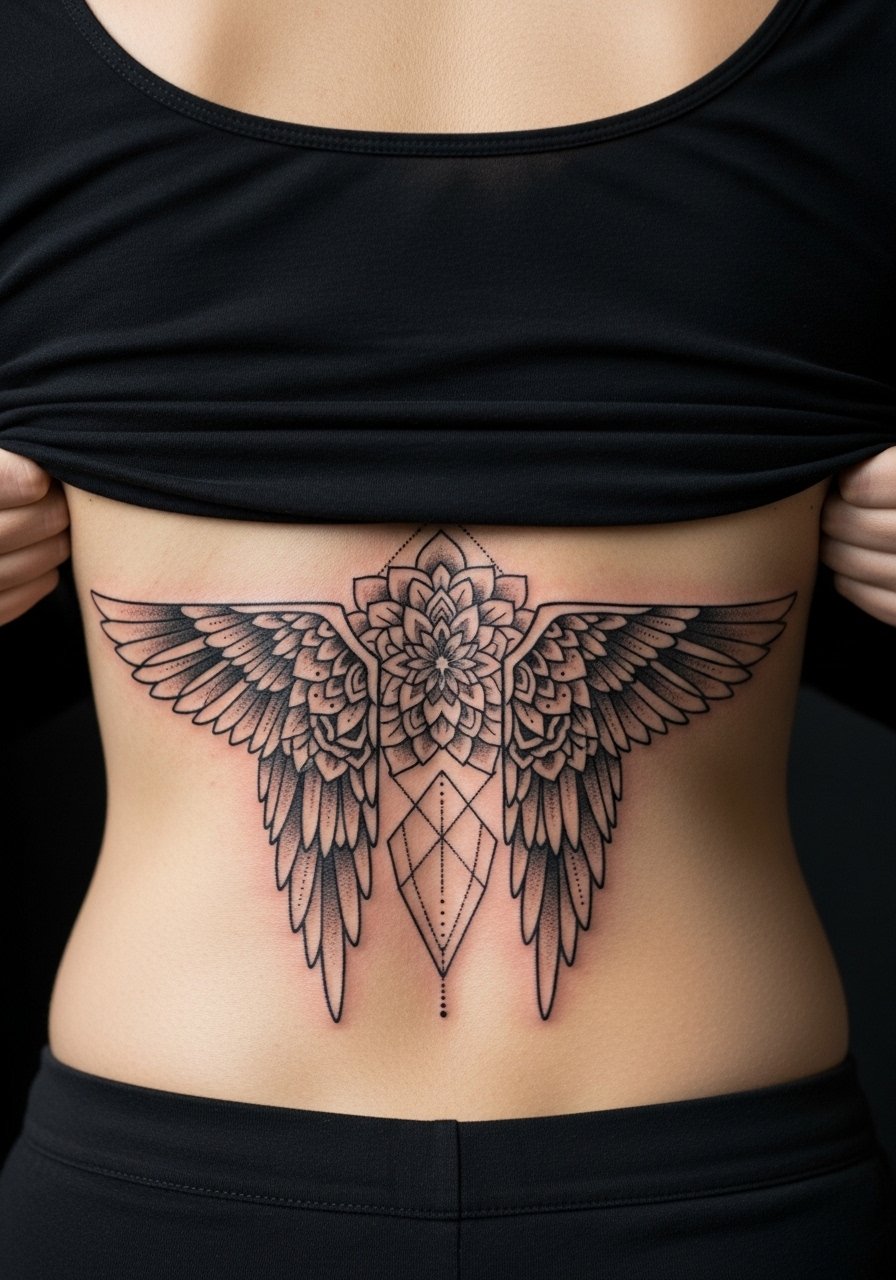
Combining mandala geometry with wing silhouettes gives a focal medallion above the spine. Tell your artist you want open negative spaces within mandala nodes to avoid dense packing. The cultural origin of mandala patterns comes from sacred design traditions, so consider variations that respect that lineage rather than copying ritual symbols directly. Pain is moderate since the work sits over the spine. At two years thinner mandala connections may soften, so ask about slightly bolder anchors during the session. This design pairs well with a scooped-back sweater for cooler nights.
9. Textured Layered Wings with Micro-Line Accents
Layering textures gives depth without relying on color. In consultation ask for alternating line weights and occasional stipple fills so each layer reads separately. The usual mistake is too many micro-lines packed tightly, which merge into a grey block with sun exposure. Sessions for layered pieces run longer because of the detail. Touch-ups at years two to three are common to maintain crisp micro-lines. For showing off the layered effect, a button back tank keeps the upper back visible and framed.
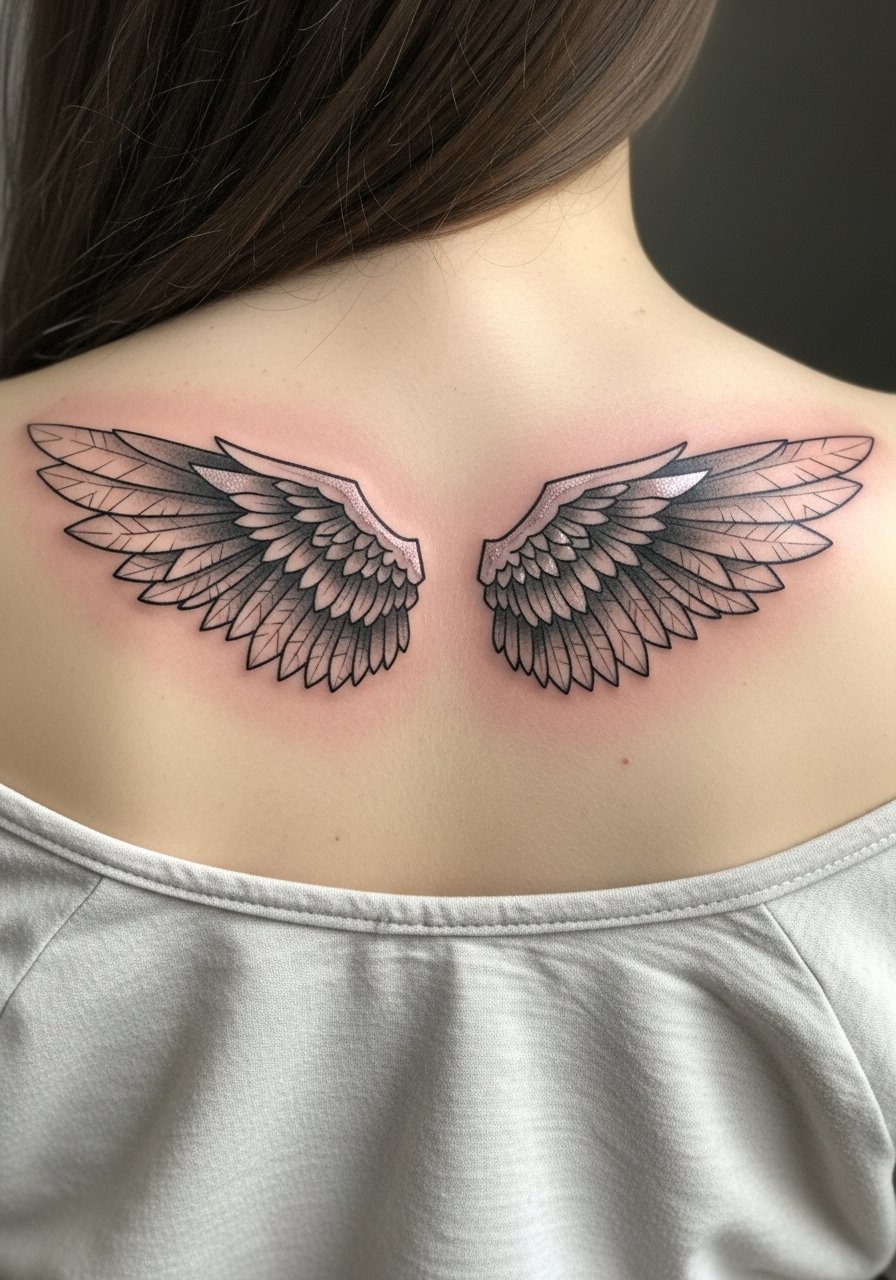
10. Low-Contrast Geometric Wings with Soft Shading
Soft shading can make geometric wings feel more sculptural while keeping lines readable. Ask for whip shading that follows each feather's direction rather than cross-hatching. The aging risk is that low-contrast shading fades faster than filled blackwork. Expect a gentler pain level and a medium-length session. For the session, wear a cropped tee you can lift without stressing seams or elastic against the tattoo.
11. Negative Space Wings Formed by Intersecting Lines
Negative space designs let the skin tone become part of the composition. During consultation say you want thick anchor lines with thinner intersecting lines so negative zones remain distinct. The common error is matching all lines too closely, which collapses the negative space into a grey mass after healing. Pain is moderate and the session often requires careful stencil alignment. Check the stencil in various standing and bending positions before the needle. For evening wear, a wide-back dress highlights the negative zones cleanly.
12. Optical-Illusion Wings that Curve with Motion
This design plays with perspective so the wings appear to move when you shift. Ask your artist to map the geometry over muscle contours and test the stencil in walking and sitting positions. A common mistake is ignoring how the skin puckers when you sit, which can warp optical lines. The session is detail-rich and may be done in multiple passes. For showing motion, open-back or asymmetrical tops like an off-shoulder blouse let the wings read in different poses.
13. Haloed Wings with Subtle Metallic Ink Accents
Metallic inks add a faint reflective line that catches light, but they can fade unevenly. Tell the artist you want metallic accents used sparingly along anchor lines, not as fill. Some artists avoid metallic inks because the pigments behave differently in healing. If you are sensitive to new pigments, discuss a small patch test. The session feels similar to a regular outline job, with extra care during healing. To show off the subtle shimmer, choose a low-back dress or a strappy top that leaves the upper back visible.
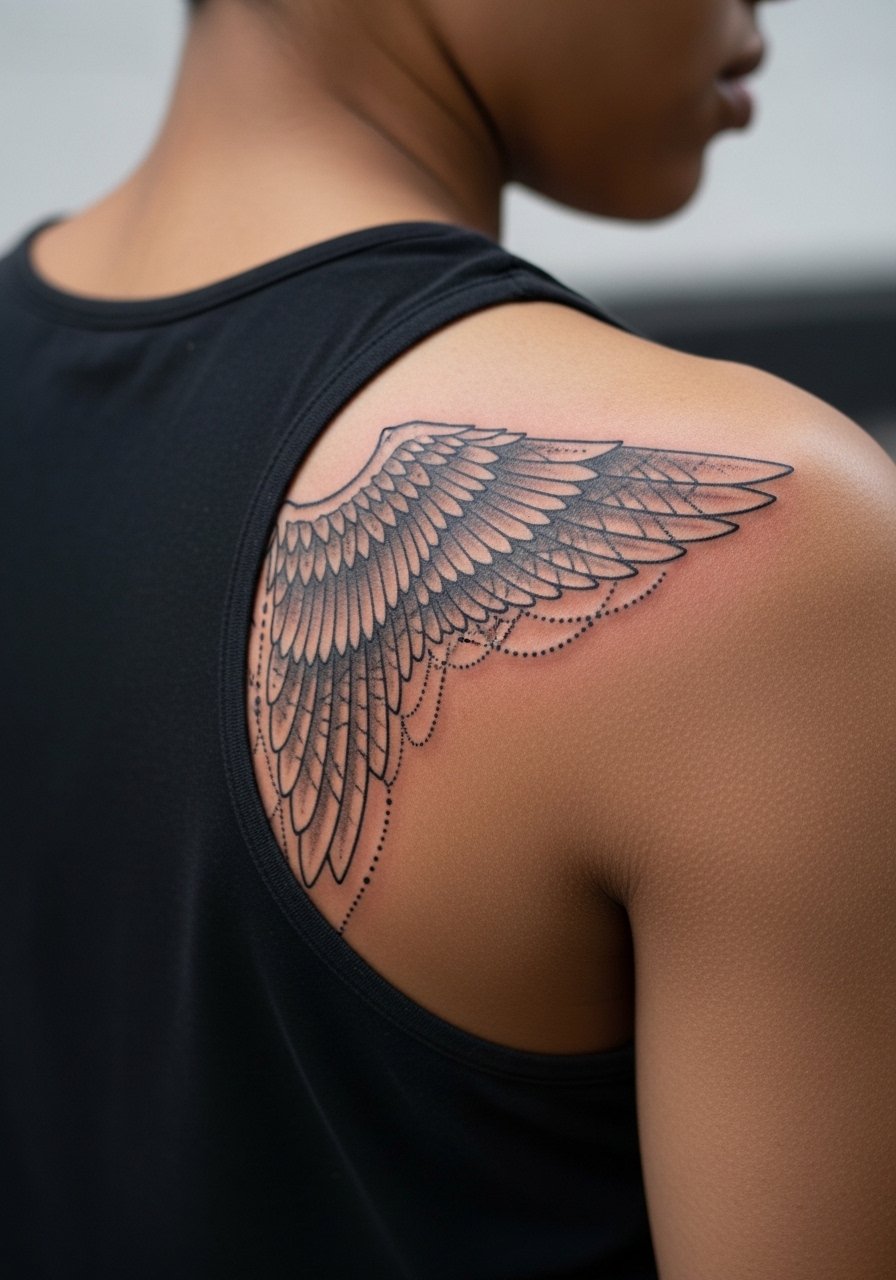
14. Angled Geometric Wings That Follow the Shoulder Line
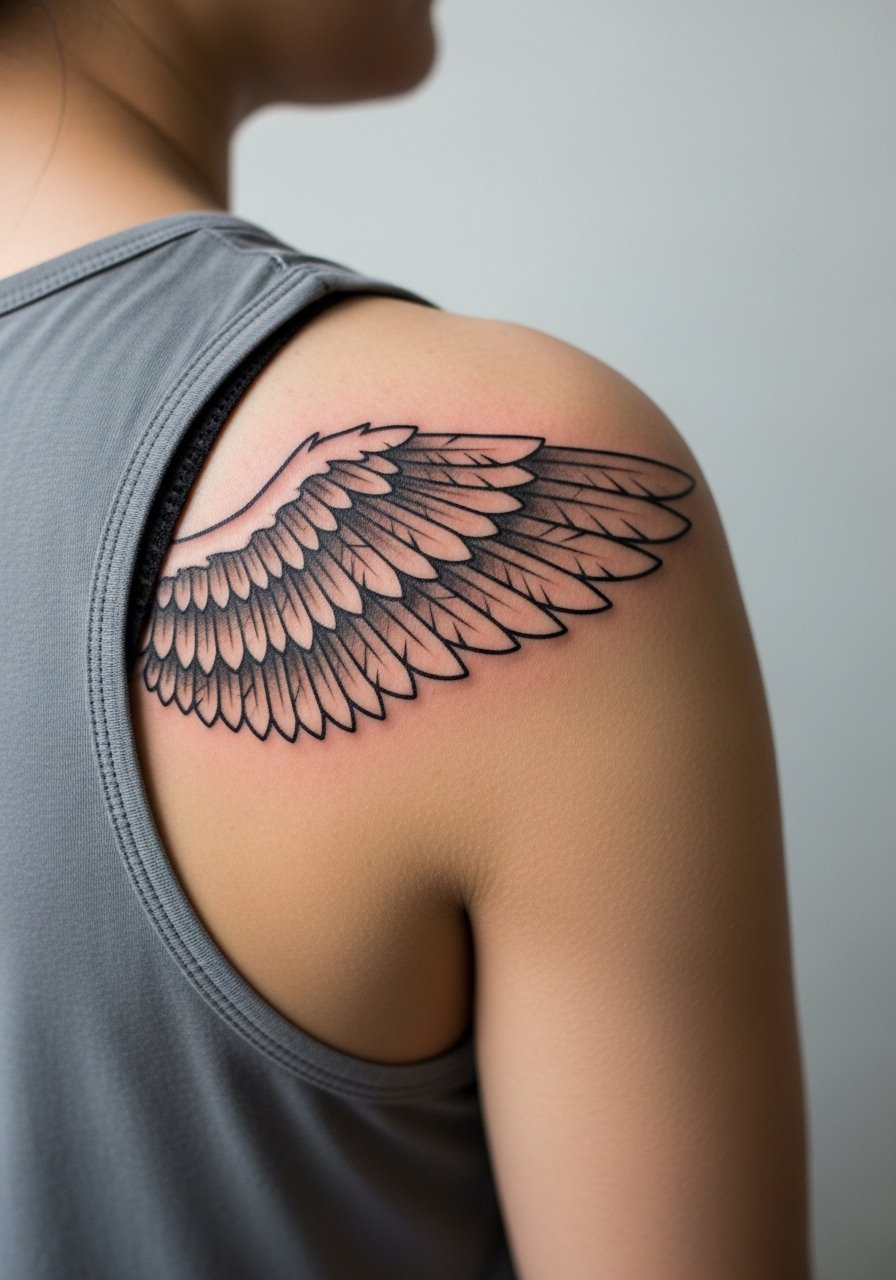
Designing wings that follow the shoulder line makes them read as a natural extension of posture. Ask for geometry that shortens near the shoulder joint to avoid flaring over the arm. A common mistake is drawing long wings that rub against bra straps, causing irritation during healing. Expect higher friction zones, so plan clothing accordingly during the first week. For outfit pairing, a tank with thin straps shows the angled geometry without constant strap rubbing.
15. Lace-Inspired Geometric Wings with Fine Negative Threads
Lace-inspired geometry reads delicate but still bold when scaled correctly. Tell your artist you want negative-thread lines slightly thicker than hairline so they remain visible after healing. The usual error is micro-scaling lace into tiny motifs that collapse. Sessions require patience because precision matters. For special occasions, pair the lace geometry with open-back formalwear or a scooped-back dress that frames the lace without smudging it in tight fabrics.
16. Fragmented Triangular Wings for a Modern Edge

Triangular fragmentation gives a sharp graphic feel and resists the softening that plagues heavy dot work. Ask the artist to use clear separations between triangles and slightly bolder borders where triangles meet. The mistake people make is filling every triangle with micro shading, which collapses into muddiness. Pain is manageable and sessions can be split if you want layered shading. For casual showing, a wide-neck casual tee displays the triangles cleanly.
17. Winged Chevron Pattern Narrowing Toward the Lower Back
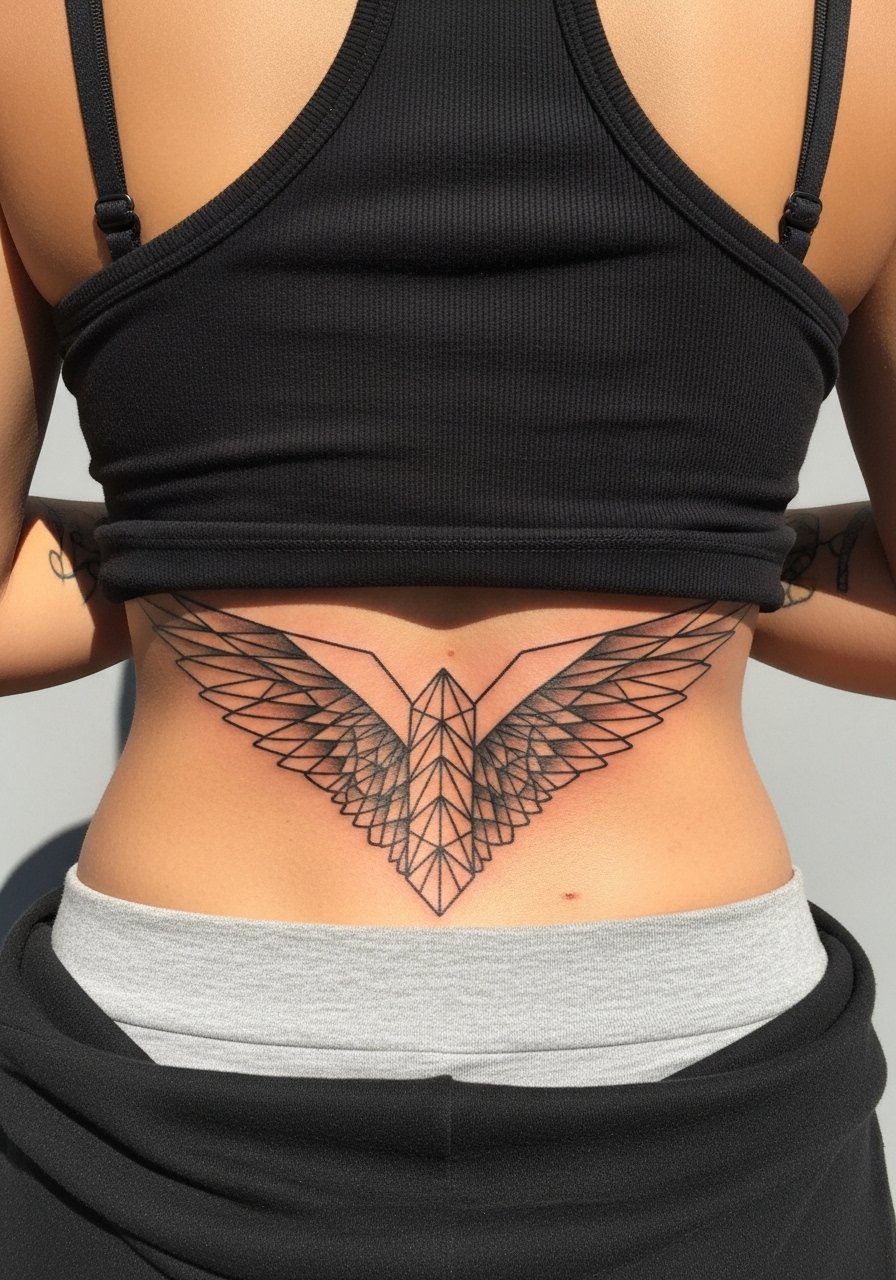
Chevron patterns create directional motion and work well when narrowed toward the tailbone. Tell your artist you want graduated spacing so lower chevrons are more open. The common problem is uniform spacing that makes the lower section dense and prone to blur. Lower back movement and clothing friction matter, so expect touch-ups in high-friction zones. For weekend wear, high-waisted bottoms like high-waisted shorts keep the chevrons visible while minimizing waistband rubbing.
18. Architectural Wings with Bold Anchor Frames

Bold anchor frames help the architecture survive years of sun exposure. Ask for heavier outer lines and lighter internal geometry so the piece retains its silhouette. Some artists debate whether anchors should be heavier than internal detail. One camp prefers heavy anchors for longevity. The other camp argues mid-weight anchors with denser internal contrast achieve the same effect without overpowering detail. The session is straightforward but may take longer if you want heavy fills. For showing the framed structure, choose a button-back top for neat presentation.
19. Mirrored Wings That Extend to the Side Ribs

Extending wings to the side ribs adds wraparound drama but increases sensitivity and movement. Fair warning, ribs are higher on the pain scale. Discuss breathing and short breaks during the consult so you can manage longer sessions. The mistake is packing too much micro detail near the ribs, where skin stretches more and detail blurs. Expect touch-ups along the rib margins sooner than on the central back. For session comfort, wear a cropped athletic top you can adjust without removing.
20. Geometric Wings with Gradient Saturation Toward the Tips
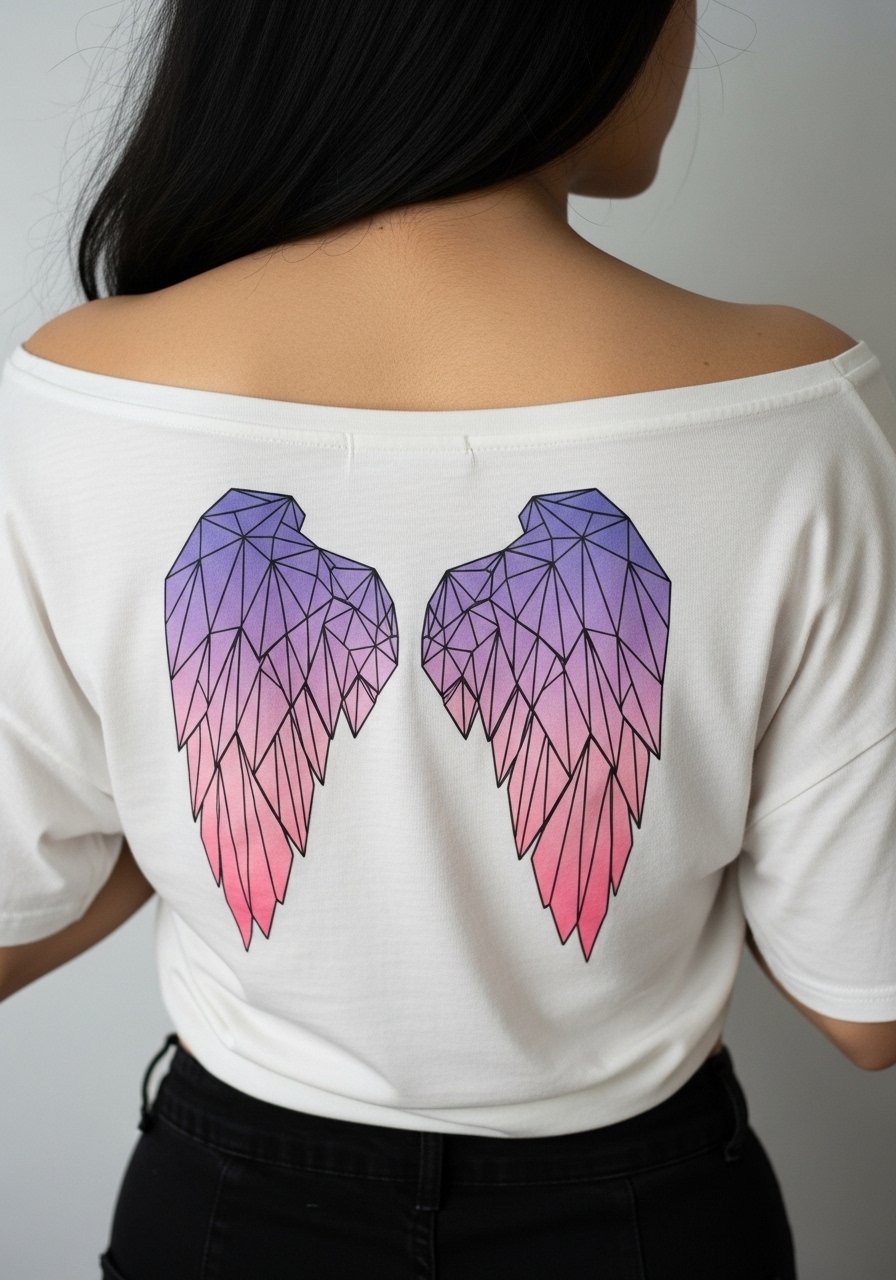
Gradients soften the edge of a geometric wing and reduce the look of harsh cutoffs. Ask for staged passes of saturation that taper gradually so the tips are intentionally lighter. The common mistake is attempting a too-subtle gradient that disappears after healing. Sessions for gradients require careful layering and more time. For wearing, a wide-back sports bra gives access during the session and frames the gradient after healing.
21. Oversized Geometric Angel Wings That Wrap the Entire Back

This full-back option is for people who want a committed statement that moves with the body. In the consult, plan the work as a multi-session custom piece and discuss how panels will age differently. A common mistake is treating a full back like a single session flash, which leads to uneven saturation and inconsistent geometry. Expect varied pain zones and several sessions spread over months. For recovery and daily life, bring a button-down you can remove without pulling over your head and choose loose fabrics for the first two weeks.
Frequently Asked Questions
Q: Will the fine geometric lines on the spine blur faster than bold blackwork wings?
A: Fine lines near the spine can blur faster because the skin there is thinner and closer to bone, but it depends on spacing and depth. In my experience lines with intentional breathing room and slightly bolder junctions keep their shape longer. If you want long-term crispness, discuss anchor lines and touch-up plans during the consult.
Q: How should I dress to the appointment for a lower back wing so the artist has access and I stay comfortable?
A: Wear high-waisted bottoms and a loose top you can pull down slightly or a button-down you can open, so the artist accesses only the tattoo zone. A high-waisted denim short or a loose button shirt works well. Avoid tight elastic that presses on the area right after the session.
Q: Are metallic inks safe for back geometry and do they age differently?
A: Metallic inks can add a reflective line but they react differently in healing and may fade unevenly. One group of artists uses them sparingly and tests skin reaction first. Another group avoids them due to inconsistent longevity. If you want metallic accents, ask for a small patch test and plan potential touch-ups.
Q: How often should I expect to touch up different geometric wing styles?
A: Bold blackwork often needs a touch-up around year three for saturation. Fine line or micro-detail pieces typically need light relines at year two to three. Areas with more friction, like lower back near waistbands, often need attention sooner.
Q: Do geometric back wings need different aftercare than other tattoos?
A: The aftercare itself is similar, but back tattoos can face more friction from clothing and sleeping positions. Keep clothing loose the first week and avoid heavy backpacks or tight bras while the skin seals. If irritation appears, contact your studio for guidance rather than guessing.
Q: Should I be concerned about blowout with tightly packed geometric fills near the ribs?
A: Yes, the rib area is more prone to blowout when lines are too tight. Ask your artist for slightly wider spacing and bolder anchors rather than micro lines crammed together. That planning reduces the risk of ink spread over time.
Q: How do I find an artist who understands geometric wings without naming specific accounts?
A: Search local portfolios through directories and convention guest lists, and study hashtags like geometricbacktattoo and geometricwings to see healed examples. Visit two or three shops and ask to see healed photos from at least six months post-session before booking.
