
Fine line tattoos dominate Pinterest right now, but what looks fragile on a screen can blur fast on real skin. The forearm is forgiving, yet a sleeve that reads well years later needs bold anchors, smart spacing, and planned touch-up windows. These 21 sleeve sketch ideas balance crisp sketchwork with bold structure so you can picture a forearm that still reads clean after sun, sweat, and time.
1. Minimalist Arrow and Compass on Inner Forearm
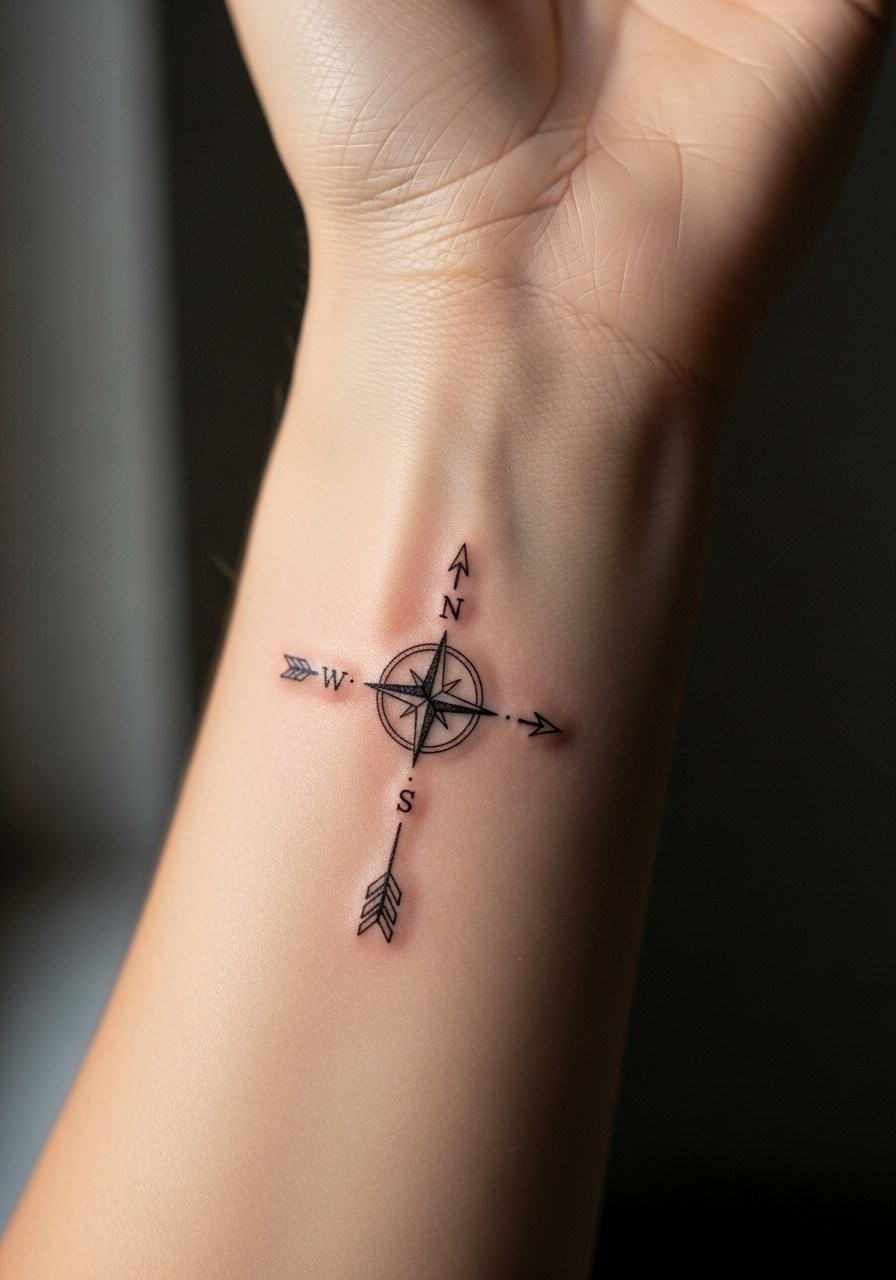
I've seen this combination age well when the arrow is drawn with a slightly bolder shaft than the compass points. Tell your artist you want the compass readable at arm's length and the arrow to have an anchor stroke so it keeps shape. Common mistake is making everything ultra-thin, which reads great at first and then blurs together by year three. Expect a mild sting along the inner forearm, a one to two hour session depending on size, and a possible touch-up at year two. For showing it off, rolled sleeves or a slim linen button-down frame the work without crowding the linework.
2. Bold Sketchy Ship Wrapped Around the Forearm
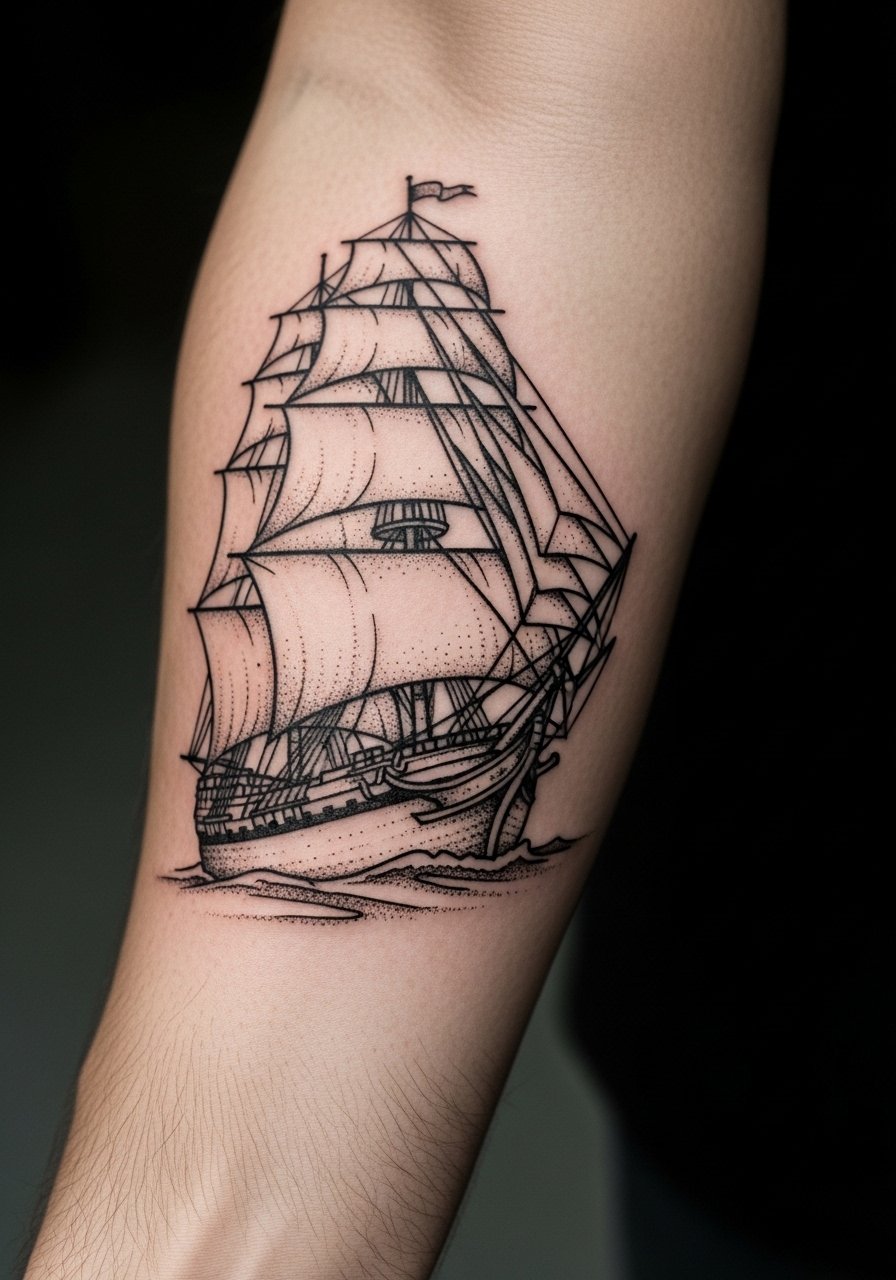
There is something about sketchy black outlines paired with heavy anchors that reads from across a room. For a forearm wrap, ask the artist to place the mast as a vertical anchor so the whole piece keeps direction when you rotate your arm. Mistakes include packing too much tiny detail into the sail area, which softens into a gray patch over a few years. Session time is usually two to three hours. Expect more soreness on the outer forearm where skin is thinner. Pair with a rolled-sleeve chambray shirt when you want the silhouette to read.
3. Botanical Linework Sleeve Sketch
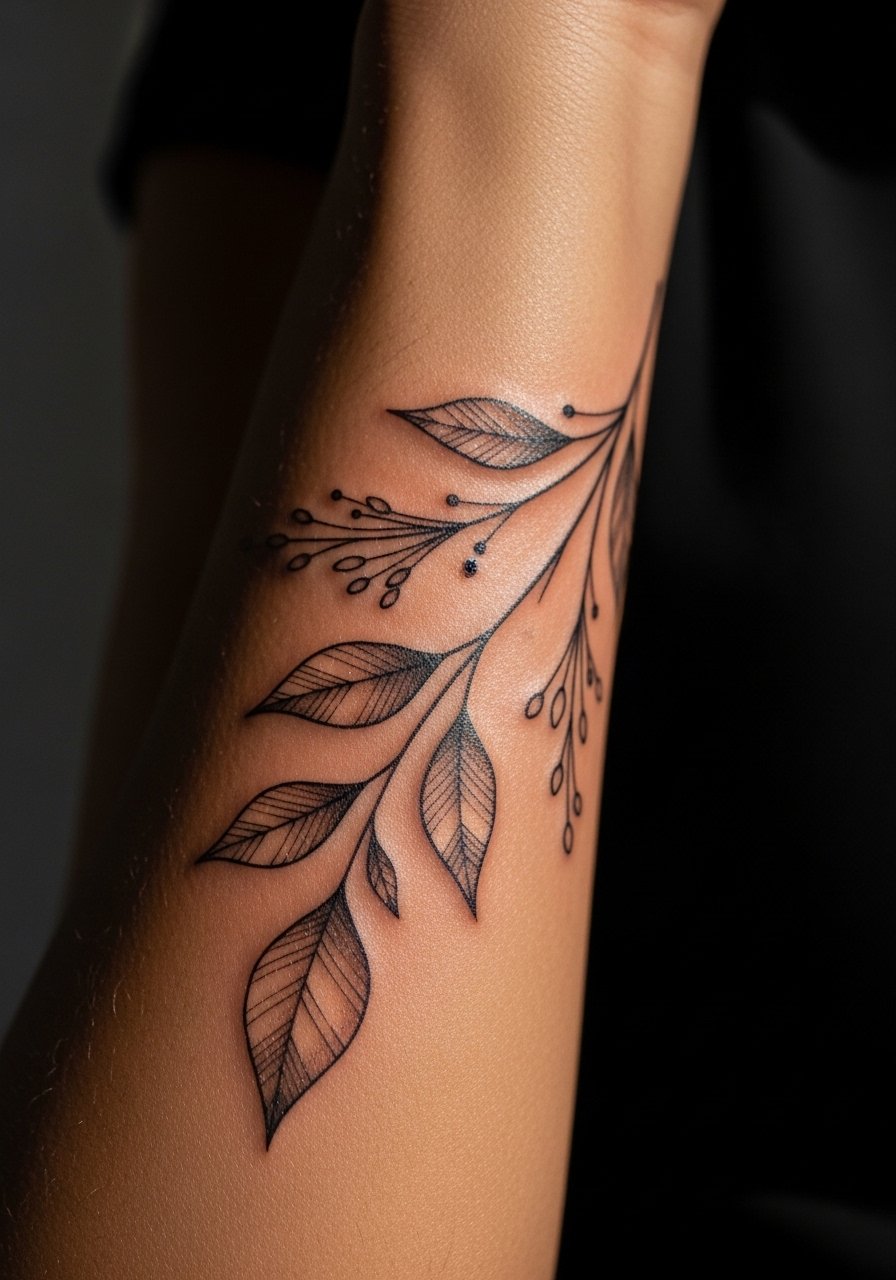
Most botanical sleeves that hold up combine fine stems with saturated leaf anchors. When you consult, say you want "negative space breathing room" between clusters so the stems do not merge over time. The common error is packing dense stipple into tiny leaves. At six months the stems look crisp, by two years the tiny nodes may need a touch-up unless they were spaced intentionally. Pain sits at a moderate level along the inner forearm. Showing this design off pairs well with a short-sleeve cotton tee rolled just above the elbow.
4. Geometric Band with Mandala Accents
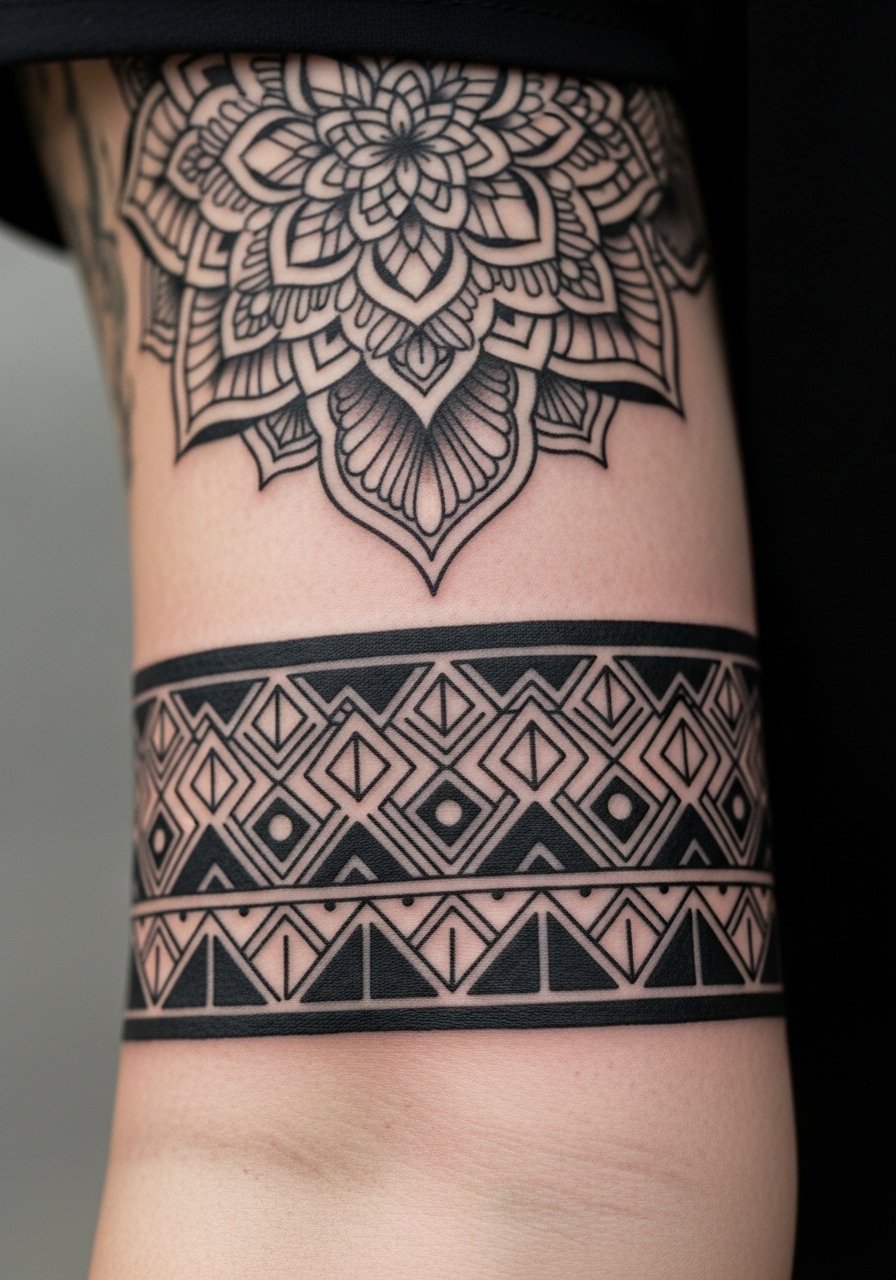
Fair warning: the biggest mistake with geometric bands is going too narrow. The symmetry relies on spacing, so instruct your artist to map the negative space and leave at least 4 mm between dense lines. One camp argues mandala elements should be micro for delicacy. The other camp favors thicker spokes for longevity. Name both camps in conversation and ask which approach they use. Expect a steady throb during the band pass, roughly one to two hours. Pair with a minimalist leather cuff when you want to highlight the circular accents.
5. Micro-Realism Portrait in a Sketch Frame
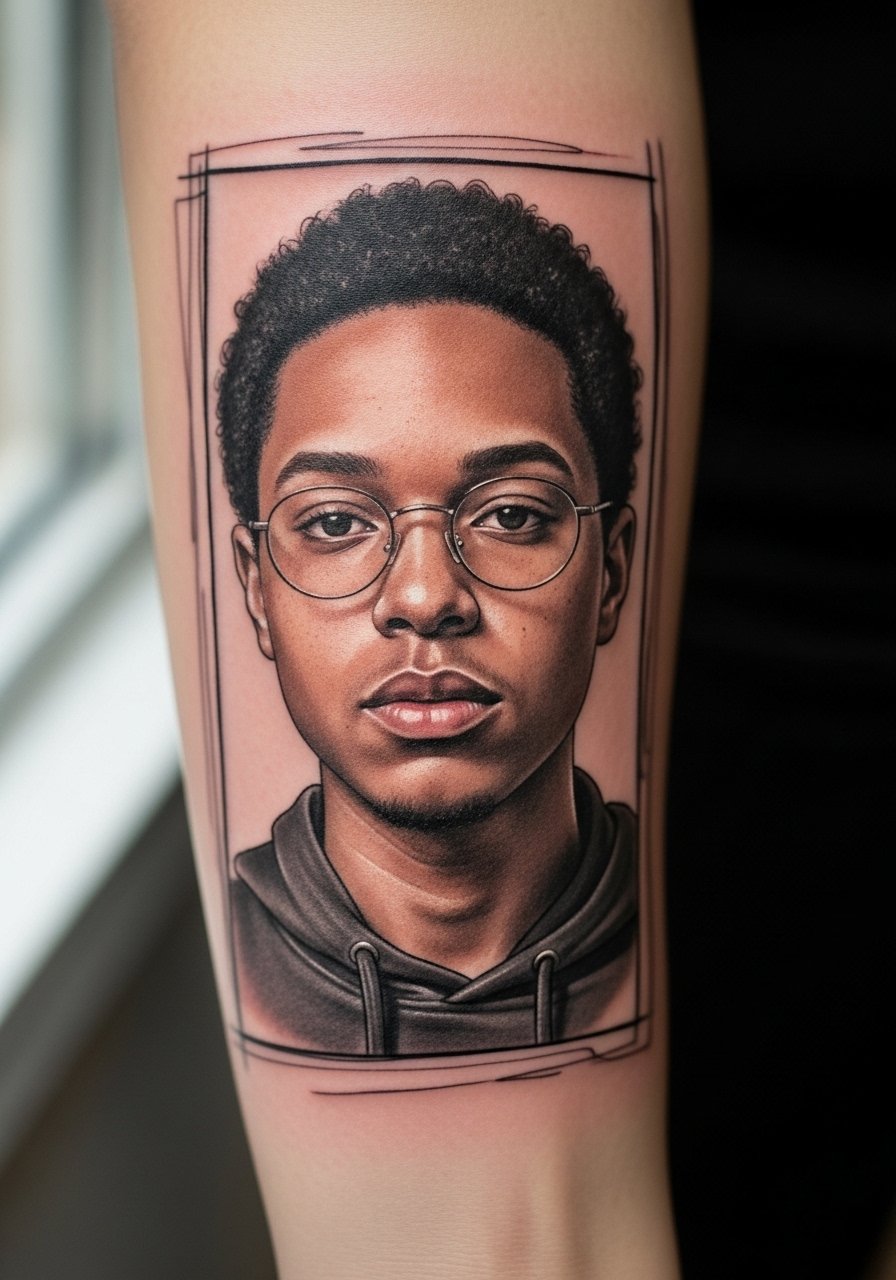
Micro-realism on forearm reads best when placed on flatter planes so the portrait does not distort with movement. Tell your artist you want the face at 60 percent realism with painterly sketch lines around it to avoid photo-real pitfalls. Tiny high-contrast dots tend to hold better than hair-thin strokes on this placement. Sessions run longer, often three to four hours, and you may need a touch-up sooner than a bold traditional piece. For session comfort, wear a short-sleeve tee you can pull aside without rubbing the stencil.
6. Neo-Traditional Anchor with Sketch Shading
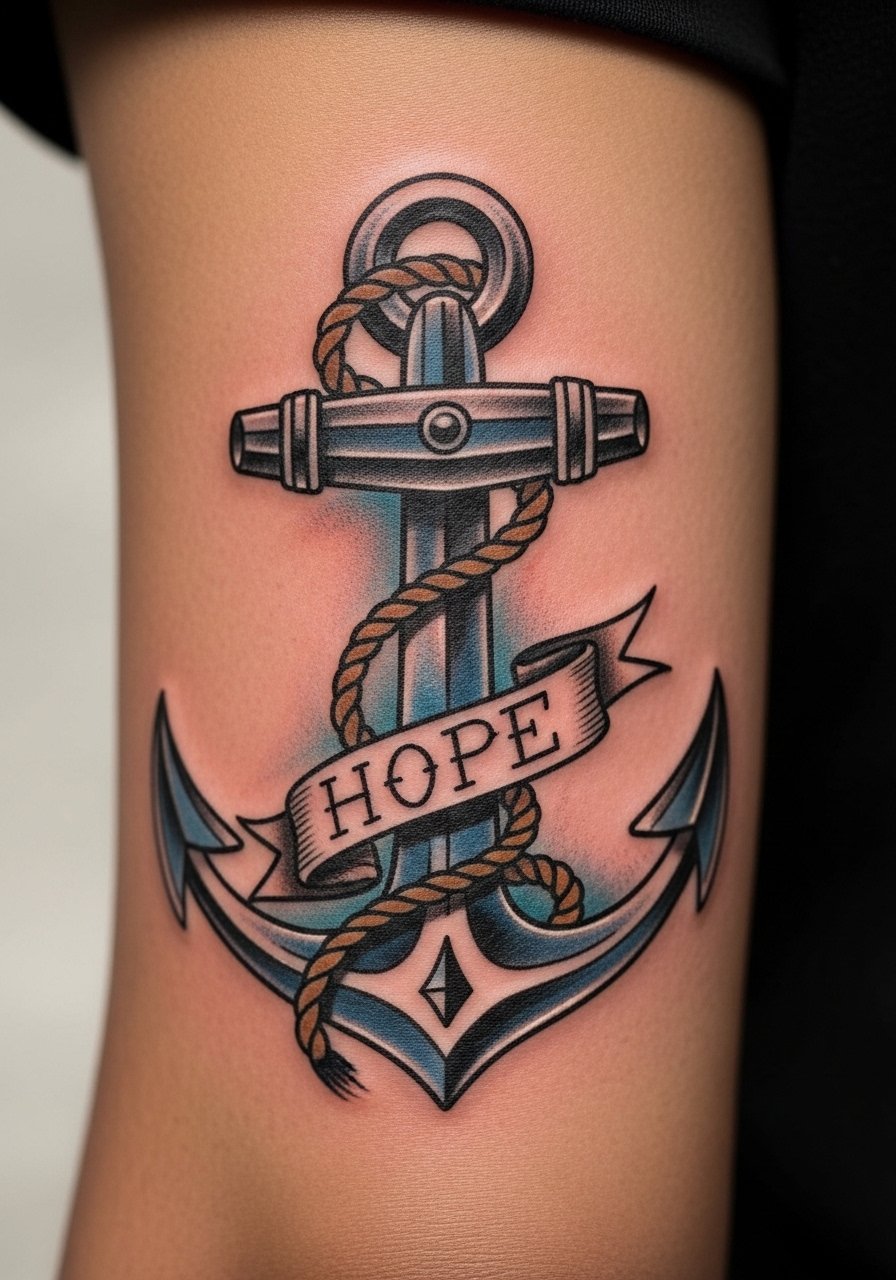
There are two camps on color washes inside neo-traditional anchors. One camp loads saturation for longevity. The other prefers subtle washes to preserve sketch feeling. Name both when you consult and ask which they recommend for darker skin tones. The anchor works as a bold anchor point for a sleeve so tiny details elsewhere can breathe. Sessions vary from two to four hours depending on color. Wear a loose button-down you can slide aside for full access and still stay comfortable.
Studio Day Picks
The first six forearm concepts above include fine line areas and saturated anchors, so a few studio essentials smooth the session and protect delicate linework during the first week.
- Stencil transfer paper kit. Helps you preview exact placement on the forearm so you avoid surprise size or wrap issues during the appointment.
- Topical numbing cream. Applied per directions it eases sensitivity on the inner forearm without altering linework if you follow the artist's timing instructions.
- Thin protective film roll. Useful for small banded areas and for clients who work with frequent hand washing, it reduces friction on fresh lines.
- Fragrance-free gentle body wash. Cleanses the area during showers without stripping pigment from fine line segments.
- Aquaphor healing ointment. A thin layer in the first days can lock moisture in for sections with delicate linework without suffocating the skin.
7. Sleeve Sketch: Animal Head with Floral Frame

There is visual impact when a bold animal head is balanced by airy florals. Ask the artist to block the animal's main planes with thick line anchors and let the florals be lighter. A common mistake is treating both elements with the same line weight, which muddles the focal point after healing. Expect a two to three hour session and more soreness where the design crosses the inner crease. Showing off these pieces works well with a rolled-sleeve flannel that frames the head without hiding the floral frame.
8. Single-Needle Script Running Along the Forearm
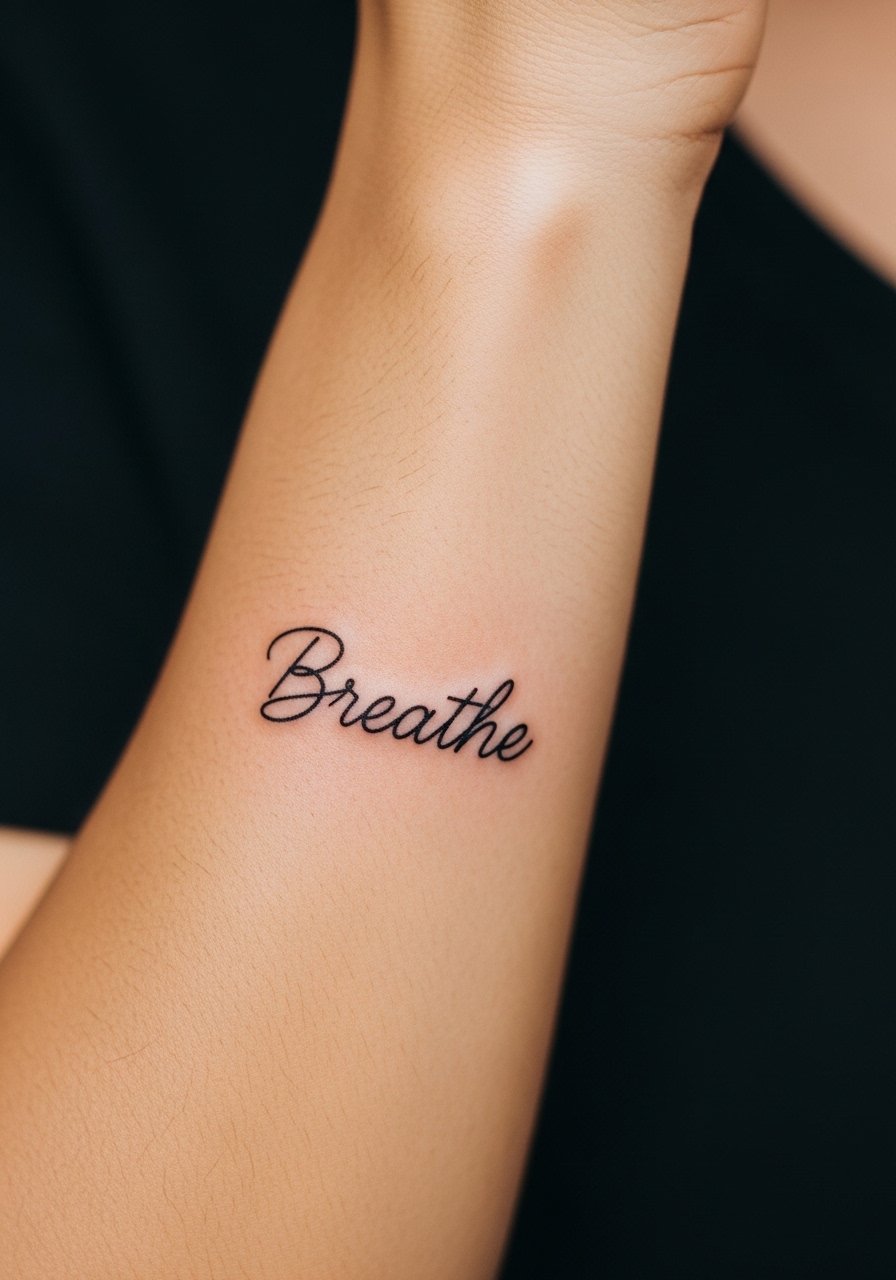
Single-needle script has a particular aging arc. The lines look razor-sharp at first, but if placed too close to high-motion zones the letters can blur. Ask for slightly heavier main strokes on letters that sit over creases. One camp thinks single-needle is fine anywhere. The other camp avoids joints and high-movement skin. Discuss both positions with the artist before penciling placement. Sessions are short, often under an hour for a phrase. Wear a lightweight tank top for easy access and less rubbing on the stencil.
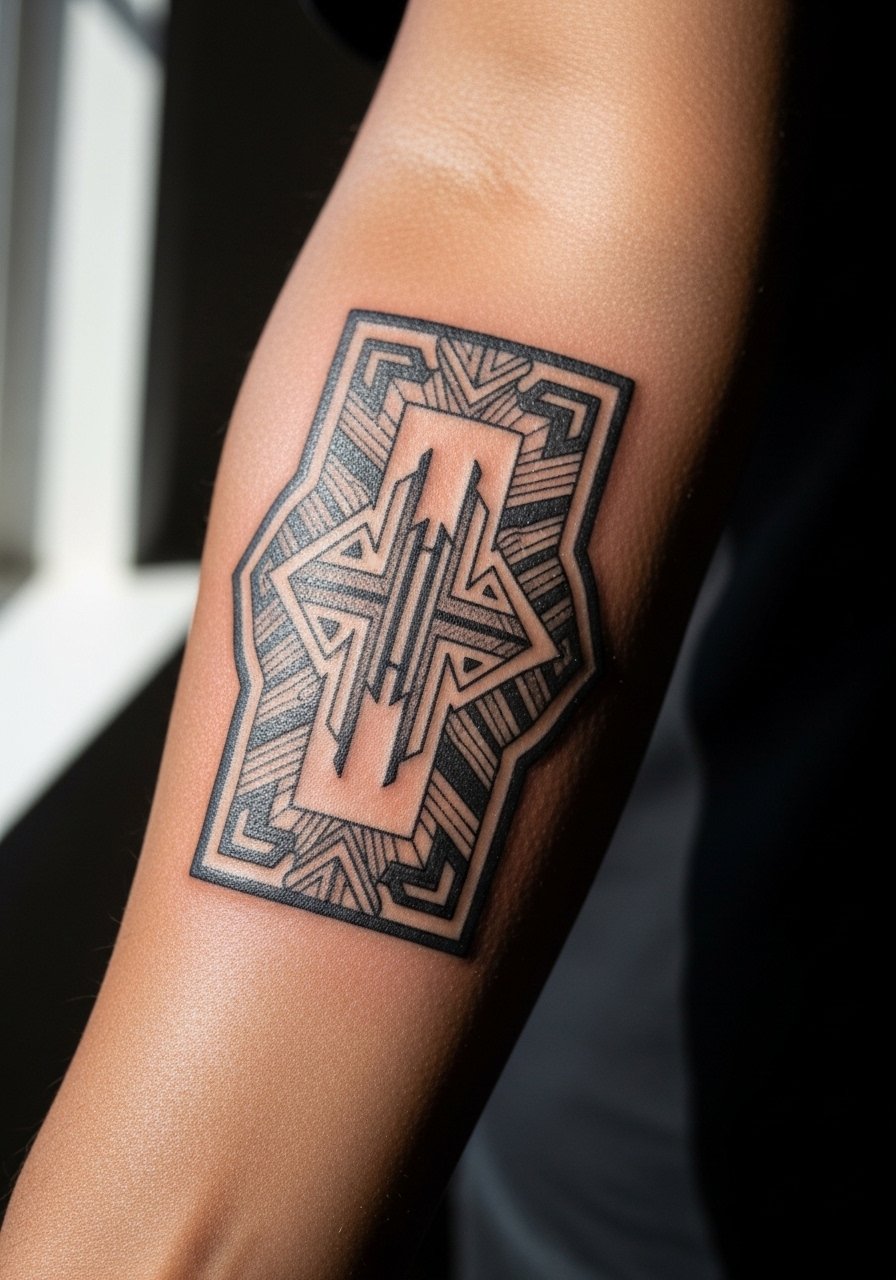
9. Blackwork Geometric Sleeve Sketch
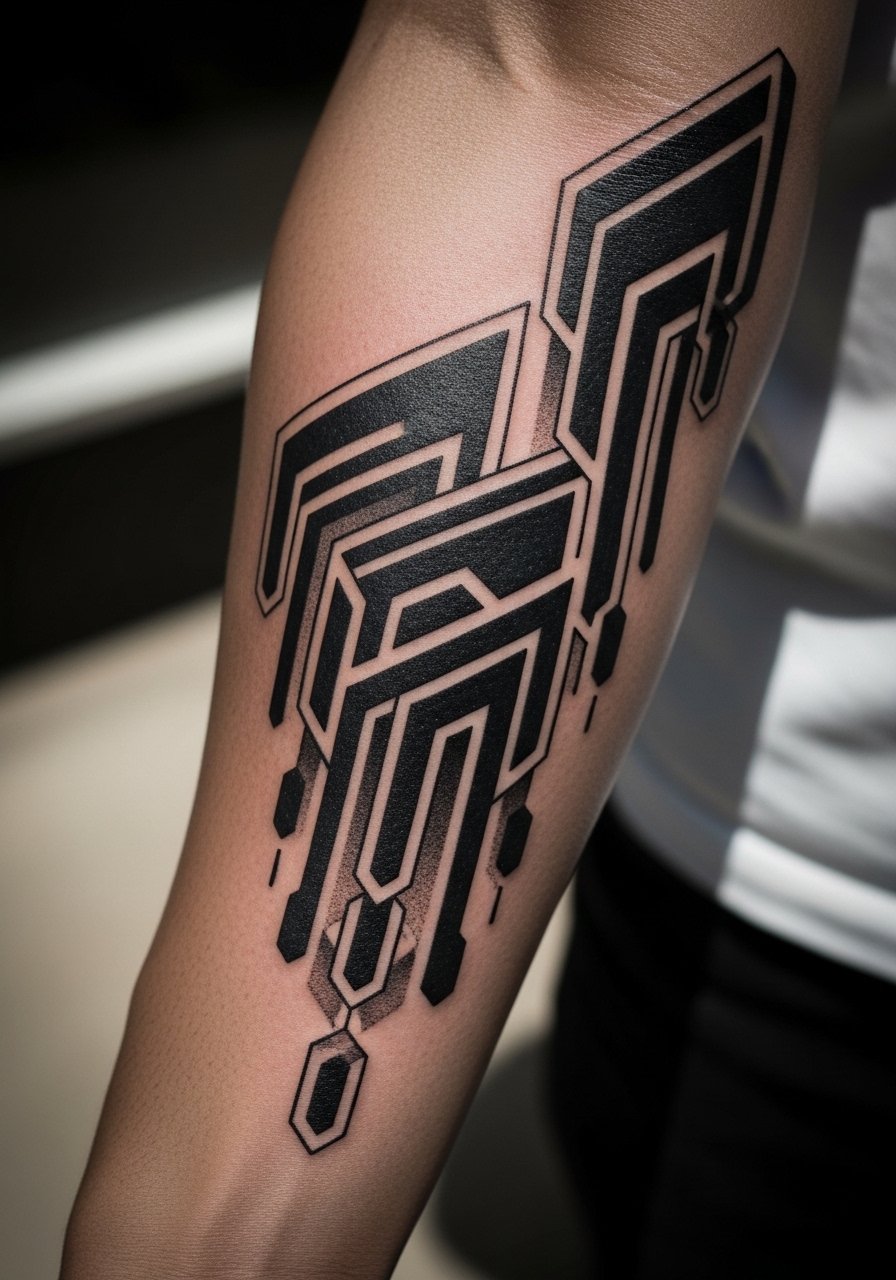
Blackwork ages differently than fine-line sketching. Saturated black anchors survive sun and time, but misaligned geometry looks worse as edges soften. Tell your artist you want crisp negative-space channels so the shapes remain distinct. A common mistake is overfilling corners which then blur into a solid mass. Expect a denser, longer session and more scabbing where saturation is high. For nights out, a short-sleeve henley keeps attention on the clean bands.
10. Nautical Chart Sleeve Sketch
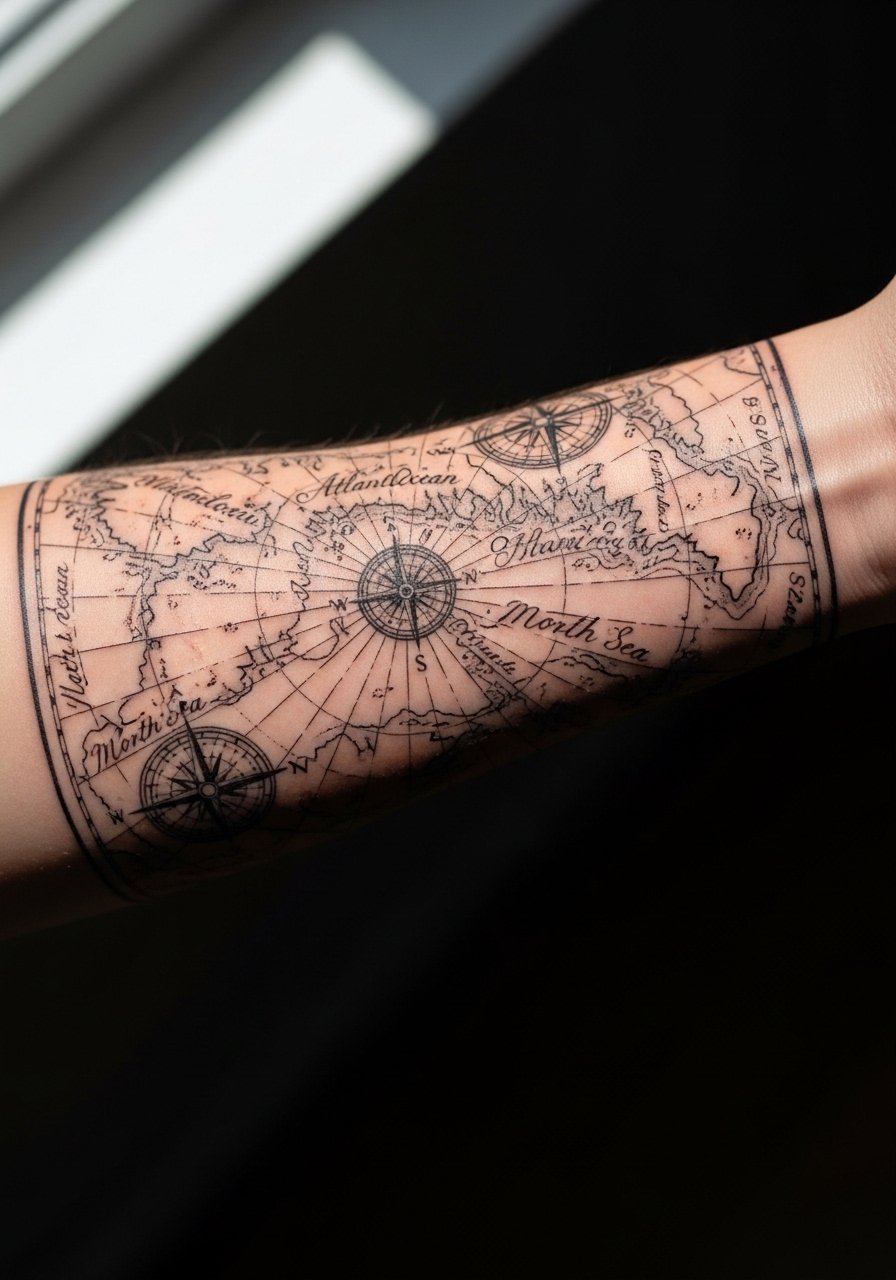
A nautical chart works best when the map elements are scaled for forearm viewing. Ask for bolder latitudinal lines and smaller detail inside the "sea" areas. The mistake is shrinking chart text to fit, which becomes illegible and muddles the piece when healed. Plan on two to three hours and factor in some touch-up on tiny lettering. For showing off, a short-sleeve polo or rolled cuffs will keep the map visible without distraction.
11. Wireframe Mechanical Sleeve Sketch
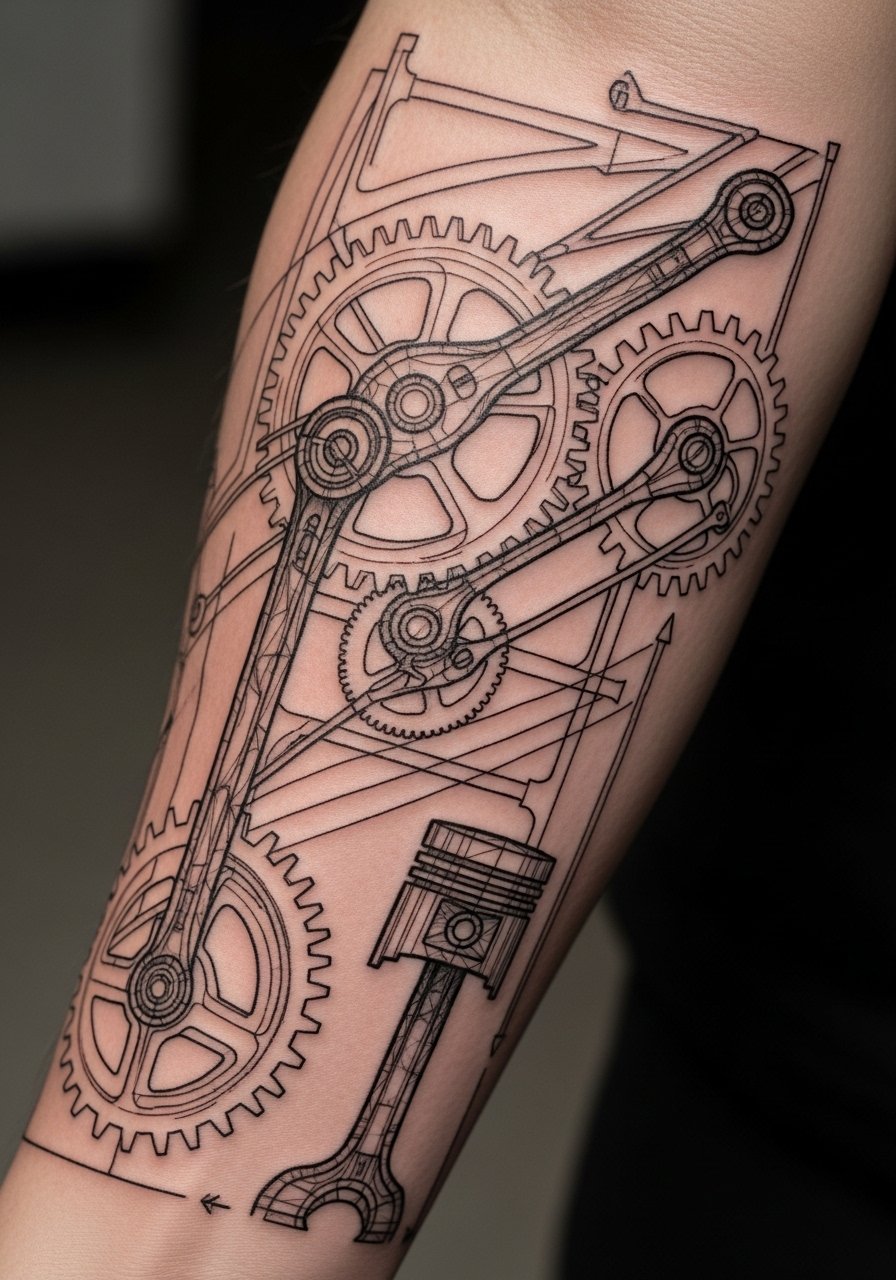
Mechanical themes need deliberate pivot anchors so the visual weight reads as structure rather than clutter. Tell your artist to emphasize gear centers and use lighter cross-hatching on spokes. A frequent error is equalizing textures across the piece, which loses depth as lines soften. Sessions can be two to three hours and the inner wrist pivots may be more sensitive. Pair with a metal mesh watch that echoes the mechanical motif without covering the center pivot.
12. Stippling Landscape Sleeve Sketch
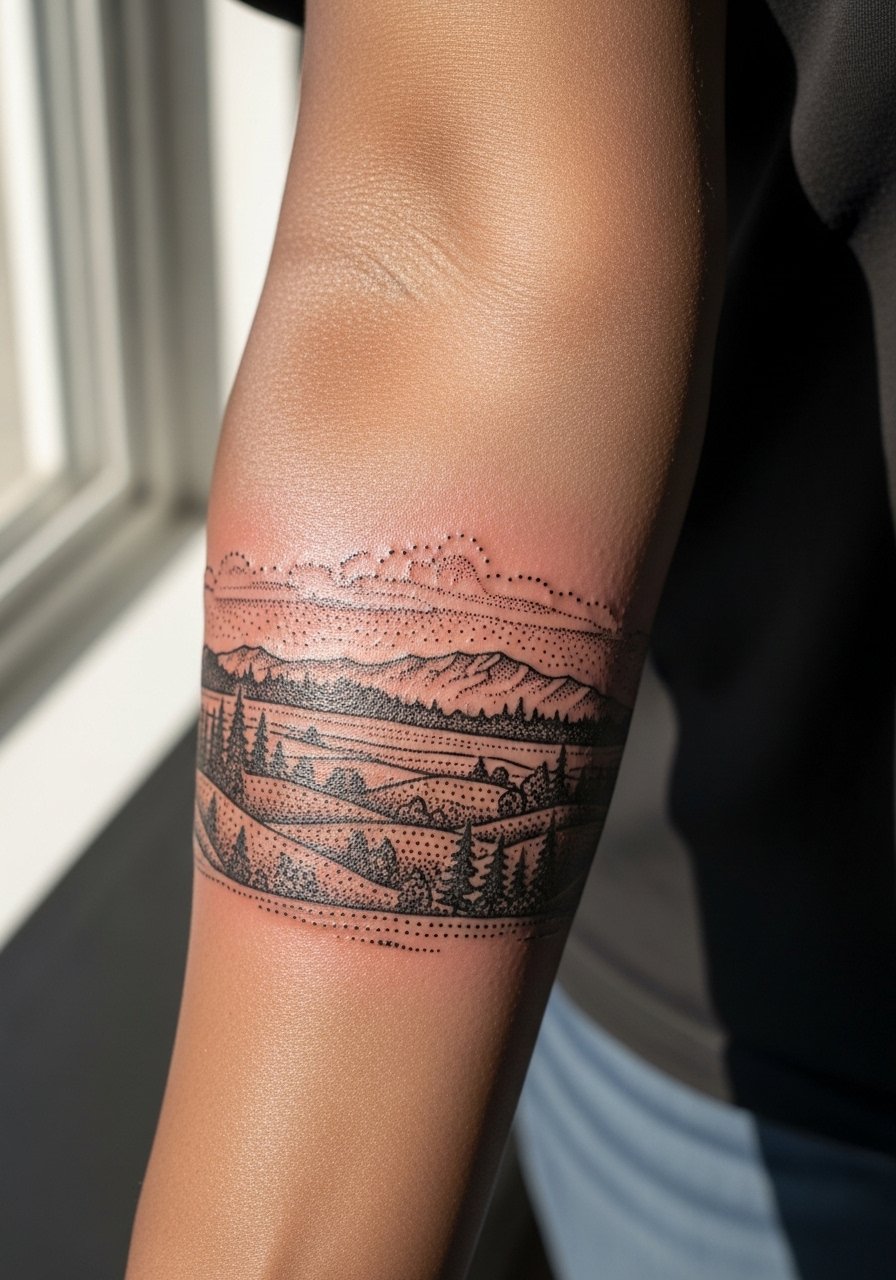
Stipple work needs room. When dots are too close they merge into a gray bleed. Ask for intentional spacing gradients so the distant horizon uses sparser stipple and the foreground is denser. One camp recommends stipple only on thicker skin zones to avoid blowout. The other says modern needle groupings reduce that risk. Talk through both approaches. Expect a long, meticulous session and a likely touch-up window at year three. For session wear, choose a short-sleeve linen shirt you can move without rubbing new dots.
13. Chain-Link Script and Tiny Symbols
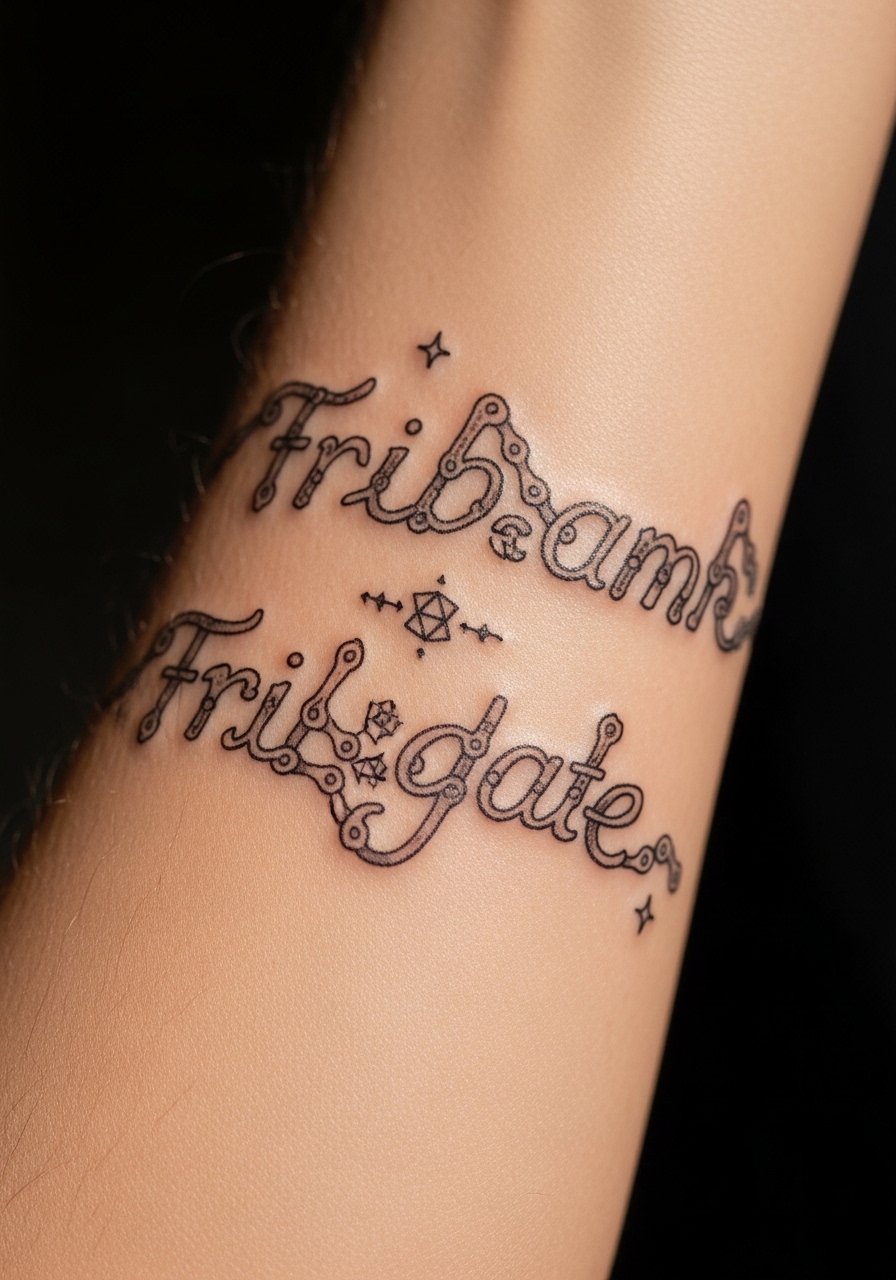
This motif reads best when the chain links are slightly heavier than the symbols. Ask your artist for a clear rhythm so the chain is the read line and the symbols are accents. Mistakes happen when symbols are sized like the chain, which flattens hierarchy after healing. Sessions are often under two hours but tiny symbols may require a touch-up earlier. Pair this with a minimalist bracelet that sits neatly above the chain without crowding the script.
14. Forearm Sleeve in Watercolor Sketch Washes
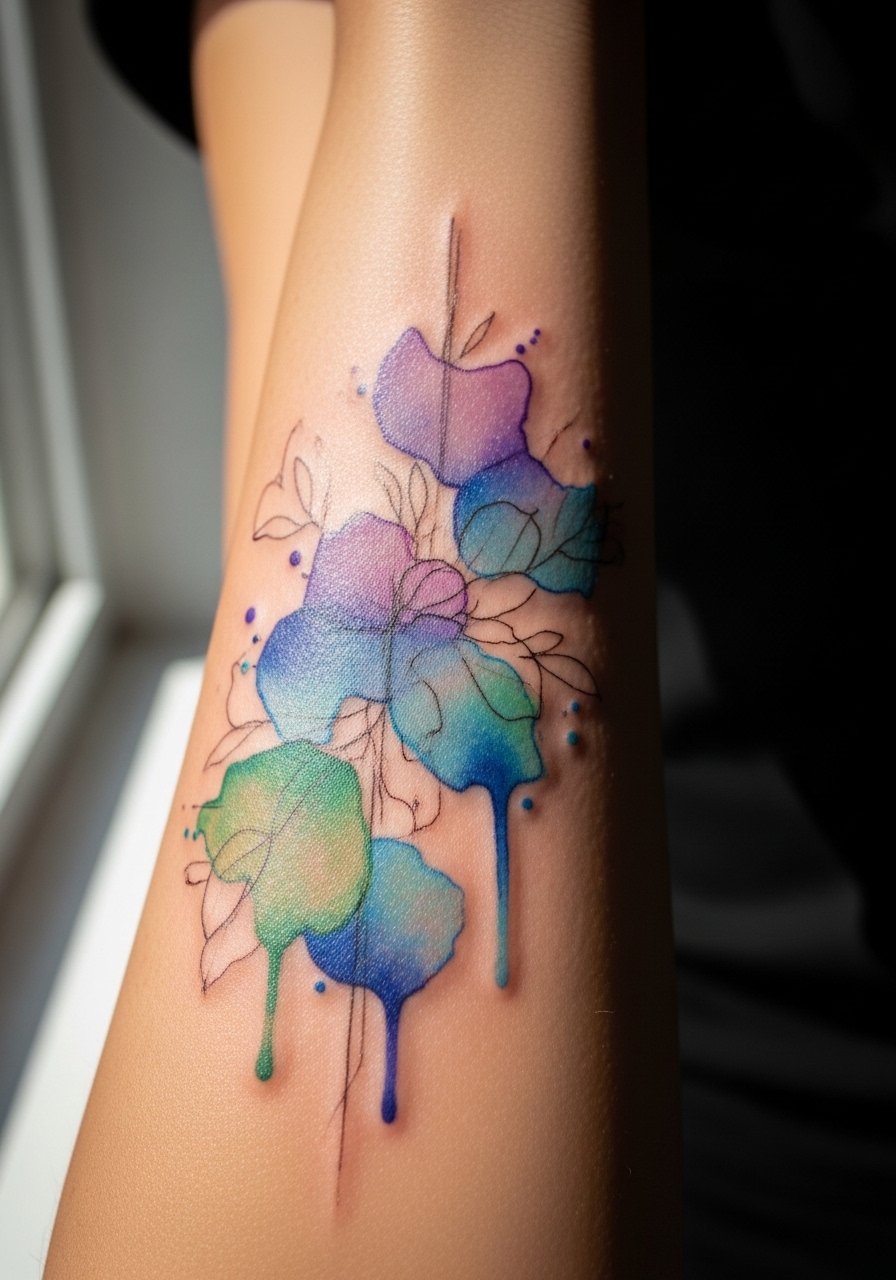
Watercolor washes are divisive. One camp argues washes fade into blotches over time. The other suggests careful placement and minimal saturation keeps the painterly look longer. Name both during consultation and ask how the artist seals washes into the sketch. The session may include multiple short passes rather than a single long sitting. Wear a loose cotton tee to avoid pressure on freshly washed areas.
15. Scripted Coordinates Around the Forearm
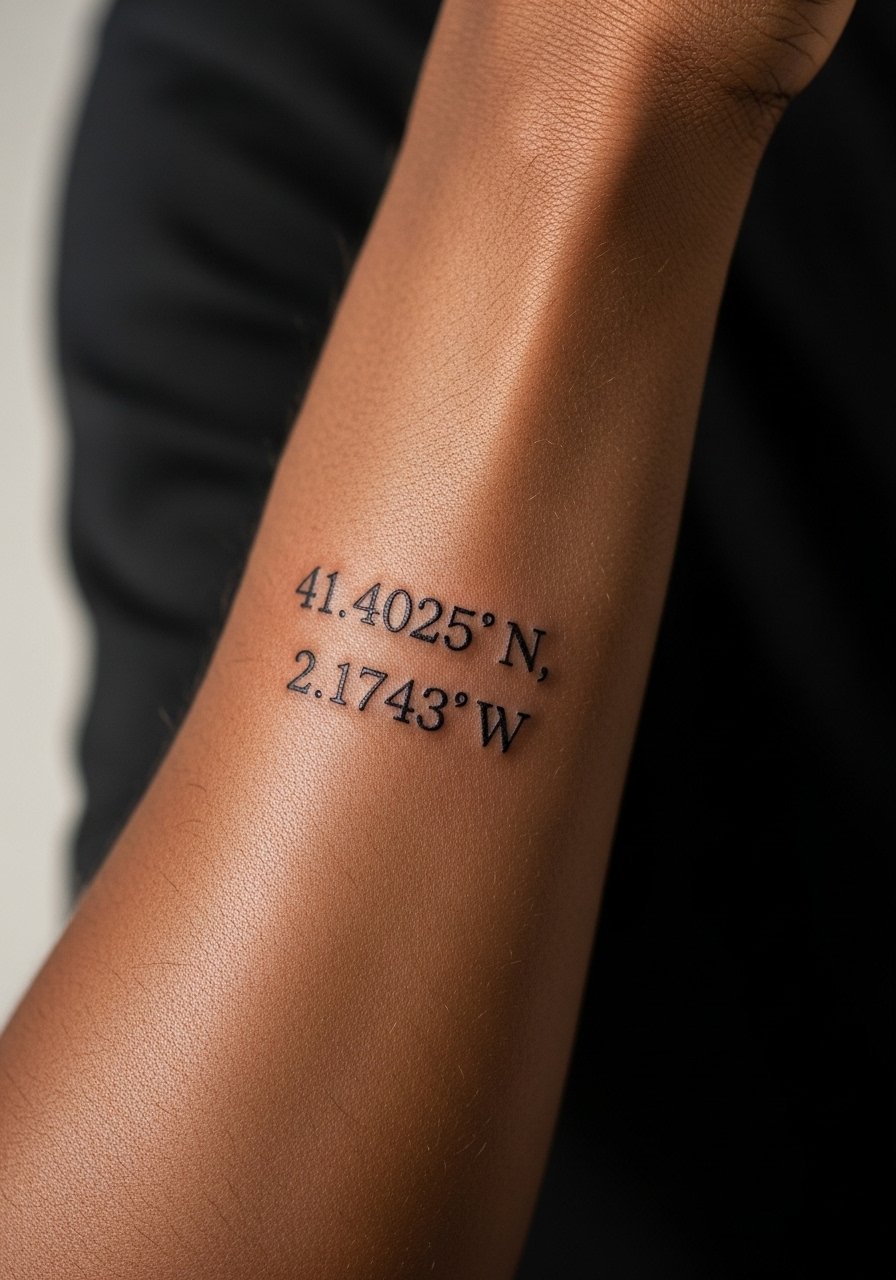
When text is used as a structural band, exactness matters. Specify the exact coordinates or phrase to avoid generator gibberish in reference art. Fine script needs slightly heavier main strokes over joint lines to stay legible. A common mistake is neglecting the arc of the forearm, which can distort numbers. Sessions are short. For showing off, wear a rolled-sleeve denim shirt to keep the numbers visible.
16. Minimalist Barbed Wire with Negative Space
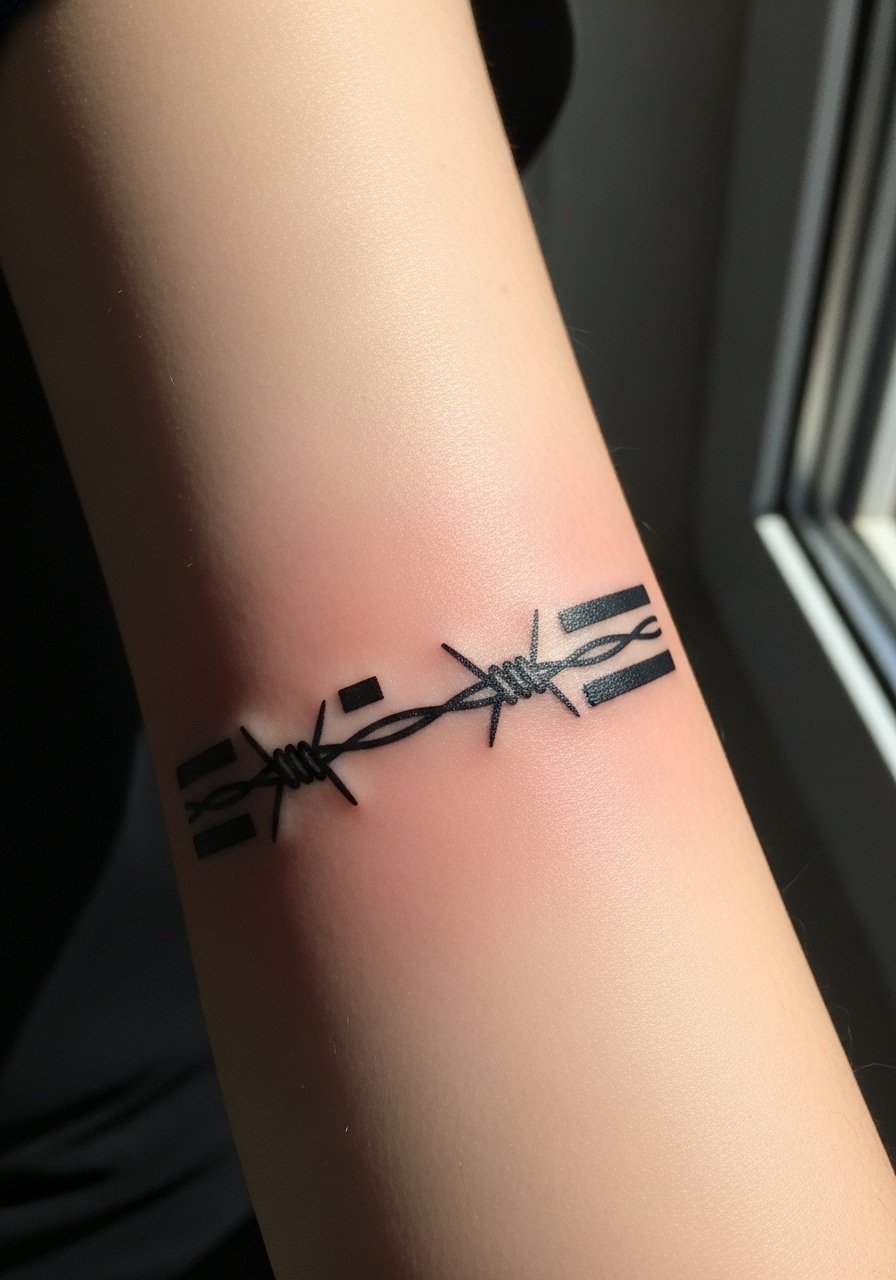
Barbed wire looks clean when lines are spaced and the barbs have breathing room. Tell your artist you want deliberate gaps rather than continuous tight repeats. The worst mistake is repeating tiny barbs that blur into a stripe. Expect a brief session and modest soreness where the ink crosses the inner arm. Style-wise, a short-sleeve graphic tee rolled above the band frames the wire.
17. Timeline of Small Icons in a Sketch Row

Timeline rows work when icons are scaled evenly and given negative space. In consultation, list the icons in order and ask for a consistent visual language so the row reads as one piece. Tiny icons can soften and lose identity if crammed close. Sessions can be modular, completed across short visits. Wear a button-down shirt you can pull aside for quick access between appointments.
18. Crosshatch Portraits with Bold Outline
Crosshatch shading requires clear outlines so the tonal work stays readable. Ask for defined contour lines and looser crosshatch inside planes. Artists split on how dense crosshatch should be for long-term clarity. Bring up both views and ask which preserves tonal variations on your skin type. Sessions are longer due to shading. For evenings out after healing, a short-sleeve button shirt keeps the portrait visible without glare.
19. Heraldic Crest in Sketch Form
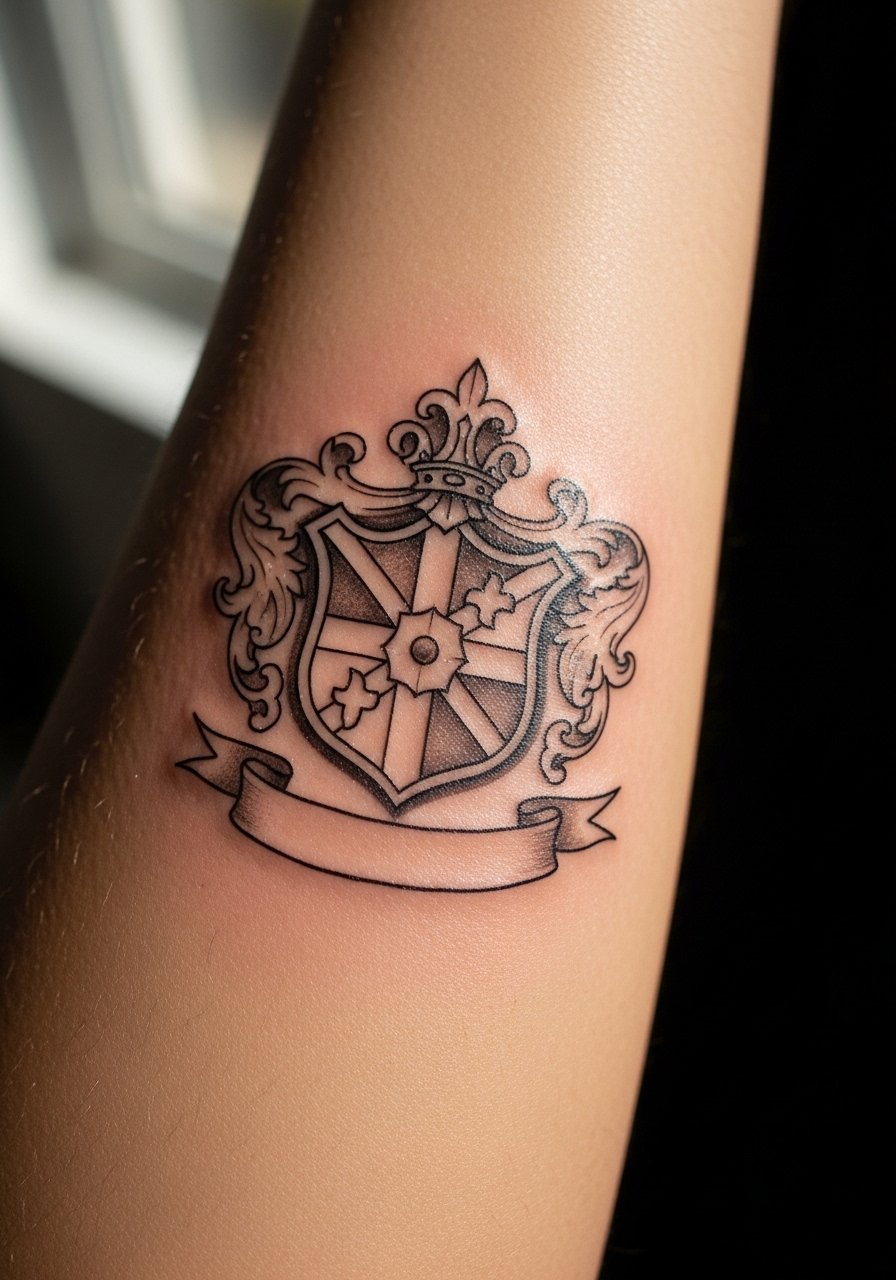
Heraldic crests need clear focal hierarchy. Ask to bold the shield and let the surrounding flourishes be lighter so the crest stays legible as details soften. A common mistake is filling every flourish with the same weight, which collapses into a single texture over time. Sessions vary depending on complexity. Pair this with a rolled-sleeve blazer casual look for nights when you want to show the crest while keeping a tailored vibe.
20. Continuous Wave Line Sleeve Sketch
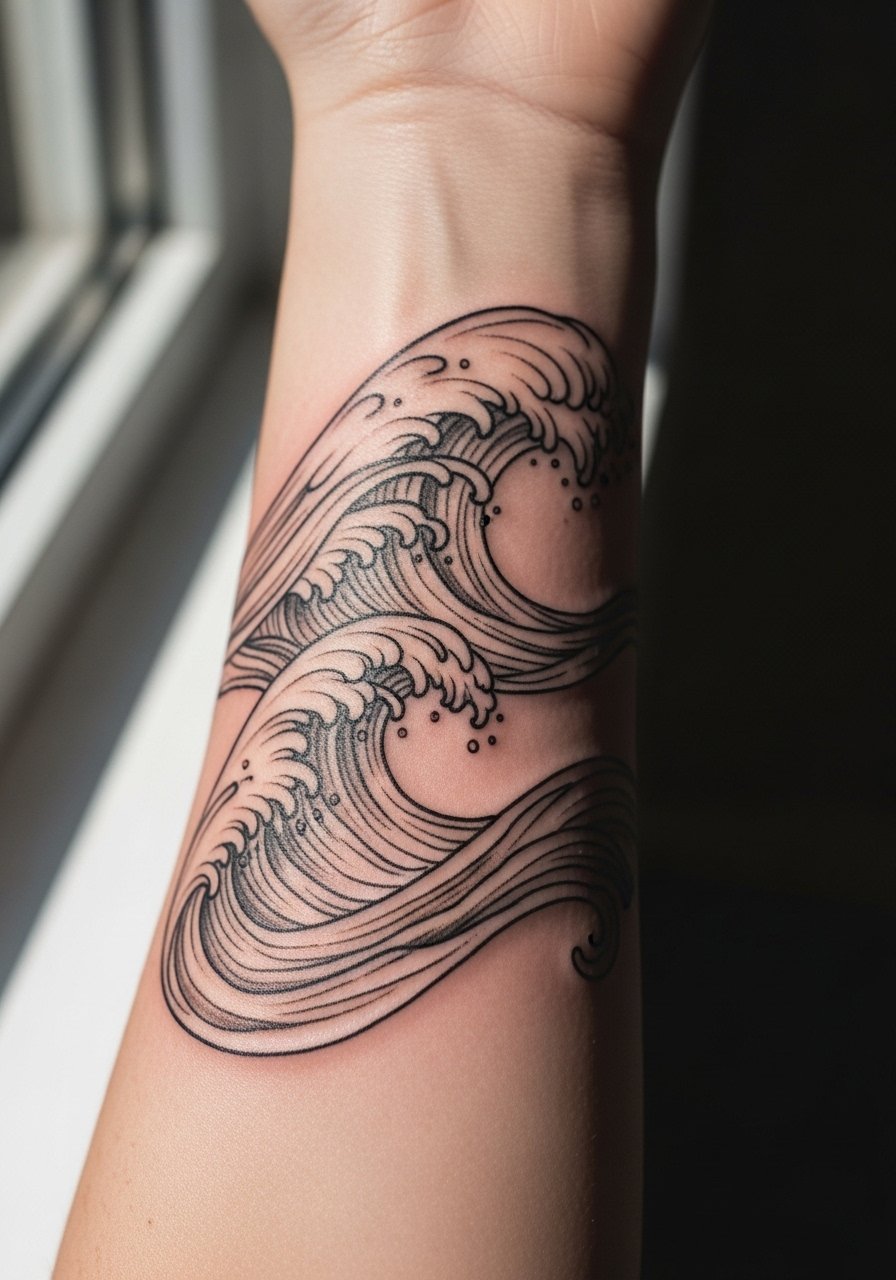
Flowing single-line sleeves need confident strokes. When done too small, the wave becomes an indistinct gray chain. Tell the artist you want varied line weight along crest points and open negative space in troughs. This design is lower pain and often a single-session piece. For the appointment wear, a lightweight short-sleeve shirt keeps the arm accessible and comfortable.
21. Sketch Collage: Tools, Timepieces, and Script
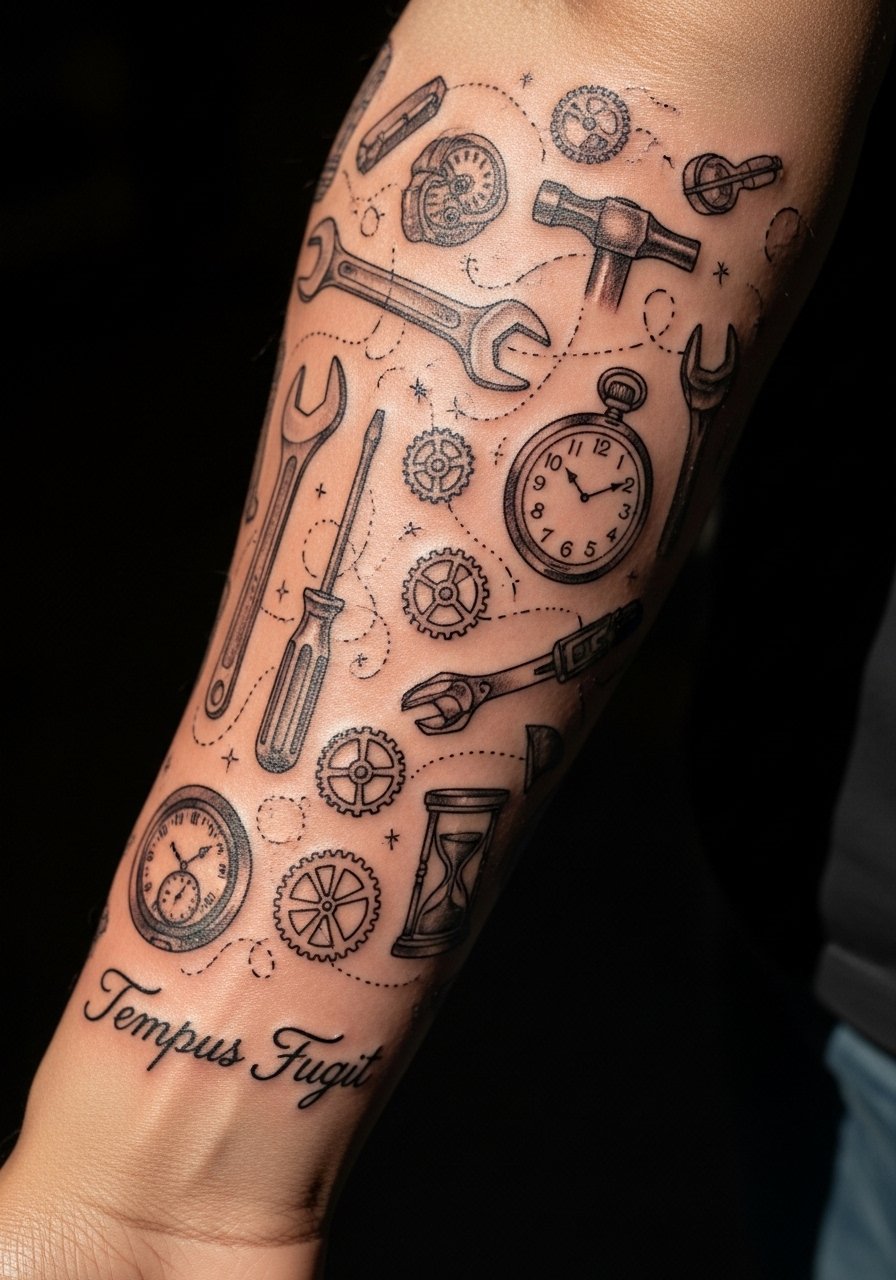
A collage reads best when there are anchors and breathing zones. Use timepieces as weight points and let smaller tools orbit them in lighter strokes. A real mistake is clustering elements without negative space, which makes the collage look muddy after healing. Sessions are modular. To show this off, a rolled-up sleeve Oxford shirt frames the collage and keeps the wrist script visible.
Frequently Asked Questions
Q: Will a full forearm sleeve of mixed fine line and blackwork blur faster than a single-style sleeve?
A: It depends on placement and spacing. Mixing bold black anchors with fine-line accents can actually preserve readability because the anchors hold form while the fine work provides texture. Ask your artist to plan negative space and touch-up windows for the fine-line areas.
Q: How often should I expect to touch up sketch-style elements on a forearm sleeve?
A: From what I've seen, fine-line sketch accents often need a touch-up by year two to three, while bold black anchors can go much longer. Plan a five-year refresh for most mixed sleeves, but talk to the artist about how much sun exposure and friction your daily routine adds.
Q: Are forearm sleeves suitable for all skin tones when using watercolor washes or subtle stipple?
A: Some washes read differently across skin tones. The safe approach is to use slightly higher contrast and bolder anchors on deeper skin tones, and to preview the palette on a patch of skin if possible. Discuss pigment choices with your artist rather than assuming a one-size approach.
Q: Can I wear normal clothes to the session or do I need specific items?
A: For forearm work, lightweight short sleeves or a button-down you can pull aside make the session easier. For example a short-sleeve tee or a loose button-down are simple, practical options.
Q: Should I avoid certain styles if I work in a conservative industry?
A: Hand and finger placements still carry the most visible workplace risk. Forearm sleeves are easier to conceal with long sleeves. If visibility is a concern, focus on inner forearm placements or choose designs that can be covered by a long-sleeve shirt when needed.
Q: How do I find an artist who understands this sketch-to-sleeve balance without following a single viral trend?
A: Use discovery pathways like local shop directories, targeted hashtag searches, and focused forum threads that showcase healed work. Look for portfolios with healed photos rather than only fresh shots and ask artists about their touch-up policy before you book.
