
Fine line hand work looks delicate in photos and can read refined in person, but the reality is messy if you skip placement planning. I have seen crisp knuckle scripts soften by year two and full-hand illustrative pieces hold for years when artists adjusted spacing and needle depth. Start with placement choices that respect skin movement and friction, and the next sections walk through 27 full-hand ideas that read clean both fresh and healed.
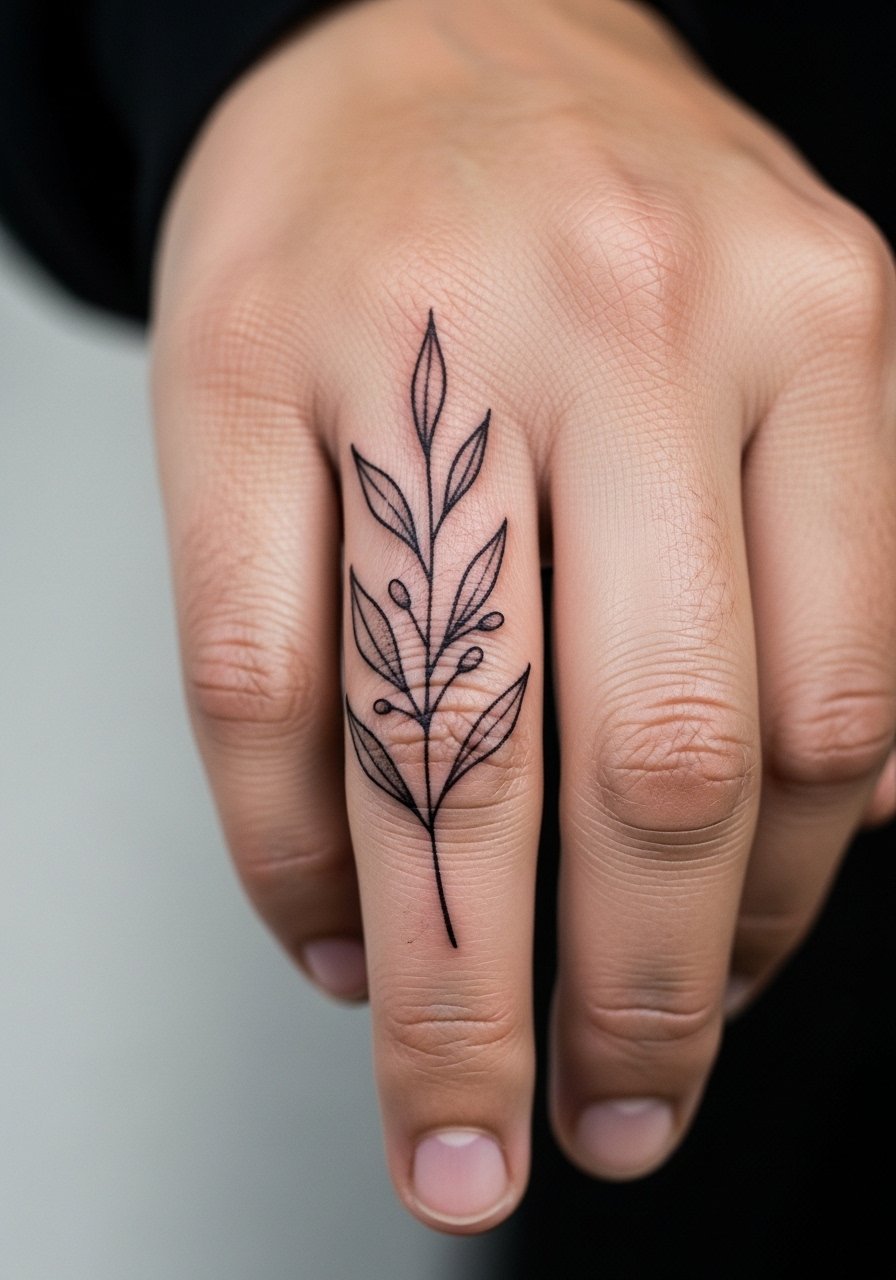
1. Single Vine Weaving Across the Fingers
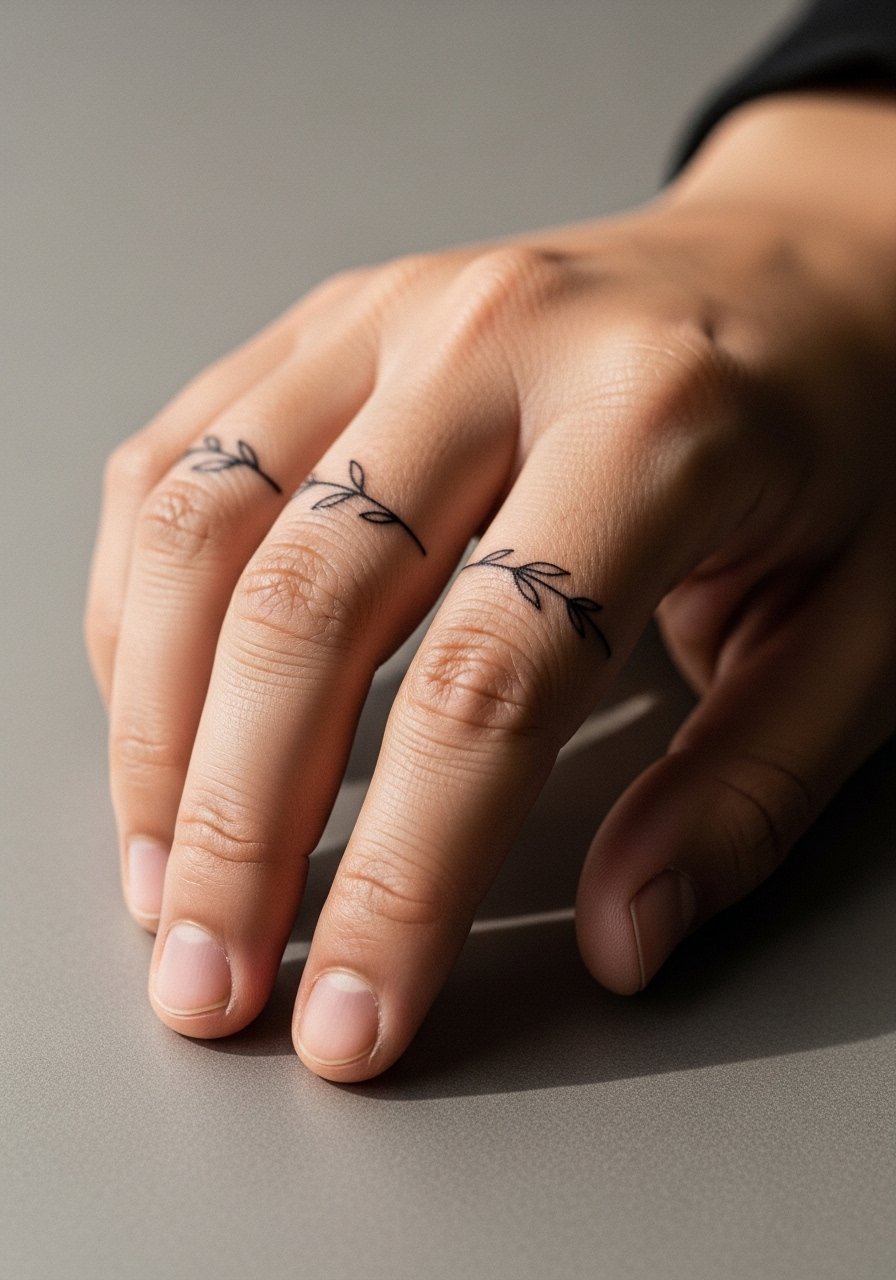
I recommend this when you want continuity without crowding the knuckles, especially if you work with your hands. Tell your artist you want the vine to sit gently on the dorsal hand with micro-gaps between leaves so it can breathe as the skin moves. Common mistakes include drawing the vine too thin over the knuckles, which leads to early blurring. Expect elevated sensitivity on the finger joints and plan for a touch-up around year two. For the session, wear a short-sleeve loose button-down shirt so your forearm is easy to access.
2. Micro Script Along the Side of the Thumb
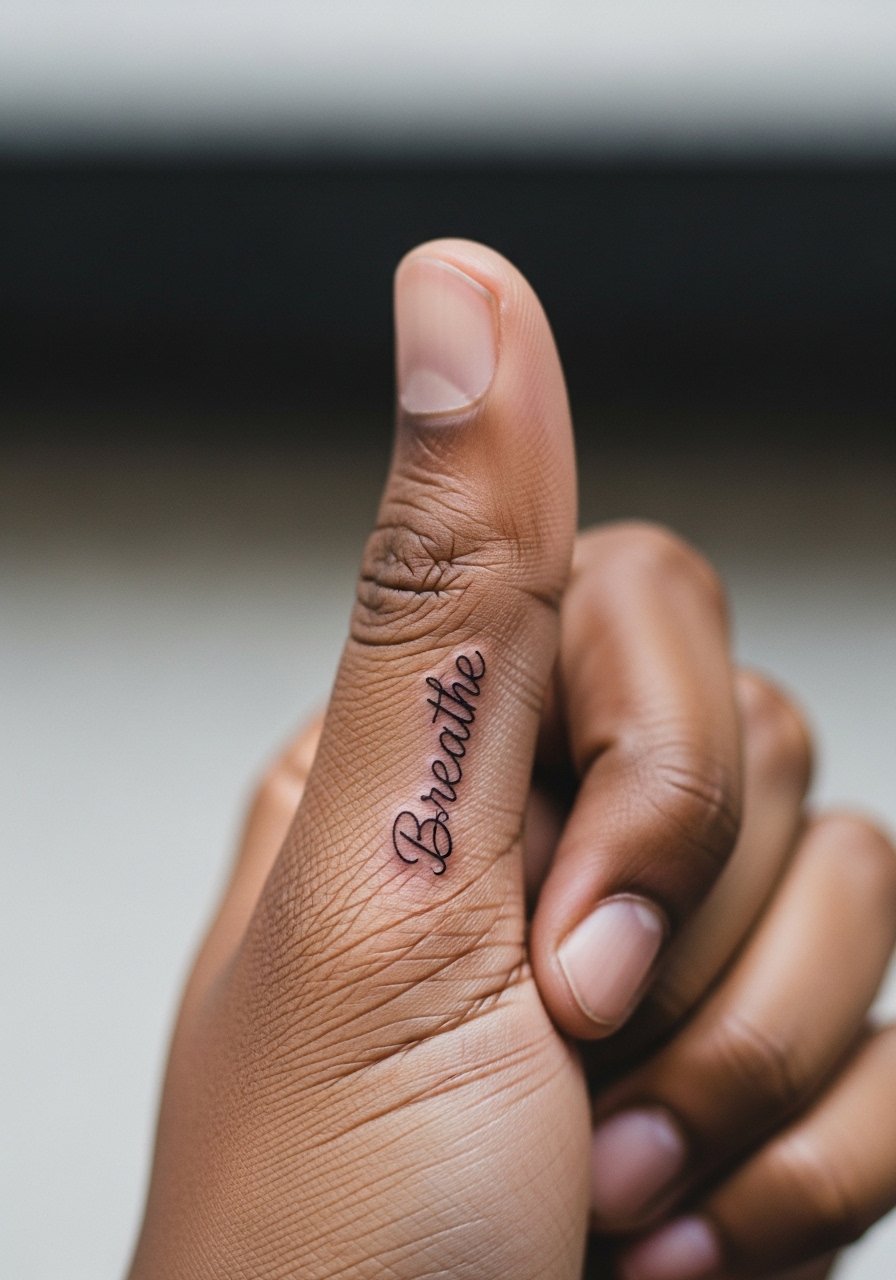
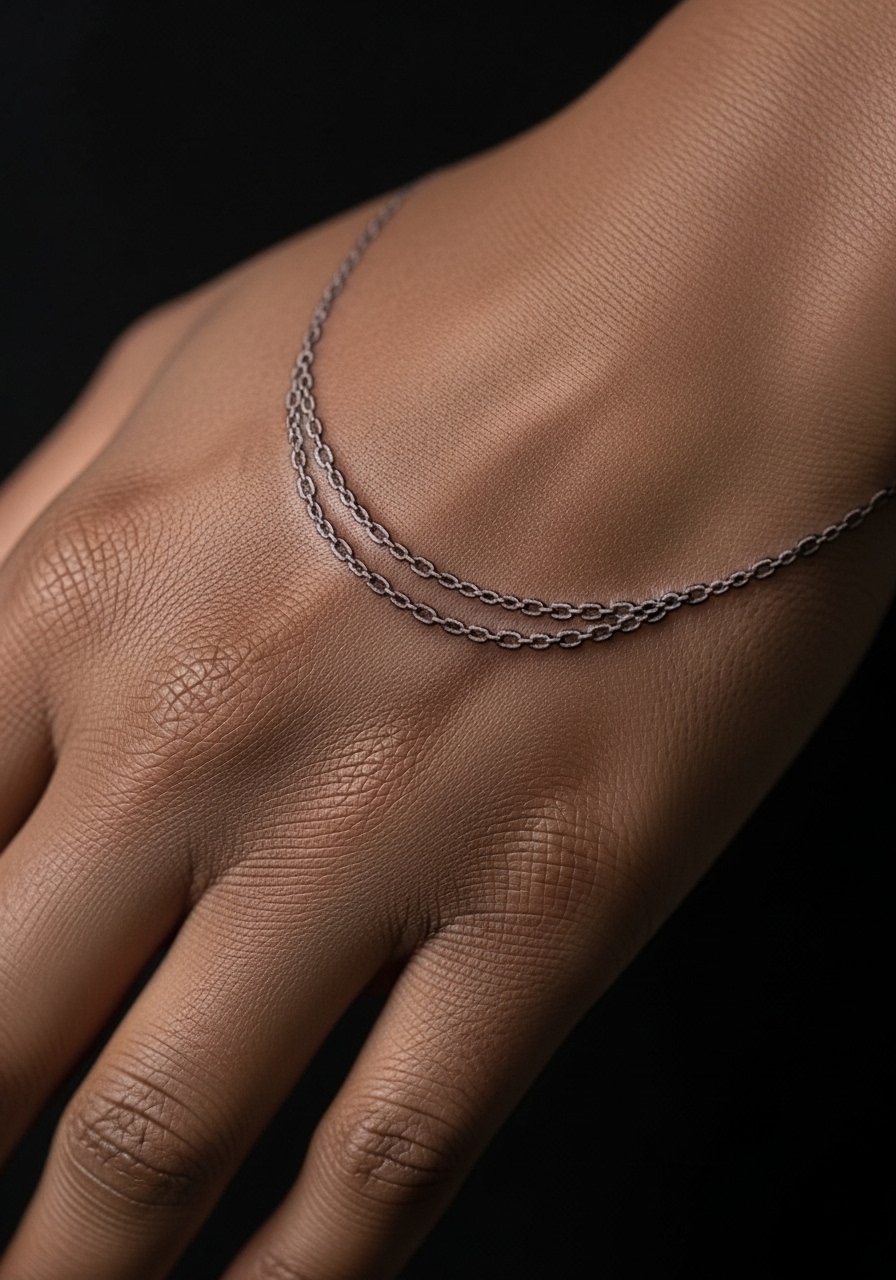
This is great if you want a discreet reminder that still shows when you gesture. In consultation, specify exact font weight and ask the artist to stencil the text and wear it for five minutes to confirm placement. A frequent error is requesting ultra-tiny lettering without spacing, which washes into a slur over time. The side-thumb area tends to need touch-ups sooner because of constant friction from thumbs rubbing phones and pockets. Pain is moderate. For showing it off, stack with a single thin chain pendant necklace worn high so attention stays on the hand.
3. Mini Micro-Realism Eye on the Back of the Hand
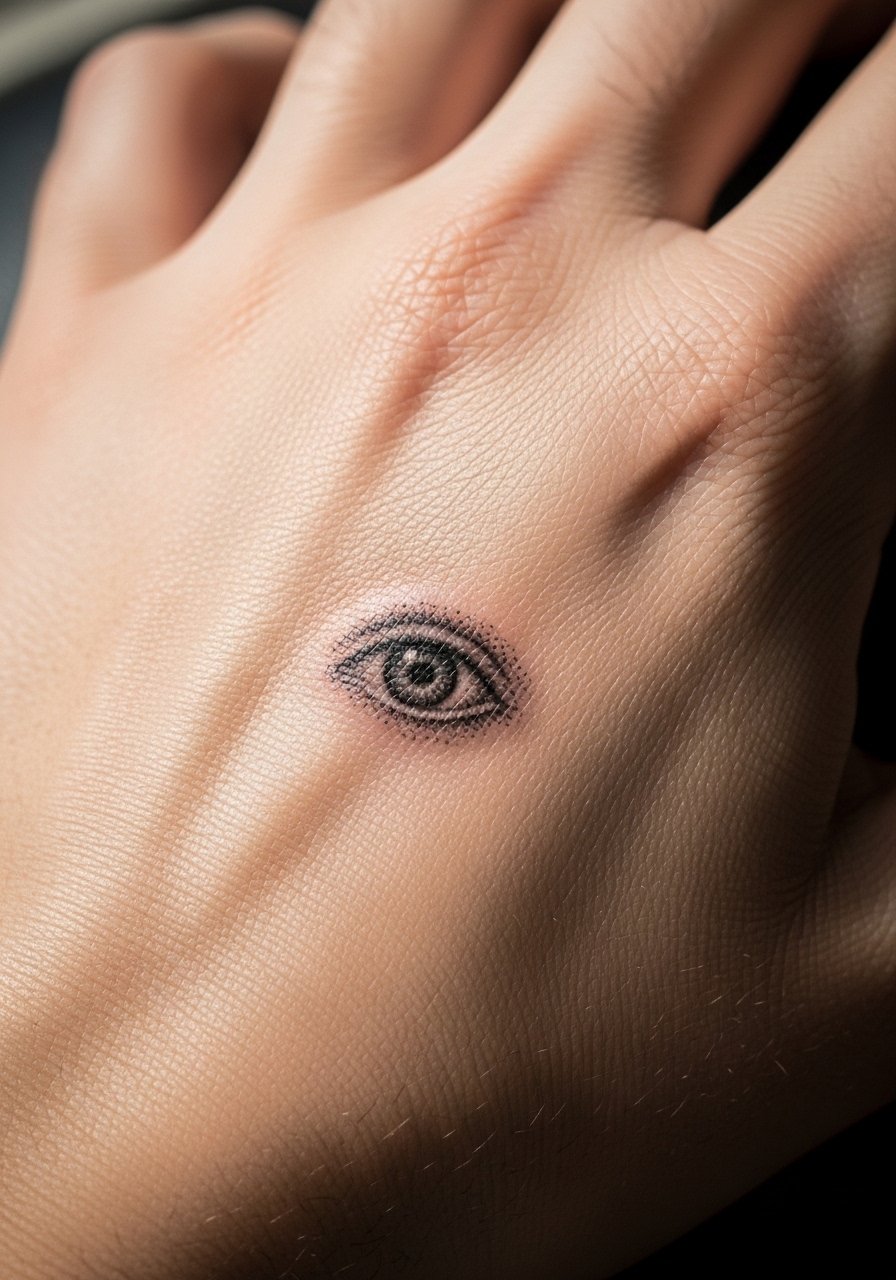
This reads like a statement piece without covering the whole hand. Ask the artist for stipple shading and contrast rather than heavy saturation so the piece keeps its shape as it heals. A common version that ages poorly is over-saturated fill that blurs across thin dorsum skin. At six months the stipple sits crisp, at two years it softens slightly, and by five years it may need a touch-up in the iris. Surface friction from rings and keyboards raises blowout risk. For the appointment, bring open-finger gloves to keep the area dry after the session.
4. Constellation Cluster Across the Fingers
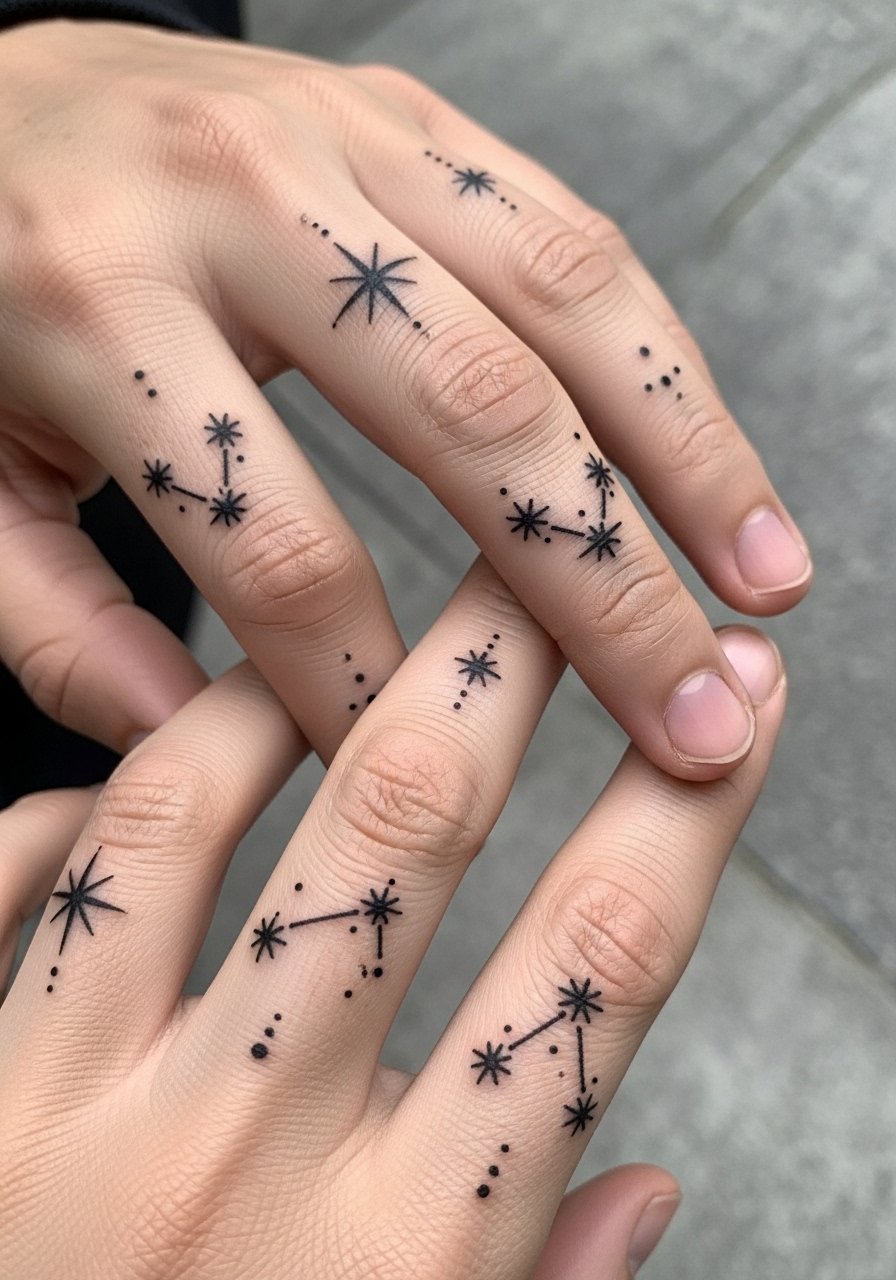
I like this for someone who wants pattern without heavy linework. Tell your artist you want spacing equal to one finger pad between stars so the clusters do not merge with movement. The mistake is compressing clusters too close to knuckles where blowout and early spread occur. Expect higher touch-up probability on the fingertips, and plan a gentle first-week routine. For showing it off, the piece pairs well with stacked rings and dainty stacking rings that echo the constellation points.
5. Thin Geometric Mesh Over the Knuckles
Fair warning, knuckle geometry exposes every misalignment. Bring clear reference photos showing exact line intersections and ask for slightly wider negative space at angles so the mesh does not collapse as the skin ages. The biggest mistake is insisting on ultra-fine crossing lines with no breathing room. Pain on knuckles is higher and touch-ups are common at year two if the mesh was too dense. For the session, wear a short-sleeve top you can roll up, like a short sleeve tee.
6. Single Botanical Sprig Along the Thumb Web
When you want something organic but not full coverage, the thumb web is subtle and tactile. During consultation, ask the artist to leave negative gaps between leaflets so motion does not blur the outline. A common error is packing shading into the web where skin is thin and moves a lot. The area can sting more than the dorsum and often needs a small touch-up within three years. For showing or hiding the piece, a simple stack of stacked dainty bracelets keeps attention balanced without crowding the thumb.
Studio Day Picks
The hand and finger ideas above demand careful prep and a few session-day items to keep the area accessible and clean.
-
Stencil transfer paper kit. Lets you preview the exact line placement on the back of the hand before the needle touches skin, which is critical for symmetry on knuckle and mesh pieces.
-
Topical numbing cream. Applied 45 minutes before can ease sensitivity during dense knuckle work without affecting artist line control.
-
Thin protective film roll. Keeps finger and thumb web tattoos cleaner during the first week when washing and friction are constant.
-
Fragrance-free body wash. Gentle cleansing is important for delicate linework on the hand that faces daily exposure to soaps and sanitizers.
-
Aquaphor healing ointment. Thin layers in the earliest days lock in moisture for fine line work without suffocating the tiny needle channels.
7. Minimalist Dot-Work Palm Accent
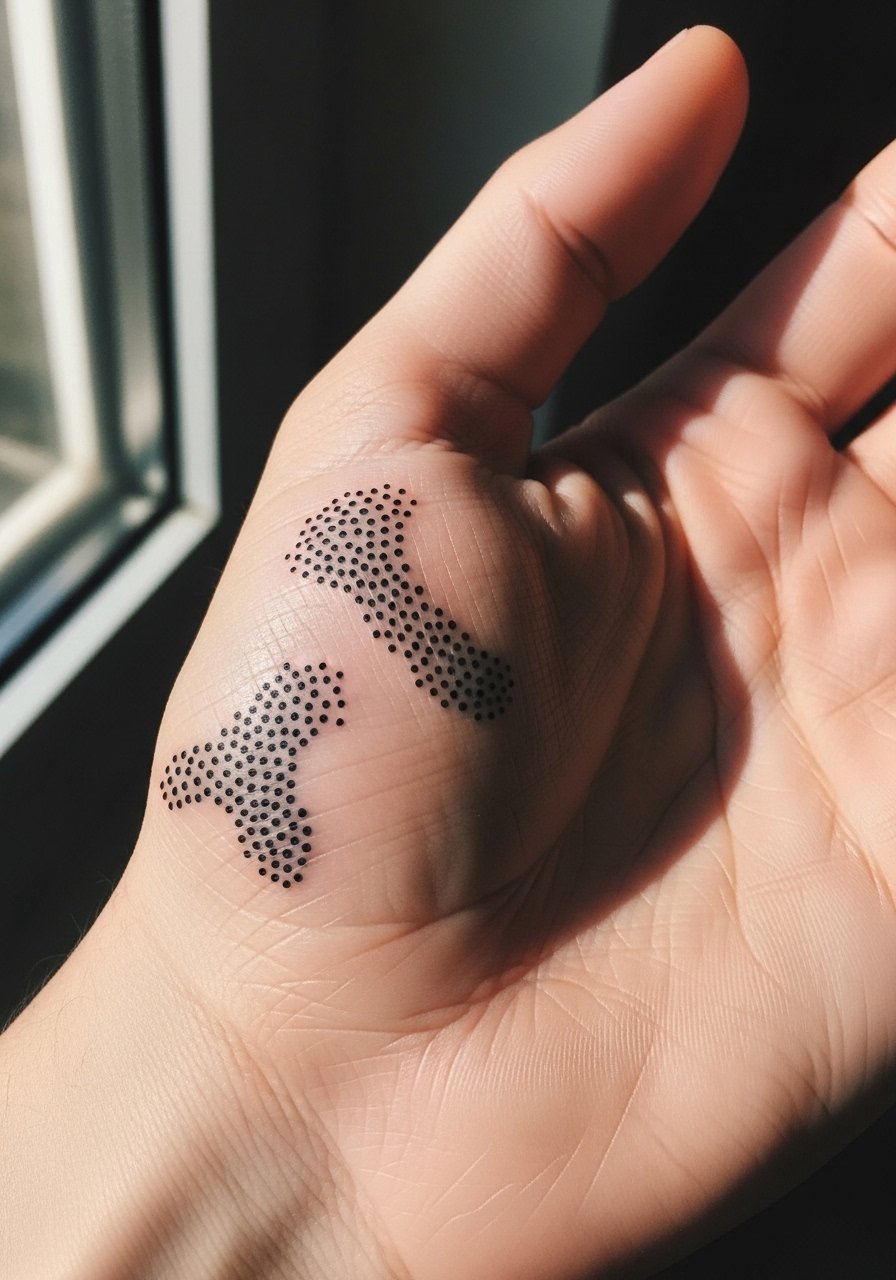
Most artists warn that palm work fades faster, but this accent can work if you accept the upkeep. Artists split into two camps on palm ink. One camp says the thick, regenerative skin causes almost inevitable fading, and the other camp argues that precise depth and repeated passes can hold pigment longer. If you choose this, plan for multiple short sessions and expect touch-ups within one to two years. During consultation, ask how many passes the artist recommends for palm texture. For the session, wear a short-sleeve shirt and bring wipes to keep the area clean afterward.
8. Lace-Like Filigree Over the Back of the Hand
This is a good choice if you want the elegance of a glove without fabric. Tell the artist you want slightly thicker anchors at key points to prevent the filigree from disappearing over time. The age-poor version uses continuous identical thin lines, which tend to blur into one mass. At six months the pattern looks crisp, at two years lighter lines may soften and need a micro touch-up. Show-off pairing: a single minimalist watch or thin cuff slides nicely across the wrist without covering the filigree.
9. Tiny Botanical Ring Around the Finger

I recommend this for someone who wants the feel of a ring without metal. Ask for a slightly broken ring with small gaps rather than a continuous line so the piece tolerates swelling and movement. The most common mistake is demanding a perfectly closed ring at ultra-fine scale, which frequently blurs. Pain is low but the wear surface invites faster fading. For session wear, slip on an oversized glove after the appointment to reduce rubbing while the ink sets.
10. Scripted Word Across the Knuckles
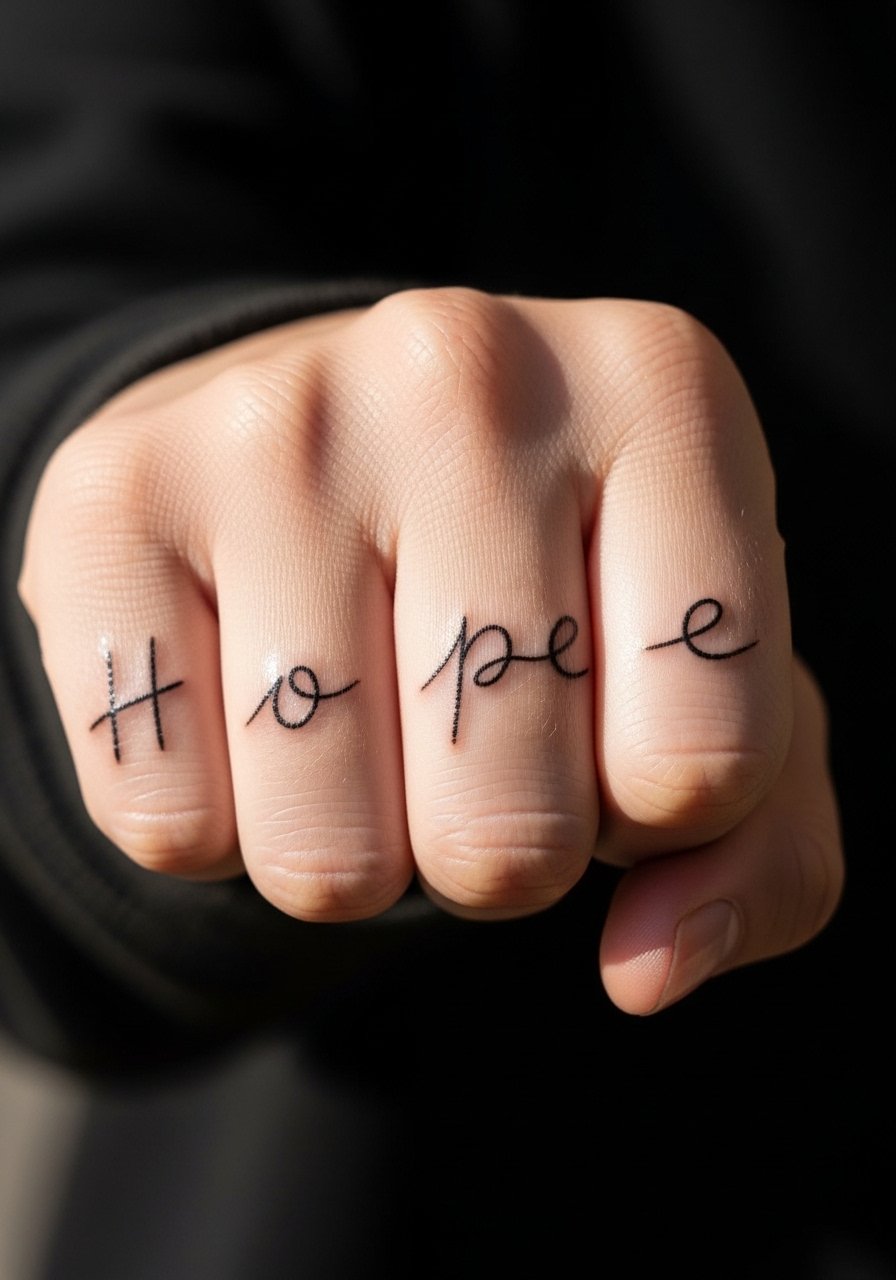
Knuckle script carries risk but also high impact. Be explicit in consultation about letter spacing and ask to preview the stencil while your hand is relaxed and then clenched. One camp of artists argues knuckle lettering is too exposed and will break down quickly. The other camp will accept the trade-off and plan strategic touch-ups. Do not pick overly ornate fonts for knuckles. Expect moderate to high pain. For styling, keep rings minimal so the script remains legible, and consider a dainty ring set for balance.
11. Micro Floral Cascade From Index to Wrist

This design works when you want flow across visible planes without full saturation. Tell the artist you want negative space between the flowers and thin stems that widen slightly at key intersections. A common version that ages poorly is dense petal shading near joints. At two years, expect slightly softened stems and plan for a touch-up if lines coalesce. The session can run longer because of the area covered. For showing it off, roll your sleeves and pair with a thin bangle bracelet.
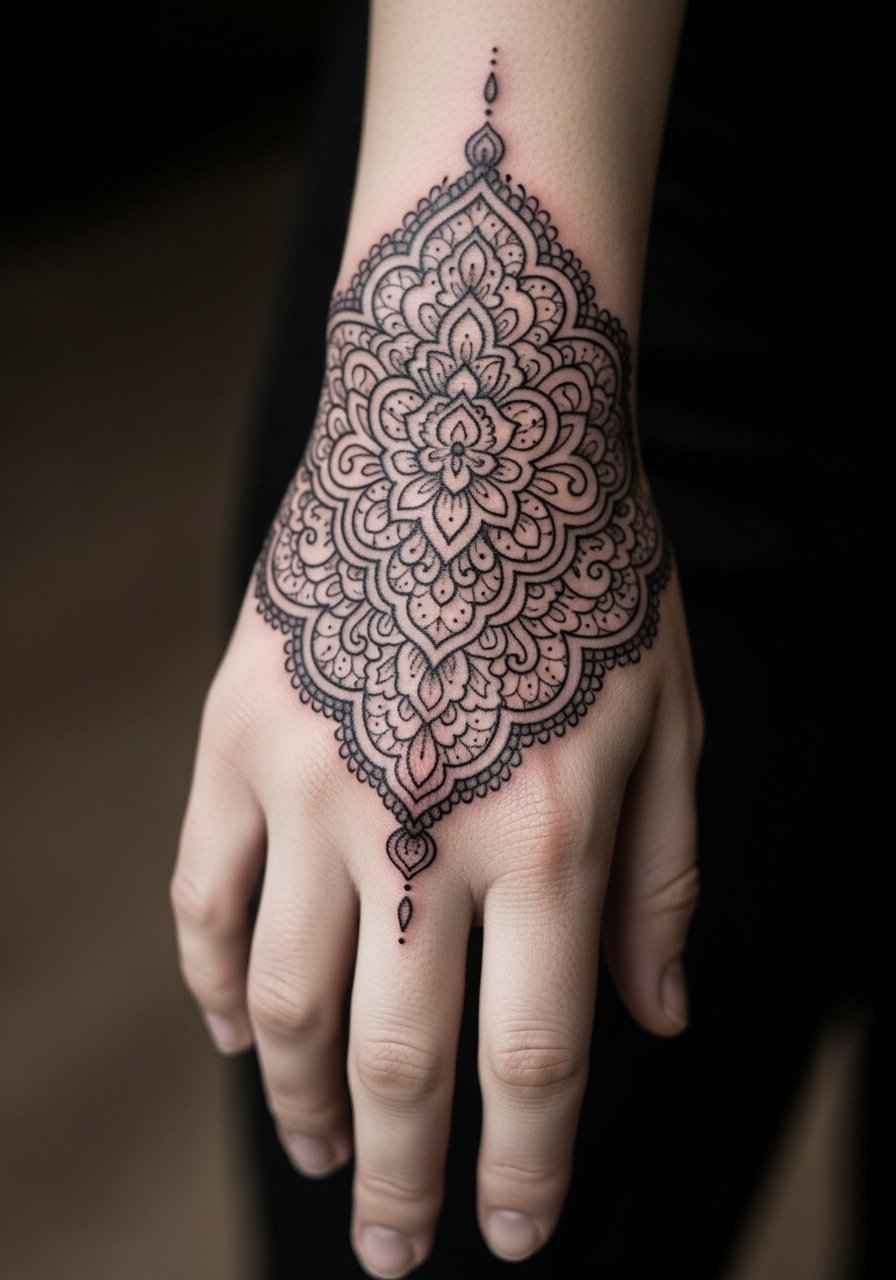
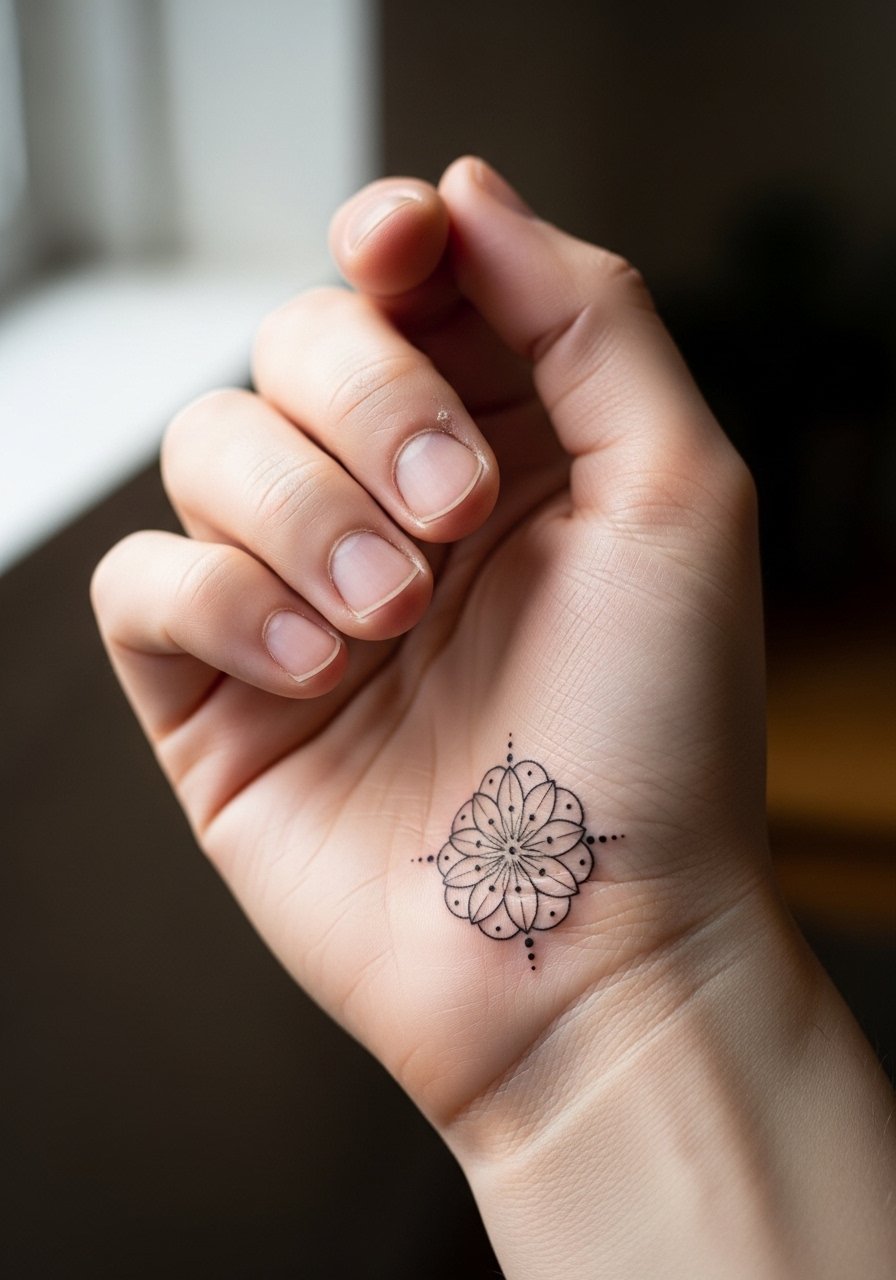
12. Micro Mandala Centered on the Back of the Hand
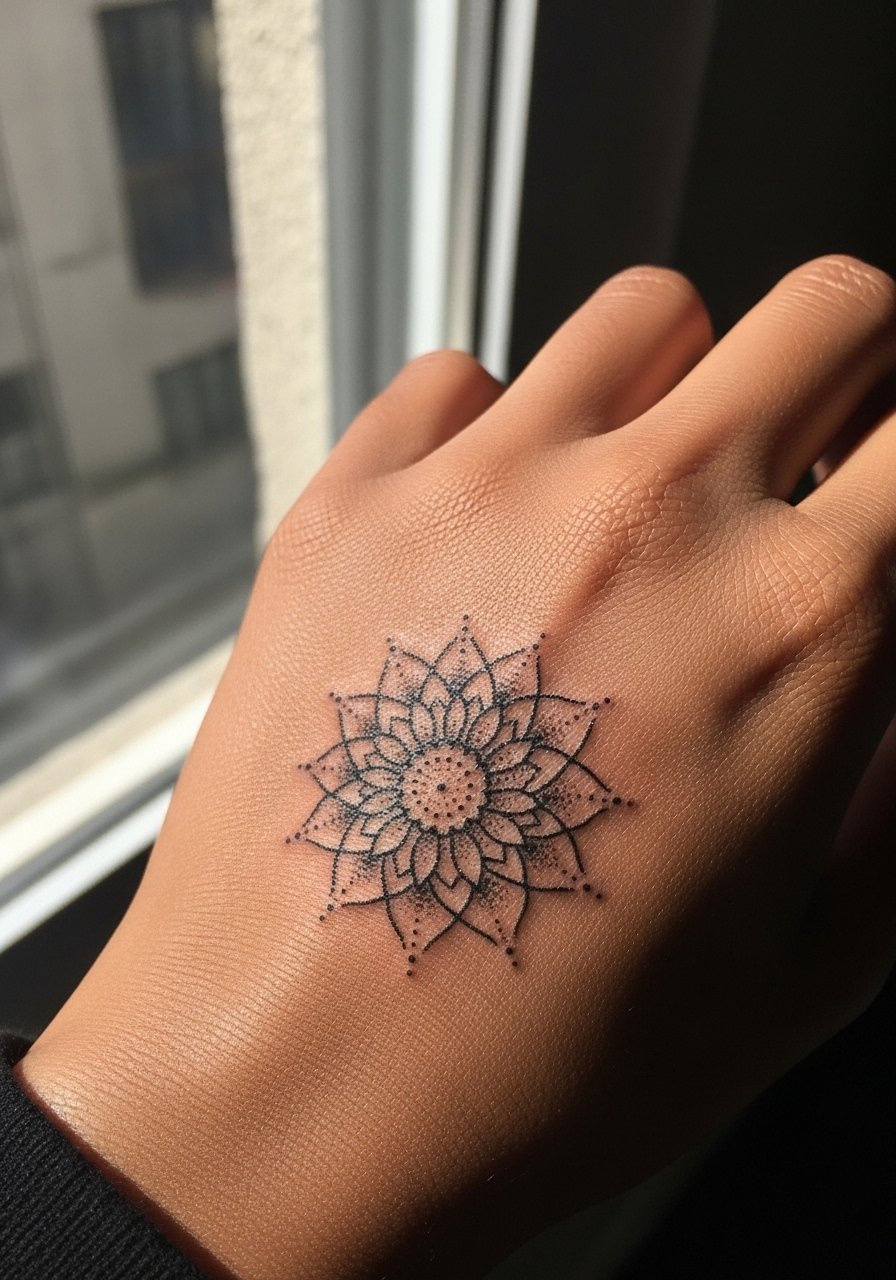
Mandala symmetry requires breathing room. During consultation, emphasize spacing between concentric rings so the pattern does not merge with movement. The mistake is shrinking the mandala to a point where dense dots touch, accelerating blur. Pain is moderate. In two years the outer rings soften first. For display, pair with an open cuff so the mandala remains the focal point without competing accessories.
13. Single Line Continuous Wave From Wrist to Pinky
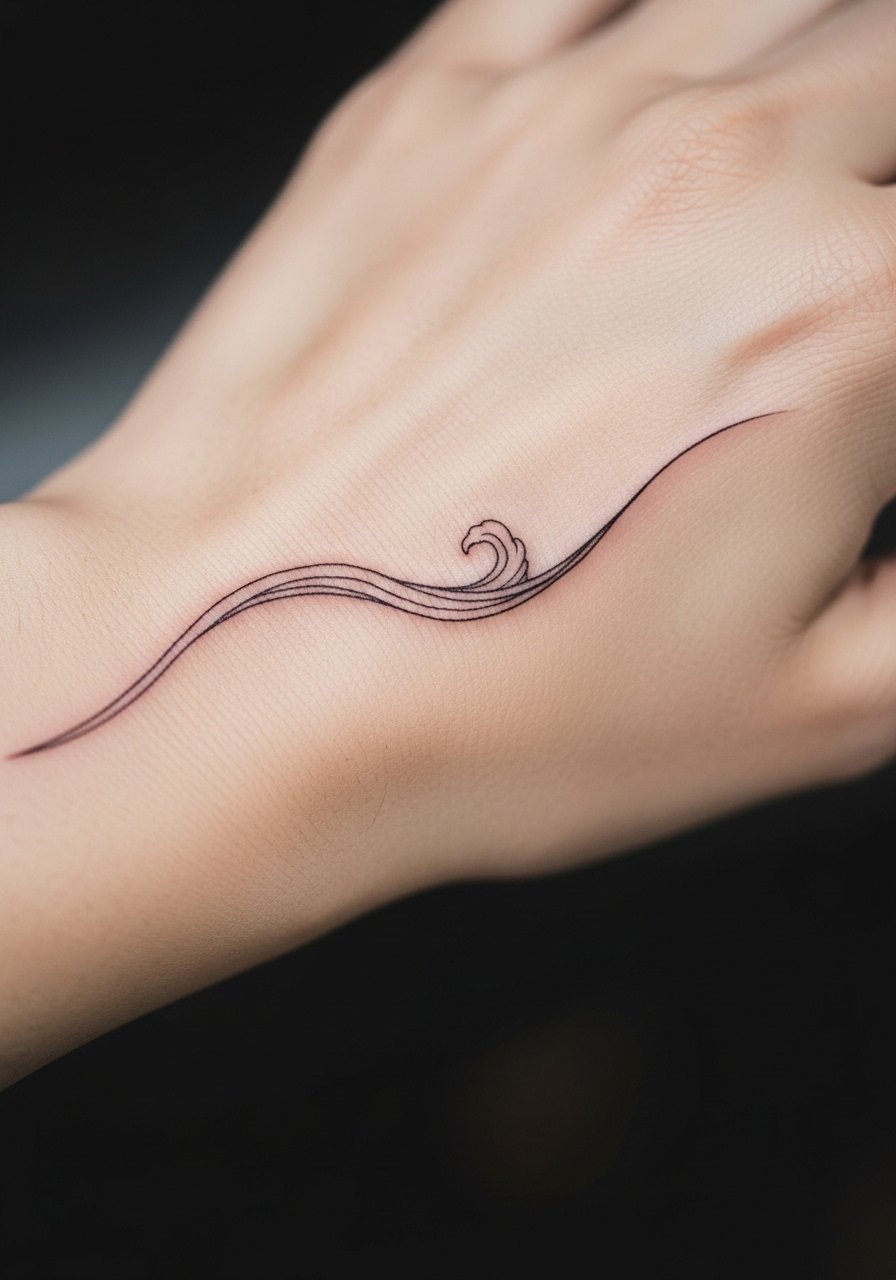
This reads modern and minimal. Ask your artist to map the single continuous line first on paper, then trace on skin for flow. A common error is trying to force multiple curves into tight spaces, which causes uneven pressure and variable line weight. Over time a single line may need a small touch-up at friction points. The session is straightforward, and you can wear a short sleeve tee that exposes the wrist and hand.
14. Micro-Realism Butterfly Landing on the Thumb
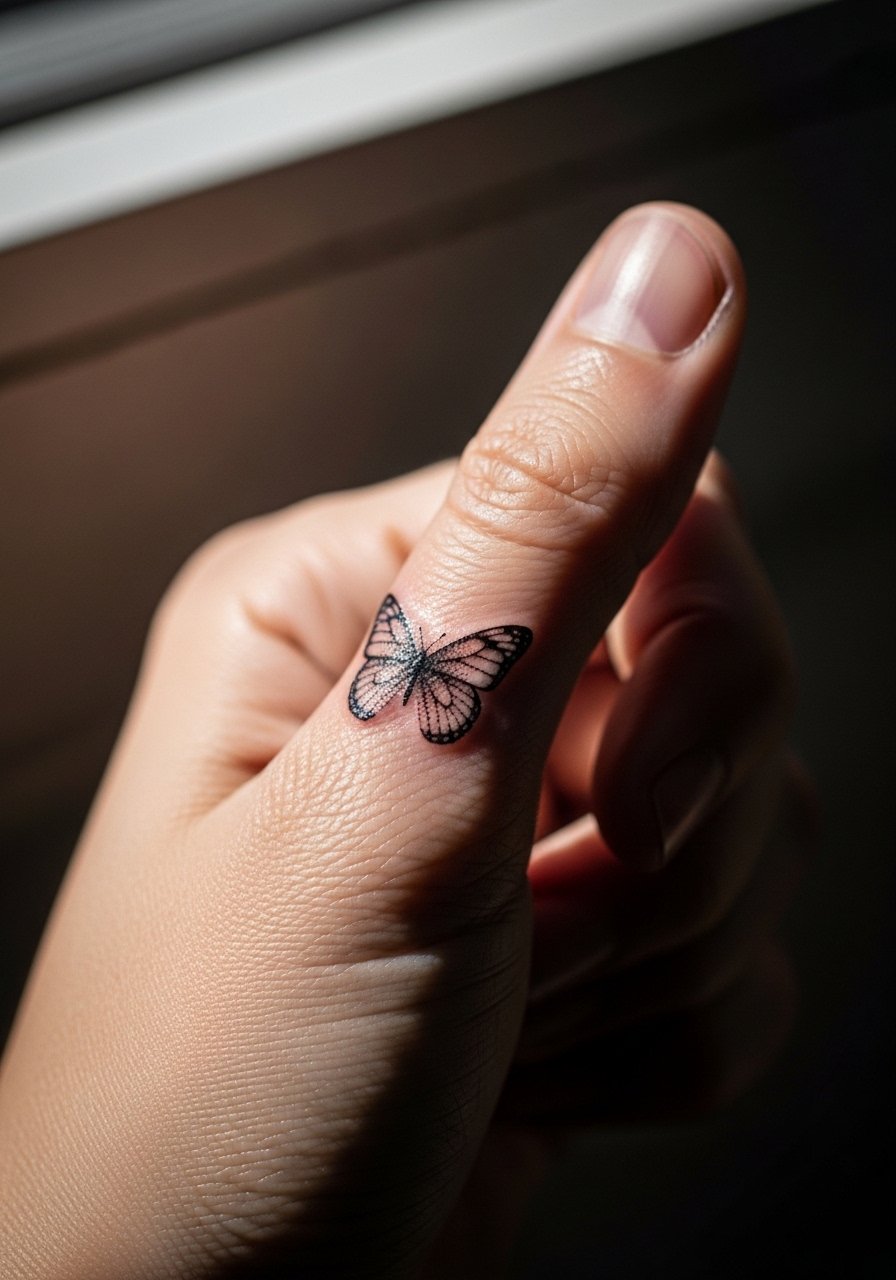
A small creature motif like this works well when scaled for hand anatomy. Tell the artist you want minimal body fill and focused linework on the wings for longevity. The major mistake is over-detailing wings that cannot hold at that tiny scale. The thumb area sees a lot of contact, so assume touch-up will be necessary within a couple of years. Wear a glove or ring to protect the area during the first week.
15. Thin Chain-Link Pattern Across the Backhand
This reads like wearable jewelry without the weight. In consult, specify the distance between links and insist on slightly thicker connection joints so the pattern stays legible. The error is matching real chain thickness at micro scale, which can blur. Touch-ups are common on the lateral hand where friction is higher. For showing this off, pair with a simple minimalist bracelet that echoes the chain motif.
16. Tiny Animal Silhouette on the Side of the Hand
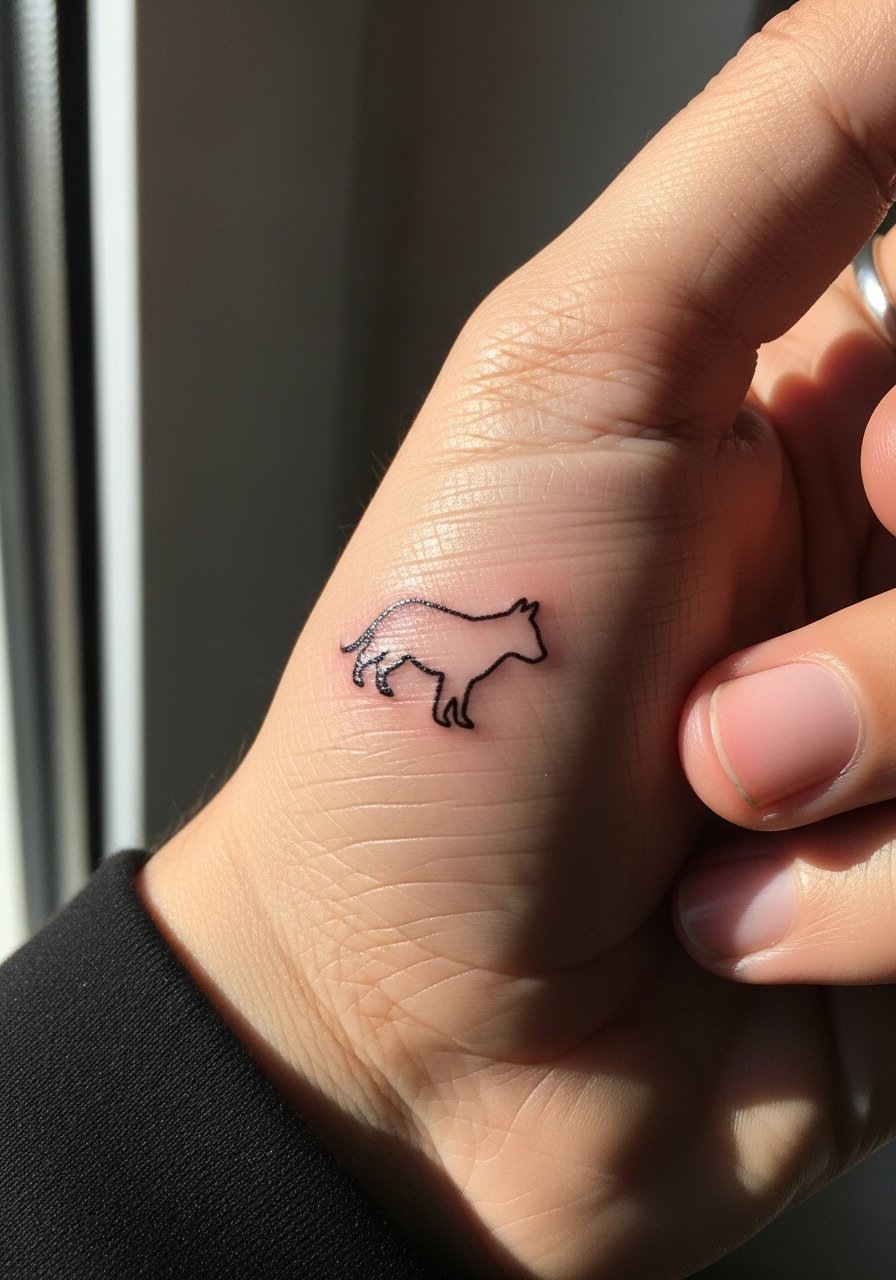
Silhouettes can be crisp if scaled correctly. Ask for a bold outline with minimal interior detail so the form reads from a distance. A frequent mistake is asking for interior texture that cannot hold at tiny scale on moving skin. Expect the silhouette to need maintenance depending on how often the hand is exposed to rubbing or water. For session comfort, wear a sleeve you can roll up easily, such as a loose button-down shirt.
17. Finger Joint Chevron Accents
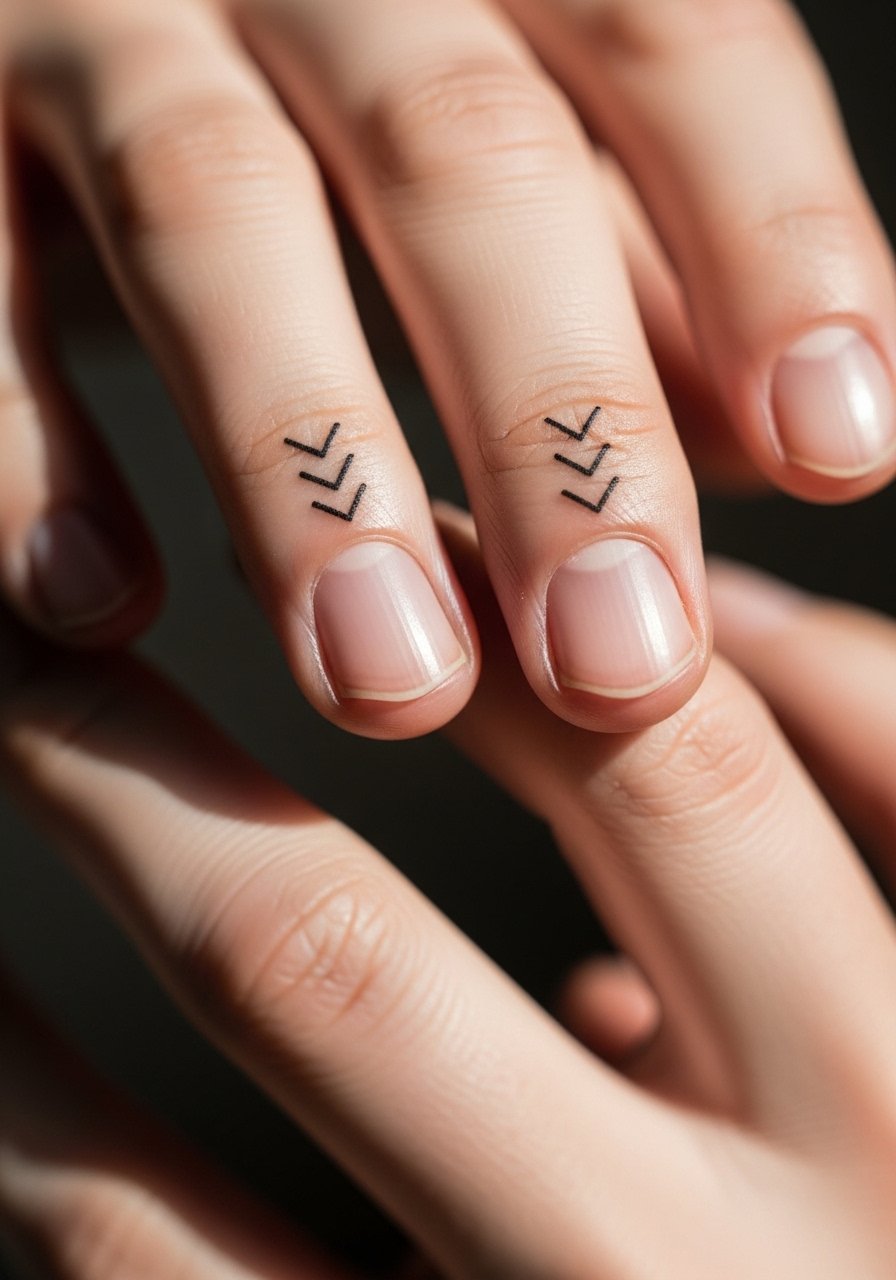
Chevrons are geometric and read well in small repeated patterns. Tell your artist you want negative spacing between each chevron to avoid merging when the fingers bend. A common error is nesting chevrons too tightly. Pain is higher near joints and touch-up needs are frequent in the first three years. Pair with slim rings that sit below the chevrons so the jewelry frames the work rather than rubs it.
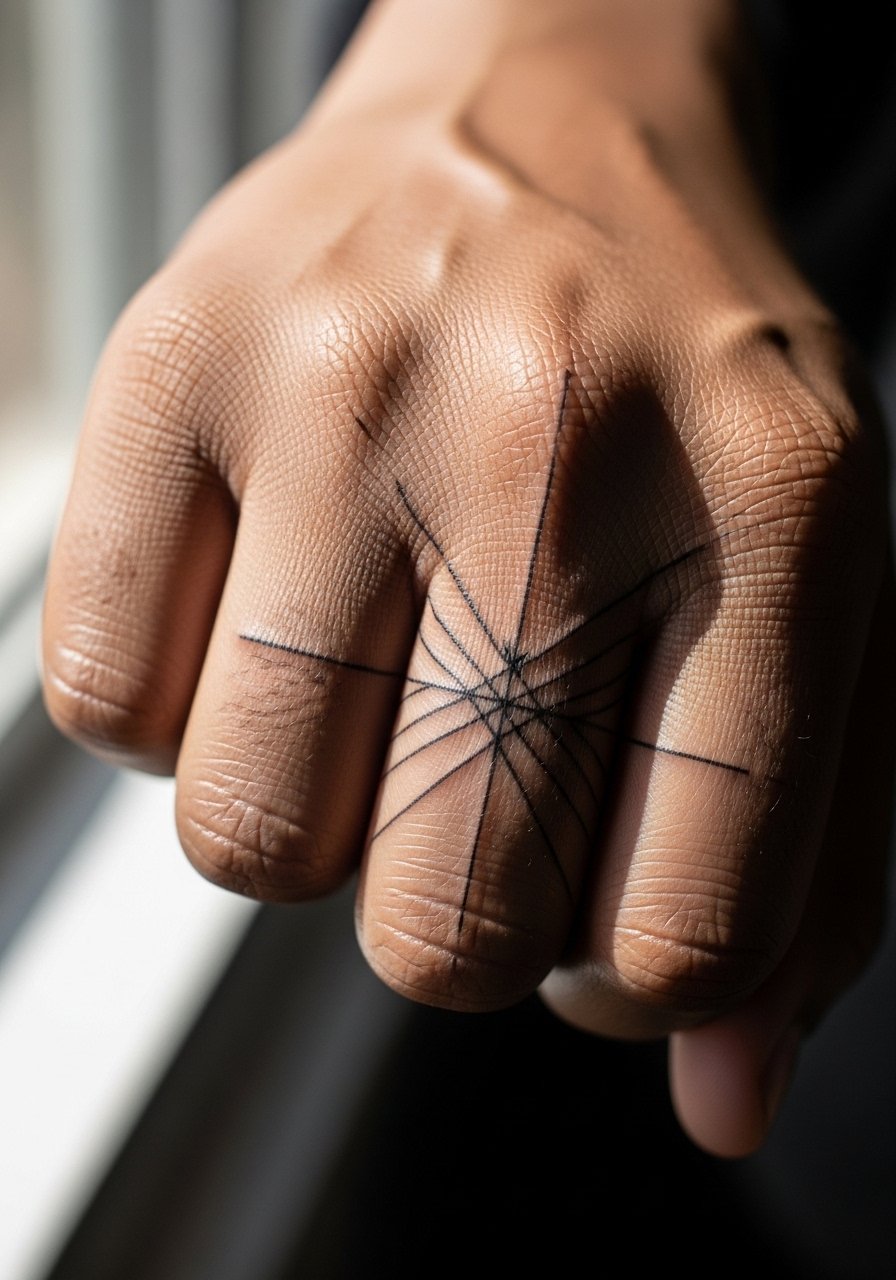
18. Micro Compass on the Hand Plane
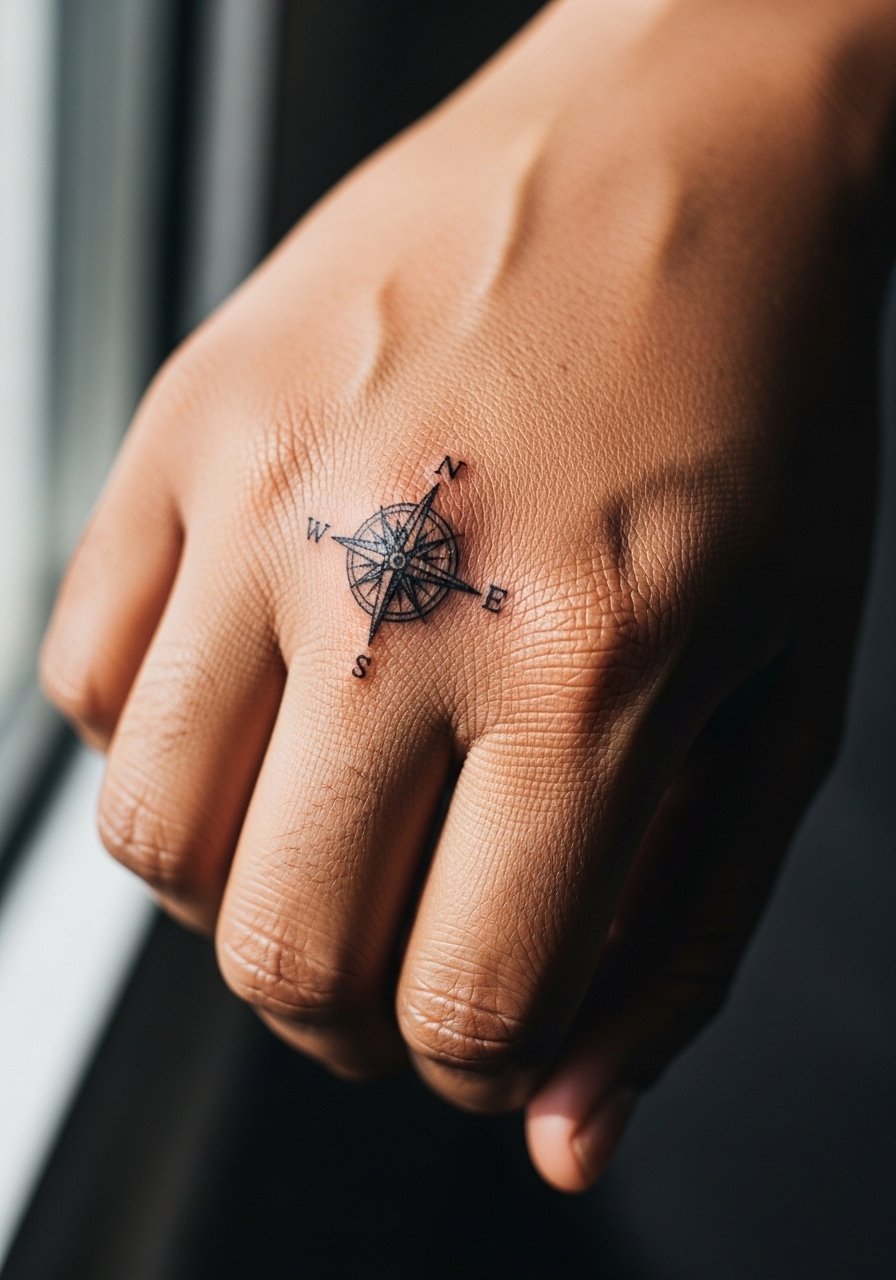
A compass gives directional symbolism without heavy ink. Confirm exact cardinal points in the stencil and ask that the compass points be slightly separated to retain readability. The error is cramming tiny decorative flourishes into the center. Expect moderate session time and a touch-up at year two if the central needle blurs. For a travel-ready look, wear a lightweight watch so the compass remains visible.
19. Tiny Script Alongside the Index Finger

Vertical finger scripts require clear spacing and a font the artist can render at small scale. During consult, ask to see the word in print and cursive to decide which holds better on your skin. The biggest mistake is choosing a font with tiny loops that bleed together. Pain is low to moderate. For presentation, pair with an understated minimalist watch or keep the wrist bare.
20. Tiny Floral Medallion on the Thumb Base
This spot suits compact, centralized designs. Ask for a clear border ring around the medallion so the edges stay defined against movement. A common mistake is relying on tiny interior dots that fade first. Expect touch-up work within a couple of years given daily use of the thumb. For session wear, roll up sleeves and bring an oversized bandage to protect the area afterward.
21. Single Fine Line Arrow Diagonal Across the Hand
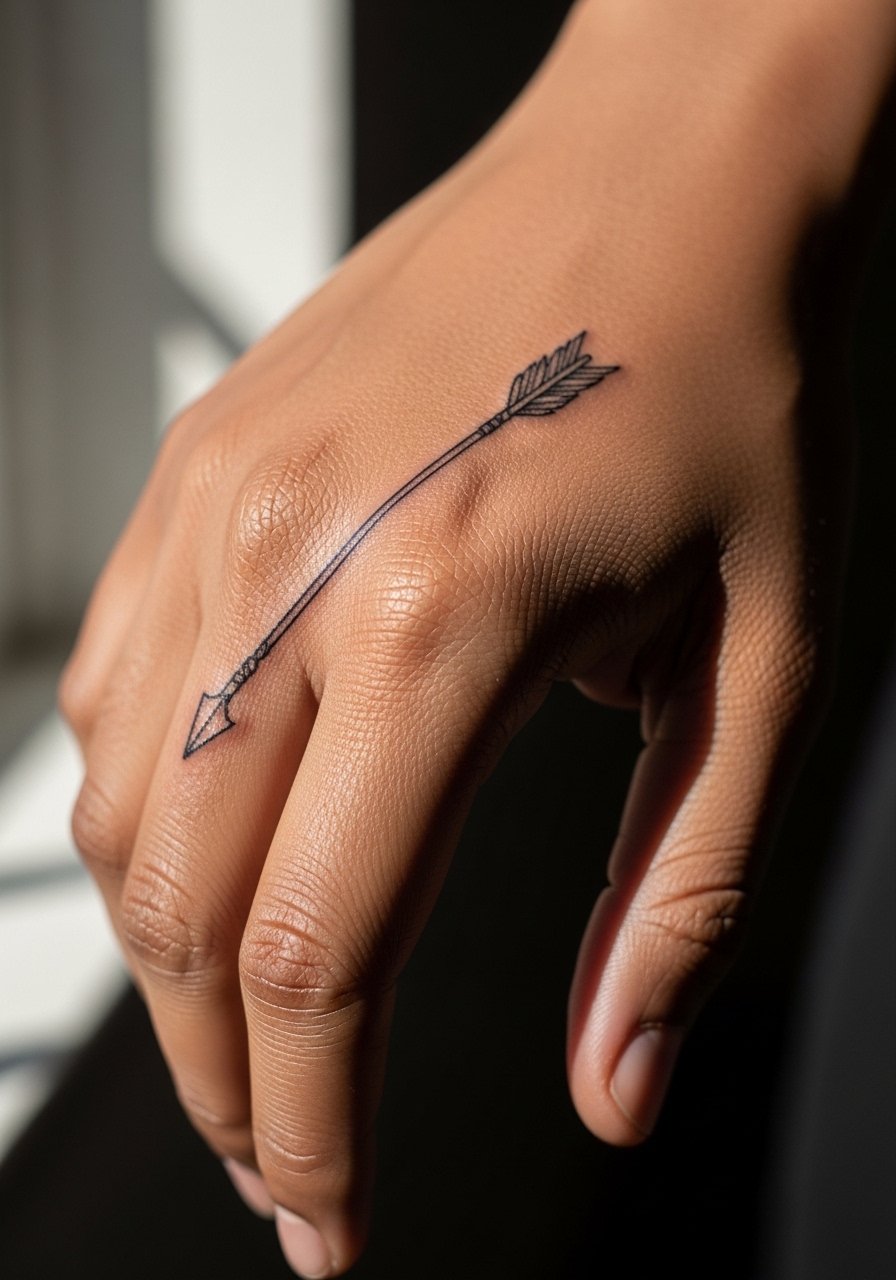
An arrow translates well when proportions respect hand anatomy. In consult, set the direction and scale on your hand while relaxed and then clenched to test visual flow. The mistake is making the arrow too long or too thin where friction will erase parts first. Expect moderate pain where bone is near the skin and a potential touch-up at year two. For showing it off, wear sleeves that stop just above the wrist.
22. Micro Script Date on the Side of the Palm

Dates are personal but exposed. Ask for exact numeral formatting in the stencil and confirm how it looks at rest. The palm edge sees friction so plan for earlier touch-ups. One common error is prioritizing ornate numerals that blur. This placement is functional but higher maintenance. After the session, avoid heavy rubbing for a week and wear a protective sleeve when possible.
23. Delicate Fern Pattern Along the Thumb Side
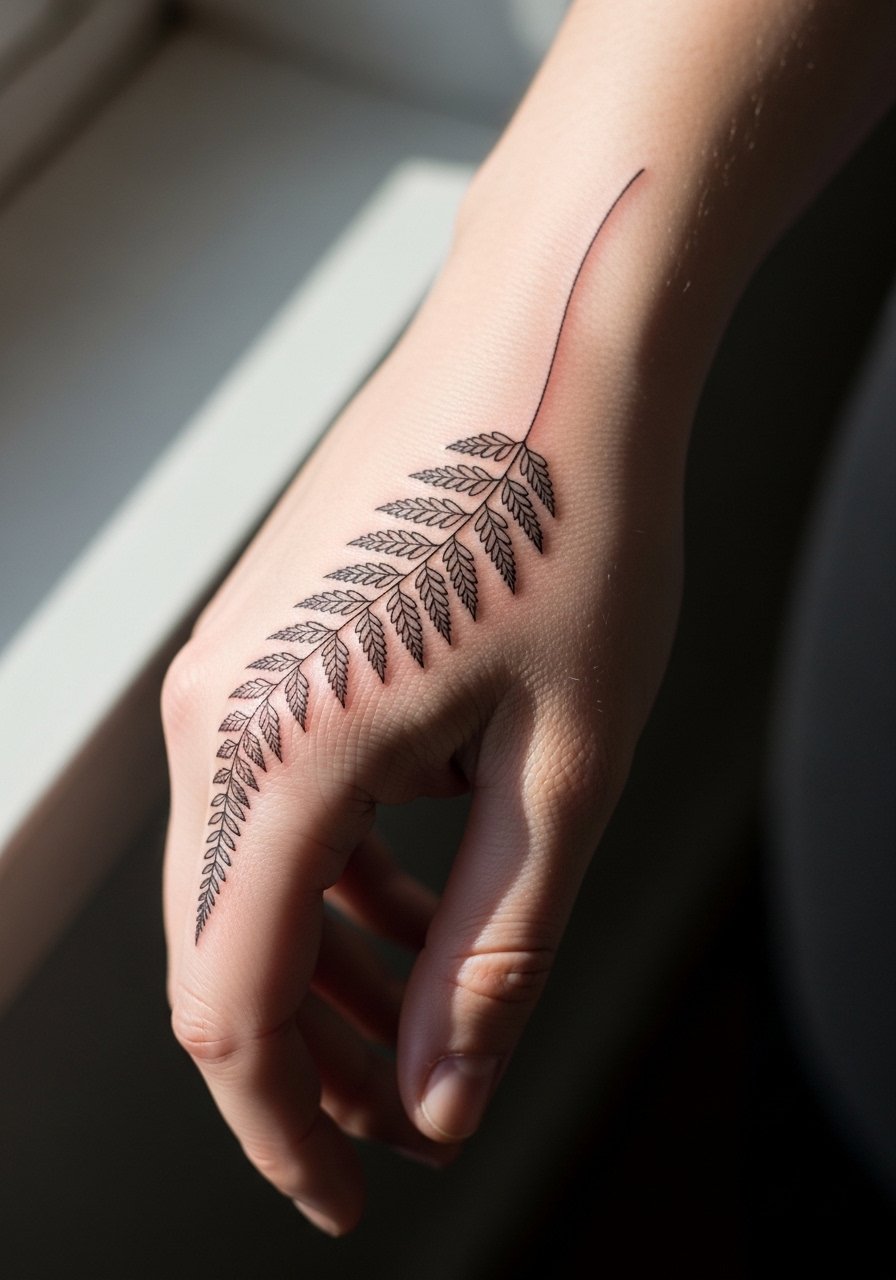
Fern patterns work when leaflets are spaced and scaled for motion. Tell the artist to leave micro-gaps between leaflets and avoid dense stippling near joints. The aging problem is compressed leaves that bleed into one another. Expect touch-ups at year three. For a finished look, pair with a thin bangle bracelet that sits slightly above the pattern.
24. Tiny Geometric Triangle Stack Along Finger
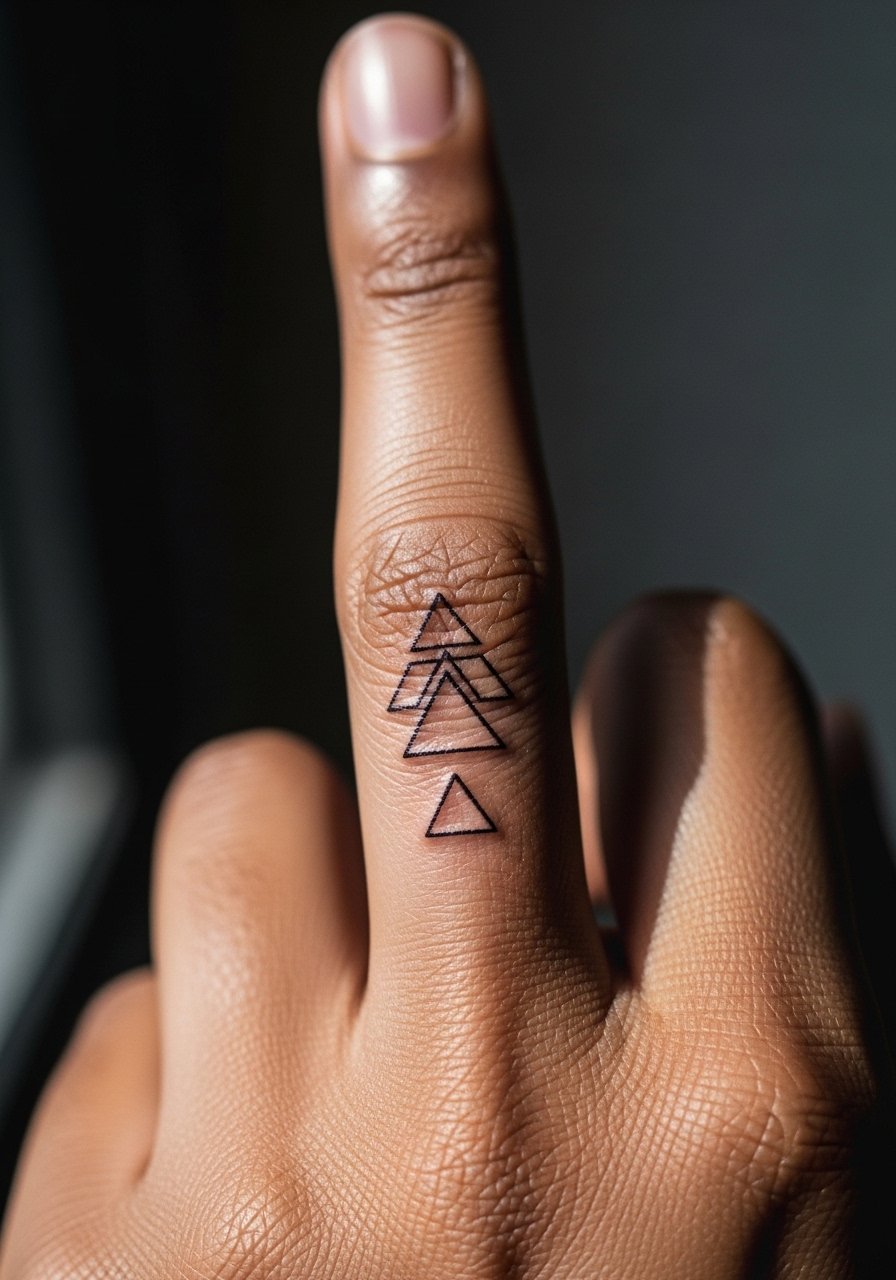
Stacked triangles create rhythm with minimal ink. During consultation, ask the artist to scale the triangles slightly larger than you think to allow for future spread. The mistake is ultra-miniaturizing, which makes shape loss inevitable. Pain is moderate near joints and touch-ups are likely within two years. For display, keep nail polish neutral to let the geometry read clearly.
25. Micro Anchor Near the Wrist Line
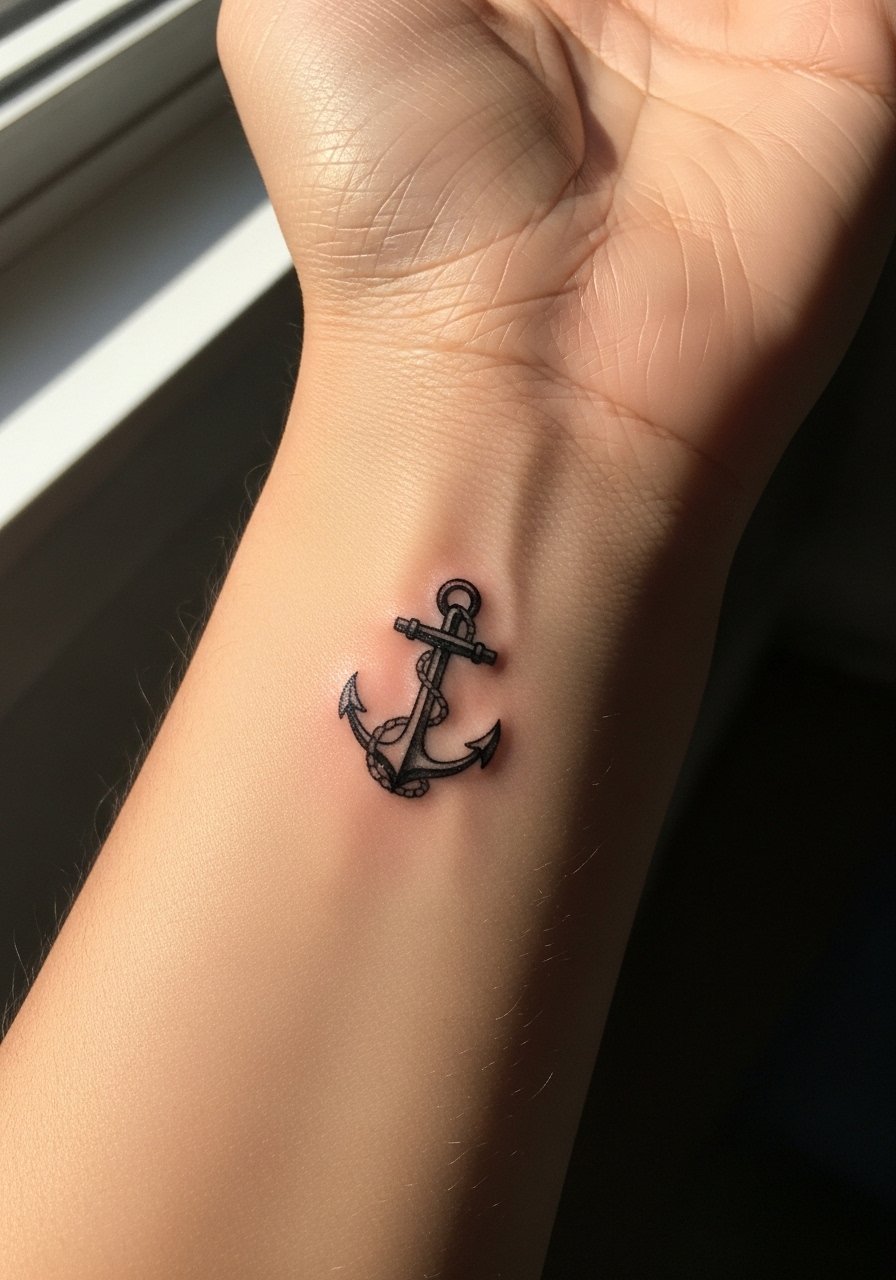
This is a classic micro motif that holds if the outline is solid. Ask for clean outer line weight with minimal interior shading. Commonly, people ask for too much interior detail which bleeds out. The wrist sees frequent bending and jewelry contact, so expect a touch-up schedule. For the appointment, wear short sleeves and bring a soft pouch to protect the area after.
26. Tiny Crescent Moon Nestled by the Thumb
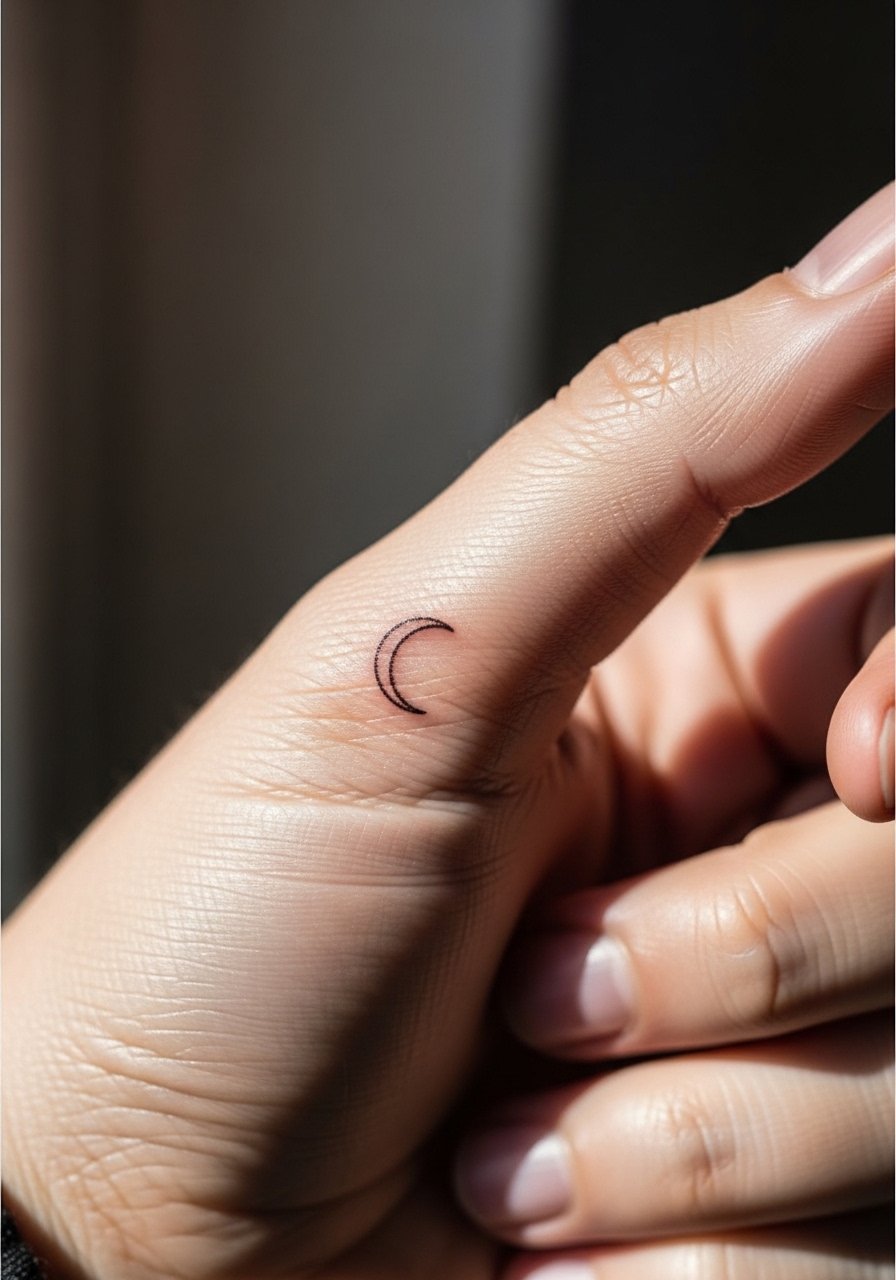
Simple shapes often outperform busy motifs on hands. Make sure the crescent has a slight thickness difference between the inner and outer curve so it reads as a shape rather than a hairline. The typical mistake is choosing a hairline crescent that disappears. Expect touch-ups as needed and avoid heavy hand creams in the first week. For subtle accessorizing, keep to one or two rings so the moon stays the visual anchor.
27. Tiny Floral Cluster at the Thumb Knuckle
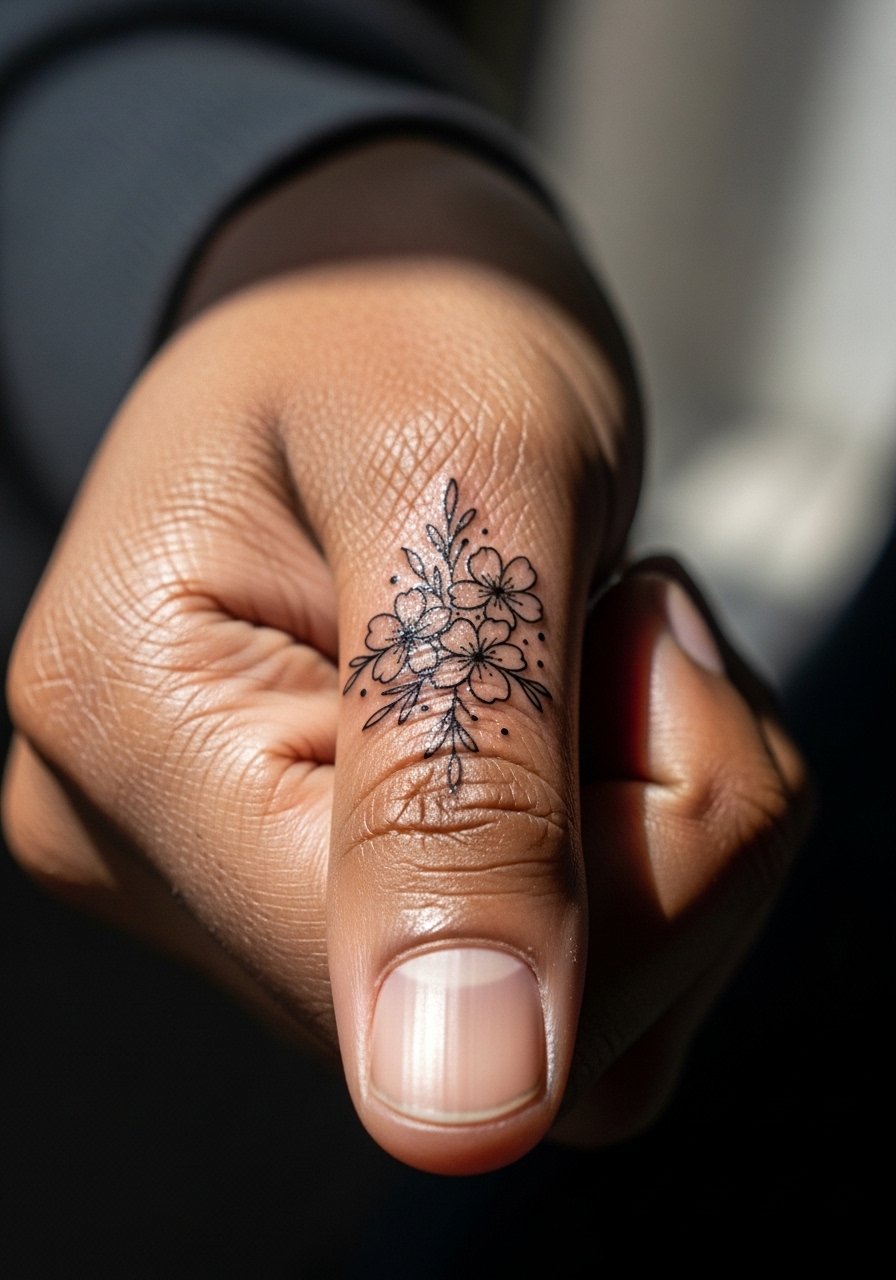
Thumb knuckle florals can be charming but are prone to wear. Ask the artist to center the design on the knuckle ridge and to use tiny anchors at petal bases to keep shape. The two camps here are clear. One says full knuckle work fades too fast to justify it. The other says with planned touch-ups and strategic spacing, the design is worth it. Expect sensitivity and plan for maintenance. For the session, wear a sleeve you can roll and bring a dainty ring set to frame the finished piece.
Frequently Asked Questions
Q: Will fine line hand tattoos blur faster than other placements?
A: From what I have seen, hand skin moves and is exposed more, so fine line pieces on hands generally need touch-ups sooner than forearm work. Placement, spacing, and how densely lines are packed matter most. Ask artists about their history with hand pieces and how often they recommend touch-ups before booking.
Q: How should I prepare clothing-wise for a full-hand session?
A: Wear short sleeves or a loose button-down you can roll up easily so the artist has full access to the hand and wrist. For designs near the thumb or thumb web, avoid tight gloves or anything that will press the area after the session. A simple short sleeve tee is often the easiest option.
Q: Are there hand designs I should avoid if I work in a formal office?
A: Visible knuckle scripts and full dorsal-hand coverage are the most noticeable and can affect perception in strict environments. If you need discretion, pick placements on the side of the hand or low on the wrist, or choose designs that are easy to cover with rings or sleeves.
Q: How often should I expect touch-ups for fine line full-hand work?
A: Expect at least one touch-up within two to three years for many hand placements, and sooner for palms or areas with constant friction. The exact timeline depends on your daily routine, sun exposure, and the initial line spacing the artist used.
Q: Can I wear jewelry over a new hand tattoo?
A: Avoid tight rings and bracelets during the initial healing window. After the first week, light jewelry that does not rub the fresh lines is usually okay. If you plan to show the piece off, choose thin rings that sit below any finger or knuckle tattoos so they do not abrade the ink.
Q: How do I find an artist who understands fine line hand work?
A: Look beyond social feeds and use in-person discovery. Visit local shops, ask to see healed hand work in portfolios, check convention booths, and search community threads for recent recommendations. Focus on artists who show healed photos and can explain spacing and touch-up expectations.
