
Fine line trends look gorgeous on a saved board, and they do not always survive a year of sun and sleeves. What holds up longer is often not the flashiest detail but the right scale, placement, and a little planning before you book. Read the sections that follow for specific orientalism art motifs, how to ask for them in a consult, how they age, and what to wear to the session so the stencil sits where you expect.
1. Oriental Lily on Outer Thigh
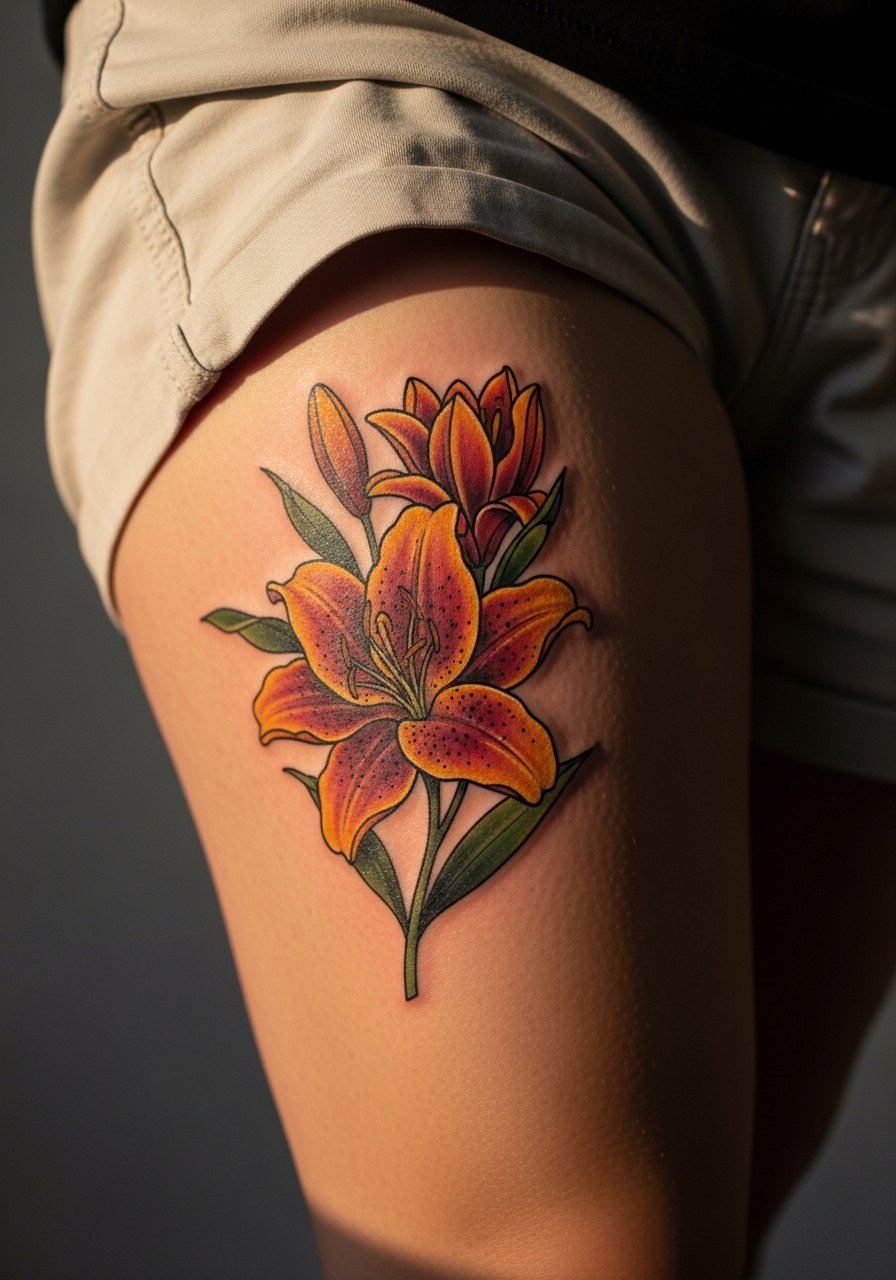
I recommend a neo-traditional lily for anyone who wants a piece that uses the thigh curve as part of the composition. I've seen these hold up better when the artist spaces petals and uses moderate saturation rather than packing every petal with tiny color fills. Tell your artist you want 6 to 8 inches across the outer thigh, bold outer linework, and selective red accents so the petals keep definition as skin shifts. A common mistake is compressing too many tiny details into a small patch, which blurs at year three. For the session wear, pull on a high waisted silk skirt or loose shorts so the artist can work without fabric rubbing the stencil.
2. Cherry Blossom Branch on Inner Forearm
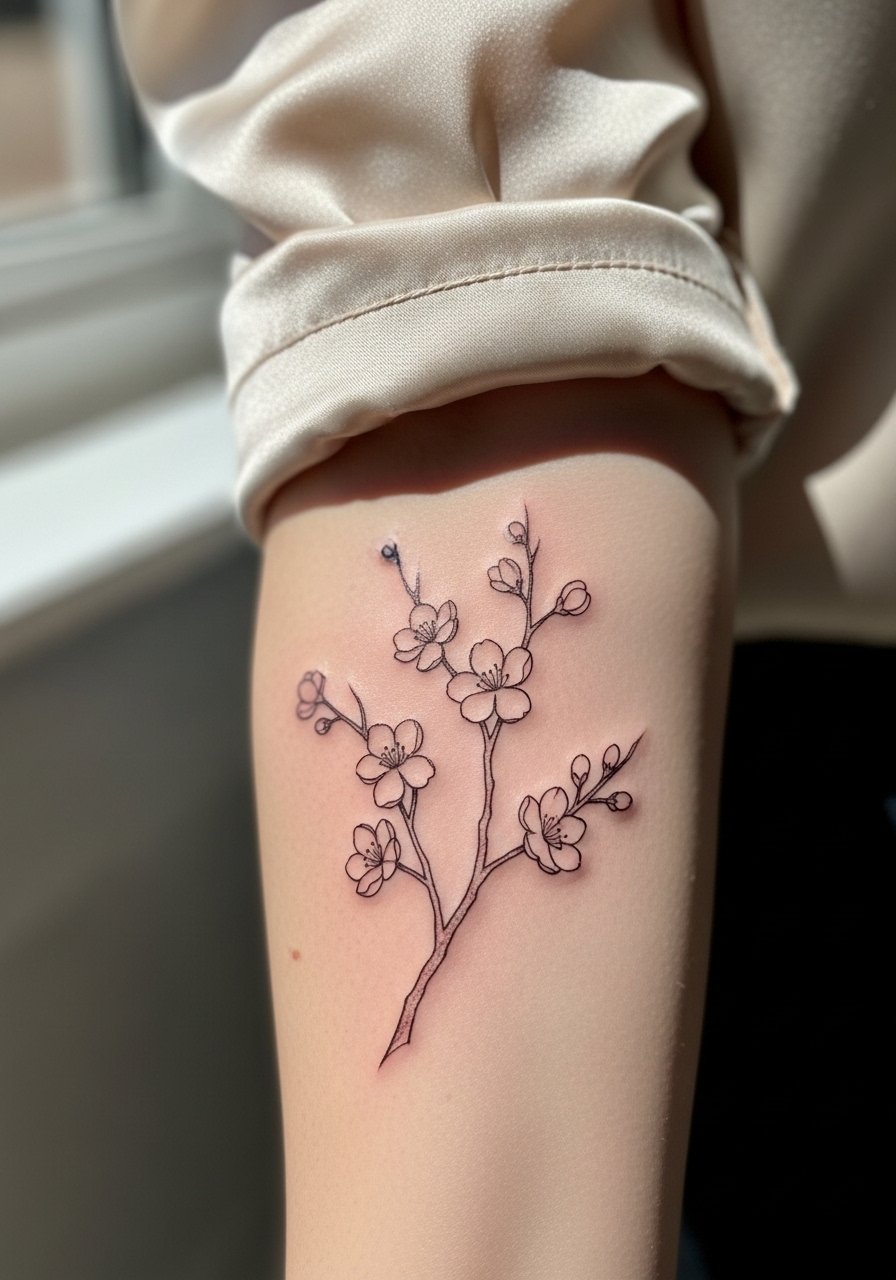
Fine line sakura is a favorite for forearms because it reads like jewelry when scaled right. Artists are split on this one. One camp says fine line ages gracefully on forearms if you allow breathing room between branches. The other camp warns that overly fragile stems will blur into gray within a couple years. My practical take is ask for slightly stronger primary stems with thinner secondary lines and plan a touch-up window at year two. During consult mention you want pink highlights only in key petals rather than full color fill. For showing it off, roll sleeves and pair with a silk blouse women in soft pink.
3. Pagoda with Cherry Blossoms on the Upper Back
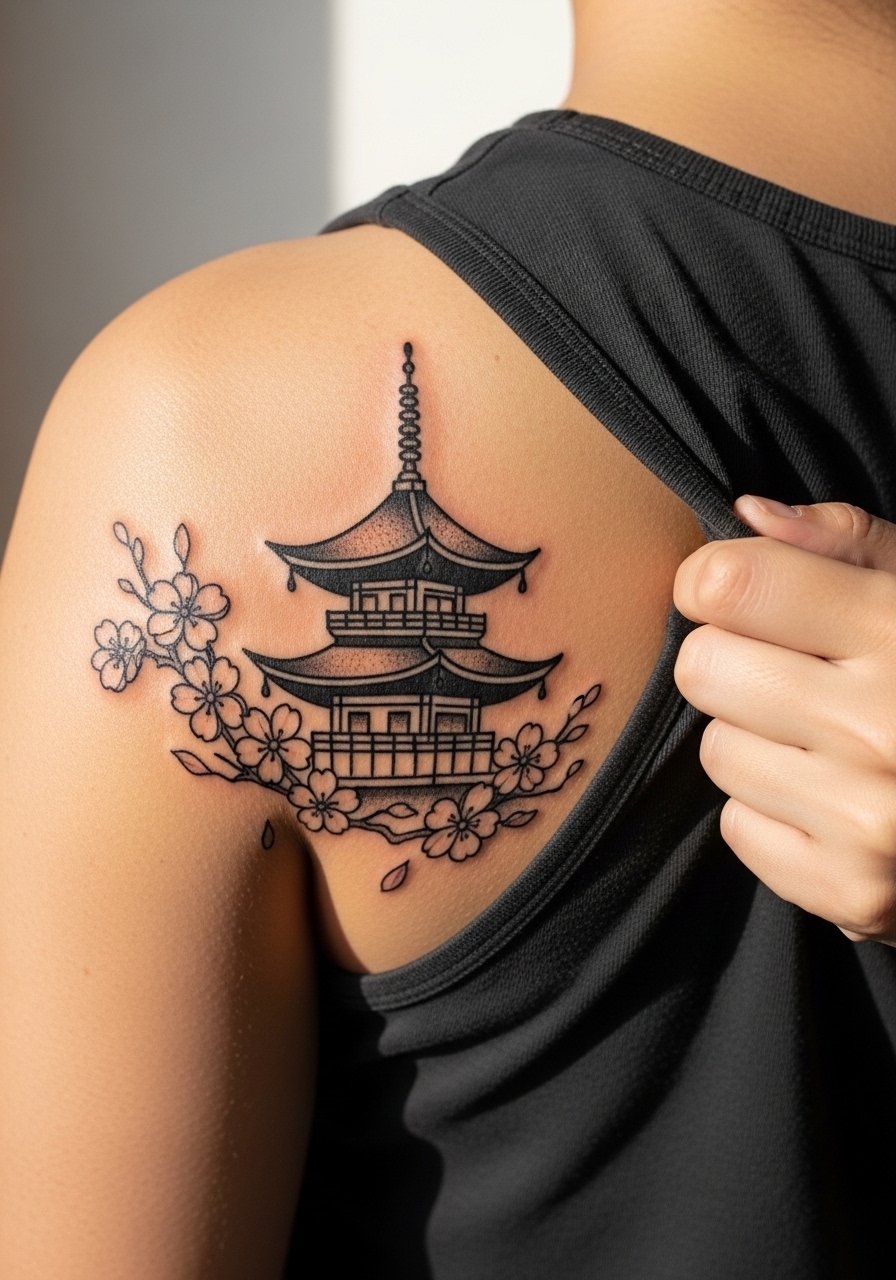
Upper back pieces like a pagoda layered with blossoms work well when you plan the composition to follow the shoulder blade. For sizable work, expect two sessions and ask for a framed composition that keeps architectural lines clear instead of crowding them with tiny background texture. A mistake I see is requesting full background mountains at the same level of detail as the pagoda, which flattens with time. If you want to show it at events, pair the piece with a boat neck sweater or an open-back cardigan so the pagoda is revealed without competing jewelry. For touch-ups expect a revisit around year three for crisp blackwork.
4. Feminine Kitsune on Full Back or Ribcage

Rib and full-back kitsune pieces read as highly personal and scale beautifully with contour. Fair warning about pain, ribs are often rated a seven or eight on everyday scales and long sessions can sap endurance. Artists also debate numbing cream. One camp uses topical numbing for multi-hour sessions to help clients last through color packing. The other camp worries it dulls feedback and can change how the skin takes ink. Ask your artist where they stand and whether they book breaks every 60 to 90 minutes. For showing it off later, a low back halter dress or an open-back cardigan frames the upper portion without hiding details. Expect multiple sessions to build saturation and let the color settle before any touch-up decisions.
5. Ukiyo-e Inspired Yin-Yang Waves on Wrist
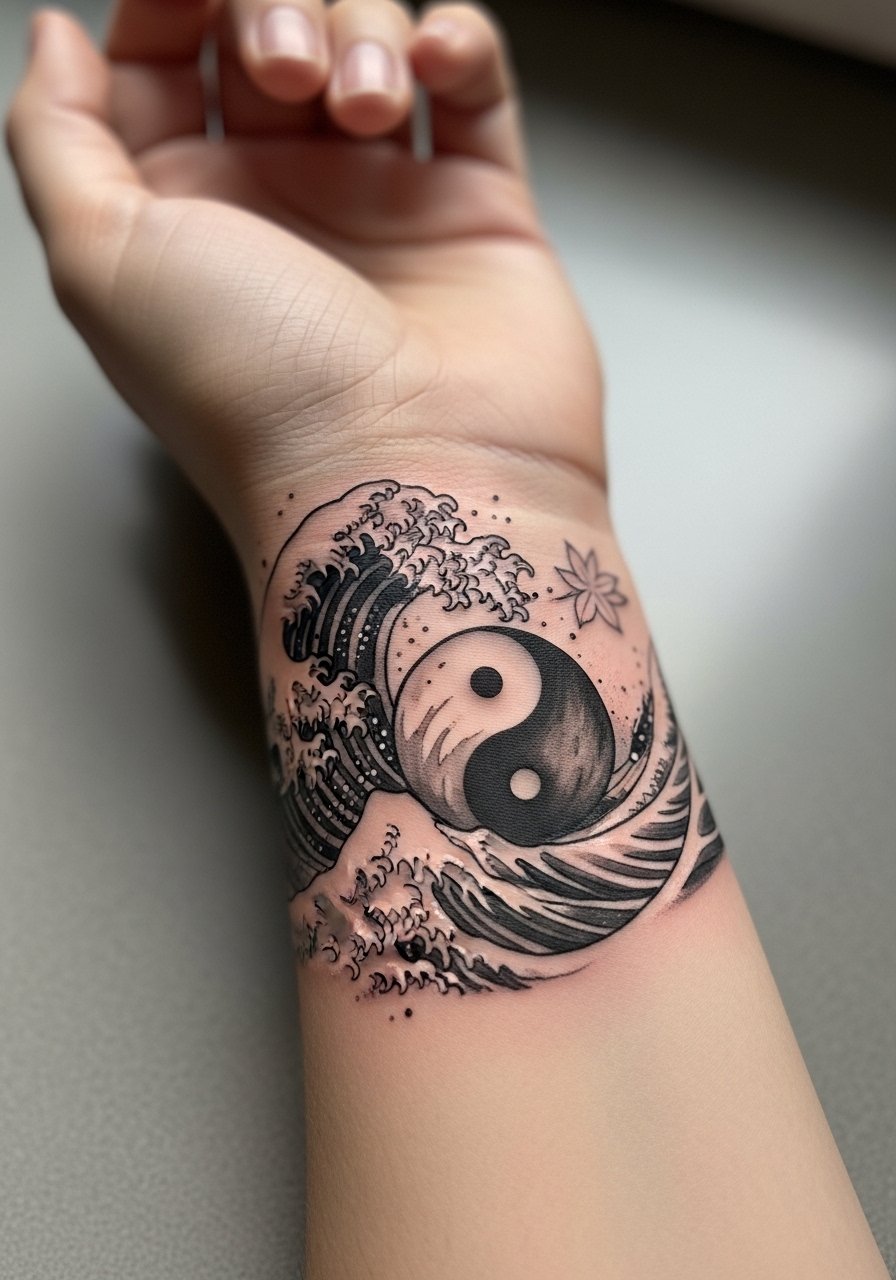
A minimalist ukiyo-e wave that forms a yin-yang makes a small wrist piece feel symbolic without overcrowding the anatomy. The real risk is placing ultra-fine detail too close to the joint. Workers who type or cycle tend to wear the outer edges faster. A practical version uses key ink drops and a dominant black element so the shape reads even after fading. If you want a cuff-like display, pair it with a thin cuff bracelet or stack dainty bracelets on the opposite wrist. For longevity plan a six-month check and expect a softening at year two that may need a line touch-up.
6. Red Dragon and Temple Architecture on Outer Forearm
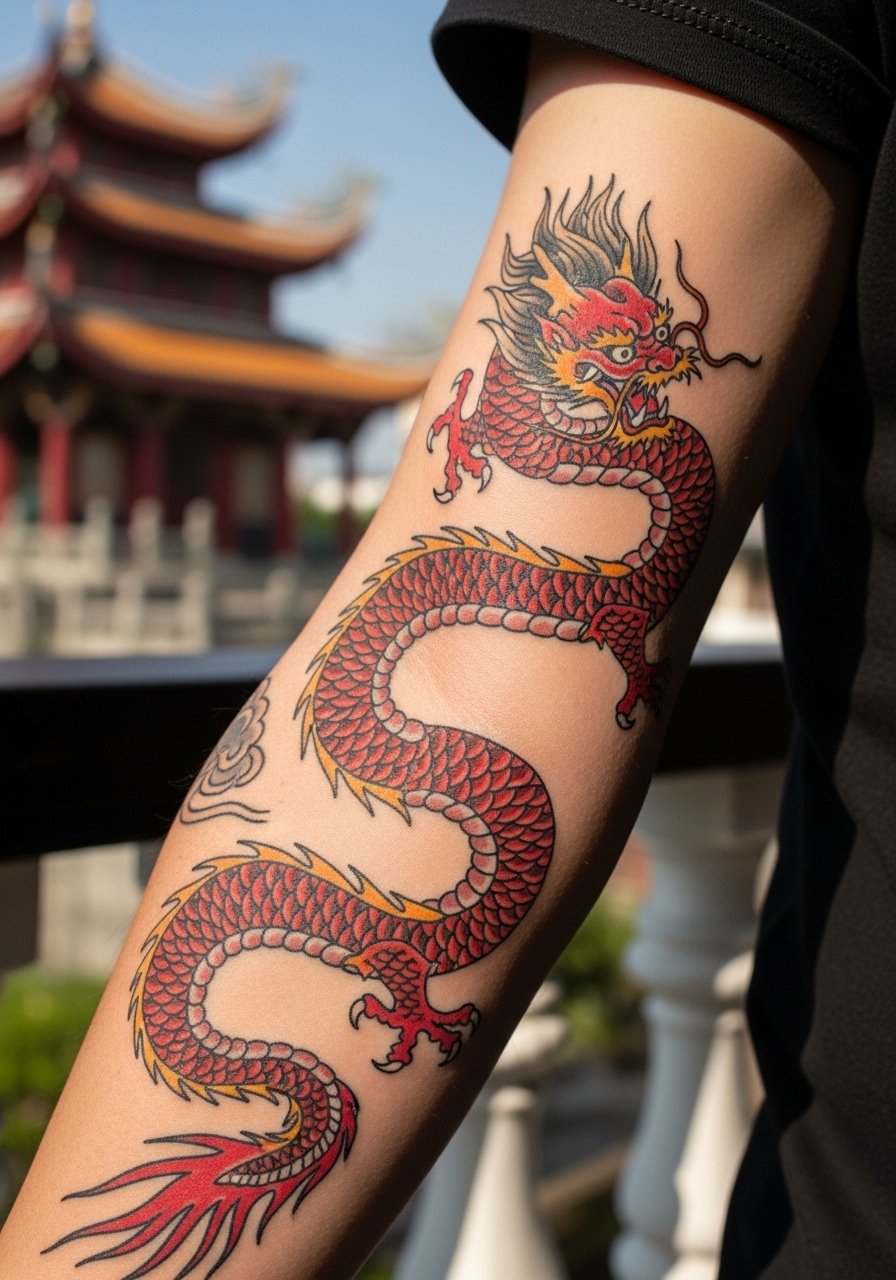
Dragons that start a sleeve on the outer forearm combine structure and movement when scaled at 6 to 8 inches. A common mistake is packing too many tiny scales into a narrow band, which loses separation after healing. Tell your artist you want prominent scales on the dragon body and simplified architectural shapes behind it so the dragon reads in motion. Expect two sessions to layer red and black without overworking the skin. For session ease wear a loose button-down shirt you can pull aside so the artist has clean access and the shirt does not drag across fresh ink.
Studio Day Picks
The wrist, collarbone, and thigh pieces above all ask for different prep and a few specific kit items smooth the first 48 hours.
-
Frida Aftercare Spray. A light mist many people prefer over thick ointments in humid weather because it avoids pore-clogging while keeping color bright.
-
Tattoo Goo, green tinted. The green-tinted formula helps reduce inflammation on red ink areas and some artists recommend it for dragon work that uses a lot of red.
-
Indie tattoo balm, Hustle Butter style. A non-greasy balm that users like for winter heals on fine line pieces without the sheen of heavier ointments.
-
Rice bran oil tattoo balm. Fast-absorbing and low shine, helpful for ukiyo-e or watercolor styles that need moisture without a glossy finish.
-
Aquaphor healing ointment. Thin layers applied for the first two to three days help protect delicate linework on wrist and collarbone pieces.
7. Butterfly with Red String on the Collarbone

A collarbone butterfly tied to a red string reads like a small narrative necklace. For collarbone placement ask the artist for a four-inch composition so the wings do not sit on the bone edge. People often request extremely tiny versions and then lose wing detail after healing. Tell your consult you want color only in the thread and selective wing highlights. For showing it off choose an off shoulder linen top and a thin chain necklace that frames without overlapping the tattoo. Session wear should be a strapless bra so the artist can access the area cleanly.
8. Koi Swimming Up the Thigh Curve
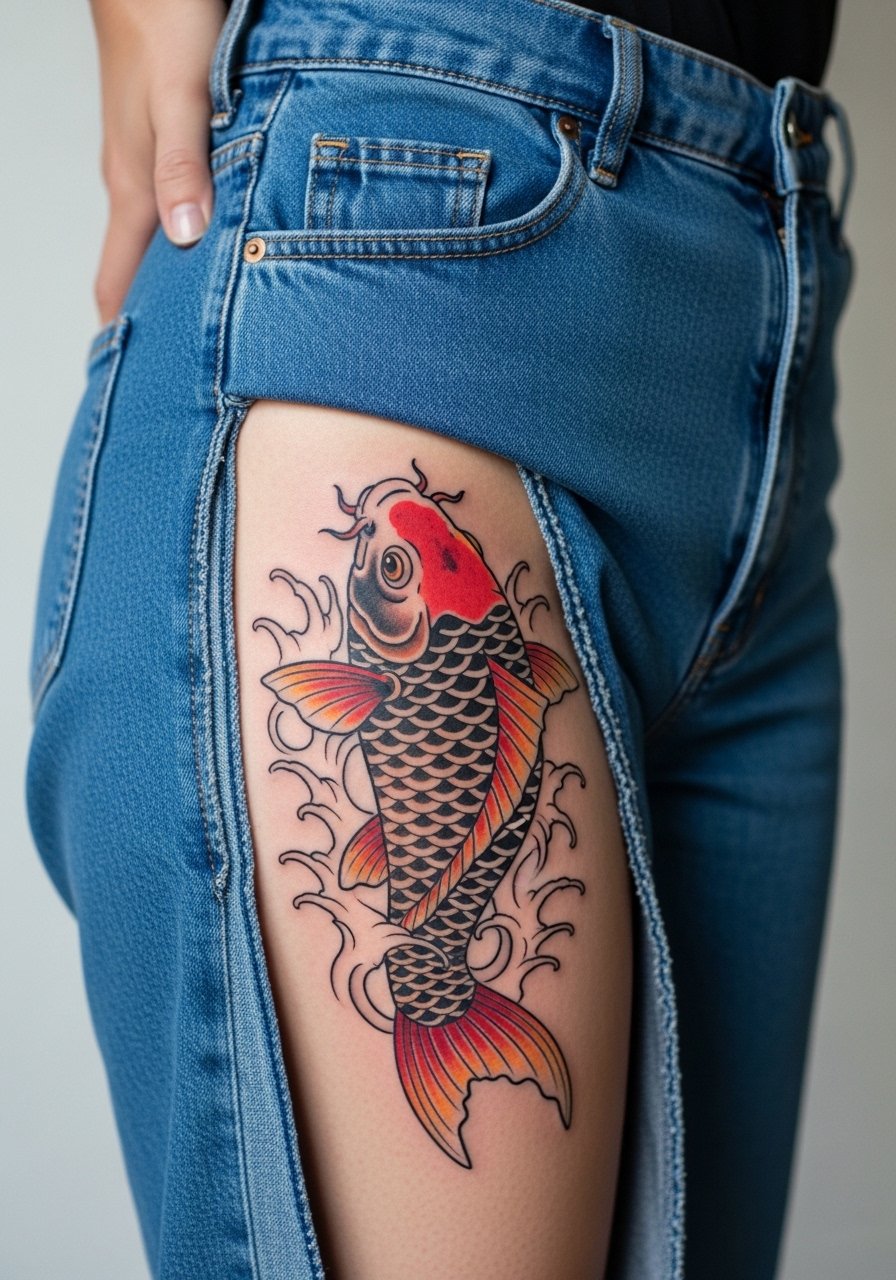
Koi on the thigh benefits from the canvas the leg provides, especially for pieces that wrap a little around the curve. I tell people to test size with a temporary decal before committing because weight or muscle changes can affect scale. The mistake is compressing the koi into a narrow strip; letting it breathe on the outer thigh preserves shape through weight fluctuations. Ask for contrast in scale between the head and tail so the fish still reads at a distance. For session comfort wear a flowy maxi skirt you can move aside and that will avoid seams rubbing during healing.
9. Minimalist Crane on the Ankle
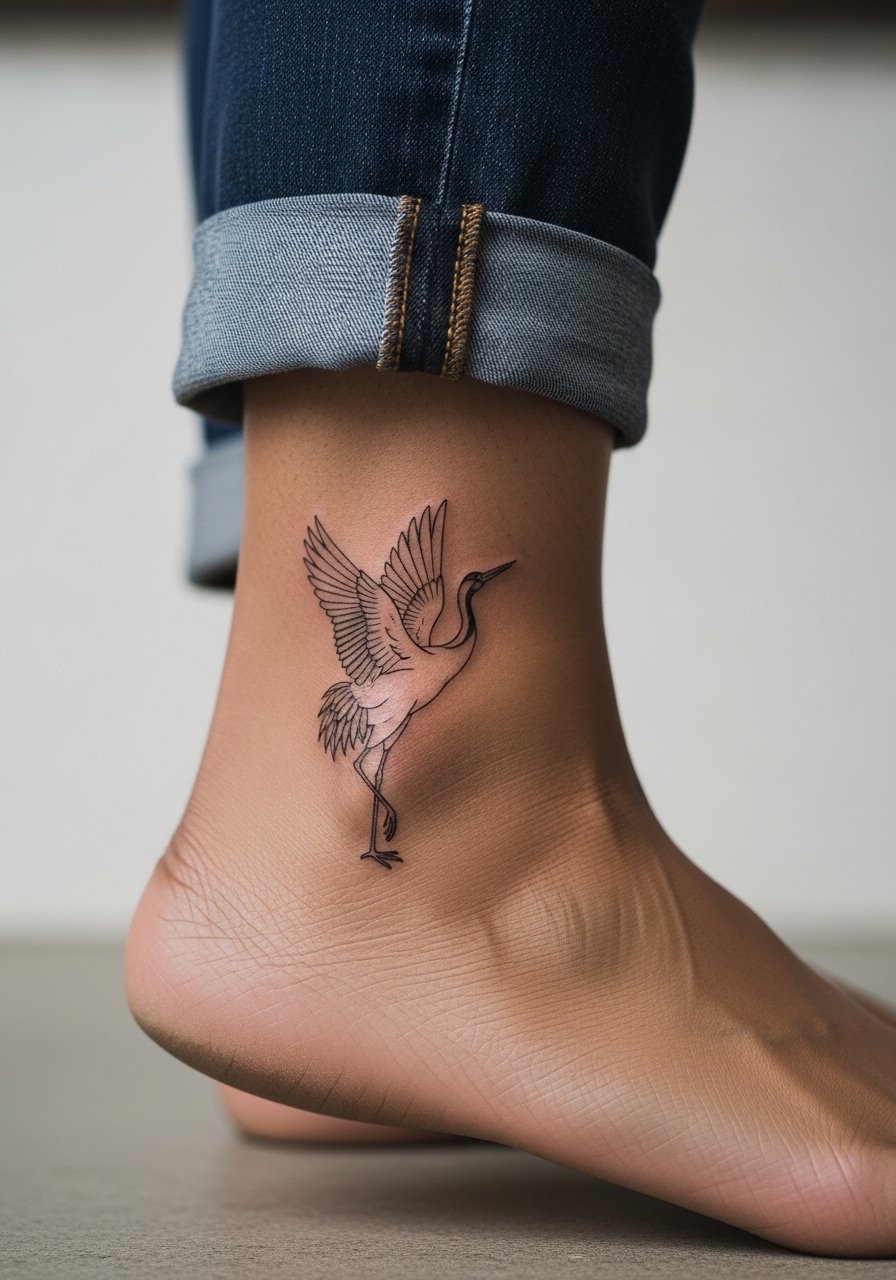
Ankle placements are charming but they face friction from shoes and socks during the first week. For a crane design scale it to four inches so the silhouette keeps airspace around wings. A common healed complaint is early blurring at the edge where socks rub. To avoid that ask for slightly bolder endpoints and plan to sleep in a bandage if you will be moving a lot. Show it with sandals and a kimono sleeve blouse for beach looks. Expect a touch-up at year one in the high-friction zones.
10. Peony Cluster on the Shoulder Blade
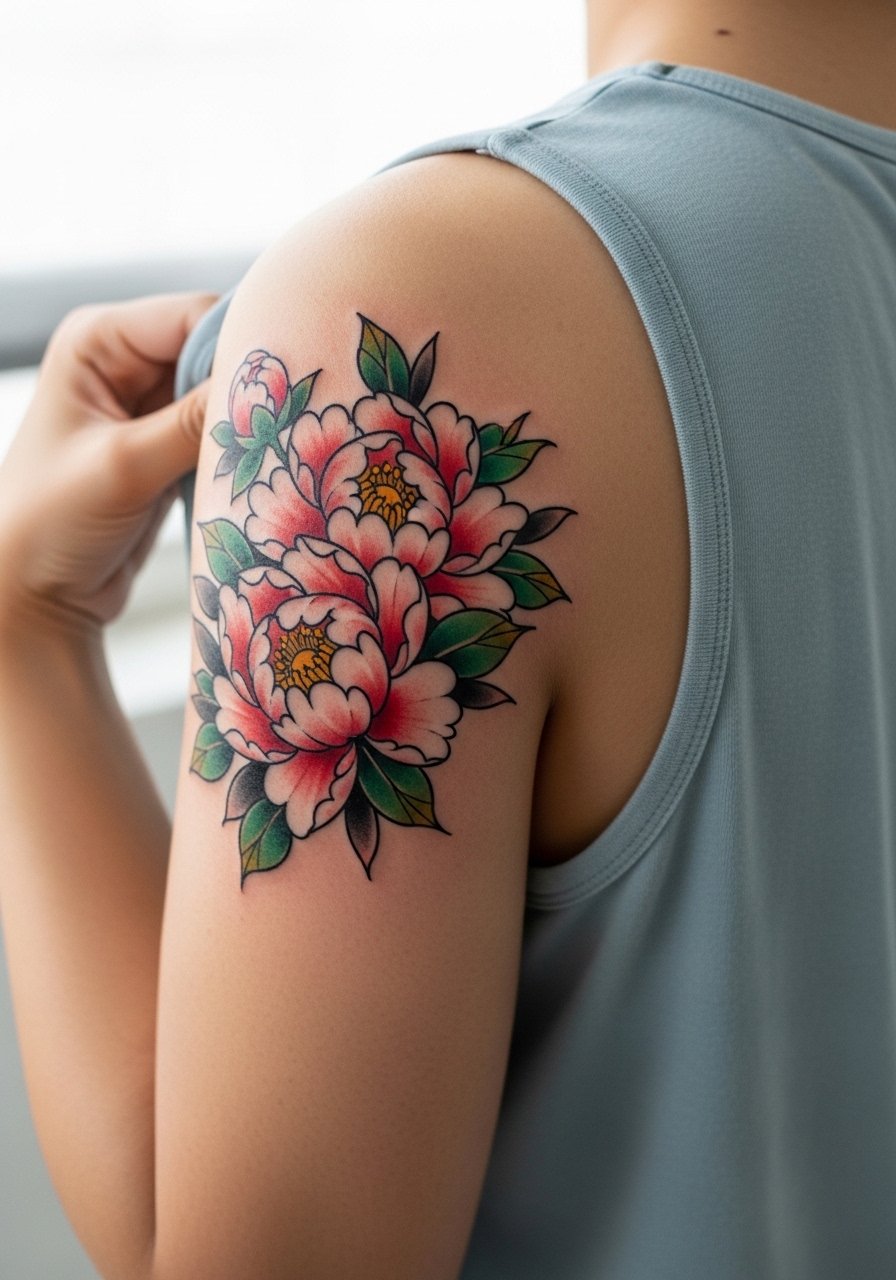
Shoulder blade florals age well if the artist leaves negative space between blooms. I've noticed peony clusters with heavy stipple shading and open petals maintain a three-dimensional feel over time. The error I see is layering dark background dots too close to delicate petal edges, which flattens contrast. During consult say you want stipple shading behind the petals and solid outlines on the foremost blooms. To show it off pull on an open-back cardigan or a tank so the shoulder blade sits in focus without heavy straps.
11. Lotus Sternum Piece
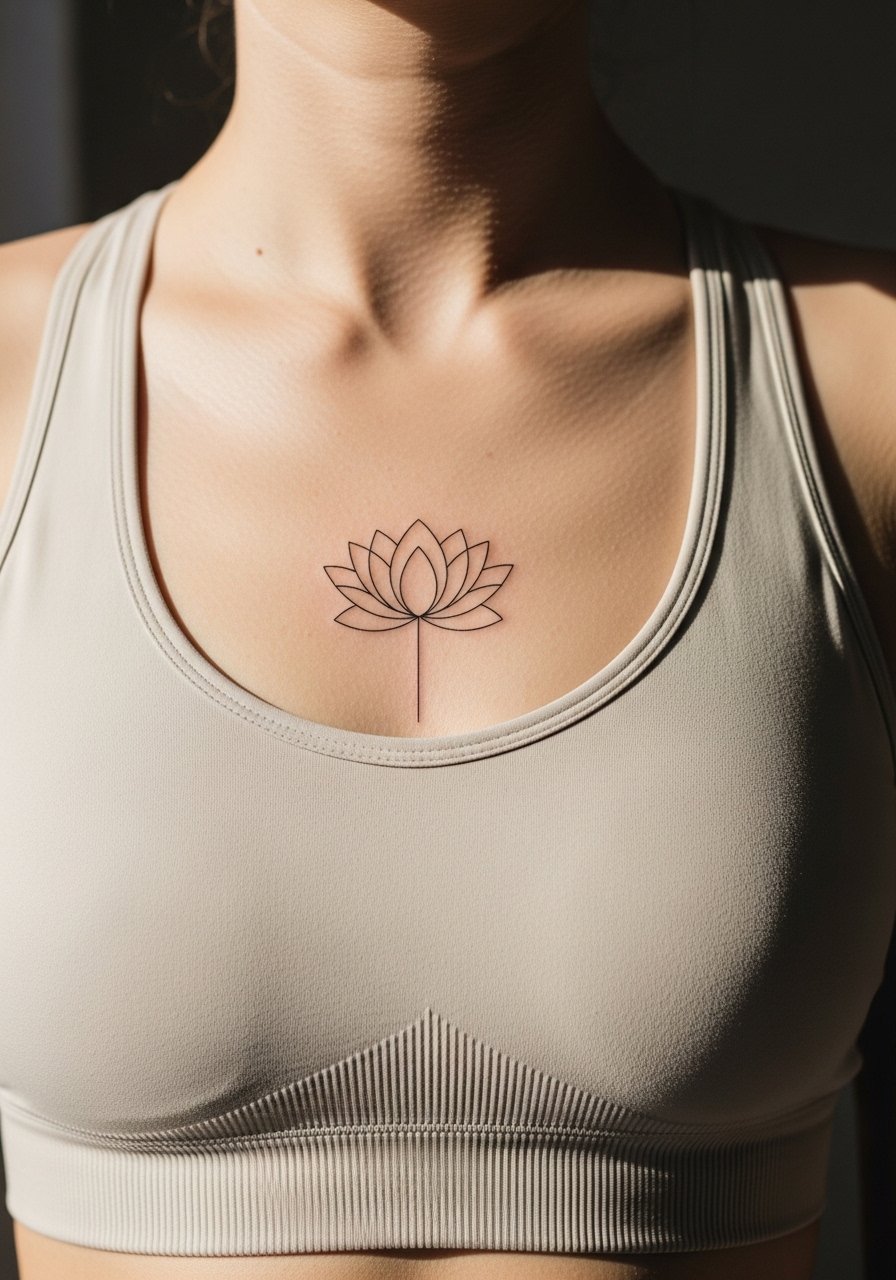
Sternum tattoos draw attention but require precise placement relative to the chest line. The sternum is a sensitive area for both pain and stretch during breathing. A good consult note is asking the artist to center the design with a vertical guide and avoid overly dense cross-hatching that can pool during healing. For the session wear a fitted sports bra that shows only the strip needed. Many choose bandeaus afterwards to make the motif peek through low tops without slipping over the ink.
12. Small Crane Behind the Ear
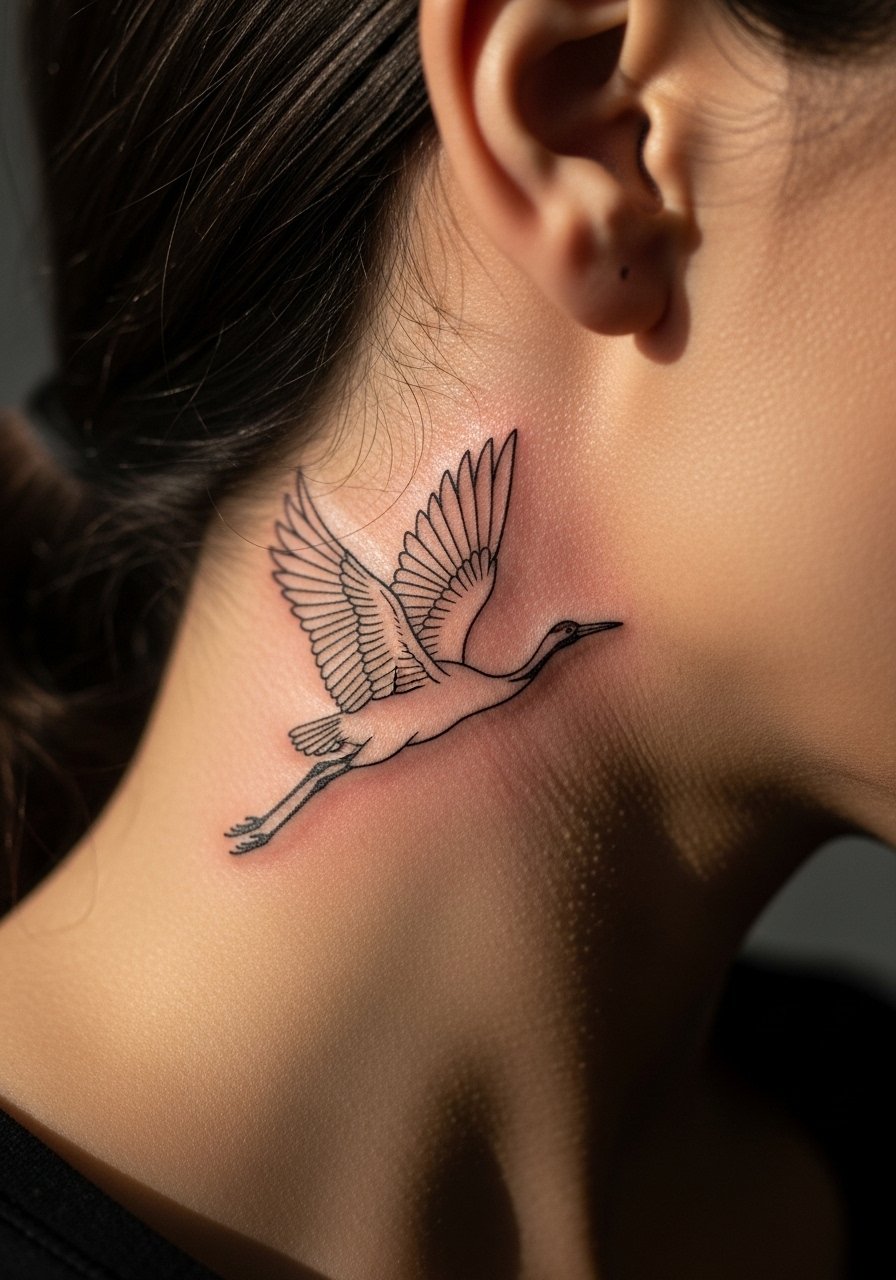
Behind-the-ear placements are delicate and best kept small. Note the strict framing here, the design must sit on the skin below the hairline. The big mistake is making the motif too intricate given the limited canvas. For a crane pick a single curve and ask the artist to keep the weight slightly bolder than you think so it still reads when hair grows. Show-off options are limited, but short hair or a tucked bun emphasizes the placement. Expect a six-month check to see if any touch-up is needed.
13. Geometric Wave Mandala on the Calf

Calf placements let you expand a mandala while keeping symmetry. The common error is cramming too much dense geometry into a small diameter. Give the pattern room and ask for alternating line weights so outer rings age separately from the center. For footwear-friendly show-off, pair the piece with cropped pants or sandals. For session comfort wear shorts or loose pants you can pull up easily. Calf work usually tolerates a single session for medium designs and touch-ups happen later if needed.
14. Small Ukiyo-e Wave at the Ankle
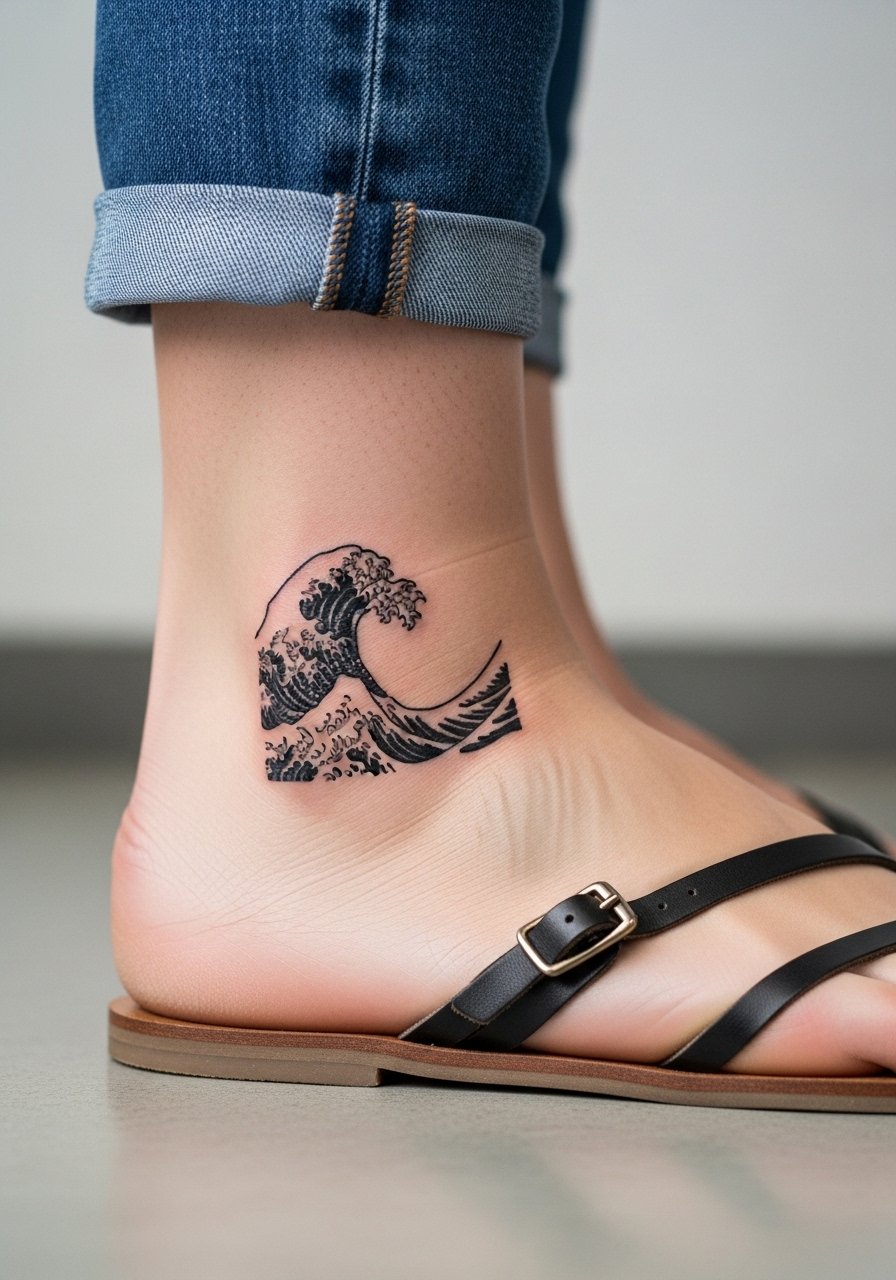
Ankle bones and joints need simplified compositions so the curve of the bone reads clearly. For an ukiyo-e mini wave choose a bold silhouette and limit cross-hatching. The mistake is over-detailing the crest which disappears as the skin stretches with movement. Ask your consult for high-contrast corners and minimal stippling. Pair this placement with rolled jeans or sandals for a seasonal reveal. Expect shading to soften by year two in high-motion zones.
15. Fan Motif on the Upper Arm
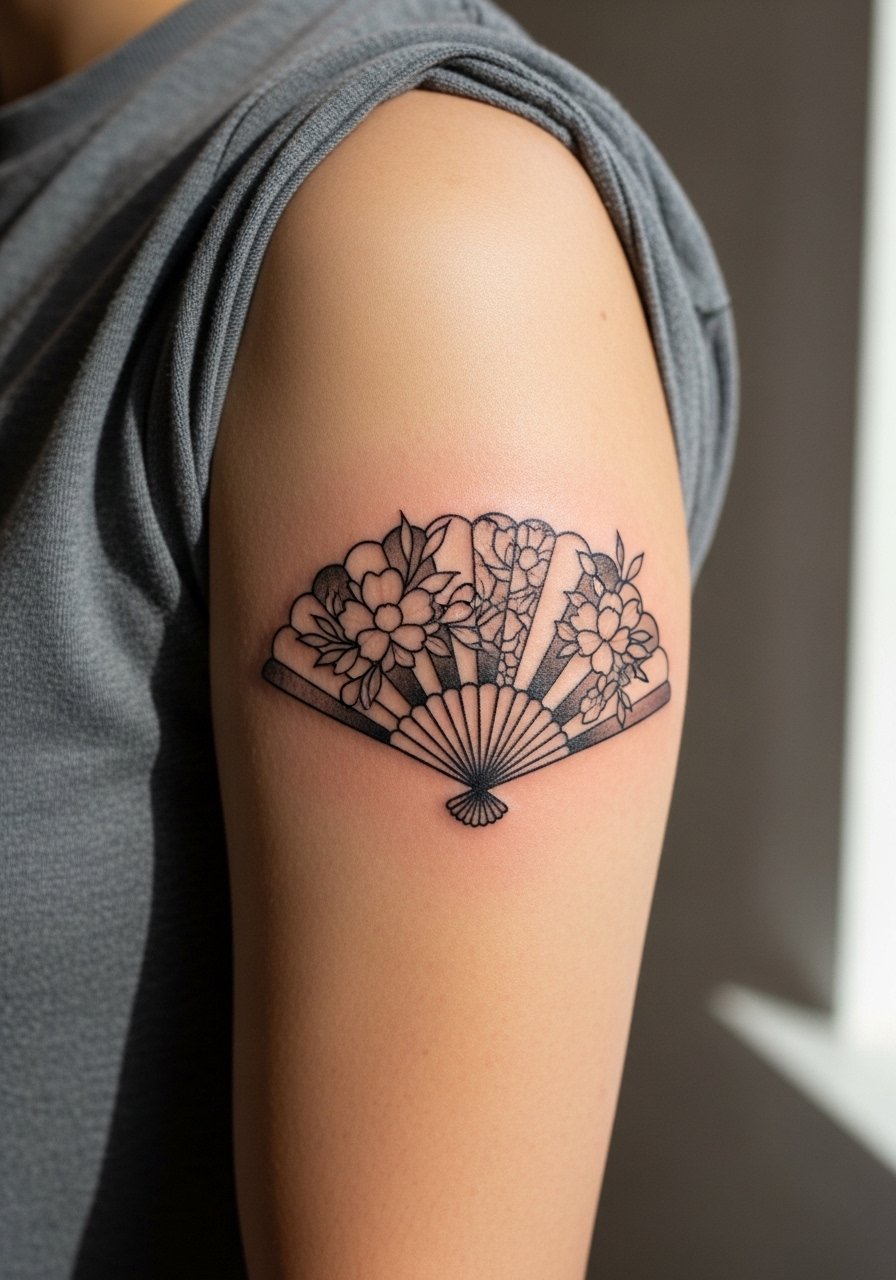
Upper arm fans in a traditional style work when scaled to let the folds breathe. Artists often build texture into the fan spines with whip shading to read as folds after healing. A common mistake is fine crosshatch in the fold which clogs. Tell your artist you prefer strong spine lines and lighter interior shading for longevity. For outfits choose short-sleeve shirts that can be rolled to frame the fan, and avoid tight sleeves immediately after the session to minimize friction.
16. Crane and Cherry Blossom Sleeve Accent on the Forearm
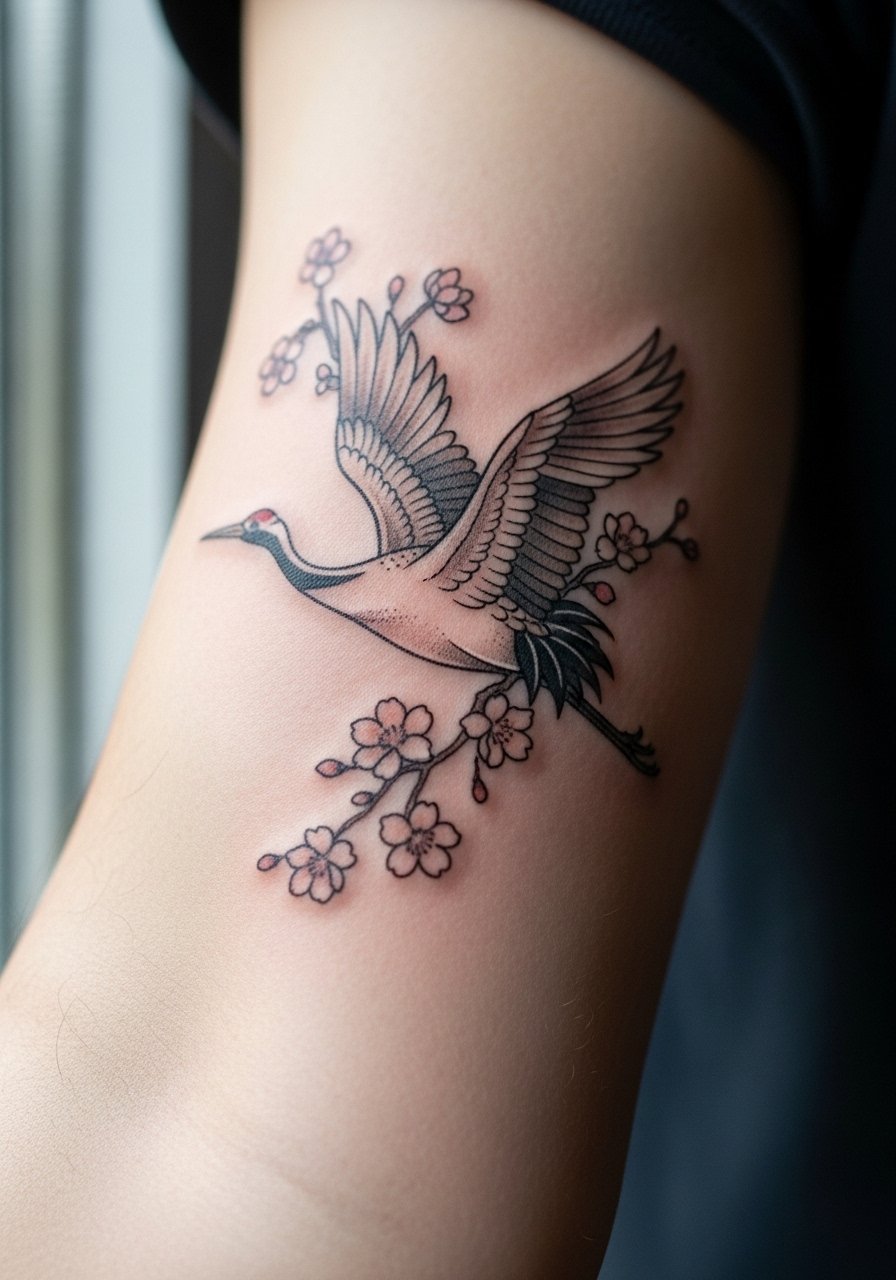
A forearm accent that ties crane and sakura motifs needs rhythm across the arm. I advise spacing the blossoms so negative space keeps each petal readable. The mistake is repeating identical petal clusters which age into a single gray patch. During consult request varied petal sizes and selective pink highlights only on focal blooms. To show it off wear a rolled sleeve shirt so the piece sits visually between cuff and elbow and does not get lost under long sleeves.
17. Small Koi Ankle Band
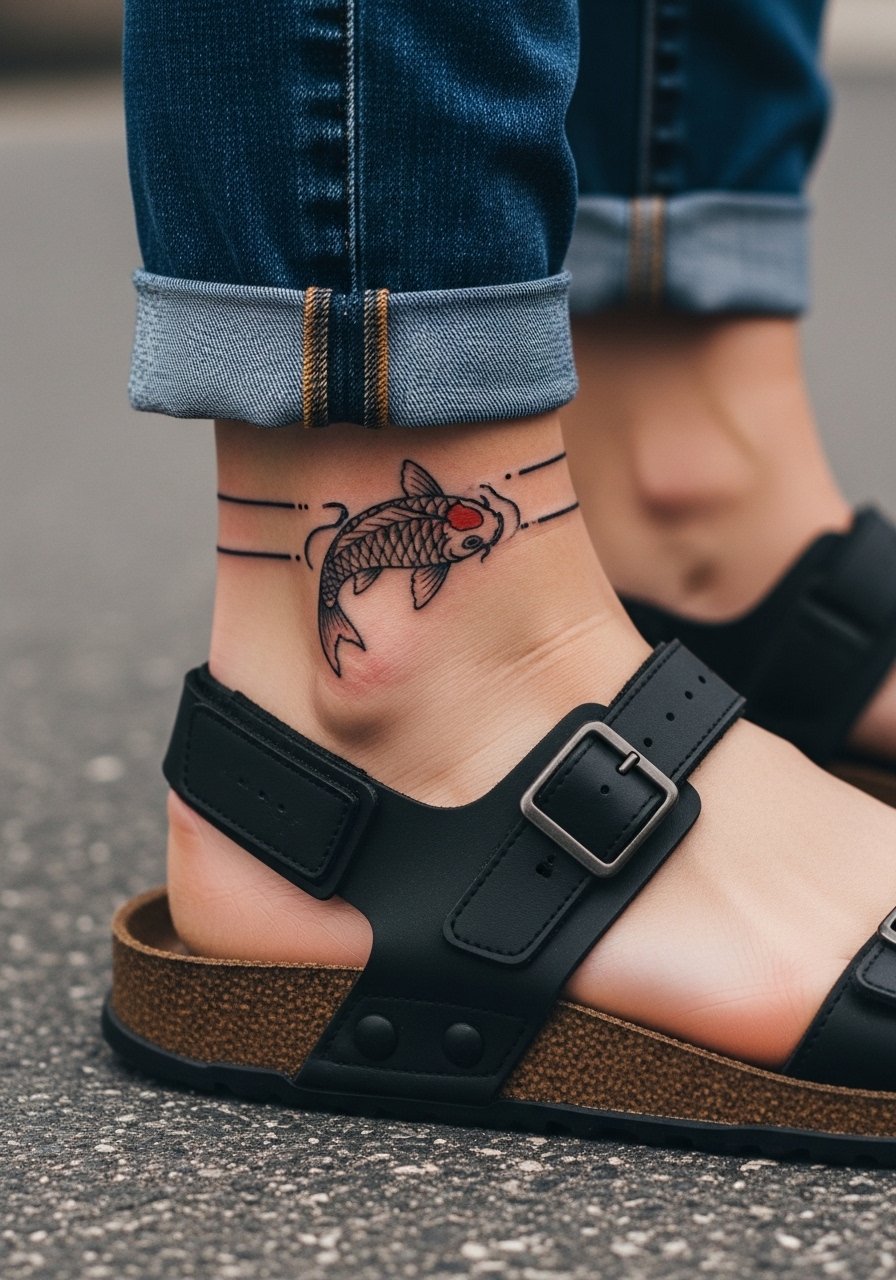
A small koi band that encircles the ankle needs uniform spacing or it will look uneven as the ankle moves. Ask for a simplified tail finish rather than intricate scales around the entire band so the motion reads as fluid. The common mistake is adding too many color transitions in a narrow circumference. For showing, pair the band with sandals and cropped jeans. Expect touch-ups in high-friction zones where shoes rub the lower leg.
18. Red String and Butterfly on the Inner Thigh
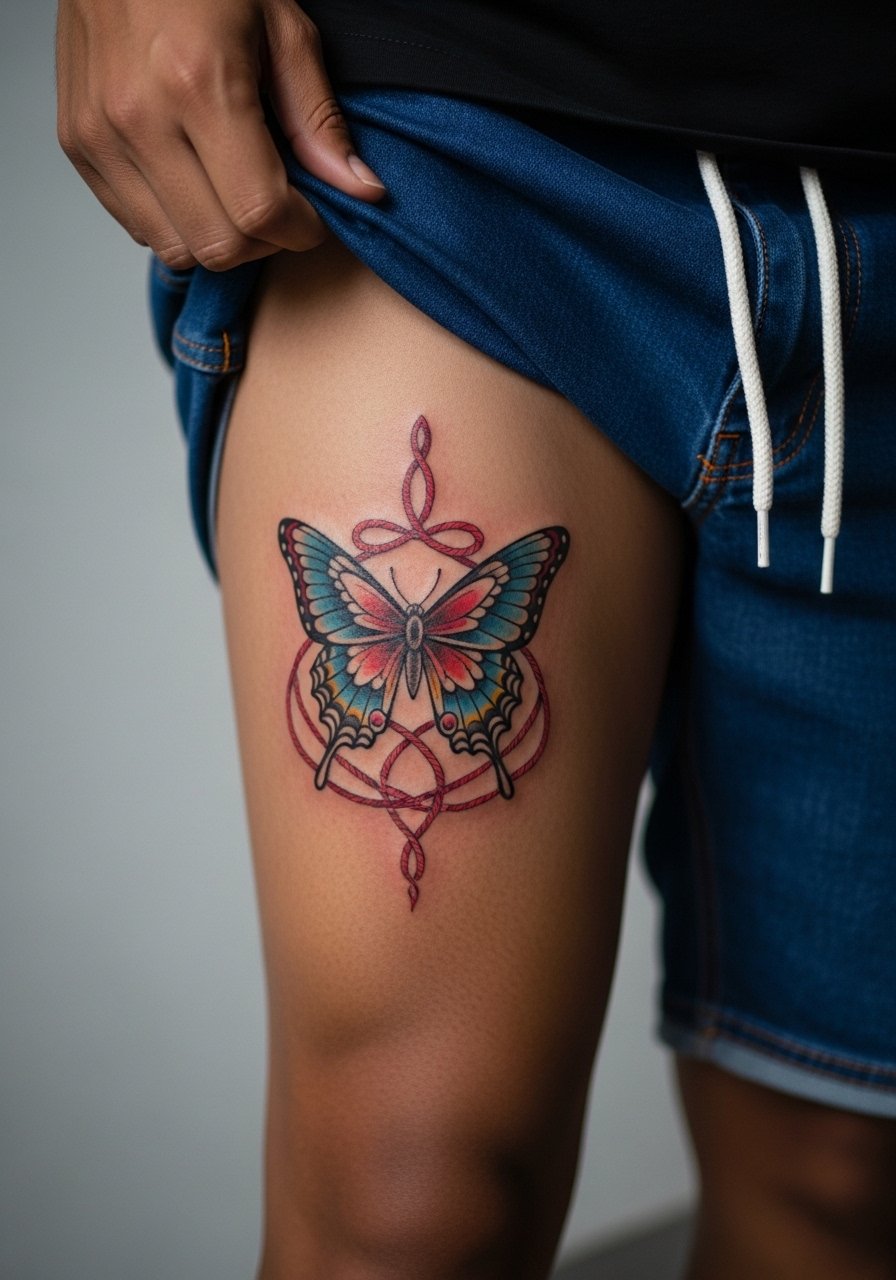
Inner thigh placements are intimate and react differently to weight changes. I always recommend testing placement with a temporary so you can sit and stand with it on. The mistake is placing delicate threads too close to crease lines where friction accelerates fading. Ask your artist to place the red string so it follows the thigh's natural lines and to keep the butterfly about four inches away from the groin crease. Session wear of shorts you can shift easily is ideal. Expect a longer initial heal and consider a touch-up after six months once the first cycle of swelling is gone.
19. Small Script in Japanese Style on Nape
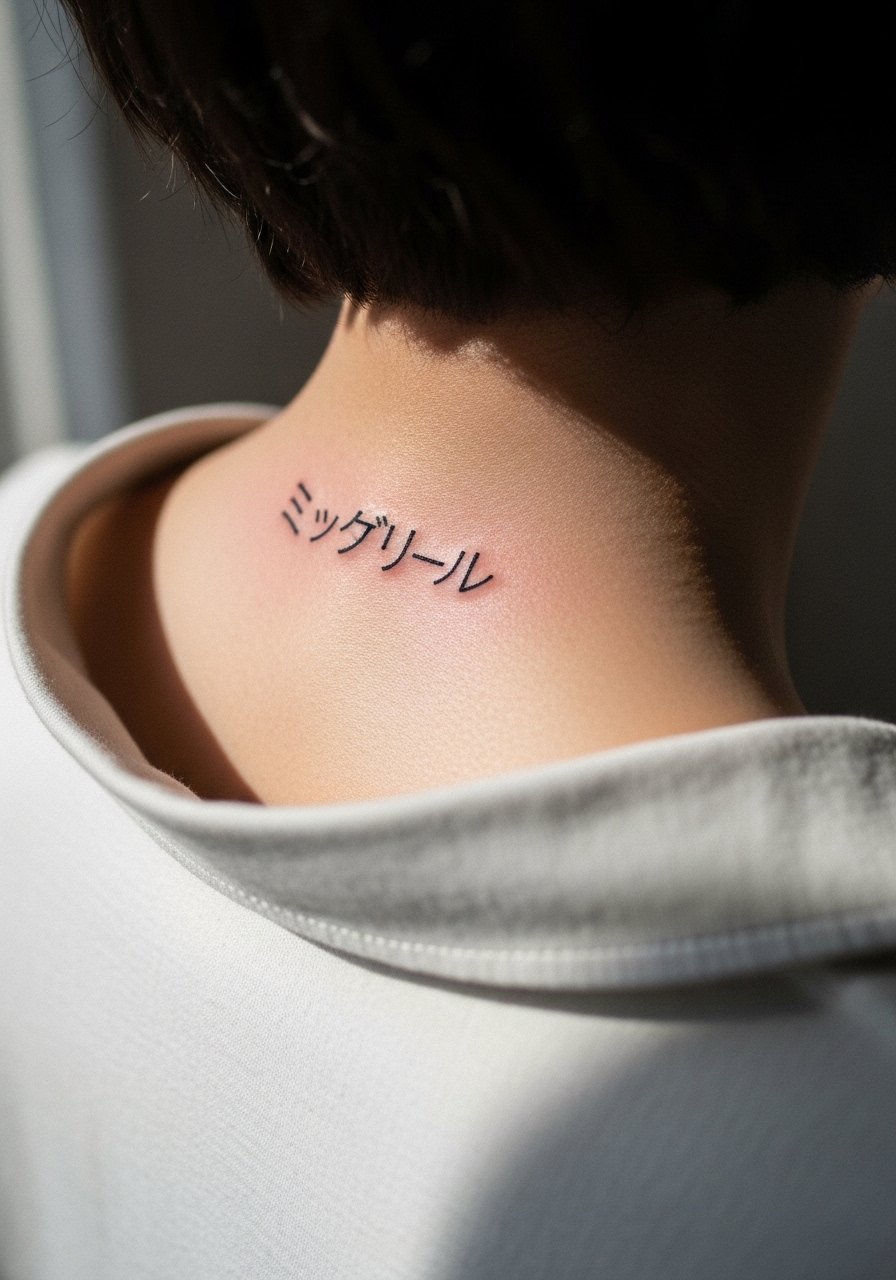
Nape text needs clean spacing and simple letterforms. For lettering request a single word in a slightly bolder stroke than you imagine so it remains legible as the skin shifts. A frequent error is choosing ornate calligraphy that loses counter space and becomes illegible. For reveal wear a wide-neck shirt or a neckline that can be pulled to one side during the session. Keep the phrase short so the composition breathes and expect minimal touch-up if the artist avoids ultra-fine strokes.
20. Komainu or Temple Mask on the Chest Side
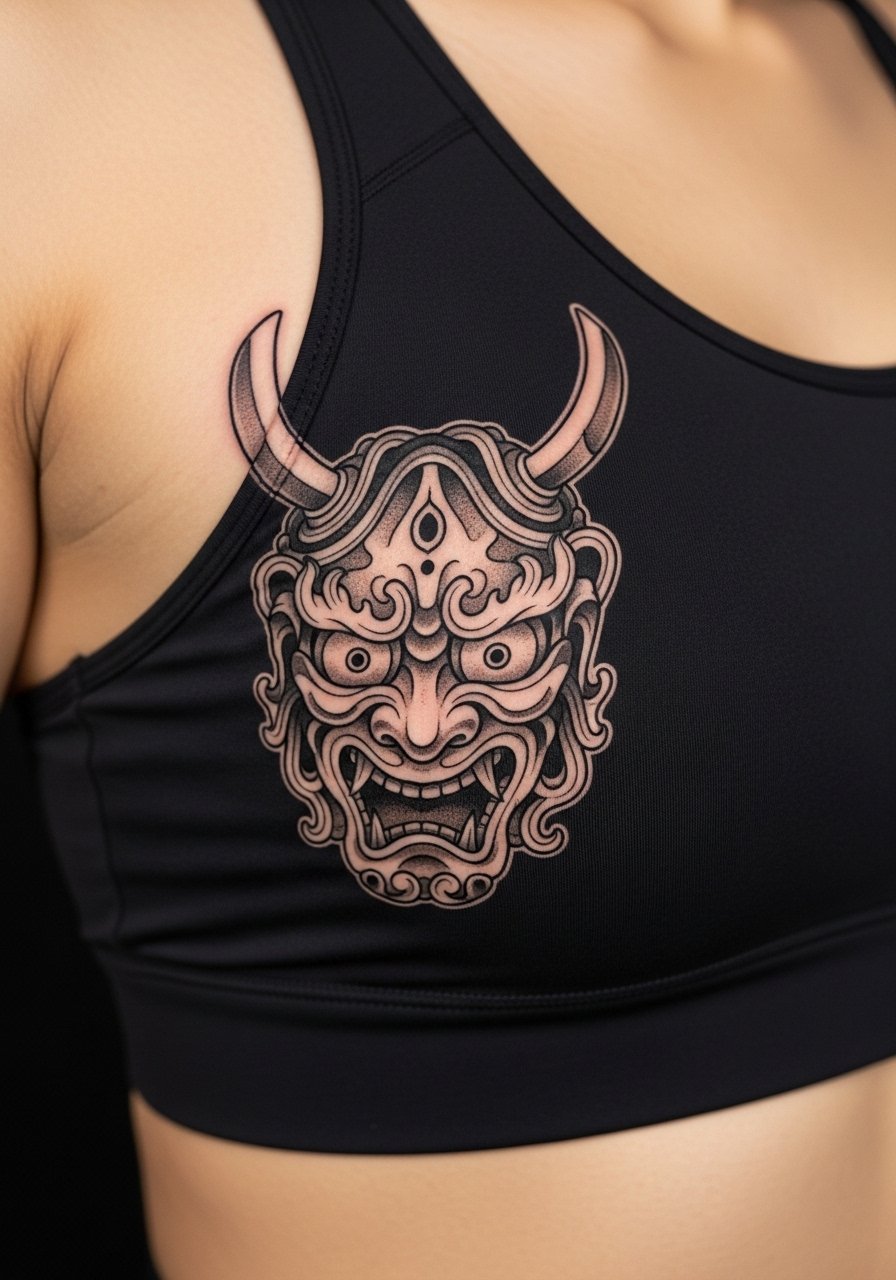
Side chest or underarm-flank pieces like a komainu mask need careful placement relative to the ribs. The chest side shifts with breathing and torso rotation. Ask for slightly simplified facial detail and emphasis on silhouette so the motif reads from the front view. A common mistake is full face detail that becomes muddied in the first year. For the session a fitted sports bra gives access while maintaining modesty. Book a break schedule if the session runs long.
21. Peacock Feather Running Down the Spine

Spine placements change with posture and clothing friction. For a feather motif center the shaft exactly on the spinous processes and leave spacing between barbs for movement. The error is compressing the barbs together which makes them look like a single shaded strip after healing. For evenings out pair the vertical motif with a low back halter dress to frame the spine without covering details. Expect touch-ups in the first two years if any lines soften near the mid-back.
22. Small Dot-Work Mountain Range on the Collarbone
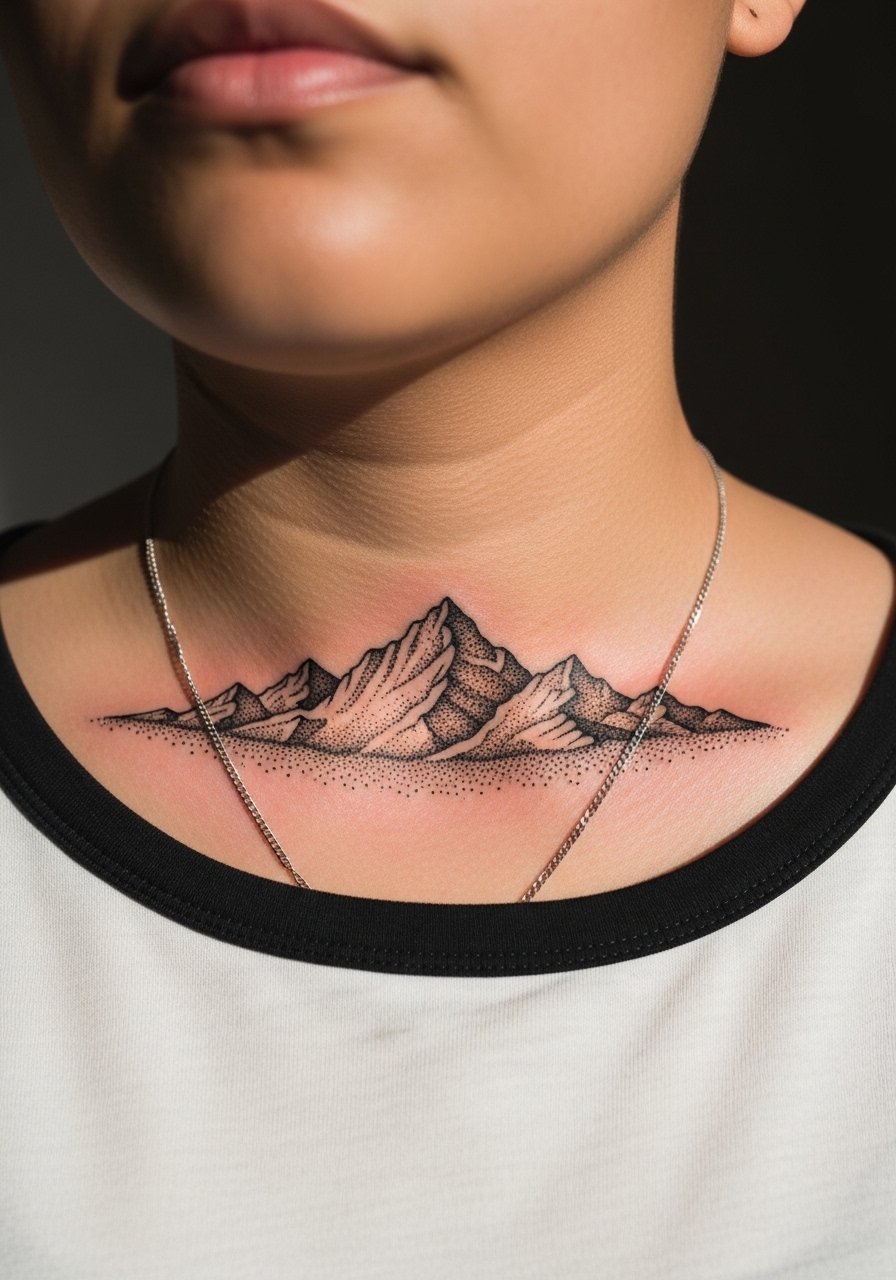
Collarbone dot-work reads like jewelry when the stipple is spaced. A mistake is an overly dense center which makes the peak melt into a blot. Ask your artist for gradient stipple that fades outward and a light single-line horizon so the peaks remain distinct. For showing it off wear a thin chain pendant and an off shoulder linen top that lets the range breathe. Dot-work takes well to touch-ups when needed, but the initial placement is everything.
23. Small Mandala Behind the Knee
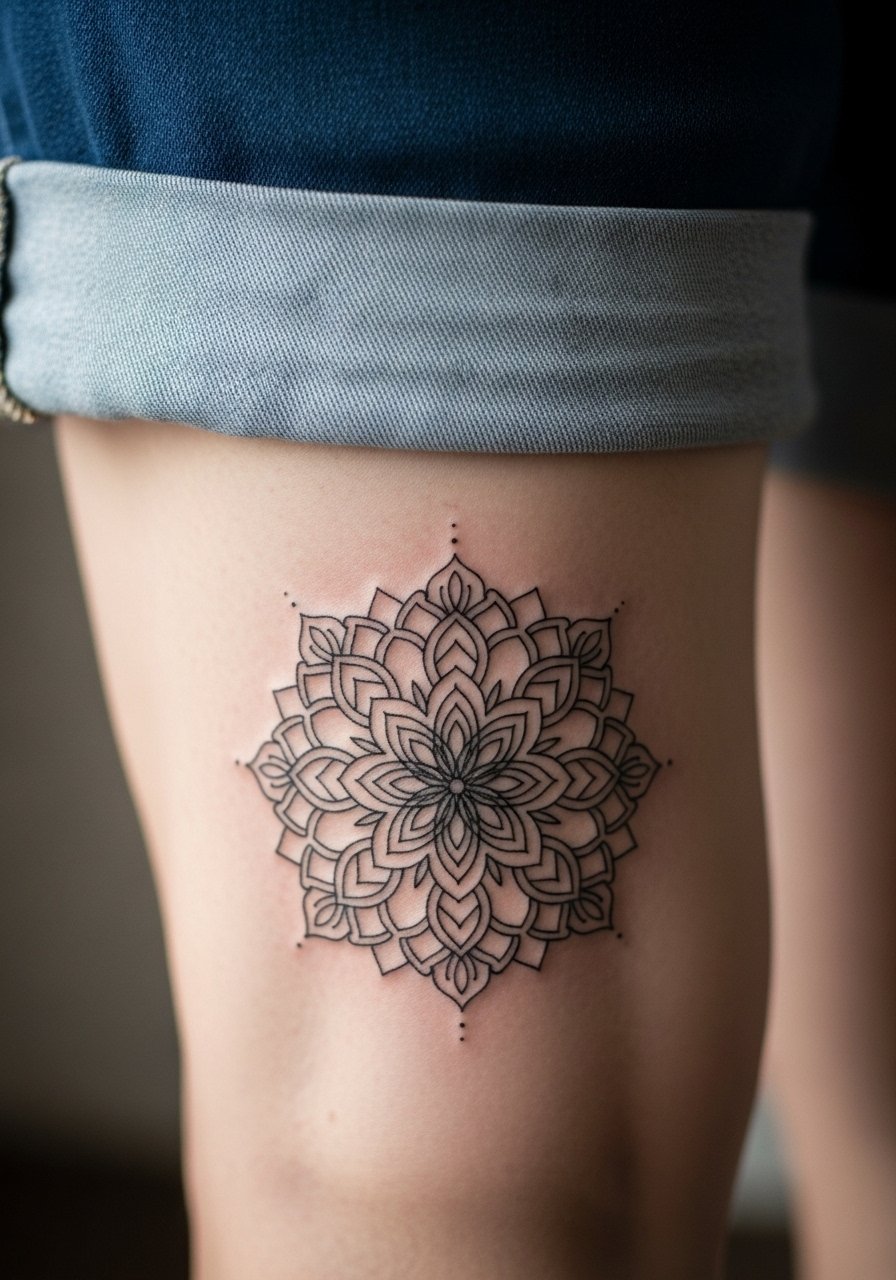
Behind-the-knee placements are high-movement areas and require simplified geometry. The typical mistake is tight concentric rings that crease when the knee bends. Request a pattern with open outer rings and a bolder central motif so the design maintains shape during motion. For session comfort wear shorts you can move around in without tight elastic pressing the area. Healing may feel awkward while sitting; plan for a slower first week of mobility.
24. Chrysanthemum Calf Wrap
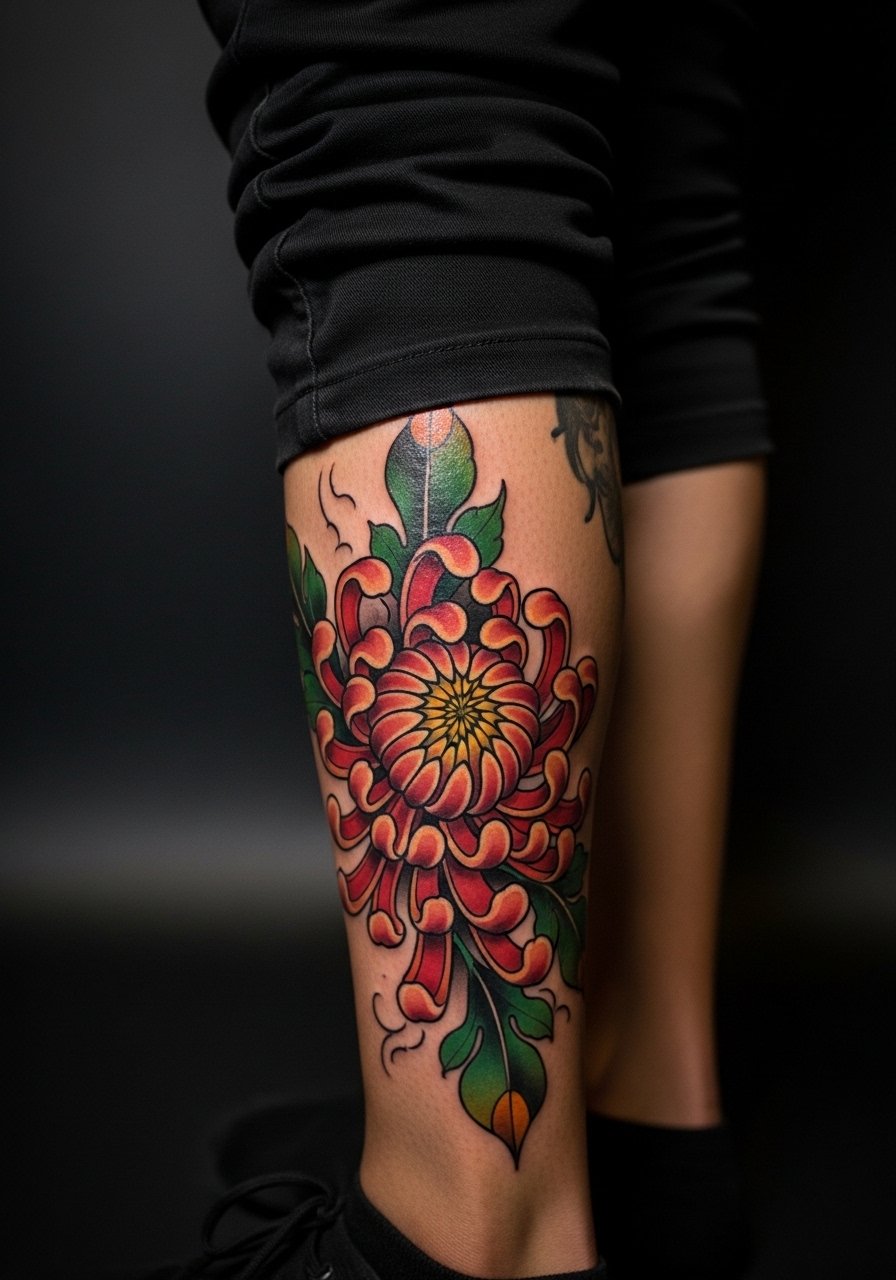
Calf wraps take advantage of a larger canvas, but repeating the same petal size flattens over time. I advise varying bloom scales and mixing stipple with solid fills to keep contrast as the piece ages. A common error is too many tiny shadow lines that merge. Wear loose pants or shorts for the session and show it with cropped trousers. Calf pieces usually require one session for medium complexity and a check-in at year two for saturation.
25. Tiny Seal Script on the Wrist
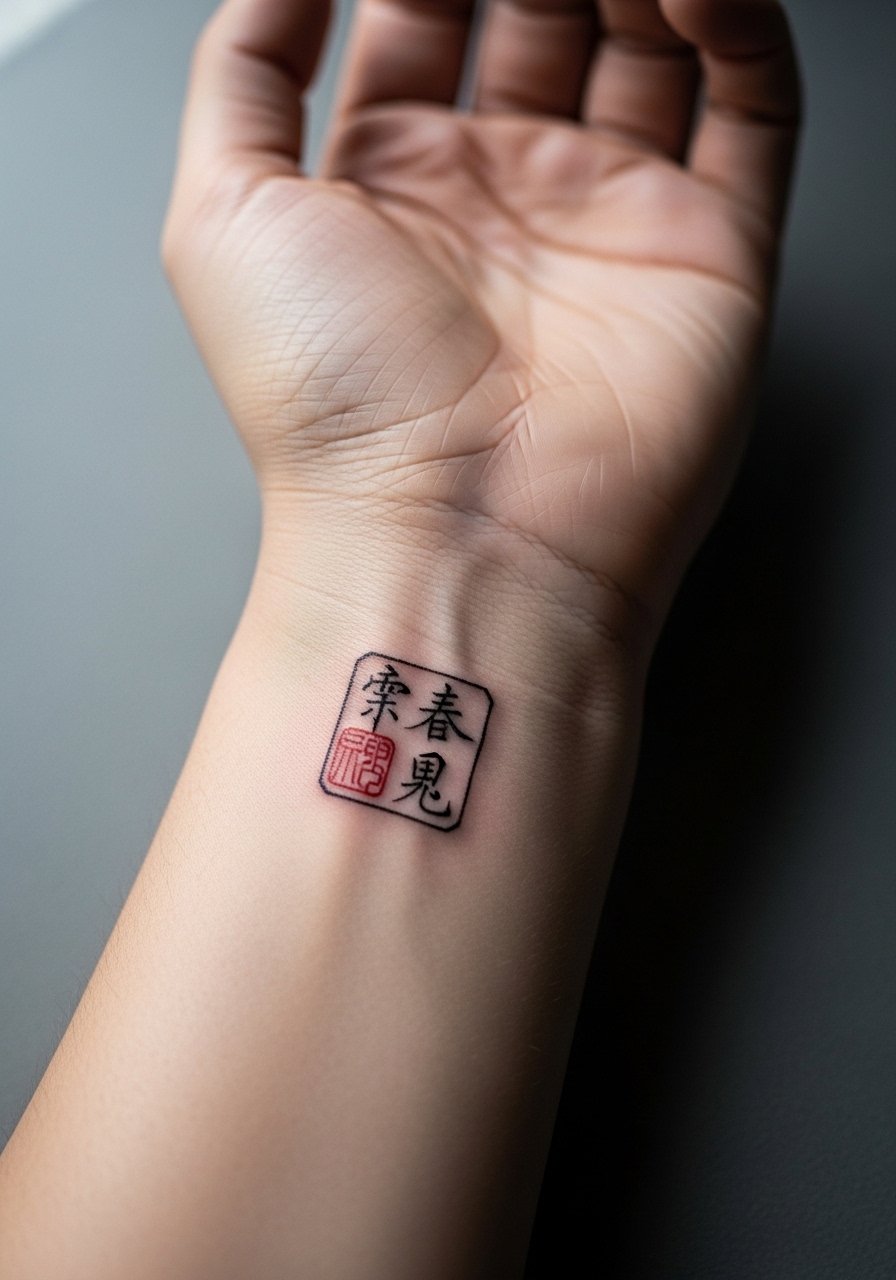
Wrist stamps are intimate and must be sized for repeat readability. The stroke weight should be strong enough to survive daily washing and watch straps. A mistake is picking a design with internal negative shapes that fill in. For session wear skip watches and bracelets so the artist has unobstructed access. Pair the finished stamp with a dainty gold bangle on the opposite wrist when you want a balanced look.
26. Paper Fan with Kanji Accent on the Upper Thigh
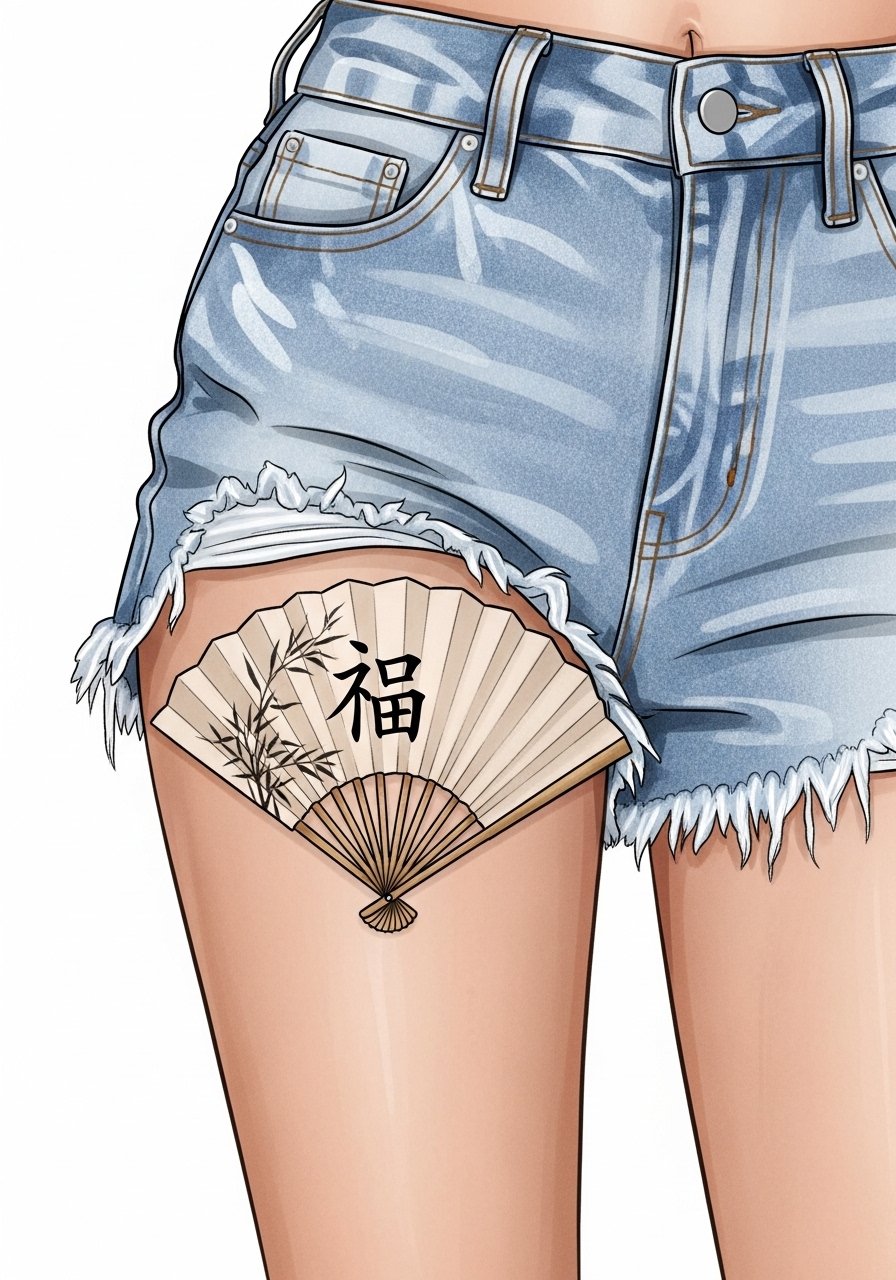
Upper thigh designs like a paper fan read well when the kanji is kept compact and the fan uses the leg curve. A frequent issue is placing the kanji too close to the fold where the skin flexes. Ask the artist to position the character toward the flat surface of the thigh and to leave airspace around it. For session wear bring loose yoga shorts so the artist can roll the leg without tight seams. Expect a calm healing phase if you avoid heavy running or cycling the first week.
27. Decorative Torii Gate with Mountain Backdrop on the Shoulder Blade
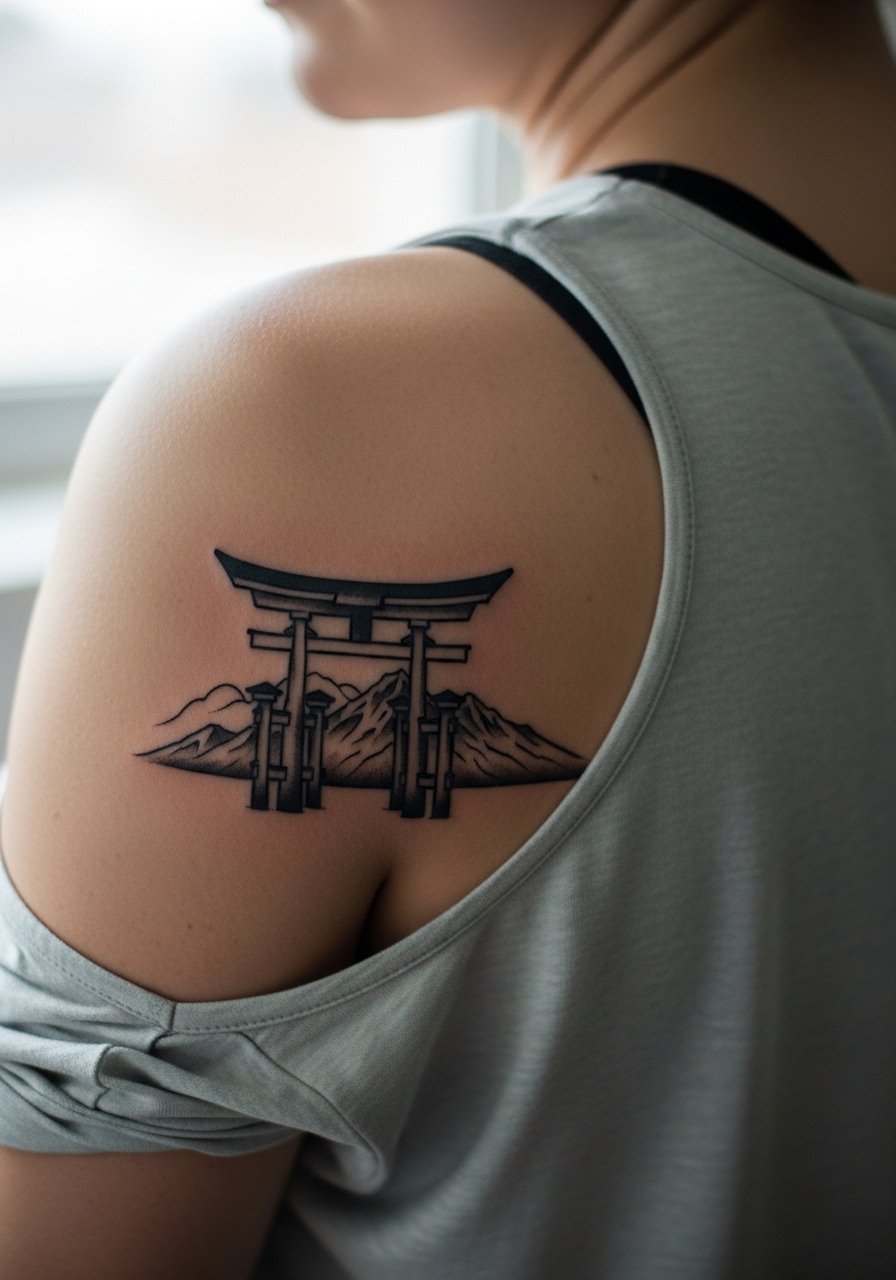
A torii gate anchors a shoulder blade composition nicely when you balance solid silhouettes with thin background lines. The mistake is detailing the mountain with the same density as the gate, which reduces the gate's visual priority as the ink softens. Ask for the gate as the focal dark element and lighter mountain linework behind it. For presentation choose a boat-neck or open-back top that frames the icon. Shoulder blade pieces usually hold their structure long term when transfers are placed with the bone landmarks in mind.
Frequently Asked Questions
Q: How does fine line cherry blossom on the forearm age compared with thicker neo-traditional florals?
A: From what I have seen, fine line sakura can look delicate for the first year but may soften faster than neo-traditional florals. If you want longer clarity choose slightly stronger stem weight and plan for a two-year check. Placement away from constant sun and friction keeps the petals readable for longer.
Q: Should I use numbing cream for a large kitsune back or rib session?
A: Artists differ on numbing. Some recommend it to manage long sessions and maintain client comfort. Others say it interferes with how the skin responds. Ask the studio what they prefer and whether they will schedule breaks so you can last through color layers without losing detail.
Q: What clothing should I wear for a thigh lily session and to show it off after it heals?
A: For the session wear loose shorts or a flowy maxi skirt that you can shift aside without tight seams. To show it off later high-waisted skirts or lace thigh-highs frame the area and echo the floral movement.
Q: Are hand or finger oriental motifs worth it given fading and workplace concerns?
A: Hand and finger tattoos face high friction and often need touch-ups sooner. They also still matter in some workplaces. If this is a concern, consider collarbone or wrist placements as alternatives, or scale the hand motif up to the outer wrist where it sees less direct wear.
Q: How do I find artists who specialize in orientalism art without naming specific accounts?
A: Search hashtags like #kitsunetattoo, #sakuratattoo, and #ukiyoetattoo paired with your city on Instagram and look for portfolios with healed photos. Use Booksy and Tattoodo filters to find neo-traditional or illustrative blackwork specialists and check forum threads on r/tattoos for guest-spot recs in your region.
