
Fine line trends look great in photos, but what lasts is often the stuff that survives years of sleeves, sleeves rolled up and sun exposure. Bold blackwork and distressed texture read as intent after time, while tiny, crowded linework needs extra room and planning. If you want pieces that still read as sharp in five years, think placement, spacing, and how the design will interact with movement. Below are thirty edgy ideas pared to twenty seven that balance immediate impact with long-term wear.
1. Coiled Serpent with Dripping Fangs on Outer Forearm
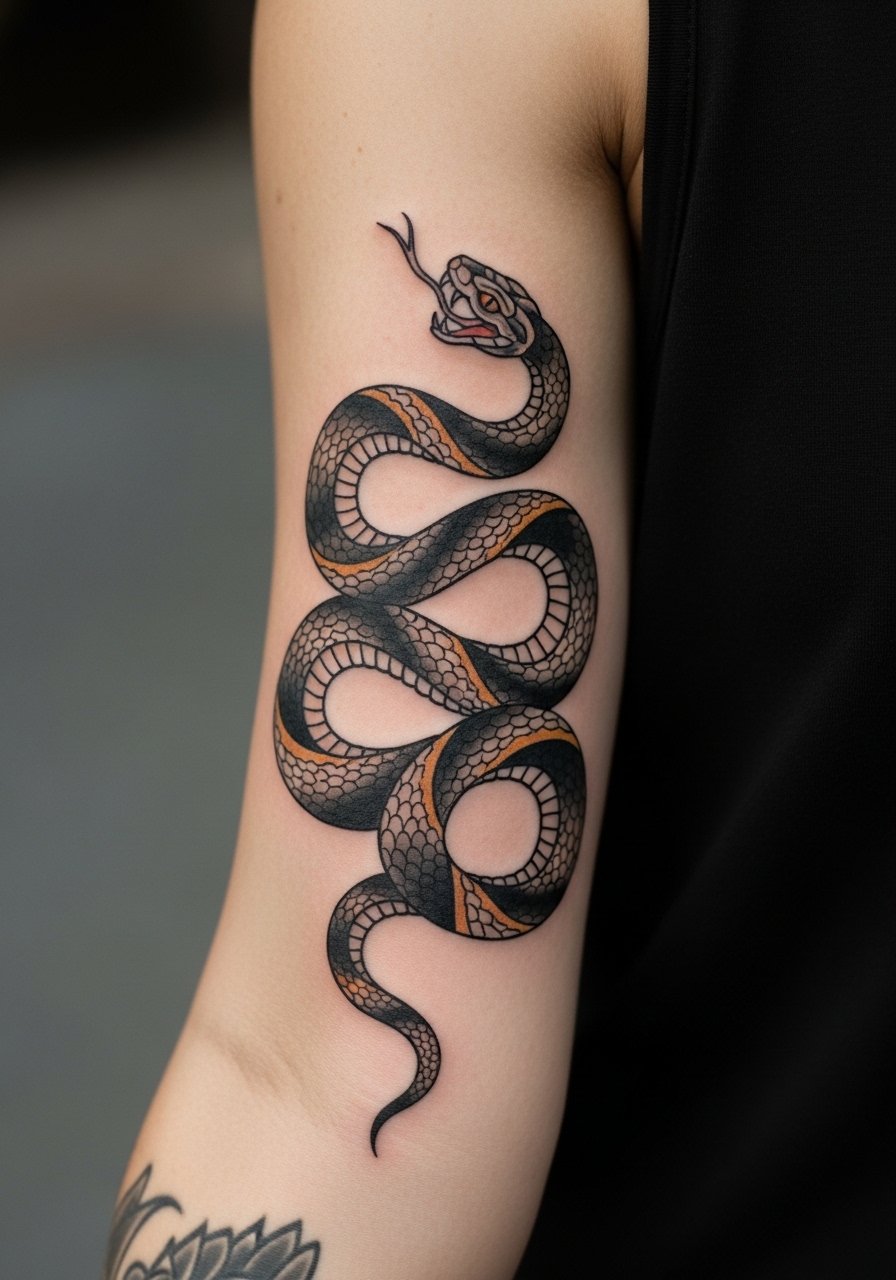
I often recommend a thicker line weight for serpents on the forearm because the arm sees constant movement. Ask your artist for bold outline work with selective red accents and stipple shading for texture. The common mistake is asking for too many tiny scales in a small design. That detail blurs over time and demands touch-ups. Pain is mild to moderate and a single session usually covers a 4 to 6 inch piece. For showing it off, pair the forearm with a black fitted tank top and a leather cuff bracelet to emphasize the coil.
2. Distressed Grunge Skull on the Wrist
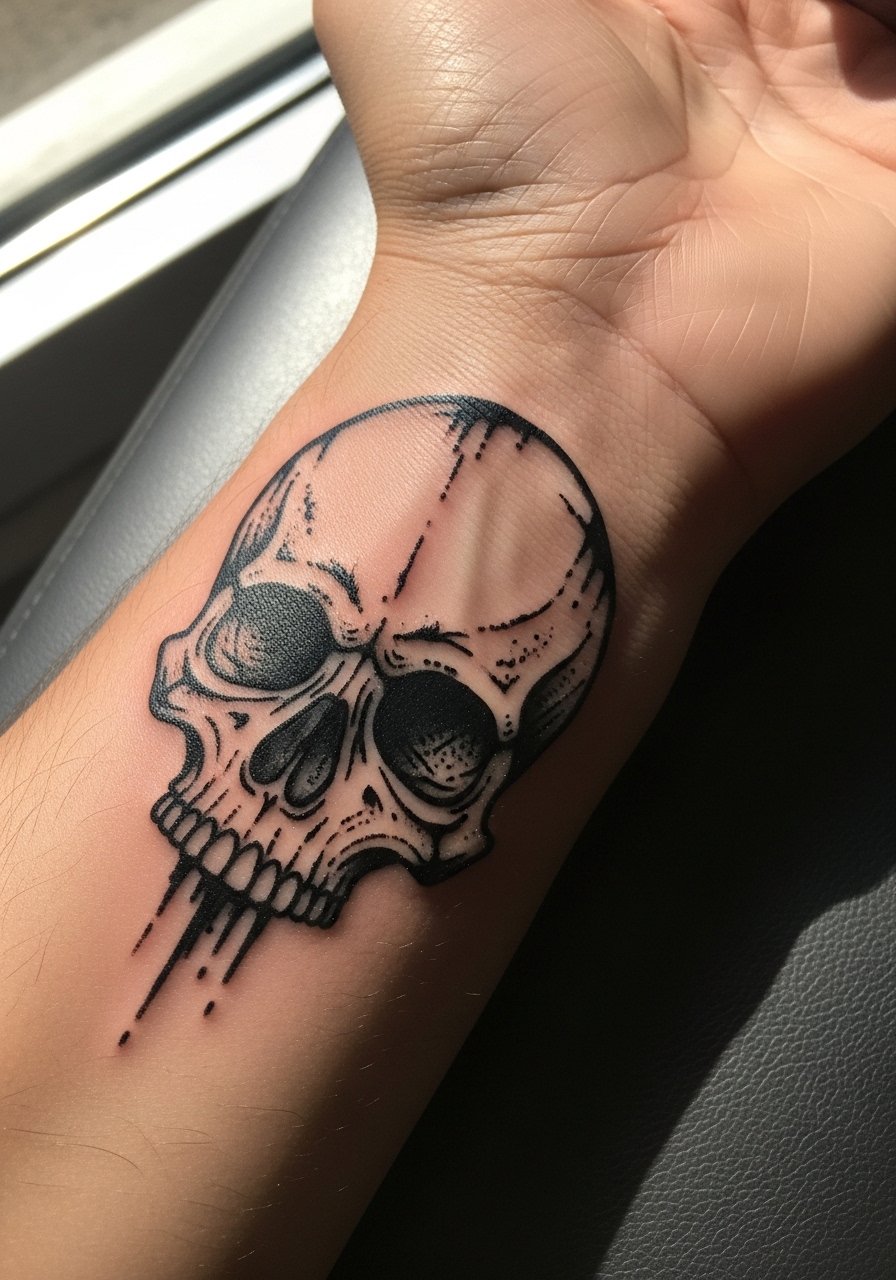
Wrist pieces are visible and take daily wear, so bold, solid black fills age better than delicate shading. Expect a short, sharp session and some sensitivity because the wrist sits above thin tissue. Tell your artist you want distressed cracks and negative space rather than soft gray shading. A frequent error is compressing too much detail into a two inch wrist piece which leads to smudging. Planning for a touch-up at year two is realistic. When you go to the chair wear short sleeves and no jewelry. For styling after the heal, stack a chunky silver chain bracelet on the opposite wrist to balance the grit.
3. Dagger Through Rose on Inner Bicep
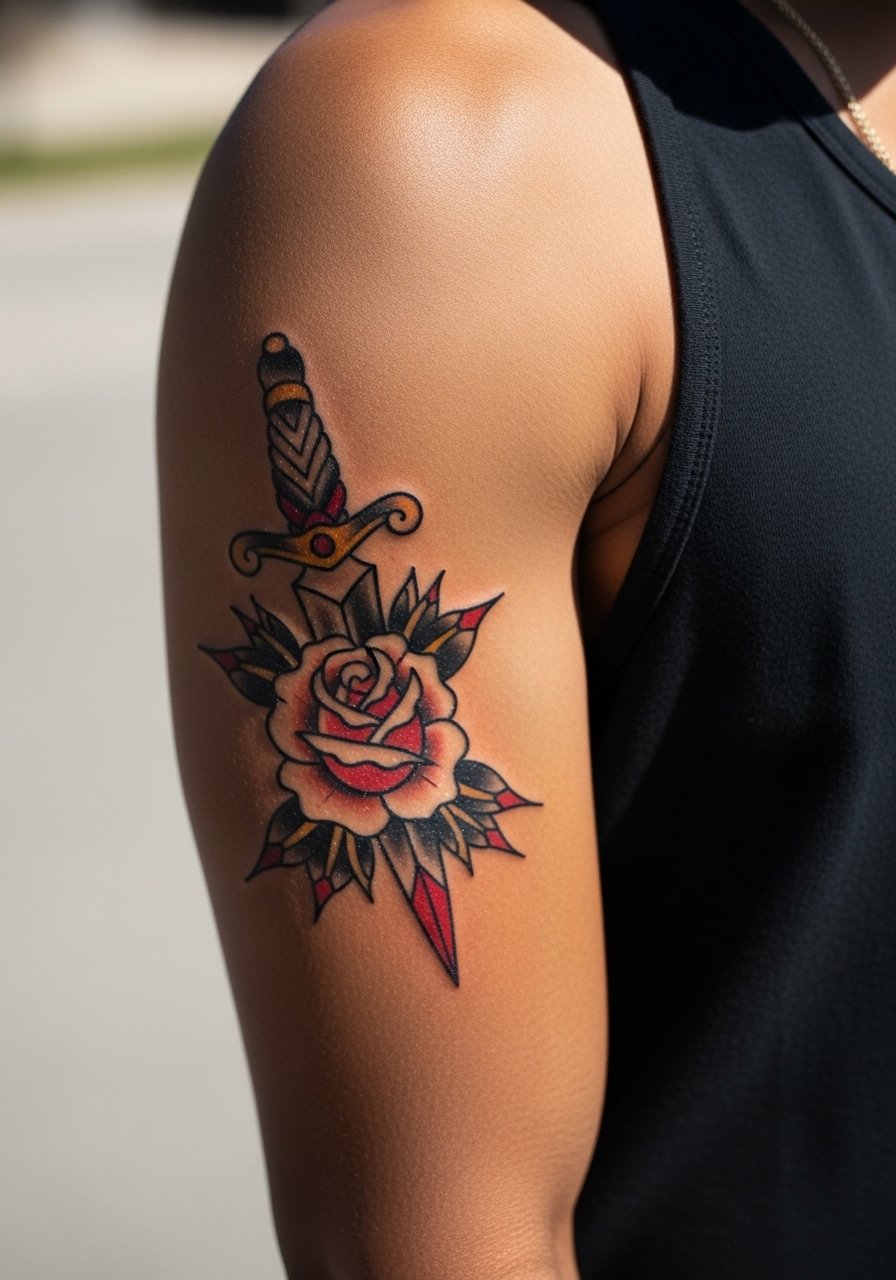
Fair warning, the inner bicep is sensitive and the skin stretches with movement. The design reads best around five inches long and with bold outlines to prevent blowout along the folds. For consultation, bring references that show the exact line weight and ask the artist to avoid overly thin petals. Tiny, intricate roses on the inner arm often soften into muddy shading after a few years. Session time can be one to two hours depending on color saturation. For the appointment wear a sleeveless tank top so the artist has full access without tugging at fabric.
4. Distressed Grim Reaper Silhouette on Calf
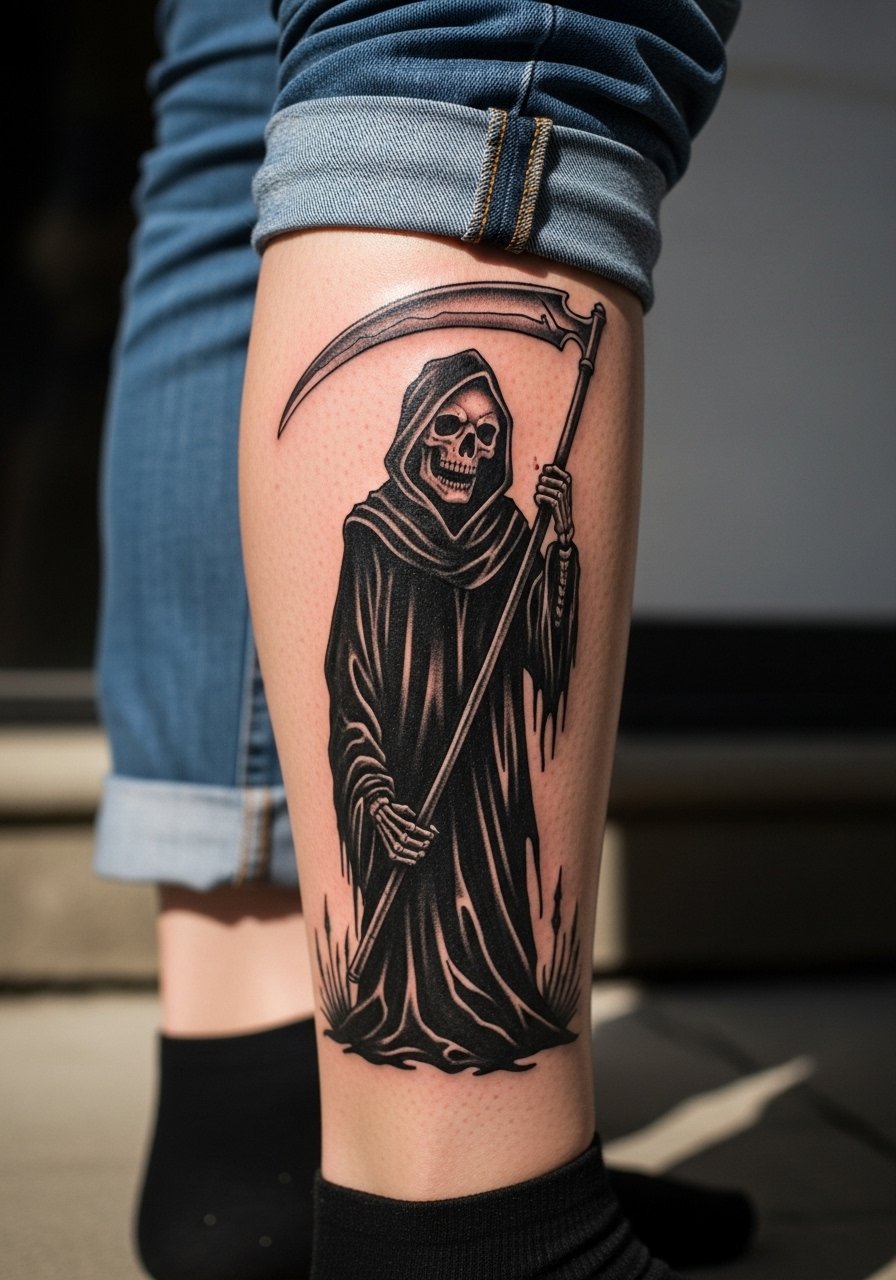
Calf pieces handle heavy blackwork well because the skin is thicker and movement is predictable. This silhouette gains its grunge effect from corroded edges and selective negative space. Tell your artist you want heavy saturation with textural breaks to mimic wear-and-tear. Common mistakes include adding tiny facial details that disappear in shadow. Pain is moderate and sessions run longer for larger fills. Styling for show-off moments includes rolling bootcut jeans or pairing with fishnet ankle socks and boots to create that punk frame.
5. Broken Chain Link Mandala on Collarbone
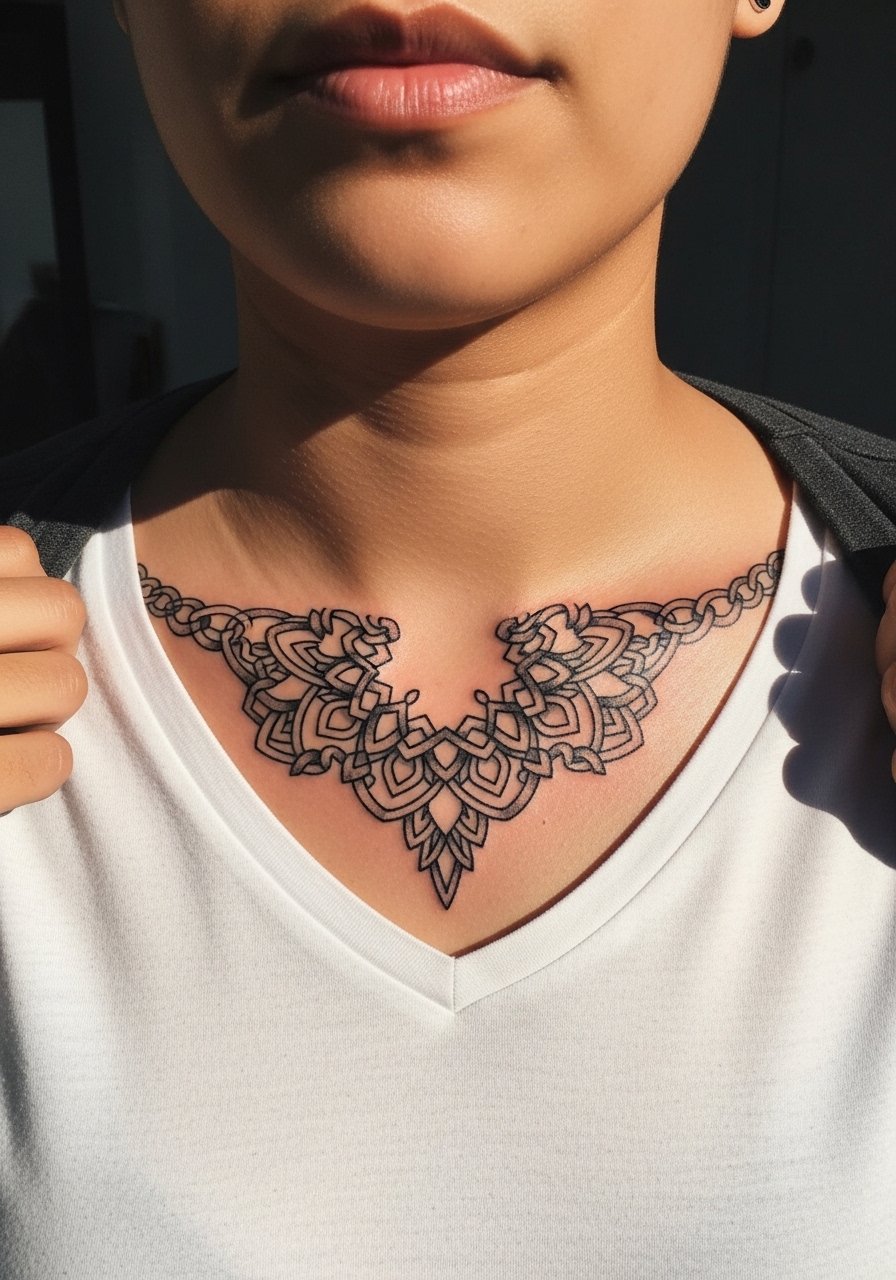
Collarbone tattoos sit on thin, mobile skin so bold geometry and clear spacing keep the mandala readable as it heals. One trick is to design the chain links with negative gaps so the texture stays crisp rather than bleeding together. Ask for single-session layout and confirm the diameter around four inches for collarbone placement. A mistake I see often is shrinking a mandala too small to fit under clothing, which causes crowded details. For showing it off pair the piece with a v neck black tee or a matte black choker.
6. Spiked Barbed Wire Heart on Ribcage
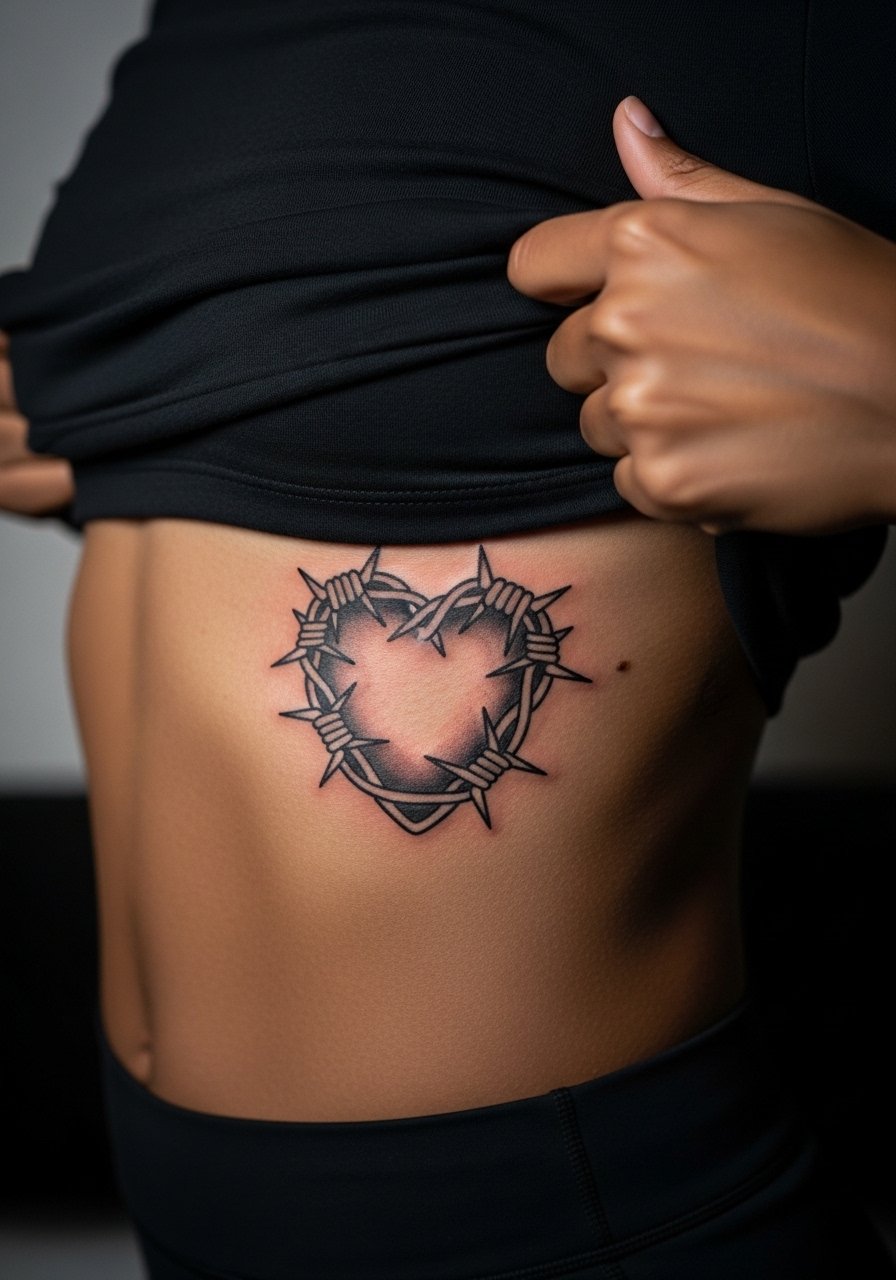
Fair warning: the ribcage is one of the higher pain placements on most charts. The heart with barbed wire benefits from bold outlines and selective red accents to keep the illusion of depth. Artists are split on sizing here. One camp says keep lines thick to survive stretch and movement. The other camp argues you can get away with finer detail if you allow more spacing. Name both concerns in consults and ask the artist which approach they prefer for the ribcage. Sessions usually require two sittings if you want color saturation. For the session wear a fitted sports bra or strapless top so the artist can work without fabric rubbing.
Studio Day Picks
The rib, collarbone and forearm pieces above need different prep and protection, so pack a few items that ease the session and the first week of healing.
-
Stencil transfer paper kit. Lets you preview line placement on skin which matters for collarbone and mandala alignment.
-
Topical numbing cream. Applied before the session to reduce ribcage and inner bicep sensitivity without affecting linework.
-
Thin protective film roll. Useful for wrist and ankle pieces that face friction from daily movement.
-
Fragrance-free body wash. Gentle cleansing during the first week keeps blackwork crisp without irritation.
-
Aquaphor healing ointment. A thin layer in the first days helps with scabbing control on high-movement areas.
7. Cracked Porcelain Doll Face on Upper Thigh
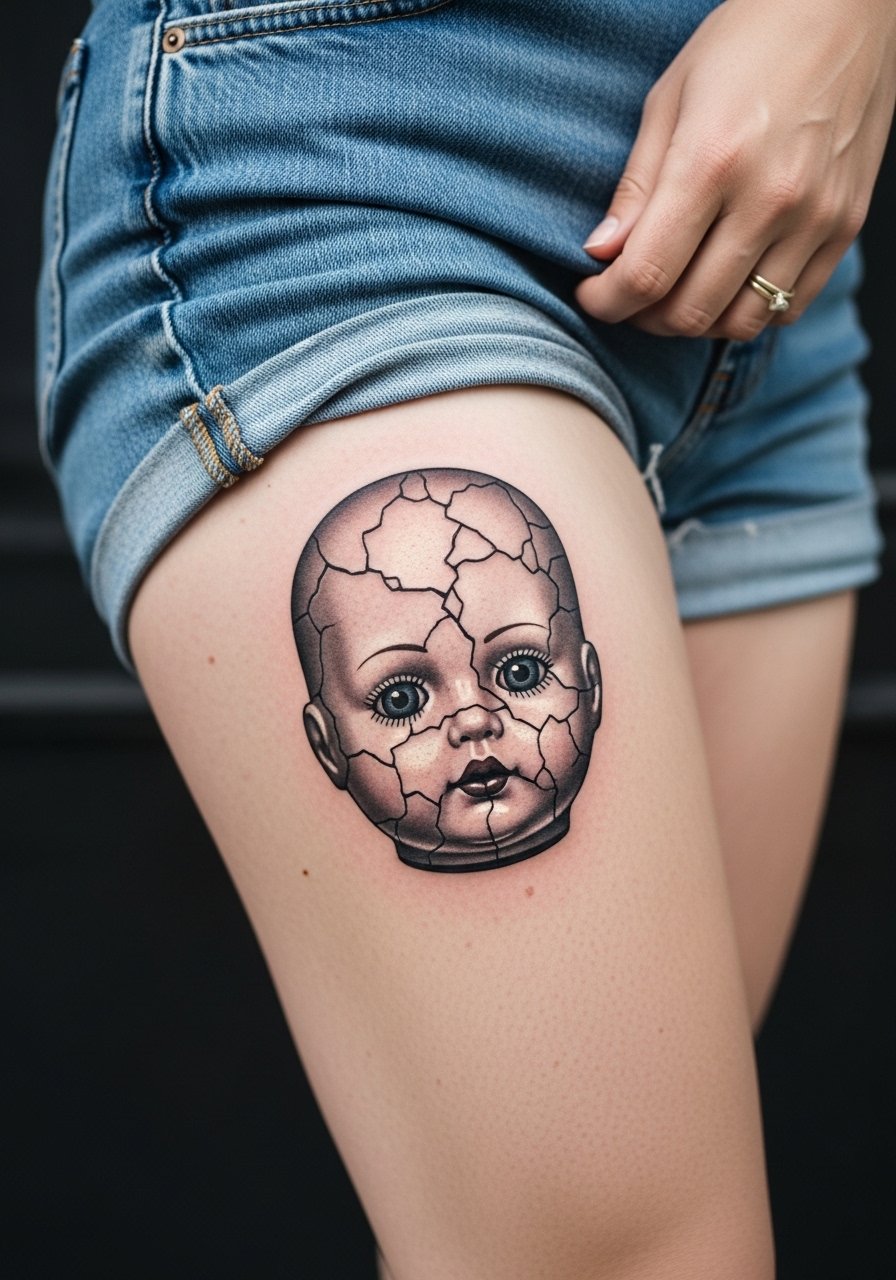
Micro-realism on the thigh reads beautifully because the area accommodates larger detail and tends to tolerate shading. This cracked doll face benefits from grayscale stippling and soft shadowing for depth. Expect multiple sessions for high fidelity realism and a touch-up around year two. A common mistake is shrinking a realism piece too small which loses the delicate crack texture. Pain is moderate and session wear should be loose shorts so the artist can access the upper thigh comfortably. For showing off later, thigh-high socks or high-waisted shorts frame the piece without revealing too much at once.
8. Rusted Anchor with Thorns on Outer Ankle
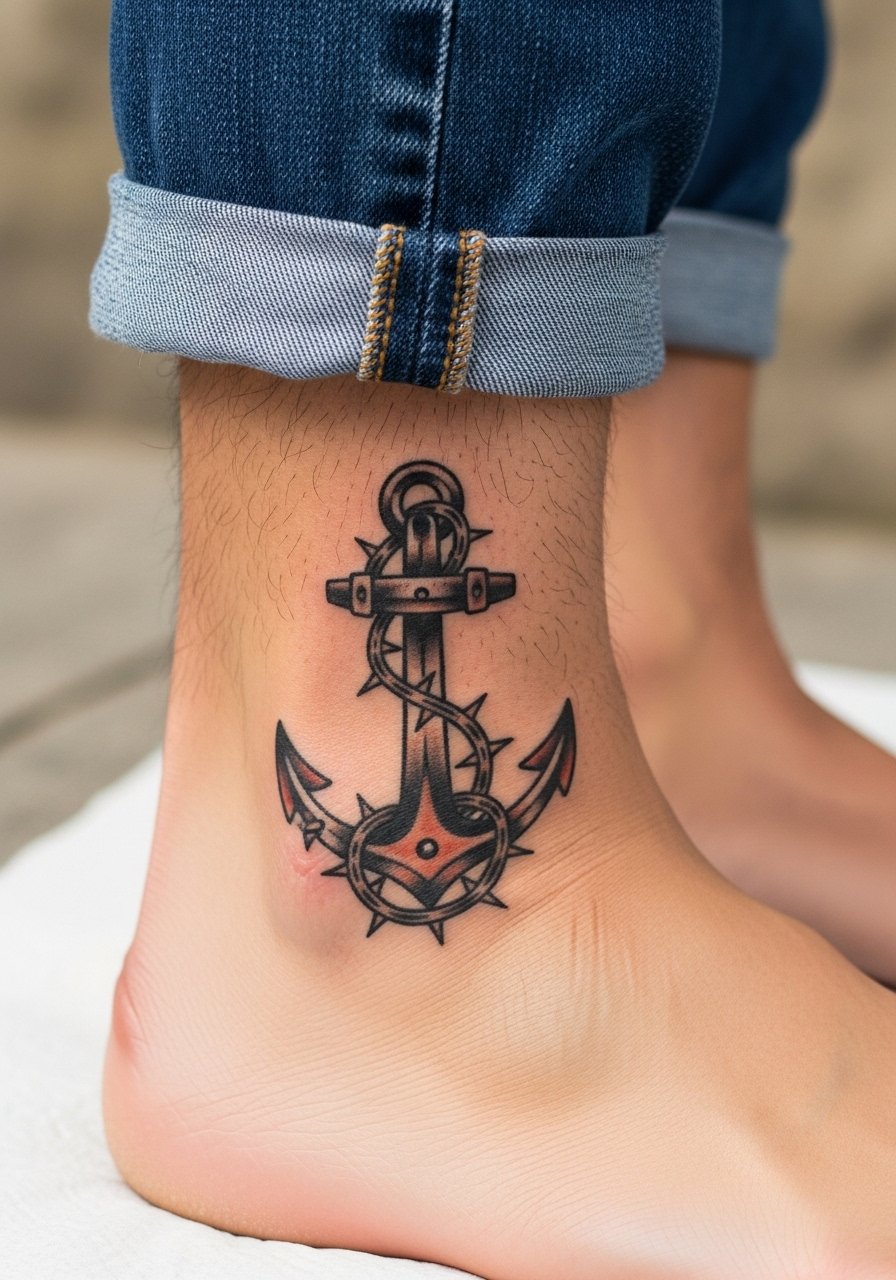
Ankle tattoos face constant friction from shoes and socks so weathered blackwork with bold contrast holds up better than subtle gray washes. Ask for weathered edges, not soft blending, and plan for a single session design around four inches. Expect moderate pain and a touch-up in the first year if you wear closed shoes daily. For showing off, roll bootcut jeans or choose sandals with a simple strap. Pair with rolled cuff jeans when you want the anchor visible without overexposure.
9. Venomous Spider Web at Side Neck
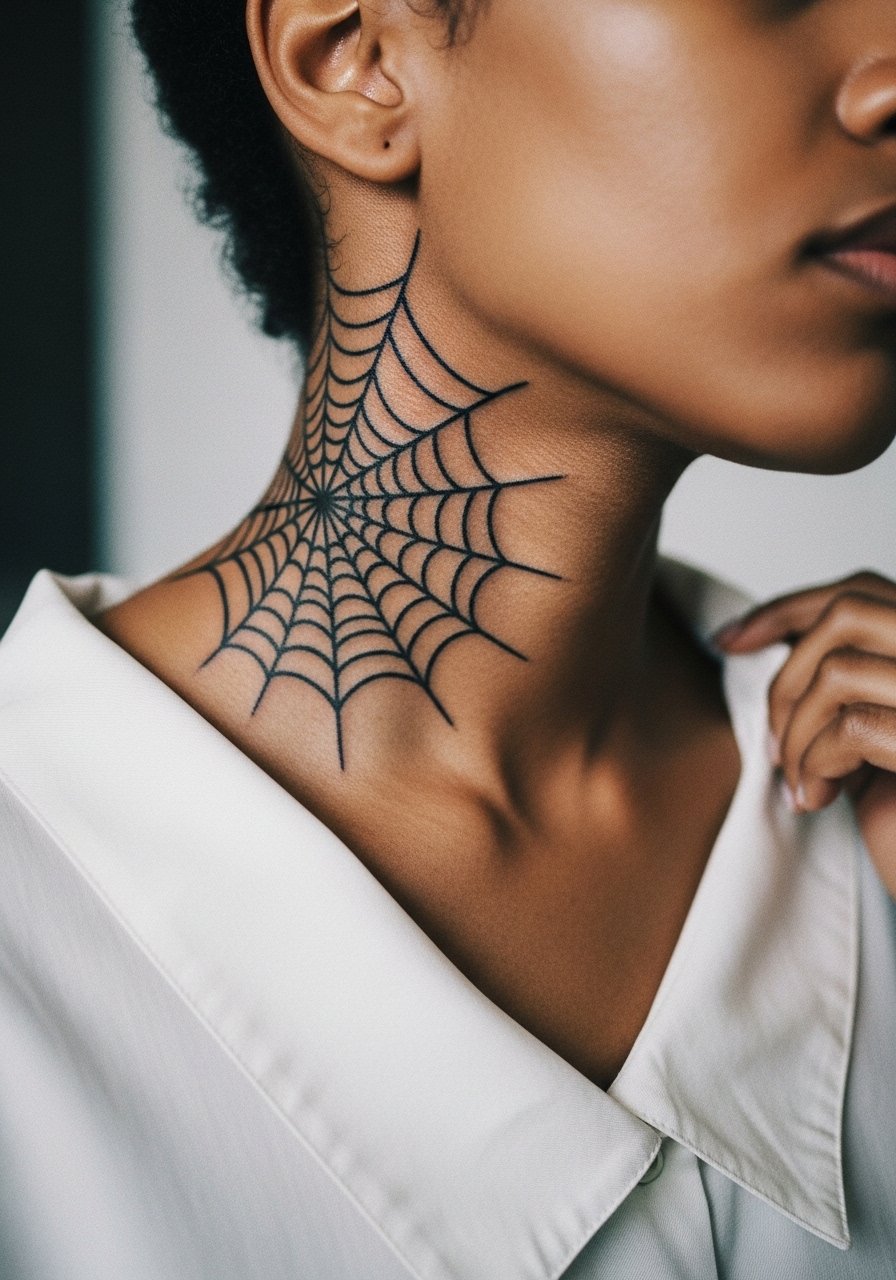
Neck tattoos live where people see them every day and where skin stretches subtly with movement. Keep the web compact and with robust linework to slow edge blending. One professional caveat is that high-visibility neck pieces may affect some workplaces, so consider future contexts before committing. Ask your artist about spacing between web strands. Expect short sessions but higher sensitivity. For show-off styling, a partially unzipped high collar jacket or a sheer black scarf frames the piece without covering it completely.
10. Fractured Bat Wings Across the Shoulder Blade
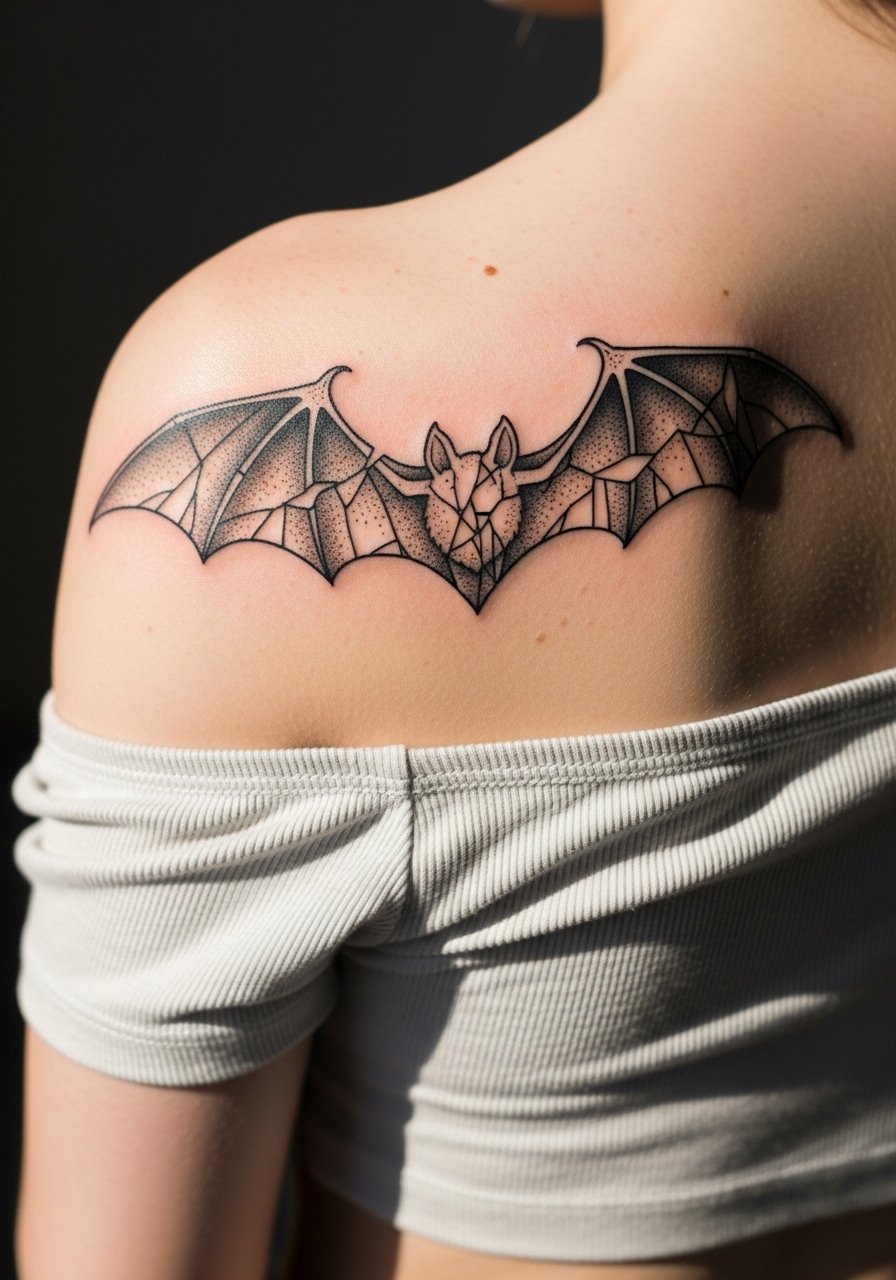
Shoulder blade pieces age well due to stable skin and low friction. The fractured texture works with heavy black shading and open negative areas so the wings read from a distance. Tell your artist you want textural breaks that mimic tears rather than smooth gradients. A common mistake is making the wings too thin where blowout becomes obvious years down the line. Sessions are medium length and usually one or two sittings. For revealing outfits, pair with an off shoulder crop top or a distressed band tee.
11. Edgy Raven with Pierced Eye on Inner Forearm
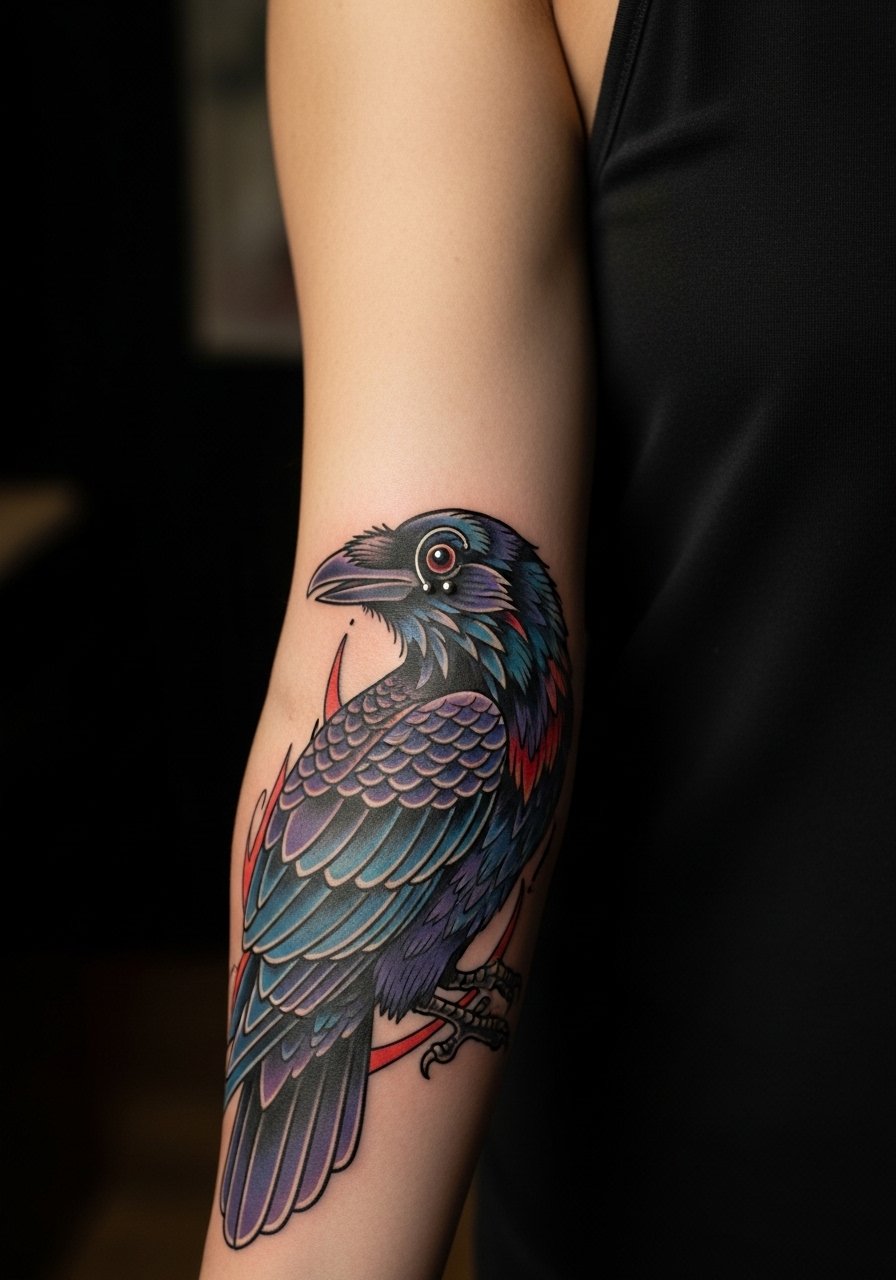
I've seen pierced or modified classic symbols like a raven with a metal-stud eye land well when the modification amplifies the concept. For the inner forearm, choose a four-inch height and request bold contouring on the beak and wing edges. The mistake is adding too much tiny feather detail which can soften. Pain is mild to moderate and sessions usually finish in one sitting. Pair the finished piece with rolled sleeves and a leather cuff bracelet to play up the punk edge.
12. Corroded Crown on Skull for Upper Back
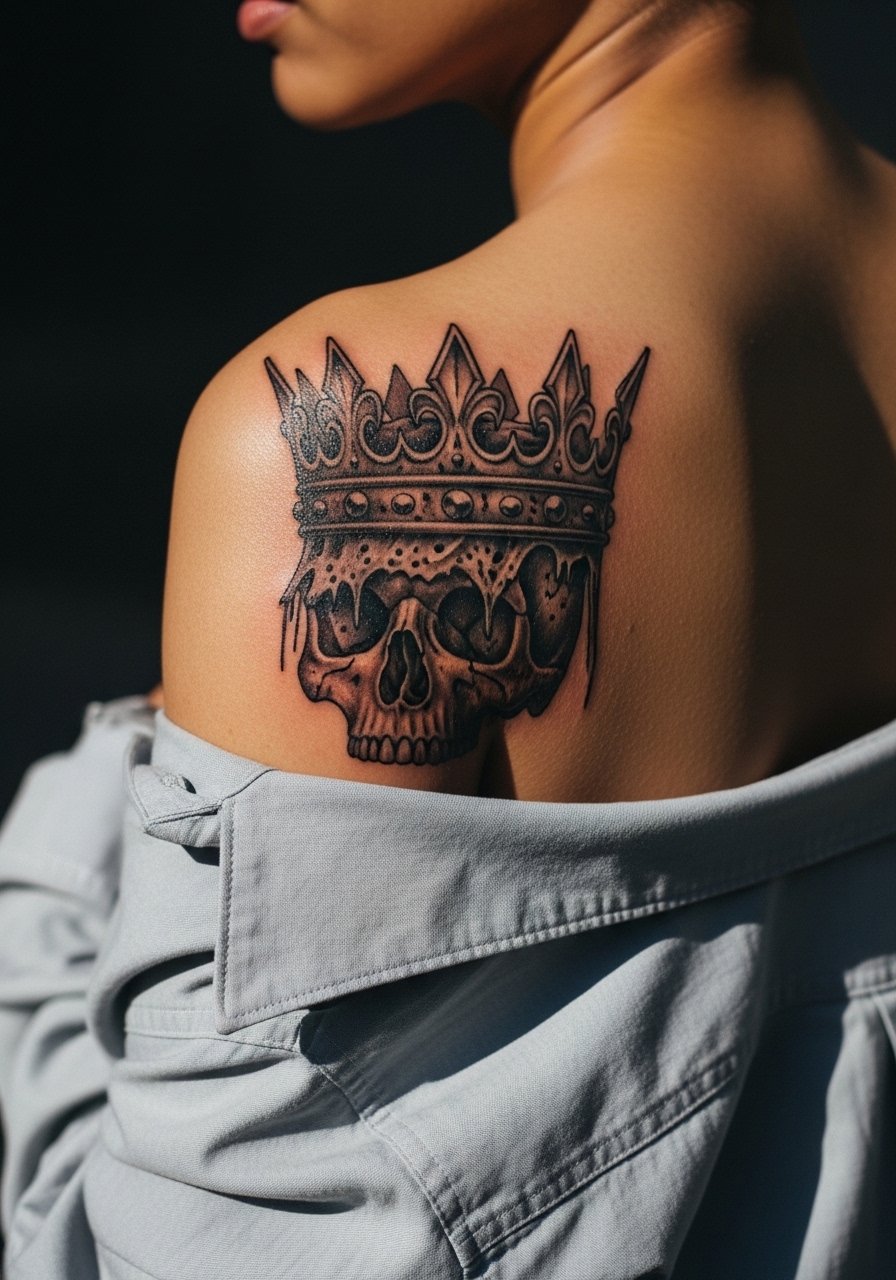
Large back pieces offer room for texture so corroded metal effects and hammered shading work well here. Ask for a balance between heavy blackwork and subtle gray washes so the crown looks aged, not muddy. A common misstep is over-detailing the skull in small formats which sacrifices the crown texture. Plan for multiple sessions and expect touch-ups for the gray layering. Wear a button-down or loose tank on the day to allow easy artist access. For later outfits, an open-backed dress or loose shirts frame the design nicely.
13. Razor Fragment Finger Tattoo
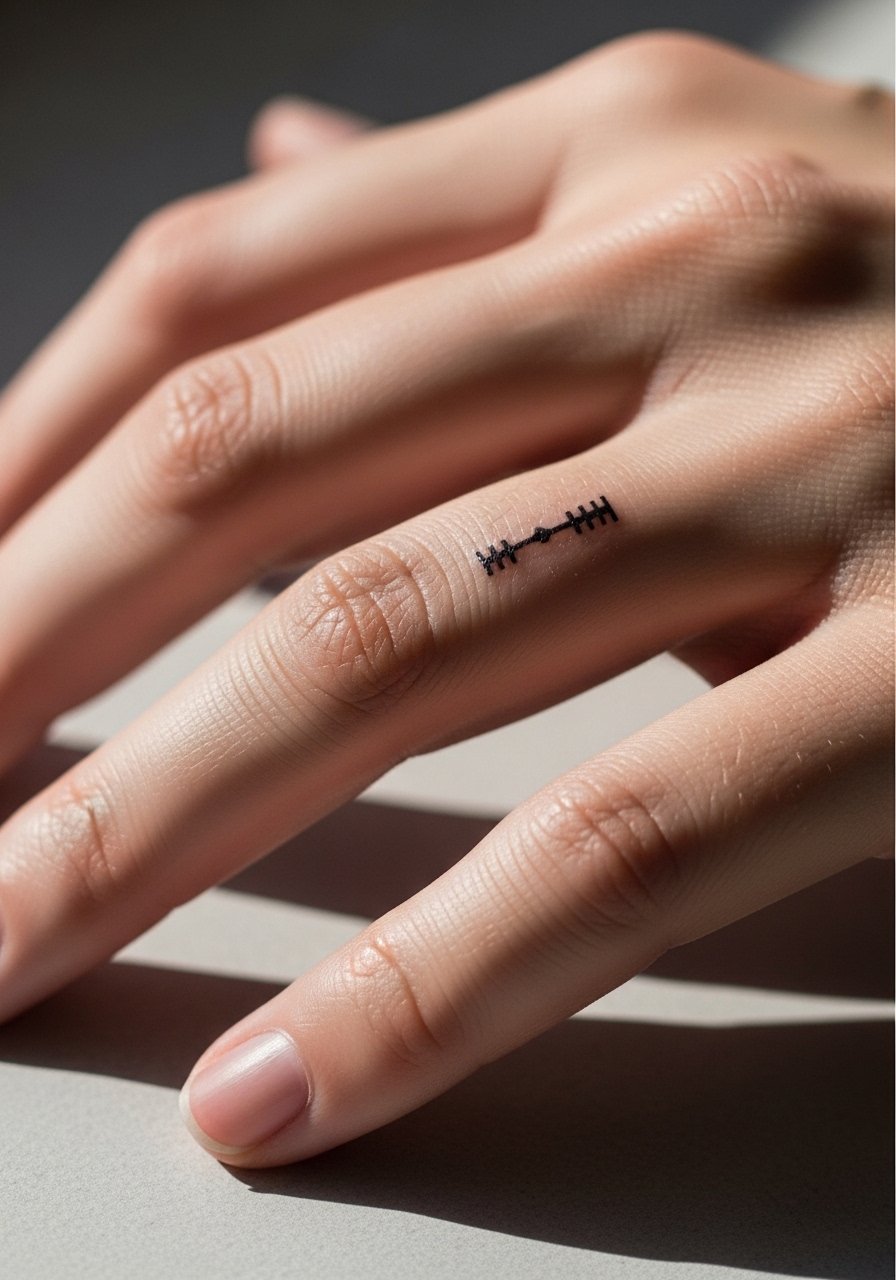
Finger tattoos are notoriously vulnerable to blowout and fading because of constant washing and thin skin. If you want a razor fragment on a finger, request bold simplified shapes rather than micro detail. The real mistake is expecting the same longevity as forearm work. Touch-ups are often needed within a year or two. Session time is brief but expect sensitivity. For the appointment avoid rings and wear a short sleeve so the artist can work freely. For everyday styling, minimal rings keep attention on the cut design without crowding the finger.
14. Torn Fabric Script Across Sternum
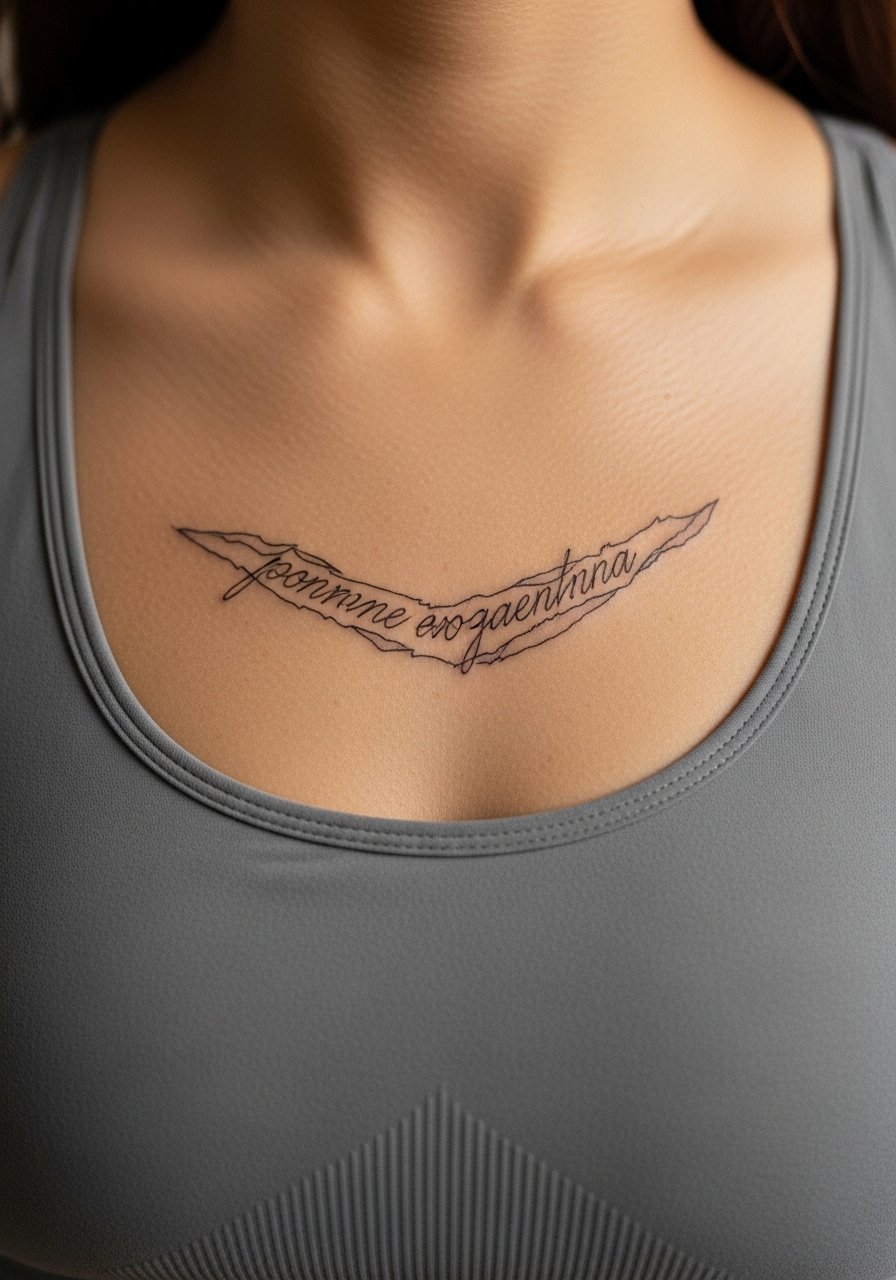
Sternum pieces are intimate and the skin is different from the chest or arm. Fine script needs space and slightly heavier line weight to avoid blurring as the area moves. Artists debate fine line on the ribs and chest. One group says fine line blurs within two years due to stretch. The other group says careful depth and spacing allow it to settle well. Ask your artist which side they lean toward and plan your size accordingly. Session sensitivity is high and wearing a fitted sports bra makes access easier.
15. Abandoned House Micro-Realism on Upper Arm
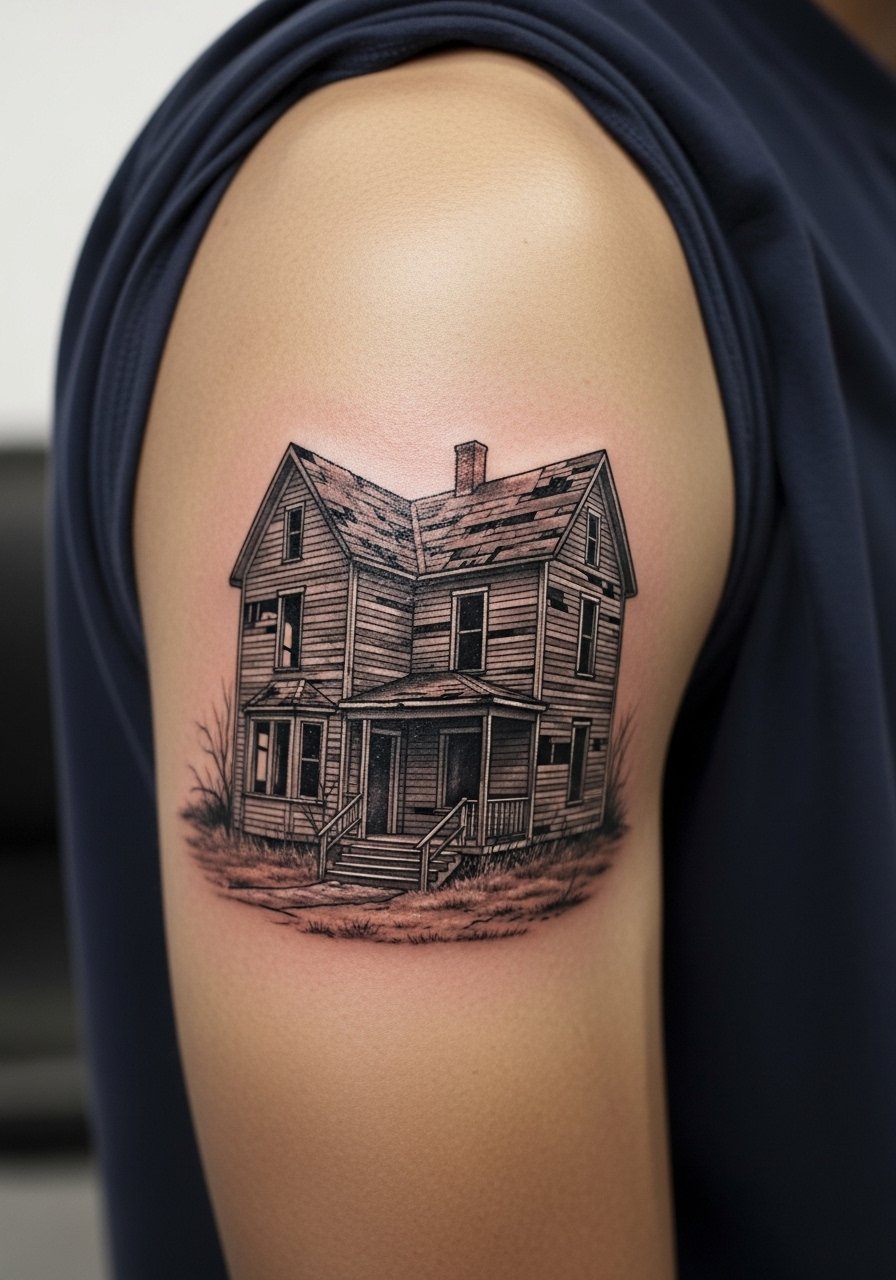
Upper arm canvas tolerates micro-realism with fewer longevity problems than wrists or hands. For architectural details request crisp negative edges and selective stipple shading for weathered wood effects. A common error is overloading windows and door details which can melt into dark smudges over time. Pain is low to moderate and the piece often fits into a single long session or two shorter ones. For the appointment wear a loose button-down shirt or a short sleeve that can roll up easily.
16. Stitched Mouth Motif on Side of Neck
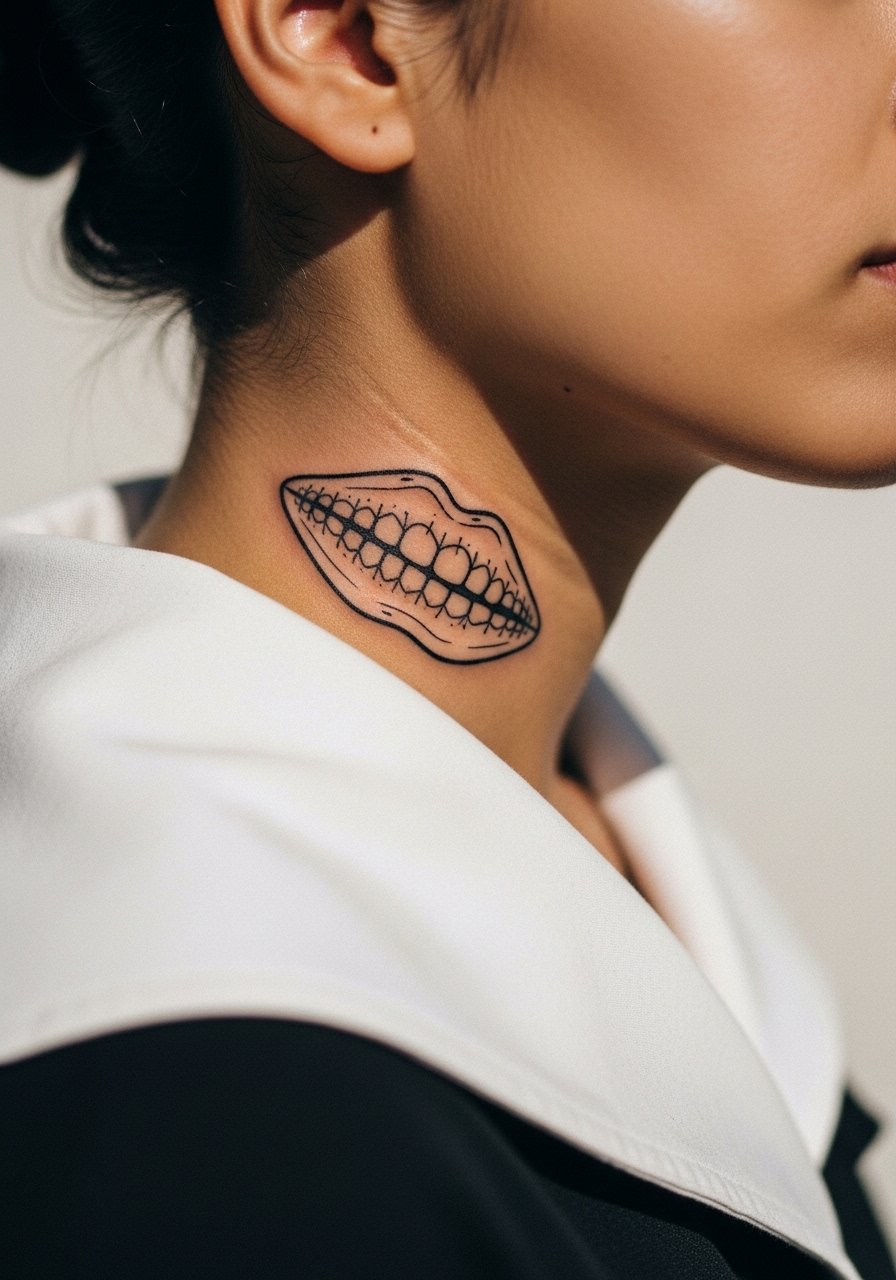
Side neck placements age into a "lived-in" look faster than upper arm pieces because of exposure. The stitched mouth benefits from bold anchor points and open spacing between stitches. The main mistake is choosing ultra-fine thread lines that disappear. Expect higher sensitivity and plan for a compact design to minimize risk to vocal movement areas. For showing it off try a partially open zip up hoodie or a wide-neck top that frames the neck. Consider how often you want that visibility in daily life.
17. Rusted Anchor Variation on Inner Ankle
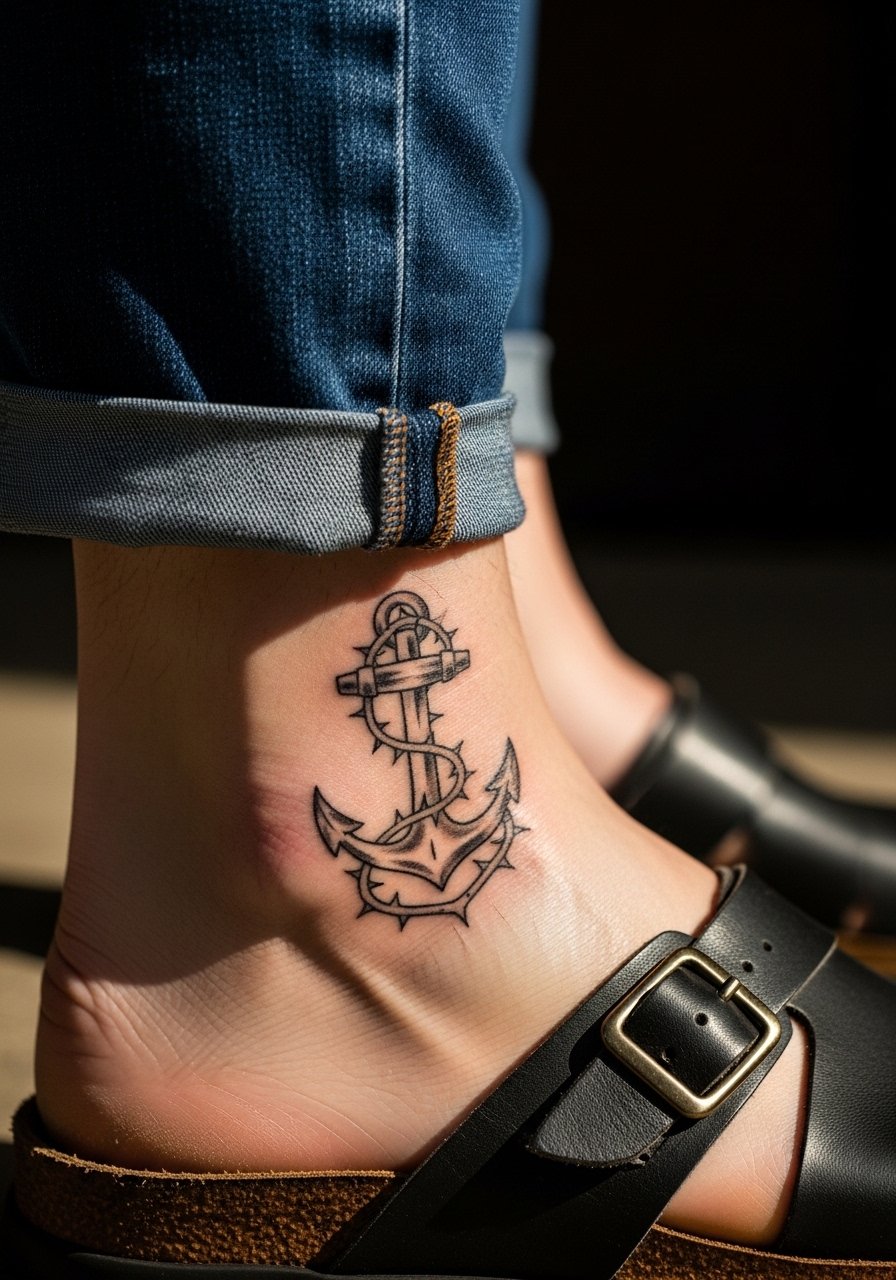
Inner ankle sees a lot of rubbing from footwear so plan for solid blackwork and compact composition. The main error is letting delicate crosshatching wash out under shoe friction. Sessions are short and pain moderate. For the appointment wear loose joggers you can pull up and avoid tight socks for a week during early healing. Dressingwise, a simple sandal or rolled pant cuff keeps the anchor visible without pressuring the site.
18. Venomous Spider Web Variation Behind the Ear
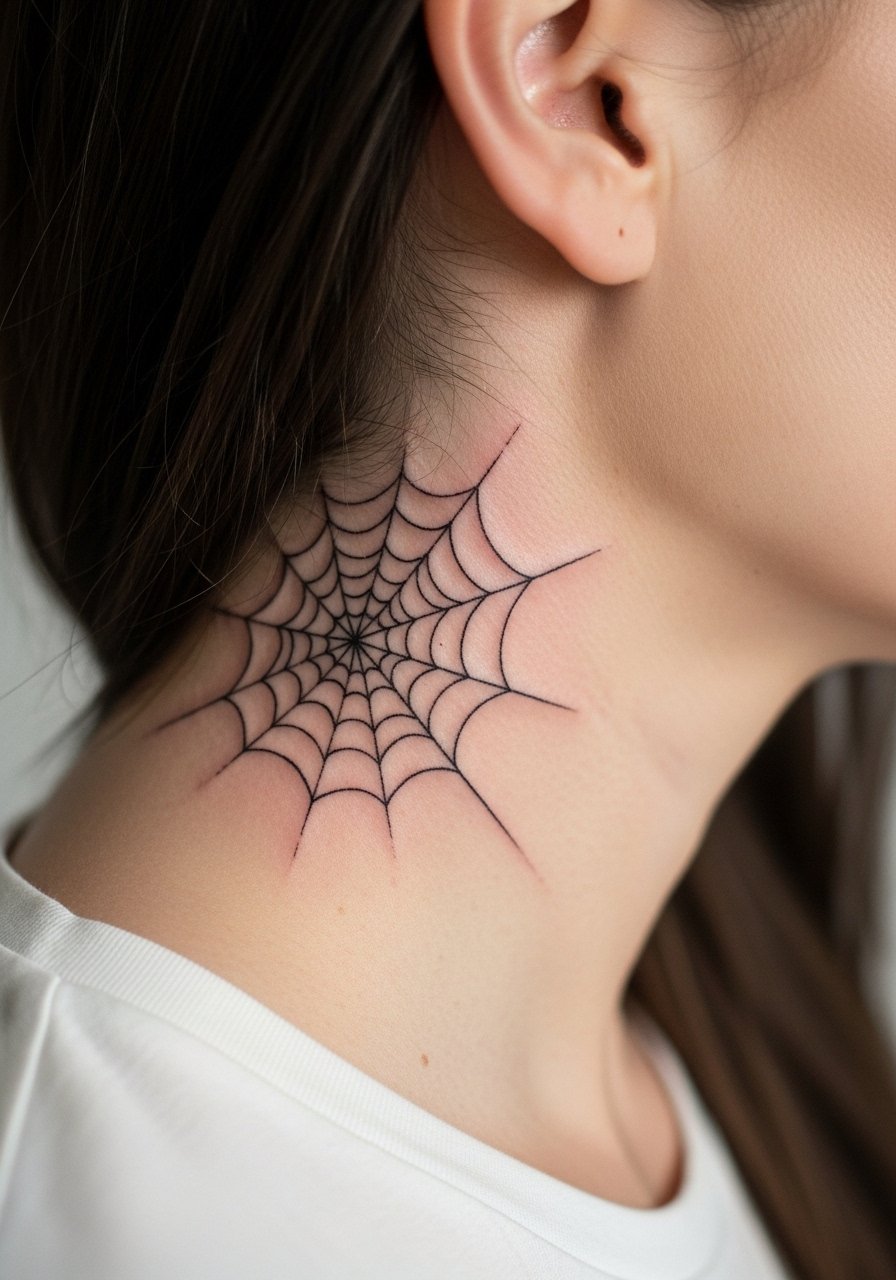
Behind the ear is discreet and heals in a sheltered spot below the hairline, but the skin is thin. Make sure to ask for modest scale and avoid micro-detail. A common mistake is wanting dense shading which can cause uneven healing. Sessions are brief but expect sensitivity. For the appointment wear a collared shirt or tie-back hair so the artist can reach the area easily. Keep in mind this spot can be easy to hide for work conversations.
19. Broken Mirror Shards on Thigh
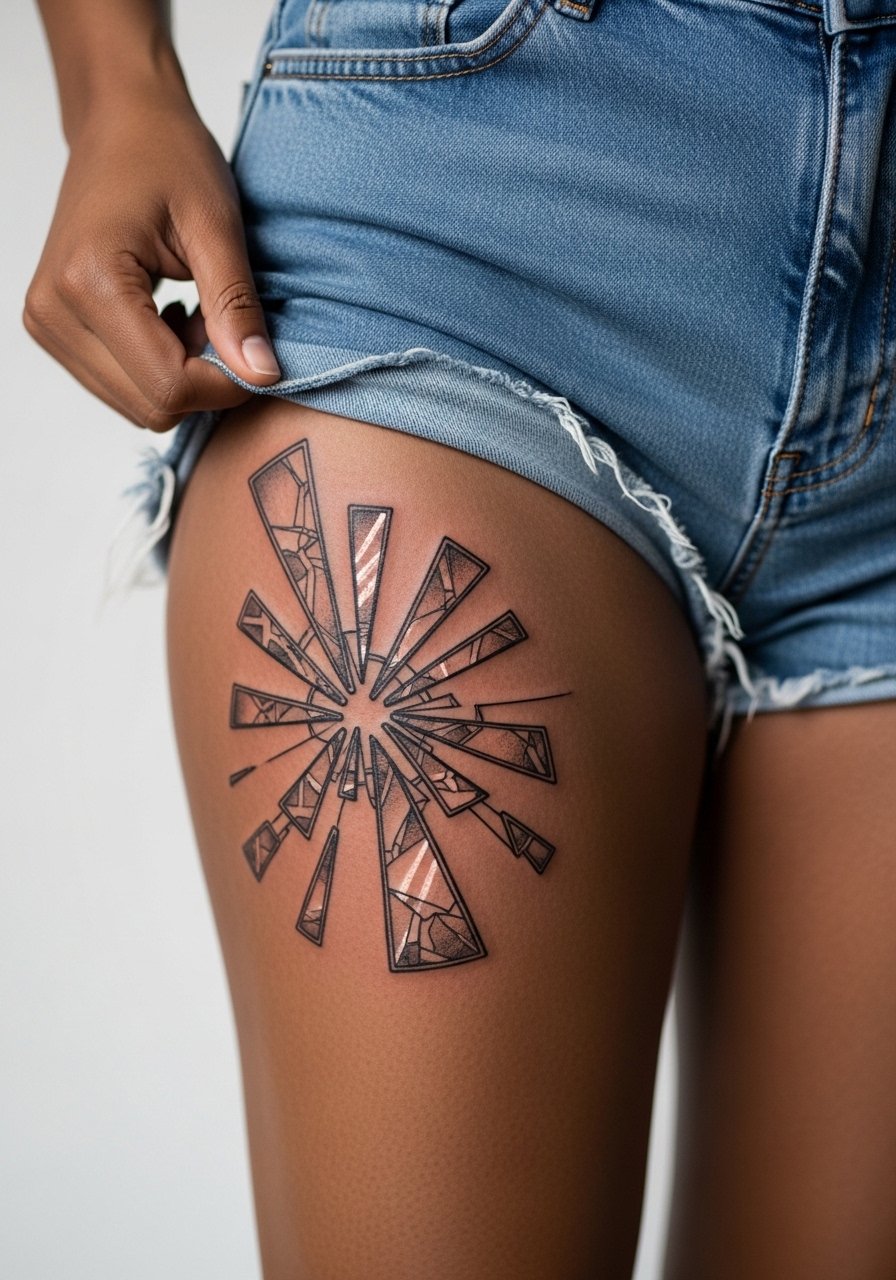
Thigh pieces tolerate both realism and illustrative linework. Broken shard textures benefit from strong negative space and varied linework to suggest reflection without heavy fill. A common misstep is crowding the design into a tiny circle. Expect multiple sessions for larger compositions and a touch-up once the initial settling finishes. Wear loose shorts or skirts to the appointment so the artist can access the area without constriction. For showing off, high-waisted shorts or thigh-high socks make the shards peek through tactfully.
20. Thorned Compass on Collarbone
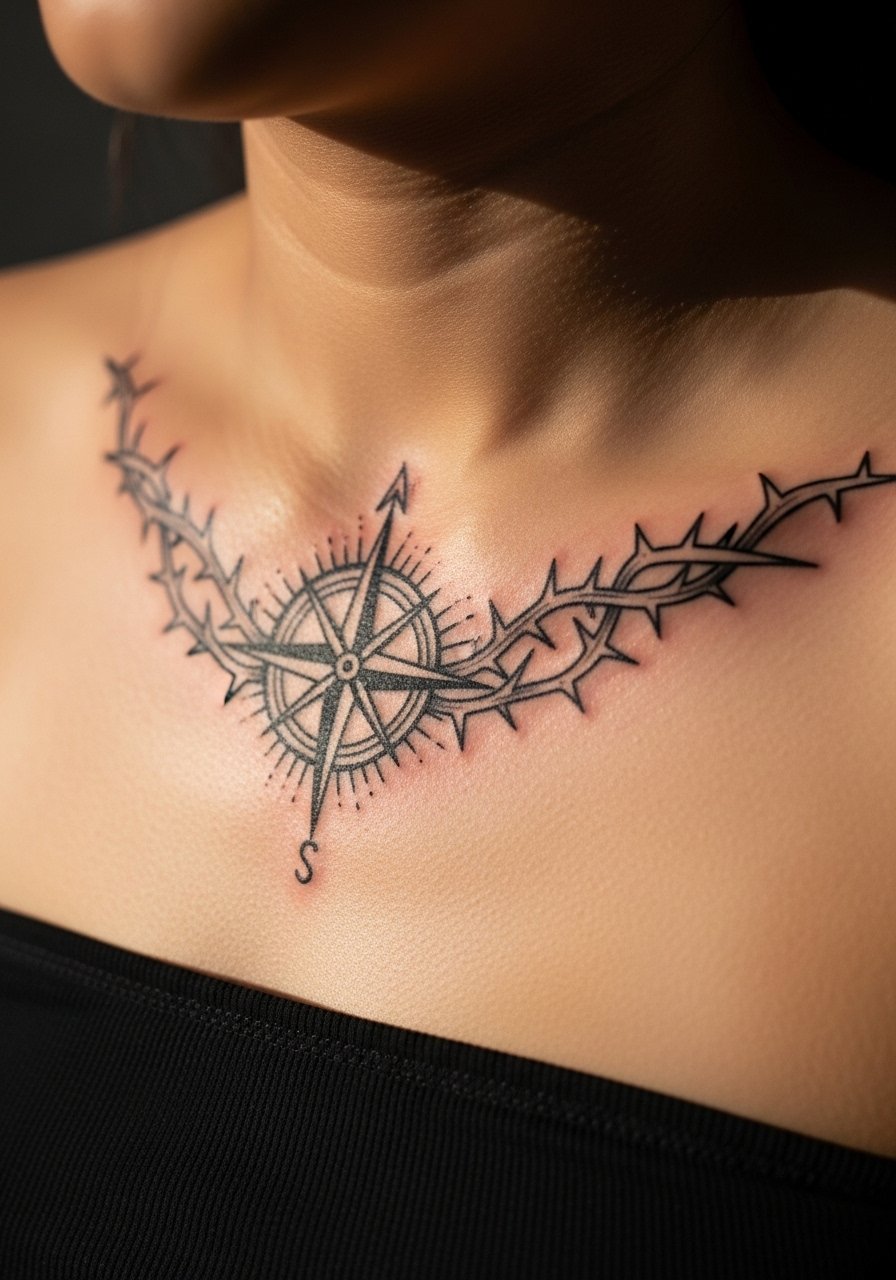
Compass pieces across the collarbone need symmetry and breathing room so the points do not merge as the skin moves. Ask your artist for heavier outer lines and simplified inner details. The usual mistake is over-inking tiny directional marks which blur on thin skin. Sessions are moderate in length and pain is manageable. For showing off pair with a strapless bralette or a low V-neck to let the compass sit at the edge of visibility.
21. Fractured Hourglass on Ribcage
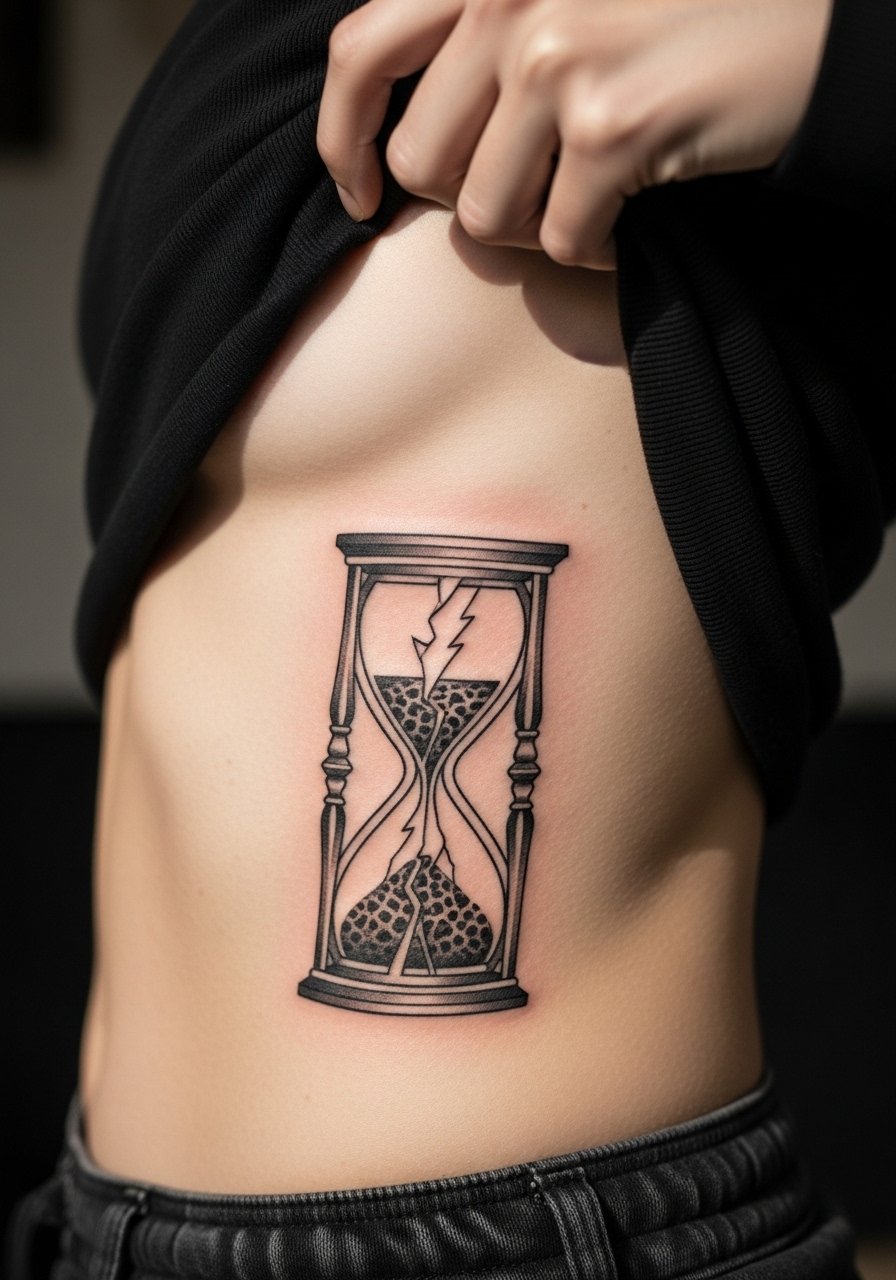
Ribcage pieces demand design breathing room because that area stretches when you breathe and move. Ask for clear separation between the sand and the glass lines so the fracture effect remains readable. Many people pick too-small hourglasses that turn into mush after healing. Sessions are typically longer and pain is higher on the ribs. Wear a loose cropped top to the appointment so you can breathe easily while the artist works.
22. Smoldering Candle Down the Spine
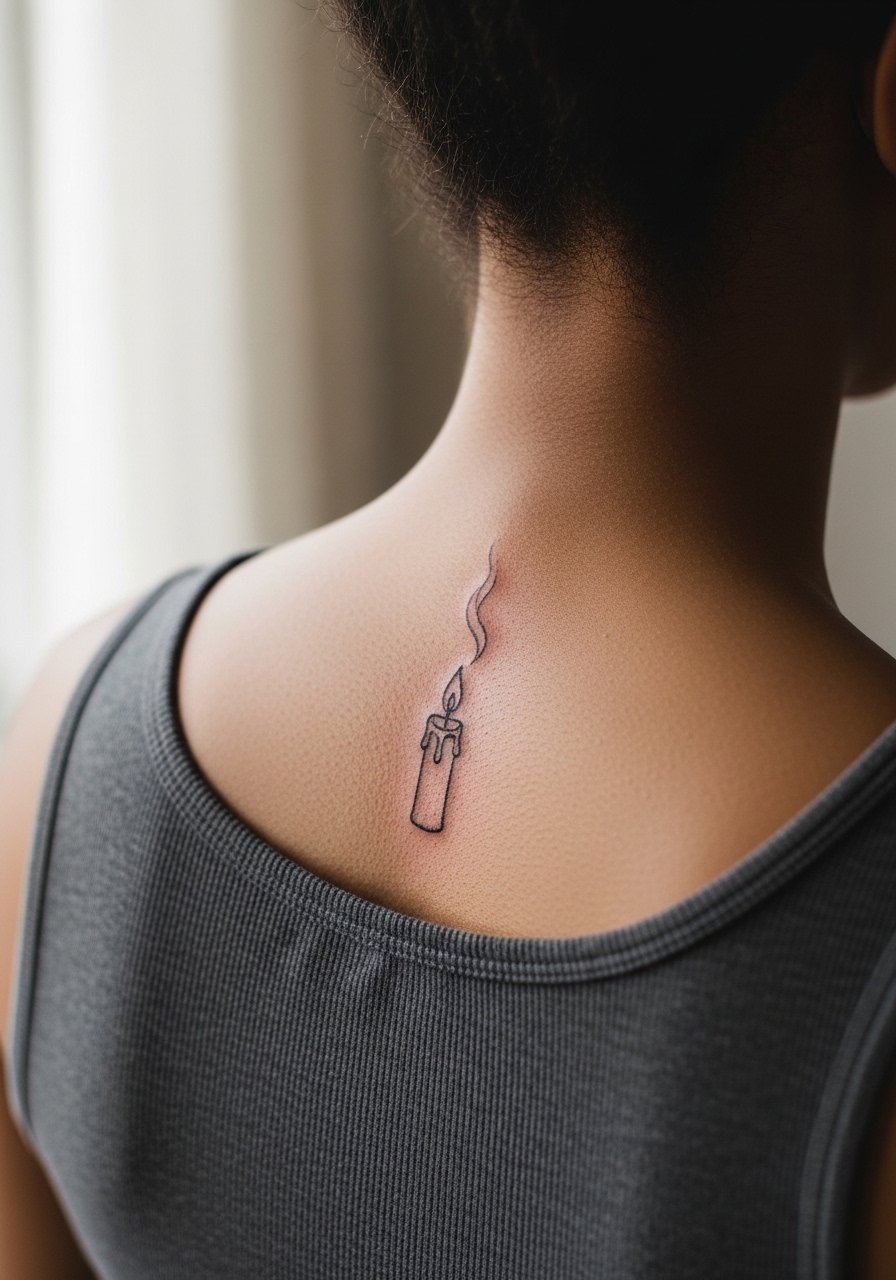
Spine work can be striking but is sensitive and sits on a curving plane. For longevity pick a candle with bold silhouette and avoid tiny flame filigree. The common mistake is crowding small flame details that blur with movement. Expect a few short sessions depending on length. For the chair wear a loose button-down you can pull aside and consider off-shoulder tops for later show-off looks.
23. Corroded Crown Micro-Detail on Shoulder Cap
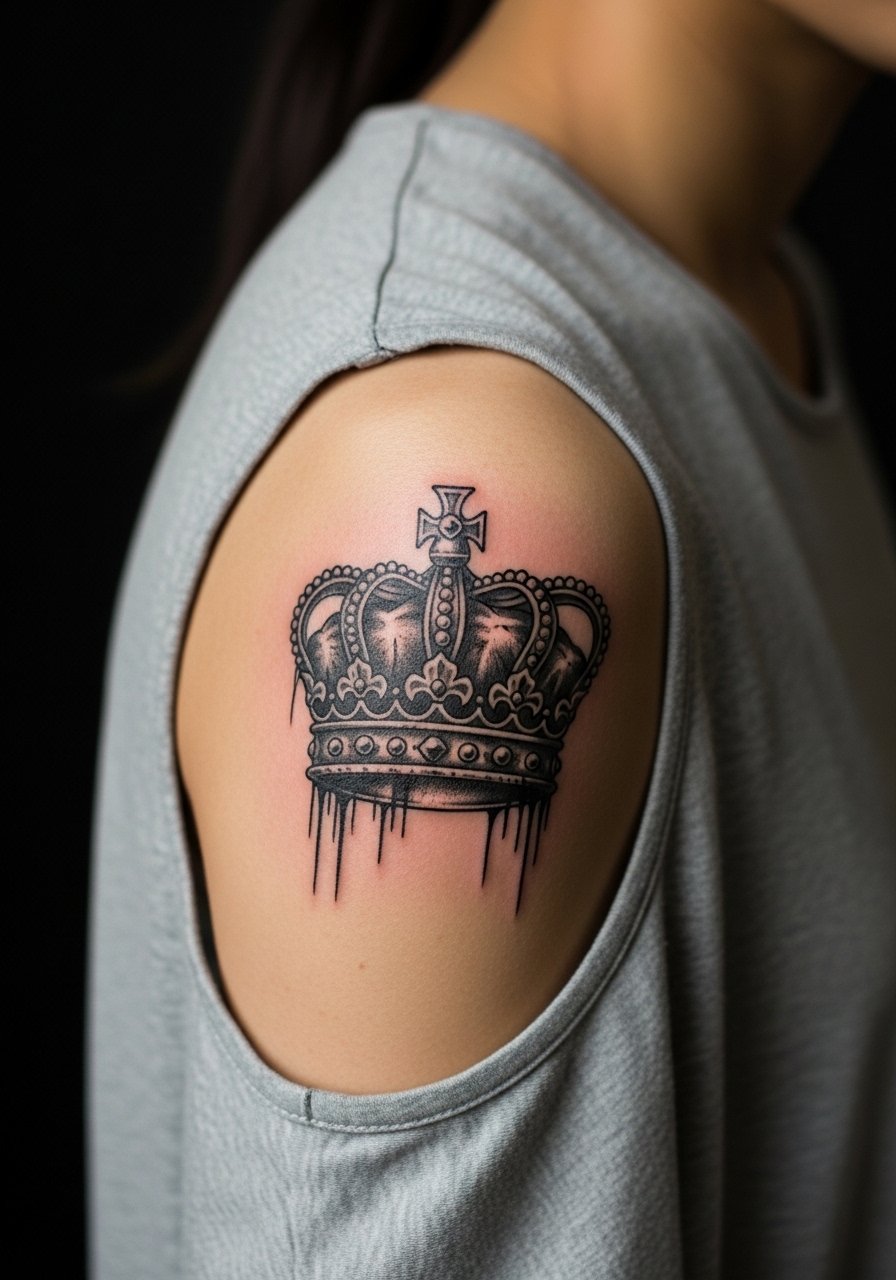
Shoulder cap placements take bold texture well so corroded metal and stipple highlights age into character. Ask for selective high-contrast spots rather than uniform gray washes. A mistake is packing too many tiny cracks which don't read on moving skin. Sessions are moderate length and usually one sitting if the size is under six inches. For the session wear a loose tank top to give the artist full access.
24. Skeletal Hand Reaching on Forearm
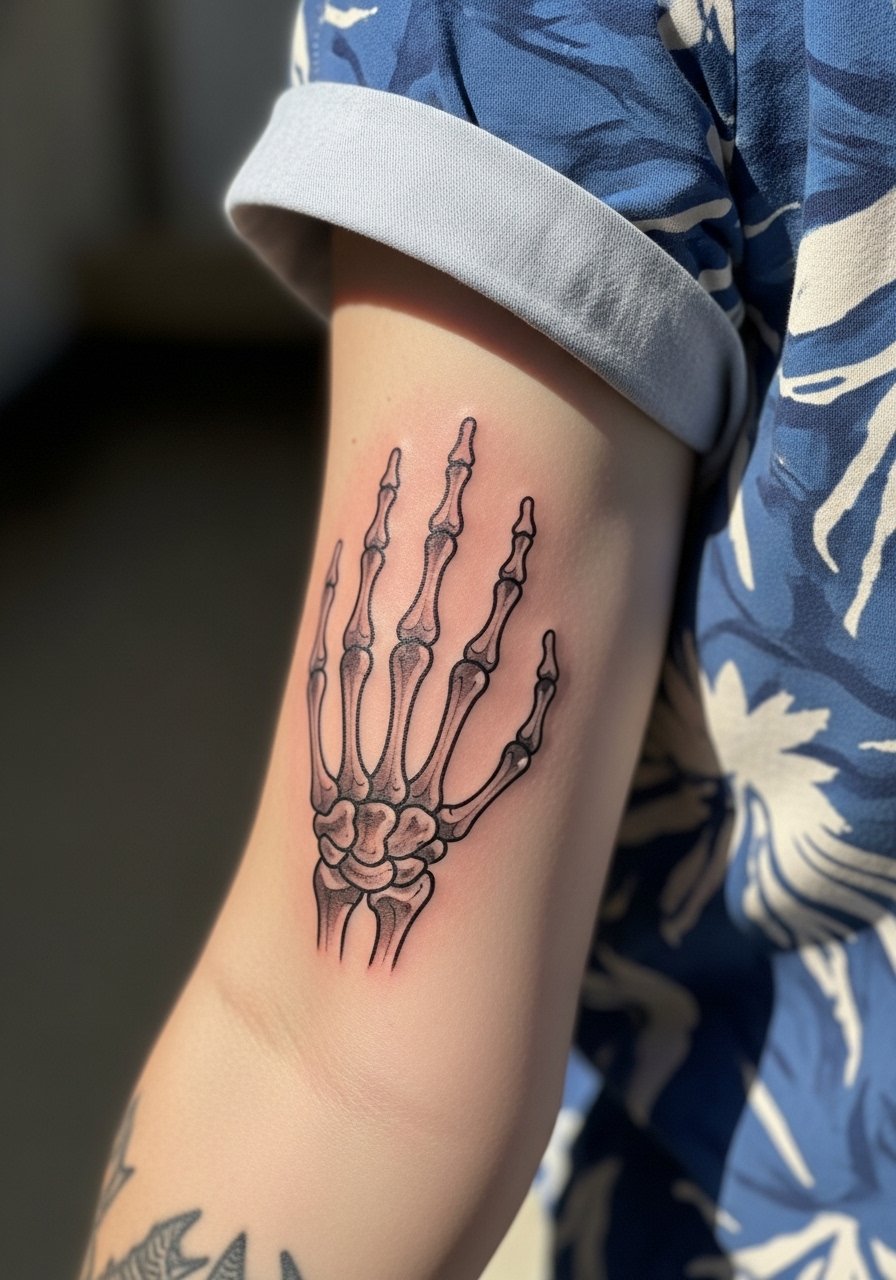
Forearm anatomy holds linework well if the composition flows with muscles. Tell your artist you want the bones to follow the arm's lines so the design moves with the body. The usual error is forcing a rigid hand that looks flat on the curved forearm. Pain is mild and the piece can often be finished in one long session. For showing it off pair with a ripped sleeve tee or rolled linen sleeves to keep focus on the forearm.
25. Barcode Stencil on Inner Bicep
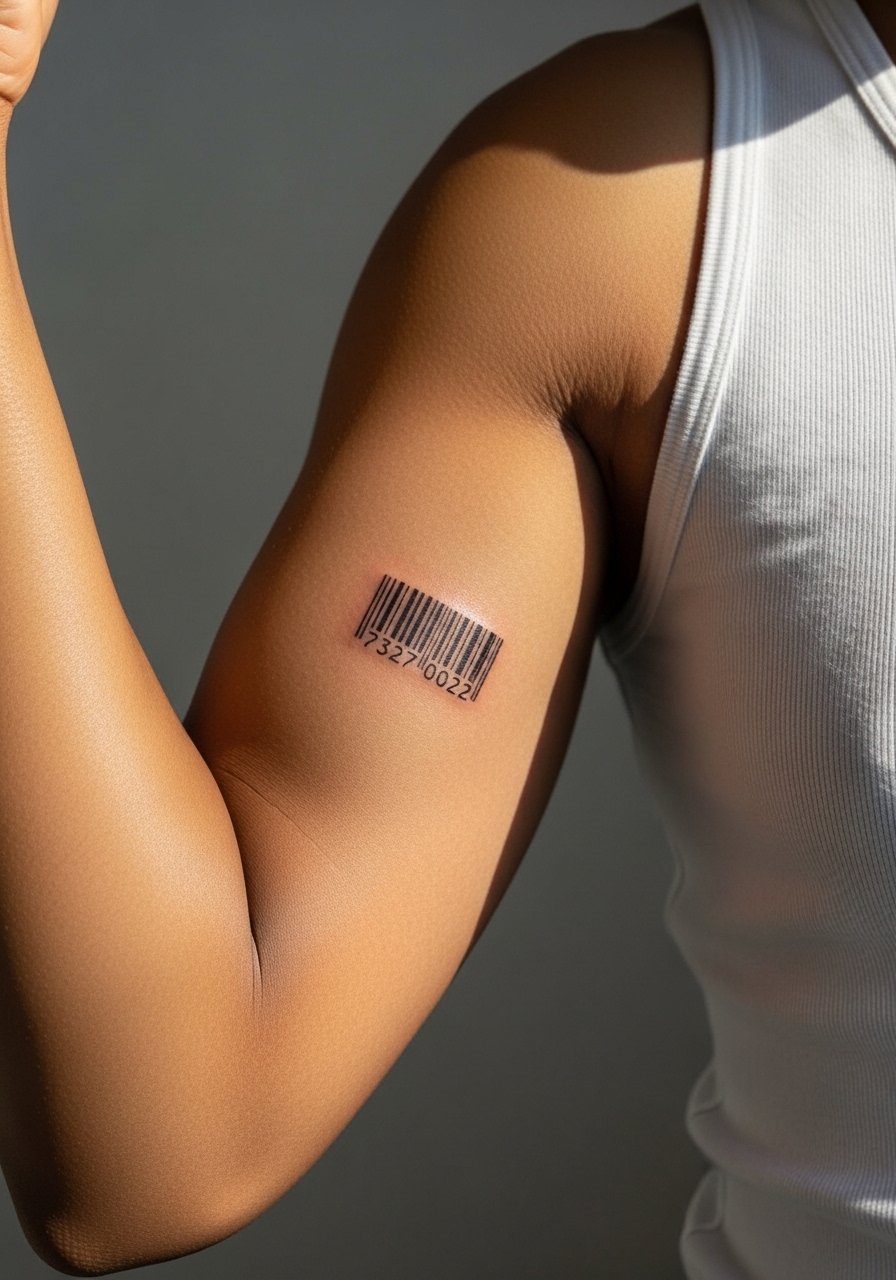
Inner bicep placements are private but risky if you want fine bars. Bold, evenly spaced bars are the solution. Tiny barcode lines can merge into solid blocks within a couple of years. Sessions are fairly short but the area is sensitive. For the appointment wear a sleeveless top or a loose button-down to let the artist work without constriction. If you want the barcode to age cleanly, plan for thicker bars and more spacing.
26. Pierced Eye Classic Symbol on Bicep Sleeve Accent
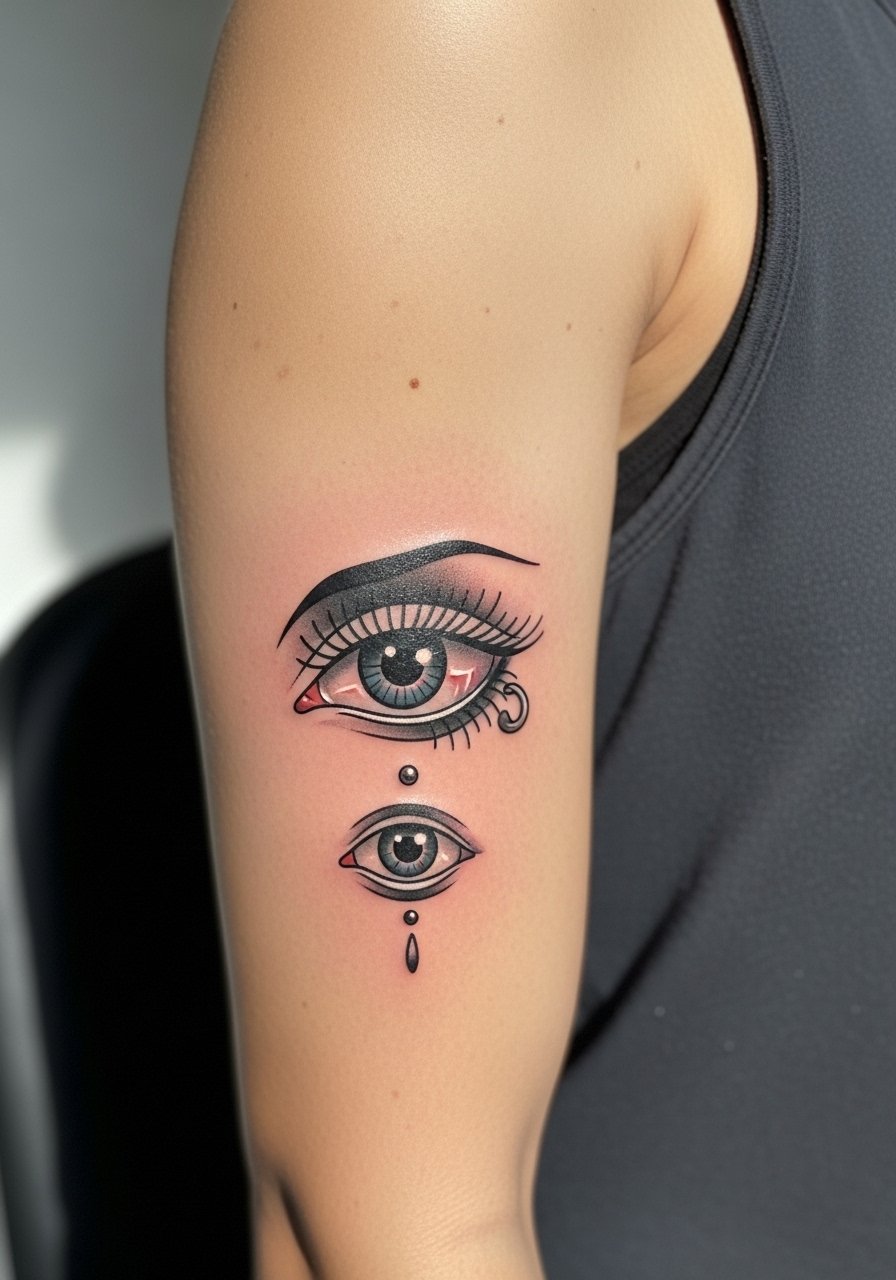
Adding piercings to classic symbols can give them a punk identity if done with respectful balance. On the bicep, allow room for the added metal detail so it does not overcrowd the original motif. The common mistake is shrinking the piercing so it reads like a blot over time. Session time depends on sleeve scope and touch-ups are common with layered blackwork. For session wear a sleeveless tank top and plan for at least two sittings if the accent fills are dense.
27. Rusted Anchor with Thorn Band on Ankle Wrap
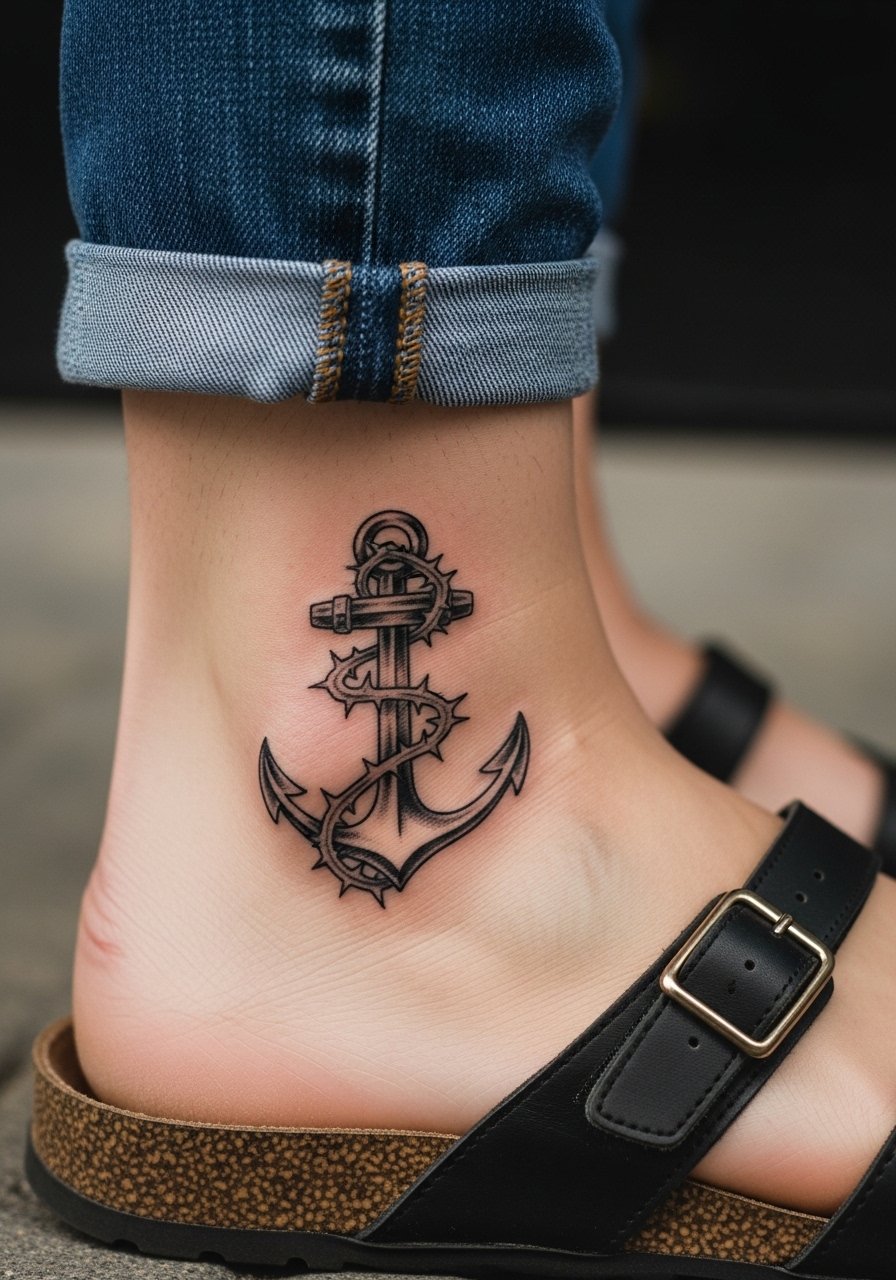
Ankle wrap designs should be compact and use negative space so the thorns keep their shape through footwear friction. Avoid ultra-fine crosshatching in the band which wears fastest. This placement handles single-session work well and pain is moderate. For the appointment wear loose pants you can roll up and avoid tight socks for the first week. For showing the wrap, pair with sandals or rolled jeans so the band reads without being hidden.
Frequently Asked Questions
Q: Will fine line elements in these grunge pieces blur faster than bold blackwork on high-movement areas like the wrist or ribcage?
A: From what I've seen, fine line tends to soften faster on wrists and ribs than bold blackwork. The fix is to allow more spacing and slightly heavier line weight in those zones, or choose bolder contouring for the elements you want to last.
Q: How should I approach touch-ups for distressed texture techniques used in grunge tattoos?
A: Distressed textures are intentionally uneven which helps long-term readability. Still, expect a touch-up around year two to refresh heavy black fills or crisp negative gaps. Ask your artist to mark which areas will likely need a top-up so you can budget time.
Q: Are there real career or social consequences to neck and hand tattoos featured here?
A: Yes, neck and hand tattoos are high visibility and can affect some job situations. Think about how often you want that visibility and use placement variants like side-neck under a collar or small wrist pieces you can obscure if needed.
Q: How do I find an artist who understands grunge blackwork and distressed textures without naming specific shops?
A: Use hashtags like #GrungeTattoo and #BlackworkTattoo on Instagram and TikTok to find portfolios. Directory searches such as "[city] grunge tattoo studio" and watch YouTube compilations for technique examples. Look for healed photos in portfolios rather than only fresh shots.
Q: If I want to show off a collarbone or shoulder blade piece, what should I wear to the session and after healing?
A: For the session wear something like a v neck black tee or a loose button-down that you can pull aside. After healing, off-shoulder tops or an open-back dress frame the area without tugging at the skin.
