
Fine line and hyper-saturated bull skulls flood feeds right now, and what catches attention on a phone does not always hold up on skin. From horn placement that warps with flex to mandala lines that tighten into a blur, the choices you make before booking shape what you actually live with. Read on for 27 bull skull approaches that account for placement, aging, and how to dress the piece for sessions and real life.
1. Tribal Bull Skull, Outer Forearm
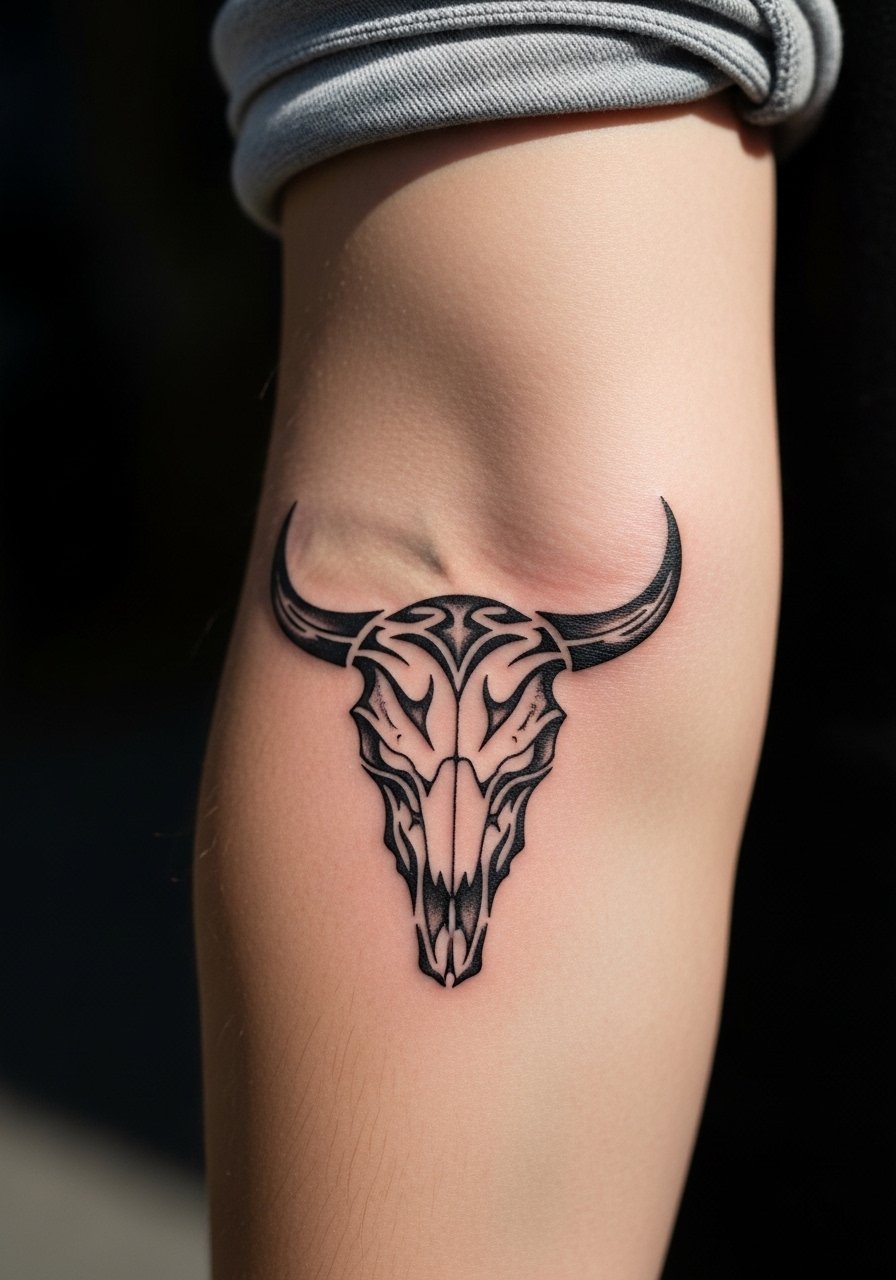
I've seen forearm tribal skulls survive a decade because their linework gives space to breathe. For this placement, warn your artist you want thicker primary linework at horn curves so flexing does not distort the silhouette. Common mistake is squeezing too many thin details into a 4-inch piece. Expect a one to two hour session and moderate pain. For showing it off, wear a fitted black tee with rolled sleeves and a leather cuff to frame the outer forearm.
2. Realistic Bull Skull with Horn Detail, Calf or Upper Arm
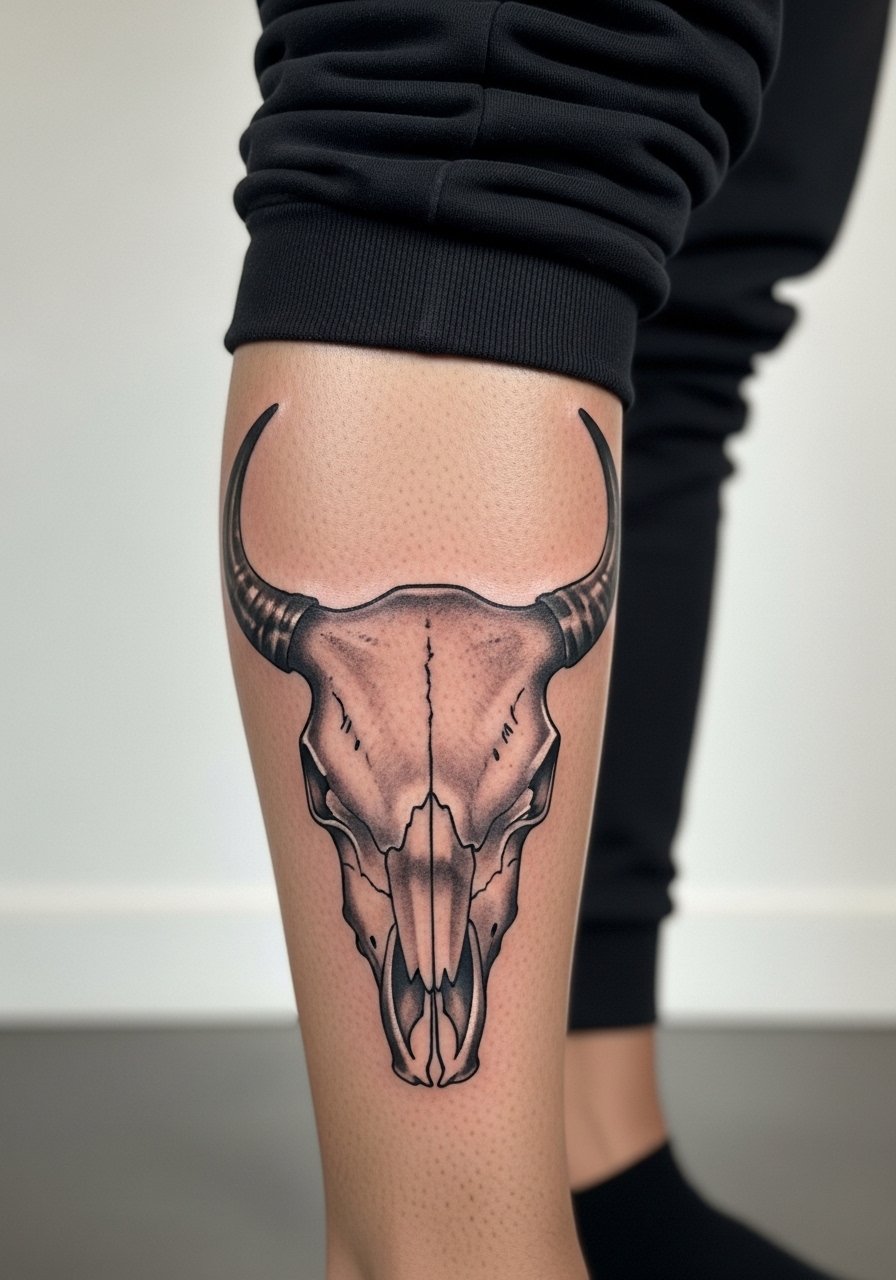
Realism thrives on saturation and smooth shading. I suggest a larger canvas, six inches plus, on the calf or upper arm so stipple shading and horn texture read clearly. Tell your artist you want the horn ridges emphasized in stipple shading rather than thin crosshatch. A mistake is asking for tiny micro-detail in a small size. Sessions run longer and may require two sittings. Pair the calf piece with bootcut jeans and crew athletic socks tall for a rugged, framed look when it heals.
3. Geometric Bull Skull, Center Chest
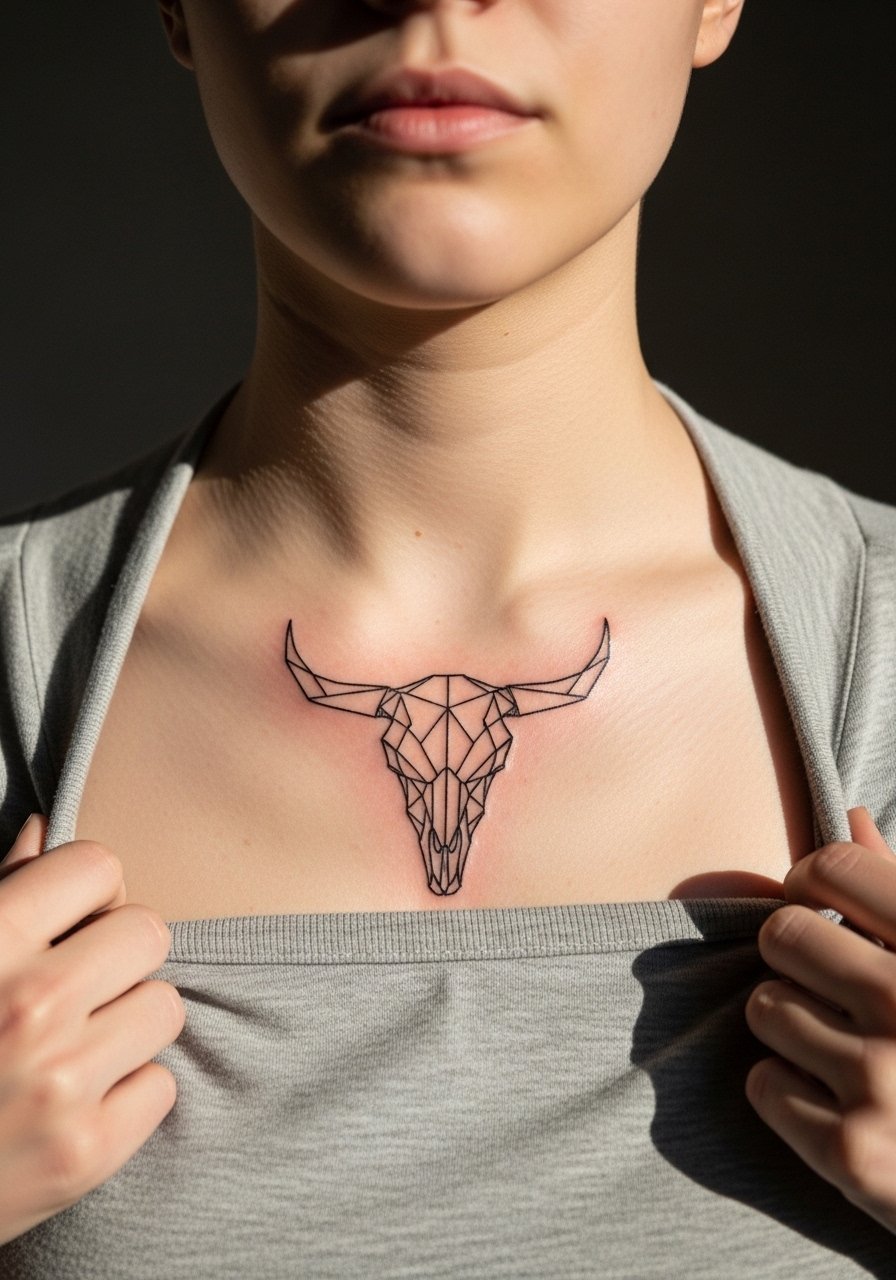
Geometric work needs breathing room. The chest allows symmetry without horns colliding with muscle movement. Ask for slightly thicker line weight through the central axes so negative space retains shape as the piece ages. Common failure is scaling a dense mandala skull too small and watching the geometry merge within two years. Expect one to three sessions and higher sensitivity on the sternum edge. For evenings out, pair the piece with a deep v neck tee that keeps the symmetry visible.
4. Neo-Traditional Bull Skull with Florals, Shoulder or Thigh
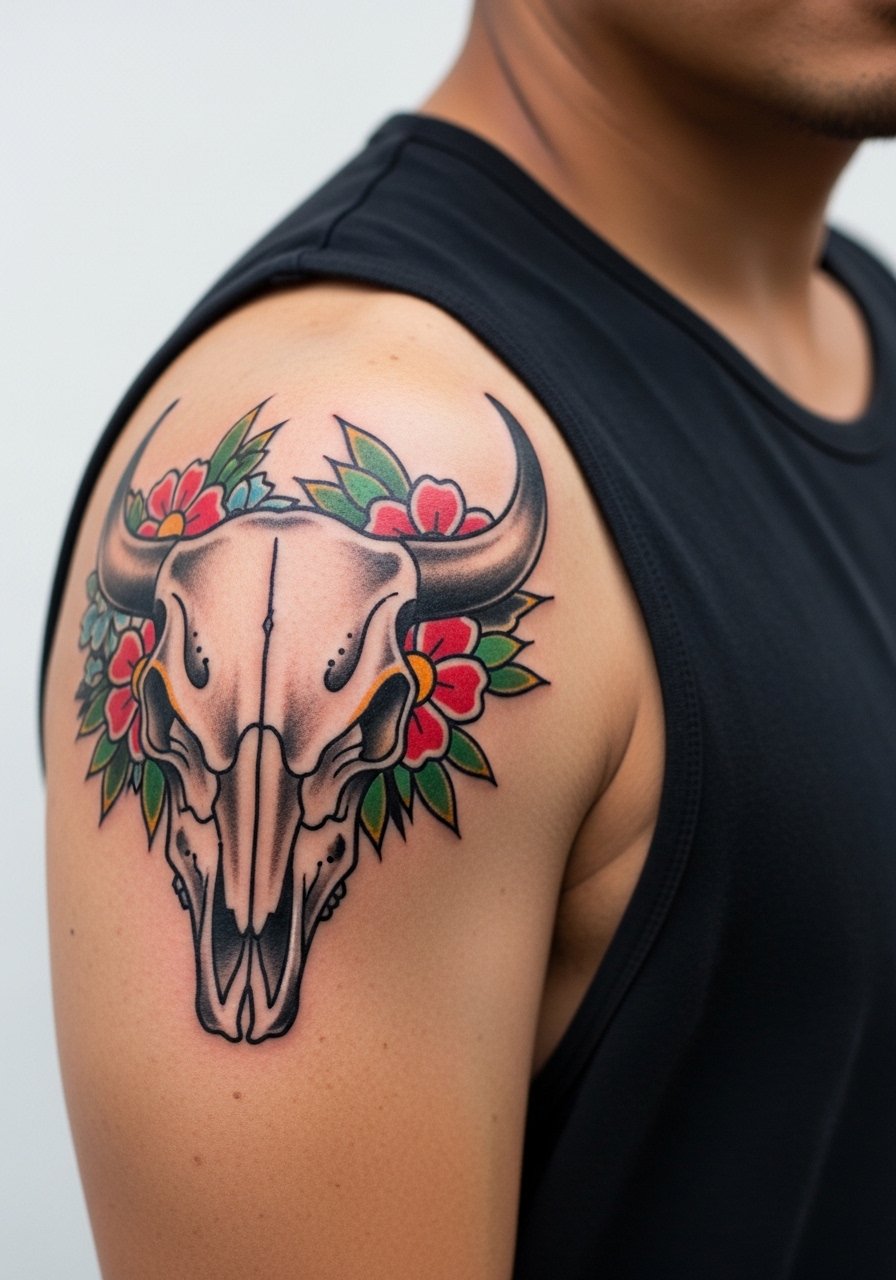
Neo-traditional lets color lift a skull without losing the bone structure. For shoulders choose exaggerated lines and solid color saturation to keep the florals from dulling into muddy patches. Tell the artist you want layered color passes rather than a single thin wash. Thigh versions are more forgiving with size, but remember weight fluctuation affects thigh placement. Wear a sleeveless muscle tank to the session for easy access to shoulder work.
5. Bull Skull Mandala Sleeve Starter, Inner Bicep to Elbow
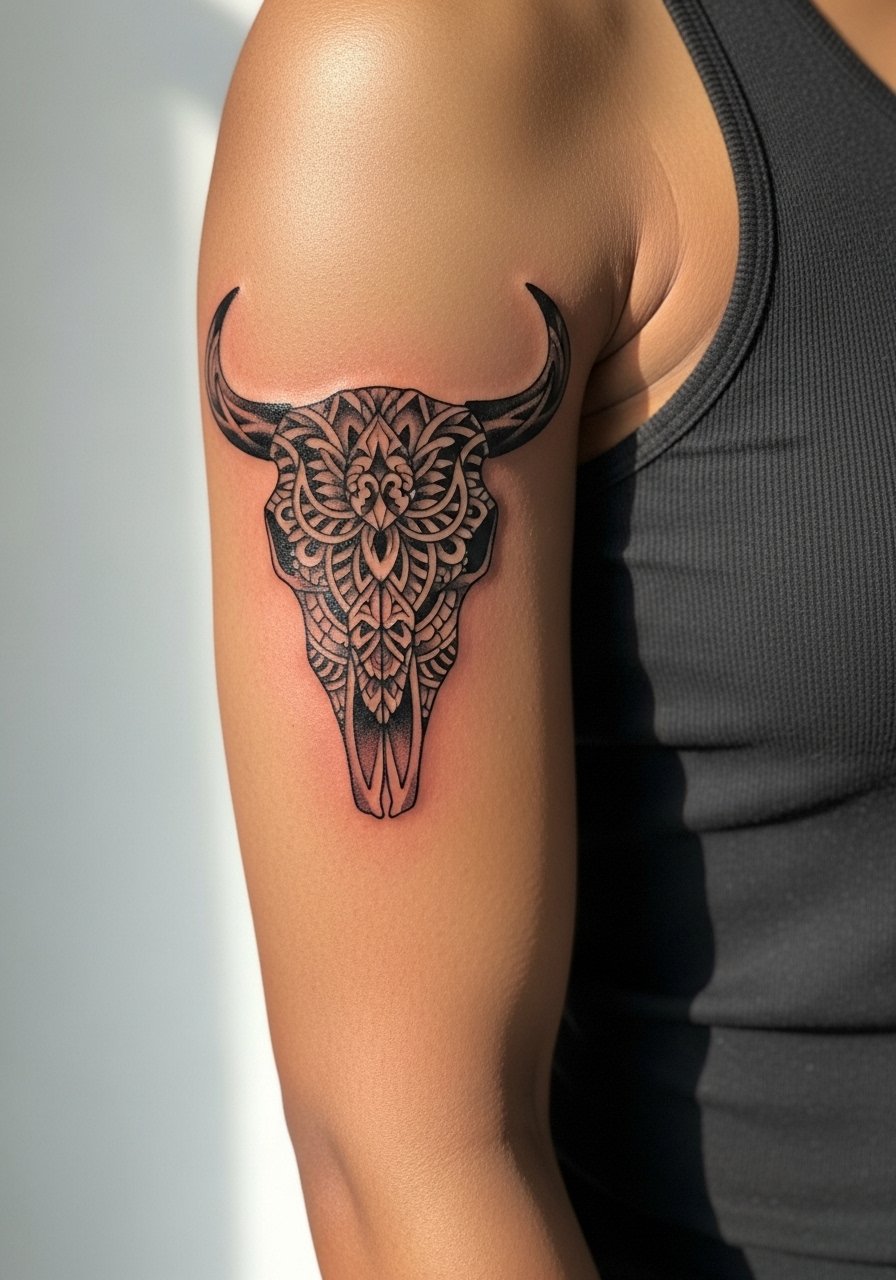
Mandala fusion reads as a spiritual-modern statement when scaled for the inner bicep. For sleeve starters, keep spacing between mandala rings and the skull outline so the pattern does not compress during touch-ups. A rookie move is packing dense dot work into the inner arm where movement causes blending. Pain is higher on the inner bicep, and sessions often occur across multiple visits. Ask for clear margins and a touch-up plan at 6 to 12 months.
6. Black and Gray Bull Skull with Raven, Back or Ribcage
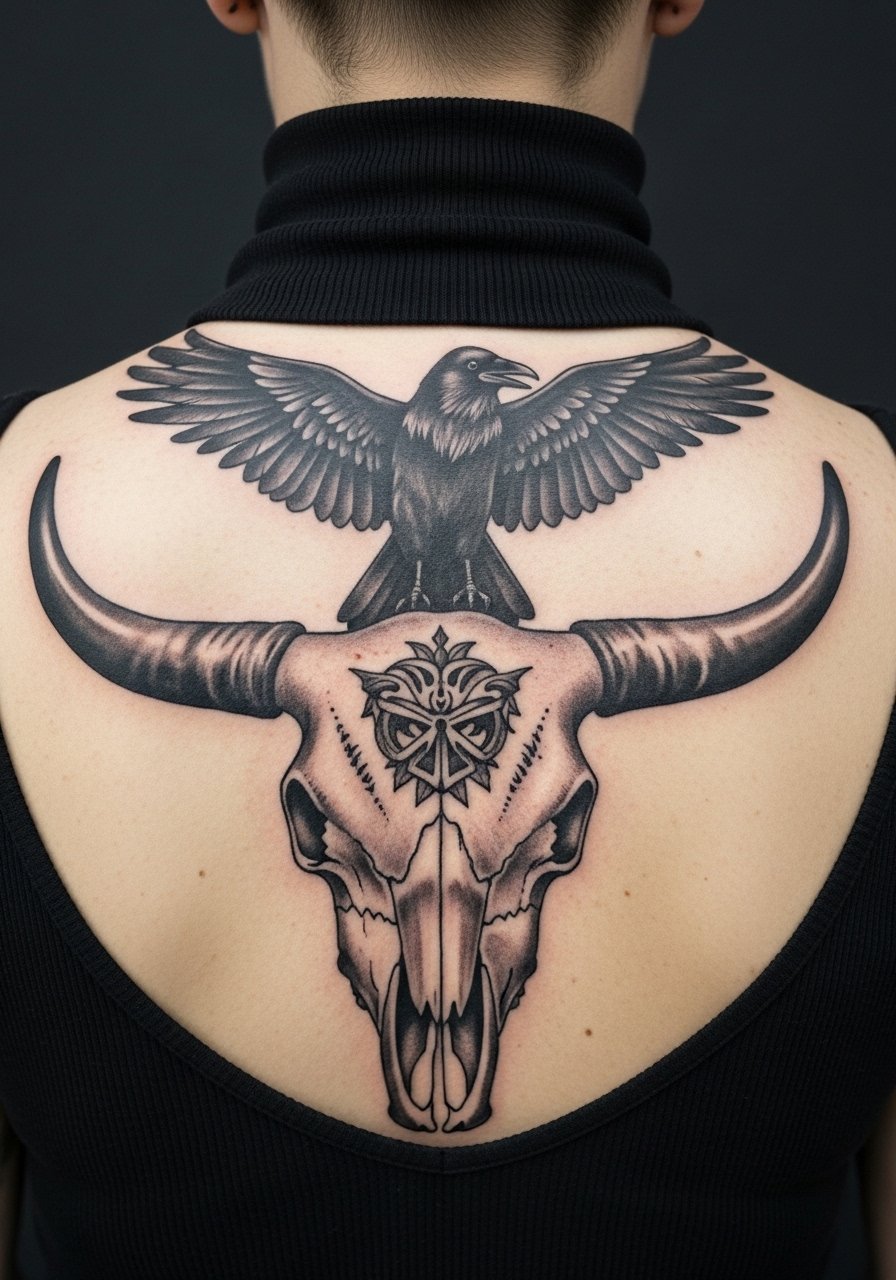
Fair warning, ribs and back come with different healing realities. The dramatic contrast this composition needs will read best with heavy saturation in the skull and deep, velvety black for the raven. Artists split on fine line on ribs. One camp says the skin stretch blurs fine details within two years. The other camp argues that with proper depth and spacing, fine line settles fine. Ask your artist which approach they trust and plan for a touch-up. Session time varies, and rib work rates as higher pain.
Studio Day Picks
The forearm, inner bicep, and ribcage pieces above demand different prep, and a few targeted products smooth the session and the first week.
- Stencil transfer paper kit. Lets you test scale and horn placement on skin before the needle starts, which matters for forearm and chest pieces.
- Topical numbing cream. Applied per directions it helps take the edge off for ribs and inner bicep sessions without changing linework.
- Thin protective film roll. Useful for back and calf pieces that face friction from clothing the first week.
- Fragrance free gentle body wash. Keeps large black and gray work clean during showers without stripping saturation.
- Aquaphor healing ointment. Thin layers during the initial days help maintain saturation on detailed areas like horn textures.
7. Double Exposure Eye and Bull Skull, Full Forearm Half-Sleeve
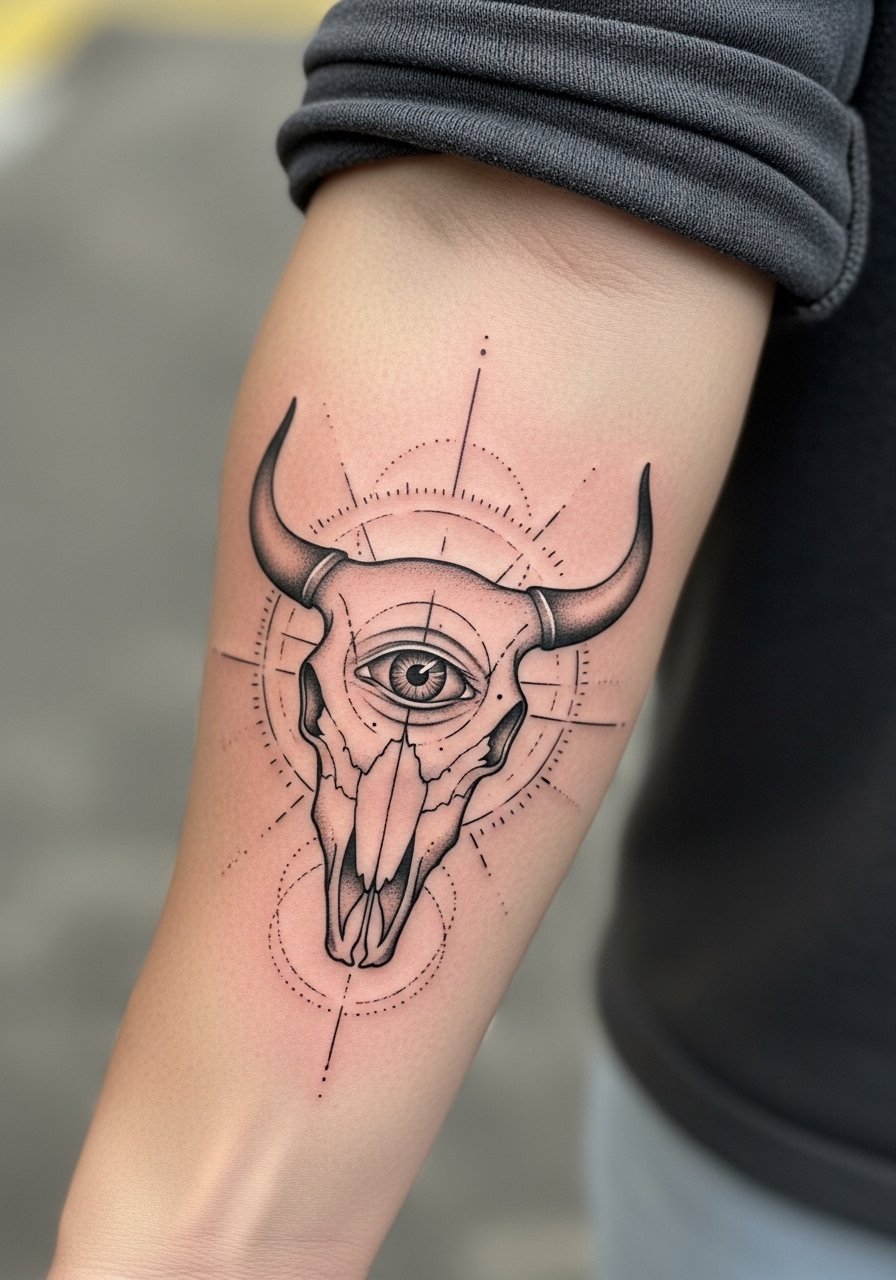
The double exposure illusion needs crisp linework and deliberate negative space. For a forearm half-sleeve, ask the artist to map the eye position relative to the wrist so the composition reads when your arm is relaxed. A common mistake is merging two focal points too close together. Expect multiple sessions and a moderate pain curve. For showing it off, rolled sleeves in a fitted black tee keep the layered illusion visible without distraction.
8. Floral-Adorned Bull Skull, Outer Thigh
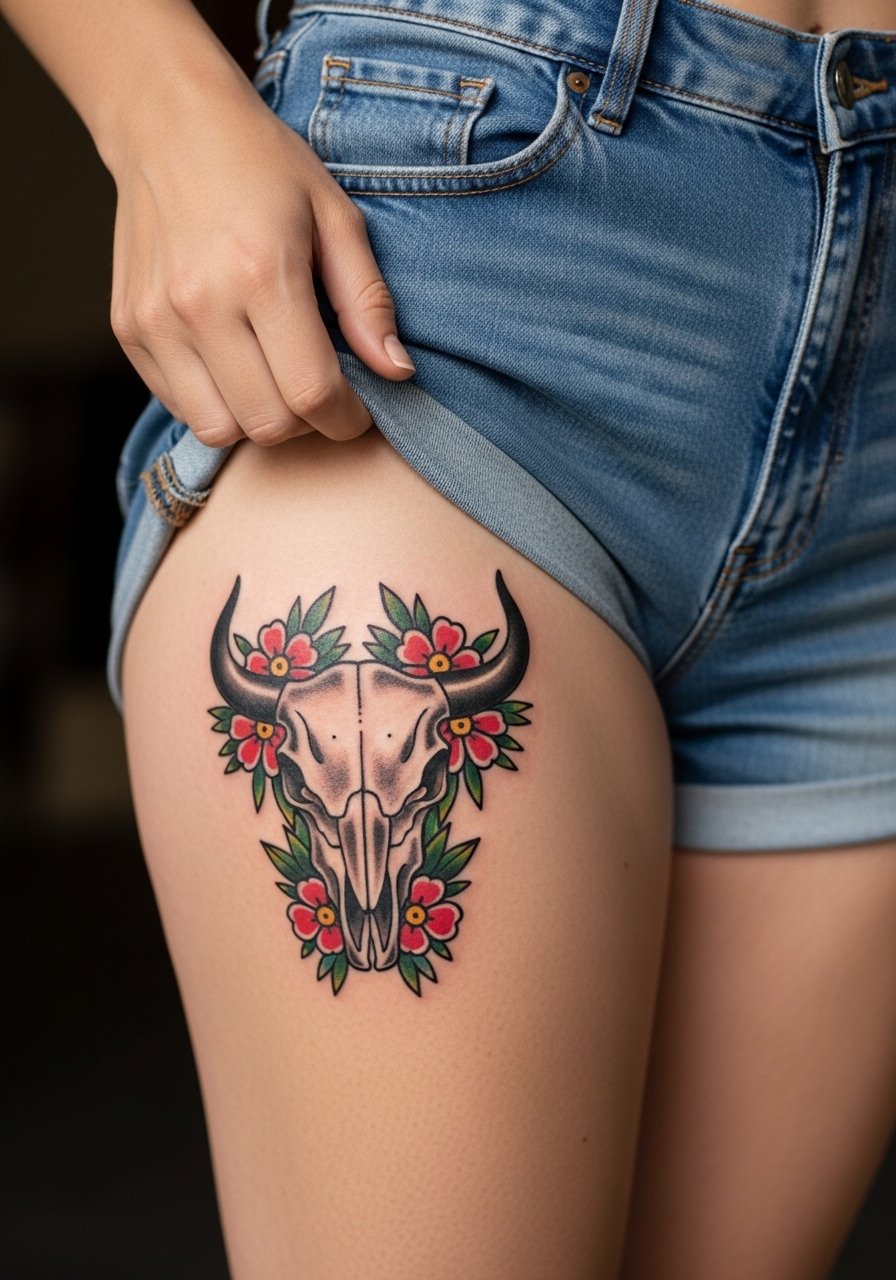
Thighs are forgiving for size and color. I recommend placing blooms to soften jawlines and horn tips so the skull keeps its edge even with weight changes. A real mistake is wrapping too many small petals into a single compact area. Sessions feel longer but pain is moderate. For casual show-off style, slim joggers rolled at the hem or khaki swim trunks men work well for summer reveals and framing.
9. Minimalist Outline Bull Skull, Inner Wrist
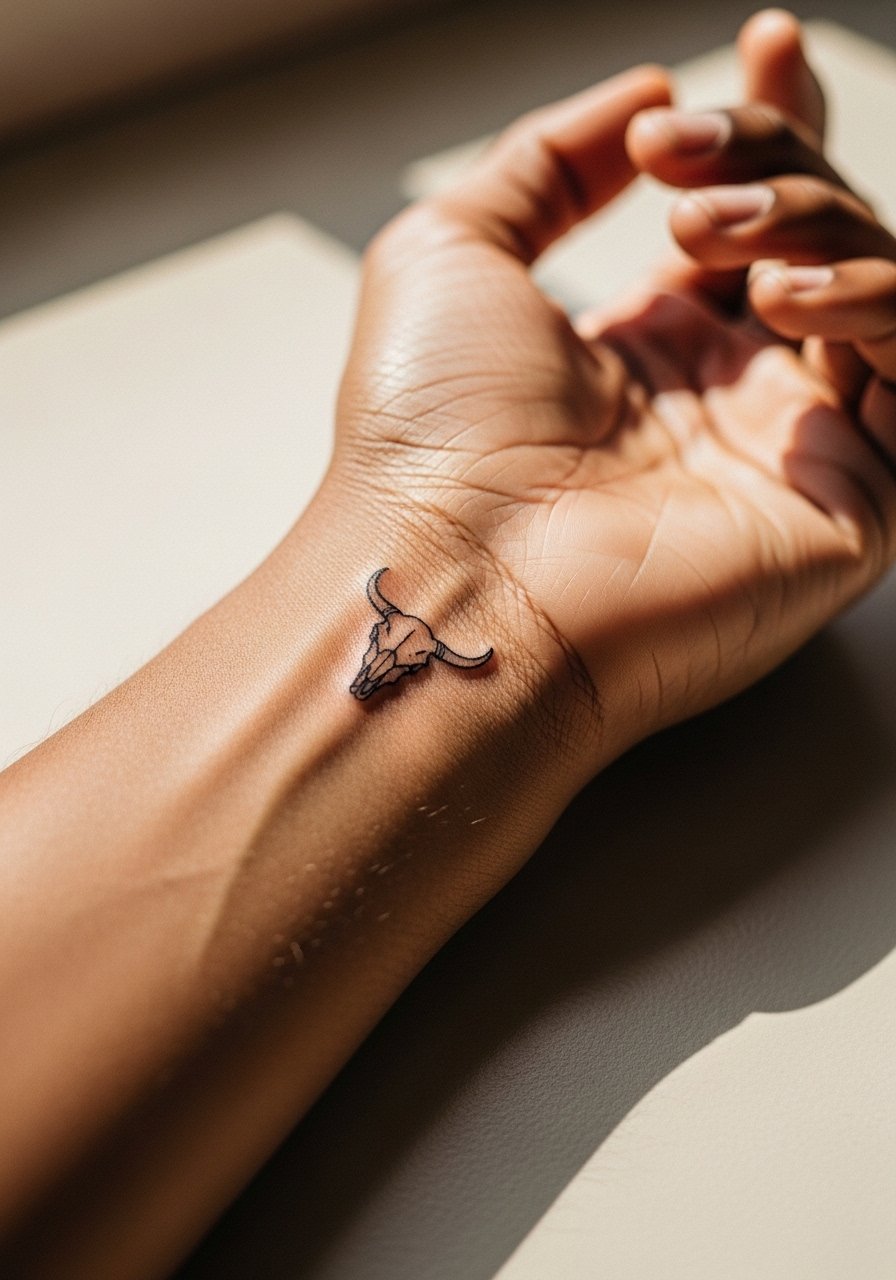
Minimalist wrist pieces read fresh and delicate but have longevity trade-offs. Fine line on the inner wrist can blur from frequent washing and sun exposure. Tell your artist you want slightly heavier outline anchor points and expect a touch-up within two to three years. Sessions are short and sensitivity is higher. For styling pairings, a thin leather wrap bracelet opposite the tattoo frames it without overpowering the outline.
10. Bold Traditional Bull Skull, Outer Bicep
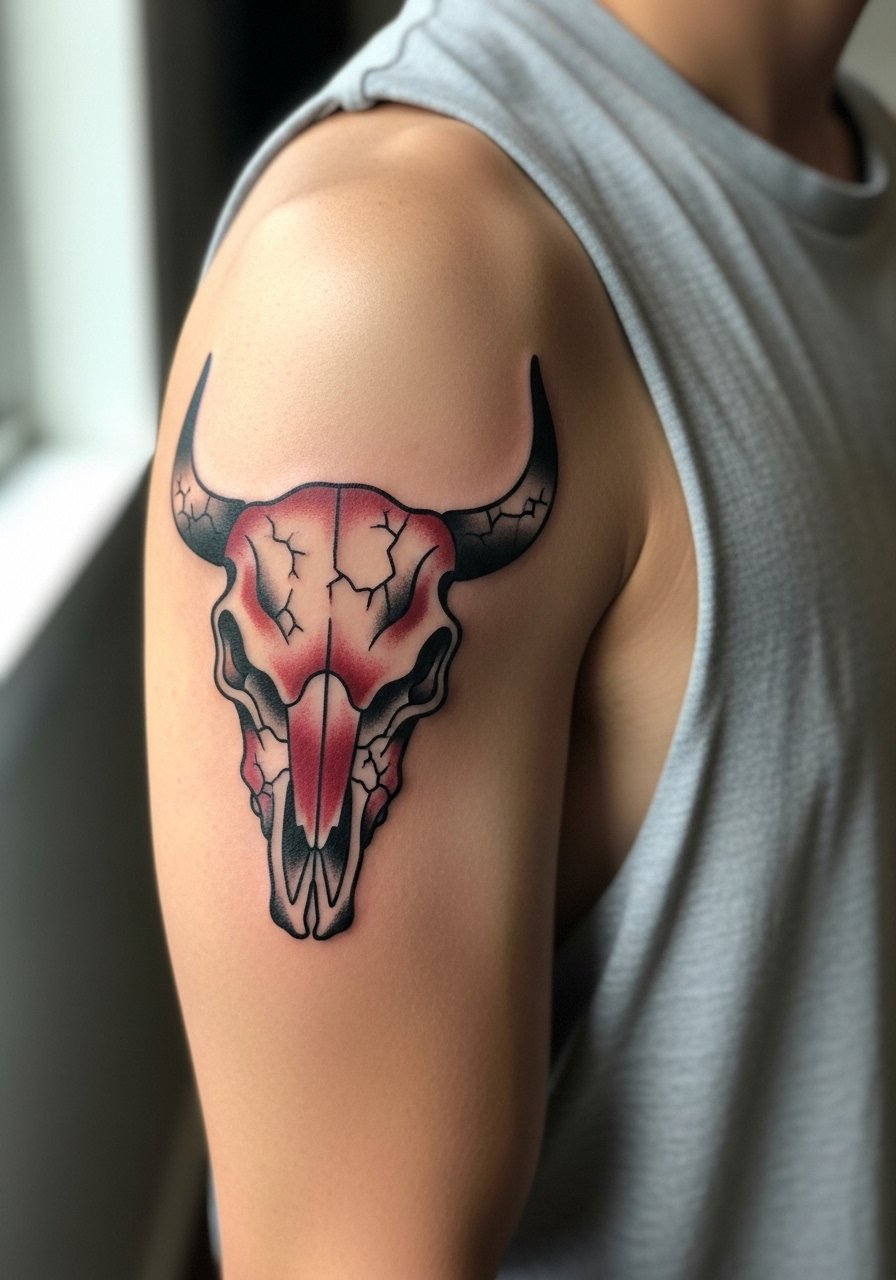
Traditional saturation ages predictably because solid fills resist early fade. For bicep placement request heavy outlines and bold color saturation in the horns so the silhouette stays legible. Mistakes come from asking for tiny traditional motifs in tight spaces. Session length is usually one to two hours with low to moderate pain. Dress for the session in a vintage fit muscle tee that you can slide aside.
11. Negative Space Tribal Horns, Shoulder Cap
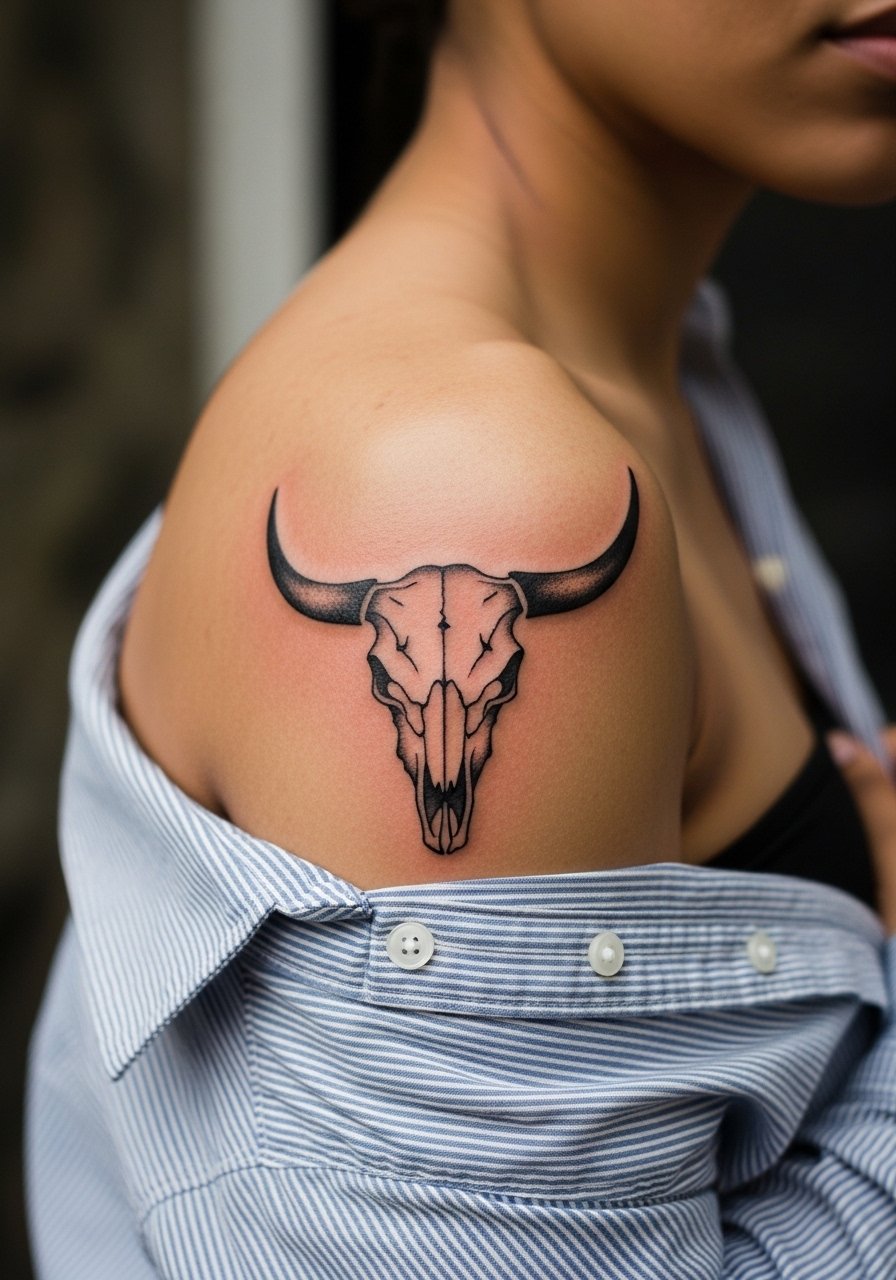
Negative space designs need deliberate gaps. On the shoulder cap, emphasize outer contours and leave skin pockets to maintain horn curvature over time. A common error is converting every negative pocket into a thin line. The shoulder tolerates movement well, so this design can last a decade with minimal touch-up. For outward styling pick a slightly unbuttoned navy button down shirt that frames the shoulder without competing.
12. Celtic-Patterned Horns, Upper Arm Heritage Fusion
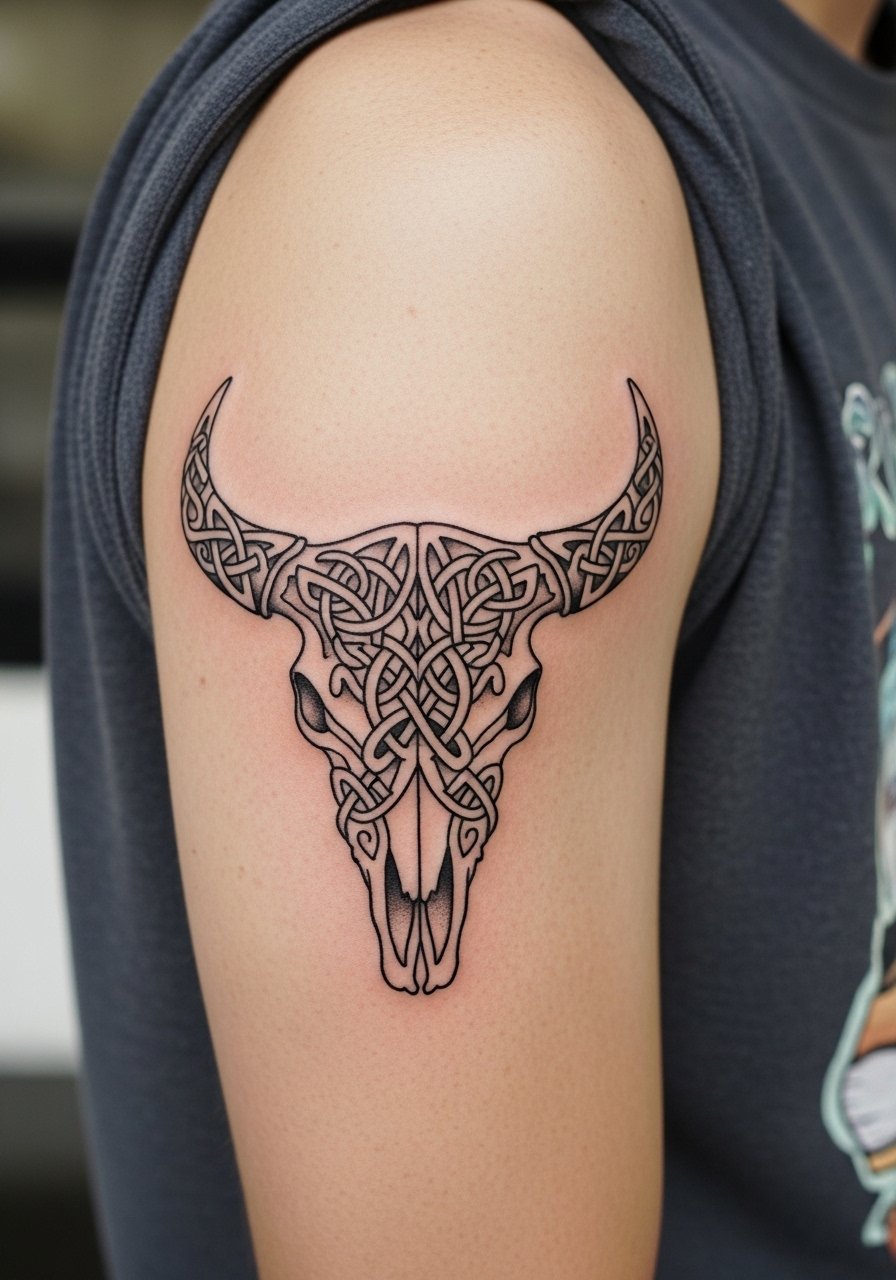
Blending Celtic knots into horn surfaces requires careful flow so the pattern follows horn anatomy. Tell your artist you want the knotwork to contour with the horn curve, not sit flat. A common misstep is inserting symmetric knots that fight the natural horn taper. Session feels like a medium-length appointment and the upper arm handles dense linework well. For the appointment, wear a loose button-down shirt you can pull aside.
13. Halo-Eye Double Exposure, Full Arm
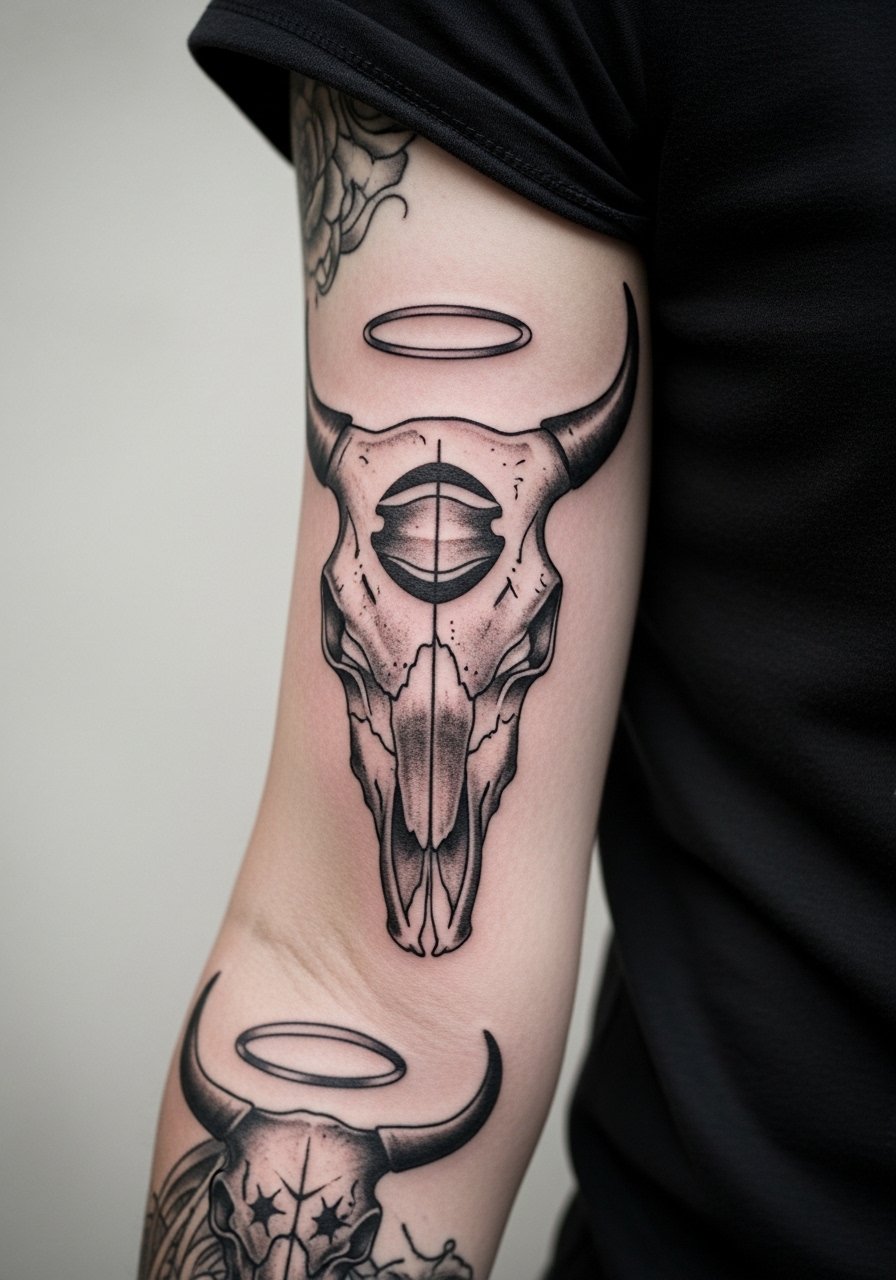
Full-arm double exposure is a commitment. The halo eye needs deliberate negative spacing so the glow reads at a distance. A setup mistake is compressing halos into the skull shadows. Expect four to six sessions and discuss how the eye sits when the arm is flexed. For longevity request heavier anchors at high-movement zones. This piece reads well with rolled sleeves or a short sleeve tee.
14. Raven-Integrated Bull Skull, Ribs for Rebirth Motif
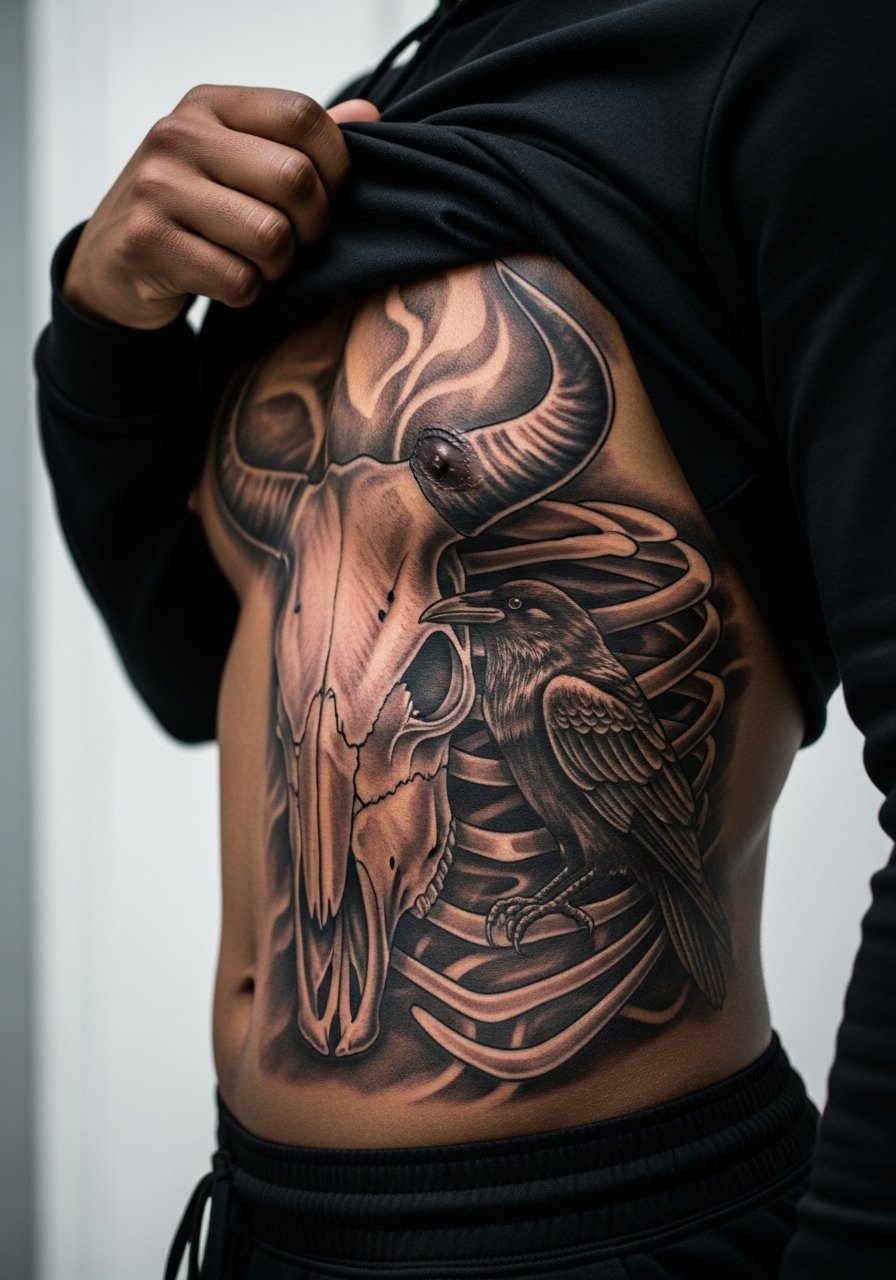
Ribcage work carries high sensitivity but dramatic payoff. For a raven motif that symbolizes rebirth, ask for strong contrasts between feather texture and skull saturation to avoid blending. Artists disagree on rib fine line. One camp says stretch blurs thin lines fast. The other says with correct needle depth and spacing it lasts. Name your preference in consultation and plan a follow-up touch-up. Session will be intense and recovery needs low-pressure clothing.
15. Micro-Realism Horn Texture, Calf Close-Up
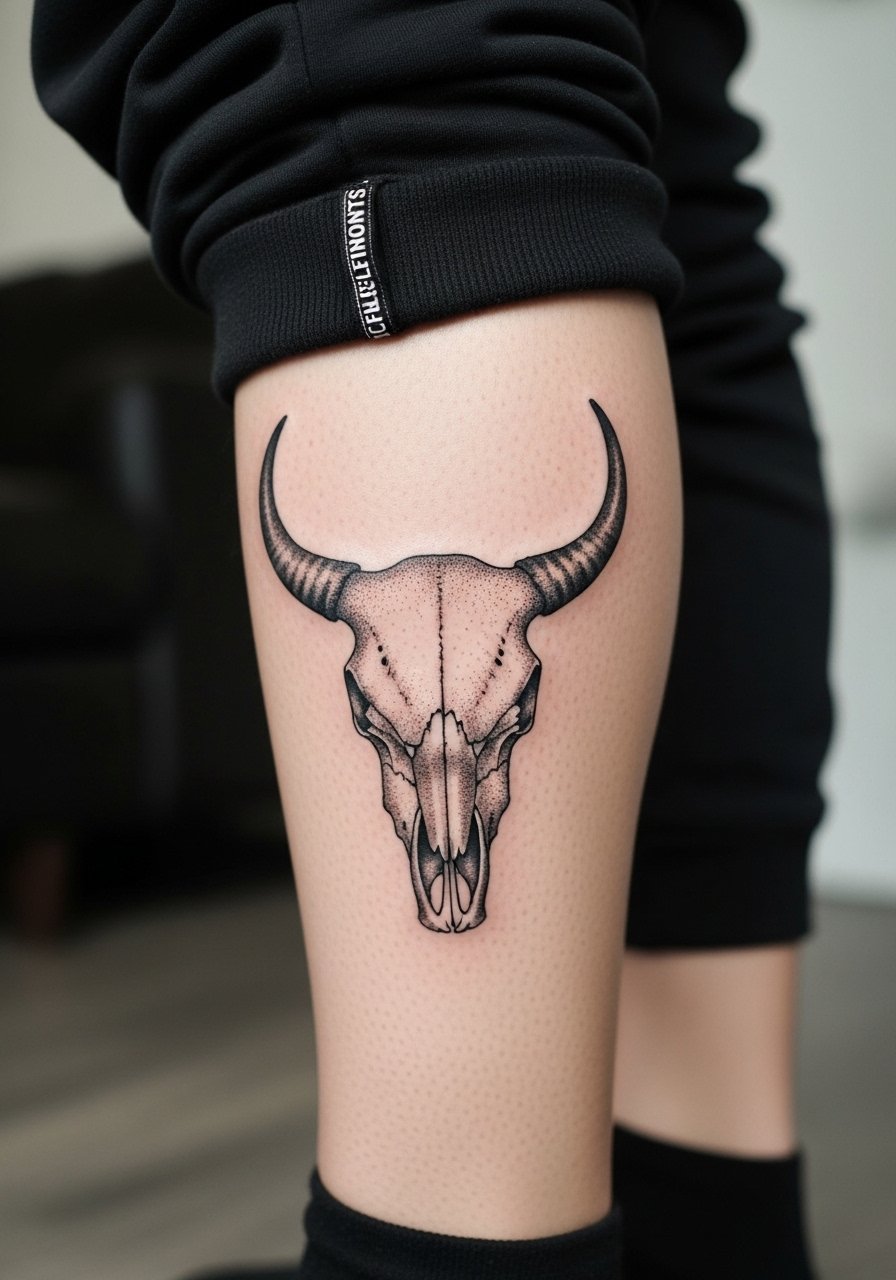
Micro-realism depends on saturation density. On the calf you can ask for subtle stipple and whip shading to model horn grooves. Avoid insisting on tiny etched crosshatches if you want longevity. Micro-detail tends to blur faster on high-friction or sun-exposed areas. Sessions may run a couple hours and touch-ups at two to three years are common. Pair with pull-up sweatpants or bootcut straight jeans for a rugged reveal.
16. Mandala Bull Skull, Full Back Panel
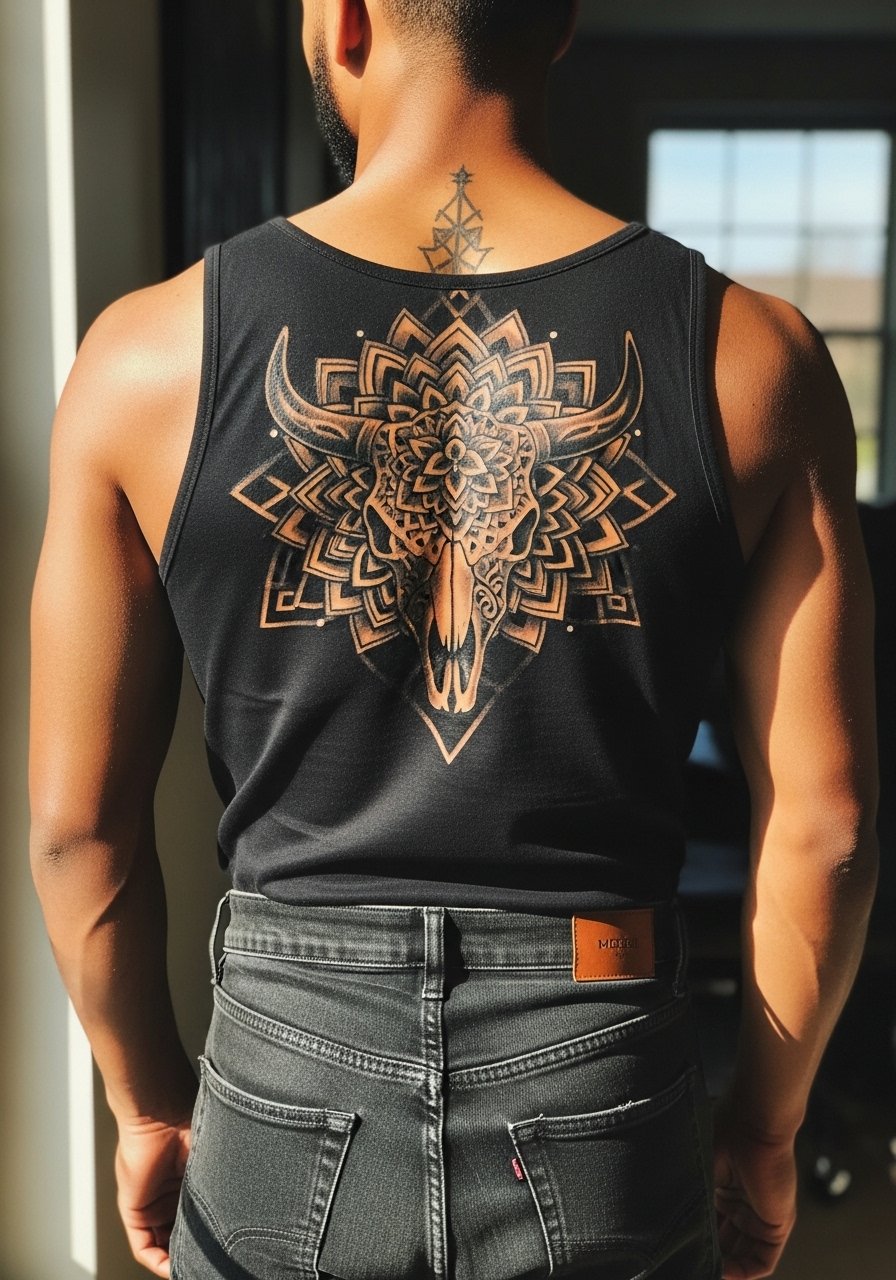
Large back mandalas win when they are spaced for long-term readability. I recommend keeping mandala rings looser toward edges and denser near the skull so the center holds. A major mistake is packing too many concentric dots, which tighten into a gray mass. Sessions usually require multiple long sittings. For showing off, choose a backless tank top that frames the mandala without cutting into it.
17. Geometric Negative Space Sternum Skull
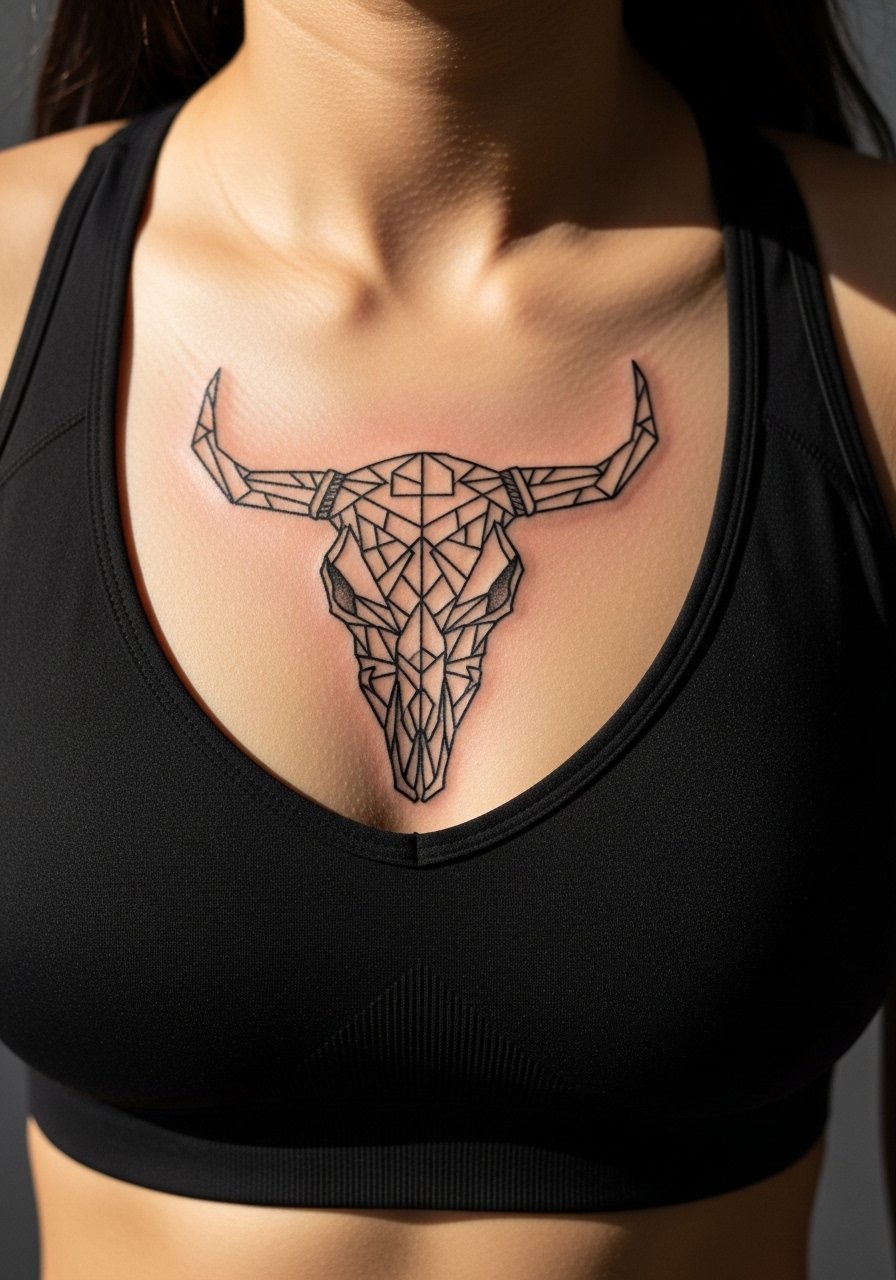
Sternum geometry is high sensitivity and needs measured spacing. Ask for bolder anchor lines across the sternum and deliberate negative zones so breathing does not collapse shapes. Common error is adding too many micro lines over the sternum itself. Sessions are shorter but more intense, and healing requires supportive clothing. Mention sensitivity to the artist and expect a controlled touch-up later.
18. Crescent Moon Horn Accent, Collarbone
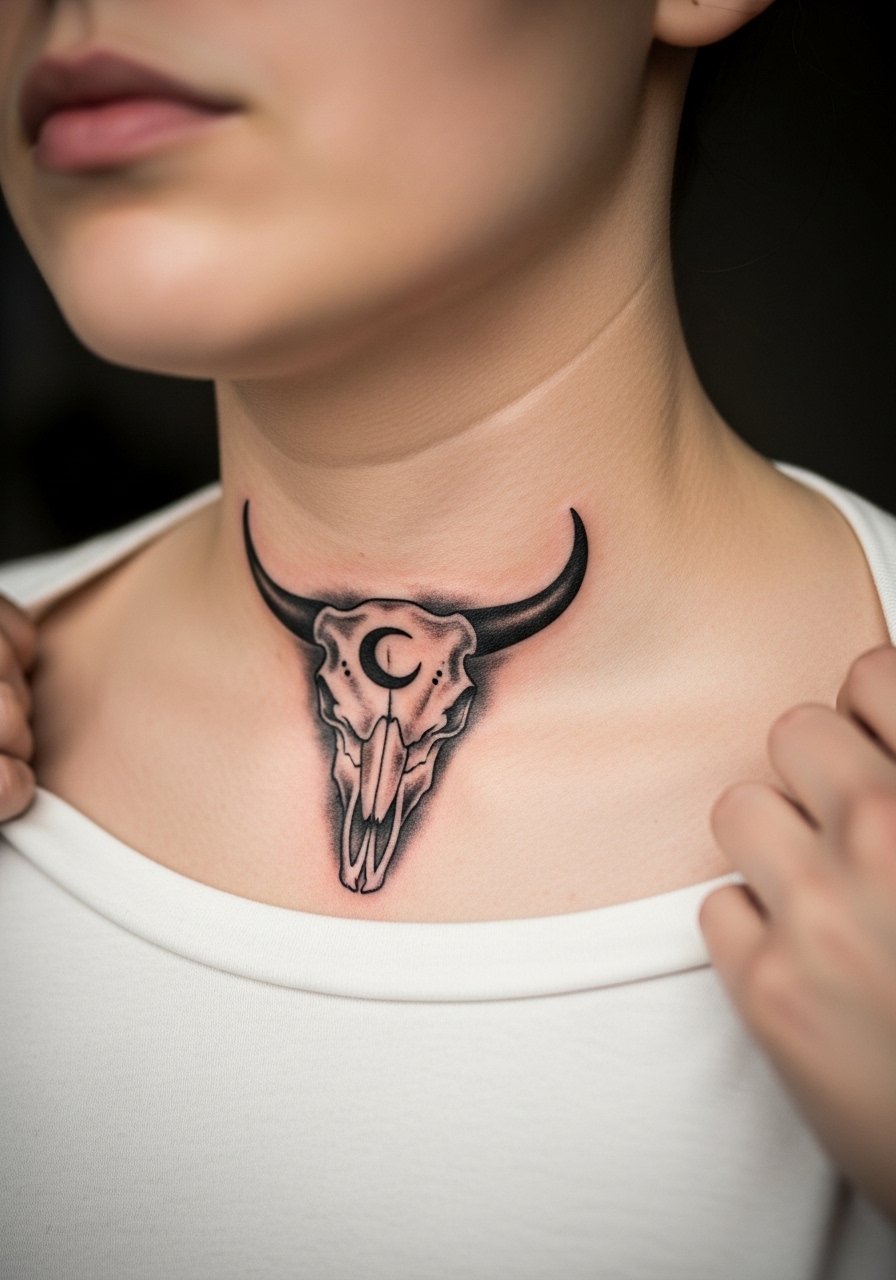
Collarbone pieces need confident linework because bone contours can thin ink contrast. For this placement, instruct your artist to emphasize the moon accent with negative space and subtle stippling around the skull. A mistake is over-detailing the area where skin stretches against clothing. Pain is moderate and healing can be finicky. For styling, a gray henley shirt or deep v works to reveal the curve.
19. Mirrored Double Skull, Lower Back
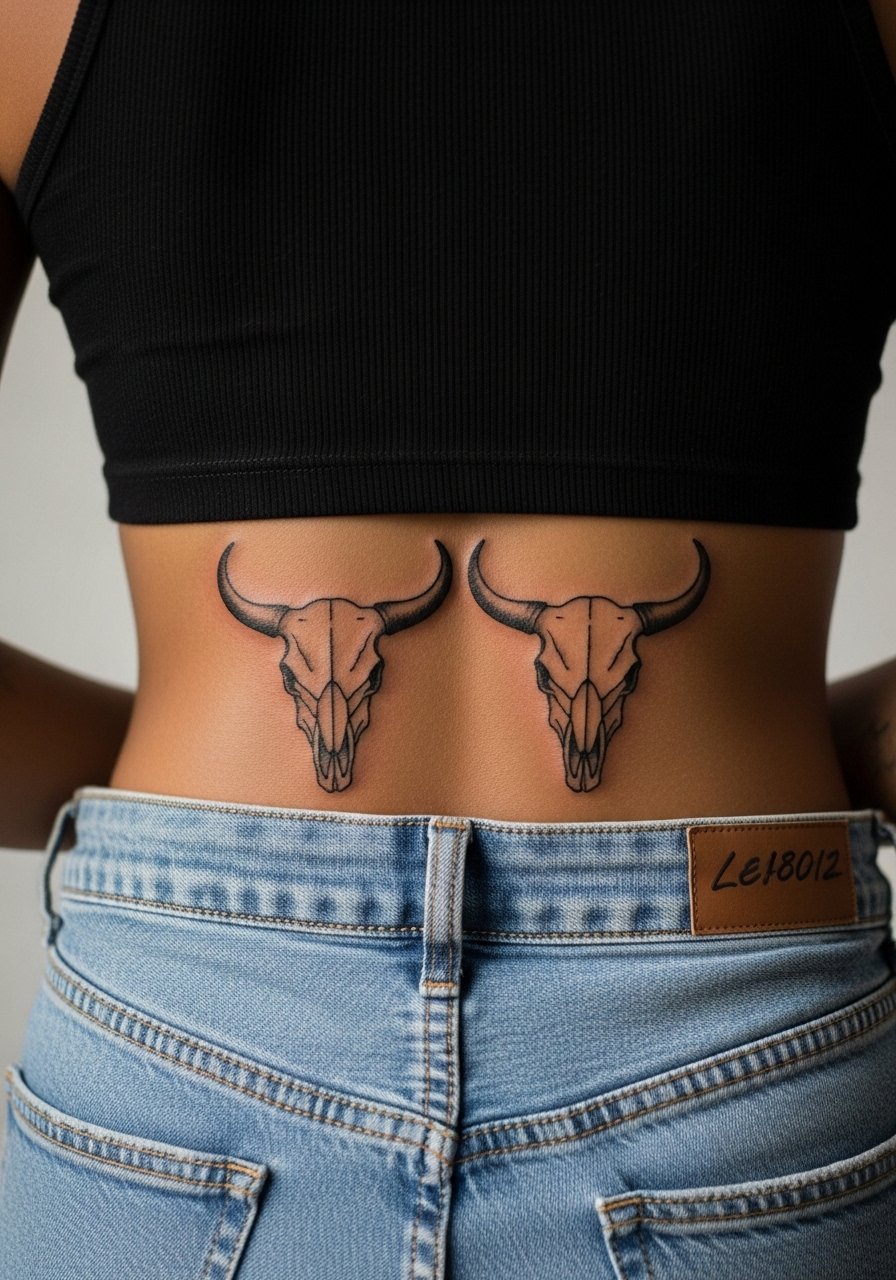
Lower back symmetry benefits from muscle-aware placement. Ask for the midline to align with natural lumbar curves so the mirror effect reads while standing. A common issue is placing the axis off center, which makes mirrored pieces look uneven. Pain is lower but be mindful during sessions about long prone positions. For nights out a tank top with high-waisted jeans or shorts frames the lower back piece attractively.
20. Tiny Dotwork Bull Skull, Ankle
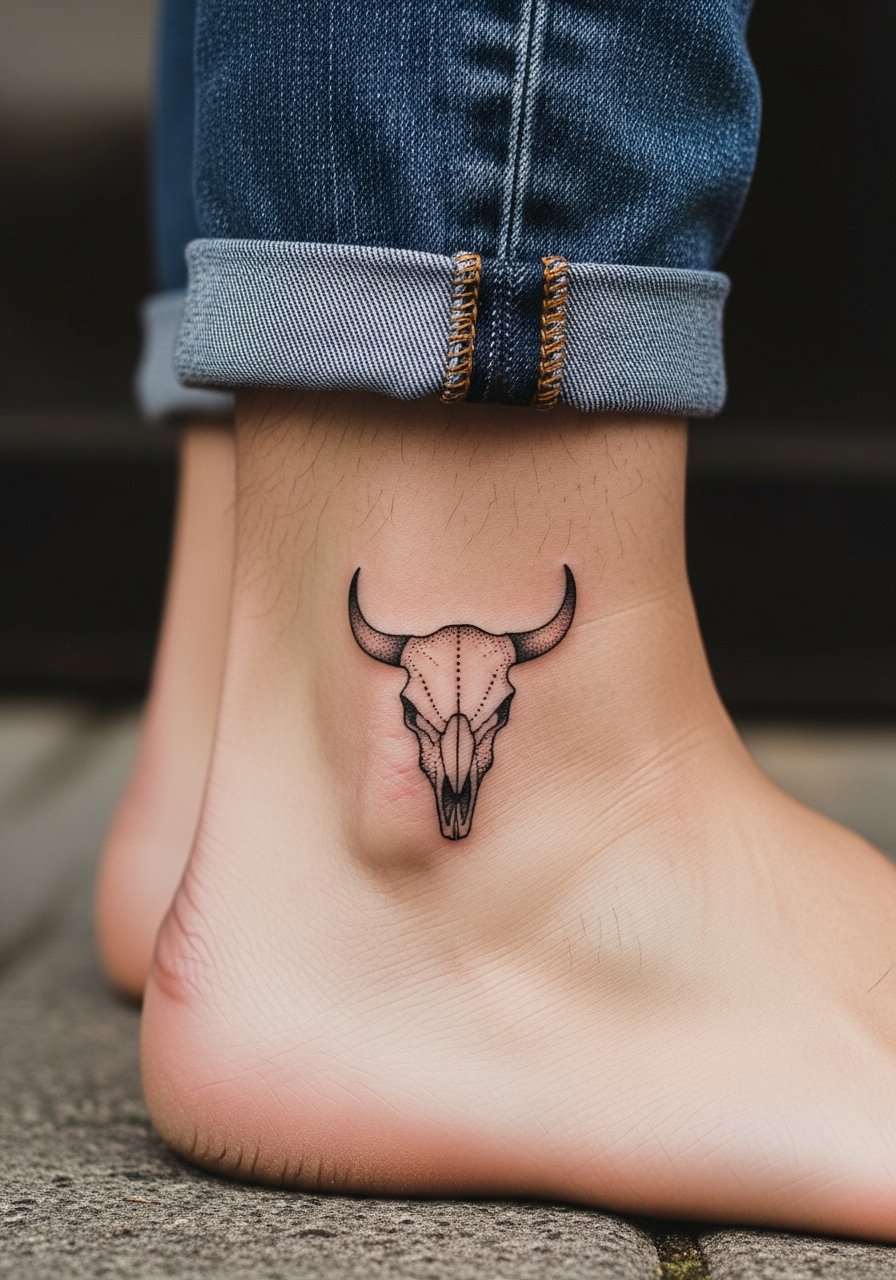
Ankle tattoos face frequent friction from socks and shoes. Dotwork fine detailing can soften quickly if placed right at a sock line. Tell your artist to raise the placement slightly away from friction zones and to use slightly denser dots. Session is quick and pain is moderate to high. For showing the piece, roll jeans and wear sandals or a simple crew athletic socks tall when healed.
21. Half-Arm Tribal Band with Bull Skull Integration
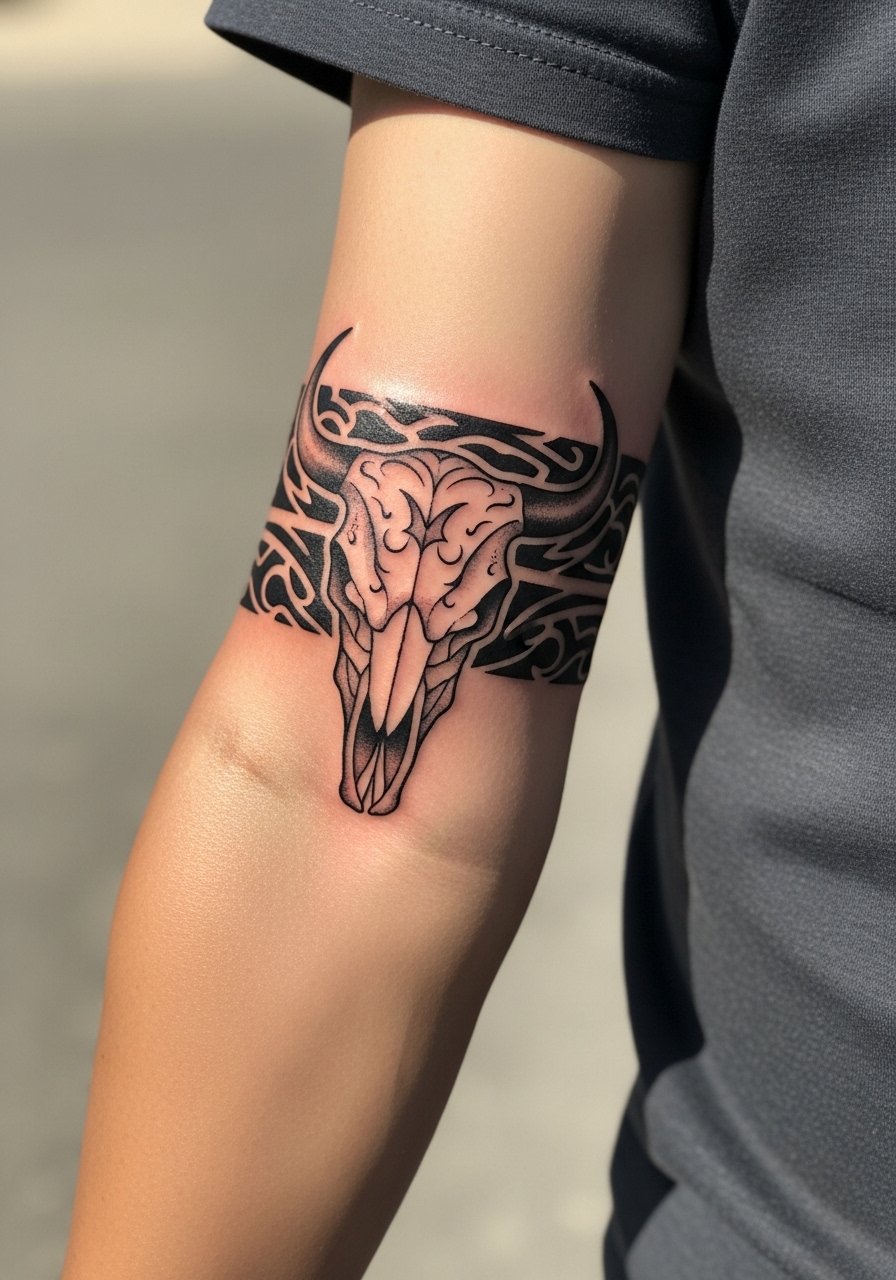
Band work must respect muscle flow. Integrate the skull so horn curves follow the arm's natural twist. A typical error is making the skull sit flat against the band and lose depth when the arm turns. For durability ask for heavier anchor lines along the band edges. Sessions are multiple and touch-ups help keep the band crisp. For a framed look, a leather cuff or rolled sleeve pairs well.
22. Neo-Traditional Thigh Panel with Saturated Horn Accents
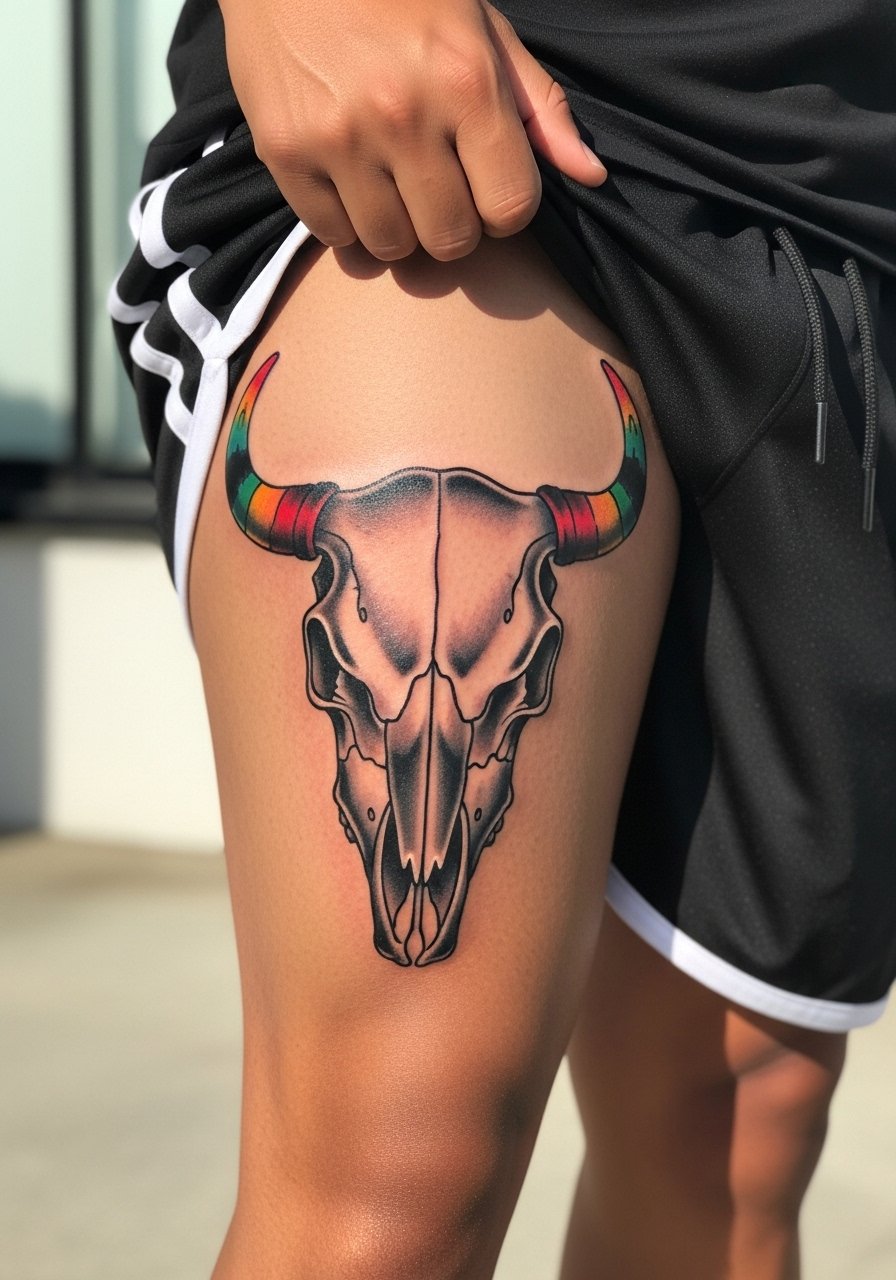
Thigh panels let color breathe. Neo-traditional shading layers keep the horns dimensional with fewer sessions if pigmented correctly. Mistakes include expecting one coat of color to last. Plan for two to three color passes and ask about session spacing to reduce trauma. For showing the piece pick slim joggers rolled at the hem or high-cut swim trunks when summer comes.
23. Bull Skull and Snake, Rib-to-Hip Flow
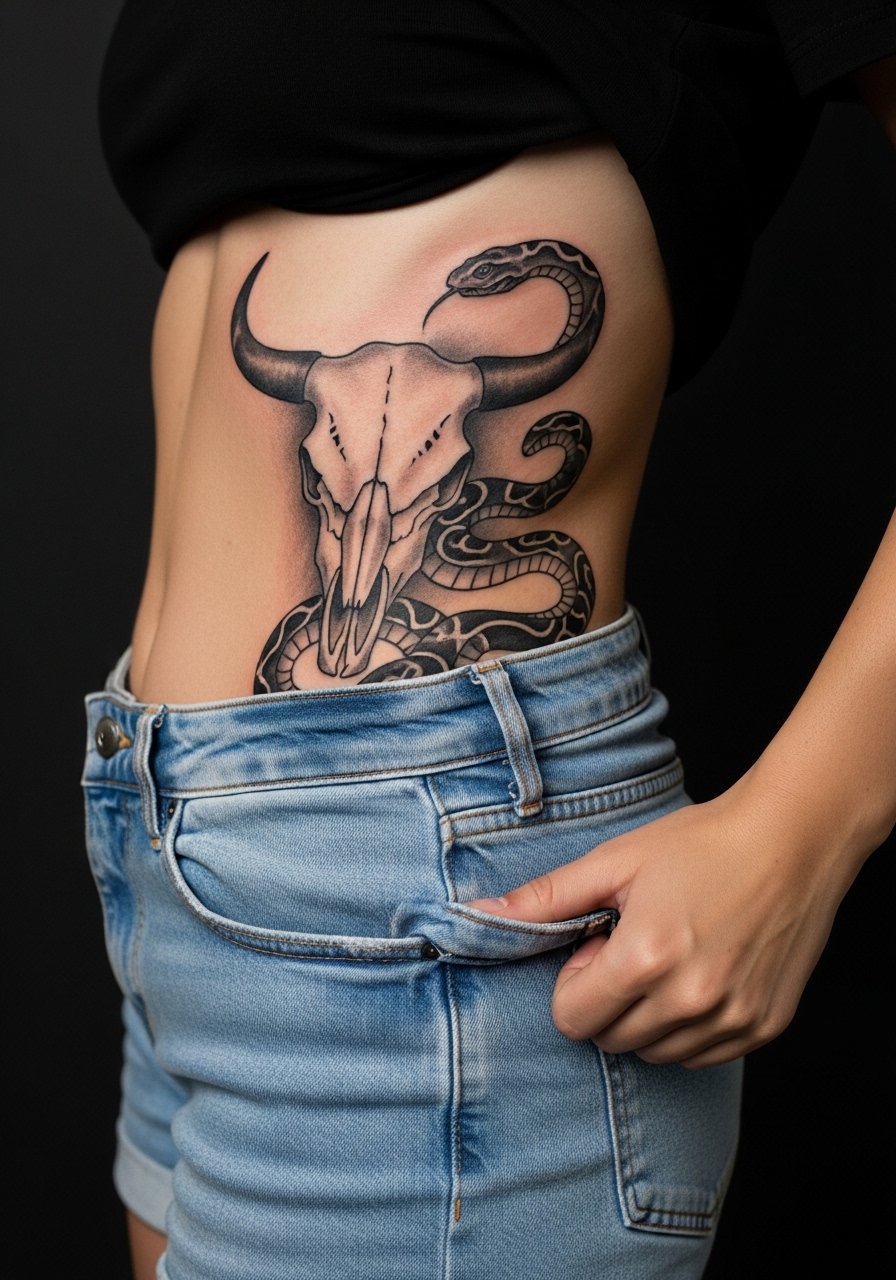
Flow pieces that run rib to hip need a map that accounts for body curve. Ask for the snake to follow muscle lines so movement looks intentional rather than distorted. A mistake is letting the snake cross high-flex zones without spacing, which causes blurring. Sessions are long and healing requires loose clothing. Plan for a follow-up touch-up once the first swelling subsides.
24. Tiny Bull Skull Behind the Ear, Subtle Neck Placement
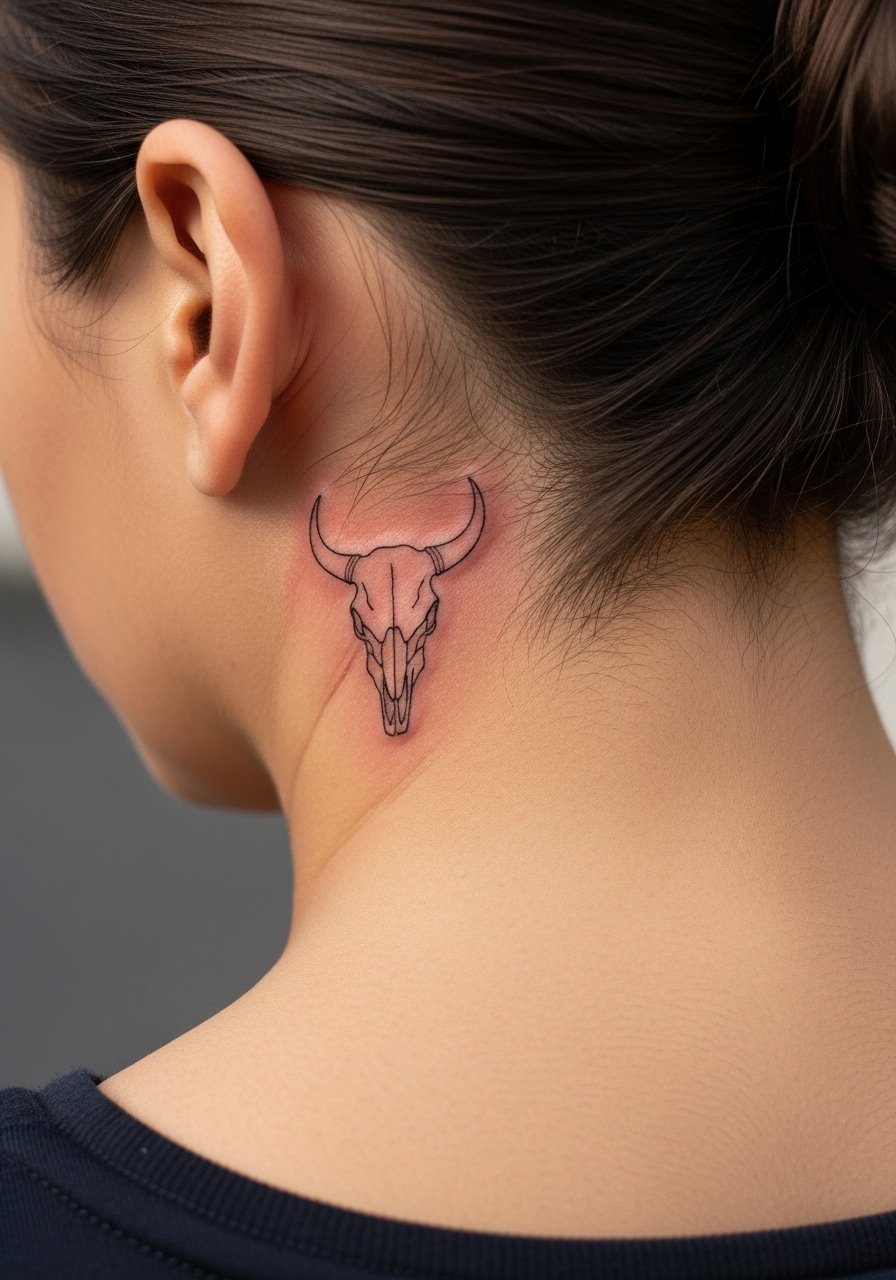
Behind-the-ear work reads tiny and intimate. For longevity avoid excessive fine filigree and request slightly bolder silhouette lines so the piece does not disappear into pore texture. Placement there is delicate and needs an artist experienced with small neck placements. Session time is short but precision matters. Keep in mind visible neck ink can have social considerations.
25. Mandala Sleeve Continuation, Elbow Cap to Wrist
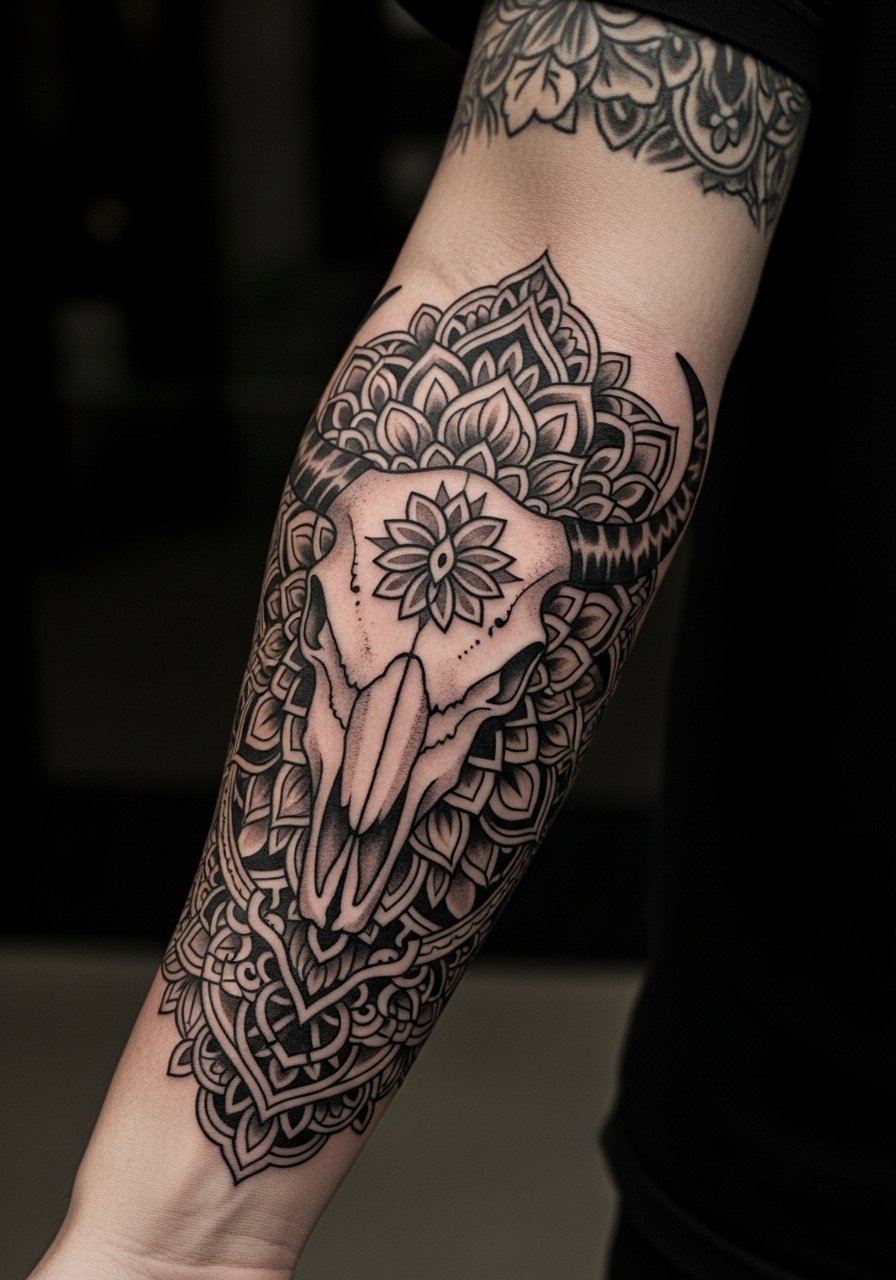
Sleeve continuation must honor existing line spacing. Ask for consistent line weight transitions between elbow cap detail and wrist finery so the mandala reads as one piece. Mistakes come from mismatched dot density between old and new work. Expect multiple sessions and a staged plan. For the session wear a loose tank top so the artist can access the elbow and forearm comfortably.
26. Geometric Forearm Wrap, Negative Space Horns
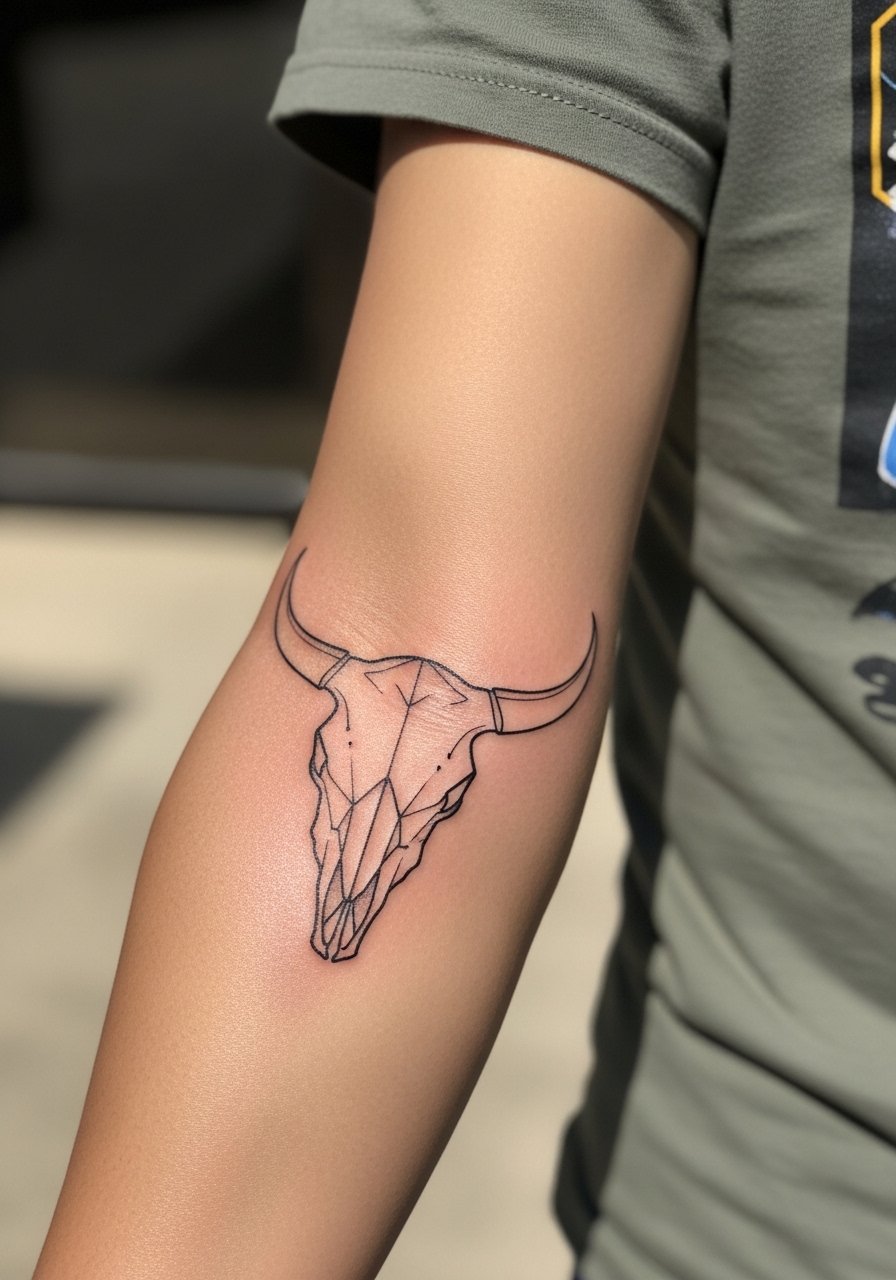
A wrap design must flow around the forearm. Ask the artist to test the piece in both flexed and relaxed positions before committing. The biggest mistake is ignoring how the wrap meets at the inner forearm crease. Sessions are multi-stage and touch-ups usually at one year. For show-off wear a fitted black tee rolled sleeve that keeps the negative horns visible.
27. Small Ankle Skull with Floral Sprig Accent
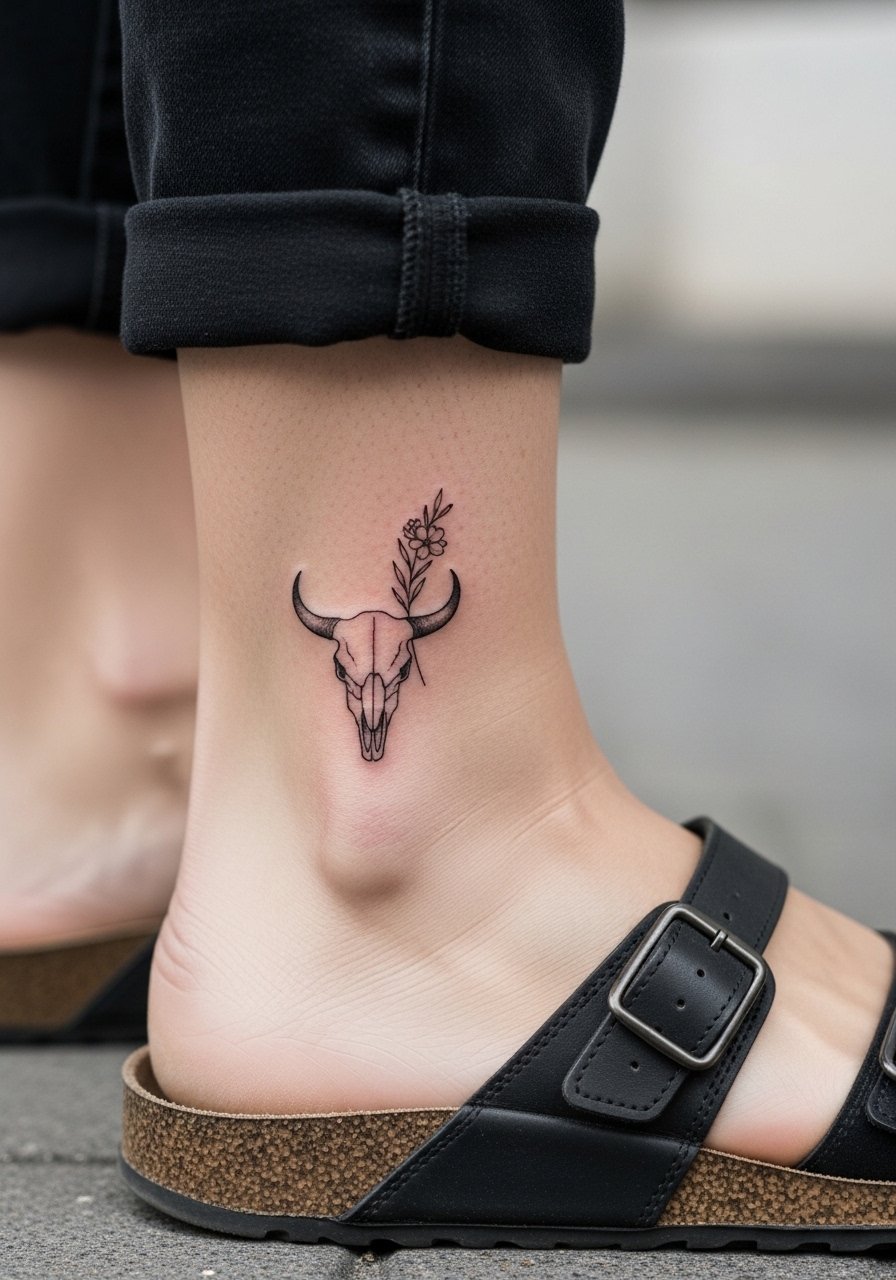
Ankle floral accents soften the skull while keeping contrast. Keep the skull small but anchor it with a slightly denser outline so the sprig does not swallow the shape over time. A common error is letting the floral sprig sit across a high-friction zone. Sessions are short and after initial healing wear ankle-exposing shoes. For warm months pick sandals that show the ankle or rolled slim joggers.
Frequently Asked Questions
Q: Will fine line bull skulls blur faster on ribs and inner biceps?
A: Yes, those zones move and stretch more, so fine line has a higher risk of softening. Ask your artist to space lines and add anchor points, and plan for a touch-up at year two or three if you want crisp contour.
Q: How should I test horn placement for a forearm piece so it does not distort when I flex?
A: Have the artist apply multiple stencil positions and move your forearm through flex and relax poses. Pick the position that keeps horn tips off major muscle bulges. Carry a photo of your arm flexed so you and the artist reference the same stance.
Q: Do black and gray realistic skulls need a different session plan than neo-traditional color skulls?
A: Yes, realism requires layered shading and subtle saturation, which often means longer or multiple sessions. Neo-traditional color usually uses larger saturated fills and can be paced differently. Discuss session length and color passes during consultation.
Q: Which wardrobe items should I bring to a shoulder or chest session for easy access?
A: Bring a loose button-down shirt that you can slide aside, and a tank or zip-up hoodie for comfort while healing. Loose clothing reduces friction on fresh ink and makes the artist's job easier.
Q: Are there design choices that help a bull skull age better on darker skin tones?
A: Heavier anchor lines and higher-contrast blackwork tend to retain form longer on darker skin. Ask your artist about saturation strategies and test small anchor areas first. Good line placement and planned touch-ups help maintain clarity across skin tones.
Q: How do I find artists who specialize in geometric or mandala bull skulls in smaller cities?
A: Use discovery paths like #GeometricSkull and #BullSkullTattoo on Instagram, search Tattoodo with style filters, and check YouTube portfolios. Artists who travel often post guest spots and convention schedules there.
