
Bold blackwork on the outer forearm reads loud without saying much, and that makes it one of the most forgiving places for a statement piece. The style holds up because saturation and clear linework age into crisp contrast, not a soft blur. Below are precise design ideas, what to tell your artist, how they heal over years, and small wardrobe moves that make each piece pop.
1. Solid Bandwork Wrap on Outer Forearm
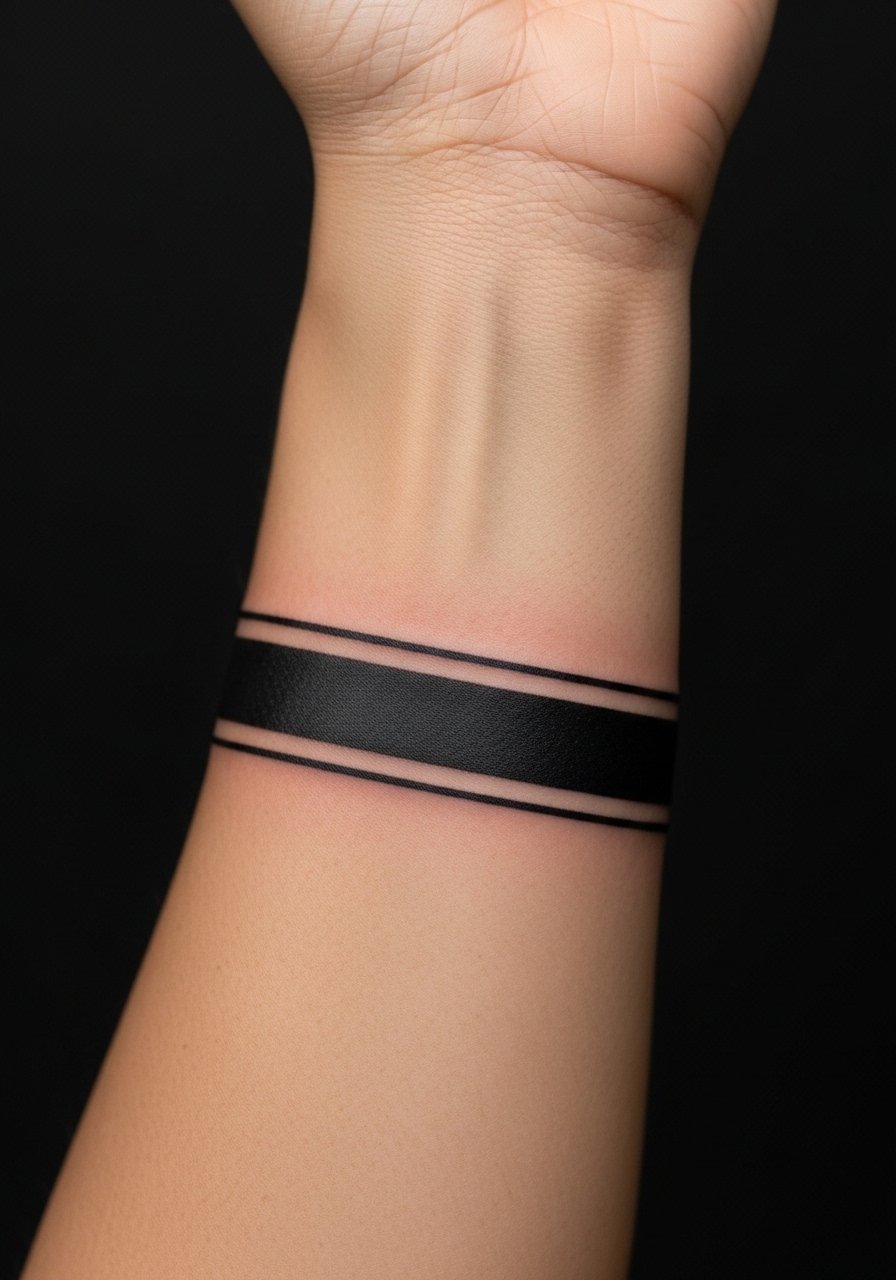
Personal observation lead: I see solid bands last longer than tiny script because the saturation stays readable as skin ages. Tell your artist you want even saturation and slightly rounded corners so corners do not open into lines over time. Pain is low to moderate for the outer forearm and a single session of 30 to 60 minutes usually does it. Common mistake is going too thin for a bold look, which leads to patchy fill at year two. For showing it off, short-sleeve shirts with a rolled cuff button-down frame the band without crowding it.
2. High-Contrast Checkerboard Panel
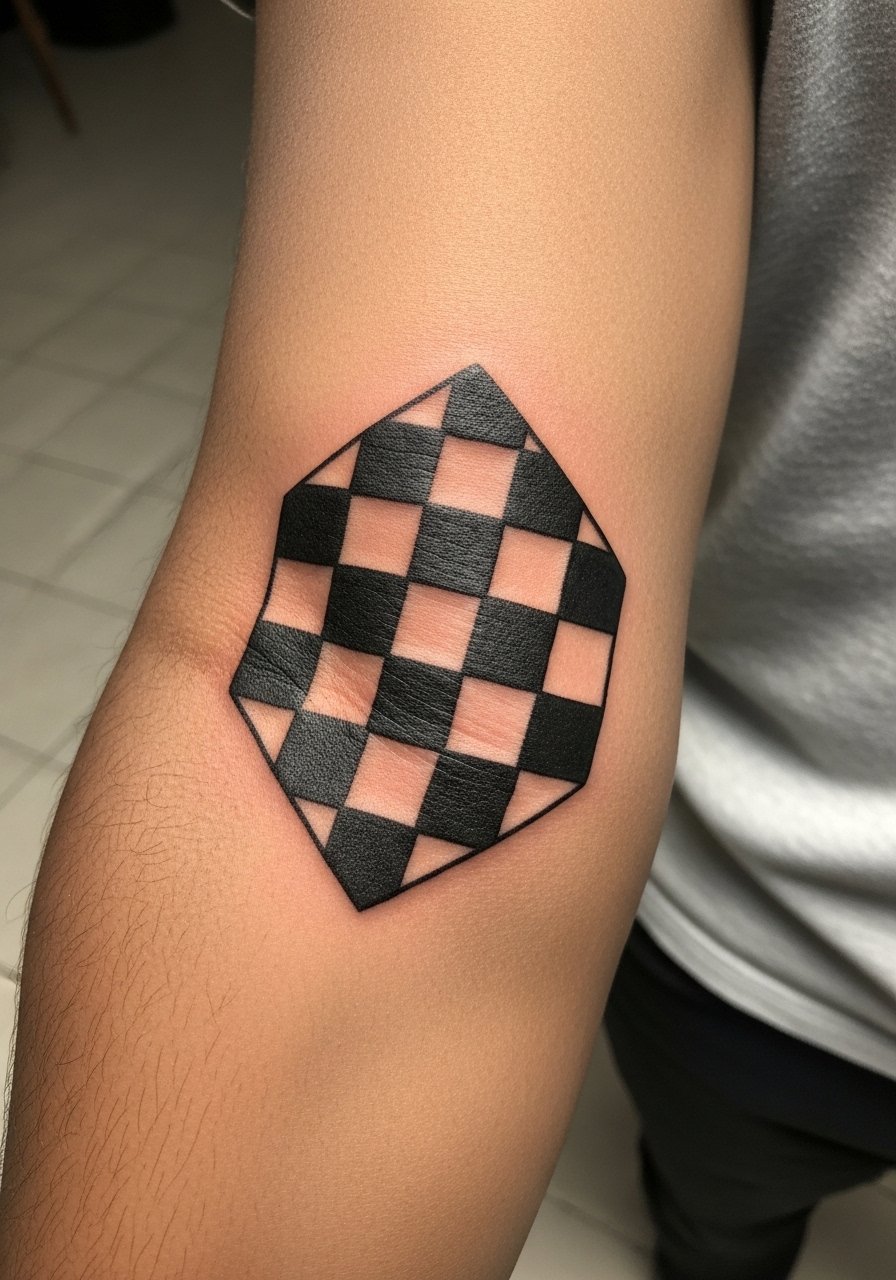
Pain warning lead: the outer forearm is forgiving but dense fills sting more than thin lines, expect a 45 to 90 minute session. Ask for slightly wider cell spacing so the checkerboard reads at two years rather than merging. A common version that ages poorly uses ultra-tight squares that blur into gray. Blowout risk is low here, but insist on the artist sitting back to check scale at normal viewing distance. For wardrobe, pair this with a short-sleeve black tee to let the high contrast read from across a room.
3. Oversized Floral Silhouette in Blackwork
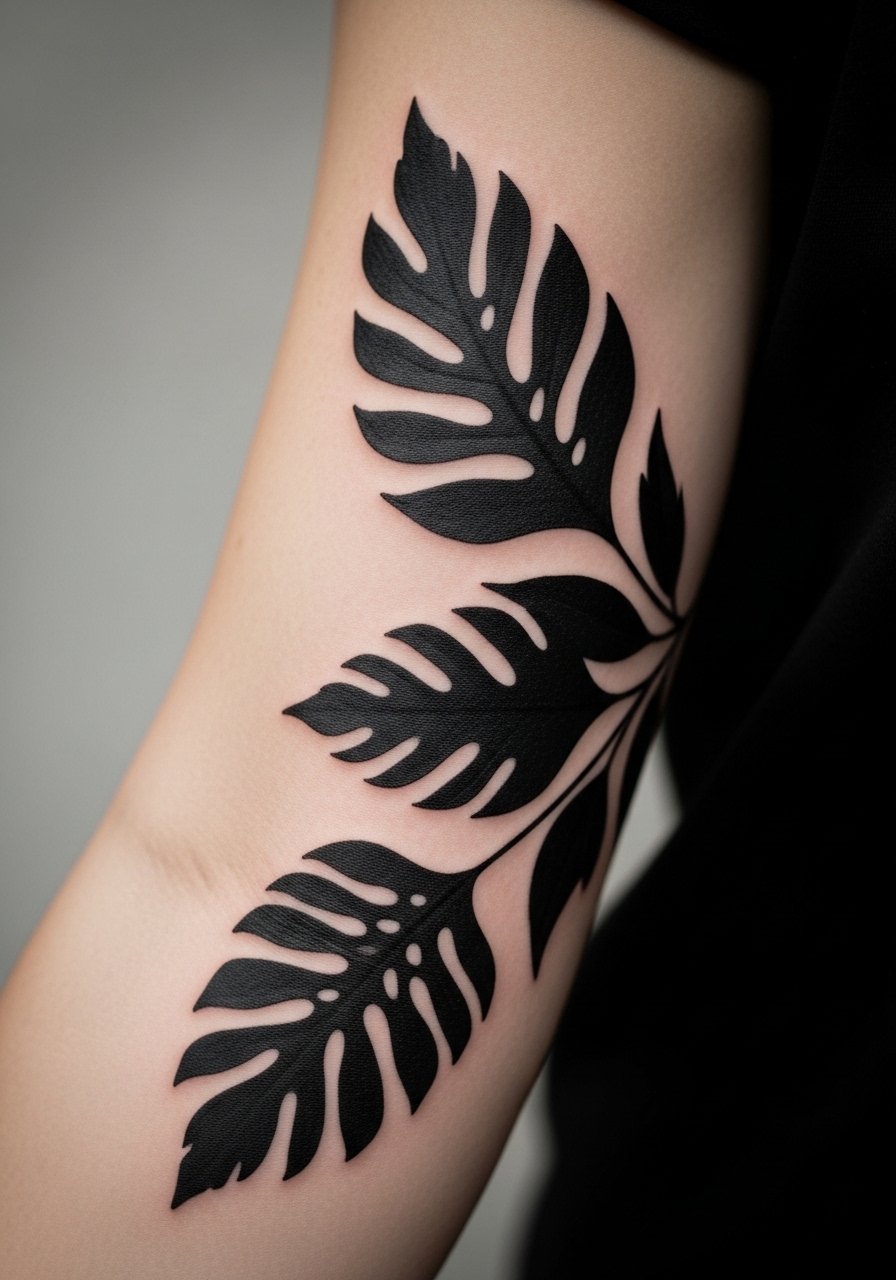
Aging and healing lead: large black silhouettes tend to age into elegant shapes because saturation softens into clean silhouettes, not smudges. Tell your artist you want broad negative space around petals so the floral remains distinct at five years. Session time is typically one long sitting of 90 to 150 minutes for full saturation. A common mistake is over-detailing tiny veins inside petals, which blur faster than the silhouette. Style this with a linen long-sleeve shirt worn rolled up to highlight the silhouette without visual clutter.
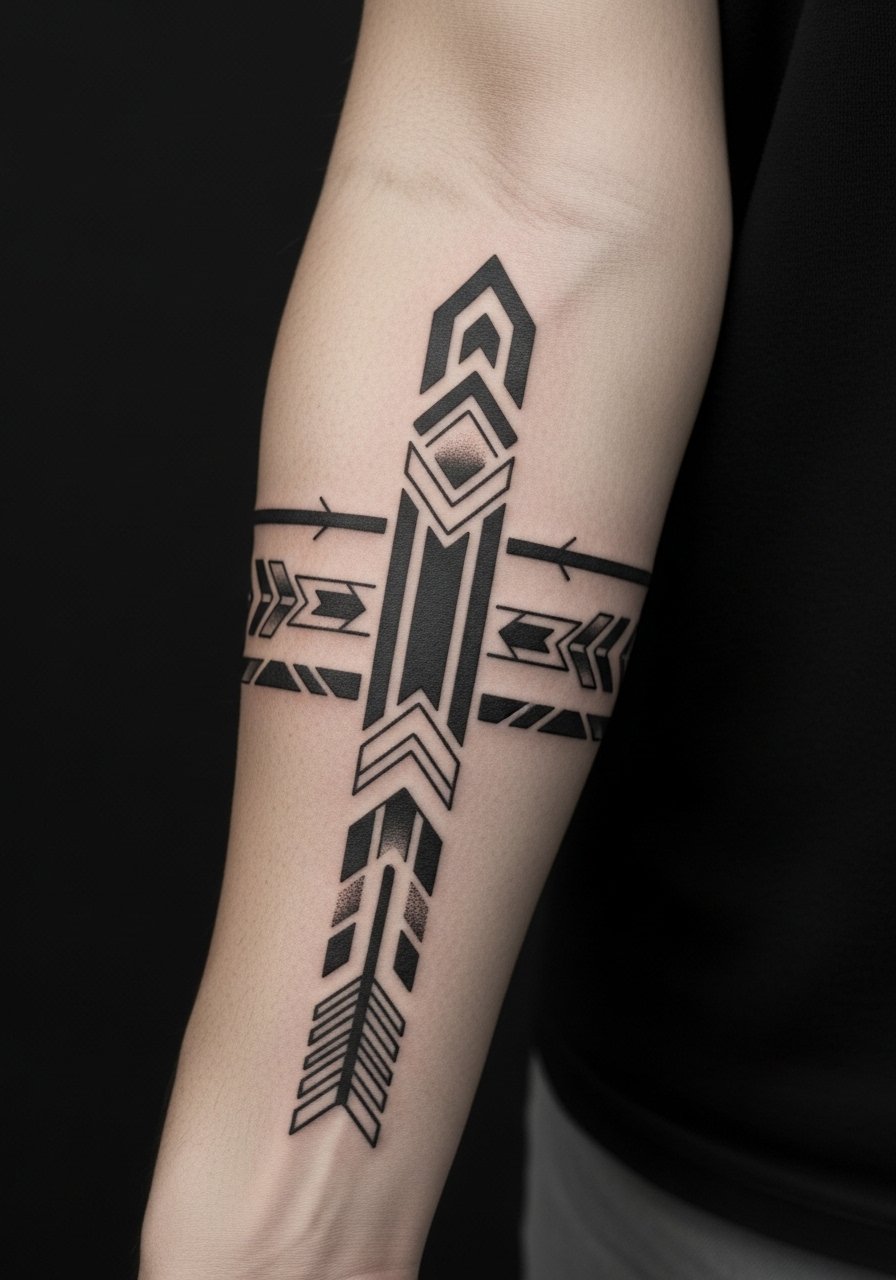
4. Geometric Arrow Panel Pointing Down the Arm
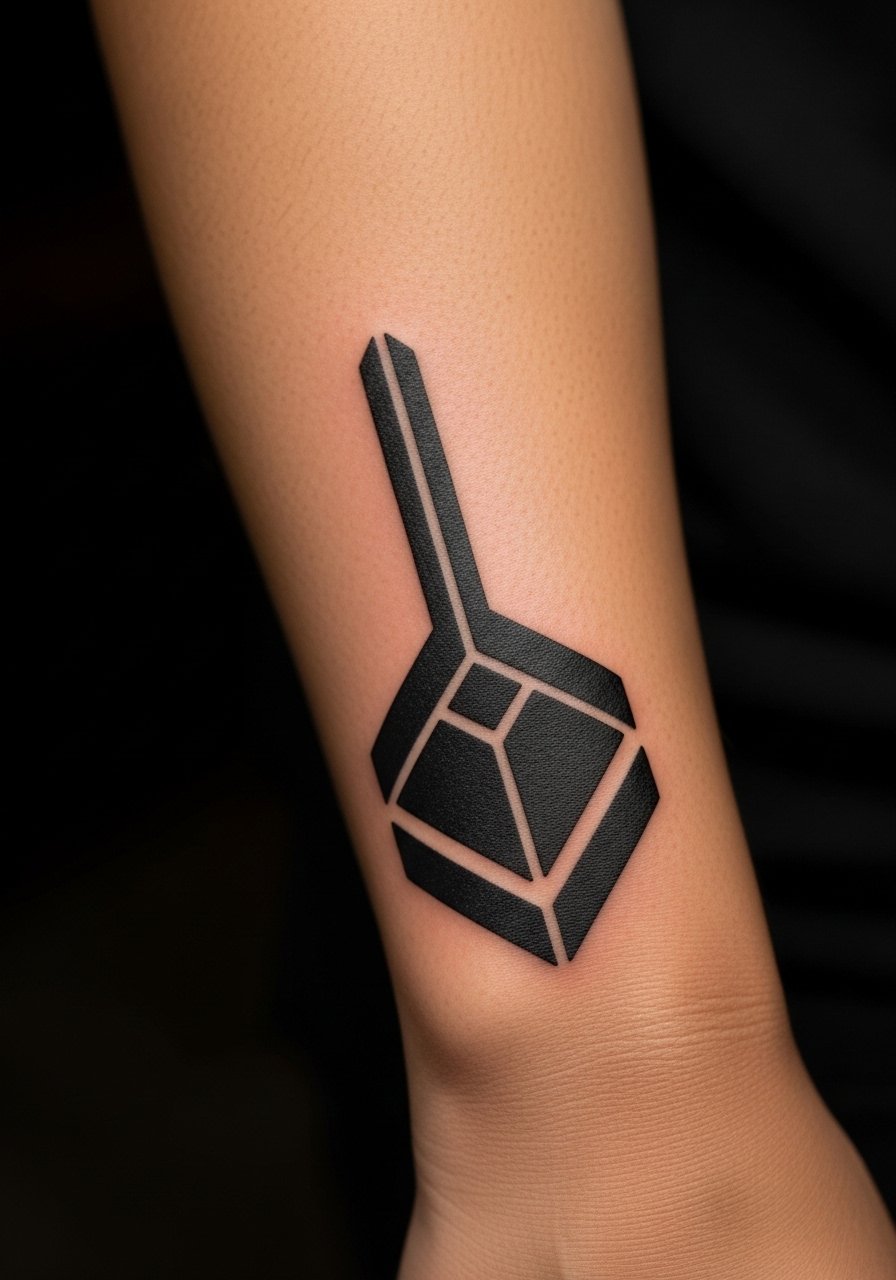
Visual impact lead: an arrow panel reads directional and clean when linework is bold and spacing is deliberate. For longevity ask for slightly heavier linework than a fine line arrow so the edges stay crisp. Expect a 45 to 90 minute session and mild to moderate discomfort near the wrist. A mistake is squeezing too much tiny geometry into a narrow strip, which creates visual noise as lines blur. For showing off, a minimal leather cuff bracelet sits just above the wrist without cutting into the design.
5. Script Block in Heavy Blackwork
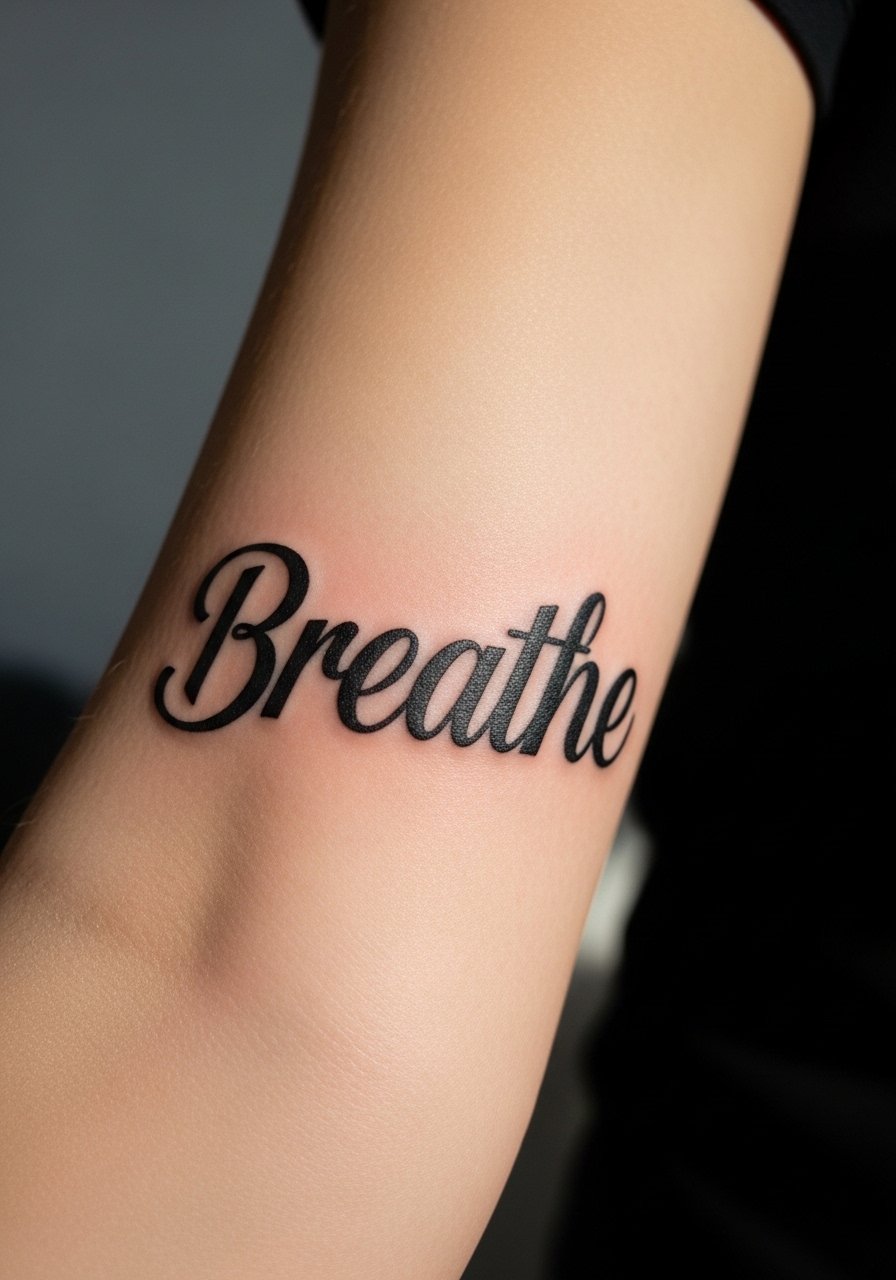
Consultation lead: when you want script in heavy blackwork, bring exact lettering and ask the artist to convert it into a block-weight style that still reads at distance. Session time varies from 30 to 90 minutes depending on length. Many people make the mistake of requesting ultra-thin lettering for a bold message, which disappears with time. For showing it off, a thin chain bracelet layered below the script keeps attention on the text without competing.
6. Stipple-Shaded Geometric Cluster
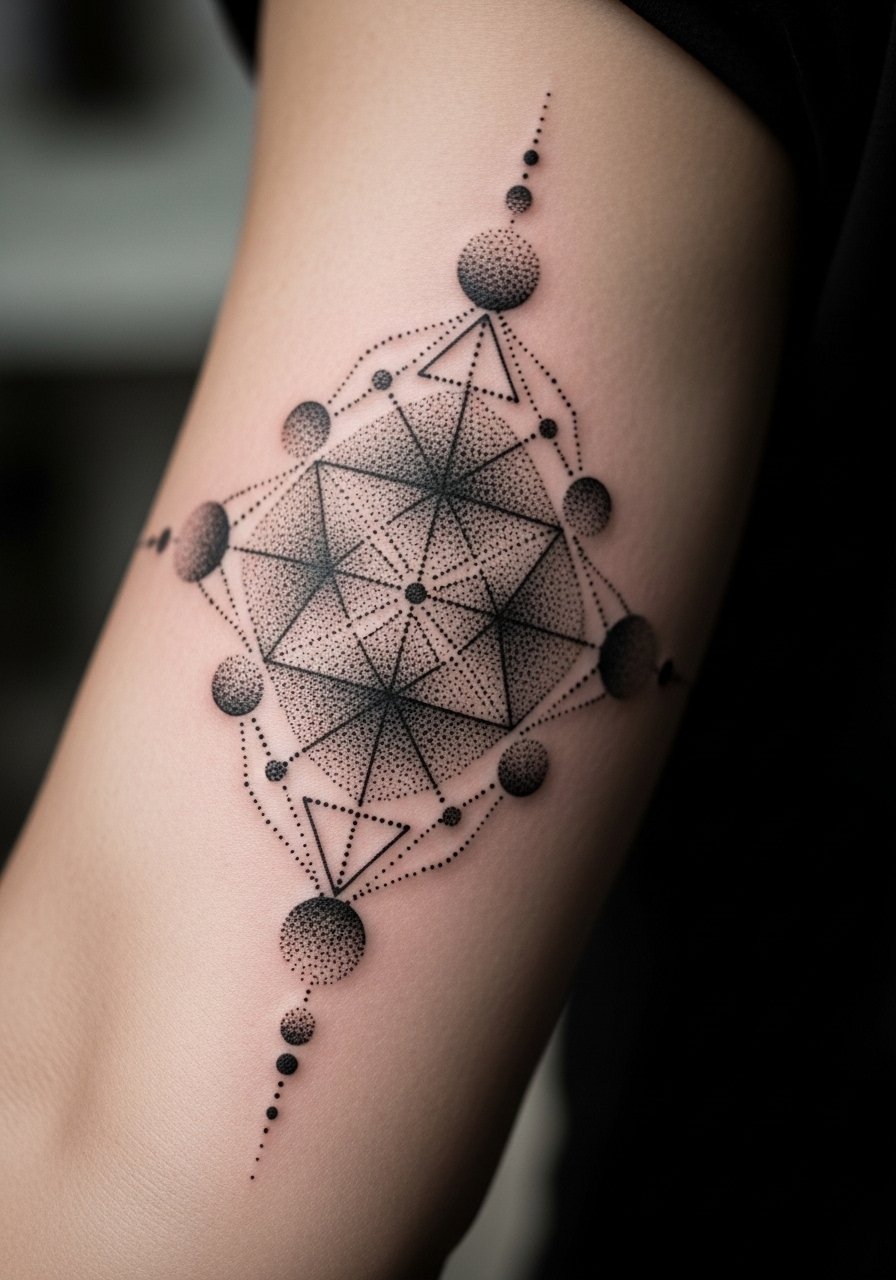
Mistake lead: the biggest error with stipple shading is packing dots too densely in narrow bands, which read as a blur later. Ask for graduated dot density with breathing room between clusters so the shading ages into texture rather than a gray wash. Expect a longer session, often two hours, and moderate pain where the needle revisits skin to build density. Pair this with a casual rolled-sleeve denim shirt to show the stipple without competing textures.
Pre-Session Essentials
The outer forearm pieces above vary from full saturation to delicate dot work, and a few small items smooth both the session and the first week of healing.
-
Stencil transfer paper kit. Lets you check placement and scale on the skin before the needle hits, especially useful for the checkerboard and arrow panels above.
-
Topical numbing cream. Applied about 45 minutes before session it eases wrist and forearm sensitivity without dulling the artist's ability to work.
-
Thin protective film roll. Useful for keeping outer forearm fills clean during the first few days when clothing rub can irritate saturated blackwork.
-
Fragrance-free gentle body wash. Cleans the skin without stripping the delicate barrier around fine stipple or script pieces.
-
Aquaphor healing ointment. A thin layer in the first few days helps retain moisture while saturated blackwork settles.
7. Bold Mandala Band Along the Outer Forearm
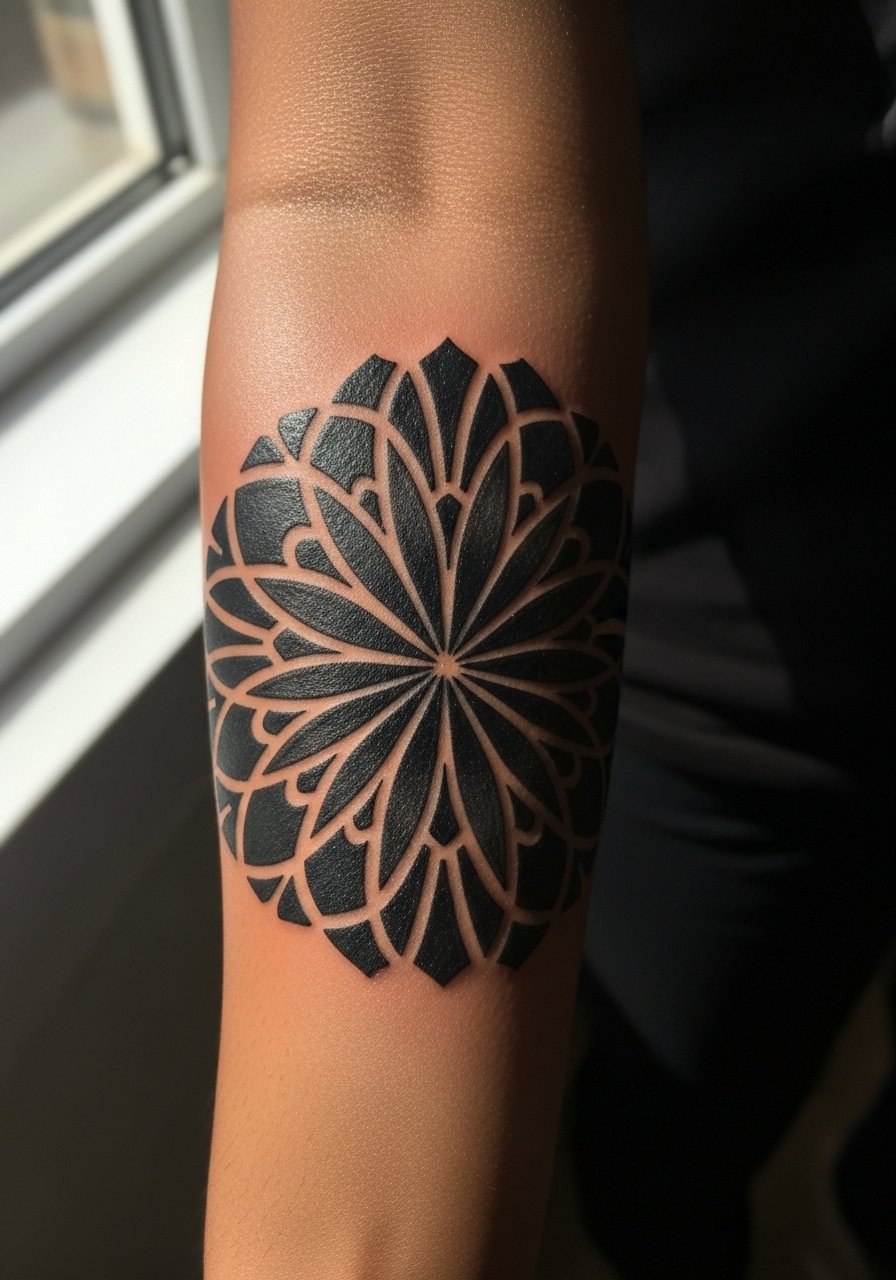
Styling lead: this mandala sits like a cuff and works best when the band has deliberate spacing between radial elements. Tell your artist to scale each petal larger than you think so details do not collapse at two to three years. Session time is often one long block of 90 to 150 minutes and discomfort averages moderate. A common error is asking for ultra-fine spokes inside the mandala, which merge into grudgy texture over time. For showing it off, try a cropped linen shirt or a stacked bangle set that frames the band without crowding the design.
8. Heavy Blackwork Portrait Silhouette
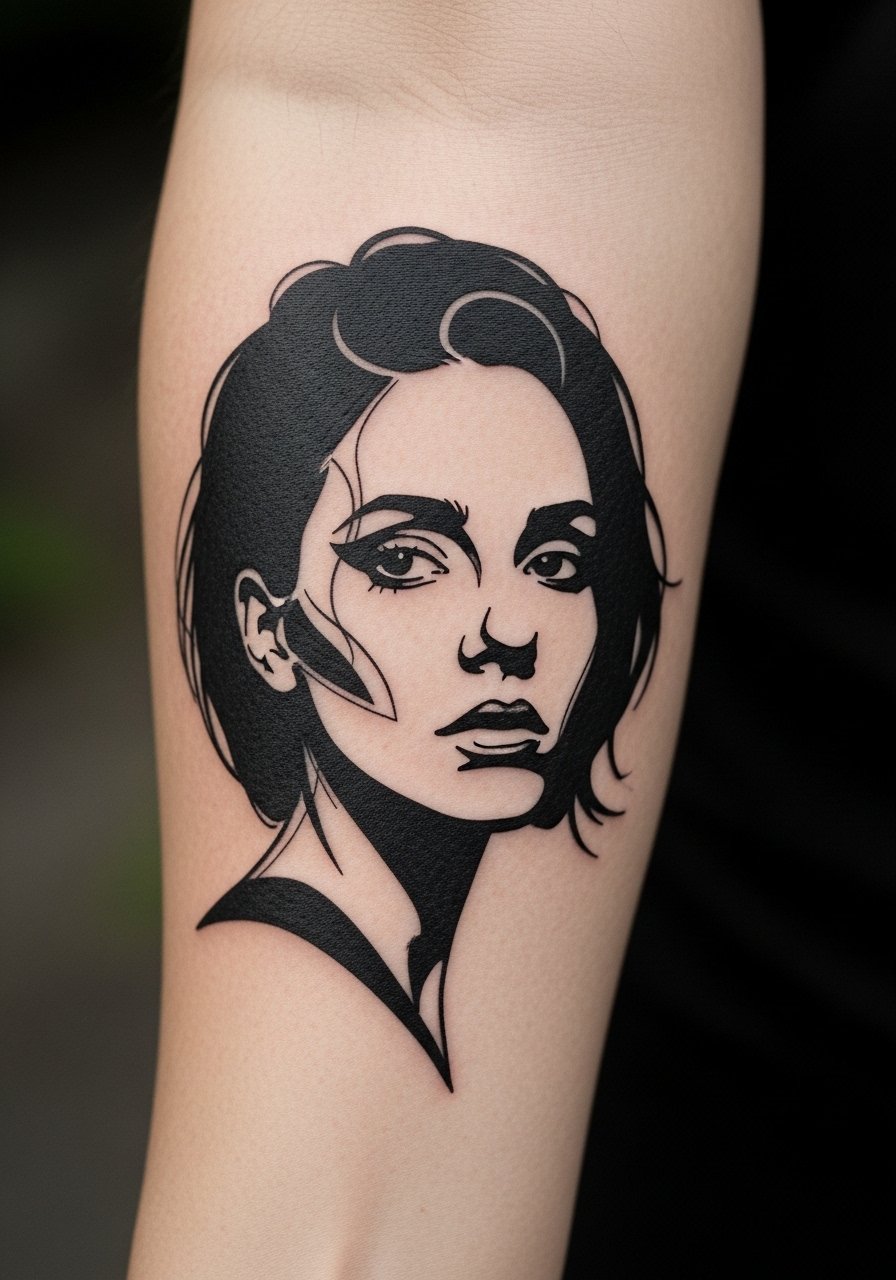
Personal observation lead: silhouettes age into readable shapes because the eye recognizes facial contours even when small detail softens. Bring a clear reference and ask for simplified planes rather than micro-detail, which avoids muddying. Session time varies but often two hours for saturation. A common mistake is wanting photoreal detail at a small scale, which becomes indistinct by year three. This piece pairs well with a simple cuff watch that lets the silhouette sit visually between timepiece and skin.
9. Chain-Link Pattern Running Down the Forearm
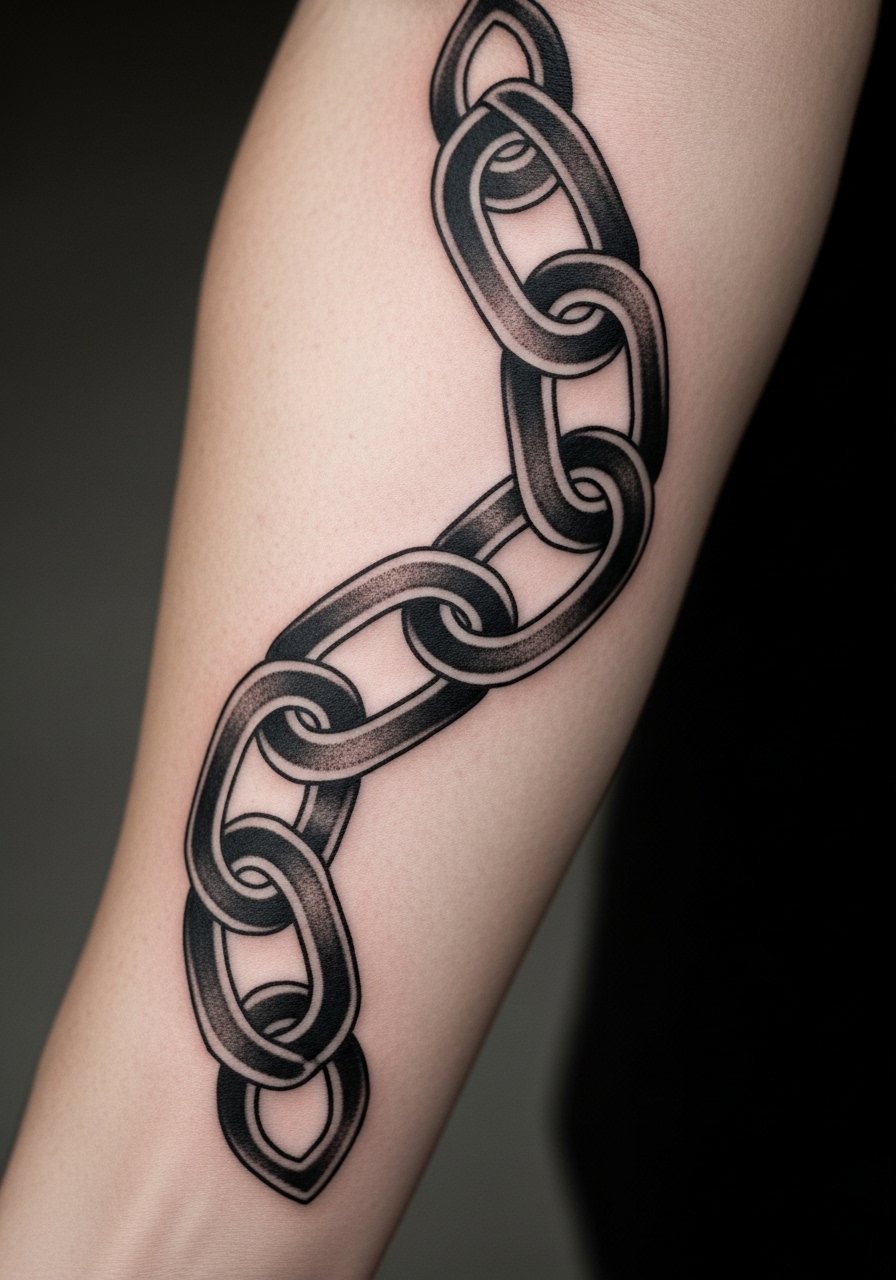
Pain warning lead: links near the wrist tend to sting more than up the arm, expect a 60 to 120 minute session depending on length. Ask for slightly rounded inner edges on each link so they do not create straight-line blowouts later. The common mistake is making each link too small for the arm width, which reads cluttered at distance. For everyday styling, a minimal leather strap bracelet below the chain keeps the theme coherent.
10. Abstract Blackwork Brushstrokes
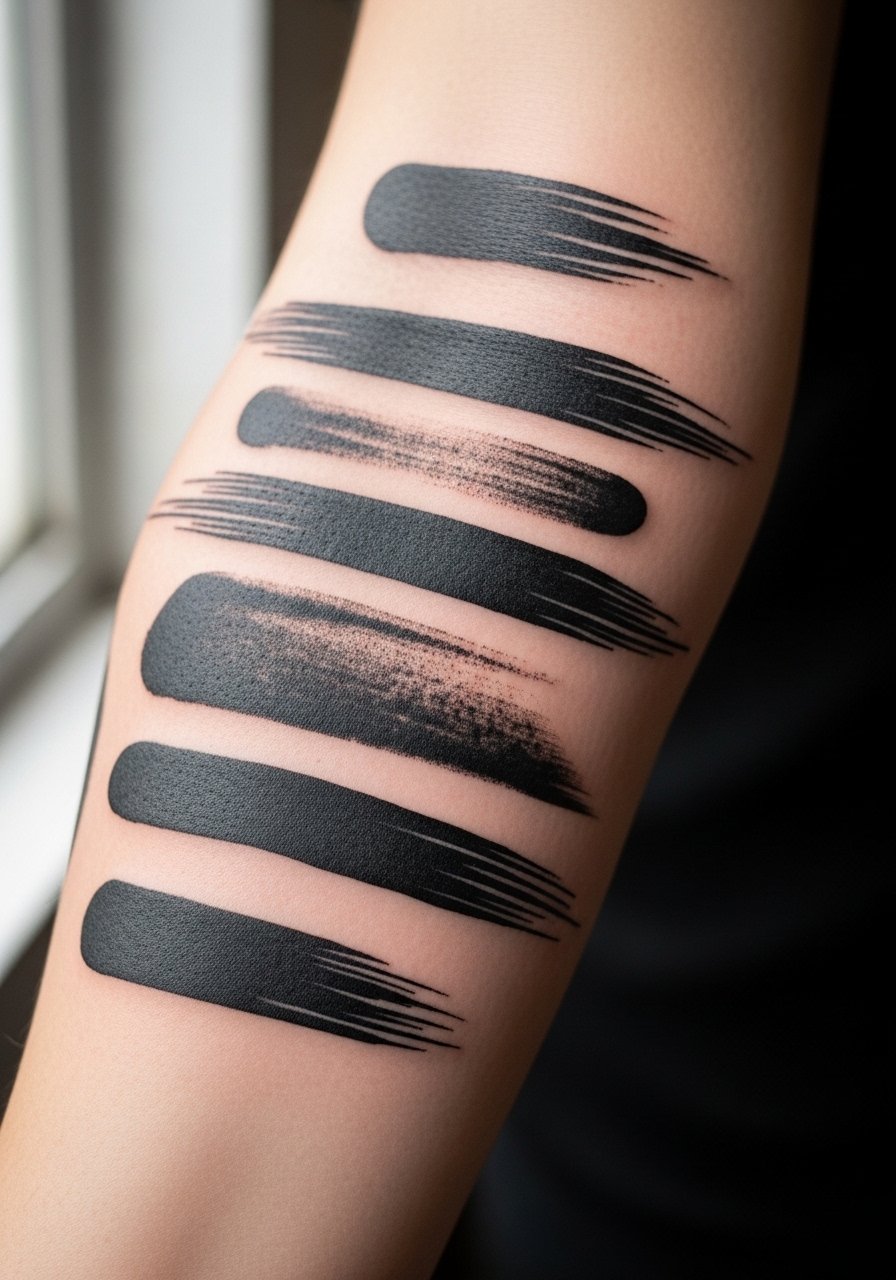
Aging/healing lead: abstract brushstrokes depend on negative space to read correctly as they soften. Request wider strokes with clear edges instead of thin broken lines. Session time is usually under two hours and pain is moderate. A mistake is placing too many overlapping strokes in a tight area, which can look muddy once healed. This design pairs well with a soft neutral knit sweater with sleeves pushed up when you want the tattoo visible but balanced against texture.
11. Bold Animal Silhouette in Blackwork
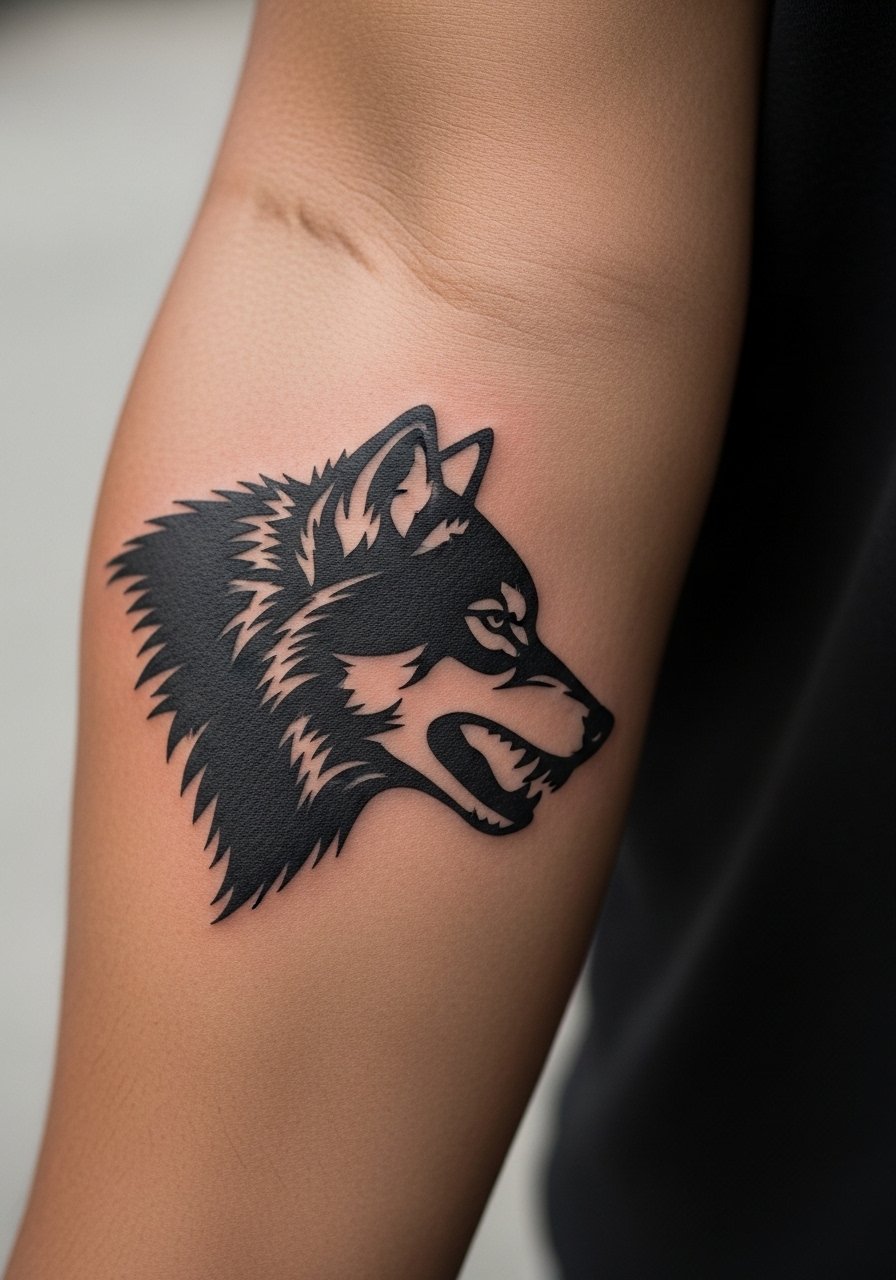
Consultation lead: with animal silhouettes ask the artist to simplify jawlines and ears so the shape reads at a glance. Expect 60 to 120 minutes for full saturation and moderate pain along the muscle. A common version that fades poorly tries to include fur texture inside the silhouette, which reads as gray at year two. For display, wear a short-sleeve utility shirt with a sleeve roll to let the silhouette breathe visually.
12. Thick Chevron Stack Along the Forearm
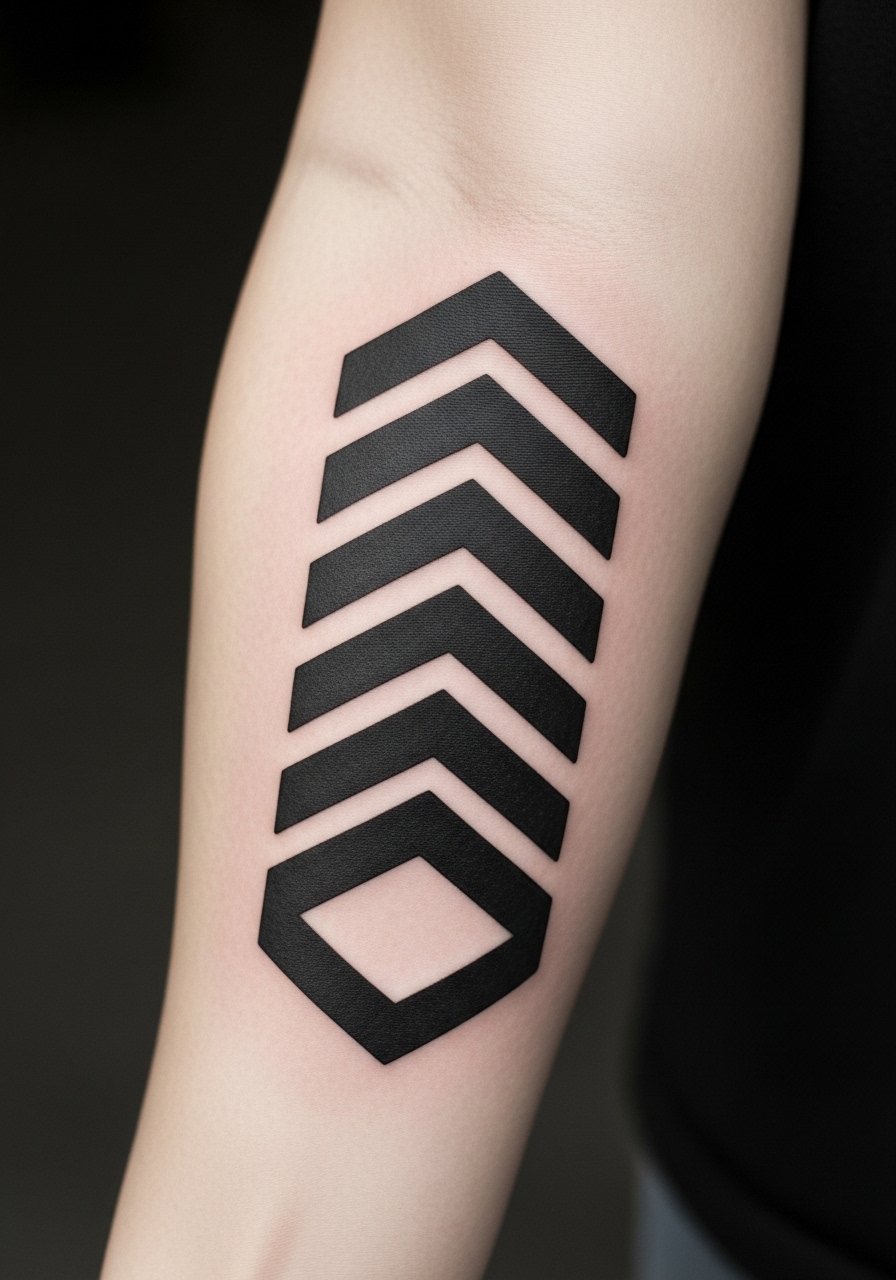
Mistake lead: stacking chevrons too tightly creates a blurred block after a few years. Ask for consistent spacing equal to at least one line width between chevrons. Session time is short per chevron but complete stacks can take 90 minutes, pain moderate. Blowout risk is minimal on the outer forearm but insist on medium line weight to avoid brittle edges later. For showing off, a short-sleeve henley frames the stack without hiding the pattern.
13. Bold Botanical Tendril Wrapped Along Arm
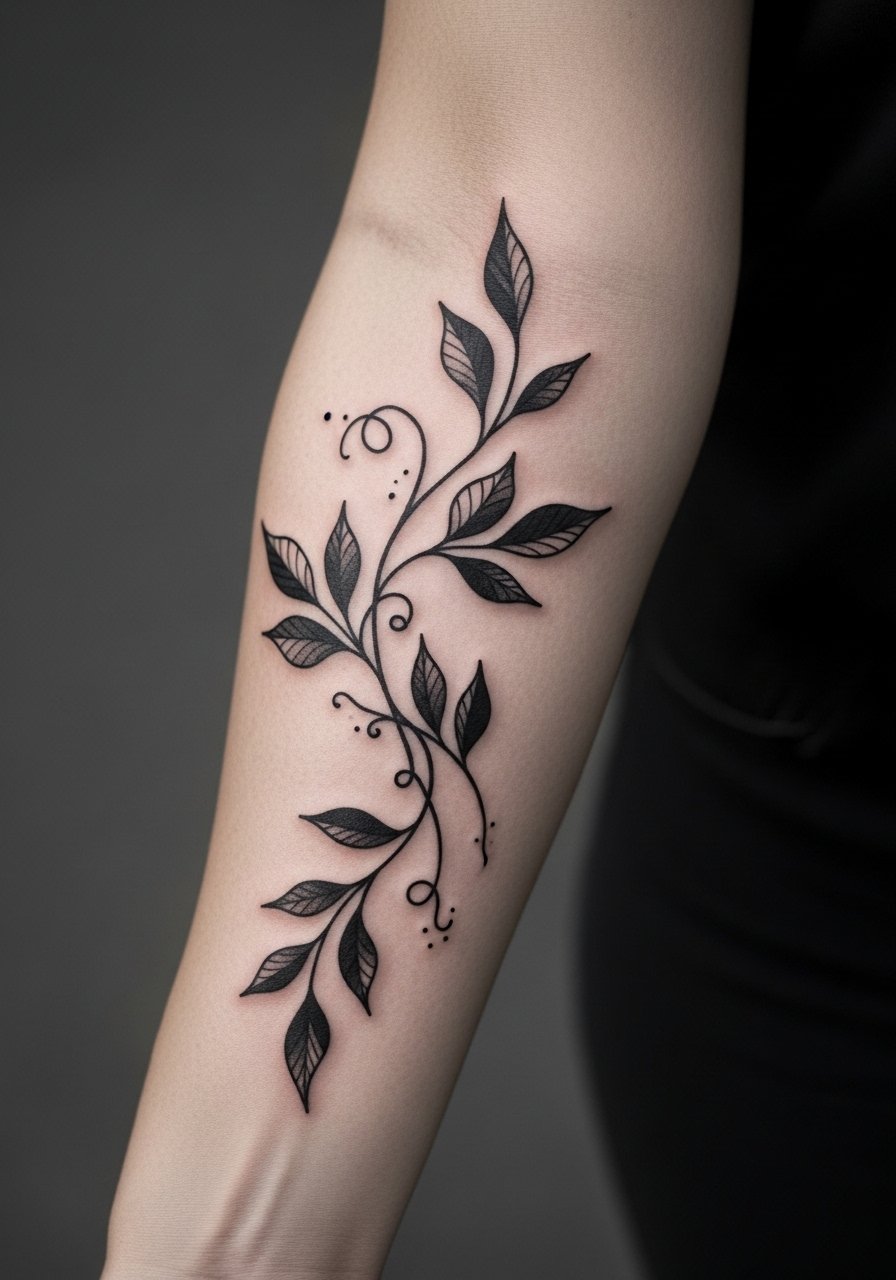
Controversy lead: some artists argue botanical curves belong in fine line work, not heavy blackwork. One camp says bold black leaves age well and keep shape, the other says heavy fills can look too blocky for organic subjects. The middle ground is scaling leaves larger and keeping stem lines clean. Expect a longer session for saturation and moderate pain near joints. A common mistake is adding tiny internal veins in dense fills. Pair this with a flowy button-front blouse worn with sleeves rolled so the tendril reads as extension of the sleeve line.
14. Thick Script Band with Negative Space
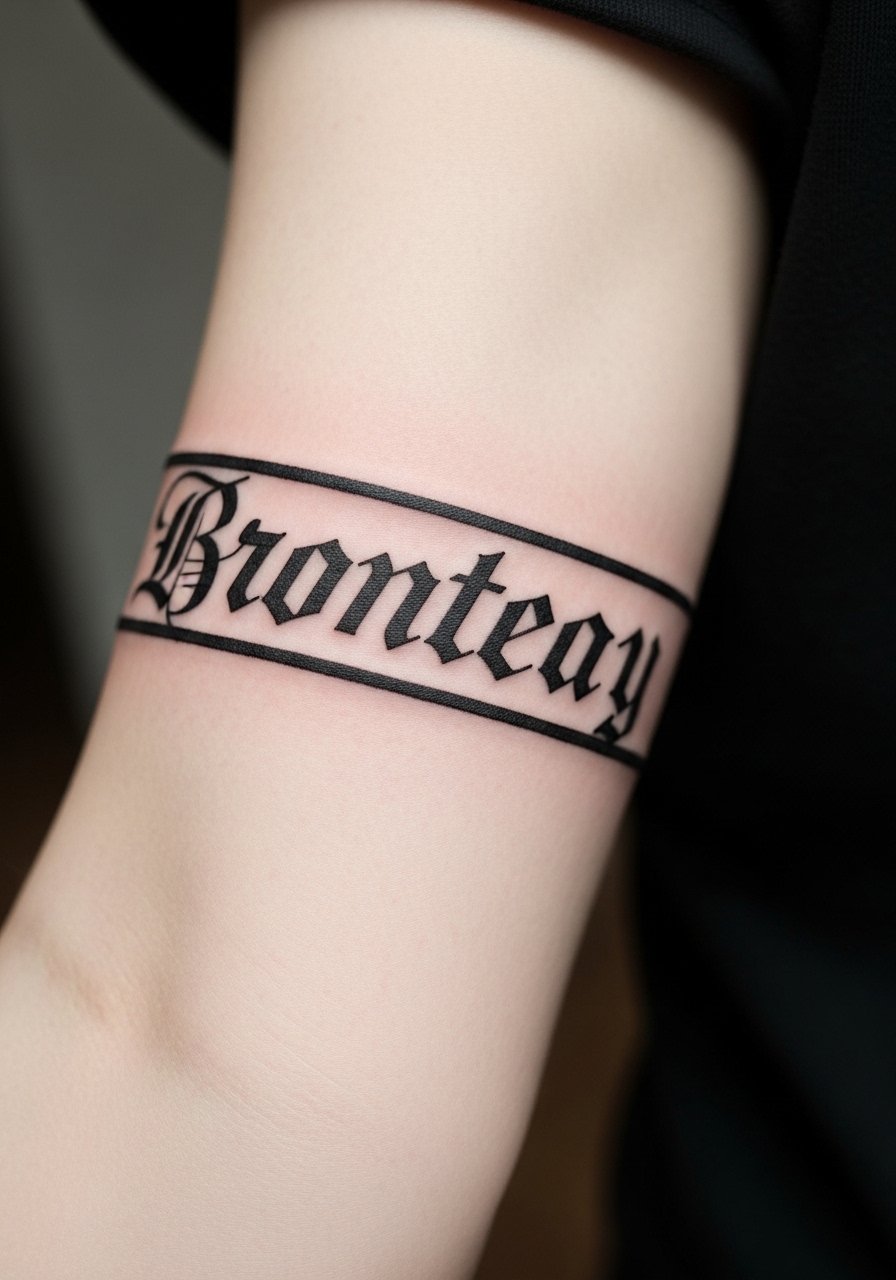
Personal observation lead: negative-space lettering in a saturated band usually holds up if letters are oversized and letter counters are generous. Tell your artist to test the negative space on paper at full size before inking. Session time is 60 to 120 minutes and discomfort is moderate. The mistake people make is choosing ornate letterforms too small for the band width. For evenings out, pair it with a delicate watch strap that sits below the band without obscuring the typography.
15. Bold Compass Motif for Directional Statement
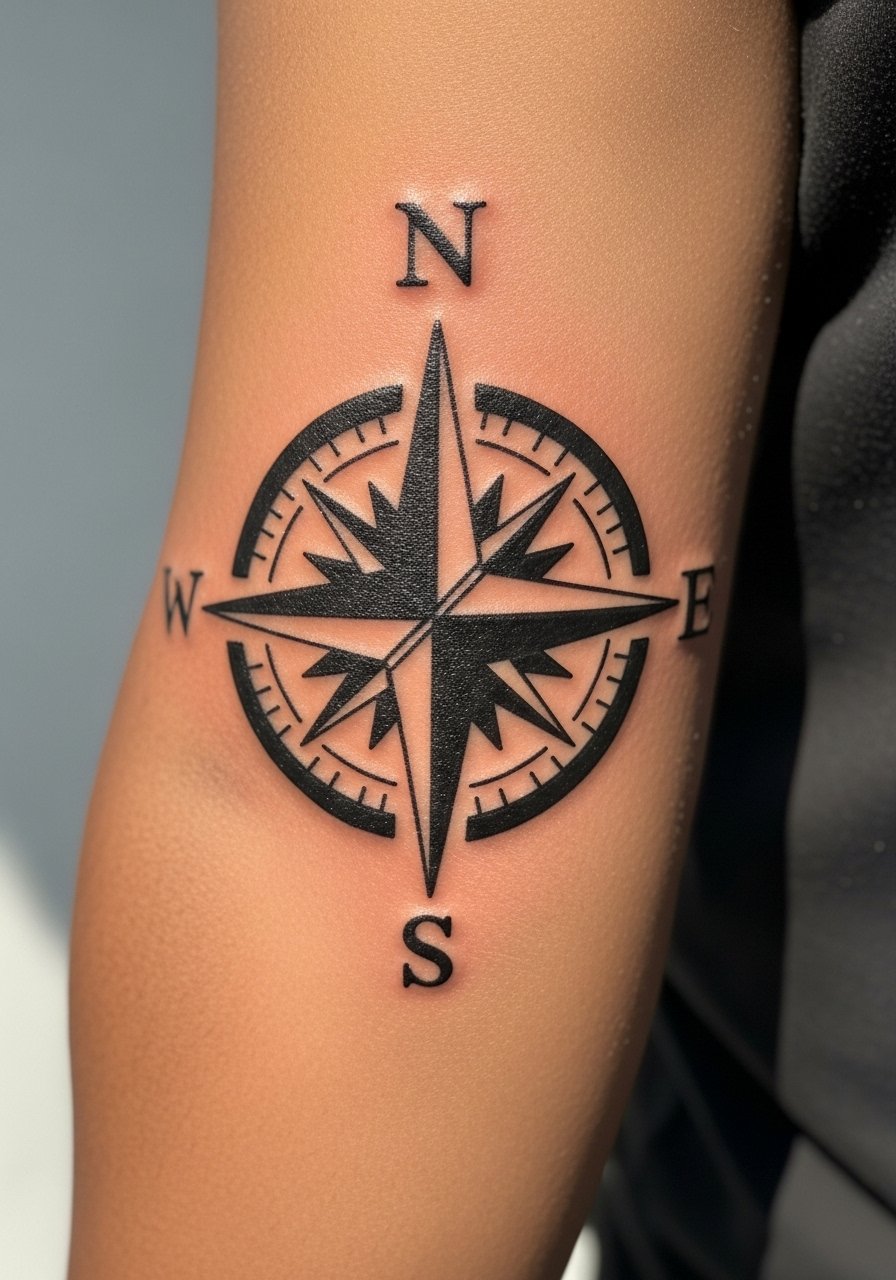
Pain warning lead: compass points that approach the wrist can be sensitive, expect a 60 to 120 minute session. Ask the artist to keep the inner angles open and to avoid tiny needles in the points. A typical mistake is cramming in ornate map lines inside a small compass, which dissolves into gray over time. For showing it off, a rolled-up denim jacket sleeve frames the motif while keeping the compass visible during cool weather.
16. Heavy Blackwork Abstract Lettering Patch
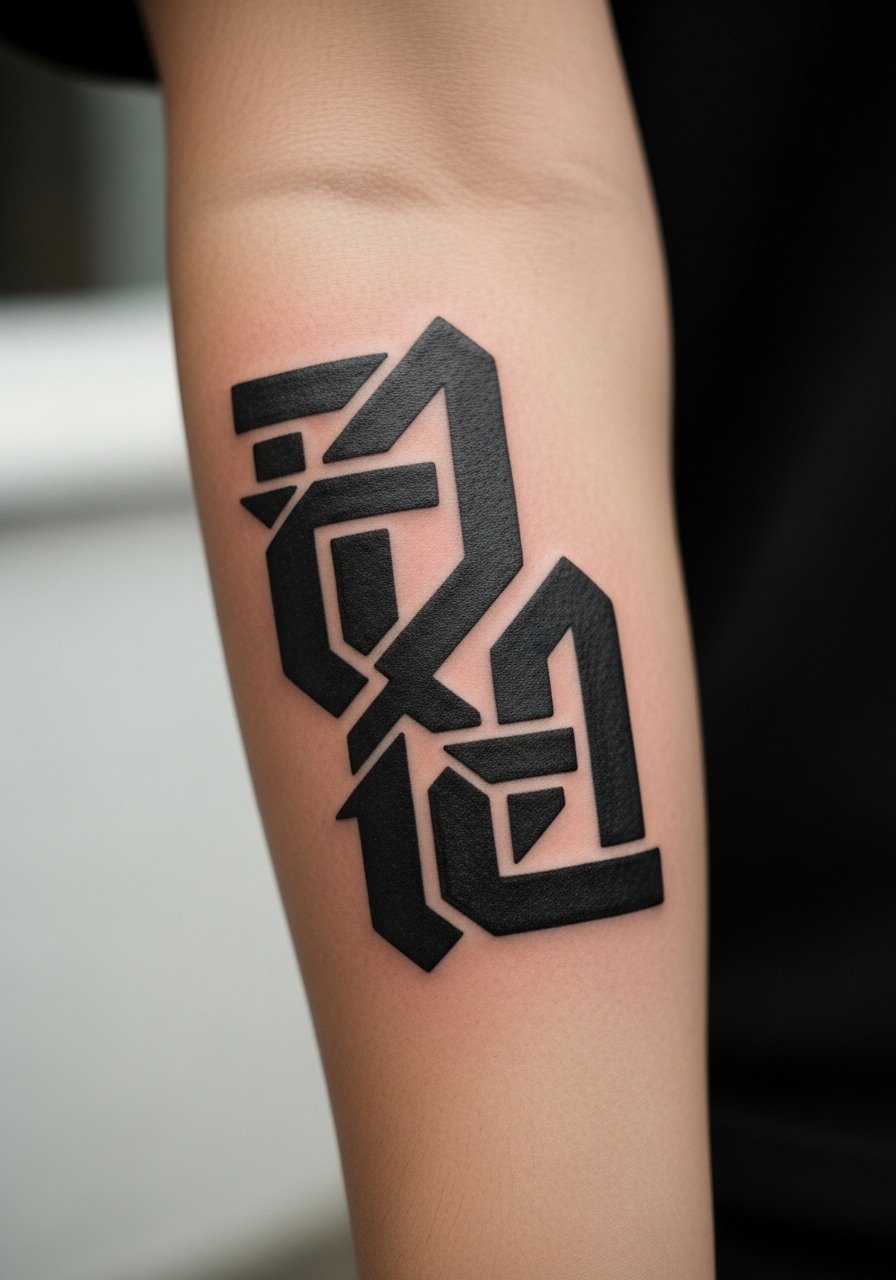
Aging/healing lead: abstract lettering ages best when letters are treated as shapes, not tiny glyphs. Tell your artist to treat each character as a block with breathing room. Expect a session of 45 to 120 minutes and mild to moderate pain. A common mistake is asking for micro kerning and thin strokes inside blocks, which become indistinct at year three. For everyday wear, a simple braided bracelet sitting beside the patch keeps focus on the shapes.
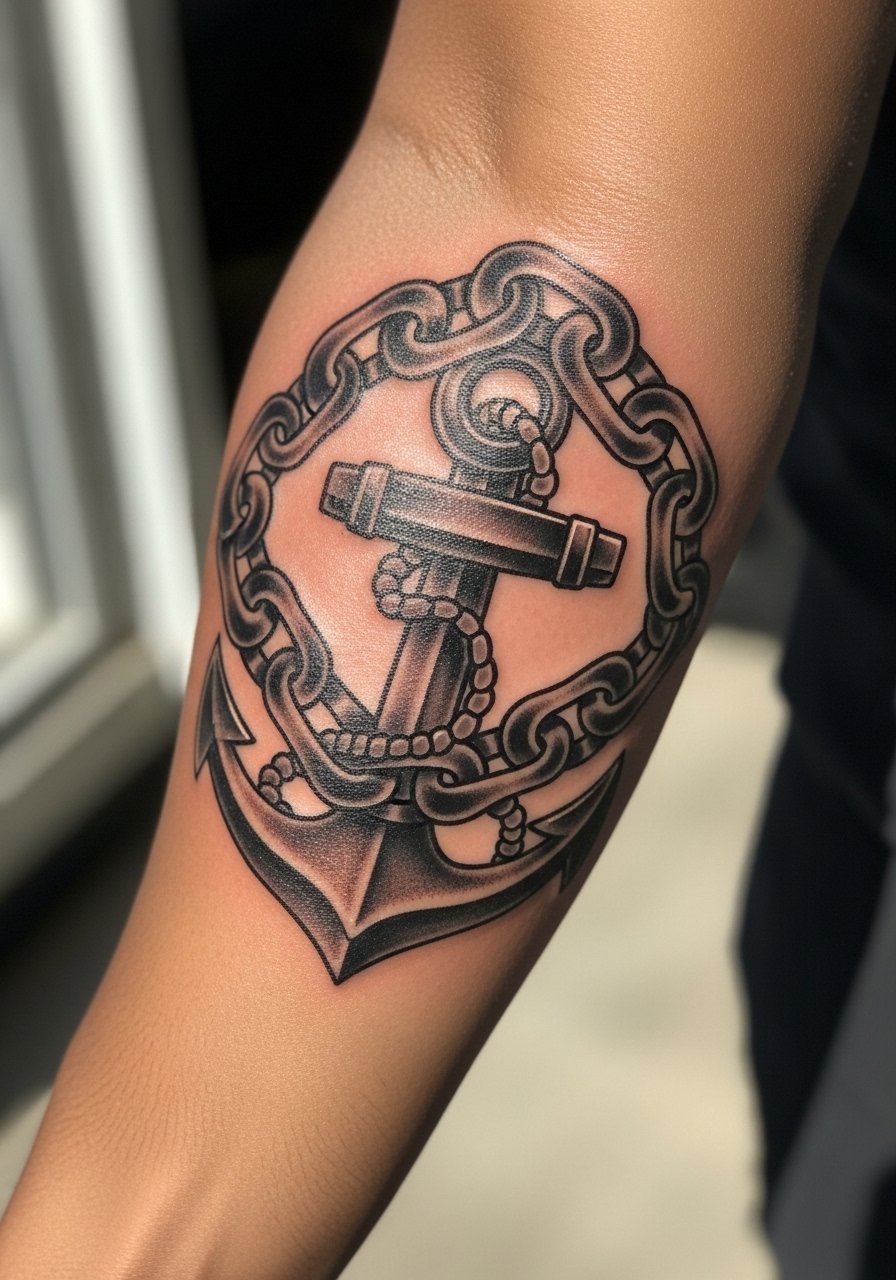
17. Bold Nautical Anchor in Solid Black
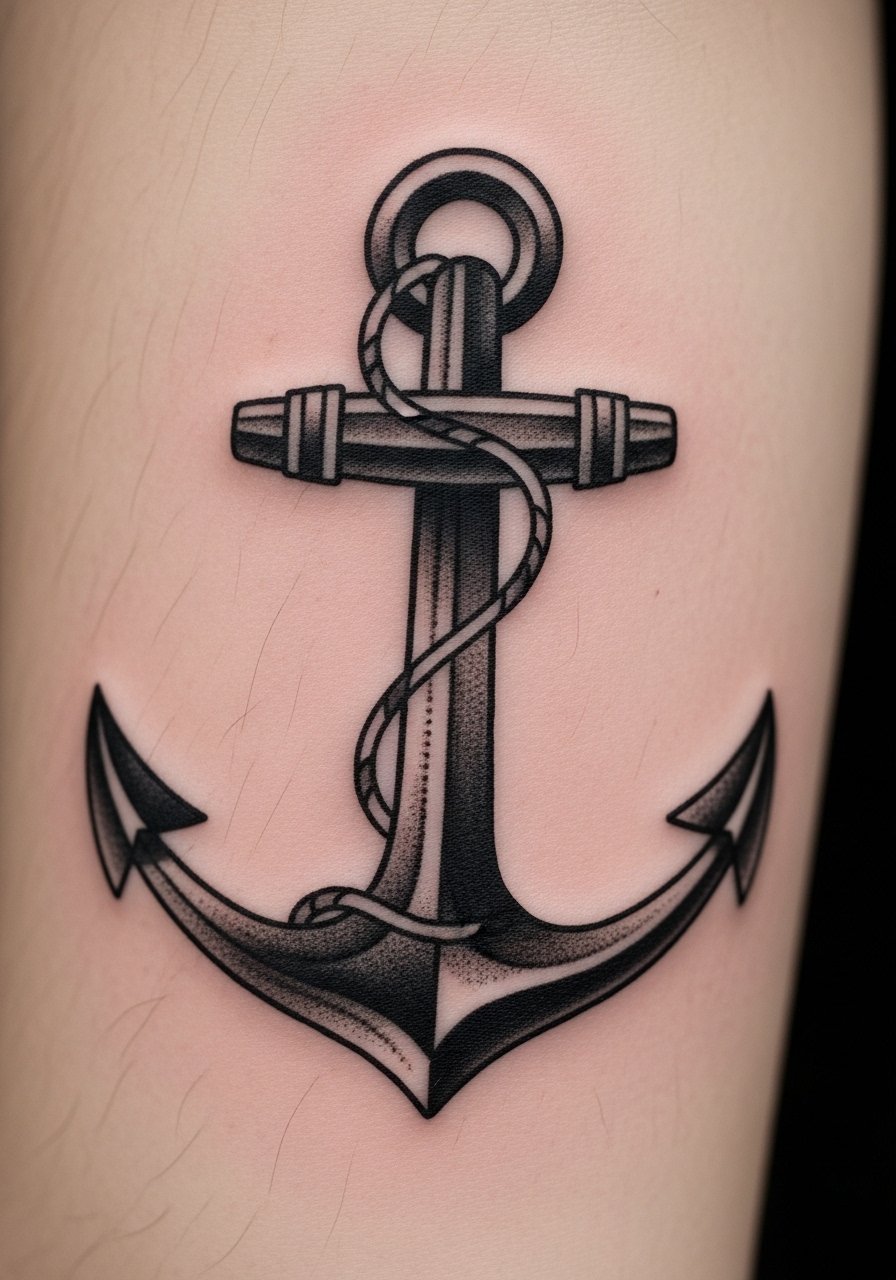
Consultation lead: anchors read as symbols, so decide if you want the classic silhouette or a simplified modern shape. Ask for thick outlines and solid fills in the shank for longevity. Session time is usually under two hours and pain is moderate. A mistake is adding tiny rope texture inside the anchor, which softens into noise later. Wear a striped short-sleeve tee to echo the nautical motif when you want to show the piece.
18. Bold Crescent Moon with Dot Work Halo
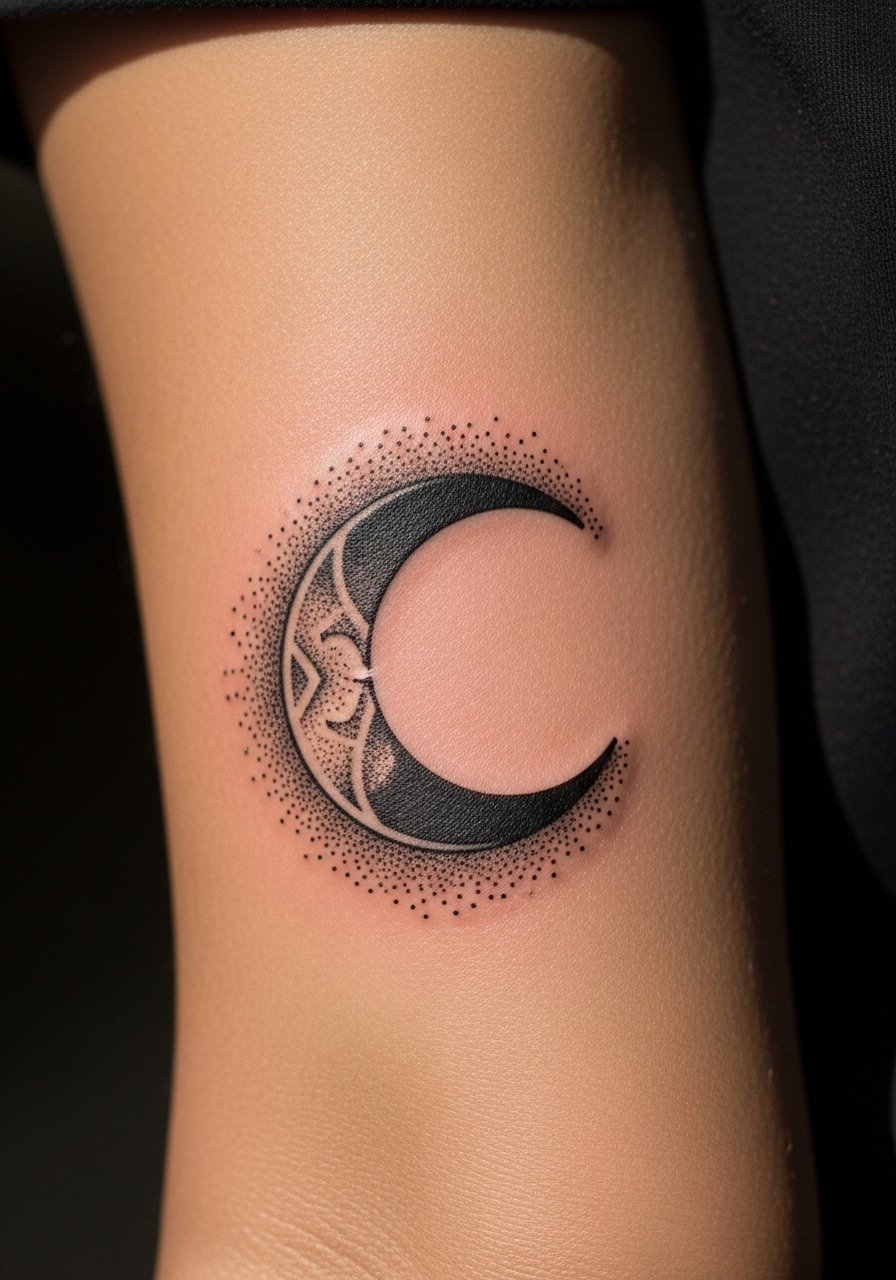
Visual impact lead: a solid crescent reads at a glance, while dot work halo adds texture without overwhelming the solid shape. Ask your artist to keep halo dots intentionally sparse where they meet the crescent. Expect 60 to 120 minutes depending on halo complexity and mild pain. A common mistake is making the halo too dense, which becomes a gray wash after healing. Pair with a thin chain pendant necklace that sits higher on the chest so the forearm moon has room.
19. Bold Botanical Patch with Heavy Fill Accents
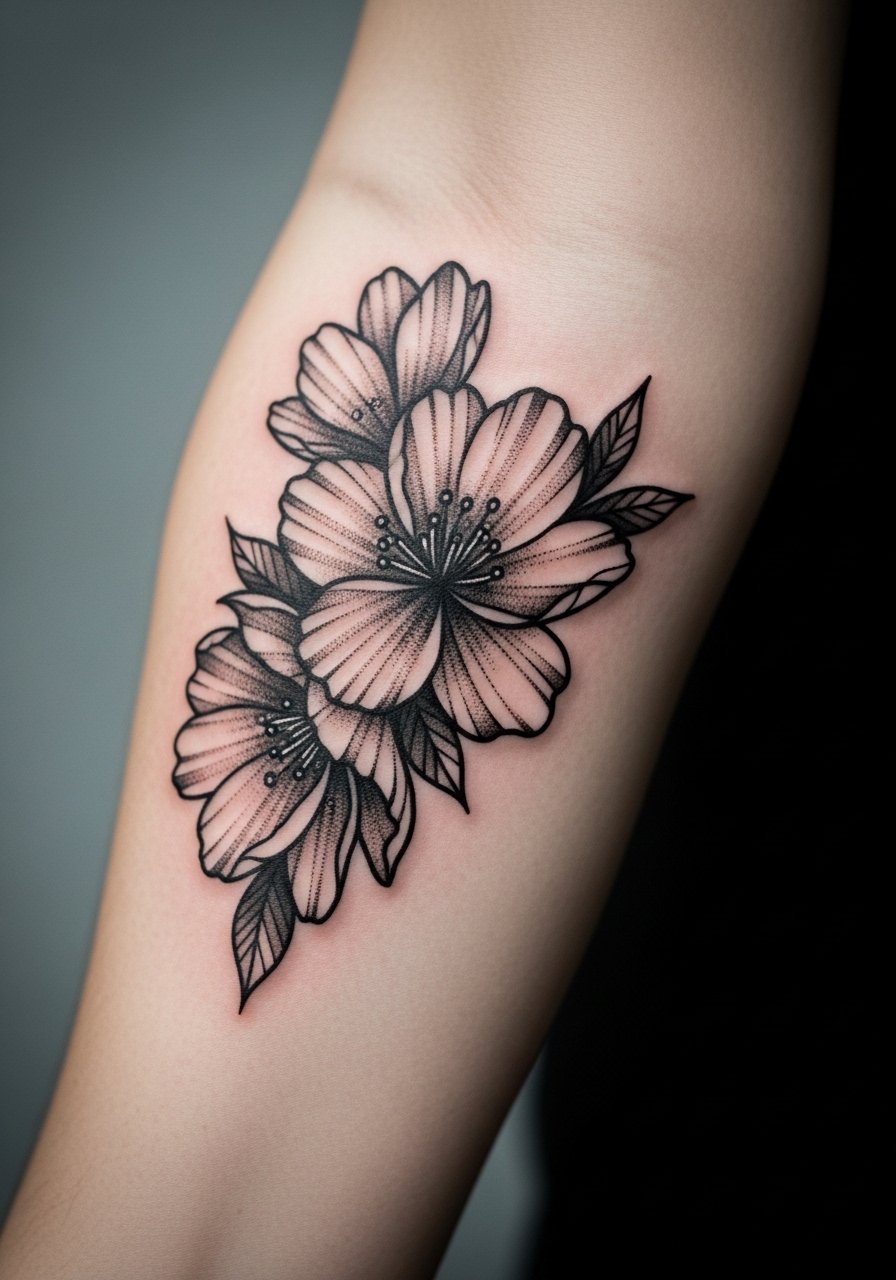
Mistake lead: overloading a botanical patch with tiny texture causes the piece to lose definition fast. Tell your artist to map out large dark anchors and leave open counters inside petals. Session time is typically 90 minutes and pain is moderate. A mistake is insisting on micro details in leaves for close-up photos, which do not hold for gallery-style wear. Style with a linen tee tucked into high-waisted jeans to let the patch sit visibly along the arm.
20. Bold Negative Space Crescent and Stars
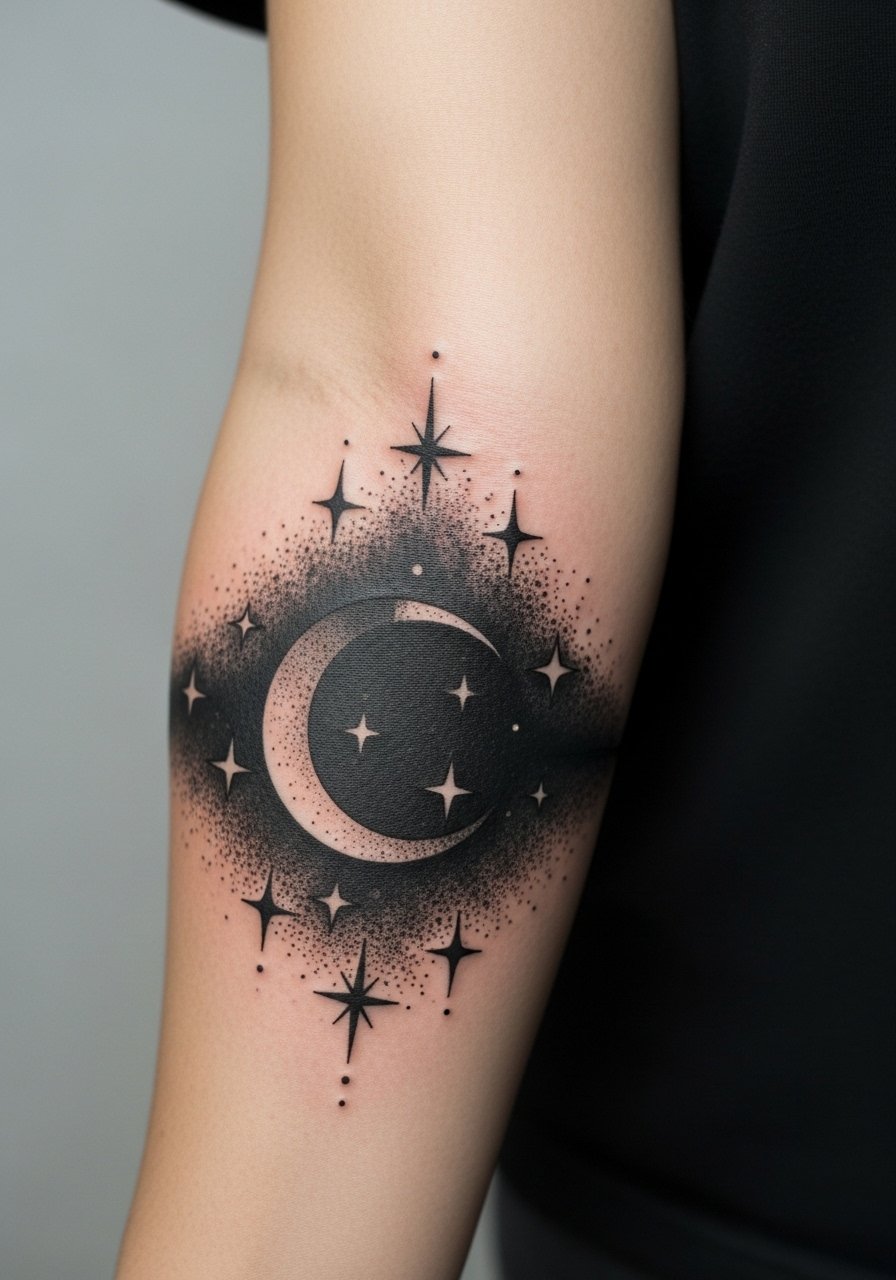
Consultation lead: negative space stars need generous counters so each star keeps shape as the black background settles. Expect a session of 60 to 120 minutes and mild to moderate pain. A common mistake is requesting tiny stars that vanish by year two. For showing it off, a black short-sleeve tee with rolled sleeves keeps the negative space crisp against similar tones.
21. Bold Arrow and Bar Cluster
Personal observation lead: clusters of arrows and bars work when each element has at least one line width of breathing room. Ask your artist to lay out the cluster on skin first so scale feels right. Session time is variable but often under two hours and discomfort is moderate. A common error is packing small arrows into a narrow strip, which becomes unreadable over time. For presentation, try a lightweight cuff bracelet that complements the linear theme.
22. Solid Black Anchor Chain Panel
Aging/healing lead: continuous chain panels age into strong graphic bands if links have rounded inner edges. Tell your artist to avoid razor-sharp inner corners which show irregularities with time. Expect a session of 60 to 120 minutes and mild to moderate pain. A mistake is using tiny link details that merge into a texture. Wear a simple sport watch with a narrow band above the chain so both elements breathe.
23. Bold Minimalist Landscape Silhouette

Styling lead: minimalist landscapes should be scaled horizontally and kept simple so horizon lines remain crisp as skin shifts. Ask for broad planes rather than micro detail and expect a single session of 60 to 120 minutes with mild discomfort. A common mistake is squeezing too many peaks into a narrow band, which removes clarity at distance. Try a neutral short-sleeve button shirt with sleeves pushed up to keep the horizon visible.
24. Bold Celtic Knot Panel in Blackwork
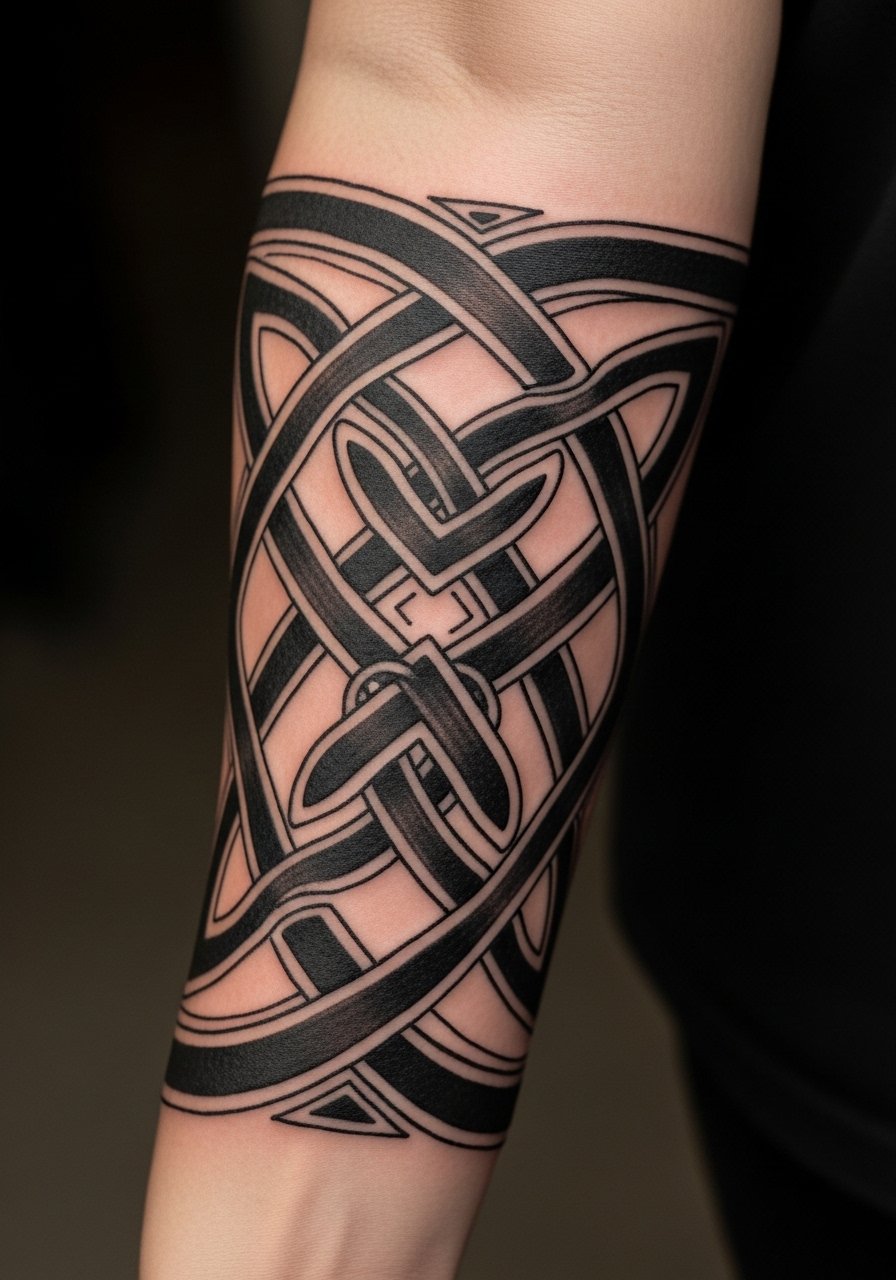
Mistake lead: complex knotwork done too small becomes an indistinct mass. Tell your artist to simplify knot intersections and keep band widths consistent. Session time often runs 90 to 150 minutes and pain averages moderate. Some artists split on whether knotwork needs finer detail or heavier bands. Name both camps and decide which approach you want before booking. For everyday wear, a textured knit sweater with rolled cuffs lets the panel breathe visually.
25. Heavy Blackwork Nautical Rope Twist
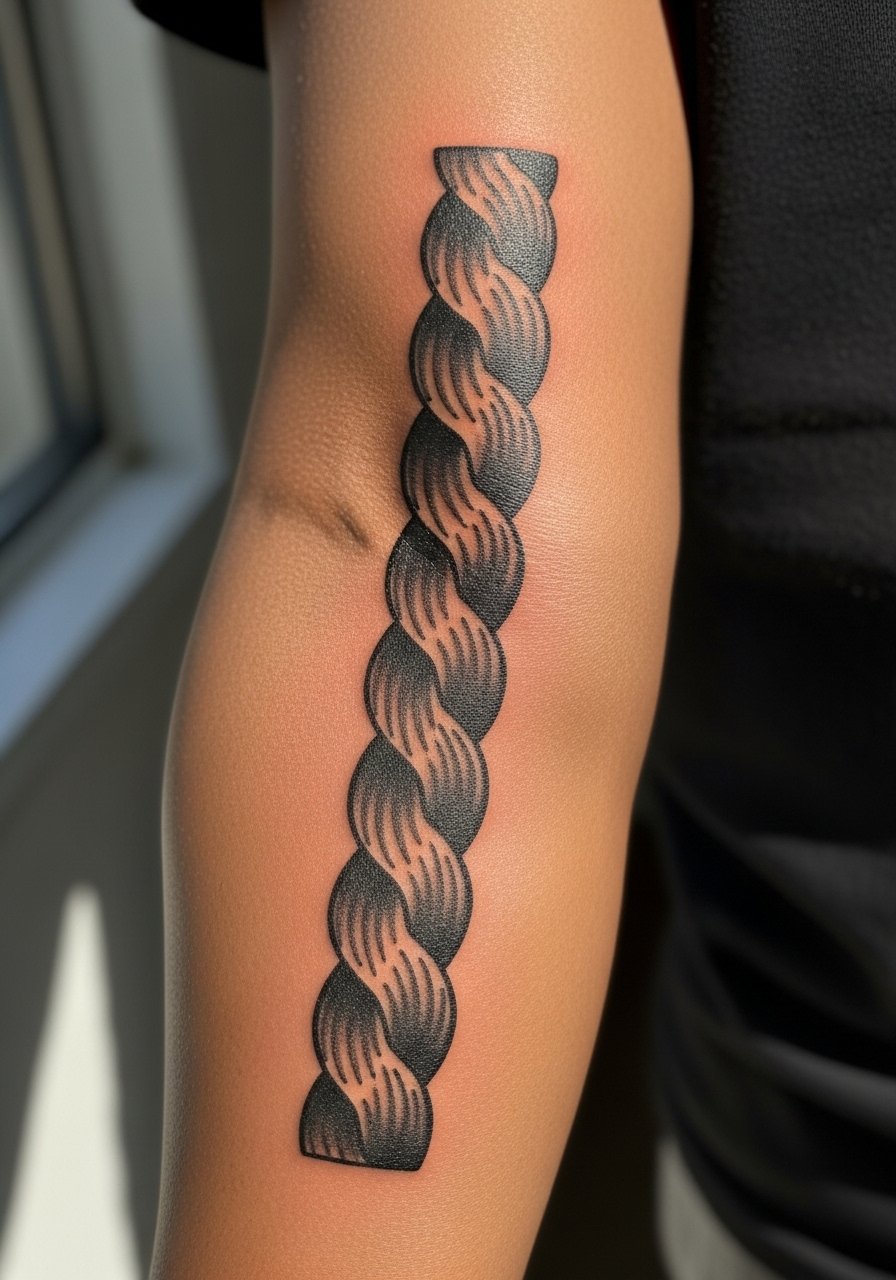
Consultation lead: for a rope twist, ask for clear alternating light and dark areas to define the twist without tiny cross-hatching. Session time is usually under two hours and pain is mild to moderate. The common error is adding too many thin fiber lines inside the rope, which blur into texture later. Style with a rolled-up chambray shirt for a nautical casual look.
26. Wide Blackwork Tribal-Inspired Band
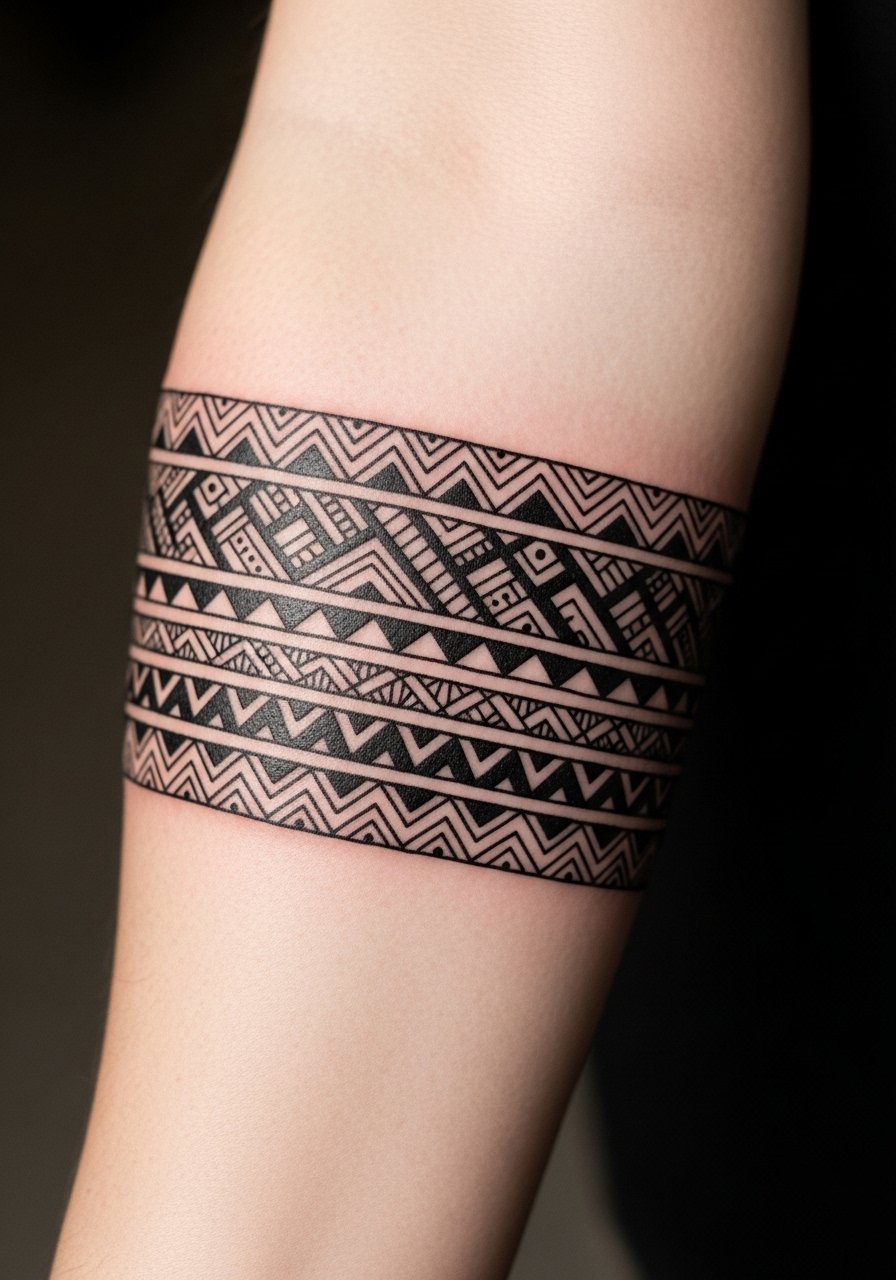
Styling lead: when borrowing from tribal forms, respect origin and opt for contemporary abstraction if unsure. Ask your artist to avoid direct cultural symbols unless you have clear permission. Expect a longer saturation session, often 90 minutes, and moderate pain. A mistake is using historically specific marks without context. Pair the band with a short-sleeve relaxed tee that lets the geometry read cleanly.
27. Bold Blackwork Compass Rose Panel
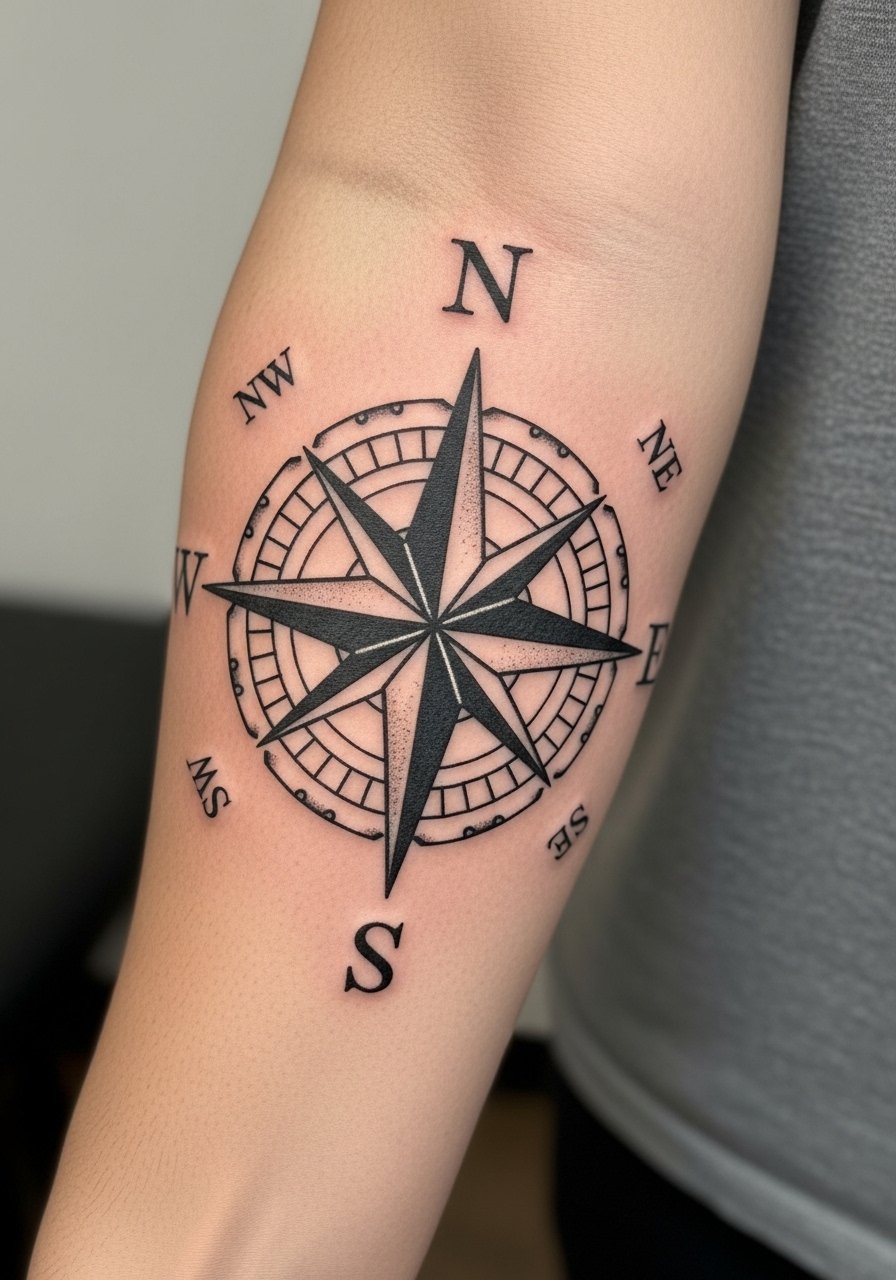
Decision-pressure lead: a compass rose needs correct scale so cardinal points do not crowd each other. Ask for a test stencil and see it in normal light before committing. Expect a 90 to 150 minute session and moderate pain near the wrist. A typical mistake is over-detailing inner rings which blur by year two. For display, a rolled-up sleeve linen shirt gives the compass room without covering it.
Frequently Asked Questions
Q: How does bold blackwork on the outer forearm age compared with fine line pieces?
A: Bold blackwork usually retains readable shape longer because solid saturation resists the softening that affects thin lines. Fine line pieces can look amazing fresh but often need touch-ups sooner. Expect broad black shapes to remain legible for many years if spaced correctly and protected from heavy sun exposure.
Q: Will stipple shading on the outer forearm turn into a gray patch after a few years?
A: It depends on scale and dot density. If the dots are placed with deliberate breathing room and transitions are gradual, stipple holds as texture rather than a solid gray. Ask your artist to mock up the exact dot spacing on skin to preview how it will age.
Q: Can I combine heavy blackwork with small fine-line details on the same forearm piece?
A: You can, but plan scale carefully. Fine-line details adjacent to heavy fills should be enlarged slightly so they do not disappear as the skin settles. Discuss clear boundaries in your stencil so the artist knows where to keep detail and where to keep mass.
Q: What should I wear to the appointment for an outer forearm session?
A: Wear something with sleeves you can easily roll up without tight elastic at the cuff, like a loose button-down shirt or a short-sleeve tee. Comfort matters during sessions of an hour or more and easy access helps the artist work without fuss.
Q: Do heavy blackwork panels affect future tattoo options on the same arm?
A: Yes. Large saturated black areas limit future light-tone overlays in the same spot. If you foresee sleeves or lighter tattoos nearby, plan negative space corridors or place heavy panels where they will not prevent future additions.
