
Blackwork Greek god tattoos keep popping up on feeds, and the trend says bold silhouettes age better than tiny detail. The designs that still look intentional at year five are usually those with strong linework, solid saturation, and breathing room between elements. Below are 17 blackwork takes on Olympian figures, with notes on placement, aging, what to ask your artist, and when to expect a touch-up.
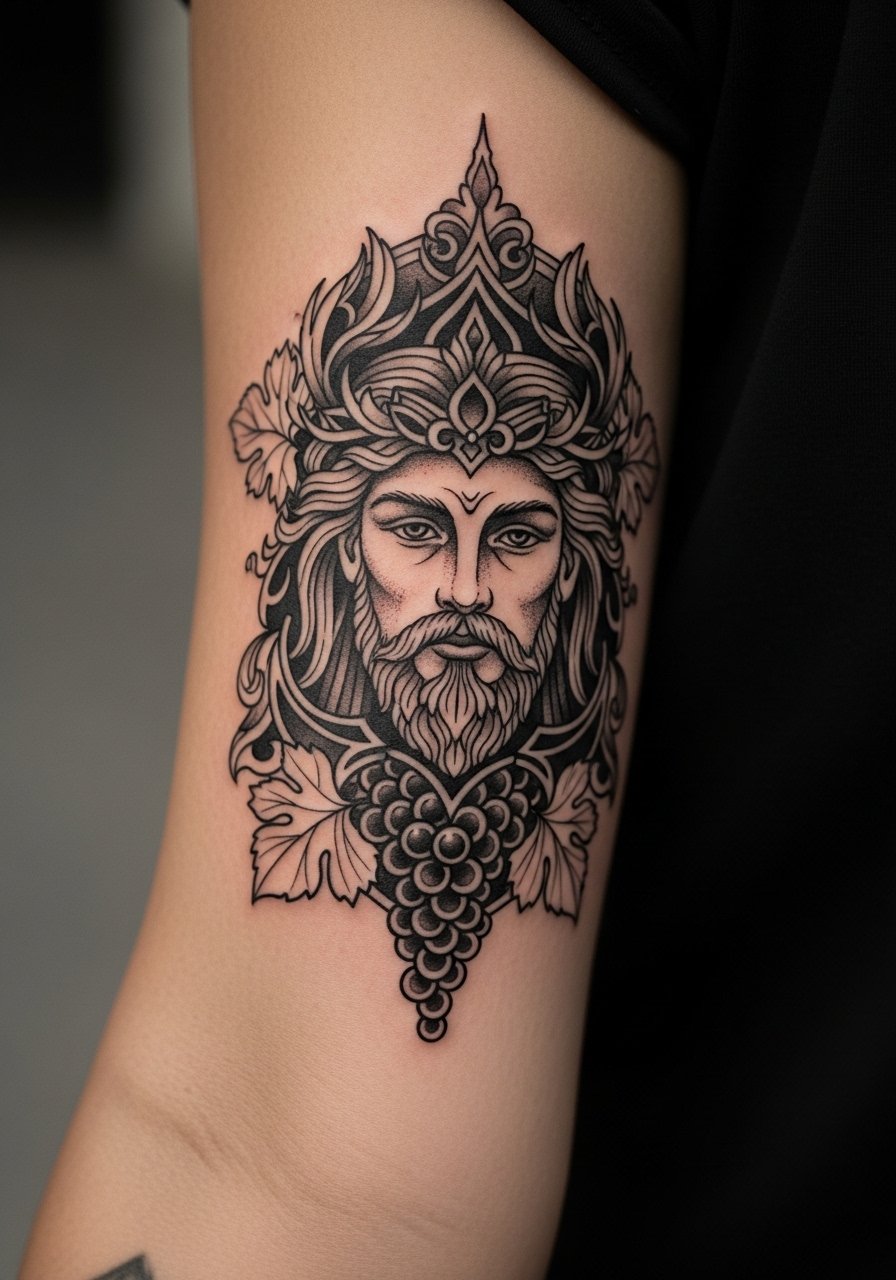
1. Zeus Head Bust on Upper Arm
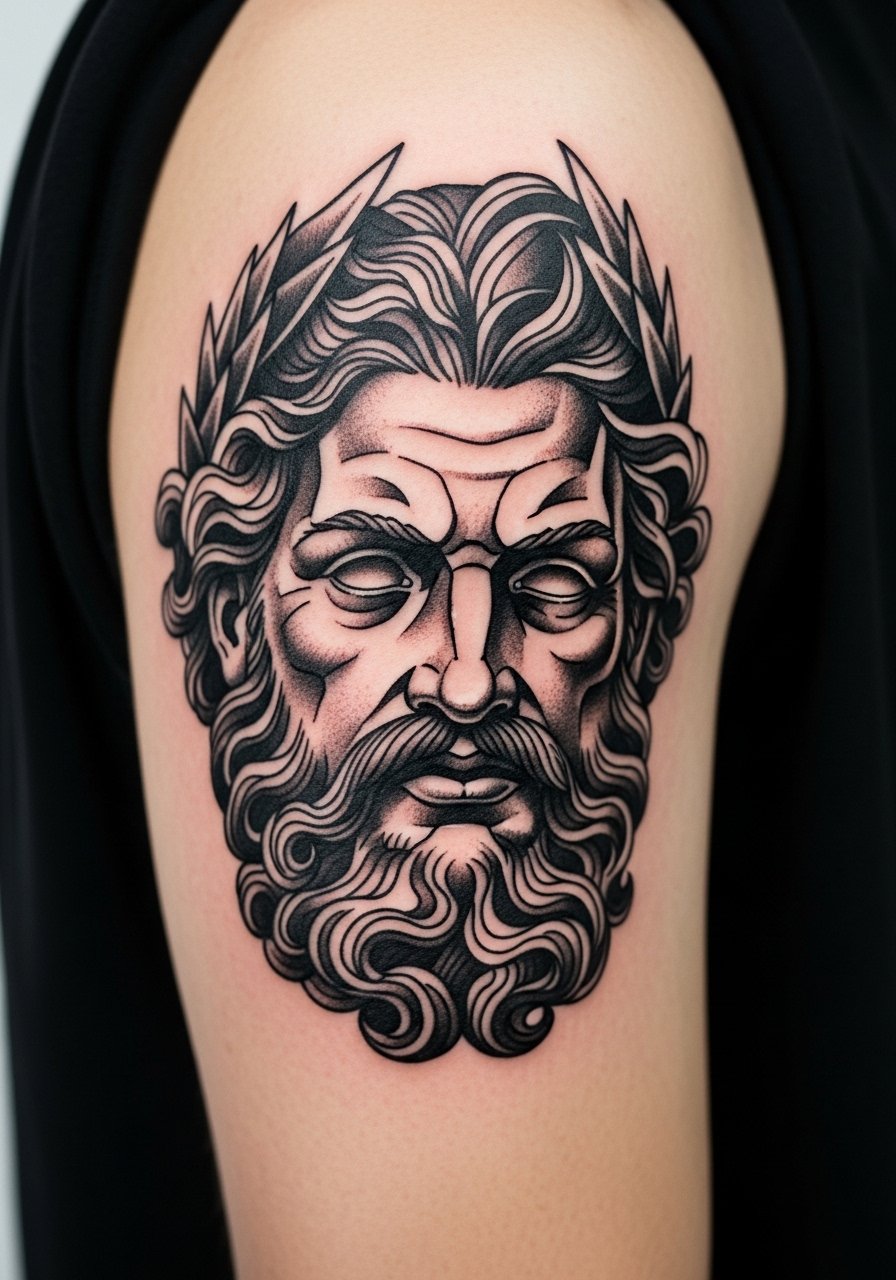
I recommend this as an upper arm piece when you want a bold anchor that holds up. Say to your artist that you want confident linework, solid black saturation, and negative space around the face so the beard reads as texture instead of a block. Pain is moderate and the session can run two to three hours depending on size. A common mistake is asking for tiny facial detail in a small patch. That version softens into an indistinct blob over a few years. Expect touch-up talk around year three for edge cleanup. For discovery, look through portfolios on directories and convention pages rather than copying a single viral image.
2. Poseidon Trident with Ocean Waves on Forearm
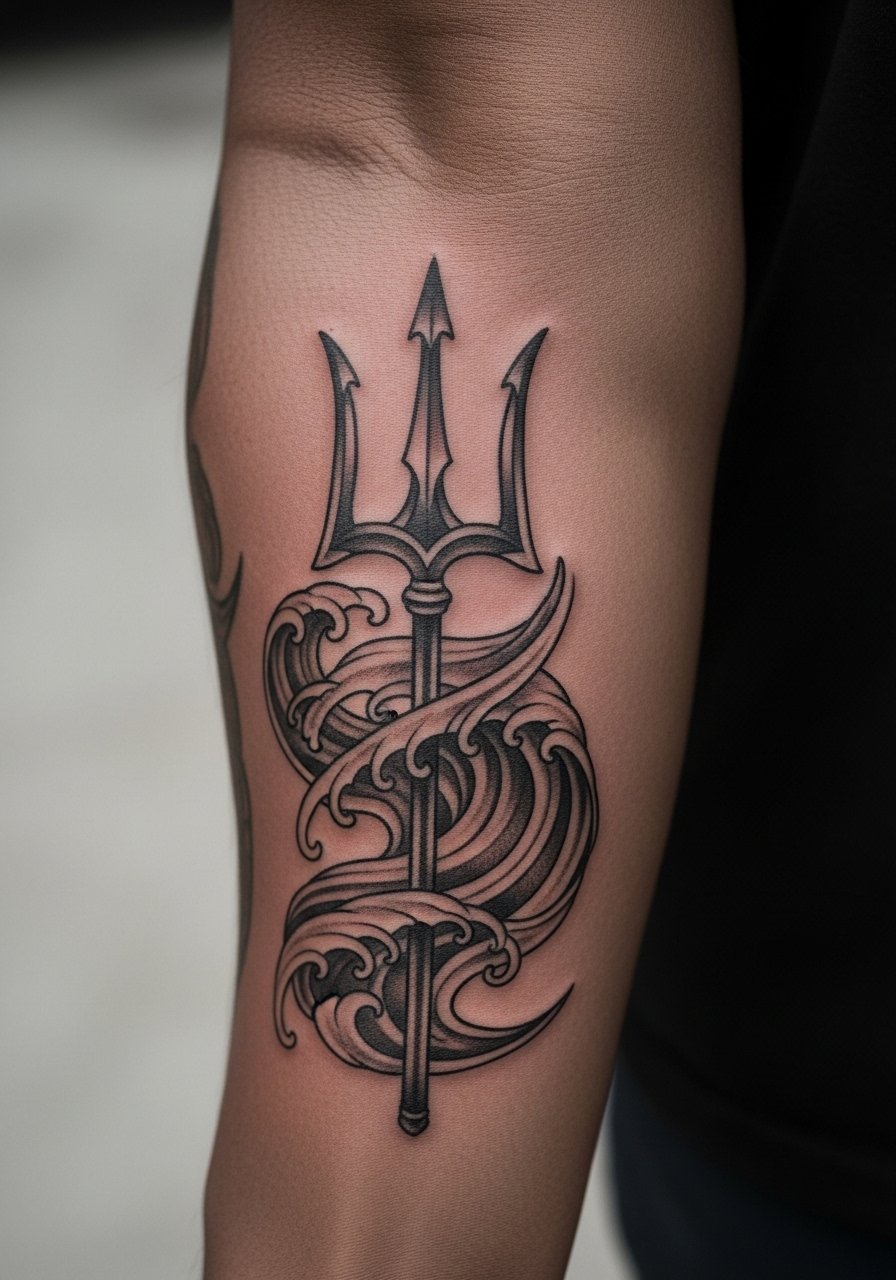
I've seen forearm pieces like this hold their graphic punch long term because the silhouette reads from a distance. Ask for bold bareness around the trident so the negative space suggests water rather than stipple detail. Expect a one to two hour session and mild discomfort along the inner forearm. A frequent mistake is packing too many tiny curls into the waves. At six months the linework will look crisp. By year three thin curls can merge if they were too close. Pair this with rolled sleeves when you want to show it off and try a rolled linen shirt for casual framing.
3. Hades Skull with Pomegranate on Sternum
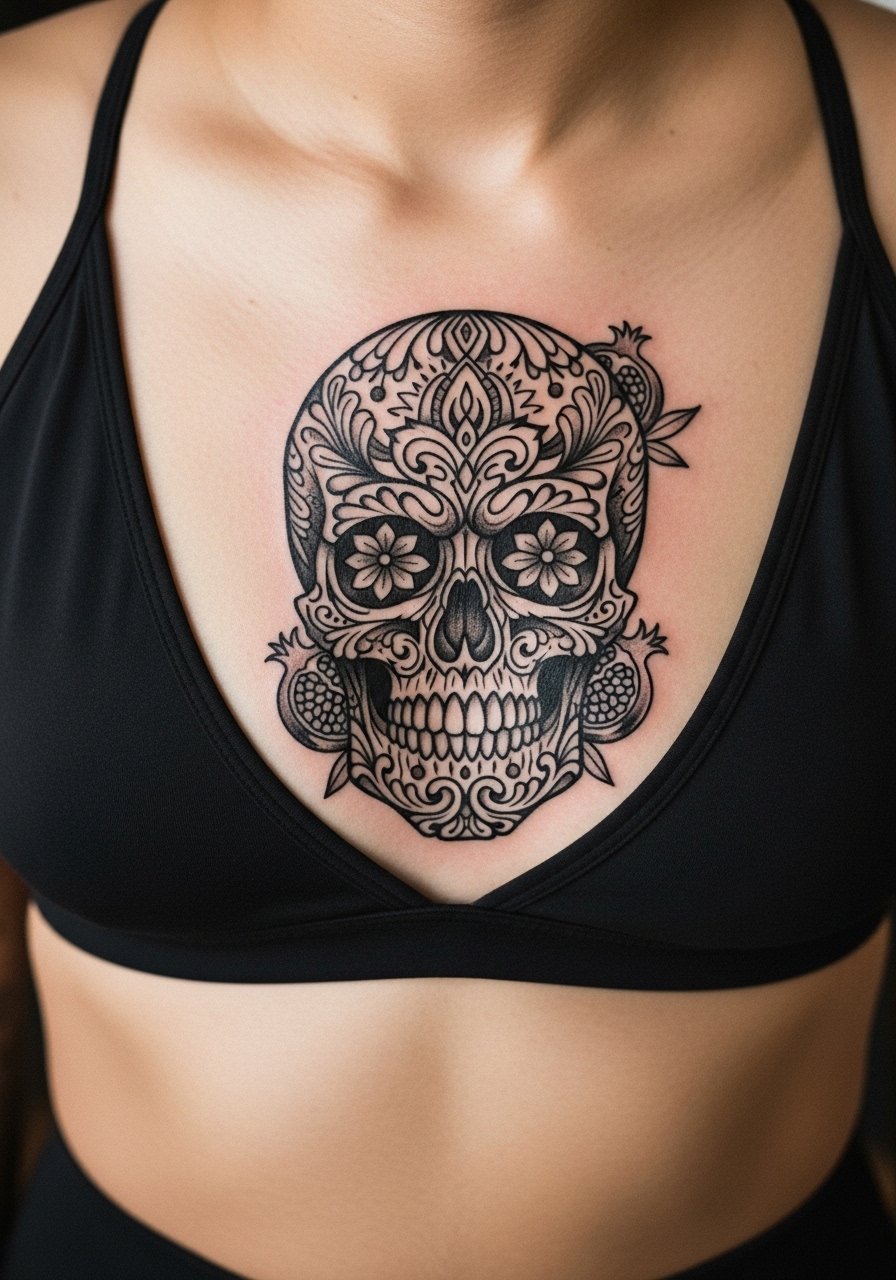
Fair warning, sternum placements are sharp on the pain scale but the central placement gives a strong, symbolic read. When you consult, ask for balanced negative space above and below the skull so the design does not creep into the ribs. A common aging issue is too much tiny dot work that densifies into a dark patch. This version uses solid black blocks and controlled stipple shading so it remains legible at year five. Plan for a longer session and a specialized artist who has done chest pieces. For sensitive placements, book someone who understands breathing and session breaks.
4. Athena Owl with Spear near Collarbone
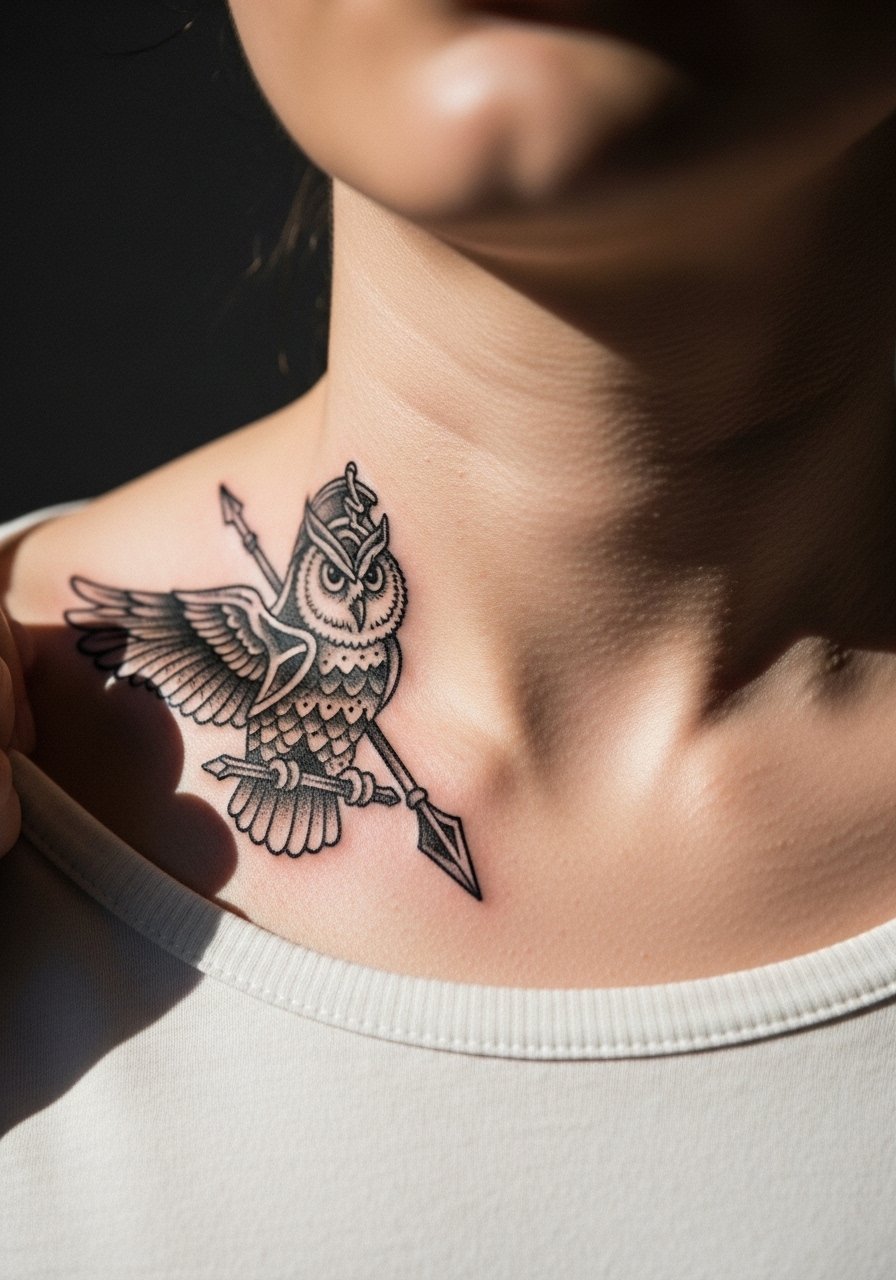
This placement reads like a statement piece for people who want something visible but not overwhelming. Tell your artist you want crisp linework on the owl's eyes and a thin spear shaft with heavy contrast around it. The collarbone feels sharp during the session and usually finishes in one to two hours. A common mistake is cramming too many feathers into a small collarbone space. For showing it off, wear an open-neck blouse to frame the motif without competing. Consider how necklaces sit above and below the design.
5. Apollo Sun Disk on Calf
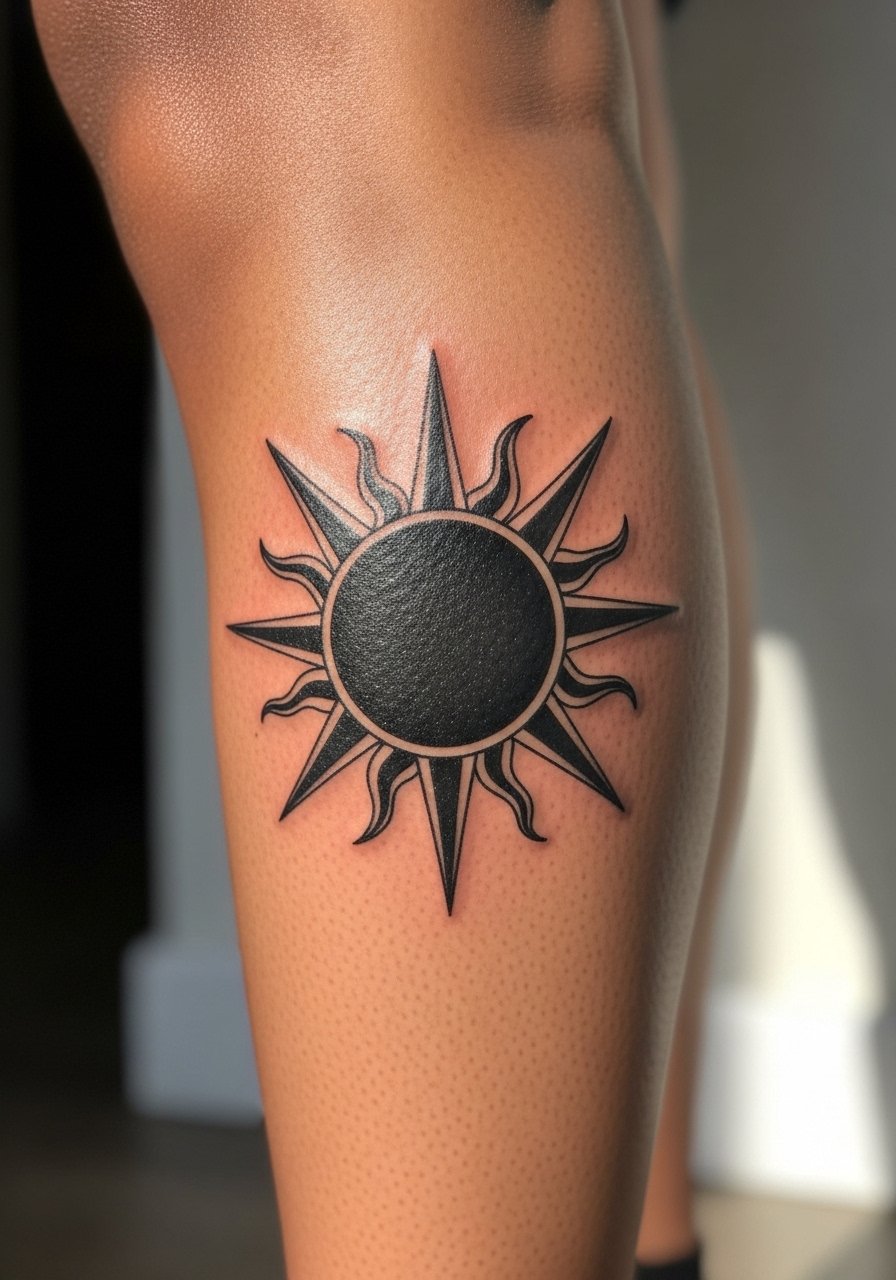
Visually this holds well because calf skin is less prone to thin-line blowout and the piece reads when you're standing. In consultation, ask for a strong outer ring and internal negative shapes rather than tiny filigree. Expect moderate pain and a session under two hours for most mid-sized disks. The aging path is usually forgiving but wearing heavy boots or rubbing with long socks can speed edge fading. For session comfort, wear loose drawstring pants so the artist can roll the leg up without squeezing the area and you can move freely afterward. Avoid asking for micro-etching inside the disk if you want long-term clarity.
6. Artemis Bow and Crescent on Outer Thigh
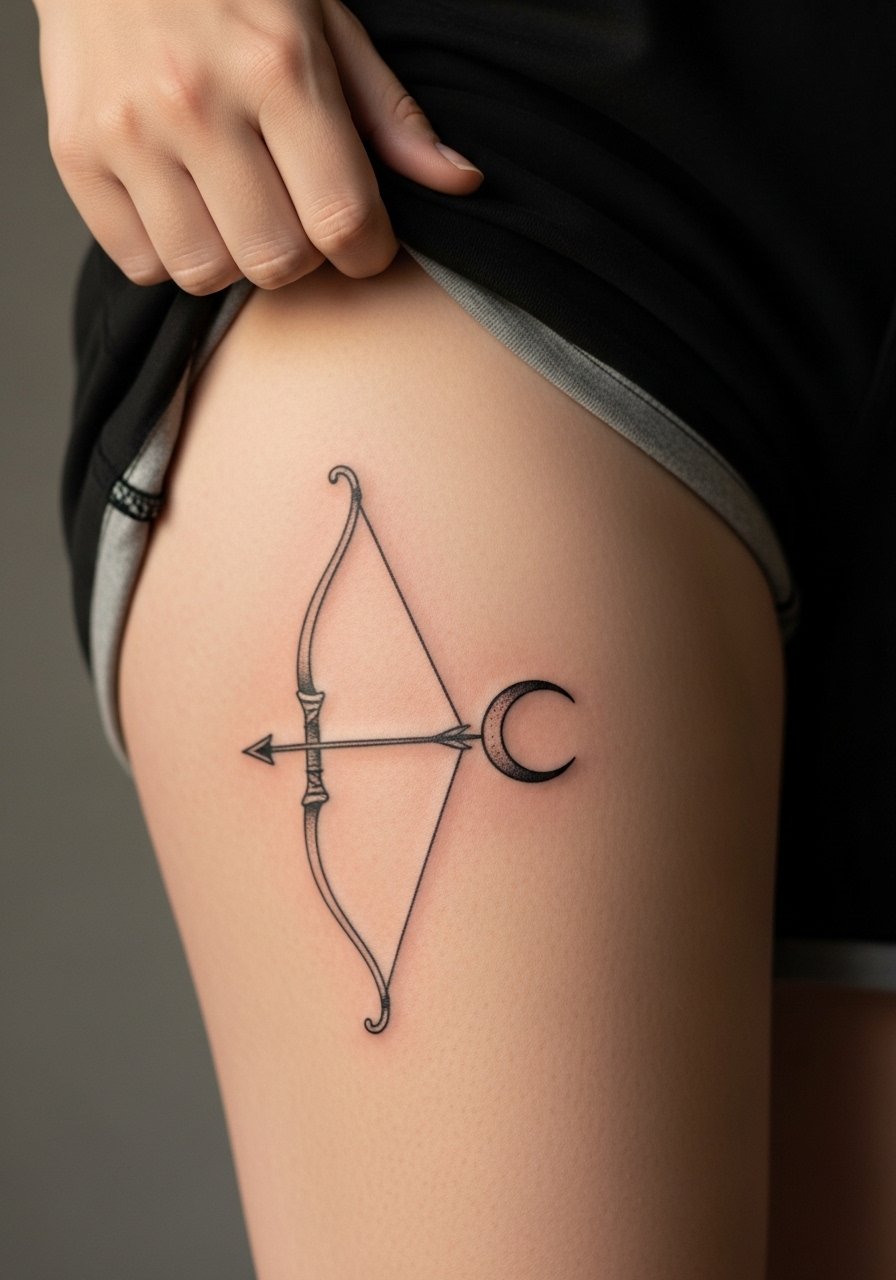
Thigh placements tolerate saturation well and are a good choice for pieces that need size to breathe. During the consult, spell out how much gap you want between the bow and the crescent so the shapes do not merge as the skin settles. Pain is lower here than ribs, and sessions are comfortable in two to three hour blocks. A mistake is squeezing this into a tiny patch to avoid a visible spot. For the appointment, wear loose shorts or a loose drawstring linen pant so the artist can access the area easily and you stay comfortable.
Studio Day Picks
These first six designs involve forearm, sternum, thigh, collarbone, calf, and upper arm work, and each placement benefits from slightly different prep and protection.
-
Stencil transfer paper kit. Helps the artist and client preview exact placement on curved areas like the sternum and thigh before committing.
-
Topical numbing cream. Applied per instructions it eases the sting on collarbone and sternum sessions without altering linework.
-
Thin protective film roll. Useful for calf and forearm pieces during the first week when clothes can rub at the edges.
-
Fragrance-free gentle body wash. Cleanses healing areas without stripping saturation from heavily packed blackwork.
-
Aquaphor healing ointment. A thin layer for the first few days maintains moisture for dense black fills without clogging pores.
7. Ares Spear on the Ribcage
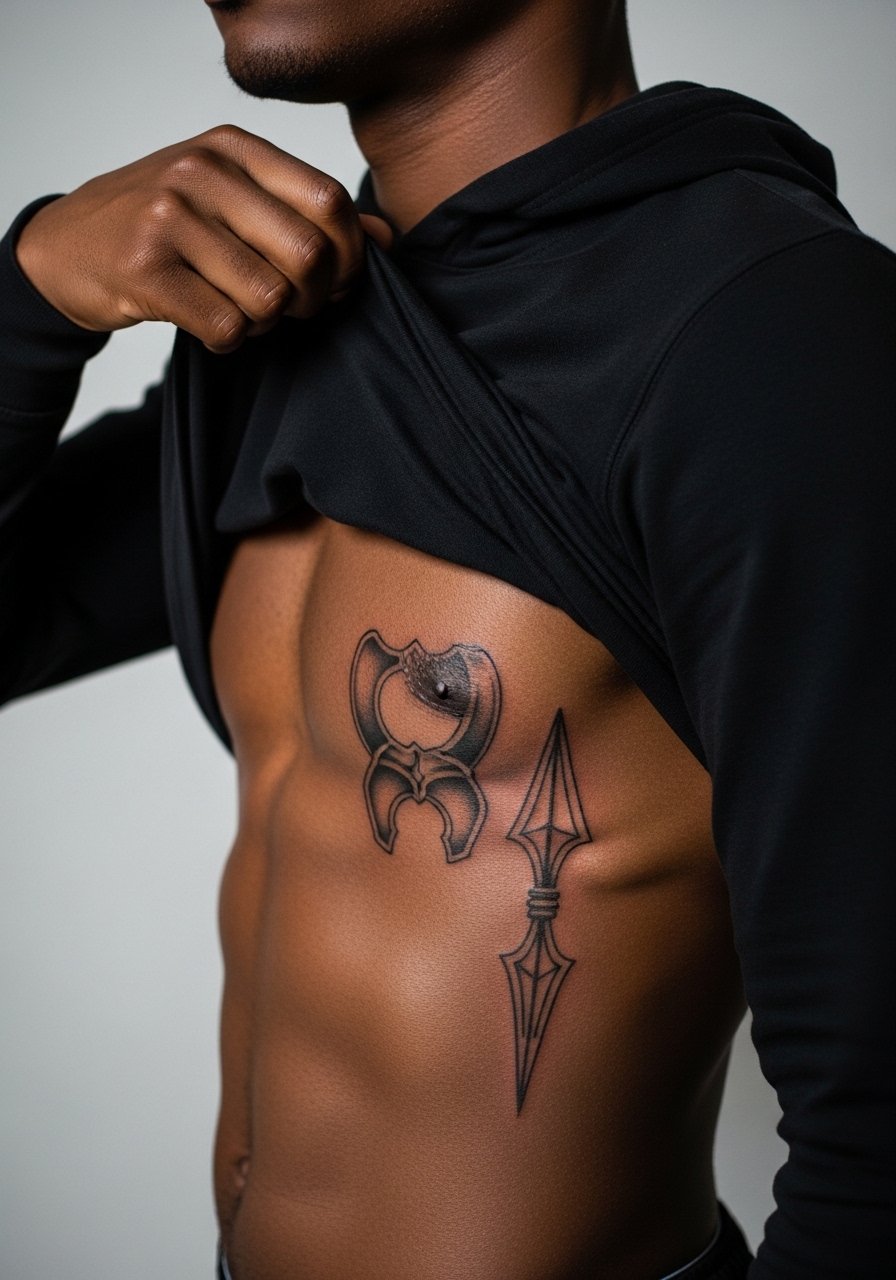
Fair warning, ribs are a high pain zone but give dynamic canvas for vertical designs. Artists split on fine line in this area. One camp says the skin stretch blurs thin lines within two years. The other camp argues that with correct needle depth and spacing, fine line can settle fine on ribs. Ask your artist where they land and ask for a version with more breathing room if they lean toward fine work. Common mistakes include demanding dense micro detail in narrow ribs. Expect one longer session and plan breaks. For longevity choose fewer thin parallels and more bold directional linework.
8. Aphrodite Silhouette on Lower Back

Lower back pieces read well as larger silhouettes because the flat plane gives a consistent canvas. In the consult, describe the silhouette edges you want to keep crisp and ask for negative space around hips so movement does not crowd the figure. Sessions are moderate in discomfort and often finish in fewer sittings than more contoured areas. Hand placement and clothing choices matter for showing this work. Try an open-back top or a tank top with a low back for nights out. Be aware that lower back tattoos can shift appearance slightly with weight changes.
9. Hermes Winged Sandal on Ankle
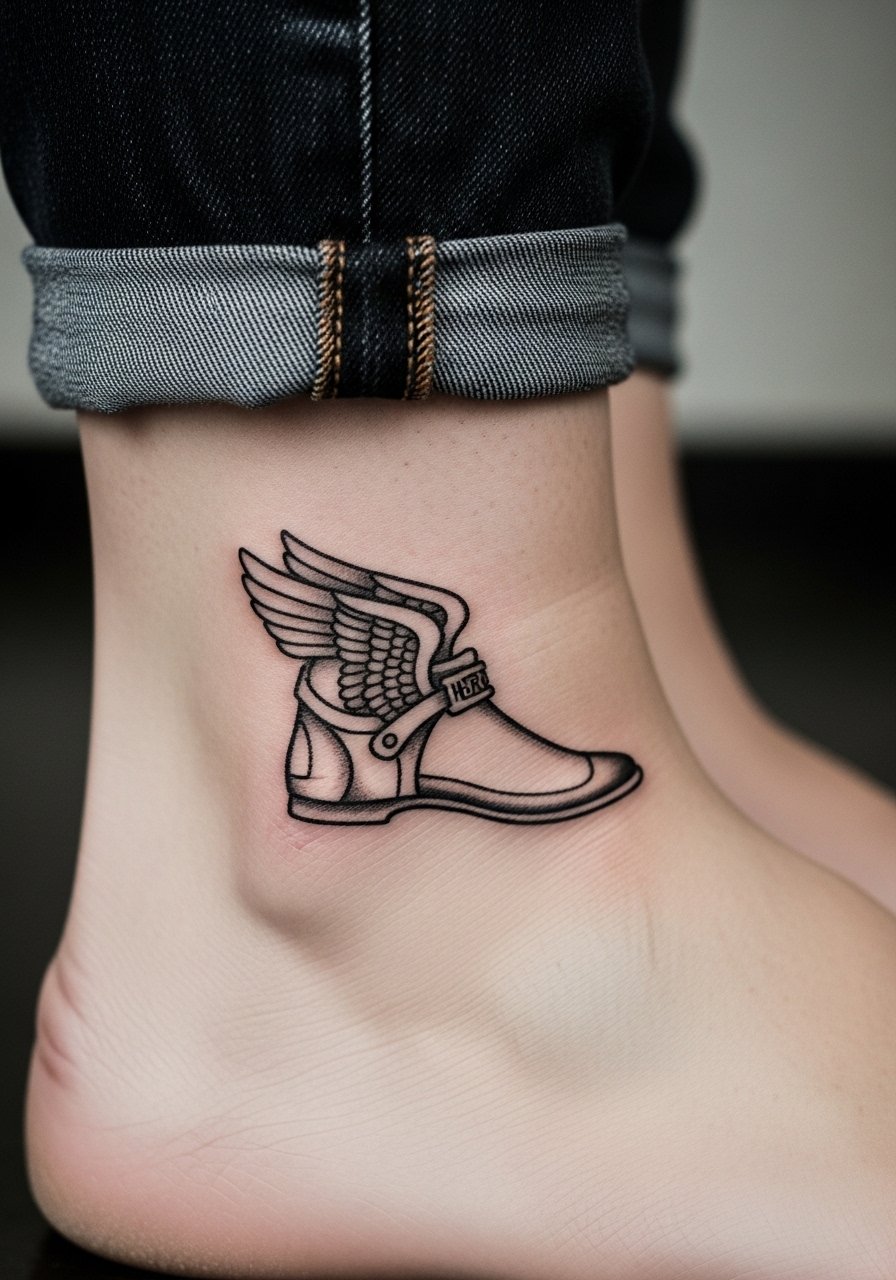
Ankle tattoos face friction from socks and shoes and need strategic negative space. Tell your artist you want the wing to read as feathers rather than tiny hatch marks so it remains legible through wear. Sessions are short and pain is moderate to high at the bone. A frequent mistake is microscopic feather detail that becomes a blur after heavy walking seasons. For showing off, pair with ankle-revealing shoes or sandals and consider a simple strappy sandal to keep attention on the ankle without crowding the motif.
10. Demeter Sheaf on the Wrist

Wrist work shows up in daily interactions and wears from washing and wrist motion. Ask for a slim banded composition that leaves skin between stem lines. Expect one hour sessions and higher touch-up probability because the wrist sees constant friction. A mistake is going too tiny with the stems and nodes. For showing off, pair with thinner bracelets or a minimalist watch that does not sit directly over the ink. A minimalist watch band can frame the design without rubbing the healing edge. Think about career contexts since hand and wrist tattoos remain more visible than other sites.
11. Dionysus Grapevine Accent on Upper Forearm
Visual impact is strong on the upper forearm because the area resists blowout better than fingers. When you consult, ask for a mix of solid black pods and negative leaf shapes rather than dense dot work. The session feels like moderate vibration and usually spans one to two hours. A common mistake is asking for filigree in the veins of leaves which can blur. At two years expect some softening of the thinnest veins. For longevity favor bolder leaf outlines and selective internal texture.
12. Hephaestus Hammer on Shoulder Blade
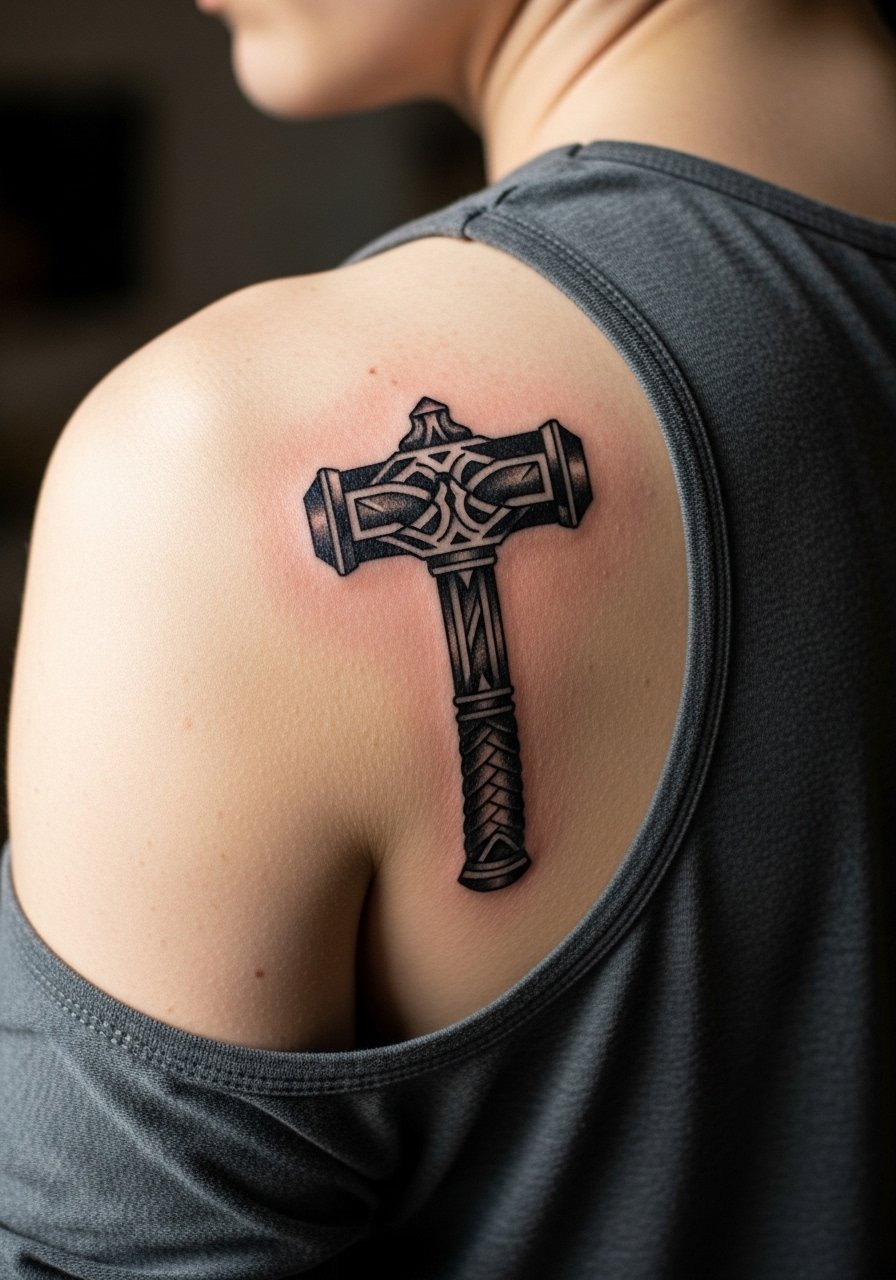
Shoulder blade placements are comfortable during sessions and the skin here takes saturation well. Tell your artist you want strong silhouette edges with subtle inner stipple shading so the hammer looks dimensional without micro detail. Expect a two hour session and low long-term blowout risk. A mistake is trying to compress a sculptural hammer into a tiny square. For showing off, open-back tops work well because they reveal the tattoo without friction from straps. Rotate sleeping positions while healing to limit constant pressure on the piece.
13. Hestia Hearth Flame on Upper Chest
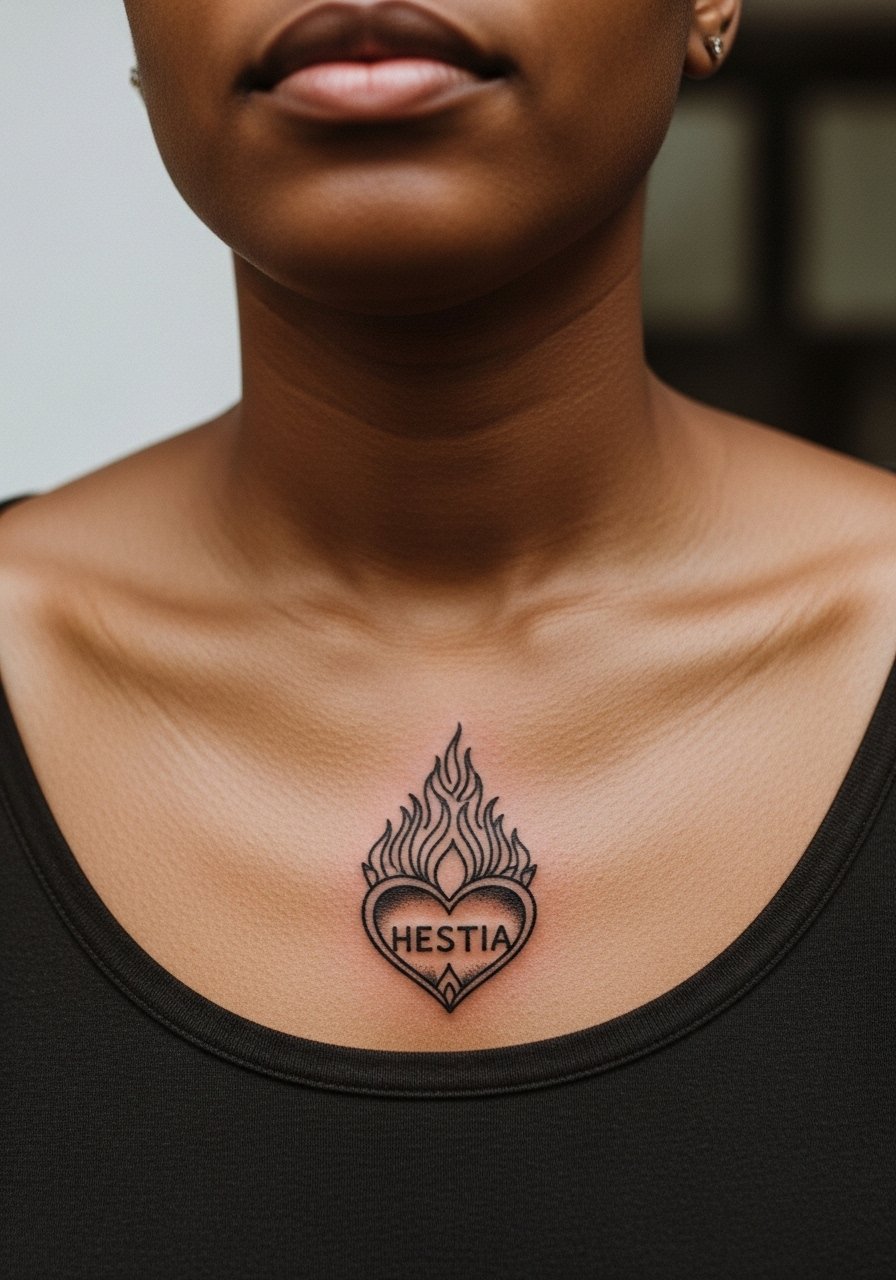
Upper chest pieces are intimate and read as close statements rather than public displays. Say to your artist you want the flame to have a controlled solid fill at the base and lighter negative shapes toward the tips so it keeps contrast as it ages. Pain is moderate and breathing can affect the line origin near the sternum so plan short breaks. A mistake is overfilling the tiny tendrils which can merge over time. For showing this area, a wide-neck shirt frames the piece and keeps fabric off fresh lines.
14. Persephone Pomegranate on Upper Thigh
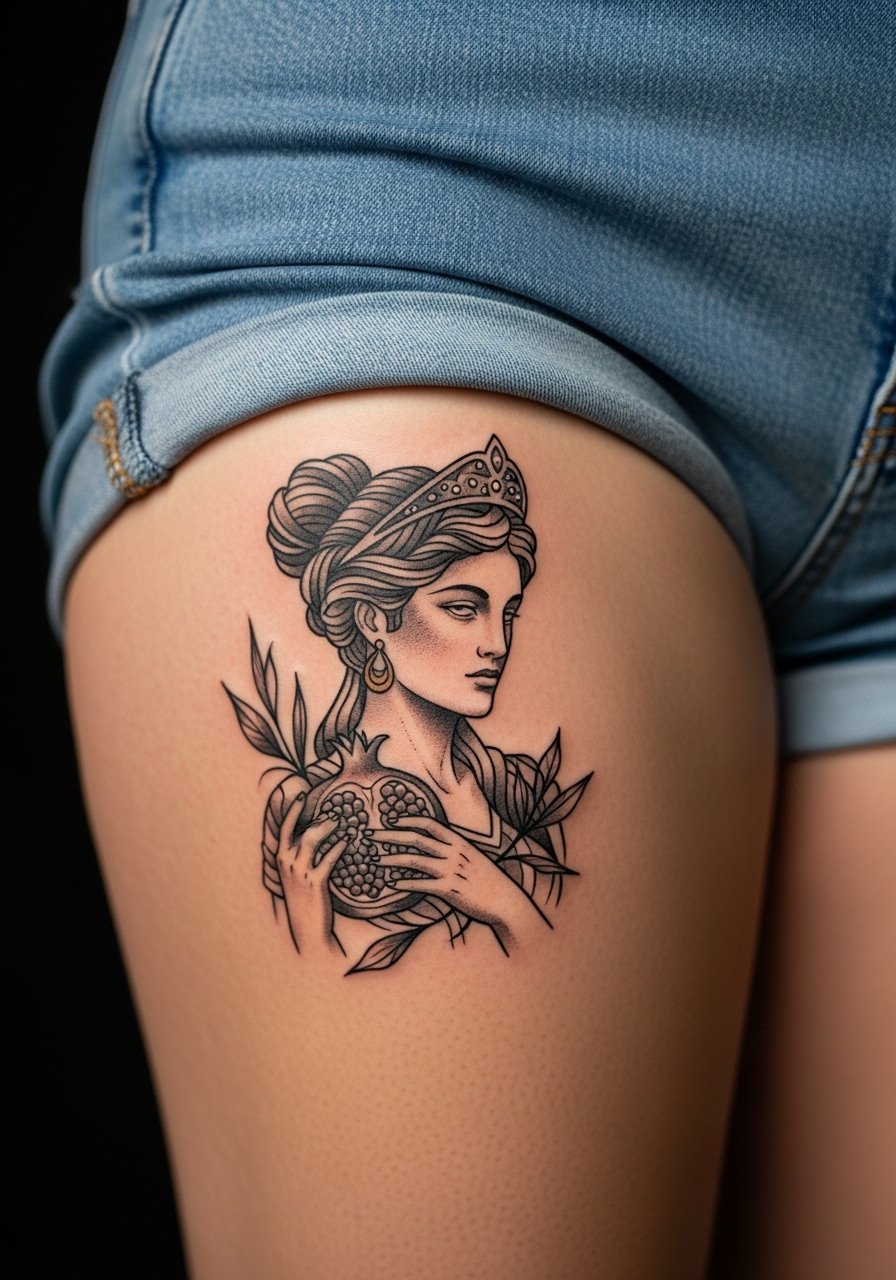
Thigh placements let you go bigger and keep detail readable longer. During the consultation, specify how big the seeds should be and ask for alternating solid seeds and negative-space seeds for long-term legibility. Sessions are comfortable and you can usually sit for longer stretches. A common mistake is cramming tiny seed detail without size. If you opt for inner thigh work, find an artist with private-session experience because that area requires sensitivity and setup.
15. Helios Sun Wheel across the Upper Back

The upper back is ideal for larger, symmetrical motifs because the flatness keeps radial elements true. Tell your artist you want a bold outer rim with internal negative geometry so it reads from across the room. Sessions can be longer and may need two sittings. Mistakes include tiny interior lace patterns that blur into gray at year three. For longevity favor spacing and heavier outer bars rather than micro-lining.
16. Eros Arrow on the Side Finger
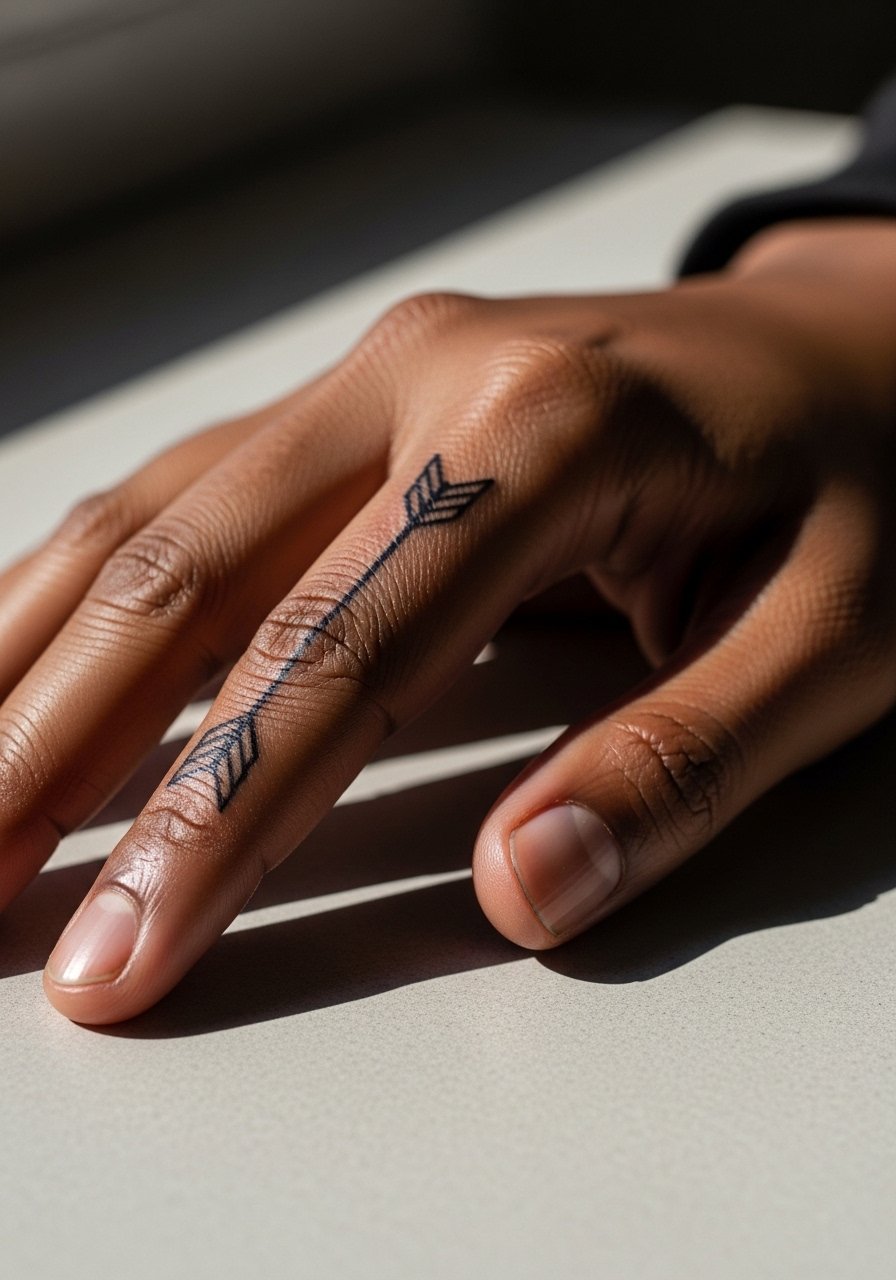
Finger tattoos are notoriously touch-up heavy because skin is thin and subjected to constant washing and abrasion. Be explicit with your artist that you want thicker shaft lines and minimal internal cross-hatching. The session is usually short but the piece will likely need a touch-up at year one and again at year three. A common error is asking for ultra-thin filigree. For showing off, stack simple rings or wear a thin chain ring to echo the arrow without covering it. Remember that finger tattoos can fade faster than forearm or calf work.
17. Nemesis Scales on the Bicep
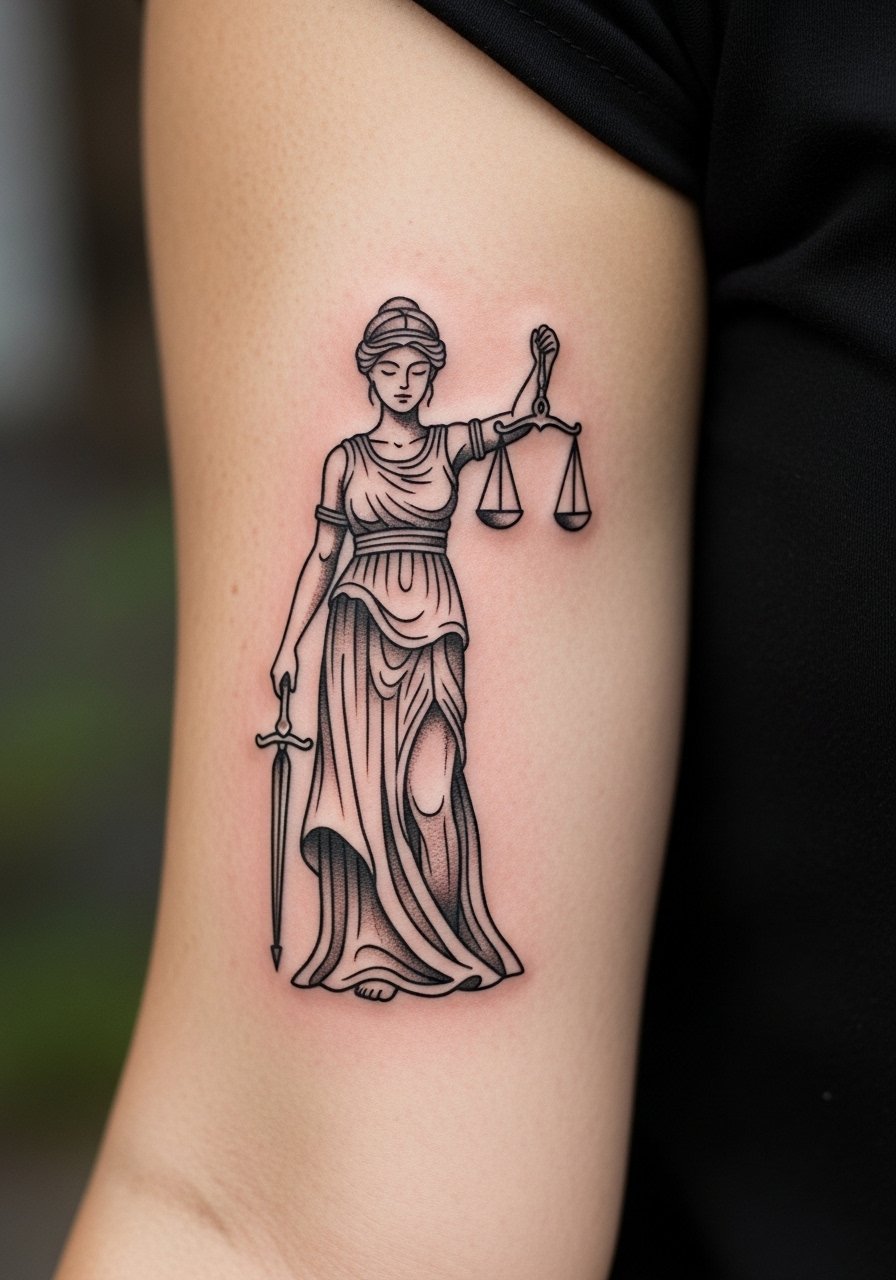
Bicep placements give you room for balanced compositions and the muscle offers a forgiving canvas. In the consult, be clear you want the scales to maintain a gap between chains and pans so they do not merge over time. Sessions are generally comfortable and one to two hours is typical for medium-sized work. A common mistake is adding too many tiny chain links which can merge. If you plan arm workouts, allow a week before heavy lifting to reduce swelling that can distort fresh lines.
Frequently Asked Questions
Q: Will bold blackwork portraits like Zeus stay readable on the upper arm after five years?
A: In my experience, bold portraits with strong linework and solid black saturation hold up better than tiny micro-portrait attempts. Ask your artist to prioritize edge clarity and negative space around facial features. Expect a touch-up conversation around year three to five depending on sun exposure and how often the area sees friction.
Q: Is fine line detail a bad idea for ribcage pieces such as the Ares spear?
A: Artists are split on this in two camps. One says thin lines blur on ribs within a couple of years because of skin stretch. The other says with correct depth and spacing the lines can settle fine. The safest route is to ask your chosen artist about their healed photos for rib work and to consider slightly bolder line weight or more spacing if you want longer readability.
Q: How should I dress for a sternum session like Hades to make the artist's life easier?
A: Wear a fitted sports bra or a wide-neck shirt you can pull slightly aside so only the area being worked on is exposed. This keeps the rest of the torso covered and makes touch-ups and breaks easier. A zip-up hoodie is also handy for layering on afterward.
Q: Do ankle and wrist placements require special aftercare because of friction?
A: Yes, they do. Both areas see repeated rubbing from clothing and daily use, so keep them dry and protected in the first week and consider a thin protective film during high-friction activities. If you plan to keep the area exposed, swap in softer shoes and looser cuffs while healing.
Q: How do I find a good blackwork artist for Greek god motifs without relying on a single viral post?
A: Search portfolios via directories, convention guest lists, and community threads on platforms that focus on tattoos. Look for healed photos of similar placements and heavy black saturation. Use tags and community galleries to compare multiple examples before booking so you can ask specific questions in the consult.
