
Fine line back pieces are trending on feeds, and they often look flawless in photos. The reality is that what reads delicate and crisp on day one can blur or soften if placement and spacing are ignored. Think about how your back moves, what clothing will reveal the work, and how often you want to schedule touch-ups. Below are 27 back tattoo ideas with practical notes on aging, session feel, and what to ask in the consult.
1. Vertical Script Along the Spine
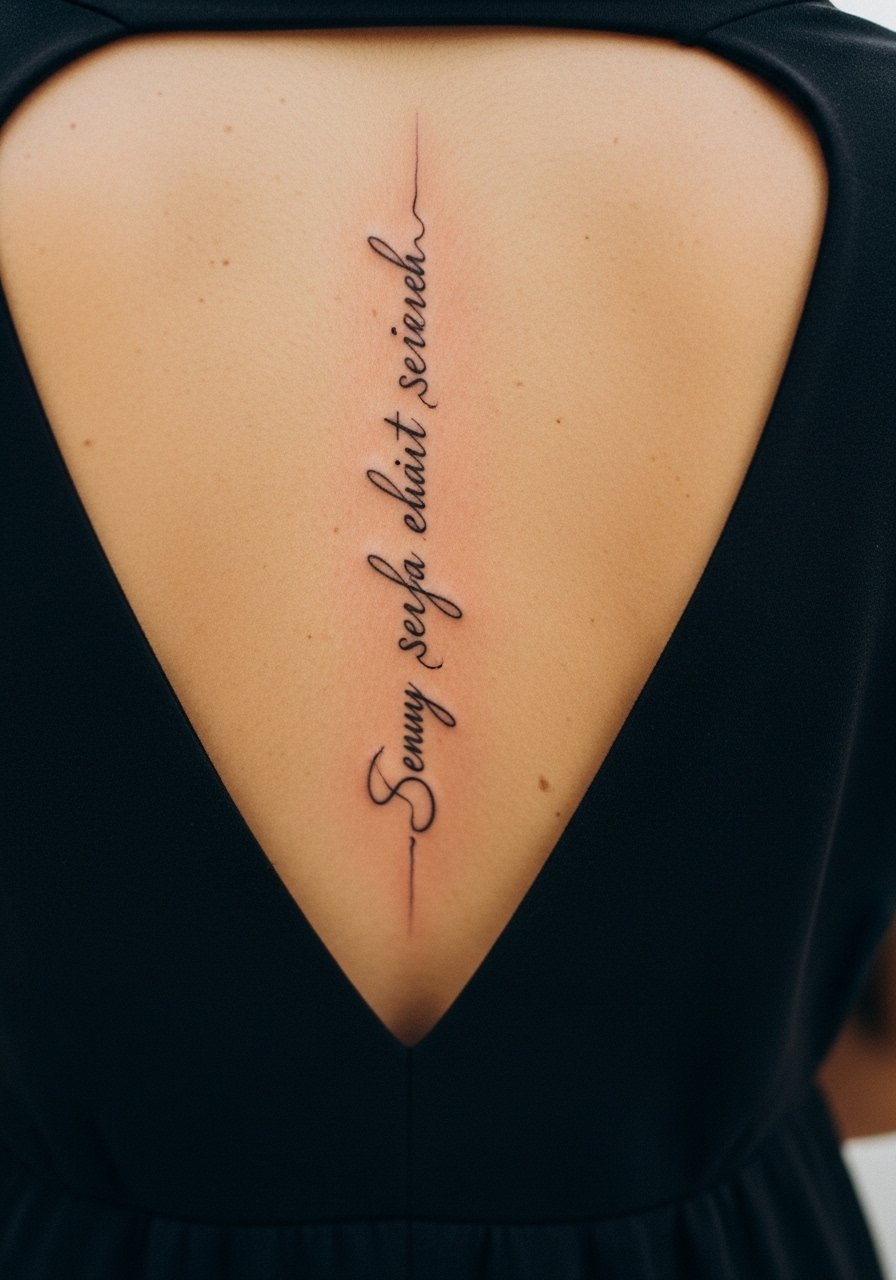
A vertical script down the spine reads elegant when the lettering has breathing room. Tell your artist you want slightly increased letter spacing and a medium line weight so the letters do not merge as the skin moves. Fair warning the spine can be a bony, sensitive spot so expect a sharper sting than the fleshier parts of the back. For healing, small touch-ups are common around year two because the linework can soften where the skin stretches. This placement pairs beautifully with open-back midi dresses for evenings and a racerback tank for casual days.
2. Upper Back Floral Garland
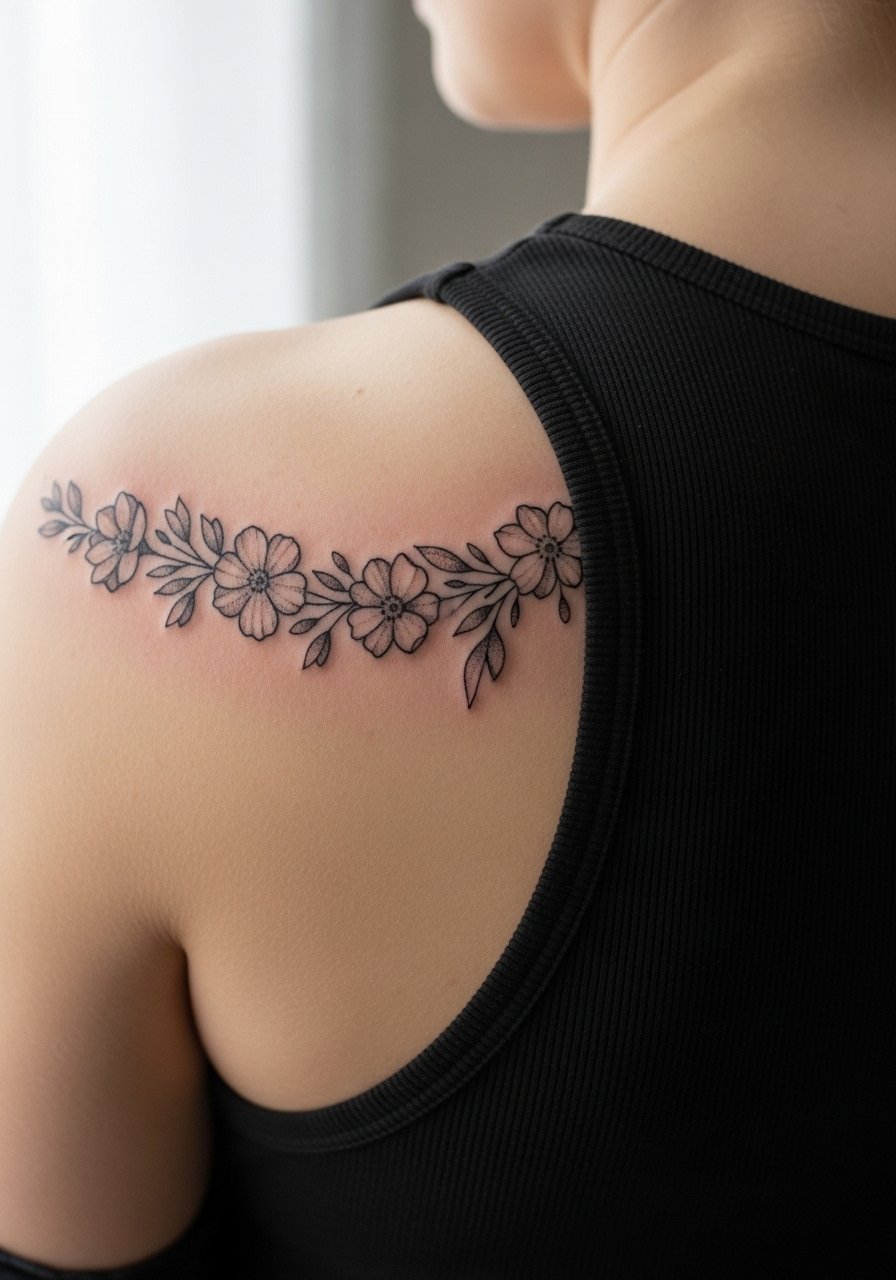
This garland follows the curve of the shoulder blades and is forgiving if you want something that still reads from a distance. Ask for stipple shading in the petals rather than saturated color to avoid long-term fading that leaves patchy color. Most clients describe the session as a slow, steady buzzing with brief sharp spots near the spine. Expect a touch-up around year three if you want the stippling to stay crisp. For show-off looks wear open-back tops or a loose button-down shirt pulled aside at the shoulders.
3. Single Bold Blackwork Butterfly Between Shoulders

A single bold silhouette reads from across a room and ages in predictable ways. Solid black saturation tends to hold better over time than thin black lines, so request a heavier fill if longevity is a priority. The shoulder-blade pocket is less painful than the spine but expect the artist to scrape and layer to get even saturation. Blowout risk here is low compared with thin script on the same spot. For daytime outfits try halter neck tops that frame the butterfly without covering it.
4. Mandala Centered at the Nape
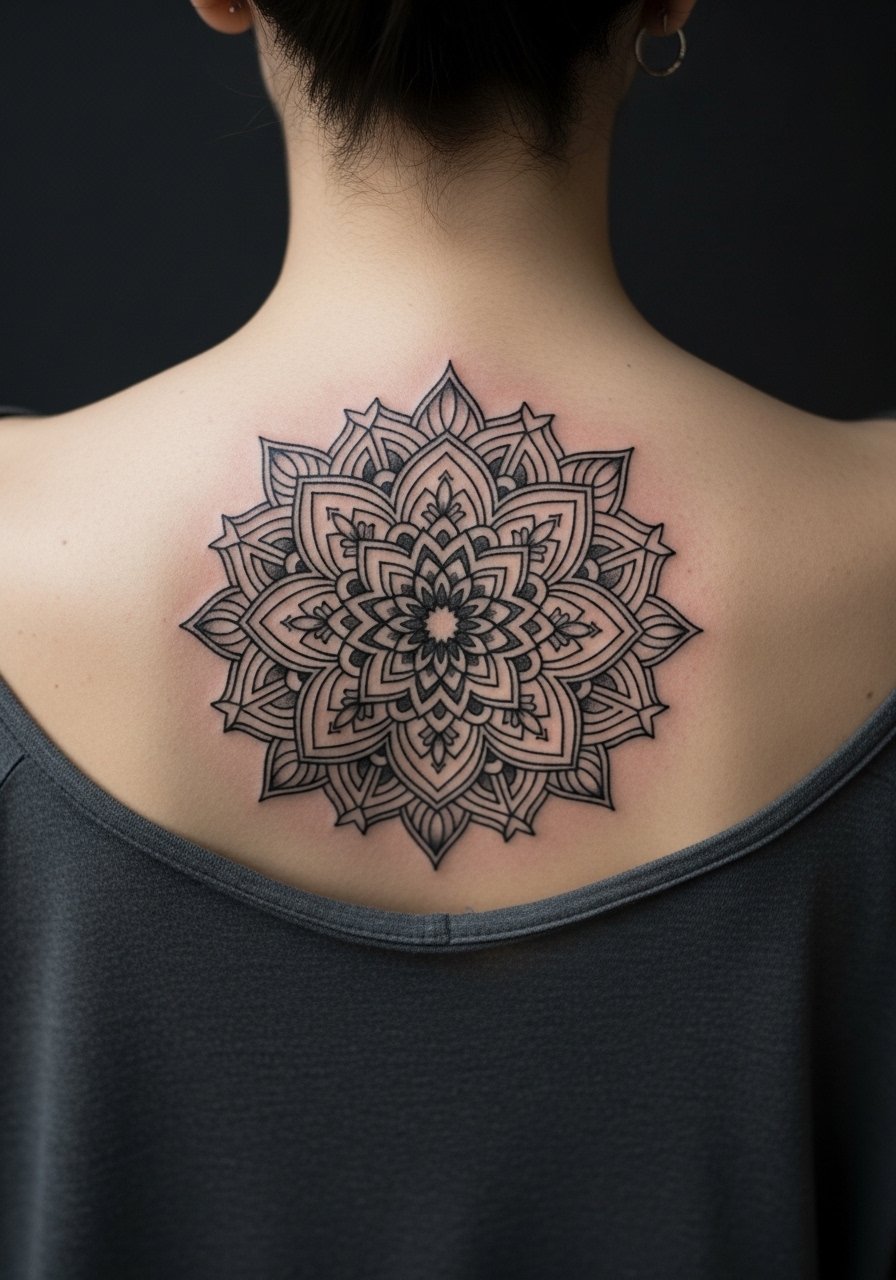
A mandala at the nape is a classic choice that balances symmetry and negative space. If you want it to keep clean detail, ask for more spacing between the inner rings and for dot work instead of dense shading in the center. Some artists debate how small mandalas can go and still read at distance. One camp says keep the tiers roomy so the pattern does not blur. The other camp trusts micro-line technique for smaller pieces. Name where your comfort for detail sits during the consult. For easy access to the area during the session wear a wide-neck shirt you can pull aside.
5. Asymmetrical Shoulder Blade Piece
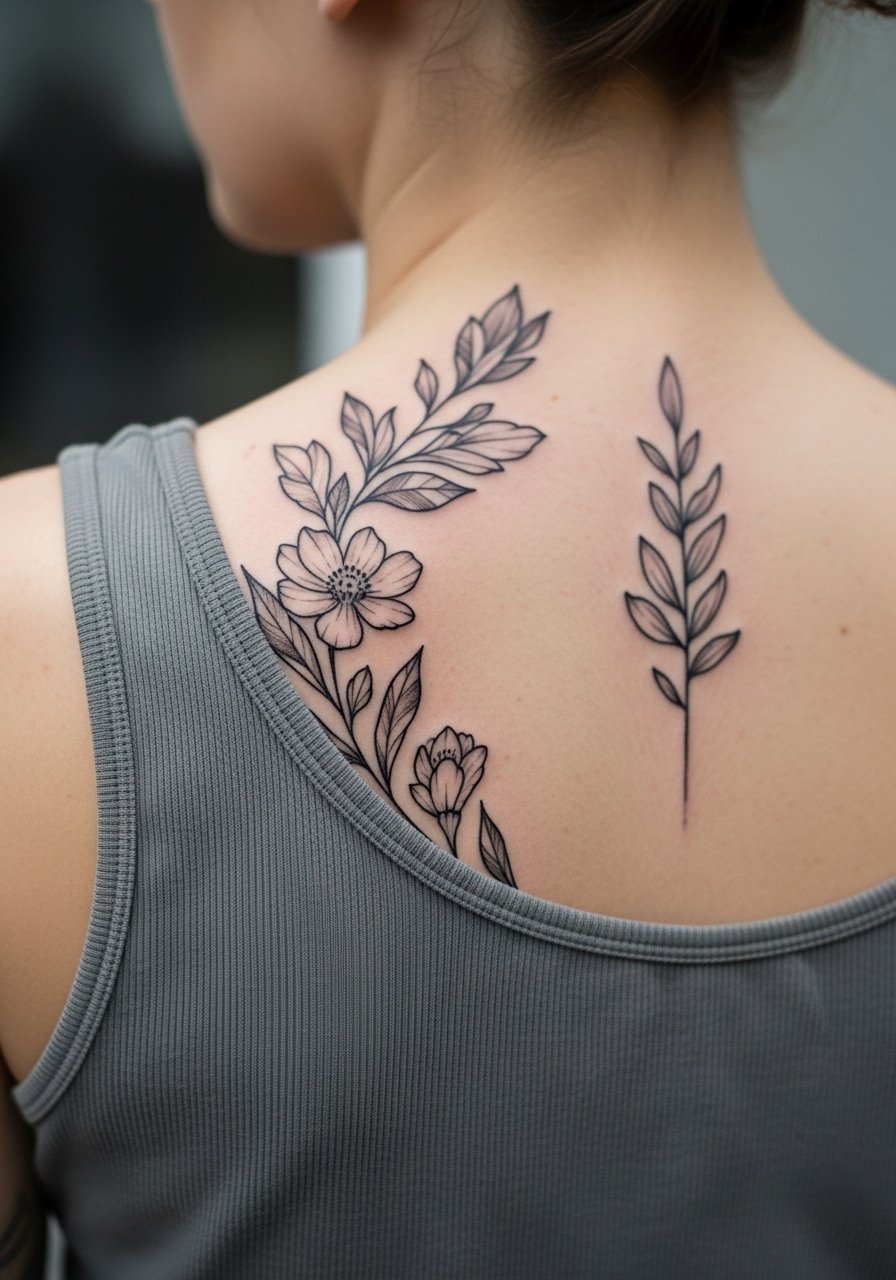
Asymmetry plays well across the scapula because the design can follow natural muscle lines. Say you prefer a composition that looks like it was laid over the bone rather than sitting squarely centered. That instruction helps the artist tilt stems and leaves so the piece moves with your shoulder. Most people report the session as comfortable when lying face down for upper back work, though reaching to adjust position can briefly sting. Style this with a one-shoulder top to show off the sweeping motion.
6. Minimalist Constellation Across the Lower Upper Back
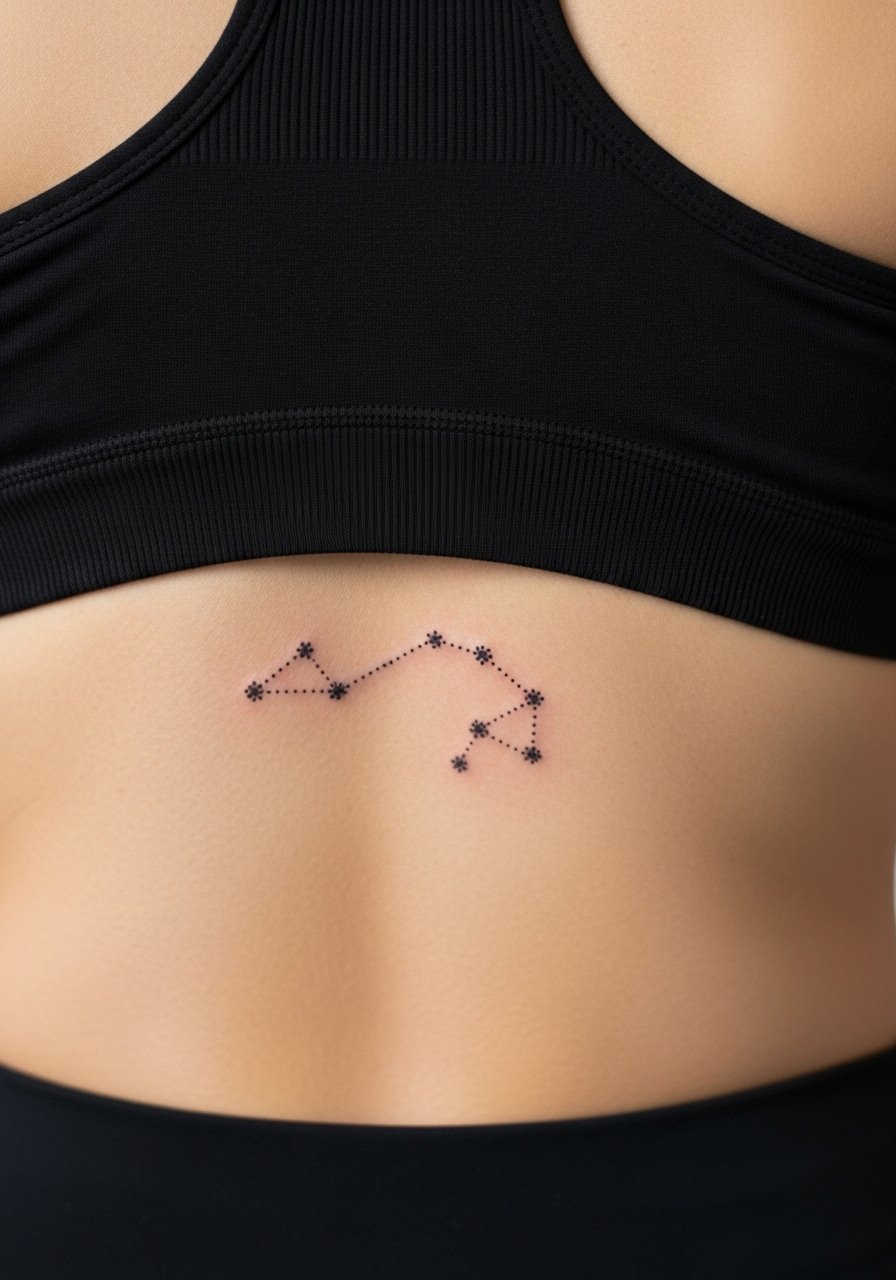
Tiny constellations depend on crisp dot placement and spacing. The common mistake is crowding the dots too close. Ask for slightly increased spacing and for the artist to preview the negative space with temporary ink marks so you can see how it reads from a few feet away. Dot work holds up well if dots are placed with intent rather than clustered. This placement is wonderfully shown off with sports bras with scoop backs or layered under a low-back dress.
Studio Day Picks
These items smooth out sessions for upper and shoulder-back pieces and address the access needs of the designs above.
-
Numbing cream. Use as directed before an especially sensitive upper-back or near-spine session to reduce peak pain and make longer sittings more manageable.
-
Disposable wide-neck cover. Keeps clothing clean during stencil placement and helps you avoid smudging fresh lines on open-back tops.
-
Breathable body adhesive tape. Useful for keeping stencil edges flat on curved shoulder blades so the transfer stays accurate throughout the first pass.
-
Gentle unscented dry shampoo. Handy if you want to keep hair off the nape area without worrying about wet hair sticking to fresh ink.
-
Aquaphor healing ointment. A thin layer helps retain moisture in the first days for delicate linework on the upper back while the area is most prone to friction from clothing.
7. Full Back Botanical Panel
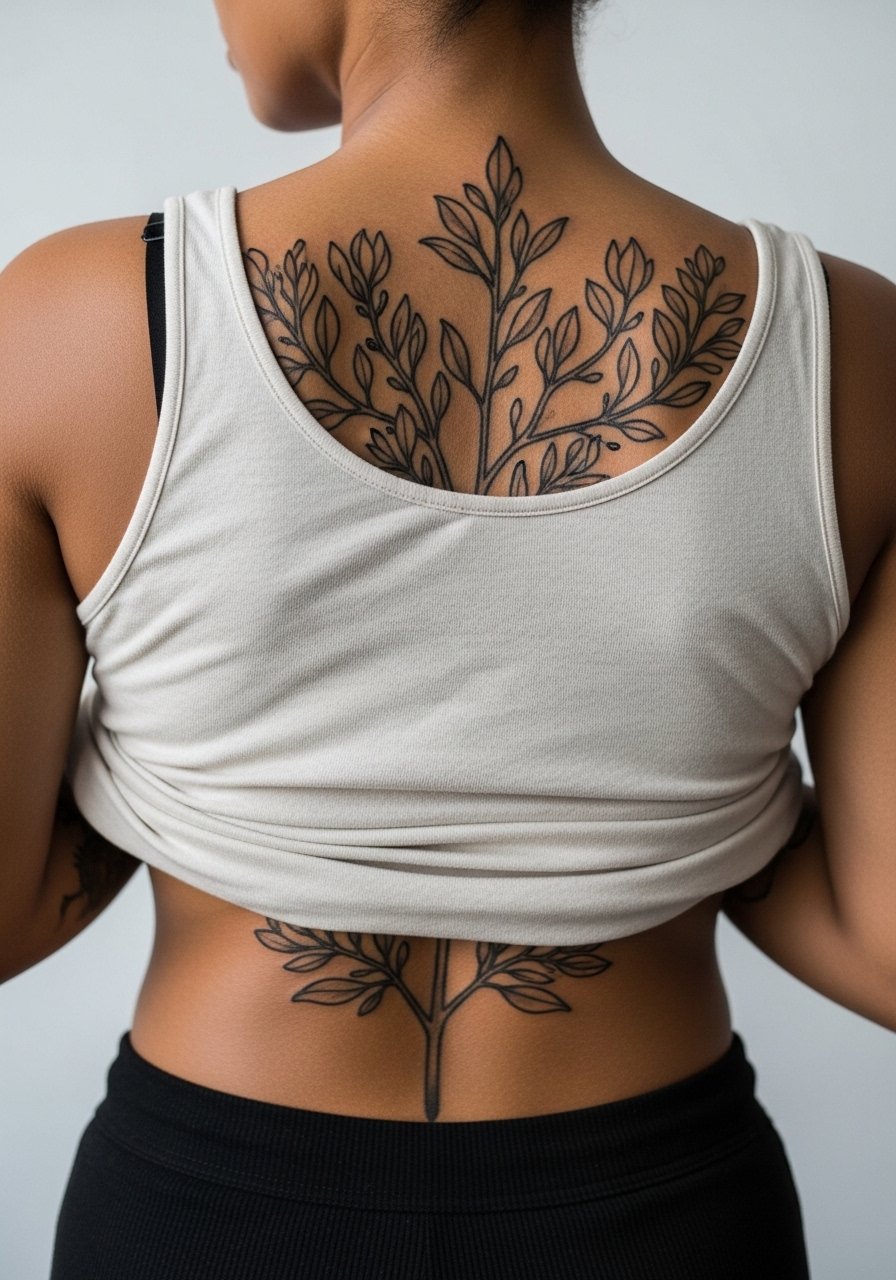
A full back botanical allows for room to breathe and intentional spacing that ages well. In the consult, request a layout that leaves negative corridors between stems to minimize future merging in shaded zones. These sessions are long and usually done over multiple visits. Plan for two to four sittings depending on saturation and detail. The common mistake is trying to cram too much micro detail into the first pass. For show-off outfits consider open-back maxi dresses or halter tops that reveal the central panel.
8. Geometric Spine Column
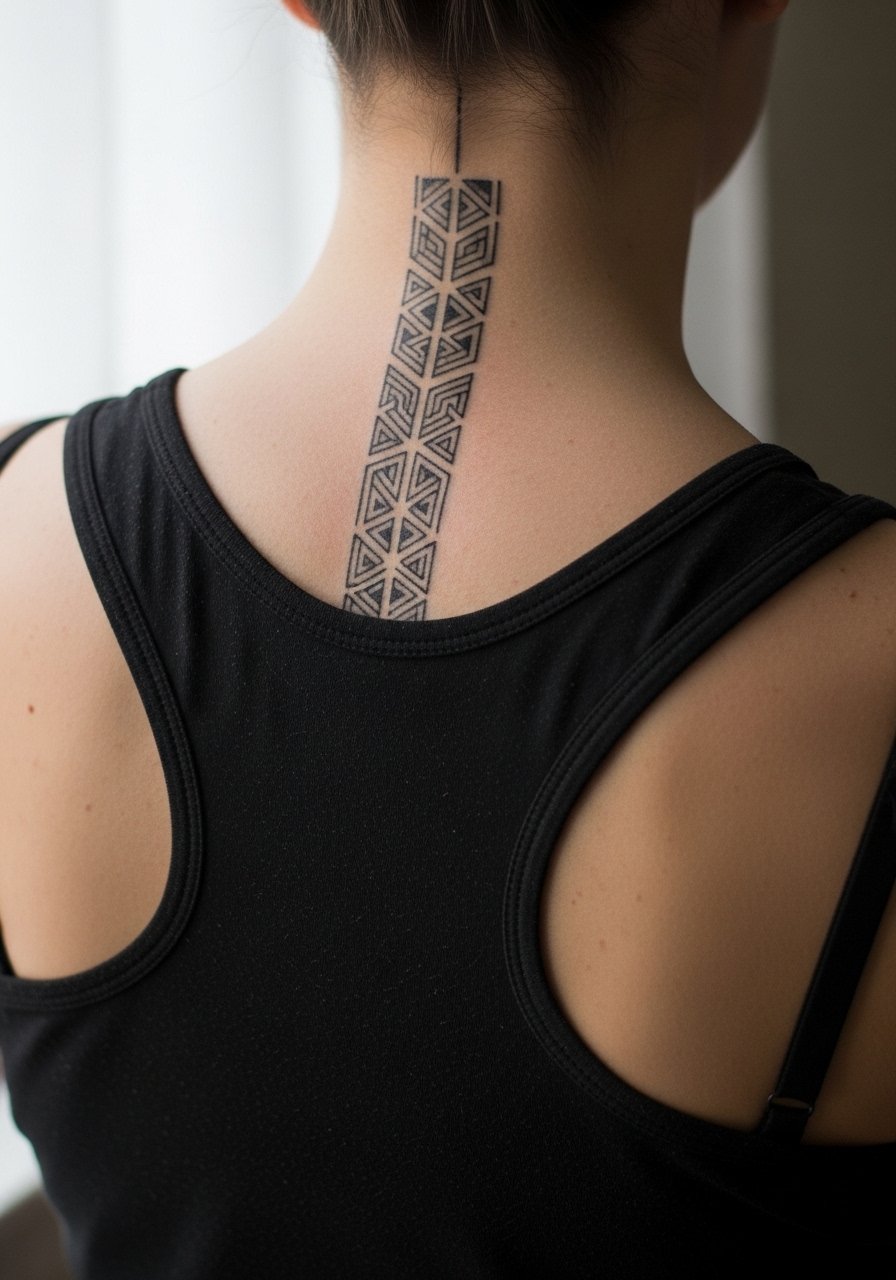
Geometric work on the spine reads architectural and demands perfect symmetry. Bring photos that show the exact spacing you want and ask the artist to mark the vertical axis on your skin before stenciling. The spine area sees subtle stretching, so expect small touch-ups around the two to three year mark if the inner lines soften. Some artists argue that micro-geometry should avoid the very center of the spine because of movement. The other view is that careful depth control handles it fine. Discuss where your chosen artist stands. For session comfort wear a racerback tank you can shift without rubbing the stencil.
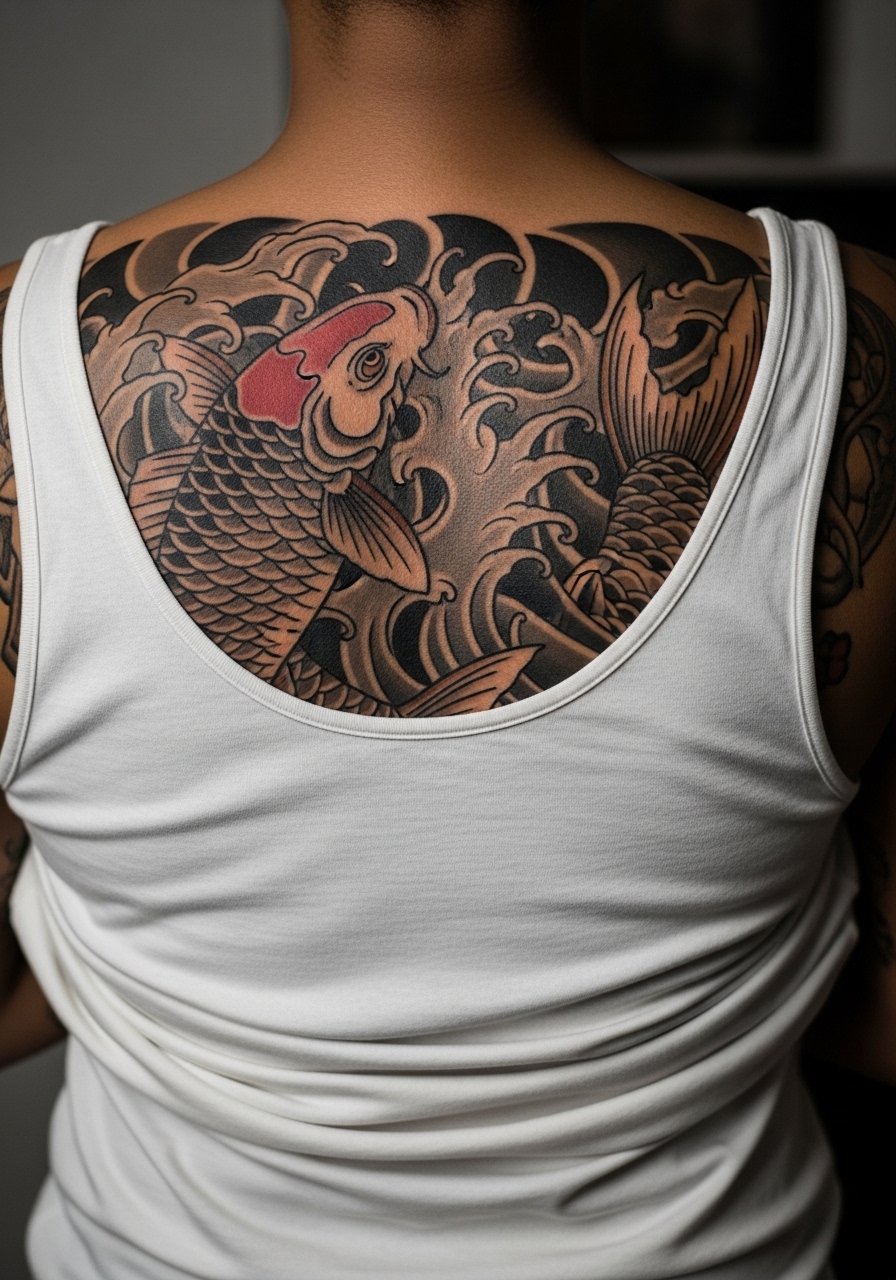
9. Koi Curve Along the Side Back
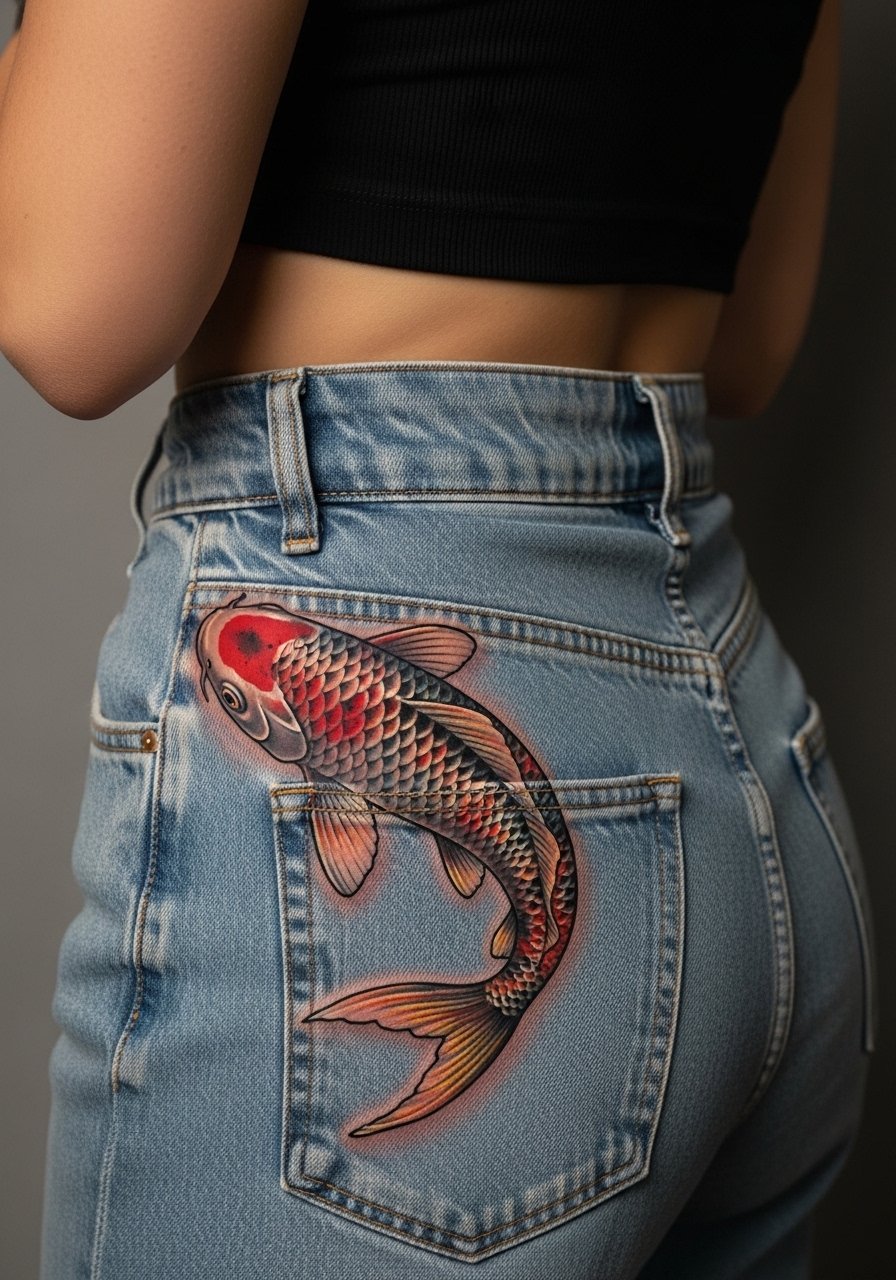
Koi influence traces to Japanese tradition, and many people choose the motif with respectful variations rather than direct replicas. If you want a nod to that aesthetic, opt for composition and movement without copying sacred elements. Micro-realism on the side back plays with curvature, so tell the artist you want the tail to follow the waistline. Sessions on the side can be more sensitive than the flank because of thinner skin. Expect color to settle unevenly and plan a color-correction touch-up if necessary. Wear high-waisted bottoms that can be lowered slightly for the session.
10. Neo-Traditional Phoenix Across the Upper Back
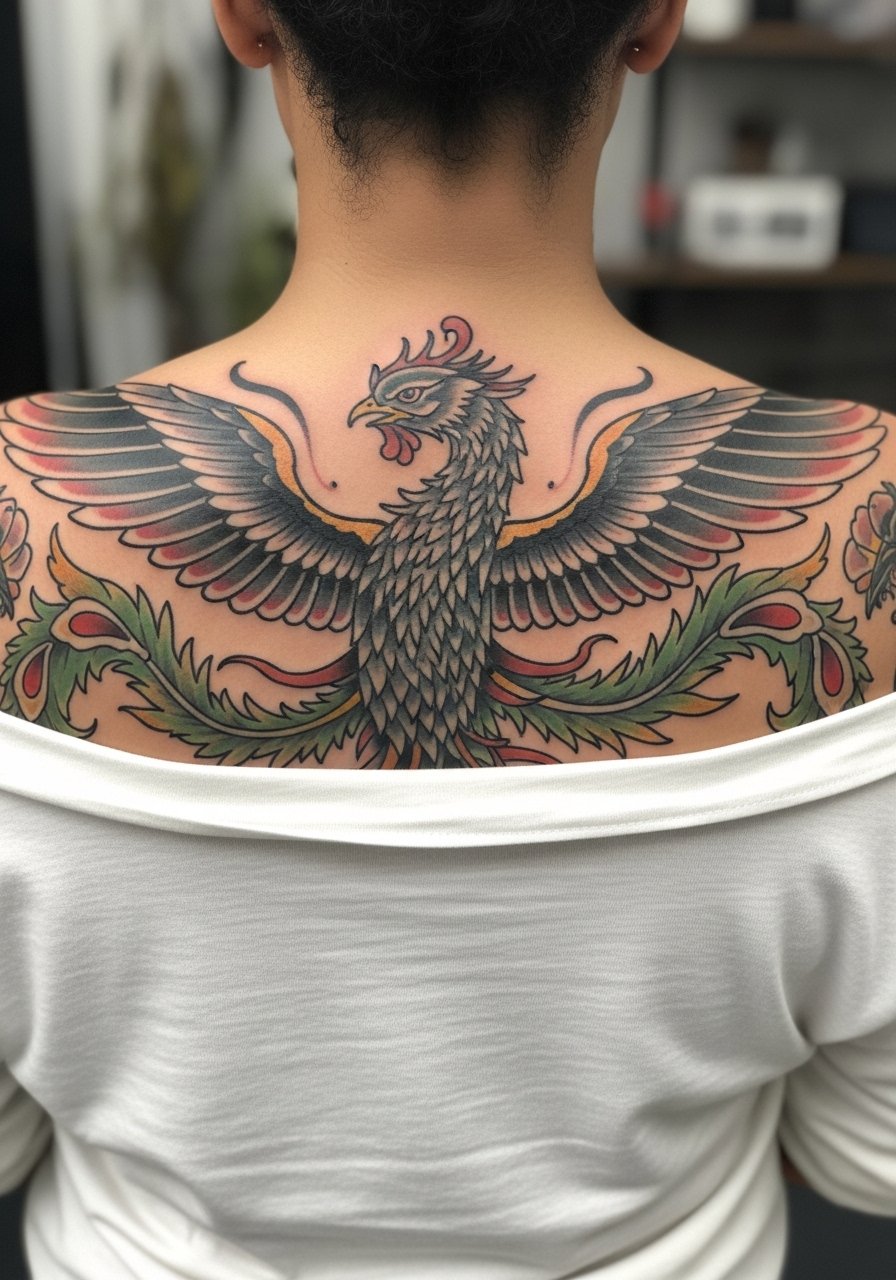
A neo-traditional phoenix uses saturated color and bold linework that often ages more predictably than tiny micro-line pieces. The trick is asking for slightly thicker outlines around critical edges so the bird reads even as colors soften. Sessions of this scale can bruise more than line-only work, and the shoulder-blade area sometimes swells slightly. Expect a touch-up focused on saturation at year three to four. Pair the piece with off-shoulder tops when you want to reveal the wingspan.
11. Dot Work Spine Chevron
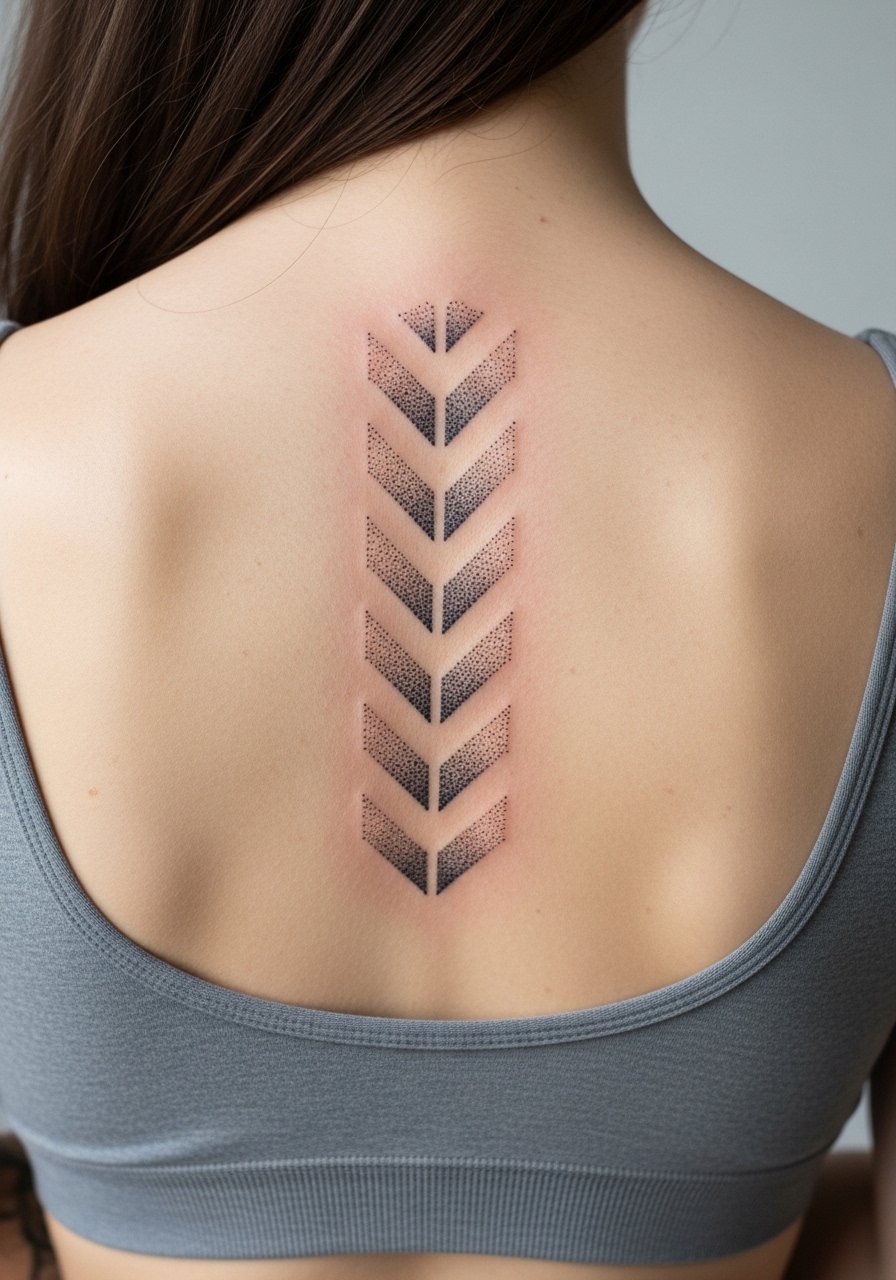
Chevron patterns create rhythm along the spine and dot work keeps the effect airy. The common mistake is overpacking dots which turns airy stippling into muddled shading. Ask for gradation guides so the artist spaces dots progressively. This area tolerates dot work well but needs slightly deeper placement to avoid early fading. The session feels like a steady vibration with an occasional sharp pinch over the vertebrae. For evening looks try scoop-back tops.
12. Blackout Lower Back Accent
Blackout work can make a bold visual statement and it hides older marks effectively. Discuss long-term commitment because blackout pieces are hard to modify later. The lower back has consistent movement so ask about breath breaks during long sessions. Expect several sittings for even saturation. A frequent mistake is choosing a pattern with too-small negative shapes which disappear as the black settles. Style this with low-rise jeans or high-waisted skirts that reveal the negative-space motif.
13. Map or Coordinates Across the Mid Back
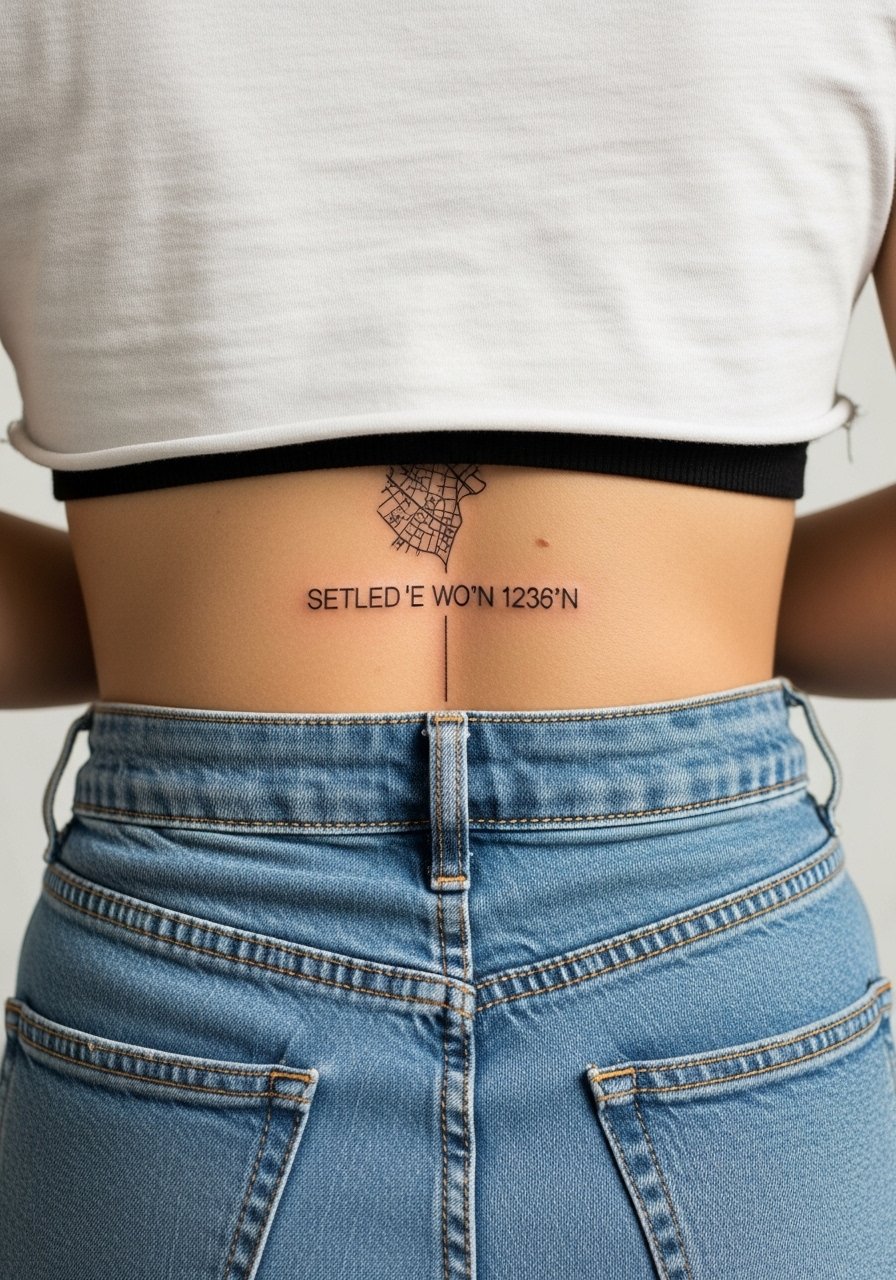
Text on the back requires precise spacing and clear type choice. If you include coordinates, specify the exact punctuation and ask the artist to stencil the exact string before inking. Text tends to soften faster than bold shapes, so choose a slightly bolder script or a small serif to hold up. The mid back is forgiving because of thicker skin. During the consult mention whether you want Roman numerals or decimal coordinates to avoid miscommunication. Show off this placement with a cropped tee.
14. Irezumi-Inspired Backpiece
Irezumi has deep cultural roots, so many clients opt for respectful adaptations rather than direct transplanting of sacred iconography. If you lean toward this style, discuss historical elements with your artist and agree on adaptations that honor the source. These large pieces are a commitment in time and budget and are best planned over multiple sessions. Expect heavier sessions with more saturation. For showing it off pick open-back garments that let the narrative flow.
15. Watercolor Wash Across the Upper Back
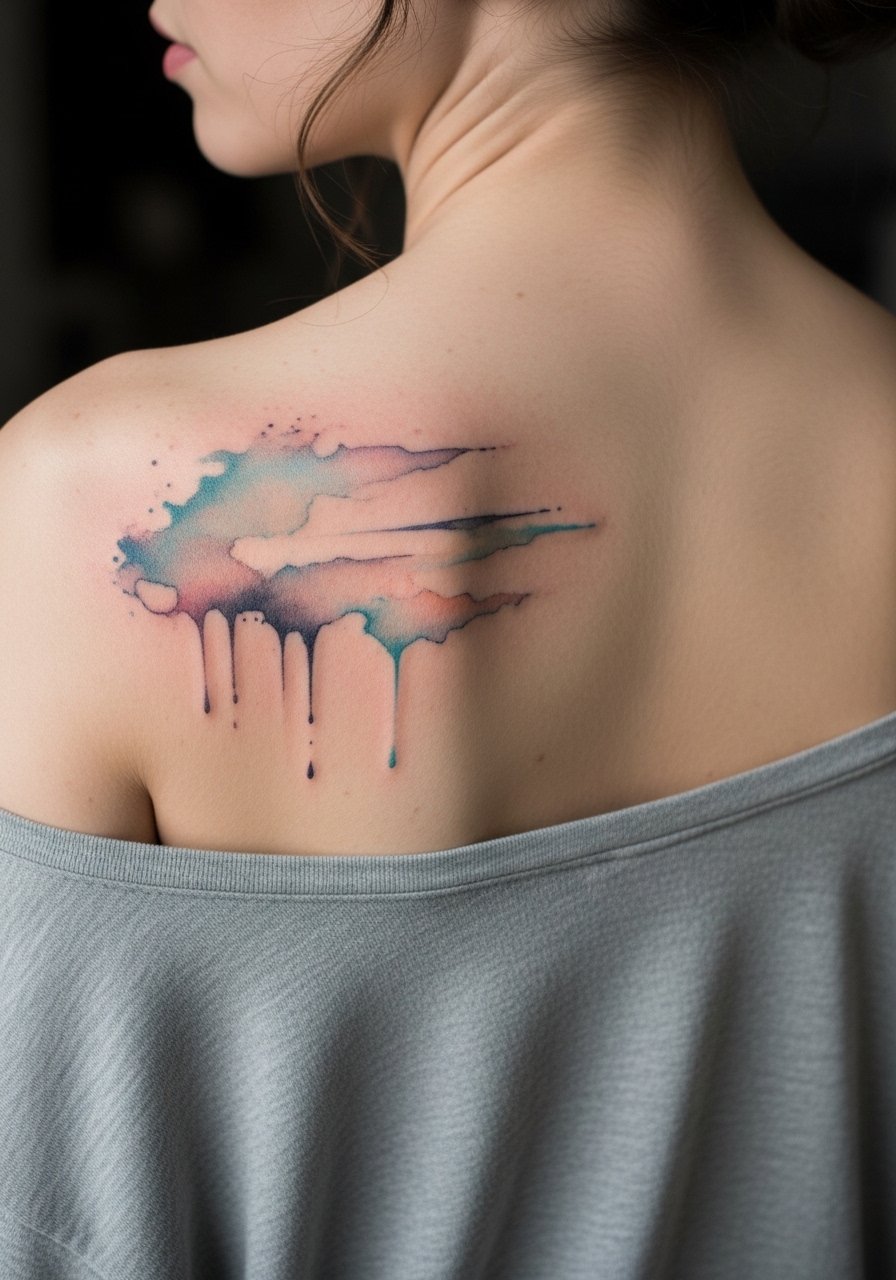
Watercolor tattoos have a painterly feel but they can fade unevenly. A common error is relying solely on splashy brushwork without anchor lines. Ask your artist to include subtle anchor linework or dot frameworks so the piece keeps definition as pigments soften. Expect more frequent color touch-ups than with bold blackwork. For casual shows pair the tattoo with a cropped tank.
16. Floral Spine Runner
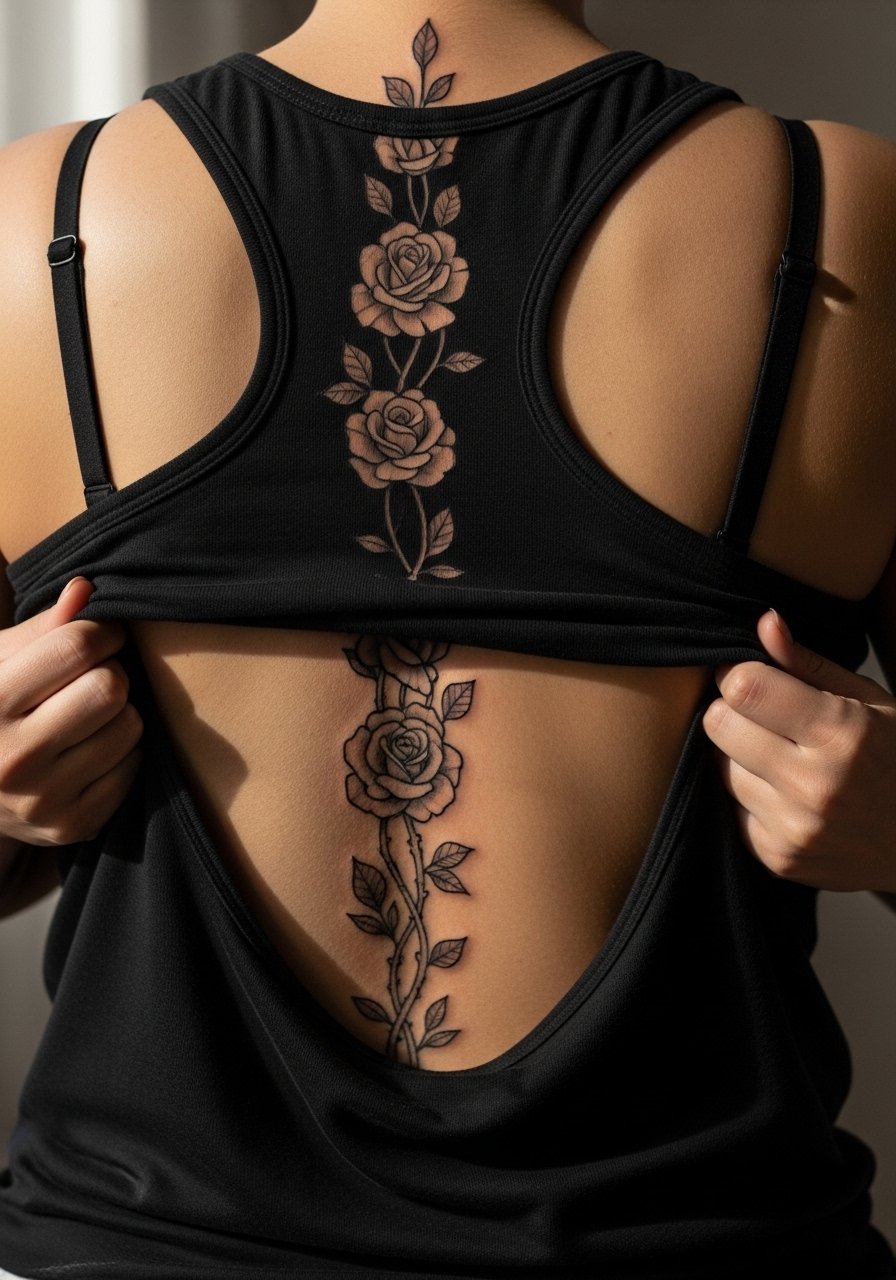
Florals along the spine can be anchored so each bloom has room. Tell the artist you want petals with negative borders to limit merging over time. The spine will be more uncomfortable than side flesh but many clients say the rhythm of the session makes it manageable. Blowout risk increases if lines are placed too shallow near vertebrae. Plan for a touch-up at two to three years for the finer contours. Wear a racerback tank during sessions for access.
17. Abstract Linework Across the Right Back

Abstract continuous linework depends entirely on predictable negative space. A frequent mistake is asking for a single unbroken line without considering how that line will age near high-movement zones. Ask the artist to assess movement in your shoulder area and to plan anchor points where lines can be thicker. Session time is moderate and pain is usually manageable. Pair with an asymmetrical top to emphasize the line flow.
18. Crescent Moon and Stars Lower Back
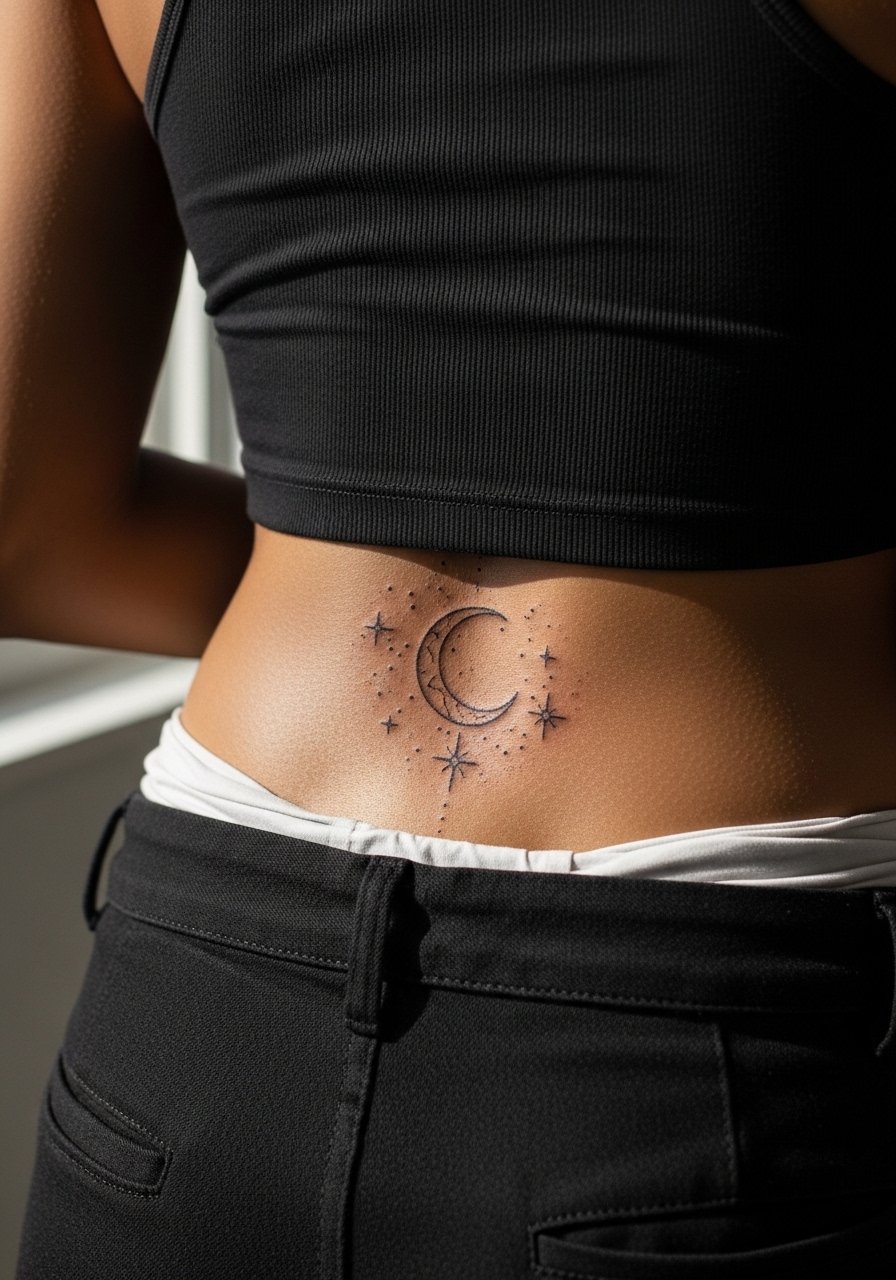
Celestial motifs on the lower back age predictably if the line spacing is generous. Ask for dots and stars to be slightly larger than you might think so they keep shape after settling. The lower back has moderate pain and tolerates longer sitting than thin-rib areas. For show-off outfits consider a low-back dress or a backless crop top.
19. Map of Constellations Across Both Shoulder Blades
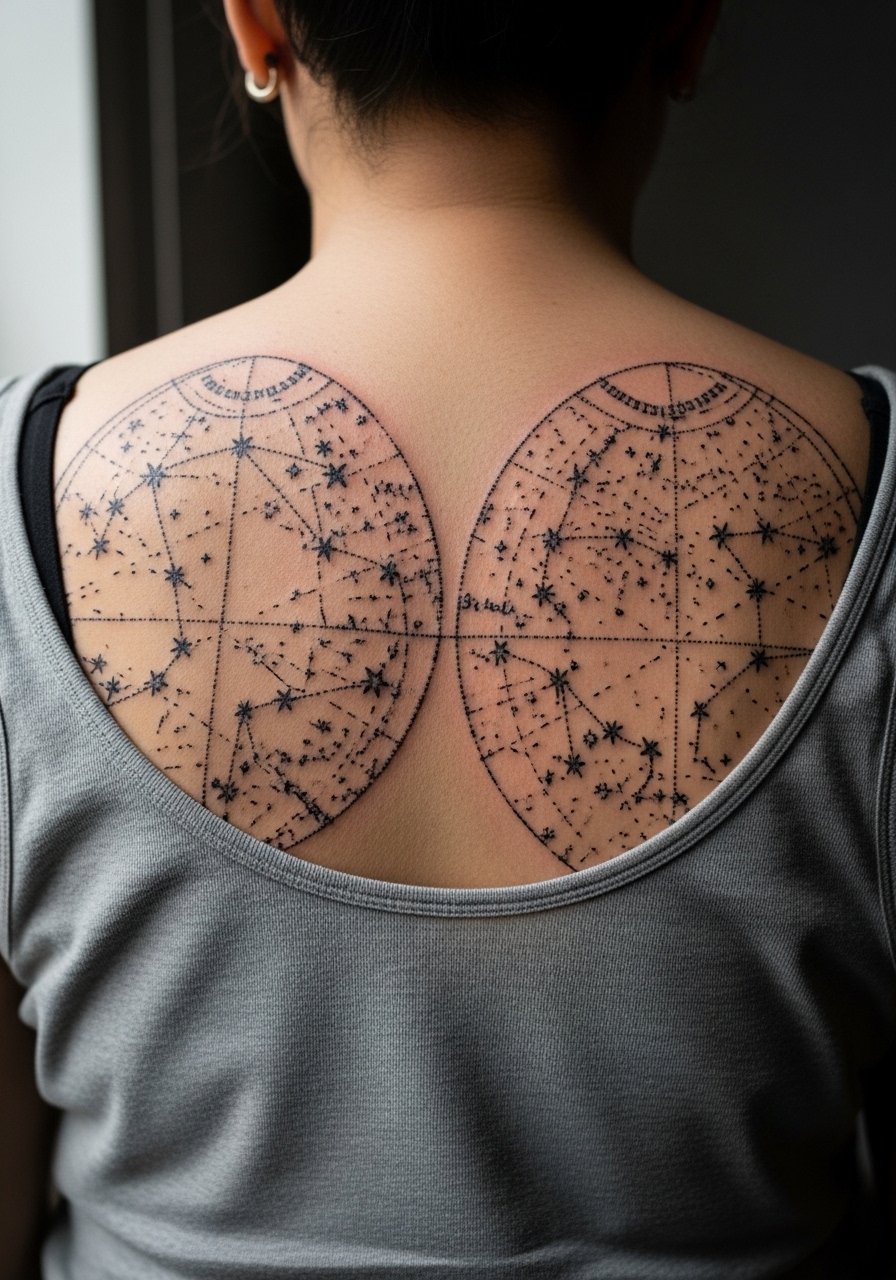
Splitting a map across both blades looks intentional when the grid lines and negative space are pre-planned. Tell the artist you want the major stars slightly larger, and that you want connecting lines with space on either side. Art on both blades is less likely to blur than clustered work near the spine. Session discomfort is minimal compared with ribs but expect shoulder movement to be sore for a few days. Style with halter tops.
20. Scripted Quote Arcing Over the Shoulder Blade
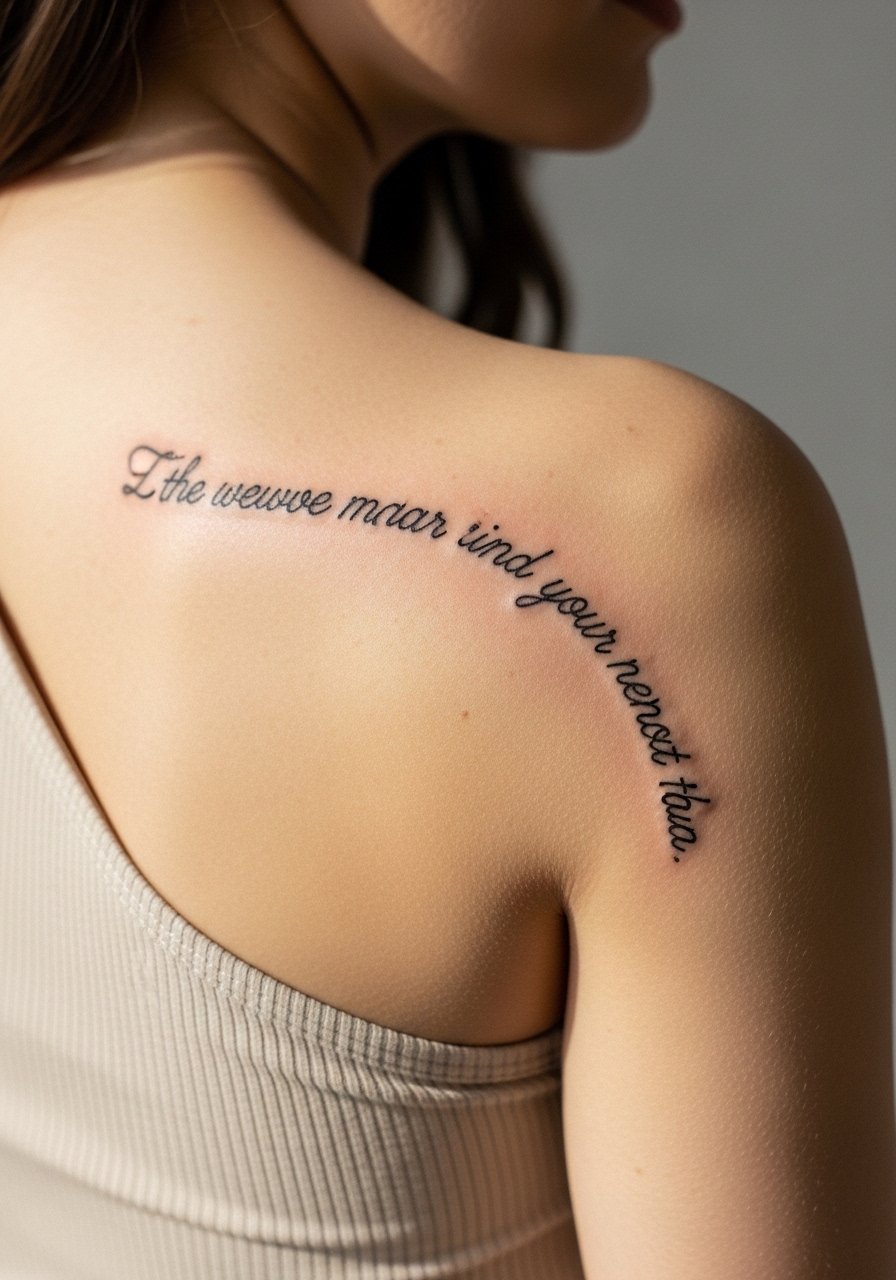
Curved script needs a steady hand and a clear stencil curve. The usual mistake is choosing overly thin cursive for a high-movement zone. Request slightly heavier script weight and ask to see the curve on your body before inking. This area heals predictably but letters at the curve apex may require touch-up at year two. For revealing looks wear a one-shoulder top.
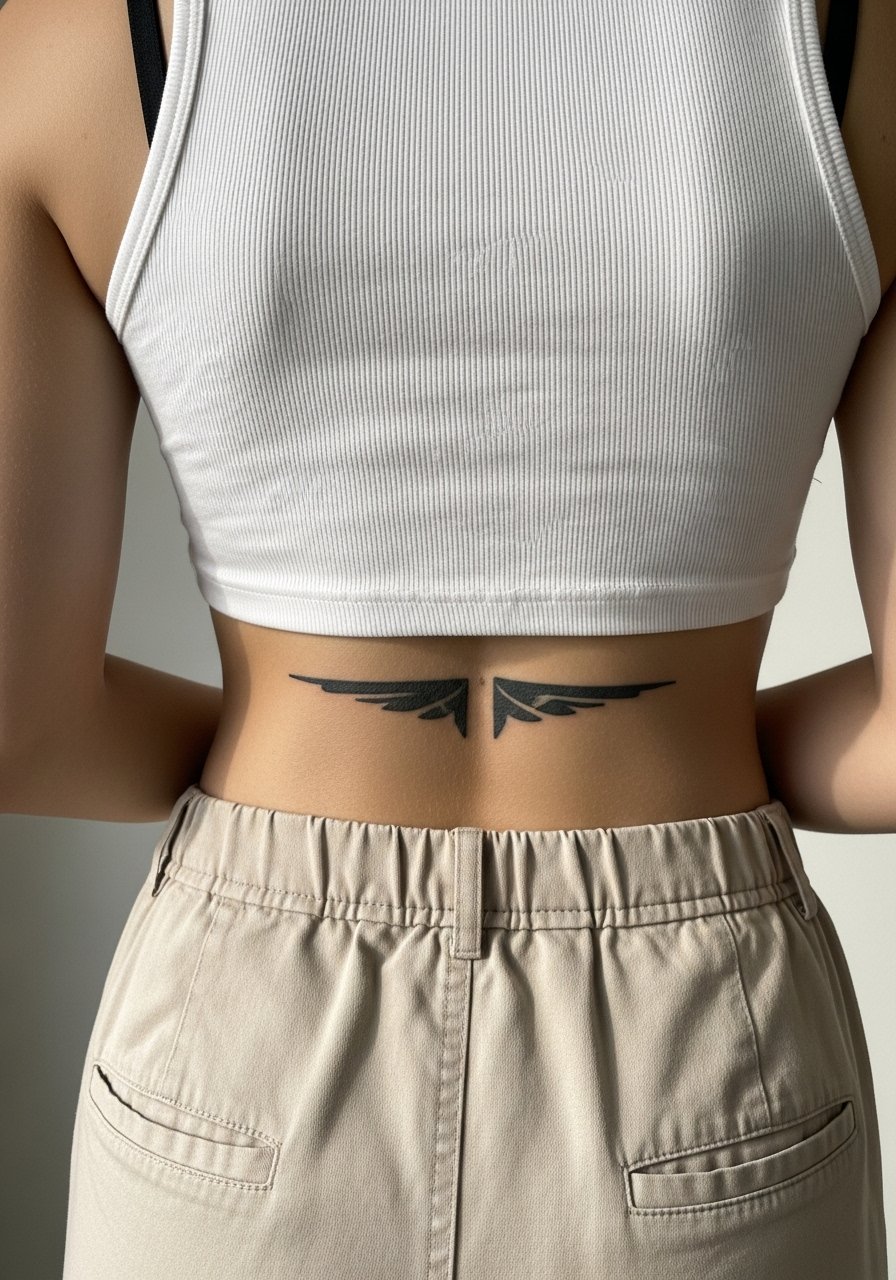
21. Stylized Dragon Tail Along the Lower Back
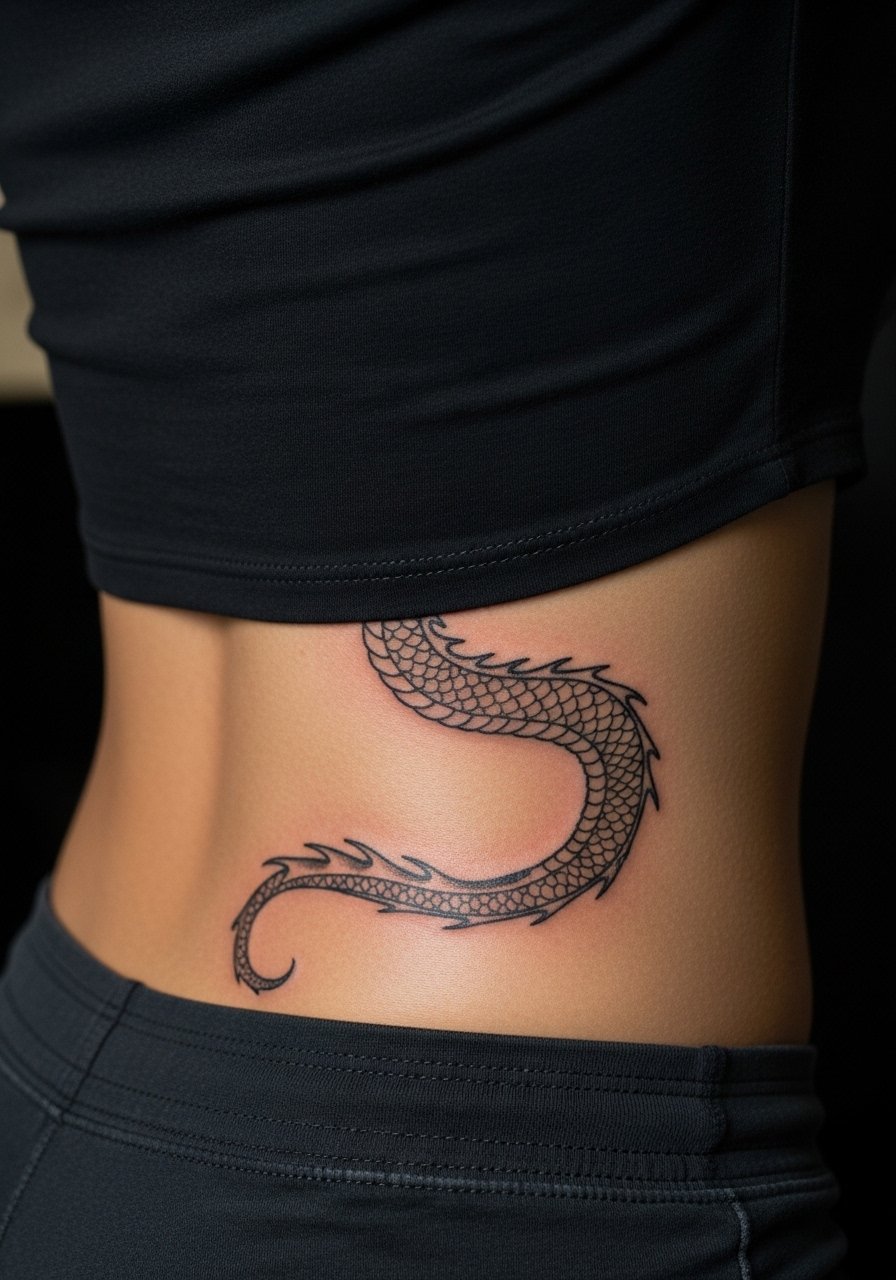
A tail motif uses the natural sweep of the waist and hip to suggest motion. Tell your artist you want flow from the spine out toward the hip so it reads as movement rather than a static mark. The lower back tolerates longer sessions and swelling is usually mild. Watch out for small negative shapes inside the tail which can close up over time. Pair with high-waisted skirts that show the curve.
22. Negative Space Lace Panel

Lace panels use skin as a color and rely on crisp surrounding lines. A common mistake is over-detailing the interior lace so the small negatives vanish as the ink settles. Ask the artist to test the stencil and adjust the smallest gaps. Sessions can be long and require patience as the artist refines tiny outlines. For showing this piece pick open-back dresses with simple straps that frame the lace.
23. Portrait Bust on the Upper Back

Portrait tattoos on the back need an artist experienced in skin tone rendering and tonal transitions. The biggest mistake is expecting photographic clarity at small scale. Ask the artist for a size recommendation for photographic fidelity and for a portfolio of healed work. Placement between the blades is stable and helps maintain likeness. Plan for a detailed consult and a likely touch-up to refine mid-tones. For session ease wear a loose tank top.
24. Tribal-Inspired Band Across the Mid Back
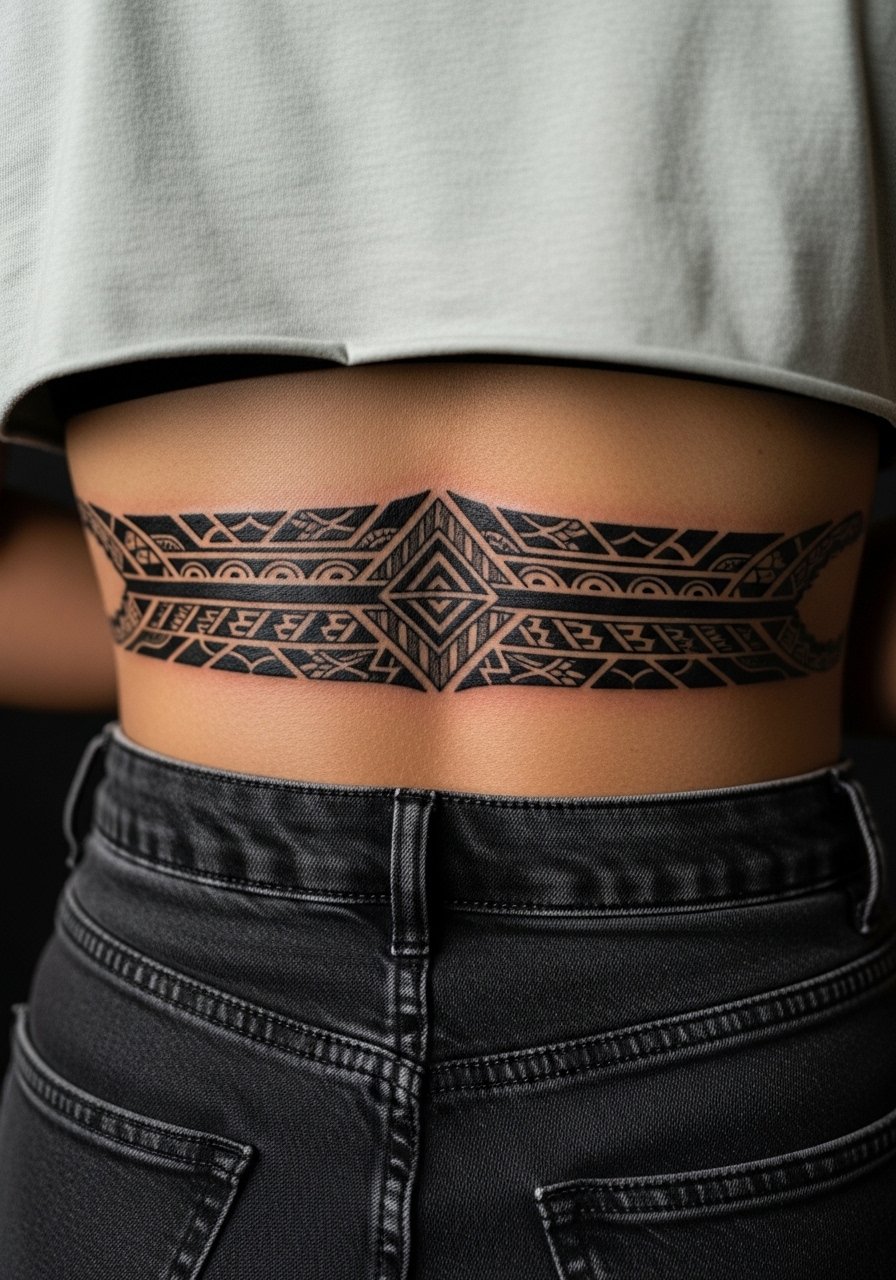
Tribal-inspired work has many regional meanings so consider sourcing motifs responsibly and avoiding sacred symbols without context. If you prefer the aesthetic, ask for modernized shapes that respect origins without copying specific cultural emblems. Bold bands age well when negative shapes are large enough to survive saturation. Mid back sessions are moderate in pain. Style with high-waisted shorts.
25. Spine Floral Ladder with Tiny Leaves
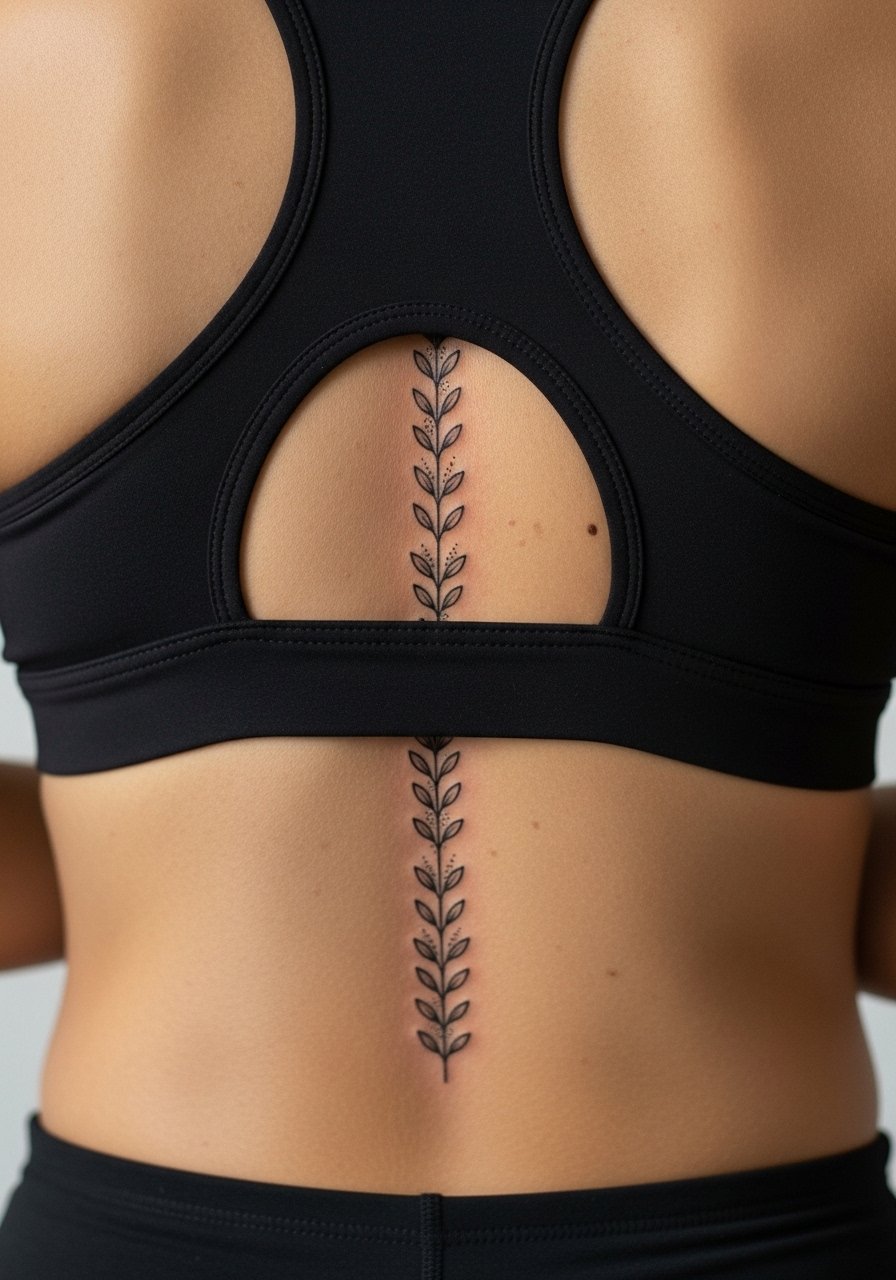
A ladder of leaves benefits from slightly increased spacing so each leaf keeps definition. The common mistake is wanting the ladder too thin which causes merging in sections that stretch. Tell your artist you want incremental spacing between leaves and ask for a map showing expected healed sizes. Sessions are steady and tolerable with strategic breaks. For outfits choose racerback sports bras that reveal the vertical line.
26. Ornamental Half-Back Piece Over One Shoulder
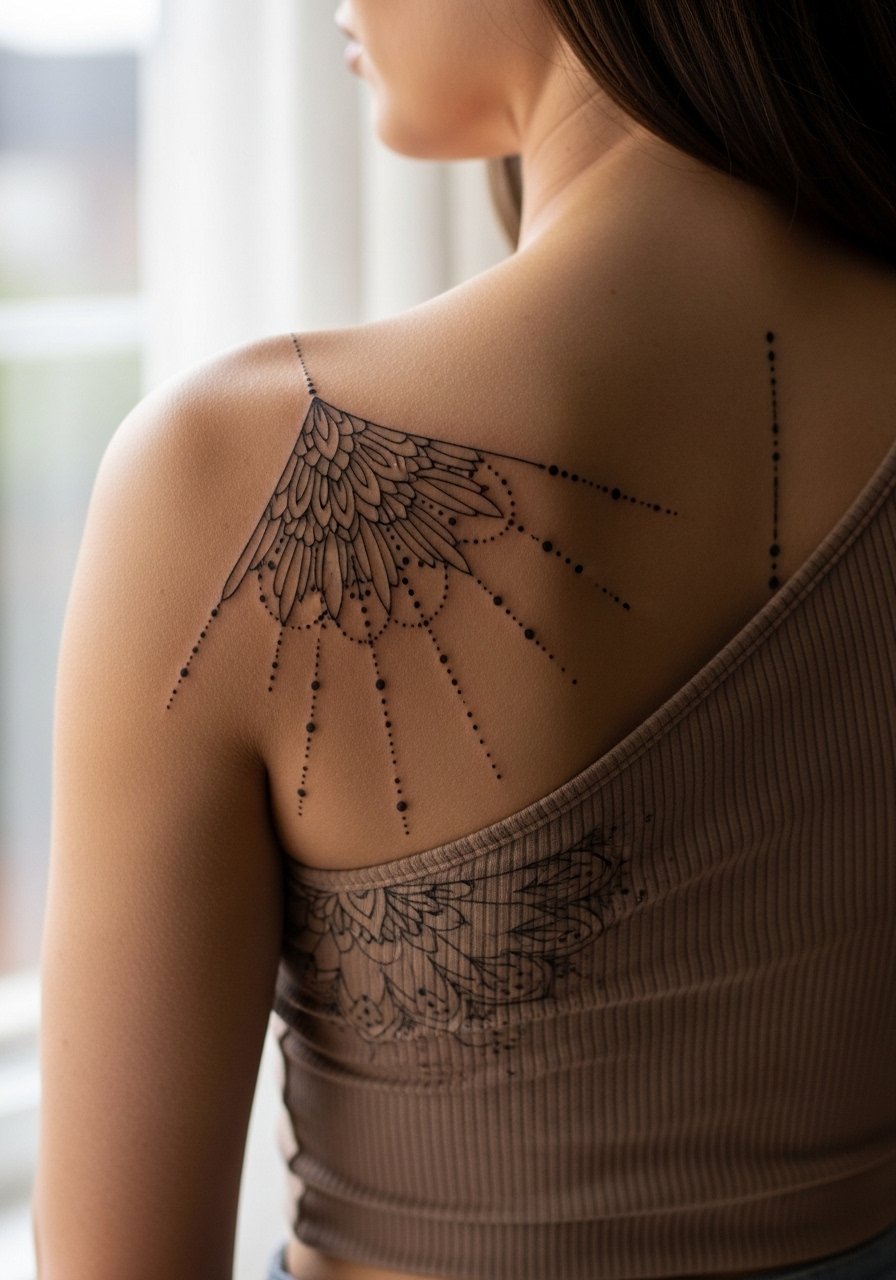
Half-back ornaments play with asymmetry to create interest without committing to a full canvas. In consultation ask the artist to plan the fan so negative fields occur between motifs and avoid tight clusters. Session time is shorter than a full back piece and pain is concentrated near the shoulder blade edge. Pair the design with a one-shoulder top to show its sweep.
27. Small Anchor or Symbol on the Lower Back
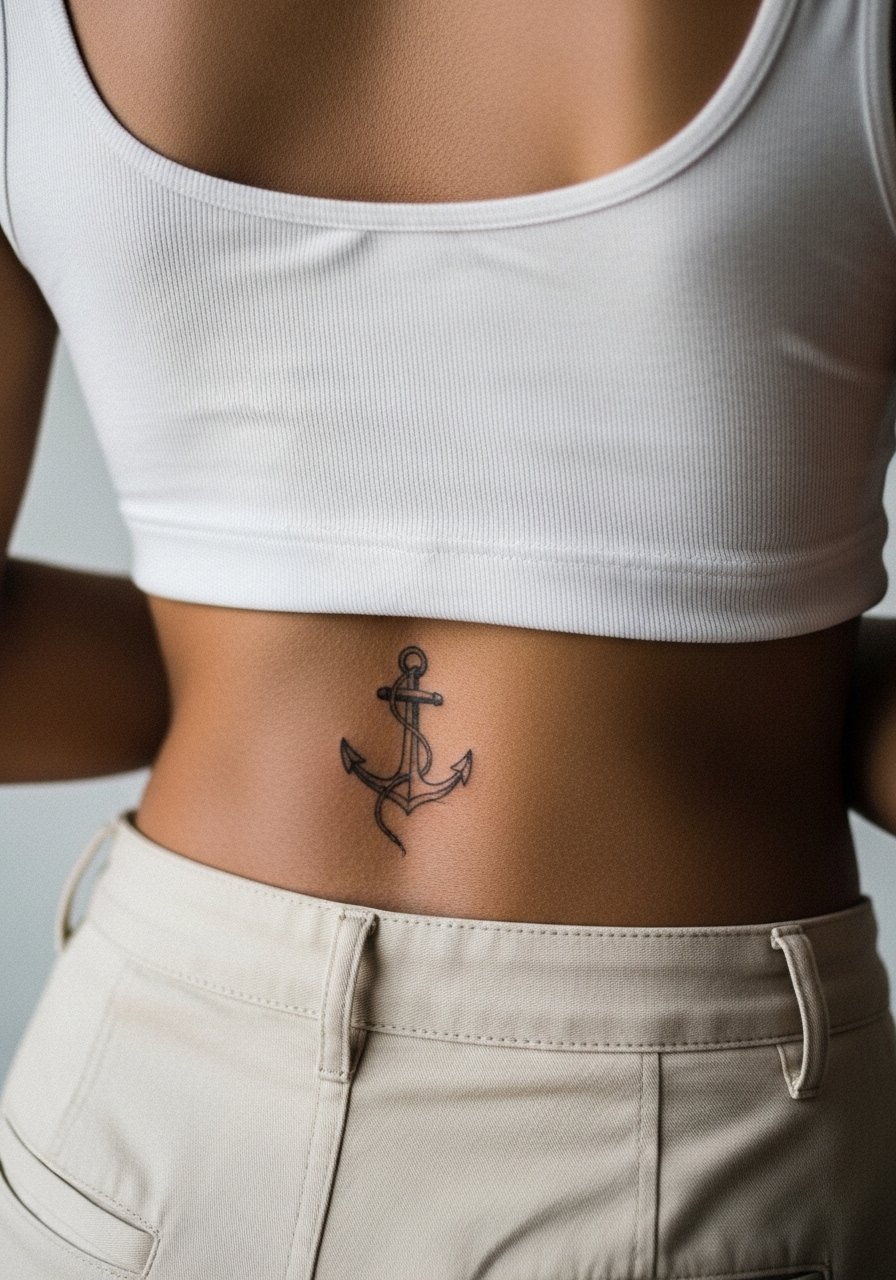
Minimal symbols on the lower back can age well if they are slightly bolder than you expect. The usual mistake is picking a very fine weight for a spot that sees regular friction from waistbands. Ask for a slightly heavier line and a preview of the healed look. Sessions for tiny anchors are quick and usually require minimal aftercare beyond the studio advice. Show it off in low-rise or high-waisted combos.
Frequently Asked Questions
Q: Will a spine script blur faster than a shoulder-blade script?
A: It depends on spacing and depth. The spine is higher movement and lower fat, so finely packed script can soften sooner. Ask for slightly increased letter spacing and a medium line weight, and expect a possible touch-up around year two to three.
Q: Are watercolor back tattoos harder to maintain than blackwork pieces?
A: Yes, watercolor styles generally need more frequent color refreshes because pigments fade unevenly in sun exposed zones. Blackwork and bold outlines tend to retain contrast longer. If you like the watercolor look ask for anchor lines or dot frameworks that preserve shape as color shifts.
Q: How do I find an artist who can handle a full back botanical or Irezumi-inspired piece?
A: Use discovery pathways like shop directories, tattoo convention listings, and niche hashtag searches on social platforms. Browse portfolios for healed photos of large pieces and ask to see work photographed months after sessions. Forums and subreddit communities are also useful for firsthand referrals.
Q: What should I wear to a long back session to stay comfortable?
A: Bring loose, button-front or wide-neck tops so you can slide clothing aside without rubbing fresh ink. A loose button-down shirt is a practical pick that keeps you comfortable during multiple sittings.
Q: Do mandalas on the upper back require special spacing to age well?
A: Yes. Mandalas with tight inner rings are at higher risk of merging. One camp says keep tiers roomy to avoid that. The other camp trusts micro-line skill to keep detail tight. Ask where your artist stands and request a slightly more open inner pattern if longevity matters.
Q: Can I plan a large back piece over multiple sessions without the composition shifting?
A: Yes. A well-planned layout with mapped negative spaces allows you to stage sessions over months and still keep a cohesive composition. Ask for a session plan and notes on how color and linework will be distributed across sittings.
