
Custom shops fill up with the same question on Saturdays, people trying to mash three saved designs into one sleeve and wondering why it reads like clutter. The smartest builds start with a clear anchor, a few decisive shapes that respect muscle lines, and negative space used like punctuation. Below are 27 bold, aesthetic arm sleeve ideas that guide what to ask your artist, what to wear to the session, and how each choice looks healed years down the line.
1. Fine Line Botanical Panel on Outer Forearm

I've seen fine line botanical pieces on forearms hold their elegance for three to five years when spaced correctly. Ask your artist for slightly heavier primary stems and spacing between petals so the stipple shading has room to breathe. The common mistake is cramming tiny petals into dense clusters which blur into grey mush as lines soften. Pain is moderate, session time is usually one to two hours. For the appointment, wear a rolled cuff long-sleeve shirt you can push to the elbow without tugging. Six months in, saturation looks soft. At year three, a small touch-up often restores crispness.
2. Blackwork Geometric Sleeve Starting at Shoulder Cap
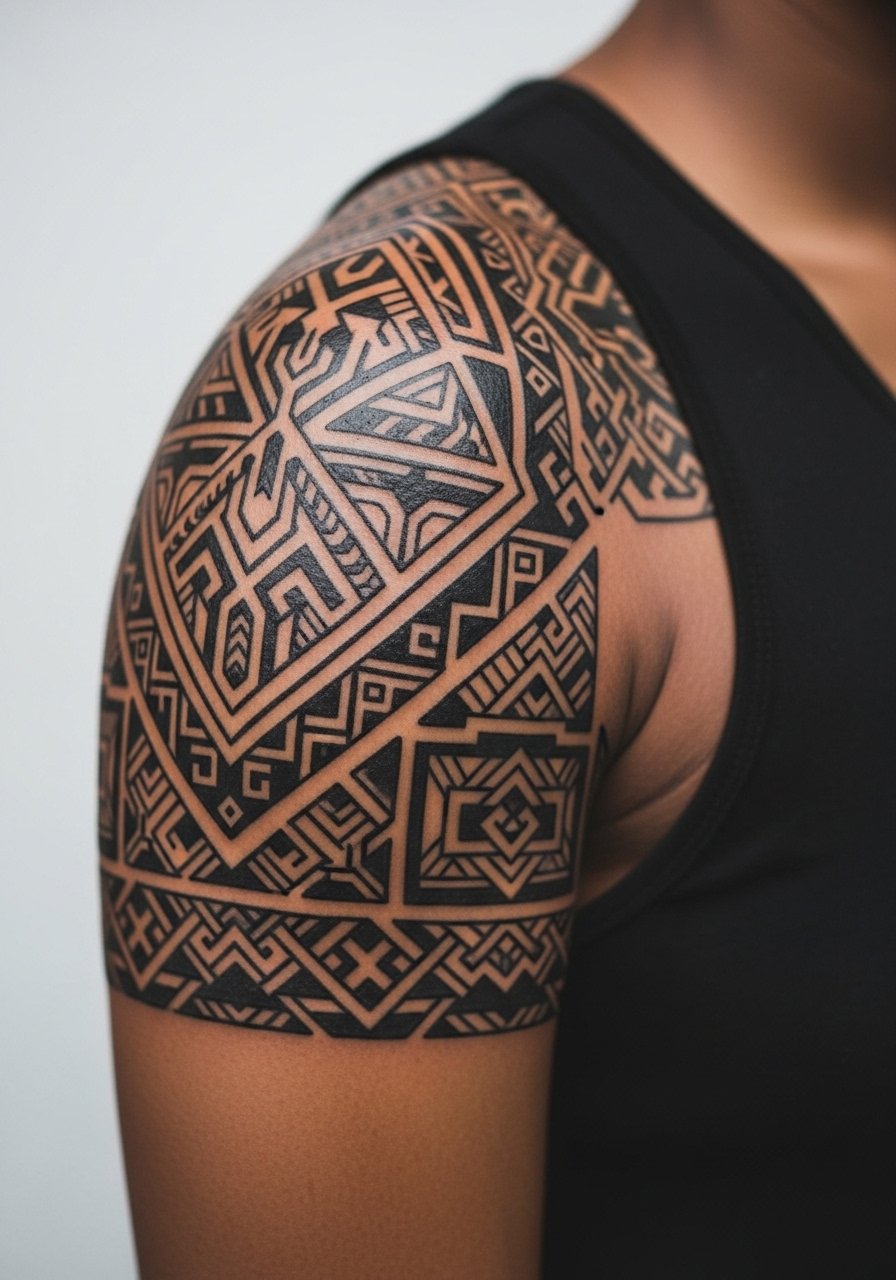
Bold blackwork reads like armor on the shoulder cap and hides healing inconsistencies well. This style relies on heavy saturation and broad fields, so blowout risk drops compared with ultra-thin line pieces. Tell your artist you want clear negative space around the deltoid to keep the shapes readable when you flex. Sessions run longer because saturation takes time, and you should expect multiple passes for consistent depth. The biggest mistake is letting the black swallow natural muscle flow. For showing it off, pair with a mens tank top that leaves the shoulder open without distracting prints. Touch-ups are rarely needed in year one, but check year three for any soft edges.
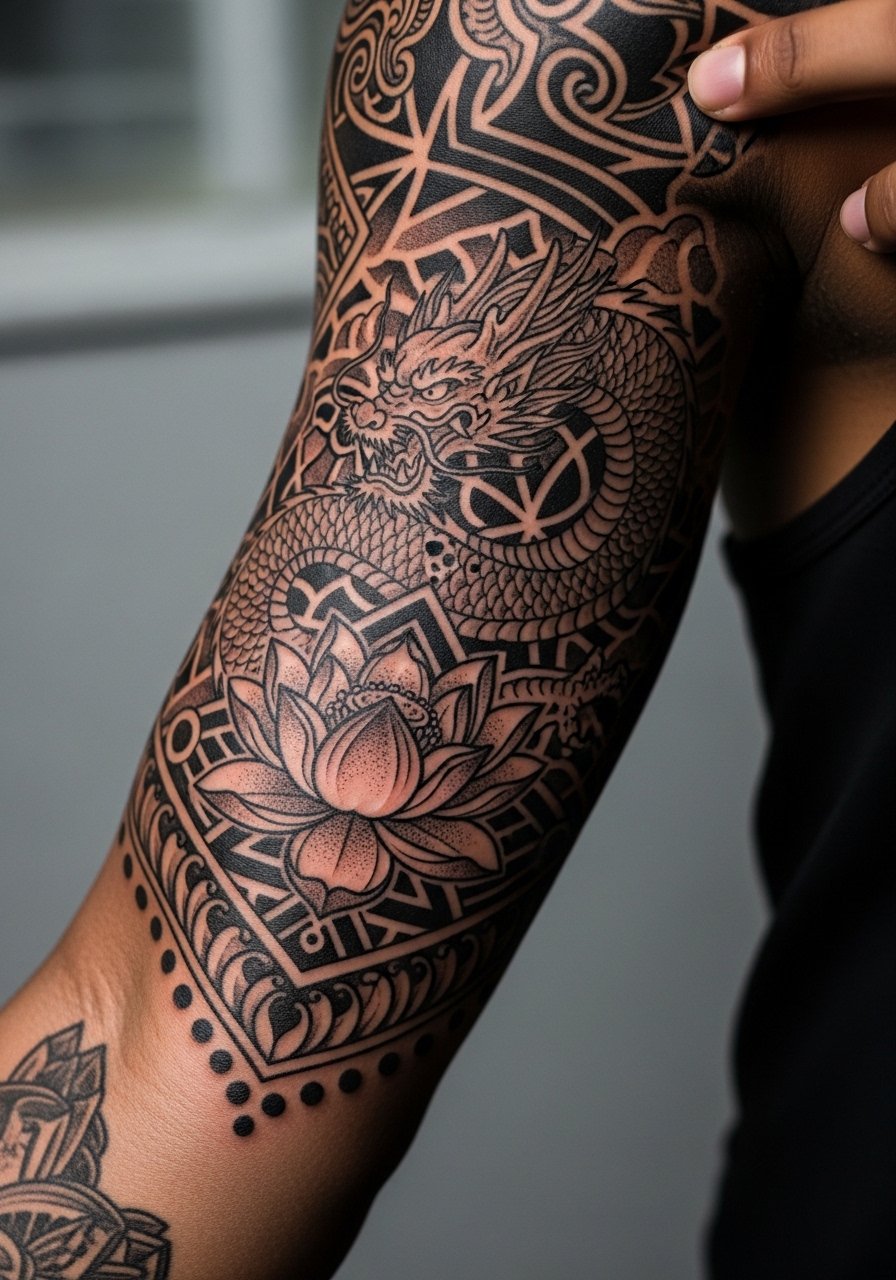
3. Neo-Traditional Mythology Sleeve Across Outer Bicep
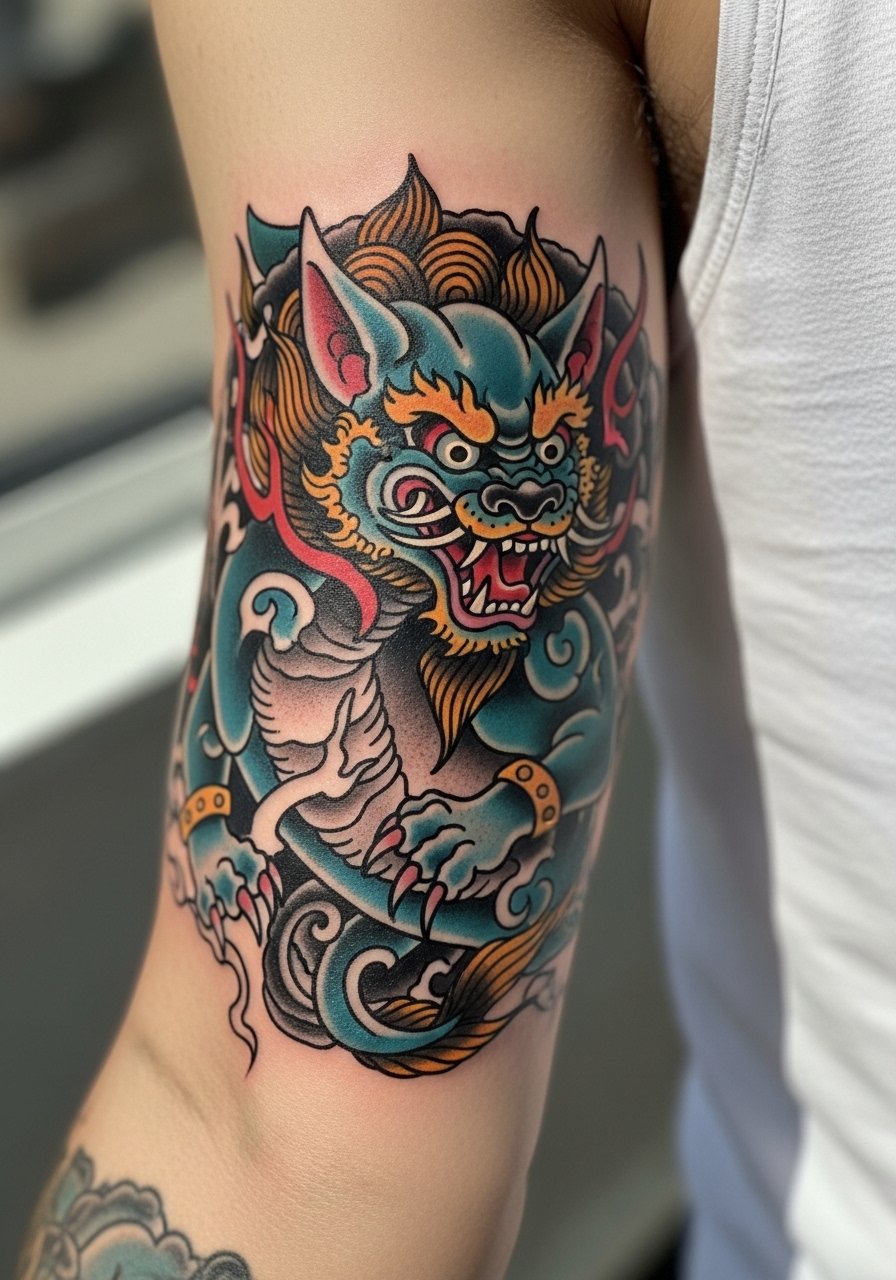
Neo-traditional anchors like a god or dragon on the outer bicep create a focal point your filler art can orbit around. During consultation, bring images of color palettes you like and note whether you prefer saturated fills or more muted washes. The common aging problem is over-detailing tiny facial features inside large creatures. Ask the artist to prioritize strong linework and bold shapes for longevity. Pain is moderate, session lengths vary from two to five hours per visit. For the day, wear a loose button-down shirt you can pull aside easily. At two years the color will soften but the composition keeps reading.
4. Continuous Scene vs Patchwork Sleeve Debate Applied to Full Arm Narrative
Artists split into two camps on sleeve layout. One camp favors continuous scenes that read like a single painting wrapping the arm. The other camp prefers patchwork, building the sleeve from strong individual pieces tied by fillers. Both approaches work. The practical difference is touch-ups and healing scheduling. Continuous scenes demand careful planning from the start, otherwise a single bad session can unbalance the whole composition. Patchwork lets you add pieces over time, but it risks visual mismatch if you skip consistent line weight and saturation between artists. If you care about longevity, ask your artist how they handle both scenarios in their portfolio.
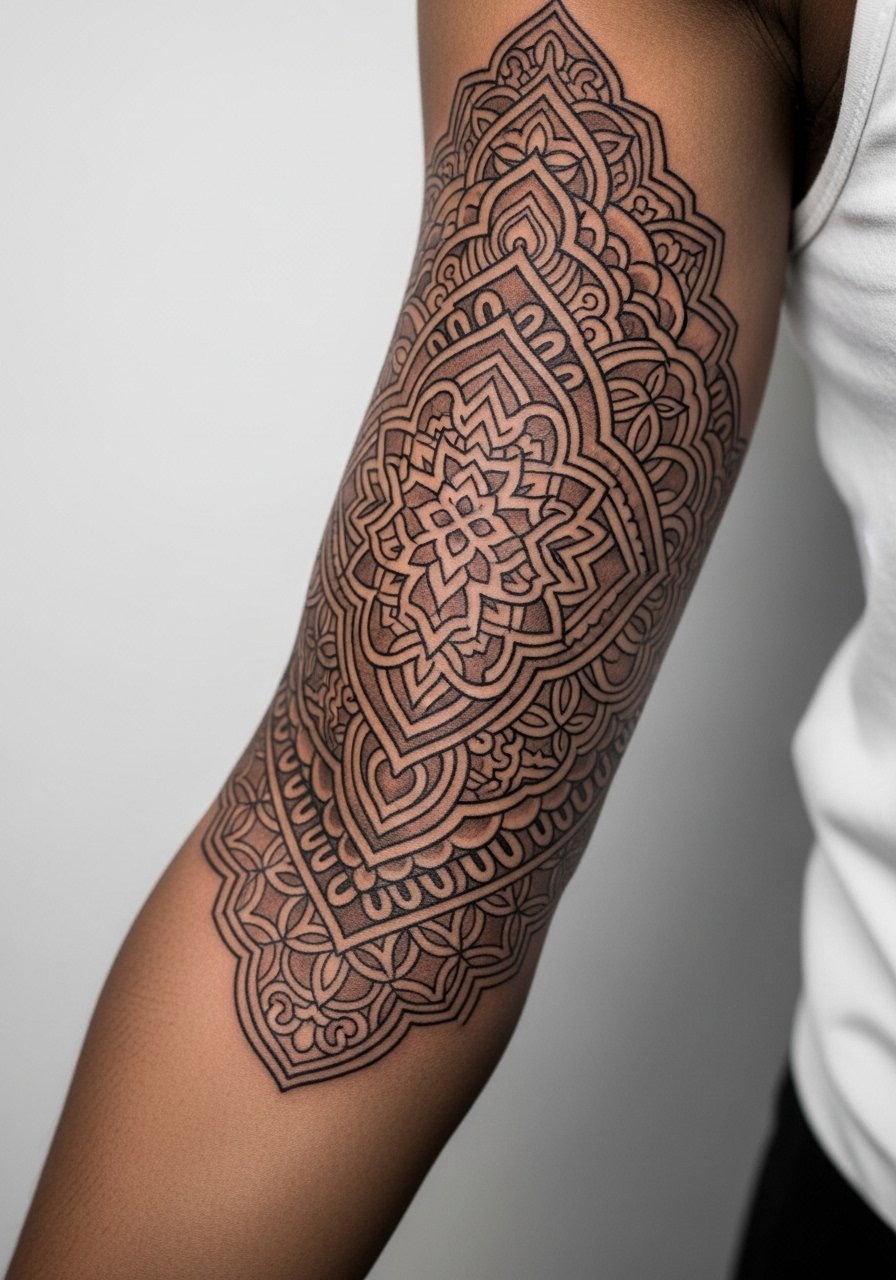
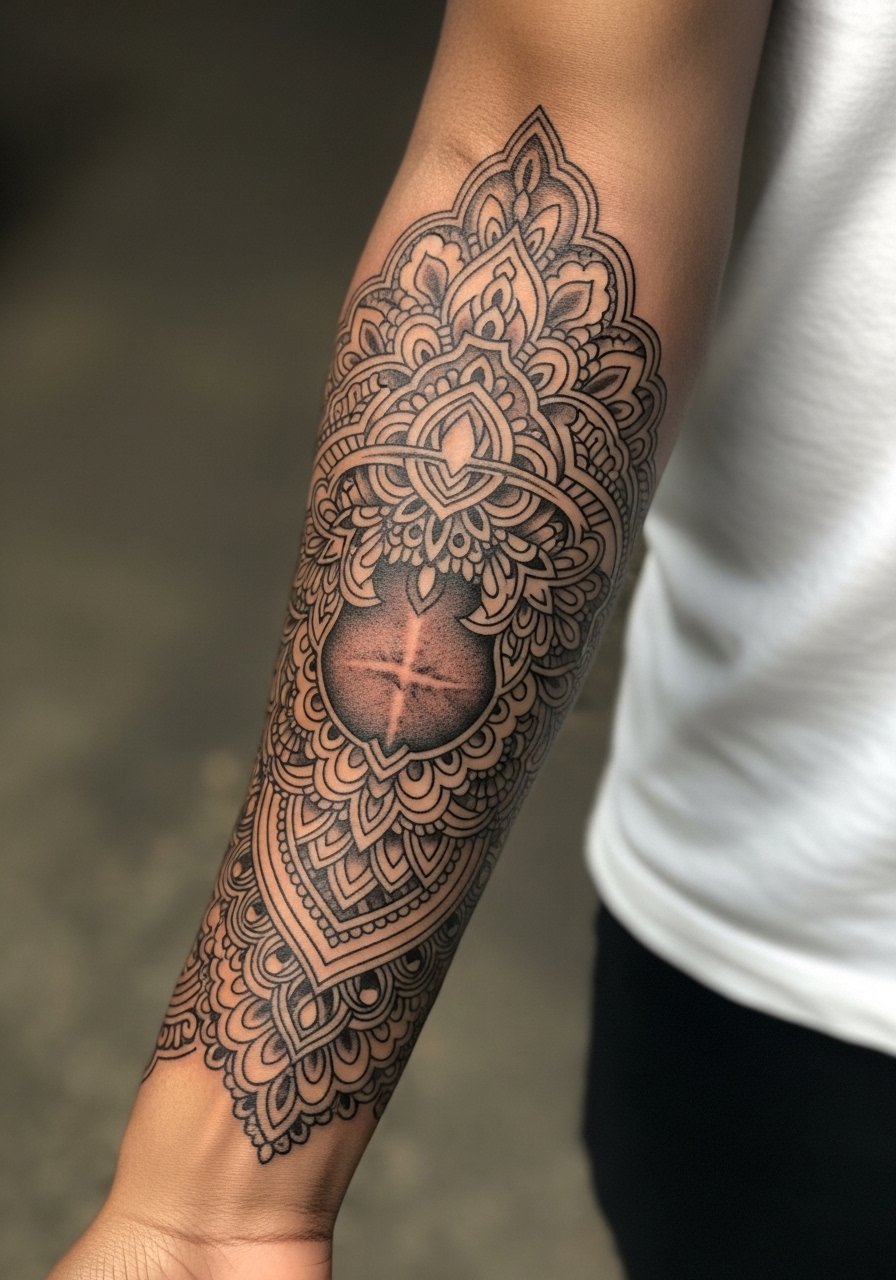
5. Geometric Mandala Forearm Column
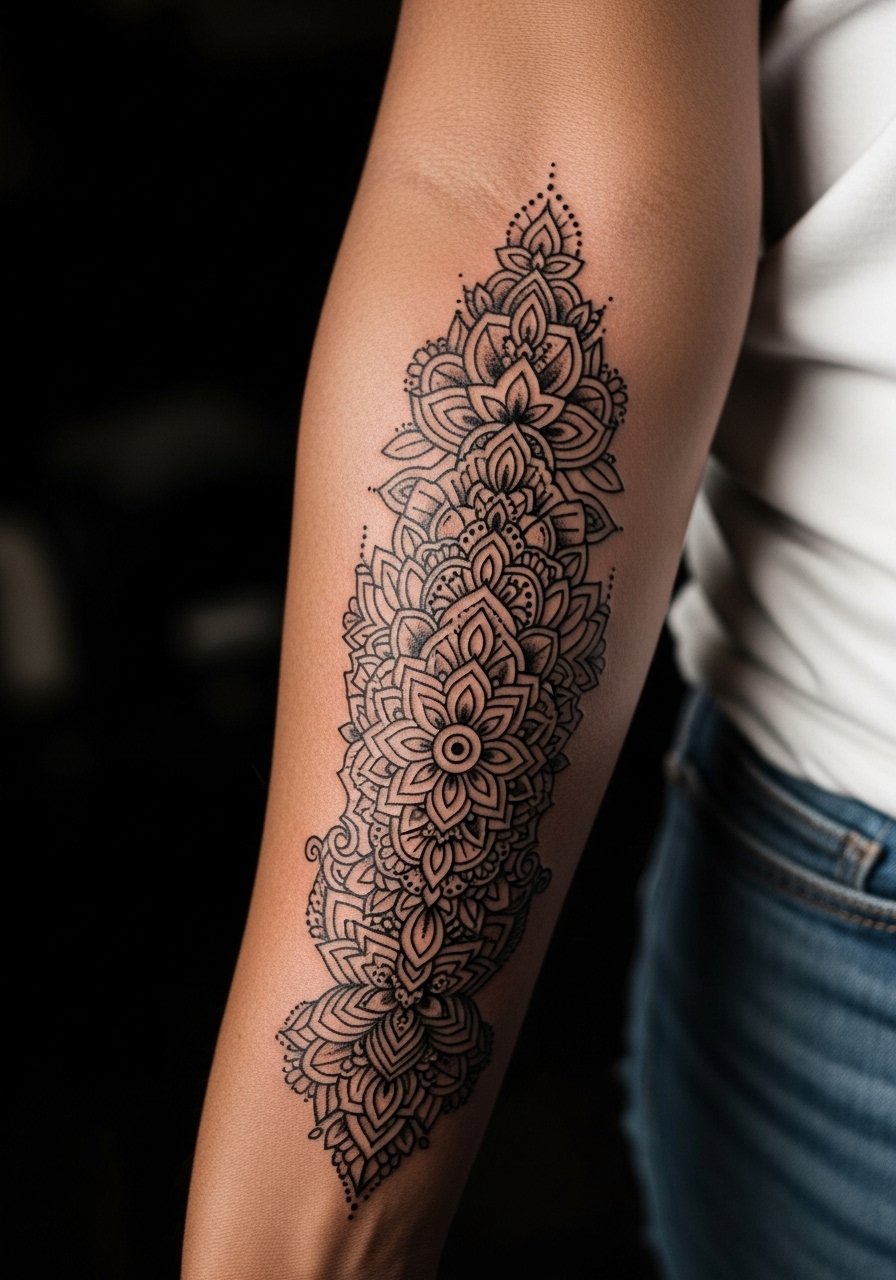
Mandala columns work well on the inner forearm because the flat plane helps maintain symmetry. The biggest rookie move is too-small line spacing. Tell your artist you want the central geometry scaled so the negative space keeps each ring readable. Expect two-hour sessions for a clean column and a touch-up if dot work needs densifying. For showing this off, roll up sleeves and use a linen button-down shirt men in a neutral shade that frames the inner forearm. At six months the mandala should settle into soft contrast, and by year three you may want a minor refresh for the outer rings.
6. Biomechanical Half-Sleeve Blending Shoulder and Upper Arm

Biomechanical work plays with depth on the upper arm using stipple and whip shading to sell the illusion of parts beneath skin. In consultation, say whether you want high-contrast blackwork or a mid-tone grey wash. A common mistake is overcrowding the muscle flow, which weakens the 3D effect. Sessions are longer and can be intense on the shoulder, so plan breaks. For session comfort, a loose button-down shirt that buttons open makes accessing the deltoid effortless. Expect touch-ups after the first year where highlights and edges soften.
Pre-Session Essentials
The forearm and upper arm pieces above have different access needs, so a short kit smooths the session and the first week of wear.
-
Stencil transfer paper kit. Lets you preview placement on your skin ahead of time so scaled mandalas and botanical panels sit where you want them.
-
Tattoo numbing cream. Applied before shoulder and inner arm work it can take the edge off for denser sessions without affecting linework.
-
Thin protective film roll. Useful for forearm and wrist pieces to reduce friction from clothes during the first days.
-
Fragrance free gentle body wash. Cleanses healing sleeves without irritating fine line shading and dot work.
-
Aquaphor healing ointment. A thin layer for the initial days helps maintain moisture levels on newly inked forearms and upper arms.
7. Black and Grey Portrait Sleeve on Inner Bicep
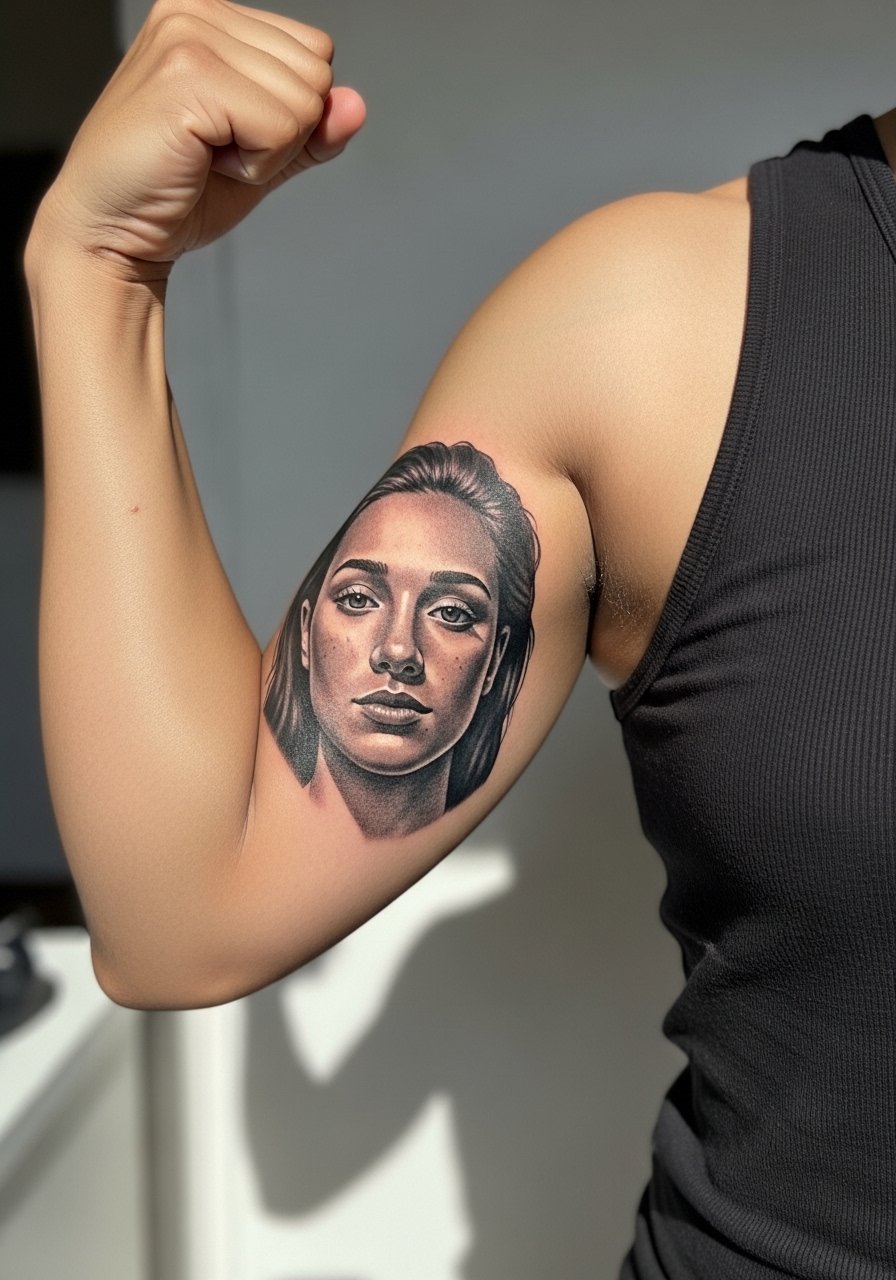
Portraiture on the inner bicep reads intimate and requires precise saturation to avoid patchy fades. Tell your artist you want contrast preserved between mid-tones and highlights so facial planes do not flatten. The inner bicep can be sensitive, expect a higher pain level and shorter sessions focused on one area at a time. A common error is undersized faces, which lose detail when the skin settles. For session wear, bring a mens tank top so the artist can raise your arm without the shirt bunching. Plan a touch-up at year two for reactive highlights.
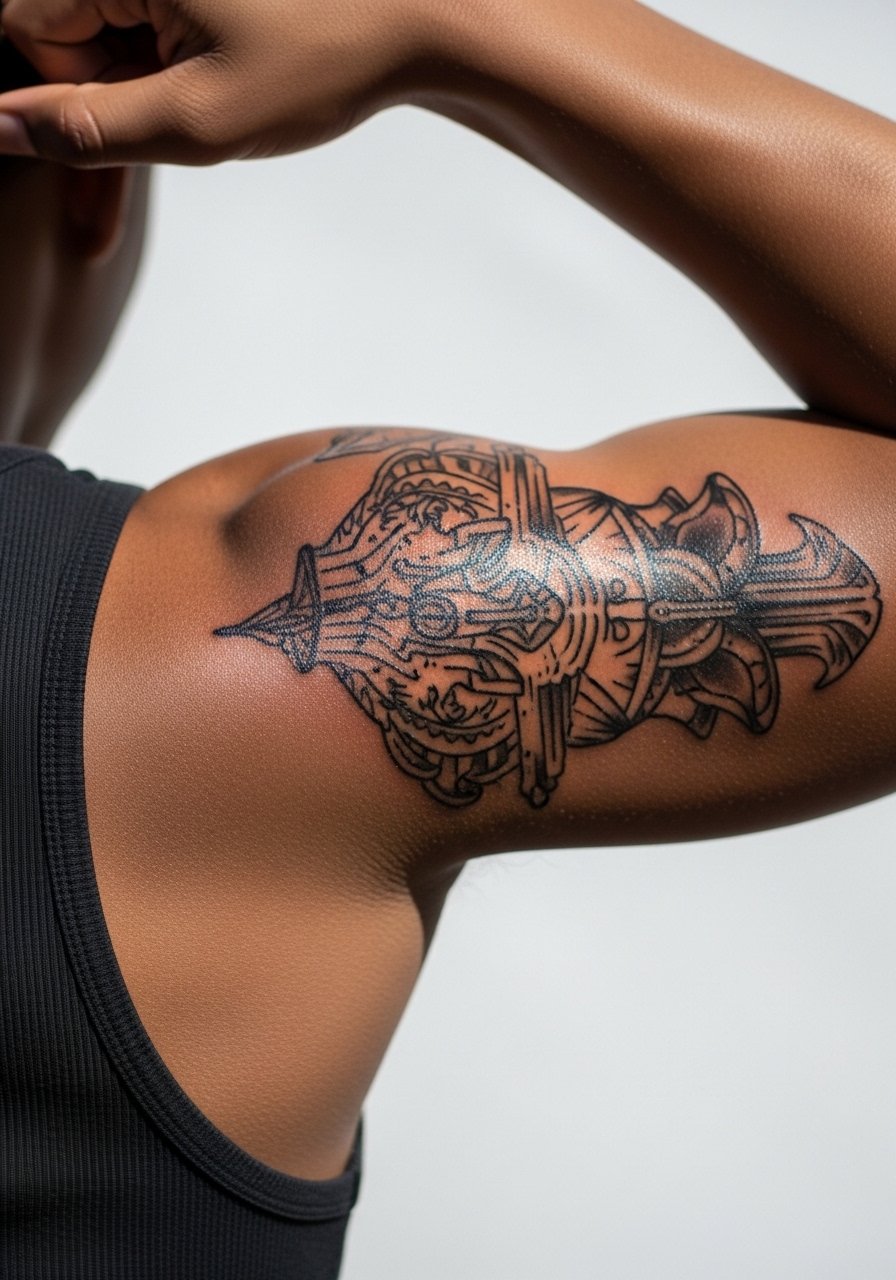
8. Traditional Americana Sleeve with Anchor and Roses
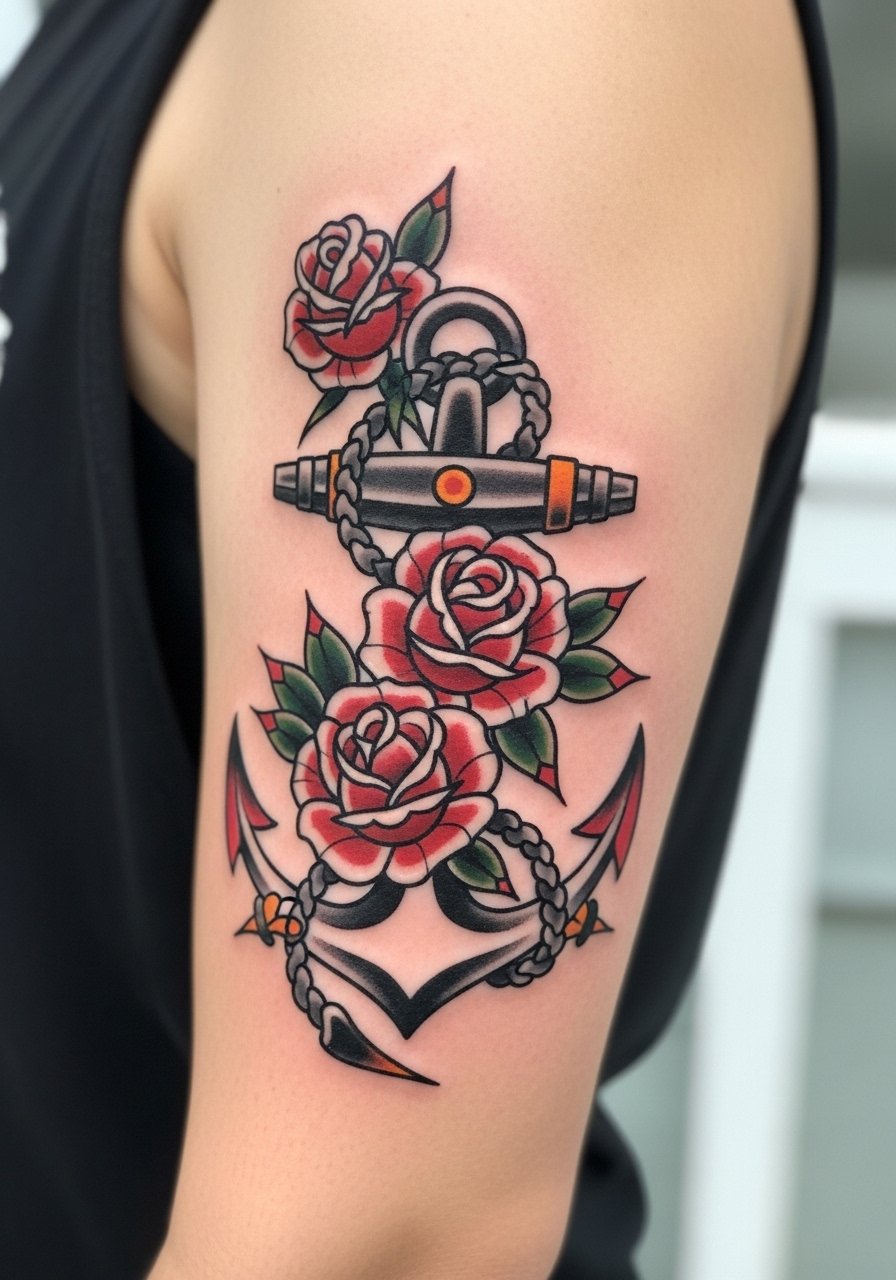
American traditional thrives on strong linework and heavy saturation, so it handles exposure and time better than most delicate styles. Ask for thick outline anchors and clean color blocks rather than micro-detail fills. The elbow transition can be tricky, so leave a cuff or band to frame the wrist. Pain is moderate, and single-session blocks often take three to five hours. The usual mistake is tiny script inside dense color fields which blurs. Pair this with a fitted short-sleeve shirt so the sleeve acts like a natural frame. Expect minimal touch-up needs in the first three years.
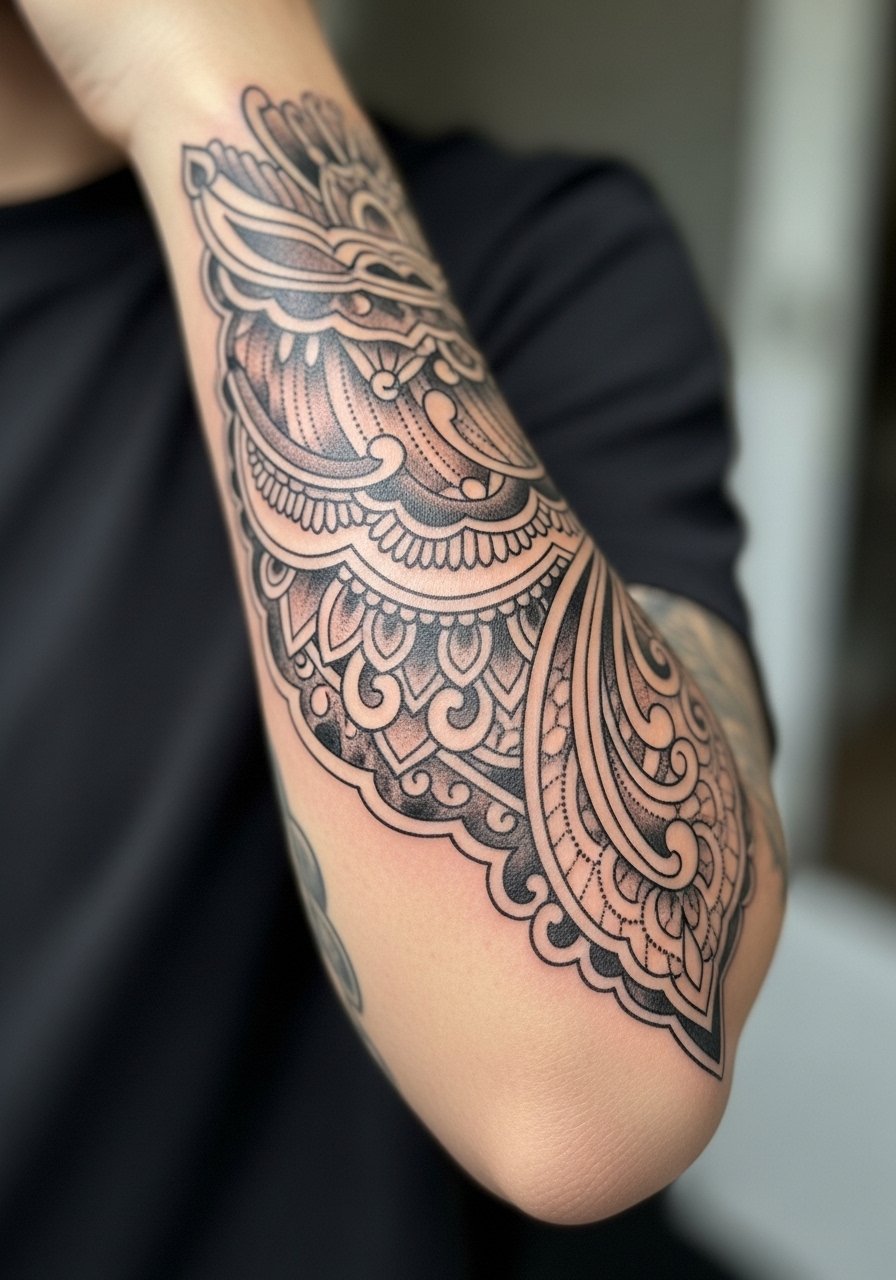
9. Sacred Geometry Sleeve with Repeating Motifs
Sacred geometry demands precise spacing so repeating shapes remain readable as the skin shifts. Tell your artist you want generous spacing between concentric elements and that you prefer consistent lineweight across repeats. The mistake is trying to scale a dense mandala too small, which merges lines over time. Sessions are methodical and take patience. For casual wear, try a fitted short-sleeve shirt men that keeps attention on the sleeve's flow. At five years, larger shapes still read but very fine concentric rings often need touch-ups.
10. Micro-Realism Wildlife Sleeve on Outer Forearm
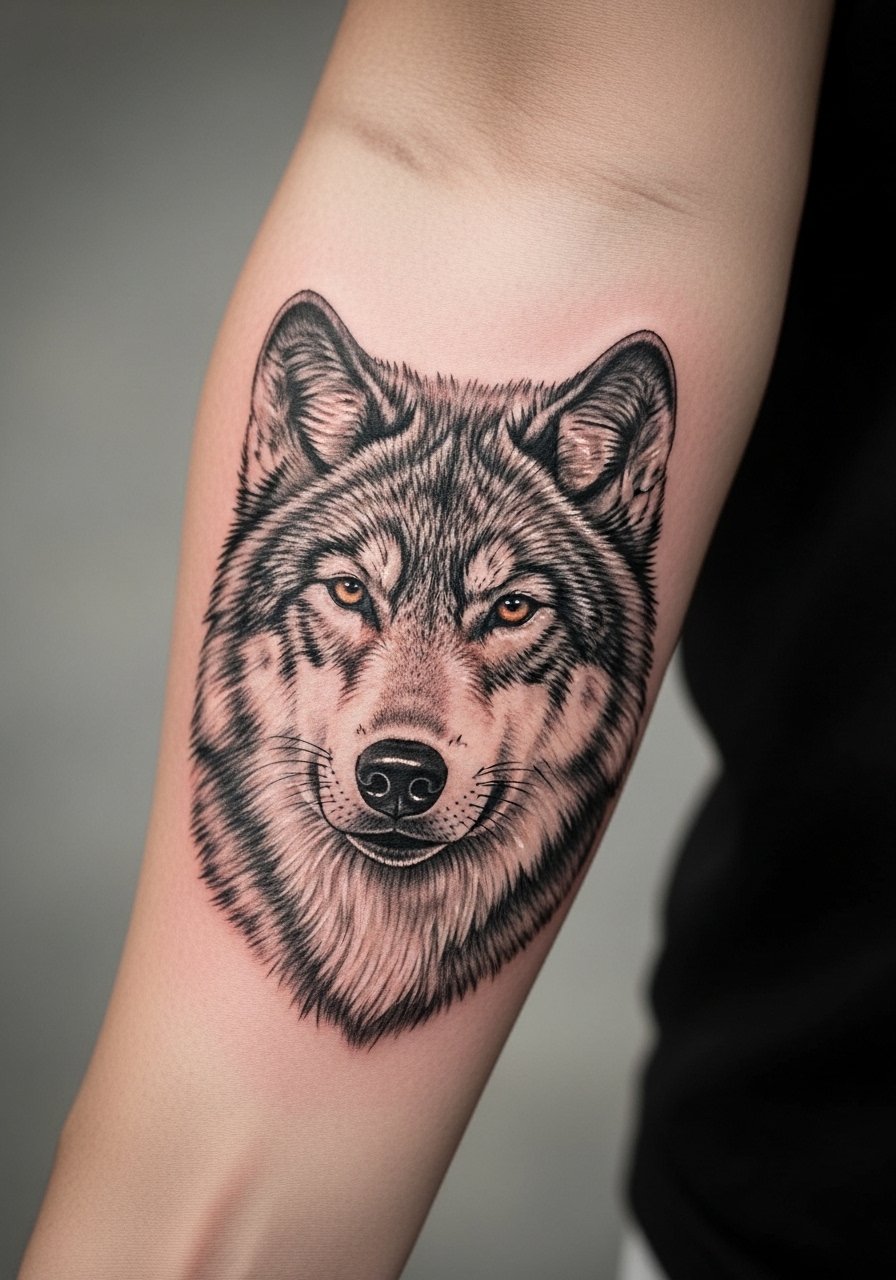
Micro-realism looks incredible when fresh but it ages differently by placement. Outer forearms give enough flat space for tiny fur strokes to maintain separation. During consultation, request slightly bolder anchor strokes and softer micro-detail in the filler areas. The common problem is overdoing tiny textures that merge after a year. Sessions are detail-heavy and taxing for both artist and client, so plan breaks. For the session, wear a rolled cuff long-sleeve shirt to expose the forearm without moving much. Expect a touch-up window around year two to restore fine highlights.
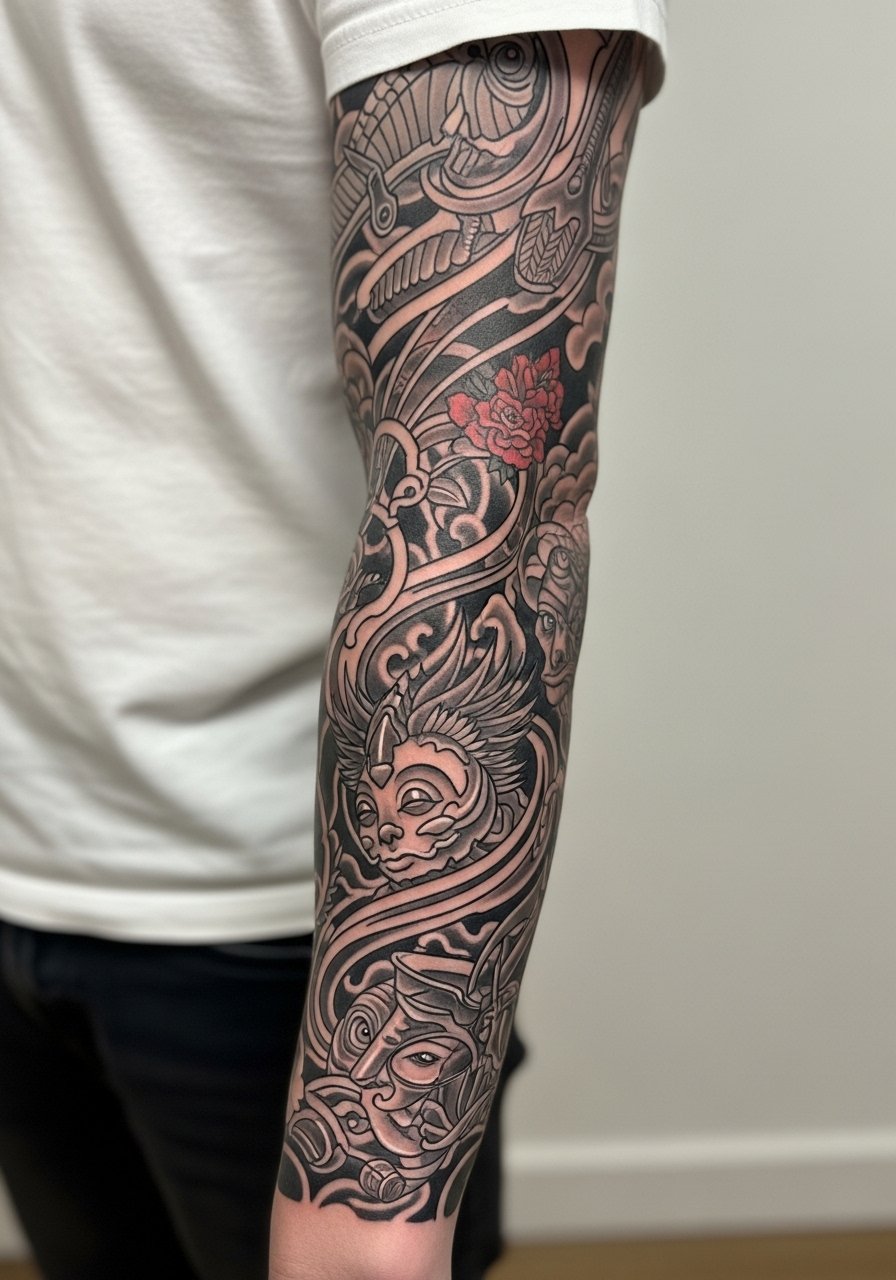
11. Japanese-Inspired Sleeve Flowing With Muscle Lines
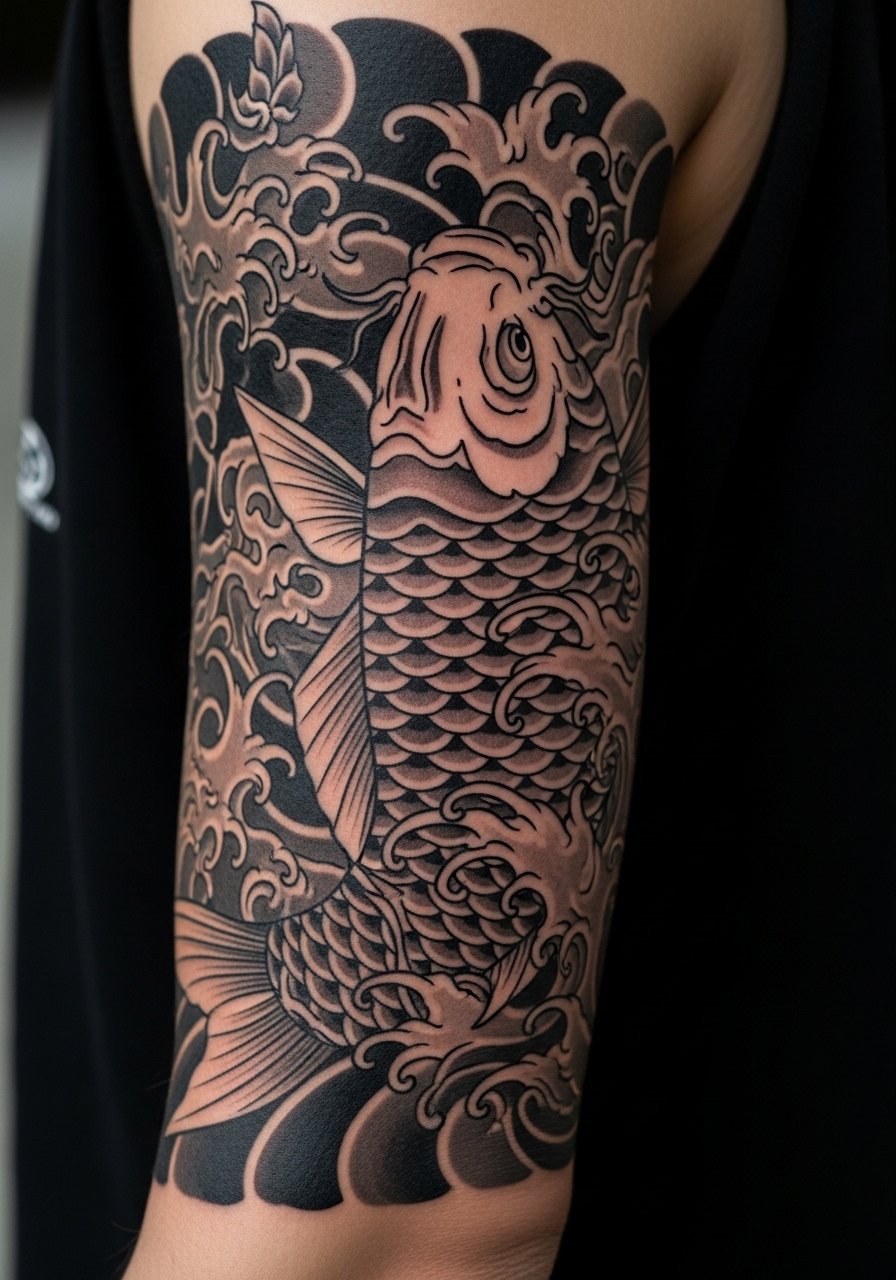
Japanese sleeves benefit from following muscle anatomy so waves and koi feel like they are moving with the arm. Tell the artist you want the main motifs placed on the outer bicep and shoulder cap, with filler waves wrapping toward the wrist. The mistake is forcing small motifs into cramped zones, which makes the composition lose its breath. Sessions vary from long days to multiple visits. For showing it off, a mens tank top frames the shoulder cap and allows the composition to read. Touch-ups are mostly about keeping edge saturation strong.
12. Dot Work Gradient Sleeve From Shoulder to Elbow
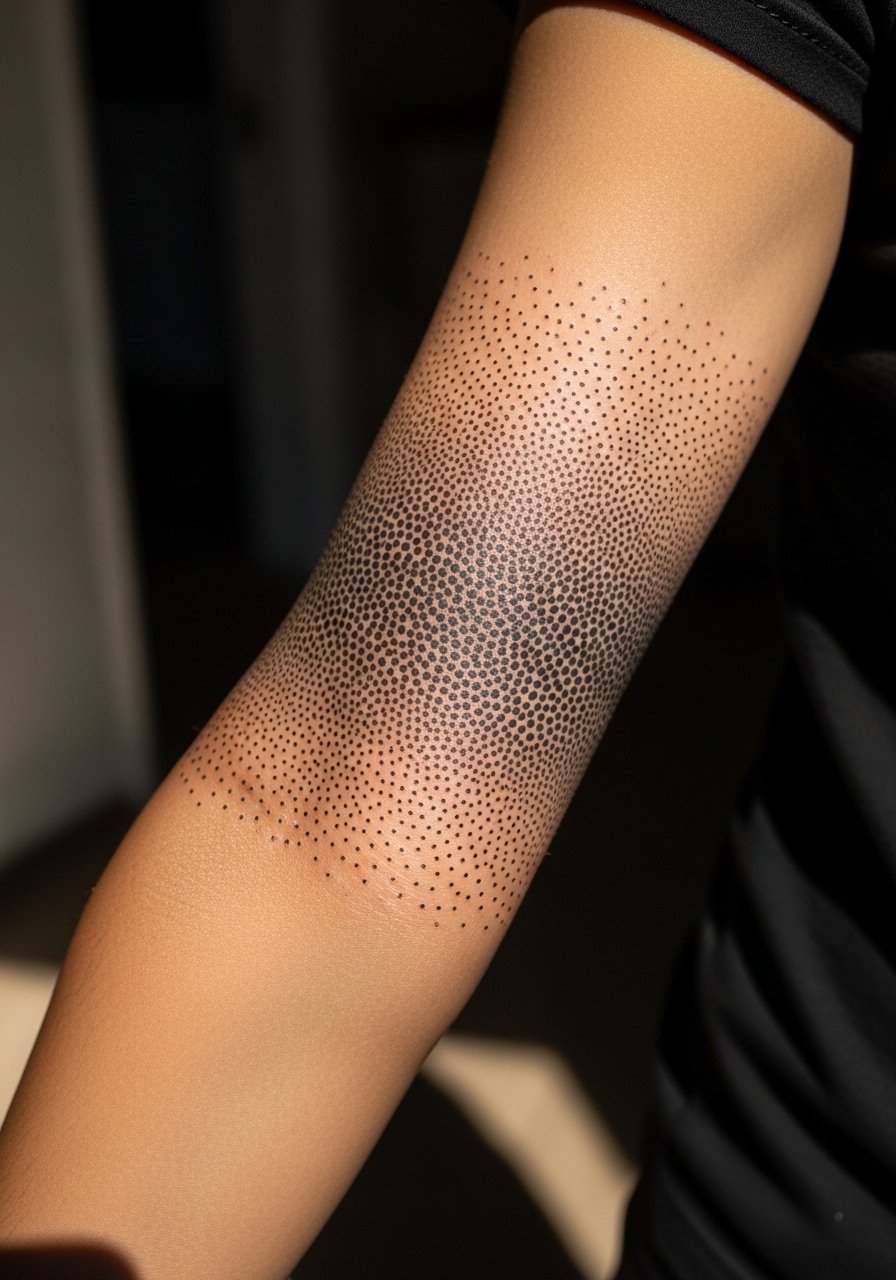
Dot work uses density to create gradients that age predictably if dots are spaced correctly. Tell the artist you want clear gaps in the lighter areas so they do not coalesce into continuous grey fields. The main error is over-densifying early, especially near joints where movement compresses skin. Sessions are steady and can be long because dot work is meticulous. For the appointment, bring a loose button-down shirt that you can move aside without friction. Expect touch-ups around two to three years if dot edges soften.
13. Sleeve That Uses the Back of the Bicep as the Anchor
The back of the bicep is often neglected, but it gives a large canvas that only you see from certain angles. Place a secondary anchor there so the sleeve rewards movement. A common planning mistake is building everything on the visible outer bicep and ignoring the reverse side, which leaves awkward gaps. Inner and back bicep areas are more sensitive, and sessions may be shorter. For comfort, wear a loose button-down shirt you can pull aside. Plan for a touch-up if the area sees a lot of friction from backpacks or straps.
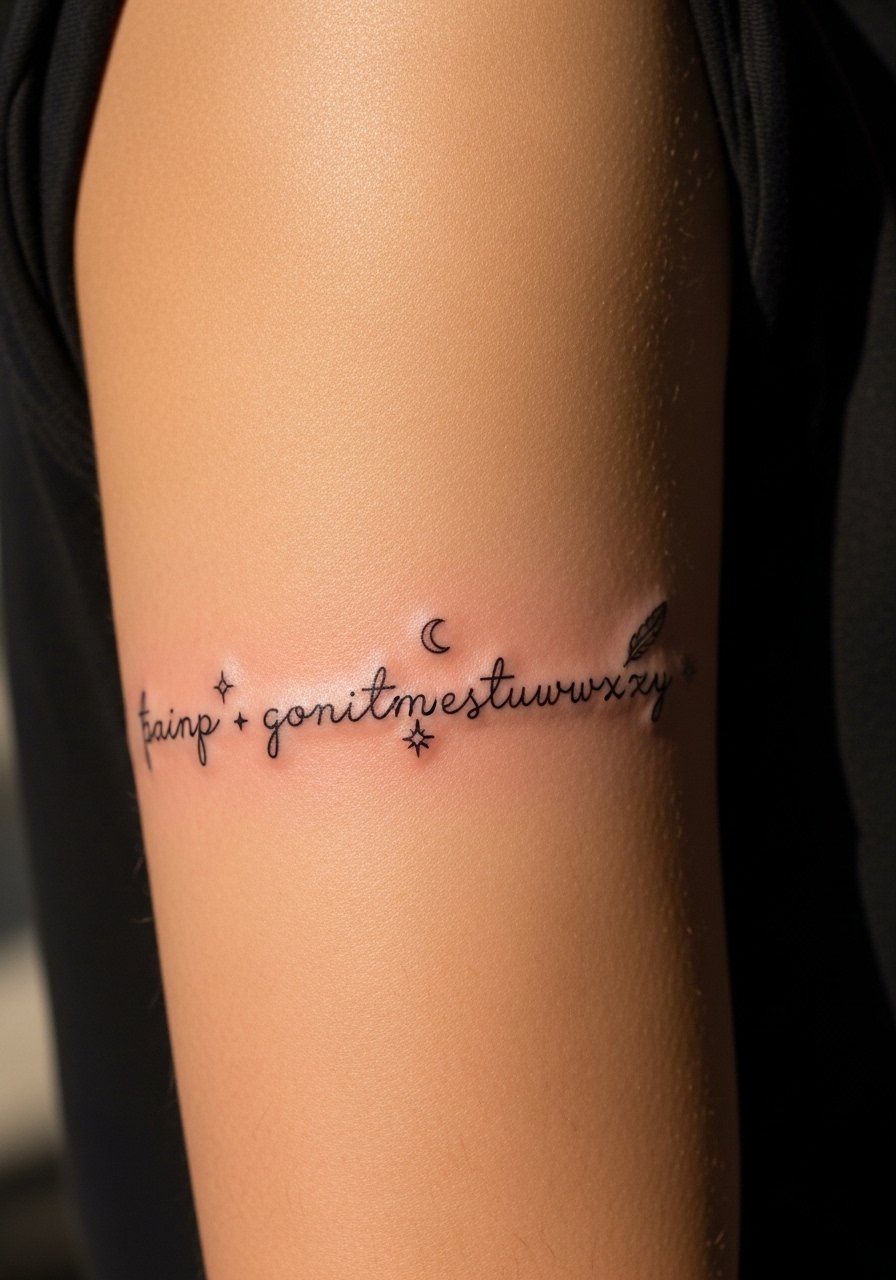
14. Minimalist Script Band That Wraps the Wrist
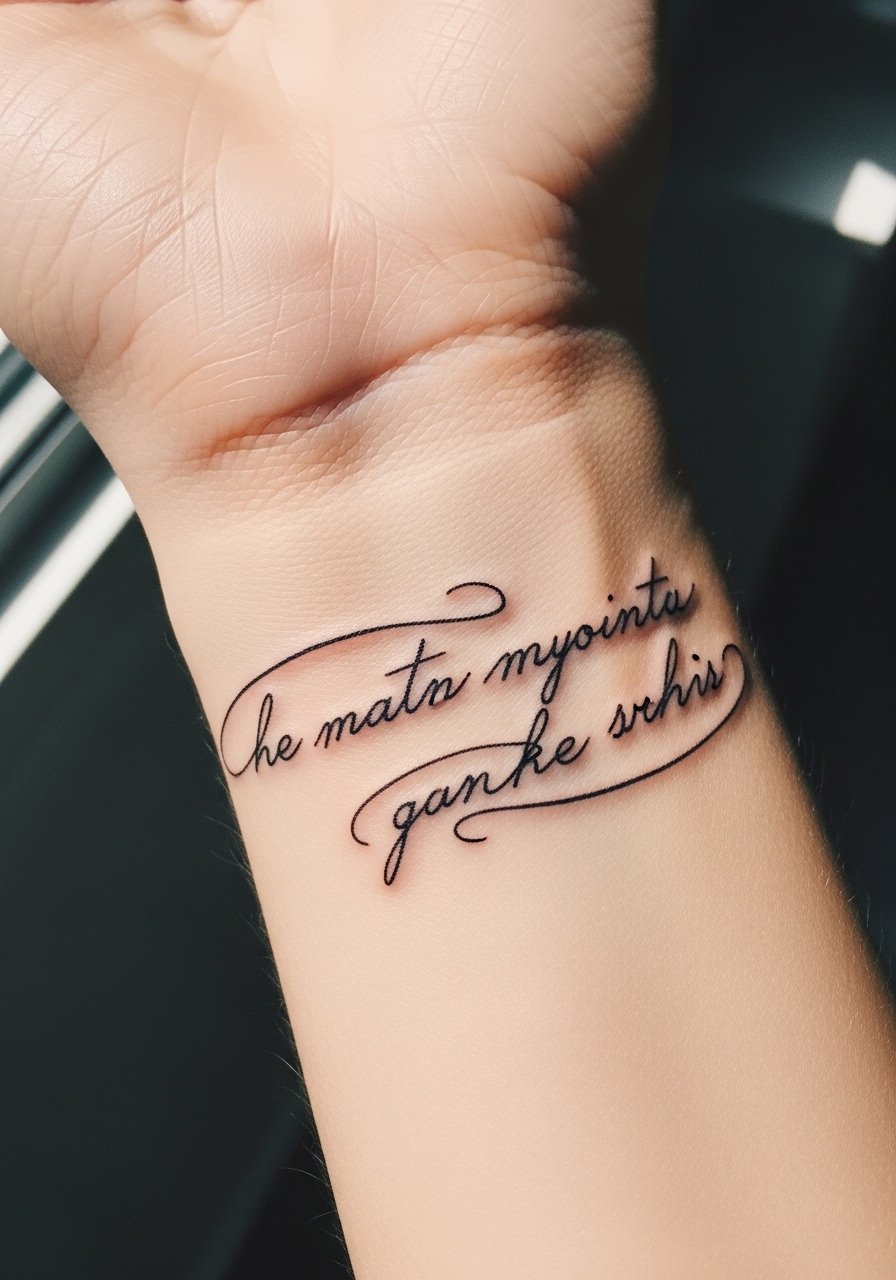
A script cuff around the wrist looks clean but needs spacing to resist blurring as lines soften. Request slightly heavier primary strokes and open letter spacing so the script reads at a glance. The wrist faces constant abrasion, so expect faster fading than on the forearm. Session times are quick but healing requires avoiding watches. Pair the finished piece with a minimalist watch men on the opposite wrist to avoid rubbing the new ink. Plan on a likely touch-up in year one or two depending on wear.
15. Full-Sleeve Patchwork of Themed Icons
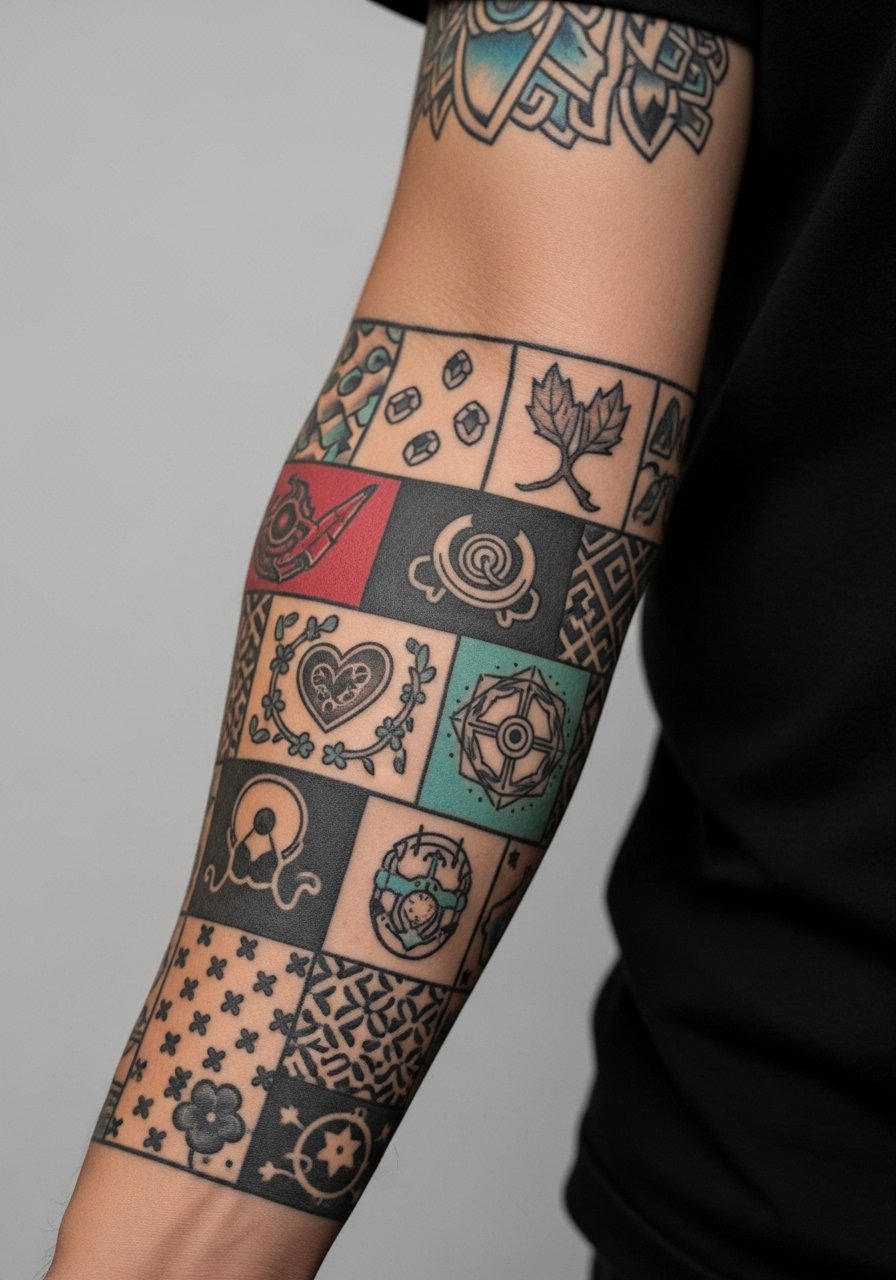
Patchwork sleeves let you build over years with each icon as its own story. The trick is keeping consistent line weight and a limited palette to avoid visual mismatch. I recommend telling your artist you want agreed-upon anchor pieces and filler motifs with shared shading techniques. The common error is haphazardly combining different hand styles, which looks disjointed once healed. For showing it off, choose a fitted short-sleeve shirt men that keeps the sleeve visually continuous. Touch-ups depend on how many different artist hands touch the piece.
16. Sleeve of Scar Cover and Negative Space Integration
Integrating scars into a sleeve requires honest placement talk with the artist. Some textures transition into the design better than others, so let them see the area in person before finalizing the stencil. The common mistake is trying to hide scars with thin linework; satiny fills and textured dot work often perform better. Sessions are collaborative and may take extra time to map flow. Wear a rolled cuff long-sleeve shirt that you can adjust for access. Expect touch-ups focused on areas with scar tissue.
17. Sleeve Anchored by a Bold Elbow Cuff and Flowing Fillers
Using an elbow cuff gives a natural stop point and a graphic frame for fillers. Tell your artist to plan the cuff as an intentional endpoint rather than a forced break. A common mistake is letting filler patterns cross the joint awkwardly, which looks messy when the arm bends. Sessions around the elbow feel sharp because the skin is thinner. For the day, a loose button-down shirt that buttons makes access easier. Over time the cuff holds up well and keeps the sleeve readable from across a room.
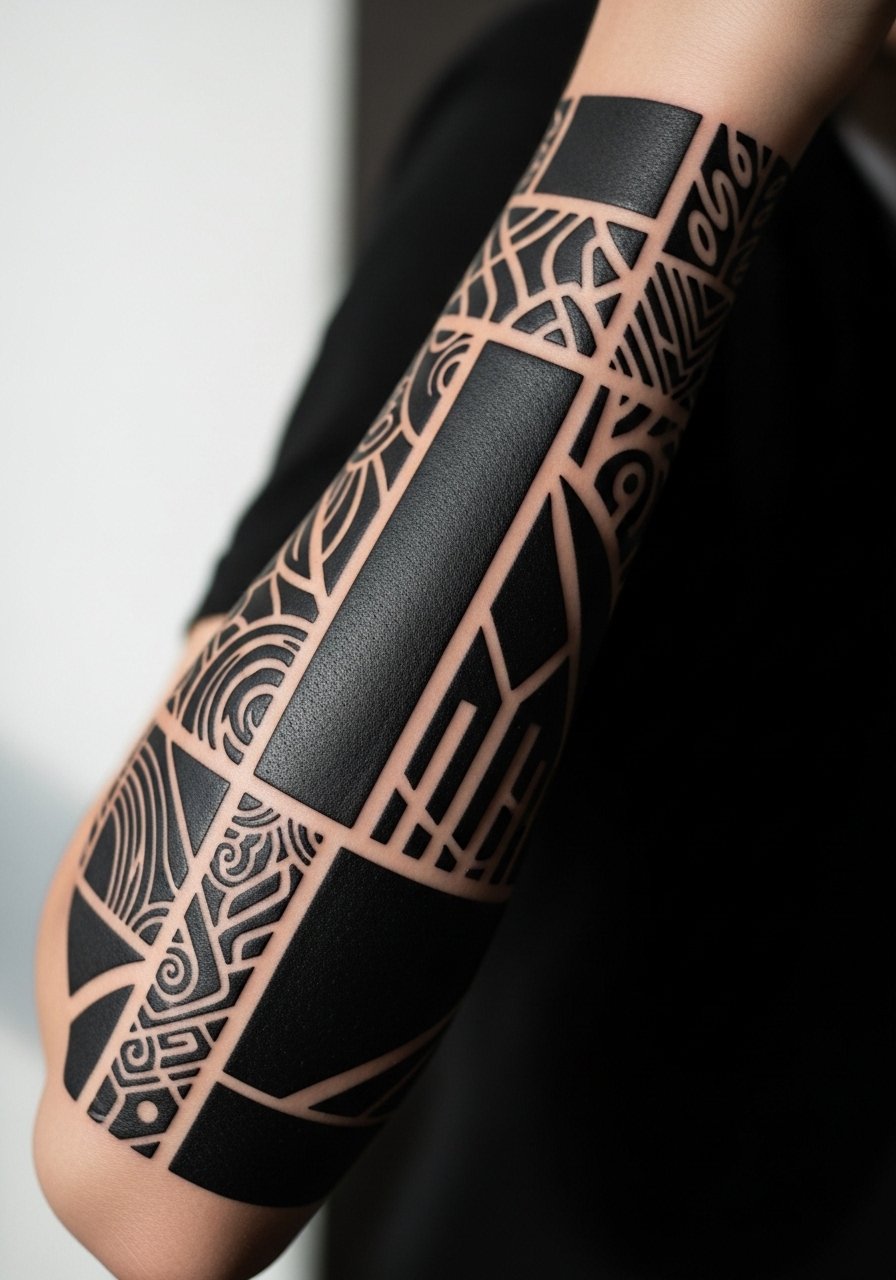
18. Armor-Style Blackwork from Wrist to Mid-Forearm
Wrist-to-forearm blackwork reads like a cuff of armor and tolerates daily wear. Keep filler textures bold and avoid micro-detail that faces constant friction from clothing and washing. A typical mistake is tiny cross-hatching that disappears with frequent contact. Sessions are intense for saturation, and you should expect multiple passes. For after the session, wear soft cotton sleeves so the saturated areas do not rub. Visual impact holds much longer than delicate styles.
19. Abstract Brushstroke Sleeve with Strategic Negative Space
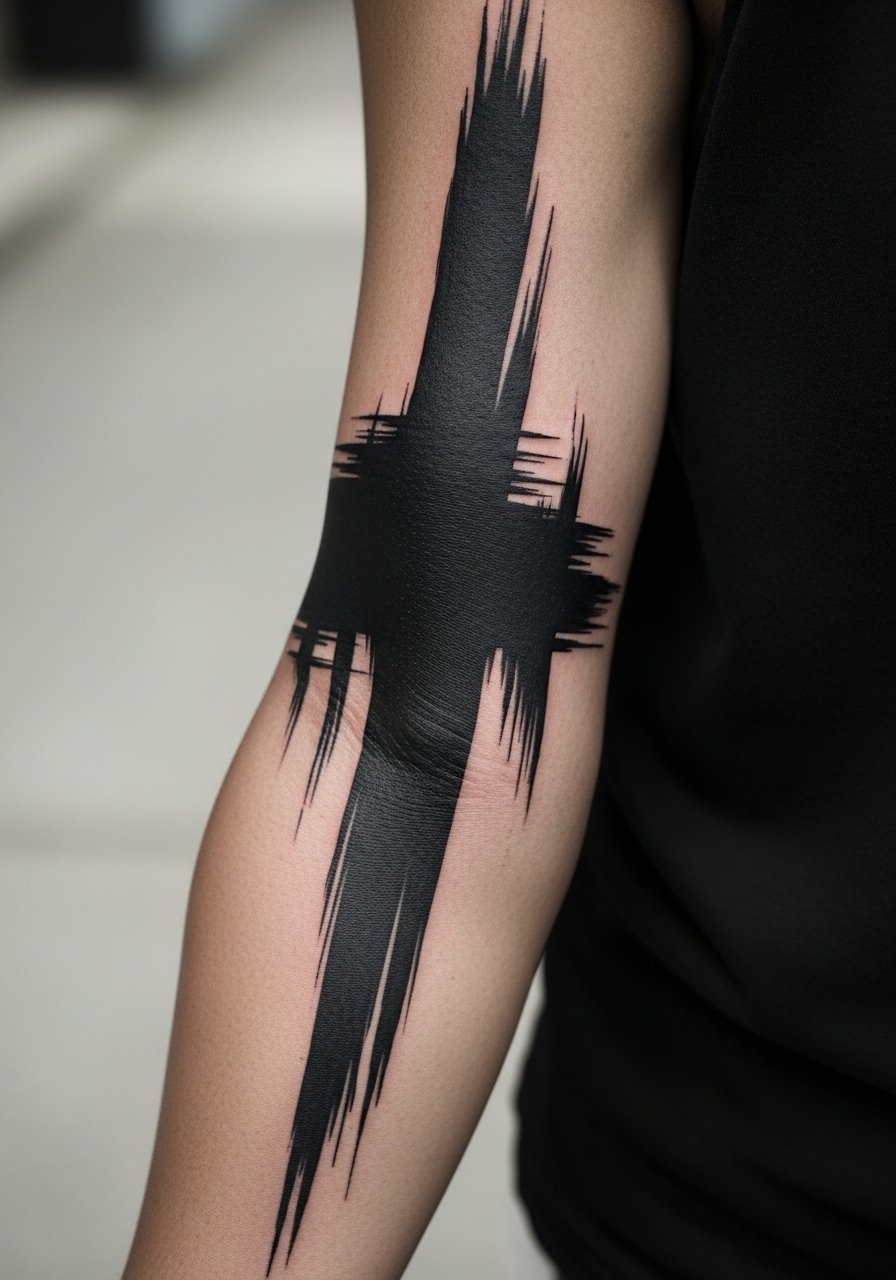
Abstract brushstroke sleeves look modern and mask aging because the shapes are meant to be bold and forgiving. Say you want confident stroke placement that follows muscle direction so the arm reads like a sculpture. A common error is scattering small strokes that age unevenly. Sessions vary depending on coverage. For showing this off, try a sleeveless athletic tank men that highlights the silhouette. Long term, bold strokes need infrequent touch-ups.
20. Botanical Wrap Around the Elbow and Inner Forearm

Wrapping a botanical motif around the elbow requires planning for movement so leaves and stems do not distort when you bend. Tell your artist you want spaced leaves that allow the elbow crease to move naturally. The mistake is lining tiny veins across the crease which will fracture and blur. Inner forearm work can sting more, so sessions are often split. For the appointment, a sleeveless athletic tank men gives easy access. Expect touch-ups near the crease within two years.
21. Mechanical Minimalism Sleeve with Thin Line Highlights
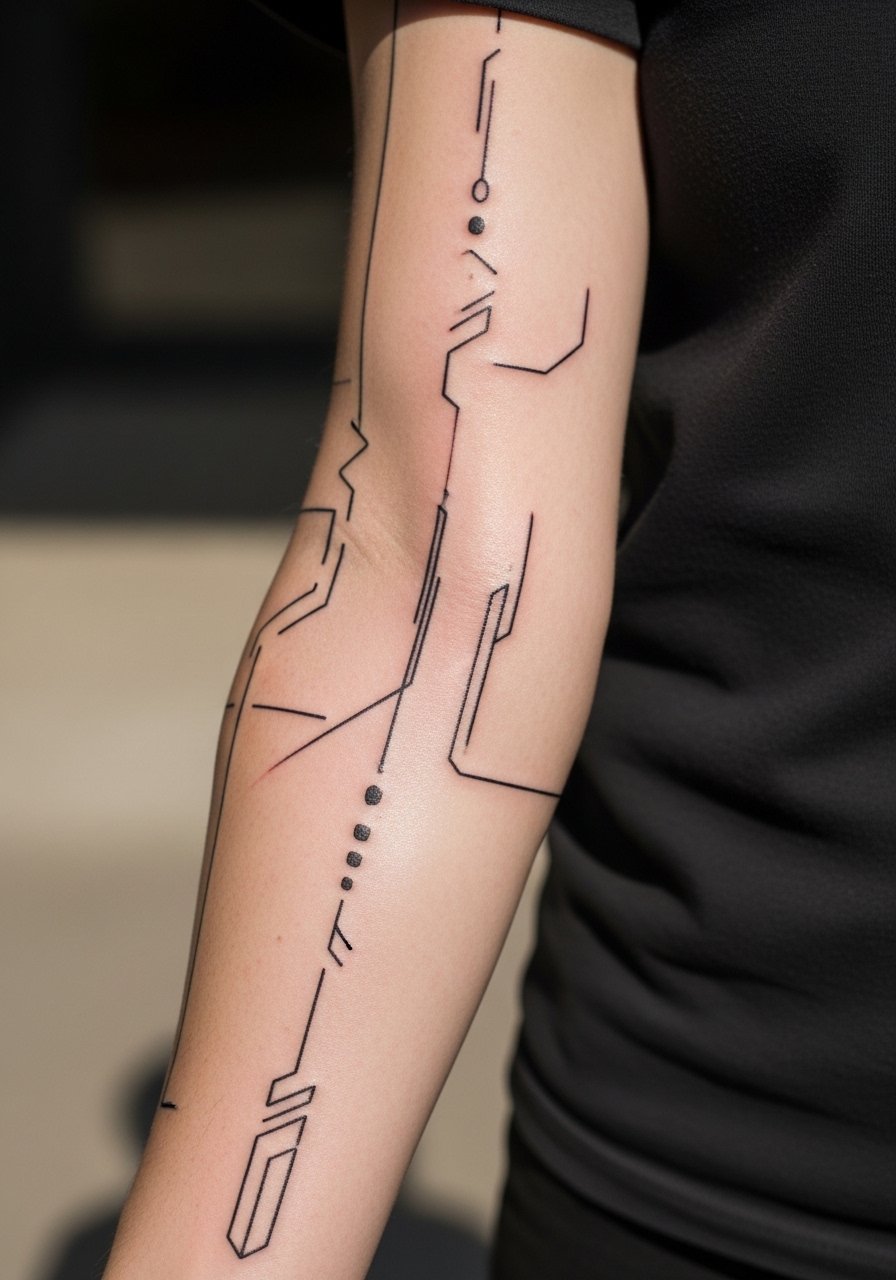
Thin line mechanical sleeves can look futuristic but they require spacing and occasional heavier anchor lines to survive time. Ask for a mix of thin detail and deliberate thicker lines to protect the silhouette. The main problem is using only hairline strokes which blur inside joints. Sessions are detail-focused, and the pain level is moderate. For showing it off, wear a fitted short-sleeve shirt men that keeps attention on the arm flow. Expect small touch-ups over the years for the thinnest elements.
22. Mythic Creature Sleeve with Negative Space Background

Negative space backgrounds let a large mythic figure breathe. During the consult, be specific about which areas you want left open so the creature silhouette remains readable from distance. Artists sometimes overfill backgrounds and remove the creature's visual float. Sessions are long for detail in scales and features. For session comfort, pick a top that you can remove without pulling across the shoulder. Over time negative space tends to stay clean if the surrounding ink is saturated properly.
23. Surrealist Sleeve with Floating Elements

Surreal sleeves play with scale and disproportions so the eye moves across the arm. Tell your artist to use deliberate gaps between floating pieces so each element survives the settling process. A common error is creating too many small floating parts that disappear into texture. Sessions are similar to illustrative work. For showing it off, choose a mens tank top that makes the arm the focal point. Touch-ups usually focus on faint floating details.
24. Cosmic Sleeve with Stars, Planets, and Deep Shading

Cosmic themes rely on deep black fields and crisp white highlights to sell depth. Ask your artist to reserve highlights in the stencil so they are not overcrowded by adjacent saturation. The common mistake is overusing white ink in thin layers which fades faster than expected. Sessions take time for consistent black saturation. For the day, wear a fitted short-sleeve shirt men that frames the sleeve. Expect highlights to need refreshes before large black fields do.
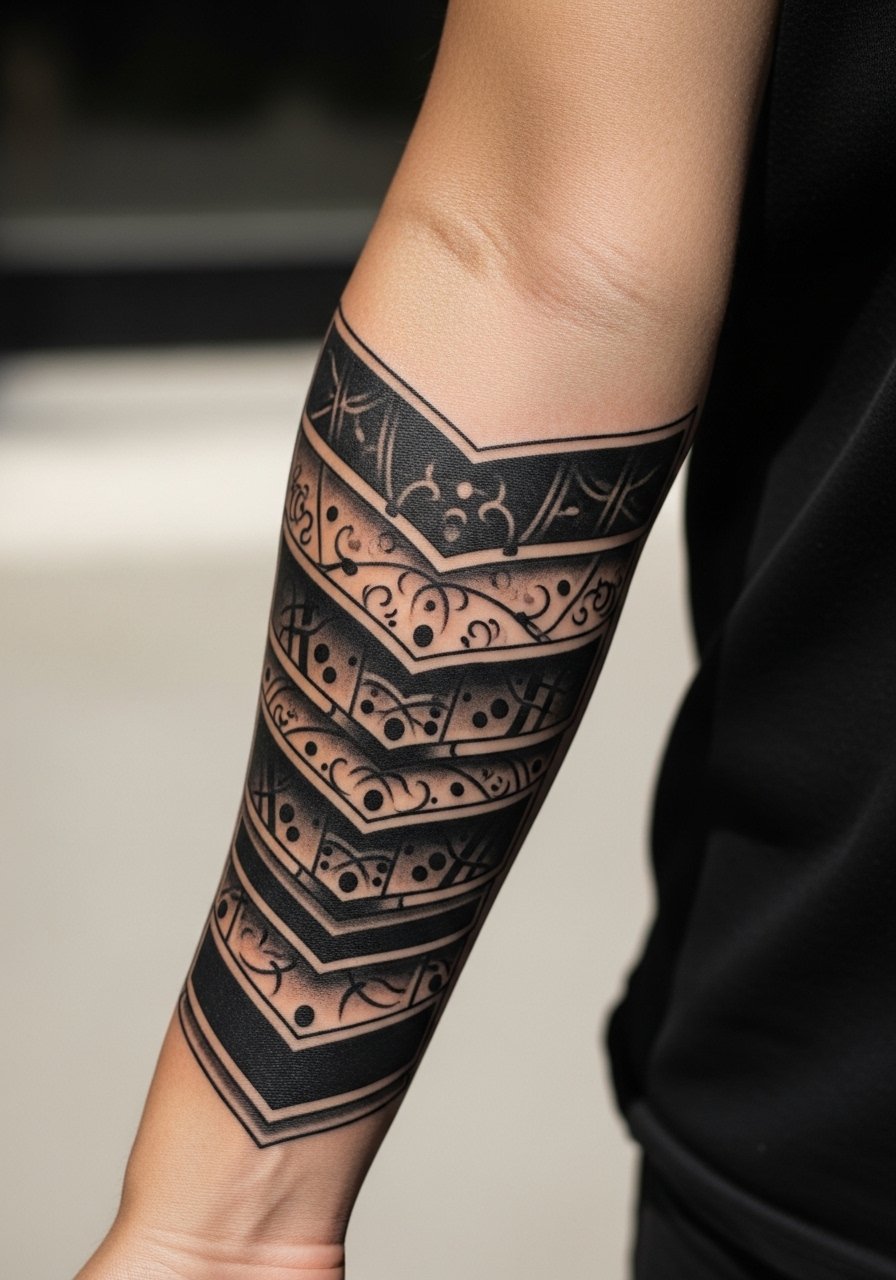
25. Script and Symbol Banding Along the Upper Arm
Banding with script and symbols creates visual rhythm on the upper arm. Request open lettering with slightly more weight than you would wear on the wrist to keep clarity. A mistake is combining ornate script with thin symbols without matching weight, which makes sections read unevenly. Sessions are quick for bands, and healing is straightforward. For showing the piece, a loose button-down shirt with rolled sleeves displays the bands. Expect a small touch-up in the first two years for delicate letters.
26. Sleeve Featuring Contrast Between Saturated Black and Skin Tone Negative Space
High-contrast sleeves hold up because bold blacks age into a graphic statement and negative space prevents visual mush. Tell your artist you want decisive edges where black meets skin so the silhouette stays sharp. The main pitfall is soft edges from rushed saturation passes. Sessions are heavy on saturation, and the artist may schedule multiple short visits. For showing it off, a sleeveless athletic tank men works well. Touch-ups usually target edge crispness rather than field depth.
27. Sleeve That Mixes Stipple Shading with Bold Linework for Texture
Combining stipple shading with bold lines gives texture without relying on color. During the consult, specify where you want dense stipple versus open negative space so the sleeve reads at multiple distances. A common mistake is putting stipple too close to heavy fields where it loses definition. Sessions are varied and may alternate techniques. For the appointment, wear a loose button-down shirt to allow easy upper-arm access. Expect select touch-ups where stipple softens by year three.
Frequently Asked Questions
Q: Will fine line forearm pieces blur faster than blackwork on the same sleeve?
A: Fine line tends to blur sooner if it lacks breathing room and anchor lines. Blackwork has natural forgiveness because saturation and contrast mask small merges. If you want delicate elements, ask for slightly heavier primary strokes and planned negative space. Expect to schedule touch-ups sooner for the thinnest lines.
Q: Is it better to build a sleeve as a continuous scene or as patchwork if I plan to add pieces over years?
A: There are two clear approaches. Continuous scenes require upfront planning so panels sit cohesively. Patchwork lets you add over time but demands consistent line weight and palette to avoid mismatch. If you might change artists, patchwork with a shared palette is safer. If you know your final vision, a continuous scene pays off visually.
Q: How should I dress on session day for a shoulder-to-wrist build that moves around the arm?
A: Bring removable layers that let you access each zone without pulling fabric over fresh work. A button-down you can open or a loose button-down shirt is handy. For forearm focus, a rolled cuff or tank works. Comfort beats style for long sessions.
Q: Do I need to plan touch-ups differently for inner bicep and wrist sections?
A: Yes. Inner bicep and wrist face different stresses. Inner biceps can stretch and see early softening if detail is too fine. Wrists encounter daily friction and washing which accelerates fading. For both, plan a one to three year check-in rather than assuming the whole sleeve needs a single refresh.
Q: Can scars be integrated into a sleeve without looking obvious?
A: Often yes, but it depends on scar texture and placement. Textured scars absorb ink differently, so artists will usually adapt technique, using texture-friendly fills and negative space to incorporate the mark. Bring the area to the consult so the artist can map a solution that works with your skin.
Q: How does sun exposure affect different sleeve styles long term?
A: UV fades color and softens edges across all styles. Bold blackwork holds up better under intermittent sun because contrast remains. Fine lines and white highlights are most vulnerable. Make applying sunscreen a habit once healed, and expect earlier touch-ups on exposed parts like the forearm and wrist.
