
Fine line and abstract Noah Kahan inspired pieces have been all over saved boards, but what actually lasts past the first year is not always what trends on social. Fine detail and loose washes photograph beautifully fresh. Longevity depends on placement, spacing, and realistic expectations about touch-ups. Below are 21 abstract takes that nod to his lyricism and sonic textures while prioritizing how the work will settle on real skin.
1. Minimalist Waveform on Inner Forearm
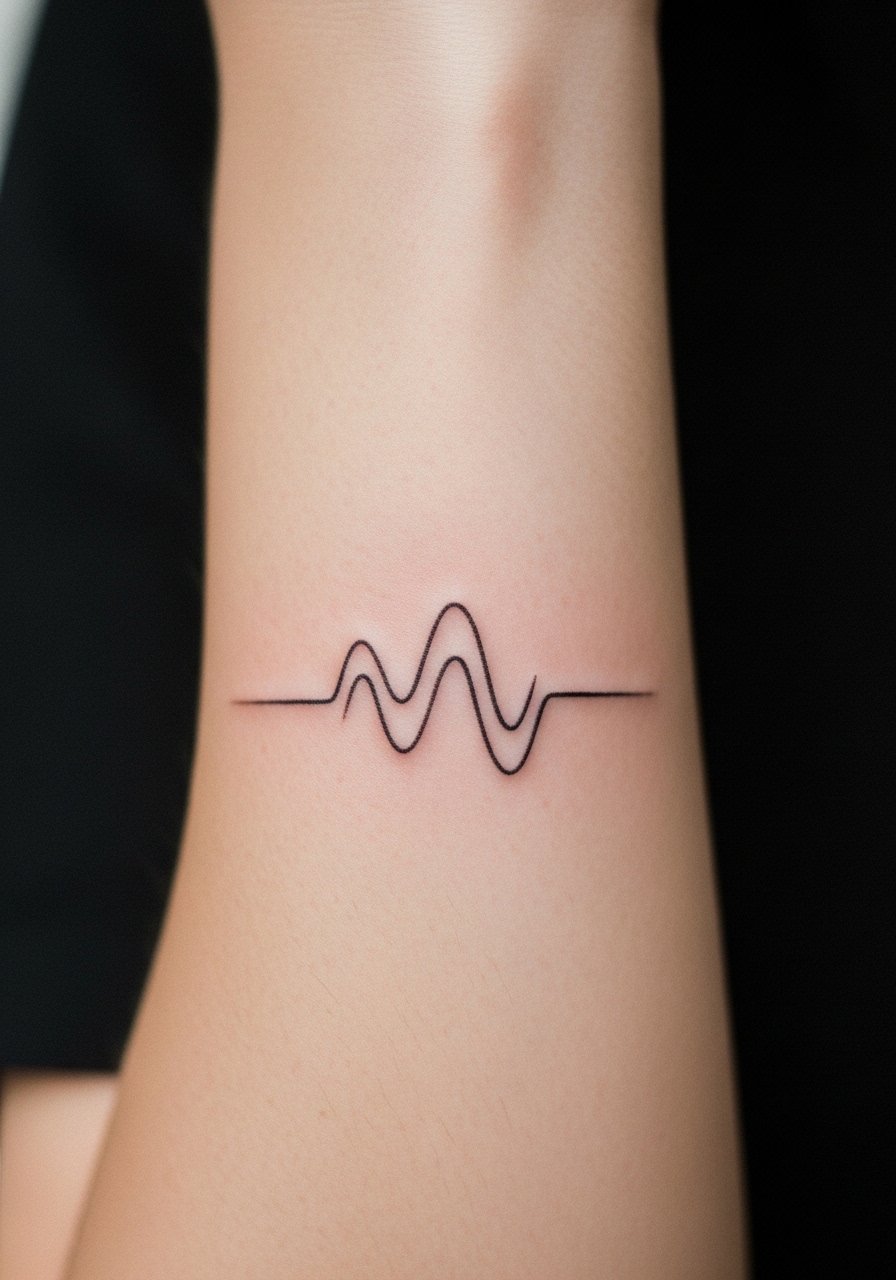
I recommend this when you want a direct nod to a song without literal text. Ask your artist for slightly increased line weight and spacing so the waveform keeps its silhouette after a few years. Fair warning, the inner forearm is visible and gets sun exposure, which affects saturation. During the consultation, show the exact size and say you want lines that hold up, not ultra-hairline work. The session feels like light buzzing, a three out of ten on most pain scales, with one short sitting. Pair it with rolled sleeves and a loose linen button-down when you want to frame the piece without crowding the wrist.
2. Stippled Lyric Snippet on Outer Bicep
This version turns a lyric into texture rather than readable script. I suggest asking for stipple shading that reads like grainy light in photos. The outer bicep tolerates denser work without blowout, and the session is moderate in length, often one to two hours. A common mistake is requesting the script too thin and too tight to the shading, which merges after healing. Tell your artist you want visible negative space around the text area to preserve contrast. For the appointment wear a racerback tank top you can pull aside so the artist has clean access.
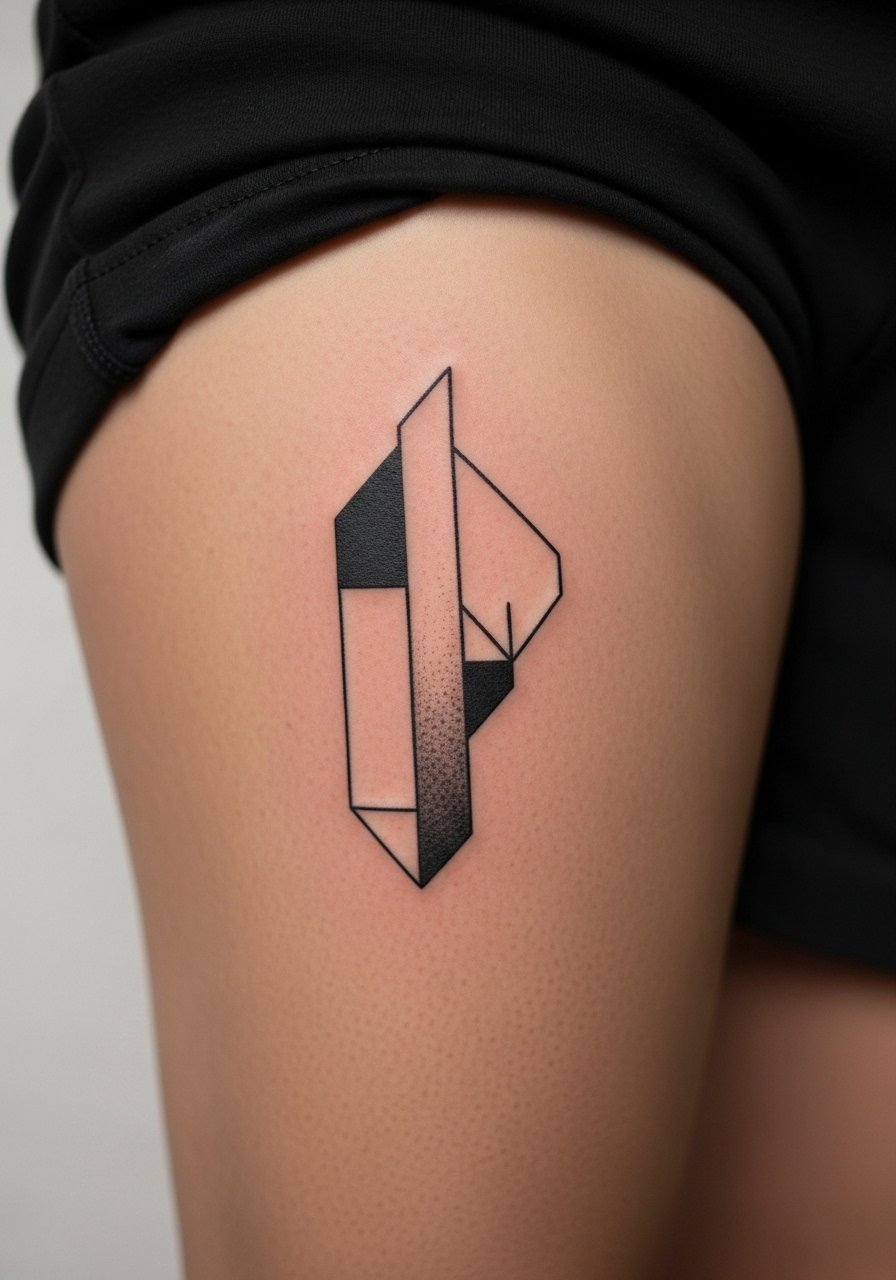
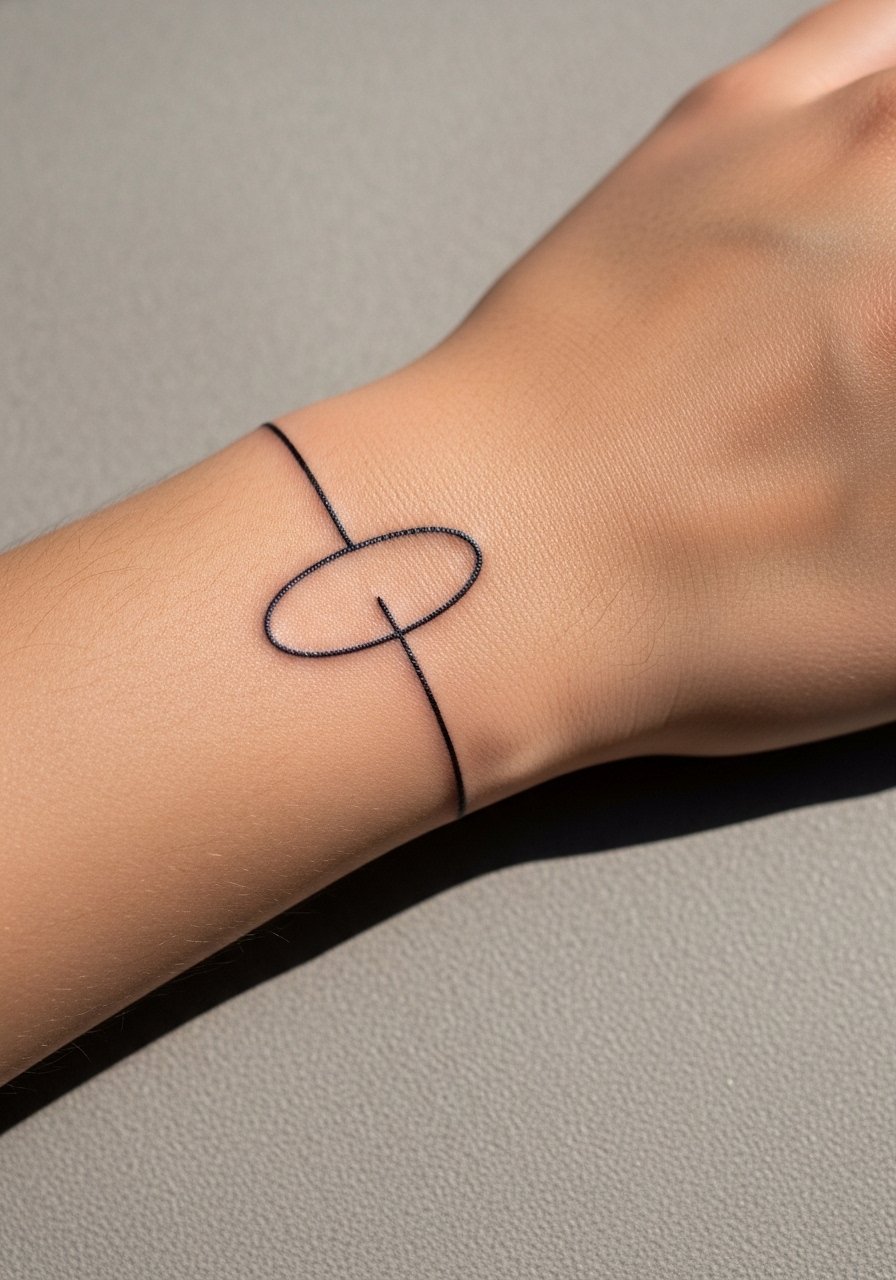
3. Constellation of Lines on the Wrist
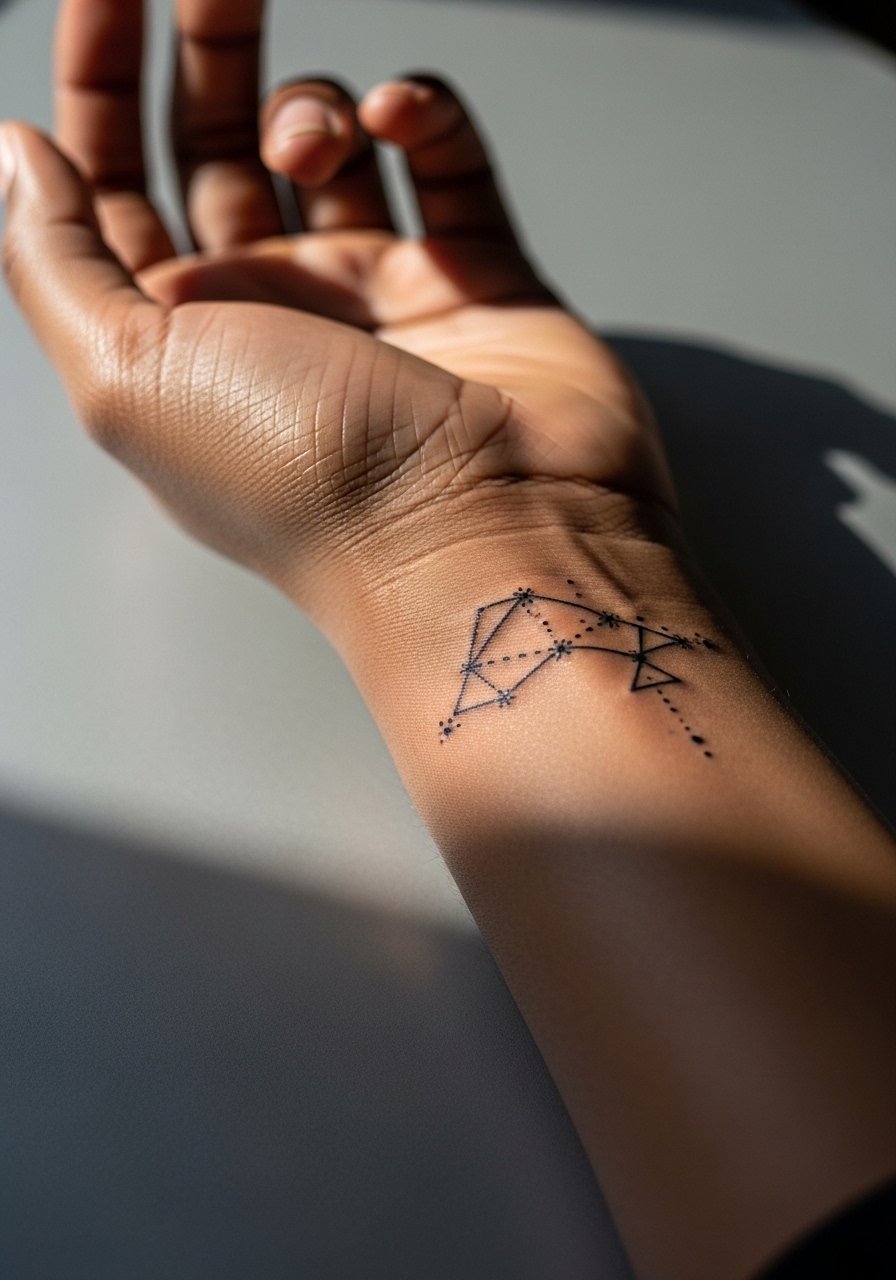
Wrist pieces are intimate and show every imperfection, so I push for slightly bolder dot work and robust linework. The biggest mistake is going too small. Lines need breathing room or they blur into a smudge where skin creases. This design uses dot work and tiny negative spaces to suggest a cluster of ideas rather than literal stars. Expect a short session, under an hour, but plan a touch-up at year two for crispness. For showing it off wear a thin chain bracelet or a minimalist watch that does not sit on top of the tattoo.
4. Collarbone Geometry That Breathes

Collarbone geometry reads sharp when given space. Many people ask for dense mandalas there and then find the lines merge with body movement. I advise larger negative space between shapes and a mix of whip shading for subtle depth. This placement can sting more than the arm, so expect a higher pain rating. Tell the artist you want the piece to work with open necklines and to avoid micro-detail in high-movement zones. Pair it with an open-neck blouse for evenings and a loose sports bra for the session so access is easy.
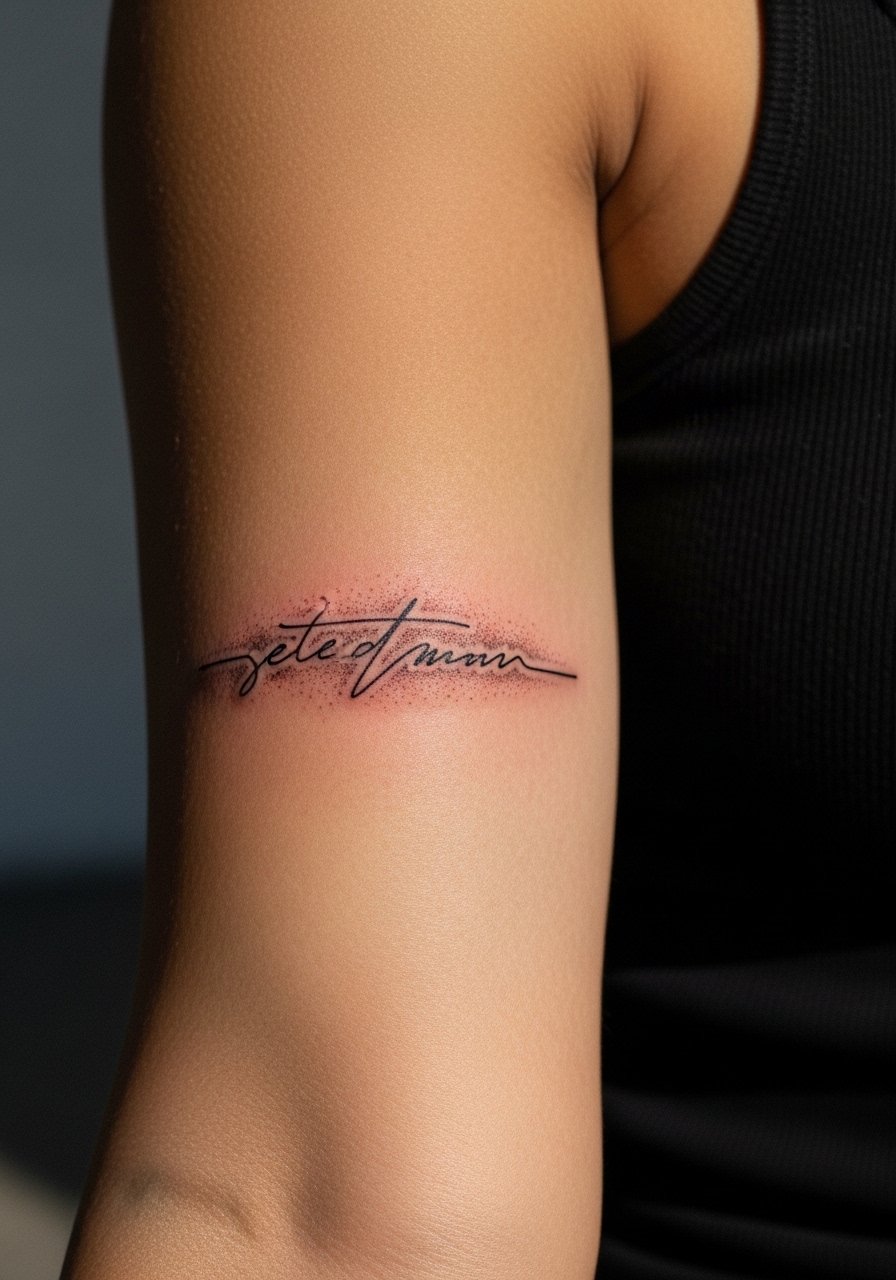
5. Ribcage Lyric Wash with Intentional Spacing
Fine line lyrical scripts on the ribcage split artists into two camps. One group says the skin stretch and regular torso movement blur lines within two years. The other group argues that with proper needle depth and spacing, fine line settles cleanly on ribs. I sit with the latter when the design uses expanded spacing and avoids tiny connected letters. The rib is a higher pain placement, often a multi-hour session with breaks. A common mistake is asking for dense script with little negative space. For the appointment wear a cropped athletic top you can lift so the artist sees the exact area without full torso exposure.
6. Abstract Linework Around the Ankle
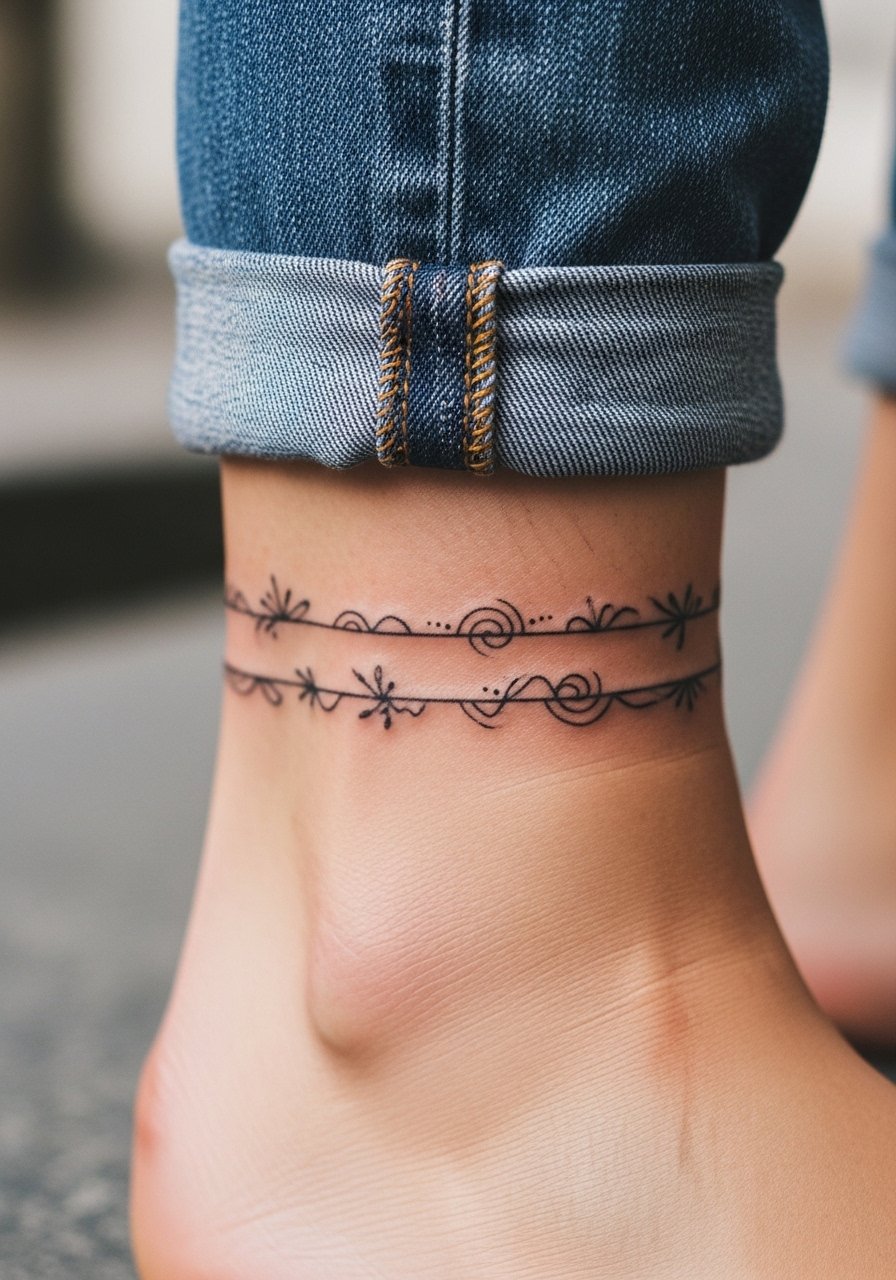
Ankle work looks delicate but deals with a lot of friction from shoes and socks. Expect a small session with spotty pain during the first pass because of bone proximity. I recommend slightly thicker primary lines and sparse dot shading that survives rubbing. The common error is ultra-fine lines that vanish after a year. For showing this off, ankle tattoos reward cropped jeans and sandals. For the session wear jeans you can roll up easily so the artist can access the area without tugging.
Studio Day Picks
The wrist, ribs, and ankle pieces above each demand different prep across a single studio day, so these five items smooth out the session and the first week.
- Stencil transfer paper kit. Lets you preview the layout on skin before the needle starts, which is helpful for waveform and collarbone geometry placements.
- Topical numbing cream. Applied per instructions it softens the edge for sensitive ribs and inner bicep work without altering line placement.
- Thin protective film roll. Keeps ankle and wrist pieces clean during the first days of friction from socks and watches.
- Silicone tattoo healing pads. Cushioning for collarbone and rib sessions reduces rubbing against clothing while you heal.
- Aquaphor healing ointment. Thin layer for initial days locks in moisture around fine line work without clogging the channels.
7. Fragmented Portrait Lines on Upper Back
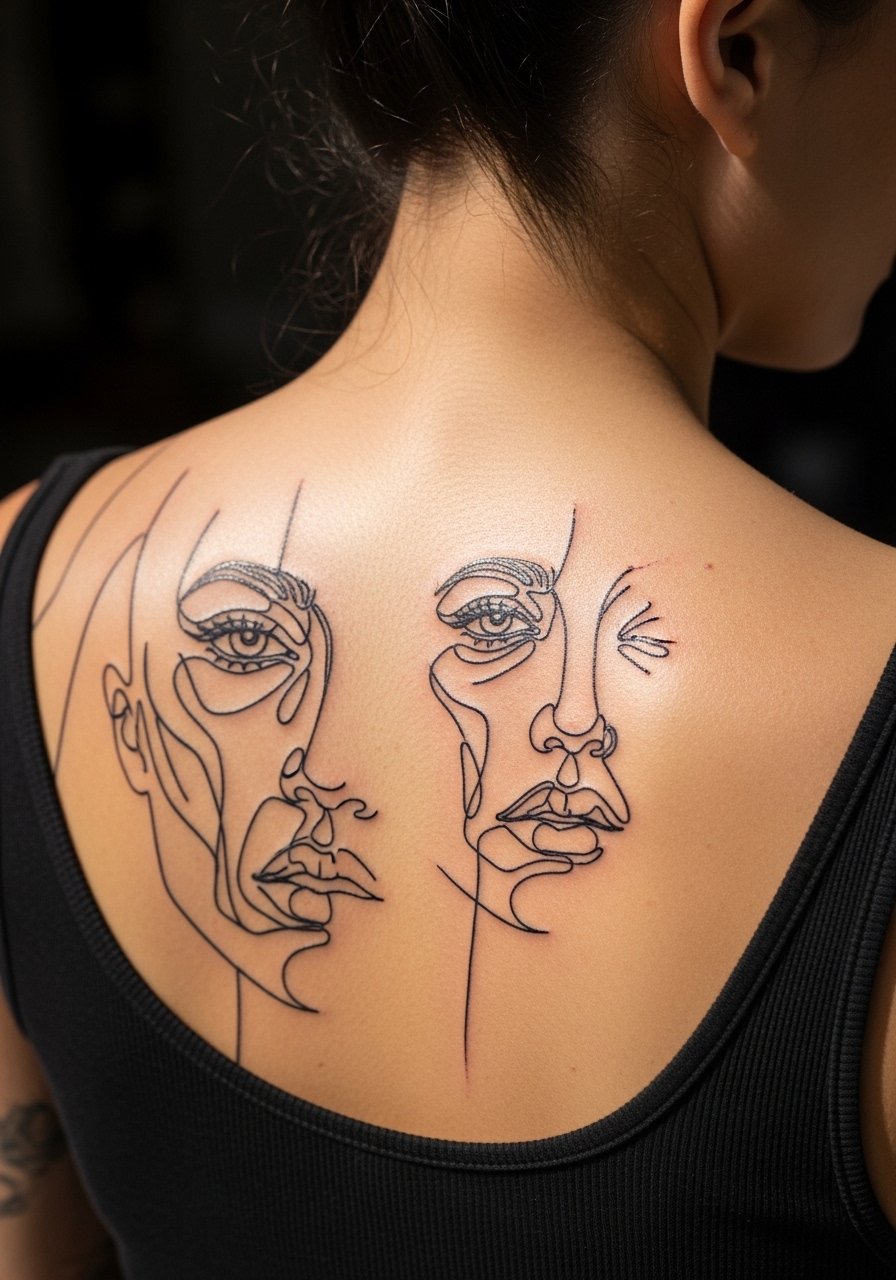
Turning a portrait into abstracted line fragments keeps the emotional cue without hyper-detail that ages poorly. The upper back tolerates denser work and larger sessions, so this design benefits from bolder strokes and selective negative space. In consultation, ask for reference photos that show the exact balance of line and gap you want. A mistake I see is pushing for facial micro-detail in a single sitting, which blurs over time. Sessions can run two to three hours depending on size. For the session wear a loose button-down shirt you can pull aside to expose the upper back without discomfort.
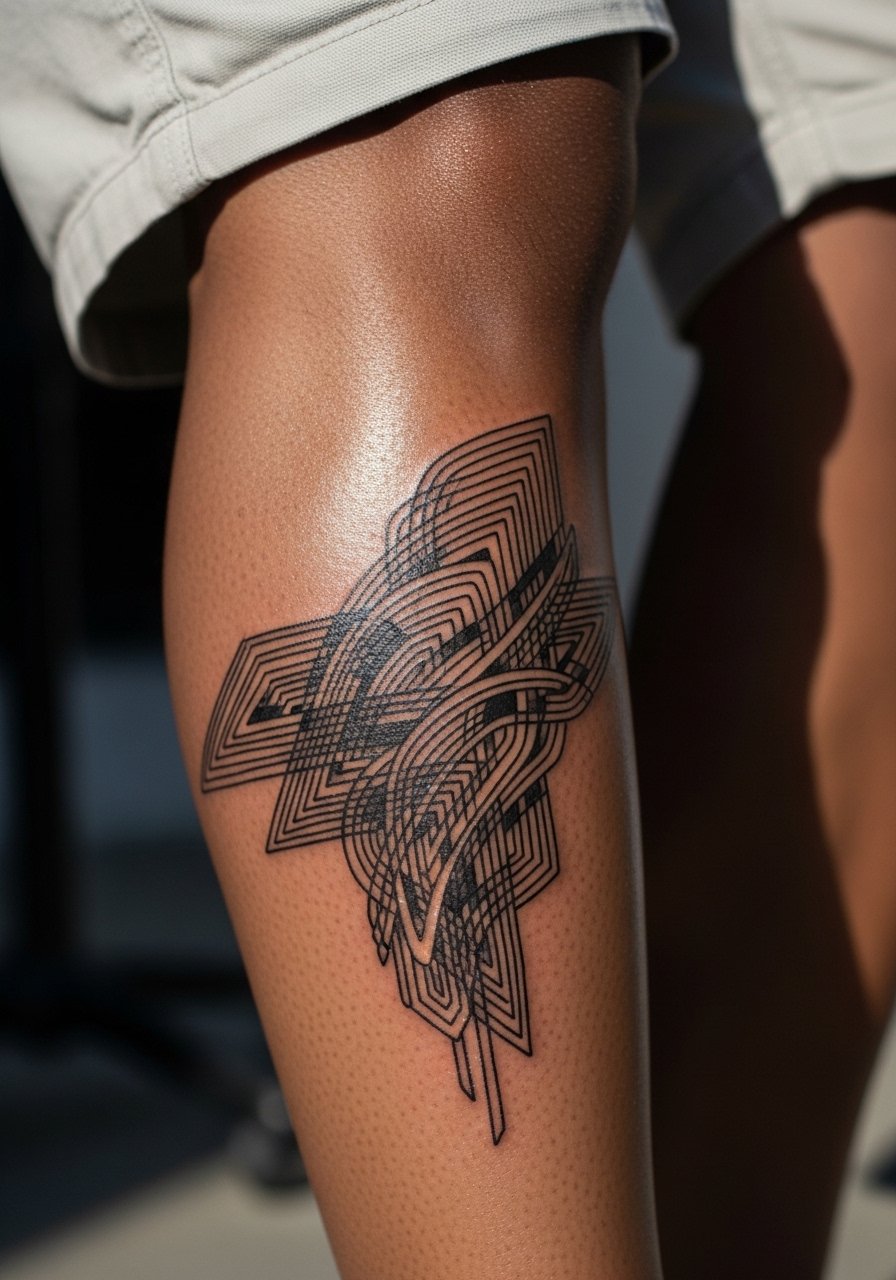
8. Ribboned Soundwave Around the Calf
Calf pieces move a lot with walking but they age predictably because the skin is thicker. I suggest a ribboned approach where the waveform bends into negative space, which reads well from a distance. The common version that ages poorly is a crowded waveform too close to the ankle where abrasion accelerates fading. Tell the artist to space the ribbons and keep primary lines slightly heavier for longevity. Session pain is manageable and often one long sitting. Pair this with knit shorts and slip-on shoes after healing to avoid unnecessary pressure on the area.
9. Micro-Realism Leaf with Dot Gradient on Inner Arm
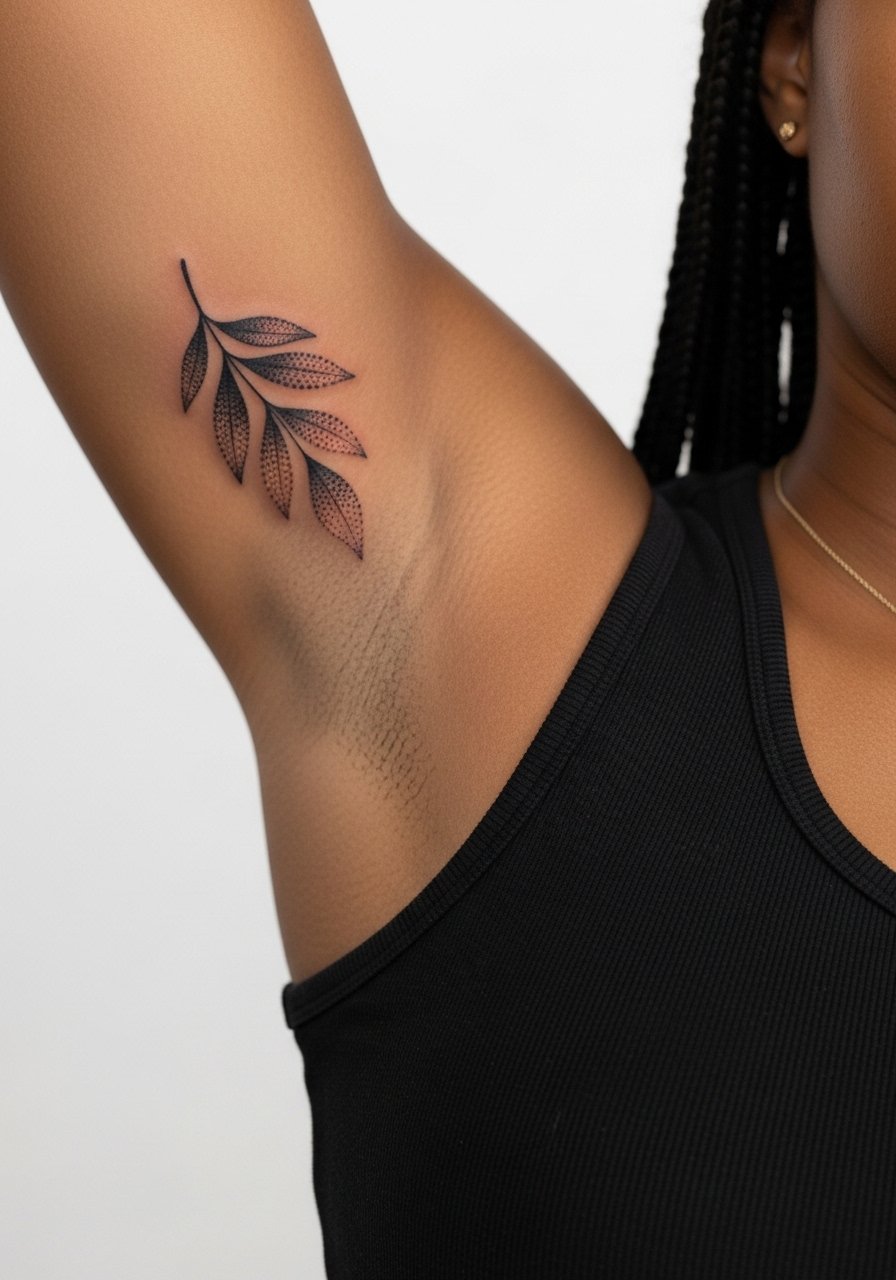
Micro-realism works on inner arm when it is scaled appropriately and uses stipple shading rather than dense fills. The inner arm moves and stretches, so dot gradients keep the shape without creating a large saturated block that blurs. During the consult, ask for a proof stencil that sits in the area while you move your arm so the artist can adjust placement. Sessions are medium length. The inner arm can be tender so expect breaks. For the session choose a sleeveless top you can lift without rubbing or tugging.
10. Fragmented Chord Chart on Side of Hand
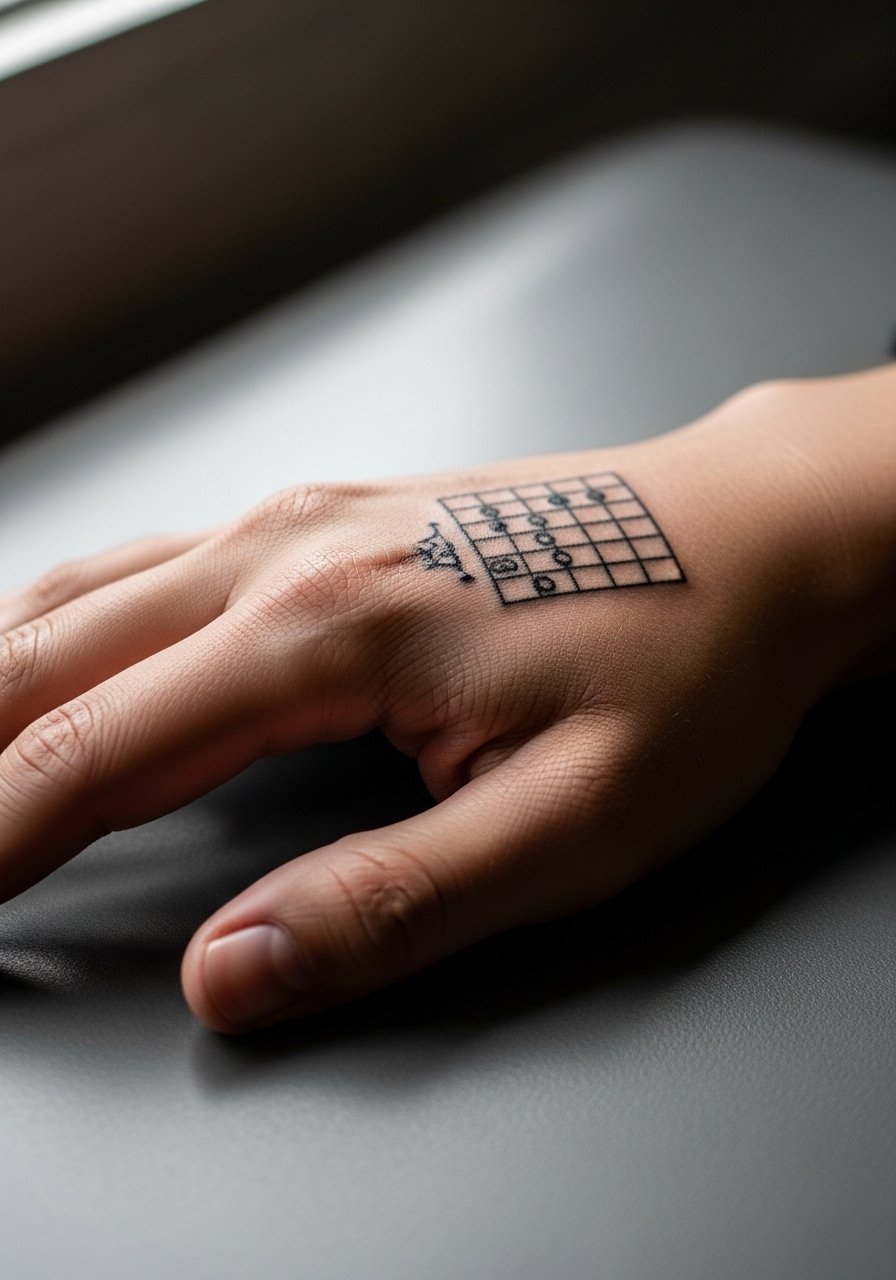
Hand placements are high-impact and visible, and they still affect some workplaces, so think about that before you commit. The skin here is thin and mobile, which raises blowout risk. I often recommend thicker main lines and simplified detail so the design keeps its identity through heavy use. Mistakes include overly detailed fingernail-adjacent work that fades quickly. Sessions are short but expect multiple touch-ups over the years. Wear a thin glove or protective wrap to travel home and avoid immediate contact with harsh surfaces.
11. Negative-Space Chorus on the Sternum
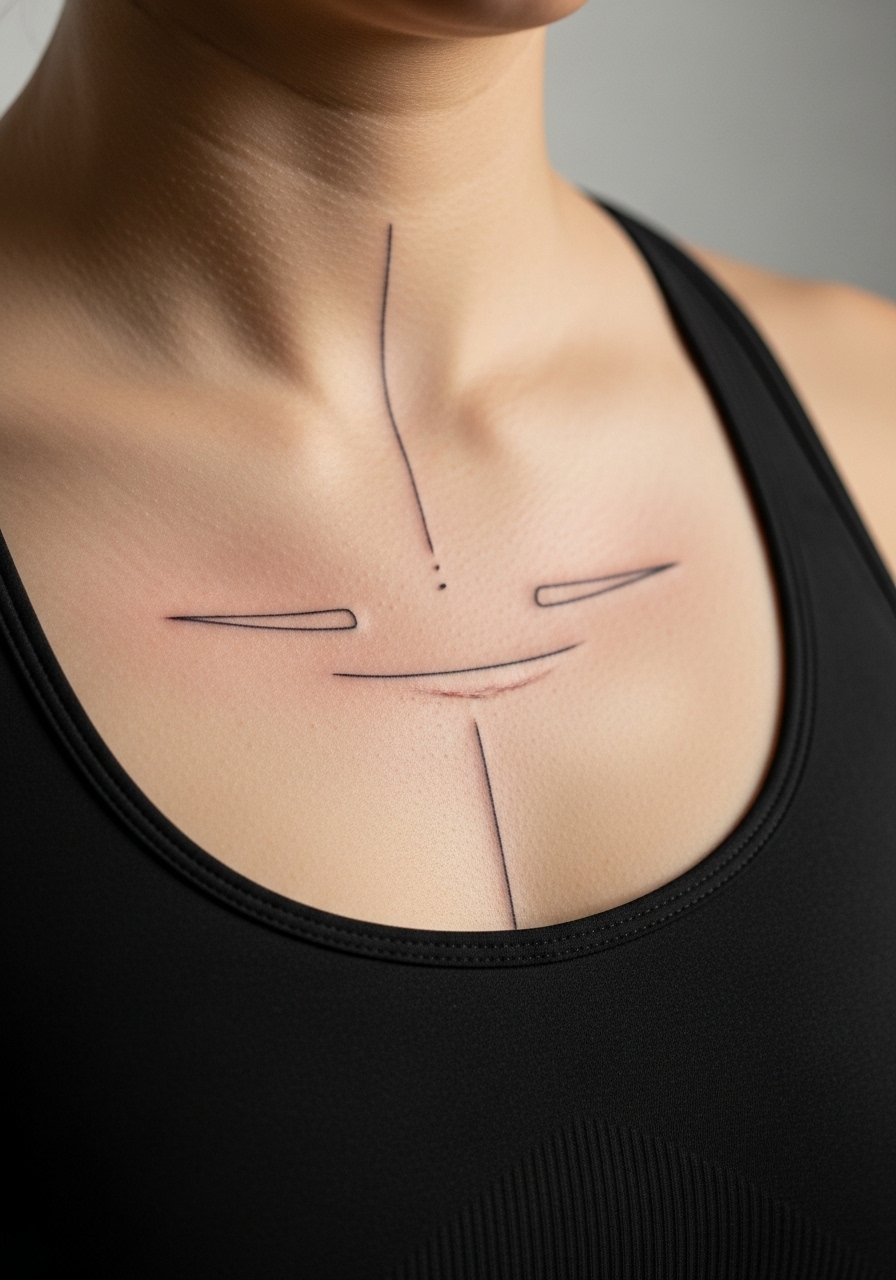
Sternum work is intimate and sensitive, and it needs mindful planning to avoid distortion with breathing. Artists debate how fine the central lines should be, but I prefer clear negative space to anchor the shapes. The session can be intense in pain and may require breaks. A common mistake is packing too many close lines across the sternum where movement will soften edges. For the appointment wear a fitted sports bra that keeps coverage without interfering with the area.
12. Abstract Pulse on the Outer Thigh
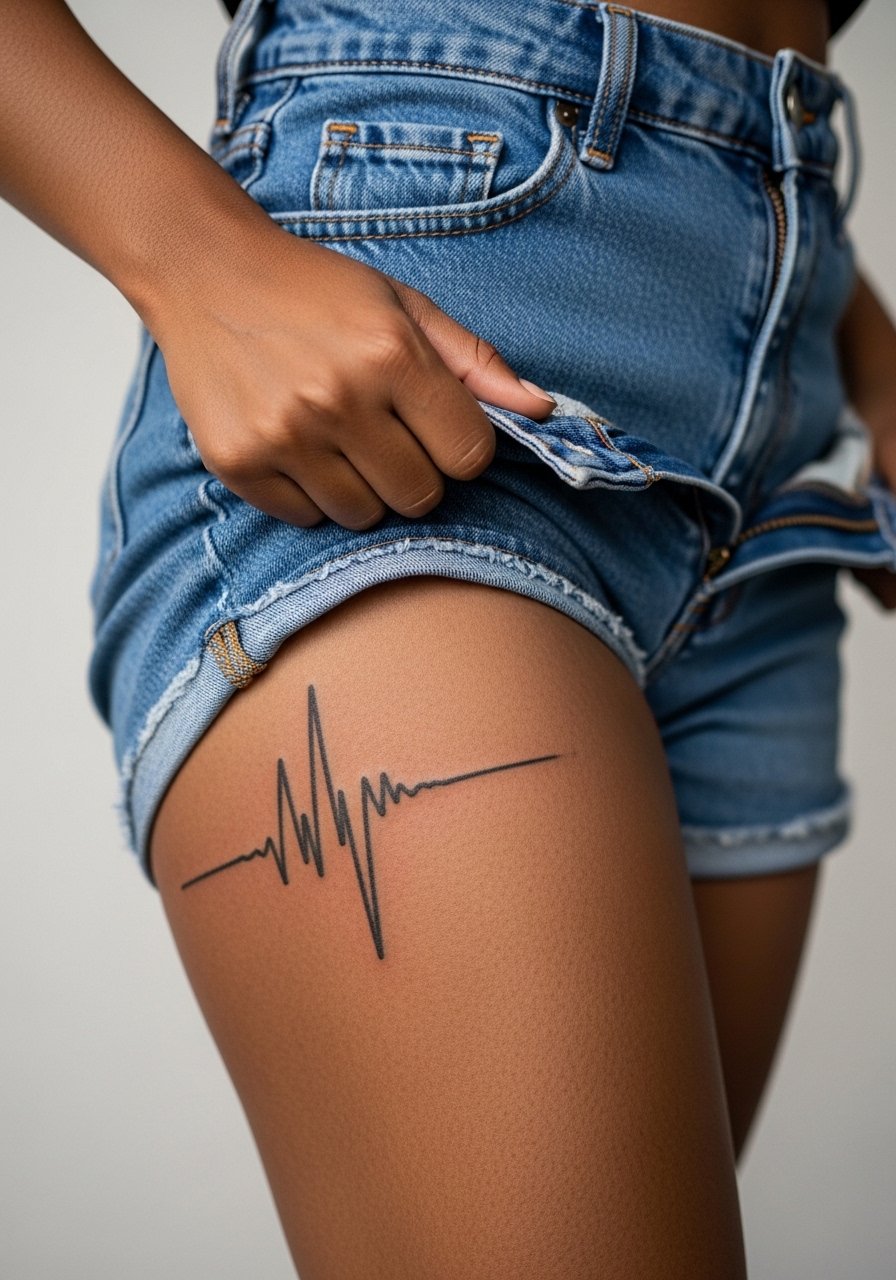
Outer thigh pieces are forgiving and hide well under clothing, which makes them great for larger, looser abstract compositions. I suggest keeping central lines bold enough to read through stretched clothing and adding stipple fields around them for texture. A common error is over-detail in small scales that lose clarity after healing. Sessions can be one to three hours. For the session wear high-waisted bottoms you can shift easily so the artist has full access without exposing more than necessary.
13. Minimalist Loop on the Side Neck
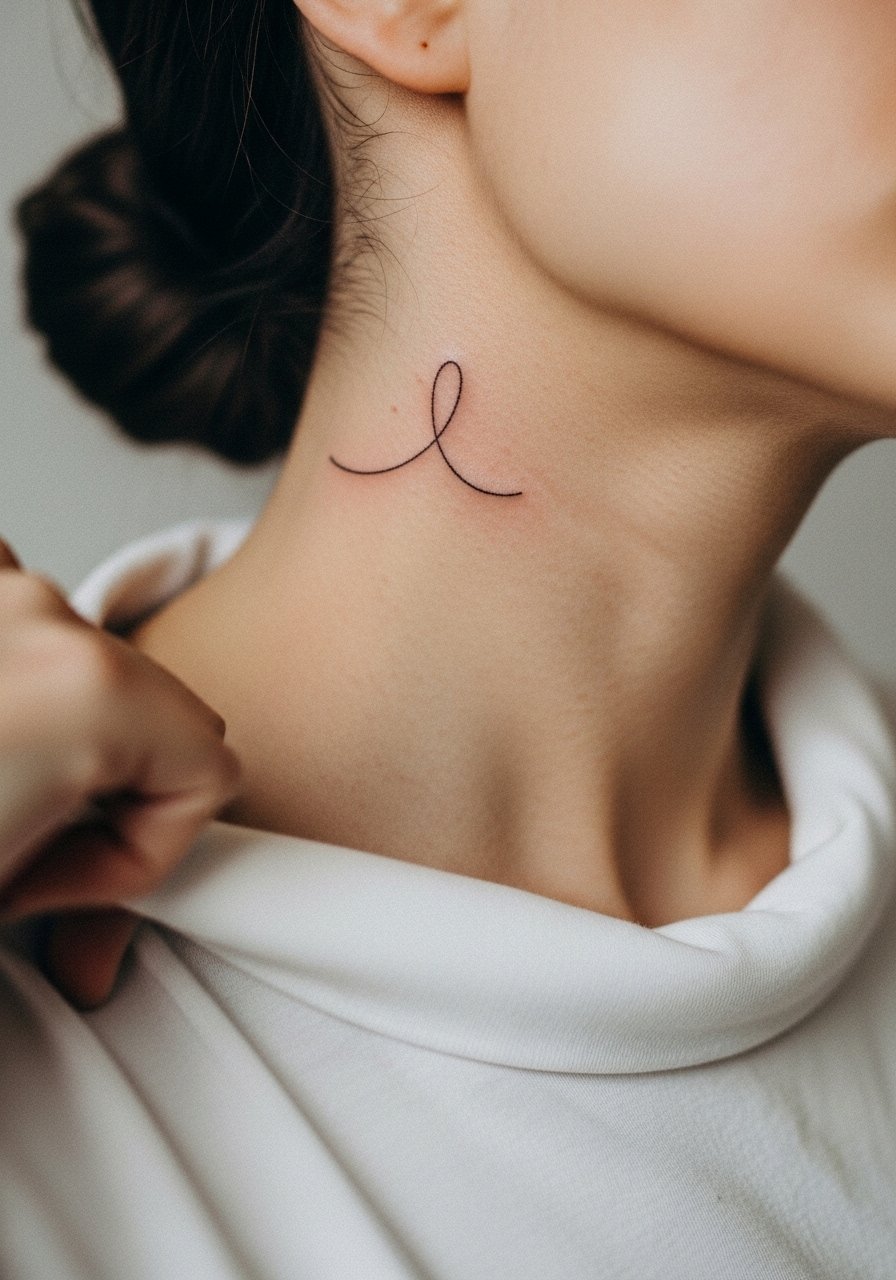
Neck placements look intentional but are high-visibility. The side neck needs slightly stronger linework than a tiny facial script because the area moves and oils can accelerate fading. Discuss touch-up timelines with your artist before booking. A real mistake is asking for micro-lines that sit too close to the hairline or collar and then lose structure. Sessions are shorter but the healing needs attention. For the session wear a wide-neck shirt you can pull aside so the artist sees the exact placement.
14. Layered Abstract on the Calf Wrap
A calf wrap benefits from layered elements that create motion around the leg. Avoid tiny inner details that ride up against the ankle where abrasion wears them down. In consultation request visible negative space between layers and consistent line weight so the motion reads clearly at distance. Sessions are medium in length and the area tolerates saturation well. After healing, expect less fading than hand or wrist work. Wear comfortable shorts and slip-on shoes to the appointment so you do not irritate the new ink.
15. Subtle Script Fragments Along the Spine
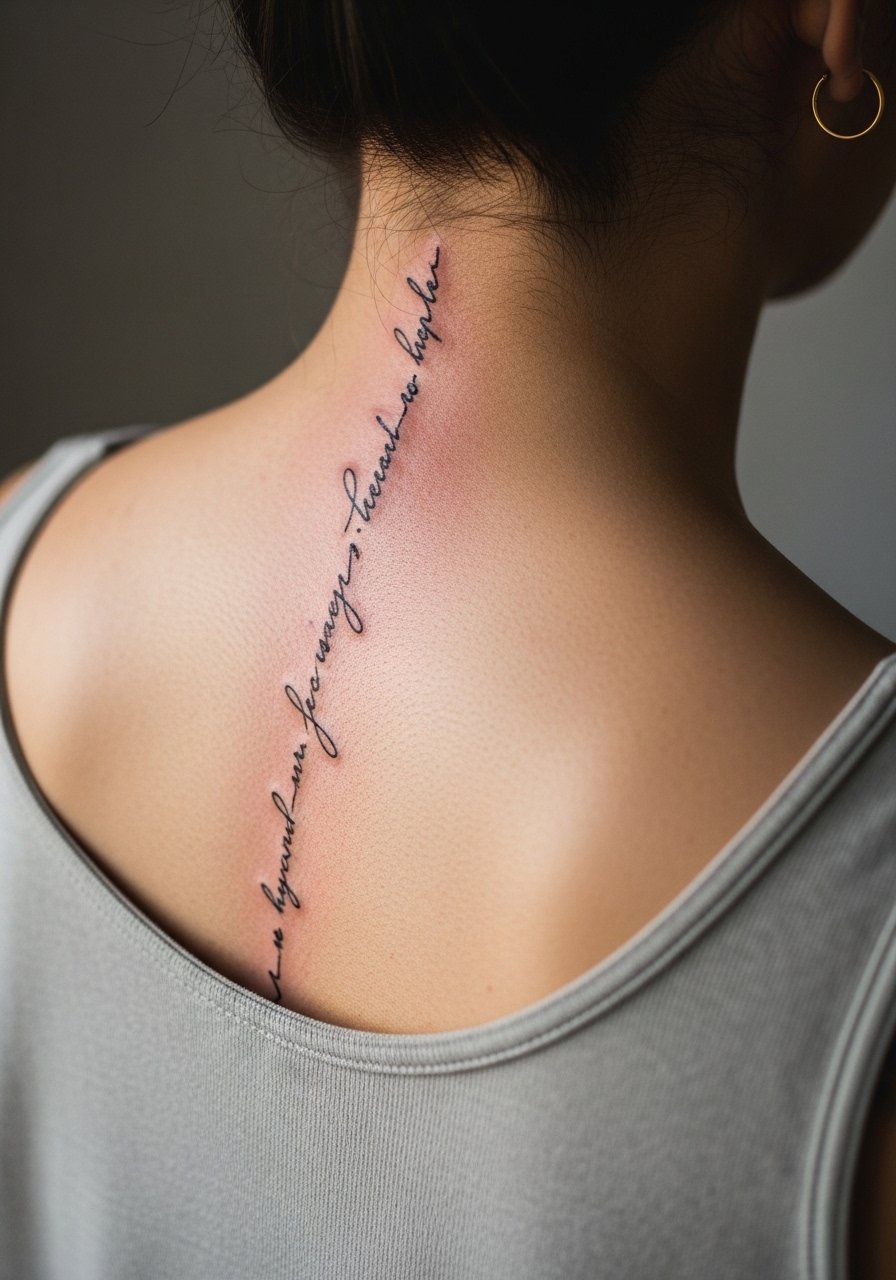
Spine pieces look elegant when the script fragments follow natural vertebrae contours and include deliberate gaps. A common aging issue is crowding lines along a moving axis. I recommend spacing and alternating tiny dot work to keep the rhythm. Sessions here can be a multi-hour commitment with breaks for comfort. If you have career concerns, consider how visible it will be with open-back clothing. For the session slip into a tank top you can wear backwards to expose the area with dignity.
16. Negative-Space Mandala on the Shoulder Blade
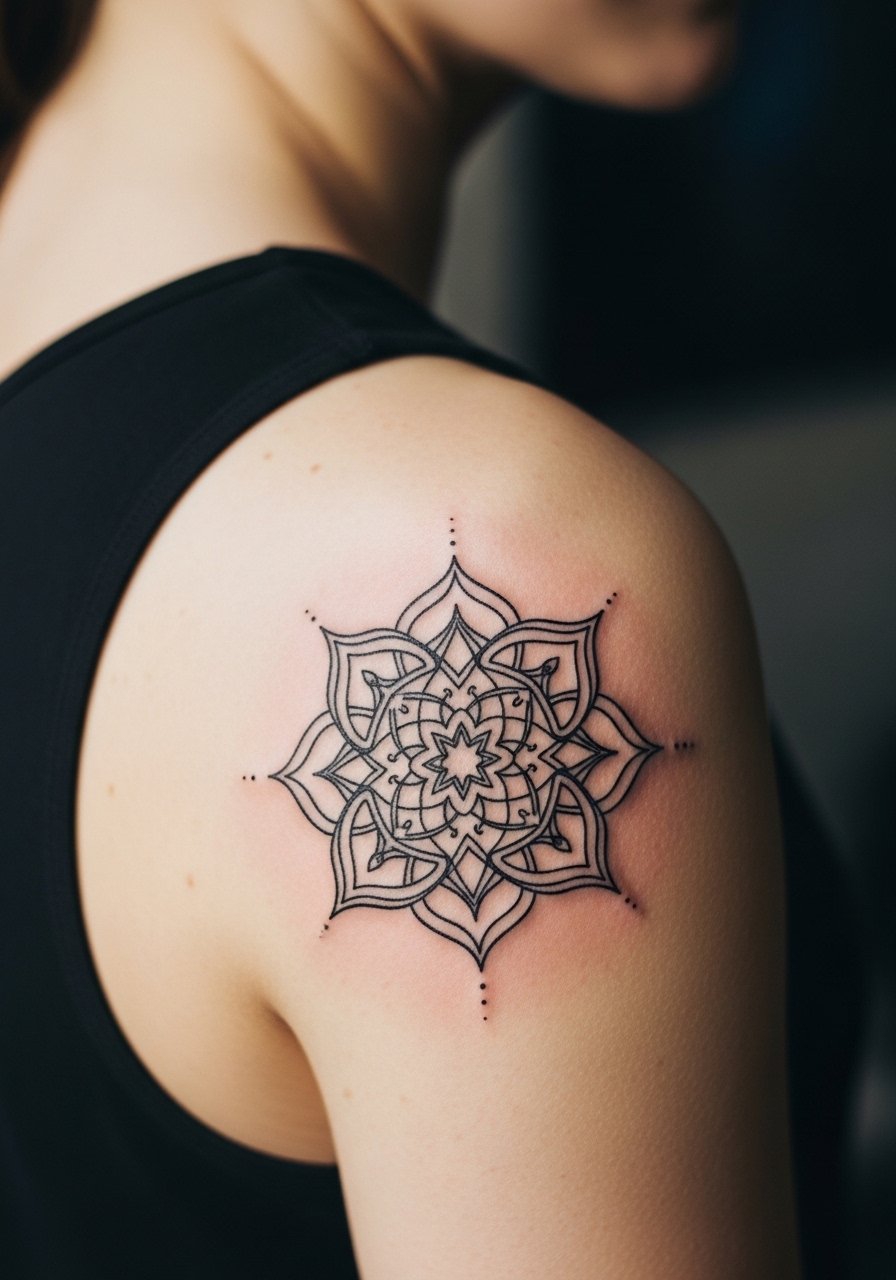
Shoulder blade pieces survive well because the skin there holds detail and is less prone to constant friction. I push for negative-space mandalas that avoid hyper-dense center detail which often merges. Tell your artist you want the design to be visible under swimwear and open backs without small interior fills. Sessions are one to three hours depending on size. Bring a loose tank top you can adjust during the process without shifting the stencil too much.
17. Sparse Brushstrokes on the Lower Back
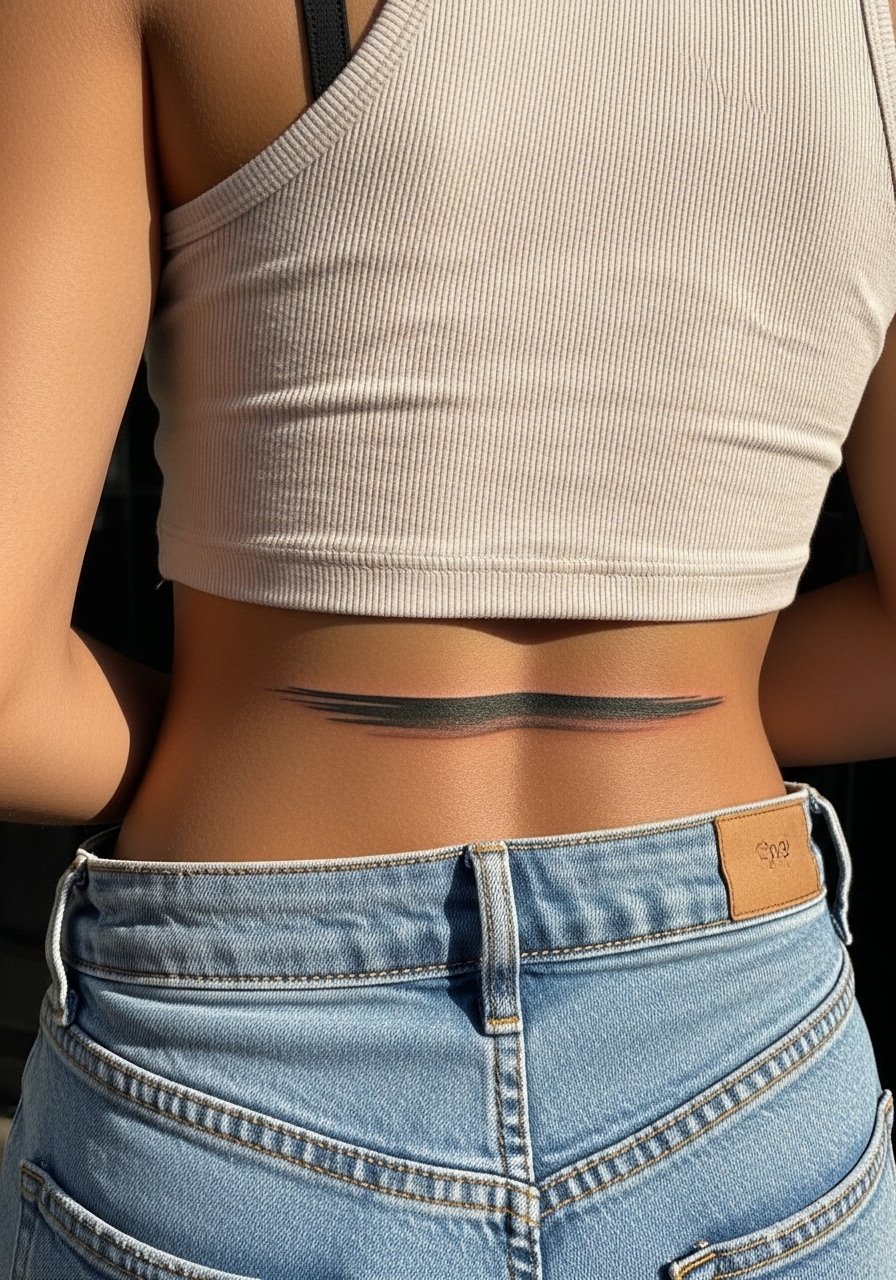
Lower back work is less common now, but a sparse composition ages predictably due to lower sun exposure. The risk is using too many overlapping strokes that lose their identity with movement. I advise single-direction strokes and clear spacing so each mark reads on its own. Sessions are moderate in length. Avoid low-rise clothing that rubs the area during initial healing. For the appointment pick high-waisted jeans you can shift slightly to reveal only the needed zone.
18. Geometric Fragment on the Upper Thigh
Upper thigh placements allow for scale and contrast without frequent sun exposure. For longevity, ask your artist to use crisp linework with a few stippled fill zones that age into texture instead of blotchy fades. The common error is placing sharp angles too close to seams where clothing rubs. Sessions can be longer because the area is large and forgiving. Wear loose shorts to the session so the artist can position the stencil without stretching skin.
19. Single-Line Loop on the Wrist Crease
Crossing the wrist crease is tempting for flow, but movement there can blur ultra-thin lines. I suggest a modest increase in line weight where the loop crosses the crease and clear spacing on either side. The session is quick and the main downside is frequent touch-ups if you want it to stay razor sharp. In consultation, ask for a small mockup placed on your wrist while moving your hand. Pair it with a minimalist watch that sits above the design rather than on it.
20. Abstract Horizon Line across the Chest
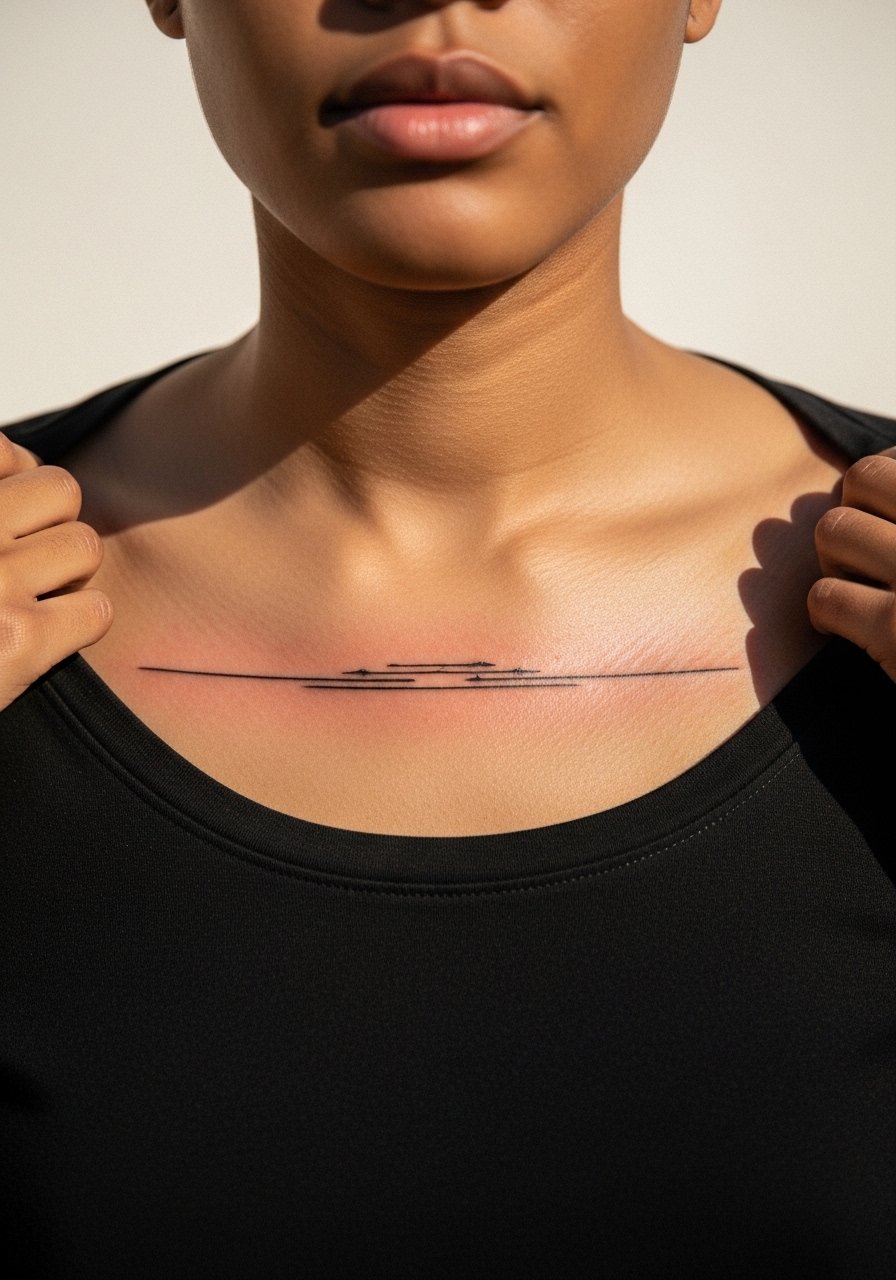
Upper chest horizons read well with open-neck clothing but they compete with collarbones and breathing. I recommend clear negative space under the line so it sits like a horizon rather than a band. One camp argues chest lines should be bold to survive sun exposure. Another camp prefers careful spacing and lighter saturation to age more naturally. I favor spacing plus a slightly heavier primary line. Sessions here can be uncomfortable and may need a short break. For the appointment wear an open-neck top so the artist can work without full torso exposure.
21. Tiny Abstract Glyph on the Finger Side
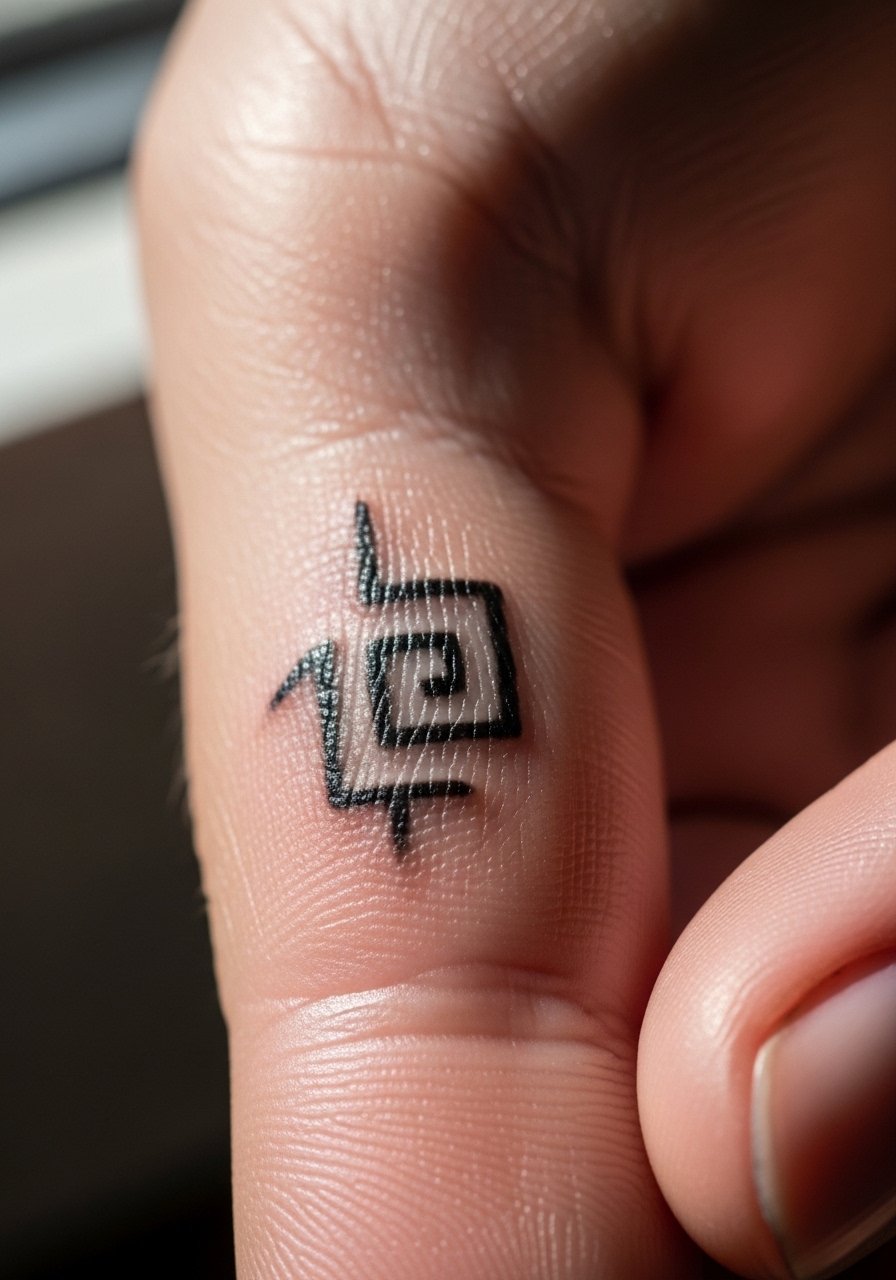
Finger-side tattoos are high-maintenance because of constant washing and friction. The most durable approach is a solid, simple glyph with modest line weight rather than filigree. Expect frequent touch-ups and possible pigment loss over time. A common mistake is asking for script or small detail that simply does not last well on fingers. The session is brief but plan for follow-up. For the session wear a thin glove for transit home if you want to avoid immediate contact with surfaces.
Frequently Asked Questions
Q: Will fine line abstract work blur faster on the ribs than on the forearm?
A: It depends. Ribcage skin stretches more and gets more movement with breathing, so ultra-fine lines have a higher blur risk there. If the design uses spacing and the artist adjusts needle depth, ribs can hold well. Ask about expected touch-up timelines during your consult.
Q: How should I dress to a collarbone or chest session to make the process easier?
A: Wear a wide-neck shirt or a fitted sports bra that you can pull aside without exposing the whole chest. A wide-neck shirt keeps you comfortable and gives the artist access while keeping the rest covered.
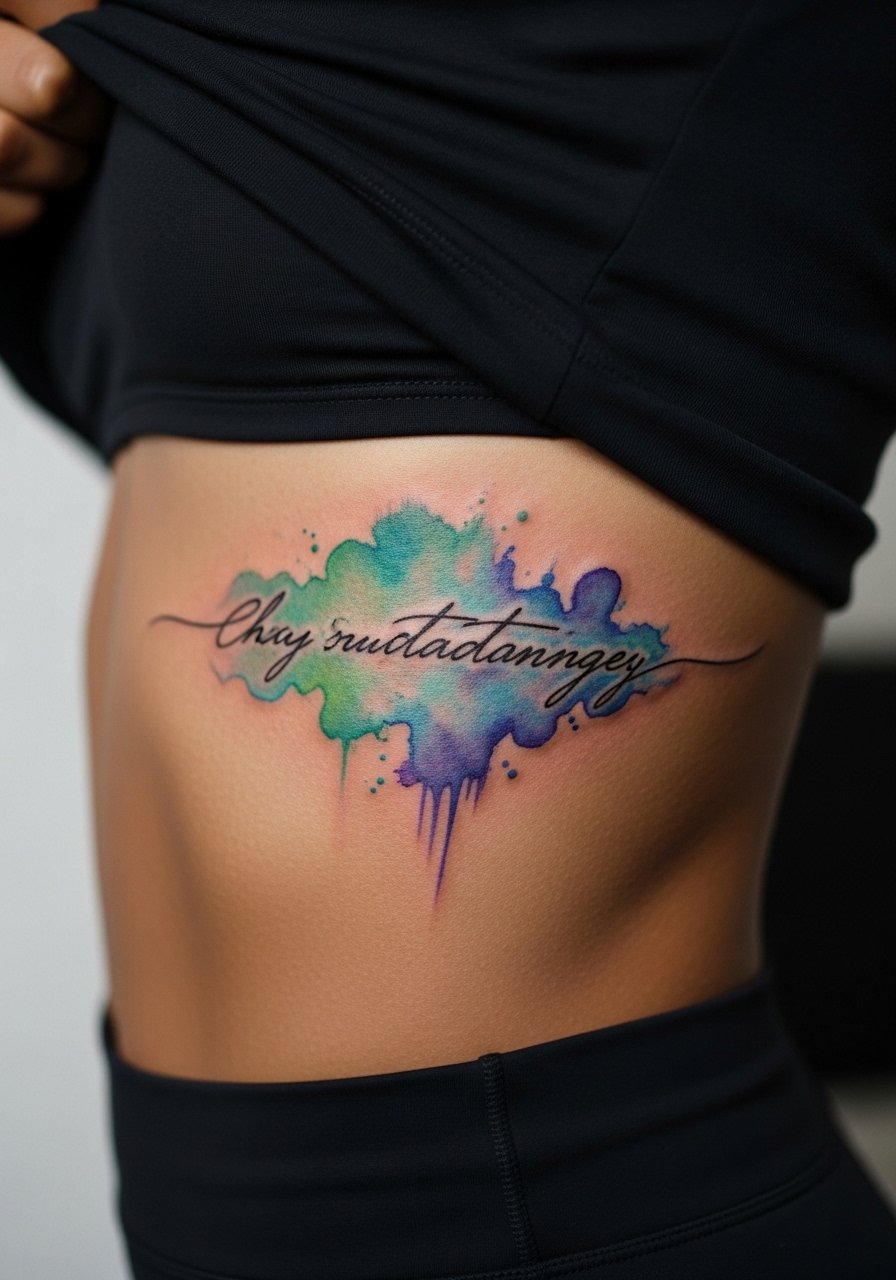
Q: Are watercolor-style washes a bad idea for abstract Noah Kahan inspired pieces?
A: Watercolor washes tend to soften and fade faster, especially in high-friction areas. If you like the watercolor look, ask for a hybrid approach that uses line anchors and stipple shade so the wash reads longer without losing the airy feel.
Q: How often should I expect touch-ups for hand or finger pieces?
A: Hand and finger placements often need touch-ups every one to three years if you want them to stay crisp. The exact interval depends on job-related abrasion, sun exposure, and how well you protect the area while healing.
Q: What should I ask my artist about before booking an abstract piece?
A: Ask how they rate success for this placement and style, what their touch-up policy is, and to show healed photos of similar work on comparable skin tones. From what I have seen, that gives a clearer picture than just looking at fresh photos.
