
Fine line is everywhere right now, but what holds up and what becomes a soft blur is not obvious until a few years in. Pain, placement, and how much sun the area sees shape whether a delicate gap filler will still read as a motif or vanish. Below are 21 abstract gap filler ideas that balance immediate impact with long-term clarity, plus what to ask your artist in the consultation.
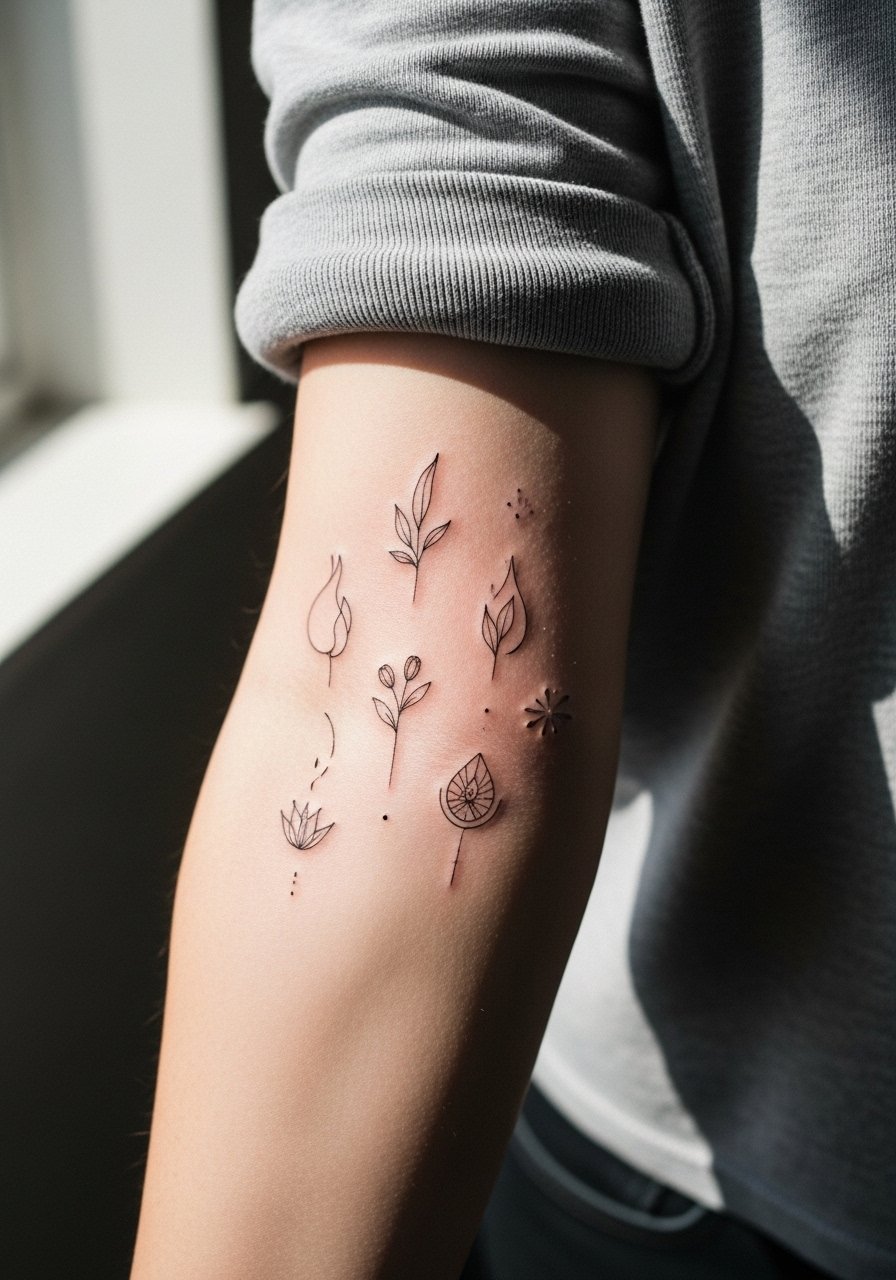
1. Minimalist Line Cluster on Inner Forearm
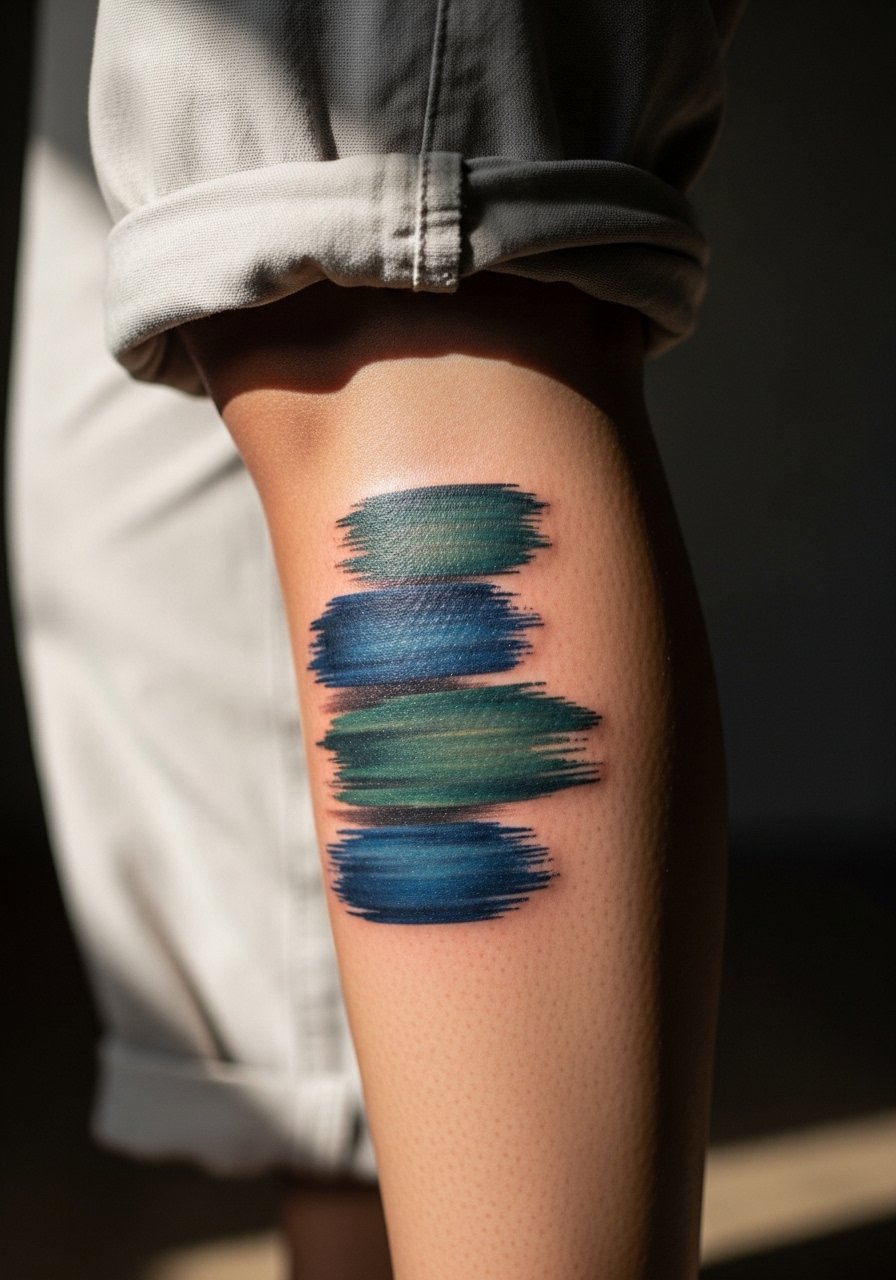
There are few gap fillers that read as clean as a small cluster of parallel lines and arcs on the inner forearm. I recommend this when a sleeve needs breathing room between larger pieces because the arm moves less than the wrist and lines retain separation longer. Tell your artist you want slightly varied spacing so the negative space reads at six months. The main mistake is going too tiny, which invites line merging by year three. Expect a mild 2 out of 10 pain and a single one to two hour session. Pair with rolled-up sleeves for showing off and wear a loose button-down shirt to the appointment so the artist has access.
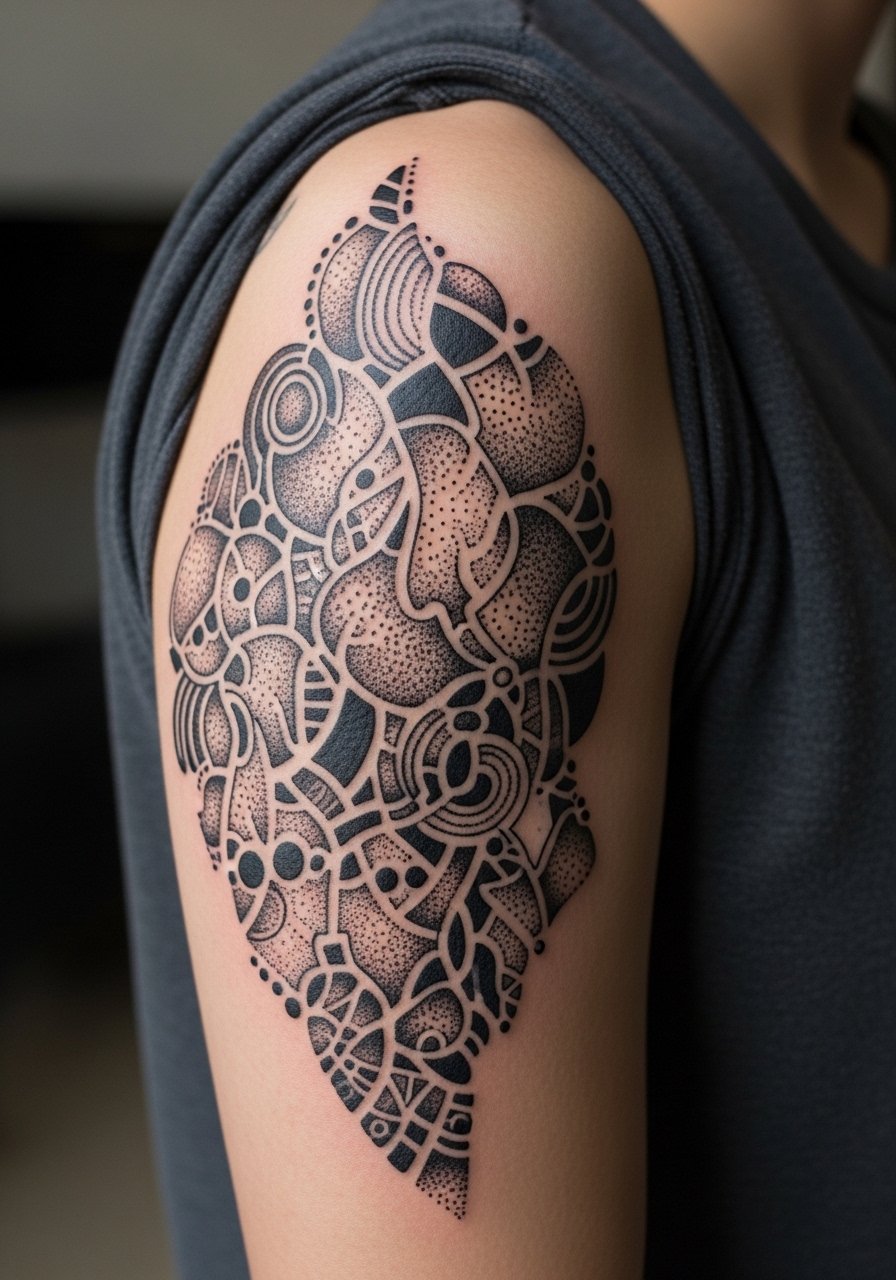
2. Abstract Dot Work Cluster on Upper Arm
Dot work fills hold texture without heavy saturation, which makes them ideal between larger bold pieces on the upper arm. If you want the stippling to fade gracefully, ask for gradual density and avoid solid blocks. A common error is packing dots too close, which creates a muddy mass after two years. Sessions feel like steady buzzing but are forgiving compared with ribs. Expect a three out of ten pain and a one to two hour session. For styling, this works well under short sleeves and pairs nicely with a simple linen short sleeve shirt when you want to reveal it.
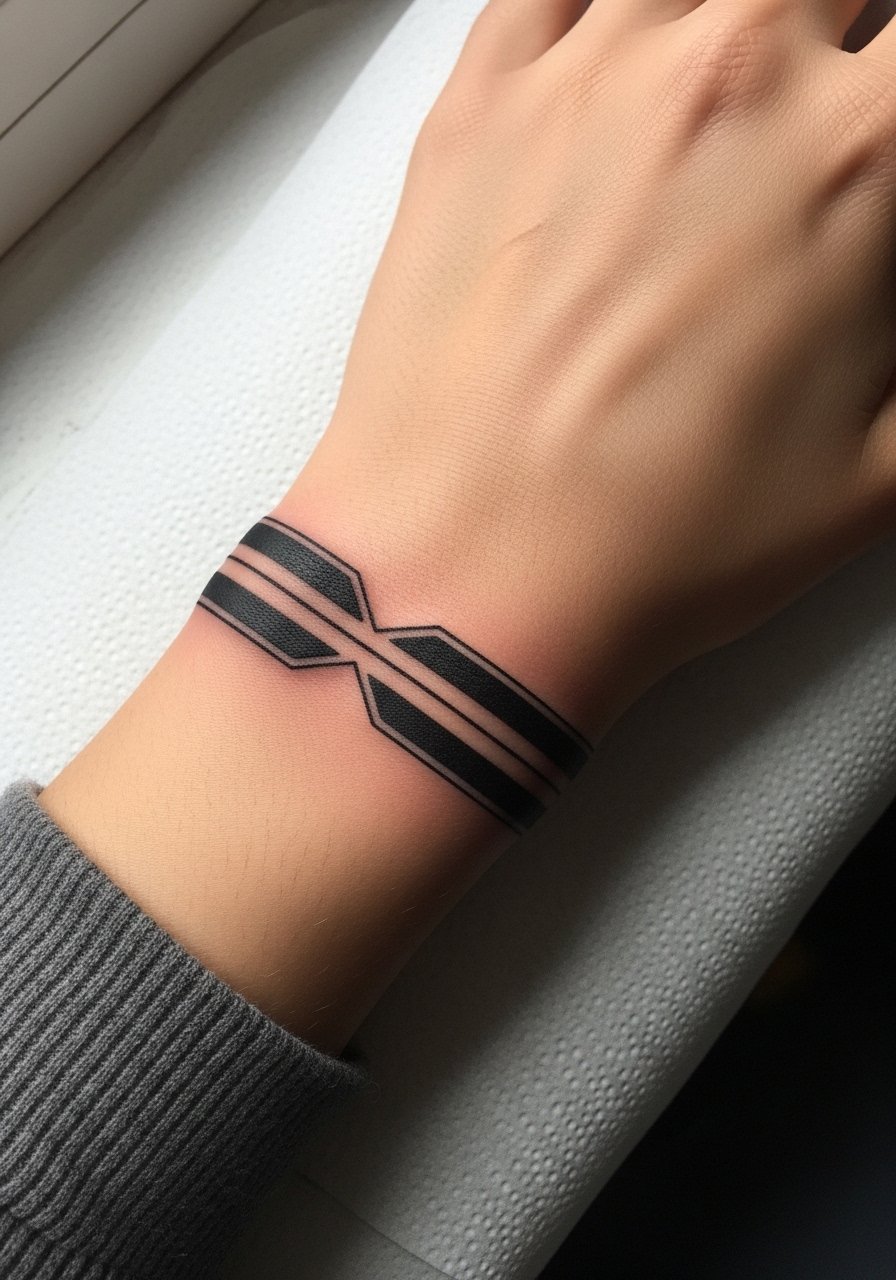
3. Geometric Negative Space Band on Wrist
Warning: wrist skin takes a beating from daily washing and typing. A geometric band that uses negative space rather than thin lines will read longer. When you ask for this, say you want bold outlines framing empty shapes instead of lots of micro lines. The common mistake is requesting extremely thin geometry, which blends into a soft bar by year two. Session time is short, under an hour, but expect a five out of ten on the pain scale. For showing it off, stack with a thin chain bracelet or a minimalist watch to frame the wrist without crowding the negative space.
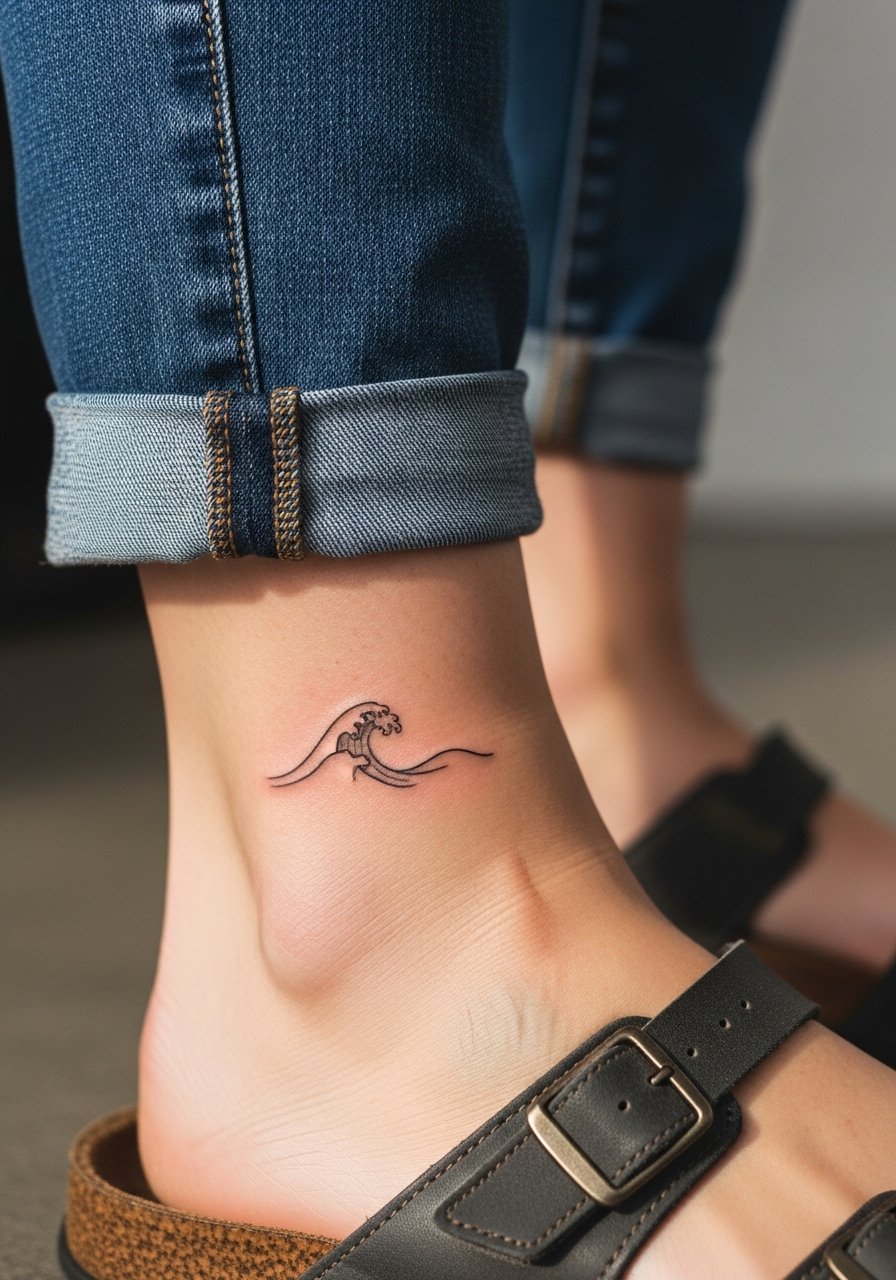
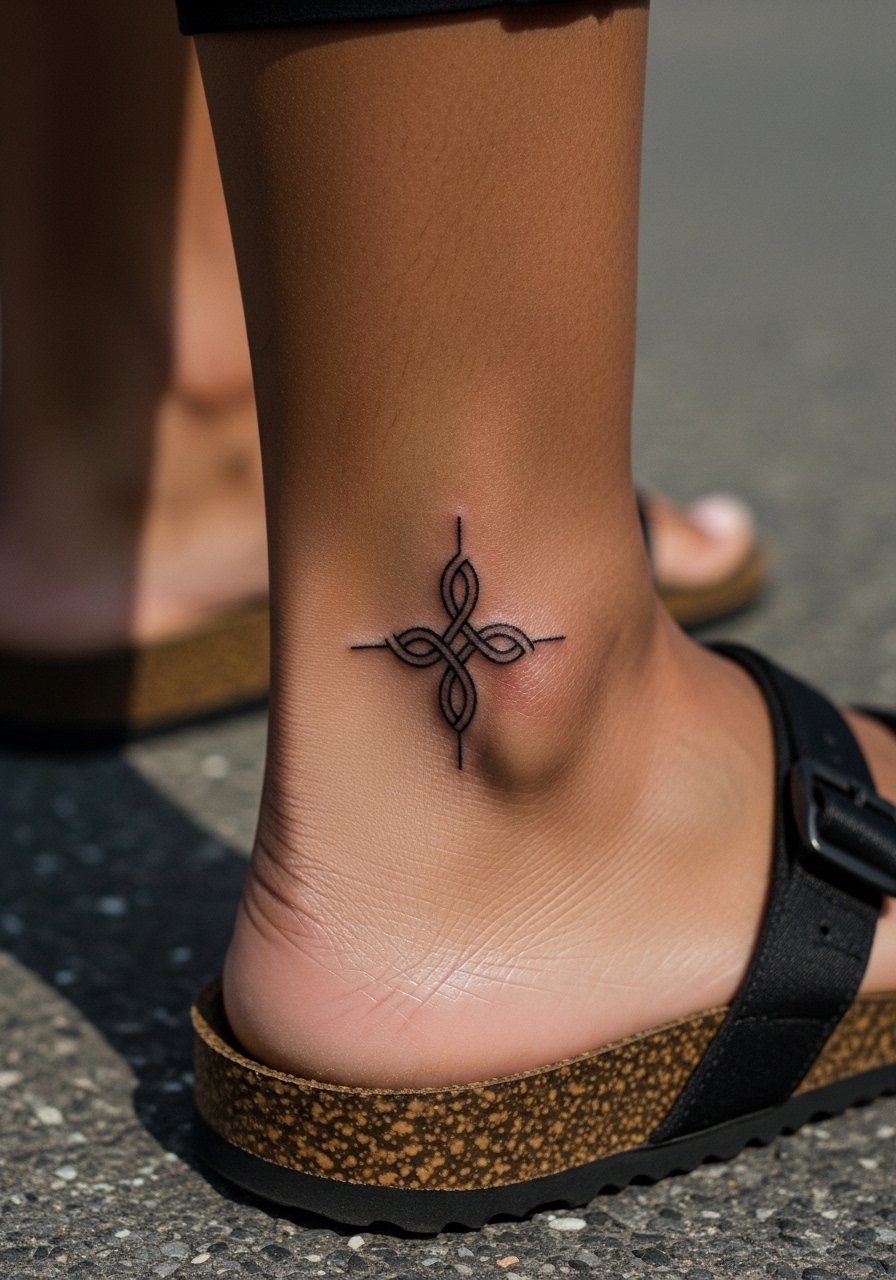
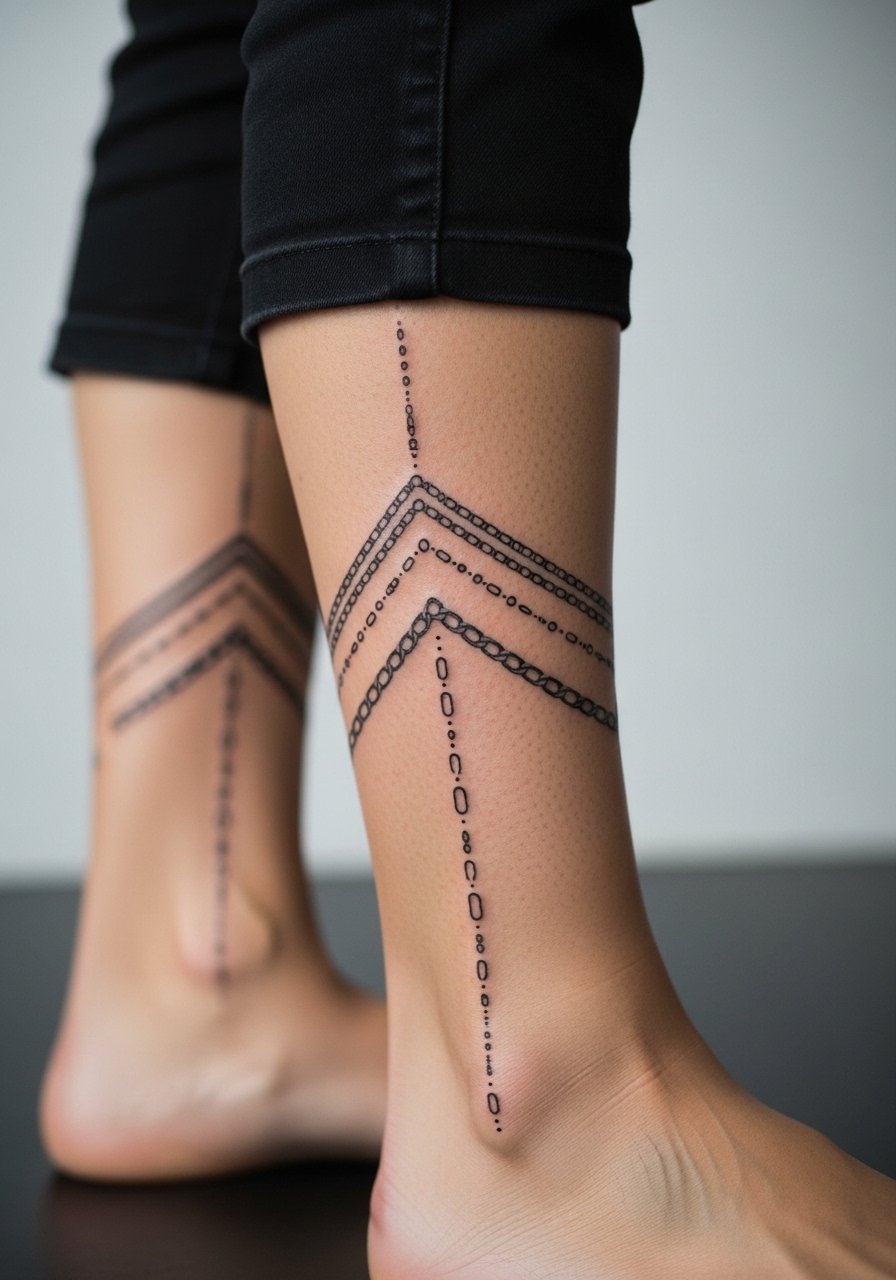
4. Tiny Abstract Wave on Ankle
An ankle gap filler needs to survive sock and shoe friction. I recommend a simple wave or curved mark placed slightly above the ankle bone so it avoids constant rubbing. Tell your artist you want a touch more saturation than usual for small work to combat fading. A frequent mistake is putting the design too low where shoes scrape the area. Pain lands around four out of ten and sessions are short. For session wear, roll your jeans up and wear slip-on shoes or sandals, like these women's slide sandals so the artist can access the area easily.
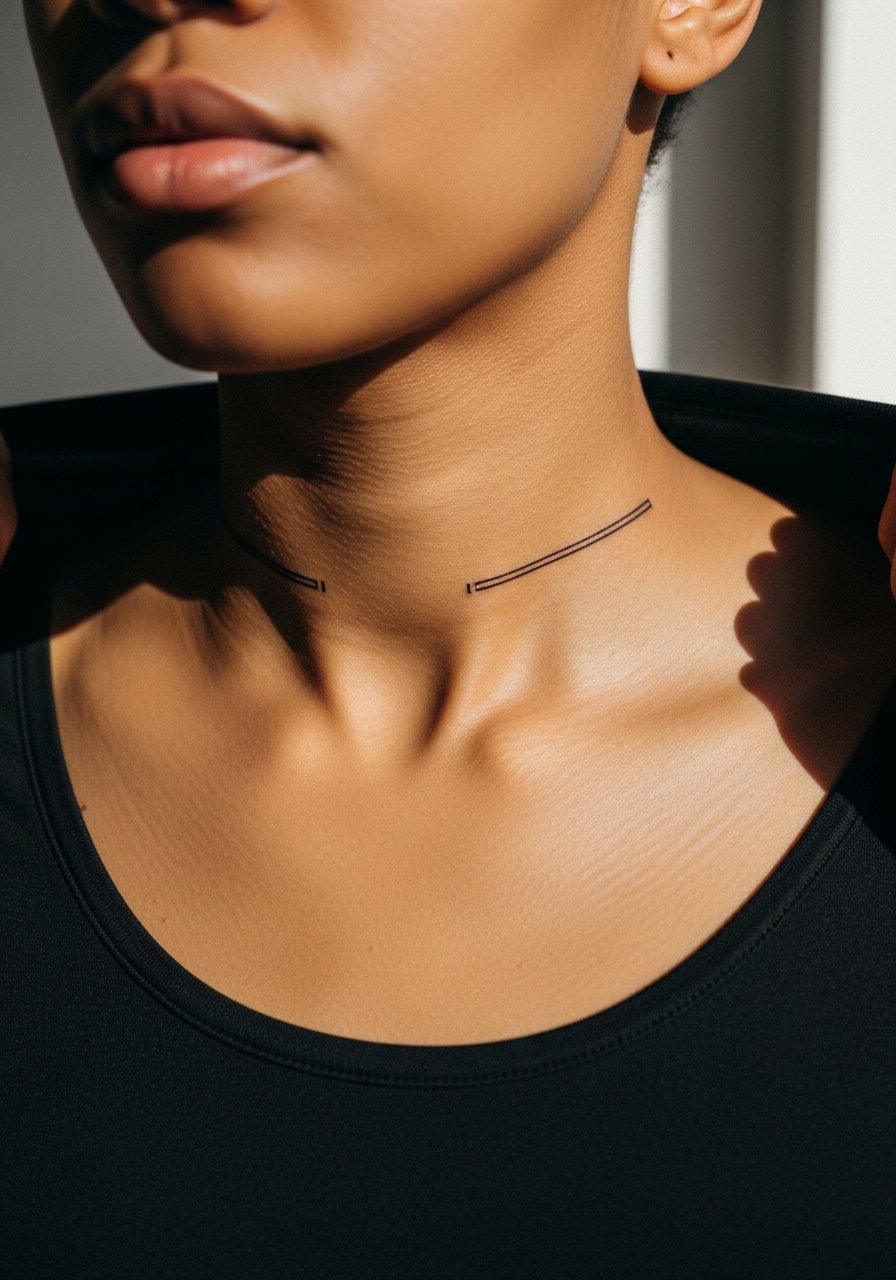
5. Collarbone Linear Accent
A single abstract bar or a broken line near the collarbone draws the eye without competing with chest pieces. This area ages nicely when the line sits close to the bone and is sized for the anatomy. Most mistakes come from making it too close to the sternum where movement distorts the line. Pain tends to be a 4 to 6 depending on proximity to bone and sessions are quick. For showing it off, pair the piece with open-back midi dresses or a wide-neck top that keeps the focus on the collarbone. If you care about career visibility, collarbone work is easier to conceal than hand or neck pieces.
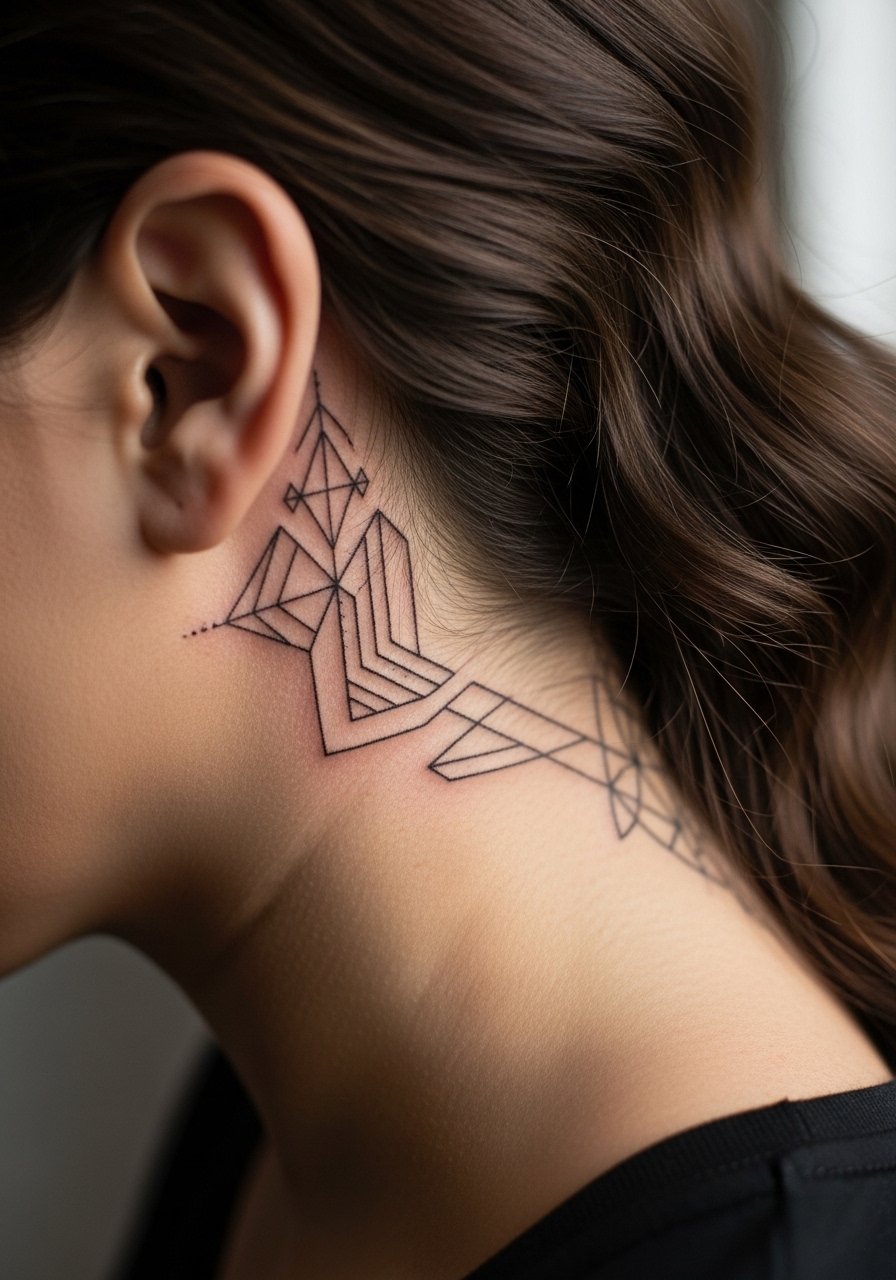
6. Micro-Abstract Behind the Ear Accent
Behind-the-ear gap fillers are tiny shapes that peek out from the hairline. For safety and longevity, describe the placement as on the skin just behind the ear, below the hairline on the neck. Artists split on tiny work in that spot. One group says the area keeps fine detail since hair shields sun exposure. The other group warns that hair oils and sweat can blur micro lines faster. Ask where your artist stands. Sessions are quick and pain is low. For the appointment, tuck hair back with a clip and bring a travel-size mirror.
Studio Day Picks
The wrist and collarbone pieces above heal differently from larger arm work, and the right prep items smooth the session and the first week.
-
Stencil transfer paper kit. Lets you preview line placement on skin so small gap fillers land where you expect.
-
Topical numbing cream. Useful for sensitive zones like the ankle or behind the ear when pain tolerance is low.
-
Thin protective film roll. Keeps high-friction spots such as the wrist and ankle clean during the first days of healing.
-
Fragrance-free gentle body wash. Cleans healing linework without stripping moisture from delicate areas.
-
Aquaphor healing ointment. A thin layer for the first few days can protect small, detailed work while you wait to switch to a lighter moisturizer.
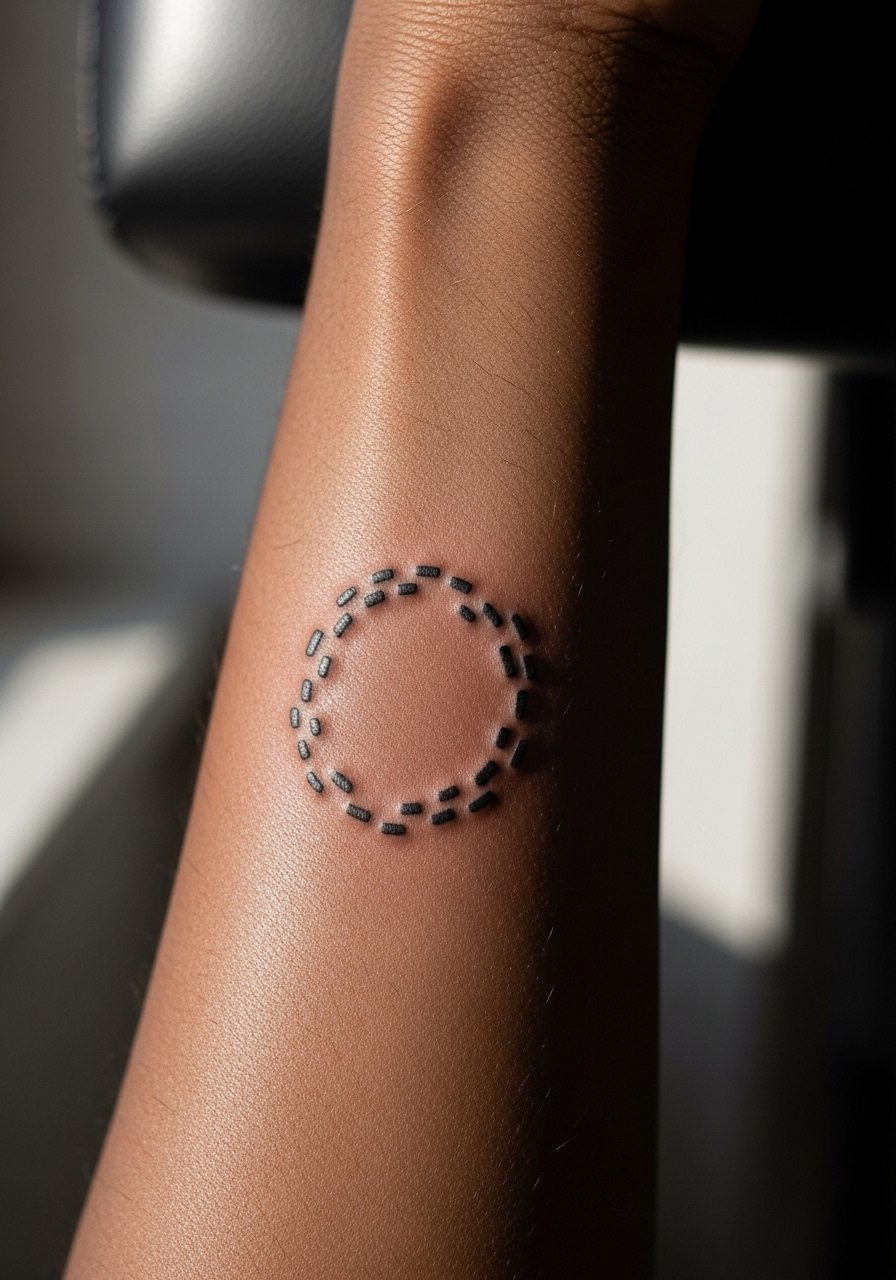
7. Broken Line Ring Between Larger Pieces on Outer Forearm
If you have dense imagery elsewhere, a broken line ring can act as a breath of air between two heavy panels. I suggest slightly offset segments rather than a perfect circle to avoid a heavy optical border that competes with neighboring pieces. The error most people make is insisting on symmetric perfection which reads louder than intended after a touch-up. Sessions are brief and pain is low. Ask for moderate saturation so the gaps stay visible at two years. For showing it off, cuff a sleeve or wear a minimalist watch that frames the ring without overshadowing it.
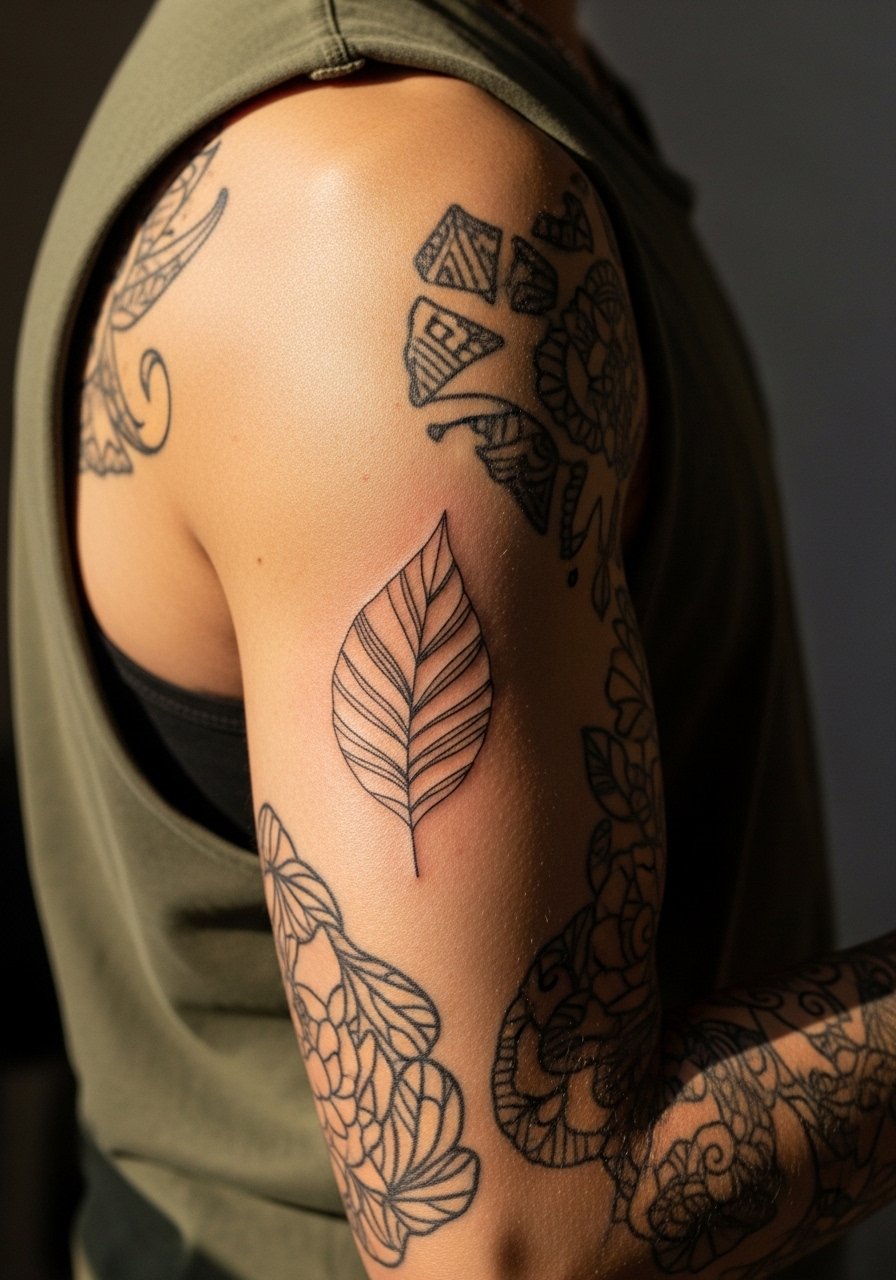
8. Negative Space Leaffill for Sleeve Gaps
For botanical sleeves, negative space leaves are reliable fillers because they avoid heavy saturation next to colorful florals. Tell your artist you want the leaf shapes carved out of the existing background rather than additional shading. A common mistake is filling every empty area, which makes the sleeve look busy at six months. The session can be short but depends on how much integration is required. This ages well when leaves respect the flow of the arm. For the appointment, wear a loose tank top so the artist can roll your sleeve upward easily.
9. Micro-Abstract Script Bits on Finger Side
Finger and side-of-finger gap fillers are notorious for fast fading because of constant washing and friction. If you want small script ticks, request thicker micro letters with generous spacing and expect touch-ups every one to three years. The biggest mistake is choosing ultra-fine script that looks crisp at first and disappears within months. Sessions are brief but painful, often a seven out of ten. For showing it off, pair a micro script with a simple stacking ring set that complements rather than covers the work. Be aware that some employers still react to visible hand tattoos.

10. Brushstroke Texture on Calf
Calf gap fillers that mimic brushstrokes add motion without heavy lines, which is useful when leg pieces sit above or below them. Ask for slightly longer strokes that follow muscle direction so the design flexes with walking. A frequent error is orthogonal strokes that clash with anatomy and blur unevenly. Pain is moderate and sessions can run one to two hours. For showing the piece, ankle boots or cropped pants work well, and for the session wear loose drawstring linen pants so the artist can access the calf without tight seams digging in.
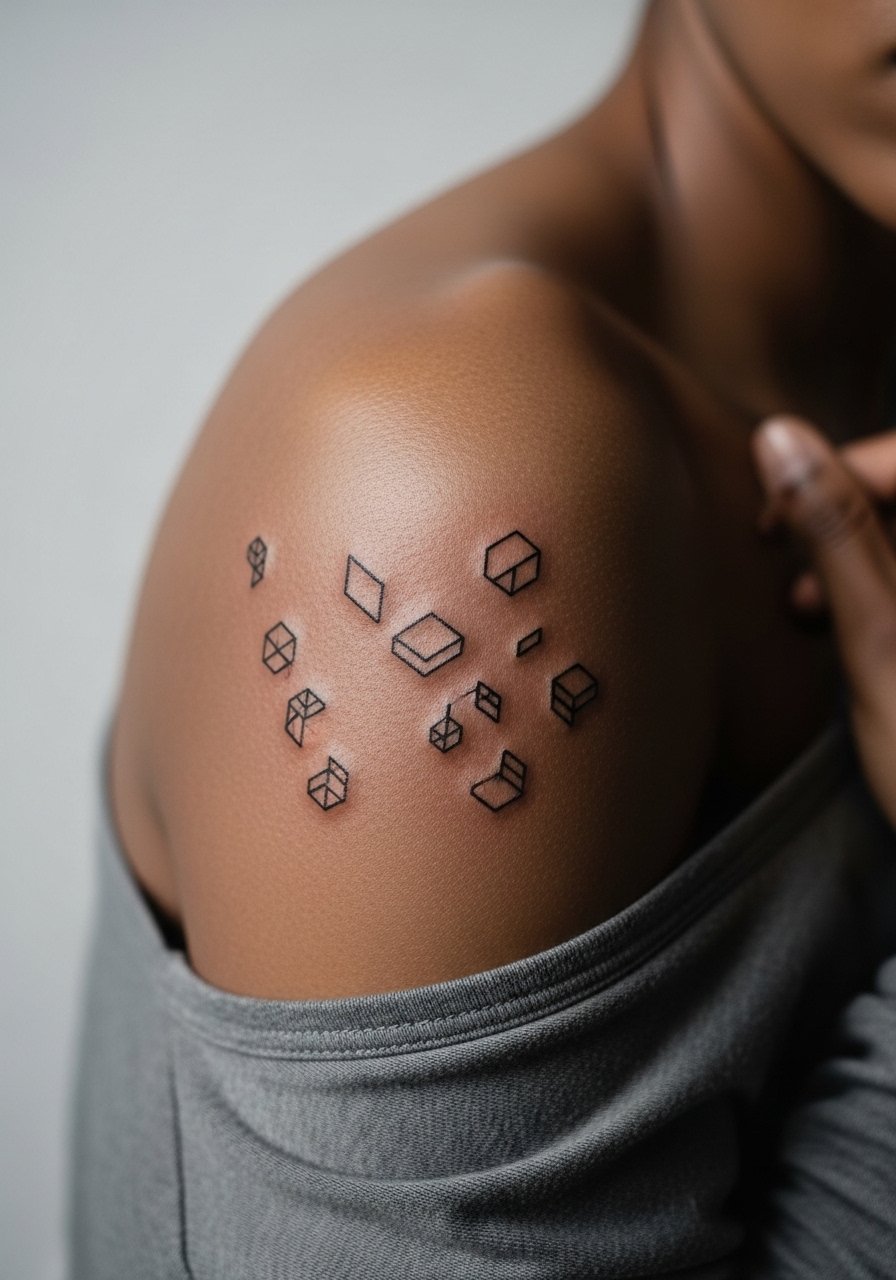
11. Micro-Geometric Filler on Shoulder Blade
Small geometric shapes on the shoulder blade make tidy gaps without pulling focus from larger back pieces. When you consult, ask for shapes that align with the shoulder blade contour so they do not look tilted when you move. The common mistake is forcing symmetry where the body is asymmetrical. Sessions are comfortable because the area is broad, pain is a three out of ten. For session wear, a loose button-down or a top you can pull aside works best. If you want to reveal it at events, open-back dresses layer nicely with a thin chain pendant sitting above the shoulder.
12. Sternum Minimal Accent Line
Sternum gap fillers are intimate and require careful planning. Always show the artist where you want the line relative to the sports bra or bandeau because movement can change visual balance. There is a real debate about fine line on the sternum. One camp argues the stretch and sweat there blurs micro detail quickly. The other camp says with controlled needle depth and solid spacing the lines settle fine. Ask your artist which approach they prefer. Expect a higher pain score around seven and a one to two hour session. For the appointment, wear a fitted sports bra so the artist can expose only the treated strip.

13. Tiny Orbiting Dots Along Spine
Small abstract dots along the upper spine work as vertical gap fillers between shoulder blade pieces. I like spacing them with rhythm so they guide the eye without forming a heavy column. The main mistake is packing the dots too close which creates a visual bar after two years. Sessions can be a bit awkward because you need to sit or lie face down, and pain varies with proximity to the spine. For showing this piece, low-back or open-back tops highlight the line, and for the session choose a top you can remove easily.

14. Inner Bicep Whisper Mark
Inner bicep gap fillers are hidden and intimate, which makes them great for subtle negative space. If you want the mark to age well, ask for modest saturation and slightly larger shapes so the skin movement does not merge elements. The mistake people make is requesting micro detail that disappears when the arm flexes. Sessions can feel tender because the skin is softer, pain around six out of ten. For session wear, bring a loose tank top you can pull to expose only the inner arm. Note that inner bicep work often requires a steady hand and experience.

15. Foot Side Minimal Knot
Small knots or loops along the side of the foot can bridge the gap between toe and ankle pieces. Expect more fading because of shoes and moisture. Ask the artist to place it on the outer ridge of the foot rather than the sole edge to minimize abrasion. The usual error is underestimating how much walking smudges delicate work. Pain is higher here, often seven to eight out of ten, and touch-ups will be more common. For session wear, wear sandals so the area is unobstructed.
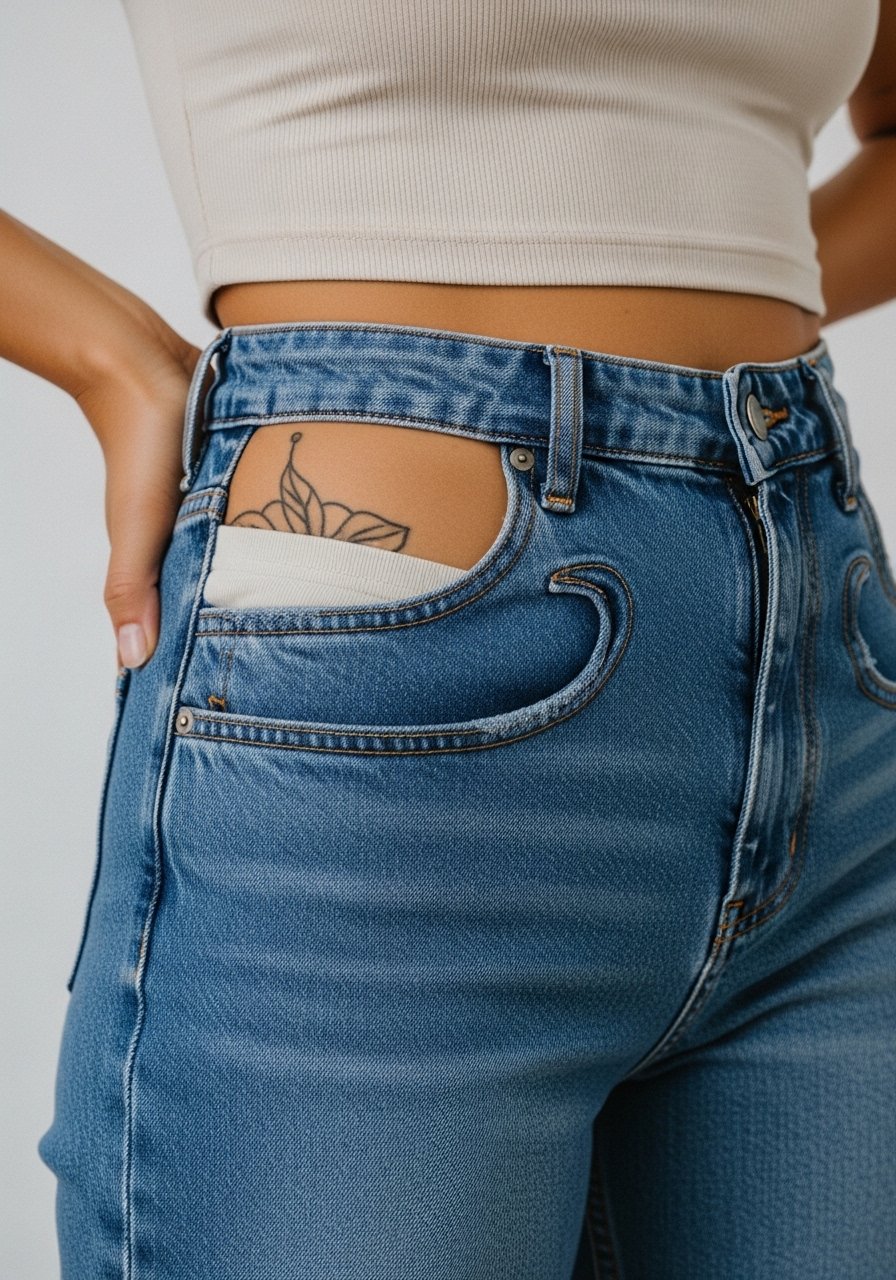
16. Hip Curve Accent Near Thigh
Hip gap fillers look great when they echo the curve of the pelvis. For longevity, place the motif slightly onto the upper thigh so it avoids waistbands. The mistake is situating it under tight waistbands which rub during daily wear. Sessions are moderate in pain and may require a little shifting for comfort. For the session wear high-waisted denim or high-cut shorts you can pull down slightly, such as high-waisted denim shorts so only the hip area is revealed. This placement is discreet and shows up selectively.
17. Lower Back Minimal Crescent
A small crescent or arc on the lower back can be a clean gap filler if you have lumbar pieces above it. Place it just above the waistband to keep it visible with low-rise styles. The common error is anchoring it too low where clothing constantly rubs and fades the ink. Sessions are low to moderate pain and usually under an hour. For showing off, wear a cropped tee or high-waisted bottom and consider open-back tops for evenings out.

18. Calf-to-Ankle Negative Space Chain
A thin chain of negative space marks that travels from calf to ankle helps integrate leg pieces. Ask for breaks in the chain so the negative areas remain distinct at two years. The mistake is a continuous thin line that loses shape with friction. Sessions can run longer depending on length and pain varies with placement. For footwear during the healing phase, choose sandals or roomy trainers because tight shoes cause irritation. For showing it off, cropped trousers or a maxi skirt with a side slit reveal the chain elegantly.
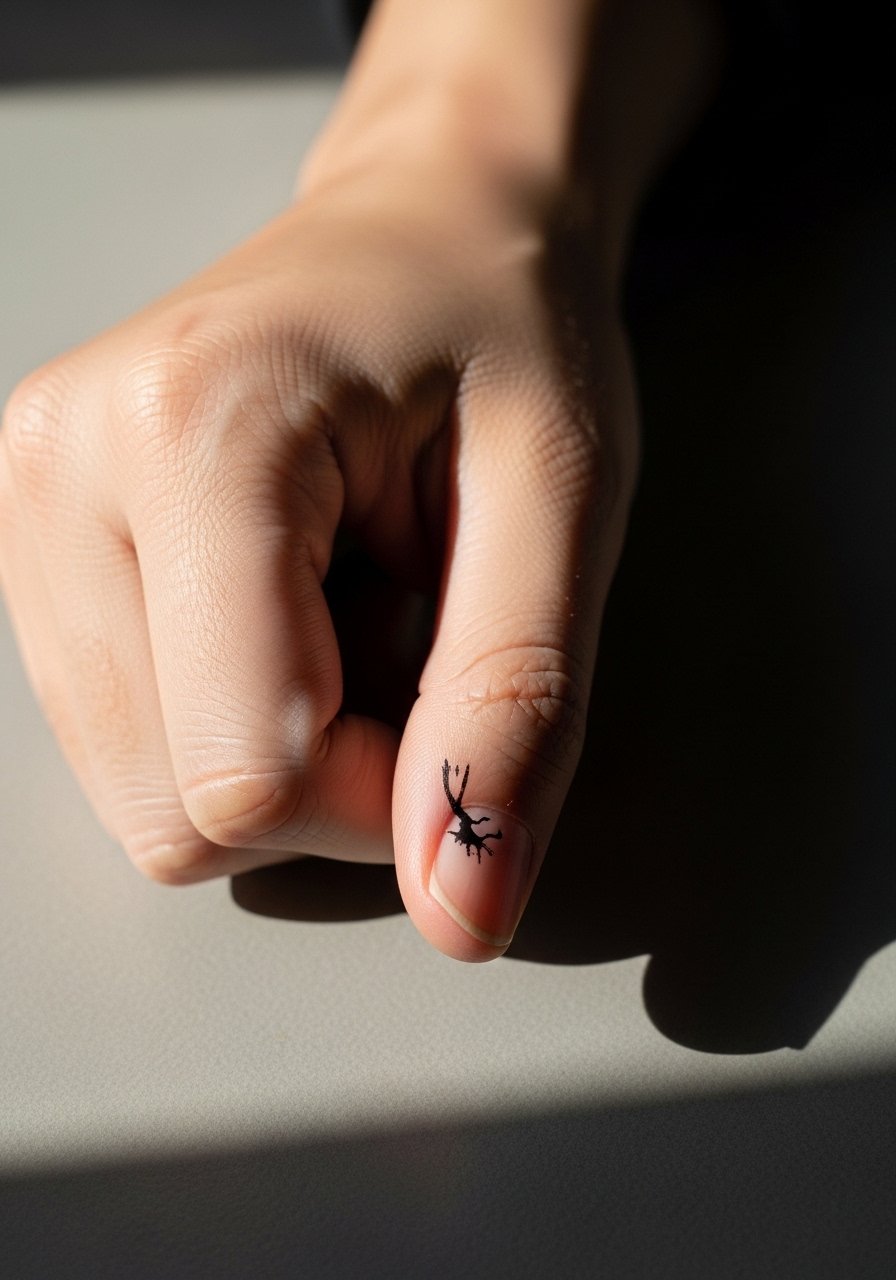
19. Thumb Knuckle Micro Mark
Knuckle and thumb joint gap fillers are bold despite their size because the skin there moves constantly. If you choose this, ask for slightly bolder mark weight and expect maintenance. The mistake is choosing super fine detail that disappears with hand motion. Pain is high and the touch-up rate is frequent. If your industry is conservative, remember hand tattoos are the most visible. For showing it off in jewelry-friendly ways, thin metal bands and minimalist rings pair best.
20. Subtle Cheekbone Accent Near Hairline
Facial-adjacent gap fillers must be chosen carefully and require an artist experienced with facial skin. Keep the motif small and close to the hairline rather than the central cheek so it can be covered easily with hair if needed. The mistake people make is treating facial skin like body skin, which leads to faster loss of crispness. Pain varies and healing is quicker than expected. For discovery, search local artist directories and hashtags to find someone who lists facial work. For session wear, pull hair back with clips and bring a small scarf.

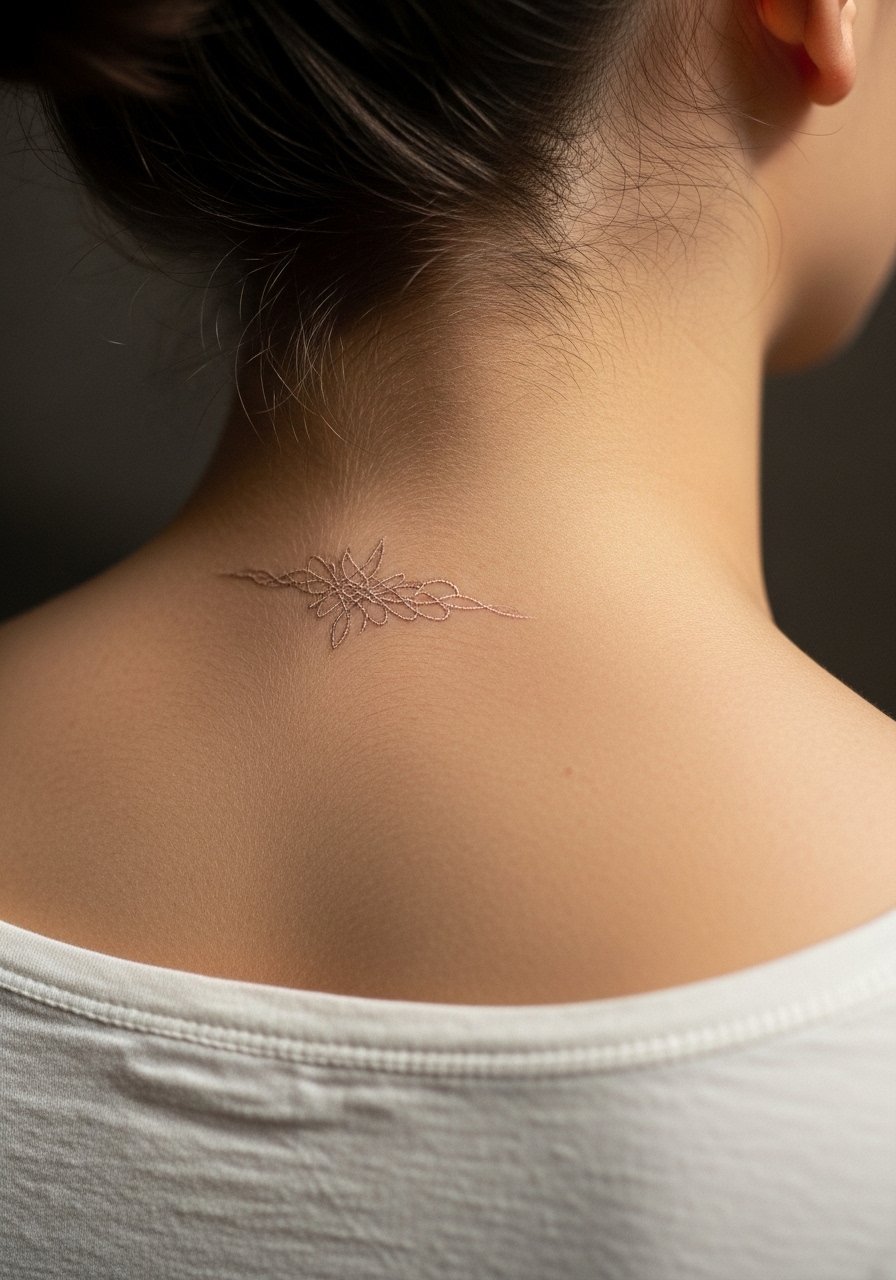
21. Neck Nape Minimal Mark
Nape and lower neck fillers read as discreet vertical accents. Describe placement as on the back of the neck framed by a wide-neck shirt so only the nape shows. These pieces age well because hair protects them from direct sun, but one common error is putting too much micro detail which blurs with sweat and movement. Sessions are low to moderate pain. For showing it off, pair with wide-neck tees or low-collar tops. For the appointment, wear a wide-neck shirt you can adjust so the artist has clear access.
Frequently Asked Questions
Q: How much will these small abstract gap fillers hurt on average?
A: Pain varies by placement. Wrist, hand, and foot locations rate higher often around six to eight out of ten, while upper arm, calf, and shoulder blade are milder. Expect a short session length for most gap fillers, and plan for numbing if you are sensitive.
Q: Do fine line gap fillers need touch-ups more often than bolder fillers?
A: Yes, delicate work usually requires touch-ups sooner because thin lines and micro detail lose crispness faster. Ask your artist about realistic timelines for refreshes, especially for fingers, knuckles, and ankles.
Q: Are there workplace risks with small visible gap fillers like neck, hand, or face accents?
A: Visible placements still affect hiring in some fields. Hand and face accents are the most noticeable and thus the riskiest for conservative workplaces. Collarbone and nape pieces are easier to conceal with clothing when needed.
Q: How should I dress for a sternum or ribcage session?
A: Wear a fitted sports bra or bandeau you can pull aside so the artist exposes only the treated strip. If you plan to show the finished work, open-back or wide-neck styles layer well and keep irritation down.
Q: Can I book a minor touch-up right after the first year if a gap filler shows blurring?
A: Absolutely, touch-ups are common and normal. Many artists prefer waiting until the ink fully heals into the skin, often around six to twelve months. For small fills, expect occasional touch-ups every two to four years depending on sun exposure and friction.
Q: What should I bring to my appointment when getting ankle or foot gap fillers?
A: Bring sandals or slip-on shoes and wear shorts or pants you can roll. This makes access easy and reduces rubbing after the session. If you need protection afterward, the Studio Day Picks section above lists useful items for the first few days.
Q: Where is the best place to find an artist who understands small abstract gap fillers?
A: Use local shop directories, artist hashtags on social platforms, and community forums to find portfolios that show healed small pieces. Look for clear healed photos that match the line weight and spacing you want rather than fresh photos only.
