
Fine line work on the hand looks delicate in photos, but the skin on the dorsal hand, knuckles, and fingers moves differently than the forearm. That movement plus everyday friction means a design that reads crisp the day after your session can soften faster than you expect. Below are 27 full hand ideas that consider placement, aging, and how to talk through details with your artist so the result still looks intentional years from now.
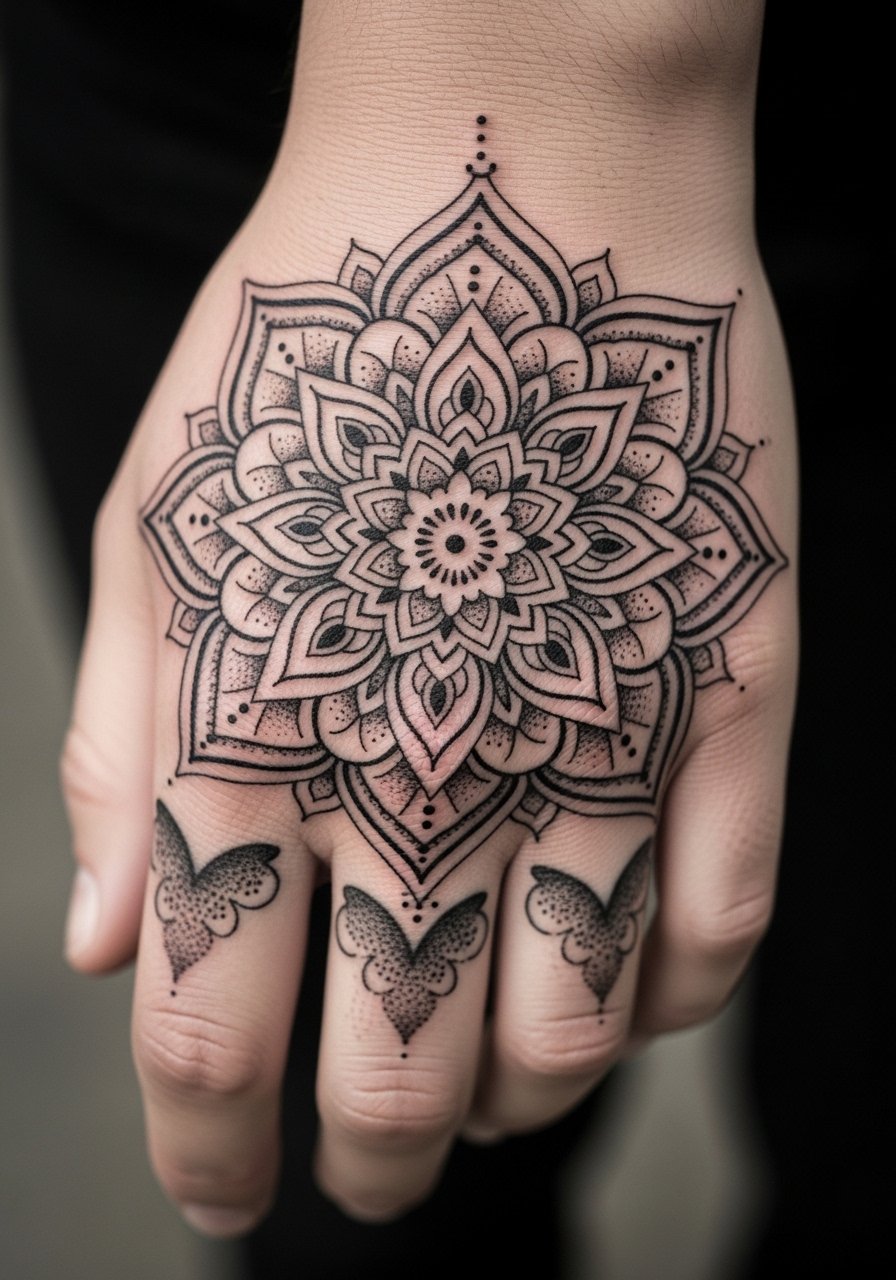
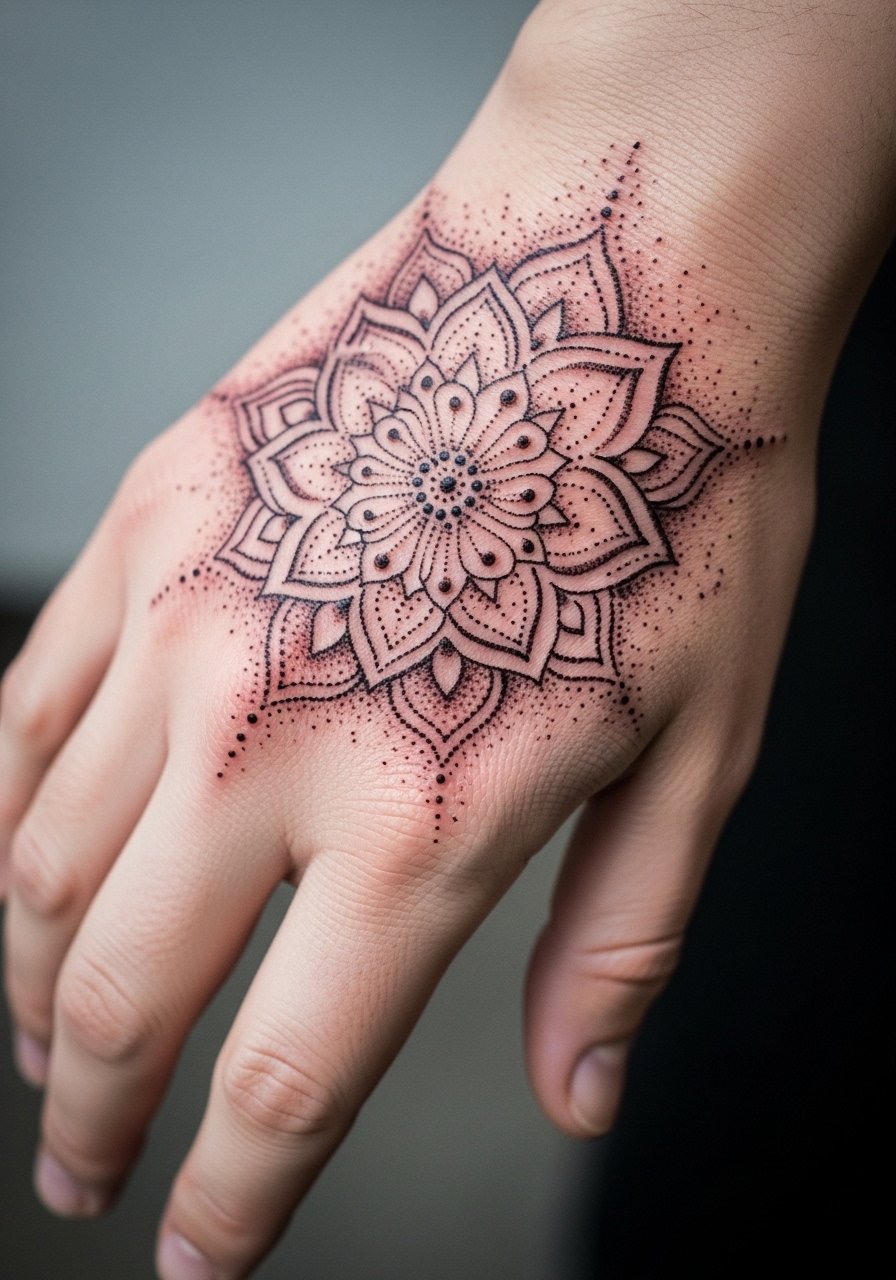
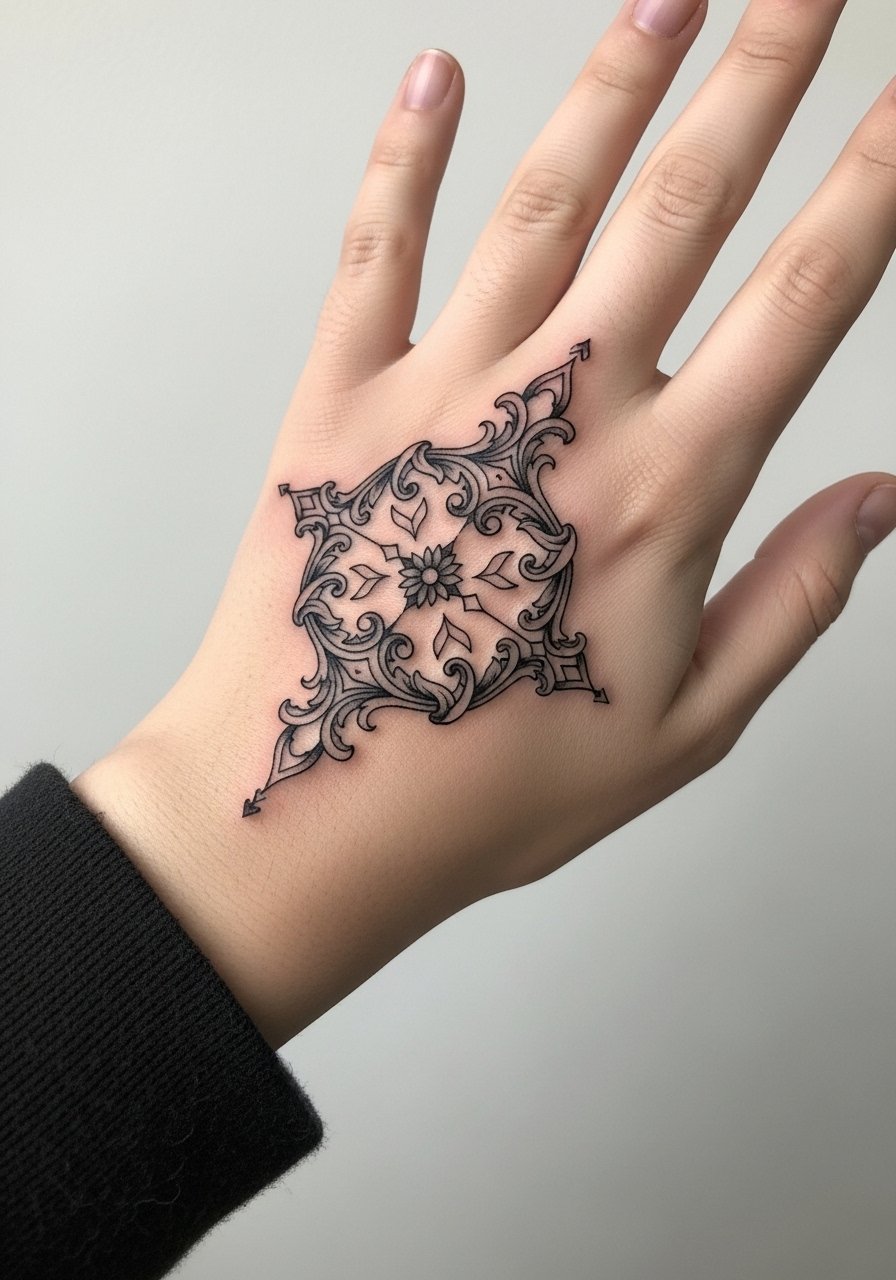
1. Ornate Blackwork Mandala Across the Back of the Hand
I've seen blackwork mandalas hold up on hands when the central elements are given breathing room. The key is bolder central geometry and lighter stipple toward the fingers so the dense center does not merge over time. Expect a moderate pain level across the back of the hand and knuckles, and plan for a two-hour session for a medium complexity piece. Common mistake is packing too many tiny petals into the knuckle area, which blurs first. Tell your artist you want spacing around knuckles and a stippled fade to the fingers. Hand tattoos still affect hiring in some industries, so think about your career path before committing.
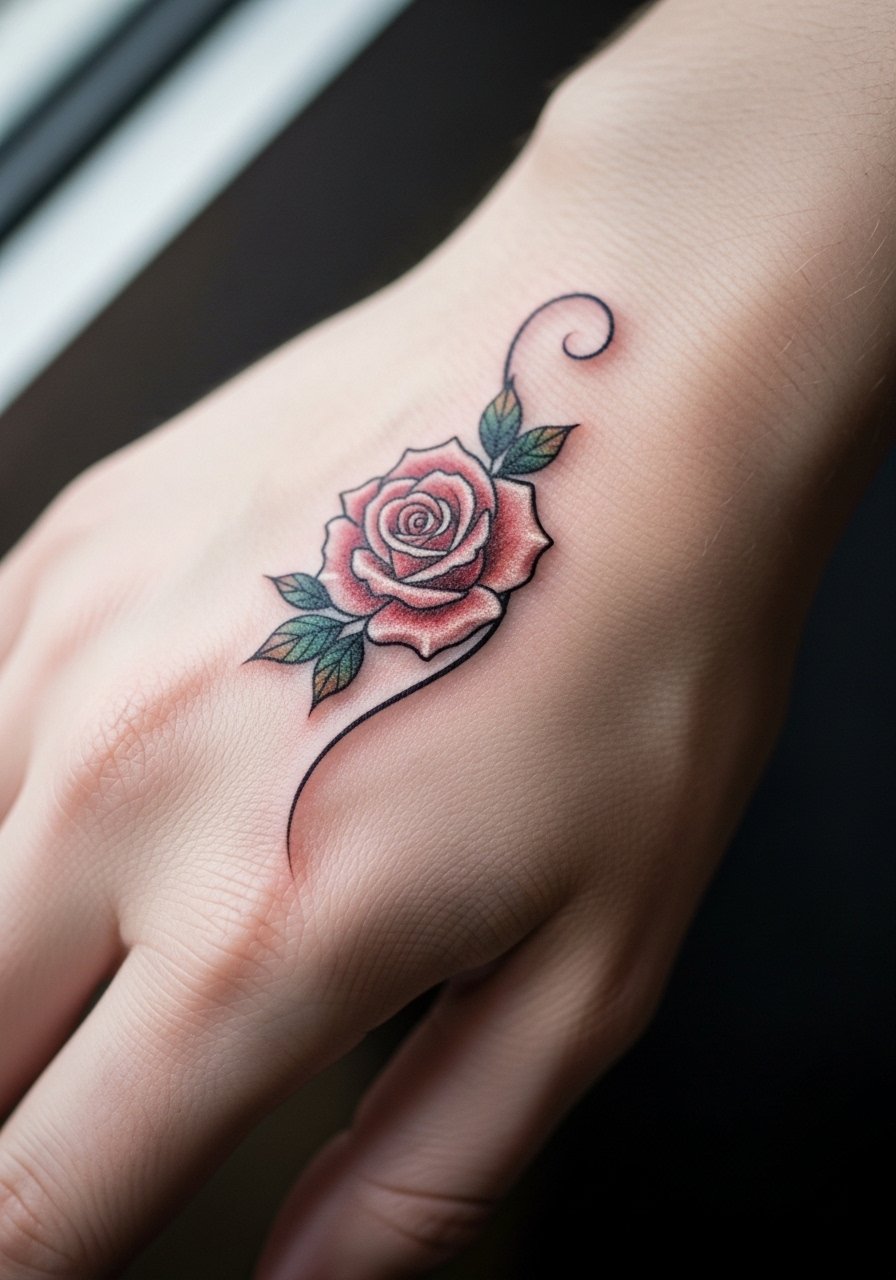
2. Micro-Realism Rose Blooming Toward the Thumb
Personal observation: micro-realism on hands looks most convincing when artists allow tiny highlights and negative space to breathe. For a rose that starts on the dorsal hand and wraps gently toward the thumb, expect a focused two to three hour session and a fair amount of tenderness during and after. A common version that ages poorly is when artists try to cram hyper-detail into the knuckles. Ask for slightly softer edges near joints and stronger contrast on the bloom center. For showing this off, pair it with a thin chain pendant necklace that draws the eye upward while keeping attention on the hand.
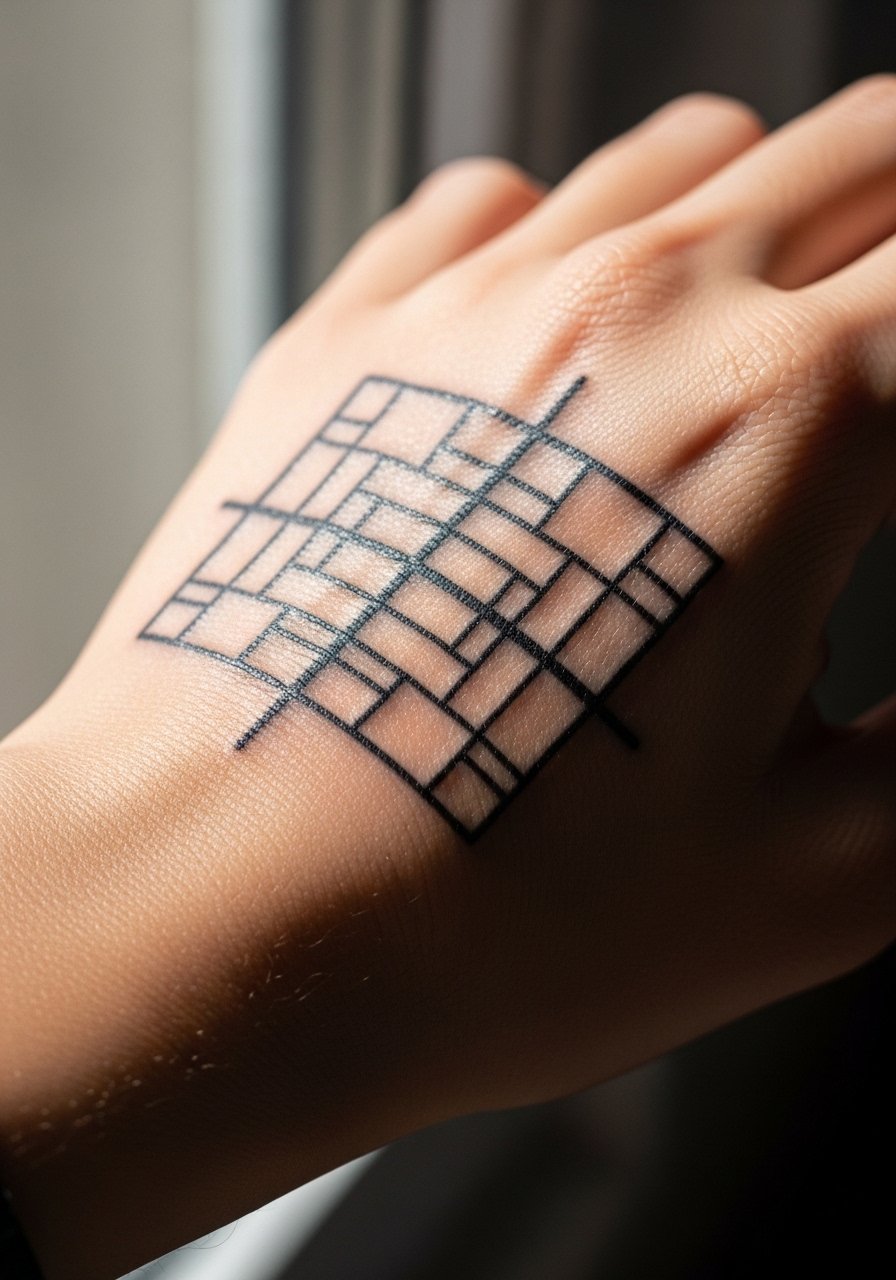
3. Geometric Grid with Negative Space Panels
Visual impact lead: a structured grid that uses negative space to create skin windows reads sharp across the whole hand. This design needs deliberate spacing so squares and triangles do not merge after a year. Expect a medium pain level and a one to two hour session depending on coverage. The biggest mistake is going too small with the grid. During consultation, ask the artist to show a stencil at real scale and to increase line weight slightly for the knuckle crossings. Pair this with rolled sleeves and a loose button-down shirt when you want to showcase the clean geometry.
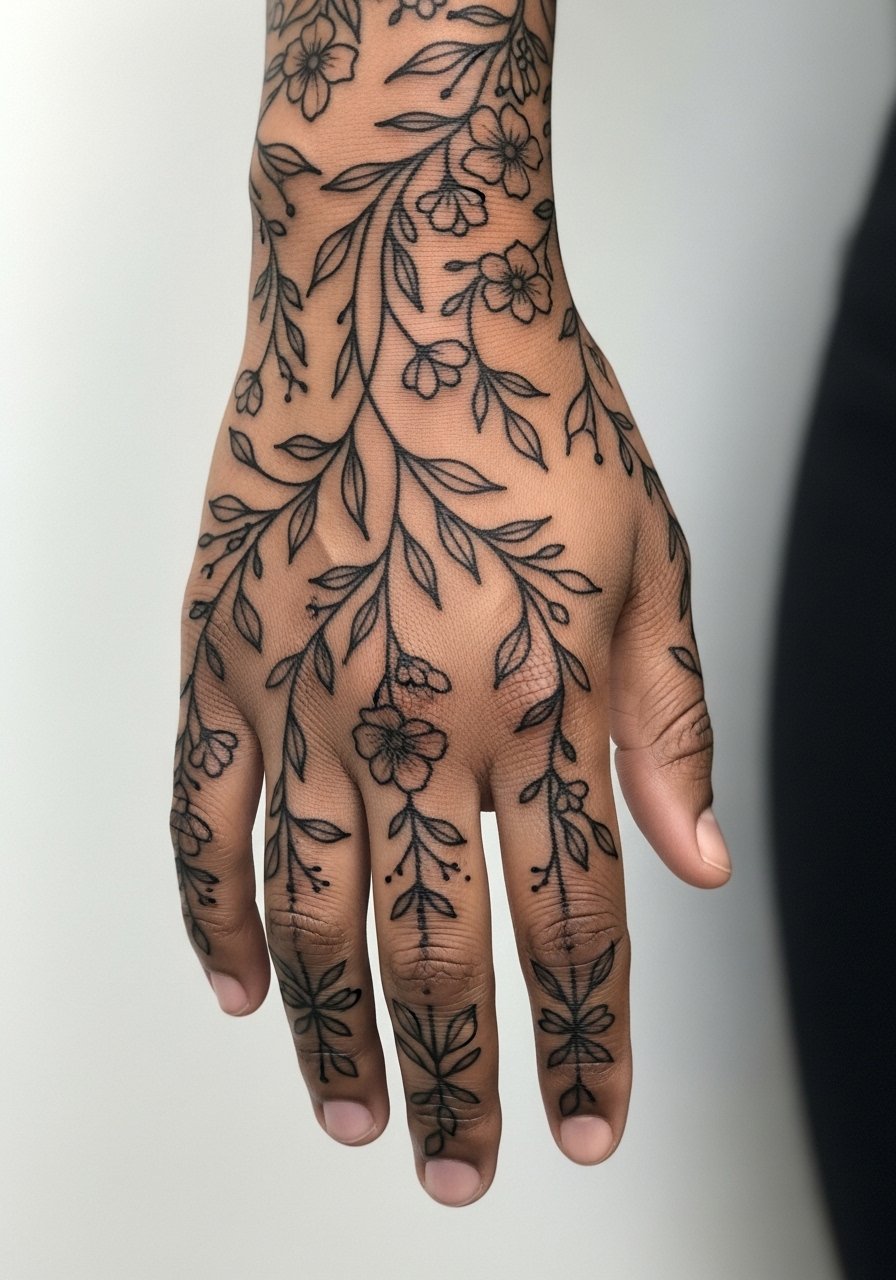
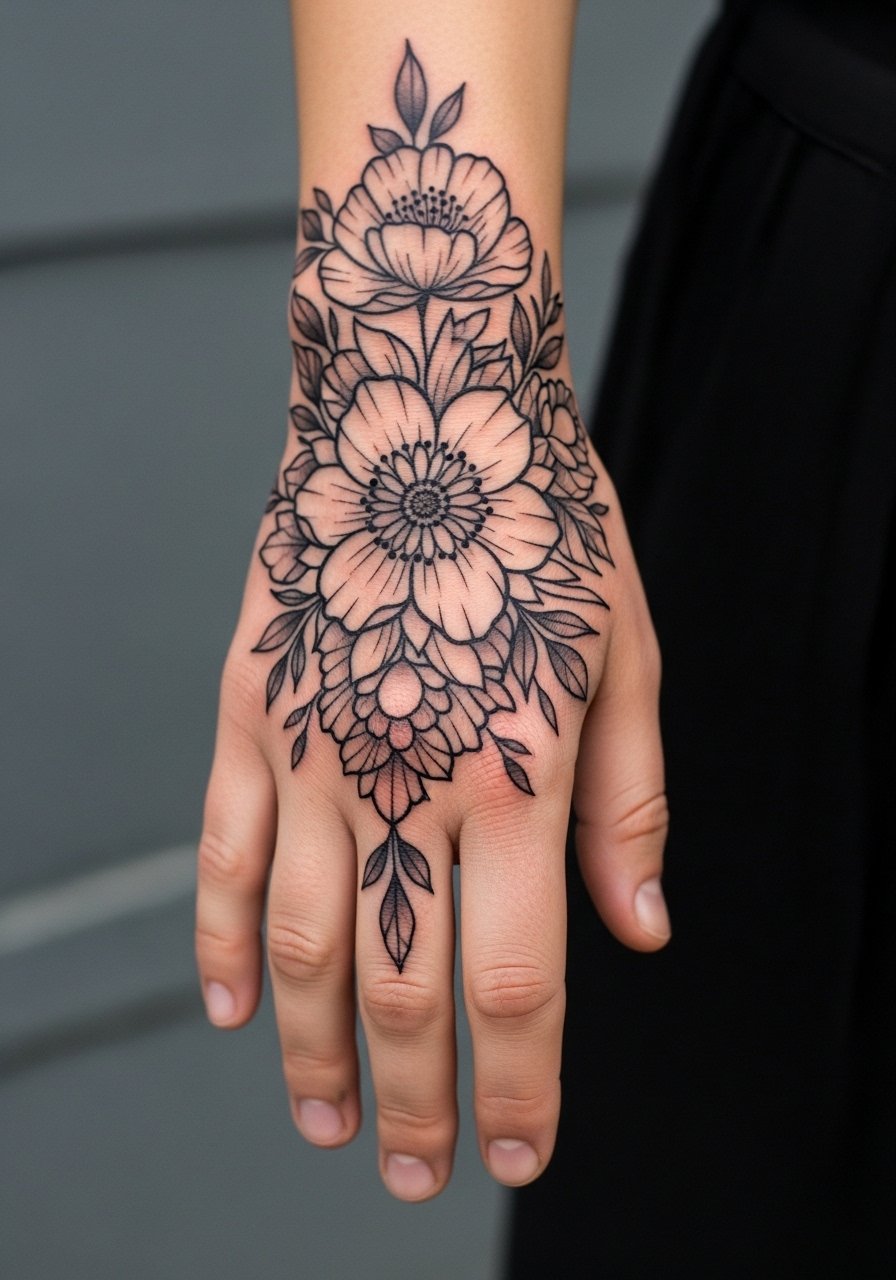
4. Botanical Sleeve Across the Full Hand
Consultation lead: bring images that show the scale you want and note where you want stems to avoid knuckle folds. A full-hand botanical sleeve with leaves, small blooms, and trailing vines reads organic if the stems curve with natural hand lines. Pain is moderate, session time three hours for half coverage, longer for dense saturation. A mistake is forcing large floral elements into tight finger spaces. For showing off, cuff a rolled-up linen sleeve or push a short-sleeve top so the vines align with sleeve edges.
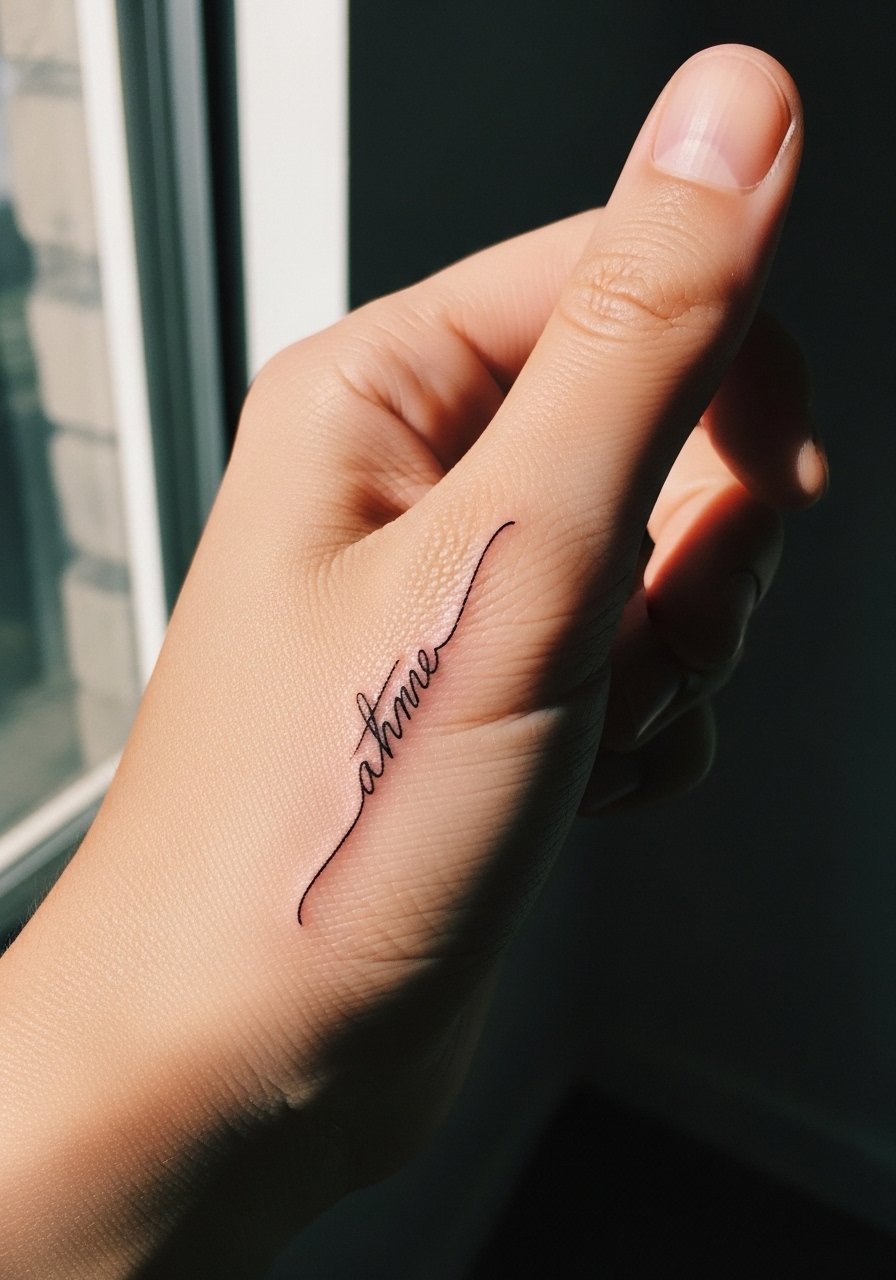
5. Single-Line Script That Wraps the Side of the Hand
Mistake lead: the typical error with single-line script is placing thin letters over knuckles where folds break up the letters. Place script along the thumb side or outer hand for cleaner aging. Session time is often under an hour for short phrases, pain is moderate. During the consultation, specify letter spacing and ask to see a stencil that sits on the hand while you move your fingers. For session comfort, wear a loose long-sleeve you can push up so the artist can access the side of the hand without tugging.
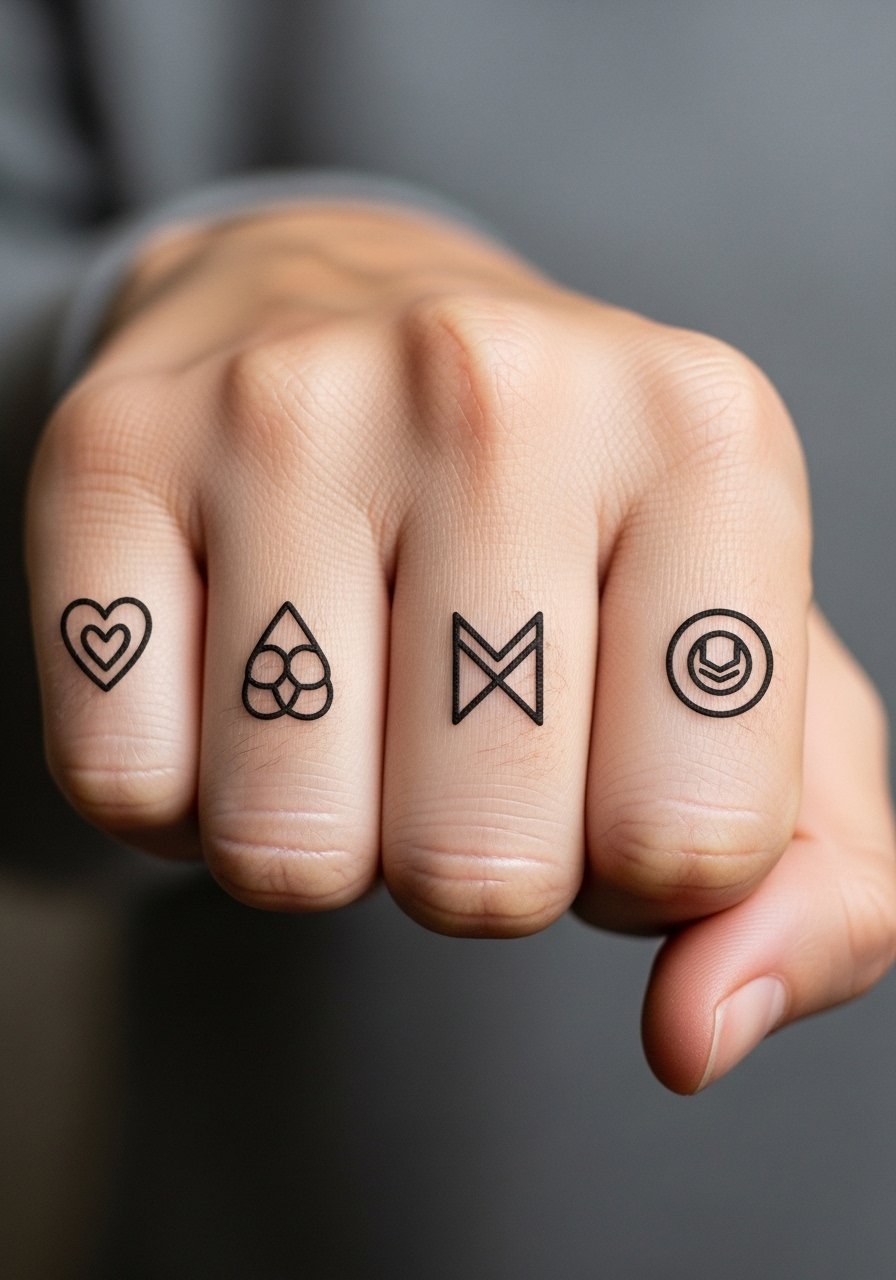
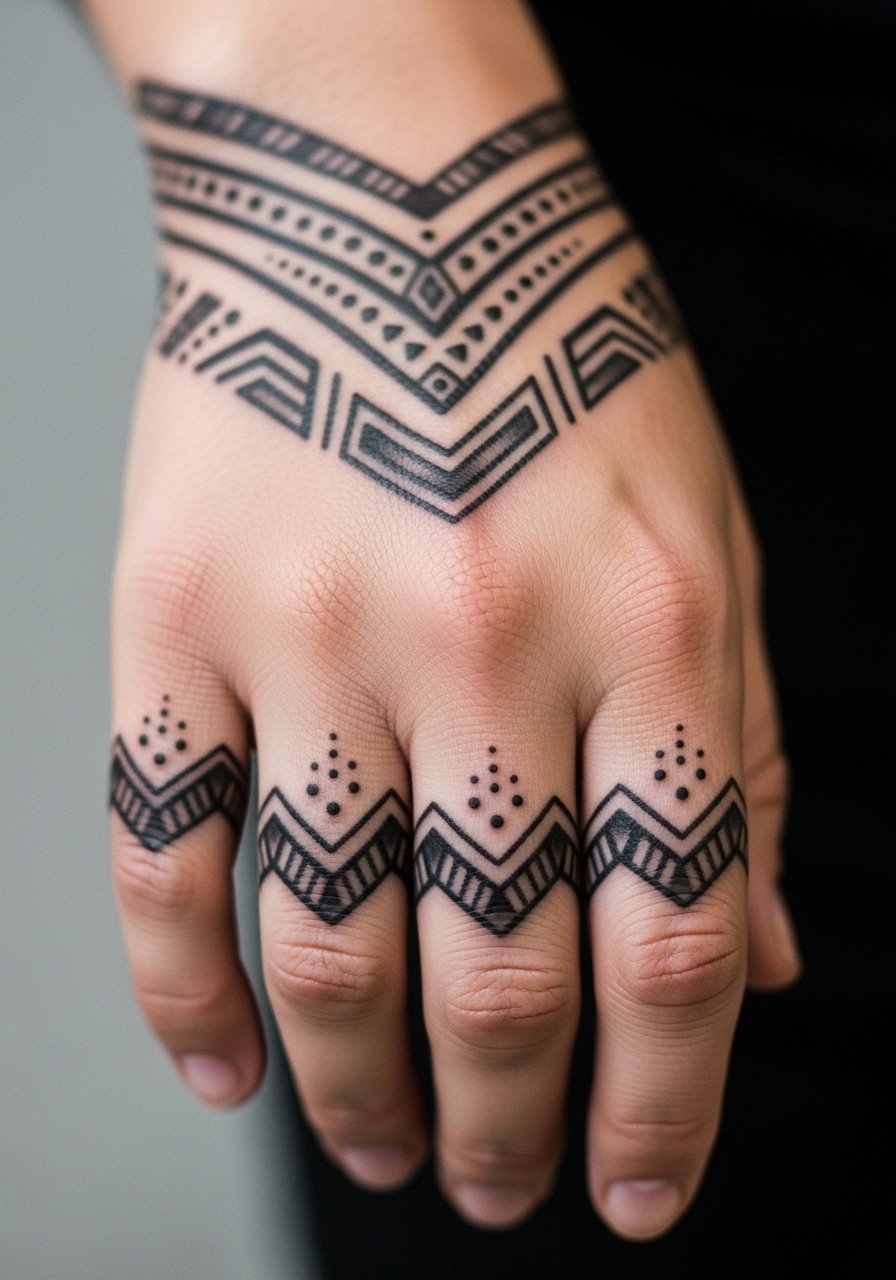
6. Knuckle Icons in Minimalist Linework
Aging lead: minimalist knuckle icons look crisp at first, but repeated washing and friction from handbags and keyboards erode thin lines. For longevity, pick slightly thicker outlines and leave negative space around each glyph. Expect sharp pain over knuckles and short session times per letter. Common mistake is tiny script stacked over knuckles which often needs touch-ups by year two. For styling, stacked thin rings and a minimalist watch frame the knuckles without crowding them.
Studio Day Picks
These full-hand motifs above involve knuckle work, thumb wraps, and dorsal coverage, so a few studio items make the session and first week easier.
-
Stencil transfer paper kit. Lets you preview exact placement on the hand and fingers before the needle touches skin.
-
Thin numbing gel. Applied as directed before sessions that include sensitive knuckles and side-thumb work to take the edge off.
-
Disposable hand rest cover pads. Help keep the hand steady and sanitary, especially during long sessions that require repeated positioning.
-
Low-profile compression glove. Useful in the first few days if swelling or soreness affects hand mobility.
-
Aquaphor healing ointment. Thin application for the first few days helps protect fine line and small glyph work without suffocating tight needle channels.
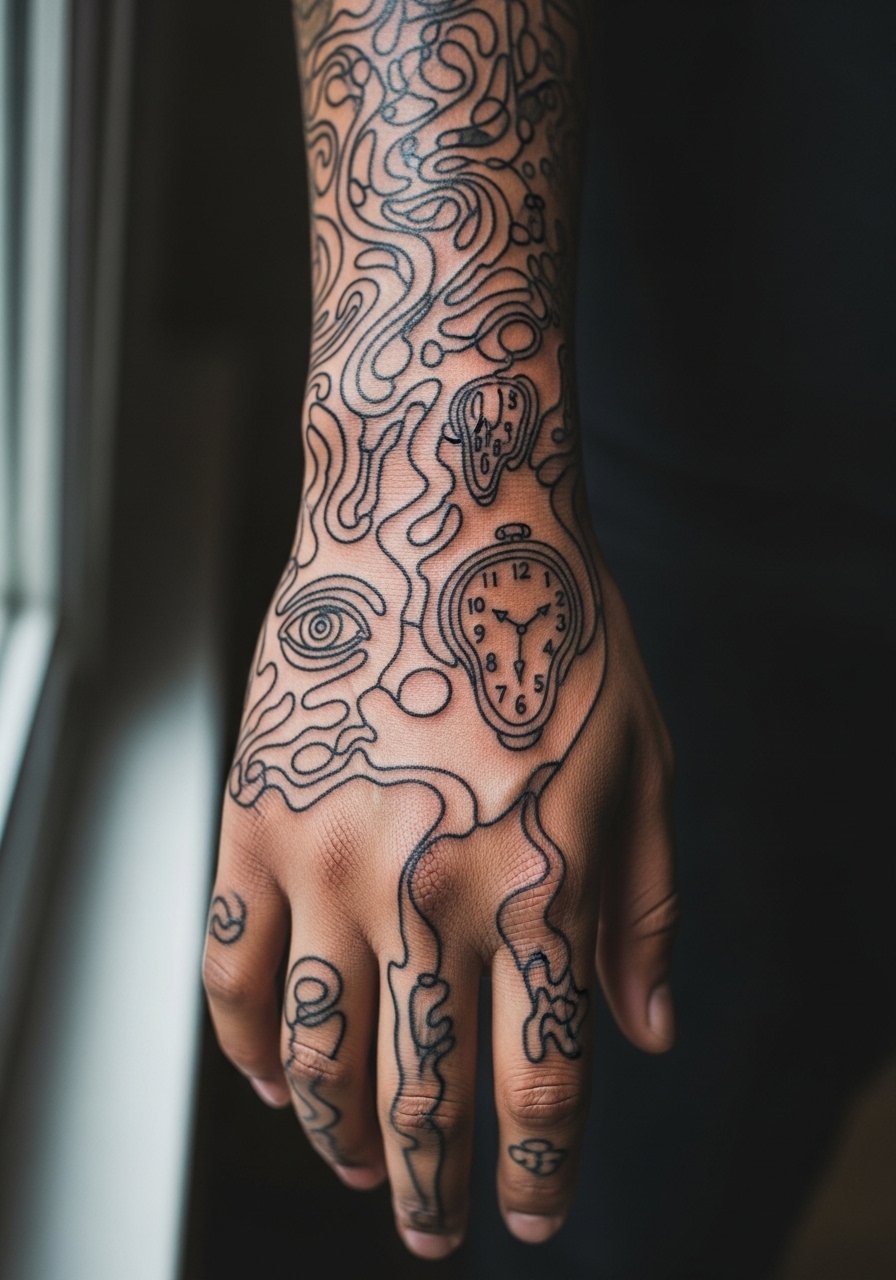
7. Surrealist Line Art Stretching From Wrist to Fingers
Personal observation: surrealist single-stroke line art translates surprisingly well to the hand when allowed to flow with tendons. It reads graphic from a distance and subtle up close. Expect a one to two hour session depending on complexity and moderate pain in finger joints. The common mistake is forcing disconnected micro elements that don't follow hand motion. Tell your artist you want lines that trace natural tendons and to avoid heavy shading over joints. Pair this with short-sleeve tees or a racerback tank to keep the focus on the drawn lines.
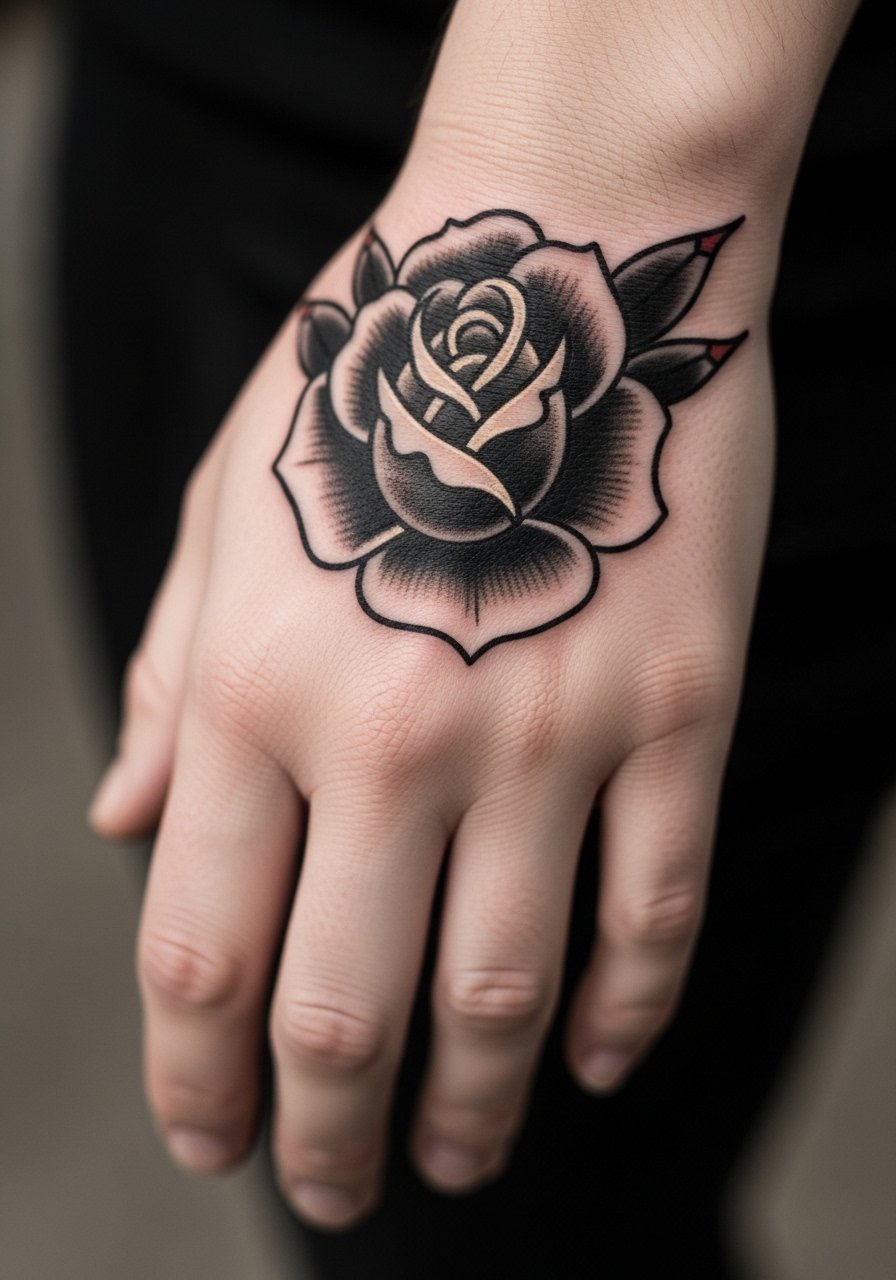
8. Traditional Black Rose With Bold Saturation
Pain warning lead: the hand takes saturation differently because of thin skin and frequent movement. Traditional black roses with bold outlines age into a solid silhouette if artists avoid over-detailing petal interiors on joints. Expect a two-hour session and moderate pain. A mistake is asking for tight black fill right up to finger creases. During the consult, request bolder outer lines and softer internal shading away from knuckles. For showing off, a stacked leather bracelet complements the silhouette without crowding the bloom.
9. Dot Work Mandala That Gradually Fades Toward Fingers
Aging/healing lead: dot work holds when the dots are sized and spaced for movement. Dense stippling near the center and airy dots toward the fingers prevents merging. Pain is moderate and session time depends on density, often two to three hours. The real mistake is using micro dots too close together near moving joints. Ask for gradual spacing and for the artist to mark potential blowout zones on your hand. For display, cuff a loose sleeve shirt and roll it back so the mandala sits visible without competing prints.
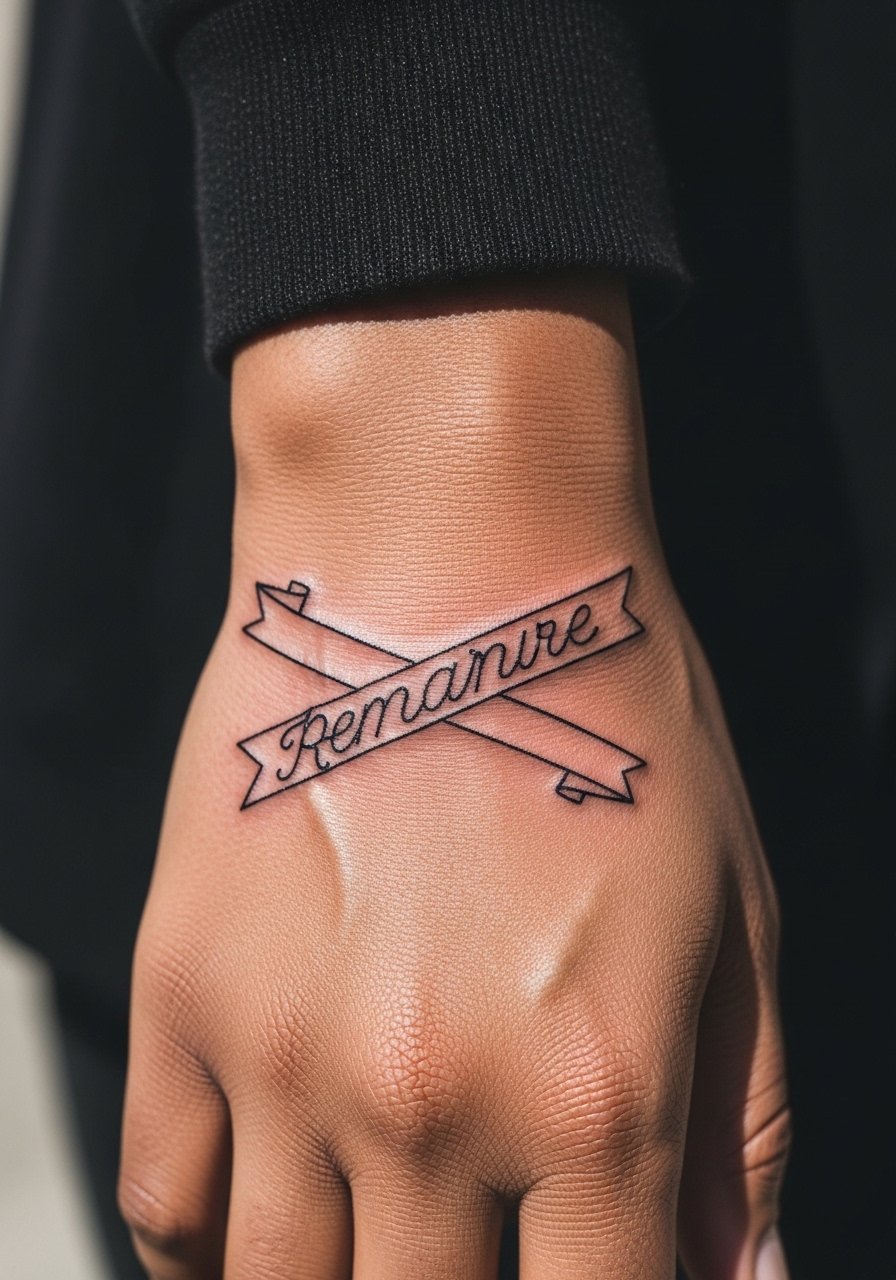
10. Script Banner That Crosses the Hand Horizontally
Mistake lead: crossing script across knuckles is tempting for symmetry but letters break when skin stretches. A horizontal banner that sits below knuckles or slightly diagonal holds letters clearer. Expect brief session time and moderate pain. In consultation, ask the artist to map the banner at rest and while you flex fingers to see how letters distort. For session day, wear a zip-up hoodie you can pull aside so the artist can access the hand without tugging tight clothing.
11. Negative Space Floral With Finger Tips Left Bare
Visual impact lead: leaving finger tips or nail beds bare while filling the rest of the hand with dense floral shapes creates striking contrast. This technique reduces blowout risk on the smallest surfaces. Sessions vary by coverage and pain is higher on fingers. A frequent error is overloading tiny finger sections with heavy ink. Ask for open negative tips and stronger stems on the dorsal hand for anchoring. Pair with stacked dainty rings or a minimalist band ring set to highlight the uninked tips.
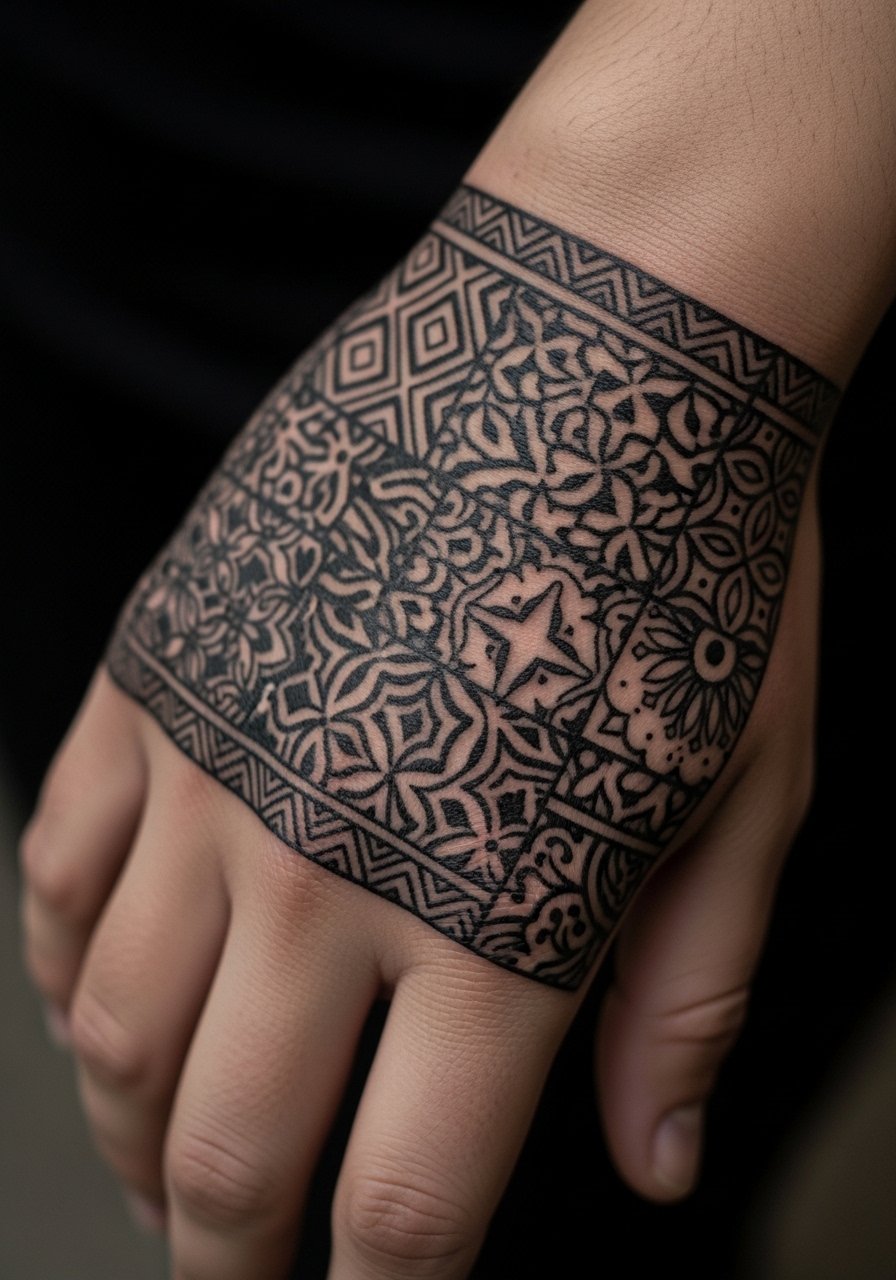
12. Blackout Patchwork With Patterned Borders
Controversy lead: blackout hand work divides artists. One camp says large blackout patches resist fading and simplify future cover-ups. The other camp warns that blackout on thin hand skin can migrate into adjacent fine work. The truth is technique matters and placement determines the outcome. If considering blackout, plan for session time that may exceed three hours and expect heavier discomfort. A common mistake is adding tiny fine-line elements at the edge of a blackout patch without buffer space. For style, pair blackout with chunky metal bracelets and a wide cuff bracelet for contrast.
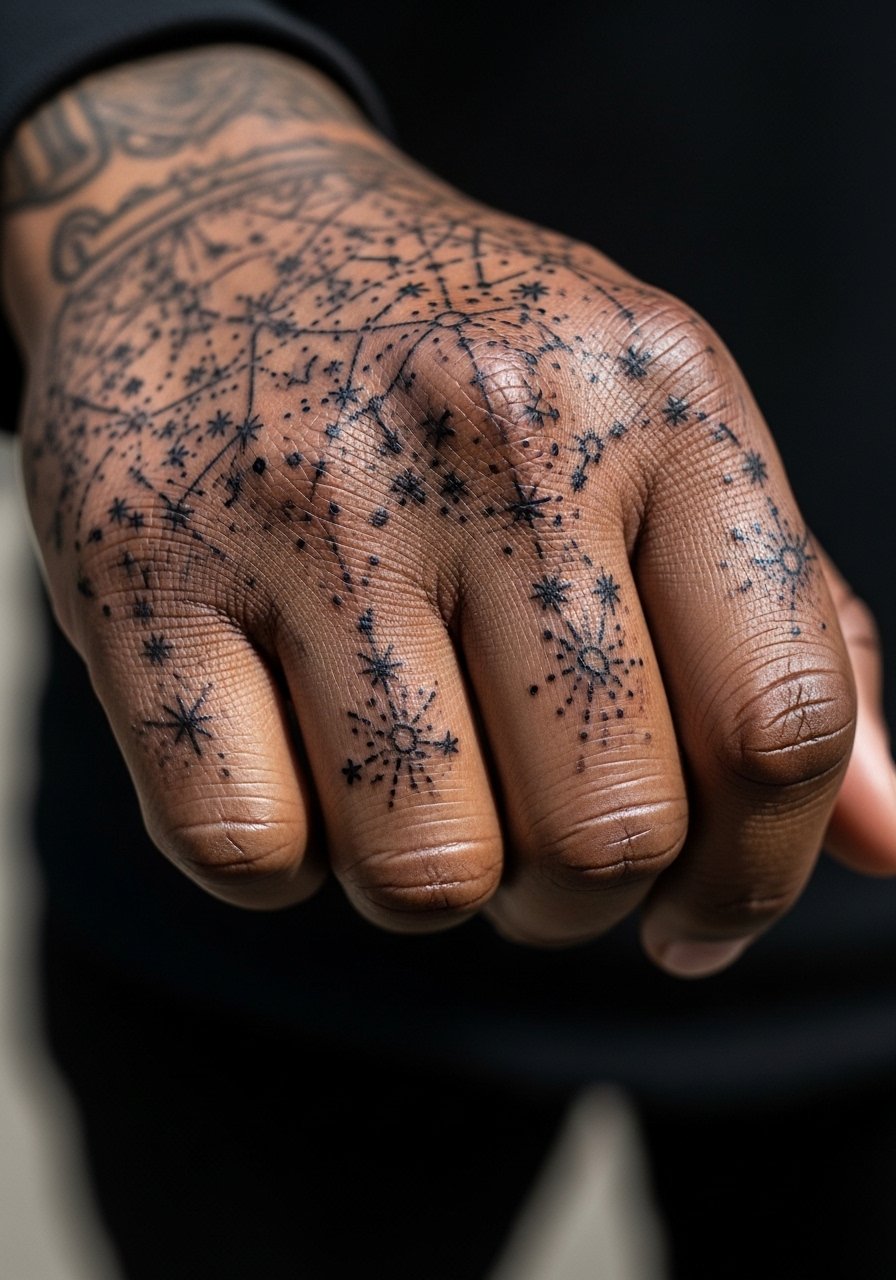
13. Celestial Chart That Maps Across the Knuckles
Consultation lead: celestial charts that span knuckles need exact placement to avoid breaking star clusters across finger folds. Expect short but sharp sessions per knuckle and higher pain at the joints. A common mistake is packing too many tiny stars into the creases. Ask your artist to space constellation lines slightly and to thicken star points near creases. For showing the piece, a thin chain bracelet sits low on the wrist and keeps the constellation visible without covering it.
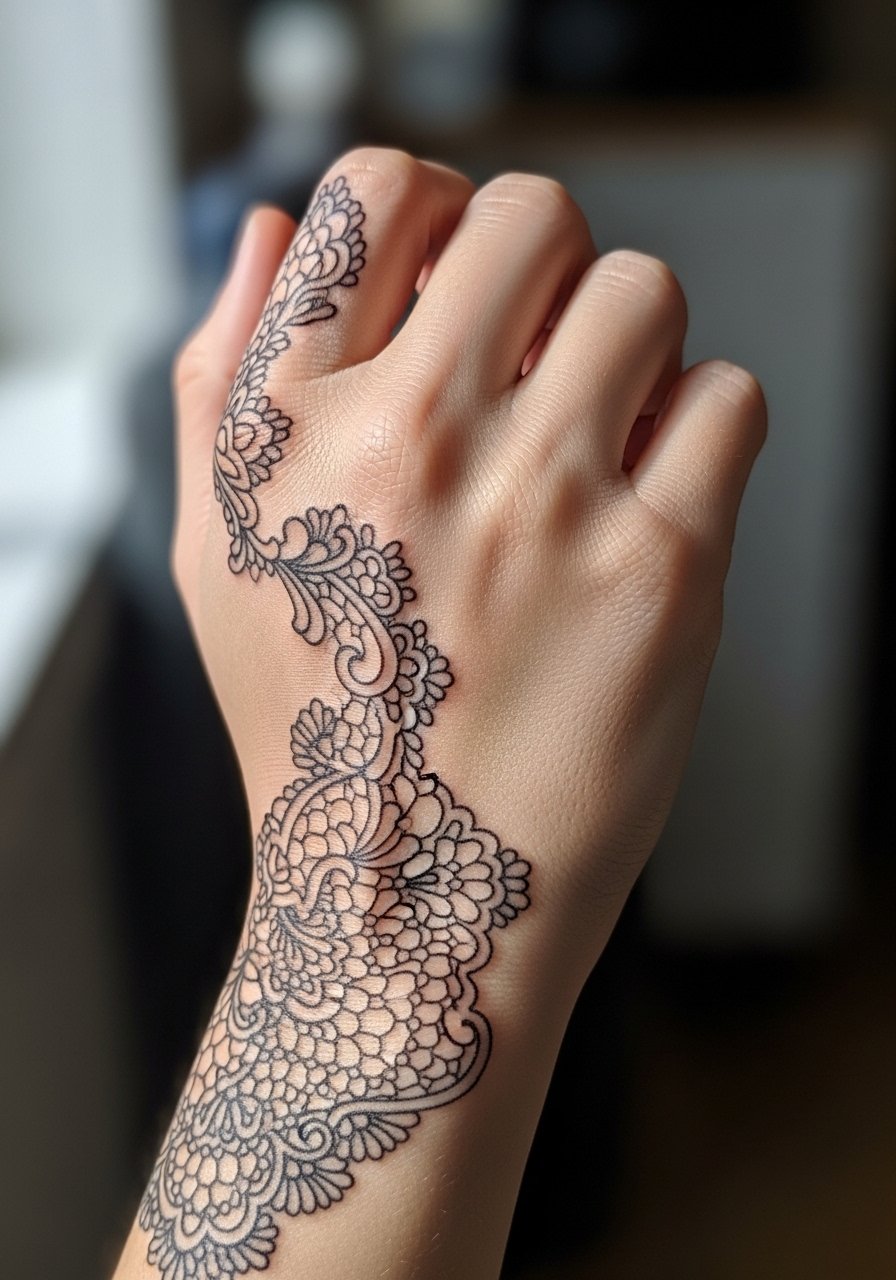
14. Ornamental Lace That Flows to the Wrist
Personal observation: lace-style ornamentation reads delicate when artists use a mix of linework and small open areas to mimic fabric. On the hand, avoid micro filigree over finger creases. Expect a two-hour session and sensitivity on the finger joints. The usual error is trying to cram lace density where the hand naturally wrinkles. Ask for airy gaps and for the lace to echo wrist tendons. For show, wear a delicate bracelet stack that sits just above the lace so the design frames the wrist.
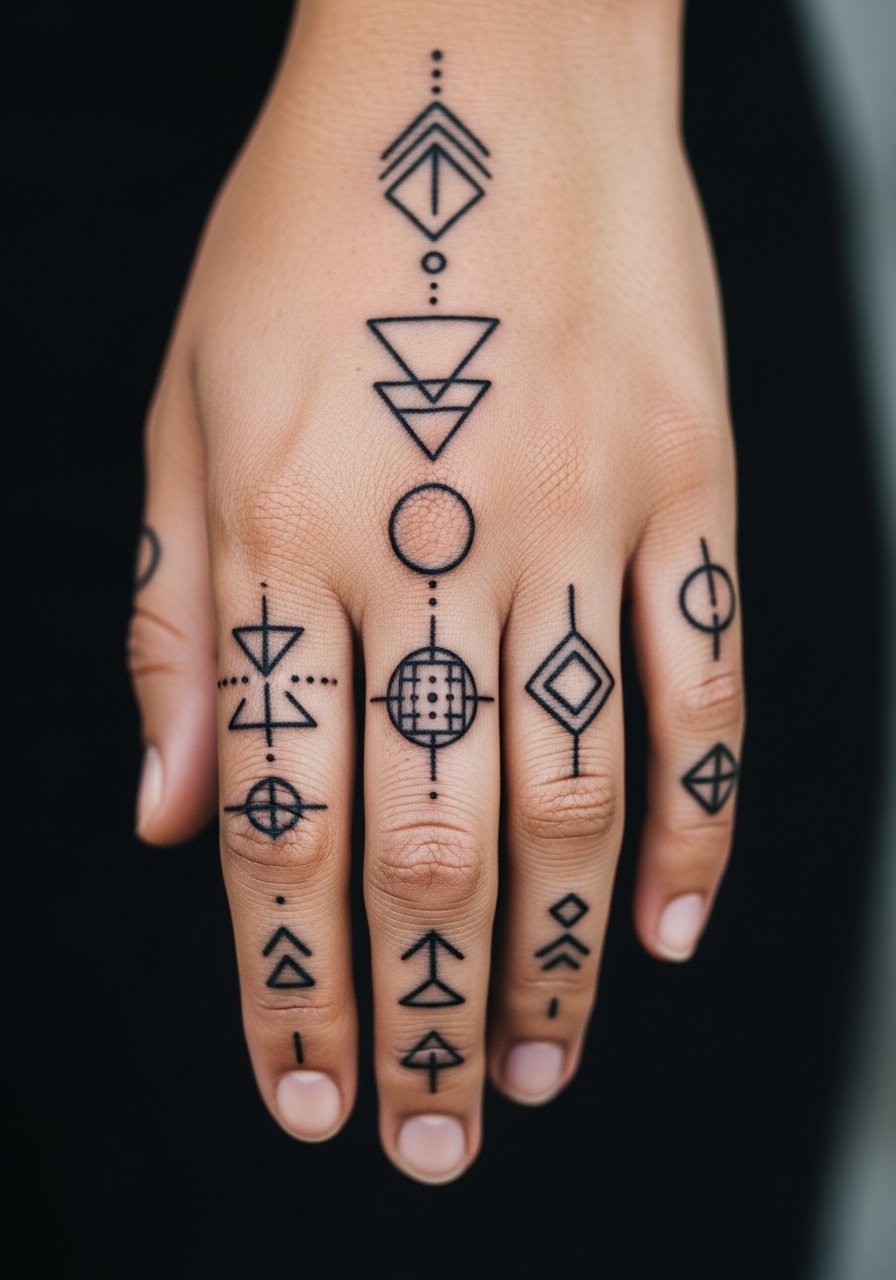
15. Minimal Geometric Shapes Across Fingertips and Back
Mistake lead: the geometric shapes that look neat on an iPad often lose definition on fingertip skin. Keep shapes larger and give each a buffer to avoid merging. Pain is high on fingertips, expect short focused bursts during the session. Tell your artist to prioritize shape isolation and slightly heavier line weight for the fingertip elements. For showing off, slip on a pair of low-profile rings that do not hide the shapes but add simple context.
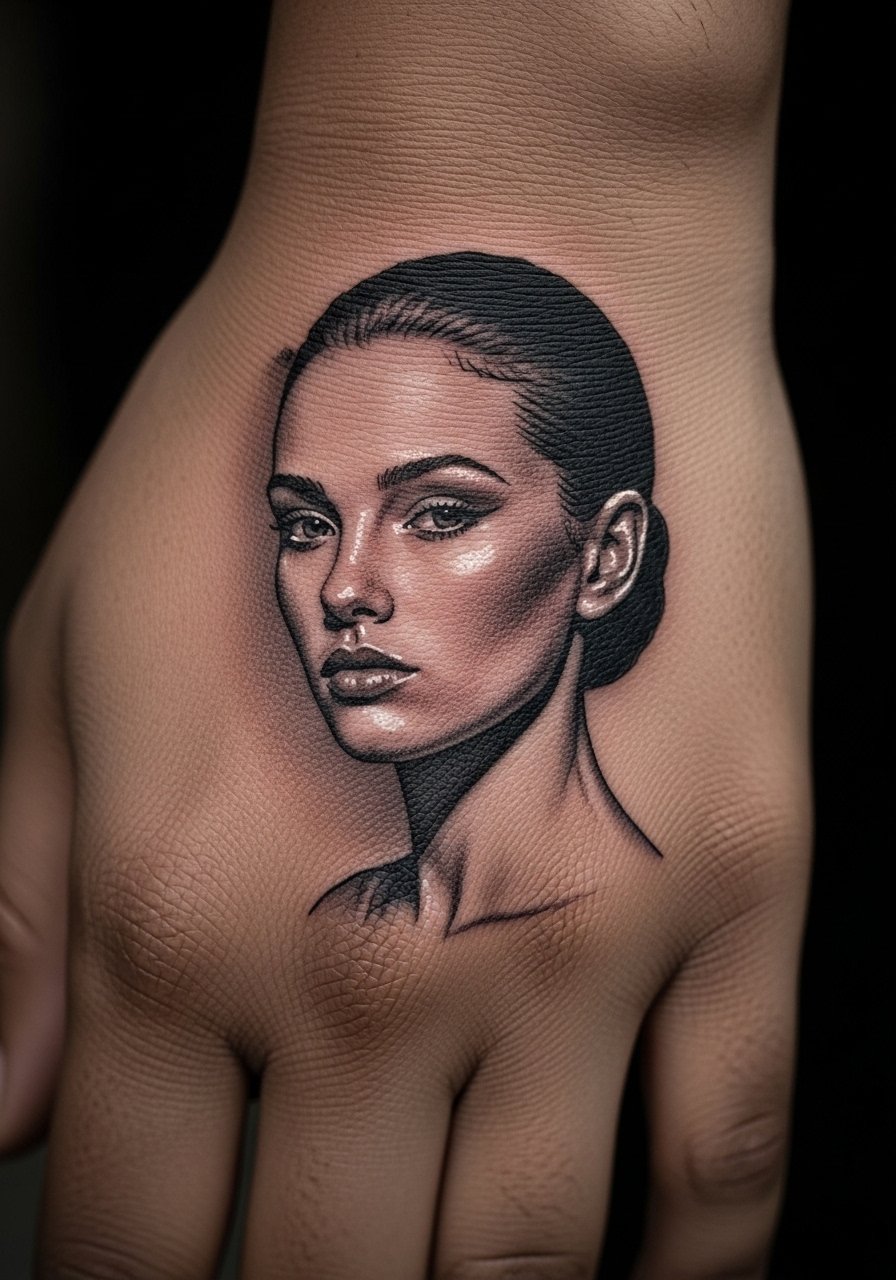
16. Portrait Micro-Realism Anchored on the Back of the Hand
Controversy lead: realistic portraits on hands prompt debate. One camp says micro-realism needs more skin canvas than a hand offers so details blur quickly. The other maintains that with adjusted contrast and simplified features a portrait can remain recognizable. Be explicit with your artist about simplification and contrast. Expect longer sessions and higher pain where fine shading meets thin skin. The core mistake is demanding photoreal micro detail over knuckles. Choose a simplified likeness and plan for a touch-up at year two.
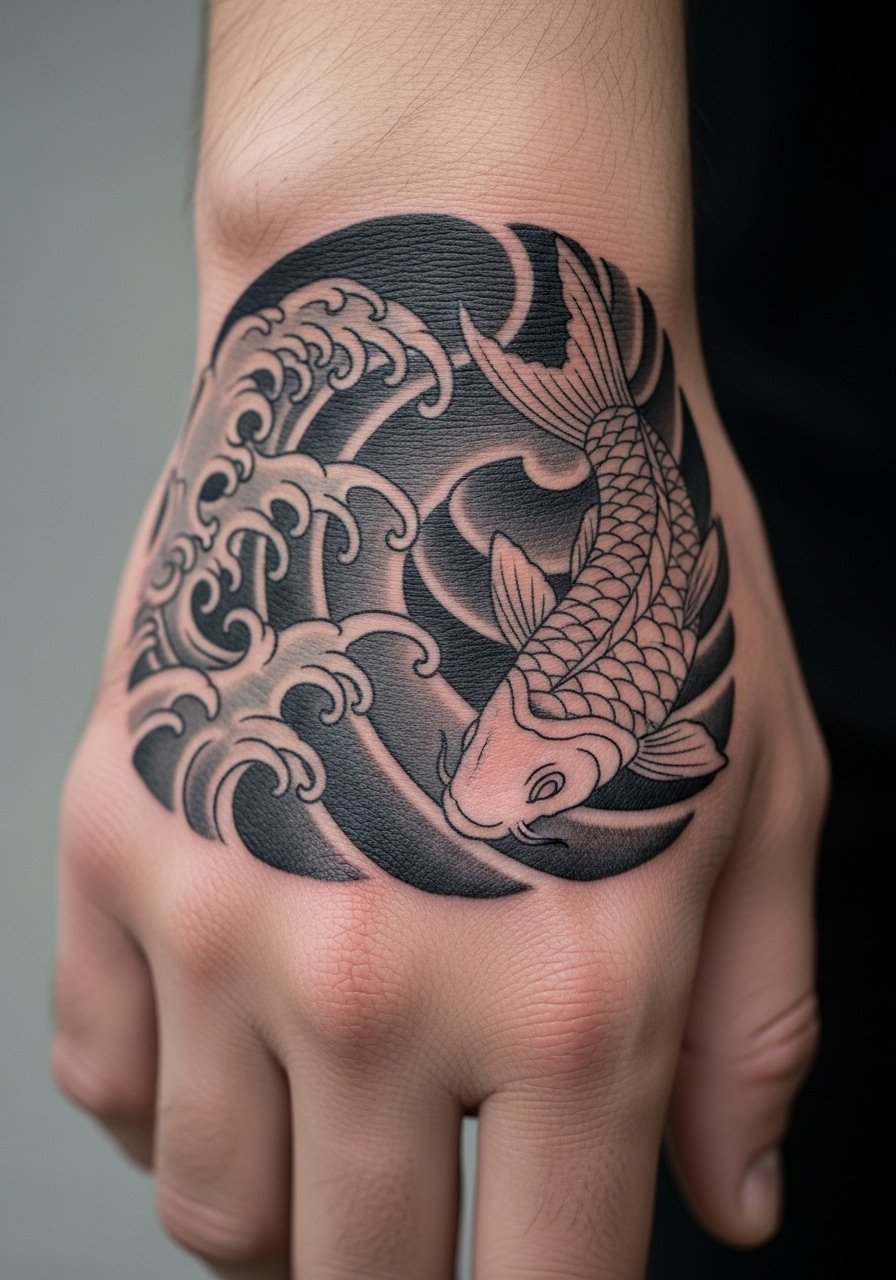
17. Irezumi-Inspired Wave and Koi Composition
Cultural origin sensitivity: this composition borrows from Japanese carving traditions and waves, so many opt for stylistic interpretation rather than copying sacred motifs exactly. Visual impact lead: bold waves and a single stylized koi can sit across the hand and hold up if the artist scales the elements for the hand. Expect a multi-hour session and moderate pain. A common mistake is crowding the hand with too many koi. Pair with casual rolled sleeves or an open-back dress for nights out when you want the art visible but framed.
18. Minimalist Baroque Motif That Wraps the Thumb Base
Pain warning lead: the thumb base sees a lot of movement and pressure. Baroque swirls that anchor at the thumb base and sweep across the hand need slightly thicker lines where movement is highest. Sessions are shorter but the area is sensitive. People often ask for extremely delicate filigree that disappears; instead, ask for contrast points and negative space. For session comfort, wear a short-sleeve button shirt you can roll so the artist can access the thumb without fabric tug.
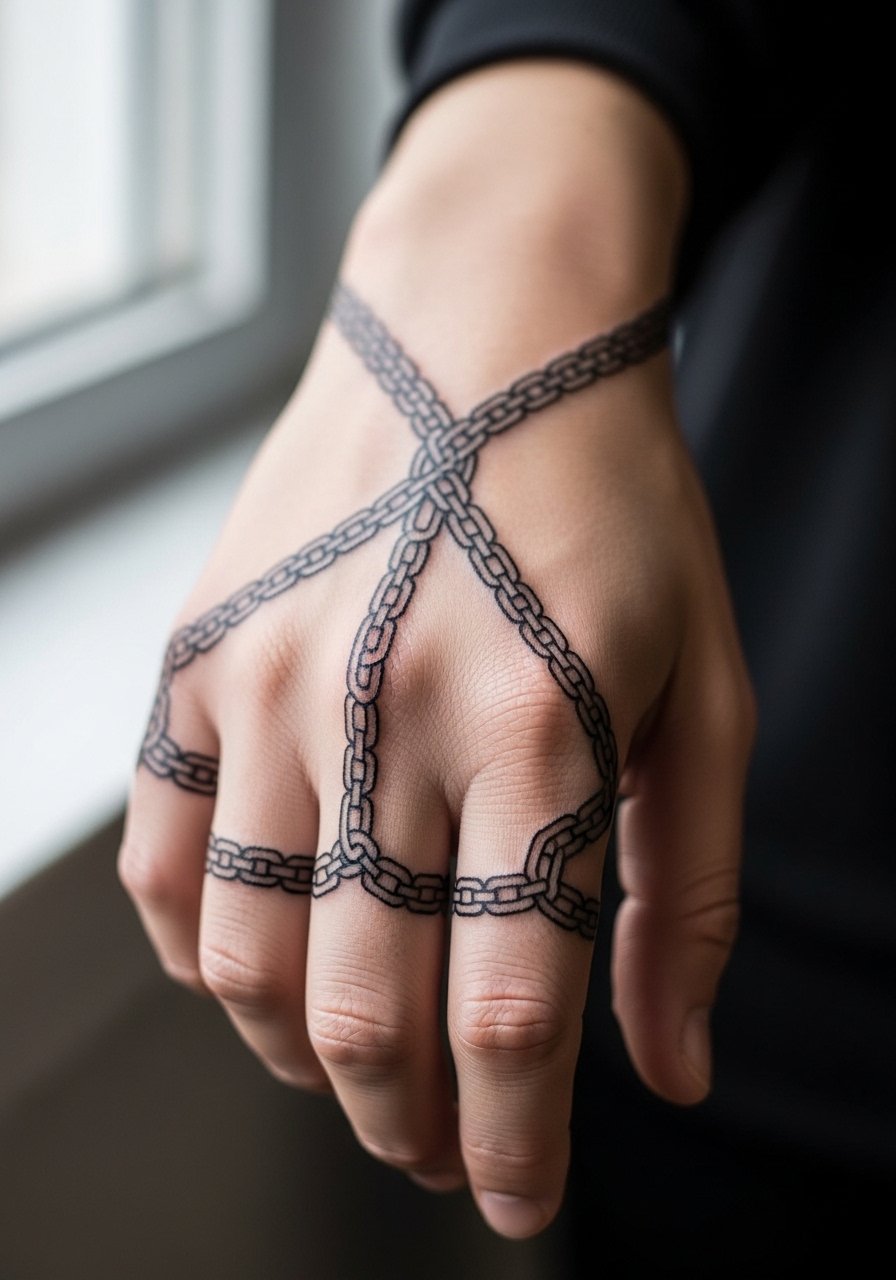
19. Chain-Link Pattern That Follows Tendons
Visual impact lead: repeating chain links that follow tendon flow look mechanical and clean. The trick is to scale the links so they do not overlap knuckle folds. Expect moderate pain and a session length around one to two hours. A common mistake is lining links too close to finger joints. Request a stencil test with hand movement so the artist can see how the pattern shifts. For showing off, short sleeves and a minimalist watch strap keep lines visible during daily gestures.
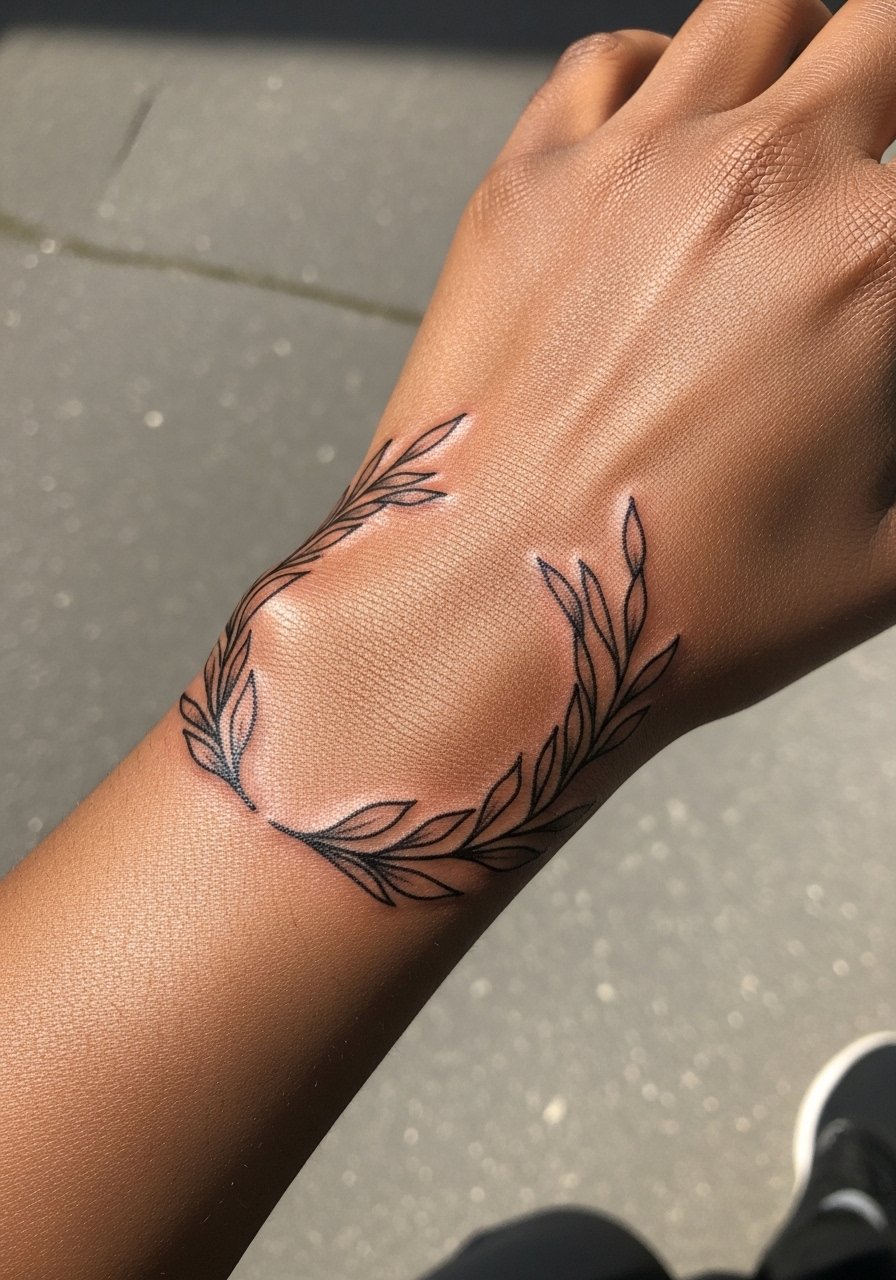
20. Botanical Crescent That Frames the Wrist
Personal observation: framing the wrist with a crescent of leaves that creeps onto the hand gives the illusion of a continuous sleeve while avoiding heavy ink on knuckles. This placement is lower on the hand and sees less direct abrasion. Expect one to two hours of work and moderate discomfort. The mistake is letting leaves cross tight skin folds. Ask for a crescent that stops short of the knuckles and for tapered stems. For session wear, pull on a loose drawstring linen pant if you also have lower arm work scheduled the same day.
21. Chevron Bands That Align With Finger Bones
Mistake lead: chevron and band tattoos look structured but require bone alignment checks. If bands sit askew relative to finger bones they twist visually when you move. Have the artist place a live stencil and flex fingers to confirm alignment. Expect sharp moments of pain on finger bands during a short session. For style, thin stackable bracelets sit above chevrons and complement the geometry, try a stacked thin bracelet set.
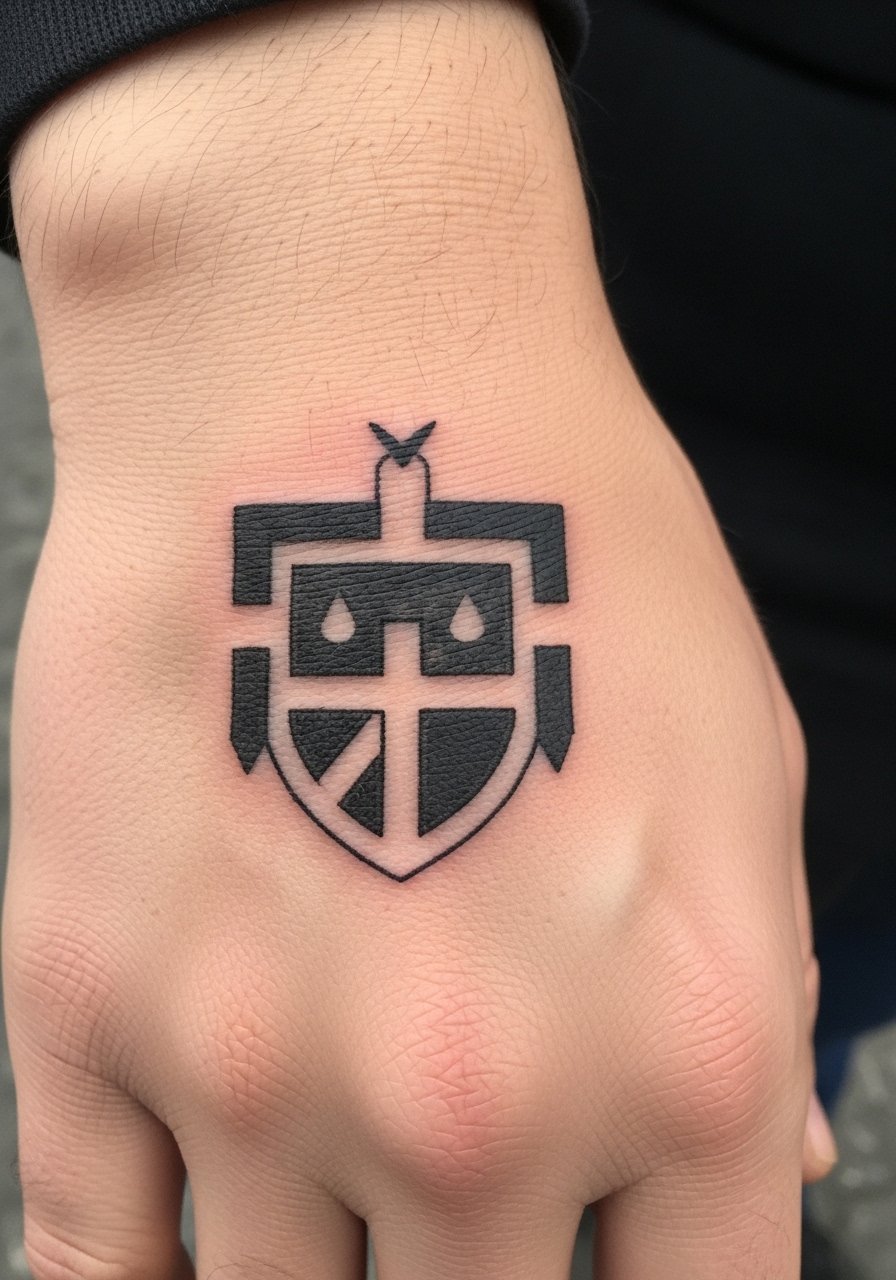
22. Heraldic Emblem Centered on the Back of the Hand
Visual impact lead: a small heraldic shield or emblem centered on the back of the hand reads authoritative when simplified. Keep heraldic detail to a minimum so fields and charges do not blur. Expect moderate pain and a two-hour session. The common mistake is insisting on tiny crests that become indistinguishable. Ask the artist to block in strong shapes and to leave negative space for clarity. Pair with a classic leather watch that positions the emblem when your hand rests at your side.
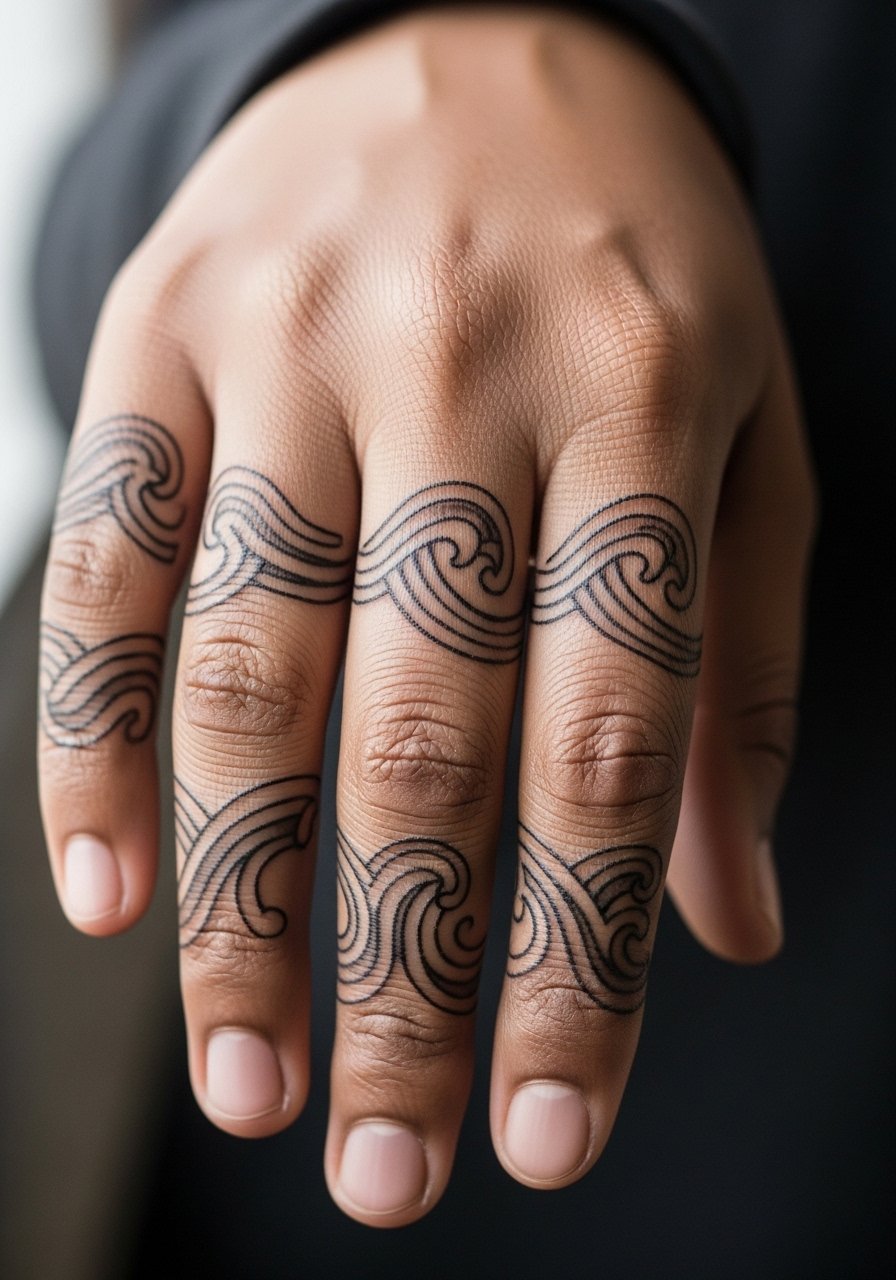
23. Wave Linework That Wraps Around Each Finger
Pain warning lead: finger wraps are among the most painful and most likely to fade. If you want wave motifs wrapping each finger, keep the lines open and avoid heavy filler. Sessions are short but intense and touch-ups are common. A typical mistake is dense shading close to nail beds which melts under constant use. Ask for single pass linework and plan for a touch-up window at year one. For display, a simple ring set can complement the finger waves without obscuring the lines.
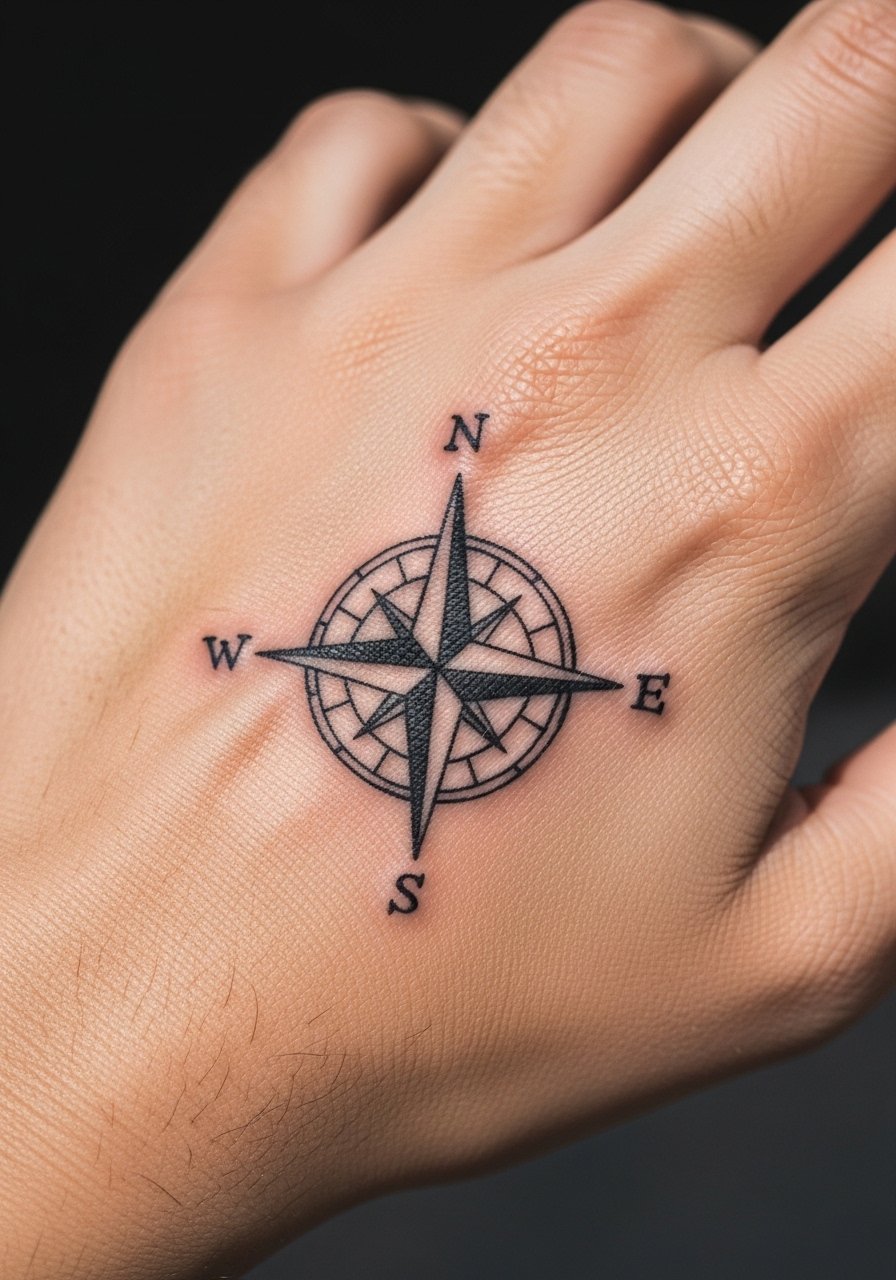
24. Compass Rose That Spans the Center of the Hand
Consultation lead: compass roses read best when the central point is centered on the palm-meets-hand junction and the points extend toward the fingers. That central spot experiences a lot of abrasion, so favor linework and small dots for shading rather than heavy fill. Expect moderate pain and a one to two hour session. The mistake is adding heavy fill near the center which fades quickly. For showing off, cuff a leather bracelet on the wrist below the compass so the design sits visually between accessories.
25. Tiny Symbols Trail from Wrist to Middle Finger
Visual impact lead: a trail of tiny symbols that graduates in size from wrist to middle finger reads deliberate when spacing increases toward joints. This approach reduces blowout risk and creates motion. Sessions can be segmented into short bursts and the pain varies by symbol location. Common error is keeping uniform tiny size across joints. Ask your artist to scale symbols up slightly near knuckles. For wearing comfort after the session, reach for a soft cotton tee that you can move without rubbing directly over fresh ink.
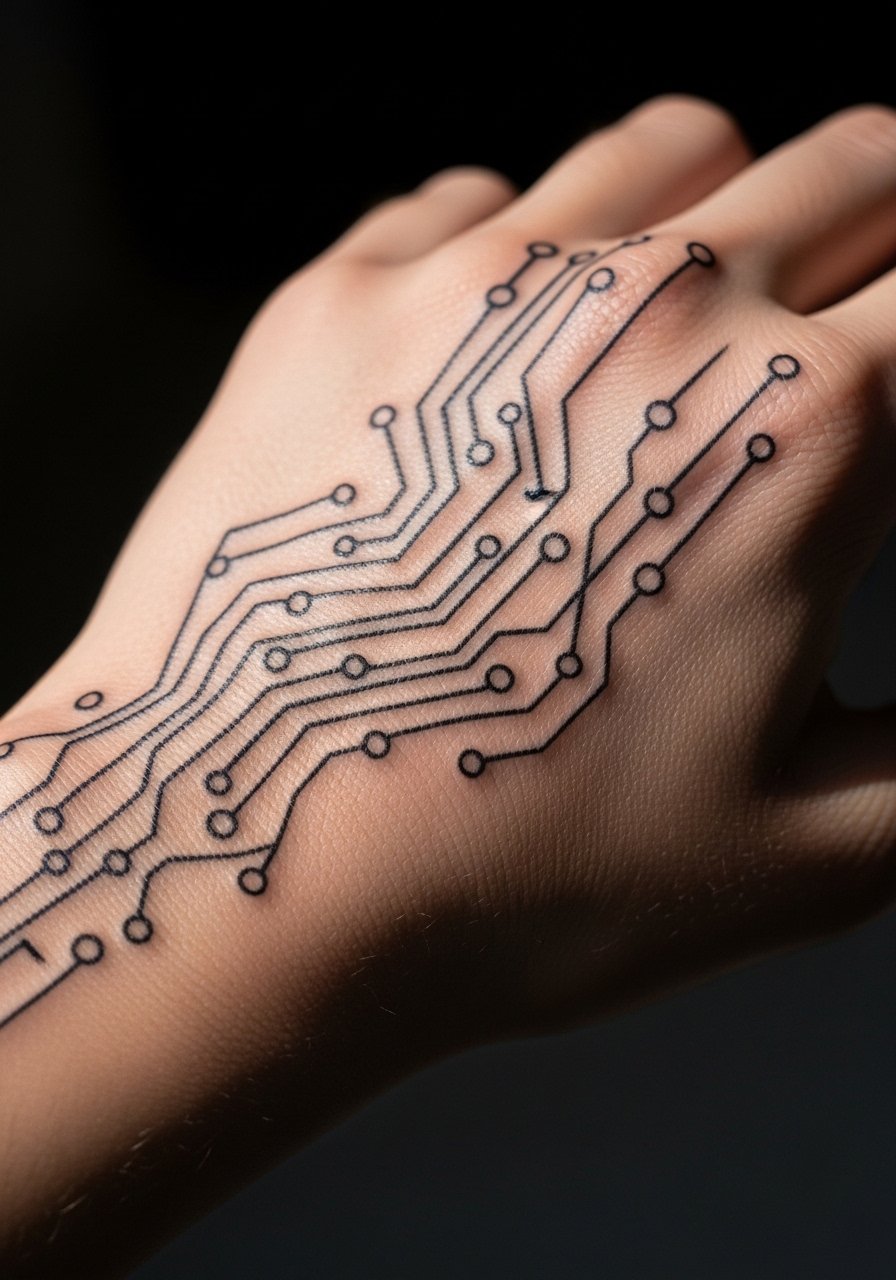
26. Futurist Circuitry Pattern That Maps Tendons and Veins
Personal observation: circuitry patterns that echo tendons and superficial veins can look high-tech while following natural lines. They require more negative space than they initially appear to need. Expect a two hour session and moderate discomfort on tendons. The mistake is filling in the voids with heavy solid color, which defeats the circuitry illusion. Ask for crisp linework and clear skin windows. For a modern look, wear a minimalist metal cuff to highlight the pattern without covering it.
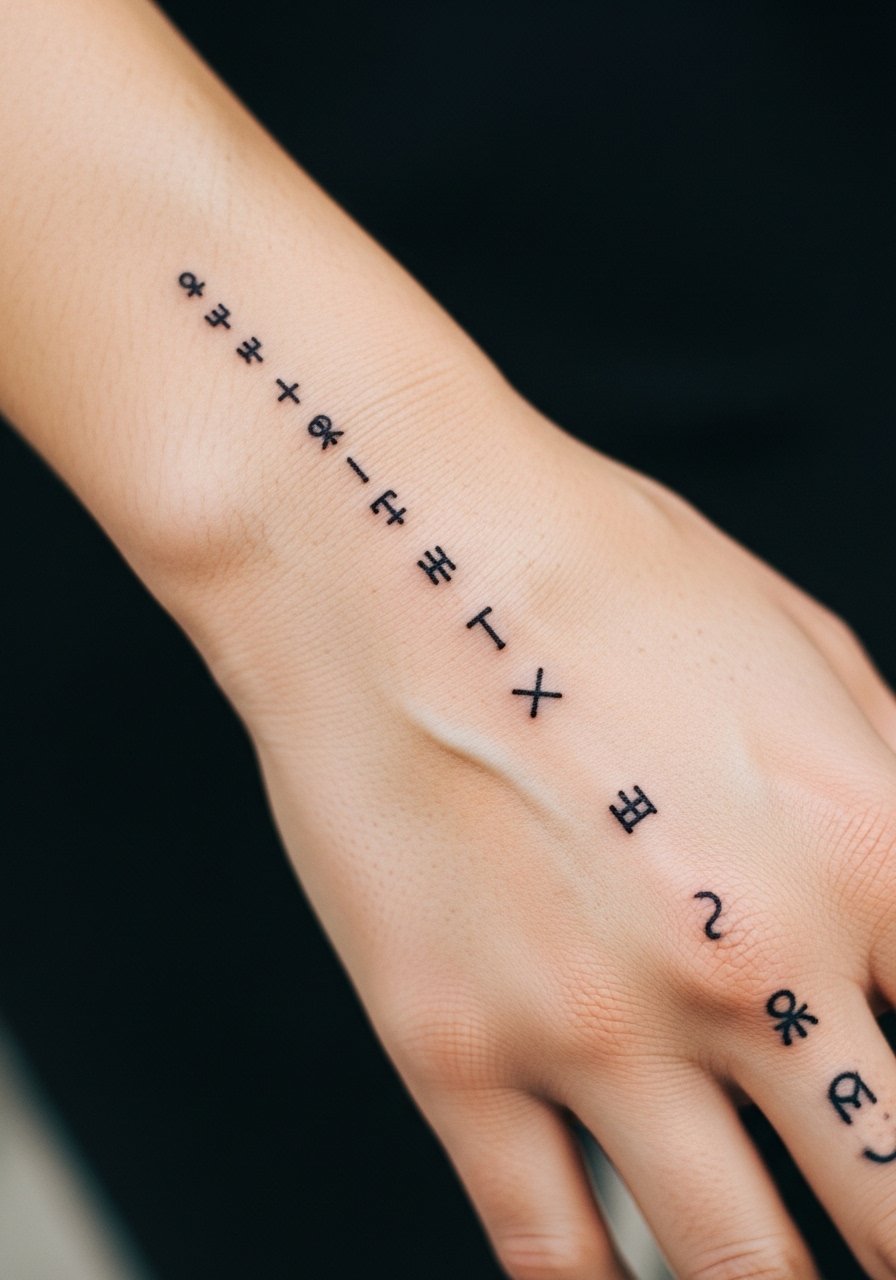
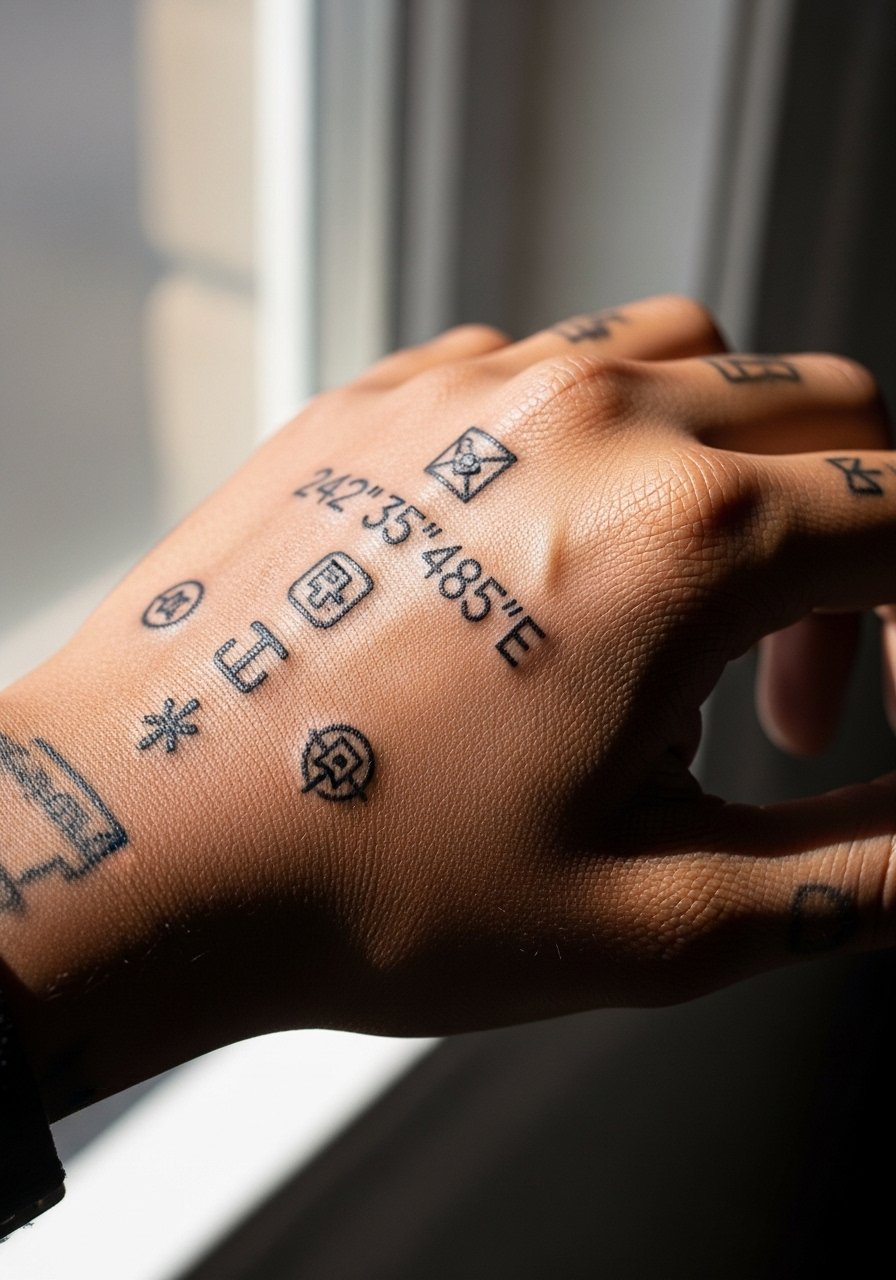
27. Heritage Glyphs and Coordinates Across the Hand
Consultation lead: text and coordinate tattoos are literal, so specify exact spelling or numbers and request the exact font in the stencil. These pieces age predictably if placed away from high-friction zones like nail beds and palm creases. Expect short sessions and moderate pain. A common mistake is using tiny serif fonts that blur; pick a clear sans or monospaced style for longevity. For showing the piece, low-profile rings keep attention on the glyphs. Discovery pathways include searching local shop portfolios, niche hashtag threads, and community forums to find artists who specialize in readable micro text.
Frequently Asked Questions
Q: Will fine line full-hand work blur faster than bold traditional pieces?
A: From what I've seen, fine line work on hands does tend to blur sooner because of the constant movement and washing hands undergo. Bold, saturated traditional pieces often age into a readable silhouette, while fine lines may need a touch-up around year two to three if you want them to keep crisp edges.
Q: How should I prepare clothing-wise for a full-hand session that includes knuckles and thumb wraps?
A: Wear a loose, short-sleeve or button-up top you can easily roll back so the artist can access the hand without fabric tugging. A zip-up hoodie is also handy if you need coverage after the session and want easy access during the appointment.
Q: Do hand tattoos hurt more than forearm pieces and how long are sessions usually?
A: Yes, hand and finger areas are often more painful because the skin is thinner and closer to bone. Session times vary by coverage, but expect full-hand pieces to take anywhere from one to several hours. Larger or more saturated designs may be divided into multiple sessions.
Q: Are there designs you should avoid putting on a full hand because they will look bad fast?
A: Extremely tight micro-detail across knuckles or tiny script that crosses skin folds tends to age poorly. Avoid asking for ultra-small stipple clusters in moving zones. If you love detailed art, request scale adjustments and ask your artist for a longevity-minded stencil.
Q: How do I find an artist who understands hand-specific tech and long-term wear?
A: Use discovery pathways like shop directories, specialist hashtag searches, and community forums that focus on hand work. Look for portfolios that show healed hand photos rather than just fresh shots and ask about touch-up policies in consultations.
Q: Will a full-hand tattoo limit career options or professional settings?
A: It can in some fields. Hand tattoos remain more visible than many placements and some employers still have strict policies. Think about future job settings and consider placement choices that can be partially concealed or that align with your career plans.
