
The tattoos that still read clean at year ten are rarely the ones that looked most intricate the day they were finished. Heavier linework and sensible spacing make a rose hold its shape through sun, sweat, and life changes. Below are 21 traditional rose drawings that balance vintage flash with real-world aging, plus what to ask your artist and how to wear each piece during the session and after.
1. American Sailor Rose with Anchor
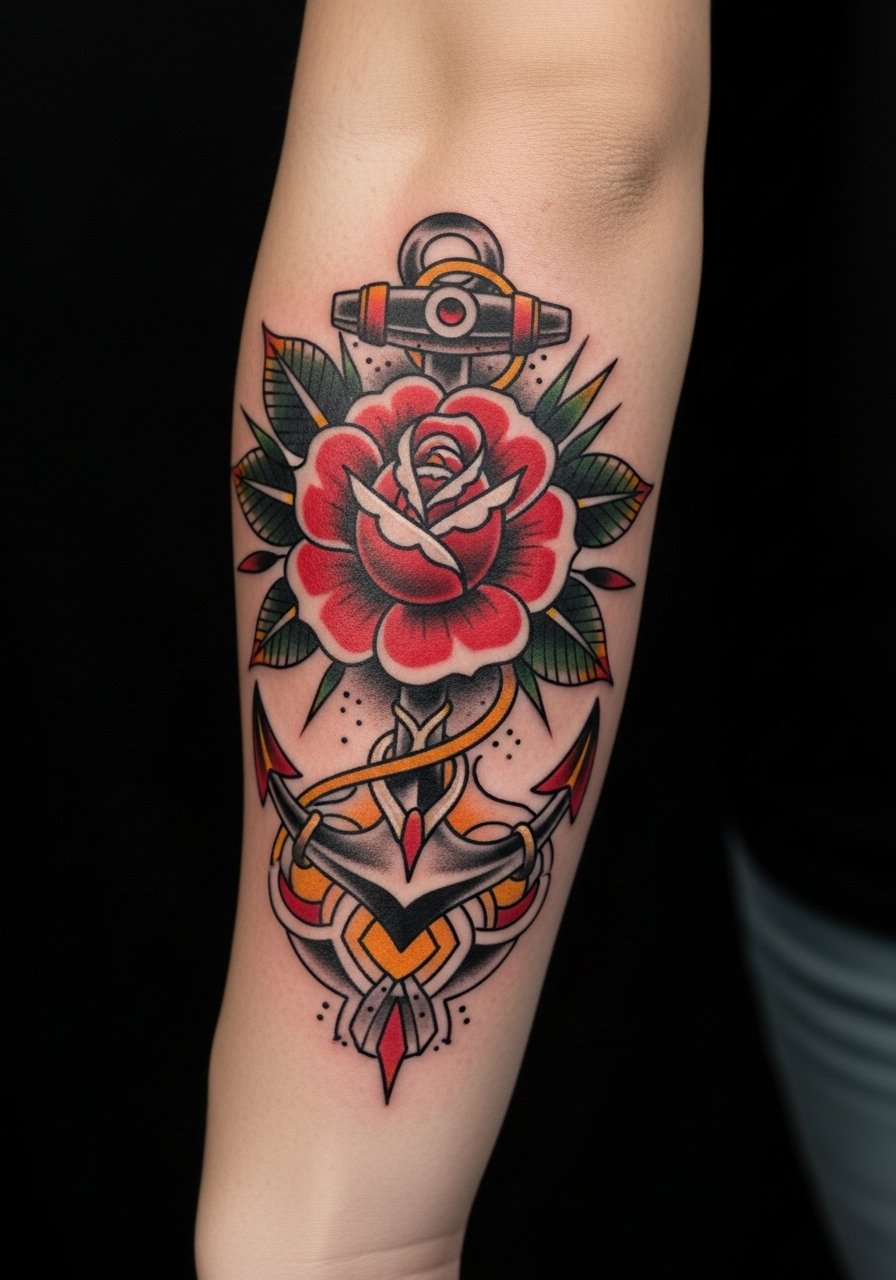
The classic sailor pairing works when you want a symbol that reads from a distance. I recommend asking your artist for slightly heavier linework around the anchor to prevent blurring at the thin shank over time. Pain on the outer forearm is mild, and one session usually gets a 4–6 inch piece finished. A common mistake is compressing the anchor details too small, which ages into indistinct shapes. Expect touch-ups for saturation at year three to five depending on sun exposure. For the appointment wear a rolled short-sleeve tee so the artist can access the area without tugging.
2. Bold Outline Rose Solo on Wrist
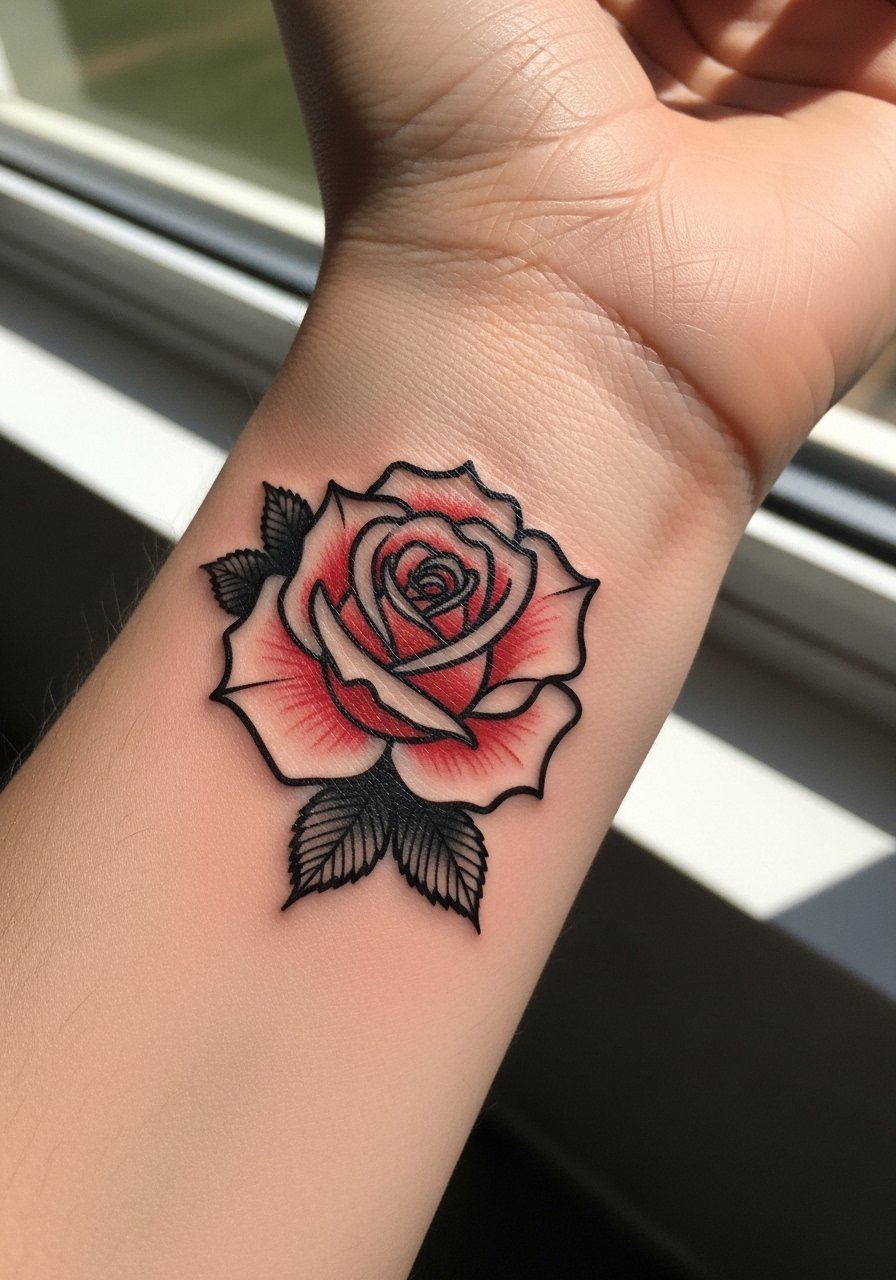
Wrist roses are tiny statements that need confident linework to last. I suggest keeping the bloom at least three inches across so the petals have room to breathe. The wrist is a higher friction zone from watches and bracelets, so tell your artist you want reinforced outlines and a little extra saturation near the edges. Pain is moderate and sessions are short. A frequent error is choosing thin fine line there, which often fades into a blur. Show-off styling pairs this with a slim leather watch on the opposite wrist to keep attention balanced.
3. Neo-Traditional Rose with Swallow on Shoulder
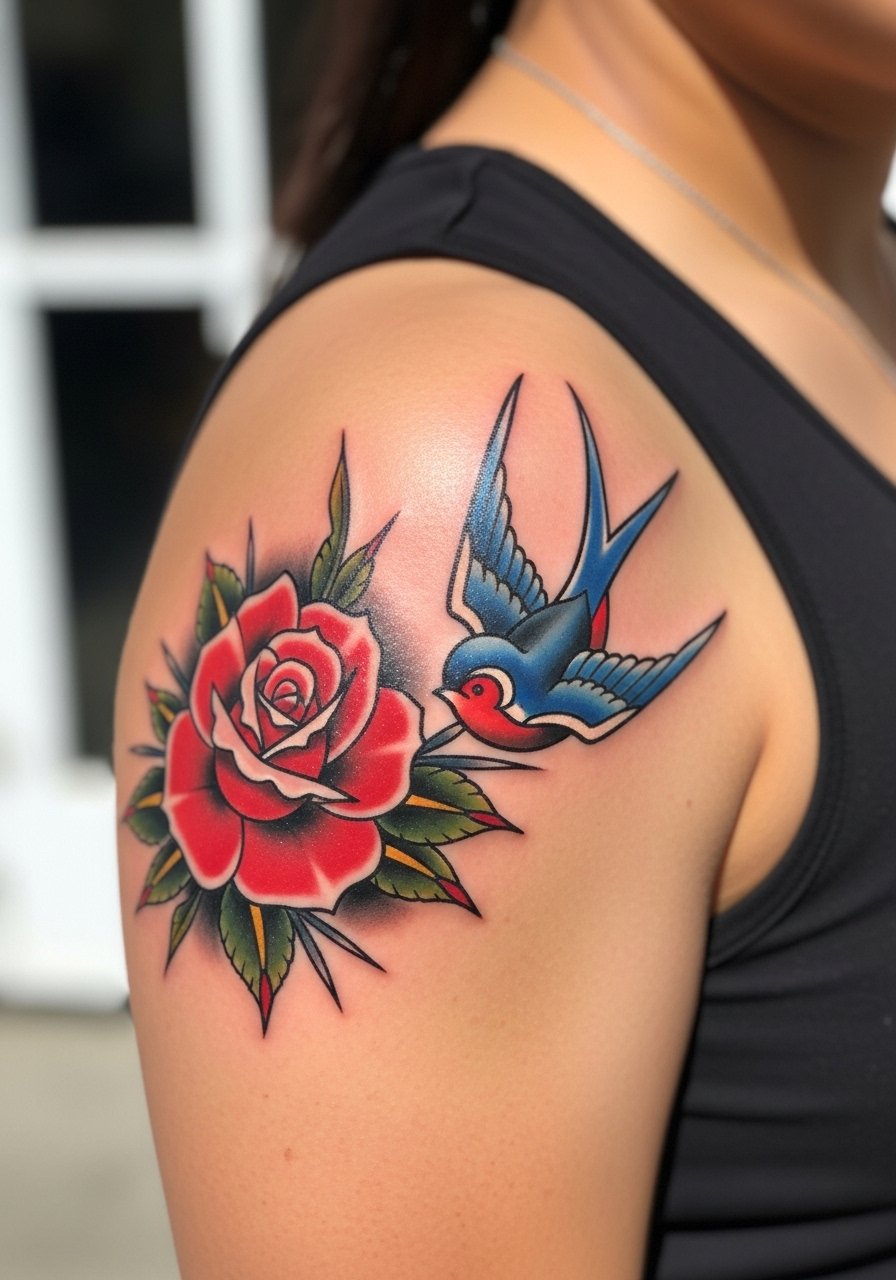
The shoulder gives room for narration and motion, which neo-traditional shading uses to tell a short story. Ask for gradual saturation and smooth transitions rather than tiny micro detail that can muddle when the arm flexes. Sessions take two to three sittings if you want the swallow to read clearly around the bloom. Many artists split into two camps on complex shading for shoulders. One camp prefers high saturation now for longevity, the other favors layered sessions to avoid overworking the skin. Decide which method you prefer during consultation. For the session wear a sleeveless tank or a loose button-up you can pull aside.
4. Heart-Encircled Rose on Upper Arm
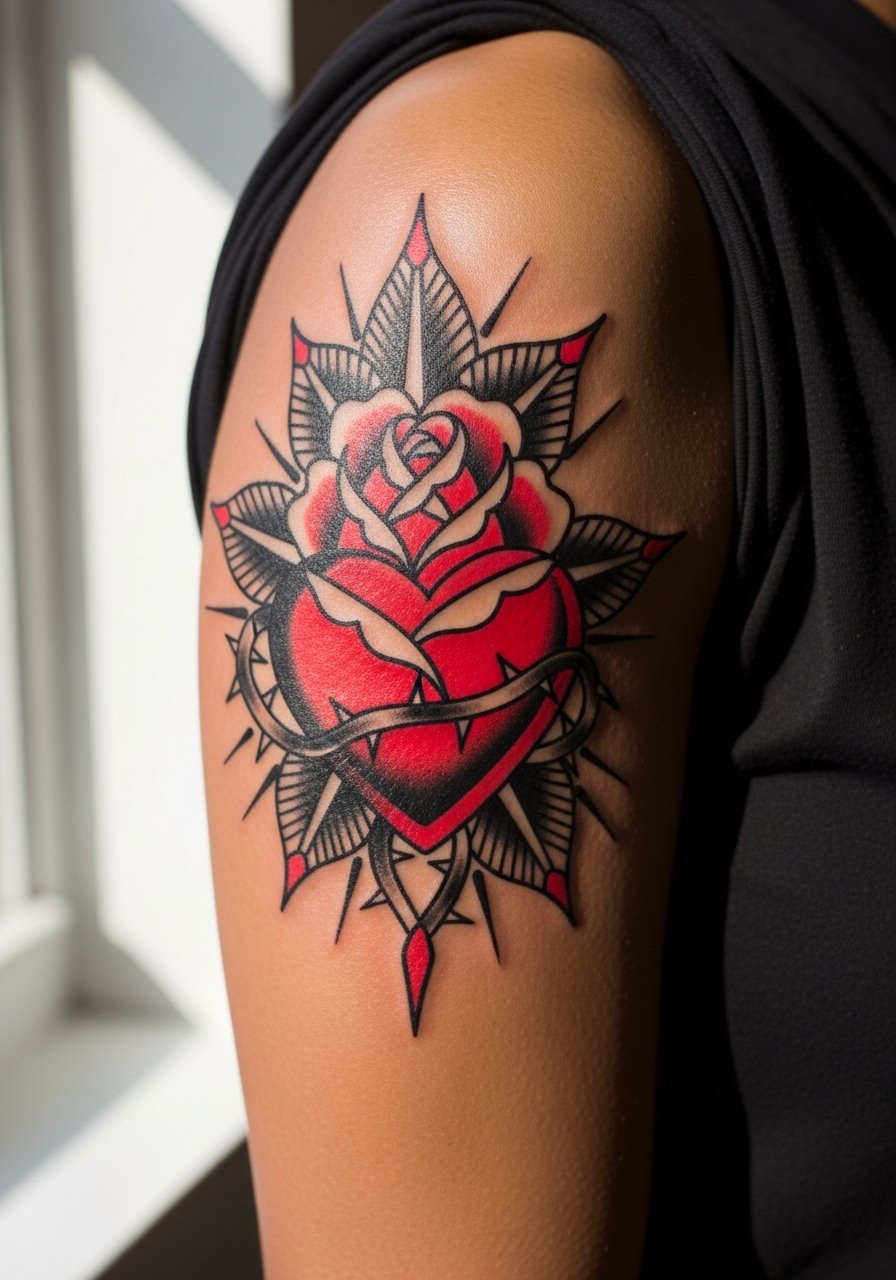
This romantic combo reads like flash but is highly customizable with banner text or initials. Upper arm work tolerates denser ink, so request a clear spacing plan in your consultation. Many people ask for tiny script inside the banner and later regret the illegibility once the tattoo heals. Pain is low and a single session often suffices for a 4–7 inch composition. To show it off, throw on a fitted tank top after healing and keep necklaces minimal so the chest area does not compete.
5. Realistic Rose Bloom on Ribcage
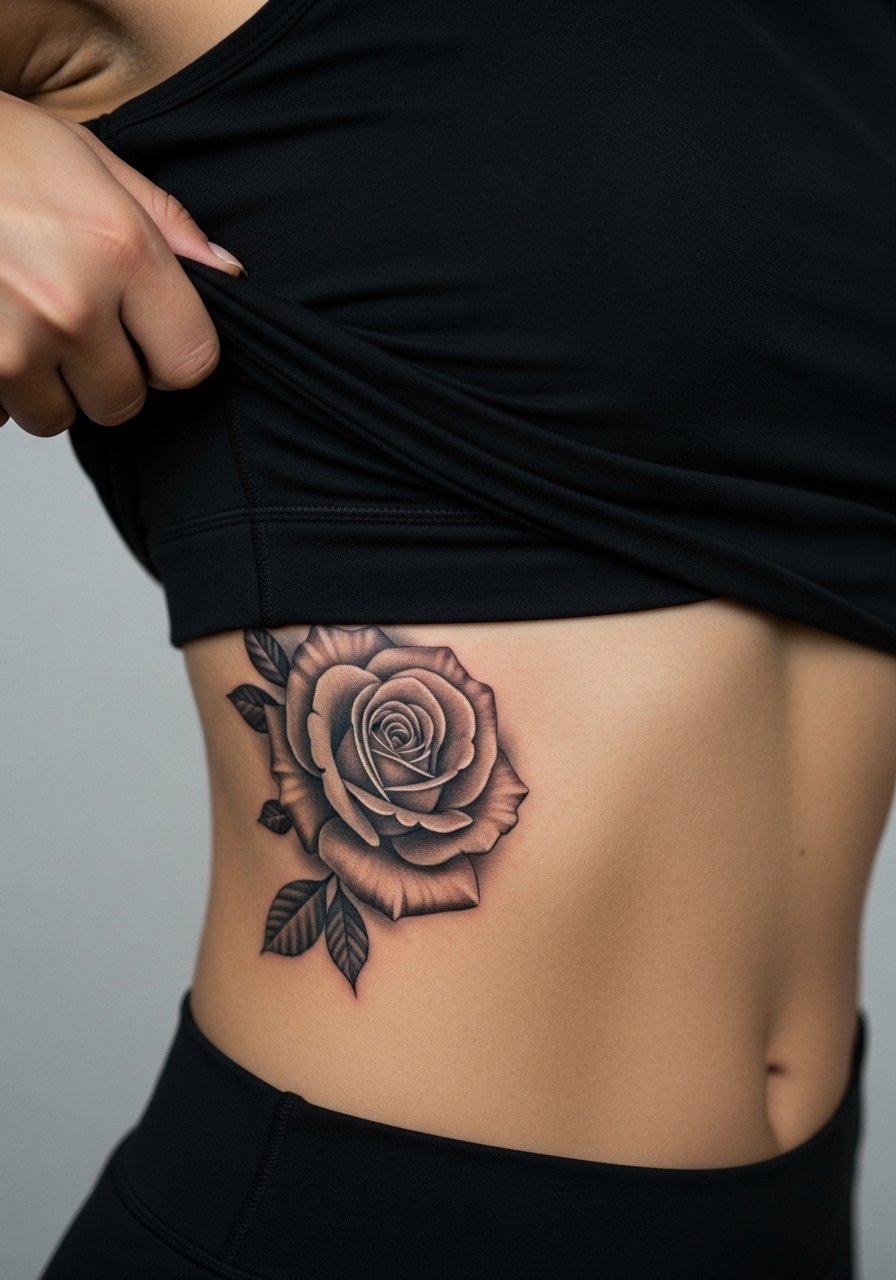
Fair warning, ribs rank high on most pain charts. But the canvas lets realistic shading sing if you can sit through longer sessions. Ask your artist to space petals with negative space so the darks do not merge after healing. A common mistake is compressing too much contrast into tight areas, which becomes muddy by year two. Expect three or more sittings for photo-real depth. Hand care and steady breathing between passes make sessions more tolerable. Because this sits under clothing often, wear a cropped athletic top you can lift without full undress for the appointment.
6. Watercolor Rose Splash on Inner Bicep
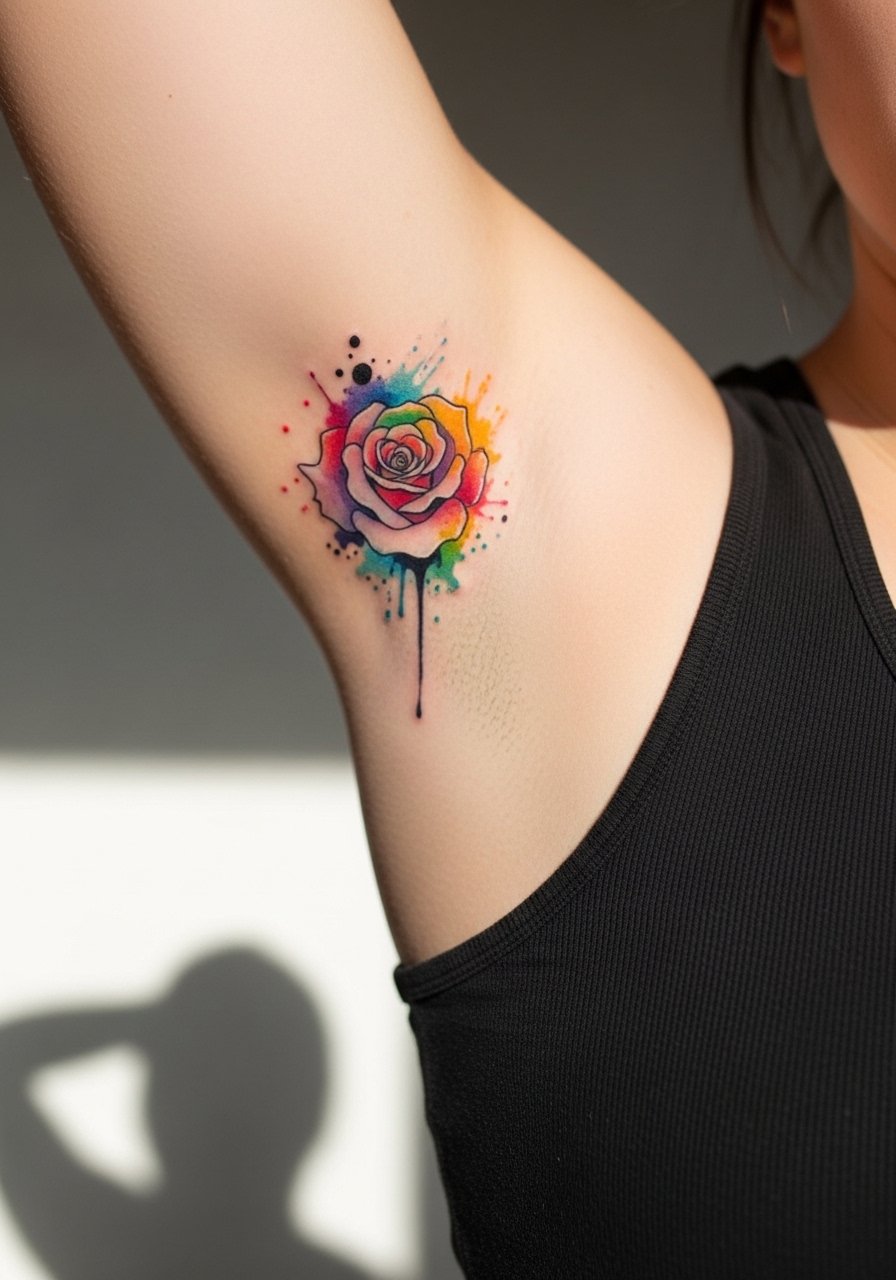
Watercolor pieces look like paintings, but they age differently depending on placement. Inner bicep skin holds color reasonably well, yet softer edges can feather over time if the pigment sits too shallow. Artists fall into two camps here. One side argues watercolor should avoid high-movement areas, the other says controlled saturation and layered work keeps the wash stable. When consulting, request sample healed photos on inner biceps and ask about their layering plan. Pain is moderate and two sessions is common. For session comfort pick a loose tank top so you can raise and reposition the arm without rubbing the fresh ink.
Studio Day Picks
The forearm, ribcage, and inner bicep pieces above ask for different prep, and a few targeted items smooth the session and first week.
-
Stencil transfer paper kit. Lets you preview the exact placement on curved areas like the shoulder and forearm so the anchor or swallow sits where you expect.
-
Topical numbing cream. Applied as directed before a ribcage or inner bicep session eases early discomfort without changing how the lines settle.
-
Thin protective film roll. Useful for wrist and hand pieces that face constant friction in the first 48 hours.
-
Fragrance-free gentle body wash. Cleanses sensitive spots like inner biceps and ribcages without stripping natural oils that help healing.
-
Aquaphor healing ointment. A thin layer for the first few days locks in moisture on beginner forearm pieces without clogging pores.
7. Minimalist Rose Outline on Finger
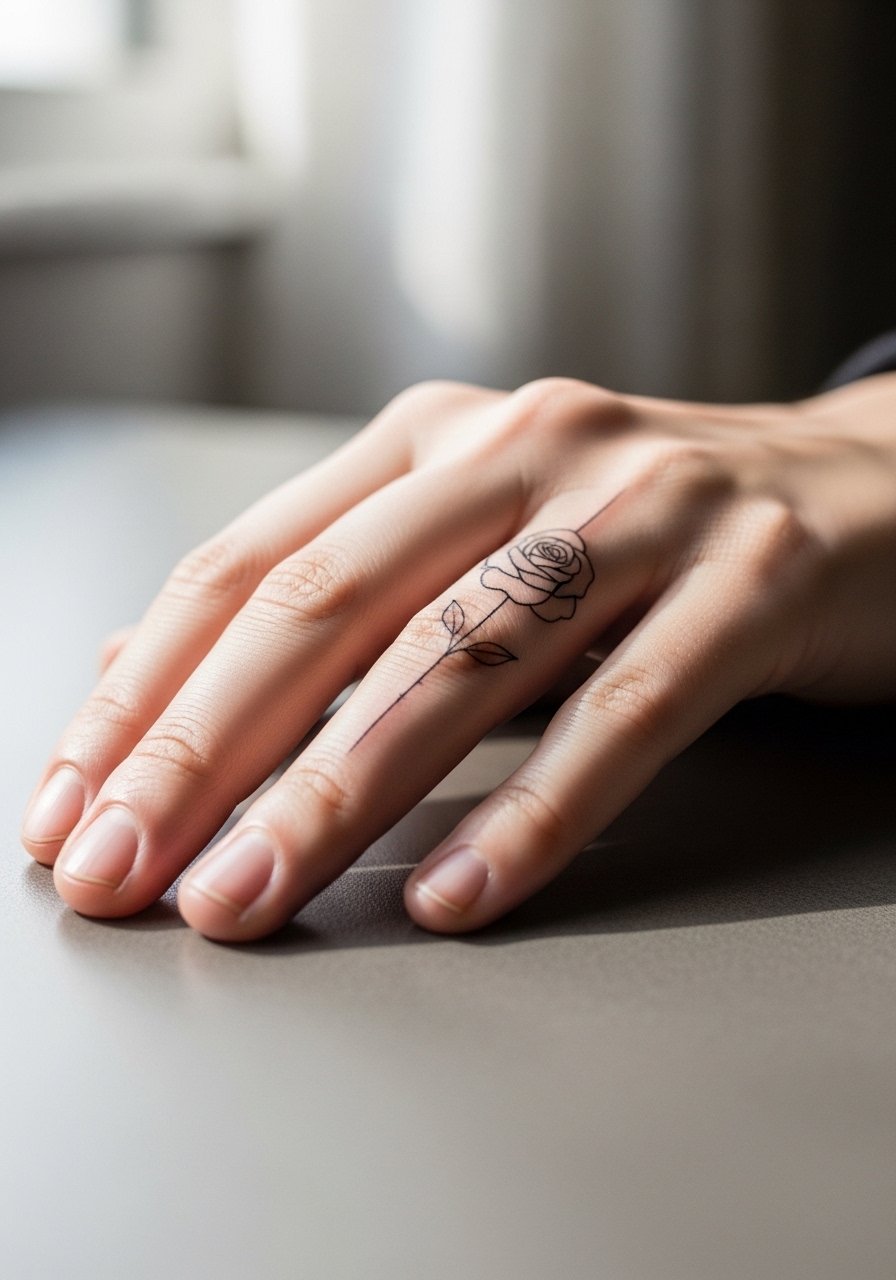
Finger tattoos are intimate and visible, and they need to be honest about longevity. I tell clients to accept that finger ink often needs touch-ups and to choose simpler line compositions. The skin is thin and moves constantly, so thicker single-line petals are a better bet than tiny cross-hatching. Sessions are quick but healing is fussy because of hand washing. A frequent mistake is picking micro script inside petals which disappears. For session day avoid rings and slip on a thin chain bracelet afterward if you want subtle adornment that does not rub the site.
8. Dagger-Pierced Rose on Calf
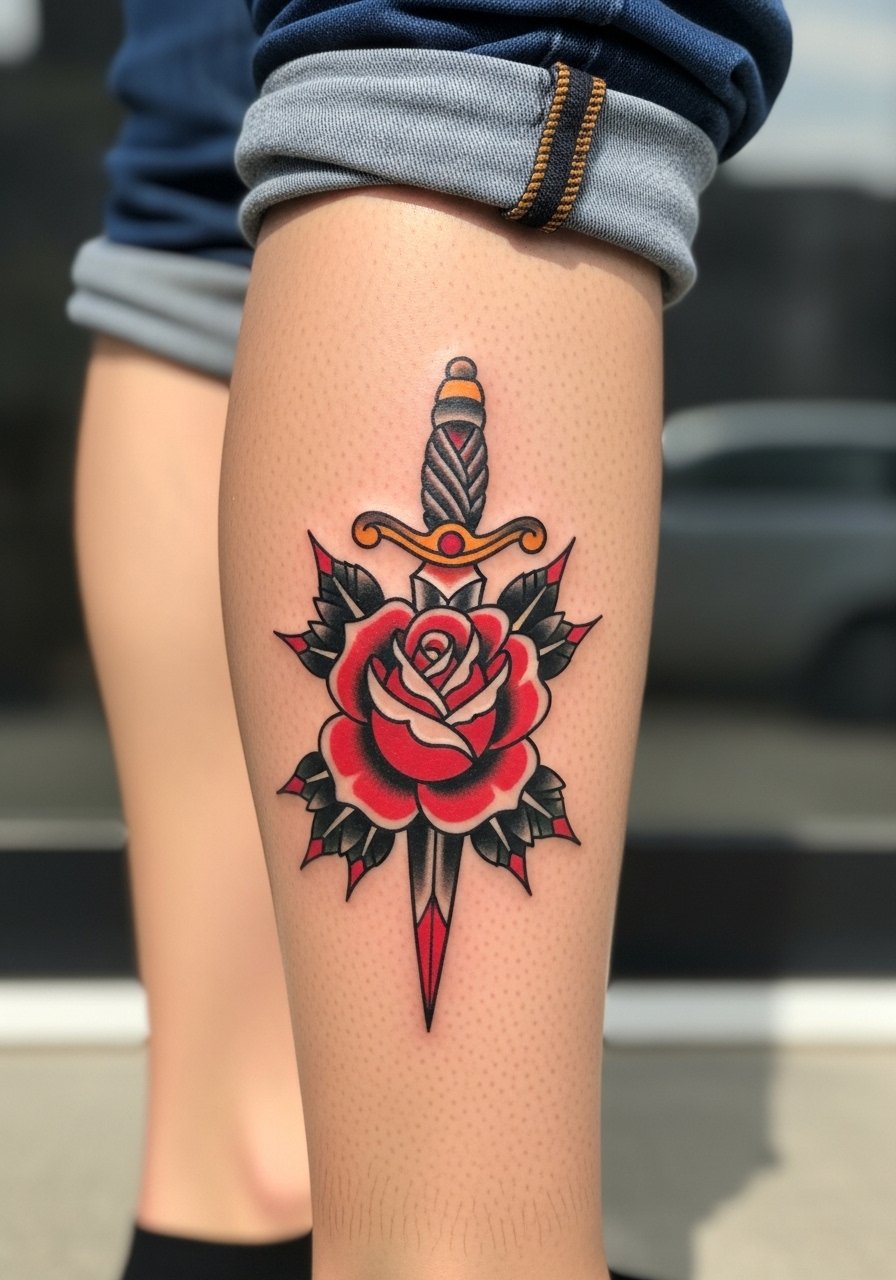
Calf placements tolerate vertical motion and larger scenes, which suits a dagger motif. Tell the artist you want the blade scales slightly larger than usual so it reads after muscle growth or weight change. Pain is moderate and a single longer session often completes a 5–9 inch piece. People make the mistake of over-detailing the blade edge, which can blur against the rose's petal edges. For showing off wear rolled jogger pants or cropped pants so the piece sits squarely above the boot line.
9. Japanese-Influenced Rose Bush Sleeve Starter
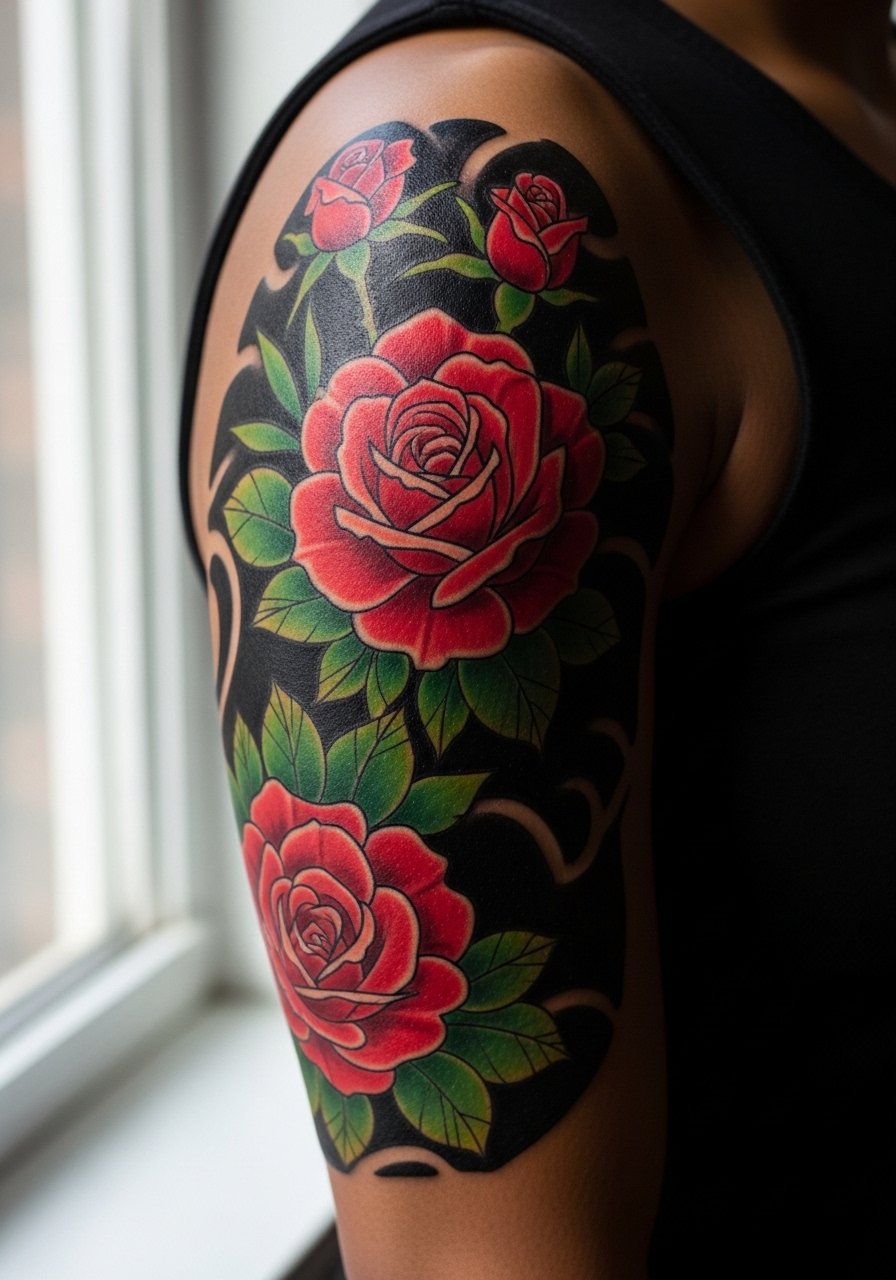
I recommend this if you want a piece that can expand into a sleeve over years. The key is designing modular roses and leaves so new panels slot in without awkward overlaps. Sessions are multiple and placement planning matters more than single-session detail. A common mistake is starting with too many small roses that leave no breathing room for future elements. Ask your artist for a master layout and leave open space for fillers. For session comfort wear a loose button-down shirt you can pull aside for upper arm access.
10. Neo-Traditional Rose Garland on Thigh
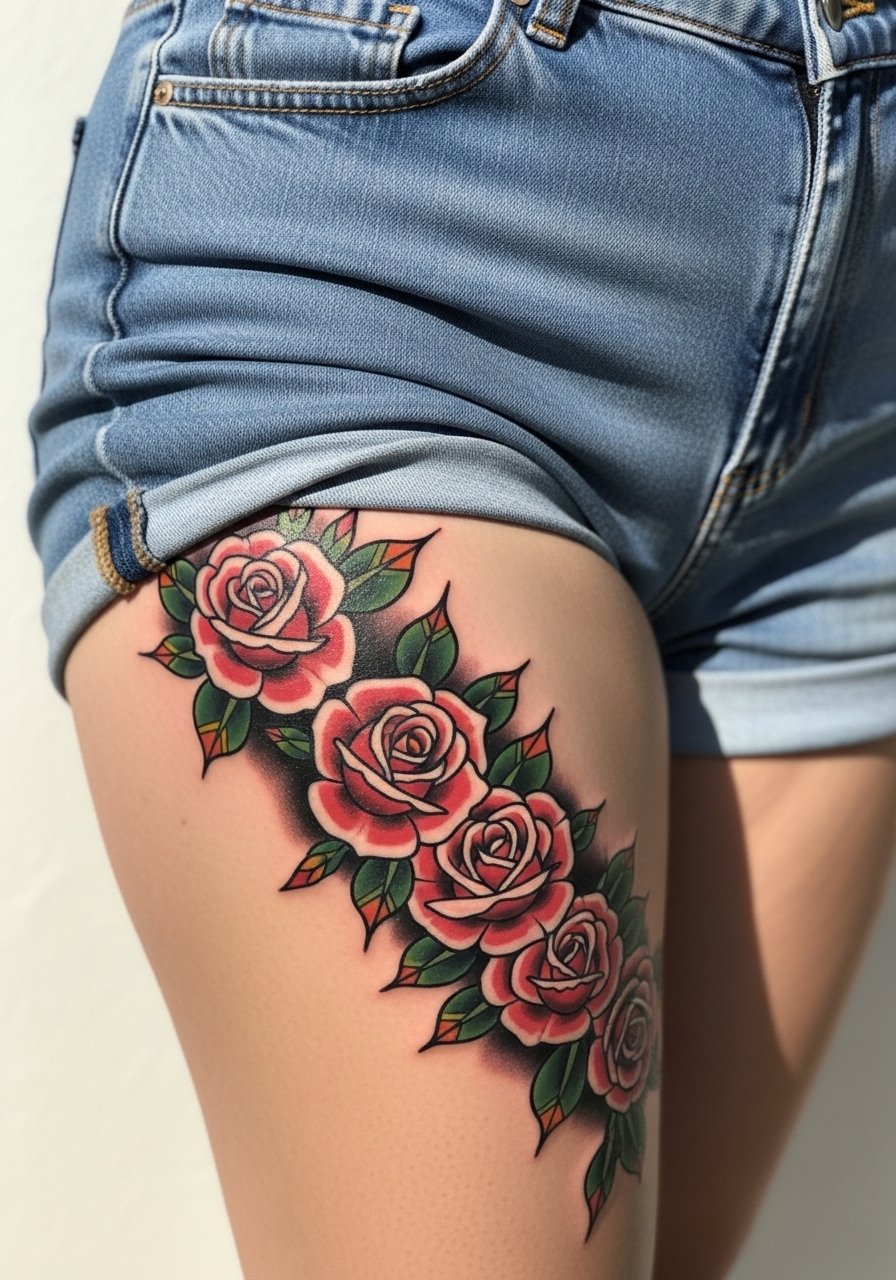
The thigh is a forgiving surface for elaborate color work, which is why garlands read well there. Tell your artist you want flow that follows the leg muscles so the garland wraps naturally when you sit or walk. Sessions are comfortable and relatively low pain, but the thigh can hide poor spacing until healed. A mistake is adding too many small leaves that merge into a single dark mass after healing. For showing the piece off pick high-waisted denim shorts or a skirt with a slit to frame the curve.
11. Blackwork Thorn Wrap on Ankle
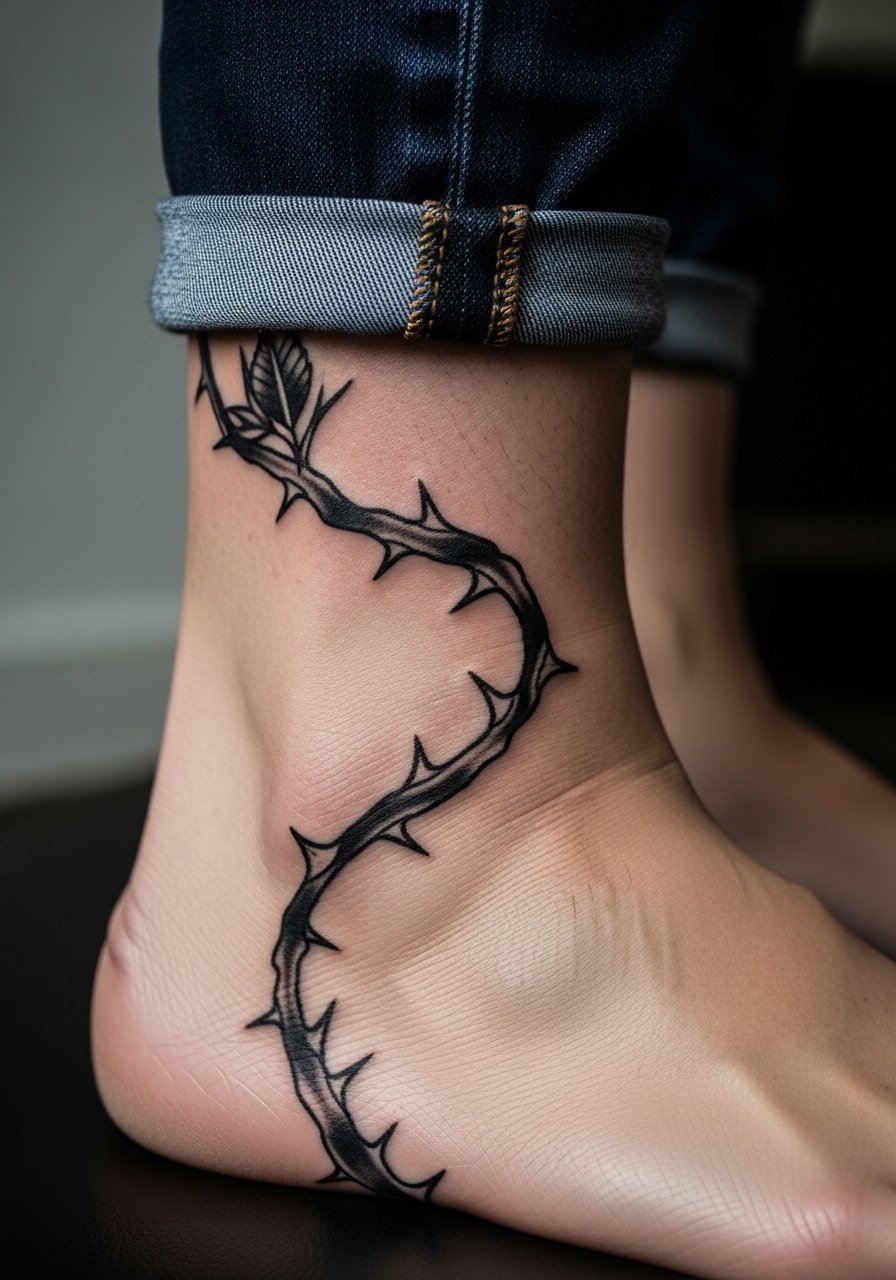
Blackwork is reliable on darker skin because it prioritizes contrast. The ankle faces high friction and shoe pressure so thick lines and solid fills keep the image readable. One session can often complete a 4–6 inch wrap. A typical misstep is using thin stems that fade under socks and shoes. Expect touch-ups earlier than on upper arms. For session day roll up jeans or wear sandals, and after healing slip on ankle-length boots to show the piece with edge.
12. Classic Rose with Banner on Chest
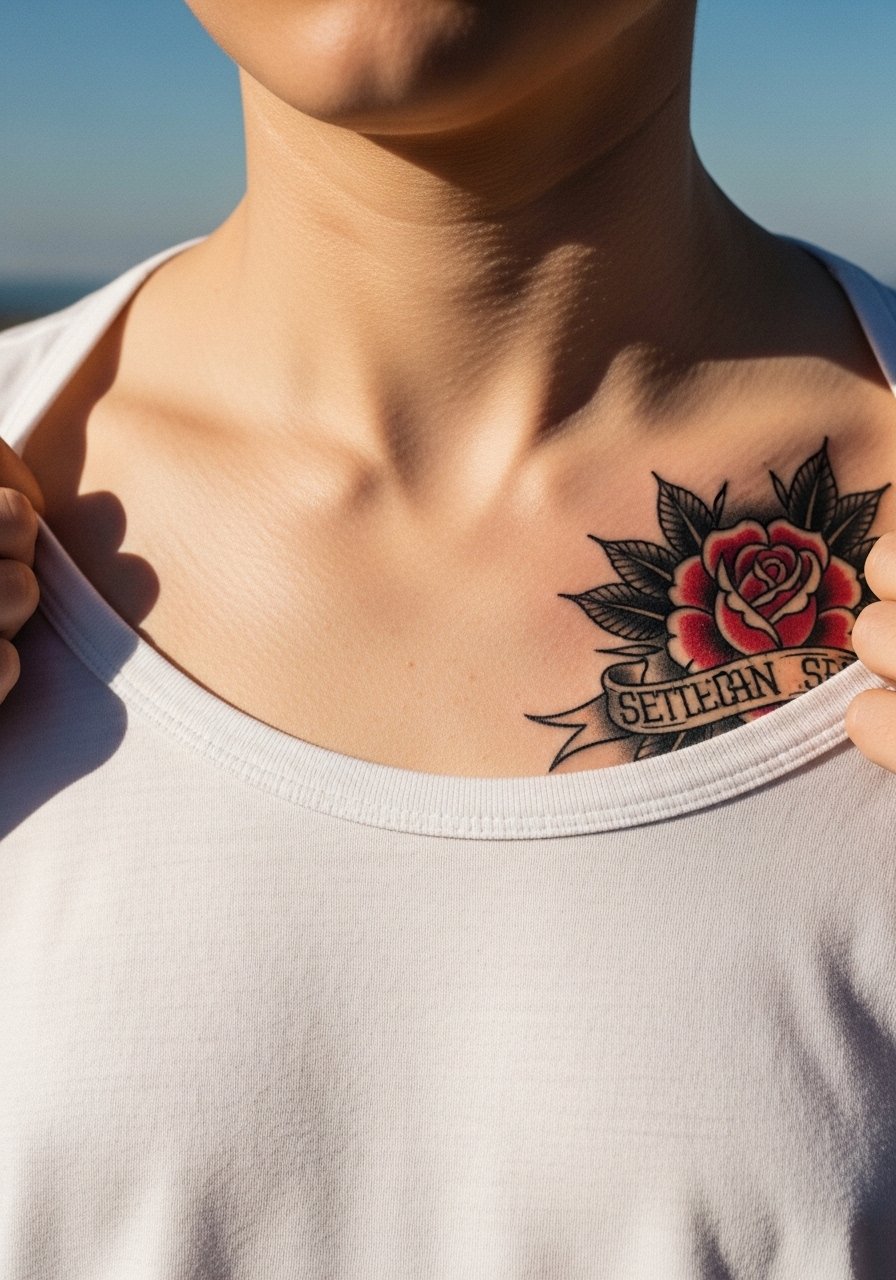
Chest pieces sit near the heart and age with daily sun exposure if you wear low necklines. I advise clients to choose banner text at a legible size and to preview stencil placement in a mirror. The chest stretches and compresses with breathing, so spacing matters for line retention. Pain varies but is generally moderate. A common mistake is tiny script that blurs into the shaded petal. For showing off pick a deep v neck tee or an unbuttoned shirt to frame the banner.
13. Starter Single Rose for Sleeve Builders
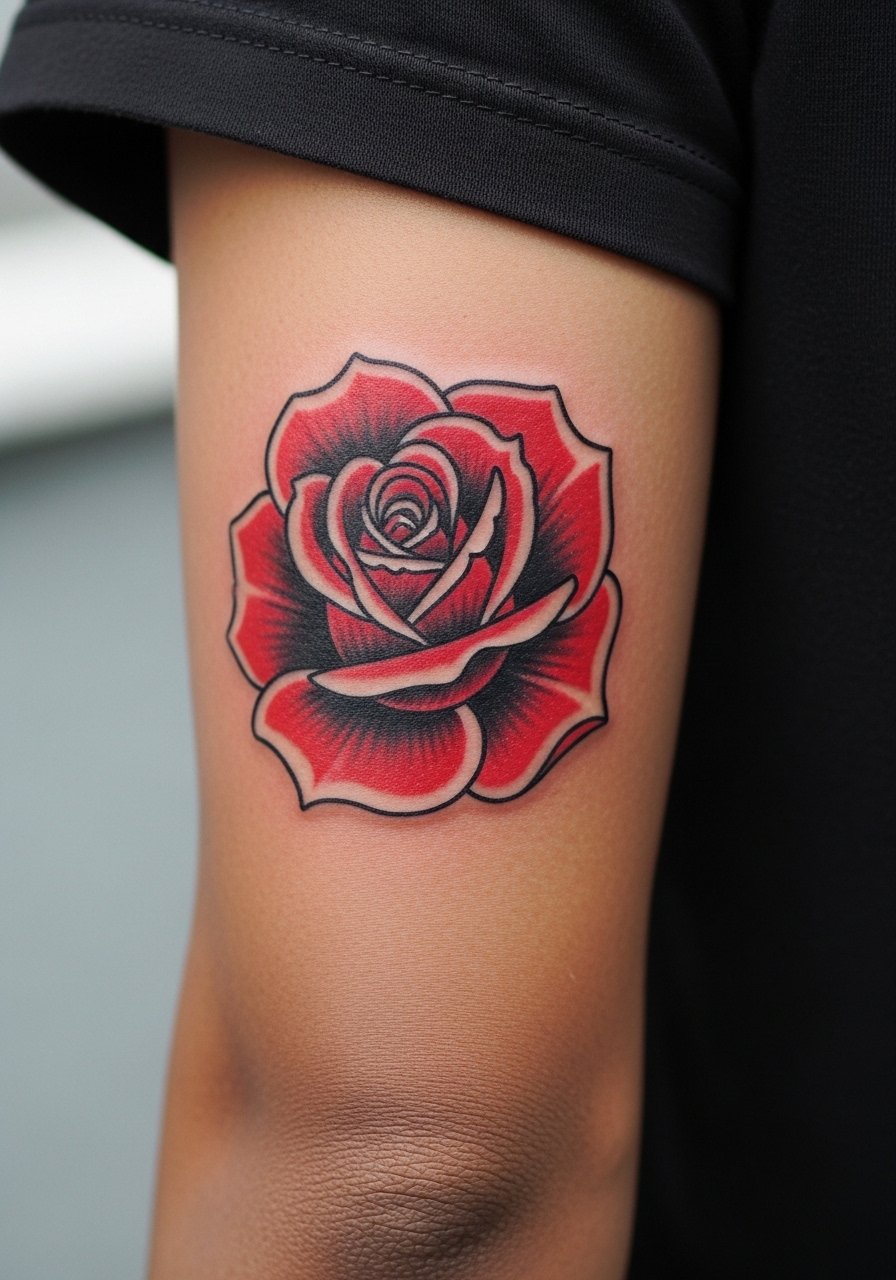
If you plan a sleeve later, begin with a well-spaced focal rose that anchors future pieces. Tell your artist you want negative space around the bloom for fillers like leaves or scrollwork. The bicep is forgiving on aging and holds saturation well. Many people make the mistake of cramming the starter too close to the elbow where future joins become awkward. Expect flex days after a session and wear a fitted tank top you can lift to expose the area without rubbing.
14. Thorn-Heavy Rose Emphasizing Pain and Resilience
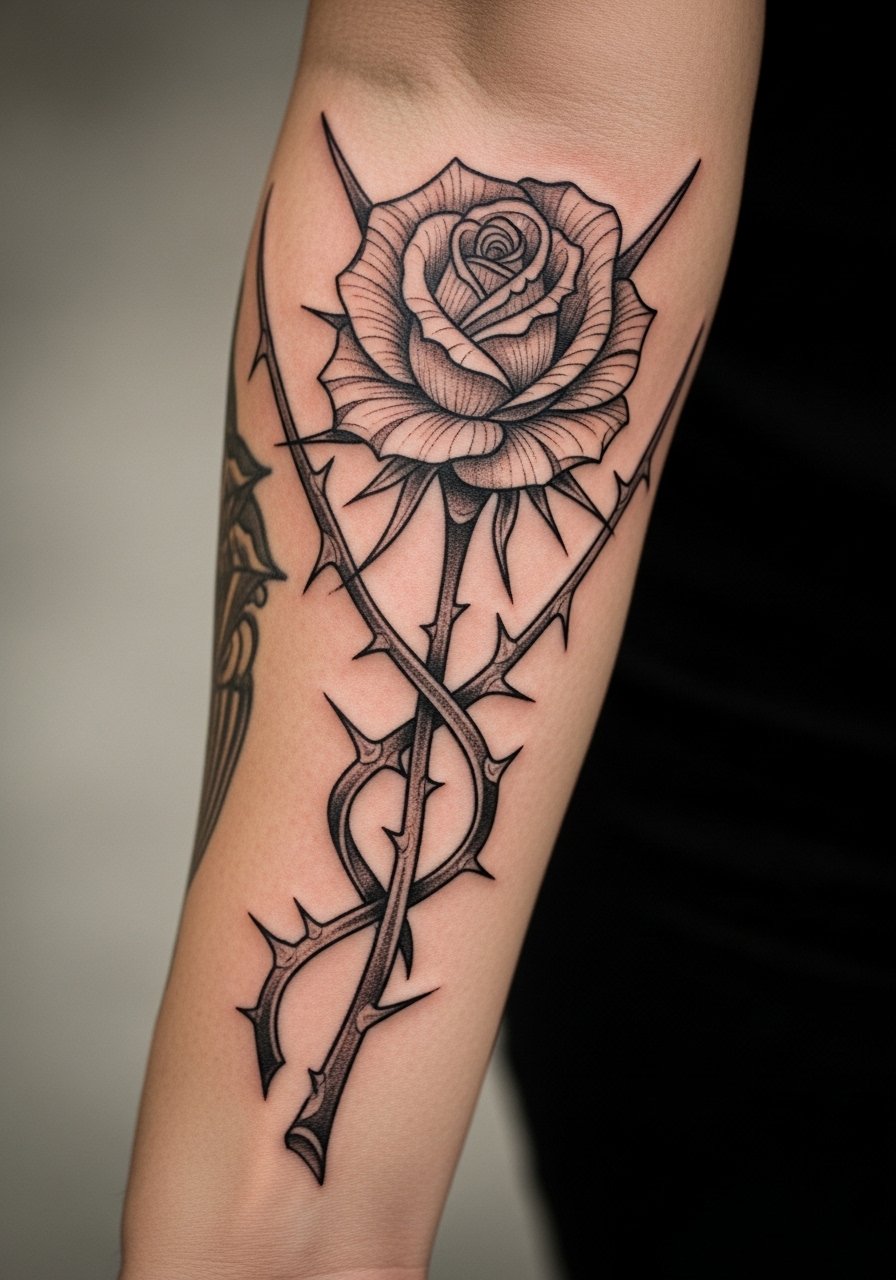
This version flips the usual beauty narrative to foreground edges and scars. I recommend stronger spacing between thorns and petals so the negative areas remain clear as the piece heals. Forearm pain is low and healing is straightforward, but tiny thorn details can blur if placed too close together. The design suits people who want symbolism leaning toward endurance rather than romance. When you consult, ask for reference healed photos of thorn work at least two years old. For showing off wear a rolled short-sleeve tee so the tattoo sits prominently on display.
15. Small Ankle Rose with Subtle Thorns
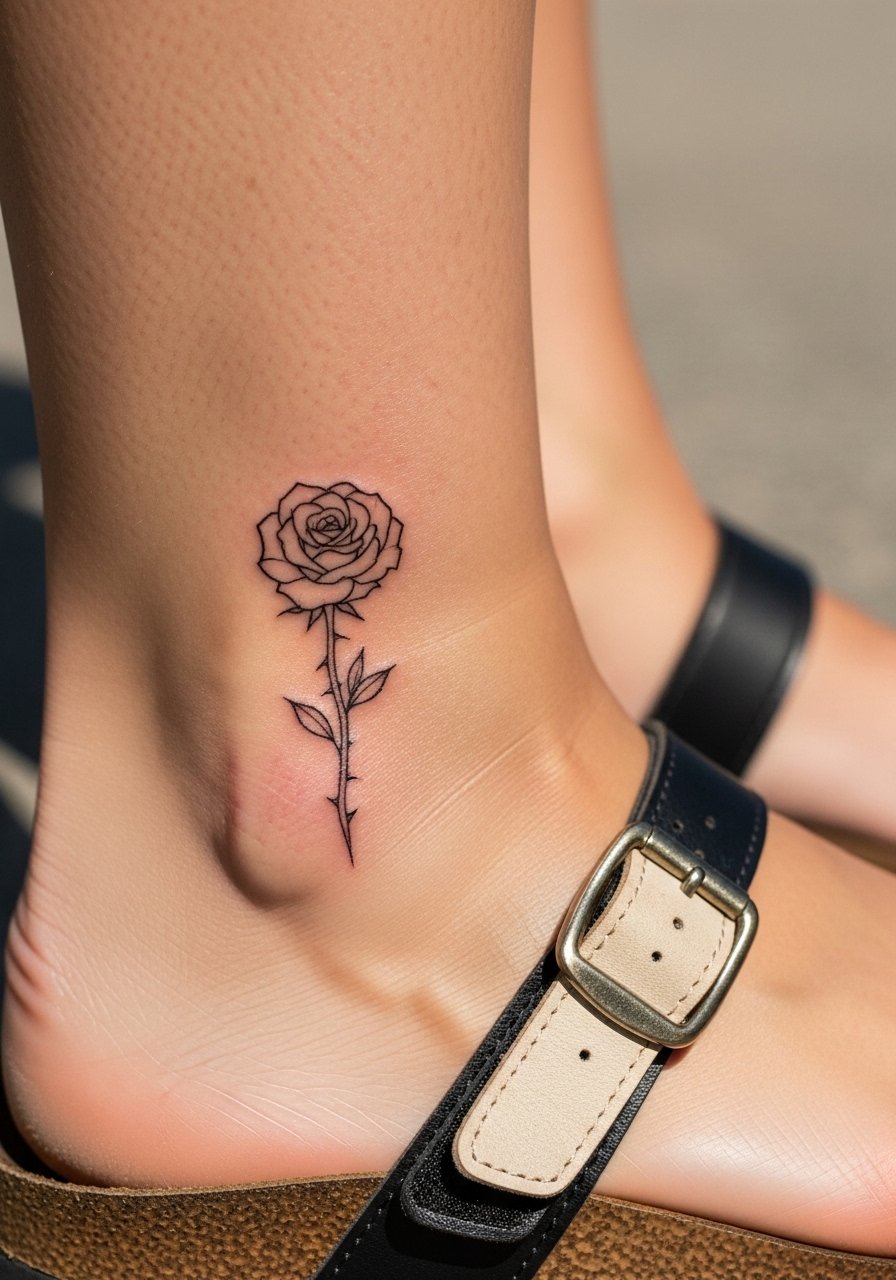
Ankle roses are discreet and affectionate choices for first-time clients. They need thicker lines than micro work because the area sees shoe rubbing. A common error is placing tiny stipple shading that fades fast in this zone. Plan for a touch-up within two years if you wear low-cut shoes often. Pain is lower than ribs but the bone proximity can sting briefly. For session wear shoes that are easy to slip on afterward and show the piece with ankle boot cutout styles once healed.
16. Bold Forearm Red Rose That Holds Up
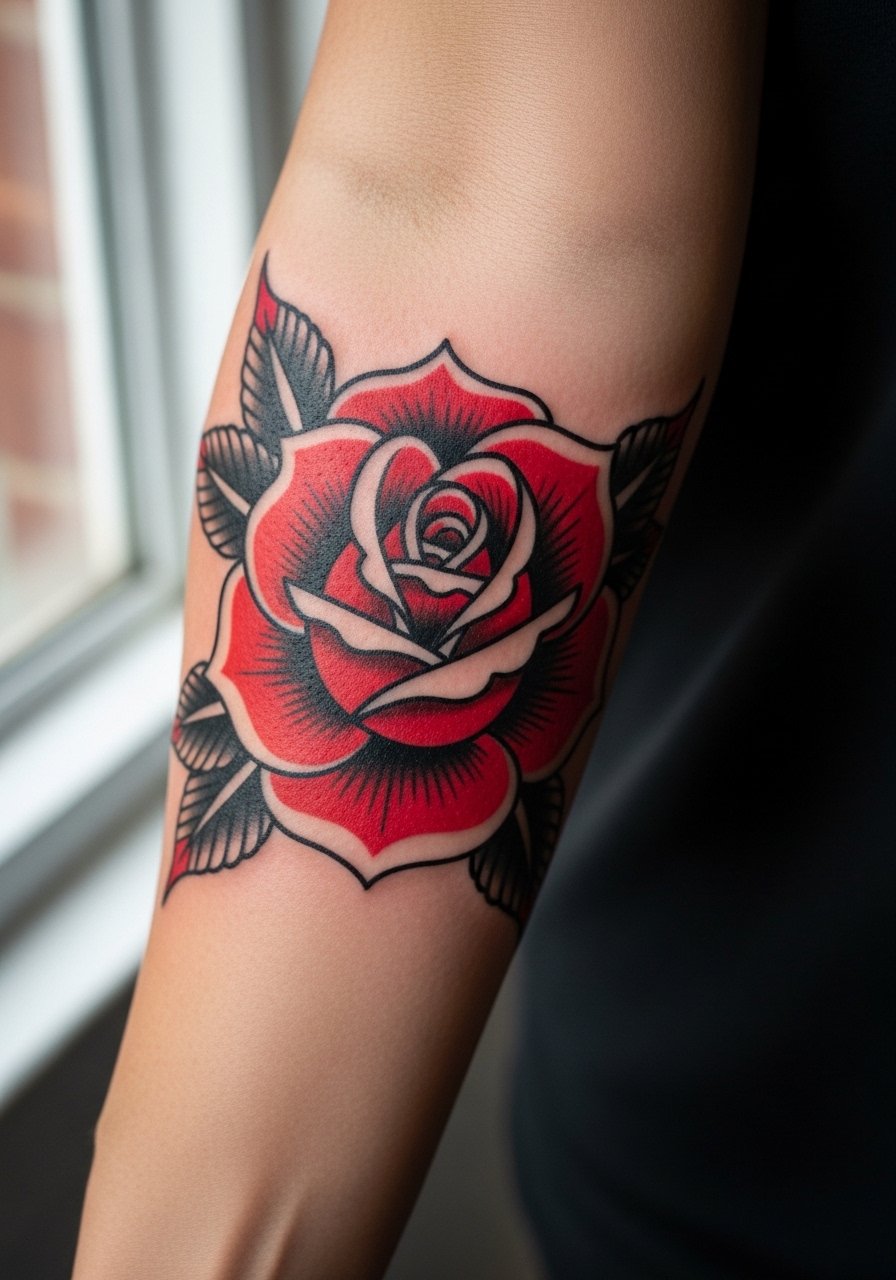
From what I've seen, clean forearm roses that last are the ones with decisive lineweight and dense saturation. Tell your artist you prefer slightly thicker outer lines and full color fills rather than feathered gradients near the edges. Forearm work is low pain and ages well if you practice sun protection. A frequent mistake is asking for too many tiny internal petal lines that merge over a few seasons. For showing off pair this with a leather cuff bracelet on the opposite arm for a balanced look.
17. Chest Cluster of Realistic Roses
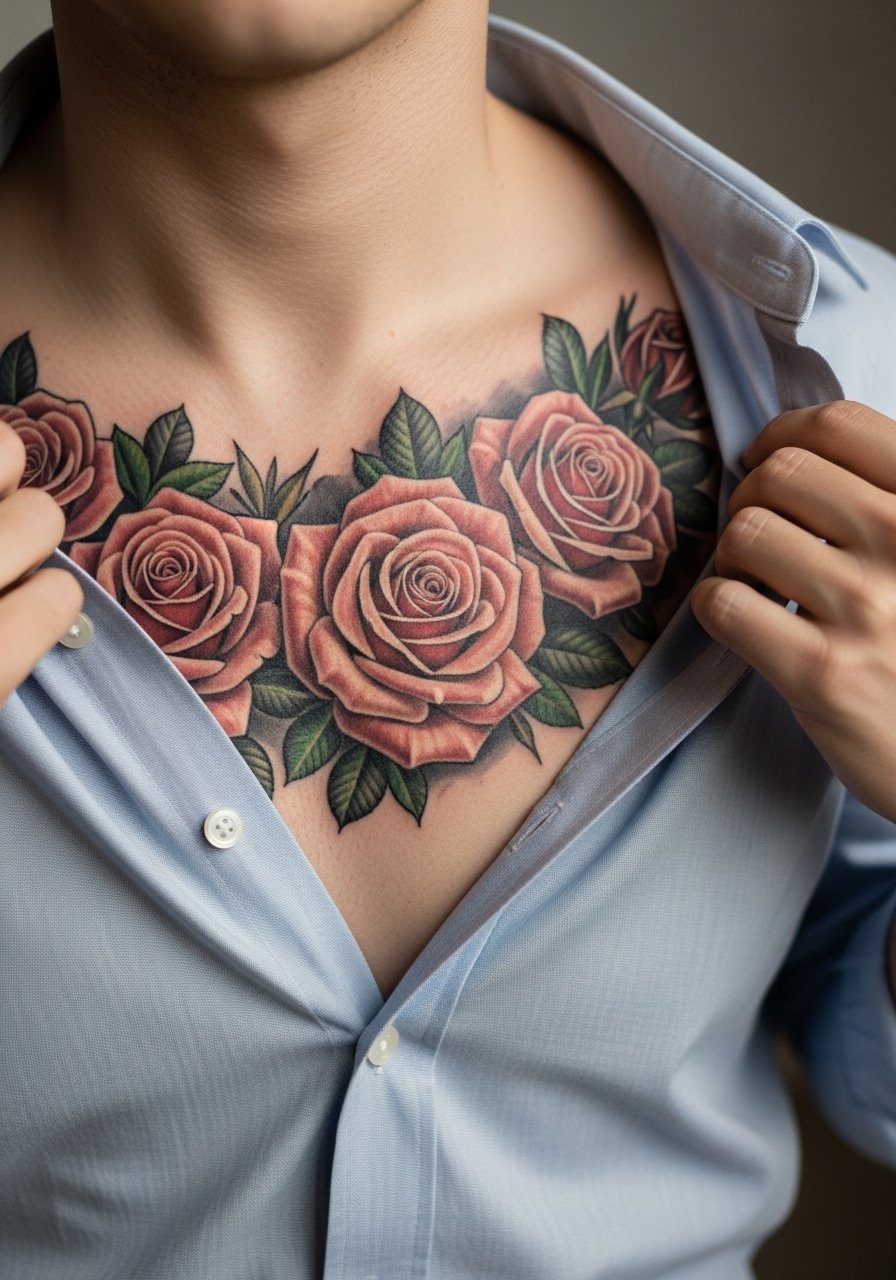
Clusters create depth and read like a floral collar. Chest skin moves with breathing so spacing and contrast planning are vital to avoid muddiness. Expect multiple sittings for tonal consistency and ask the artist how the cluster will look when you are reclined. Many clients underestimate how the chest tans and stretches with sun and workouts. For showing off pick loose button-up shirts you can unbutton to reveal the spread without exposing too much.
18. Thigh-Sized Neo-Traditional Bloom with Leaves
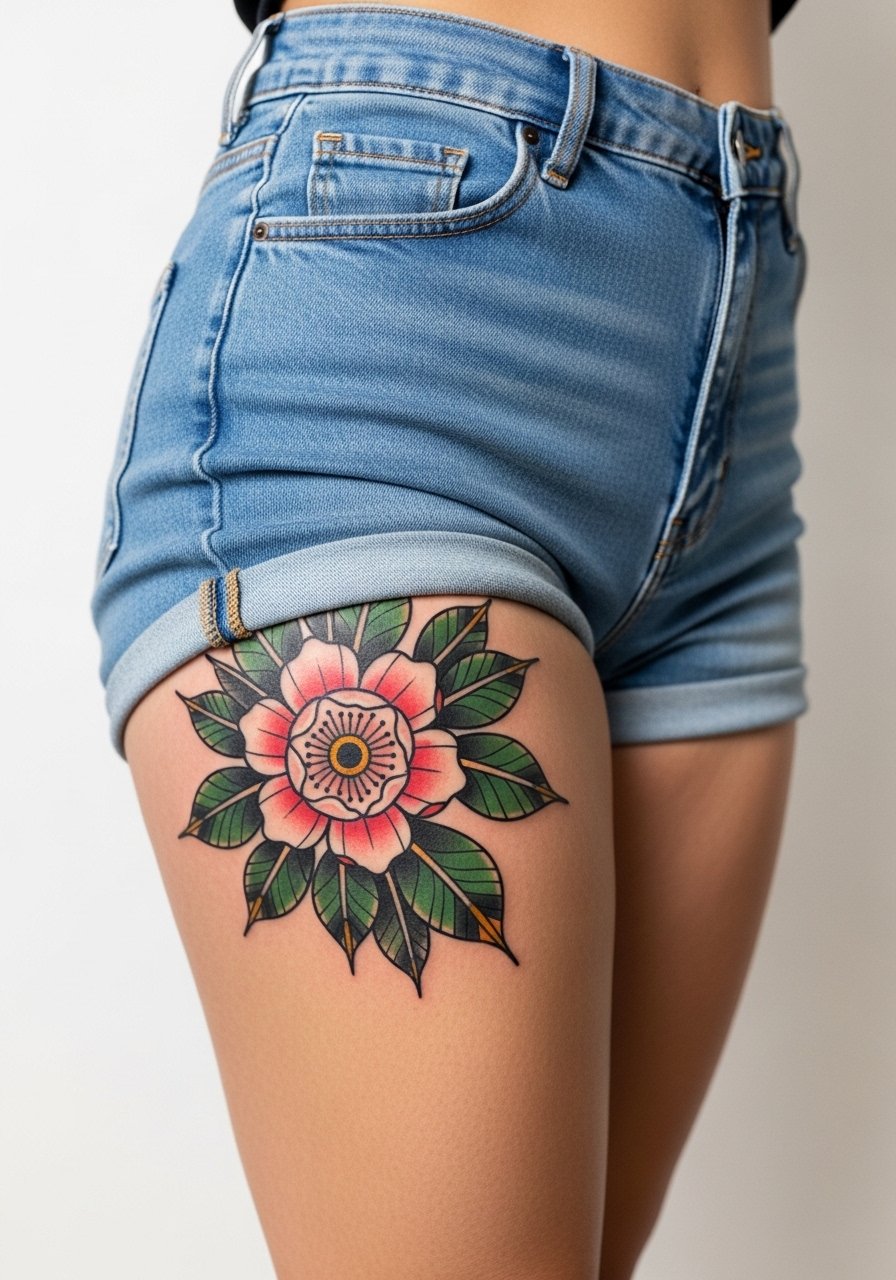
Thigh pieces handle big color fields well and are forgiving for detail. I tell clients to plan for sitting comfort and to hydrate skin in the days before long sessions. A common mistake is trying to compress a sleeve-like density into a single session, which risks overworking the skin. The thigh ages more predictably and sun exposure is controllable. For show-off aesthetics choose slit skirts or high-waisted shorts that put the bloom center stage.
19. Micro Rose on the Wrist with Bracelet Pairing
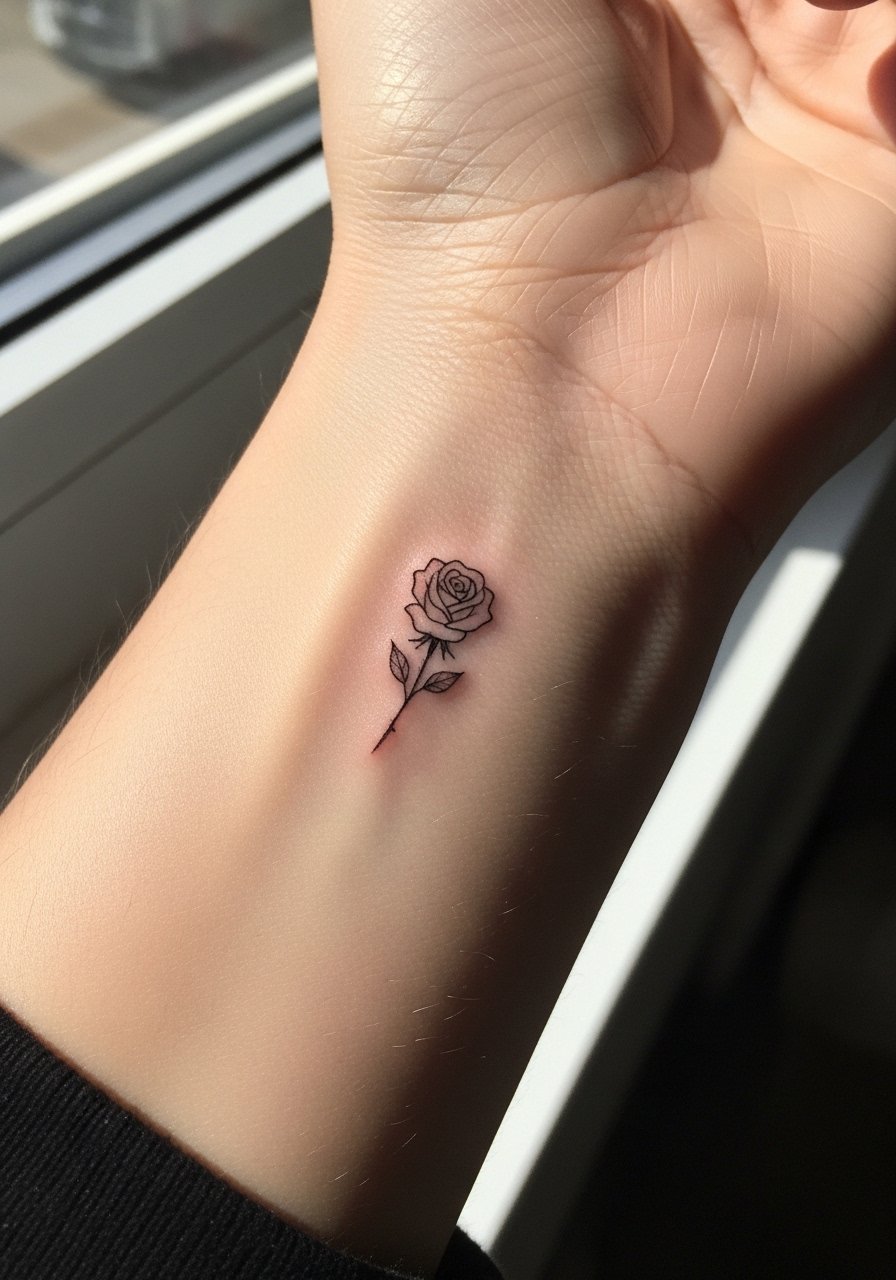
Micro wrist roses have a delicate presence but require honest sizing. If you want the petals to remain legible beyond a year, request a slightly larger negative space inside the bloom. The wrist faces handwashing and sunlight so touch-ups are common. A standard mistake is asking for dense stipple inside the petals which disappears. To frame the piece try a thin chain pendant necklace worn just above the wrist area or stacked dainty bracelets that do not sit over the tattoo.
20. Tiny Back-of-Neck Rose for Hidden Statements
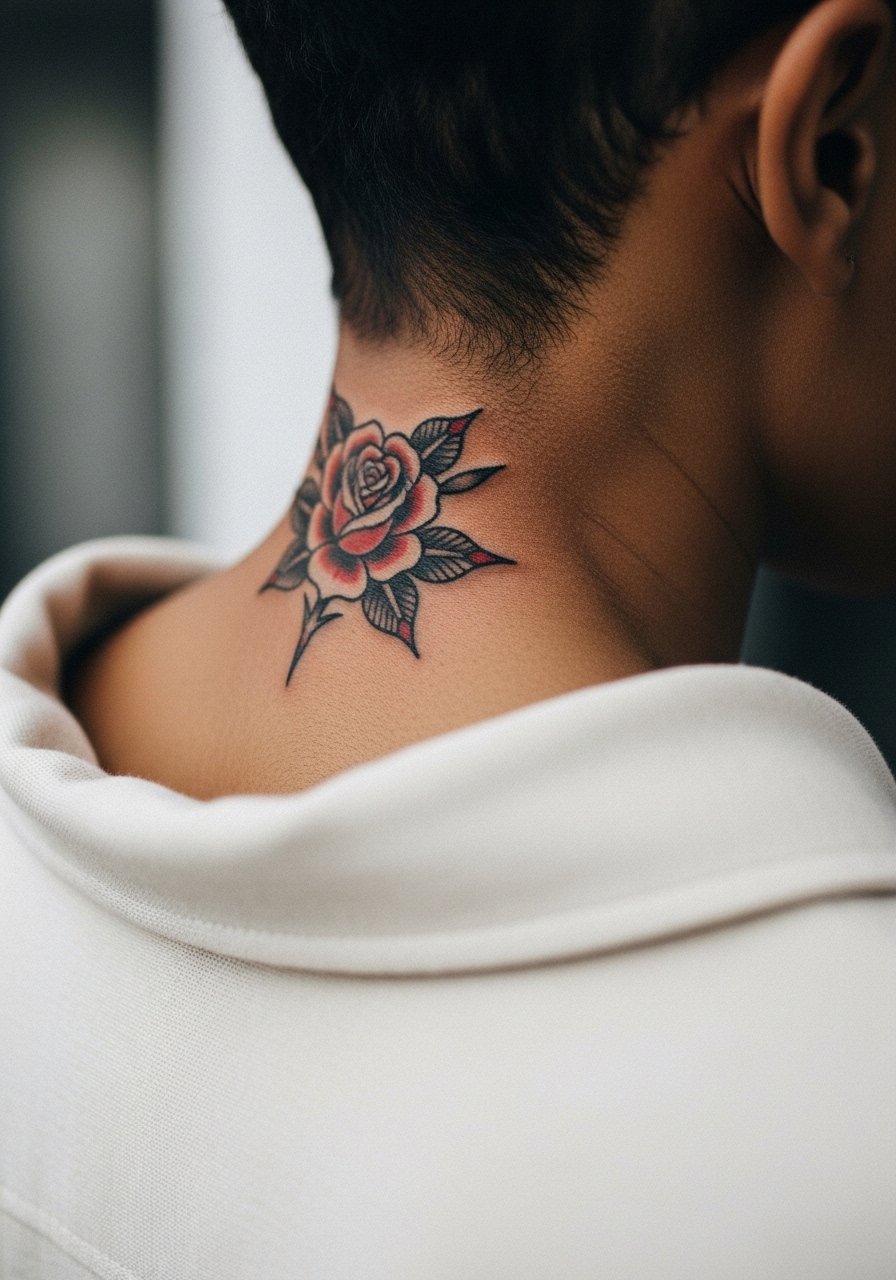
Back-of-neck tattoos are private until you choose to reveal them, and they require crisp outlines to remain readable under hair movement. Ask for a slightly thicker outline and minimal inner detail that could merge with hair oils. Pain is moderate and healing can be protected by short hair changes or strategic collars. One practical mistake is choosing script around the rose that becomes illegible when the neck flexes. For session wear a wide-neck shirt you can shift without full shoulder exposure.
21. Calf Rose Pierced by Dagger for Dramatic Verticality
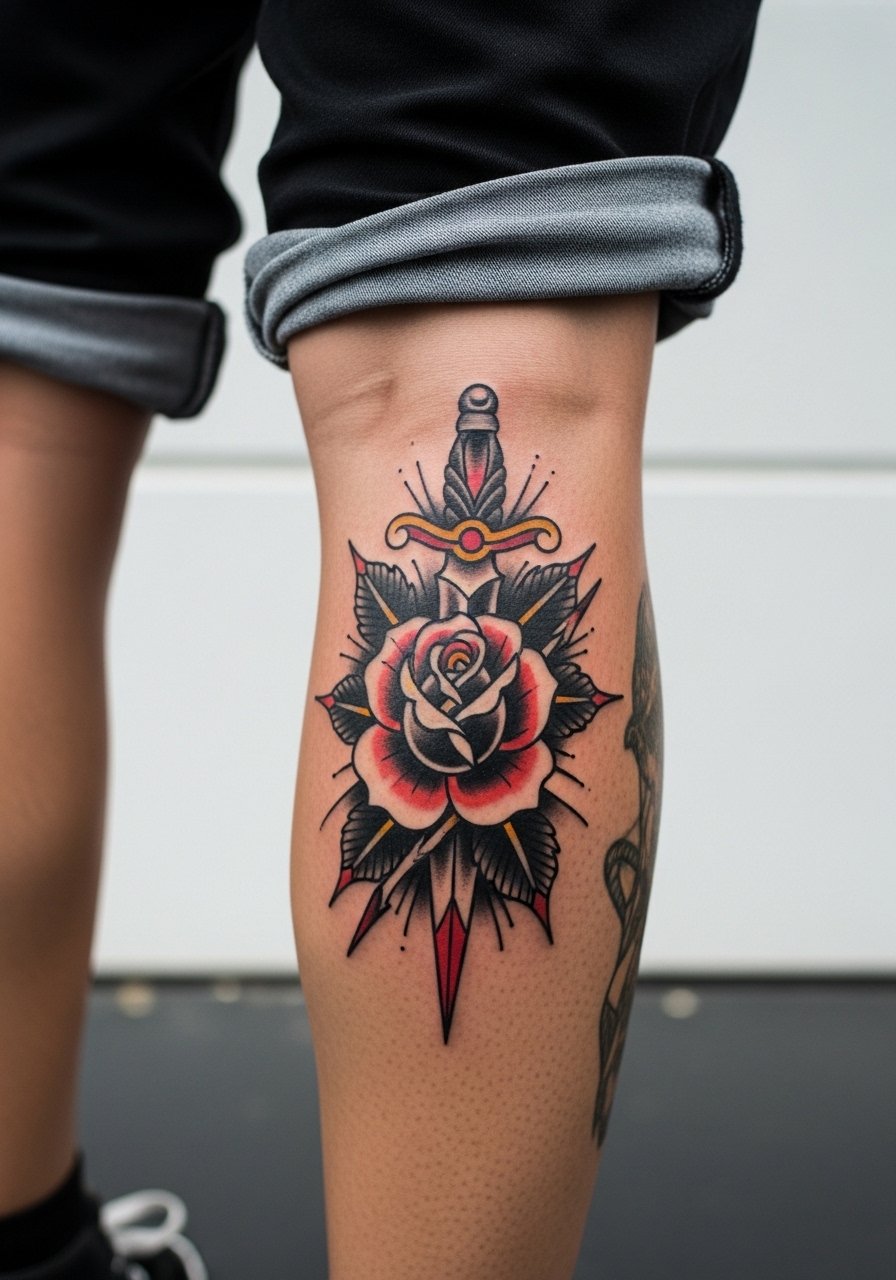
The back calf is an excellent surface for vertical compositions because the muscle provides a natural frame. Ask for blade-to-rose spacing that keeps both elements legible if you gain or lose muscle. Sessions are manageable and healing is straightforward unless you wear tight socks. A common error is compressing the blade's decorative details too tightly where shoe friction will dull them. For wardrobe pair it with cropped pants and ankle boots that show the vertical flow.
Frequently Asked Questions
Q: How much does a traditional rose tattoo cost and how should I budget for a session?
A: Costs vary by shop and region, but think in ranges rather than exact prices. Budget for one to three sessions depending on size and color saturation, and factor in a possible touch-up at year two to five for delicate placements like wrists or fingers. Bring clear reference images and ask the artist how many sittings they expect so you can plan time and finances.
Q: Will watercolor rose styles fade faster than traditional saturated roses?
A: Generally, watercolor approaches use softer edges and lower saturation which can fade or feather faster, especially in sun-exposed areas. One camp says avoid watercolor on wrists and hands, while the other says careful layering can stabilize the wash. If you love the aesthetic, pick placements with less friction and discuss layering plans with your artist.
Q: Are there placements I should avoid if I want a rose that lasts without frequent touch-ups?
A: High-friction zones like fingers, palms, and the sides of the hands need more touch-ups. Ribs and inner biceps can blur if lines are too fine. Forearms, upper arms, and calves tend to age better for saturated traditional work. Protect healed pieces from sun and heavy abrasion to extend vibrancy.
Q: How should I dress for a ribcage or thigh session to stay comfortable and give the artist access?
A: For ribs wear a cropped athletic top or a shirt you can lift without full undress. For thigh sessions choose high-waisted shorts or a skirt you can shift to expose only the working area. Comfortable, loose clothing that does not press on fresh ink after the session makes the day easier.
Q: Do blackwork roses work better on darker skin tones than traditional red-filled roses?
A: Blackwork often provides higher contrast and longevity on darker skin tones because it relies on solid fields and thick linework. Saturated reds can still look great, but ask to see healed examples on similar skin tones and request bold outlines to retain shape over time.
Q: How soon should I plan a touch-up for fine-line or minimalist rose designs?
A: Expect a touch-up within one to three years for fine-line pieces in high-movement or high-friction areas. Less exposed spots like the upper arm can go longer. Talk to your artist about their typical touch-up windows and whether they include one complimentary session.
Q: Where can I find more design inspiration and local artists who specialize in traditional rose drawings?
A: Search style-specific hashtags, check location tags on image platforms, and browse local listings using "traditional tattoo studio" plus your city. Community forums and the app designed for idea curation are also solid pathways to find portfolios and book consultations.
