
Fine line is trending, but it has real trade-offs for Kurapika chains: they can blur faster than bold work, wrist pieces need careful sizing, and small finger links suffer from constant friction. I have seen people double-book consults after a canceled session, and budget surprises are common. Read on for 21 chain ideas that balance fandom, longevity, and wardrobe so you can pick a design that works for your life and the chair.
1. Fine Line Kurapika Chains on Inner Forearm
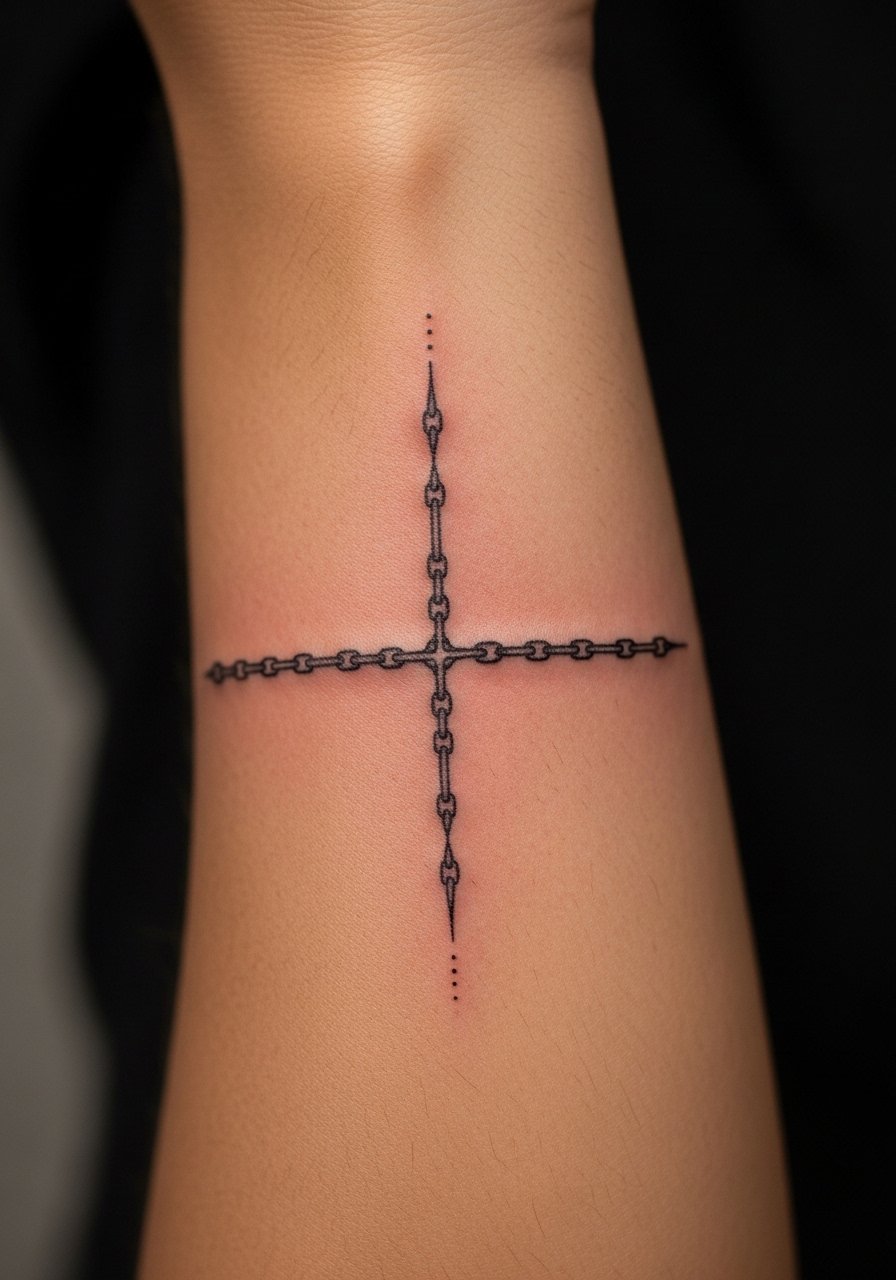
I recommend this when you want a clear nod to Hunter x Hunter without a heavy commitment. Fair warning, fine line on forearms can lose crispness faster than blackwork, so ask for slightly bolder lineweight than you think you need and plan a touch-up at six to twelve months. In consultation, bring close-up references that show exact link thickness and negative space so the artist can map spacing to the forearm curve. Expect low to moderate pain and one short session for a 2–4 inch piece. For showing it off, roll your sleeve or wear a rolled cuff chambray shirt and a slim bracelet on the opposite arm to balance attention.
2. Minimalist Single Chain Link on the Wrist
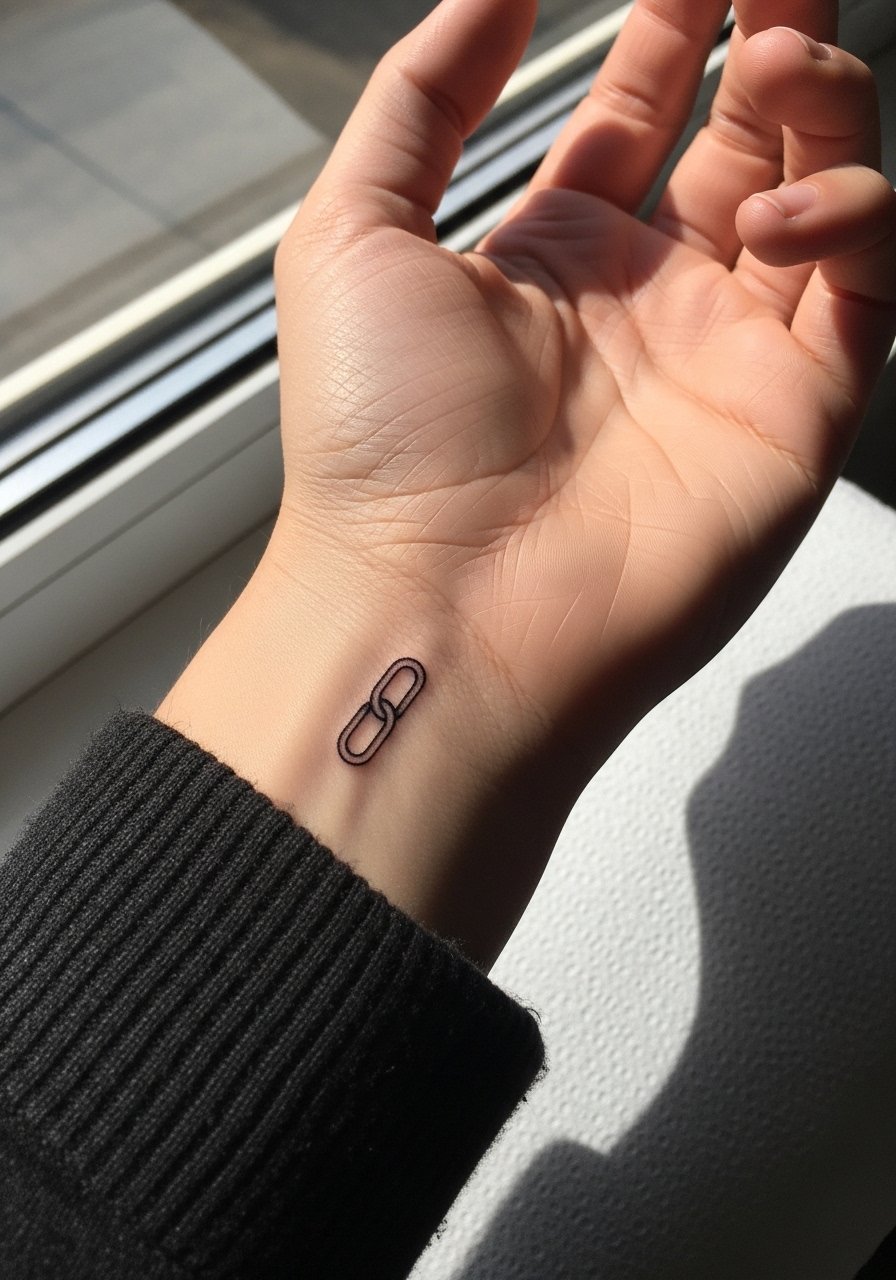
Most people pick this for concealability. The wrist is one of the easiest spots to hide at work, but it is also high friction from watches and bracelets. Tell your artist you want clean negative space between links and slightly reinforced line ends so the chain reads after daily wear. The session is short and the pain is moderate, especially over the bone. A common mistake is going too thin; the result can blur within a year. During the session wear a sleeveless tank or loose short sleeve and leave jewelry at home. When you show it off, pair the tattoo with a thin leather wrist cuff rather than multiple bangles so the linework stays visible.
3. Ornate Geometric Chain Band on Outer Forearm
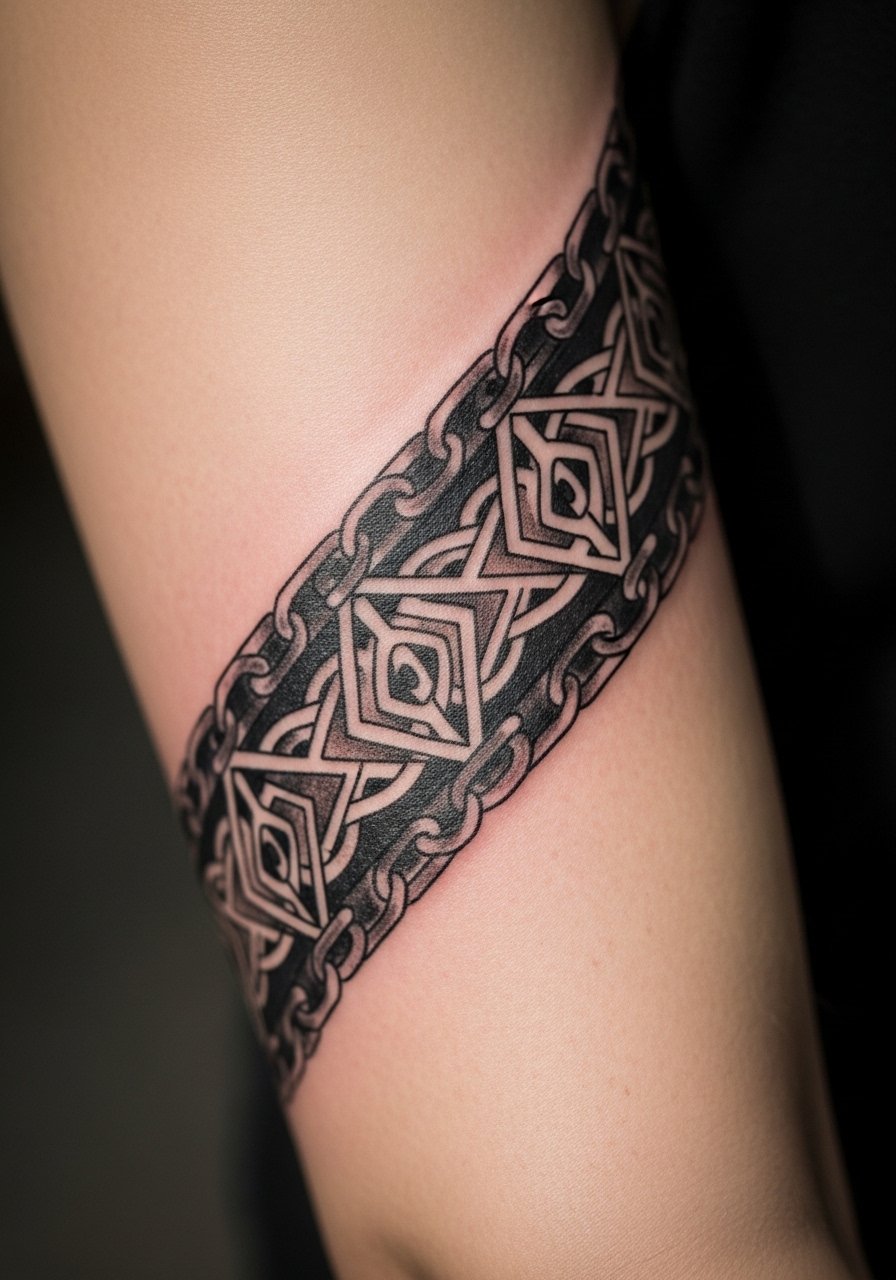
The architectural look suits people who want justice-themed geometry without overt anime styling. In consult, specify the balance between solid black and negative space so the pattern breathes and avoids early merging. This placement tolerates denser work better than the inner wrist, so bold spacing helps longevity. Expect two to three sessions for a 4–6 inch band and moderate pain. A frequent error is shrinking the elements too small, which causes lines to merge after a couple of years. For placement checks, have the artist stencil the band while you move your wrist so the links curve naturally with motion.
4. Watercolor Kurapika Chains with Ethereal Glow on Shoulder
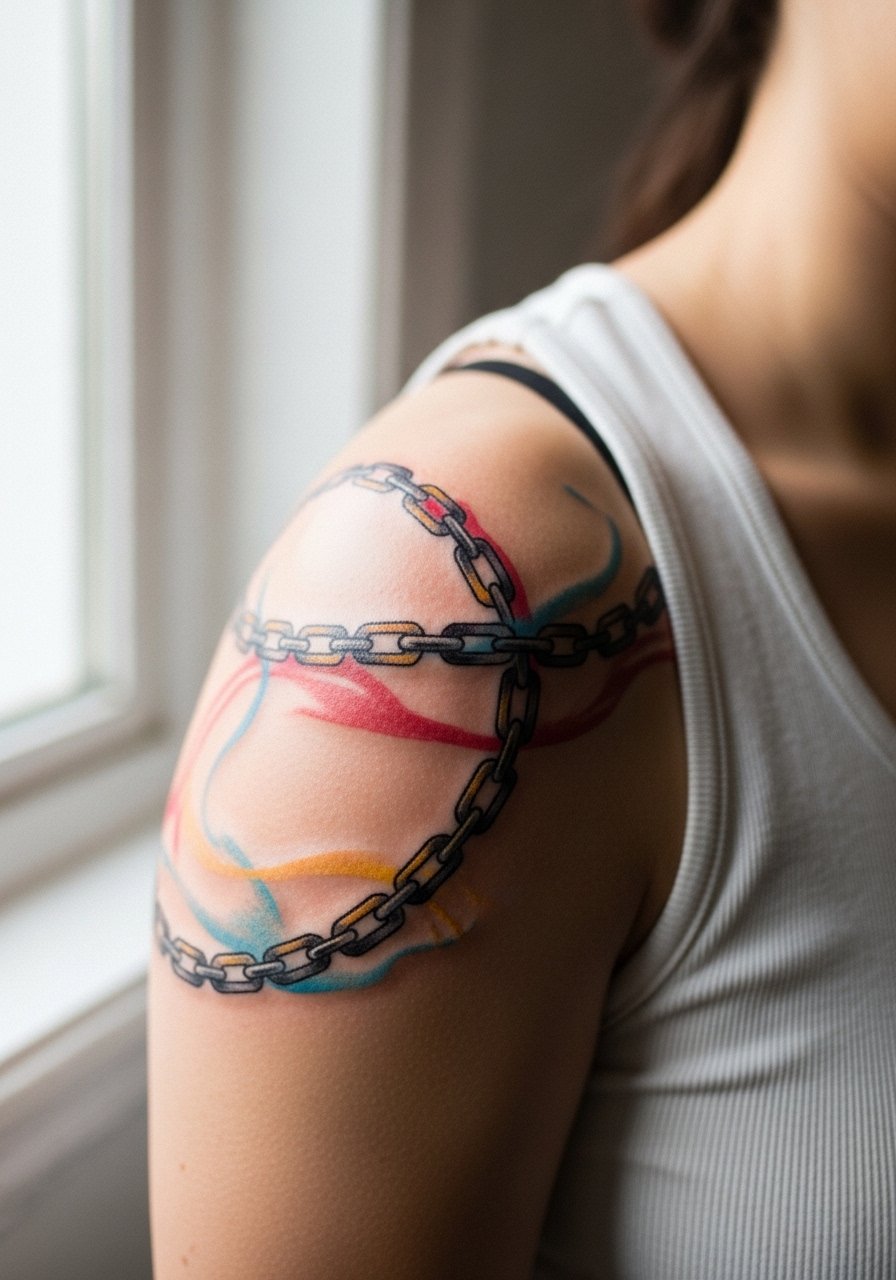
Watercolor brings Nen effects to life but asks for realistic expectations during healing. Most watercolor chains need black anchors for longevity, so ask for subtle color washes around solid black links rather than full color fills. Shoulder placement sees less friction than arms, so colors hold better. Session time is often one to two sessions for a 3–5 inch composition and pain is moderate. People report color bleeding during healing if the pigment is overloaded, so request lighter saturation and slower layering. For showing it off, a sleeveless tank top keeps straps off the area and lets the glow read clearly in photos.
5. Micro-Realism Chain Detail on Finger
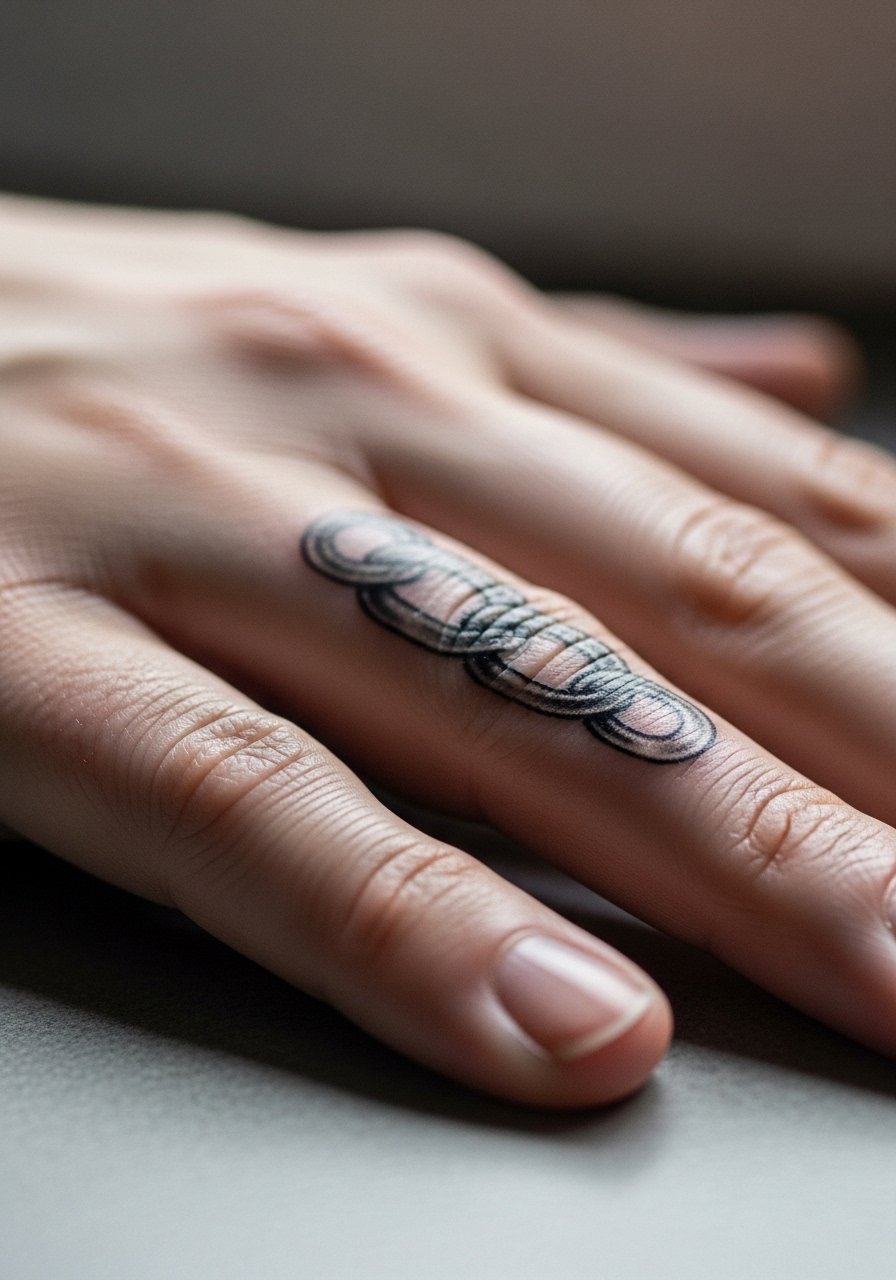
Finger chain links are stunning up close but they age differently than arm work. Expect faster fading and occasional touch-ups. Tell your artist you want denser dot shading and slightly larger negative gaps to reduce blowout risk. The session is short but painful because the skin is thin and close to bone. Avoid designs with excessive tiny details that will blur. A common mistake is assuming finger ink lasts the same as forearm work. If you want to keep it crisp, plan a yearly check and ask about protective film for the first week. Fingers see constant washing, so manage expectations on longevity.
6. Floral-Wrapped Kurapika Chains on Ribcage
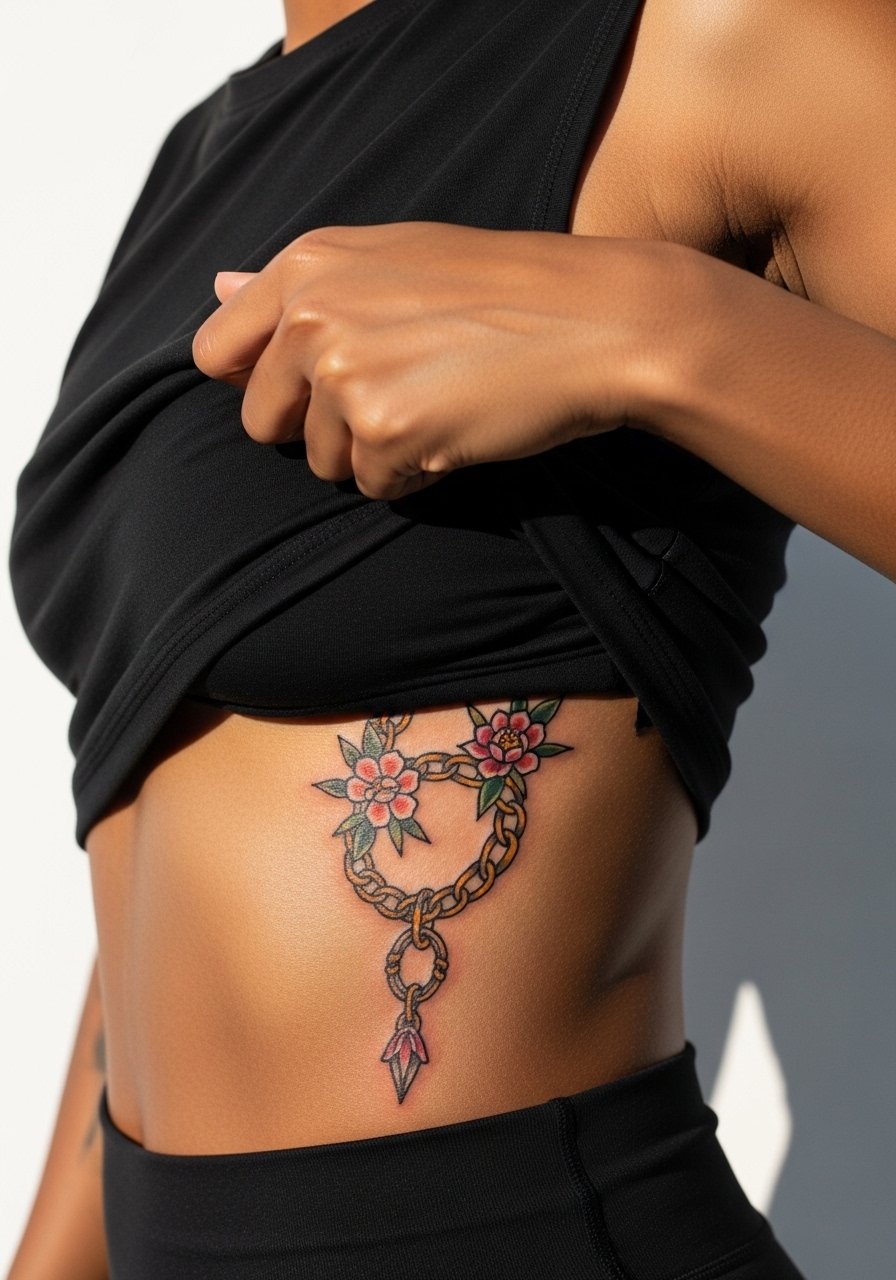
Fair warning: ribcage sessions register high on most pain charts, but the result can be dramatic and private. For a floral wrap, specify where the chain should weave through petals so the negative space reads even after healing. Artists split on fine line here. One camp argues the skin stretch and breathing make fine line blur quickly. The other camp says proper depth and spacing keep lines crisp. Ask your artist how they handle ribcage spacing before booking. Expect two sessions for a 4 inch piece and plan for careful session wear like a strapless top or zip hoodie to avoid rubbing during healing.
Pre-Session Essentials
The wrist, finger, and ribcage pieces above have different prep needs, so a few targeted items smooth the appointment and the first week.
- Frida Healing Ink Balm. A lighter, non-greasy balm that users say avoids clogging tight linework, helpful for fine line forearm pieces that need clean pores during healing.
- Tattoo Goo Healing Balm. Absorbs quickly and works well on thicker blackwork areas like geometric forearm bands where you want moisture without residue.
- Ink-Eeze Numbing Spray. Useful for short, sharp sessions such as finger or wrist links to reduce the edge without altering line placement.
- Australian Bush Aftercare Balm. Lightweight for warm, dry climates and helps keep ribcage florals from drying into hard scabs.
- Aquaphor Healing Ointment. A thin application in the first 48–72 hours protects fine line pieces and eases initial dryness without heavy buildup.
7. Bold Line Kurapika Chains Sleeve Starter on Outer Forearm
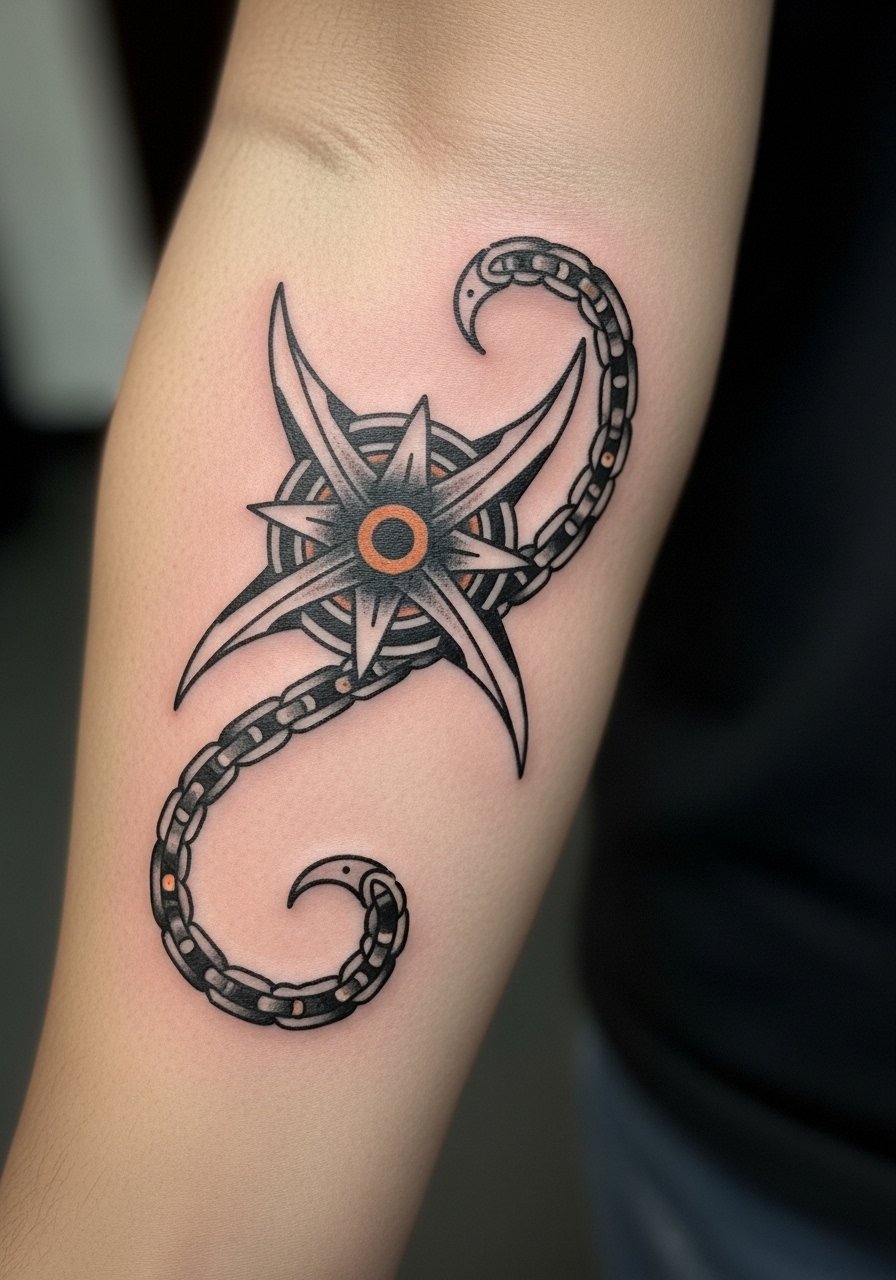
There is a reason bold starters age well for sleeves. The outer forearm tolerates saturation and shows less early softening than inner areas. When you consult, ask for link spacing that allows future elements to interlock without crowding. Sessions usually run two to four depending on size and lining. A common mistake is making the starter too small to anchor future work. For session wear, a loose button-down or short sleeve that rolls up helps your artist access the whole forearm. To style it out, wear a loose fit button shirt with sleeves rolled so the bold links stand out.
8. Ornate Blackwork Geometric Kurapika Chains on Calf
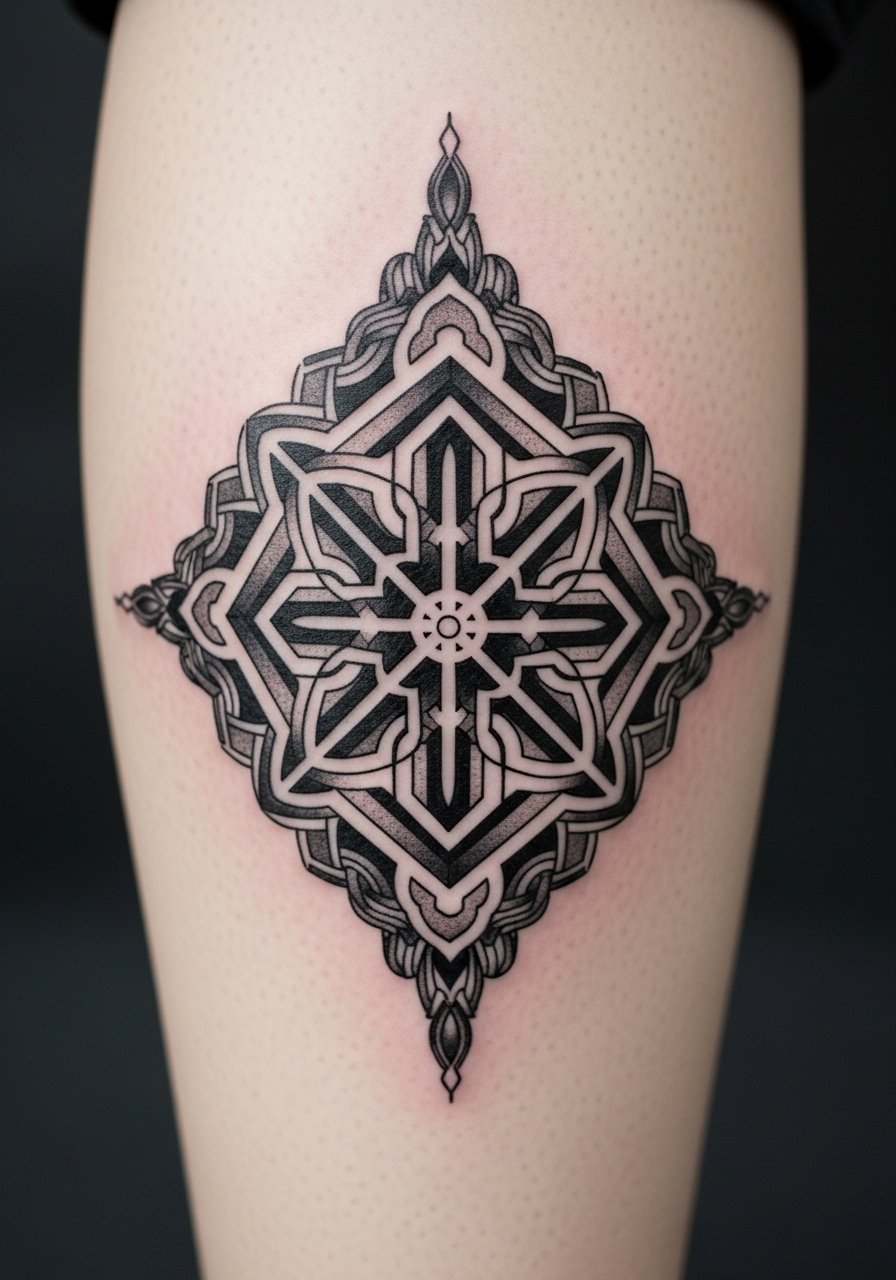
Calf placement gives you room for architectural chainwork and heavy black fills that last. Request that the artist plan negative space between dense areas so stipple shading does not merge over time. Expect one to two sessions for a 4–6 inch composition and moderate pain levels. The biggest mistake is over-detailing in a tight area, which ages into a blob. For casual show-off looks, rolled joggers and boots work well. Pair this piece with a rolled cuff joggers aesthetic on off days so the chain sits visually with your footwear.
9. Ornamental Kurapika Chains Mandala on Shoulder Blade
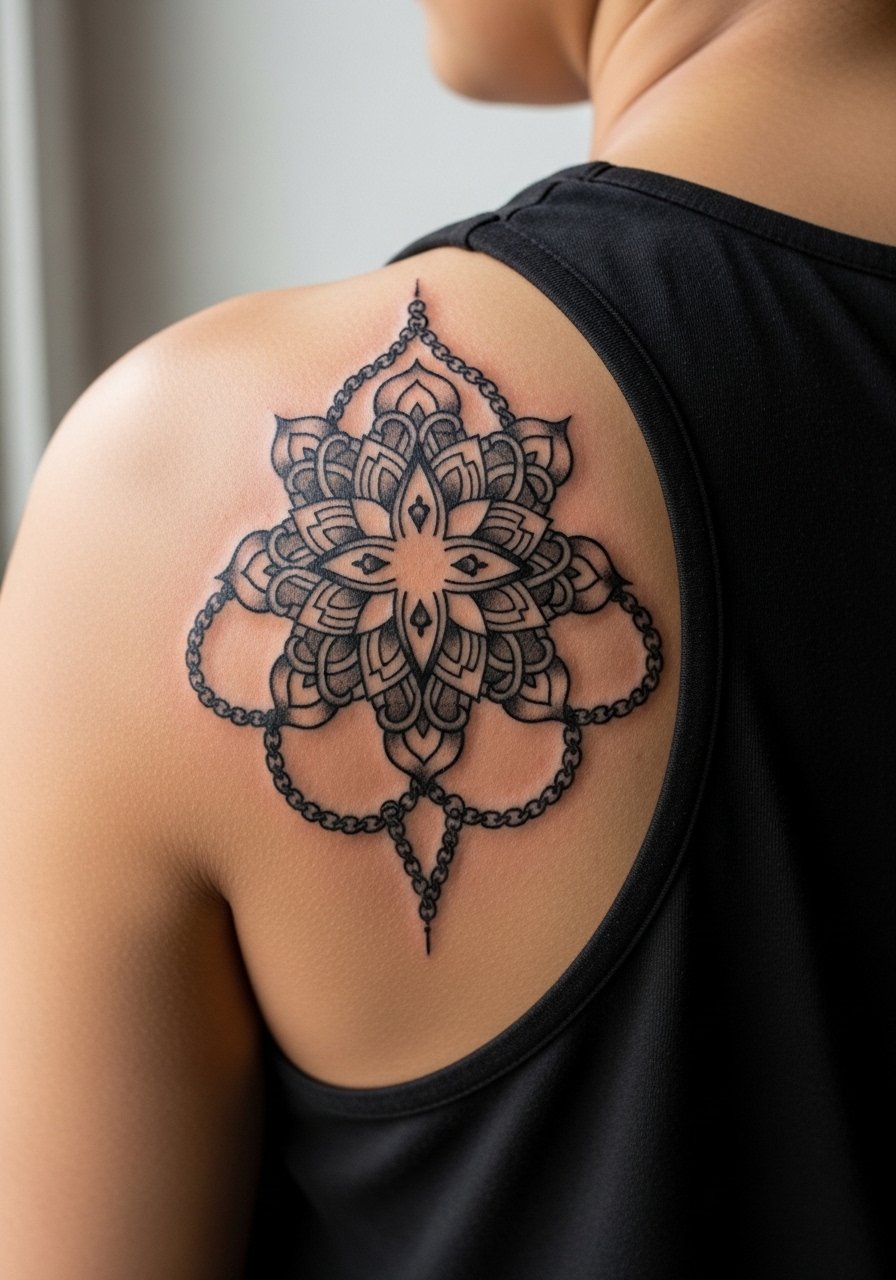
This design blends meditative geometry with chain motifs for a centered, bold look. Shoulder blade skin holds detail well when the elements are balanced with open areas. In consult, show mandala references and ask the artist to map the chain flow so it frames rather than crowds the pattern. Three sessions may be needed for intricate symmetry and shading. A common error is forcing too many tiny motifs into the center. For showing it off, a shifted strap or an open-back top highlights the piece, and wearing a loose tank top on session day gives the artist full access without exposing the rest of your torso.
10. Patchwork Kurapika Segment for Sleeve Builders on Inner Bicep
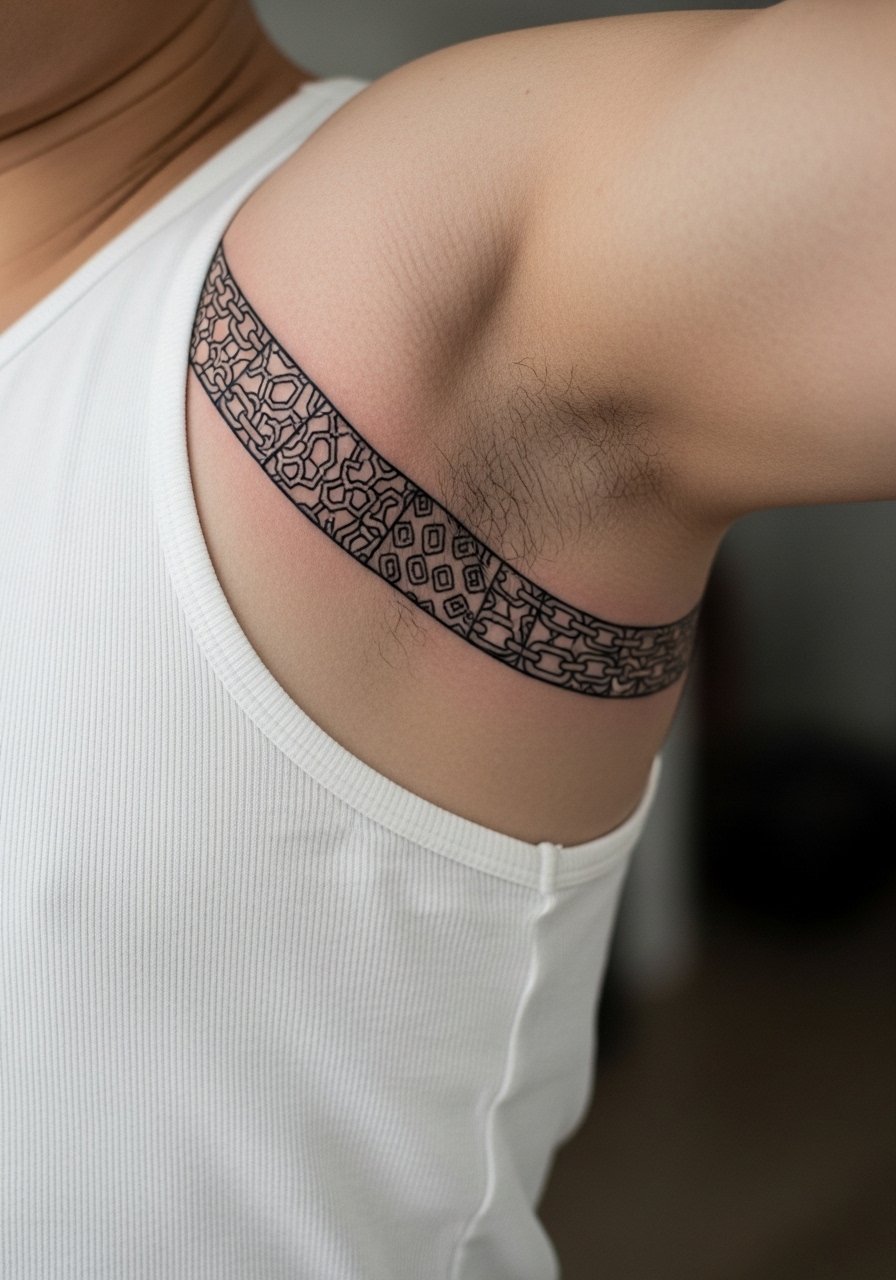
Patchwork segments are perfect if you plan to grow a sleeve over years. The inner bicep is intimate and can be tender during the session, but it provides a stealthy spot to add symbolism in small bites. Tell the artist you want link ends that read well at both close range and stitched into future elements. One session per segment is common and touch-ups may be needed as new adjacent pieces change tension and skin movement. A typical mistake is inconsistent line weight across different guest artists. Use discovery pathways like style hashtags and local guest spot listings to find a specialist who understands chain continuity.
11. Blackwork Kurapika Chains with Dotwork on Thigh
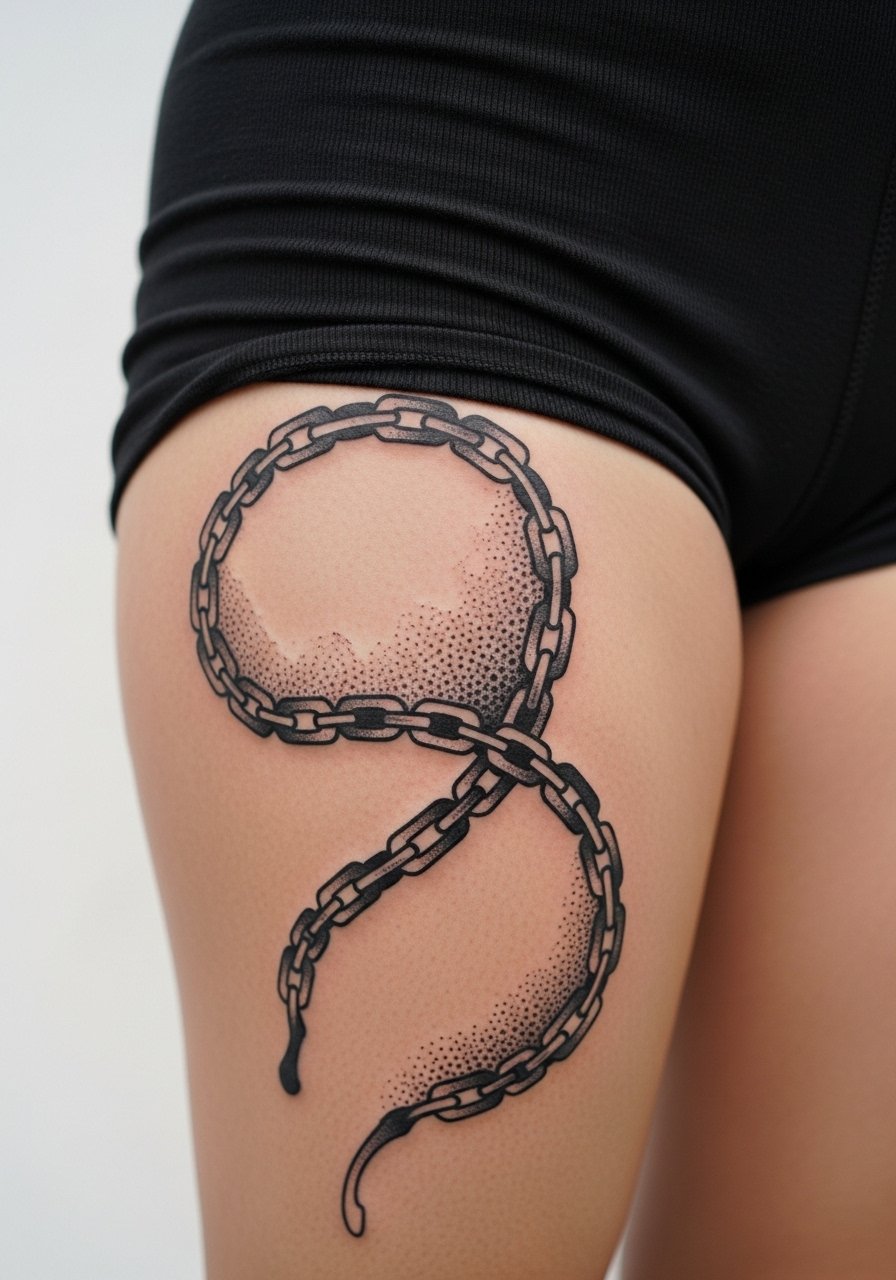
Thighs are forgiving for dense blackwork and dot shading, which makes this a solid choice for long-lasting contrast. In consult, ask for stepped dot gradients rather than uniform stippling so the piece keeps dimension as it ages. Expect two sessions for a 4–6 inch thigh composition with moderate pain. A mistake is placing extremely tight dot clusters that heal in as mud. For show-off styling, high-waisted shorts or a side-slit skirt pair well and keep pattern coherence. Consider wearing high waisted shorts to sessions so the artist can access the area easily.
12. Ignorant Style Chunky Kurapika Chains on Calf
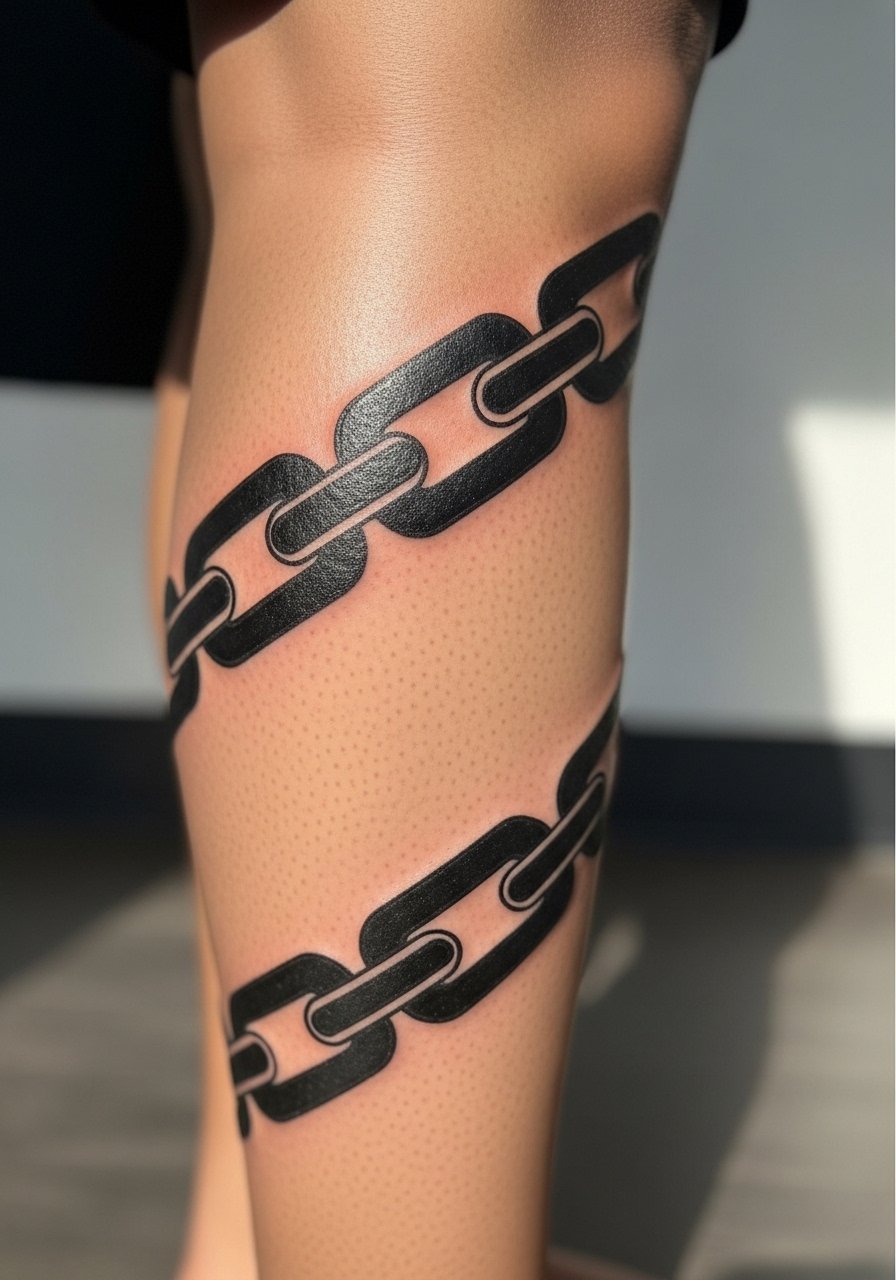
Ignorant style leans raw and graffiti-like, which appeals to collectors who want edge over precision. The calf gives room for chunky links and bold fill that barely needs touch-ups. Tell your artist you want intentional irregularity in stroke and fill to keep the style authentic. Sessions are usually quick and low to moderate pain. The common error is polishing the rough edges too much, which kills the aesthetic. This approach is forgiving for aging because the design reads as intended even when saturation softens.
13. Ornate Collarbone Kurapika Chain with Delicate Accents
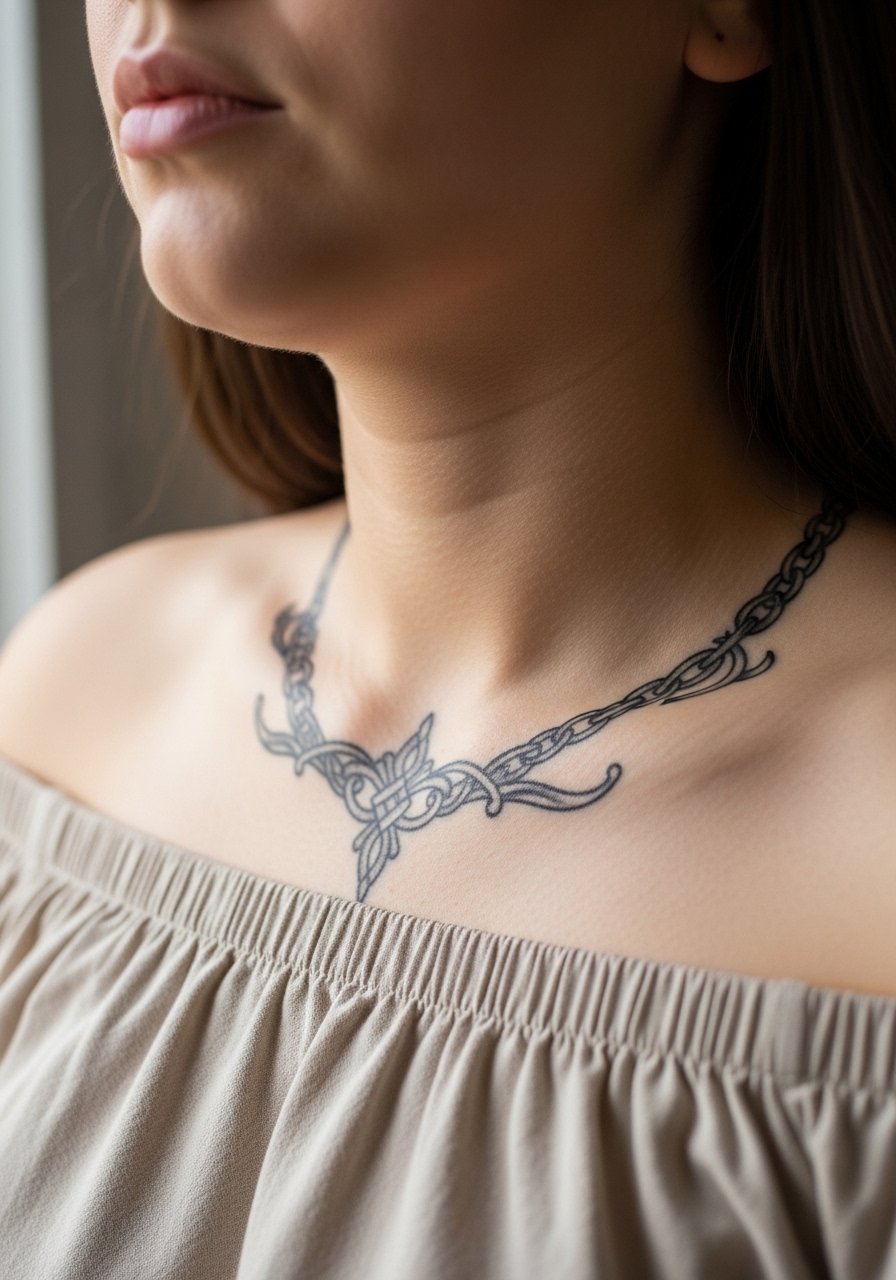
Collarbone chains look strong yet feminine when the links are given breathing room. Expect moderate pain because the bone sits close to the surface. During consult, mark how far the links should extend toward the sternum and shoulder to avoid crowding necklaces. A frequent mistake is placing too dense a pattern over the clavicle. For showing it off, an off shoulder blouse highlights the lines and a delicate choker can sit below the tattoo without competing for attention. Session wear such as a strapless or open button-down helps the artist avoid fabric rub while working.
14. Minimalist Ankle Chain Link
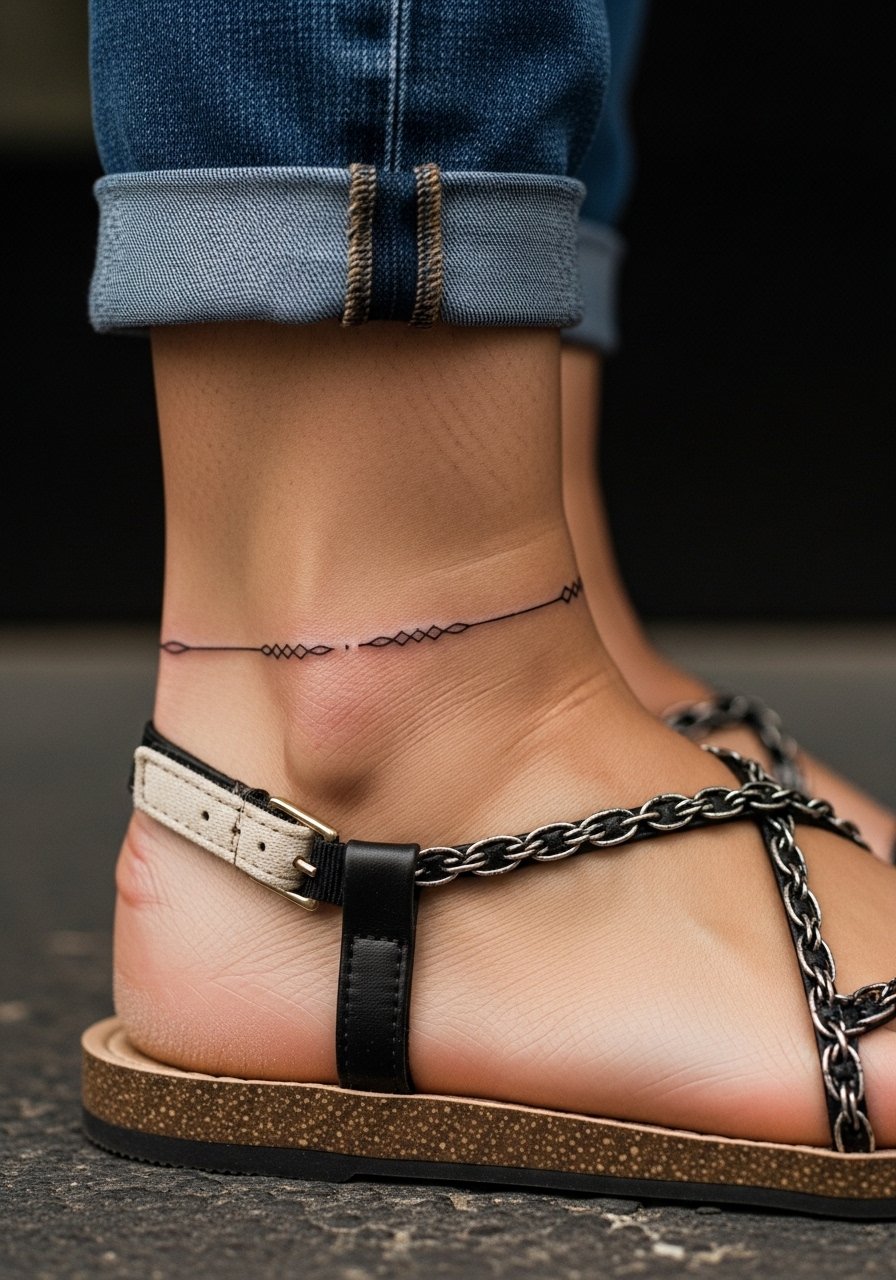
Ankle chains are discreet and seasonal, but expose to sun and sandals makes longevity variable. Ask your artist for slightly bolder contouring and spaced links to withstand summer wear. Sessions are short and pain is low to moderate over bone areas. The usual mistake is going needle-thin, which can vanish in months. For styling, cuffed slim jeans or strappy sandals pair nicely, and you can plan session attire like loose shorts to give the artist clean access. Try slipping on strappy flat sandals after healing so the tattoo reads with your footwear.
15. UV-Reactive Nen Glow Chain for Night Visibility on Upper Back
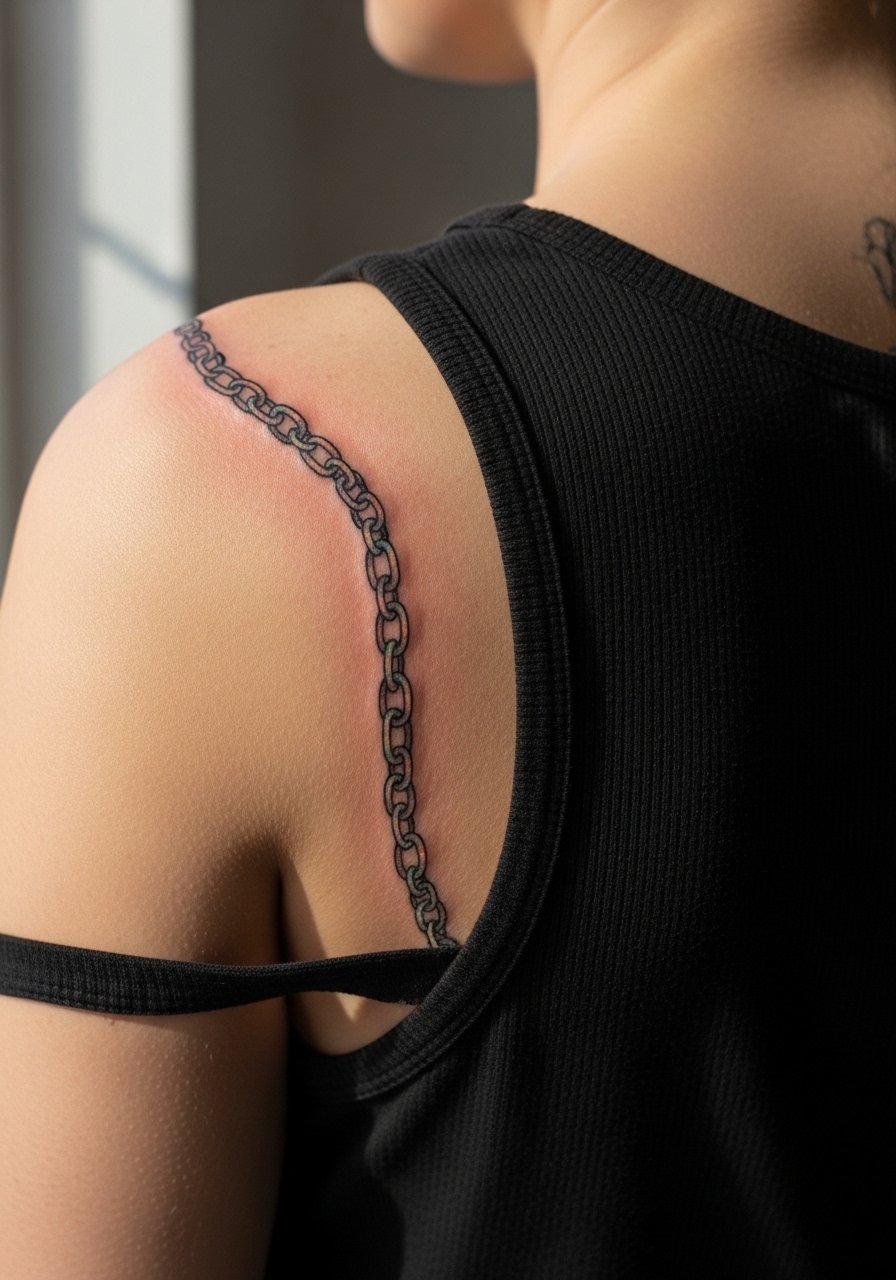
UV-reactive ink gives a hidden glow under black light, which plays well with Nen themes. This idea fits upper back placement because it stays largely private and shows only under special lighting. Note that not all studios use UV ink, and healing needs careful sun protection because the effect can fade. In consult, ask about pigment type and long-term expectations. Sessions can be one to two visits and pain is generally low. Be aware of extra maintenance and occasional touch-ups under the glow. For session wear, a loose tank top keeps the area accessible while avoiding full torso exposure.
16. Micro-Realism Chain Detail on Side Neck
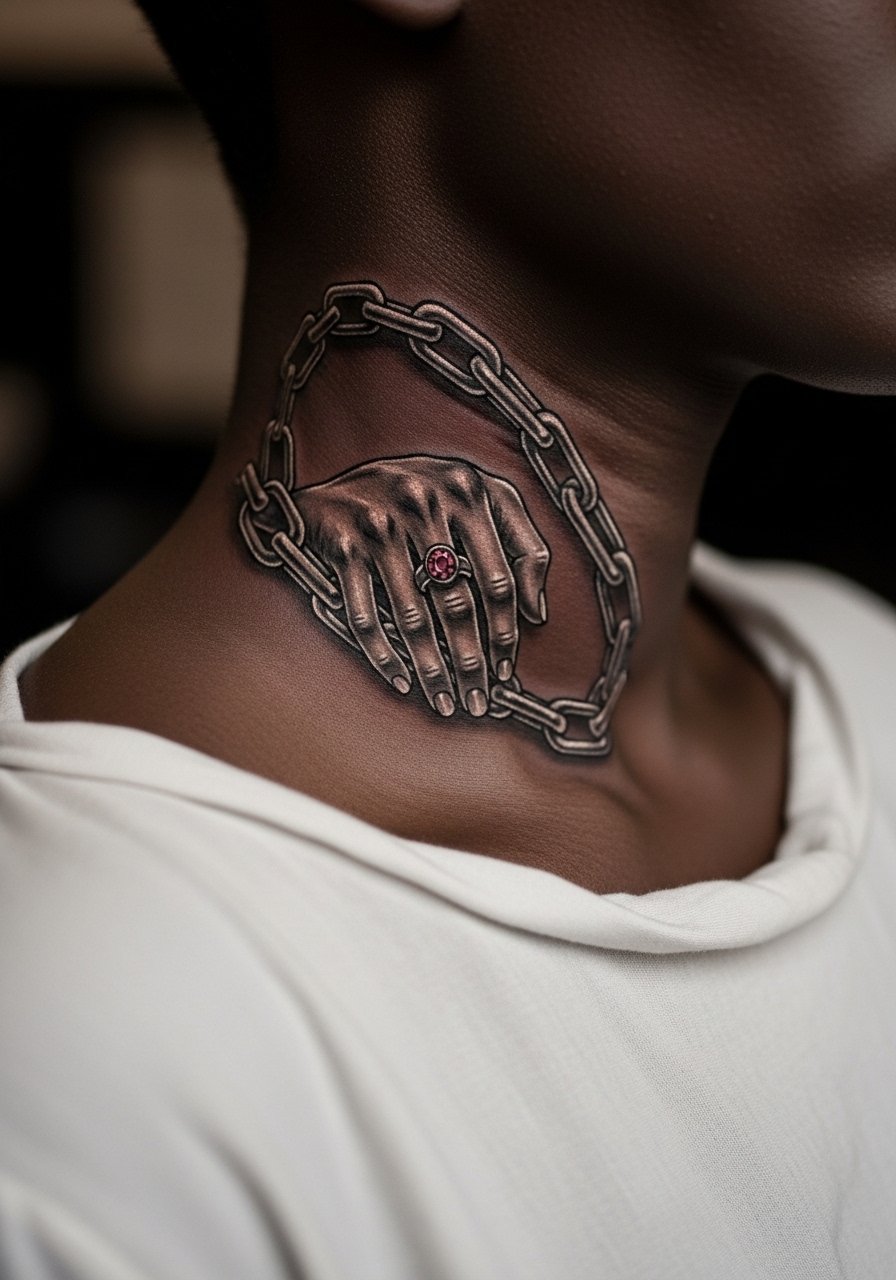
Neck pieces require special consideration because they are visible and sometimes sensitive in professional settings. Micro-realism here offers hyper-detailed metal texture that reads close up but subtle from afar. Tell the artist you want controlled saturation and conservative contrast so healing stays neat. Pain is moderate to high depending on placement and sessions are usually brief. A common mistake is asking for excessive shine or highlights that heal inconsistently on curved neck skin. Discuss visibility and career considerations before booking and use discovery pathways to find artists comfortable with neck detail work.
17. Birth Flower Wrapped Chain on Inner Thigh
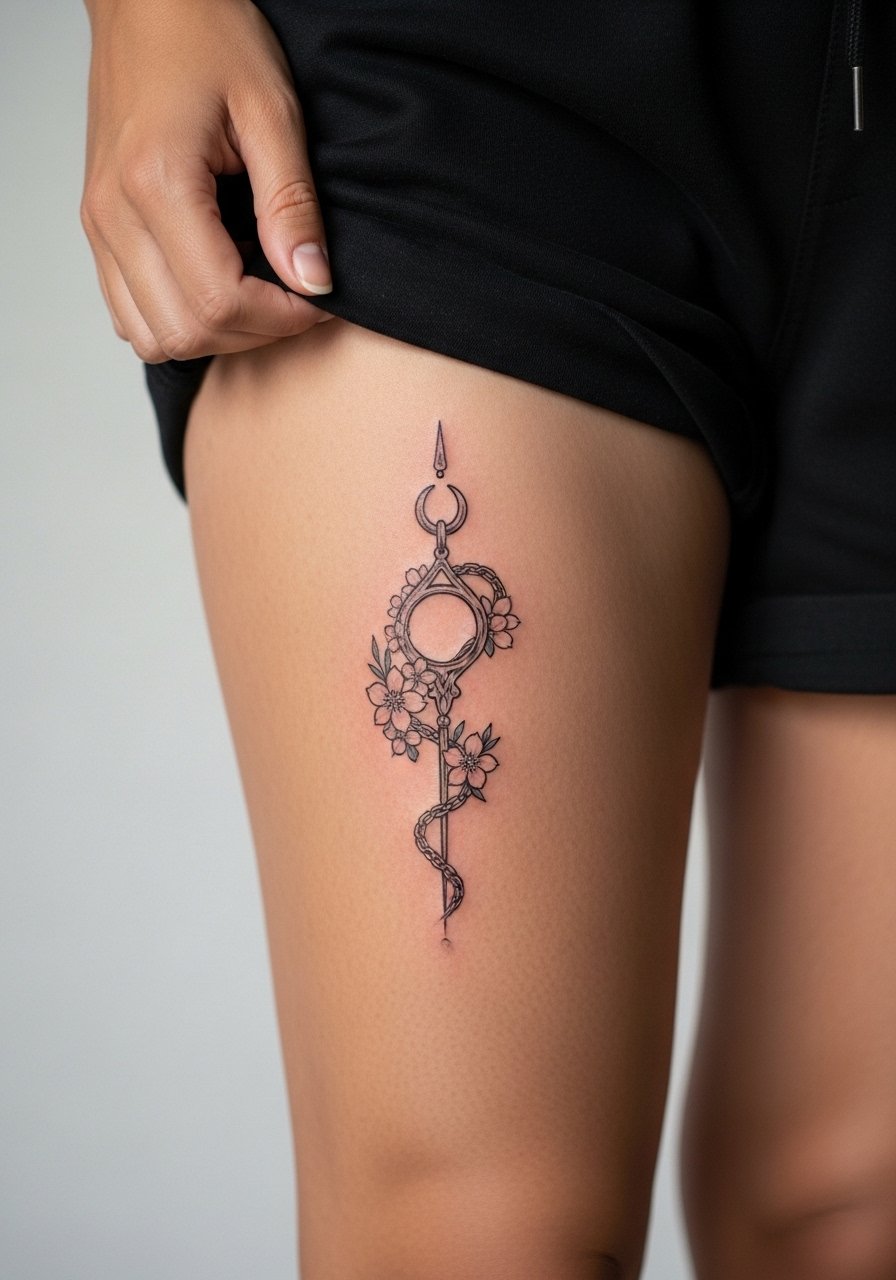
Combining a personal birth flower with chain imagery gives the piece a specific meaning without generic phrasing. Inner thigh work heals well away from constant friction, but it needs careful session wear to avoid rubbing during healing. Expect moderate pain and one to two sessions depending on size. A mistake people make is overcrowding the floral details which then softens into indistinct shapes. For session day, wear shorts you can adjust easily so the artist only exposes the area needed. Discuss how the chain wraps with your artist so it follows movement across the leg.
18. Chain Curving Around the Elbow for Movement Illusion
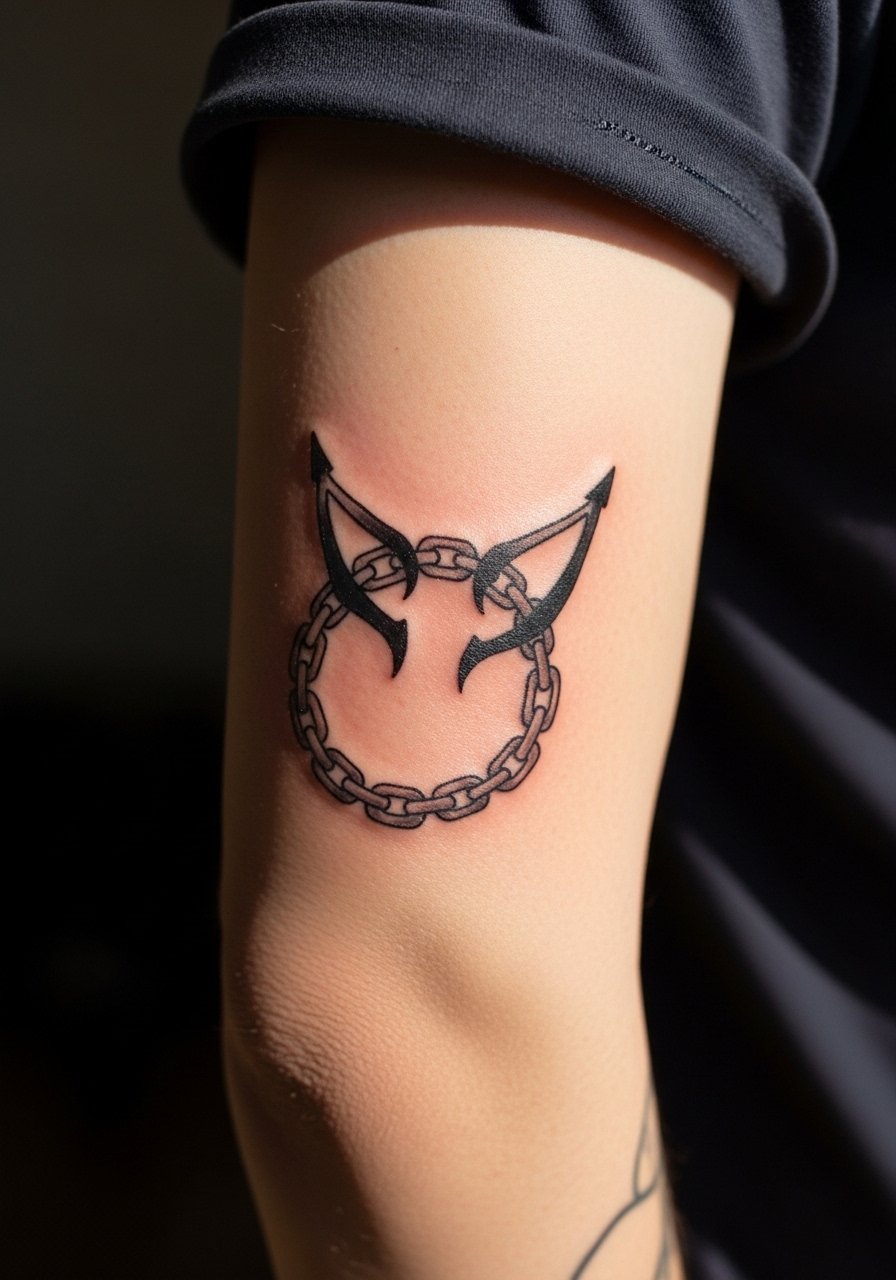
This placement is clever because the chain appears to move when you bend the arm. The elbow has higher blowout risk if lines cross creases, so specify spacing that avoids putting dense detail directly on the joint crease. Sessions are short but comfortable pauses are helpful since the area can sting when the needle crosses multiple textures. A common mistake is wrapping the chain too tightly into the crease. For show-off styling, rolled sleeves keep the elbow visible without rubbing, and session wear like a loose short-sleeve tee makes access easy.
19. Dark Skin Optimized Bold Kurapika Chains with White Ink Highlights
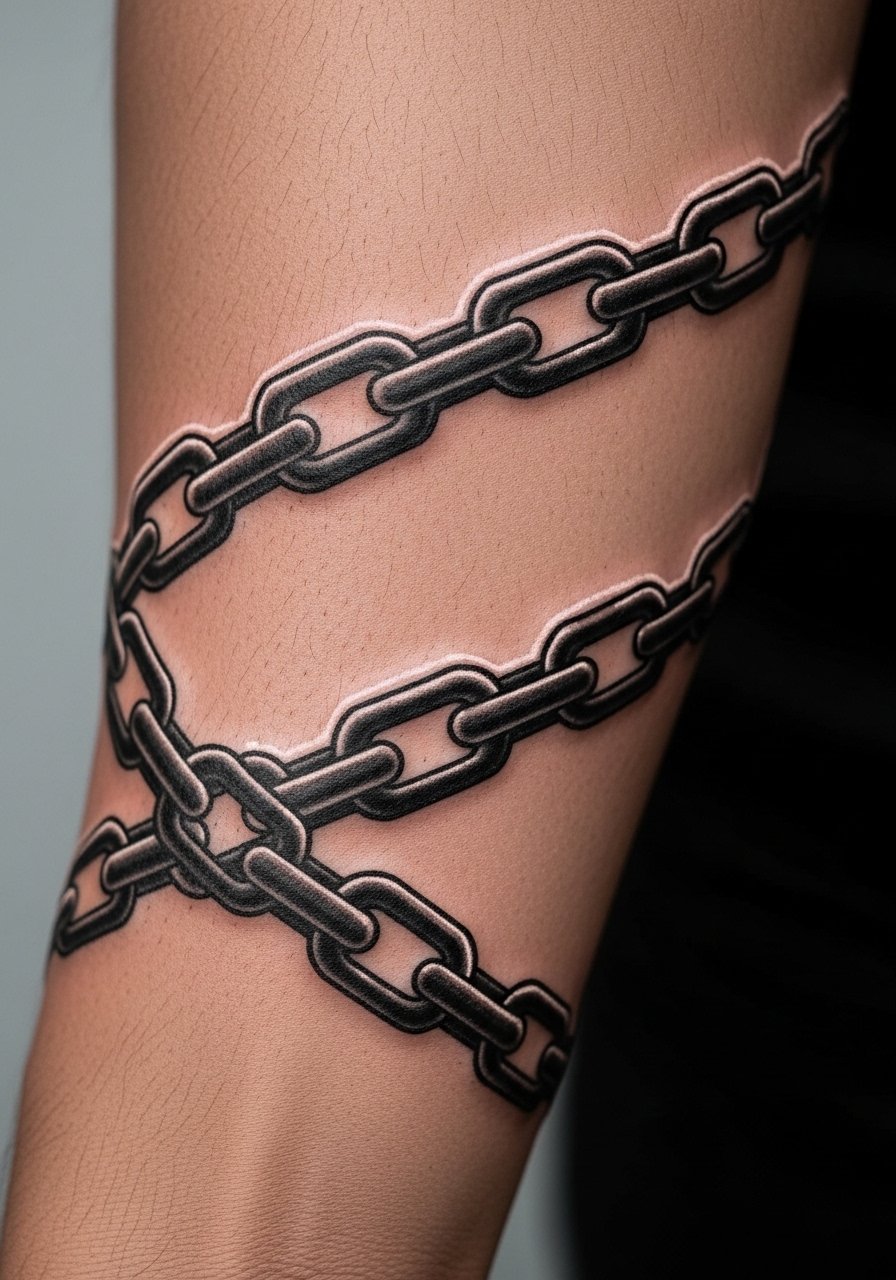
If you have darker skin tones, bold black chains with carefully placed white highlights can create contrast without losing detail in photos. Ask the artist to test a small patch or bring healed examples on similar skin tones so spacing and saturation are calibrated. The forearm holds blackwork well and touch-ups can be planned at two-year intervals for maintenance. A mistake is copying line weights intended for light skin without adjusting saturation. For the session, a loose short sleeve or button shirt that you can pull aside helps the artist maintain steady stretch. For wearing out, neutral linen shirts with rolled cuffs keep attention on the chain and skin contrast. Try a rolled cuff chambray shirt to frame the piece.
20. Watercolor Thigh Splash with Chain Overlay
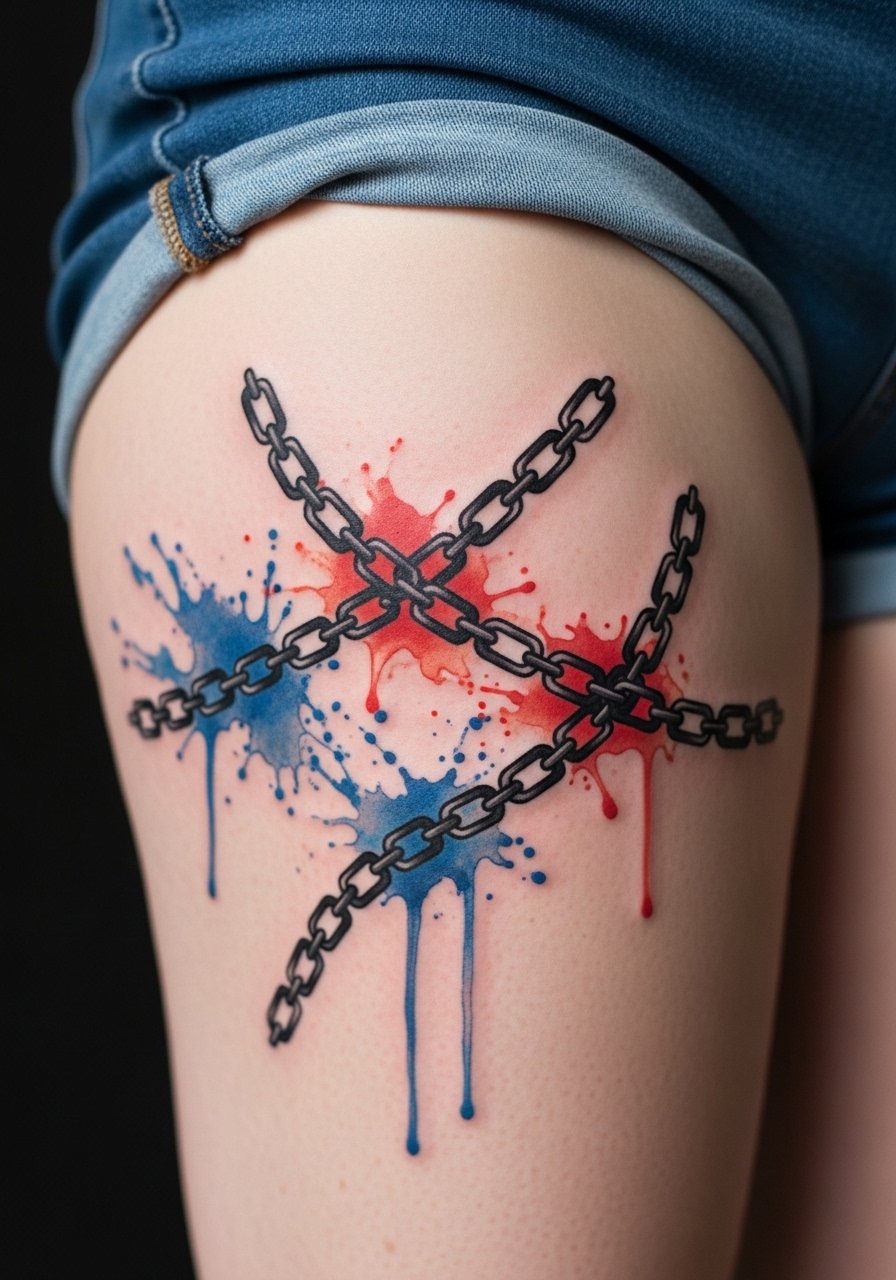
A layered approach with watercolor behind a solid chain line gives the best of both worlds: fantasy color and readable contour. Thigh placement reduces friction and lets colors hold better than exposed arms. Tell your artist to lock the chain line with solid black before applying color washes to control bleeding. Sessions can be one to two visits and pain is moderate. A common mistake is asking for saturated color without enough black anchor lines. For session wear, high-waisted shorts make access easy and keep the rest of your clothing out of the way. Pair the finished piece with high waisted shorts for summer show-offs.
21. Patchwork Sleeve Segment for Kurapika Collectors on Upper Arm
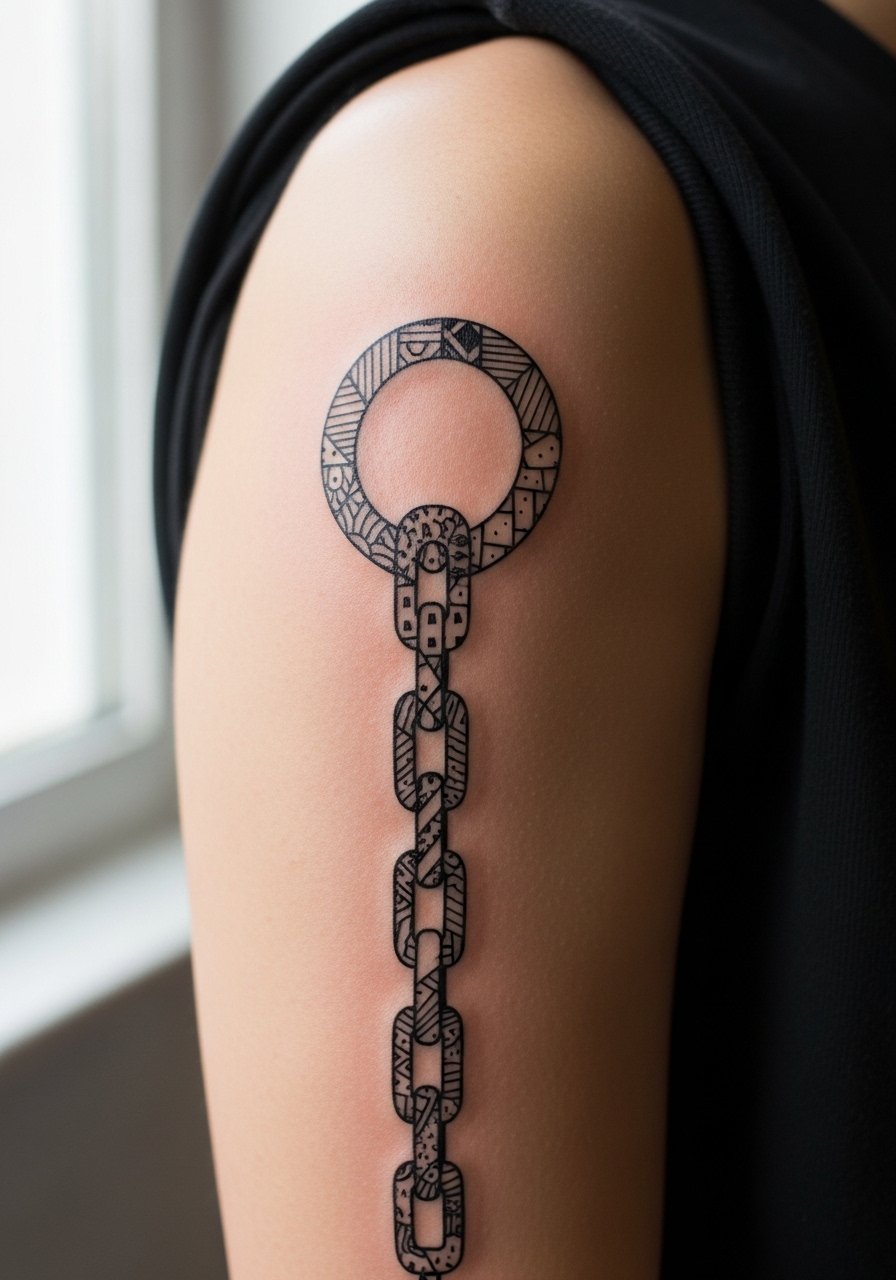
Collectors building sleeves benefit from discrete segments that interlock over time. Upper arm placement is forgiving and allows guests or travel artists to contribute without immediate continuity issues. In consult, specify the anchor points of the segment so future pieces can align links and negative spaces. One session per segment is typical, and touch-ups depend on how many adjacent elements are added later. A common mistake is inconsistency in scale between segments from different artists. Use discovery pathways like local guest spots and hashtag searches to find artists who specialize in patchwork continuity. For showing it off, a loose button-down with the sleeve rolled highlights the upper arm piece and keeps the look intentional.
Frequently Asked Questions
Q: Do fine line Kurapika chains really blur faster than bold blackwork, and what should I expect?
A: In my experience fine line tends to soften earlier than bold blackwork because the needle channels are thinner and the skin’s surface shifts over time. Expect touch-ups at around six to twelve months for wrist or ankle fine line pieces and plan slightly thicker line weight in the consult to extend clarity.
Q: How should I choose an artist who can render chain link detail without it looking cartoony?
A: Look for healed portfolio photos that show crisp linework and consistent negative space in chain motifs, and use discovery pathways like "#KurapikaChains" and "anime blackwork" filters to find style matches. Ask for process photos or healed shots of similar-scale work before booking so you see real outcomes.
Q: Which healing method is better for Kurapika chains, Saniderm or dry healing?
A: Artists and healers split into two camps. One camp prefers Saniderm for reduced mess and faster skin recovery. The other camp favors dry healing to let scabs form and fall naturally. The best choice depends on your skin type, the placement, and what your artist recommends based on their technique.
Q: Will a ribcage floral-wrapped chain be worth the pain and how does it age?
A: Ribcage pieces are higher on most pain scales, but they usually age well because they avoid constant sun and friction. Expect initial soreness and a careful healing window. If you want fine detail, ask about spacing to prevent early merging and budget for a follow-up touch-up if needed.
Q: Are there wardrobe tips for keeping chain tattoos visible without damaging them?
A: Yes. For forearm and collarbone pieces, rolled sleeves and off-shoulder tops frame the tattoo while minimizing fabric rub. For ankle and thigh work, choose sandals or high-waisted shorts that avoid constant friction during the first month. For session day, wear garments that allow easy exposure of the area without needing full undress.
