
Fine line 8 ball tattoos look gorgeous on saved boards, but the pieces that age into clean, readable ink are usually the ones planned around how skin moves and how you dress. Faded hands, surprise price bumps, and poor contrast on darker skin show up in forum threads again and again. Read these 21 ideas for practical variants, what to ask your artist, and how to dress the piece so it actually looks great a year from now.
1. Classic Black 8 Ball with Skull Overlay on Forearm
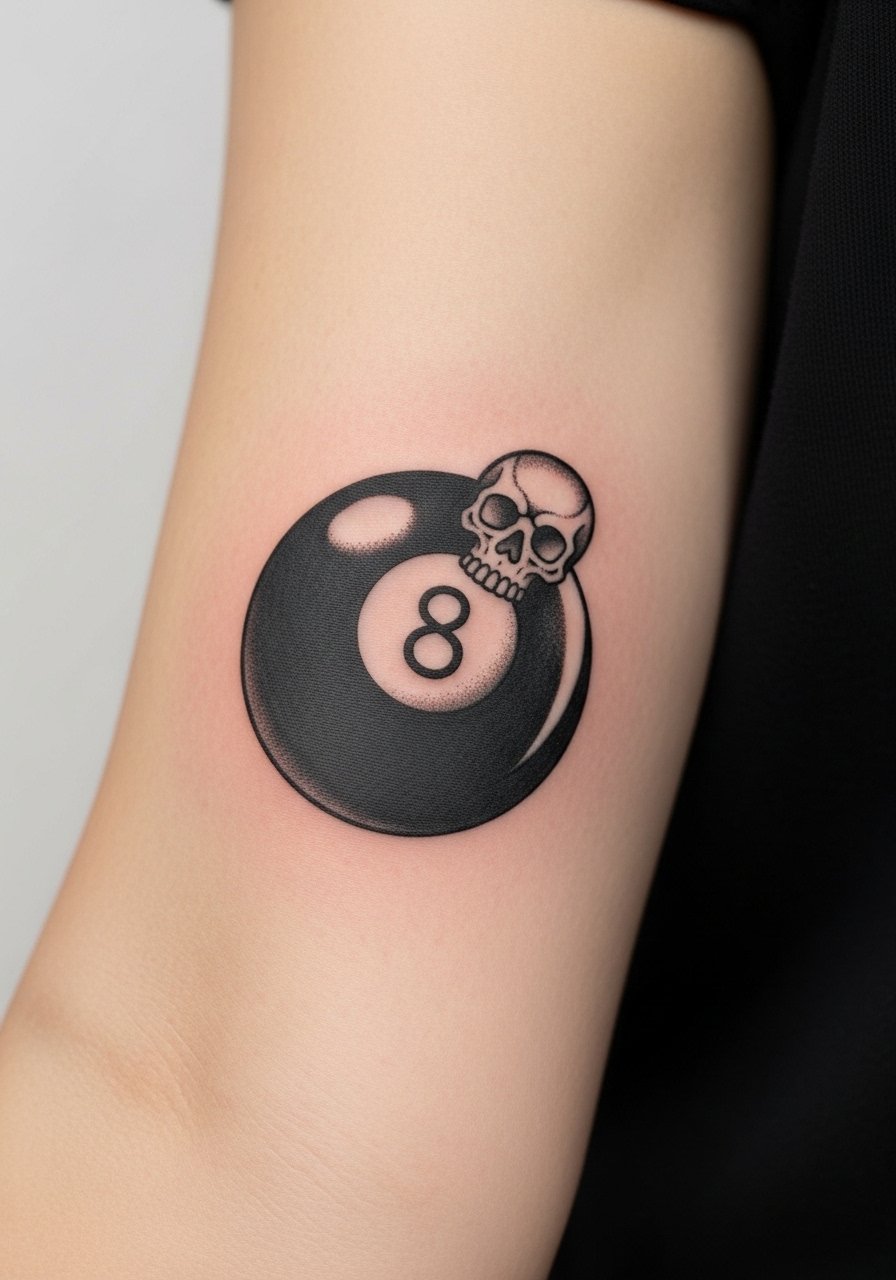
I keep recommending this version to people who want a timeless, gritty piece that still reads from across the room. Ask your artist for thicker outline linework and deeper saturation in the fill so it survives frequent sun and sleeve friction. Common mistake is shrinking the skull into a tiny overlay, which blurs into the ball as it heals. Expect moderate forearm pain and a single-session layout if you stay around two to three inches. For showing it off, roll up a rolled sleeve denim shirt and layer a leather cuff bracelet, both frame the piece without hiding it. In consultation, say you want clear separation between the skull and the ball, and mention touch-up expectations at year two.
2. Old-School Flash 8 Ball with Banner on the Hand
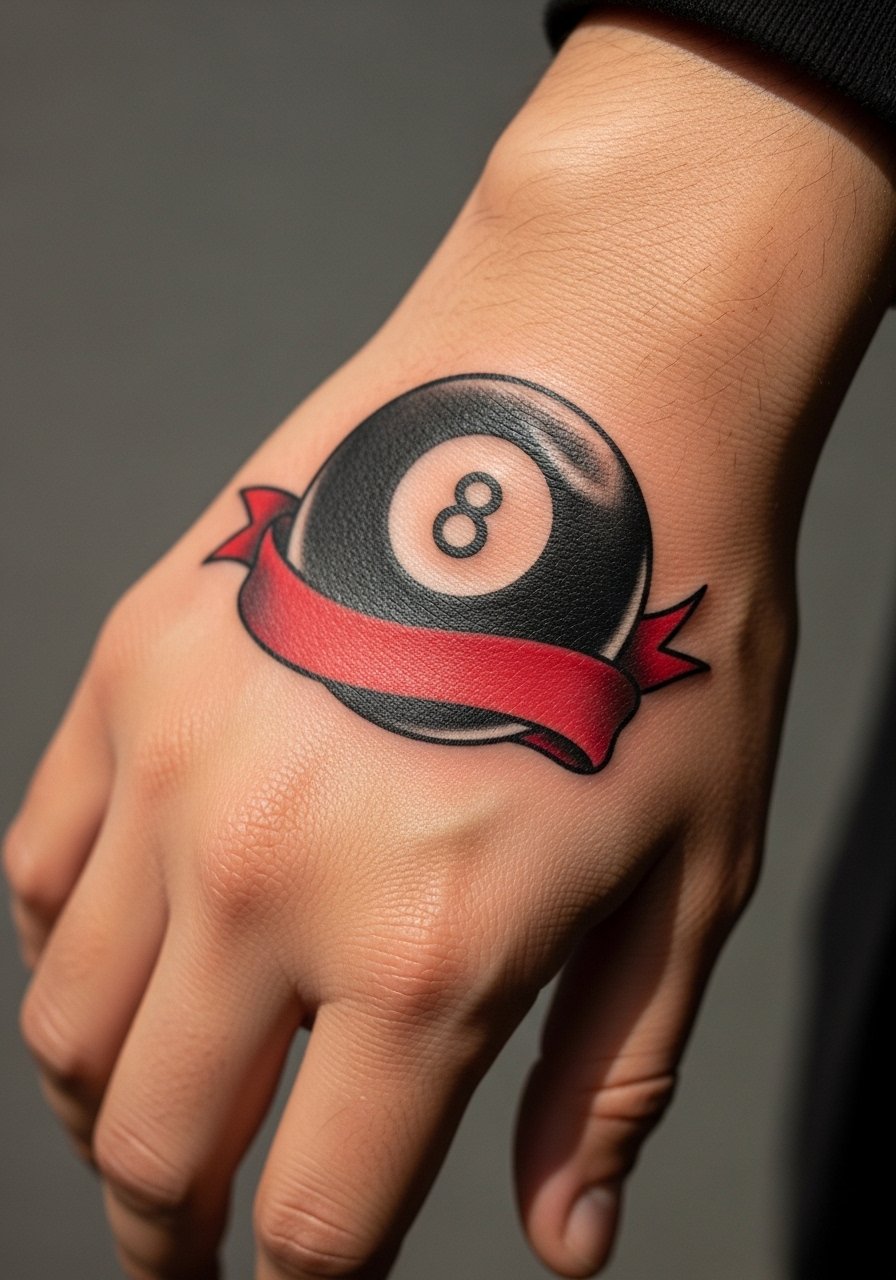
Hand flash works when the lineweight is unapologetically bold and the shapes are simple. The downside is surface wear from washing and sunlight, so plan for touch-ups sooner than arm work. The usual misstep is asking for tiny details inside the banner; keep lettering large and high contrast. Hands sting more than forearms but sessions are short. If the piece might affect work, note that hand tattoos still matter in some industries. Wear bare hands to your appointment and avoid rings on the working hand that day.
3. Minimalist Single-Line 8 Ball Outline on the Wrist
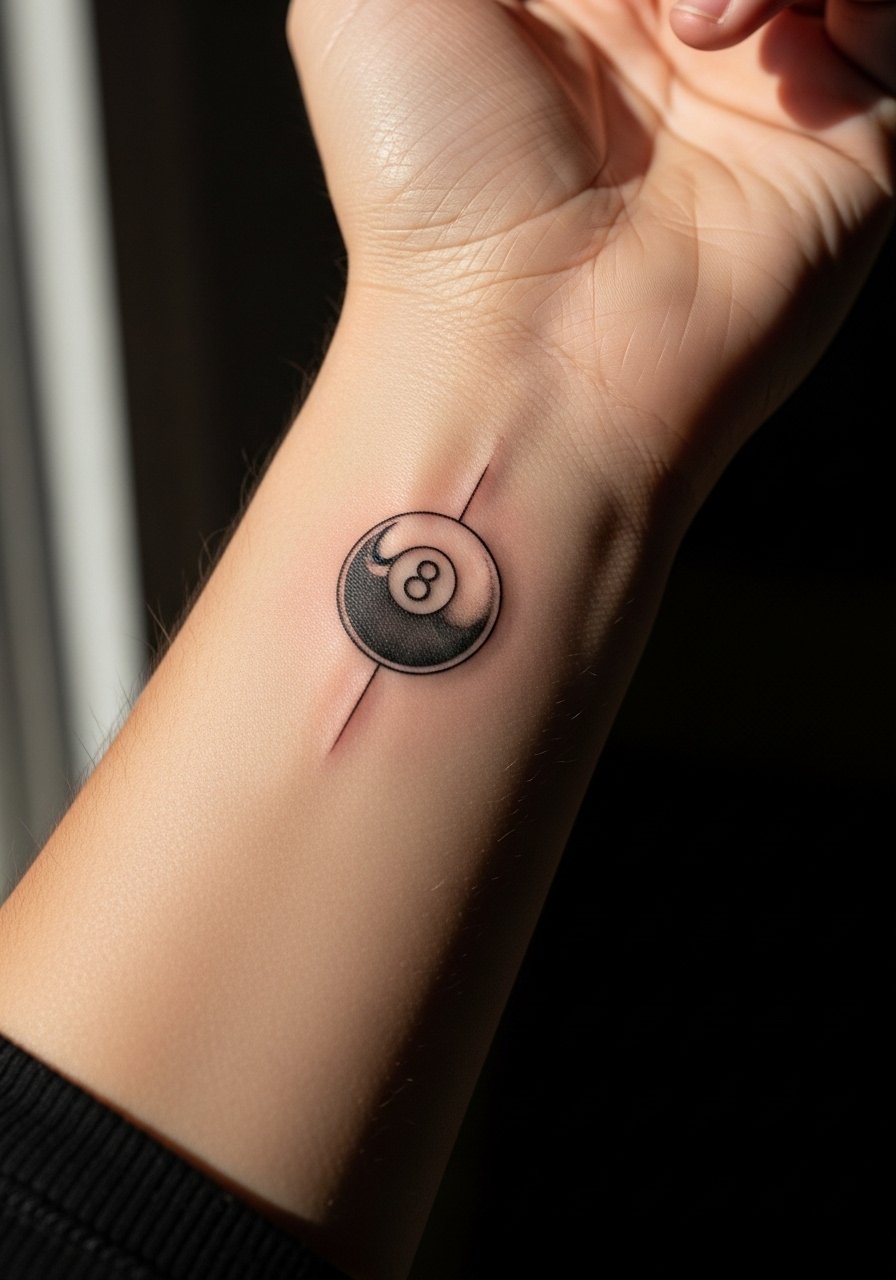
Fine line fans love the discreet wrist 8 ball, but this placement is where the fine line debate gets loud. One camp says subtle aging is elegant and the tattoo softens nicely. The other camp warns fine lines on wrists blur faster than thicker work because of constant movement and sun. Ask your artist where they land on that split and get their healed examples at two years. The biggest mistake is asking for ultra-thin lines under one inch. For a wrist piece that lasts, choose slightly heavier single-line weight and plan a touch-up at year two. During the session, the wrist range is low on pain but high on sensitivity around the tendons. Pair it with a thin silver chain bracelet or a minimalist wrist watch to stage the area without crowding the linework.
4. Neon 8 Ball with Glowing Edges and Dice on the Shoulder
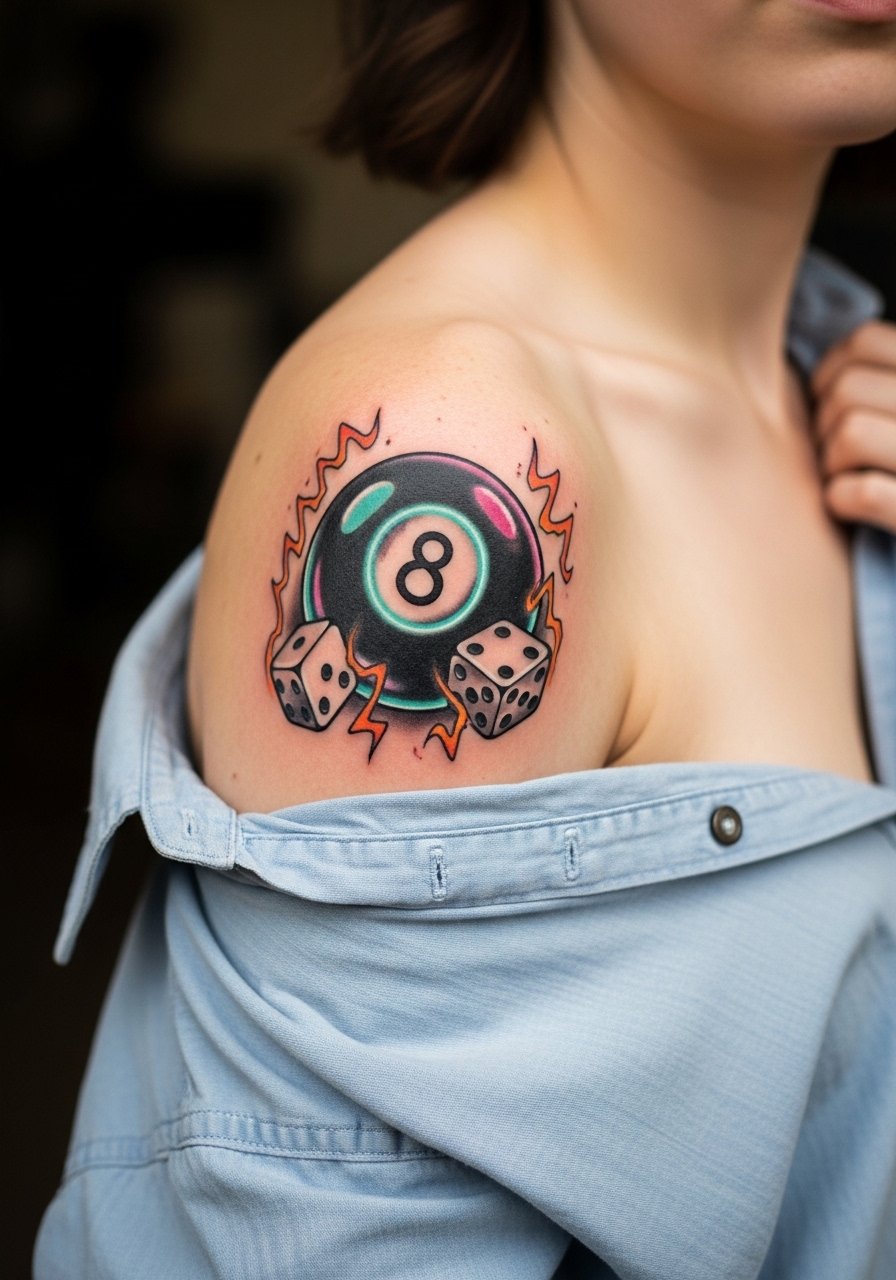
Neon shades and blacklight accents make this one pop in social photos, and the shoulder gives the artist room for a four-inch composition. The common regret is choosing neon for high-sun placements without planning for color retention. For longevity, ask for strategic black anchoring around the neon to hold contrast. Shoulder sessions are comfortable and amenable to two short sittings if your design includes dice or extra elements. If you want the arcade vibe, bring reference images showing the exact glow, not just color chips.
5. Magic 8 Ball with "Outlook Good" Text on the Ankle
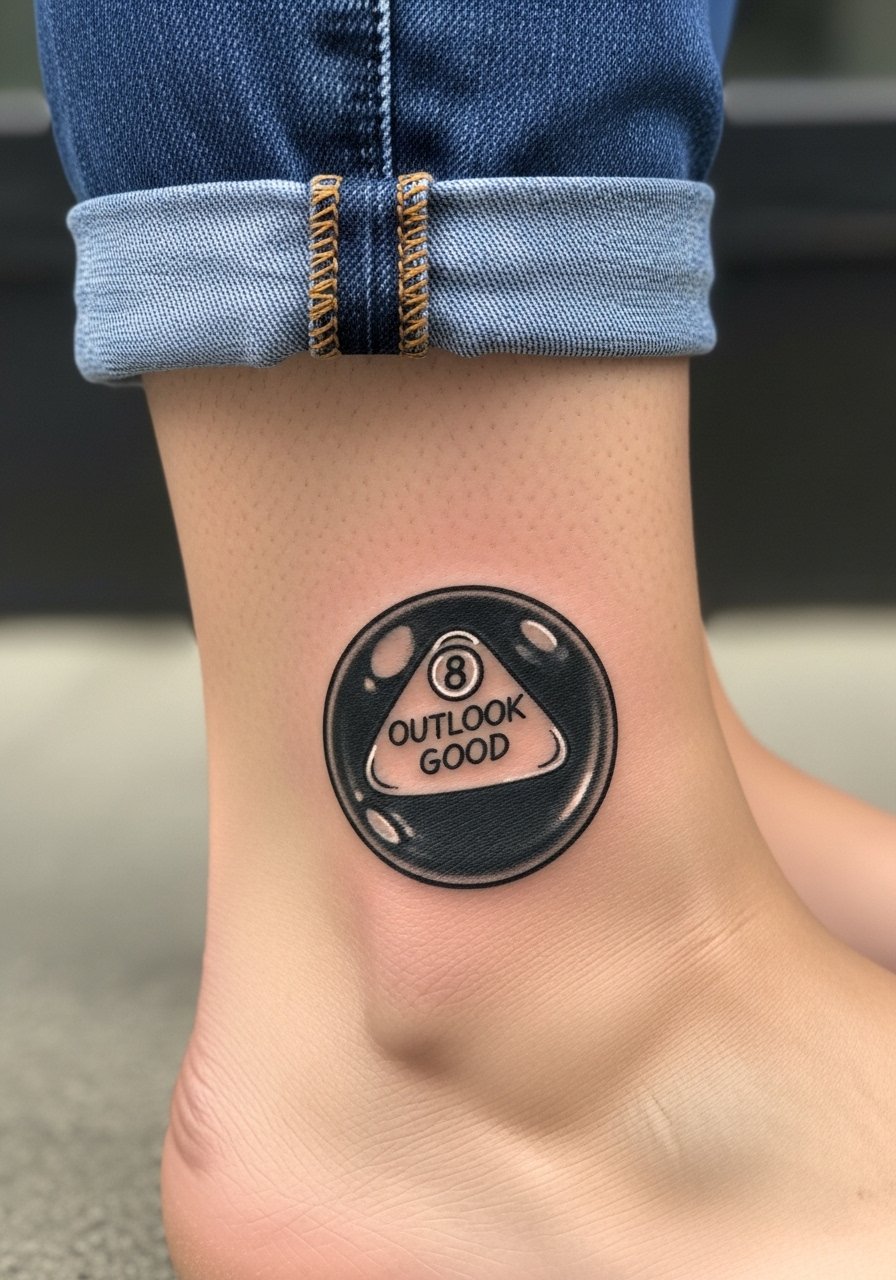
Ankle illustrations carry toy nostalgia without shouting. The phrase inside the triangle gives personality but small lettering is the trap. Insist on readable type at 2.5 inches and ask for white highlights where needed for contrast on medium skin. Ankle sessions are achy because of bone proximity but quick, and swelling is minimal if you prop the leg. For showing the piece, cropped joggers and boat shoes work well. Slip on cropped joggers and finish with boat shoes canvas to let the tattoo peek out.
6. Realistic 8 Ball with Rack of Balls Background on the Calf
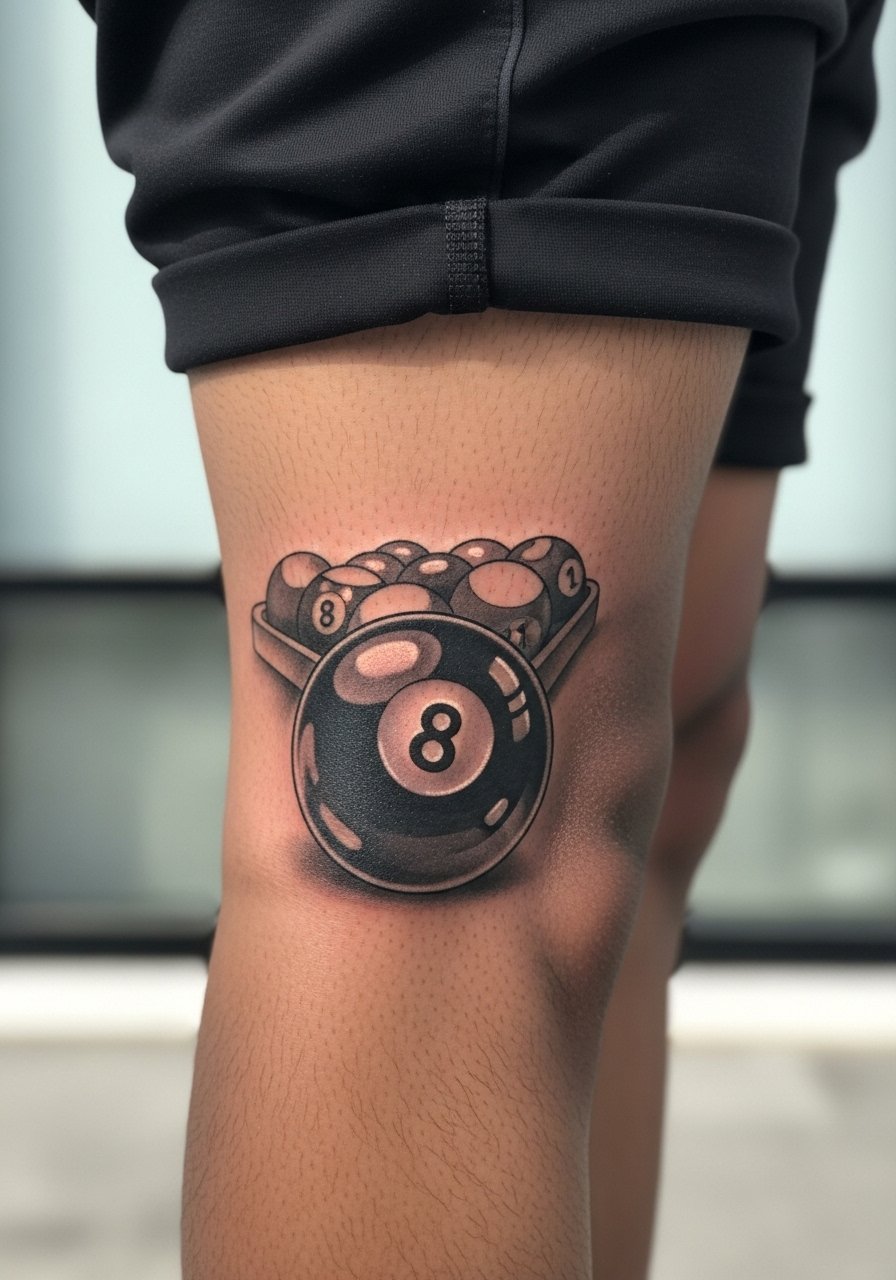
Photorealism reads cinematic on a wider canvas like the calf. Size matters here, so plan for a 4-5 inch layout and expect two short sessions if you want deep gradients. The downside is heavy realism can look dated if trends shift, but the payoff is an immersive piece that ages into a moody study of texture. Calf placements flex with muscle and weight change, so ask your artist to preview the composition on your leg at rest. During the session, keep the leg elevated and bring loose athletic shorts for easy access.
Studio Day Picks
The forearm, wrist, ankle, shoulder, bicep, and calf pieces above each need slightly different prep, so a short kit covers common needs for those areas.
-
Indie aftercare balm UK-style. A thinner balm keeps bold blackwork breathing during the first week without the heavy shine that clogs dense fills, which helps pieces like the skull overlay and blackwork biceps.
-
Australian tea tree salve. Gentle antiseptic properties can soothe irritated color work after a watercolor or neon session on areas that rub against clothing.
-
Japanese rice bran lotion. Lightweight hydration for darker skin tones helps maintain contrast without leaving a greasy sheen on packed blackwork.
-
Thin protective film roll. Use short pieces for high-friction zones like the hand and wrist during the first 48 hours to minimize scabbing and rubbing.
-
Aquaphor healing ointment. Apply thin layers in the initial days to lock moisture into fine line pieces while avoiding pore-clogging on heavily saturated blackwork.
7. Cracked 8 Ball Revealing a Skull on the Bicep
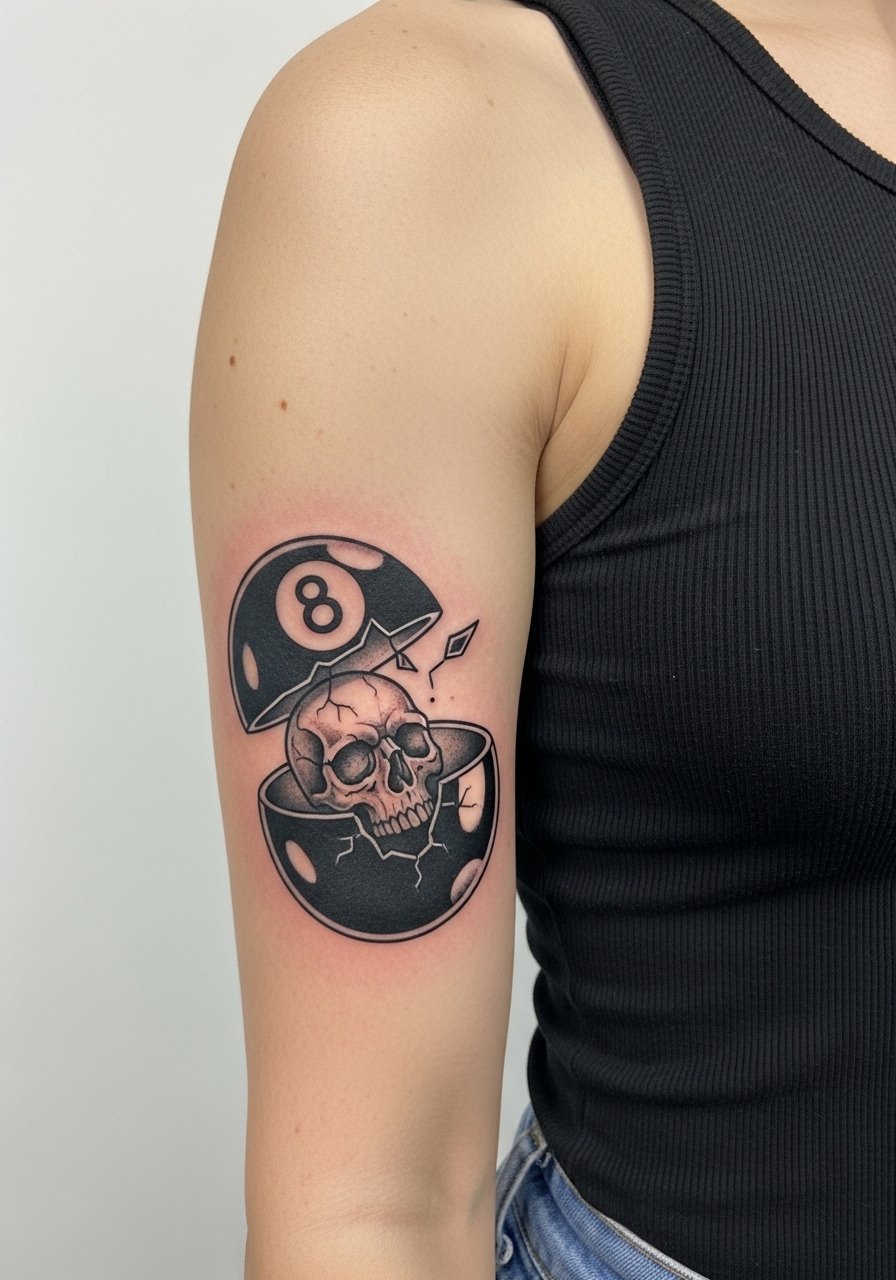
This blackwork option reads edgy without being fussy. Biceps handle heavier saturation well, so solid fills age cleanly here. Tell your artist you want strong negative space and crisp edges instead of tiny interior detail that will bleed. Pain is medium and sessions are fast for a three-inch motif. Watch out for the "too much black, no contrast" mistake; include a few white highlights or thin rays to give the cracked shell depth. Flex-friendly clothing like a fitted tank olive shows the piece at the gym without covering it.
8. Watercolor 8 Ball Splashing with Cards on the Thigh
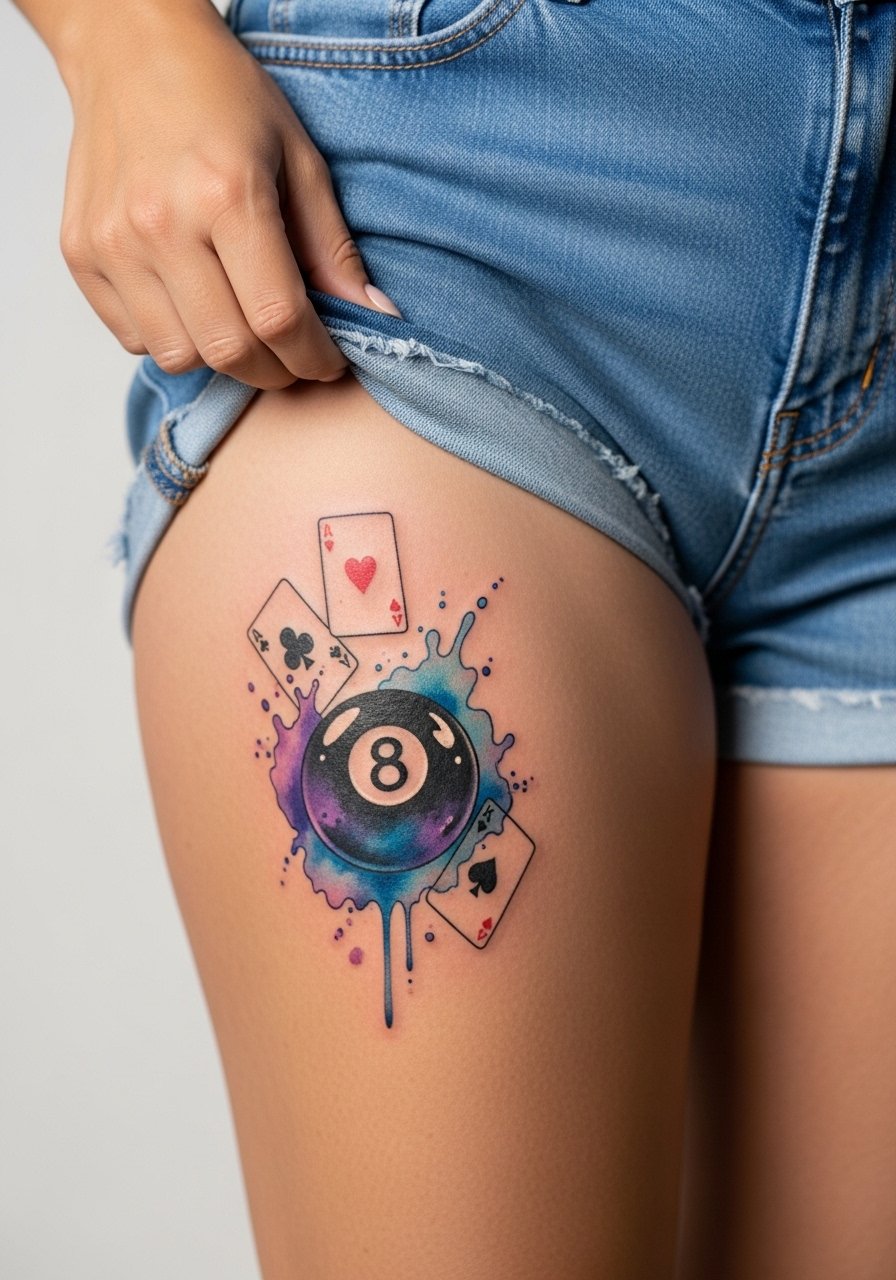
Watercolor effects let color bleed artistically, but they need size to avoid turning into a muddy patch over time. For thighs choose washes with some black anchors to hold the composition. The common mistake is compressing watercolor into a two-inch spot. Thighs give room, and two sessions often make the difference between shallow color and lasting saturation. During the session wear loose shorts you can shift without pressure on the area.
9. Micro 8 Ball Dotwork inside a Geometric Frame on the Finger
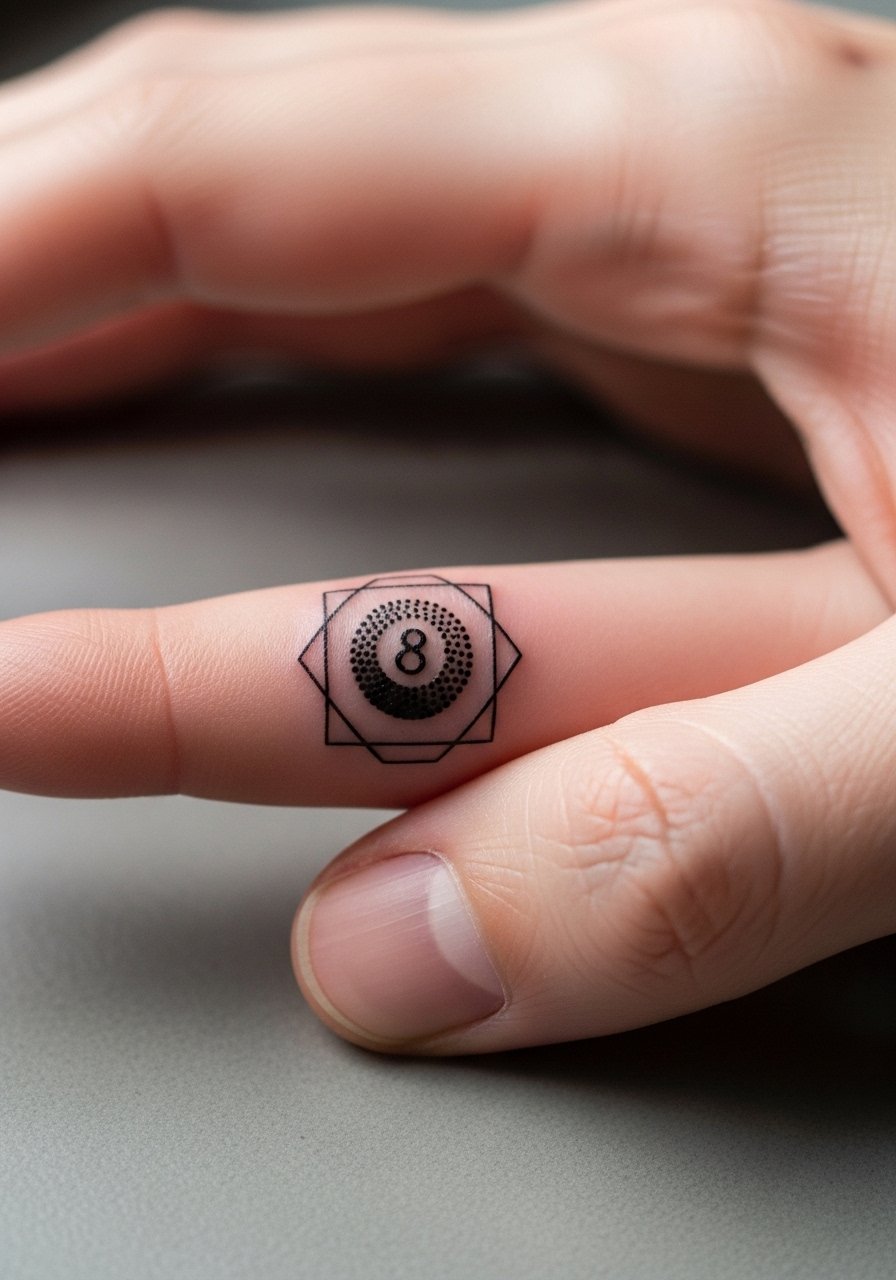
Finger micro work is delicate territory. Dotwork can look crisp at first but friction and washing wear it down quickly. Tell the artist you prefer slightly larger negative space in the frame so the dot gradients have room to age. The typical error is cramming complex geometry into a narrow finger surface. Expect touch-ups at year one for most finger placements, and plan your sizing accordingly. For showing the piece off, stacked signet rings sit on the opposite hand and keep attention without pressing against the tattoo, which helps during healing. Try stacked signet rings after it settles.
10. Black-and-Gray 8 Ball Pocketed in Table Felt on the Upper Arm
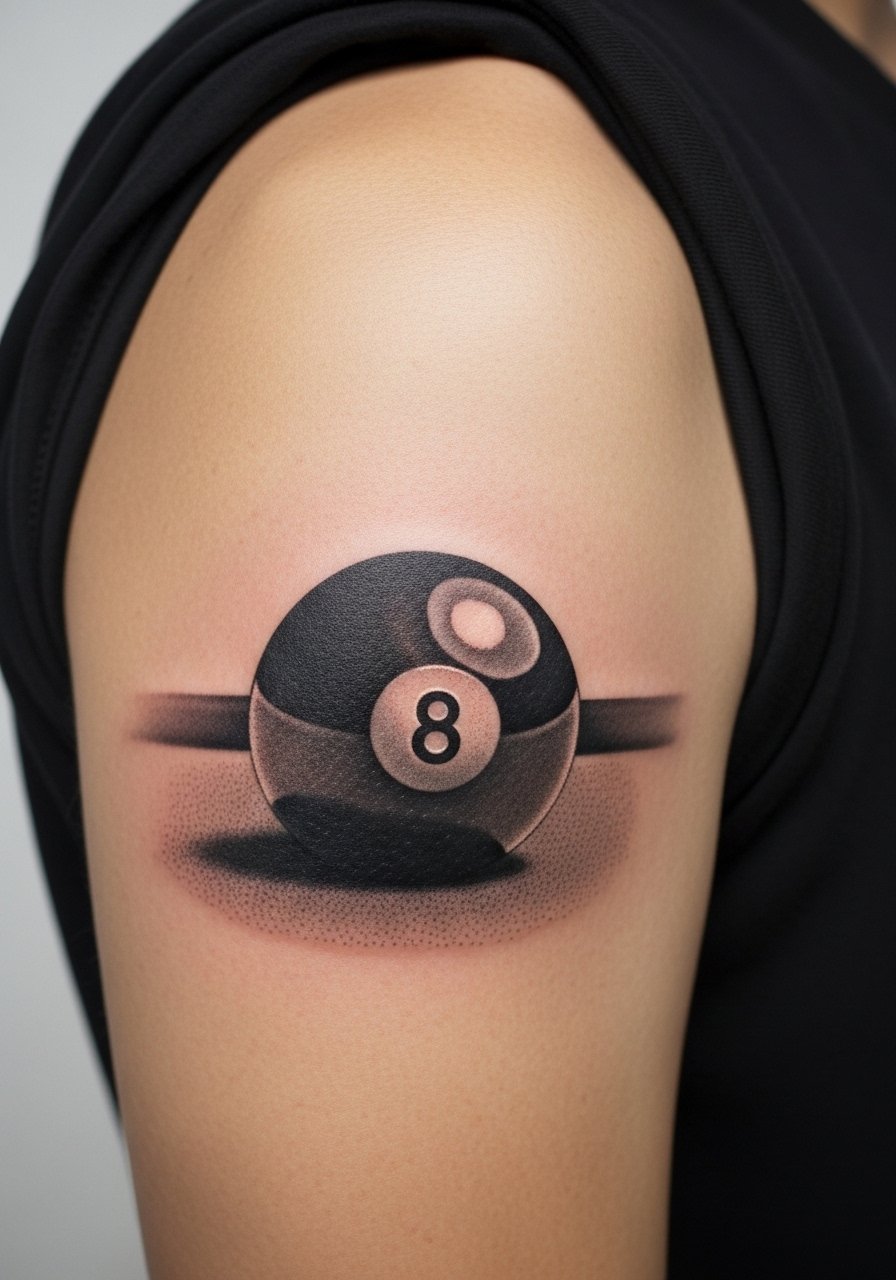
Upper-arm photorealism gives you room for texture and depth. The trade-off is time and cost, but the healed result can be cinematic. Ask for a staged mock-up of the rack background so the focal 8 ball does not compete with surrounding detail. Upper arm work tolerates dense shading, and blowout risk is lower than on wrists or hands. Schedule two sessions if you want crisp gradients without overworking the skin. Keep that area out of tight shirts the first week to avoid rubbing on fresh shading.
11. Ornamental 8 Ball with Mandala Patterns at the Collarbone
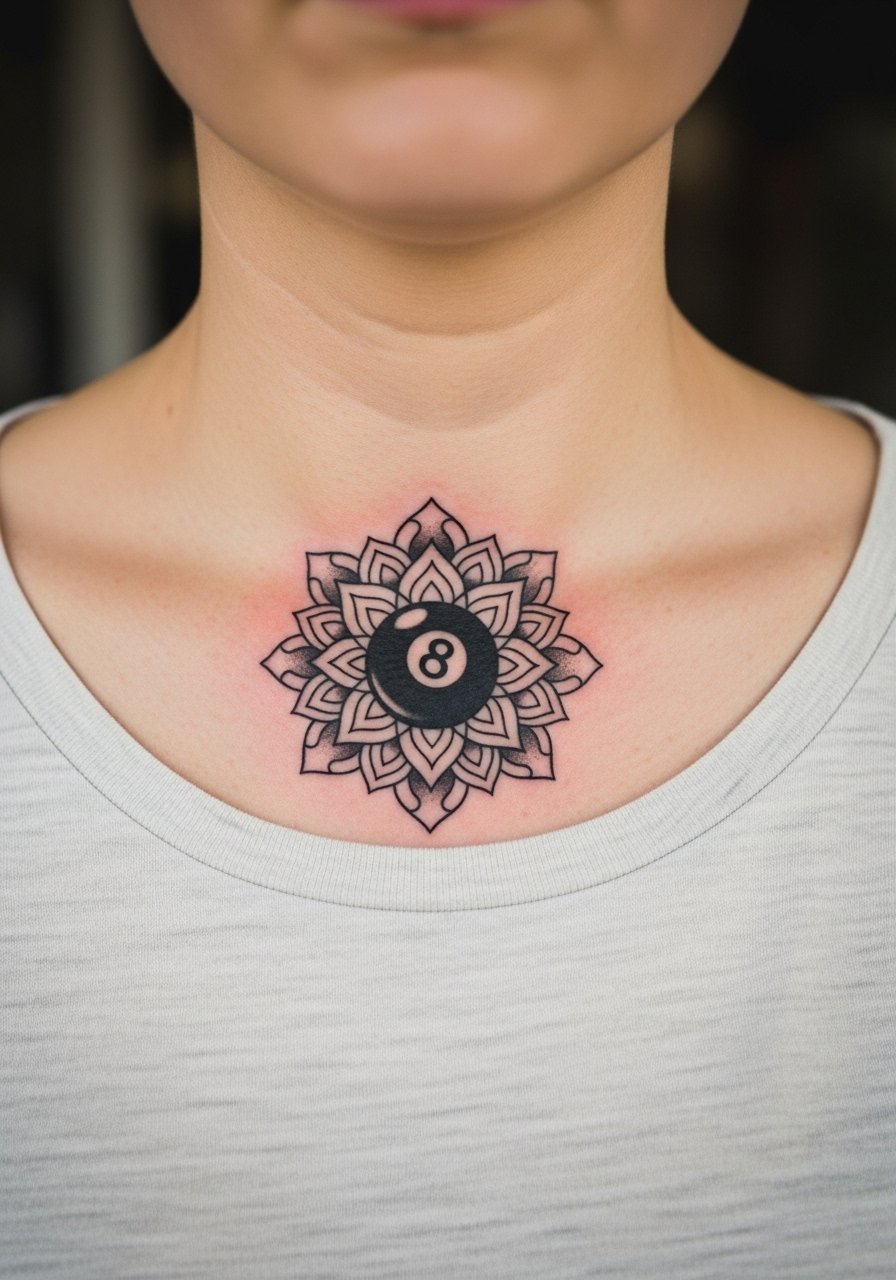
This ornamental take blends symbolic geometry with pool imagery. Collarbone skin is thinner and shows detail well, but tiny stippling can fade if packed too tightly. The common mistake is over-detailing in a three-inch area. Request balanced spacing between mandala rings and a bold silhouette for the 8 ball. Collarbone sessions can be sensitive, and you should expect sharp but short sensations. For the design, mention origin respect for mandala patterns and pick variants that nod to the aesthetic rather than replicate sacred symbols verbatim.
12. Ignorant-Style Blocky 8 Ball on the Side of the Neck
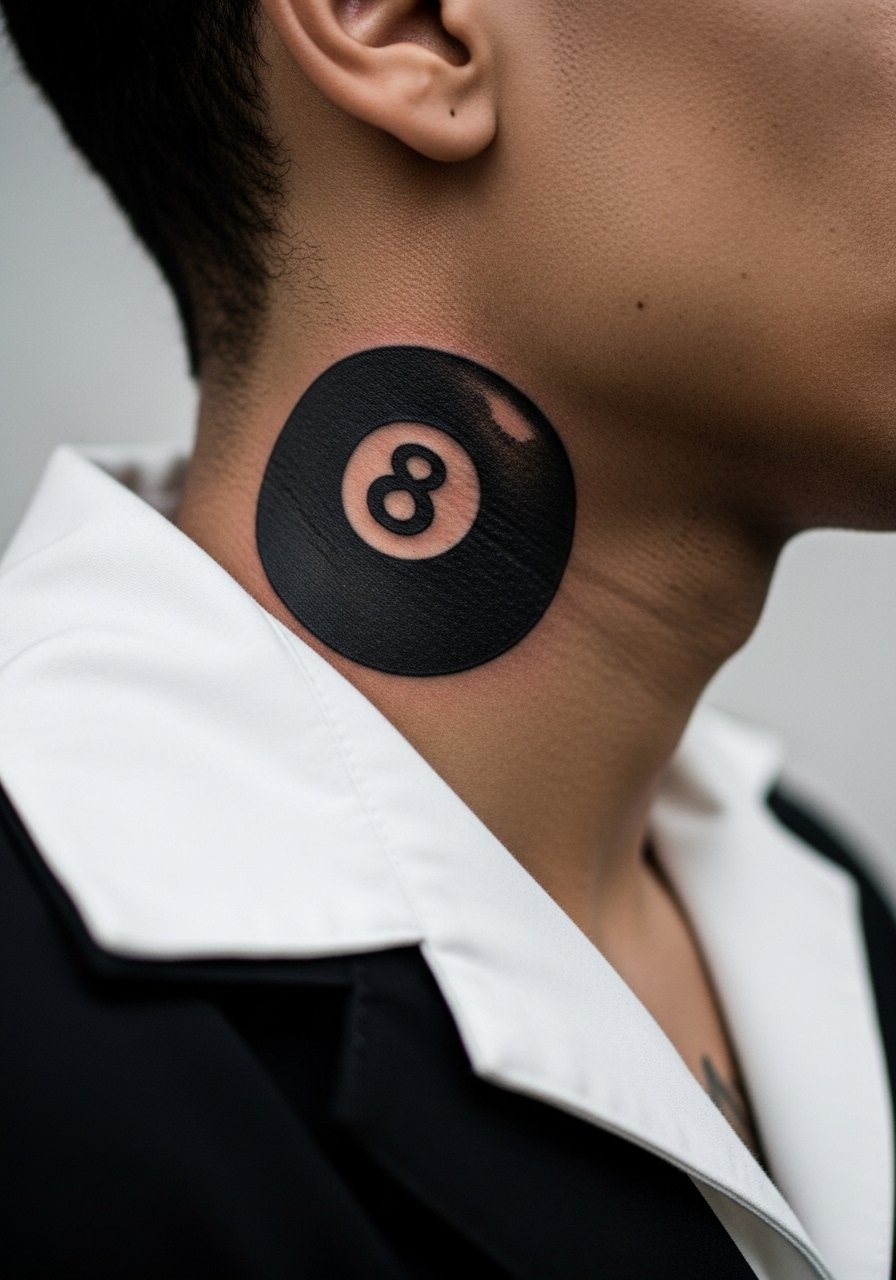
Ignorant style embraces raw marks and heavy black fills. Neck skin is sensitive and the ink can look striking, but consider visibility and potential workplace impacts. The typical mistake is asking for dense block fill without planning for touch-ups, because the neck gets constant sun exposure and friction from collars. Sessions for neck pieces are short but sharp. If you go this route, plan for a touch-up window at year one and expect the piece to patina with time.
13. 8 Ball as a Sleeve Connector for Pool and Gambling Patchwork
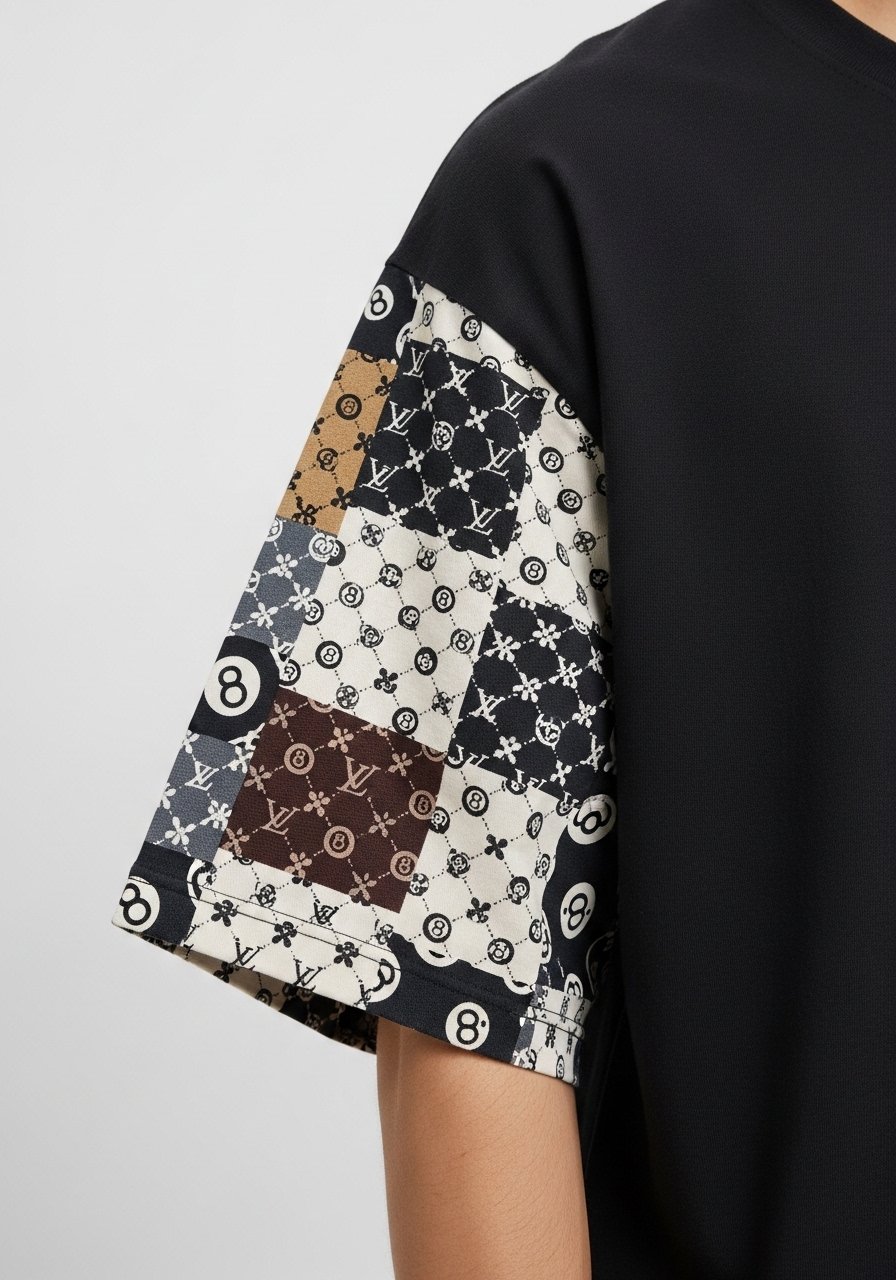
Using the 8 ball as a sleeve connector is smart for anyone building a patchwork sleeve from flash elements. I tell clients to use the 8 ball as a visual comma between unrelated patches. In consultation, bring photos of the neighbor pieces so the artist can match lineweights and saturation. The main mistake is inconsistency in scale, which looks like an afterthought. For day-of wear pick a loose fit tee so sleeves can be rolled or pulled for clear access during long sessions.
14. Dark-Skin Optimized 8 Ball with Iridescent Shading on the Outer Bicep
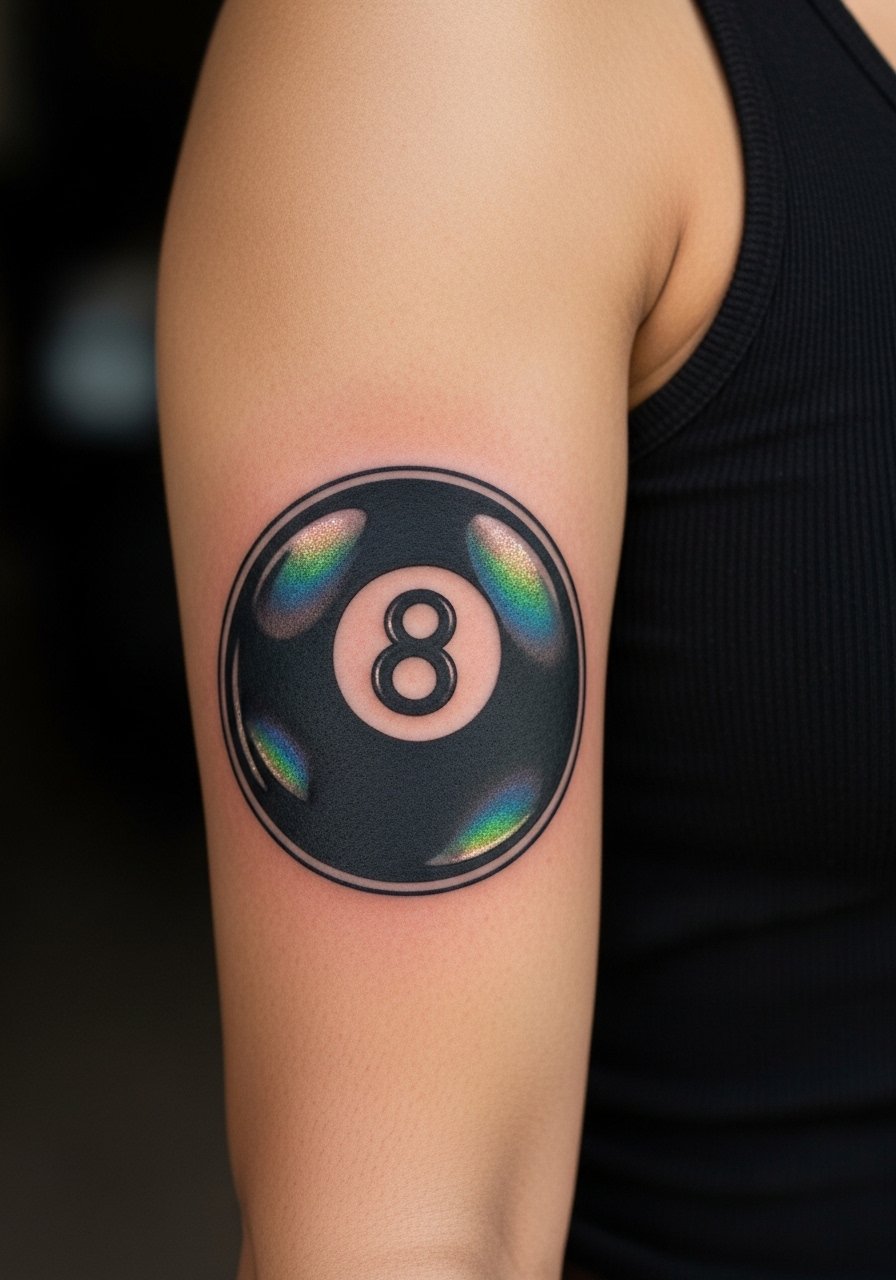
Dark skin tones often need planned contrast to keep blackwork readable. I advise artists to build in white highlights sparingly and to layer saturation in a way that creates depth without relying on sheer brightness. Iridescent ink or muted cool tones near the highlights can help an 8 ball pop. The bicep handles saturation well and flexes nicely during healing. Ask to see healed photos on similar skin tones, and request a touch-up slot in the first six months if contrast softens. Show it off with a fitted tank so the shading reads in casual settings.
15. Knuckle Countdown: 1–8 Mini 8 Balls Across the Fingers
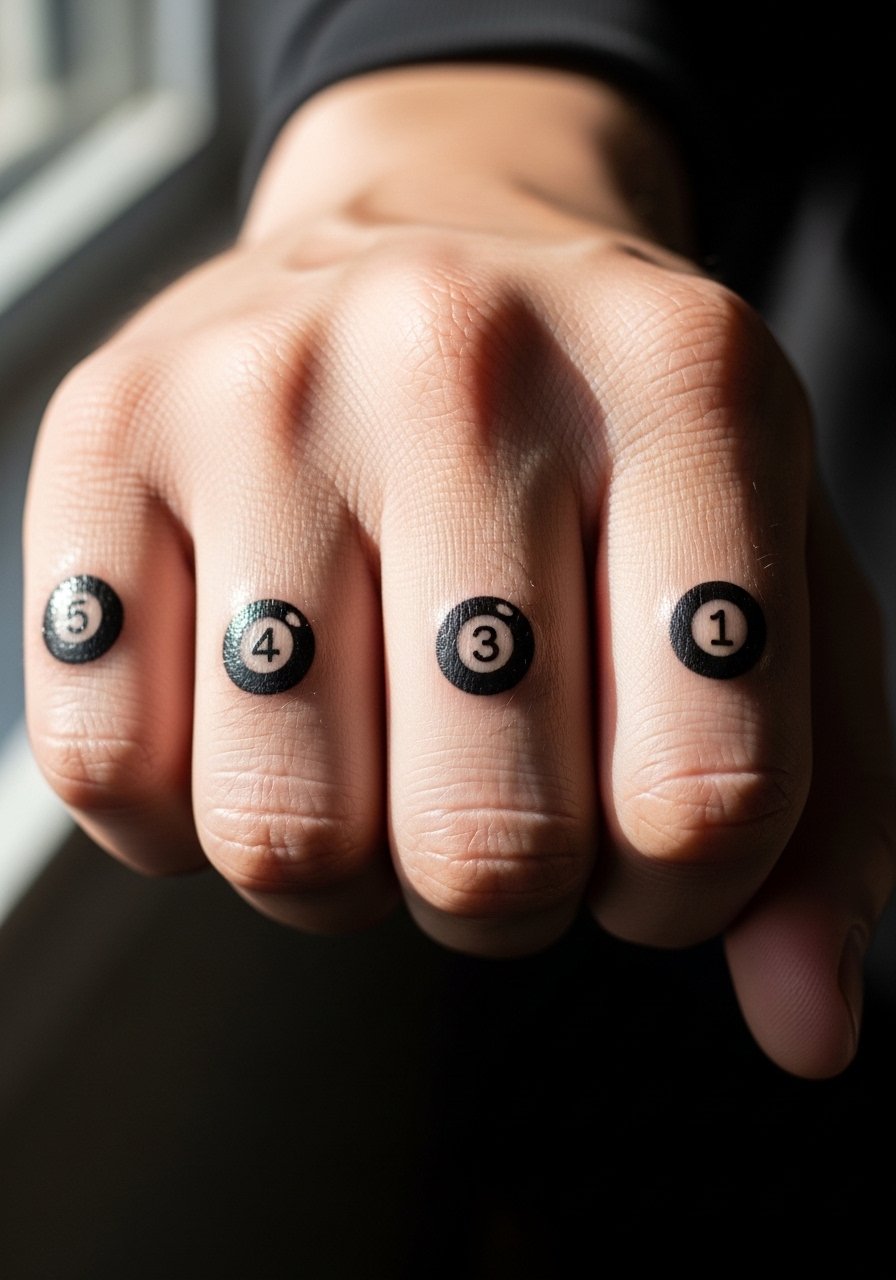
This playful approach spreads a motif across the knuckles as a series. The big compromise here is longevity; knuckles see constant washing and contact, so expect accelerated fading. Space the little balls slightly larger than you think and avoid interior micro-details. The usual error is trying to pack digits with too many tiny elements. Knuckle work stings and sometimes requires multiple touch-ups. For immediate styling and to protect during healing, keep fingerless gloves off the hand and use a fingerless gloves leather only after the two-week mark if needed for show-off photos.
16. Neo-Traditional 8 Ball with Cherries and Flames on the Outer Forearm
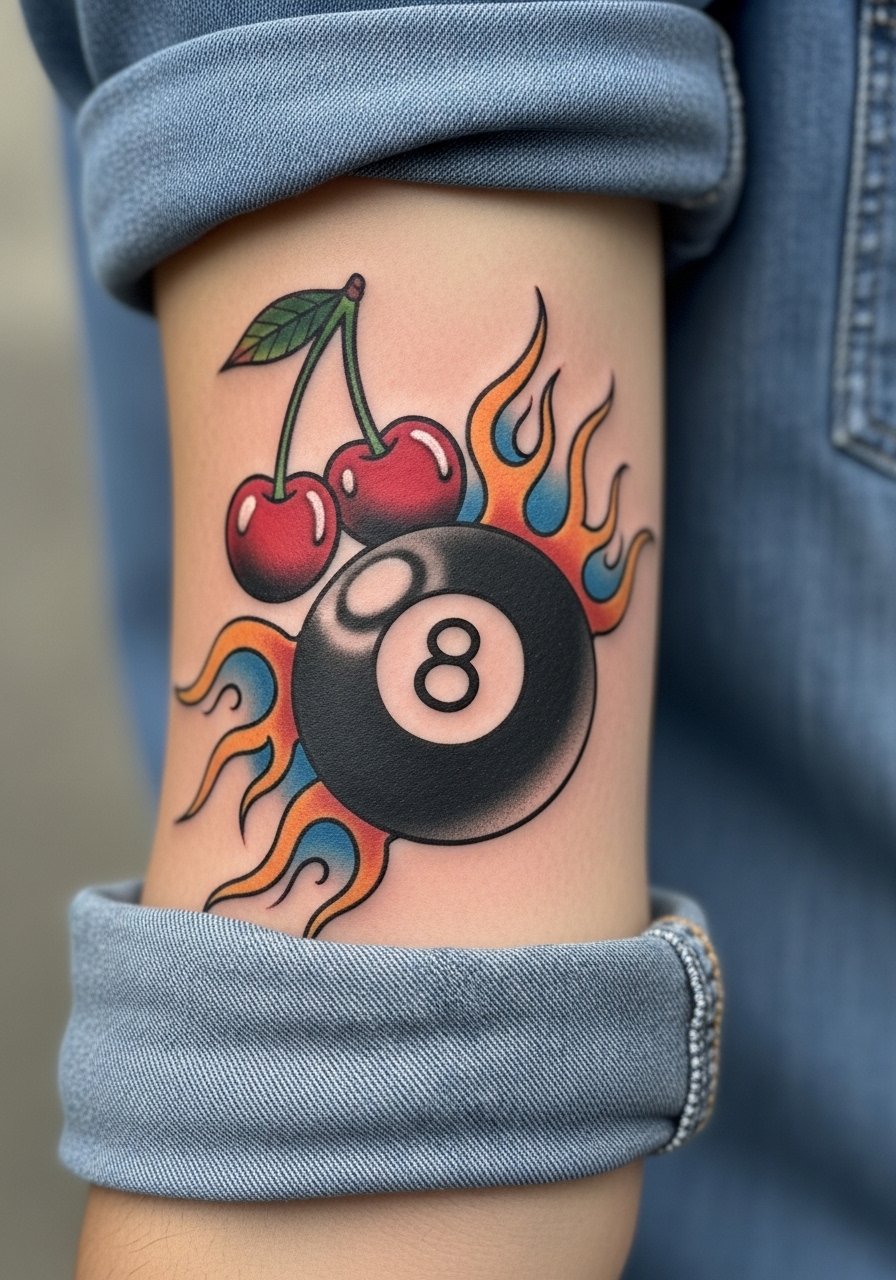
Neo-traditional treatments add playful motifs like cherries and stylized flames. Forearm placement gives room for color fields and bold outlines that keep the design readable with time. Avoid placing tiny cherries with thin stems; make the fruit slightly larger so the color holds. Forearm sessions are straightforward and often finish in one visit for a medium-sized piece. Pair it for photos with a rolled sleeve denim shirt to let the color pop.
17. Micro-Realism 8 Ball on the Inner Bicep
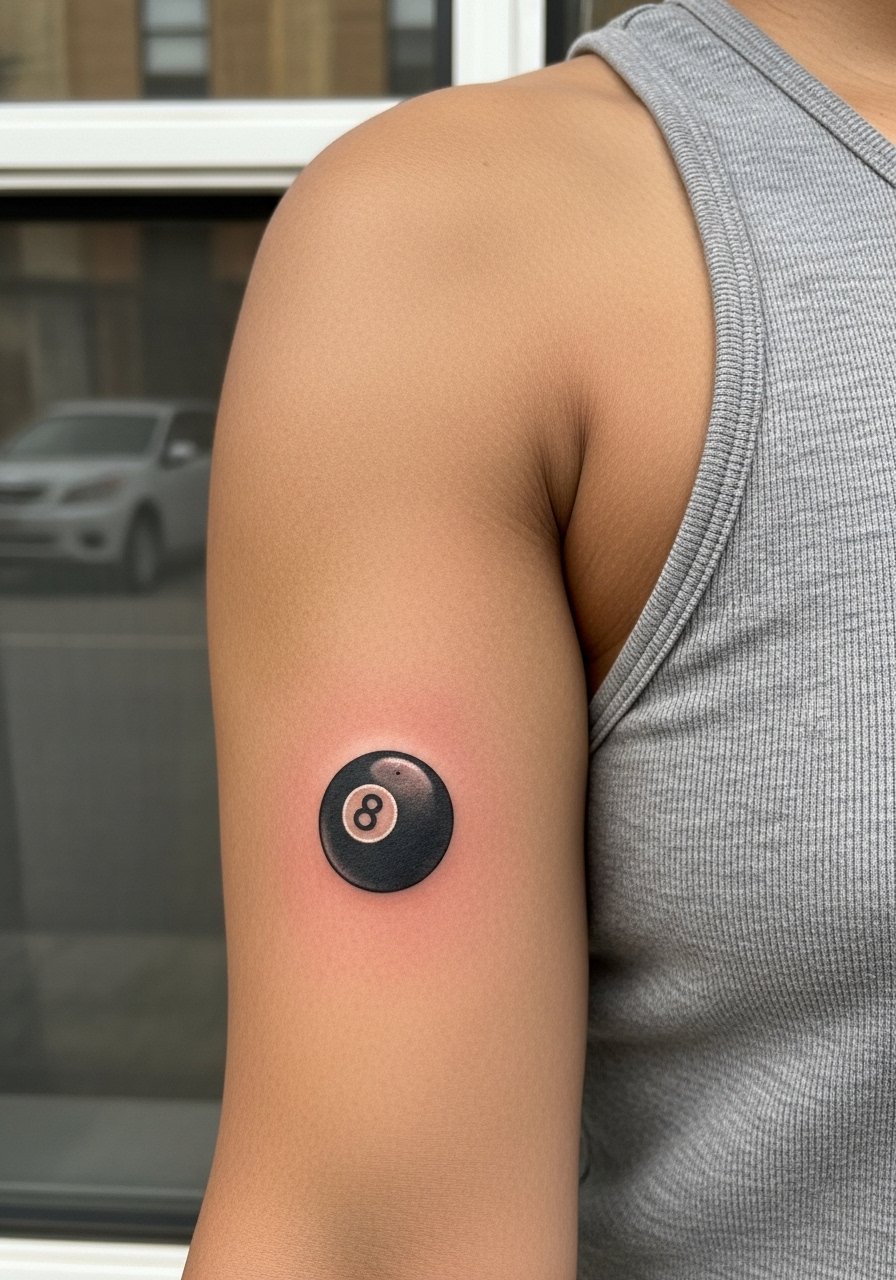
Inner bicep micro-realism sits close to sensitive skin so needle depth matters. One camp of artists treats the area like any other and gets crisp micro detail. Another camp warns that the inner bicep moves and swells often, risking softening of tiny realism. Ask your artist to show healed inner-bicep samples and book a short follow-up. Sessions are medium in discomfort because of the thin skin. For the session wear a tank top you can lift easily so the artist has unobstructed access.
18. Seasonal Calf 8 Ball for Shorts-First Summer Visibility
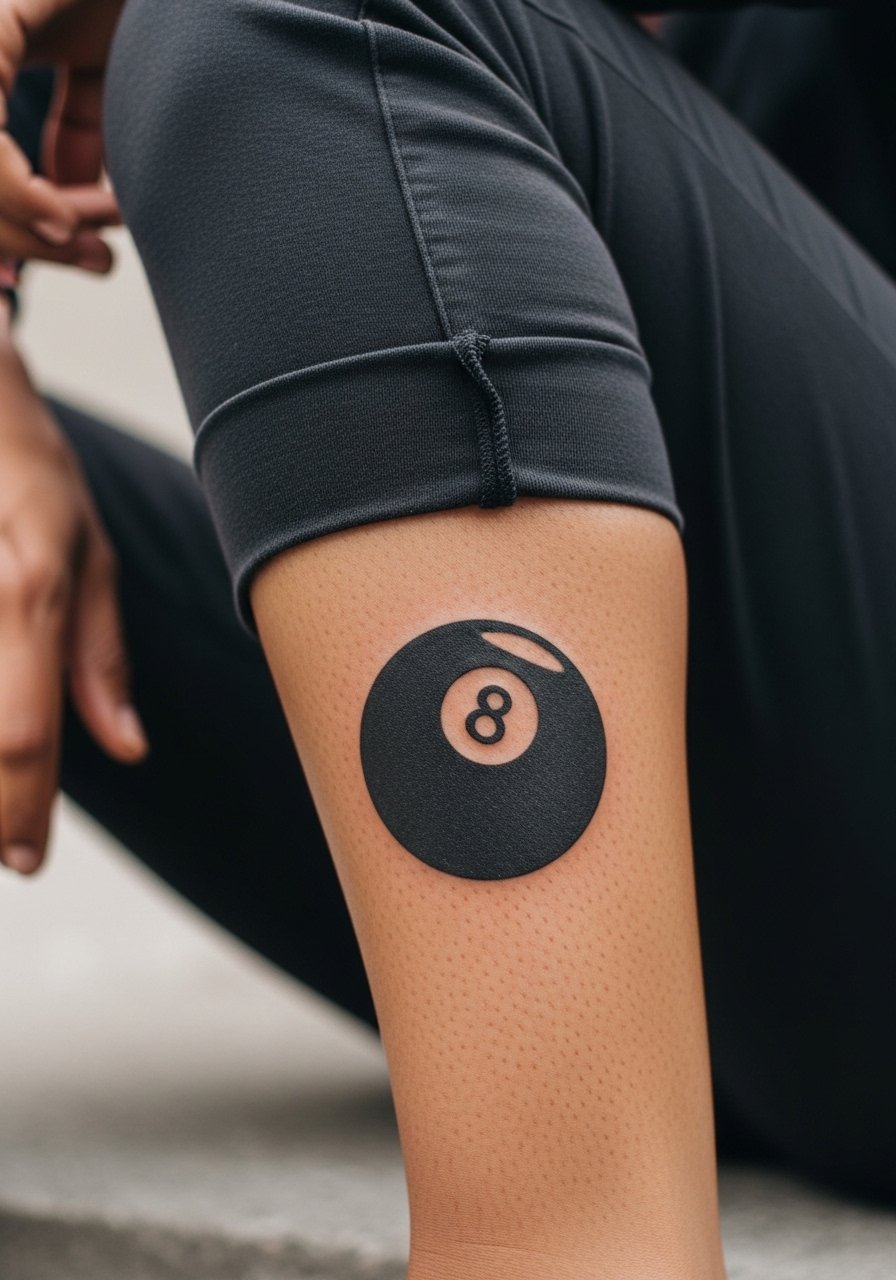
A tattoo placed for summer visibility is tactical. The calf is perfect for a slightly larger, photoreal or traditional 8 ball that looks intentional with shorts. The common oversight is not planning for weight fluctuation and how the piece sits when the leg muscles relax. Ask your artist to show the design on your leg in both flexed and relaxed positions. For showing off in season, roll up slim joggers or pull on athletic shorts loose.
19. Tiny Behind-the-Ear 8 Ball Accent
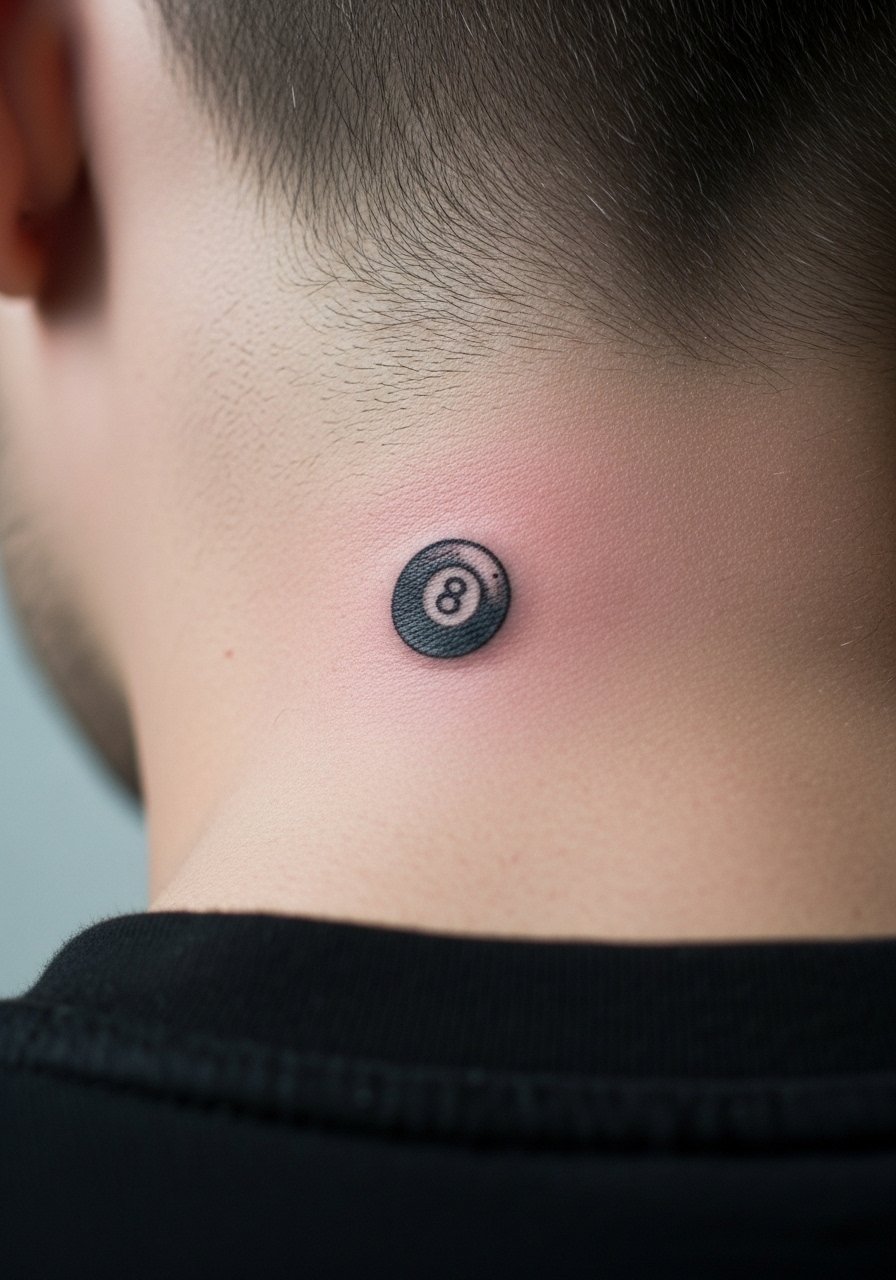
Behind-the-ear spots give a secretive nod to the motif and work well for micro pieces. The area requires a hairline framing so the tattoo reads as an accent rather than a centerpiece. Sessions are short but the spot can feel sharp. Make sure the artist has a steady hand for that small radius. Placement behind the ear takes experience to execute cleanly, so ask to see healed examples on similar skin and hairline types.
20. Linear Stack: A Column of 8 Balls Up the Forearm
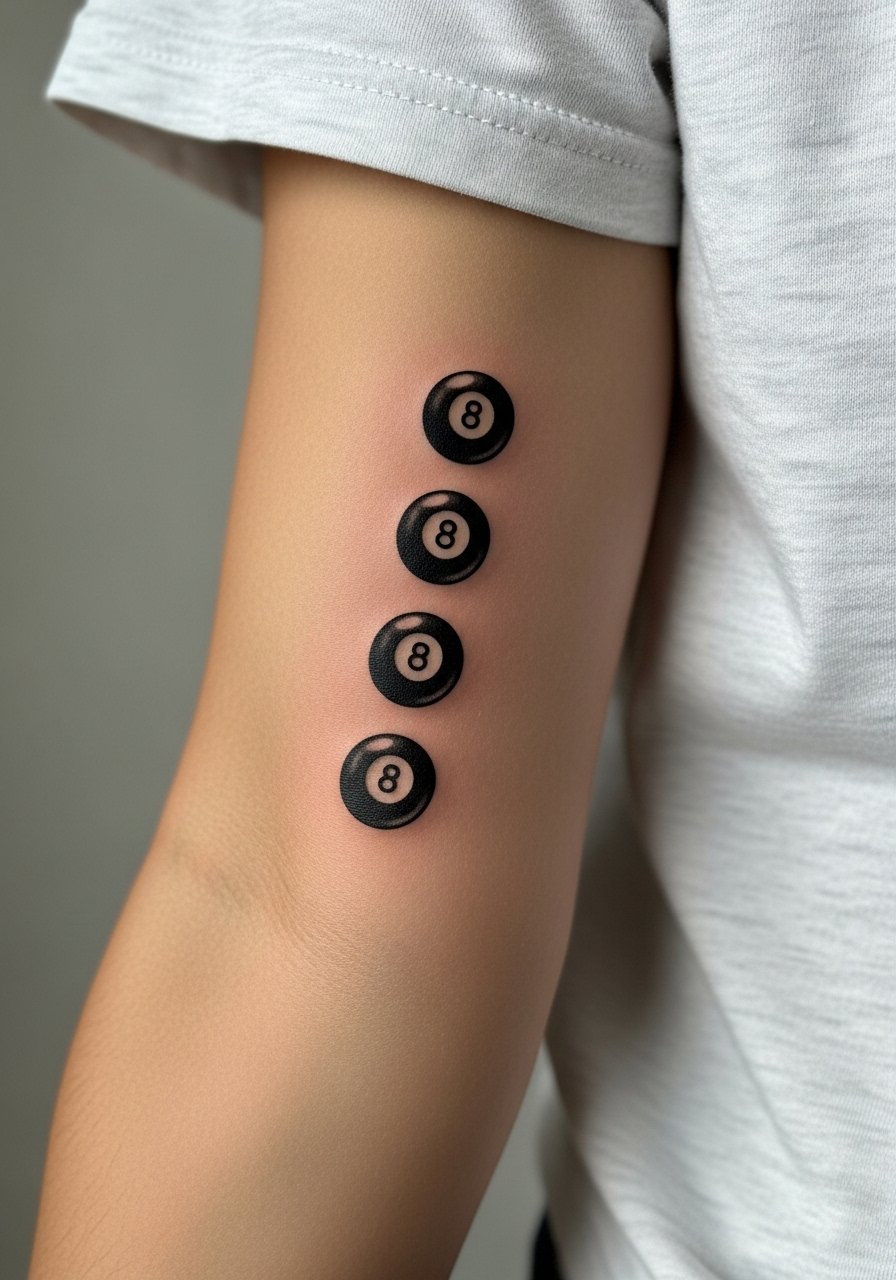
A vertical column creates rhythm across the forearm and can act as a minimalist sleeve starter. The ageing risk is inconsistent spacing or varying dot density that makes the stack feel uneven later. Tell your artist you want strict spacing and a matching line weight for every ball. Forearm placement is forgiving, but plan for touch-up if any ball shows early softening. For the session wear a loose tee you can roll easily.
21. Collage Chest Piece: 8 Ball with Cards and Dice as a Centerpiece near the Upper Chest
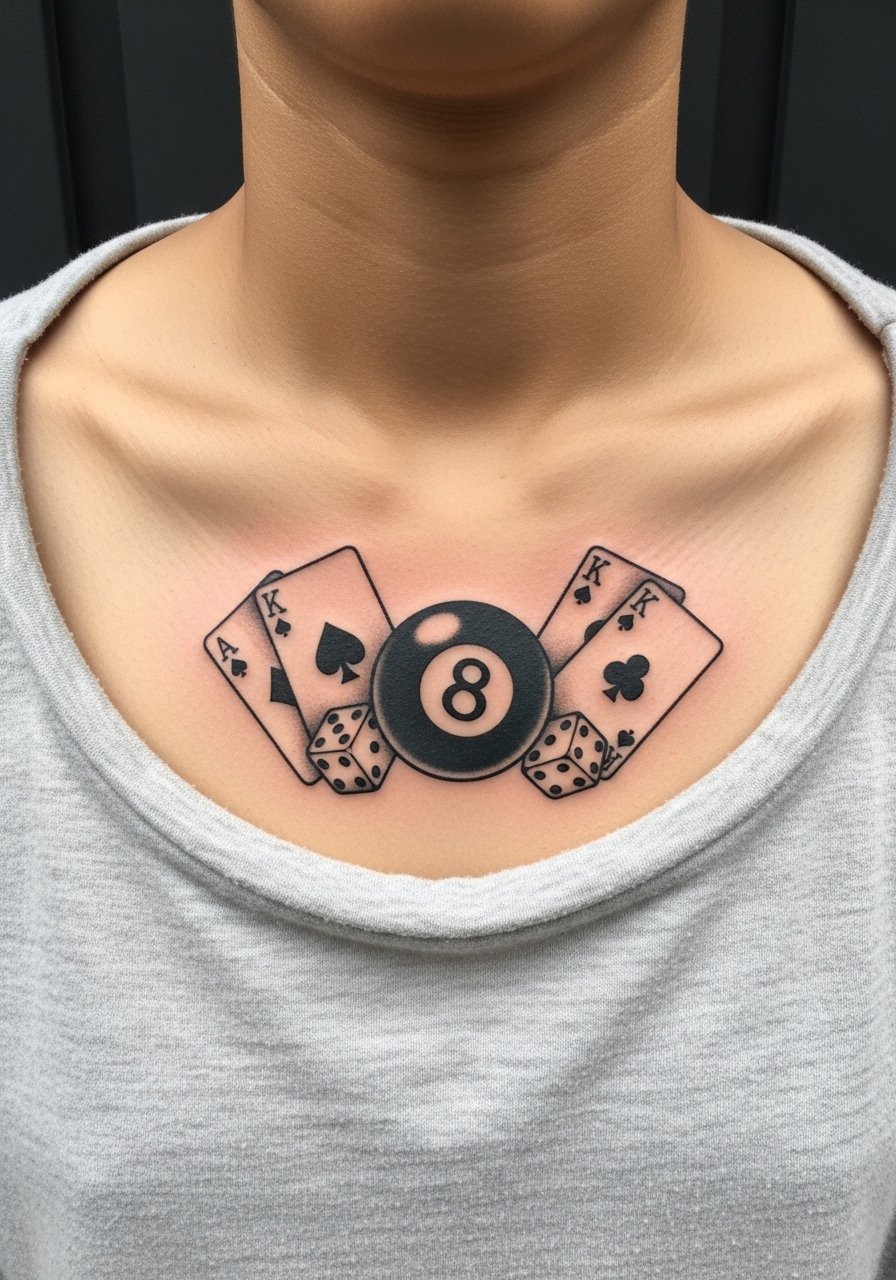
A chest-centered gambling collage can read like a vintage poster when the 8 ball is given the central focal role. Chest skin varies in thickness, so ask the artist for a mock-up on your body to confirm scale. Common mistakes include packing too many small elements into the chest area, which can blur with time. Sternum-adjacent work is more sensitive and may need a patient, two-session approach. If you opt for this, pick a wide-neck shirt for the session so the artist has clean access and you stay comfortable.
Frequently Asked Questions
Q: How much does an 8 ball tattoo cost and how can I keep it affordable?
A: Prices vary by style and size, but smaller flash or walk-in 8 balls are typically the least expensive. If budget matters, look for shop flash days or guest-spot specials and ask about single-session flash pricing. Bring a clear reference and be realistic about touch-up expectations so you do not pay more later for fixes.
Q: Will a fine line 8 ball on my wrist blur faster than a bold traditional one?
A: In my experience this depends on placement and spacing. Fine line on wrists faces more movement and sun, which can soften thin lines sooner. Many artists split into two camps: some swear fine line can last with the right depth and spacing, others recommend slightly heavier linework for wrists. Ask your artist where they stand and request healed examples.
Q: What should I tell the artist if I have dark skin and want an 8 ball that reads well?
A: Say you want contrast built into the design with selective highlights and strong black anchors. Point out your preferred skin-tone examples and ask about subtle color or iridescent shading to lift highlights. Scheduling a short touch-up after healing is common to maintain contrast on darker tones.
Q: How do I manage healing for small hand or finger 8 balls differently than larger forearm pieces?
A: Small hand and finger pieces need extra attention because of constant washing and friction. Use protective film during the first 48 hours and plan for a touch-up at six to twelve months. Try to avoid heavy work on that hand the first week to reduce scabbing.
Q: What should I wear to the appointment for a forearm or shoulder 8 ball so the artist has easy access?
A: For forearm pieces wear a loose fit tee that you can roll up, and for shoulder work bring a button-down or off-shoulder top that can be pulled aside. Comfortable, adjustable clothing keeps the session efficient and helps the artist reach the area without shifting you constantly.
