
Fine line ink dominates the feed, and the same hands booking those pieces are quietly booking touch-ups at year two. The reality is that tiny craftsmanship reads a certain way fresh and another way after a few summers of sun and sleeves. Read through these curated minimalist options, where I point out what holds up, what to ask at consultation, and which wardrobe choices actually make the tattoo sing.
1. Single-Line Arrow on Inner Forearm

I recommend the single-line arrow when you want direction without a lot of filler. Tell your artist you want a slightly heavier line weight than the thinnest option on the reference image so the shaft keeps its crispness after one to three years. Common mistake is scaling the arrow under one inch, which tends to blur into a fuzzy mark on the skin over time. Expect a low to moderate pain level and a single short session. For the appointment wear a loose short-sleeve button-up so the artist can reposition the arm easily and you stay comfortable. Touch-ups are common around year three if you want the shaft to stay sharp.
2. Minimalist Skull Outline on a Finger
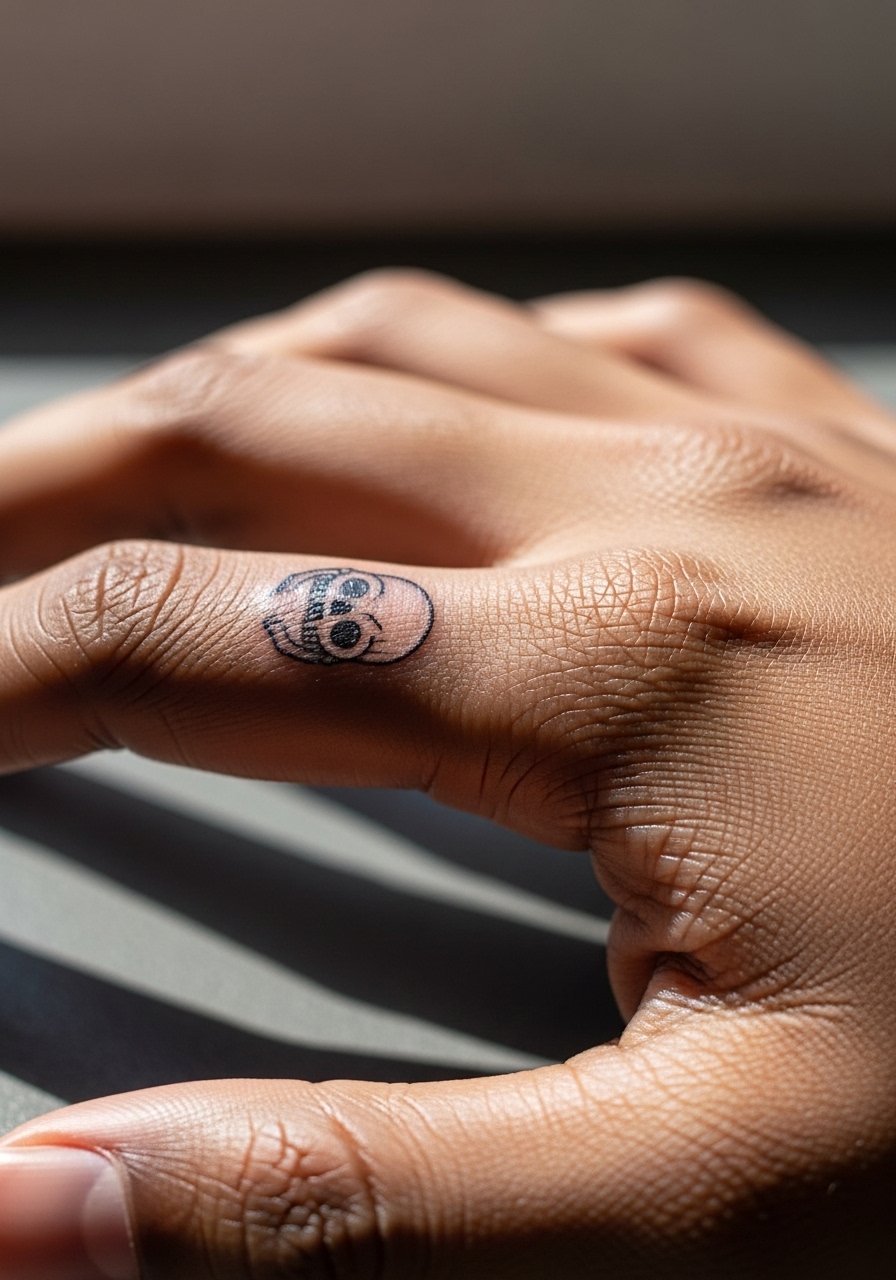
Finger tattoos live in a friction zone, so I usually recommend a slightly bolder outline than a delicate trace. Tell the artist you want a single-session outline with a small interior gray wash to preserve shape rather than fine shading that disappears. The biggest mistake is asking for ultra-thin linework on the finger because hands rub against surfaces and washing speeds fading. Plan on touch-ups roughly every 12 to 24 months. Pain is higher on finger bones, but sessions are short. For showing it off, keep hands simple with a single signet ring on the opposite hand so the skull draws attention without jewelry clutter.
3. Abstract Geometric Star Cluster on the Wrist

Wrist placements get a lot of sun and view time, so spacing matters more than density. Ask for 1 to 1.5 inches of overall spread and negative space between stars so the cluster stays readable after two to five years. A common aging issue is cramming tiny stars together, which merges into a smudge. Session time is short and pain is mild to moderate. For showing this off, pair it with a thin leather cord bracelet on the opposite wrist and avoid chunky stacks that compete with the linework. If you plan heavy sun exposure, expect an earlier touch-up.
4. Clean Matchstick with Flame on Outer Bicep

The outer bicep is forgiving for slightly longer pieces, and a two-inch matchstick reads bold without being heavy. Ask for a slightly textured flame with minimal stipple shading so the fire keeps dimension without relying on heavy saturation. The common mistake is asking for dense black fill in the flame, which ages unevenly against the thin stick linework. Session feels like a steady vibration but is short. For show-off styling, this placement pairs well with a fitted muscle tee or an open vintage leather jacket. If you lift weights regularly, mention muscle changes to your artist so they can adapt placement and scale.
5. Simple Vintage Dagger on a Finger
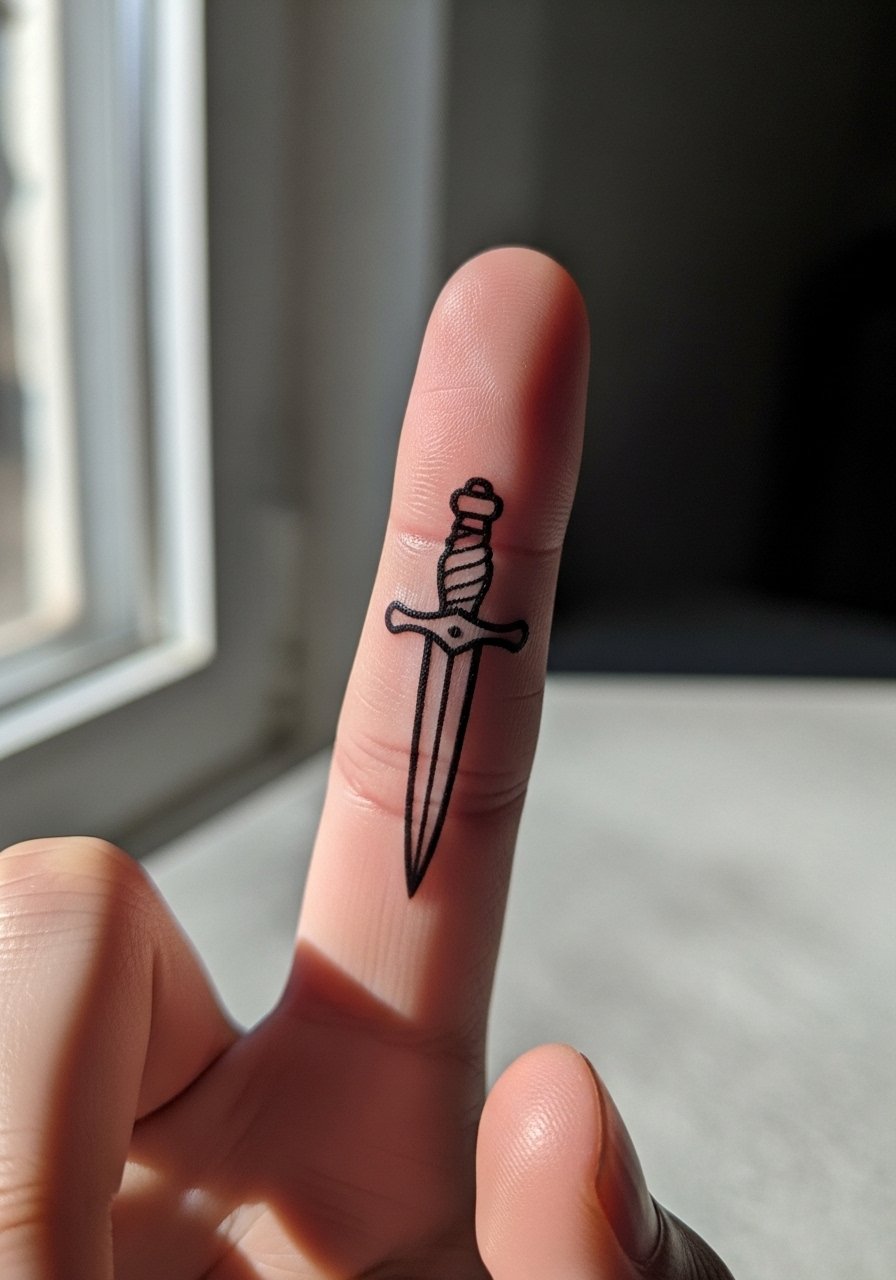
Finger daggers are iconic but demand clear line weight choices. Ask the artist for a 1-inch outline with no ultra-fine interior details. The mistake is requesting ornamental filigree inside the blade at this scale. Expect more frequent touch-ups than an arm piece because of constant use and washing. Pain is higher around the joints but sessions are brief. Styling advice favors bare hands or a single signet ring on the opposite hand so the dagger remains the focal point. If you work in an environment where hand ink is sensitive, consider placement alternatives.
6. Cyber Sigil Graphic on the Forearm
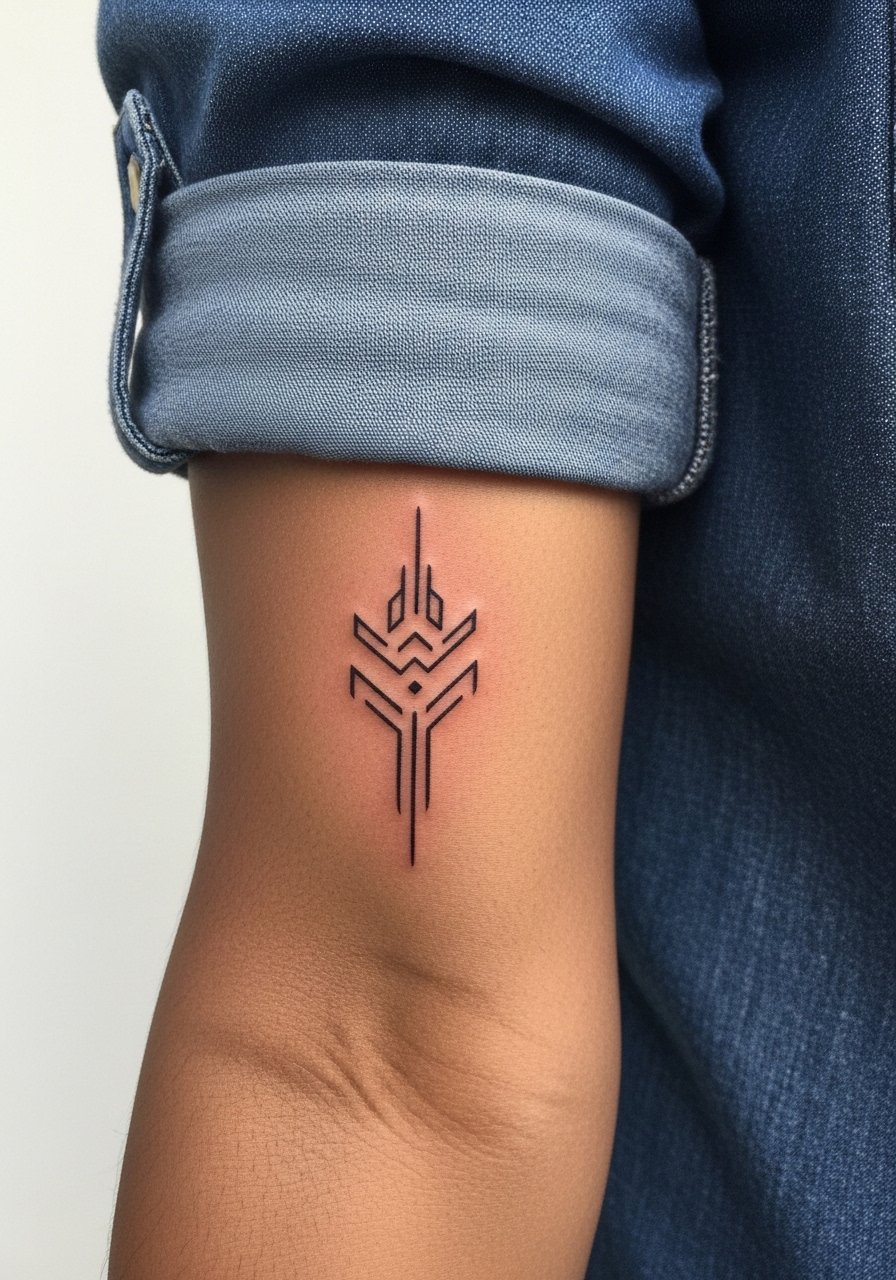
This tiny futuristic glyph works best at 1.5 to 2 inches on the forearm where it can be seen but not dominate. Tell your artist you want consistent linework and a touch of spacing inside the sigil to avoid merging lines after a year or two. The debate over fine line here is clear. One camp says fine line gives the crisp cyber aesthetic but blurs on high-motion forearms. The other camp insists that when spaced properly and done at the right depth, fine line can settle cleanly. Ask your artist which approach they back and why before booking. For wardrobe, rolled cuffs like a rolled cuff chambray shirt pair well for subtle reveal.
Studio Day Picks
The forearm, finger, and wrist pieces above heal differently from larger chest and bicep work, so a few small items make the session and first week much smoother.
-
Stencil transfer paper kit. Lets you preview the stencil placement and line weight on skin before ink hits, which is helpful for the arrow and sigil pieces above.
-
Topical numbing cream. Apply 30 to 45 minutes before a sensitive finger or wrist session to reduce needle pain without impacting the artist's line control.
-
Thin protective film roll. Keeps small finger and wrist tattoos clean while you wash your hands and type over the first few days.
-
Fragrance-free gentle body wash. Use a mild wash for the first two weeks to avoid irritating delicate linework on wrist and forearm placements.
-
Aquaphor healing ointment. A thin layer in the first three days helps lock in moisture for fine line pieces without smothering the skin.
7. Bold Simple Cross with Flair on Upper Chest
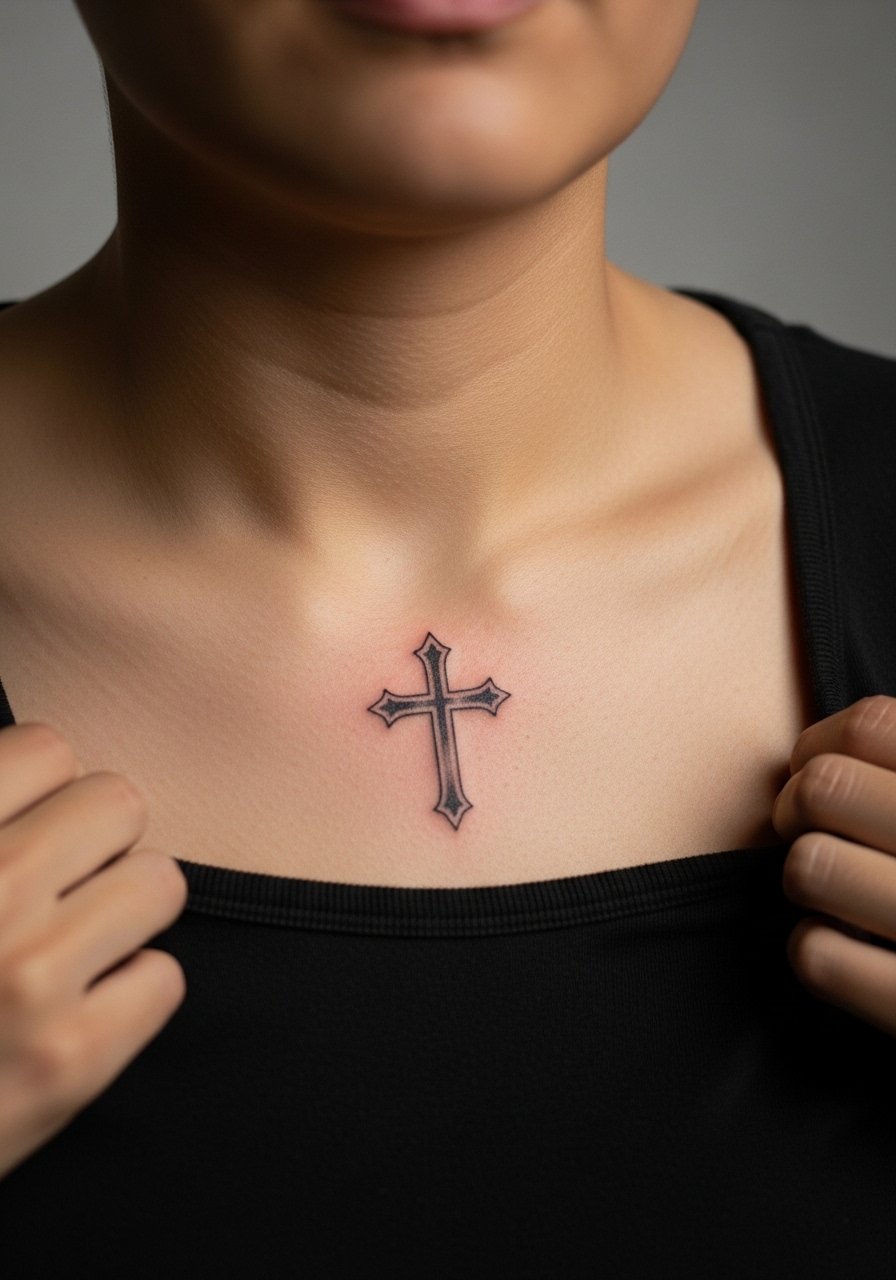
Chest tattoos can be scaled to read from a distance. For a minimalist cross with a small ornamental tail, ask for two to three inches with subtle gray shading rather than heavy fill. The rib and chest area can feel tender, so plan for moderate pain and a session that could stretch into a second if you want shading. A mistake people make is asking for tiny ornamental flourishes that vanish when the skin settles. Style this with a v neck henley or a thin chain necklace worn low so the cross sits naturally within the neckline. If faith is the reason behind the piece, consider subtle variations rather than literal replication of a widely used symbol.
8. Single Flame Outline on Knuckles
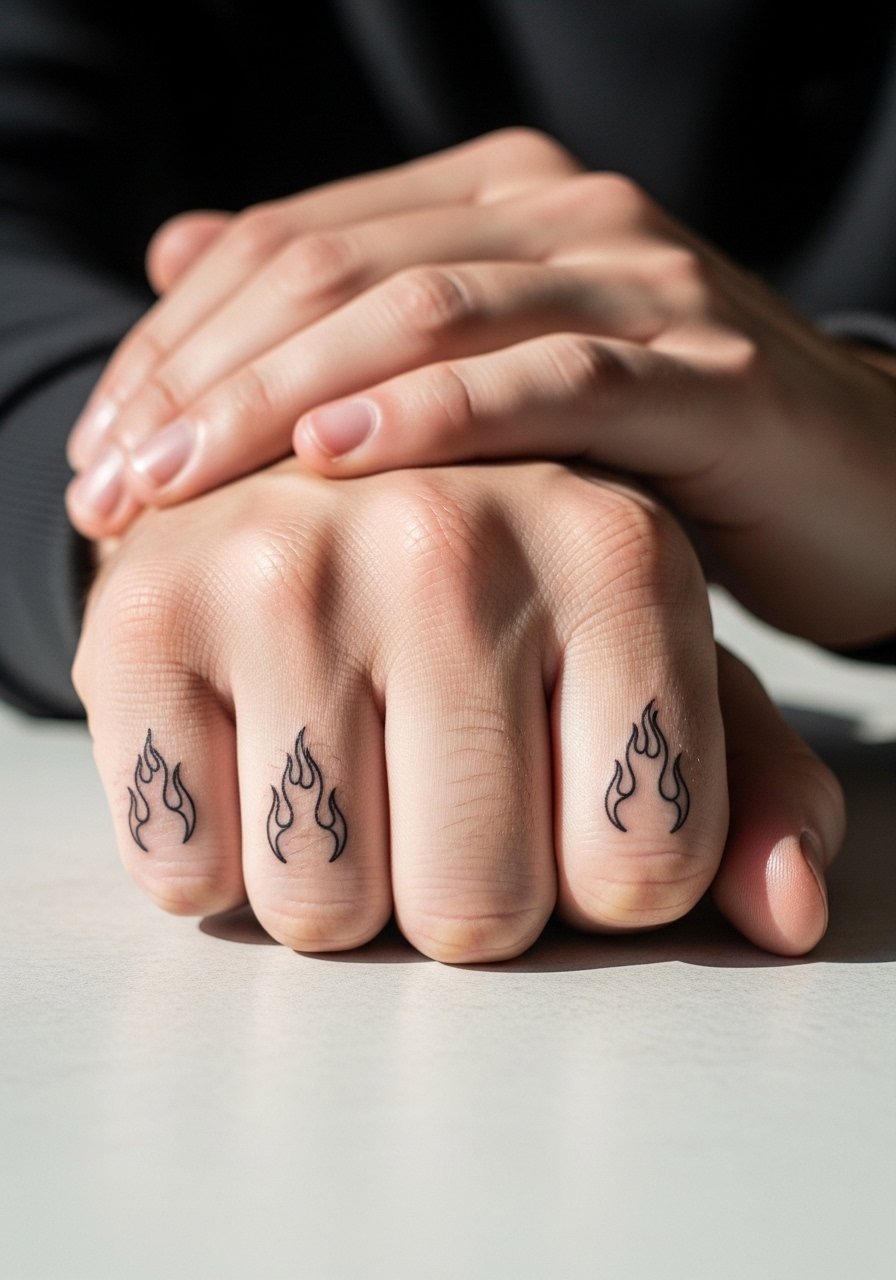
Knuckle tattoos declare intent and they wear quickly. Ask for simplified flame outlines without interior shading to avoid early pooling that looks like blur. Common mistake is asking for intricate interior detail at knuckle scale. Expect higher pain but short sessions. Touch-ups are normal at year one or two. For showing this off, keep hand jewelry minimal so the flames read clearly. Also consider workplace policies before committing to highly visible knuckle work.
9. Sans-Serif Script Initial on Collarbone
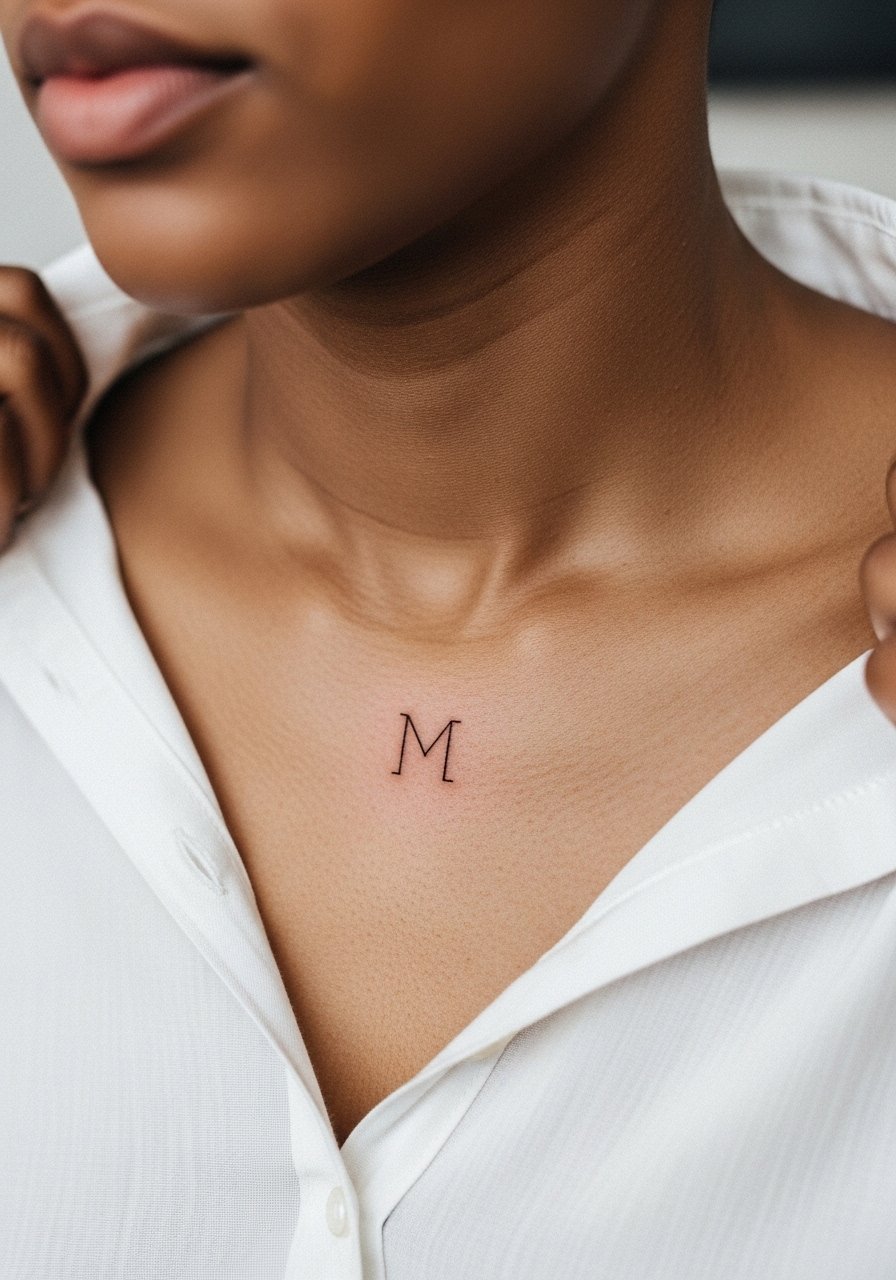
Collarbone script stays intimate and ages well if the letterforms are bold enough for the scale. Tell the artist you want a sans-serif single initial at 1.5 inches with thickened terminals so the counters do not close over time. A common error is choosing ornate scripts that blur into a smudge. Pain ranges moderate because the area sits over bone. For show-off styling, a thin chain necklace and a V-neck tee frame the initial without covering it. If you want this to remain legible at five years, plan a light touch-up at year two.
10. Dotwork Mountain Peak on Calf
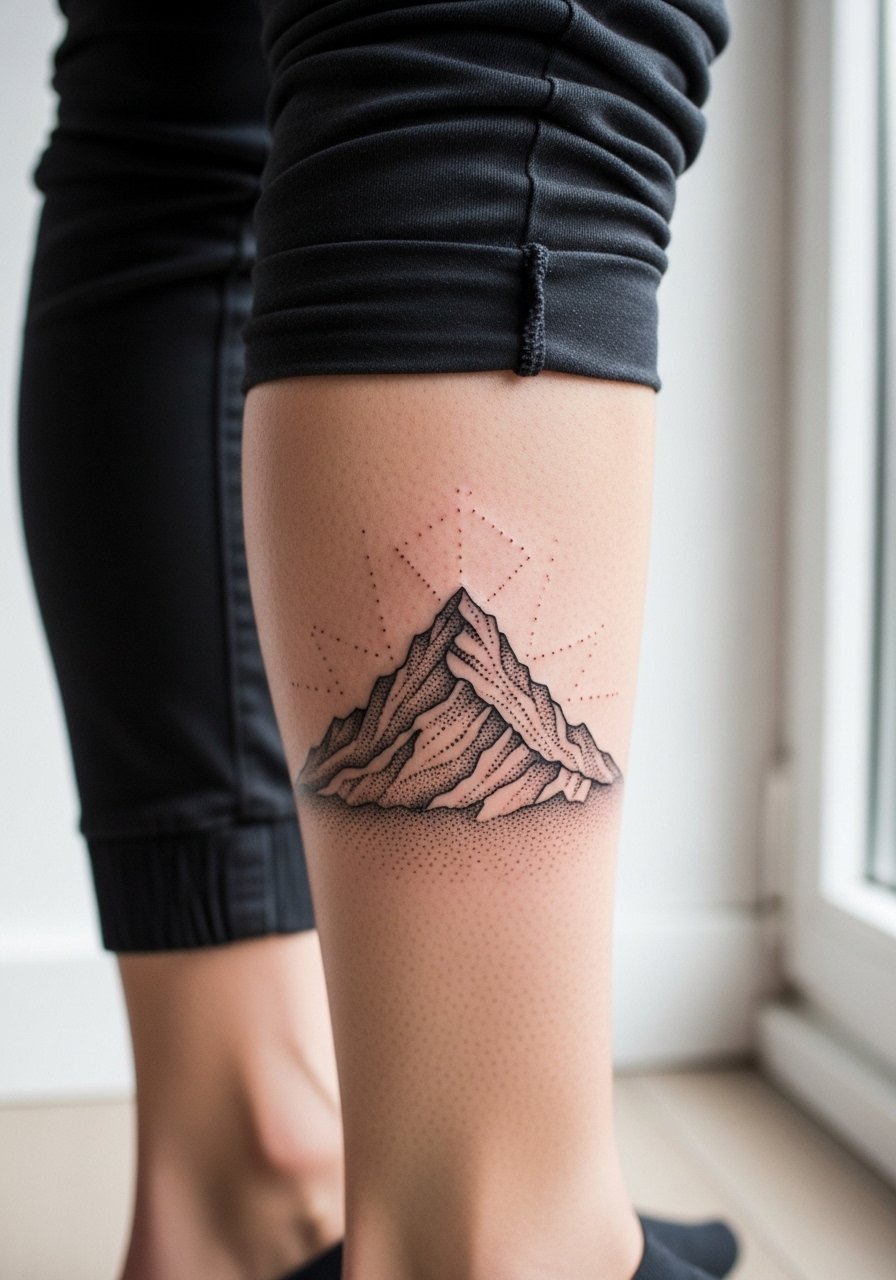
Calf placements age well because they avoid constant friction and sun exposure. Dotwork looks best at a larger scale, around three inches, so the stippling holds texture over time. A common mistake is trying to shrink dotwork into a one-inch badge, which loses the mountain silhouette quickly. Sessions vary from one to two sittings depending on complexity. For summer displays, roll up a pair of slim joggers or choose athletic shorts. If you want the fine texture to remain, ask the artist to map out the spacing of the dots rather than filling dense clusters.
11. Outline Compass Rose on the Shoulder
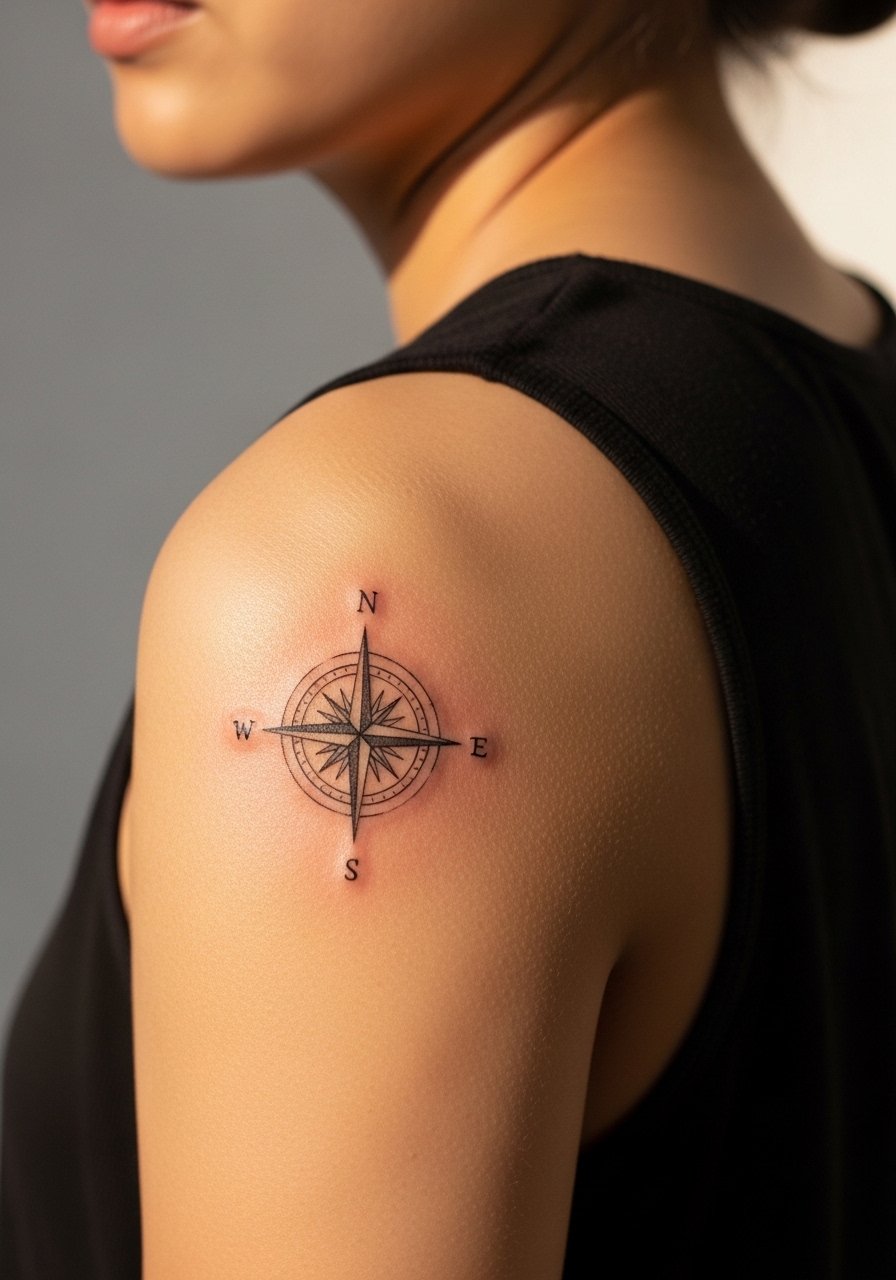
Shoulder blades give room for a 2.5-inch compass that still reads as minimalist. Ask for clear cardinal points and slightly thicker outer lines so the points do not feather into the skin over a few years. The common mistake is packing too many inner ticks that blur in the first few years. The session is low to moderate on pain and fast to complete. For show-off styling, an off-shoulder tee or an olive linen tank highlights the piece without hiding it. If you travel or change your body composition, consult about how movement will affect orientation.
12. Micro Geometric Triangle Stack on the Ribcage

Ribcage pieces look intentional and private, but the skin there stretches and breathes. Artists split on fine line versus bolder lines for ribs. One camp says the stretch and motion blur fine lines quickly and recommend bolder outlines. The other camp says properly spaced fine lines at the right needle depth can settle well. If you choose the stack, ask for spacing and slightly thicker outer triangles so the pattern stays readable for years. Pain is higher here, so plan for breaks and maybe a numbing option. Because this is a privacy placement, skip elaborate public styling and wear a loose open shirt for the session.
13. Simple Wave Line on the Ankle
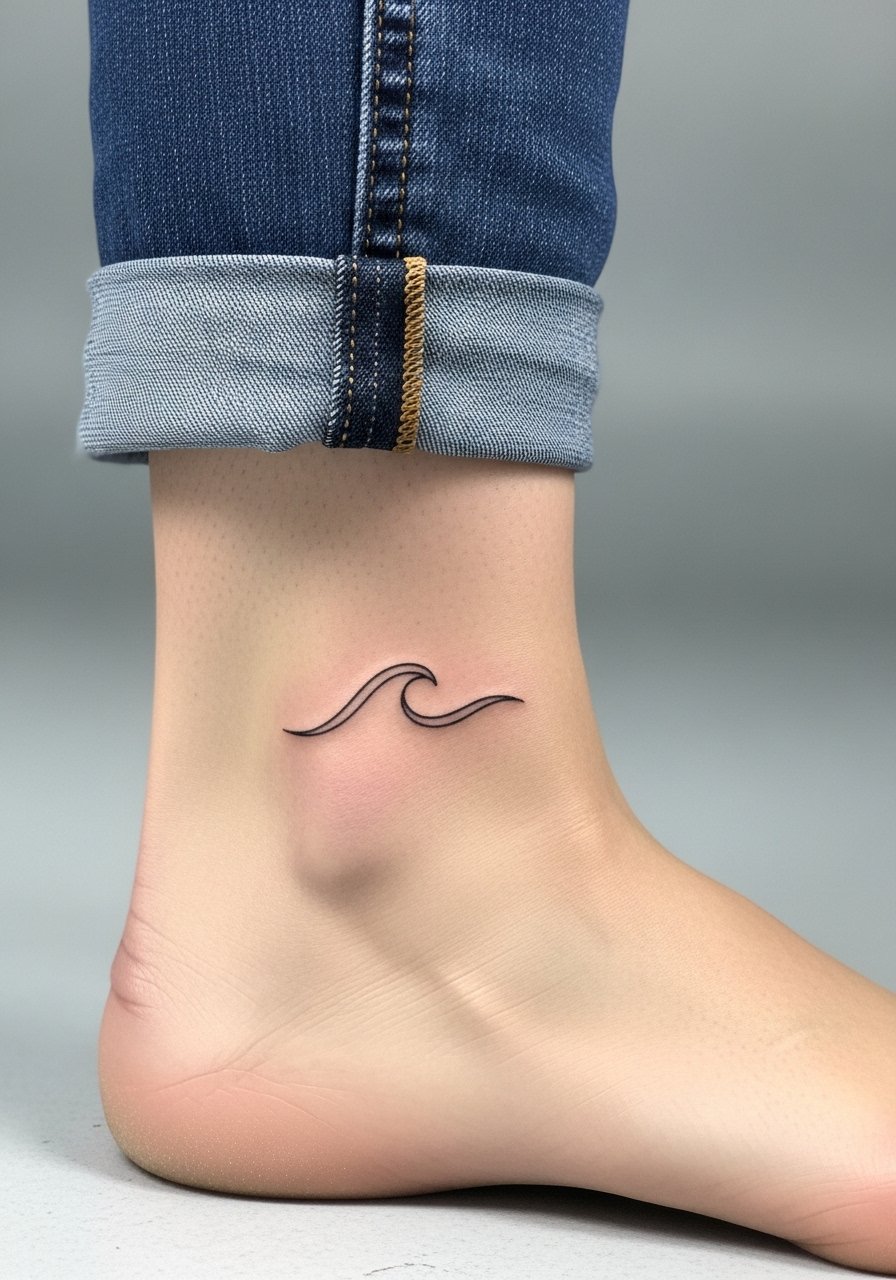
Ankle pieces handle small linear work well when they sit above the shoe line. Tell your artist you want 1.5 inches of continuous line with durable line weight so walking and socks do not erode the contour. The common mistake is placing the line too close to the foot where friction from shoes accelerates fading. Session time is short and pain is mild to moderate. For showing it off, try low-cut shoes or rolled chinos and no-show socks. If your lifestyle includes a lot of outdoor activity, expect touch-ups earlier.
14. One-Line Continuous Face on the Upper Arm
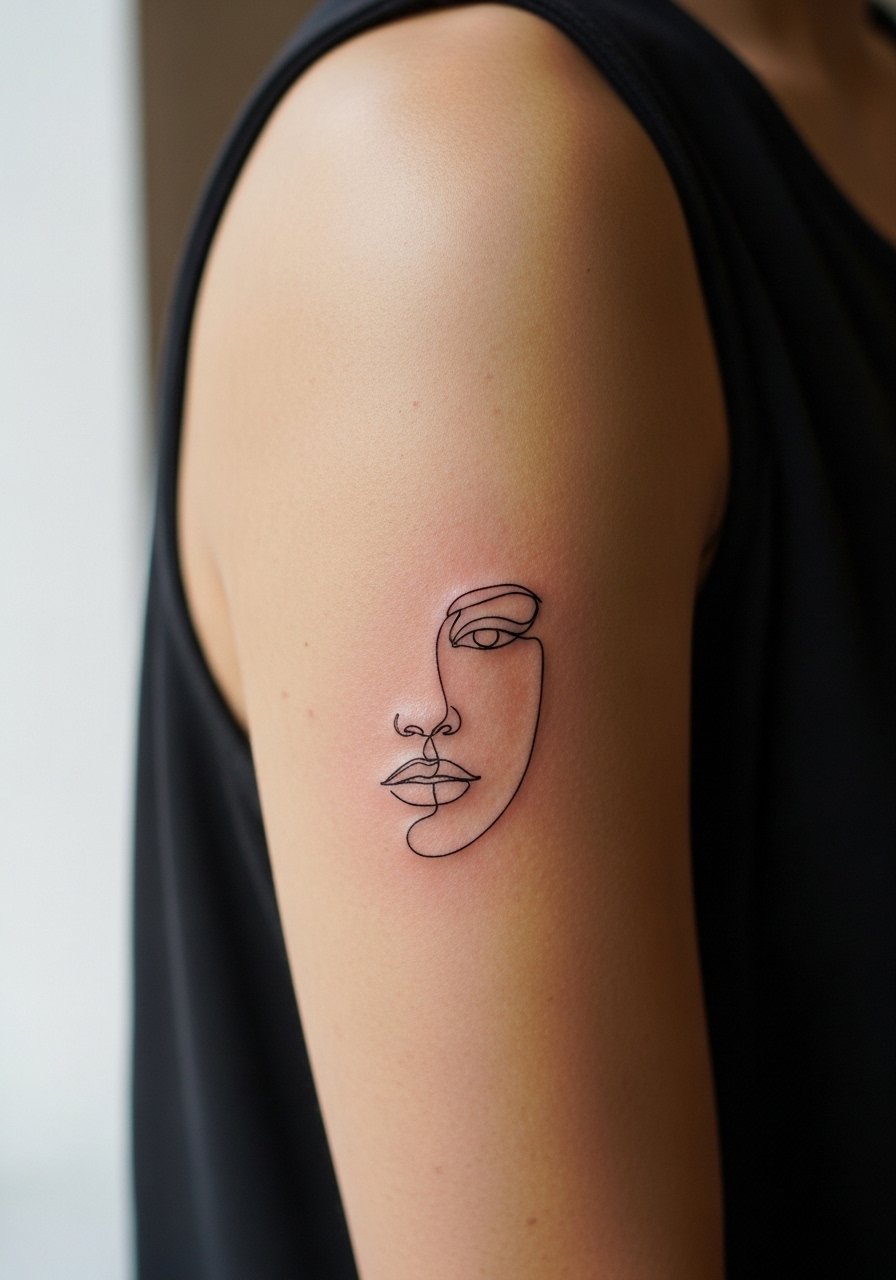
One-line portraits depend on confident linework and breathing room. Request a scale of roughly two inches across and ask the artist to keep endpoints open rather than cramped features. The mistake is shrinking a complex face into too-small dimensions. Pain is lower on the outer upper arm and sessions are quick. For casual reveal, a fitted muscle tee or rolled sleeve lets the linework breathe. If you plan to incorporate future pieces, mention connectivity during the consultation so spacing remains flexible.
15. Minimalist Ice Cube on the Wrist
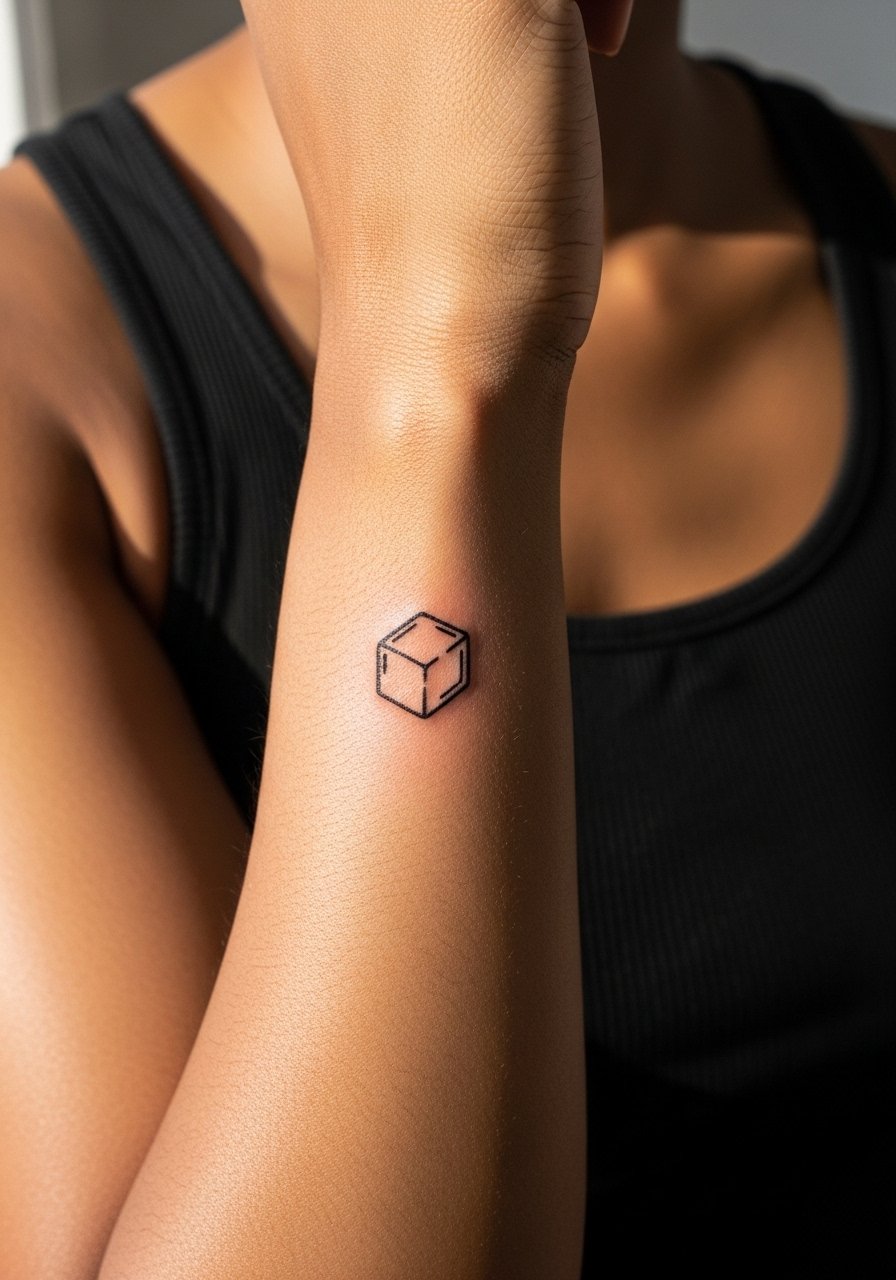
An ice cube motif reads like quiet humor and holds well if given a little negative space. Ask for a 1 to 1.5 inch square with a reinforced outer line and minimal interior facets. The common mistake is trying to add tiny interior shading that disappears into skin texture. Wrist pain is mild and the session is quick. For showing it off, a thin leather cord on the opposite wrist complements the cool geometry and keeps attention balanced. Because wrists see a lot of sun and washing, expect touch-ups within a couple of years.
16. Micro Barcode-Style Line Block on the Side of the Wrist
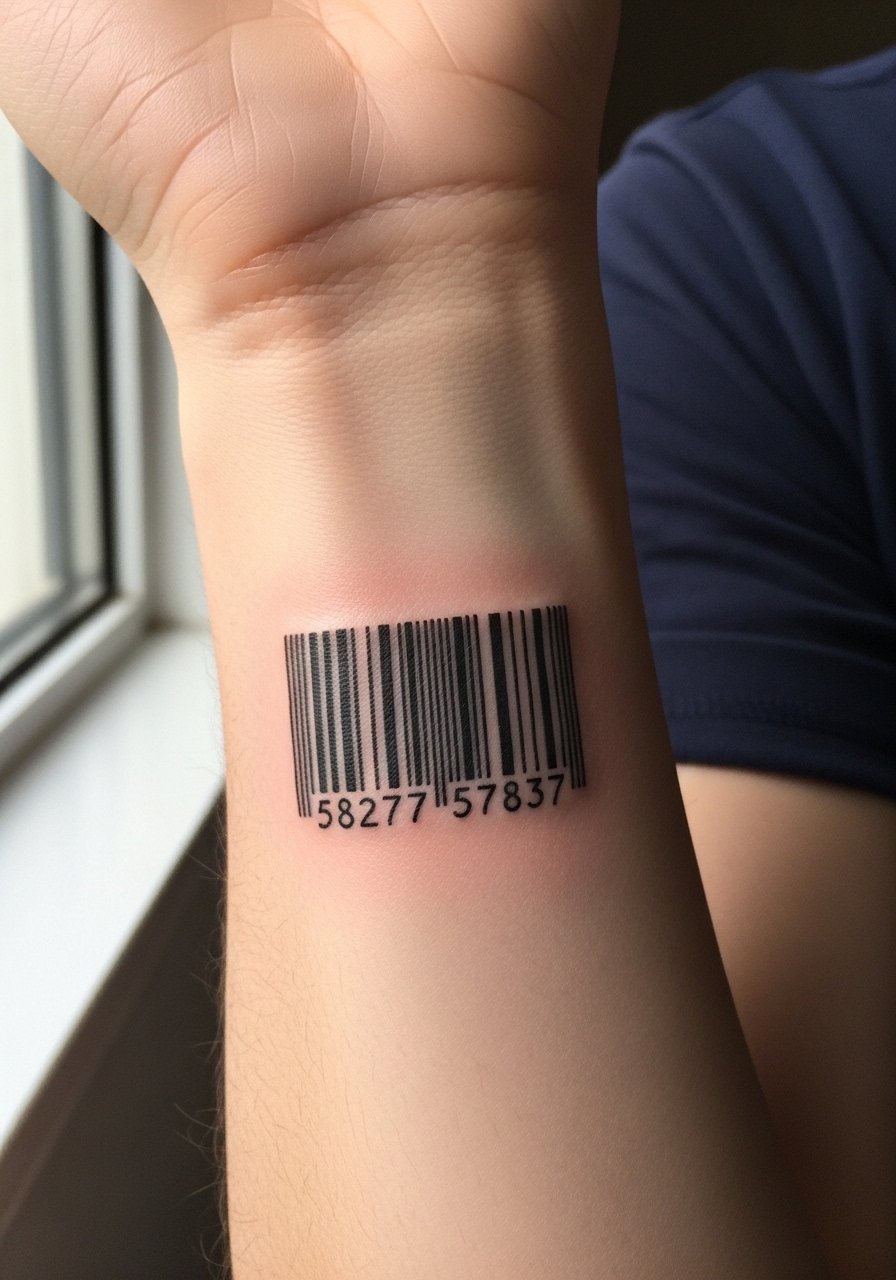
Barcode motifs need consistent spacing to avoid a washed-out appearance over time. Tell your artist you want fewer, slightly thicker bars rather than a dense block of ultra-thin lines. The mistake is packing too many thin bars so the lines merge after a year. Pain is moderate and session time is short. This placement also experiences friction from straps and bracelets, so avoid tight bands in everyday wear. If you like an industrial aesthetic, keep wrist accessories minimal to maintain the design's sharp contrast.
17. Tiny Botanical Leaf on the Inner Bicep
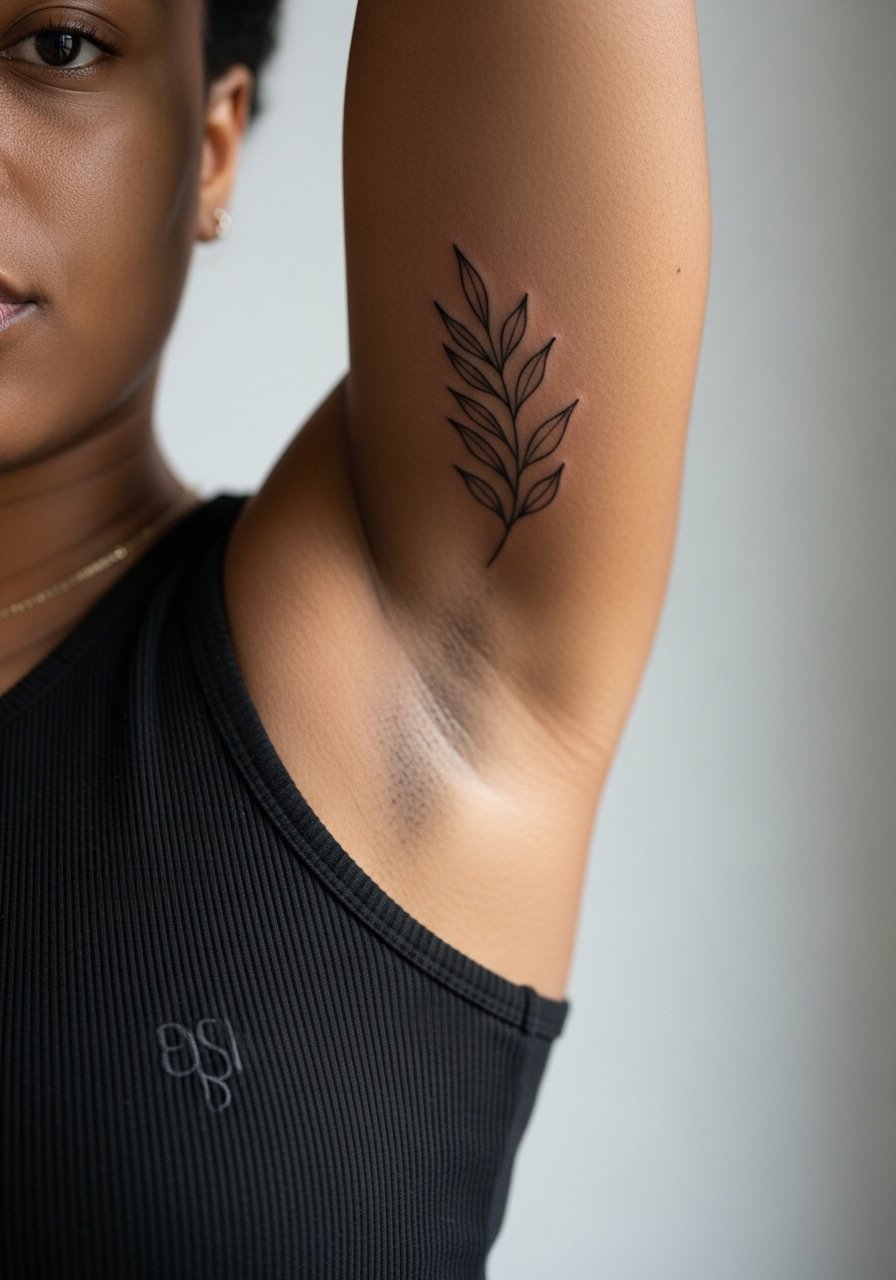
Inner bicep ink sits in a soft zone that heals differently than outer placements. Ask for a 1.5 to 2 inch leaf with slightly thicker midrib and light stipple for depth rather than thin hairlines. The main mistake is choosing hairline veins and expecting them to remain after movement and friction. Pain can be moderate, and sessions are comfortable with breaks. For the session, wear a sleeveless tank so the artist has clean access. If you plan to pair this with sleeve work later, tell your artist so the orientation sits well with future pieces.
Frequently Asked Questions
Q: Will fine line tattoos on hands and fingers blur faster than those on the forearm?
A: From what I've seen, yes. Hands and fingers get more friction and washing, which speeds fading. Forearm pieces usually keep crispness longer. If you want hand or finger ink, ask for a slightly heavier outline and plan on touch-ups every 12 to 24 months.
Q: Is a micro geometric stack on the ribs a bad idea if I worry about pain and aging?
A: The ribcage is higher on common pain charts, but it is a classic choice for private pieces. The controversy boils down to technique. One group says fine lines blur on ribs because of stretching and motion. The other group says proper spacing and needle depth can make fine lines hold. Be explicit with your artist about spacing and expect that a numbing option and breaks may help with comfort.
Q: How should I prepare clothing for a shoulder or upper arm session?
A: Wear a sleeveless top or a loose button-down you can pull aside. For shoulder work an off-shoulder tee or tank makes access easy and keeps fabric from rubbing freshly tattooed skin. I usually recommend bringing a button-down that you do not mind moving around during the session.
Q: What touch-up timeline should I expect for finger and knuckle work?
A: Plan for touch-ups at around one year, and then periodically every one to three years depending on wear. High-motion and high-friction areas are the ones that demand the most maintenance.
Q: Where can I find local artists who specialize in minimalist fine line or cyber sigils?
A: Search hashtags like #MinimalistTattooMen and #FineLineMen on social platforms, check local "city + fine line tattoo studio" searches, and read recent threads on r/tattoos for peer recs. Spend time looking through portfolios and ask to see healed photos rather than only fresh work.
Q: What should I wear to a calf or lower leg session for comfort and access?
A: Loose shorts or slim joggers that you can roll up work best. If you want a specific look for revealing the calf afterward, a pair of slim joggers rolled just above the ankle shows the piece without rubbing the area during healing.
