
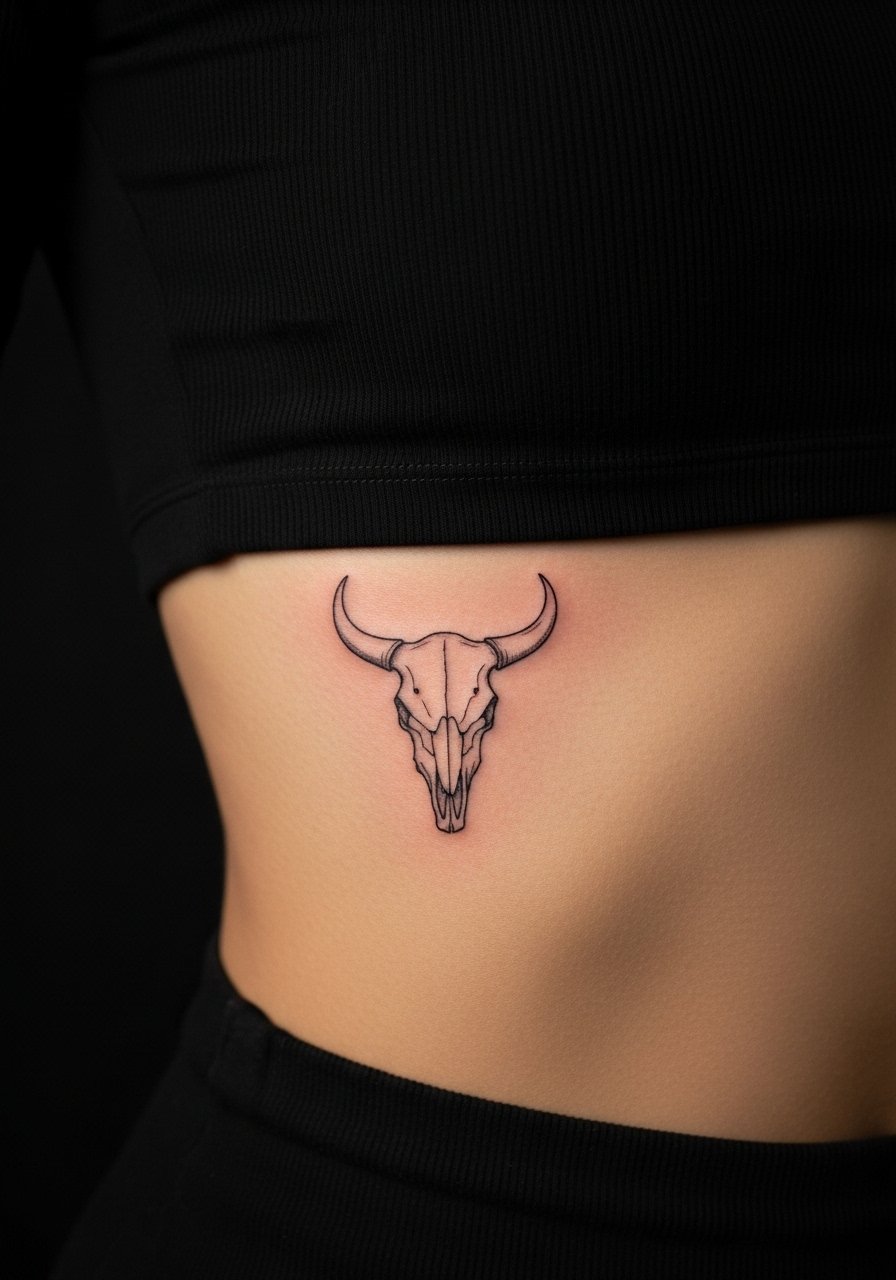
Sketch-style bull skull tattoos read bold without trying to. The raw, unfinished lines give the skull a haunted energy, while deliberate gaps and scribbled shading keep the design feeling modern instead of overworked. If you want something that looks fierce on day one and still holds character after years, these options show how to size, space, and place sketch work so the lines age with personality rather than blur into a gray patch.
1. Narrow Forearm Bull Skull with Rough Linework
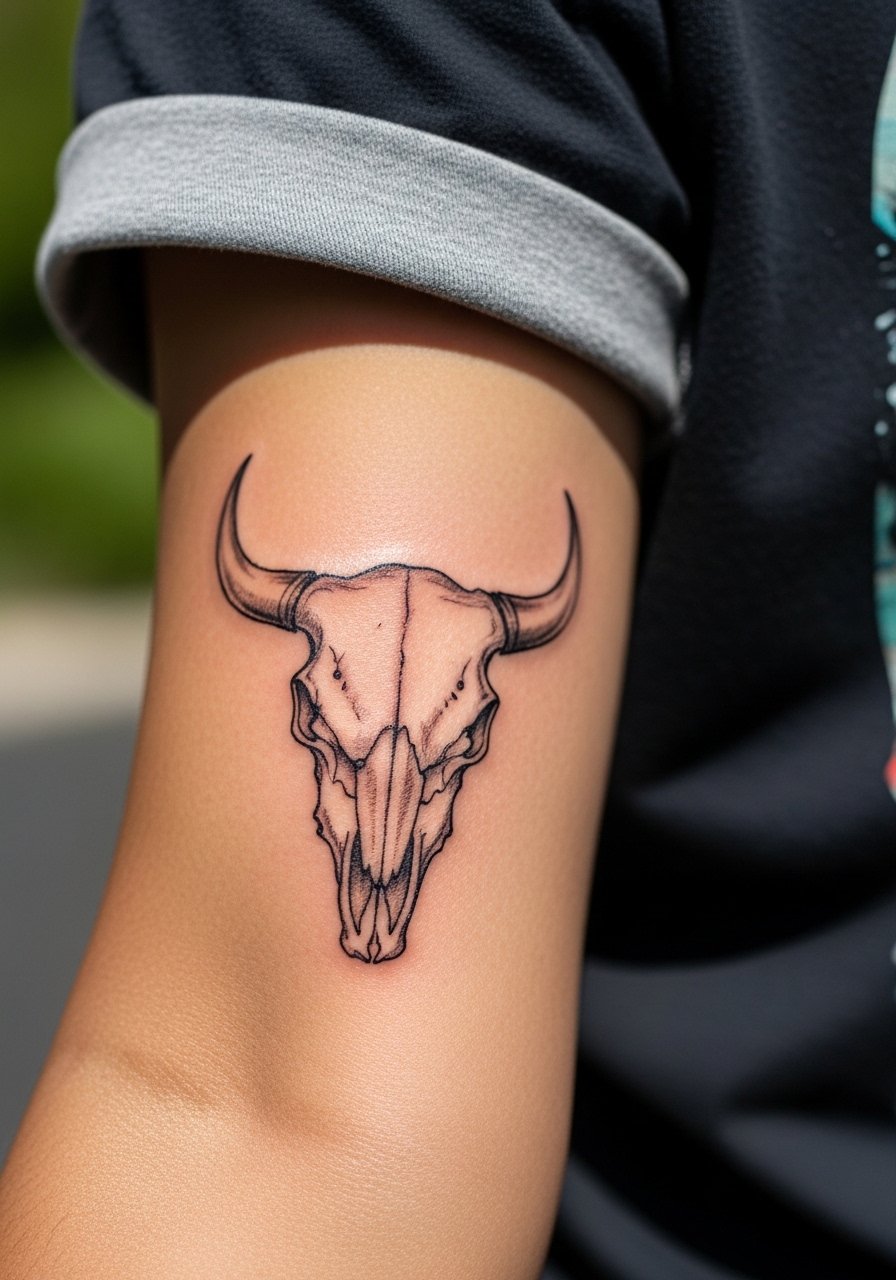
I’ve seen narrow forearm skulls hold their attitude because the design respects the arm’s length. Tell your artist you want loose, confident strokes and pockets of negative space so the shading does not turn muddy over time. Fair warning, the forearm is exposed a lot so UV will fade thin sketch lines faster than thick outlines. A common mistake is asking for micro detail that the skin can’t keep at that size. Expect a single two-hour session for a mid-sized piece, with a touch-up likely around year three depending on sun exposure and how often you wear short sleeves.
2. Inner Bicep Skull with Stipple Shading
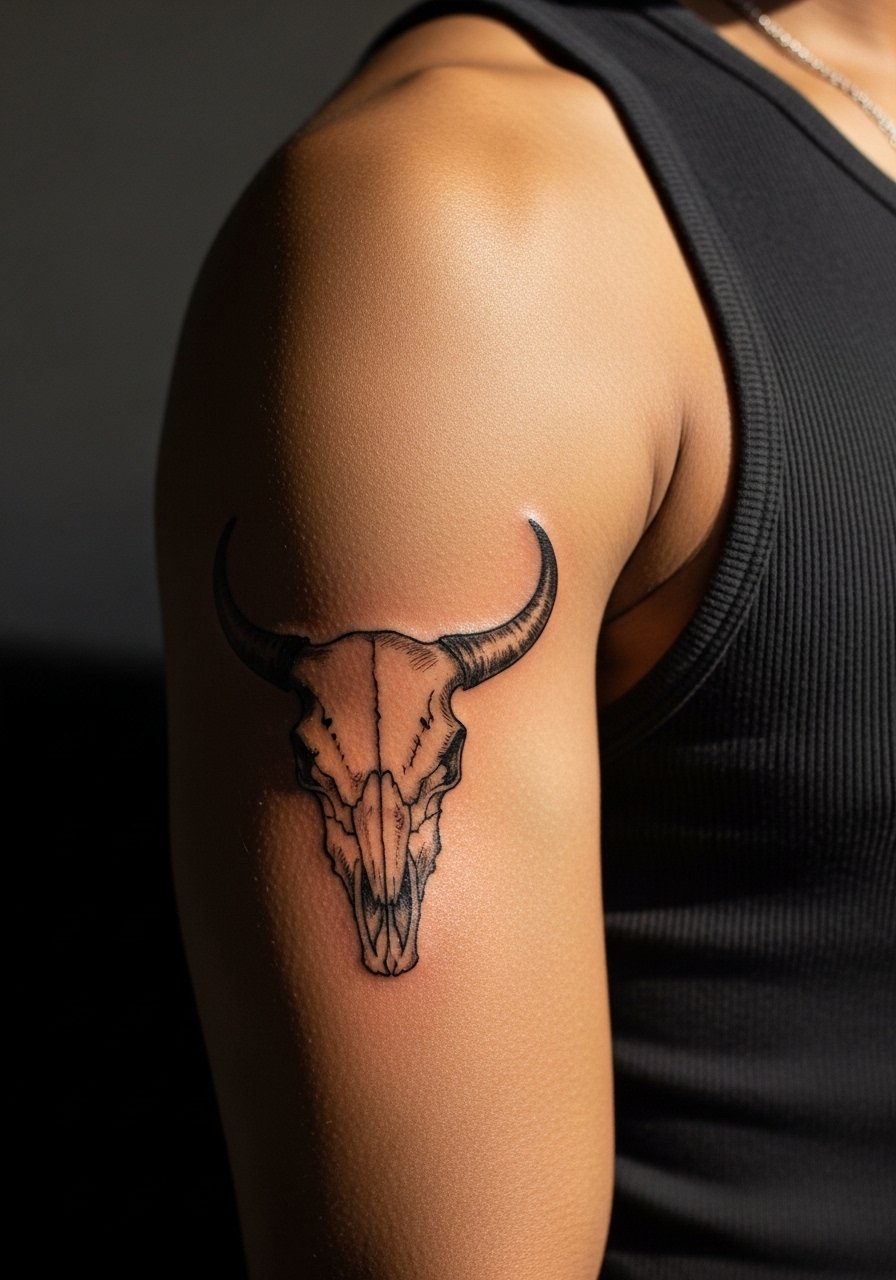
Fair warning, the inner bicep is tender during the session. The skin there holds ink well when the artist uses stipple shading rather than heavy whip shading. In consultation, ask the artist for stippling and larger dot clusters that read like texture up close but breathe as they age. One mistake is packing dense, tight shading into the crescent of the skull; that fills in and looks flat after healing. This placement also keeps the work more private, which some people prefer when committing to a bold skull motif.
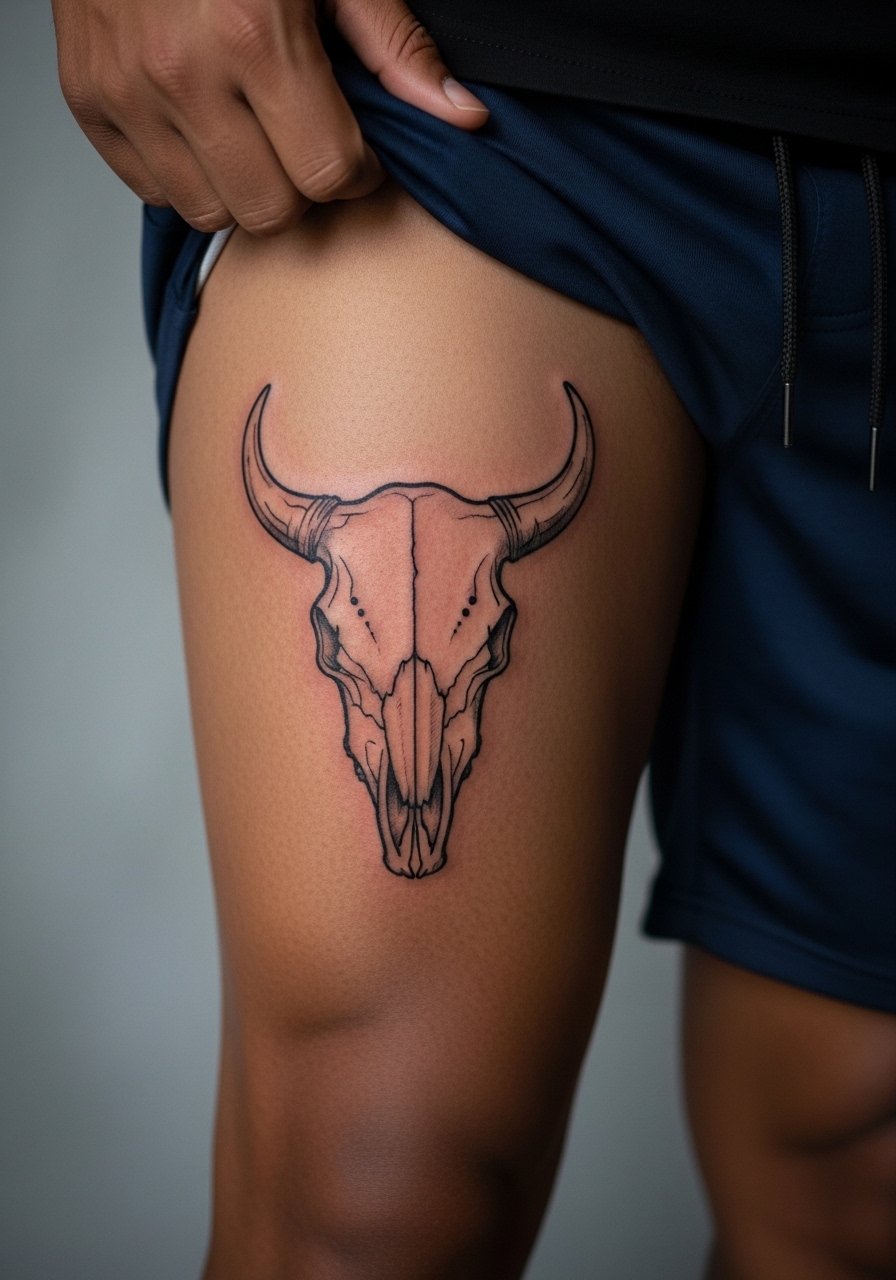
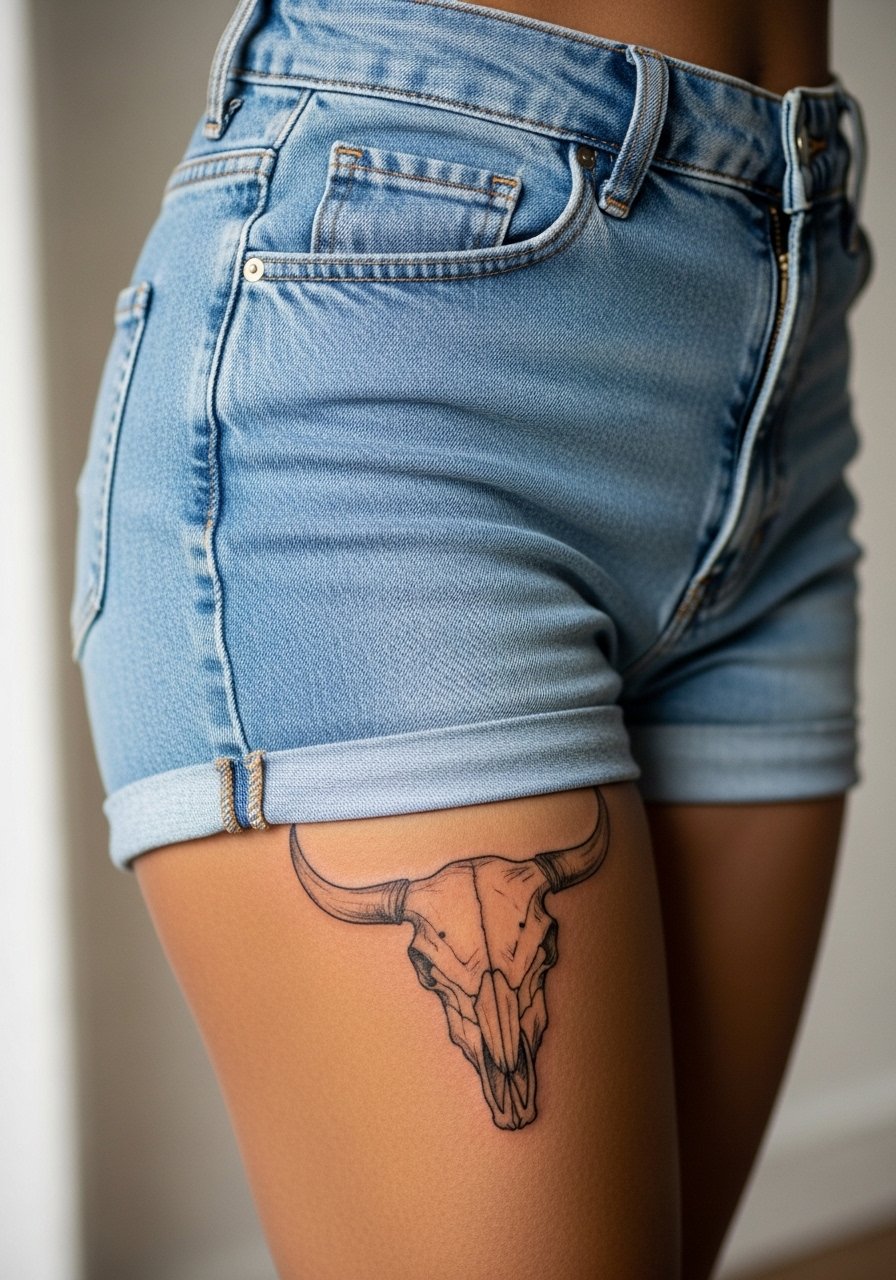
3. Outer Thigh Oversized Sketch Skull with Floral Accents

There is something about an oversized thigh piece that lets sketch strokes breathe and keep their intent. For a clean long-term look, ask for broader spacing between crosshatching lines and larger floral accents to frame the skull. Session feel is usually low to moderate pain, but expect longer sessions because the thigh takes larger coverage well. A common aging mistake is cramming too much thin detail into the skull horn area. If you plan to show it off, pair it with a high-waisted denim short that sits just above the design so the skull reads when you walk.
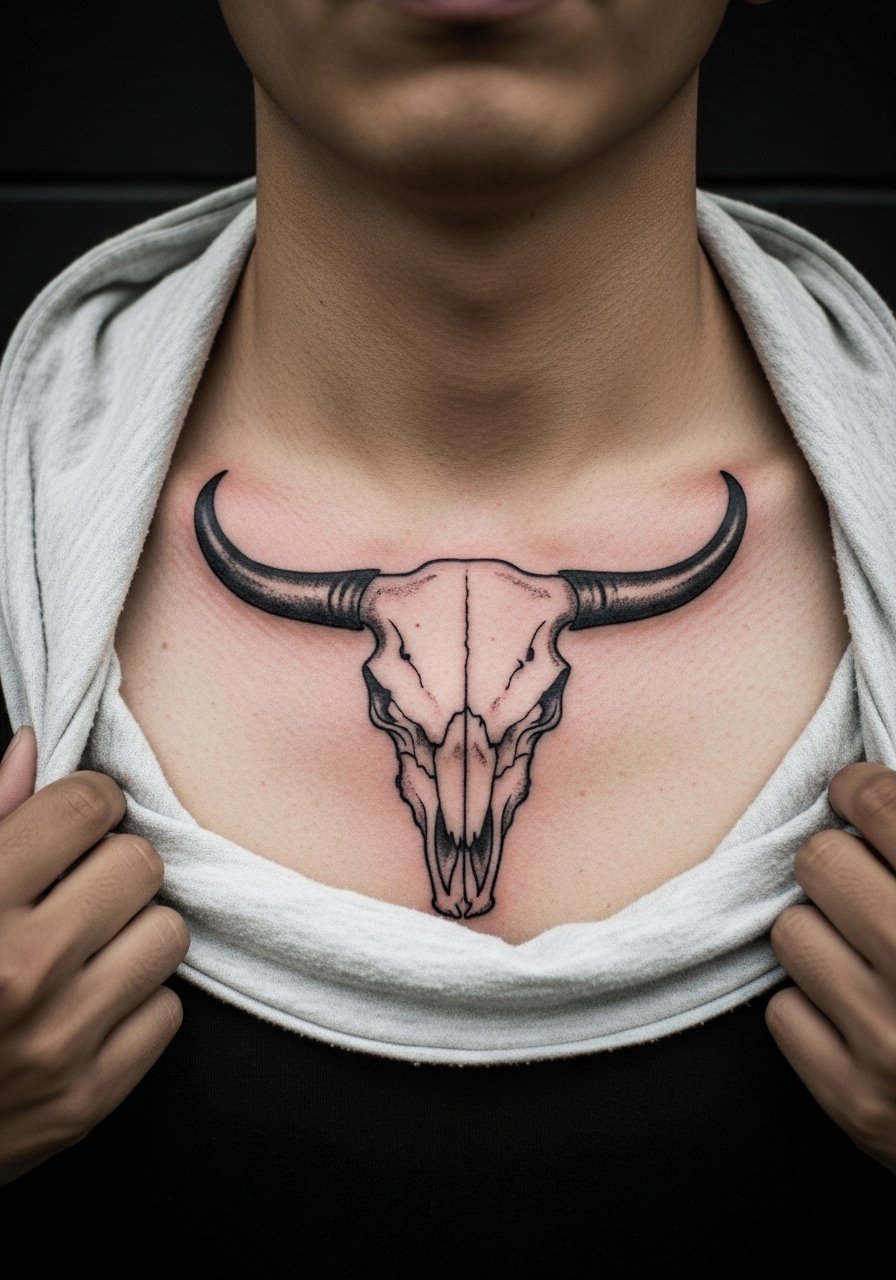
4. Sternum Skull with Sketchy Contours
Artists split on sternum work. One camp argues the constant movement and thin skin there makes fine sketch lines blur within a couple of years. The other camp says with deeper placement and fewer ultra-thin strokes it can settle and keep shape. When you consult, name that debate and ask which approach the artist prefers. Session pain is higher on the sternum, so plan for shorter passes and breaks. Wear a strapless or sports bra to the appointment so the artist has clean access without you being uncomfortable.
5. Shoulder Blade Bull Skull with Loose Crosshatching
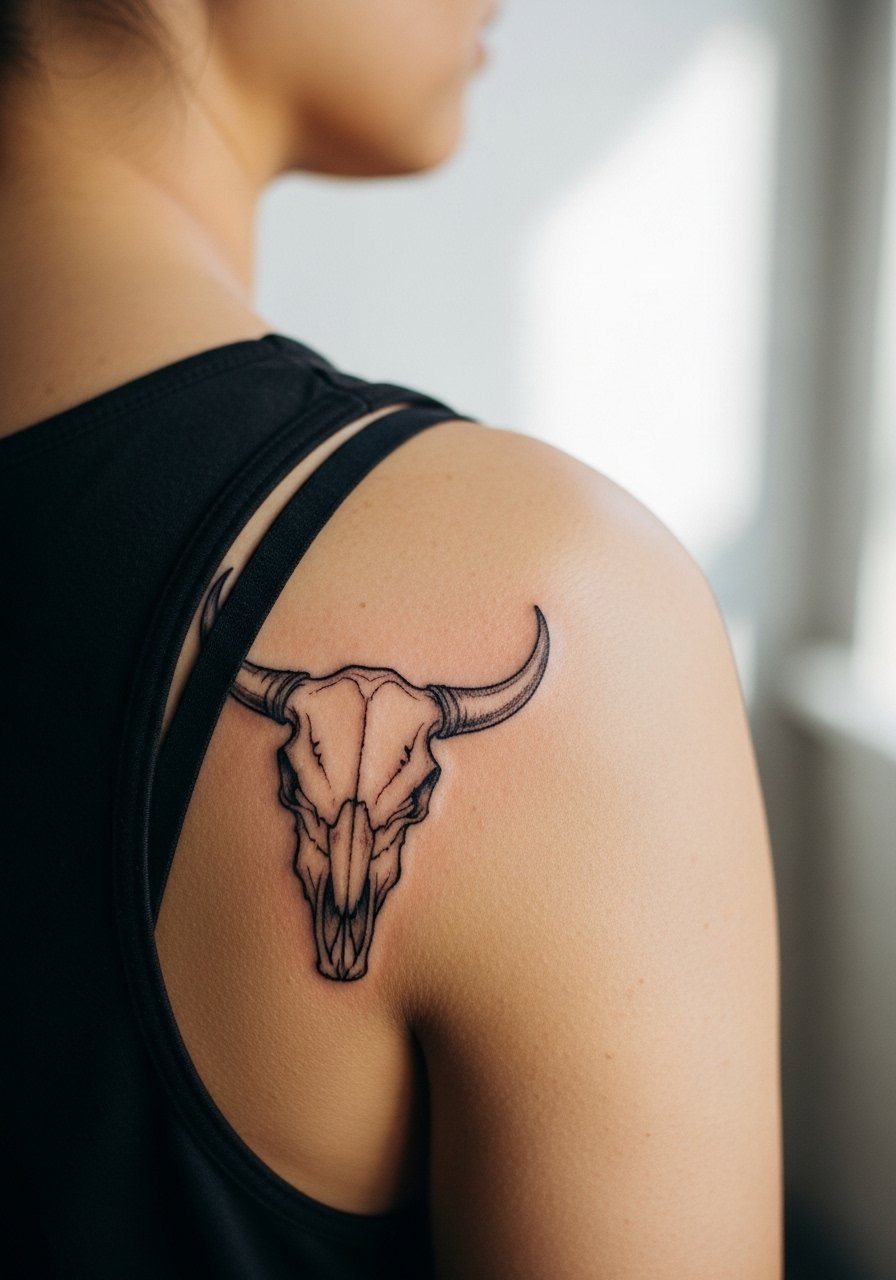
I’ve seen shoulder blade skulls keep their sketchy charm because the artist can work larger and let lines breathe. Tell your artist you want loose crosshatching rather than tiny stippling in the darkest areas. A common mistake is compressing the skull into a square on the scapula. Placement affects how it looks when you wear shirts with different necklines, so try mockups with your usual tops. For the session, wear a loose button-down that you can pull aside so the artist has clear access.
6. Tiny Wrist Bull Skull in Sketch Outline

The wrist is a high-motion area and blast of tiny detail will blur. Most people request a compact graphic and then regret overfilling it. My consultation tip is to accept bolder, simplified linework and deliberate gaps that read as intent, not missing work. Expect a quick session but a higher chance of touch-up around year two because hand and wrist work see a lot of washing and friction. For showing it off, a thin chain bracelet sits next to the wrist without crowding the skull.
Studio Day Picks
Those first six placements include exposed arms and a wrist piece, so a few small items help the session and the first week of healing.
-
Stencil transfer paper kit. Lets you preview line placement on skin so the narrow forearm and wrist skulls align with muscle and bone.
-
Topical numbing cream. Applied before a sensitive sternum or inner bicep session it eases the first passes and keeps you more relaxed.
-
Thin protective film roll. Useful for wrist and hand pieces that face constant washing and friction in week one.
-
Fragrance-free gentle body wash. Cleans healing lines without stripping the thin sketch shading that these designs rely on.
-
Aquaphor healing ointment. Thin layers over the first few days help prevent scabbing from affecting the fine strokes on exposed areas.
7. Upper Arm Half-Sleeve Skull with Sketched Horn Detail
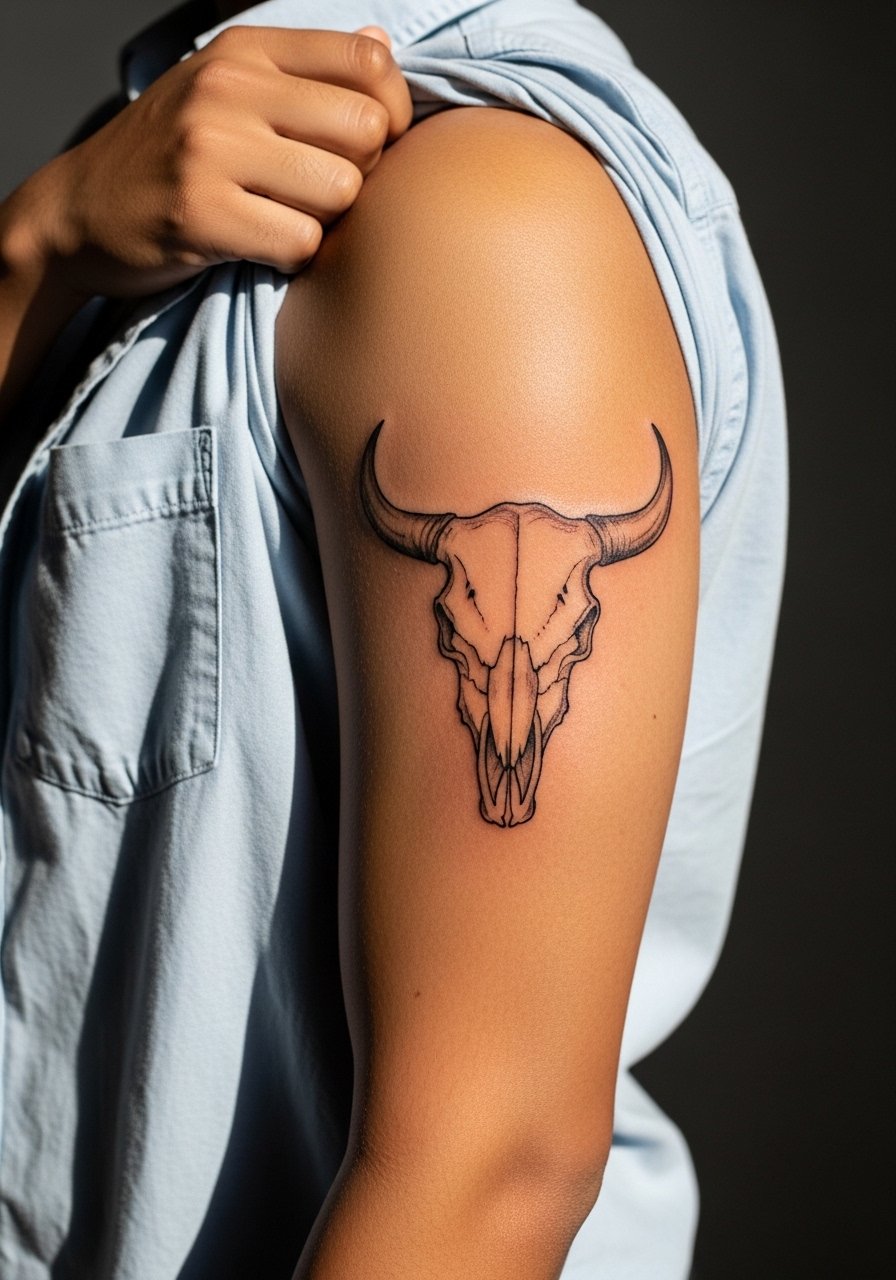
There is visual payoff in a half-sleeve because the artist can mix heavy strokes and light scribbles, which keeps the skull readable at a distance. During the consult, show sleeve-length reference so the flow around the arm matches muscle curves. The mistake is adding too many micro textures near the elbow crease. Session time runs longer, expect multiple sittings. For show-off outfits, a loose linen button-down with sleeves rolled highlights the sleeve without crowding the detail.
8. Center Back Skull with Sketchy Symmetry

The upper back gives room for deliberate asymmetry in the sketch lines while preserving overall balance. A consultation note is to ask for mirrored negative space on each side of the skull so movement does not make it read lopsided. One common mistake is insisting on perfect symmetry, which fights the sketch aesthetic. Sessions are moderate in pain with comfortable positions possible. If you plan to keep it visible at times, an open-back dress frames the center back elegantly.
9. Calf Vertical Bull Skull with Scribble Shading

Most calf pieces age well because the skin there is stable and less sun-exposed. For this vertical skull, ask your artist to orient the horns to flow with the leg line and to use scribble shading that avoids heavy saturation near the tendon. A mistake is squashing the skull into a circle on the calf. Sessions are tolerable and usually single-visit for medium pieces. Wear loose drawstring pants so the artist can roll a leg up without pressure, and consider a mid-calf boot or sandals to show it off.
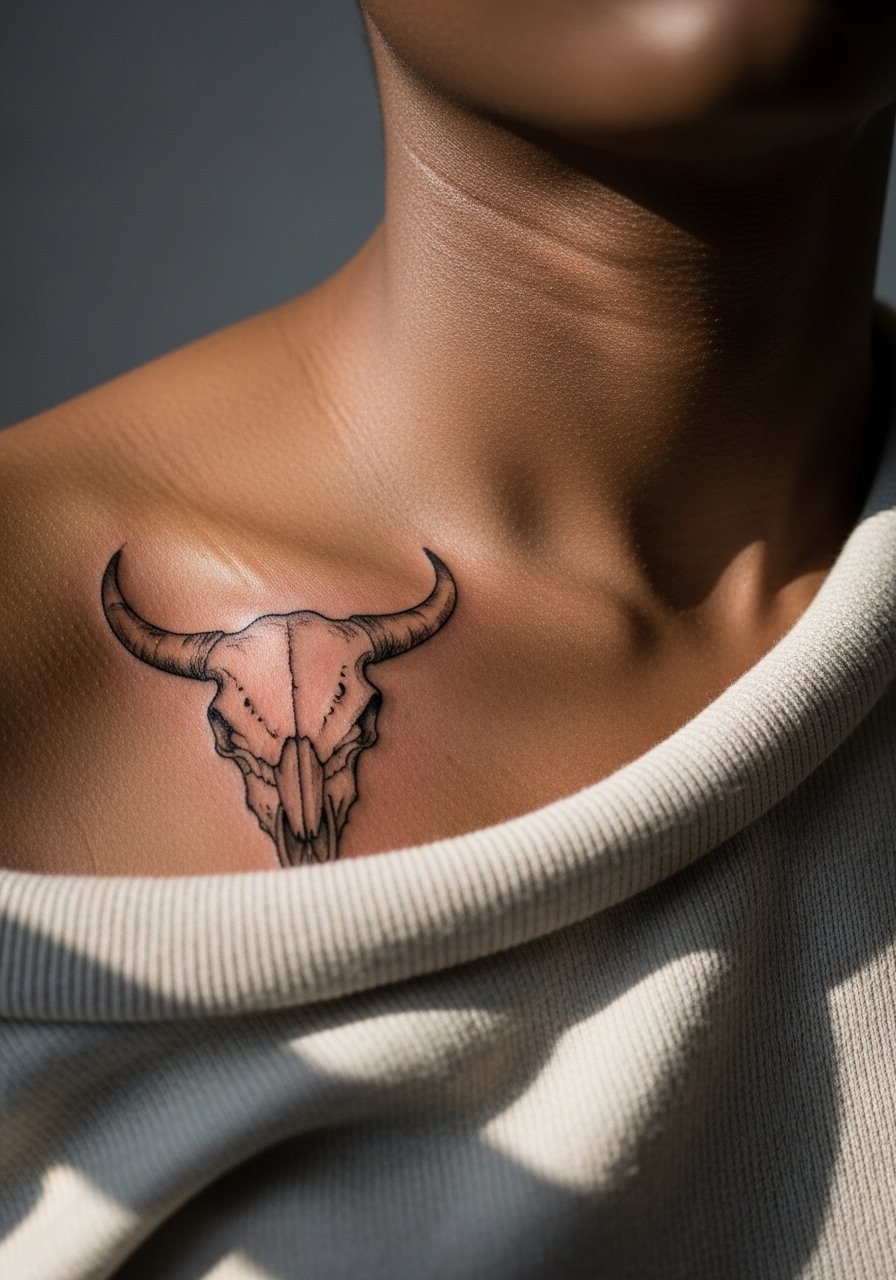
10. Collarbone Micro Skull with Energetic Pen Strokes
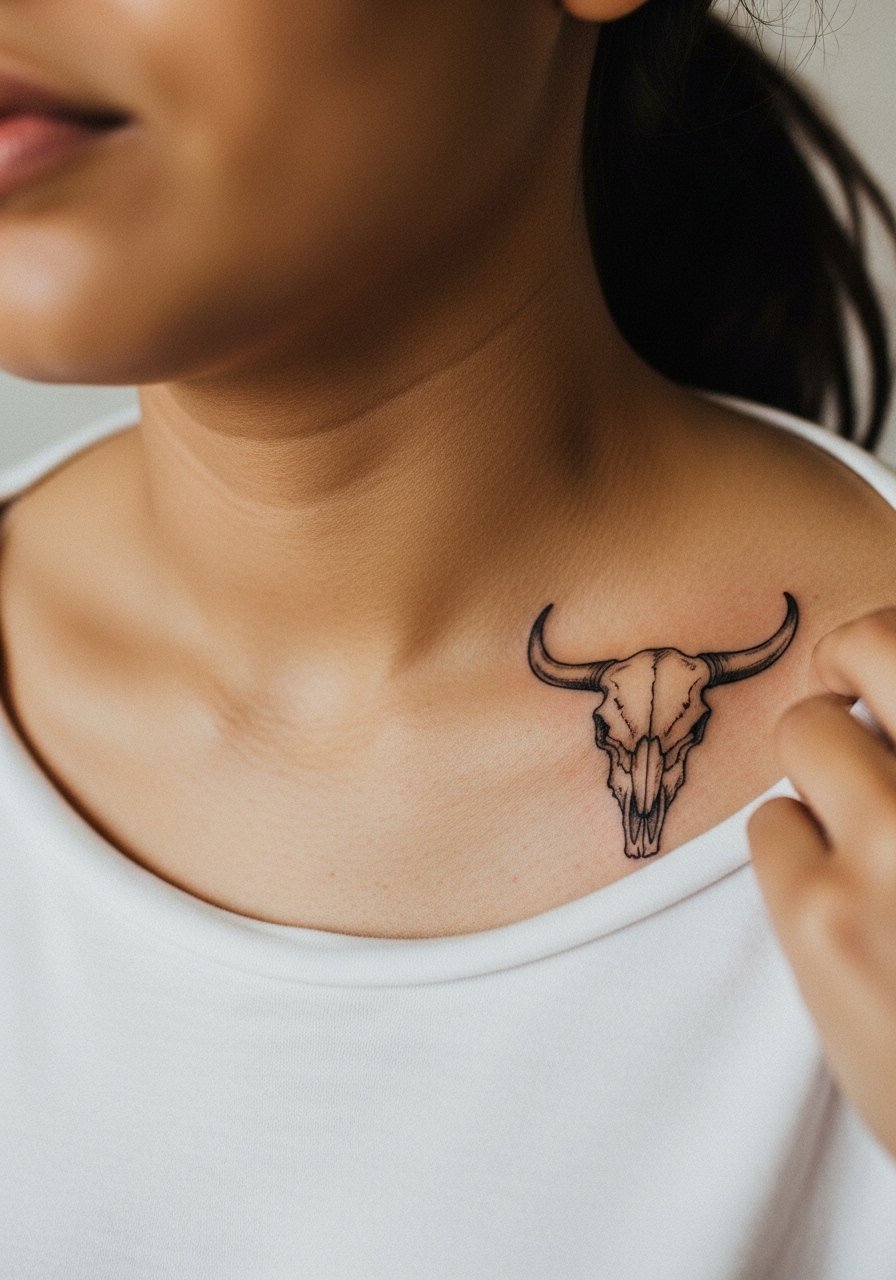
The collarbone is unforgiving for tiny sketch marks because movement and thin skin can blur lines. One contested point among artists is whether micro sketch lines can hold here. One camp says they always spread; the other argues careful depth and slightly thicker strokes will last. Ask the artist which side they take and why. A common mistake is over-detailing the horns. For appointment comfort, bring a loose wide-neck top you can pull slightly aside.
11. Ribcage Dramatic Skull with Negative Space Horns
Artists split on fine line on ribs. One camp argues the skin stretch and motion blur lines within two years. The other camp says with proper needle depth and spacing, sketch lines settle fine. I suggest asking the artist how they handle depth and whether they recommend bolder strokes for ribs. Pain is higher on the ribcage and sessions are often done in short passes. Wear a cropped top you can shift for access, and plan for a touch-up depending on how delicate the original strokes are.
12. Throat-Side Mini Skull with Rough Edgework
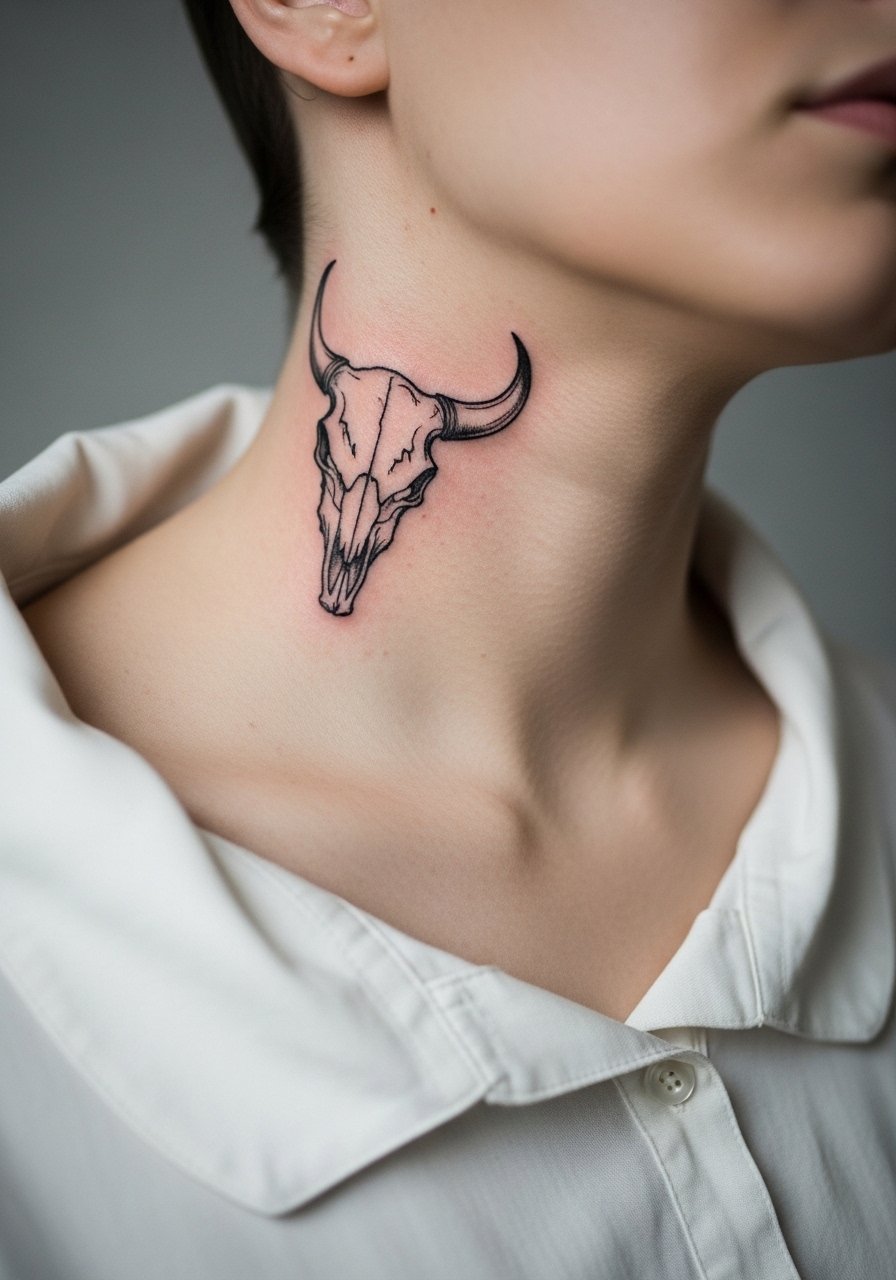
Neck tattoos show quickly and they also shape first impressions. If you want a sketchy mini skull here, ask for rough edgework and avoid tiny, dense lines that the neck will blur. One practical note is hand placement when seated, since the collarbone and neck move more than you expect. A common mistake is designing text or micro detail too close to the skull edges. Neck tattoos can affect hiring in some industries, so consider your career path before committing.
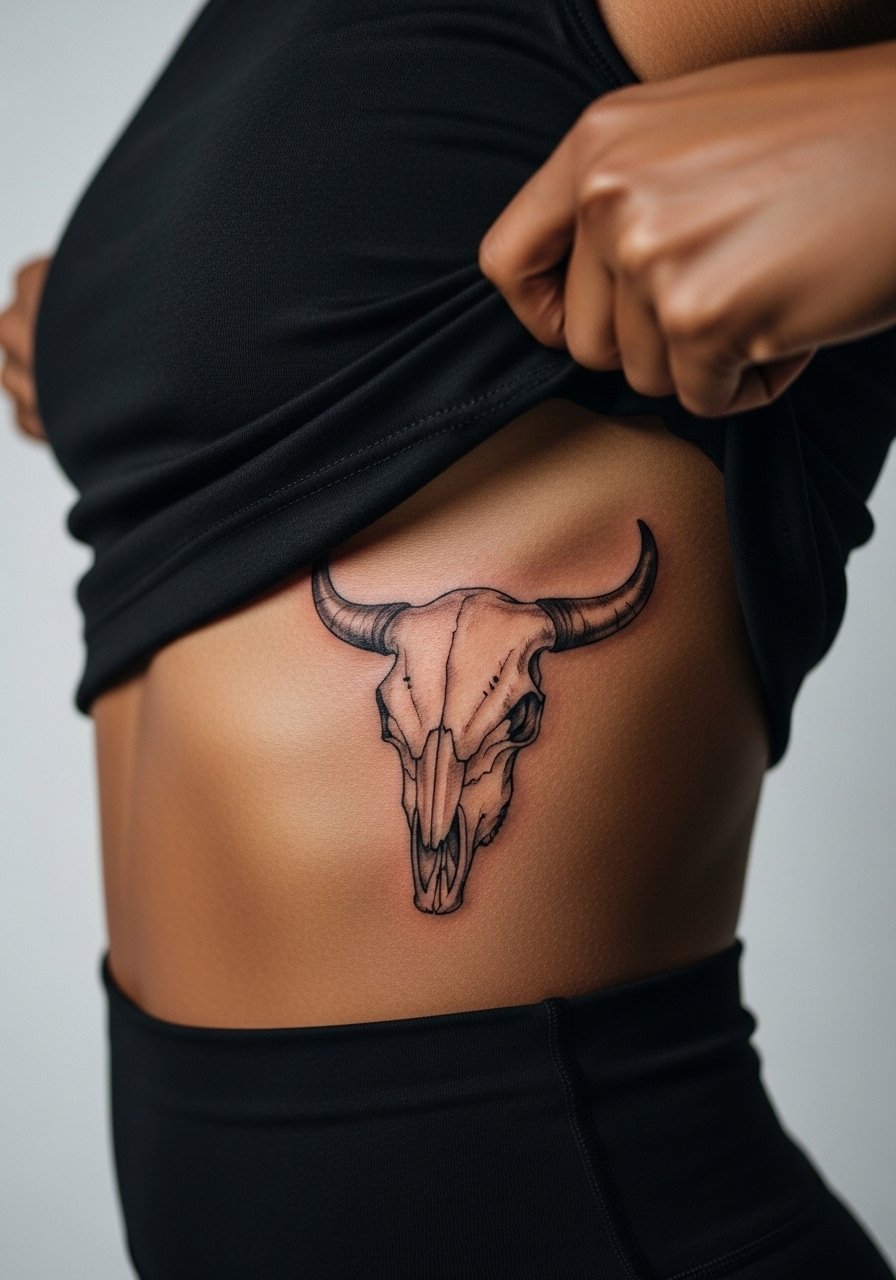
13. Hip-Side Skull with Loose Hatch Marks
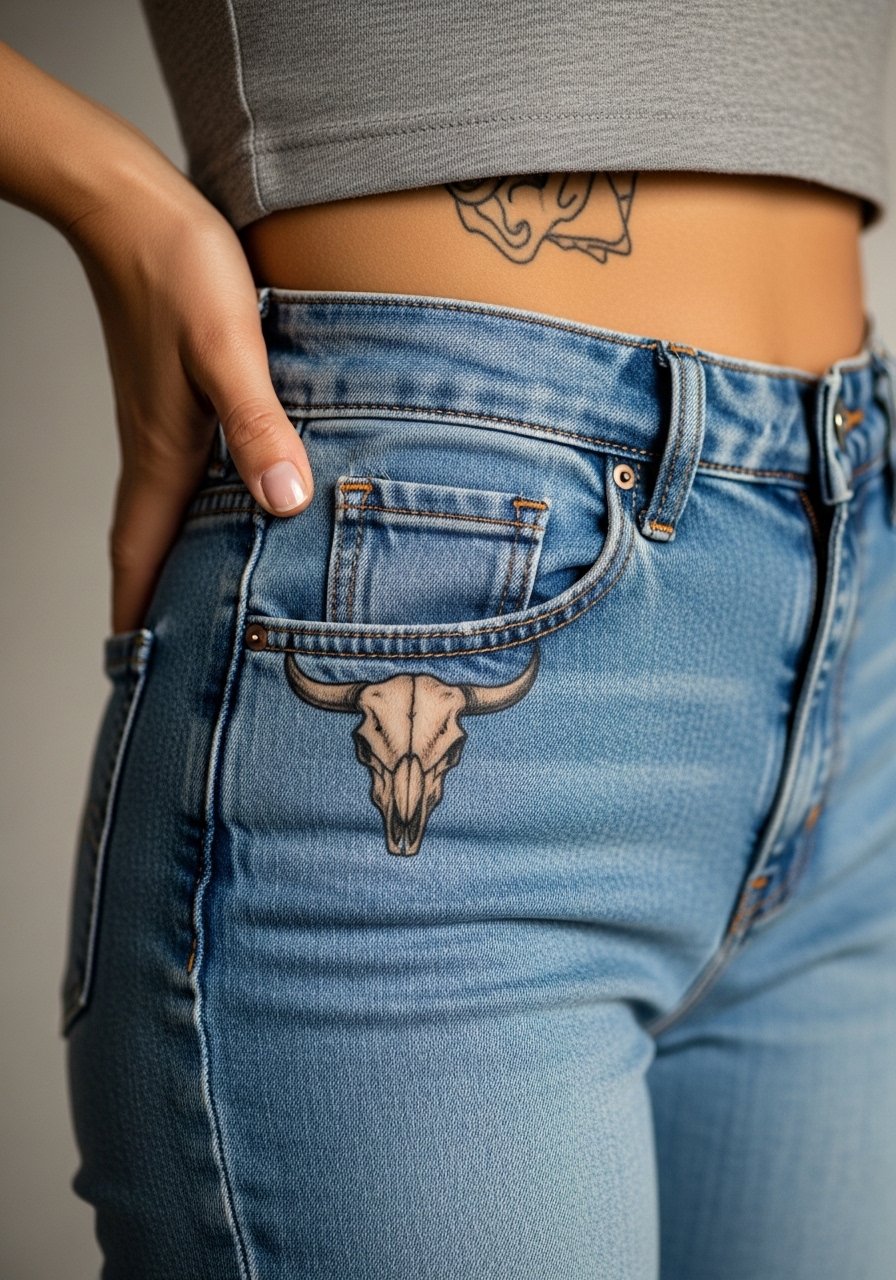
The hip area is great for dramatic sketch hatching because it gives the artist room and privacy. Tell your artist you want hatch marks that fade into negative space, not solid fill, so the piece keeps a hand-drawn feel as it ages. Session discomfort is moderate but manageable when you wear high-waisted bottoms you can shift. One mistake is asking for tiny horn textures that the thigh and hip movement will flatten. For showing the design, try pairing with a high-cut bikini bottom on beach days.
14. Finger Tip Mini Skull with Sketch Dots
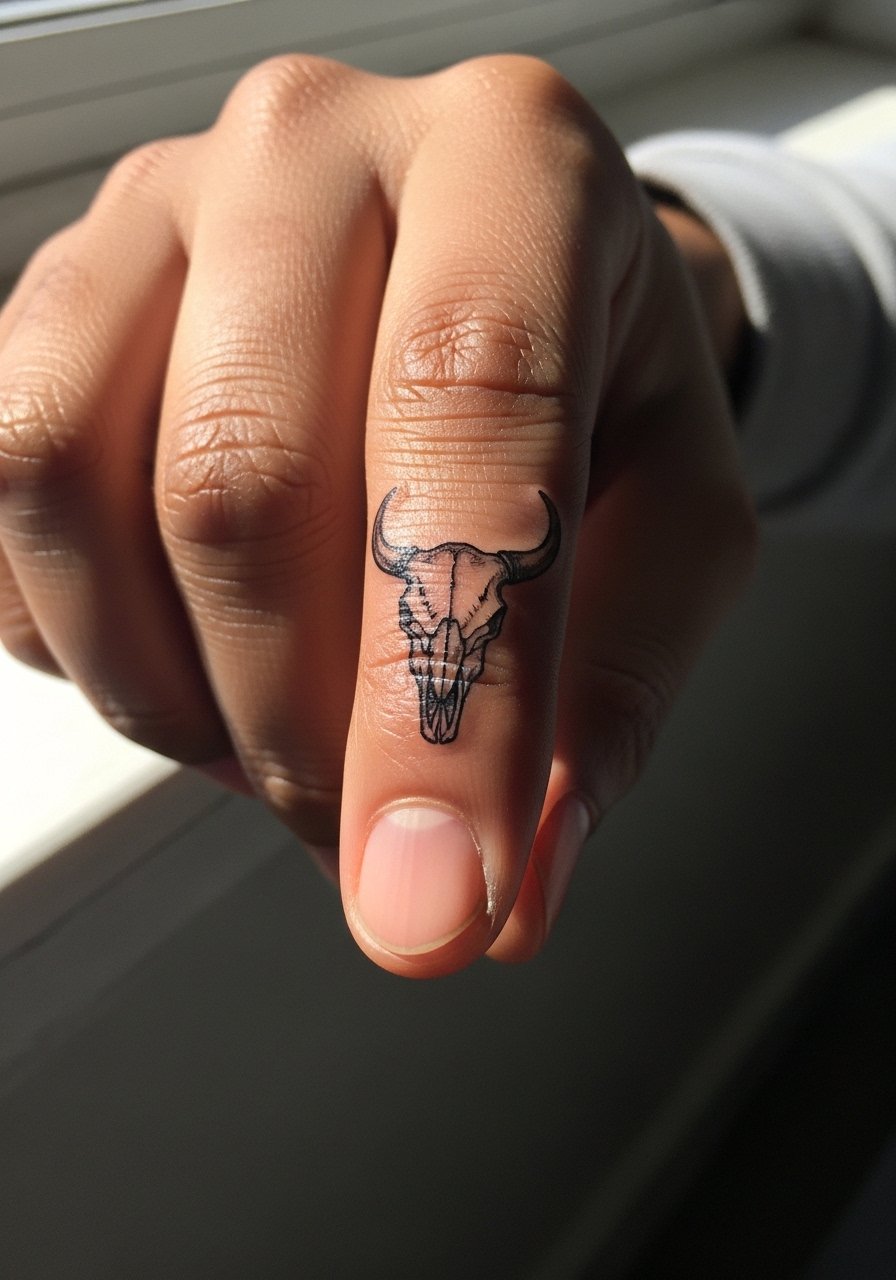
Finger and fingertip tattoos face constant wear. Small sketch dots and lines can disappear faster than expected. If you insist on a fingertip skull, accept simplified dot clusters rather than linework that will break up. The session is quick but the touch-up timeline is short, often within a year. One practical mistake is choosing a highly detailed sketch expecting it to last. Think of finger work as temporary unless you plan for frequent touch-ups.
15. Ankle Sketch Skull with Broken Line Horns
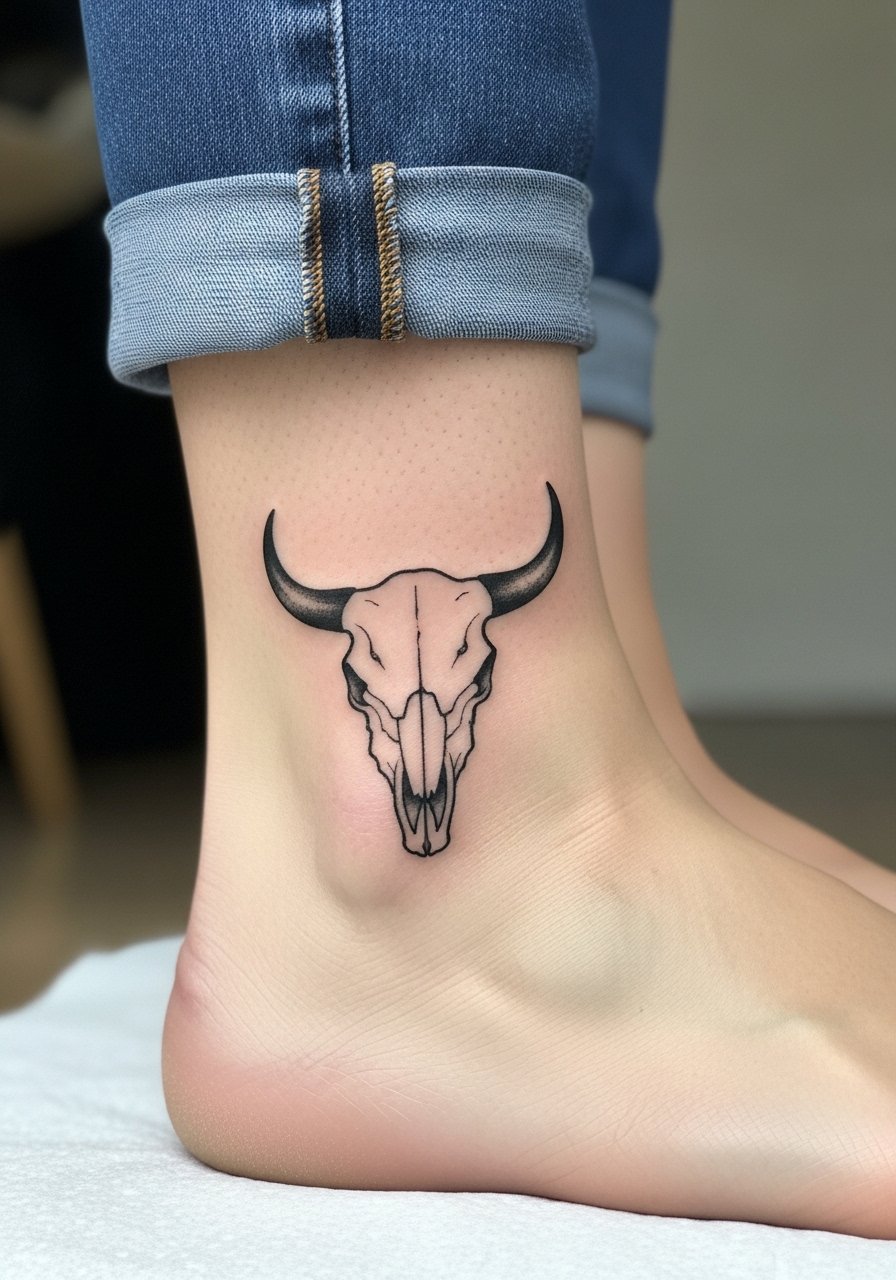
Ankle artwork must handle friction from shoes and socks. Ask for broken horn lines that read as intentional gaps rather than thin continuous strokes. Session pain ranges from mild to moderate depending on proximity to bone. A typical mistake is crowding the ankle with tiny crosshatching. For the session wear, choose rolled-up jeans or ankle socks you can remove to give the artist clean access while staying comfortable.
16. Low Back Sketch Skull with Faded Ink Trails
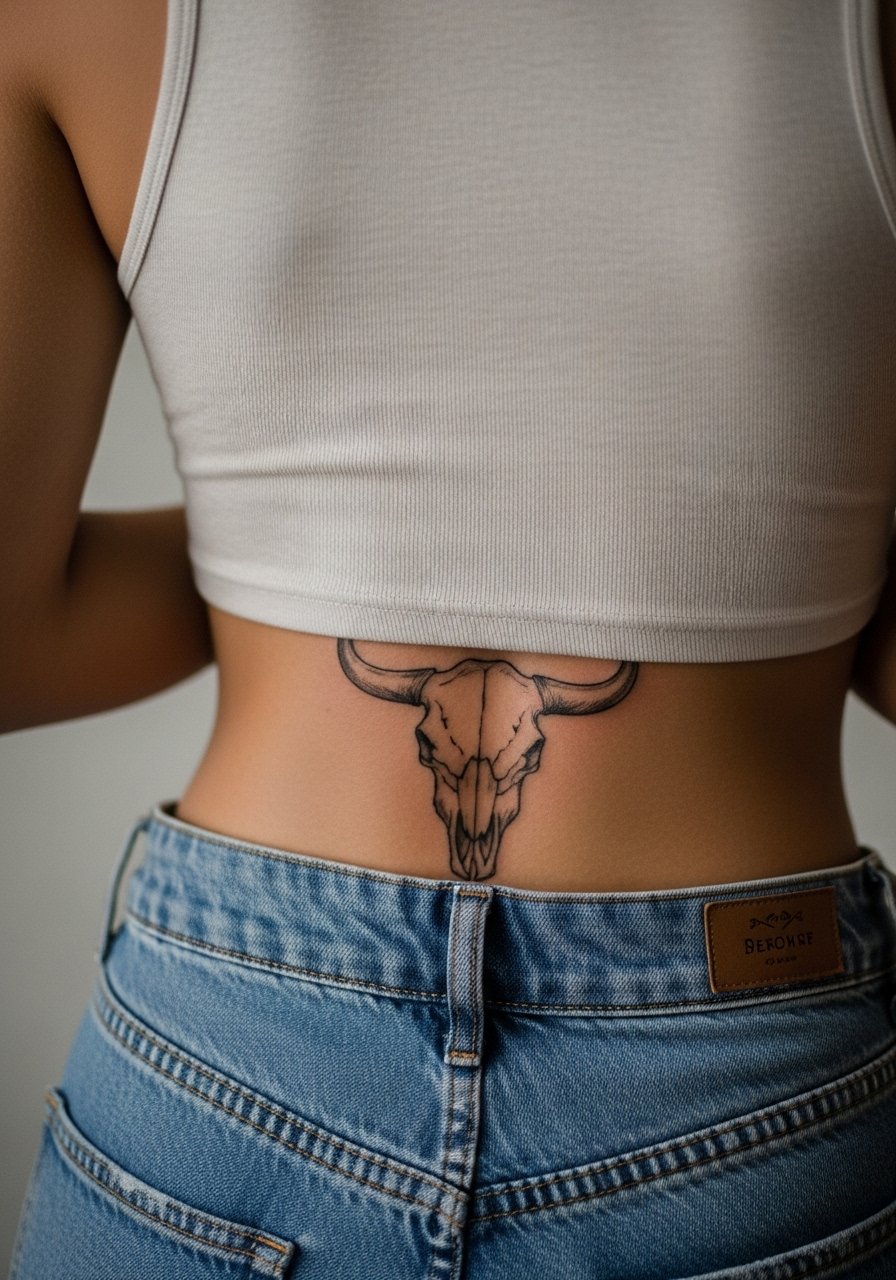
Low back pieces let sketch lines trail into faded ink strokes that look deliberate. During consult, ask for trailing lines that reduce into soft dots near the waist so the design ages like a drawing. A common mistake is centering the skull too low where waistband friction rubs daily. Sessions are moderate and you should plan clothing that avoids constant rubbing while it heals. For evening outfits, low-back or cutout dresses frame this area.
17. Thigh Inner Fold Skull with Subtle Whip Shading
Most inner thigh pieces are intimate and sit where skin texture is softer. Ask the artist for subtle whip shading rather than dense fill so the skull keeps depth without turning into a block. Session pain can be higher on inner thigh for some people. A mistake is placing fine crosshatching too close to the creases where movement will blur lines. Wear loose shorts or a skirt you can shift during the appointment, and know that touch-ups are common for inner thigh sketch work.
18. Rib-to-Back Transitional Skull with Open Sketch Lines

This transitional placement gives dramatic scope, but it also tests sketch line longevity. Tell your artist you want open strokes between the ribs and back so the design can flex with skin movement. One mistake is insisting on tiny, dense detail at the rib edge. Sessions are longer and split into passes. Pain on ribs is higher, so plan breaks and short appointments.
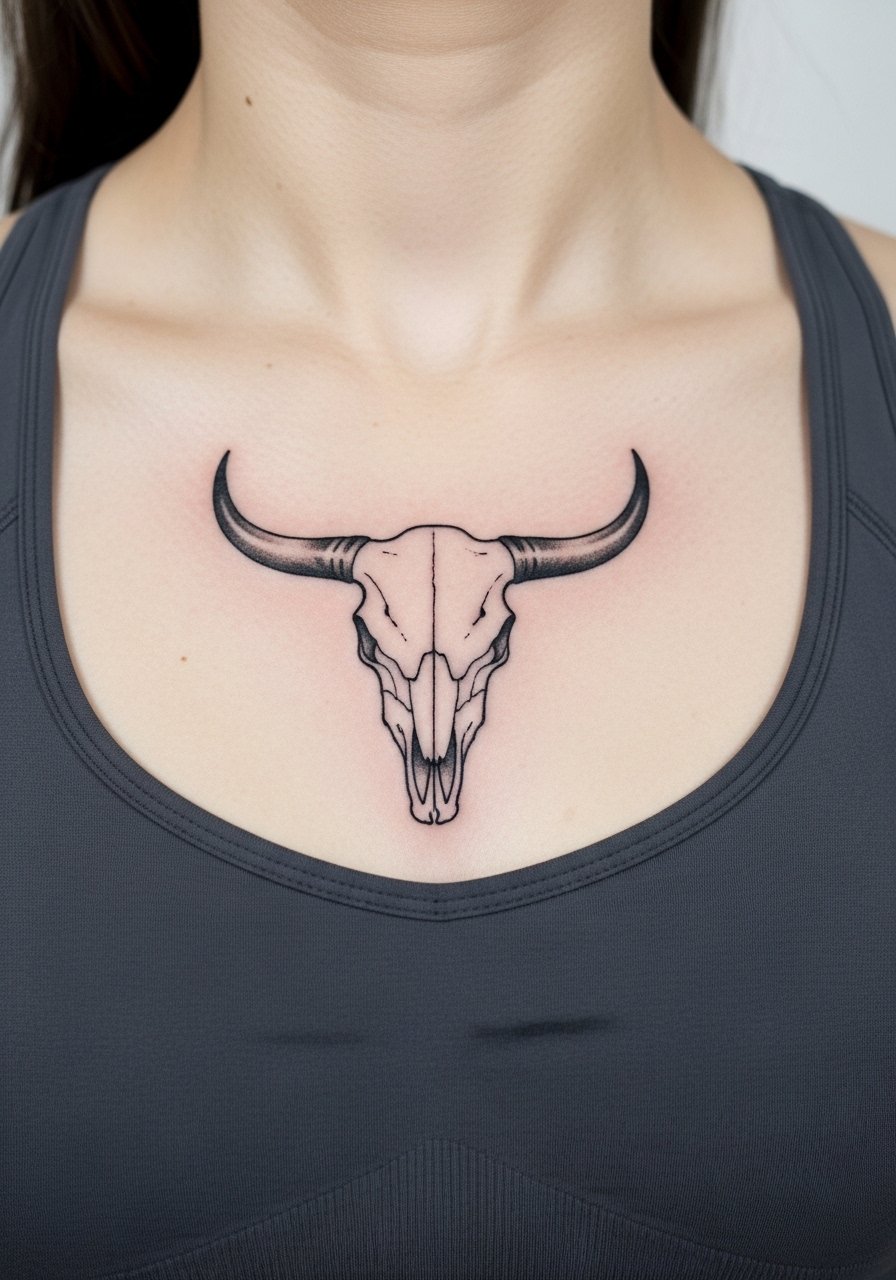
19. Chest-Collar Skull with Loose Graphite Texture
Chest pieces age differently because of movement and sun exposure. For sketch texture, request loose graphite-like strokes that suggest shading rather than solid saturation. A common error is packing ultra-thin hatchwork across the chest where it will merge. For session day, wear a wide-neck shirt you can shift so the artist has clear access. If career considerations matter, place the skull slightly lower to keep it hidden under typical work shirts.
20. Upper Thigh to Hip Wraparound Skull
Wraparound pieces allow the sketch aesthetic to play with negative space and movement. Ask for progressive line weight so the part on the hip uses thicker strokes and the thigh portion keeps lighter hatchwork. Mistakes happen when artists try to make both sides identical; asymmetry helps the sketch read as intentional. Wear session-friendly bottoms that can be shifted without discomfort. The area heals well but often needs a touch-up where friction hits.
21. Hand Top Skull with Sketchy Crown Detail
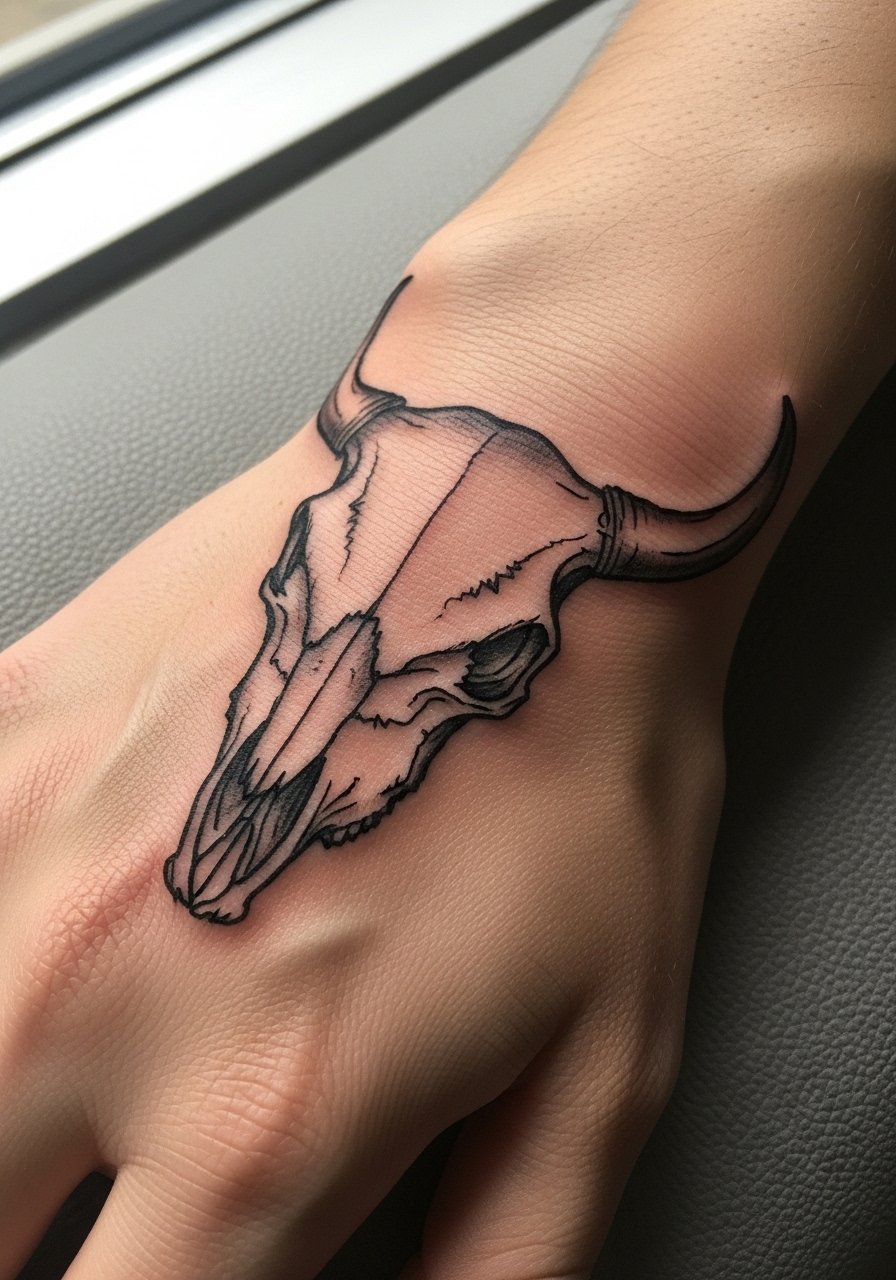
Hand tattoos are visible and fast to show wear. For a hand-top skull, request heavier anchor lines with sketchy crown details rather than delicate filigree. Expect more touch-ups here because hands face constant washing and sun. A common mistake is using tiny strokes for texture on the back of the hand. Consider whether the visibility fits your life before booking and talk to your artist about maintenance.
22. Ribcage Mini Skull Behind the Curve
Ribcage spots are dramatic and painful. For a mini skull, ask for slightly thicker contour lines so the design keeps form as the skin shifts. Artists divide on this placement. One group says mini details on ribs get lost; the other group says proper spacing and depth settle well. I recommend asking which technique the artist uses and why. Plan for short sessions and a comfortable outfit like a cropped top that can be shifted.
23. Scapular Cluster with Tiny Sketched Skulls
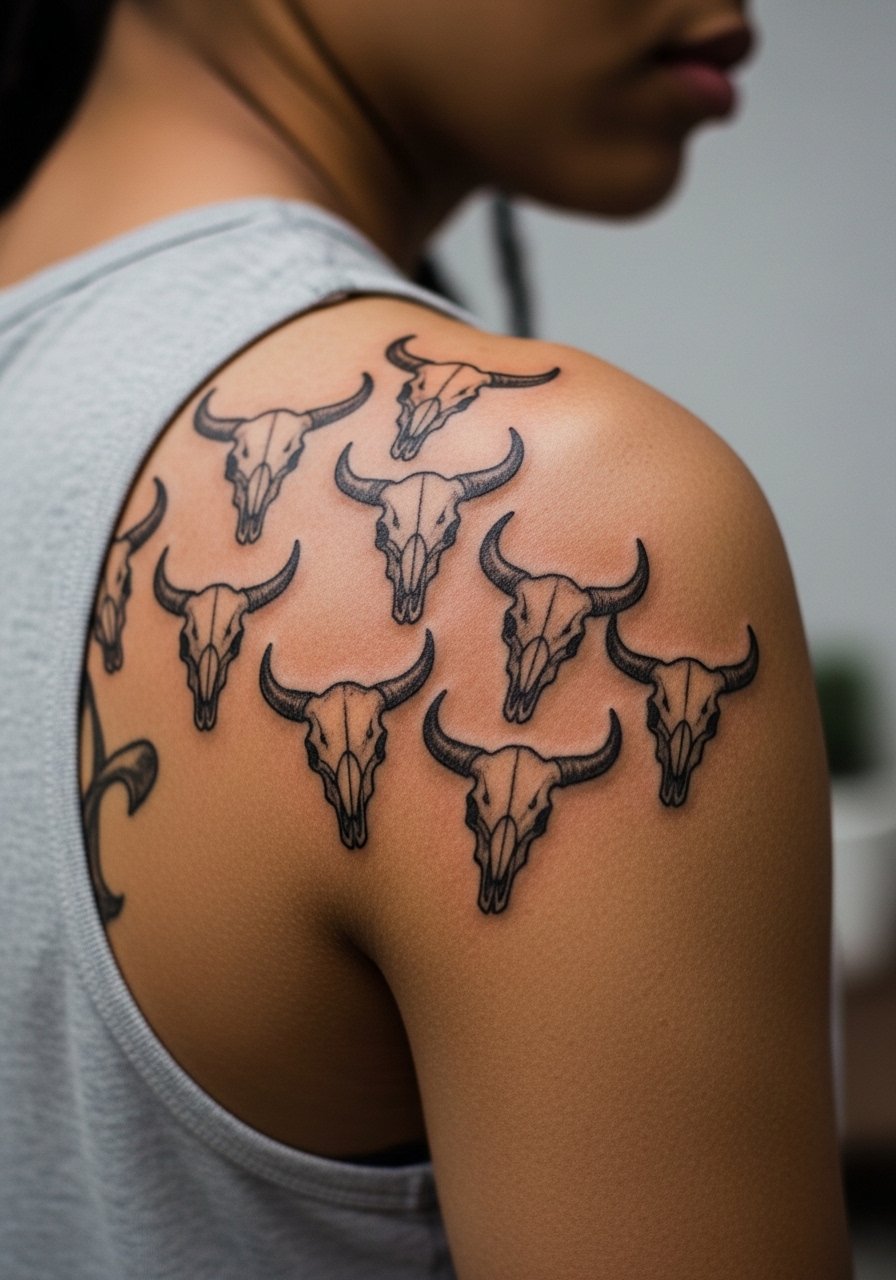
Clusters work because each skull gets breathing room. During the consult, map each mini skull so they never overlap and create unintended new shapes. A frequent error is placing them too close, which merges after healing. Sessions are moderate and you can space sittings. For show-off looks, an open-back top or tank highlights the cluster without overwhelming it.
24. Thigh Band Skull Row with Rough Ink Strokes
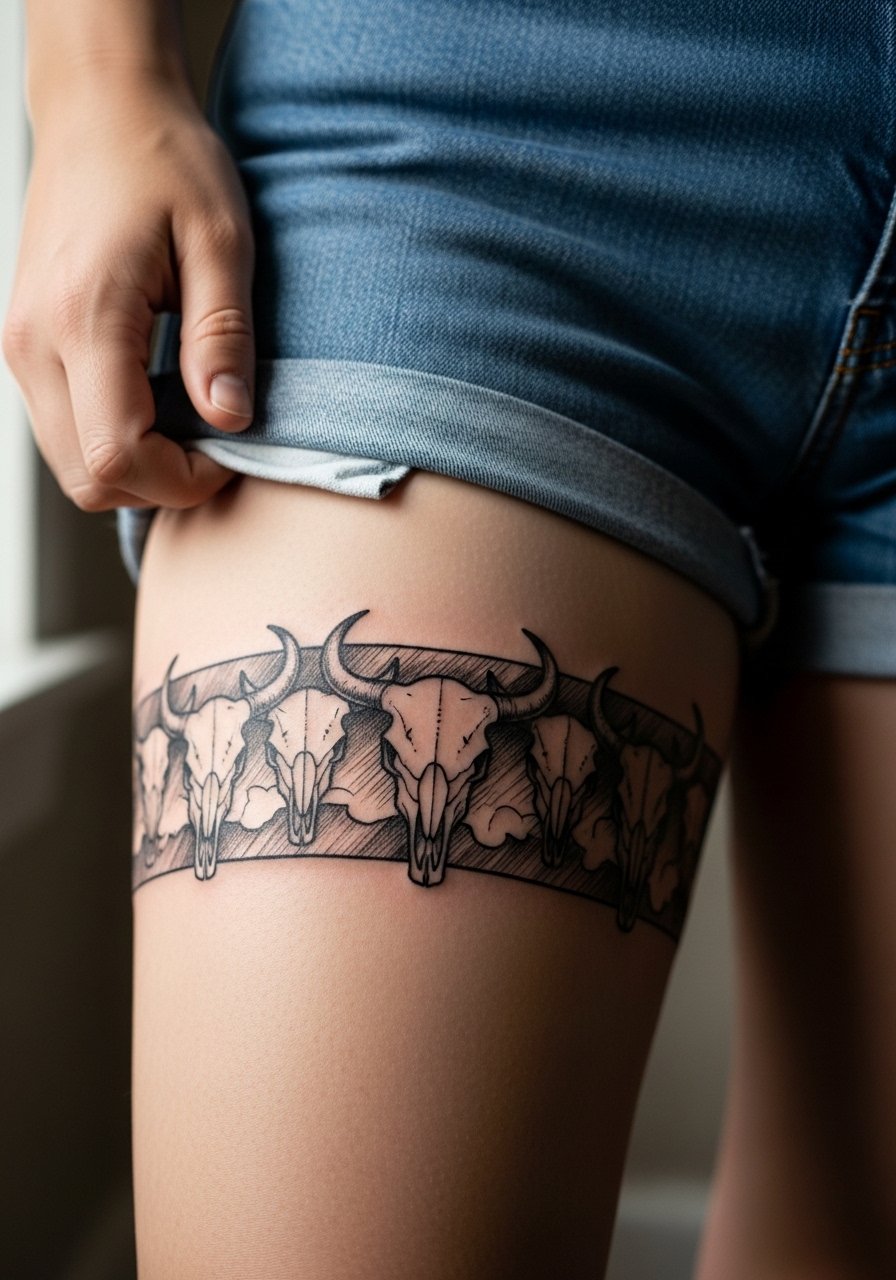
A thigh band reads like a graphic ribbon when the strokes are consistent in weight. Ask for uniform negative space and controlled spacing so the row remains readable as the skin moves. Common mistakes are varying sizes that make the band look uneven. Sessions are longer but the location hides scars from tanning and sun. Consider pairing with skirts for nights out.
25. Behind-the-Ear Tiny Skull Accent

Behind-the-ear tattoos are subtle and require a careful hand. Ask the artist to place the skull lower on the skin behind the ear so it reads when hair is tucked. The area is sensitive and one-session work is common. A mistake is getting too much fineline which disappears into hair growth and skin texture. For the appointment, have your hair tied back and clean so the artist has a clear field.
26. Collarbone-to-Shoulder Transition Skull
Placing a skull across collarbone and shoulder gives motion to the horns. In consultation, clarify how the design curves with muscle so the skull does not appear warped when you move. A common mistake is centering the skull without testing it against your posture. Sessions here are moderate and comfortable if you wear a loose top you can shift without hassle.
27. Abstract Sketch Skull Sleeve Accent with Negative Space

For sleeve accents, the skull can be an abstract element among brushy strokes and negative space. Tell your artist which pieces of the sleeve must remain readable and which can be looser so the skull does not get lost. One common mistake is over-layering the skull under other dense elements. Expect multiple sessions and a plan for how the sleeve will age over five years. Pairing with rolled-up linen shirts keeps the forearm pieces visible without competing textures.
Frequently Asked Questions
Q: How long will sketch-style thin lines in a bull skull last before needing a touch-up?
A: It depends on placement and sun exposure. Thinner sketch lines on wrists, fingers, and neck often need touch-ups by year two or three, while thicker strokes on the thigh or back can go longer without work. Expect to plan for at least one touch-up in the first three years for exposed placements.
Q: Can a sketch-style skull be adapted if I want less realistic and more symbolic?
A: Yes. Ask your artist to simplify anatomy into iconographic shapes and to use deliberate gaps and bold contour strokes to emphasize symbolism over realism. Bring references of the exact balance you want between sketchy texture and graphic silhouette so the artist can match scale and spacing.
Q: Are bull skull motifs culturally sensitive, and how should I approach that?
A: There are two views. One camp sees bull skull imagery as part of regional or indigenous traditions and urges careful adaptation to avoid direct replication. The other camp treats the skull as a broader symbol of mortality and resilience. If the design references a specific cultural style, discuss respectful adaptation with your artist and consider subtle originalizations rather than copying sacred patterns.
Q: What should I wear to an appointment for a ribcage or sternum sketch skull?
A: Wear a cropped top, sports bra, or zip-up hoodie that you can shift so only the tattoo zone is exposed. A loose top makes for easier access and helps you stay warm during breaks. For ribs and sternum specifically, a fitted sports bra gives the artist stable access without full exposure.
Q: How do I find an artist who understands sketch-style linework without naming specific people?
A: Look for portfolios via local shop directories and convention lineups, search hashtags for sketch-style tattoos, and read threads in tattoo communities like the relevant subreddits to see long-term healed shots. Ask shops for healed photos rather than fresh work so you can judge how the lines settle over time.
