
Fine line and saturated red accents are a conversation between old-school black and grey technique and modern pop. Trends push brighter red highlights, while solid black linework keeps a piece readable as skin changes. Pick pieces that lean into where your body will move and age, and bring references that show spacing and saturation. The list below opens with accessible forearm and wrist ideas and moves into placements that need more care in consultation.
1. Fine Line Arrow on Inner Forearm
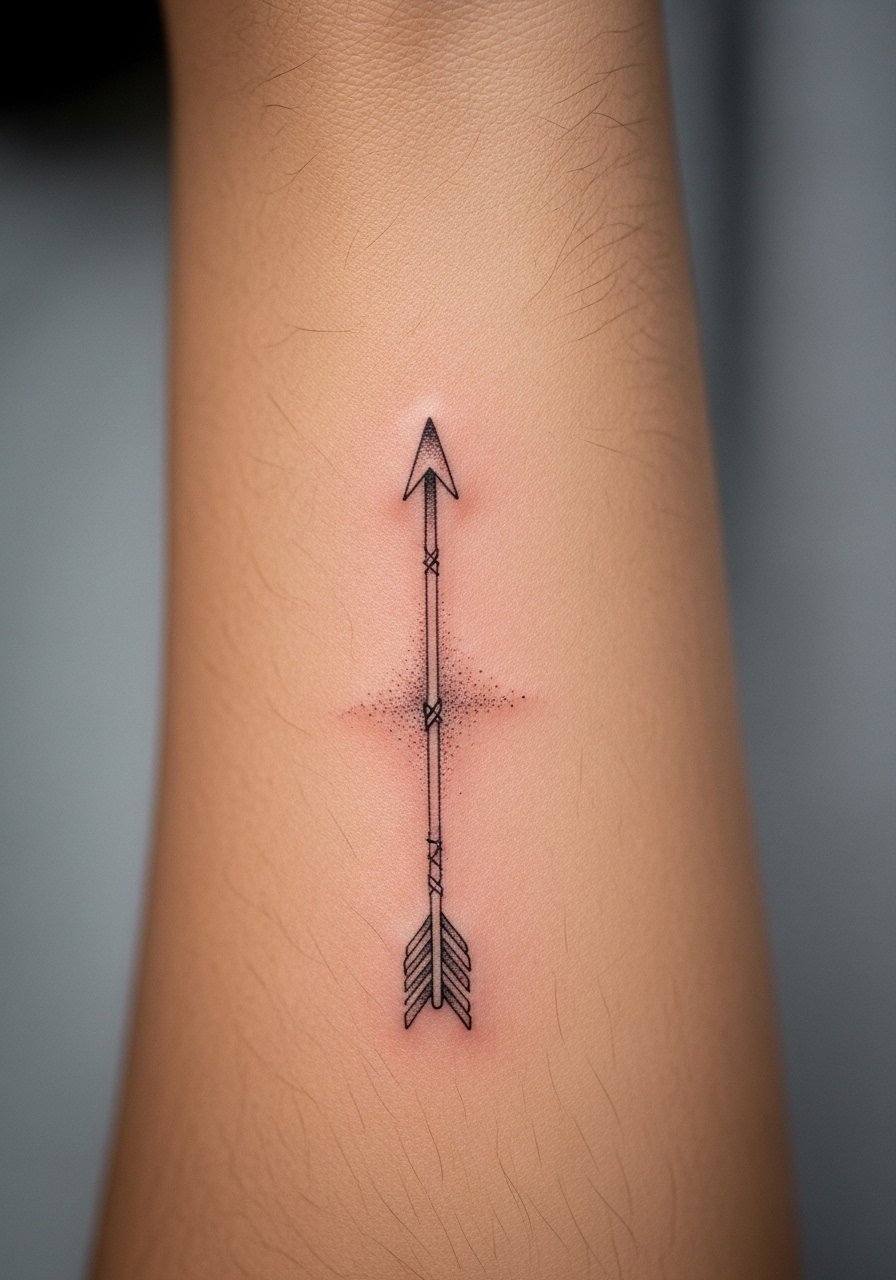
I've seen this tiny arrow hold up best when artists increase line weight slightly compared with the reference. Ask for clean, single-pass linework and light stipple shading behind the shaft if you want depth without color. The inner forearm is forgiving for fine line, but going too thin invites early fading and occasional blowout near wrist creases. Pain is mild and sessions run short. For showing it off, roll up sleeves and wear a loose button-down shirt so the forearm is visible without stretching the skin. Expect a touch-up around year three if you want razor-sharp lines.
2. Micro-Realism Wolf Head on the Bicep
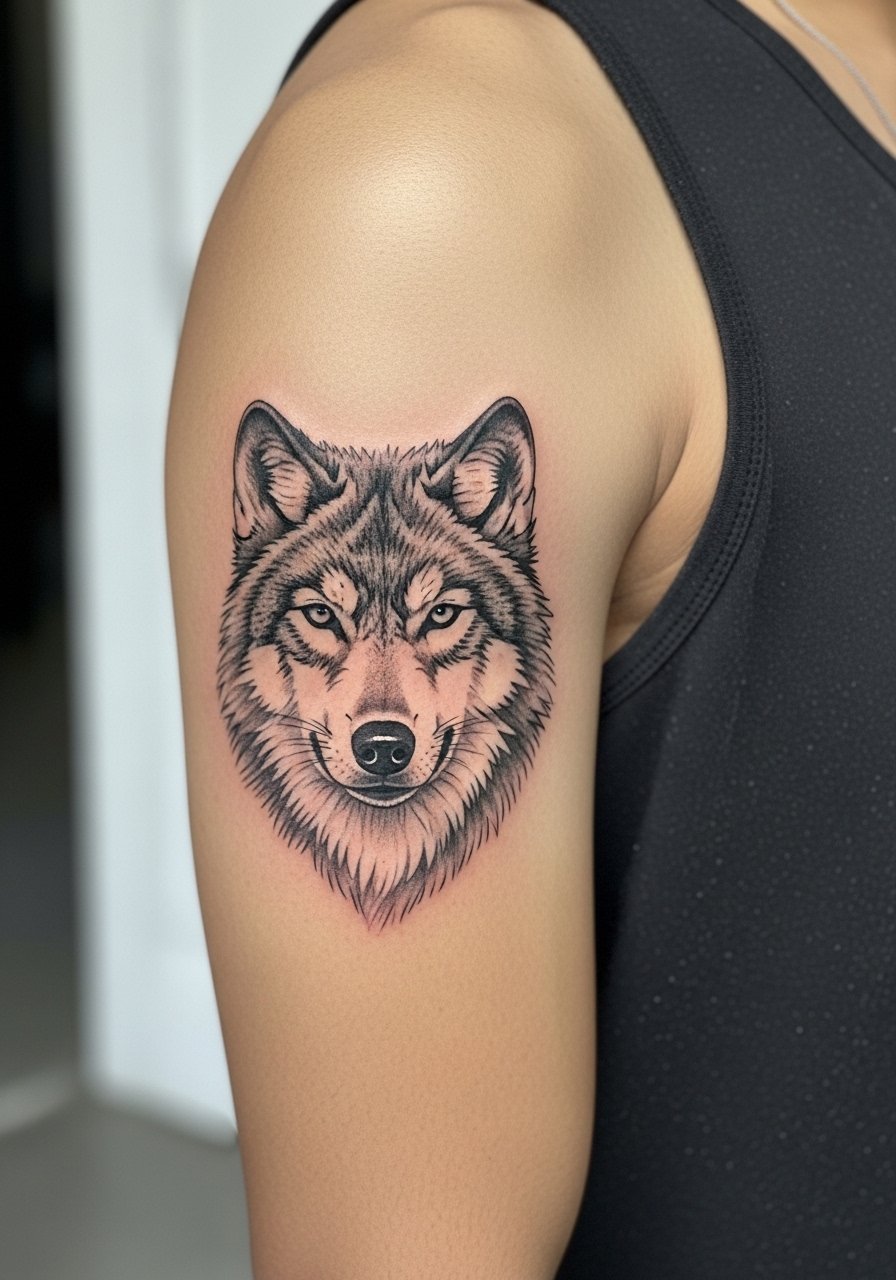
This reads like a larger piece in a small area because of dense stipple shading and careful saturation. The outer bicep has moderate pain and accepts saturation well, so ask your artist for heavier saturation in shadow zones rather than more tiny lines. A common mistake is cramming hyper-detail into a small bicep area, which blurs into grey at two years. For sessions, wear a loose tank top so the artist can rotate your arm easily. Expect one longer session of two to three hours and a possible touch-up at year two if you want to maintain the highlights.
3. Black And Red Accent Rose on Upper Chest
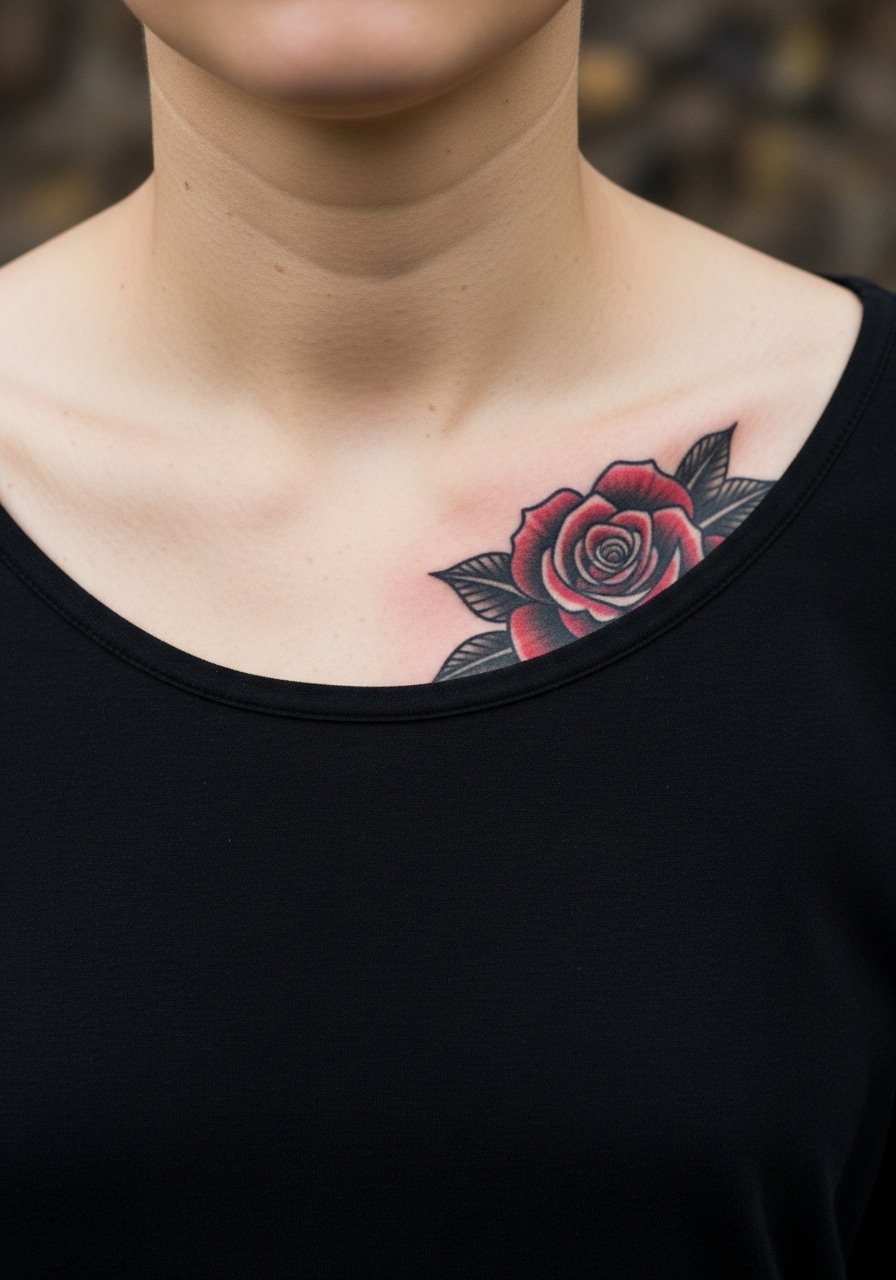
Chest pieces demand respect for movement and sun exposure. For this black and red rose, ask the artist to plan spacing so petals get breathing room. The ribcage and chest vary a lot, and artists split into two camps on fine detail here. One camp says dense fine line blurs fast because skin stretches and rubs. The other camp argues that with deliberate spacing and proper needle depth, details stay crisp. Tell your artist you want heavier saturation in shadowed petals and lighter, deliberate spacing in the center. For evenings out, an open-back midi dress or a wide-neck top frames the collarbone without hiding the work.
4. Geometric Mandala on the Sternum
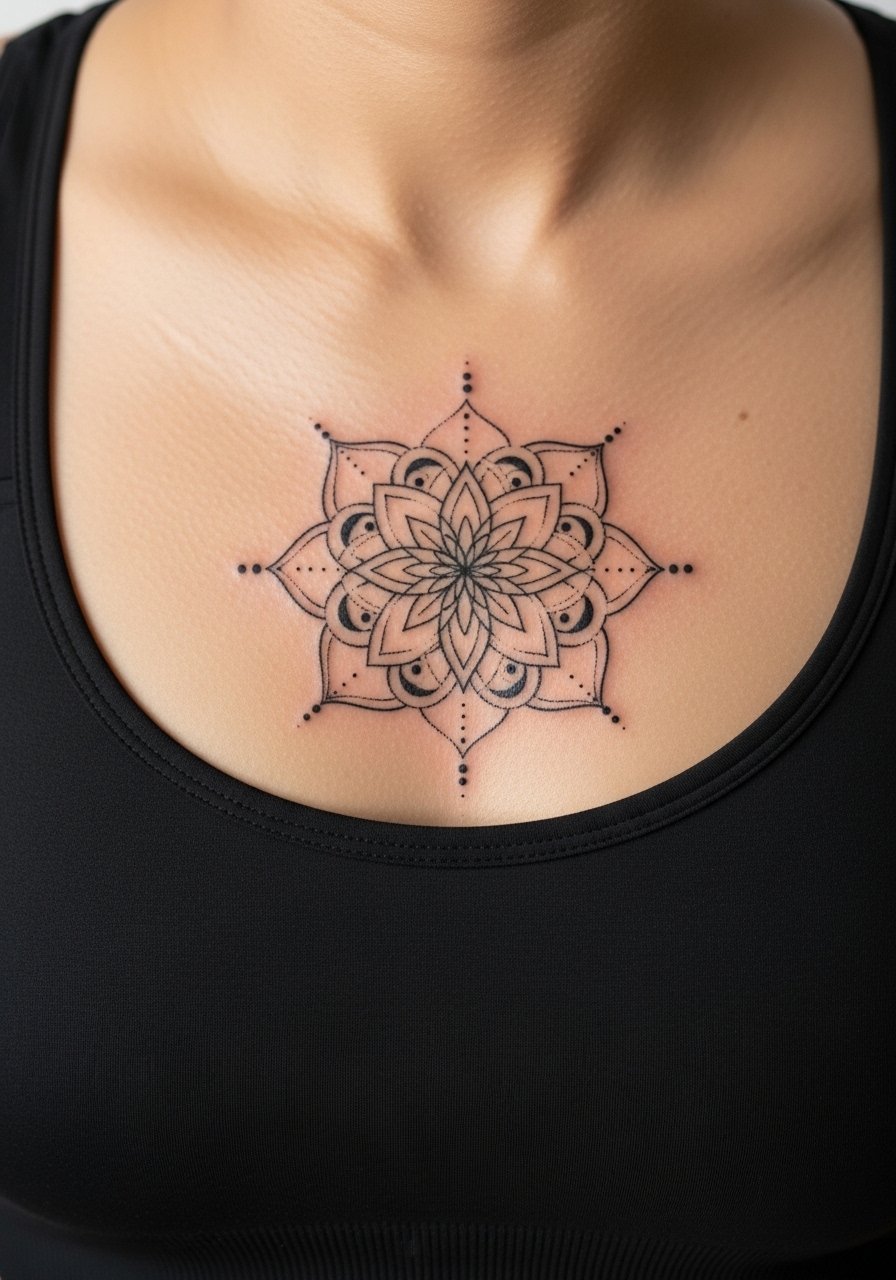
Sternum mandalas need scale more than extra detail. Small, dense mandalas age poorly on this canvas because the skin moves a lot during breathing. Ask for generous spacing between concentric elements and for stipple shading rather than continuous grey fills. The session feels sharp in spots and duller in others because the bone is shallow. Wear a fitted sports bra to the appointment for easy access and modesty. Expect more pronounced fading along the midline where friction from clothing is highest, and plan a touch-up within two to four years if you want the radial lines to stay crisp.
5. Script With a Red Period on the Ribcage
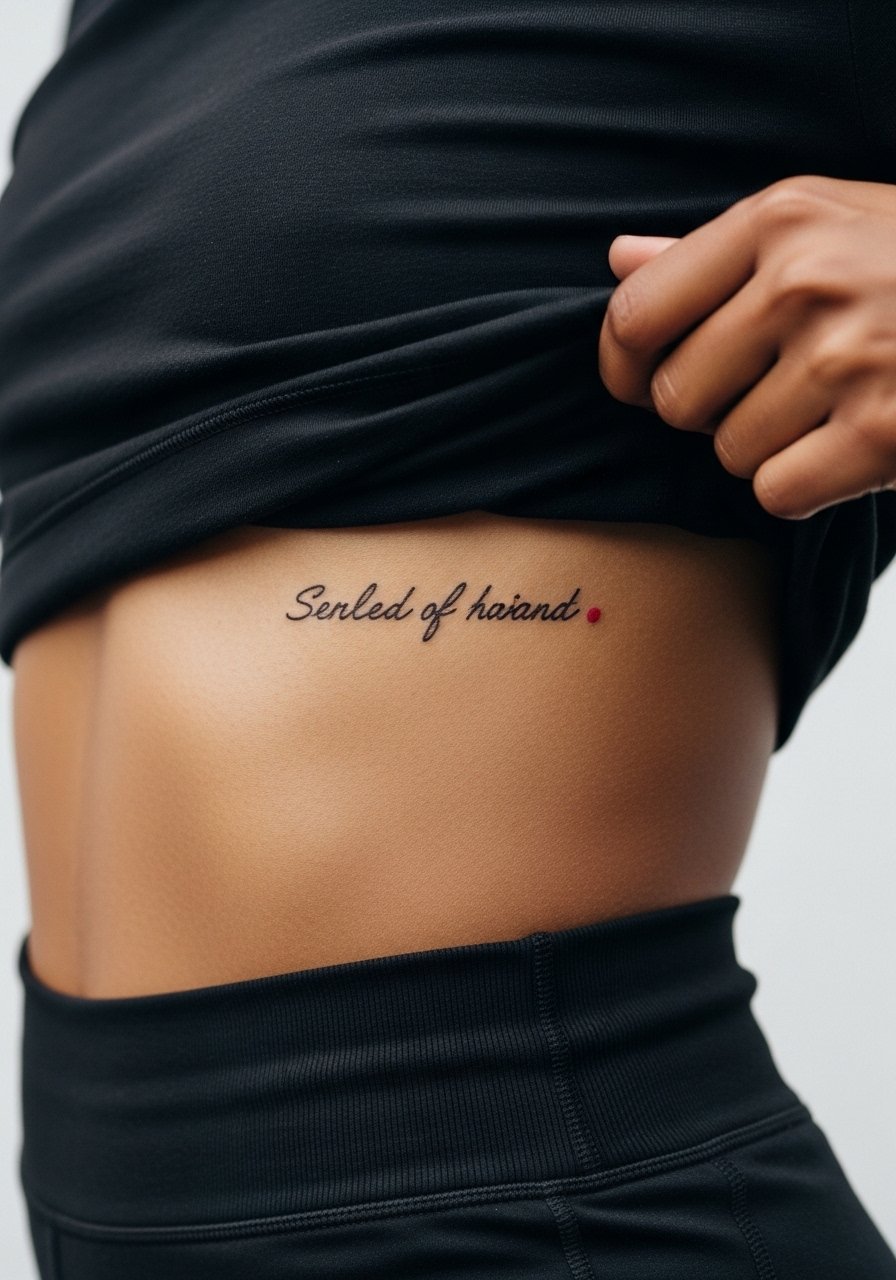
Ribcage script is elegant when spaced for breathing room. The biggest mistake here is requesting tiny cursive without allowance for natural skin movement. Artists split on whether fine script holds up on ribs. One camp says the stretch and contour blur lines fast. The other camp says proper depth and slightly heavier line weight solves that. If you want the tiny red dot to pop, ask for a small packed dot of pigment rather than a washed red wash. For the session, wear a cropped top you can lift, and expect higher pain during long sittings. Plan a touch-up at year two if you keep the lineweight minimal.
6. Blackwork Skull With Red Eye on the Calf
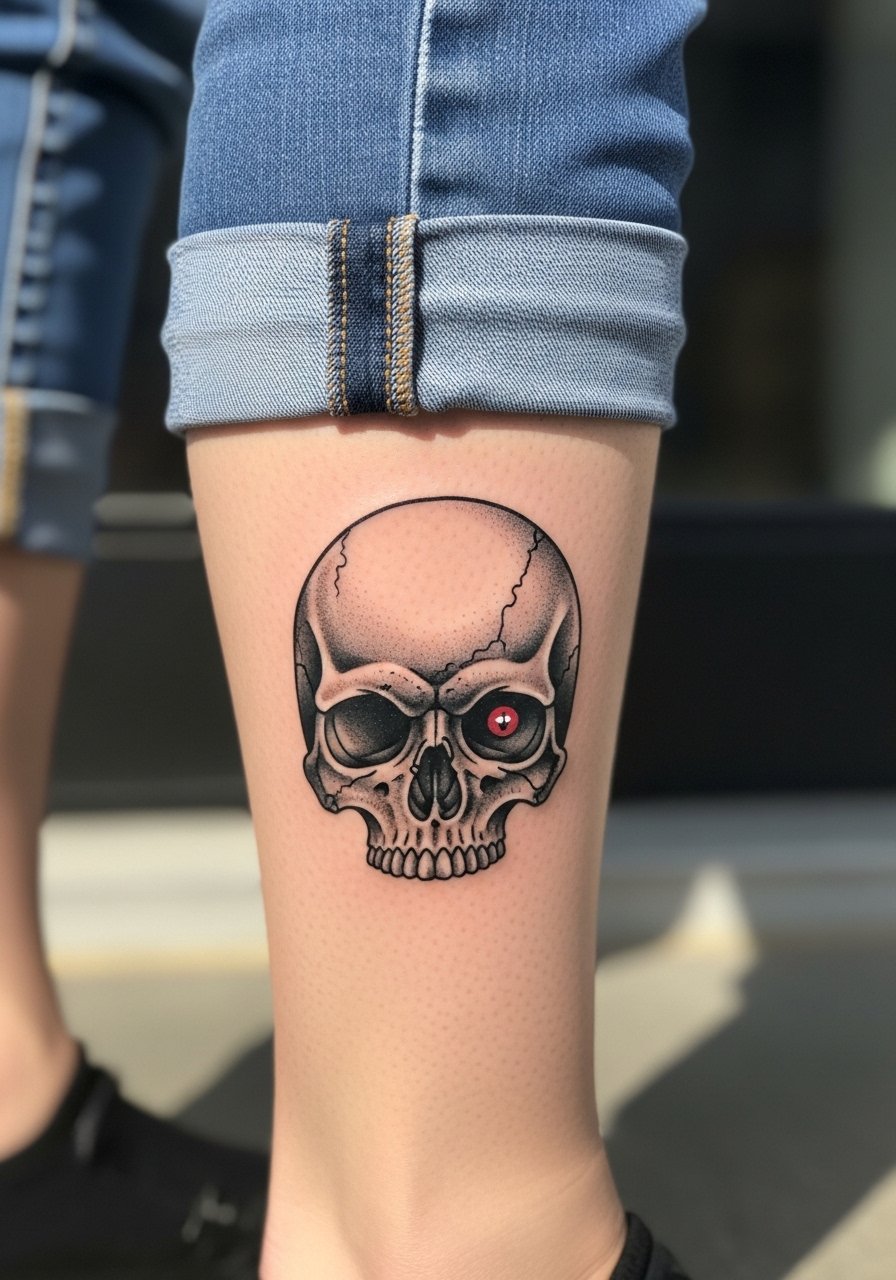
Calf placements are great for blackwork because the skin holds saturation well and sessions are tolerable. For a skull with a red accent, ask for dense black saturation first so the red sits on top and maintains contrast. A common mistake is over-detailing in shadow fields which reads as noise at distance. Wear jeans rolled up to the studio or shorts that allow the artist full access without pressure on the area. Expect a two to three hour session and a possible touch-up at year three where sunlight fades the red faster than the black.
Studio Day Picks
These first six pieces include chest, rib, forearm, and calf placements that all need slightly different prep and first-week care.
-
Stencil transfer paper kit. Lets you preview the line placement on skin before the needle touches it, which is helpful for collarbone and forearm compositions.
-
Comfortable disposable shorts. Useful when you have thigh or rib work and need something hygienic that still gives the artist access.
-
Thin protective film roll. Keeps small areas like the wrist and calf from catching friction from clothing during the first 24 to 48 hours.
-
Fragrance-free gentle body wash. Cleanses healing zones without stripping pigment on fresh black and red pieces.
-
Aquaphor healing ointment. A thin layer during the first 48 hours helps lock in moisture on tight linework without clogging needle channels.
7. Stipple Shaded Crescent Moon on the Shoulder
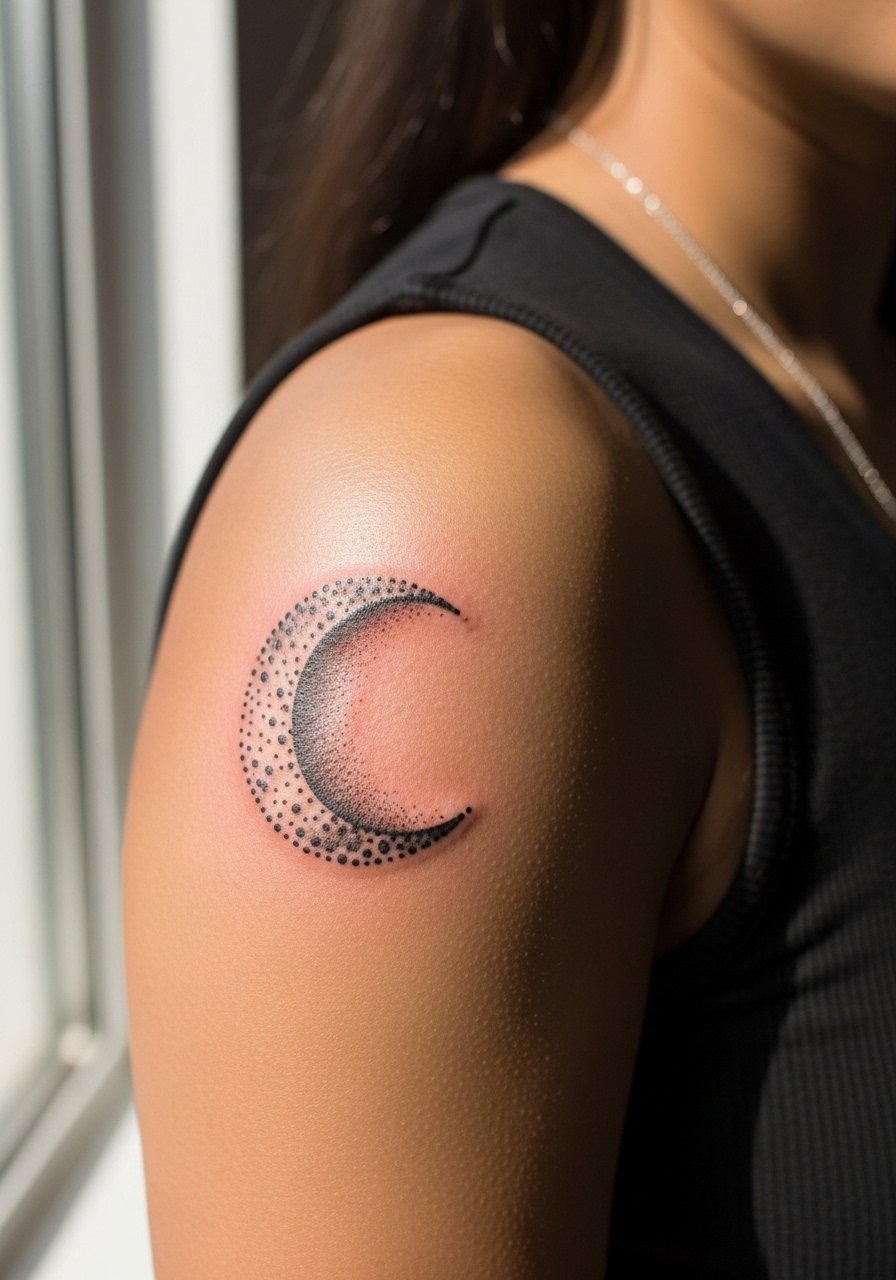
Shoulder stipple work ages predictably well because of even skin and low friction. Tell the artist you want dot work that reads from six feet away, not just up close. The session is comfortable for most and usually done in one longer sitting. A real mistake is asking for continuous shading when stipple will give cleaner texture long term. For showing the piece, pair it with a loose drawstring linen pant and tank combo that keeps shoulders exposed in warm months. Touch-ups are rare here unless the piece sits high and sees repeated sun.
8. Black And Red Partial Sleeve With Negative Space
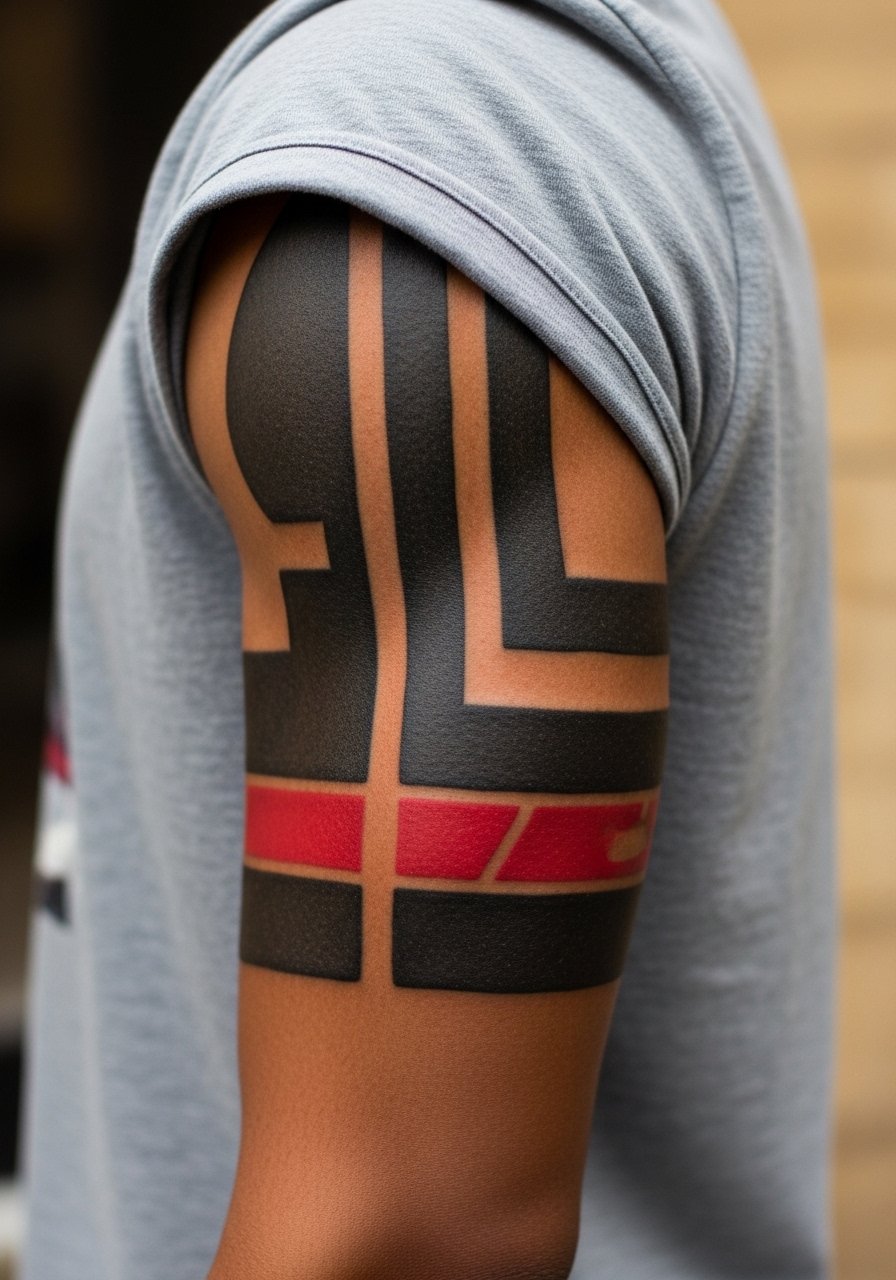
Sleeves ask you to think in chapters rather than single images. For a black and red sleeve, plan where negative space will breathe before the first session. That spacing is what keeps detail from merging at year five. Common mistakes include adding tiny filler pieces that end up muddying the composition. In consultations, bring a sequence of images so the artist can map flow. For showing off the work, roll sleeves or pick short-sleeve shirts and consider a minimalist watch that does not cover key focal points. Expect multiple sessions and a built-in touch-up for mid-sleeve saturation.
9. Tiny Red-Dot Accents Around a Wrist Chain
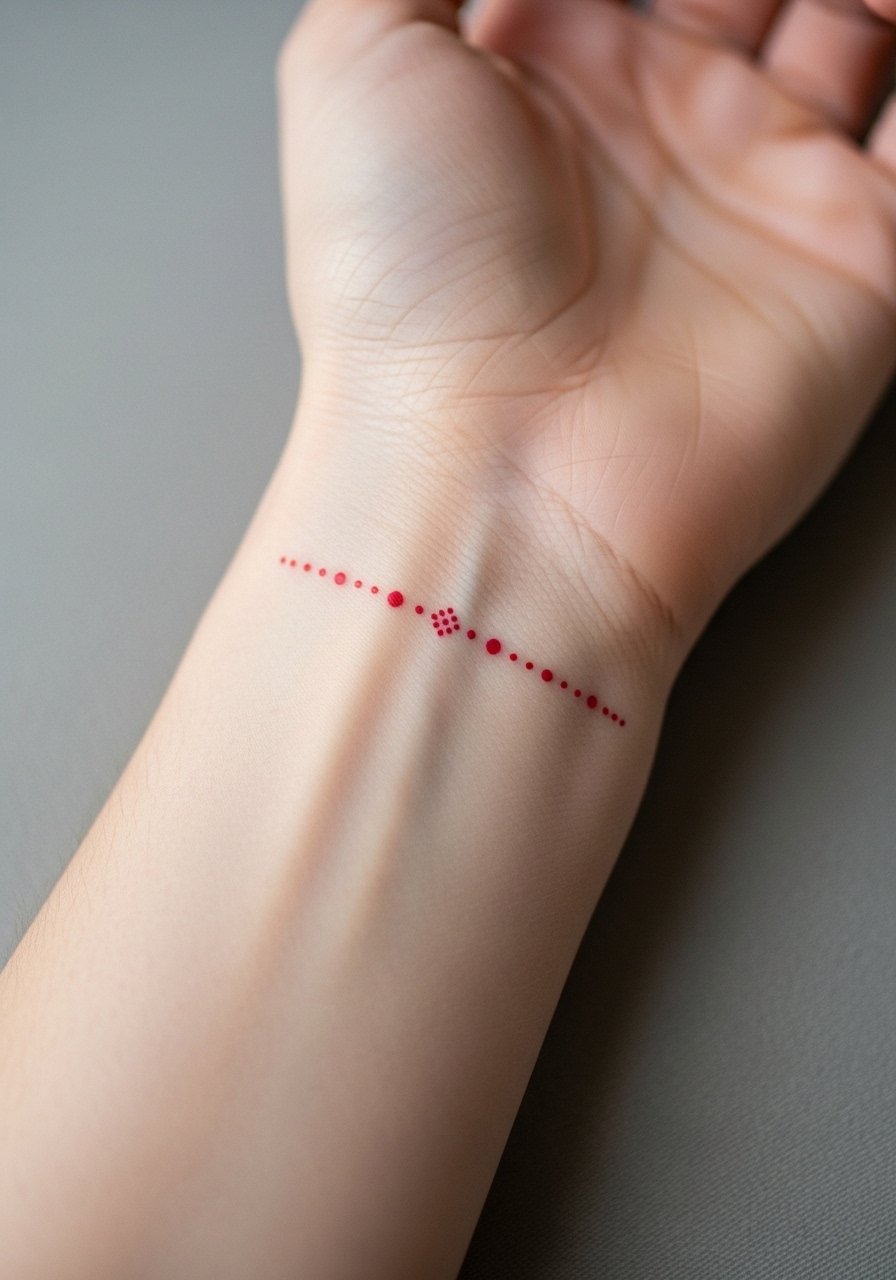
Small wrist dots are deceptively tricky because constant wash and sun exposure fade red faster than black. Ask for small packed dots instead of washed pigment so the red holds. The wrist also risks blowout if lines sit too shallow. A smart consultation will include asking the artist for a slightly bolder dot and conservative spacing. For daytime wear, pair the wrist dots with stacked dainty bracelets that frame rather than cover the ink. Expect a touch-up between year one and two to keep the red vivid.
10. Micro-Realism Portrait With Red Rose Foreground on Upper Arm
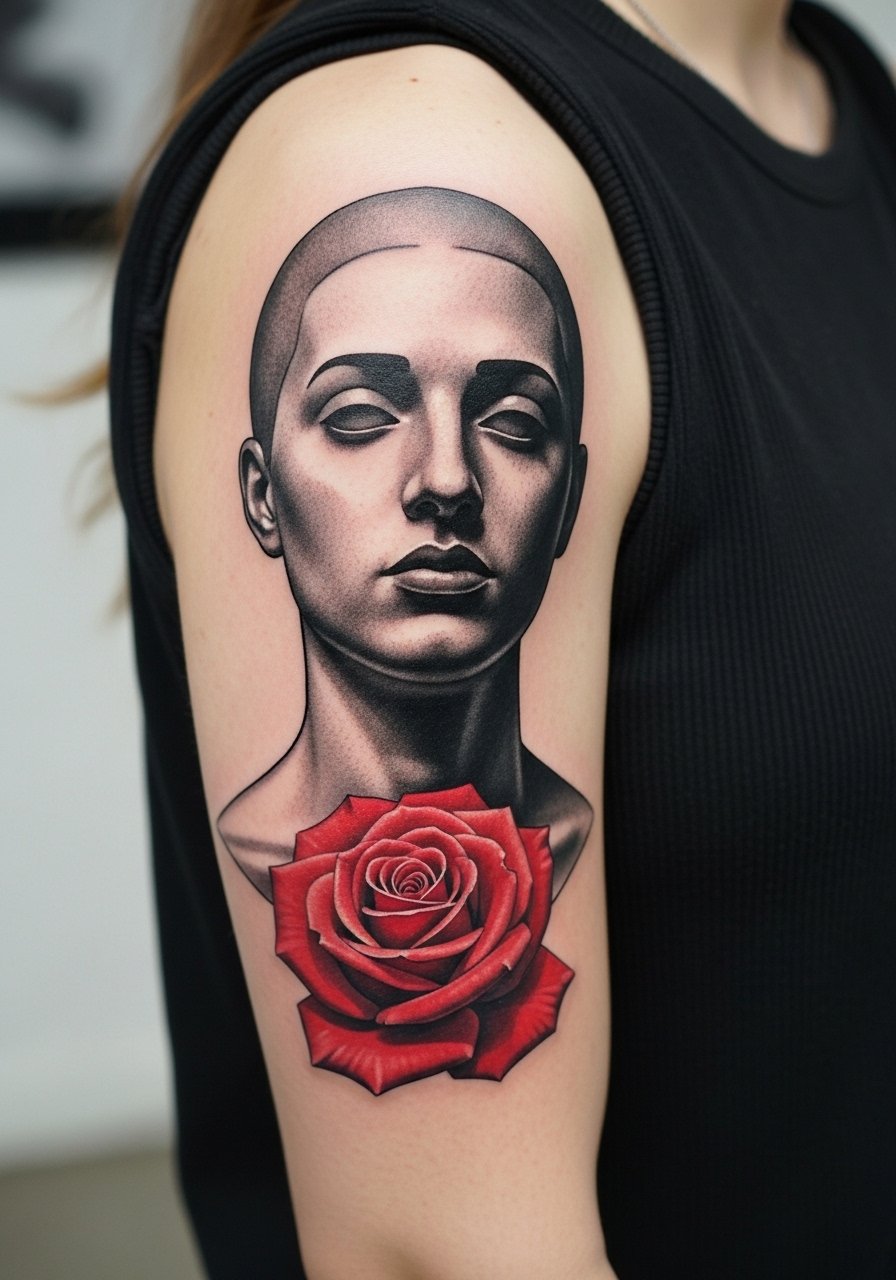
Portraits in black and grey demand contrast planning. If you want a red rose foreground, tell the artist you want deep black contrasts behind the face so the red reads as an intentional focal point. A common mistake is soft background greys that wash out the portrait. The upper arm accepts saturation well but loses highlight contrast over time under sun. For sessions, wear a loose tank top so the artist can work on the whole circumference. Plan a detailed touch-up at year three for both portrait crispness and red vibrancy.
11. Black And Grey Koi With Red Patches on the Calf
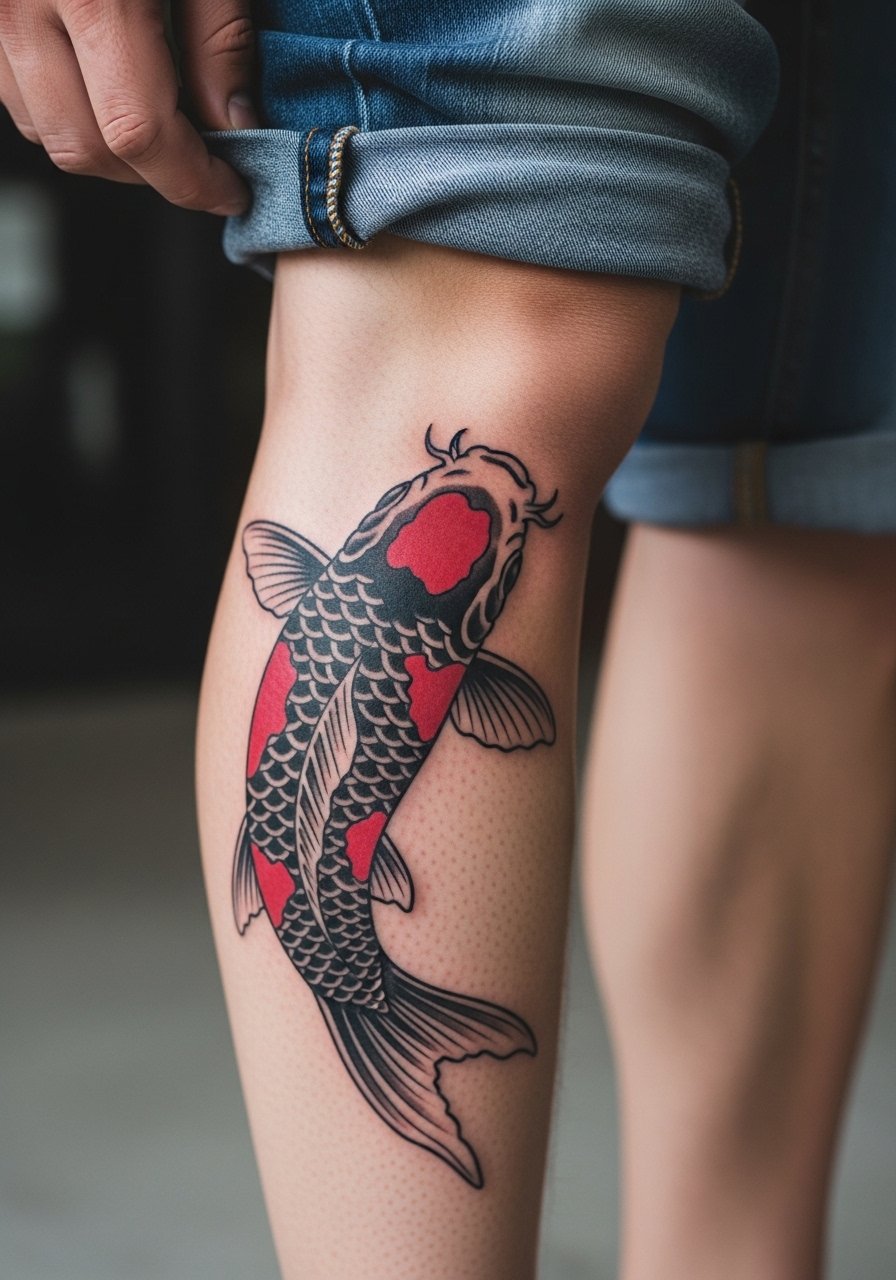
Koi pieces benefit from broad areas of saturation and careful highlights. Ask for red patches that sit in guarded spaces, not in high-friction zones. The calf tolerates touch-ups well, and the red will fade faster than black if left in sunlight. A common error is too many fine scales crammed into a tight area, which bleeds into texture. For casual showing, wear shorts that sit mid-thigh so the calf is visible and the piece can breathe. Expect lower maintenance than hand or wrist pieces.
12. Negative Space Lace Ankle Band
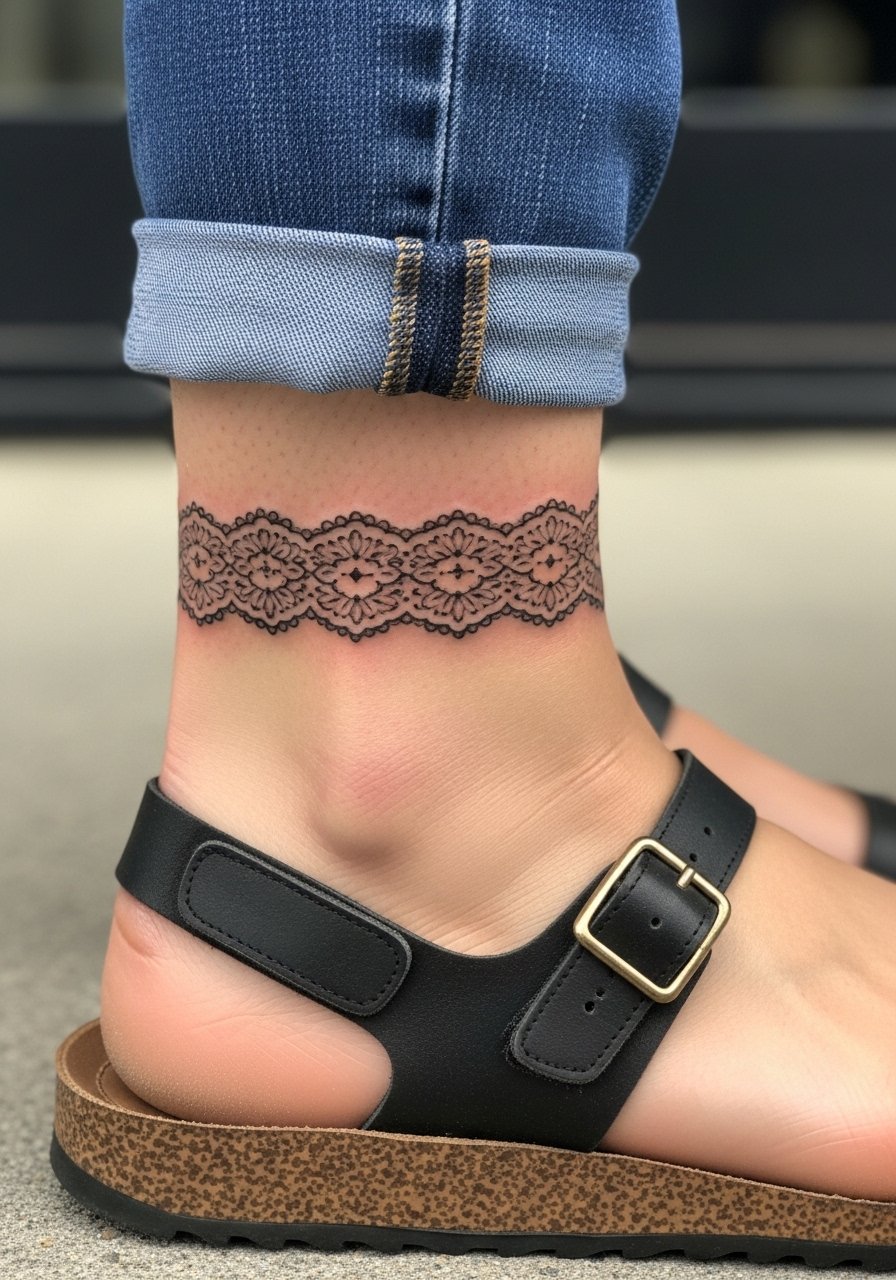
Ankle bands sit where friction and footwear rub constantly. Ask for a slightly bolder line in areas that will contact shoes and for negative space to be large enough that edges stay crisp. A real mistake is choosing an ultra-thin lace pattern that loses definition after the first year. For the appointment, wear pants you can roll up comfortably and a pair of open sandals so the artist can test movement. Expect a touch-up at year two if you want the lace to remain delicate and defined.
13. Red-Eyed Raven on the Collarbone
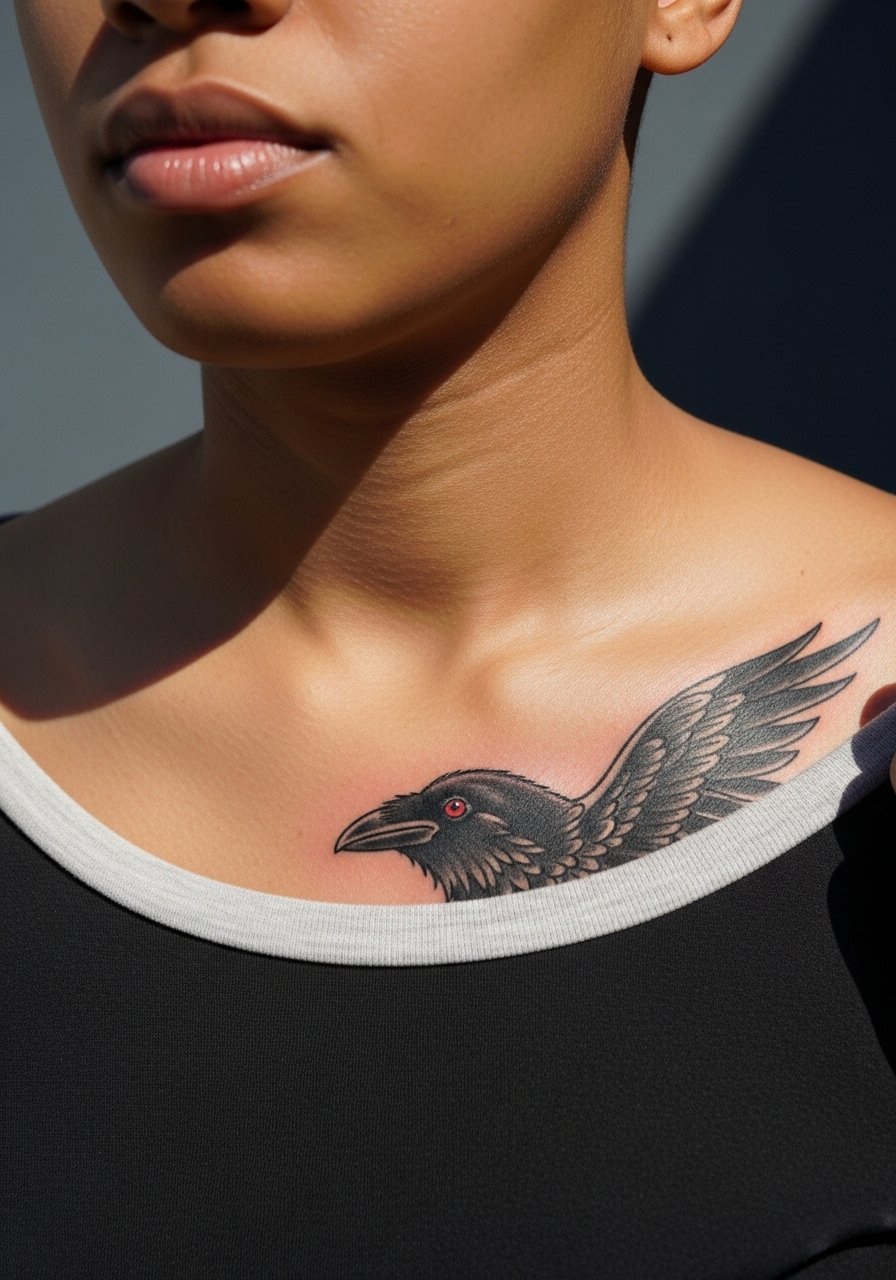
Collarbones are a show-off spot that needs careful composition so the piece sits with your clavicle line. Ask for a higher contrast in the raven's body so the red eye becomes the anchor. One common mistake is centering the focal point directly on the bone where healing is slower. For nights out, pair this design with a thin chain pendant necklace that frames the raven without covering it. Expect minor fading around the bone margin and a touch-up if highlights soften.
14. Ornamental Spine Linework in Black And Grey
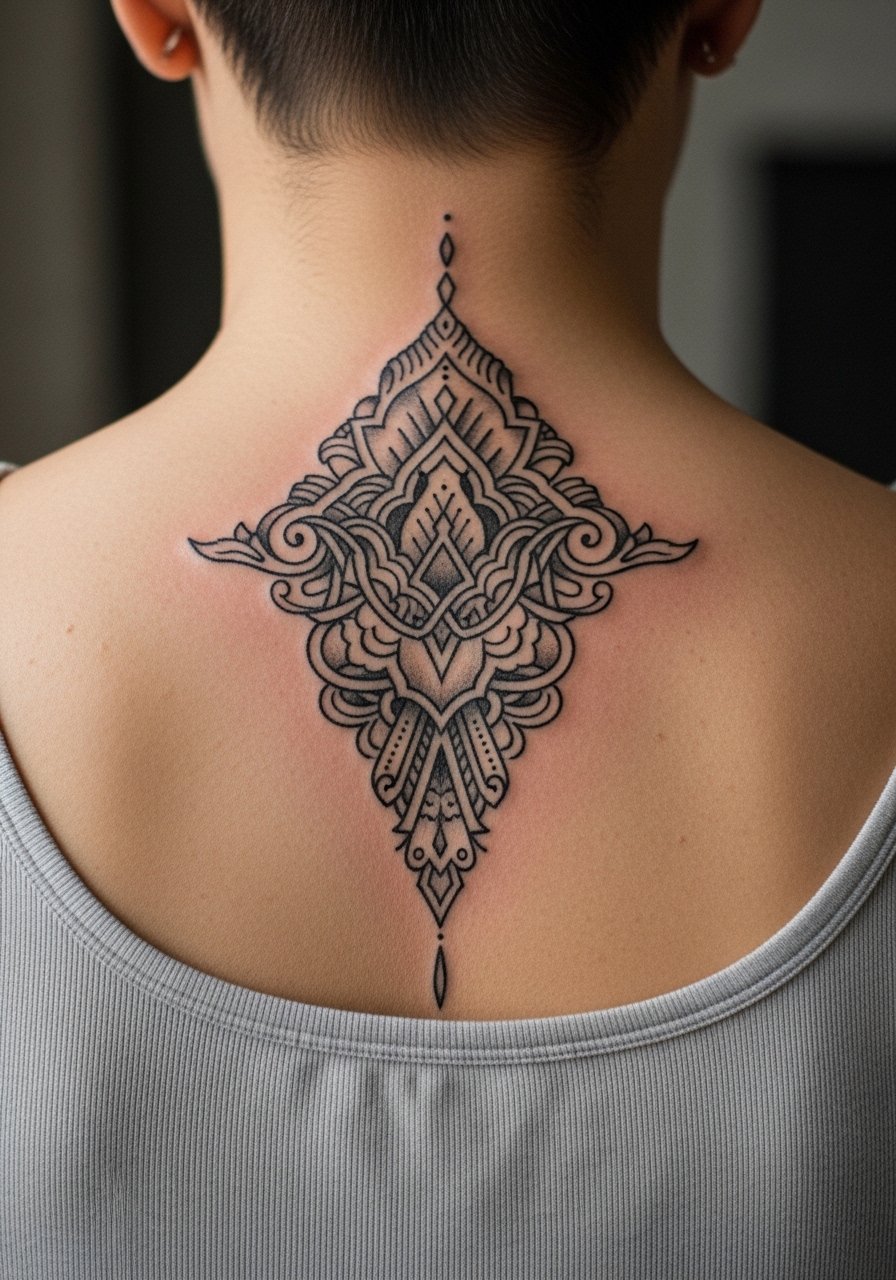
Spine ornaments require an artist comfortable with symmetry and flow. The midline sees tension and movement when you bend, so spacing matters more than tiny detail. Tell the artist you value broader elements over intricate micro-lines that could merge. Sessions on the spine can be a higher pain experience in spots near the vertebrae. For showing it off, open-back tops work well, but bring something like a wide-neck shirt to move aside during the session. Plan for a touch-up in areas that see repeated movement.
15. Small Script On Fingers With Red Accent Slash
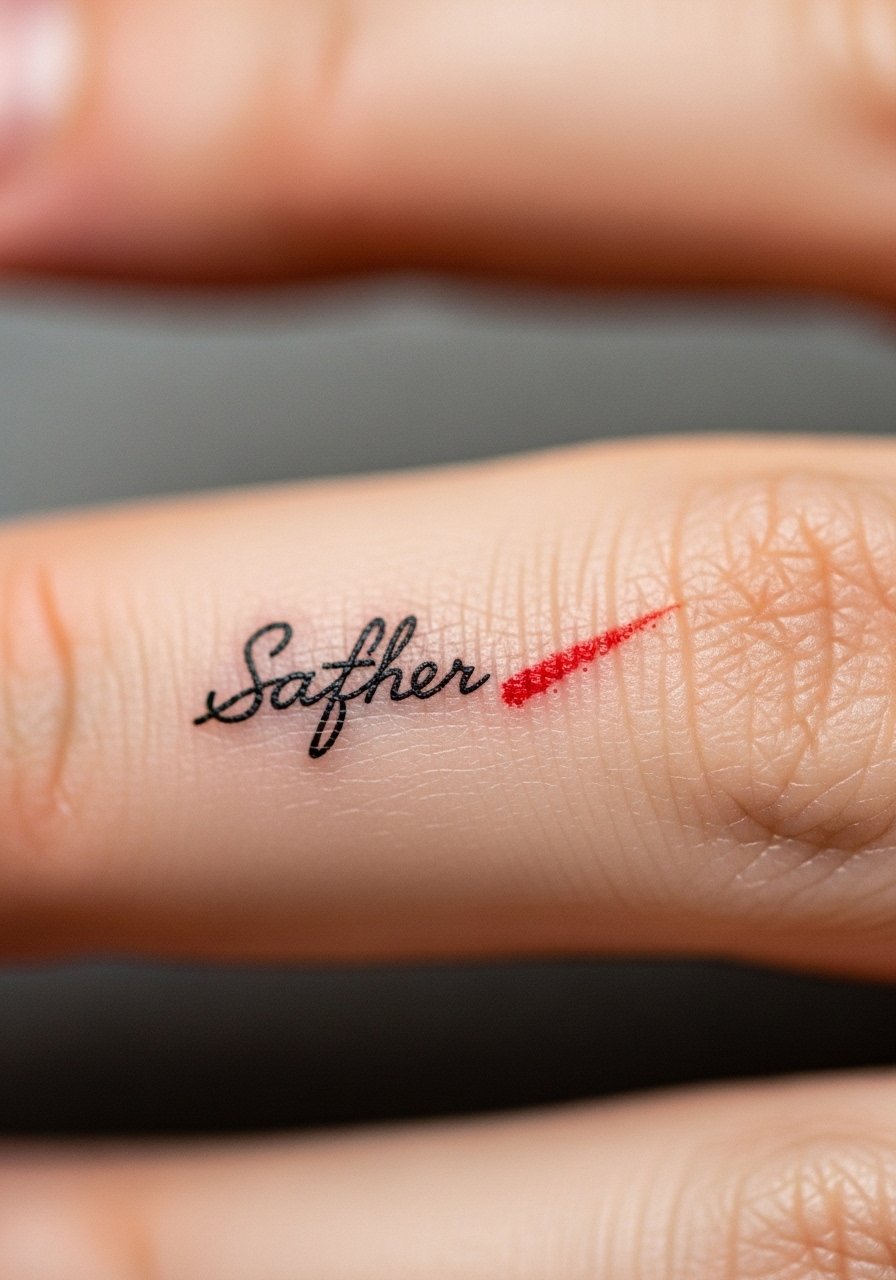
Finger tattoos are high-maintenance because skin there sheds and moves constantly. Tiny script risks softening into an unreadable smudge if the letters are too close. Ask for slightly heavier linework and for the red accent to be a packed bar of pigment rather than a wash. Hand and finger placements also bring workplace considerations, so think through visibility. For day-to-day wear, avoid tight rings over fresh ink and consider a thin silicone ring if you need a band that slips on without rubbing. Expect touch-ups frequently, often within a year.
16. Minimalist Barcode On the Back Of The Neck
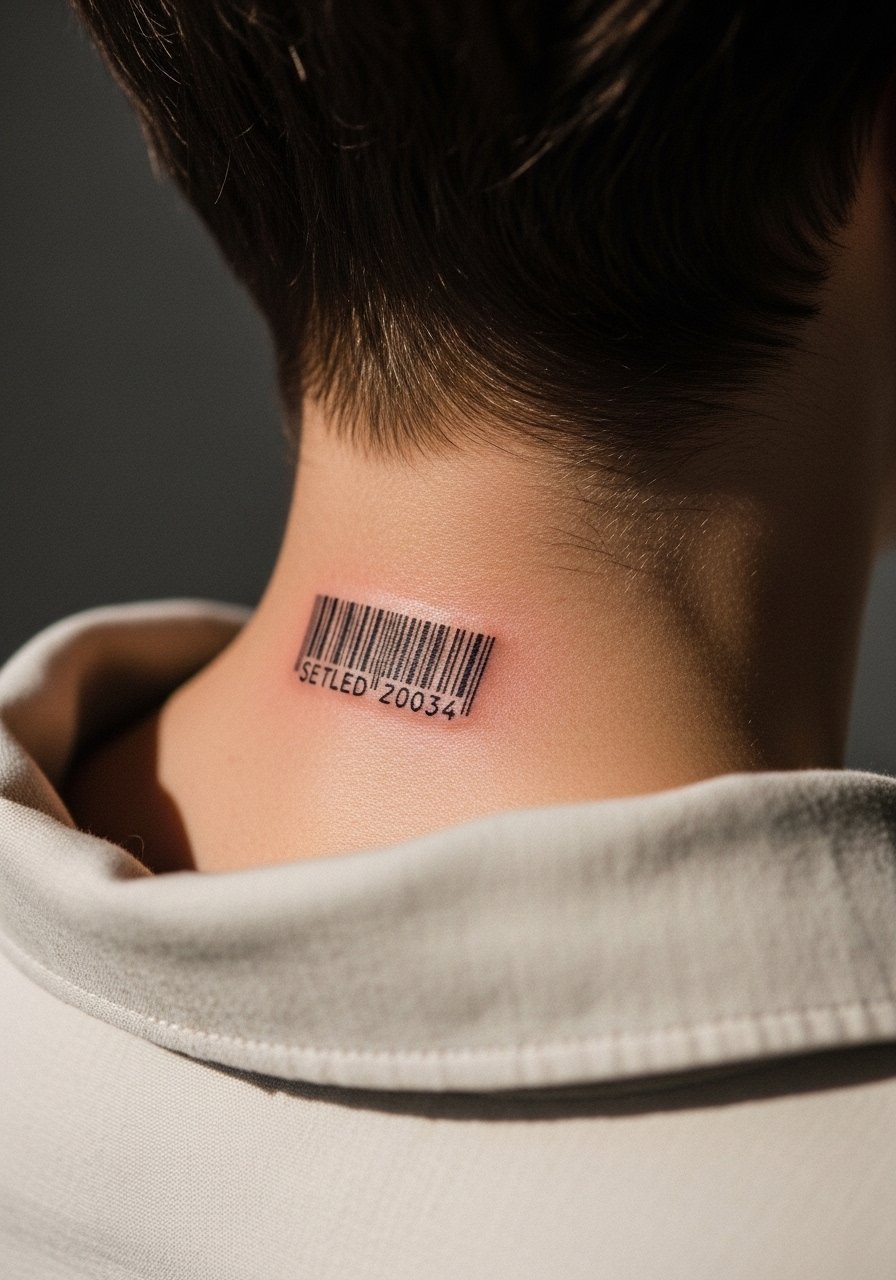
Neck tattoos are visible and carry social considerations. Barcodes need clear spacing so the bars do not blur into a block with time. Ask the artist for a combination of thicker and thinner bars so the pattern survives natural fading. The back of the neck often settles well but is exposed to sun and shampoo abrasion. Wear a wide-neck shirt to the session and keep in mind some workplaces still screen visible neck ink. Expect a touch-up at year two to retain crispness.
17. Micro-Florals Behind the Ear
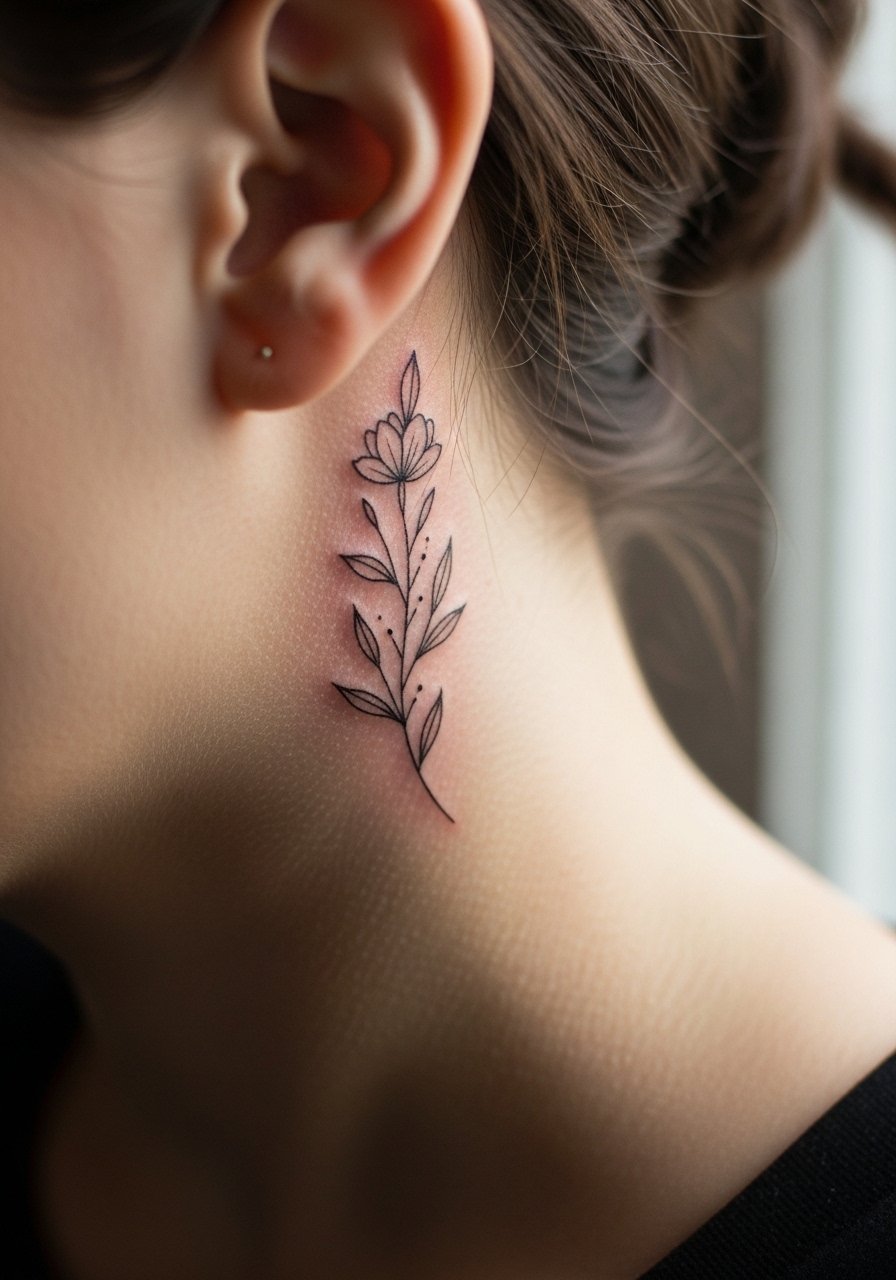
Behind-the-ear pieces are discreet and age fairly steadily if kept small but bold enough. The risk here is asking for ultra-fine detail that the small canvas cannot hold. Tell the artist you want slightly increased line weight in the petals and a compact silhouette. The session is quick but the area can feel tender. Because this placement is near sensitive skin, choose an artist experienced with small head-and-neck work and use discovery pathways such as local shop directories or convention listings. For after the session, style hair to the side or wear a loose scarf if you want to show or hide the piece.
18. Black And Red Watercolor Splat Back Piece
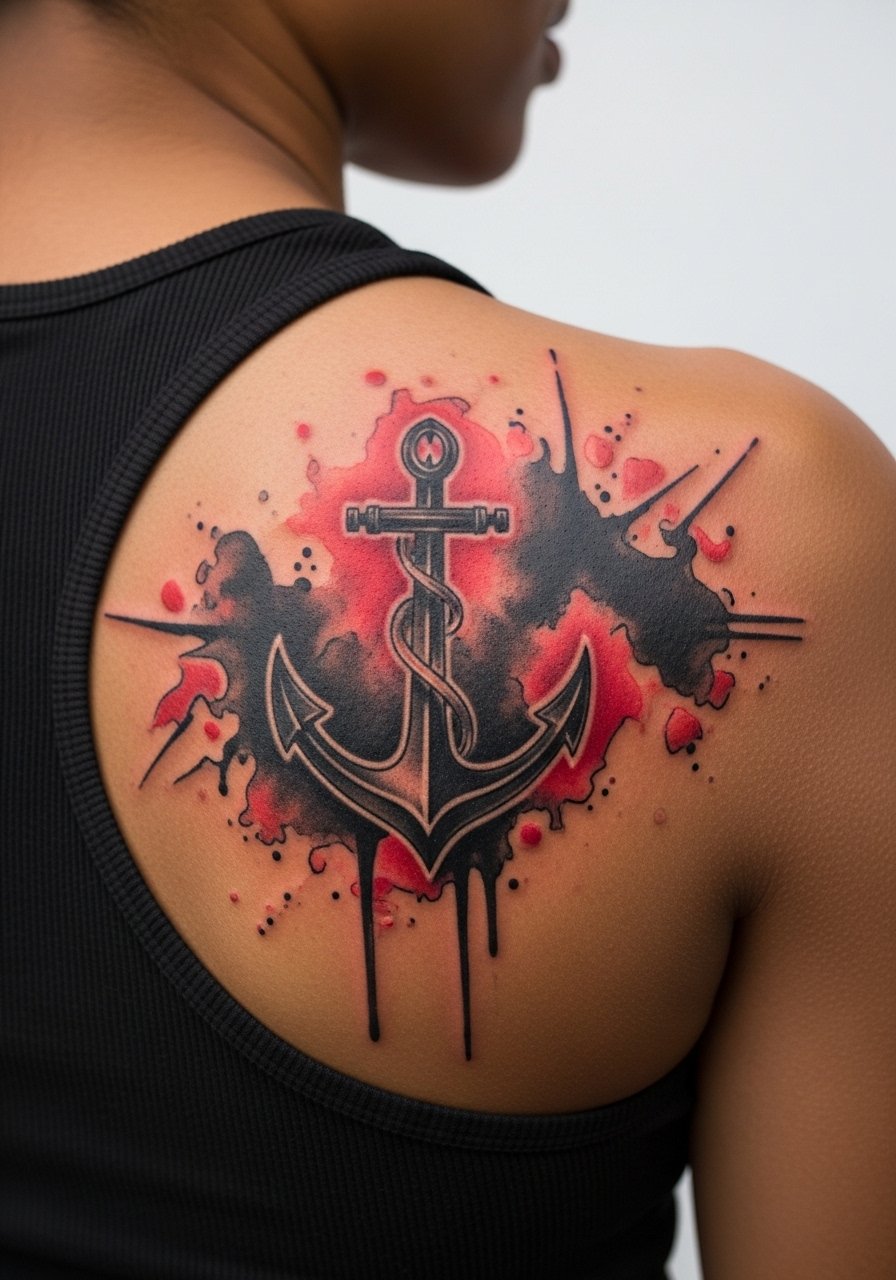
Watercolor elements need anchors in solid black or defined negative space so the washes do not bleed into an undifferentiated stain. For a back piece, ask for a linework skeleton beneath the washes and for red placement away from high-friction bra straps. The session can be long and is best split across two bookings. For showing the work, open-back dresses or halter tops give clean exposure, and a racerback tank works for casual wear. Prepare for touch-ups on the washes sooner than on solid black elements.
19. Tiny Geometric Ankle Constellation
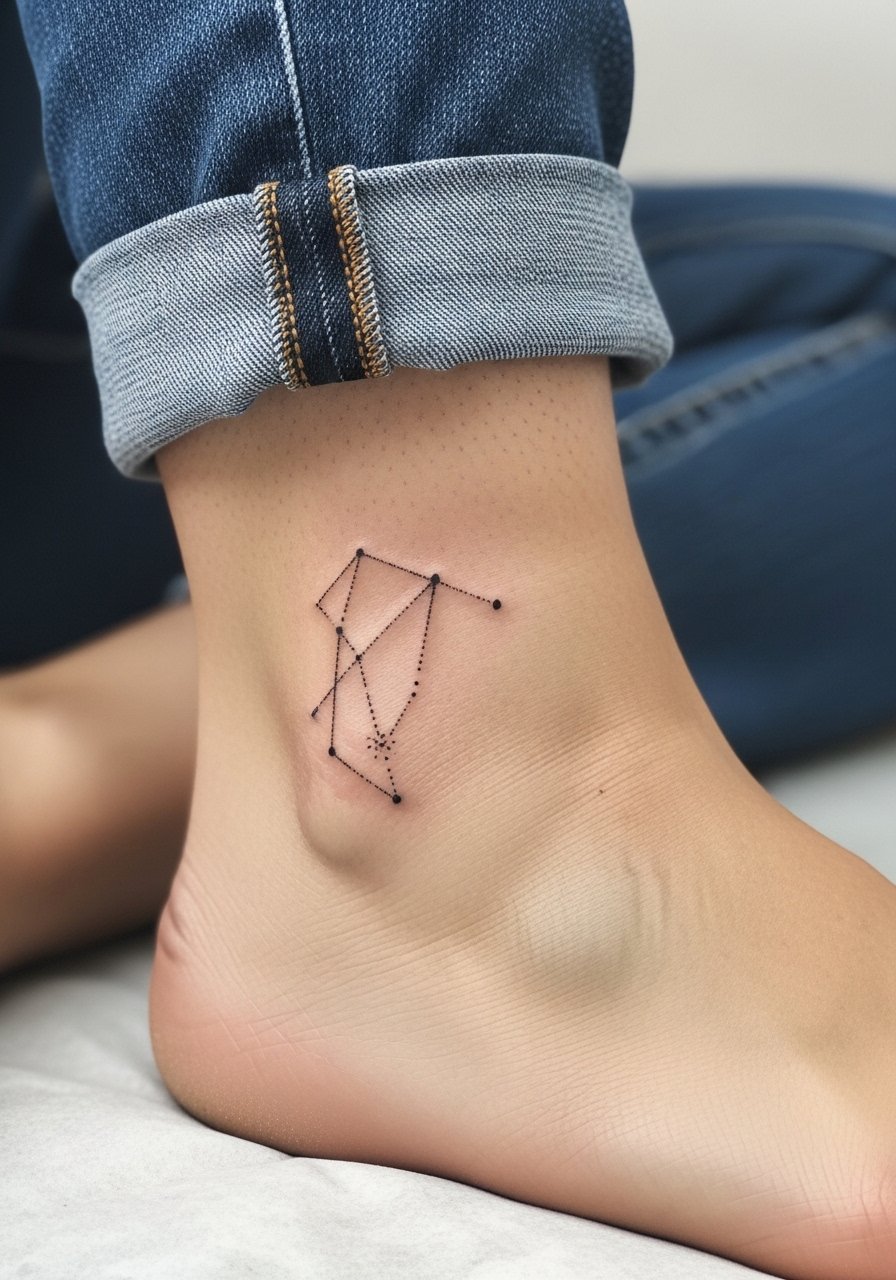
Ankle constellations need simple geometry to survive friction from socks and shoes. Ask for small dots that are slightly packed and for lines that are wider than the hairline. A common mistake is choosing a dense geometric fill that breaks into blurred grey. For the studio, wear pants you can roll up easily and test movement of the line with your shoe. Pair the piece with ankle bracelets that sit above instead of rubbing the tattoo itself. Expect a touch-up around the two-year mark if you walk a lot.
20. Black And Grey Biomechanical Calf With Red Highlights
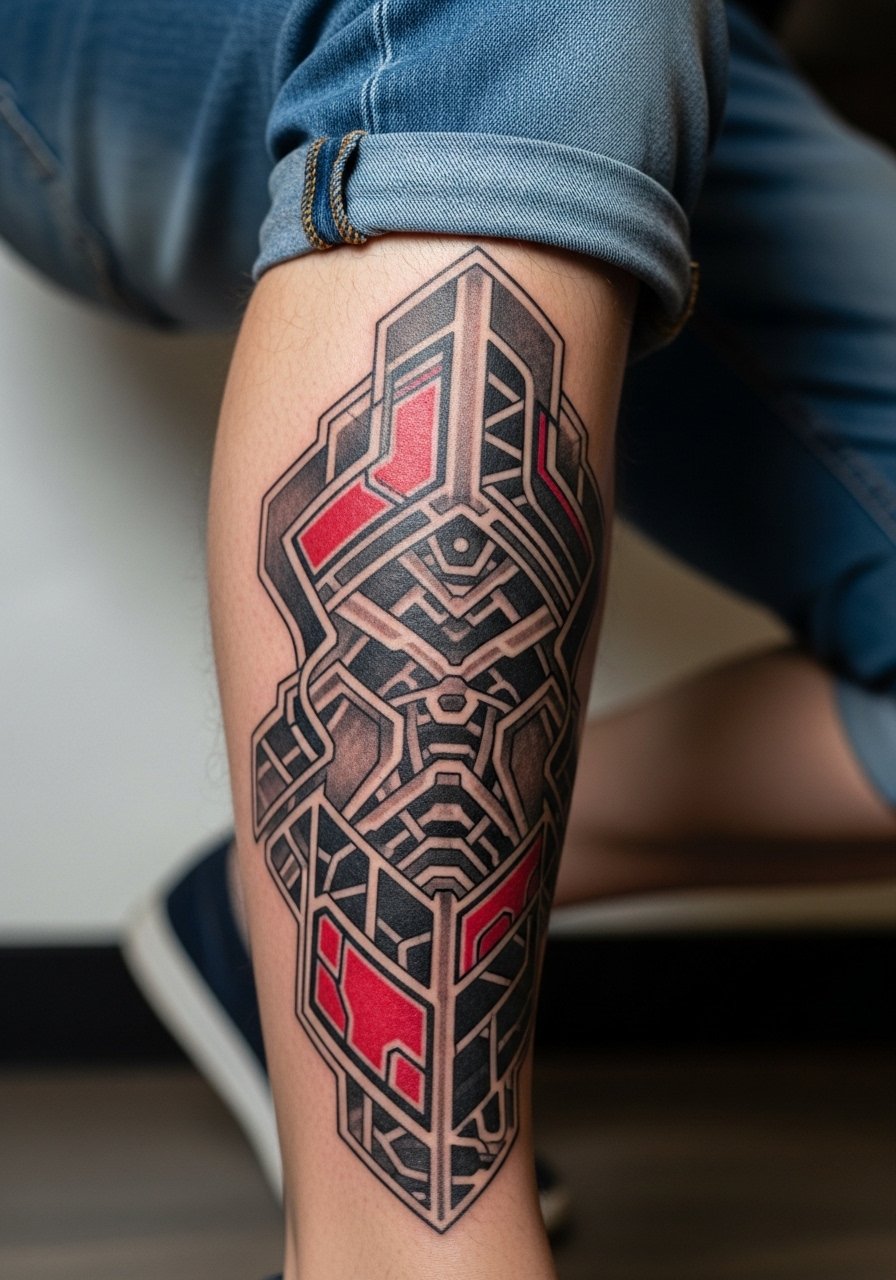
Biomech relies on high contrast and carefully rendered shadows. For the red highlights, request they be placed in recessed areas so they appear as intentional glints rather than patches. The lower leg takes saturation well, but the skin there will soften fine detail over time. Wear shorts that allow the artist to work without constriction and plan multiple sessions. A common error is overloading the design with minute detail that reads muddy in motion. Expect a touch-up for red vibrancy after a couple of years.
21. Black And Red Ornamental Hip Piece
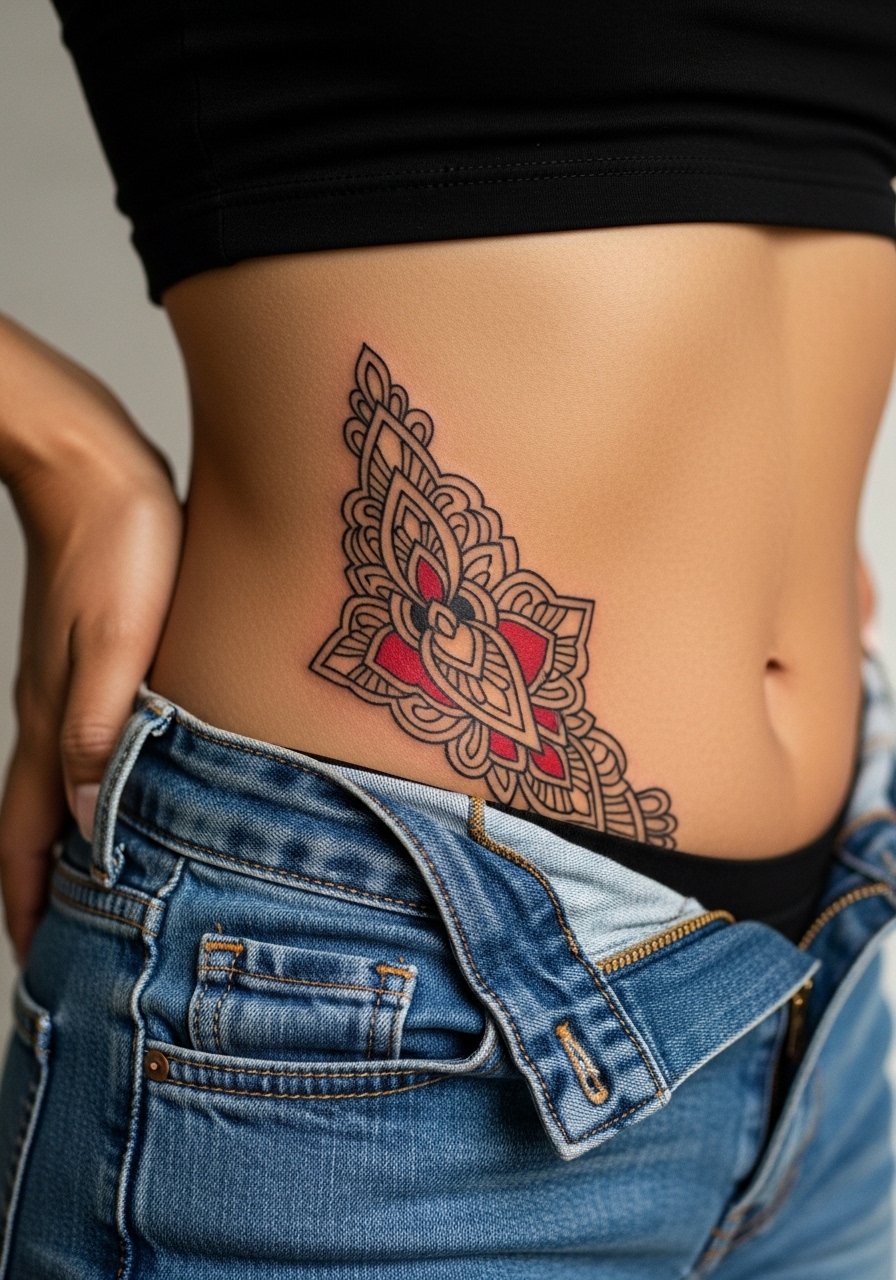
Hip pieces can be hidden easily yet dramatic when revealed. Because clothing often sits right at the edge of hip tattoos, plan the red fills away from elastic lines to reduce constant abrasion. The session feels like a mix of tender and dull zones depending on proximity to bone and soft tissue. A common mistake is asking for tiny filigree right on the edge where jeans rub. Wear high-waisted denim or a swimsuit bottom to the studio so the artist can expose exactly the area needed. Expect minimal touch-ups if you protect the area from repeated friction and sun.
Frequently Asked Questions
Q: Will small red accents fade faster than black in a mixed piece?
A: Yes, in my experience red pigments tend to lose brightness sooner than dense black. Red sits in the skin differently and often needs a touch-up earlier. Placement matters a lot. Areas with frequent sun exposure and friction will speed up fading for reds more than blacks.
Q: How should I talk to an artist about spacing for fine line work on the ribs or sternum?
A: Be explicit that you want breathing room between elements and ask to see a test stencil on skin before the session starts. Say you prefer slightly heavier lineweight for longevity and ask where they'd place negative space. If an artist resists those adjustments, ask them to explain why and show healed photos of similar placements.
Q: Are black and red pieces riskier on hands and fingers?
A: Yes. Hands and fingers are high-wear areas and even solid black can blur or fade; red often needs more frequent refreshes. If you want something there, plan for yearly touch-ups and pick simple, bolder shapes over tiny script. Consider a protective ring choice or avoid tight metal that covers fresh work.
Q: Should I change my wardrobe for the studio session for a sternum, rib, or hip piece?
A: Wear items that give clear access like a fitted sports bra for sternum, a cropped top for ribs, and high-waisted bottoms you can shift for hip work. A loose button-down shirt also works for some shoulder or chest sessions if you want easy coverage. Comfortable clothing reduces prep time and keeps the session moving.
Q: Do geometric mandalas need larger spacing on the inner wrist than on the forearm?
A: Yes. The inner wrist sees more bending and thinner skin, so scale mandala elements up there compared with a forearm placement. Larger gaps and heavier outer lines help the pattern stay readable beyond the first couple of years. If you love tiny geometry, discuss a forearm or upper arm alternative that ages better.
