
Fine line tattoos look effortless at first glance, but the choices you make before booking decide whether a piece still reads crisp in five years. Small spacing, needle depth, and placement matter more than trend-driven detail. Read these one-off fine line ideas with notes on how they age, what to say in consultation, and the wardrobe moves that make them sing.
1. Fine Line Arrow on Inner Forearm
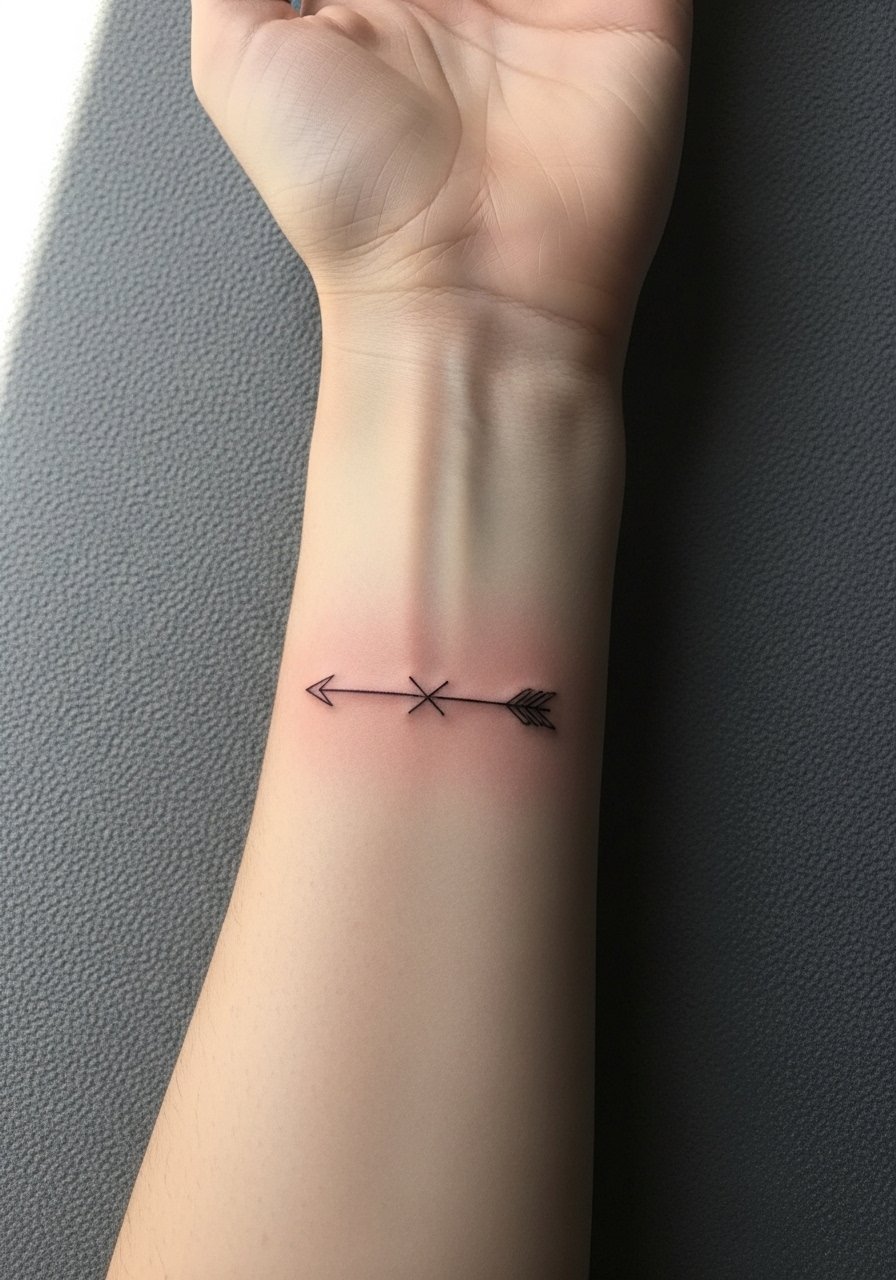
I often recommend a simple arrow when someone wants a steady visual anchor that ages predictably. Ask your artist to keep shaft lines slightly separated with micro negative space so the arrow does not blur into a solid line over time. Fair warning, the inner forearm is moderate on pain and sees frequent sun exposure, so plan touch-ups at year three if you love ultra-fine shafts. Bring reference images that show exact line weight and scale, not just the silhouette. For the session wear a loose button-down shirt so the artist can roll the sleeve without tugging. A common mistake is asking for the thinnest possible line and then putting the piece too close to veins, which can distort the clean geometry.
2. Micro Script Coordinates Along the Collarbone
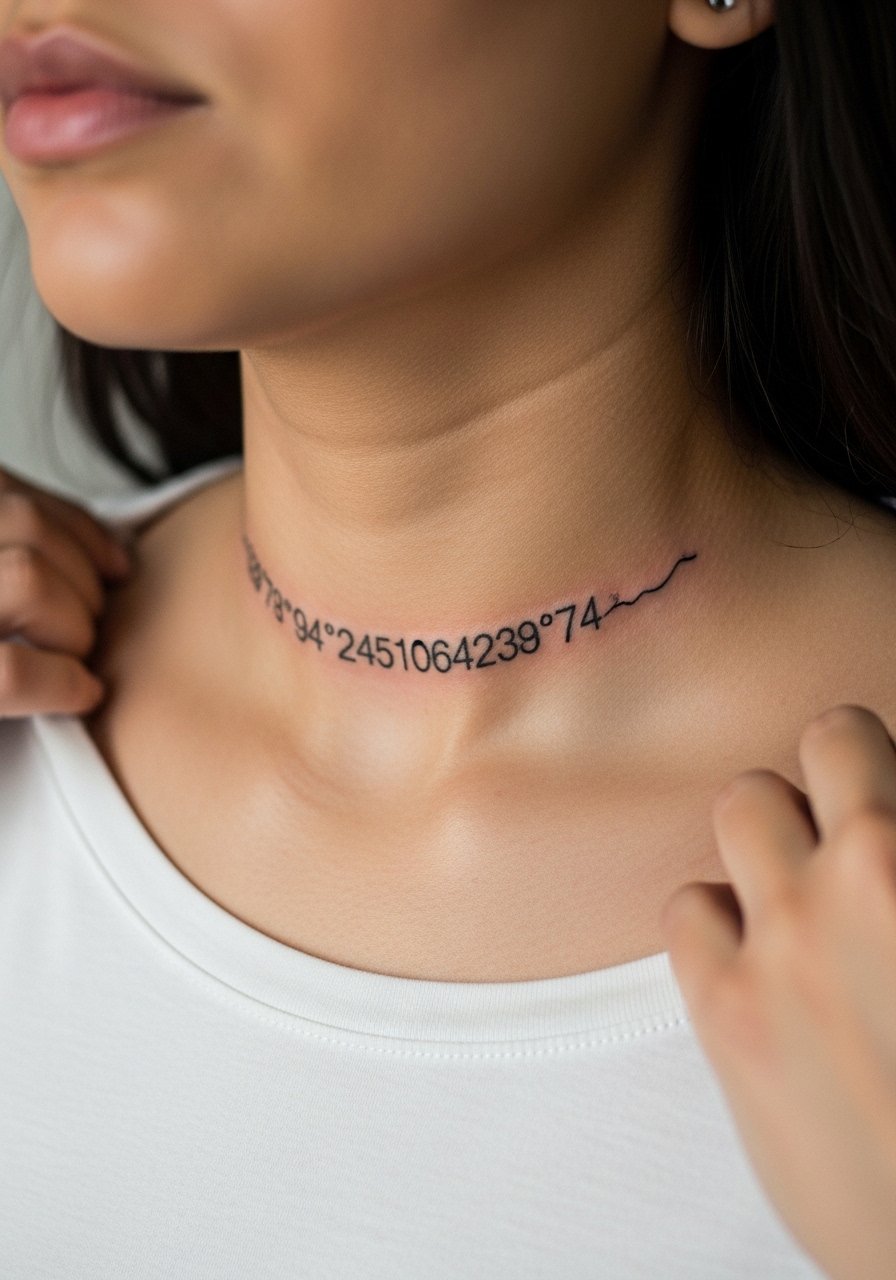
A string of fine-line coordinates feels personal without dominating the chest. The collarbone sits in a spot that flexes with breathing, so tell your artist you want slightly bolder single-stroke lettering to compensate for movement. Pain is low to moderate and sessions are quick, often under an hour. Show a photo of how the text sits on the body so the spacing follows the collarbone ridge. For showing it off, pair it with a thin chain pendant necklace that sits just above the script. One mistake I see is asking for microscopic type that becomes illegible after a year.
3. Single-Stem Botanical on the Ribcage
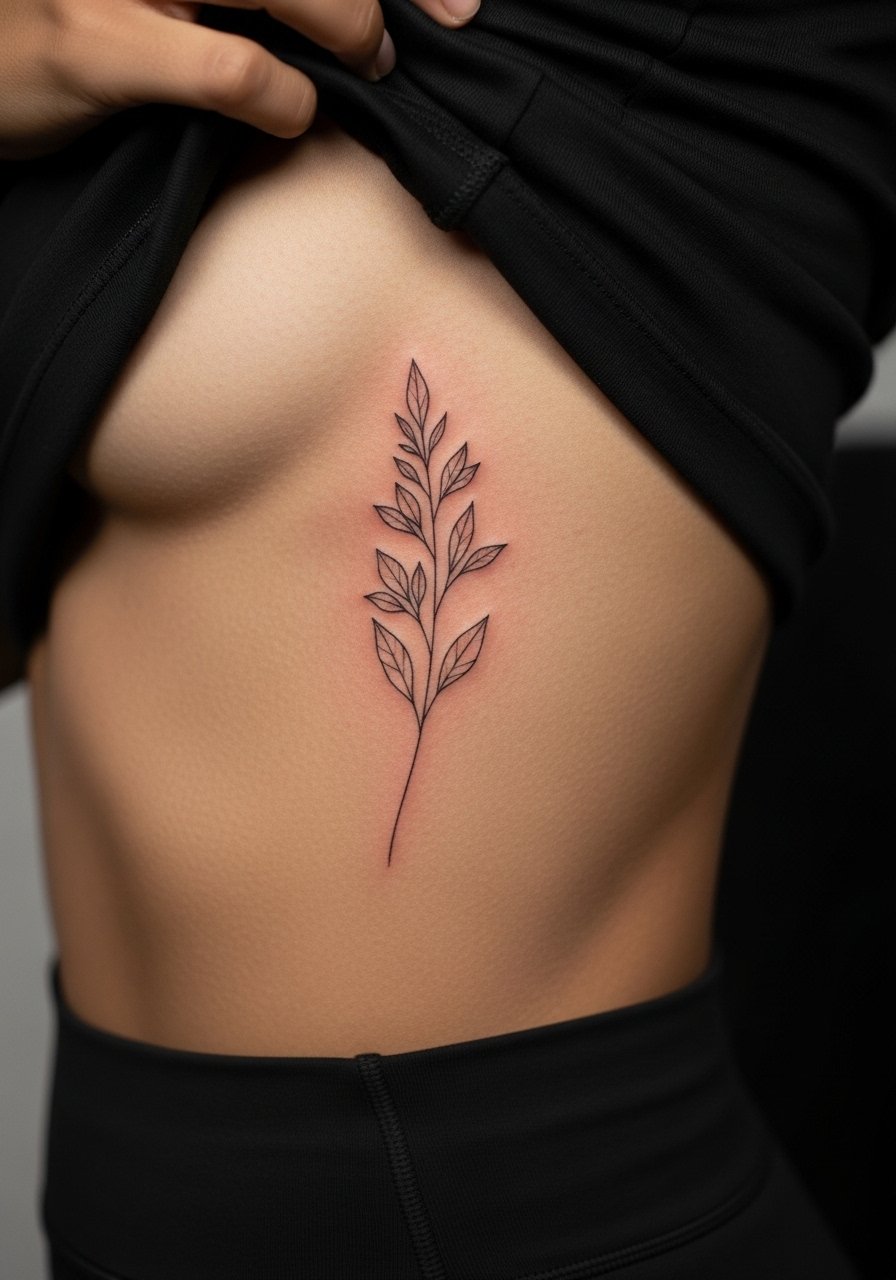
Ribcage placement splits artists into two camps. One camp says the skin stretch and constant movement make ultra-fine work blur quickly. The other camp argues that with careful depth and spacing the lines settle and last. I tell clients to expect a higher chance of touch-up at year two to three, and to ask the artist which approach they use. Sessions are painful and slower, so wear a top you can lift easily. The common aging issue is overcrowding the stems. Ask for more negative space between leaves and request a touch-up plan when you book.
4. Tiny Constellation on the Ankle
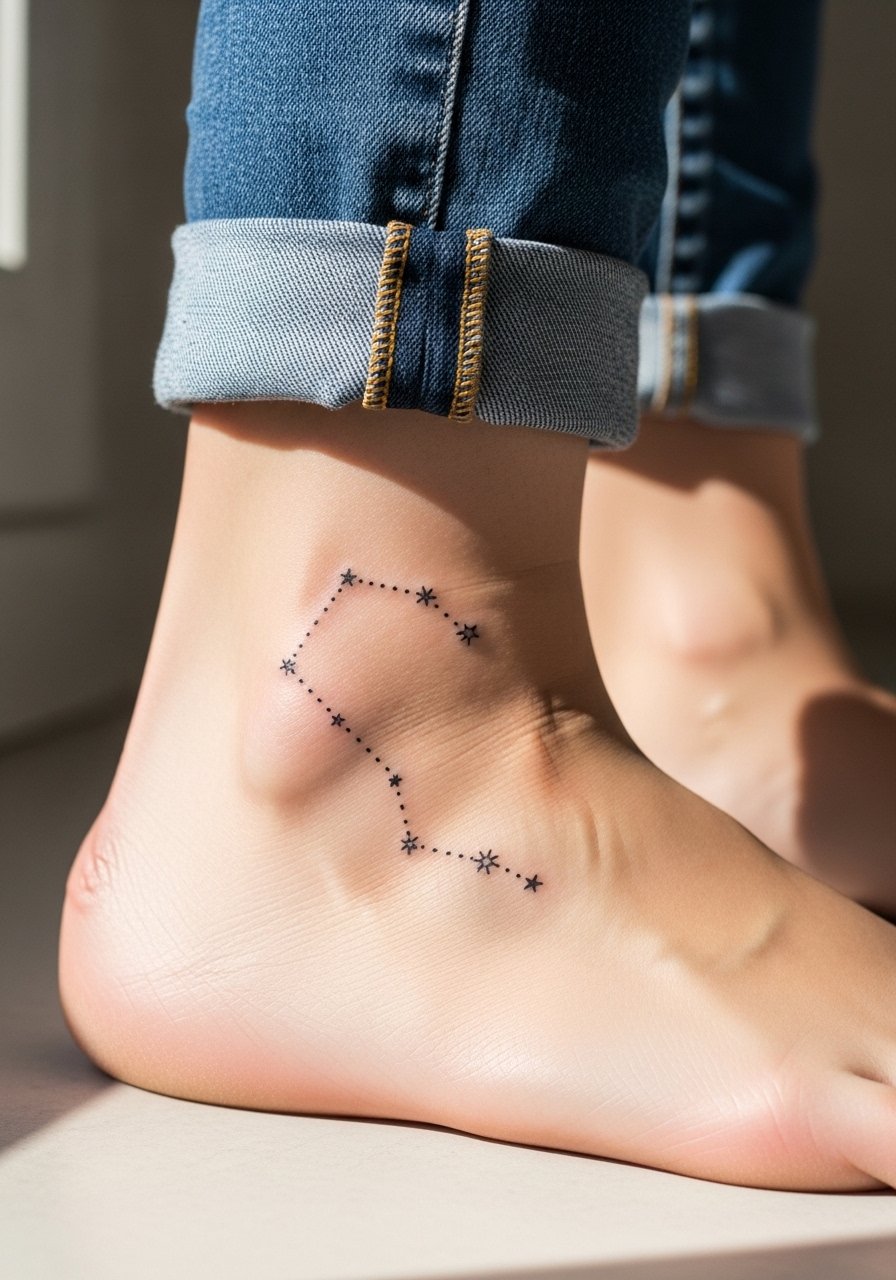
Ankle constellations look great small but they live in a friction zone. For an ankle piece, tell your artist to keep dot work slightly more spaced and to avoid extreme single-needle dots that sit too superficially. Expect faster fading from socks and shoes, and plan a protective film during the first week to reduce rubbing. Session time is short and pain is moderate. For footwear that frames the work, try a dainty ankle strap sandal when you want it seen. A common mistake is placing the design where shoe edges repeatedly rub, which forces premature touch-ups.
5. Micro-Realism Eye on the Back of the Arm
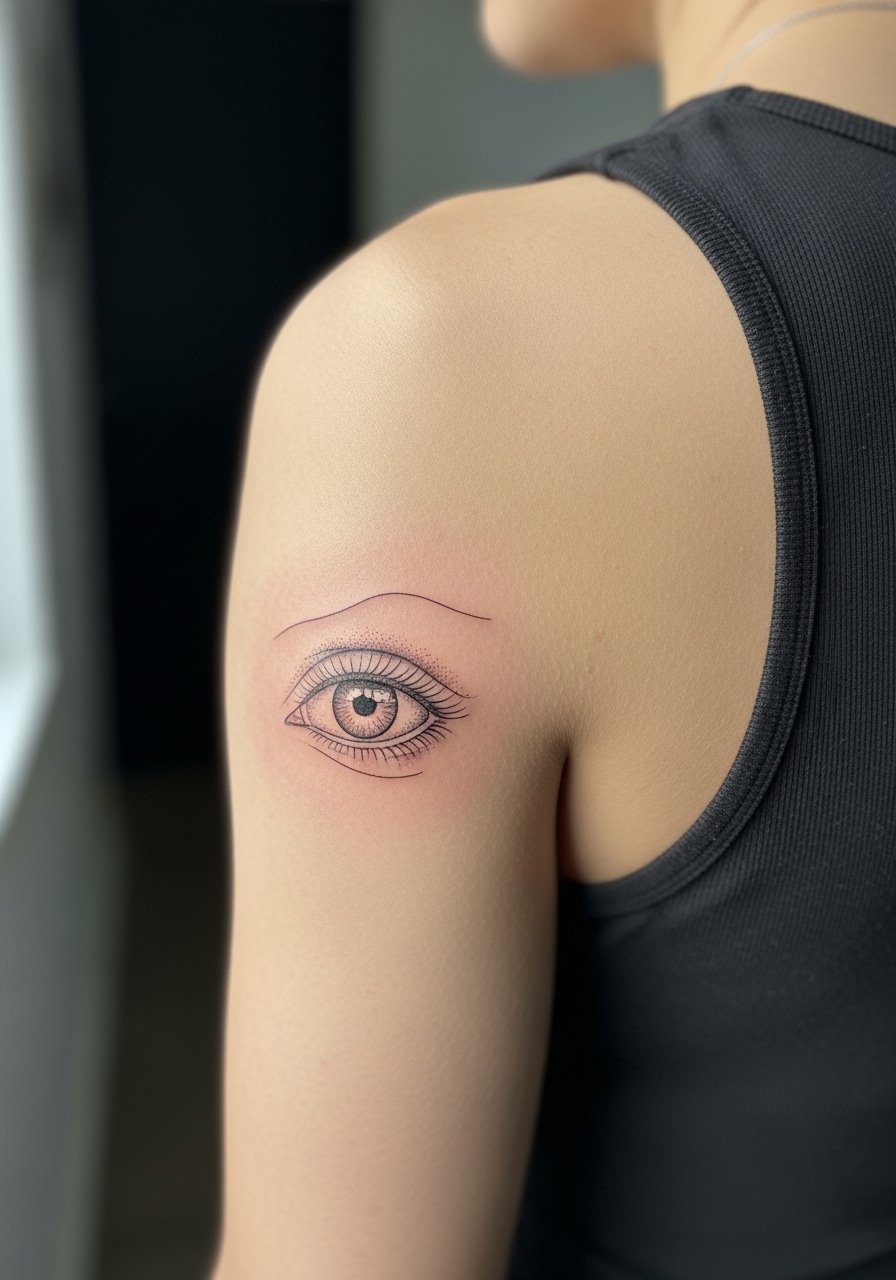
Micro-realism in fine line requires planning for subtle stipple shading rather than dense washes. On the back of the arm the skin can thin, so ask for slightly heavier primary contour lines and stippling inside for texture. Touch-ups are common around year two for tiny shading loss. Session feels like a steady medium-pressure run of the machine. Style-wise, this placement looks sharp with a sleeveless linen top that keeps the area visible without sun damage. A real mistake is asking for photoreal detail at a scale too small to hold over time.
6. Single Fine Line Wave on the Wrist
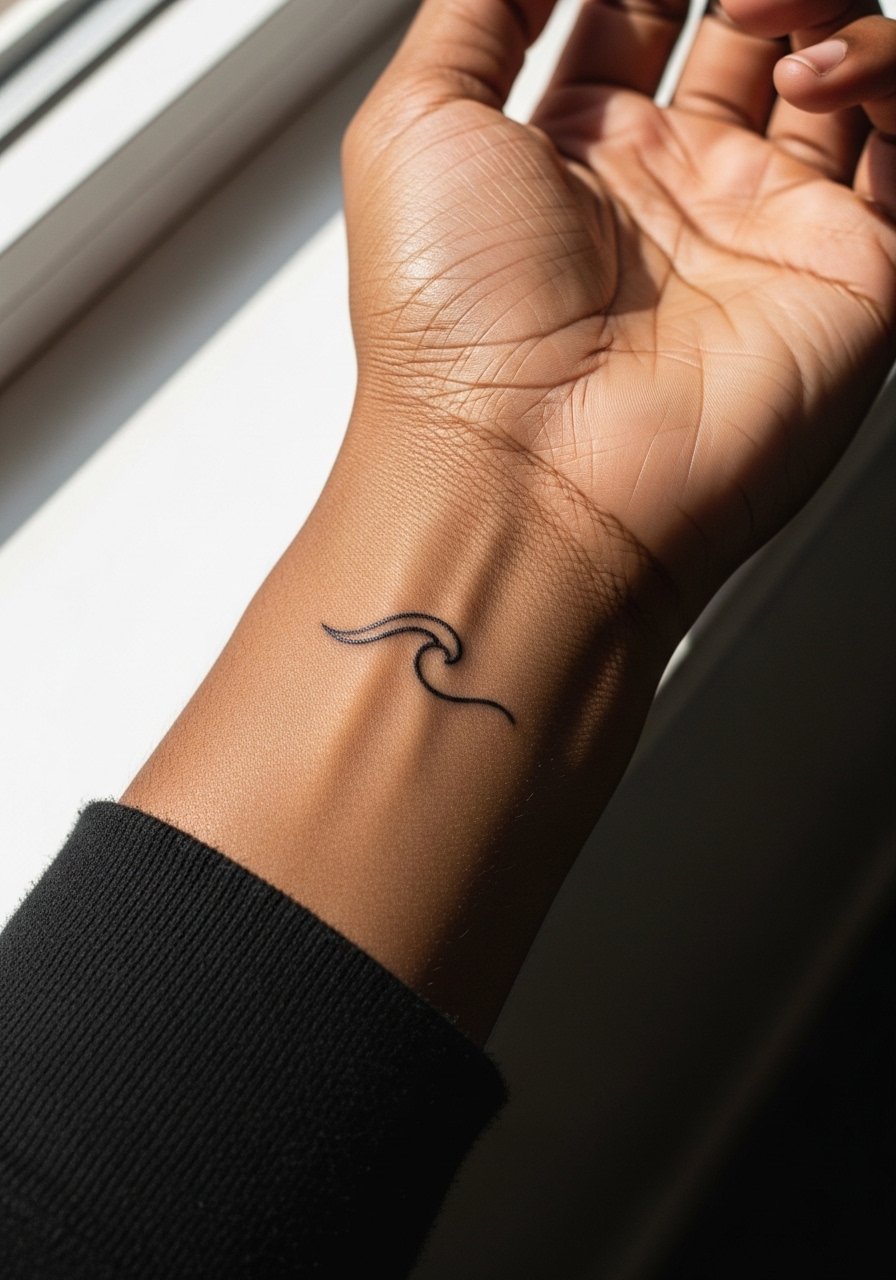
Wrist lines read clearly when given slight breathing room. If you want a delicate wave, request that the artist space the curves with micro gaps so the wave does not merge as the skin ages. The wrist is a high-motion area and sees a lot of washing, so expect a touch-up sooner than forearm pieces. For the appointment wear a racerback tank or a short-sleeve you can roll without pressure. Common mistakes include placing tight repeating details where bracelets normally sit, which causes rubbing and early fading.
Studio Day Picks
Those wrist, forearm, and ribcage ideas above ask for different prep and first-week protection, so a small kit smooths the session and the initial healing window.
-
Stencil transfer paper kit. Lets you preview exact placement and line weight on the skin, which is useful for collarbone and forearm pieces.
-
Topical numbing cream. Applied before needle time it eases shoulder and rib sessions without altering the linework when used as directed.
-
Thin protective film roll. Ideal for finger and ankle work that faces friction from daily movement.
-
Fragrance-free gentle body wash. Cleans healing lines without stripping delicate fine-line saturation in the first week.
-
Aquaphor healing ointment. A thin layer in the first few days helps lock in moisture for tight linework without smothering the skin.
7. Single Needle Dandelion Puff on the Calf
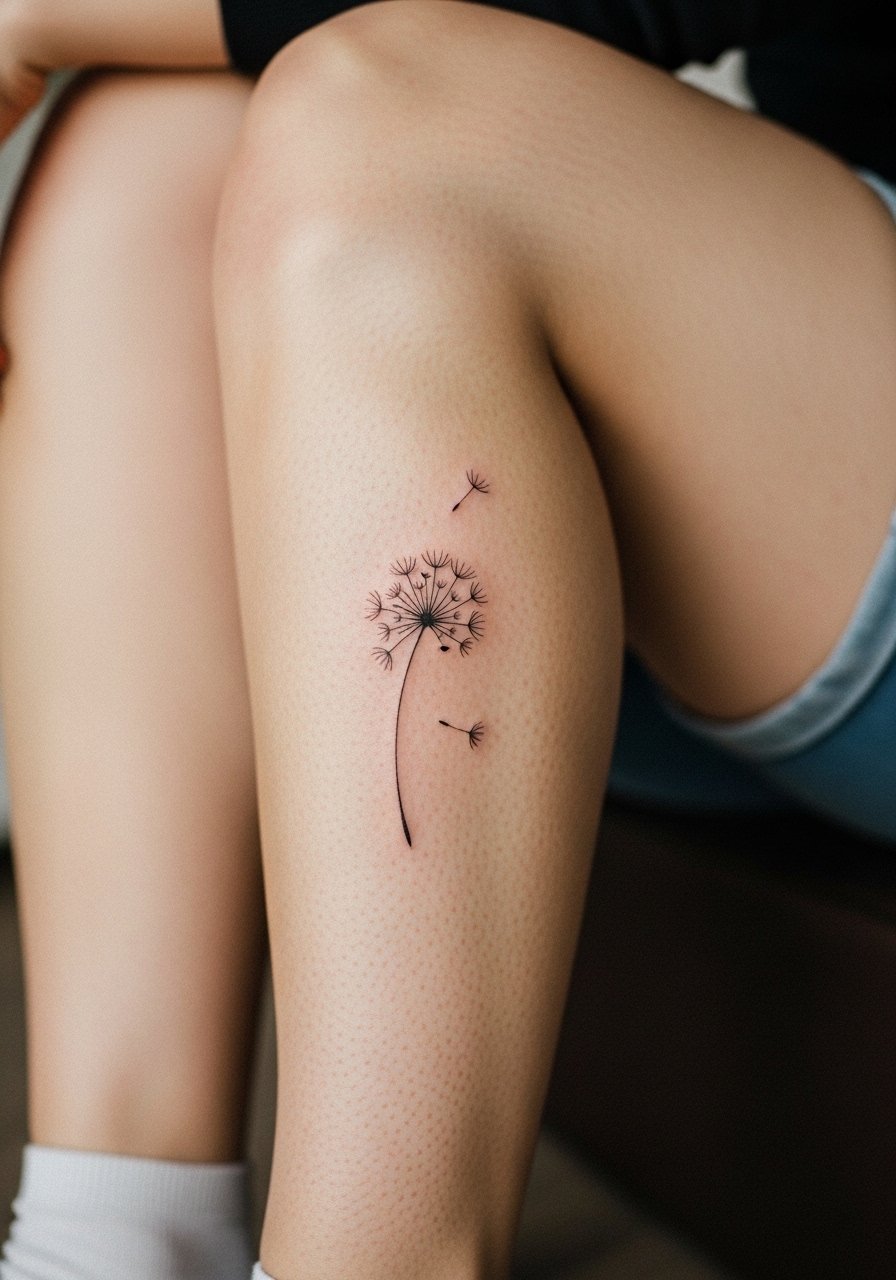
Calf placement gives room for airy compositions so single-needle breaks can read longer. Ask for stipple shading at the seed base and slightly thicker anchor lines for the stem. Pain is low to moderate and sessions run short. The design benefits from vertical placement along the muscle to avoid distortion when you bend the leg. For casual show-off, try pairing with a loose drawstring linen pant you can roll up cleanly. People sometimes compress many seeds into a tiny space. Keep the seeds spaced to maintain clarity as the ink softens.
8. Single Line Portrait Silhouette Behind the Ear
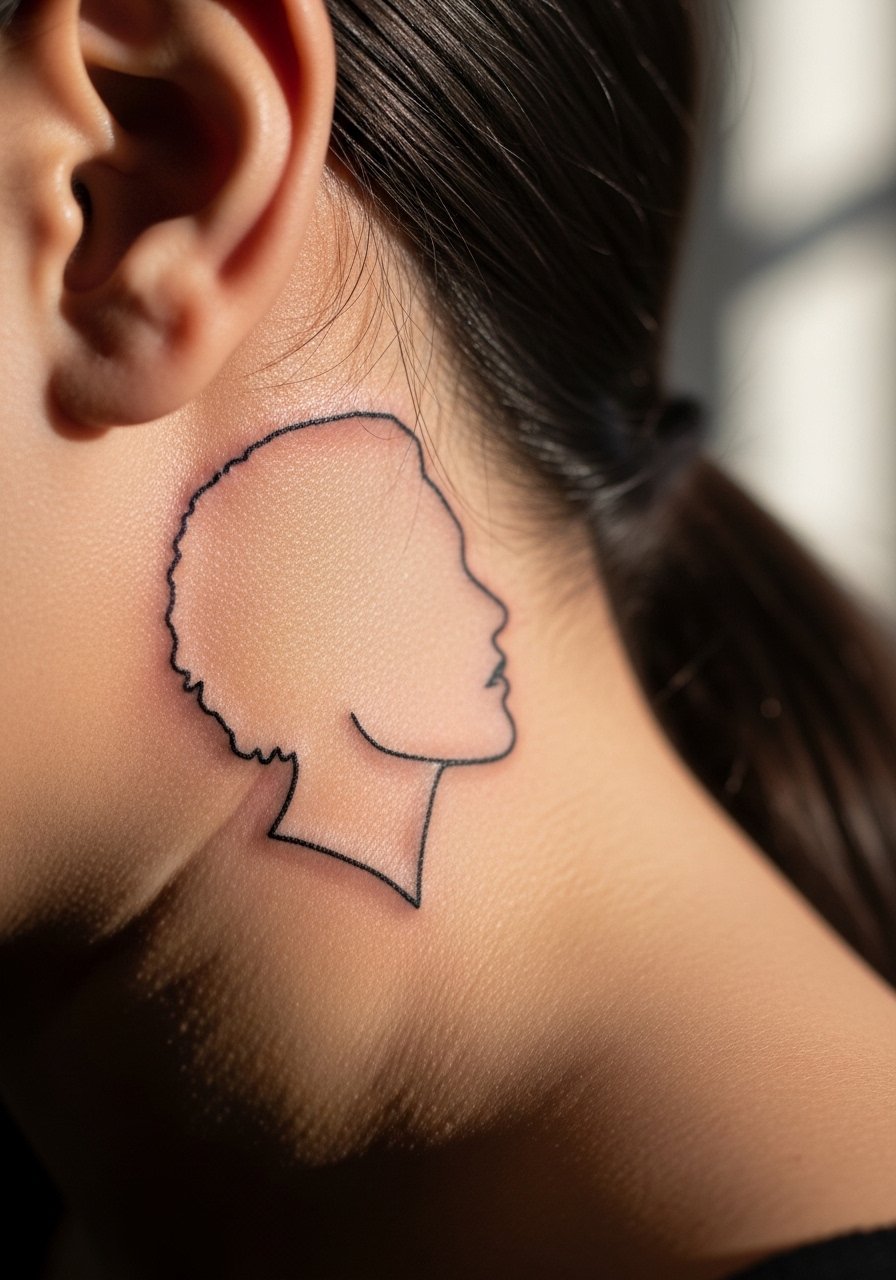
Behind-the-ear pieces read as intimate accents. The area needs a skilled hand because of the skin contour and limited canvas. Mention you want a single continuous contour line and show profile references so the silhouette captures the intended expression. Pain is mild and sessions are quick. Be mindful that hair, collars, and phone straps can irritate the spot while healing. If you plan to reveal it, style with a low ponytail silk scrunchie that keeps hair off the area without abrasion. A typical mistake is compressing detail into the tiny space, which becomes a smudge over time.
9. Fine Line Mandala on the Shoulder Blade
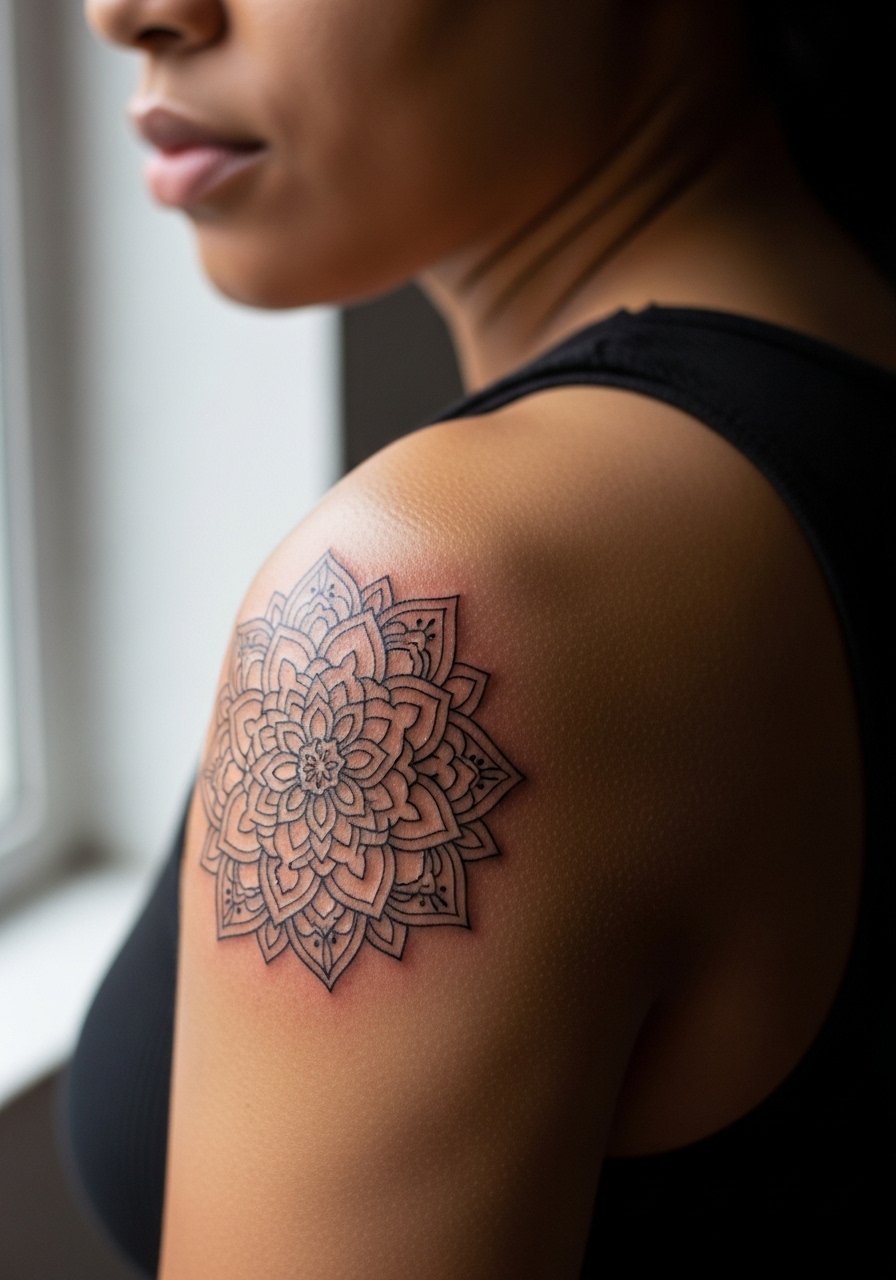
Shoulder blades are forgiving for densified fine work if you plan spacing from the start. For mandalas ask for more negative space toward the center and slightly bolder outer rings to prevent inner pattern merging. Sessions can be longer depending on complexity and pain is low. For evenings out, the design pairs with an open-back dress that frames the pattern. One common error is asking for a very tight central dot grid, which tends to blur; give the artist room to scale the elements as they transfer the stencil.
10. Minimalist Anchor on the Outer Ankle
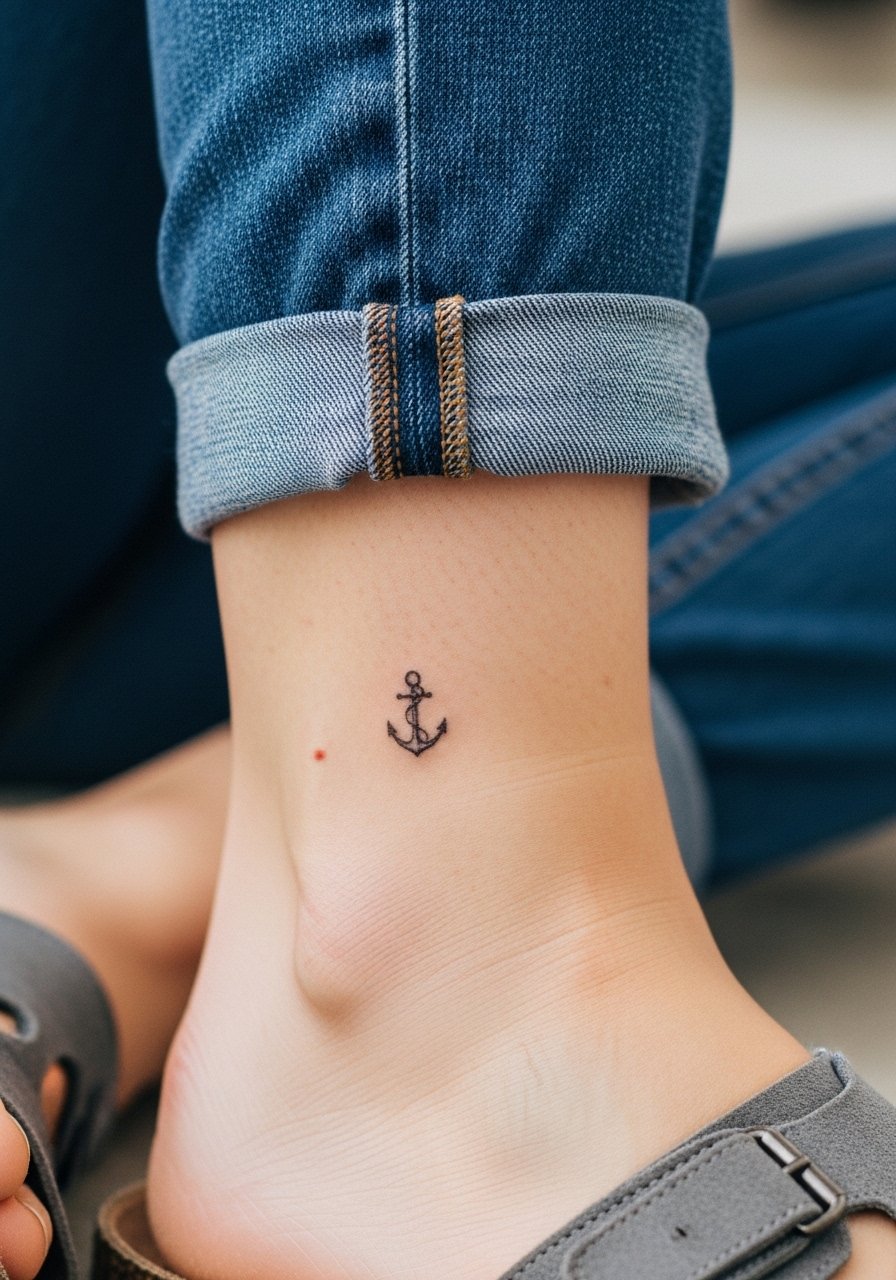
Outer ankle is a visible spot that deals with footwear friction. For anchors keep the shank slightly thicker than the flukes so the silhouette reads from a distance without needing dense fill. Expect more frequent touch-ups if you wear enclosed shoes often. The session is short and pain is moderate. For show-off days, balance the piece with a dainty anklet chain that does not sit directly on the ink. A mistake people make is placing anchors too low toward the heel where shoe straps thicken wear.
11. Thin Linked Chain Tattoo Along the Wrist
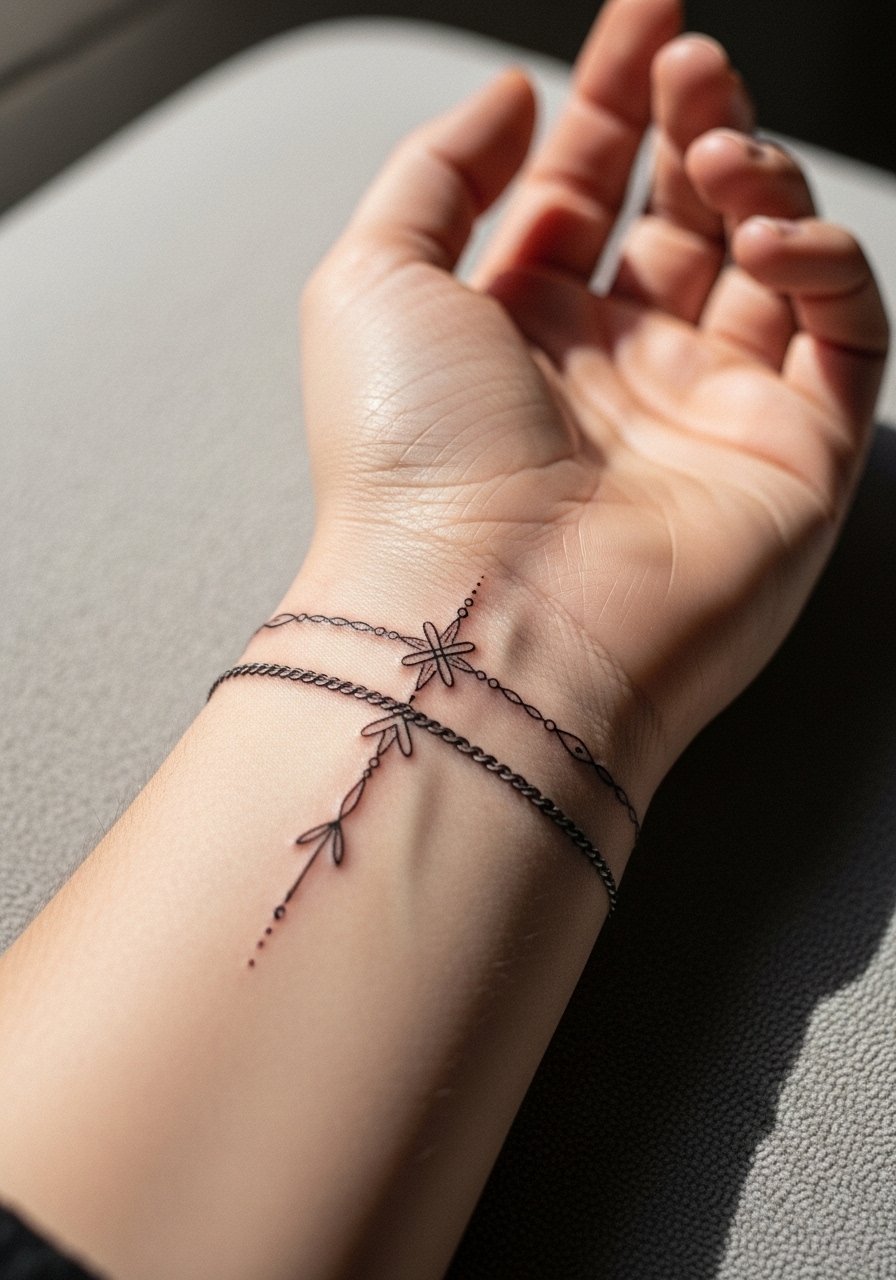
A linked chain reads like jewelry when done with slight spacing between links. Ask for consistent link size and a small gap between adjacent links so the chain keeps its shape as the skin moves. The wrist is fussy because of frequent washing and bracelets. Expect a touch-up by year two for the thinnest links. Wear a minimalist watch band loosely during show-off moments to avoid constant rubbing. The common error is requesting micro links placed right where bracelets sit, which increases scuffing and early fading.
12. Single Fine Line Mountain Range on the Side Rib
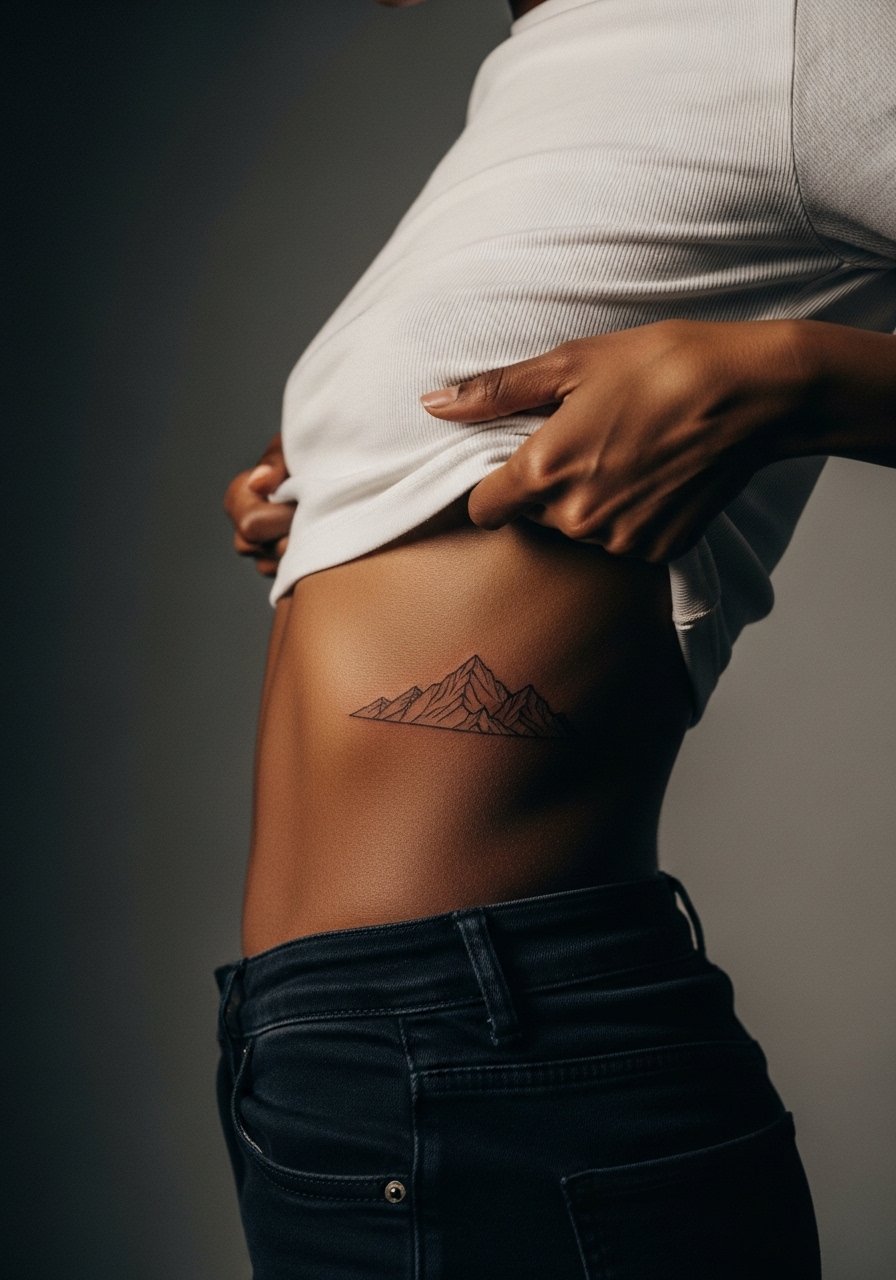
Side rib placements flex every breath. For a mountain range ask for a mix of single-stroke peaks and light dot work for texture so the silhouette keeps depth without dense shading. The debate about fine line on ribs applies here too. One school cautions the stretch will soften thin peaks quickly. The other school says spaced single-strokes with precise depth can last. Schedule a follow-up touch-up when booking so you have coverage if needed. A common mistake is packing too many overlapping lines in the valley area.
13. Micro Floral on the Inner Thigh
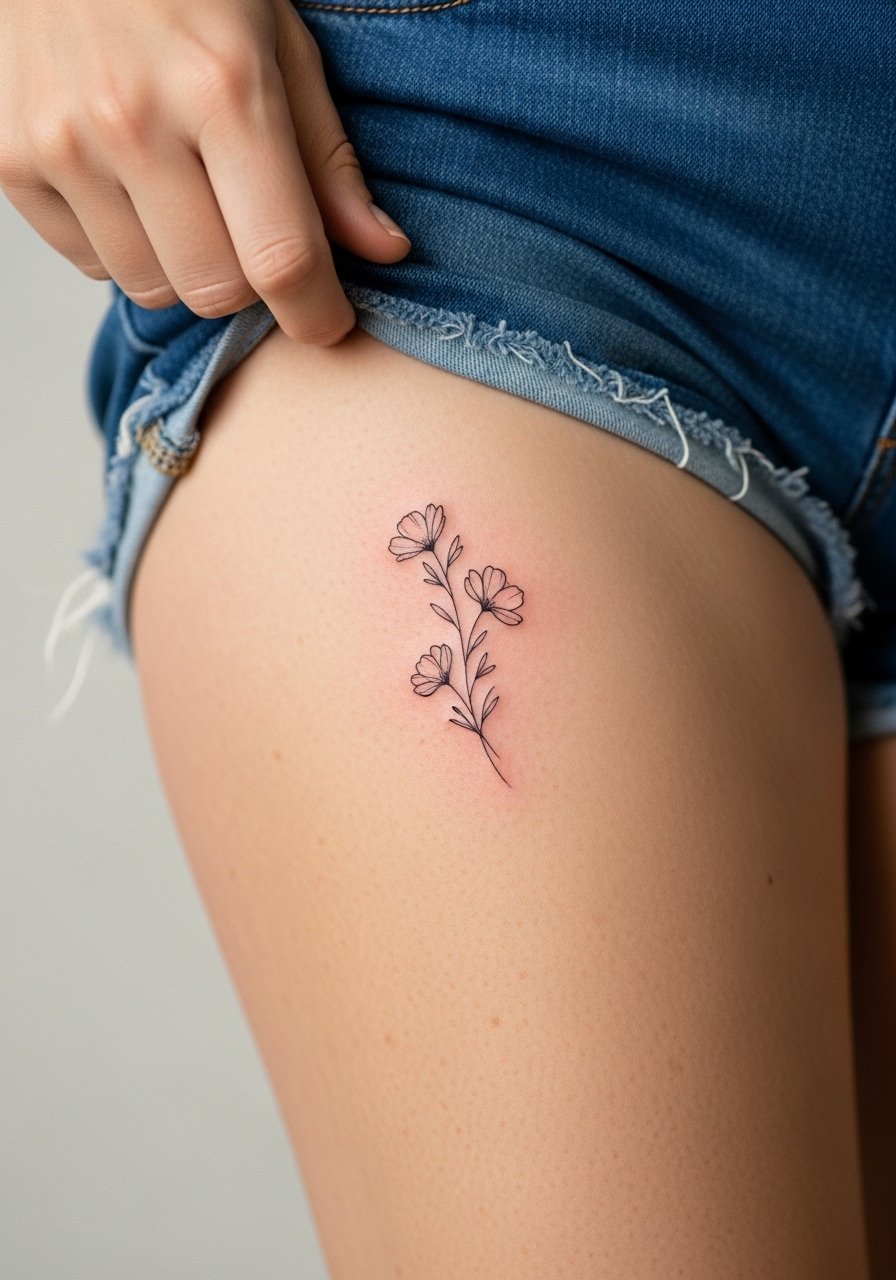
Inner thigh tattoos sit in a low-visibility, low-sun zone so fine details often age well if you avoid heavy friction. For this spot ask your artist to consider motion from walking and sit-downs when positioning stems. Sessions can be more private and pain ranges from moderate to higher depending on proximity to the crease. For the appointment wear loose shorts or a wrap skirt so the artist can access the area without discomfort. A common mistake is placing motifs too close to the groin crease where fabric rub shortens the crispness of tiny dots.
14. Single Needle Script on the Side Neck
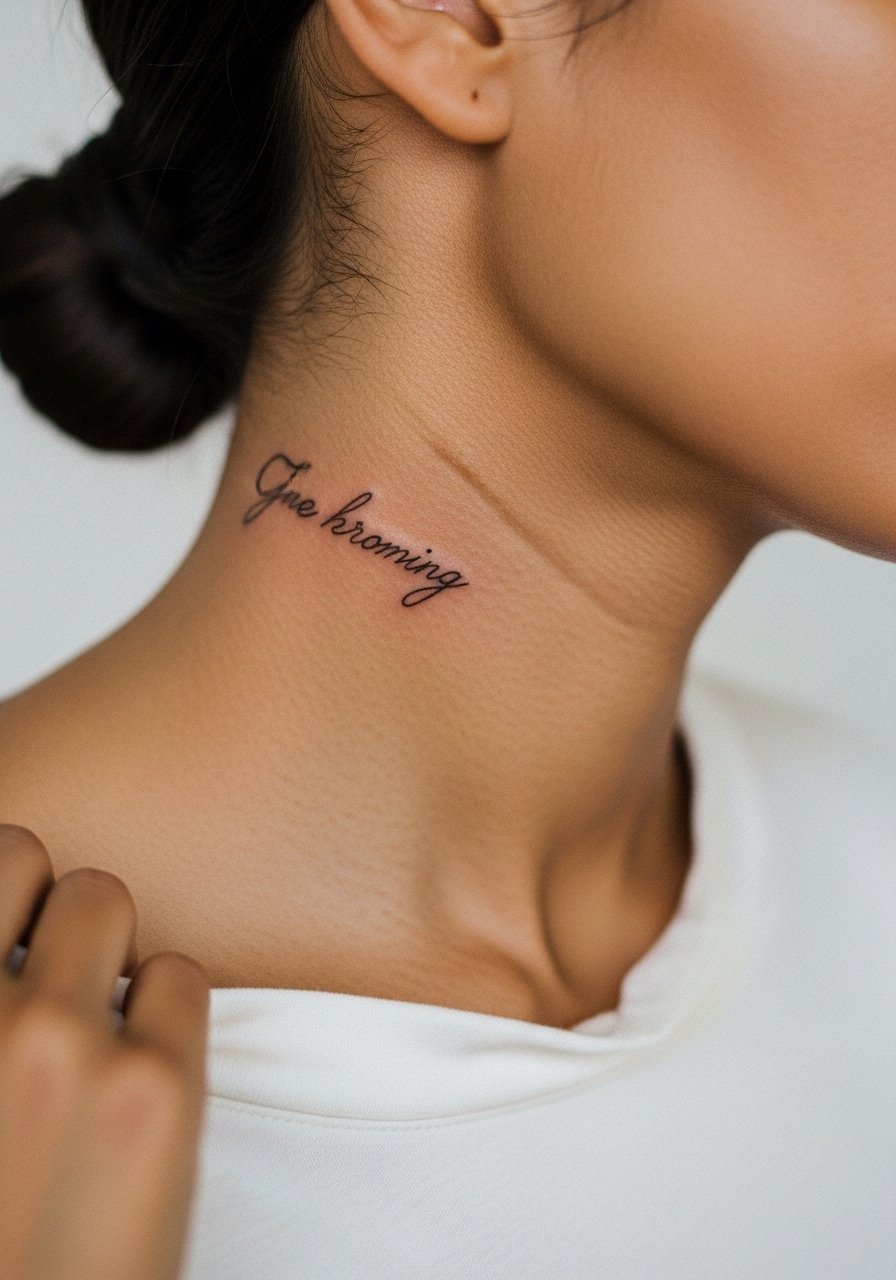
Neck scripts are bold personal choices and they show immediately. Ask for slightly heavier downstrokes and a modest x-height so letters remain legible as the skin texture changes. Pain is higher and sessions are short but intense. For showing it off pick shirts with a wide neck top to frame the lettering. A mistake is choosing ultra-tiny cursive that becomes a hairline blur after a year.
15. Delicate Spine Linework with Dot Accents
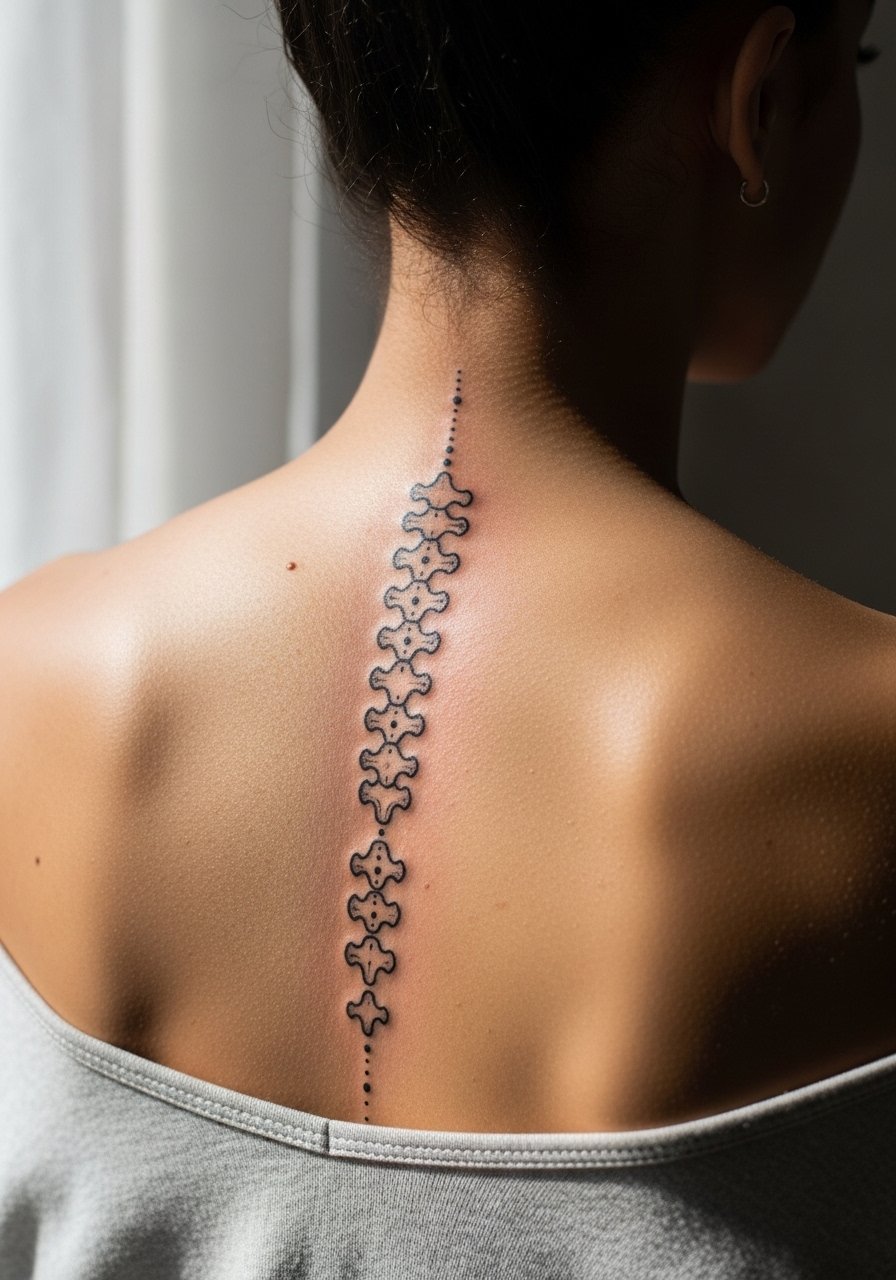
Spine pieces look stunning with vertical rhythm, but the skin over vertebrae can make single needles inconsistent. Ask for slightly bolder anchor points at the top and bottom and dot spacing that creates a long visual line without merging. Sessions are typically longer and more intense. For evenings, an open-back dress shows the run without sun exposure. Avoid packing micro detail in the lower spine where clothing waistbands rub.
16. Tiny Geometric Heart on the Hand Side
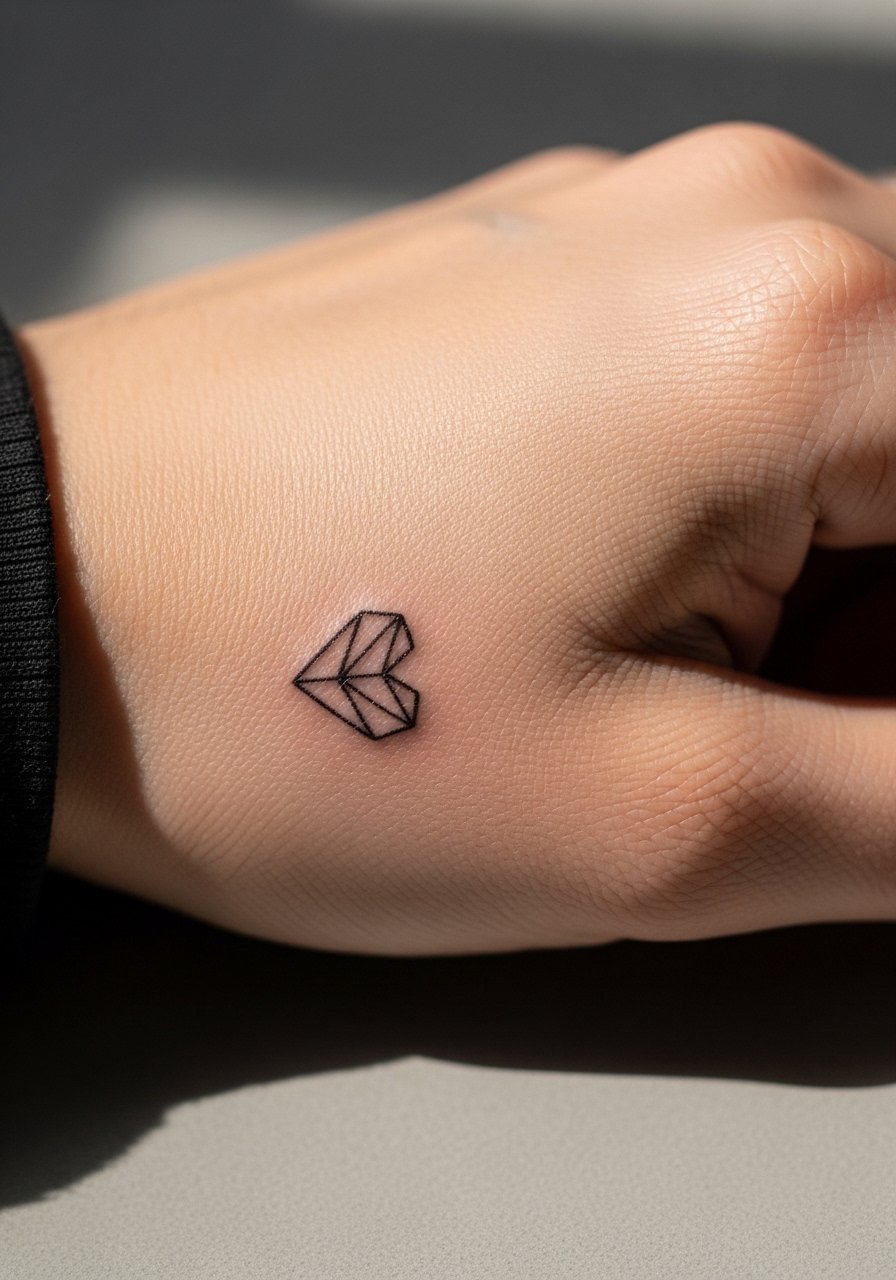
Hand tattoos remain controversial for visibility and longevity. One camp accepts the trade-off for permanent visibility. The other camp warns that hands blur faster and can affect hiring in some industries. If you choose a hand piece, request slightly heavier primary outlines and anticipate more touch-ups. The session is quite painful but brief. For styling try a simple slim band ring that complements the shape without adding pressure during healing. A mistake is placing ultra-fine filler details on the back of the hand where daily use scuffs the ink.
17. Tiny Wave Tattoo Behind the Wrist Crease
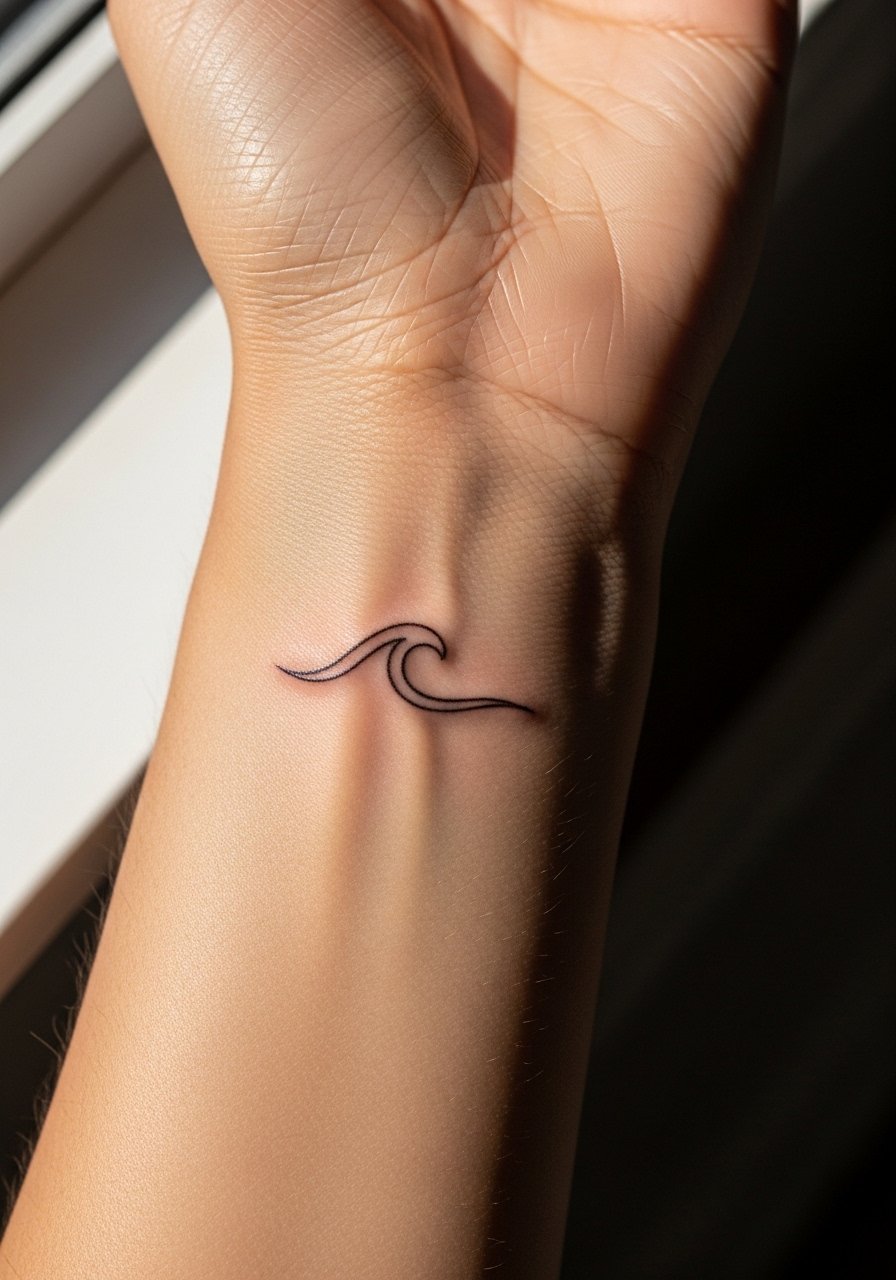
Just above the wrist crease is a sweet spot that moves a lot. For longevity ask for a softer arc and micro negative spacing between each crest. Expect touch-ups sooner than for forearm work because creases and watchbands accelerate fading. Wear a thin silicone watch band loosely during the first weeks to avoid tight rubbing. People sometimes request the wave exactly on the crease, which leads to warping as the skin folds.
18. Single Fine Line Crescent on the Thigh
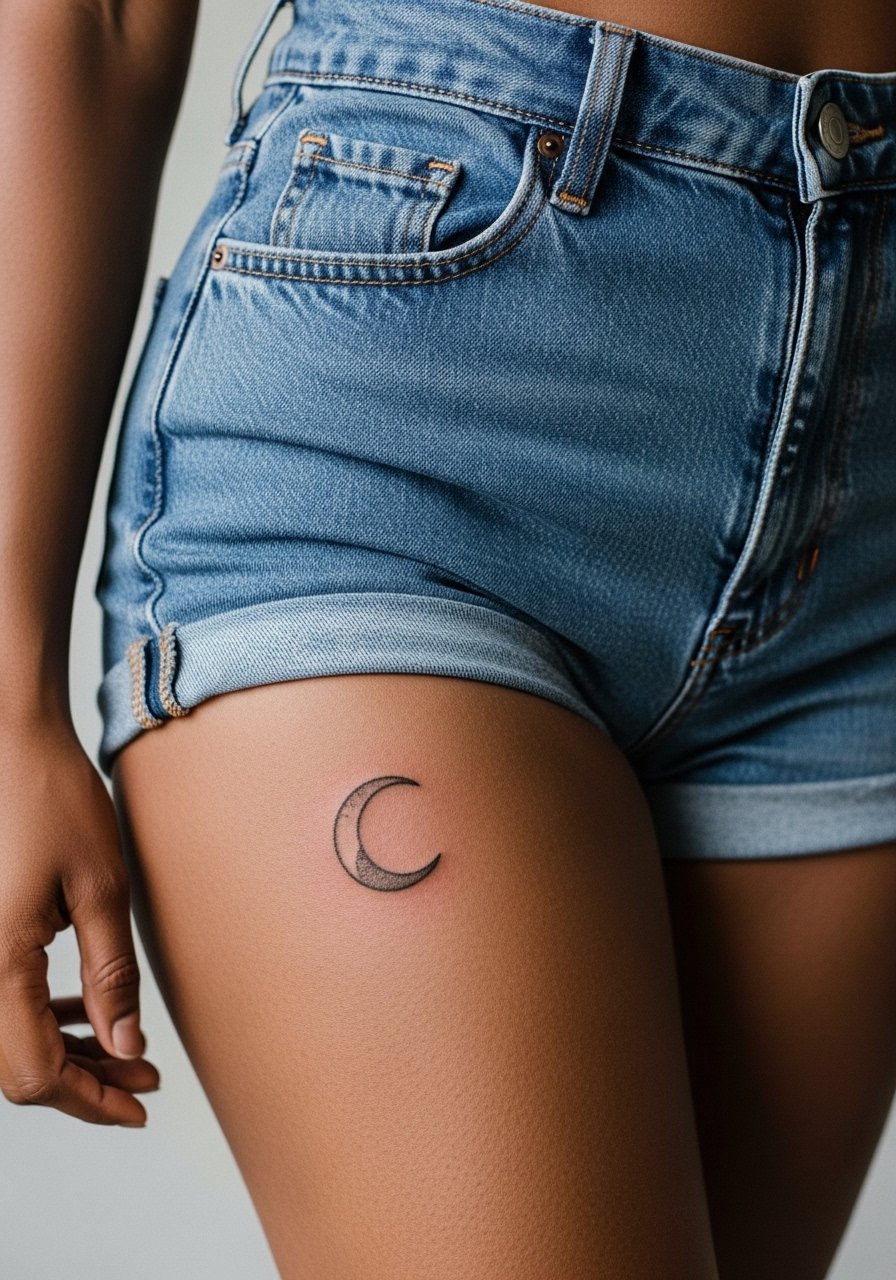
Upper thigh is a forgiving canvas for delicate lunar work because it sees less sun and friction. Ask for a slightly denser outer rim and light inner stippling for subtle depth. Pain is typically low and sessions can be short. For session comfort wear loose shorts or a high-waisted denim skirt you can shift easily. A common mistake is packing too much dot shading into the crescent, which creates a patchy look with time.
19. Single Needle Arrowhead on the Finger Side
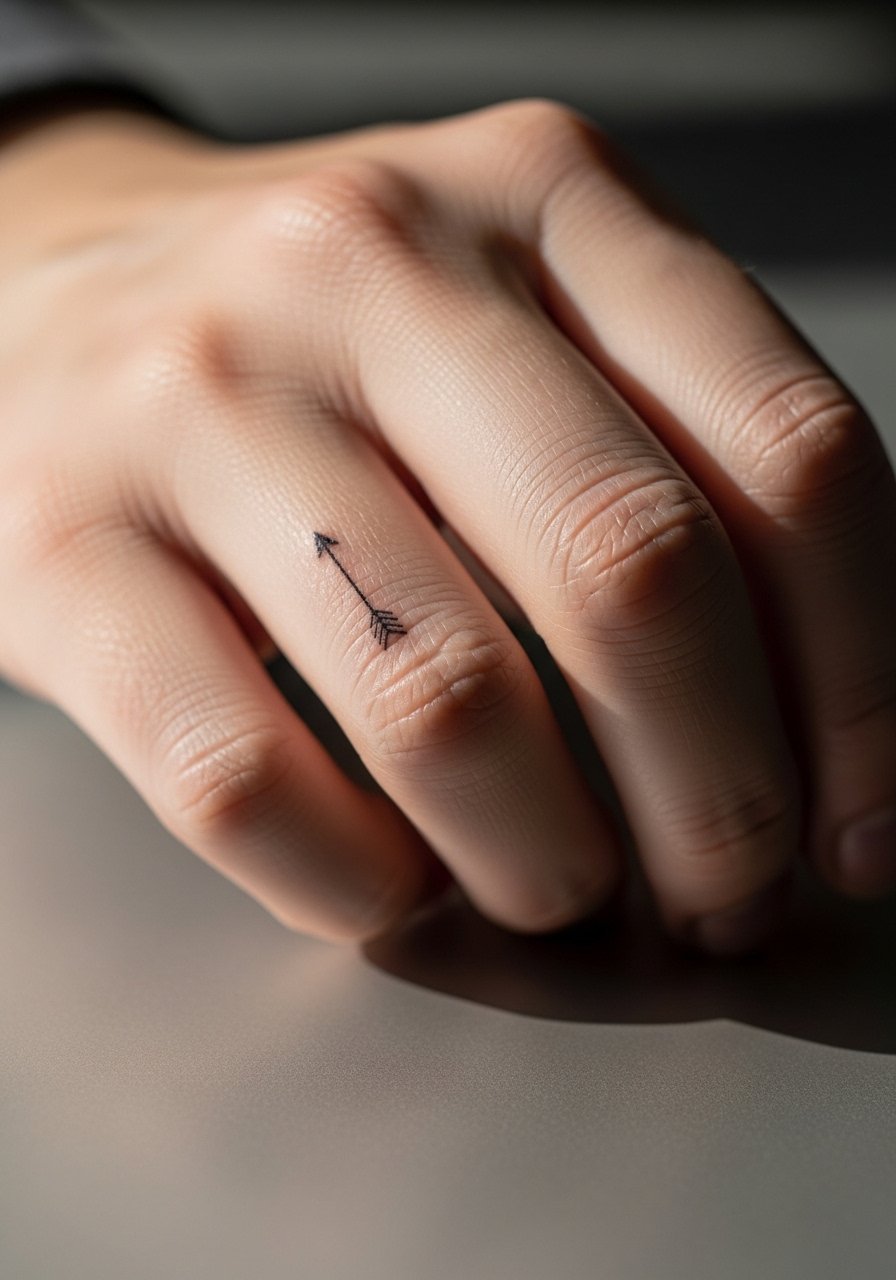
Finger-side placements are convenient but high-friction. For a small arrowhead request slightly thicker perimeter lines and anticipate more frequent touch-ups. The skin on fingers sheds and regenerates faster which affects saturation. Session time is short and the needle runs feel sharp. Pair with minimalist stacking rings that keep clear of the ink or go ring-free during the initial month. A mistake is choosing a multi-element design at finger scale where elements merge quickly.
20. Fine Line Compass on the Upper Arm
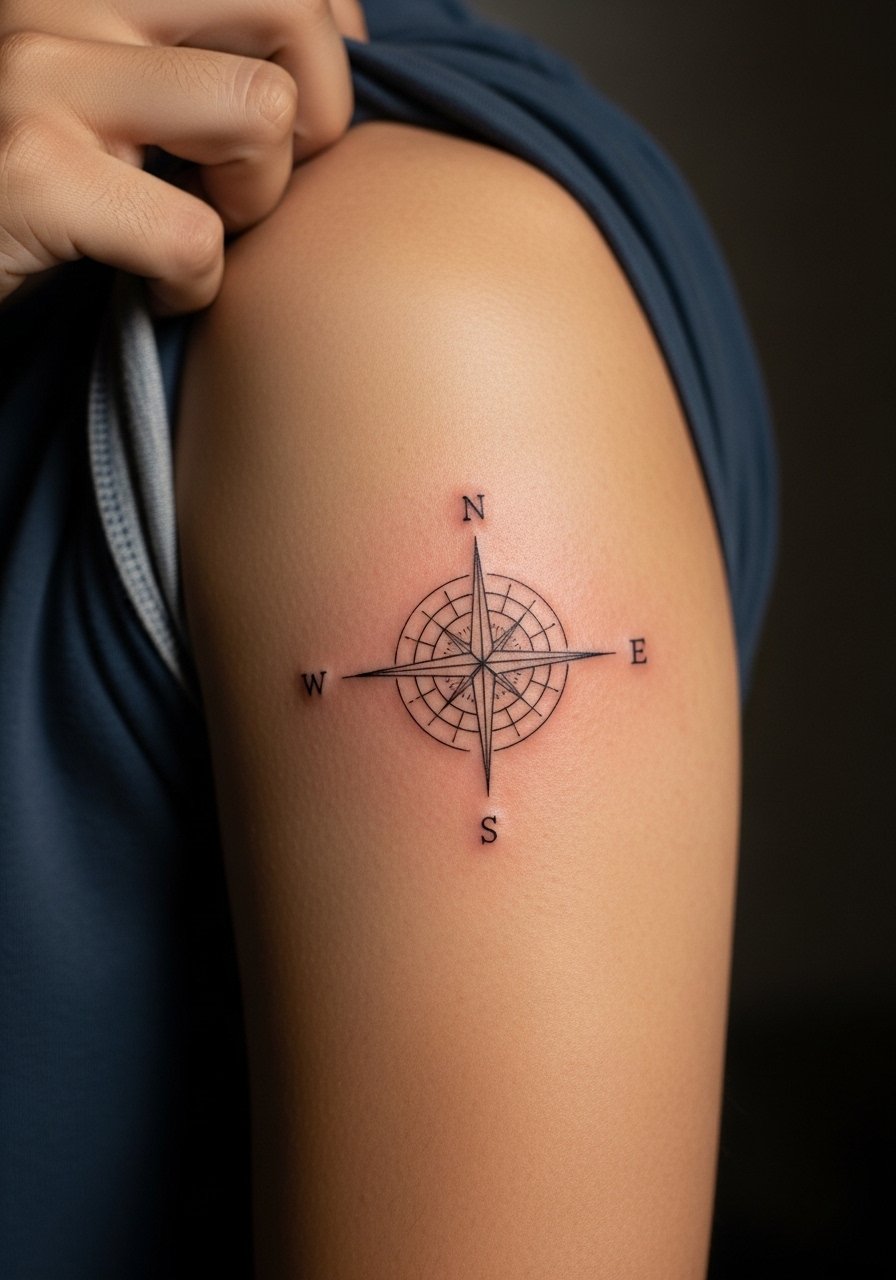
Upper arm compasses sit on flesh that moves but not as much as the forearm. Ask for clear cardinal markers with modest negative spacing inside the compass to avoid inner merging. Pain is low to moderate and sessions are typically under two hours. For casual visibility pair with a short-sleeve button shirt you can roll to frame the work. A common mistake is requesting minute lettering inside the compass that becomes unreadable.
21. Fine Line Celestial Trio on the Lower Back
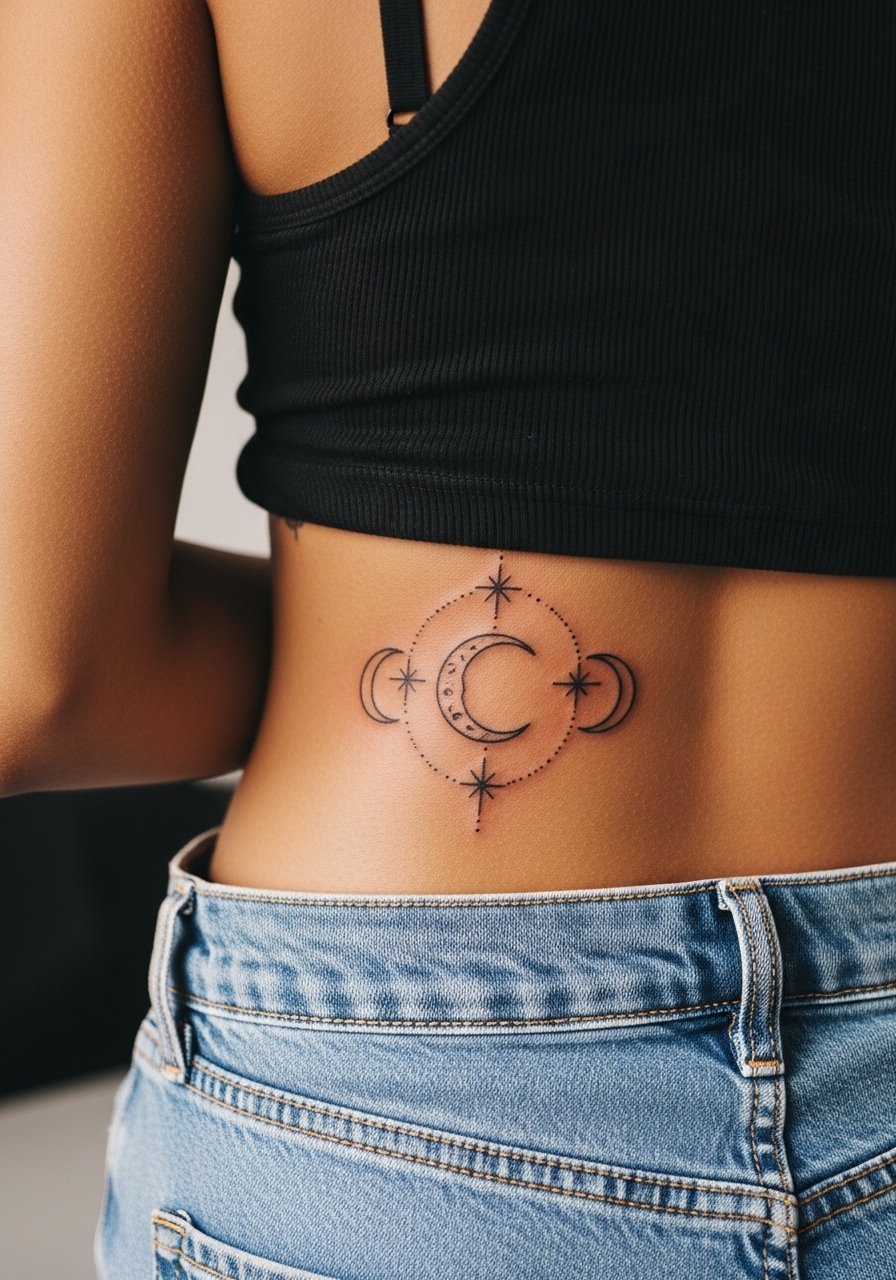
Lower back pieces give space to breathe and hide easily when needed. For small celestial clusters ask for slightly larger star points and airy spacing so the elements retain separation as the ink softens. Sessions are moderate in length and pain is manageable. For show-off moments, an outfit with a low waistline frames the trio without exposing too much. Avoid dense stipple around stars which can bleed into a blur over time.
Frequently Asked Questions
Q: Will fine line tattoos blur faster than bolder pieces on areas like the wrist and fingers?
A: From what I have seen, ultra-fine work on high-motion, high-friction spots tends to soften sooner than bold black shapes. Wrist and finger zones face constant washing and rubbing. Plan for a touch-up at year two or three for the finest pieces and ask your artist to build in slightly more negative space during the consultation.
Q: How should I describe spacing and line weight in a consult to get a one-off design that holds up?
A: Bring images that show line weight at the actual scale you want, not just the silhouette. Say you want "moderate single-needle lines with one-point heavier anchors" or ask the artist for spacing recommendations for long-term clarity. Mention specific placements from this list so the artist can suggest scaling.
Q: Are there wardrobe tips for protecting fine line pieces during the first week?
A: Yes. For ankle and wrist tattoos wear loose footwear or rollable sleeves to reduce rubbing. A loose button-down shirt is great for shoulder and arm sessions because it can be moved without pressure. Keep fabrics soft and avoid tight waistbands over lower back and hip work.
Q: Should I avoid getting a fine line piece if I plan to work in a conservative office?
A: It depends on placement and your specific workplace. Hand, neck, and very visible chest pieces are more likely to create friction with hiring policies. If visibility is a concern choose placements that can be covered by standard work attire or ask about subtle placements like inner forearm or upper thigh.
Q: How often should I expect touch-ups for these one-of-a-kind fine line designs?
A: Expect variability. Low-motion, low-sun zones can go many years without intervention. High-friction spots like fingers, hands, and ankles often need attention by year two or three. Ask your artist for a realistic maintenance timeline during booking so you are not surprised later.
