
Fine line fairy tattoos flood feeds, but the ones that still look crisp after a few summers usually pair geometry with breathing room. Give a winged figure space to read, pick placements that avoid heavy friction, and ask for deliberate line weight rather than every tiny filament. Below are 27 geometric fairy tattoo ideas with practical notes on aging, what to ask your artist, session feel, and how to style them so they look like they belong to your daily wardrobe.
1. Micro Fine Fairy on Inner Forearm
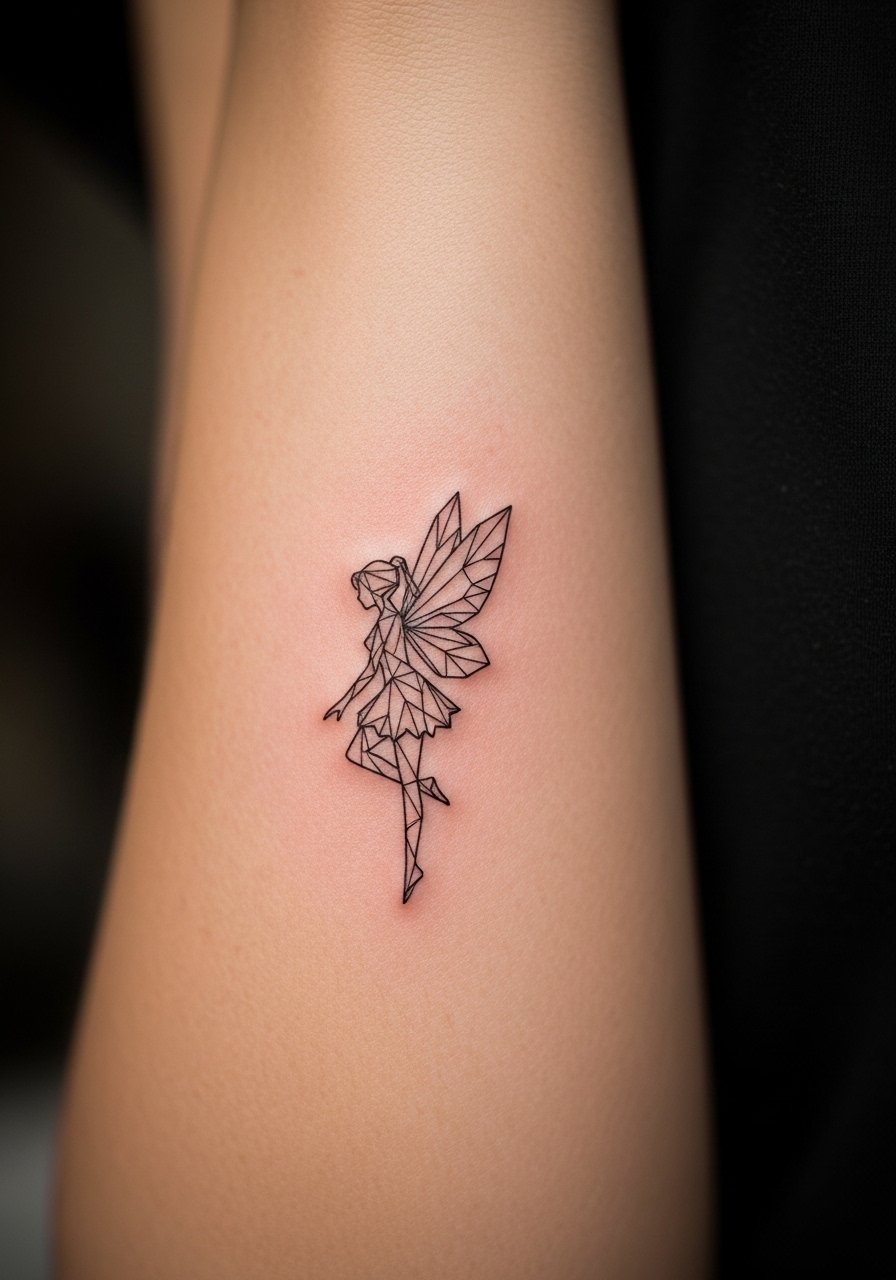
I've seen tiny inner forearm fairies last well when the stencil gives the piece room. Ask your artist for slightly heavier contour lines around the wings so the silhouette stays readable as thin filaments soften. The session feels brisk and focused, usually 45 to 90 minutes depending on detail, and pain sits in the low to mid range. Avoid requesting ultra-tiny filigree that sits close together because dense micro detail on the forearm tends to blur by year three. For showing it off, roll sleeves and pair with a racerback tank so the forearm reads as intentional style, not afterthought.
2. Geometric Mandala Fairy at the Nape
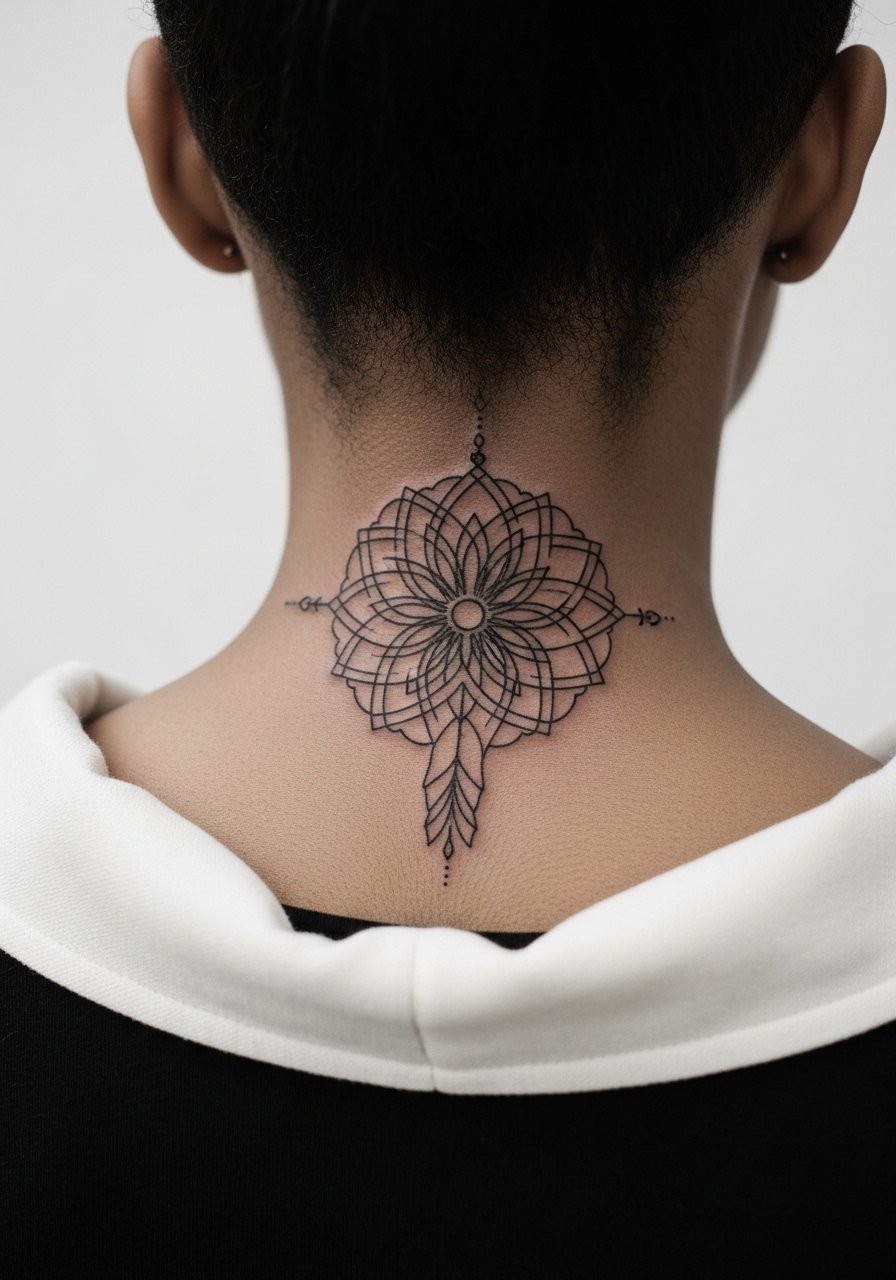
Fair warning, the nape moves a lot, and fine line there can blur if packed too tight. If you want the mandala-fairy hybrid, ask for expanded negative space between spokes and a slightly bolder outer ring so the design ages with definition. The session is short and often runs with the client seated upright, so wear a collar that you can pull aside easily. The biggest mistake is over-detailing the center. For evenings, a thin chain pendant necklace sits above the design without crowding it.
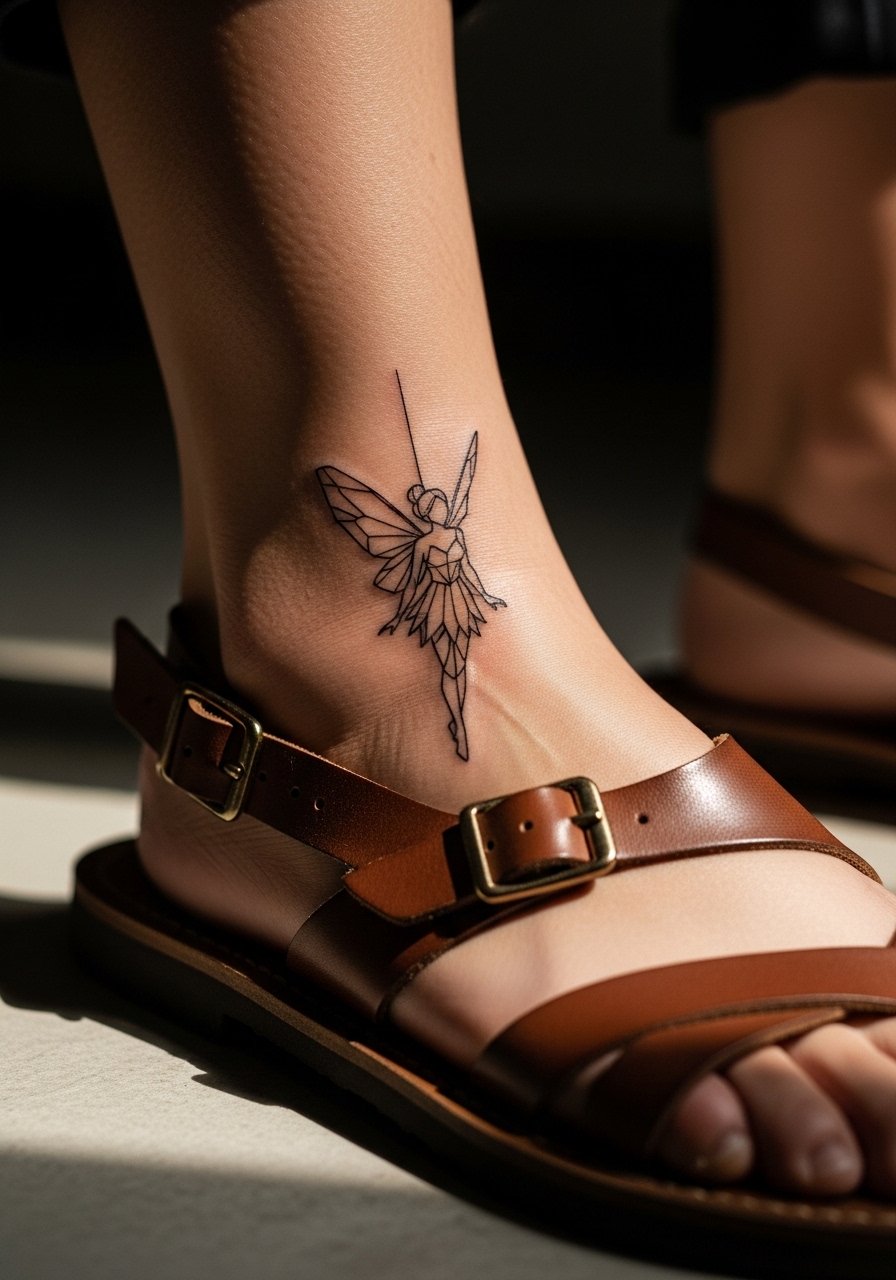
3. Geometric Fairy on the Ankle

Ankle tattoos see a lot of friction from shoes and socks so keep linework slightly bolder than your initial impulse. This placement feels quick but can be a 2-stage experience if the skin is sensitive. Expect touch-up conversations at around year two for thin stems that face constant rubbing. During the session wear slip-on shoes so you can remove footwear without bending the ankle awkwardly. For show-off looks, pair with sandals that expose the area and keep attention on the outline.
4. Geometric Fairy Collarbone Accent
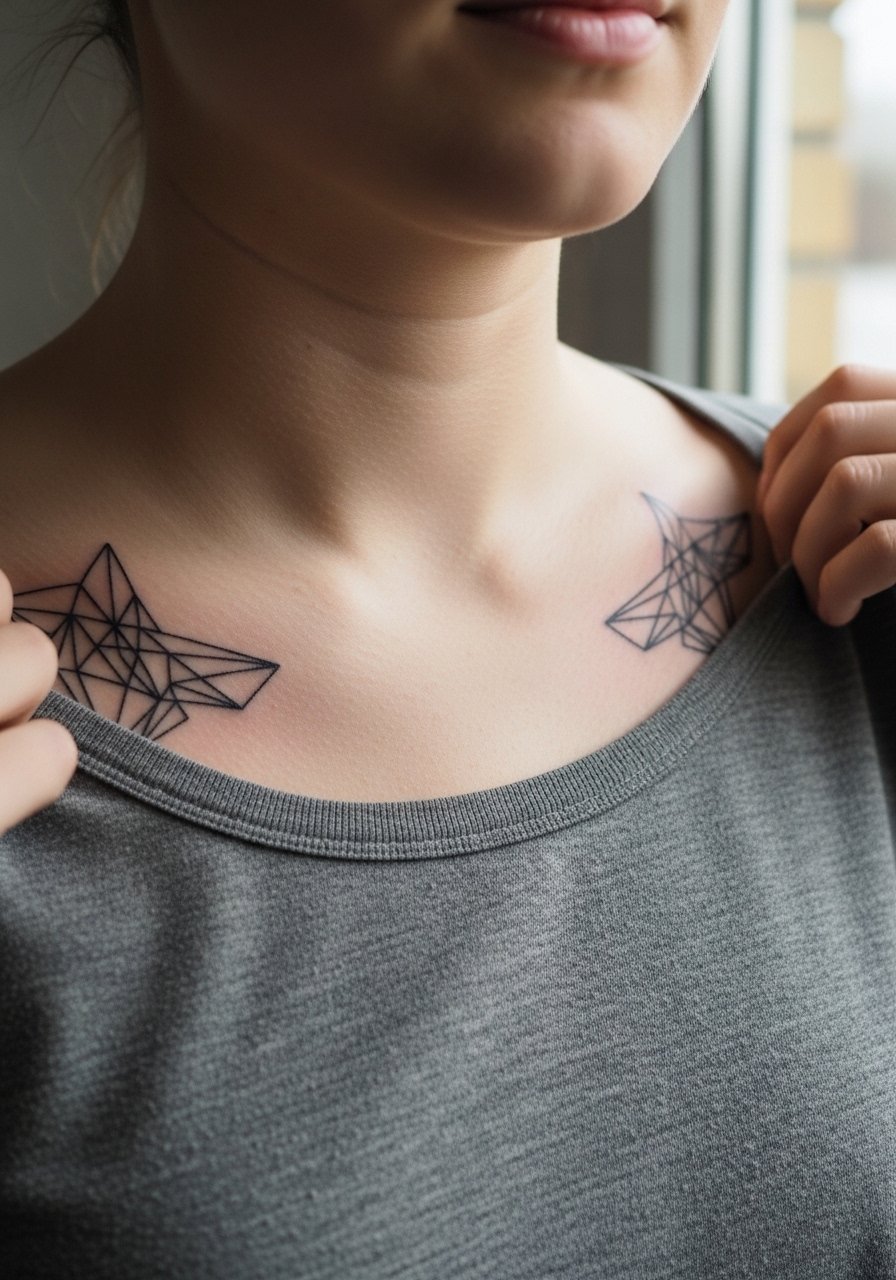
The collarbone gives a crisp plane for delicate geometry but the skin can be thin and reactive. When you consult, request slightly deeper linework around anchor points so the piece keeps its shape. Sessions here can be stinging in short bursts and often finish under two hours. Common mistakes include crowding the fairy with extra flourishes that look good fresh and muddy later. Pair this with open-neck blouses that frame the collarbone without competing.
5. Geometric Fairy Behind the Ear, Below Hairline
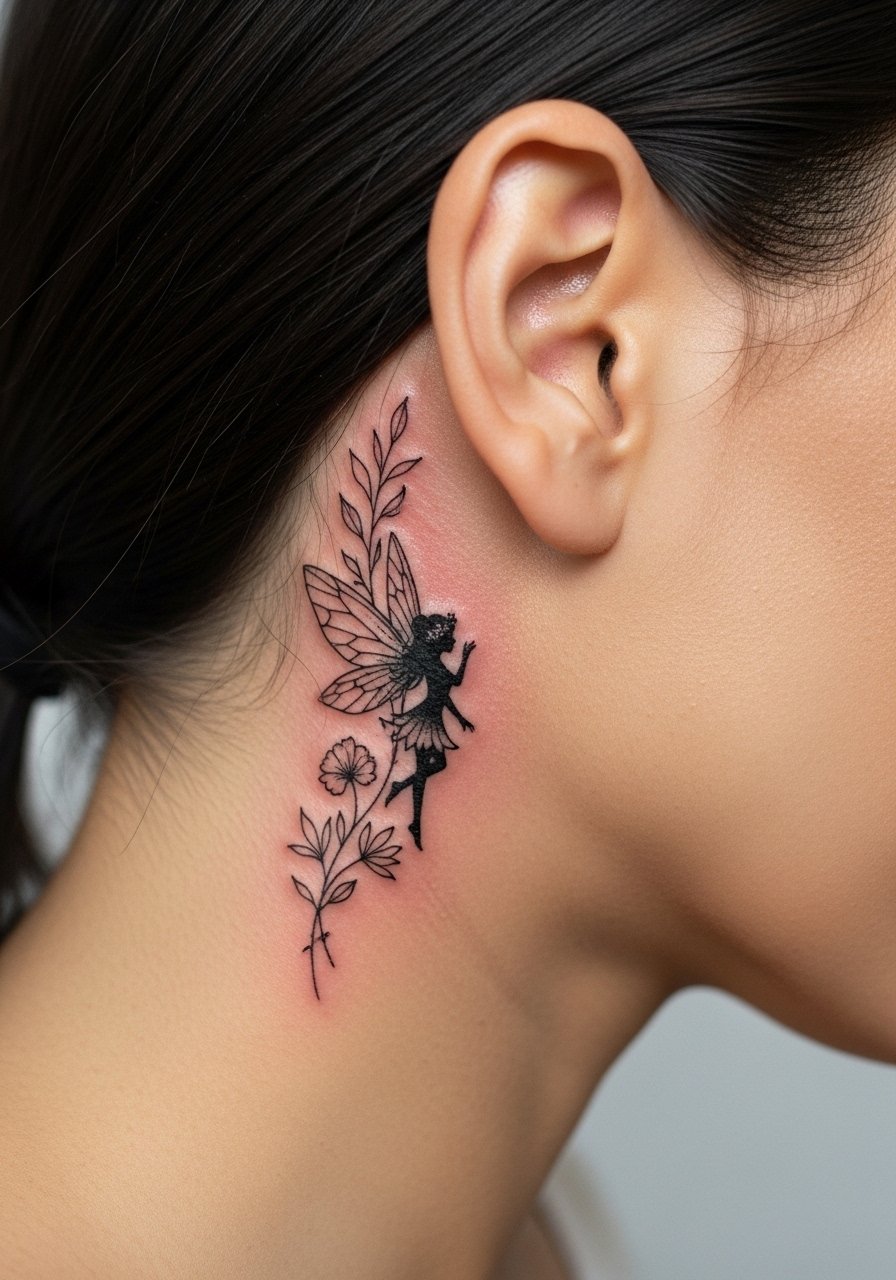
This spot reads intimate and subtle because hair often frames it. When you book, mention the hairline so the artist positions the fairy where it will peek out rather than disappear. The session is short and the sting is mild. A common version that ages poorly puts too much micro detail in a tiny zone, which fades into a gray blur. Keep the motif simple and ask for a small outline contrast. If you plan to wear your hair up, try a scrunchie or claw clip for evenings when you want the peek of ink.
6. Geometric Fairy Constellation on the Wrist
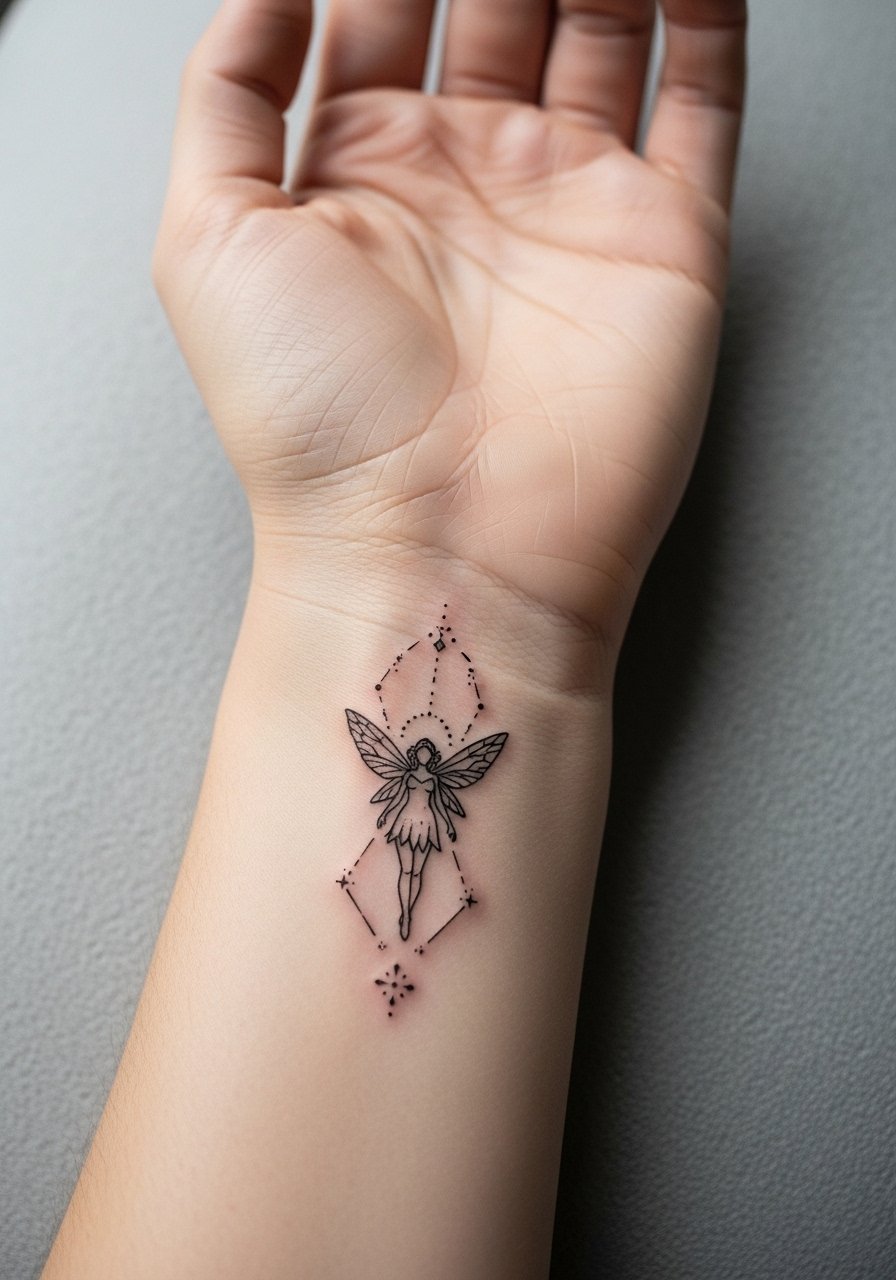
Wrist pieces face lots of hand washing and sunlight which can soften fine connectors. Ask for slightly spaced stars and a darker anchor line where the fairy sits so the constellation remains readable. The session is brief but the area is sensitive. A frequent mistake is asking for ultra-fine interlacing that blurs after frequent use. For the appointment, wear a loose button-down shirt you can pull aside, and for daily style stack with a minimalist watch that frames rather than covers the wrist.
Studio Day Picks
The forearm, wrist, and behind-ear pieces above need different prep than chest and rib work, and a few targeted items smooth the session and the first week.
-
Stencil transfer sheets. Helps you and the artist agree on exact placement for small geometric elements before the needle touches skin.
-
Topical numbing cream. Applied per directions, it eases sensitive zones like the wrist and behind the ear so you can sit through fine detail without tensing up.
-
Thin protective film roll. Keeps delicate wrist and ankle pieces clean during the first few days of frequent washing.
-
Fragrance-free gentle body wash. Cleans the tattooed skin without stripping the thin linework those tiny fairies depend on.
-
Aquaphor healing ointment. Thin application for the initial healing window helps retain moisture on small linework without clogging.
7. Geometric Fairy Sleeve Accent on Outer Forearm
Personal observation: sleeves that age best balance negative space with connected geometry. For a fairy accent in a sleeve, ask the artist to plan spacing across the arm so elements do not merge over time. Sessions can stretch to several hours if combined with other motifs. The common mistake is compressing tiny motifs too close together, which causes blurring at year three. For the session wear a short-sleeve linen shirt so the artist can work without fabric in the way. Expect touch-ups on outer forearm details at year three, depending on sun exposure.
8. Geometric Fairy on the Side Ribcage
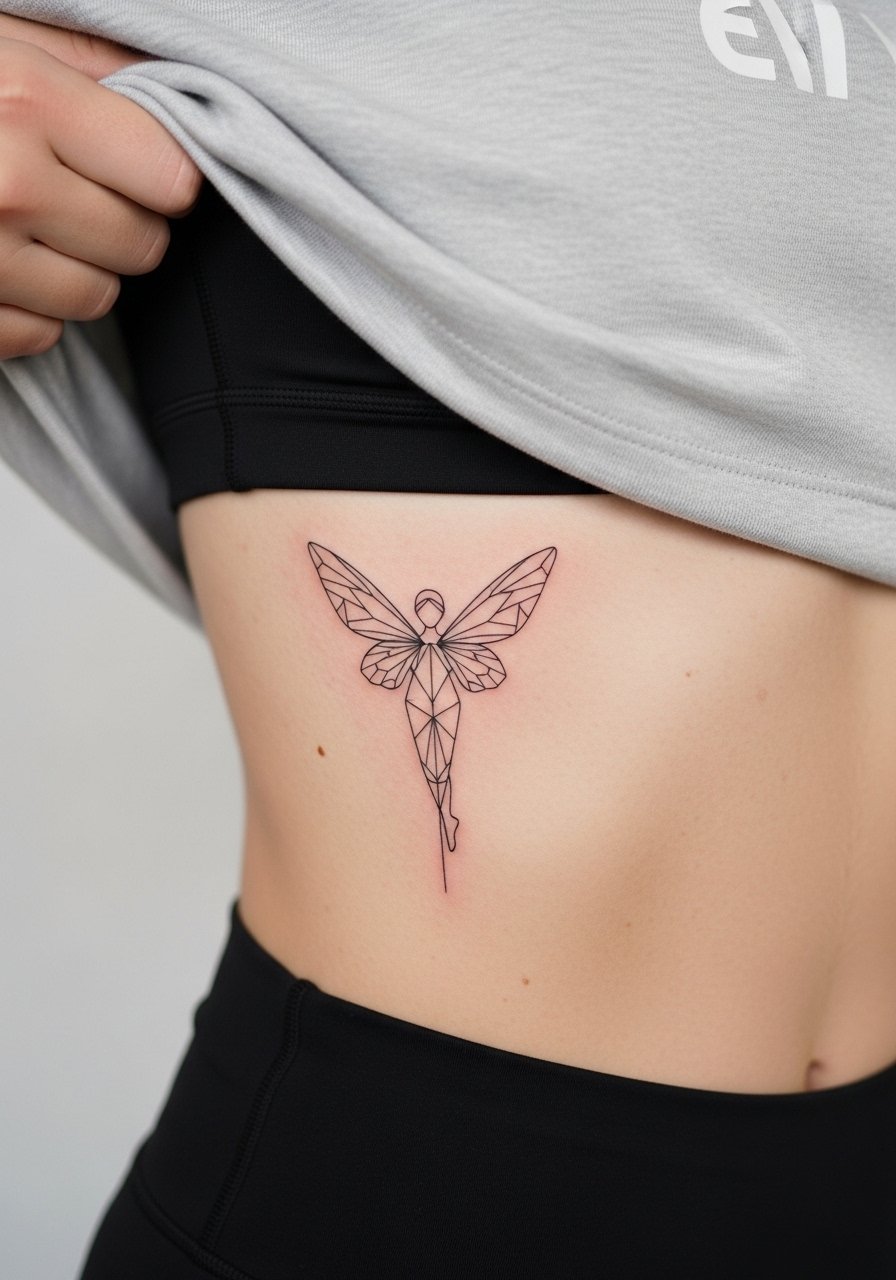
Controversy here splits artists into two camps. One camp says ribs stretch and shift too much and fine line blurs within two years. The other camp argues that with proper depth and spacing, fine line can settle well on the ribs. When you consult, ask your artist which camp they follow and why. Pain is high on the ribs and sessions can be broken into two shorter passes. A real mistake is asking for ultra-dense filigree in that curved, high-motion area. If you wear a cropped top to your session, bring a zip-up hoodie to stay warm between passes.
9. Geometric Fairy Sternum Accented with Dots

Fine line on the sternum can be beautiful but the area flexes and touches clothing. Tell your artist you want dotted shading rather than solid fills to reduce long-term saturation clumping. Sessions on the sternum sting in waves and often need short breaks. The common aging issue is heavy fill that pills into a gray mass over time. For the appointment wear a fitted sports bra or a zip top so access is easy and modesty stays intact.
10. Geometric Fairy on the Hip
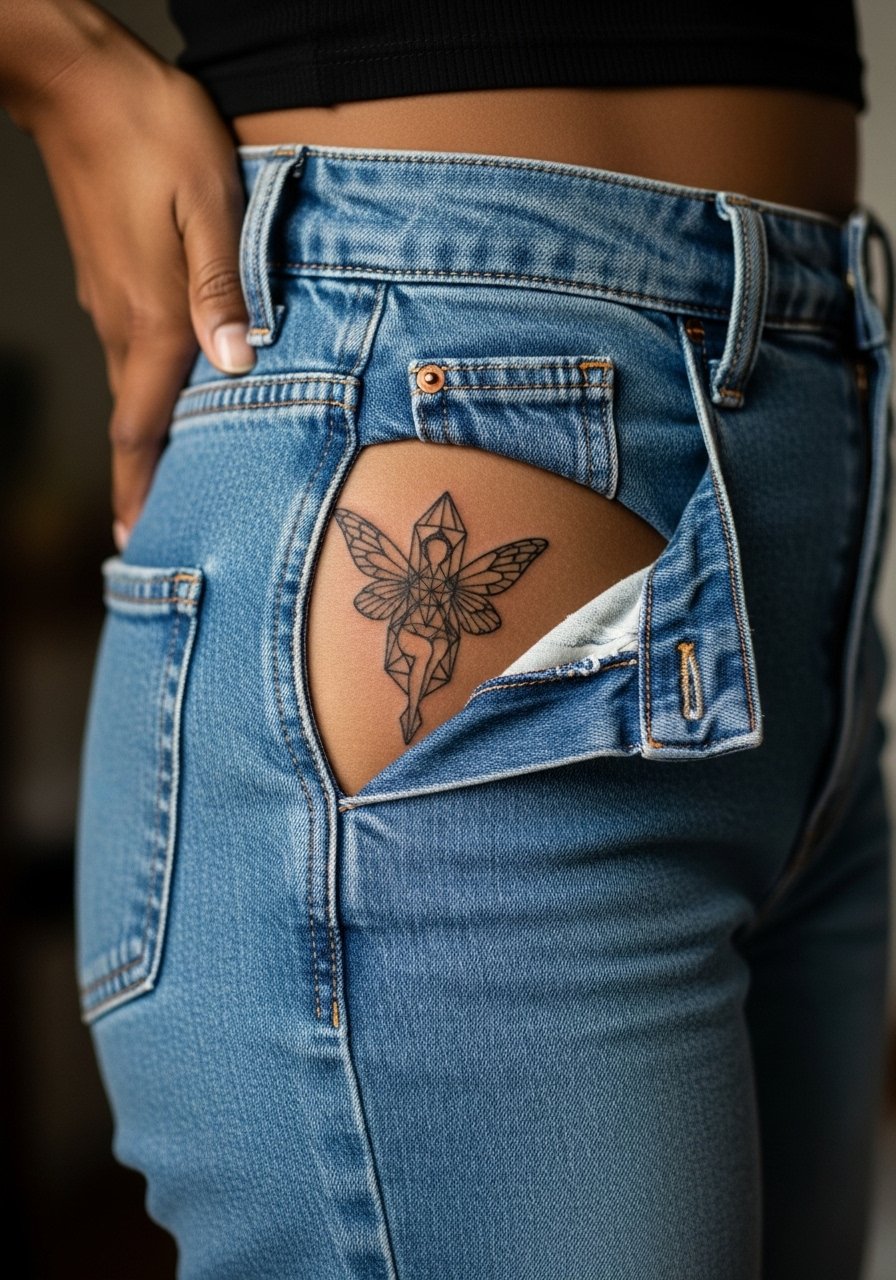
The hip sees stretch from movement and clothing pressure from waistbands. A consultation tip is to map the piece while standing and sitting so anchor points stay where you want them. Sessions can be mid-range for pain depending on fat distribution. A typical mistake is centering the motif where the waistband will constantly rub. For showing it off with swimsuits, choose high-cut bikini bottoms that frame the design rather than hide it.
11. Geometric Fairy Calf Silhouette
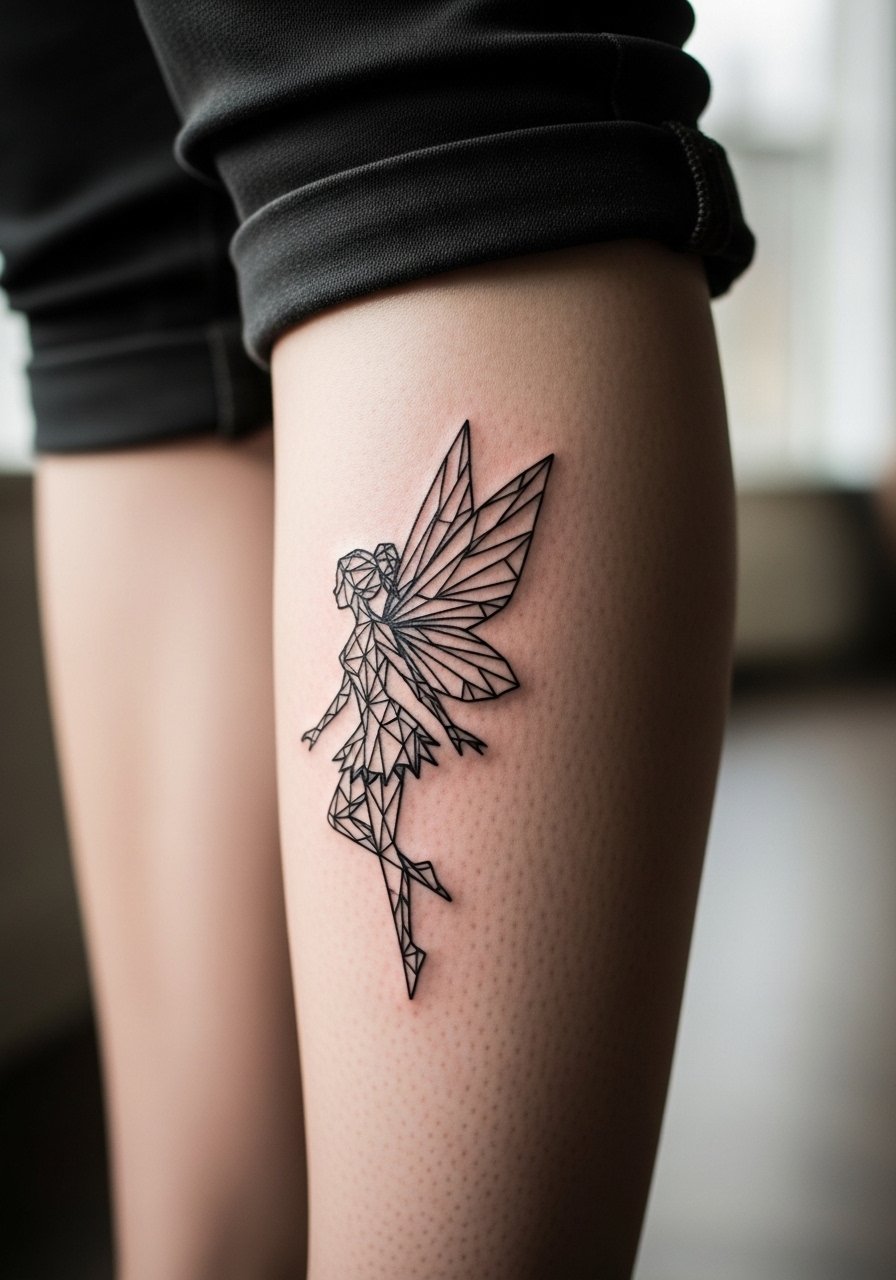
Visual impact lead: the calf gives a flat plane for bold silhouettes to read at distances. Ask for a clean outer contour and slightly heavier fill inside so the fairy stays a leg statement as color fades. Pain is moderate and sessions are comfortable for most people. A common version that ages poorly uses thin interior detail that disappears when saturation softens. Pair this piece with cropped trousers or ankle boots that keep the silhouette visible.
12. Geometric Fairy with Dot Work Halo on Shoulder Blade
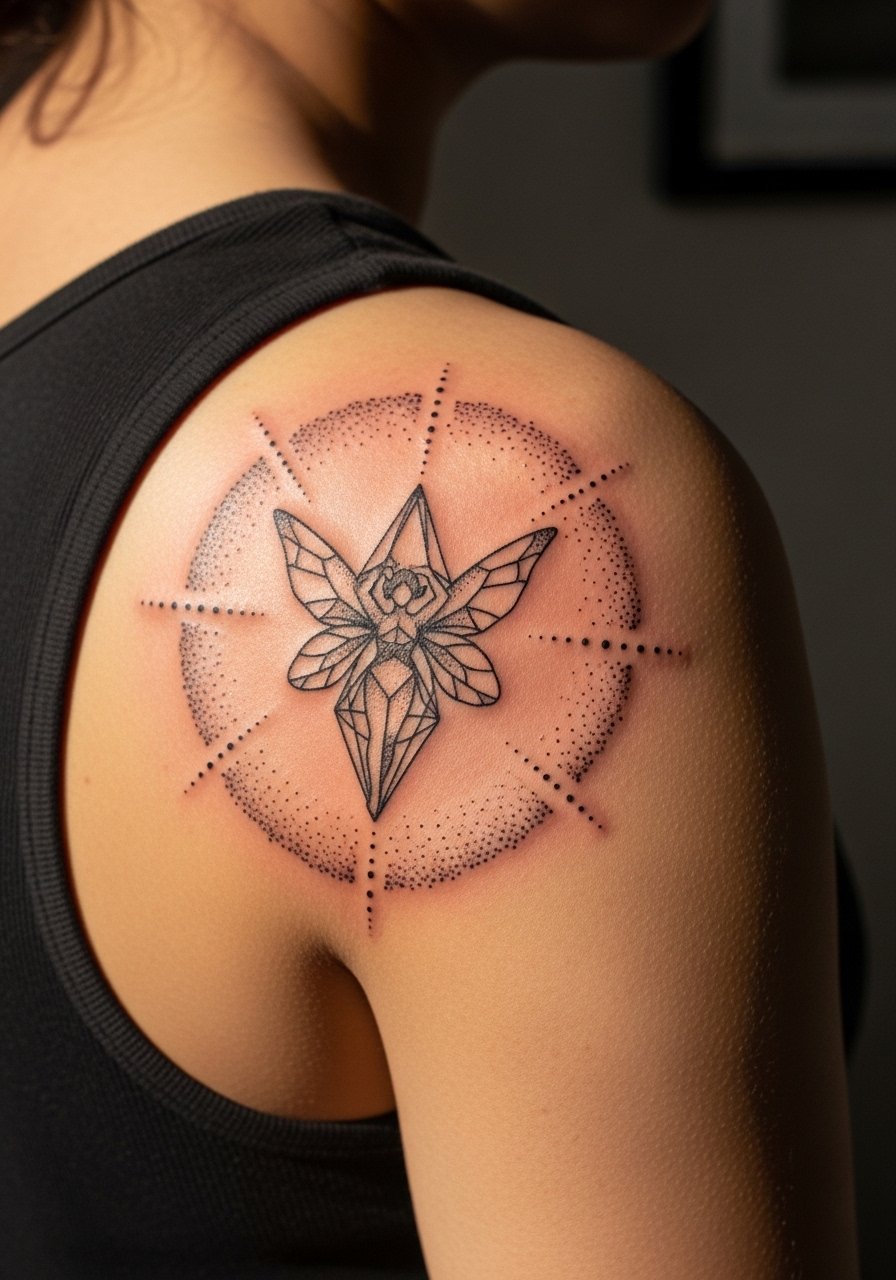
The shoulder blade balances detail and longevity because skin there is stable. When you consult, request stipple shading rather than dense gray wash to avoid patchy aging. Sessions are medium in length and typically less painful than ribs. A mistake people make is pushing for tight dot clusters that end up muddy after a few years. For the session wear a loose tank top so the artist can access the area without shifting clothing.
13. Geometric Fairy Thigh Panel

Most people expect thigh sessions to feel like a long nap with occasional sting. The outer thigh tolerates larger geometric compositions with good longevity because the skin is thicker. Consultation tip: have the artist mock the full panel on the leg while you stand and sit to judge flow. The main mistake is making the piece too small for the canvas, which causes the design to look cramped later. For the appointment wear loose drawstring shorts so the leg can be exposed without discomfort.
14. Geometric Fairy Full Back Accent
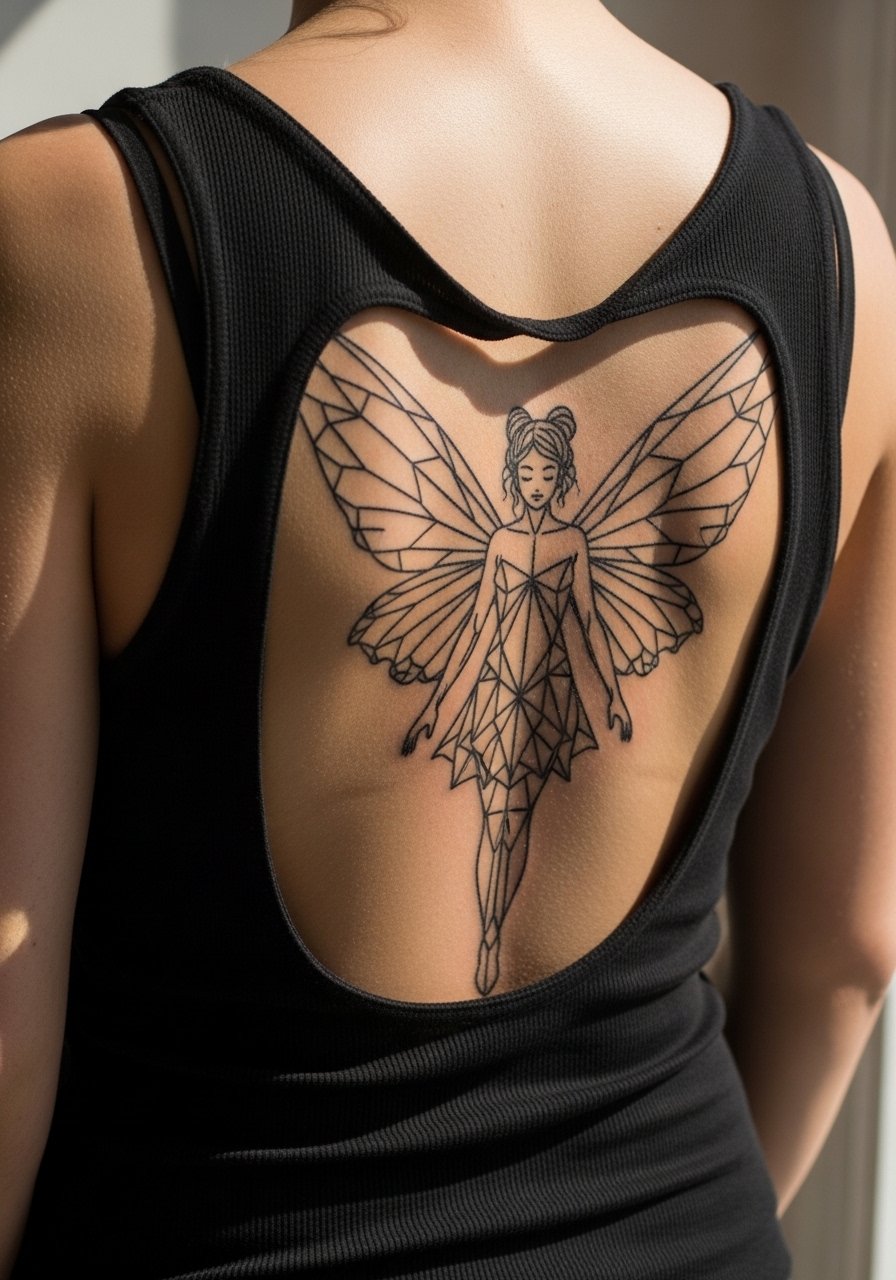
Visual impact lead: a back piece lets geometry breathe and keeps complex wings readable for years. Sessions are long and often split across multiple days. A real mistake is squeezing a highly detailed facial expression into a scale too small to hold it. For showing it off, open-back dresses or a halter top make the negative space around the fairy part of the look.
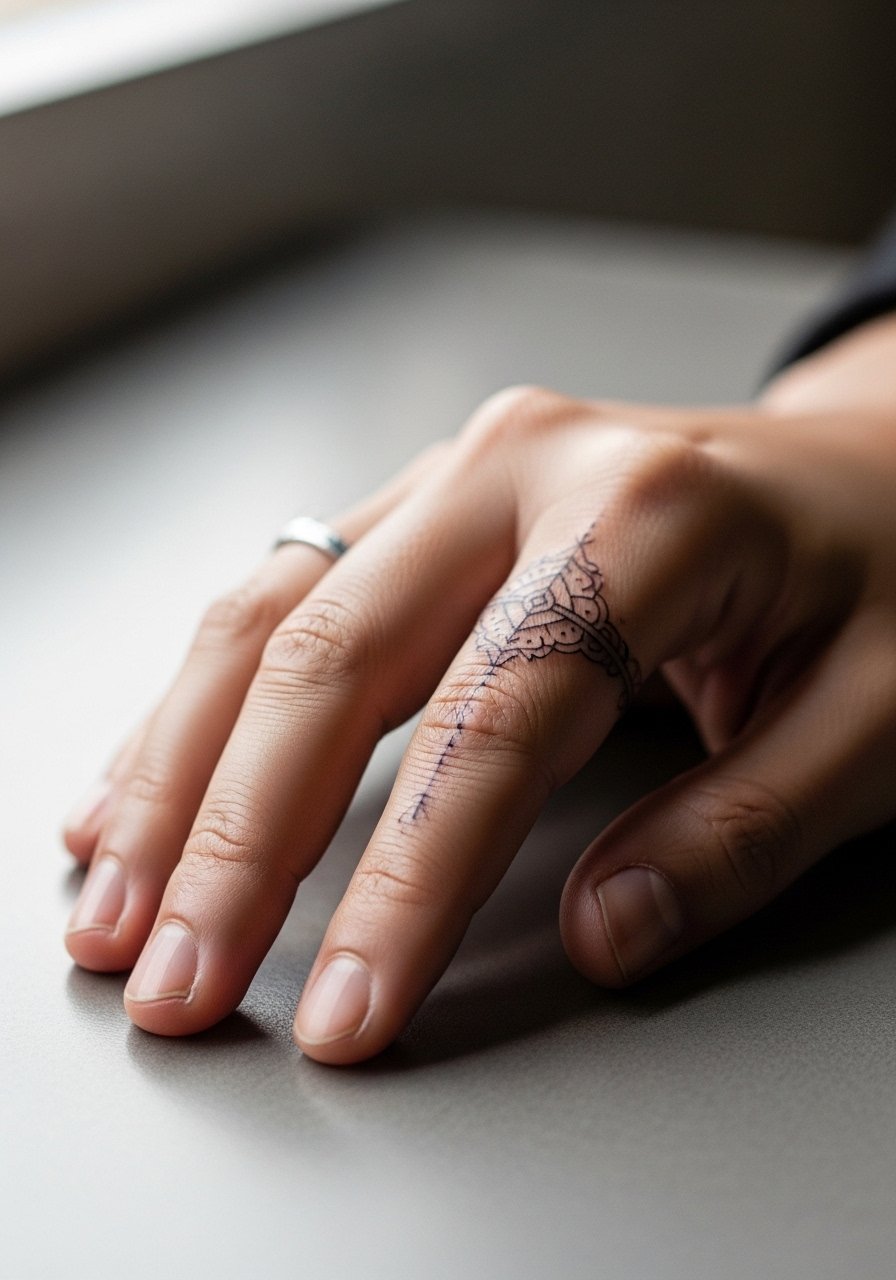
15. Minimal Geometric Fairy Finger Outline
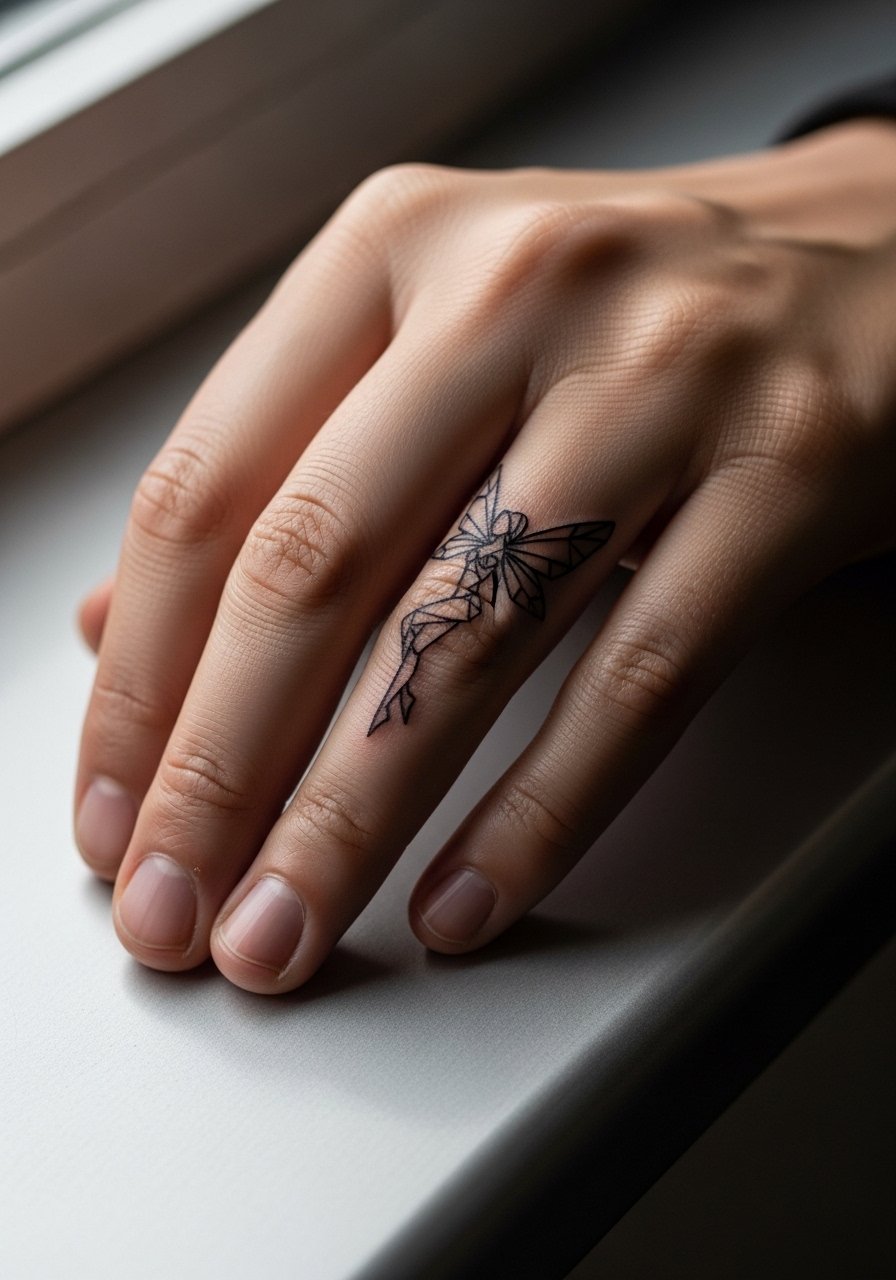
Fair warning: finger tattoos blur faster than most placements because of constant washing and skin turnover. If you want a finger fairy, ask for bolder anchor points at the knuckle lines and accept that touch-ups are common. Sessions are quick but the aftercare period is fussy. The biggest mistake is treating a finger as a permanent micro canvas. Pair a finger outline with a thin stacking ring set that complements the linework without rubbing against it constantly.
16. Geometric Fairy Mandala Half-Sleeve
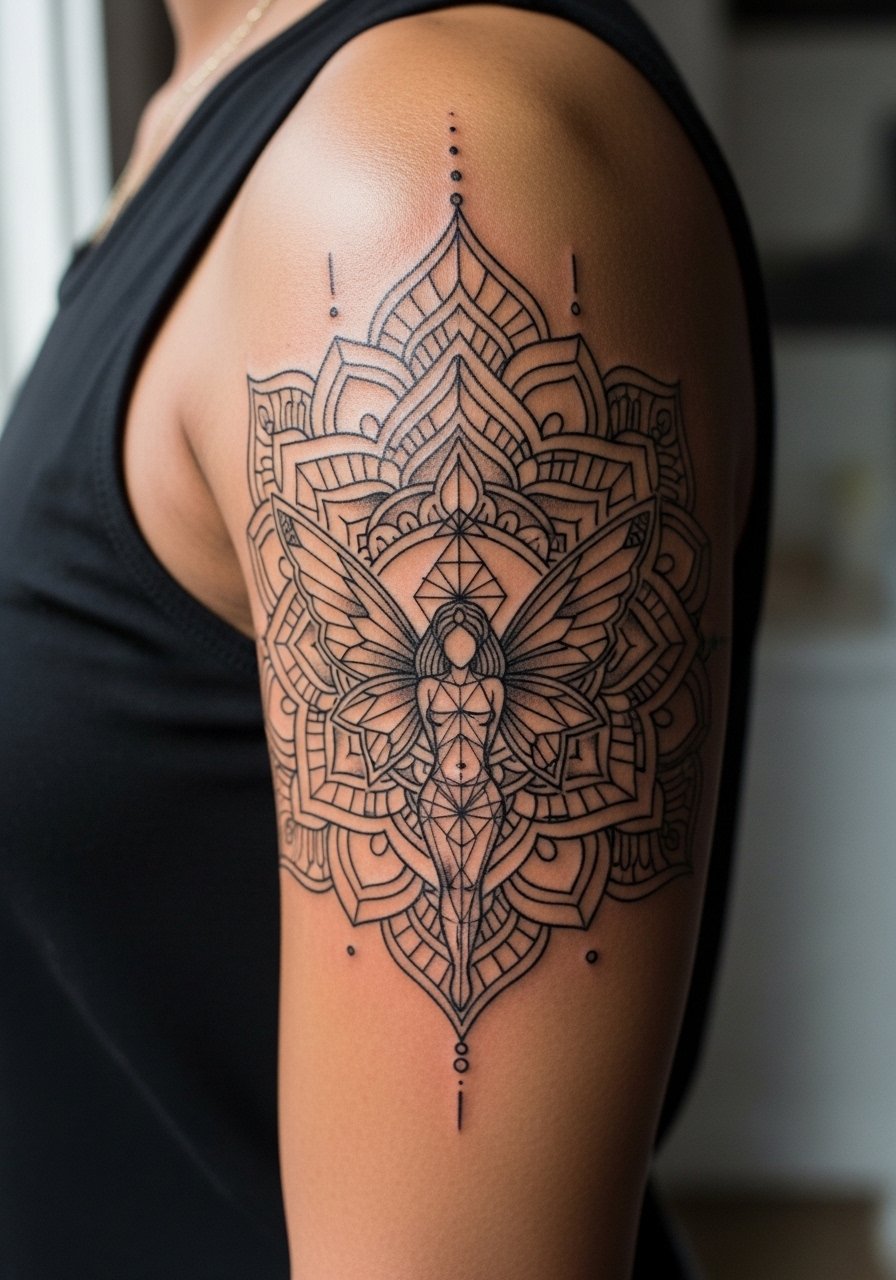
When you plan a half-sleeve, think about negative space between motifs so air shows through as the piece ages. Consultation lead: bring reference that shows desired spacing and the exact line weight you prefer. Sessions are long and may need breaks. A common aging problem is filling every inch with detail. For the session wear a loose button-down shirt you can pull aside so the artist has full access to the upper arm.
17. Geometric Fairy Calf-to-Ankle Cascade
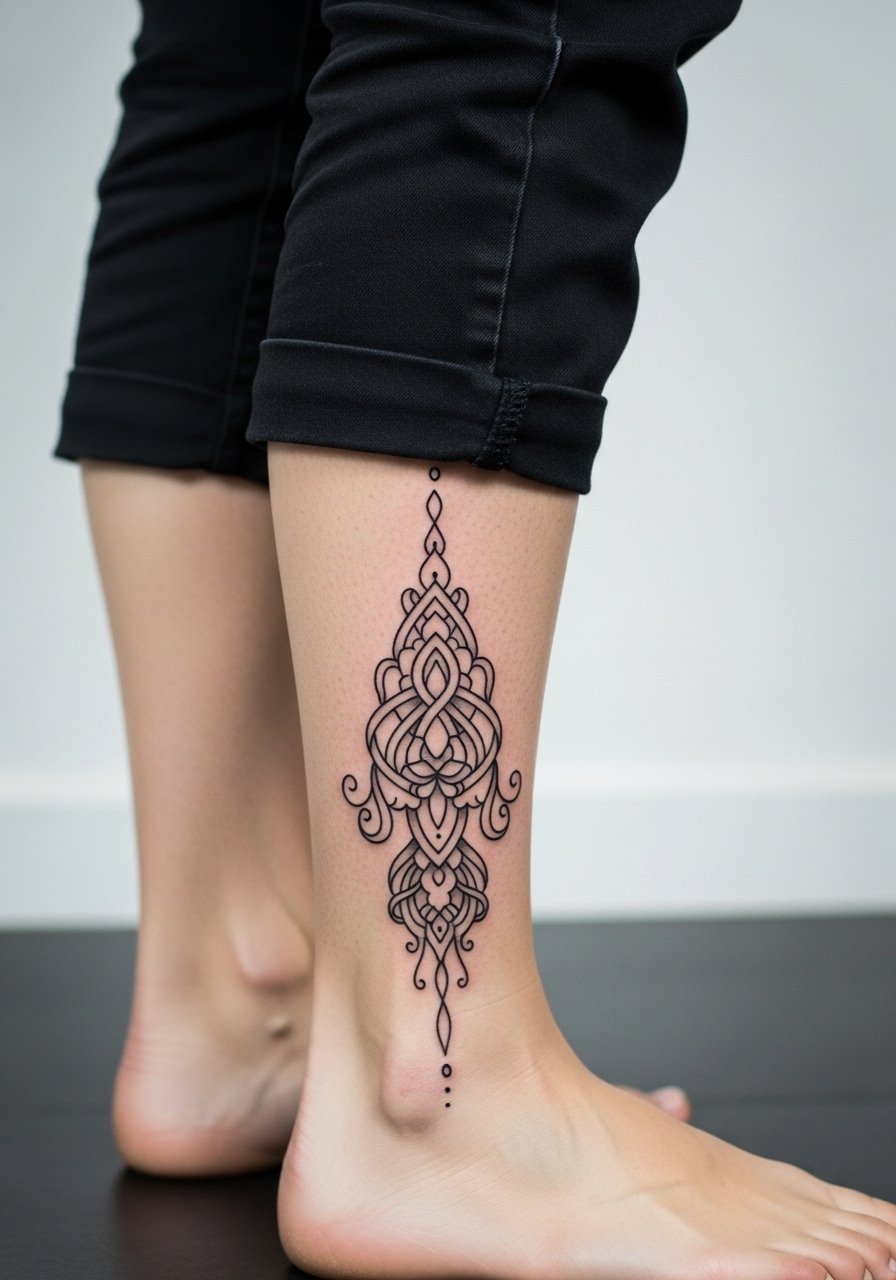
Visual impact lead: cascading elements read well when each motif has breathing room. Ask for intentional spacing and slightly stronger anchor lines toward the ankle where friction is higher. Sessions can be staged across two days to keep the leg comfortable. A mistake is adding tiny connectors down near the ankle which blur with shoe contact. Show it off with cropped jeans so the trail is visible without riding up into uncomfortable zones.
18. Geometric Fairy with Negative Space Wings on the Chest
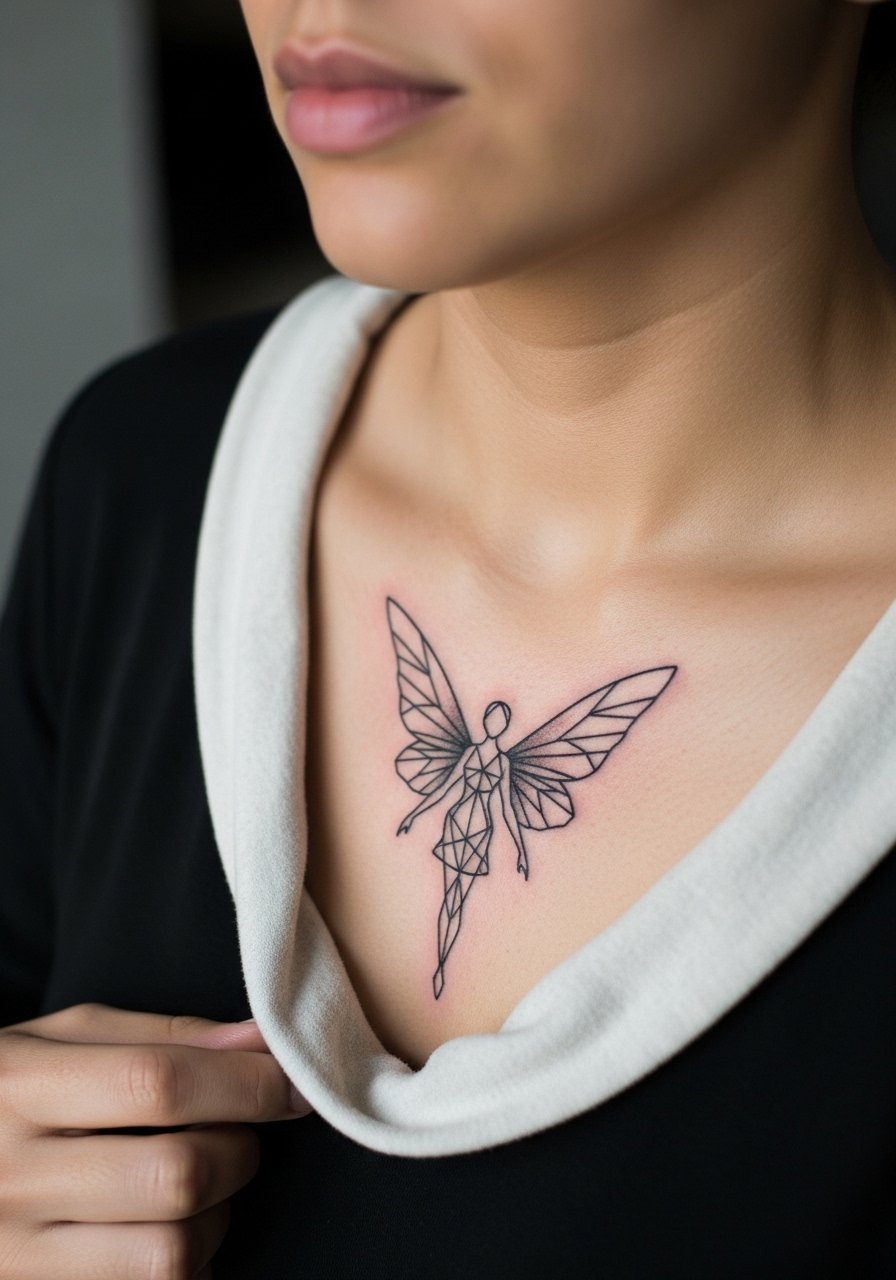
Aging lead: negative space holds longer than tiny fill because there is less saturation to migrate. Tell your artist you want the wings defined by surrounding geometry rather than packed dot fills. Sessions on the chest can be stingy and often need short breaks. A common mistake is overfilling the wing interiors. For modesty and access, wear a wide-neck shirt that you can pull aside easily.
19. Geometric Fairy Wrist Cuff
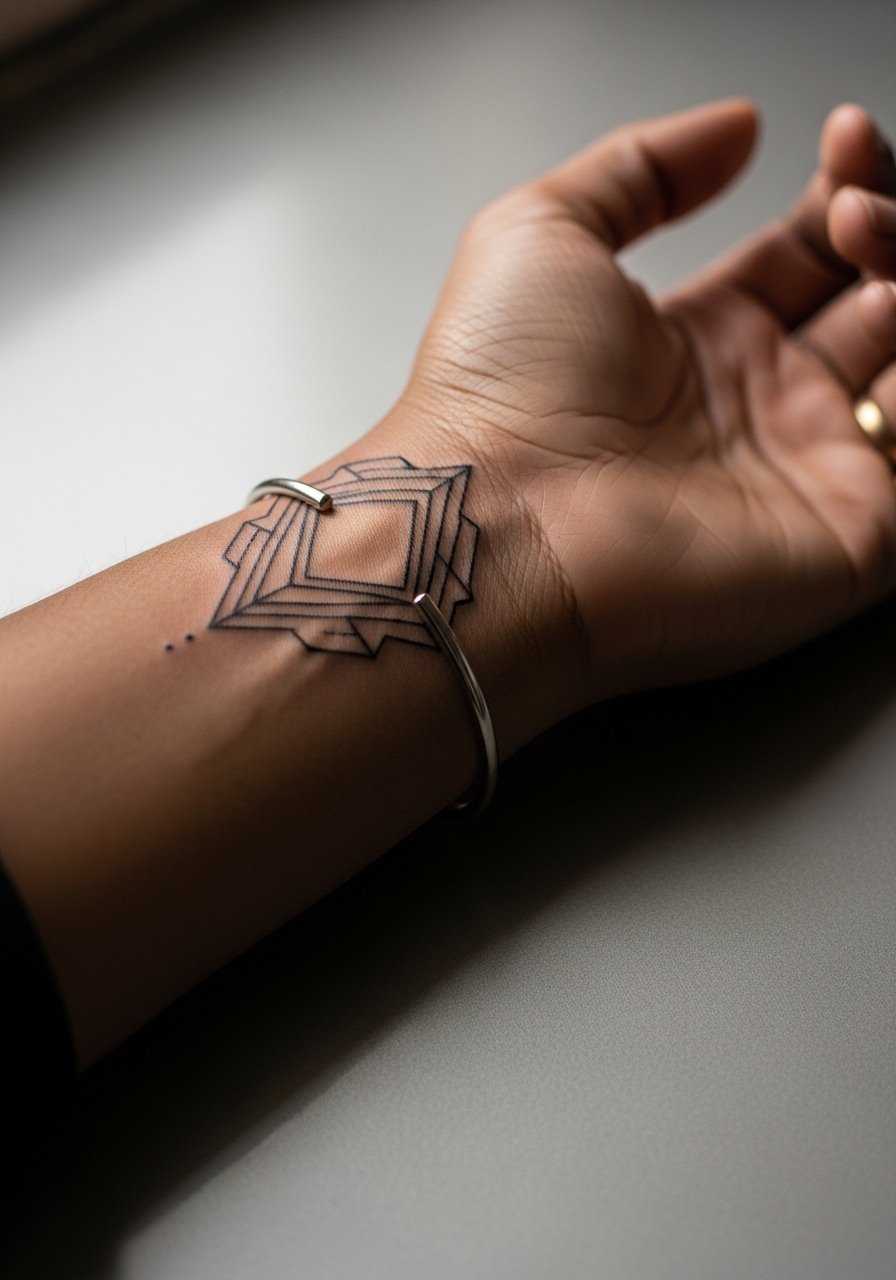
Mistake lead: wrapping too many tiny elements around the wrist leads to blurring where the skin folds. Recommend slightly larger repeating units and a decisive connecting line so the cuff stays legible. The session is brief but the area is sensitive. For the session, slip into a loose button-down shirt you can move aside. For daily wear, a thin bracelet can sit just above the cuff to frame it without rubbing.
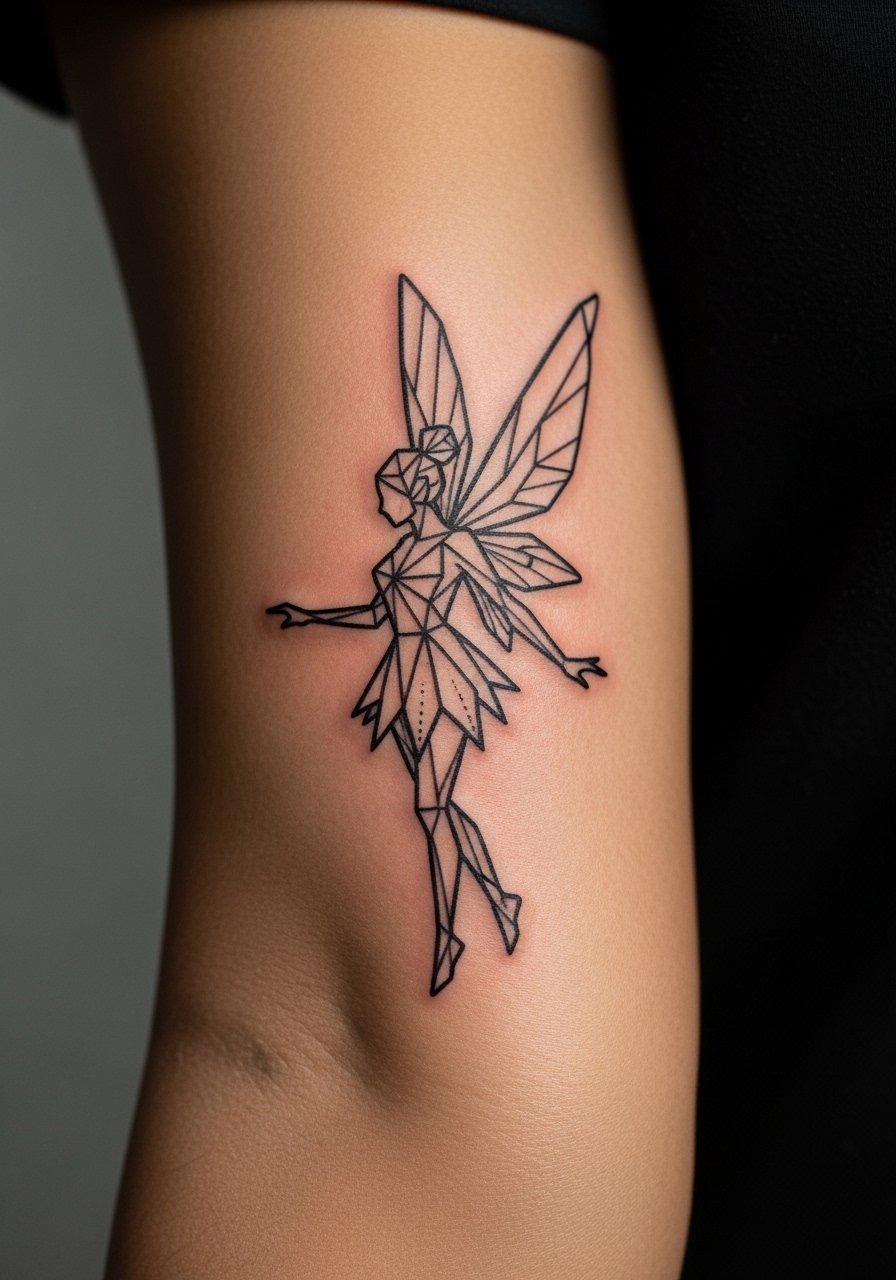
20. Geometric Fairy on the Inner Bicep
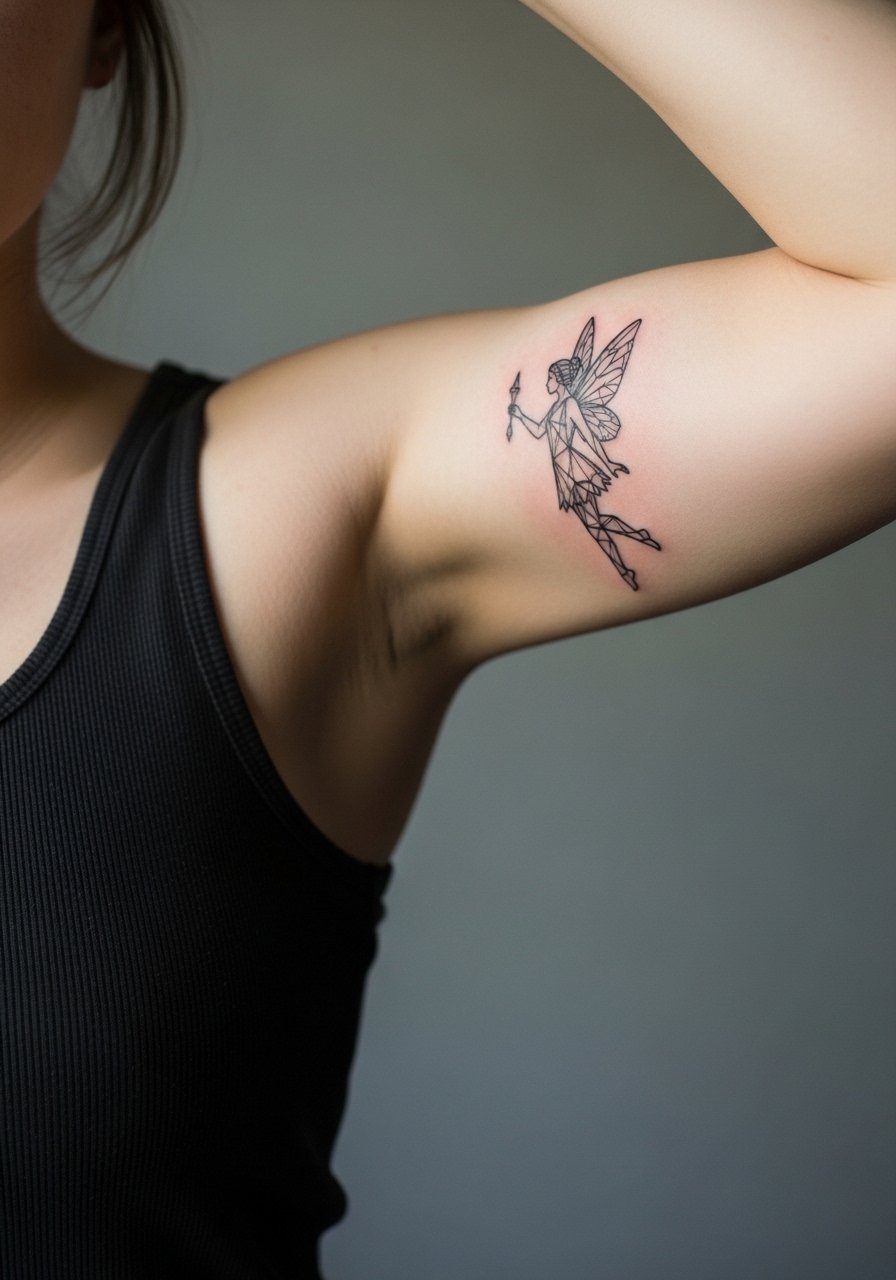
Controversy lead: inner bicep is a site some artists avoid for fine line because skin there can be softer and more prone to blowout. One camp says deep placement prevents spreading. The other camp urges larger scale or different shading. Ask where your artist stands and why. Sessions can be more uncomfortable because of pressure when the arm is positioned. The mistake is choosing micro detail without accounting for skin texture. For the appointment wear a loose tank top so the arm position is easy to maintain.
21. Geometric Fairy Finger Band
Pain warning lead: finger bands sit right over joints so expect faster wear. Ask for a thicker band outline and accept that annual touch-ups may be part of the life of a finger ring tattoo. The session itself is quick. A common mistake is asking for thin filigree over the knuckle. For styling, consider a delicate ring set as an accessory that layers without constant friction on the ink.
22. Geometric Fairy Delicate Thigh Script with Wing
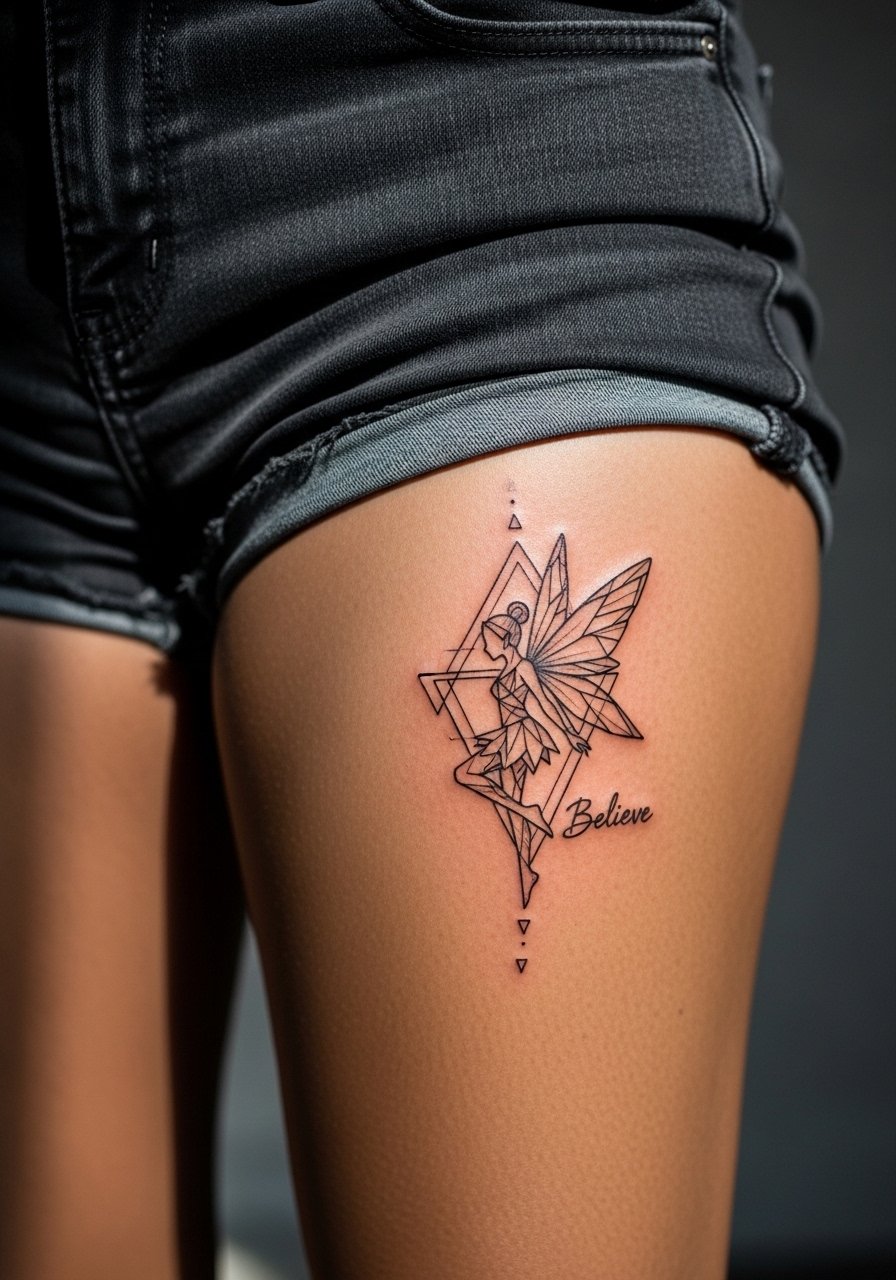
Consultation lead: when combining script and geometry on the thigh, specify the exact font and placement in sitting and standing positions. Sessions are comfortable and forgiving for placement adjustments. A mistake is placing script where clothing rubs daily. For session comfort, wear loose shorts that you can shift without irritation.
23. Geometric Fairy Tiny Foot Arch Tattoo
Pain warning lead: foot tattoos are sharp but quick and face heavy wear from shoes. Ask for enhanced contouring on the main shape so it survives footwear. Sessions are short but the aftercare window is long because of pressure. A common mistake is placing too much interior detail in an area that will blur. For showing it off, simple sandals or slide sandals keep the arch visible.
24. Geometric Fairy Back of Hand Accent
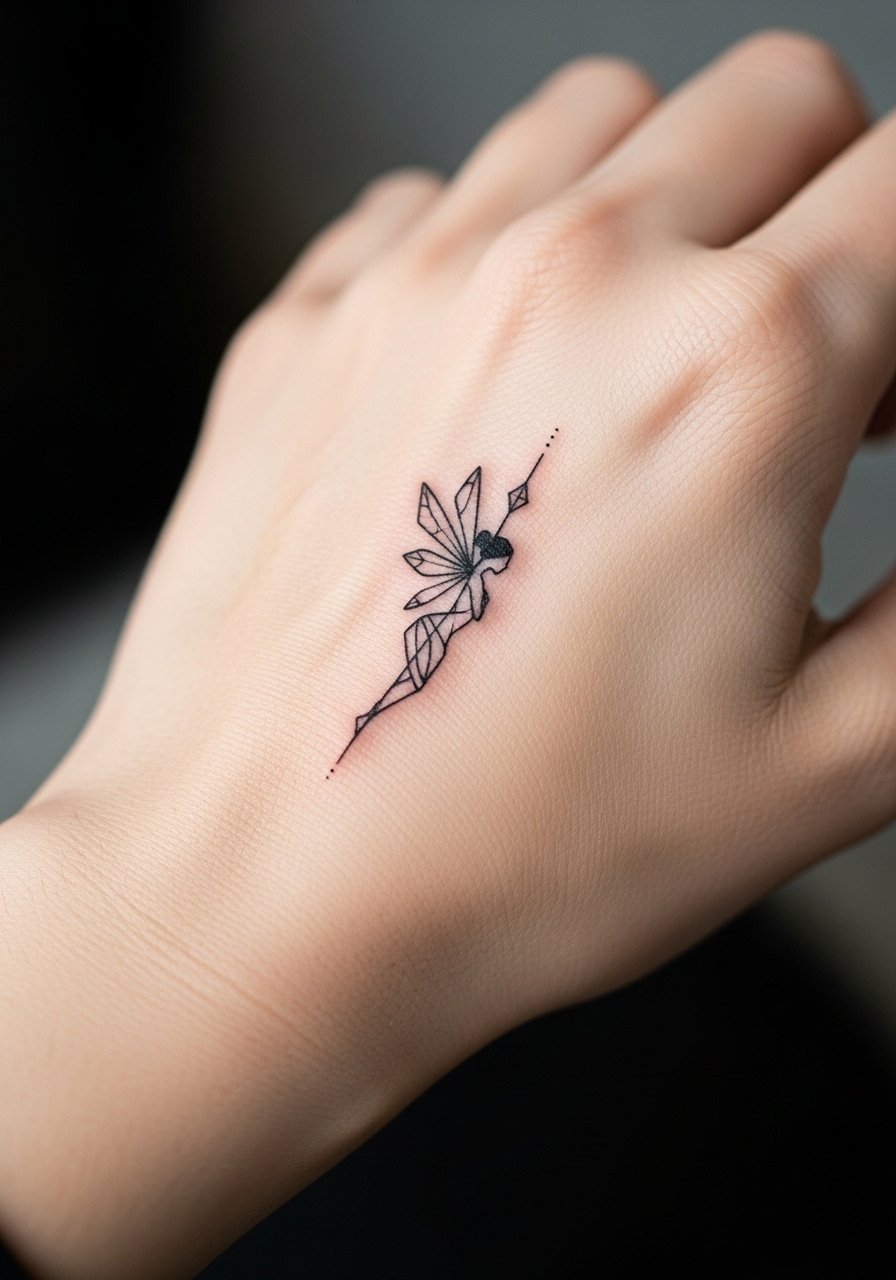
Pain warning lead: hand placements are very visible and still affect perceptions in some workplaces. The main aging issue is rapid fading and blurring from frequent use. Ask for a bolder outline and plan for touch-ups. The session stings and aftercare requires careful hand-use management. For evening looks, try a structured blazer sleeve that frames the backhand while you transition into cooler weather.
25. Geometric Fairy Neck Side Accent

Decision-pressure lead: neck pieces are bold and visible, so decide how often you want others to see them. Sessions are brief but the area is sensitive. A usual mistake is choosing dense detail that ages poorly with sun exposure. For subtle evenings, layer with a lightweight scarf that complements the motif without covering it completely.
26. Geometric Fairy Shoulder Cap with Whip Shading
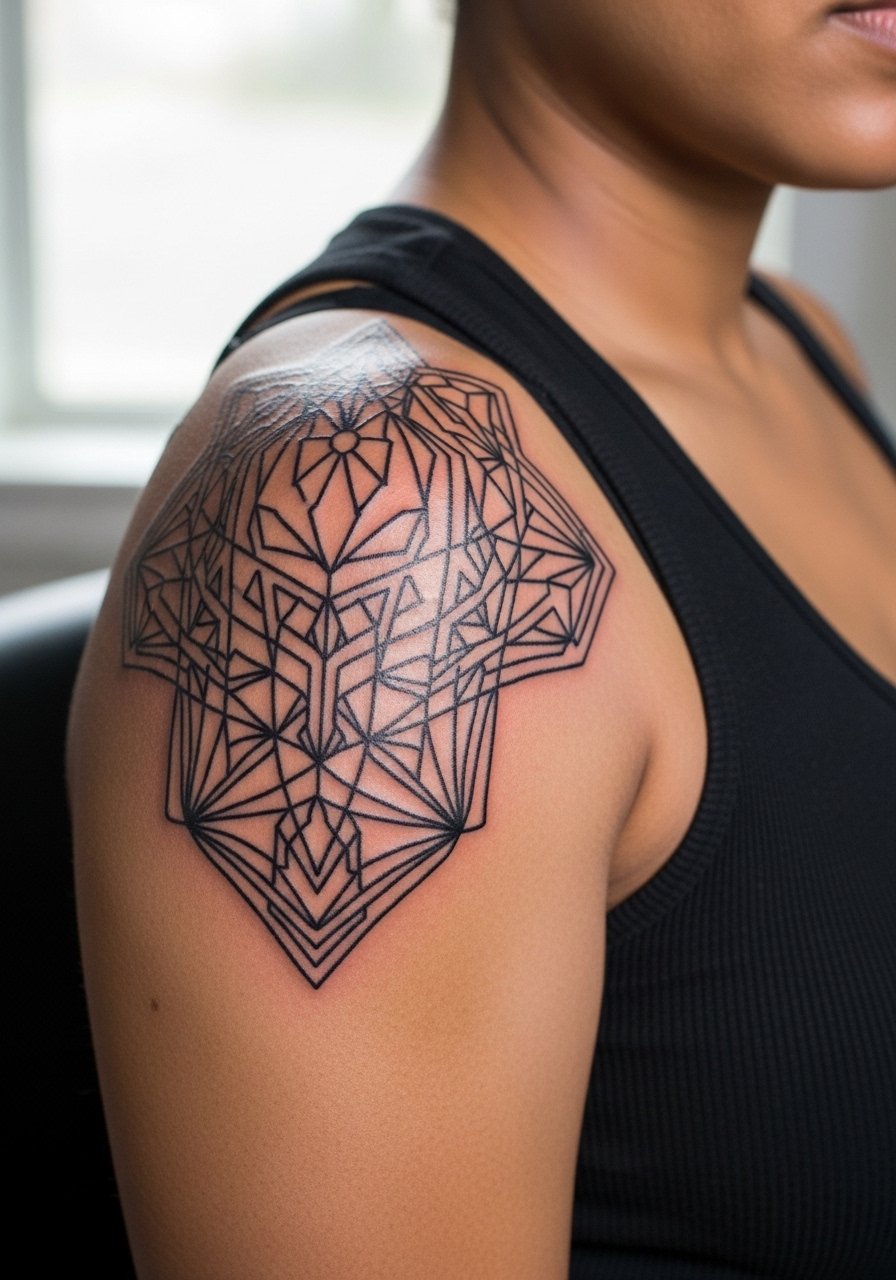
Styling lead: shoulder caps let you wear sleeveless tops and let the tattoo live as part of an outfit. In consultation, ask for whip shading that reads soft when healed, rather than heavy fill that compresses over time. Sessions are mid-length with a tolerable sting. For showing it off, an open-back tank keeps the cap visible without forcing you into unfamiliar clothing.
27. Geometric Fairy Tiny Back-of-Neck Script and Glyph

Consultation lead: when combining glyphs and a fairy on the back of the neck, specify exact lettering and placement because generators and stencils can garble small text. Sessions are quick but require precision. A real mistake is assuming small text will remain crisp without a slight increase in scale. For modest dress, a crew neck tee with a lowered back lets the piece peek out while keeping most coverage.
Frequently Asked Questions
Q: Will geometric fine line fairies blur faster on ribs and sternum than on forearms?
A: It depends on scale and spacing. Ribs and sternum move and flex with breathing more than forearms, so very tight fine work tends to lose definition sooner. Ask your artist about spacing and slightly stronger anchor lines if you want fine line there, and expect that touch-ups might be needed earlier than on a forearm.
Q: How should I choose between stipple dot work and light gray shading for a fairy halo?
A: Stipple shading usually ages more predictably because it leaves intentional gaps for skin to show through. Light gray fills can merge if overused. If you like a soft look but want longevity, request stipple work and discuss how dense those dots should be based on your skin type.
Q: Are finger and hand fairy tattoos worth it if I want low maintenance?
A: Not usually. Hands and fingers are high-maintenance because of constant washing and friction. If low maintenance is the priority, choose placements like the shoulder blade or outer calf. If you still prefer the hand, plan for annual touch-ups and ask for slightly bolder lines.
Q: How should I dress for a sternum or rib session so the artist has access and I stay comfortable?
A: Wear a fitted sports bra or a crop top you can lift slightly so only the tattoo zone shows. Bring a zip-up hoodie or loose button-down to wear between passes. This keeps you warm and modest while letting the artist work cleanly.
Q: Can I pair a geometric fairy with jewelry without rubbing the tattoo?
A: Yes, if you pick jewelry that frames rather than sits on the ink. For wrist and finger pieces use thin rings or a minimalist watch that sits above or below the tattoo area. For collarbone or nape accents choose delicate chains that do not rest directly on fresh ink.
