
The raw, sketchy lines of an oni mask can read violent or playful depending on how the needle hits the skin and where you place it. Sketch style lets an artist mimic pencil strokes and scratchy shading that age into texture rather than smudge. Pick a placement that suits the level of detail you want and read these specific ideas before you book your consultation.
1. Sketch Oni on Inner Forearm, Raw Linework
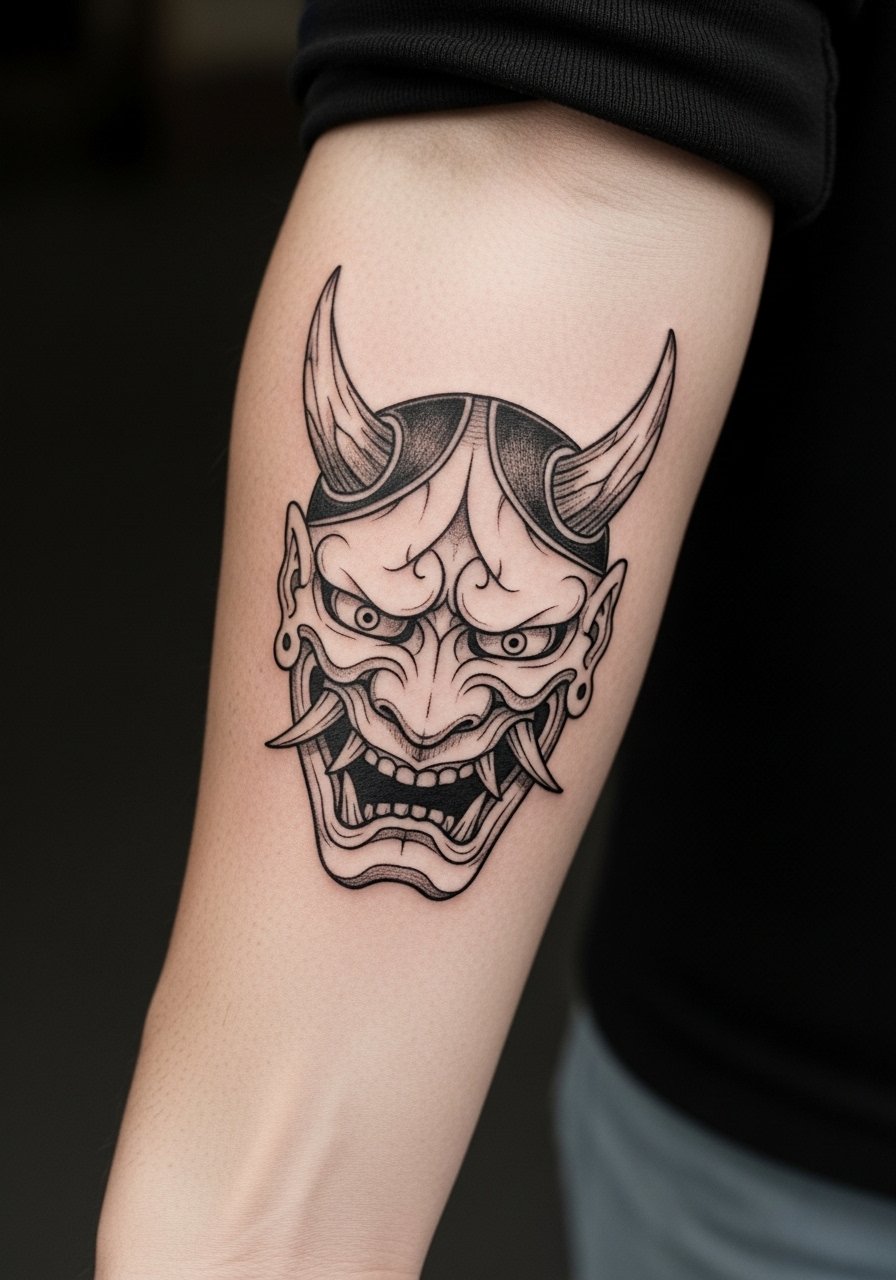
This placement shows the sketchy strokes clearly and is a good option if you want your mask readable from a short distance. Pain is moderate for most people and a typical session runs one to two hours. Tell your artist you want visible pencil strokes in the negative space and ask for slightly heavier anchors on the main contours so the sketch effect keeps structure as it fades. A common mistake is asking for ultra-fine scribble without a bolder spine, which can blur into indistinct shading by year three. Expect a light touch-up around year two if you wear your forearms in the sun a lot. For sessions, roll up a loose linen sleeve so the artist has clear access without you getting cold.
2. Half-Sleeve Oni Mask with Stipple Shading

This combines sketch linework with stipple shading to keep texture without heavy saturation. Pain on the outer upper arm is mild to moderate and sessions typically span three to five hours across two sittings. During consultation ask for stipple in shadowed areas and quick, confident whip shading in the highlights so the mask looks hand-drawn rather than airbrushed. The aging trade-off is positive because dots hold better than tiny continuous gray wash when treated respectfully. A mistake is asking for too many overlapping textures at a small scale. If you want to show it off, short-sleeve shirts that stop above the shoulder make the half-sleeve read clean in summer.
3. Sketch Oni Peeking from Collarbone
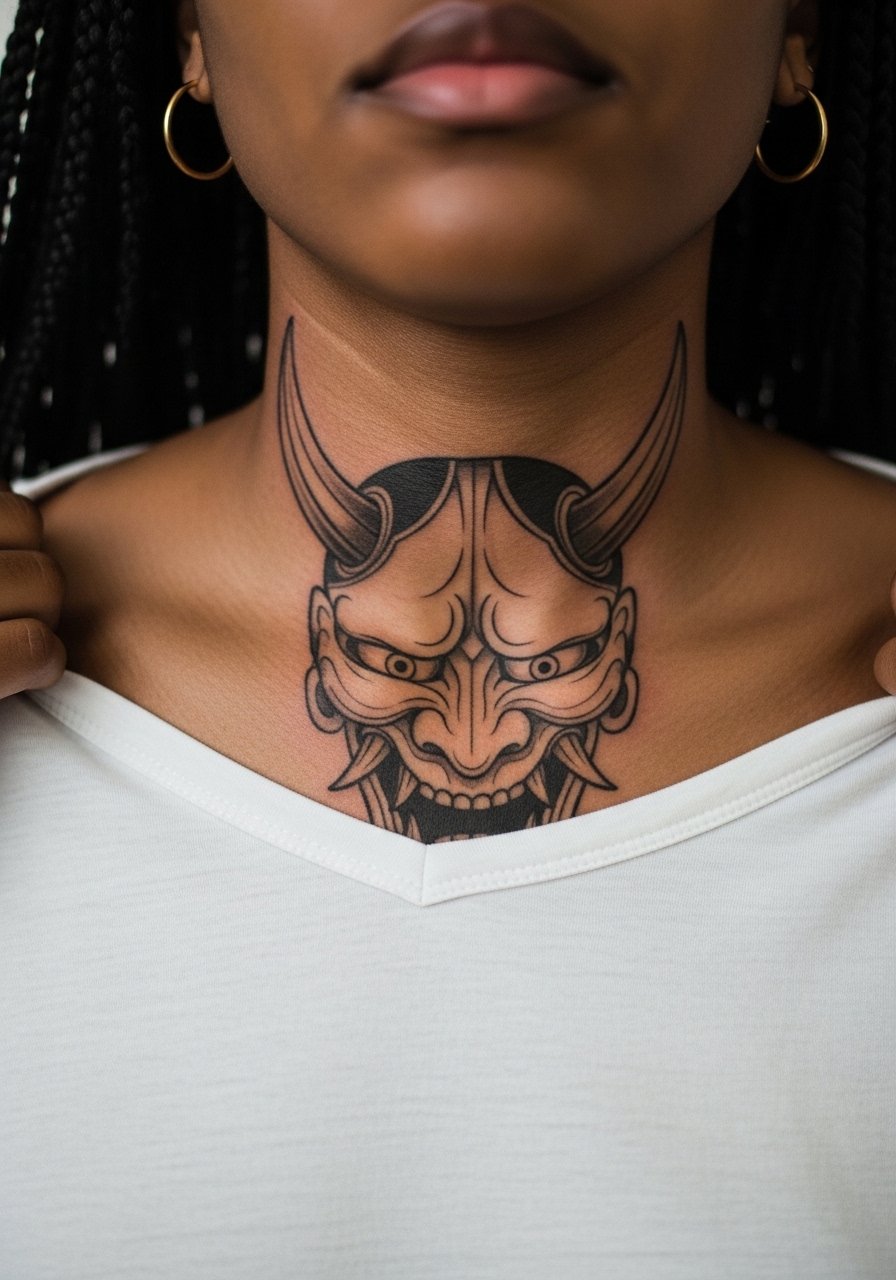
Upper chest placements require a thoughtful composition so the mask fits the collarbone curve. Pain is moderate and sessions are usually one to three hours depending on size. Ask for the mask to follow the bone line rather than sit centered on the sternum, especially if you wear low necklines and want the piece to feel integrated. Artists split on fine line near the collarbone. One camp says thin sketch lines there blur faster because of constant movement and friction from clothing. The other camp believes careful depth and spacing makes it settle well. Name both camps to your artist and ask which approach they use. For evenings out, a wide-neck blouse frames the piece without covering the details.
4. Ribcage Oni in Loose Pencil Strokes
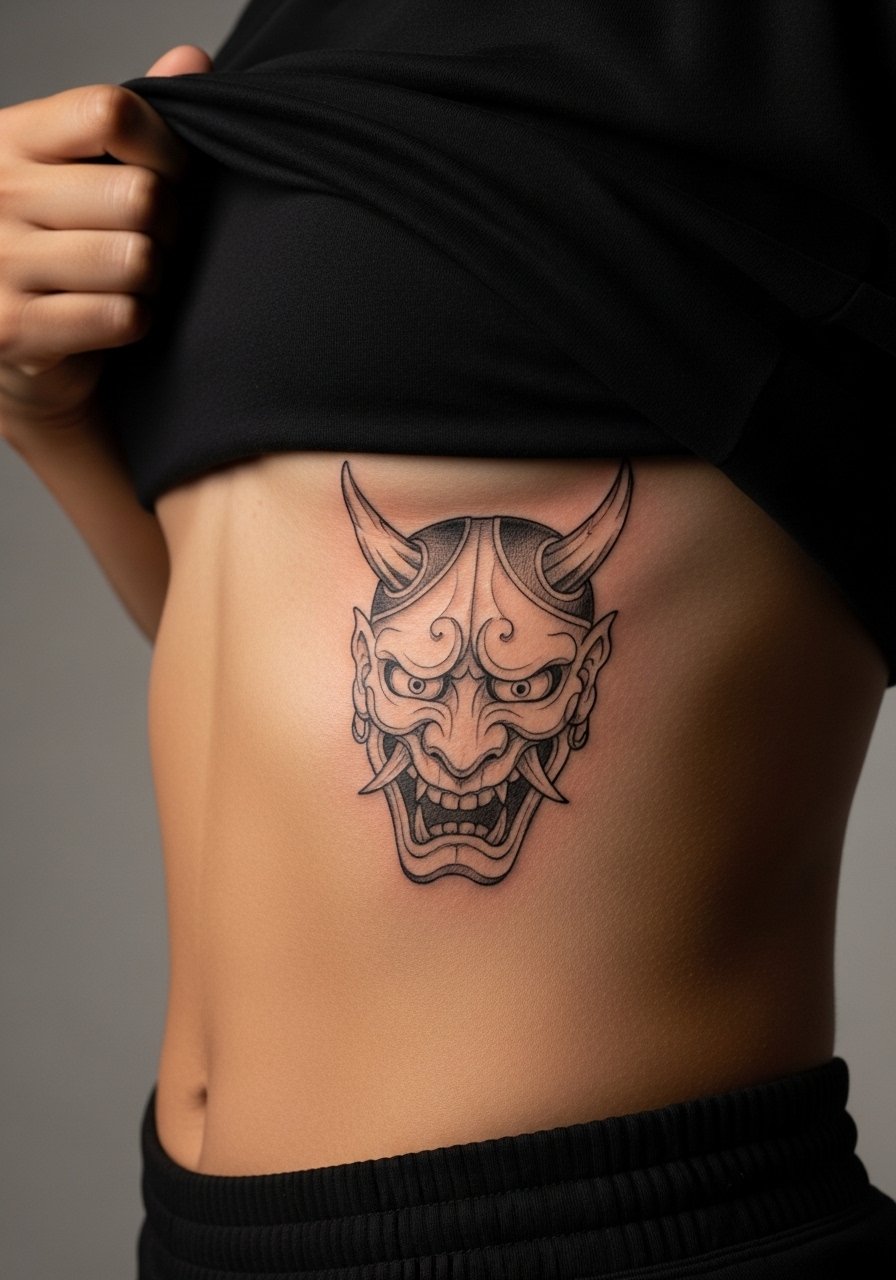
Ribs are high on the pain scale, usually a seven or eight out of ten for most clients, and sessions vary by size from one to three hours. I suggest this placement if you want a personal piece that peeks out when you choose. Ask your artist for wider spacing between delicate scribbles so the sketch feeling lasts instead of crowding into a gray block. The common mistake is pushing too many micro details into a curved area, which flattens as the skin moves. Expect touch-ups later than on wrists because the rib skin shifts, but also expect more intense initial soreness. For the session, wear a zip-up hoodie you can lift and lower without pulling on the fresh work.
5. Mini Sketch Oni on the Wrist
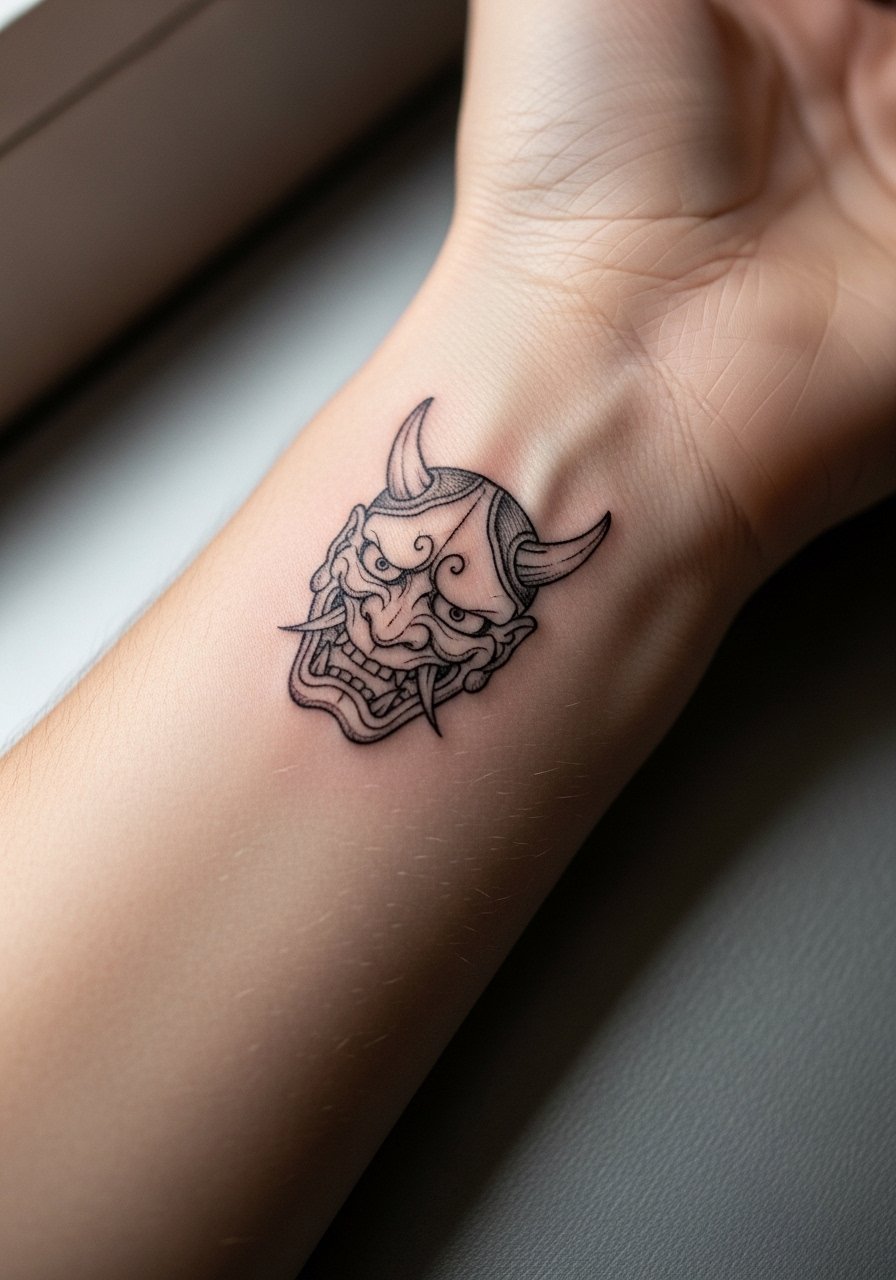
Wrist tattoos are small statements and they show brush-like sketch lines well, but they are prone to faster fading. Expect a short appointment, usually under an hour, with quick, controlled needlework. Tell your artist you want a stronger outer anchor line around the sketch to protect the internal scribbles from spreading. The usual mistake is getting a design too small and too dense here, which leads to early blurring. Because wrists see frequent washing and movement, plan a touch-up at year one or two if you want crisp edges long term. A great way to highlight a wrist piece is with stacked dainty bracelets like a thin chain bracelet that sits just above the tattoo without covering it.
6. Thigh Placement with Rough Cross-Hatching
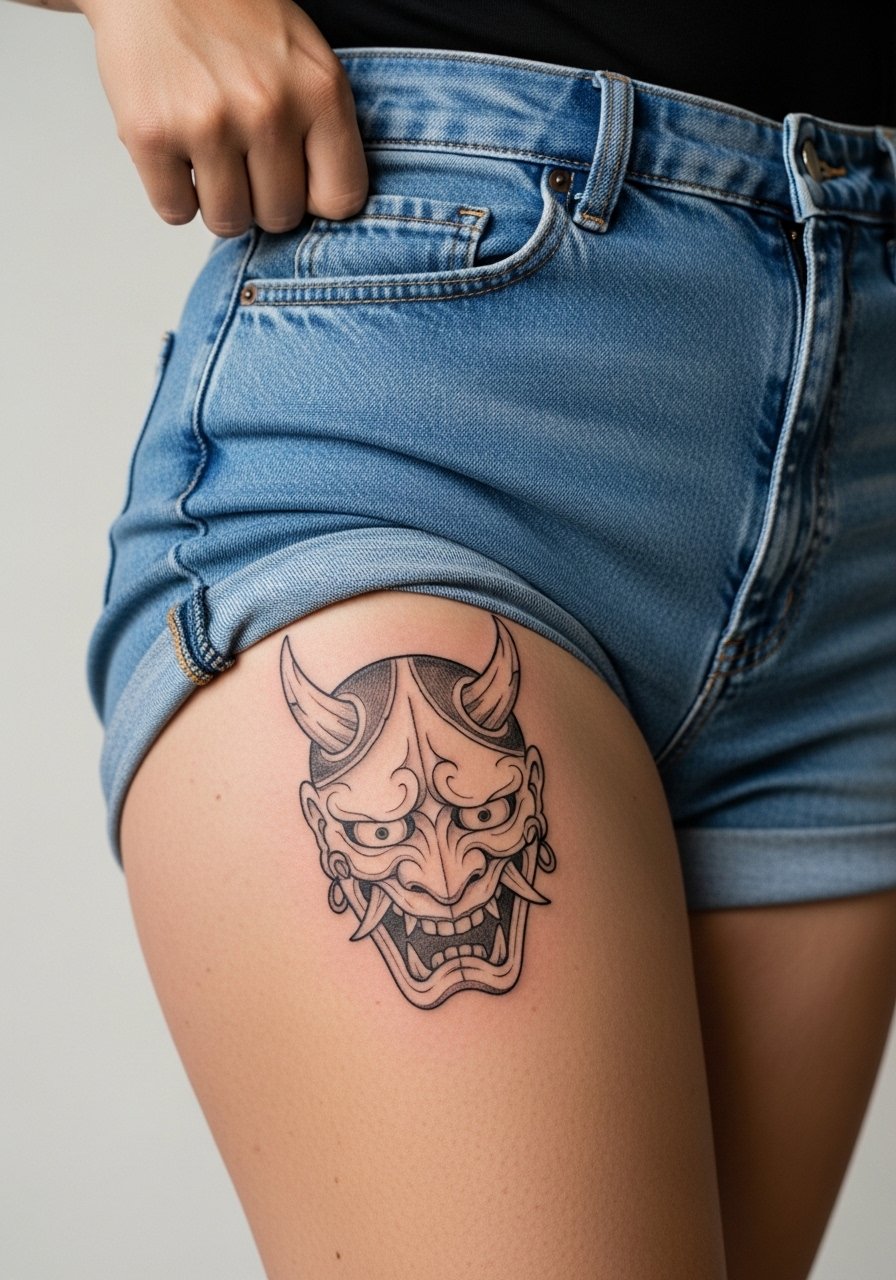
The thigh accepts texture and bold sketch strokes well and pain here is usually lower than ribs or hands. Sessions for a medium-sized mask range one to three hours. Ask your artist for intentional cross-hatching that follows muscle curves to add motion. A common mistake is too much contrast in the first session, which can flatten the sketch texture once healed. Expect the best longevity if you avoid constant friction from tight waistbands while the piece heals. For the appointment, slide into high-waisted denim shorts so the artist can expose the upper thigh without you getting cold.
Pre-Session Essentials
The first six ideas include wrists, ribs, forearms, and thigh work, and those placements ask for different prep to keep the session smooth and the sketch detail intact.
-
Stencil transfer paper kit. Lets you preview how the sketch lines land on curved areas like the ribcage and forearm before the needle touches skin.
-
Thin topical numbing cream. Applied correctly it can ease wrist and rib sensitivity for appointments that run long without dulling the artist's ability to see shading.
-
Breathable protective film roll. Keeps fresh wrist or hand pieces safe from daily friction while showers and typing happen the first few days.
-
Fragrance-free gentle body wash. Cleans areas like the thigh and forearm without stripping moisture from the delicate sketch linework while it heals.
-
Aquaphor healing ointment. A thin layer in the initial days supports fine sketch strokes without suffocating the needle channels.
7. Shoulder Blade Oni, Loose Composition
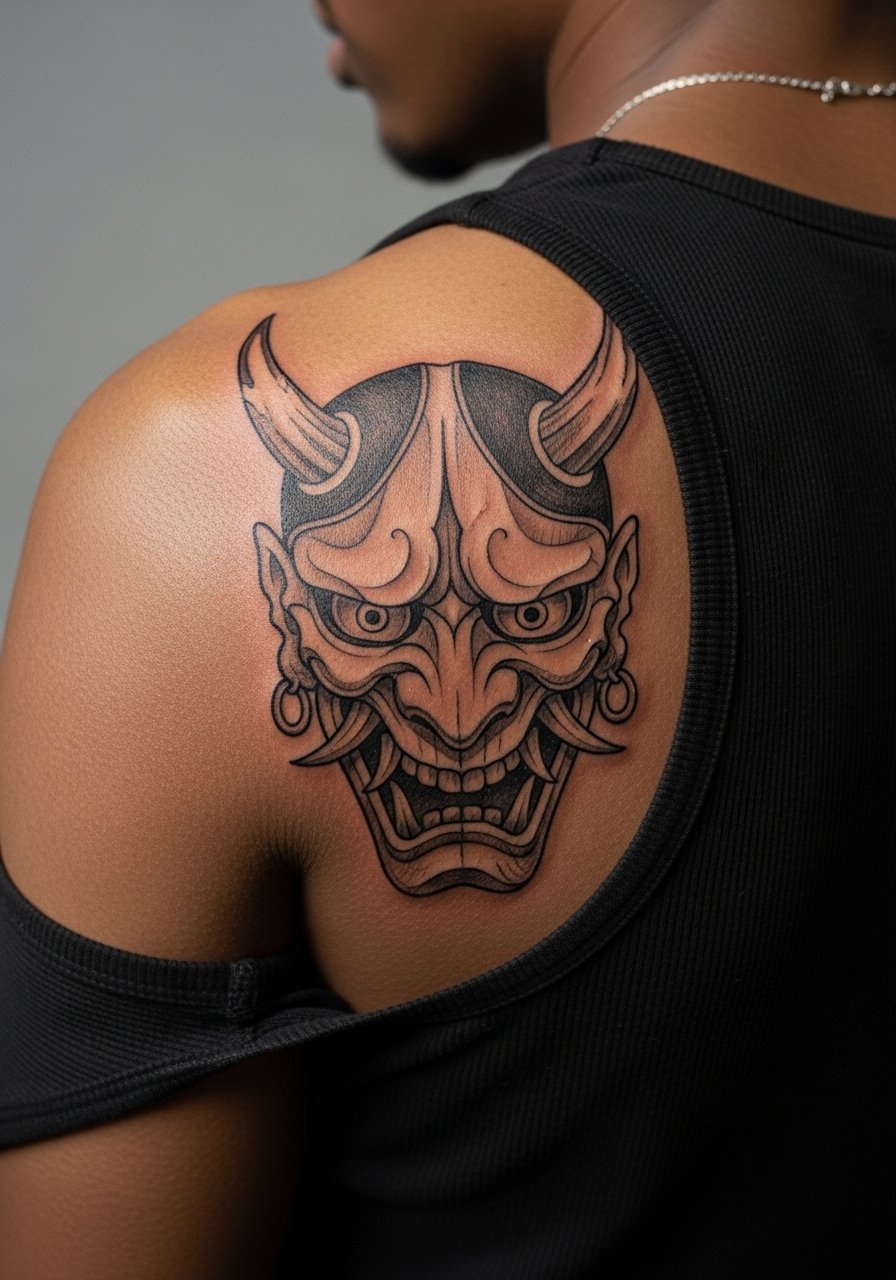
The shoulder blade is forgiving for loose sketch composition because movement helps the lines read as intentional texture. Pain is moderate and sessions are usually one to two hours. Ask for a composition that uses motion of the scapula so the mask appears to shift when you move. A mistake I've seen is centering the design too squarely on the blade, which reads static and can distort with muscle changes. Longevity is good if you avoid heavy sun on that zone. For showing it off, a tank top with thin straps frames the area without hiding contour work.
8. Sketch Oni Wrapped Around the Calf
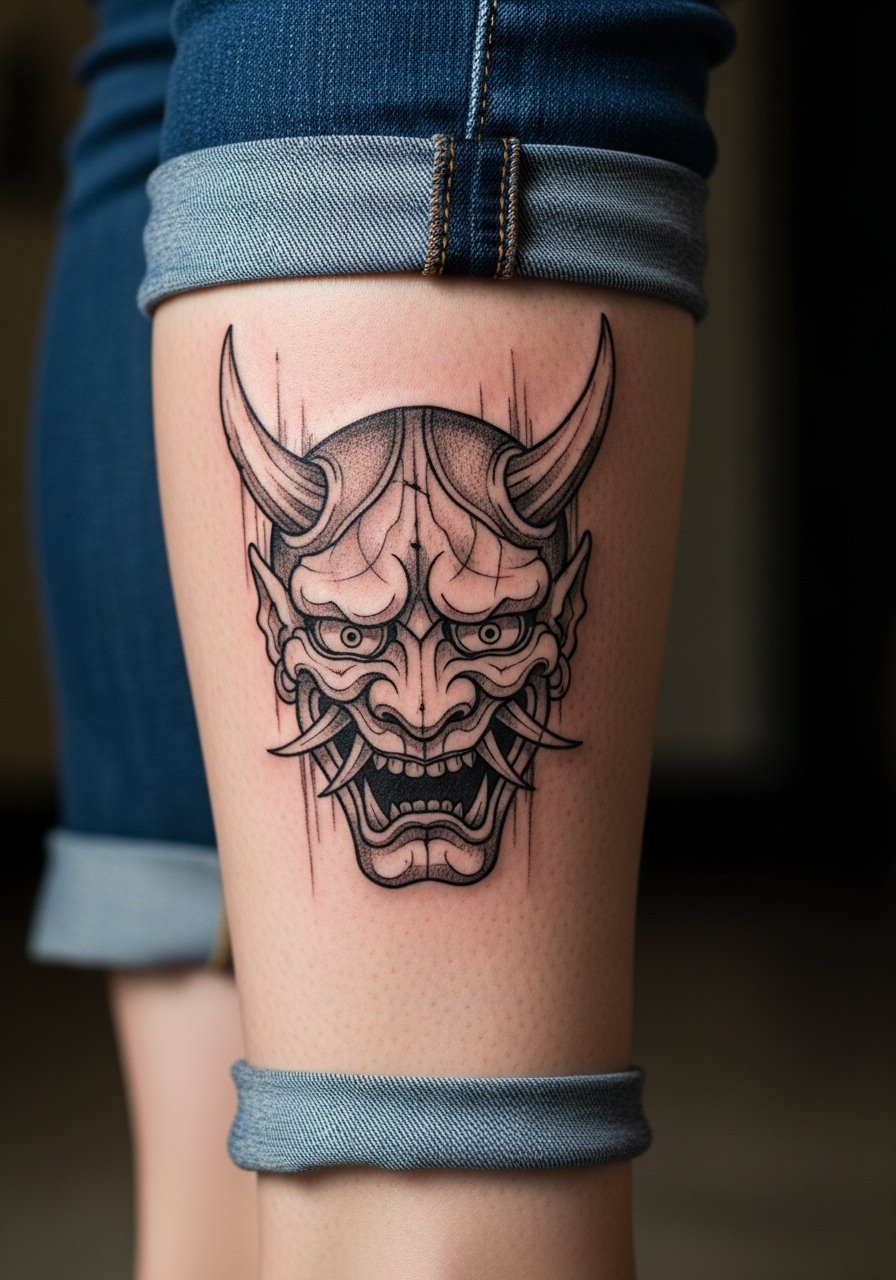
Calf tattoos handle vertical composition and sketch motion well, and the area is lower on the pain scale. Sessions for a half-wrap are two to three hours. Tell your artist to plan line anchors where the piece wraps so the visual flow reads continuous from multiple angles. The common error is compressing detail into the curve where pants rub, which accelerates fading. Healed texture on the calf stays readable, but heavy sun or abrasion from boots changes the contrast faster. Wear rolled jeans or a pair of sandals when showing this off so the wrap reads without clothing interference.
9. Sketch Oni on the Neck Side

Neck pieces age with exposure and movement, and pain is higher than the forearm. Sessions are typically under two hours for compact pieces. When you book ask your artist about needle depth and spacing because the skin there is thin and lines shift differently than on the arm. There is an active debate about neck fine line permanence. One side warns that constant sun and friction blur thin strokes quickly. The other side counters that with deliberate spacing and deeper anchors, sketch lines settle acceptably. Ask your artist which side they practice and why. For discreet show-off options, a wide-neck tee covers or reveals the piece as you choose.
10. Forearm Negative-Space Oni with Scratch Shading
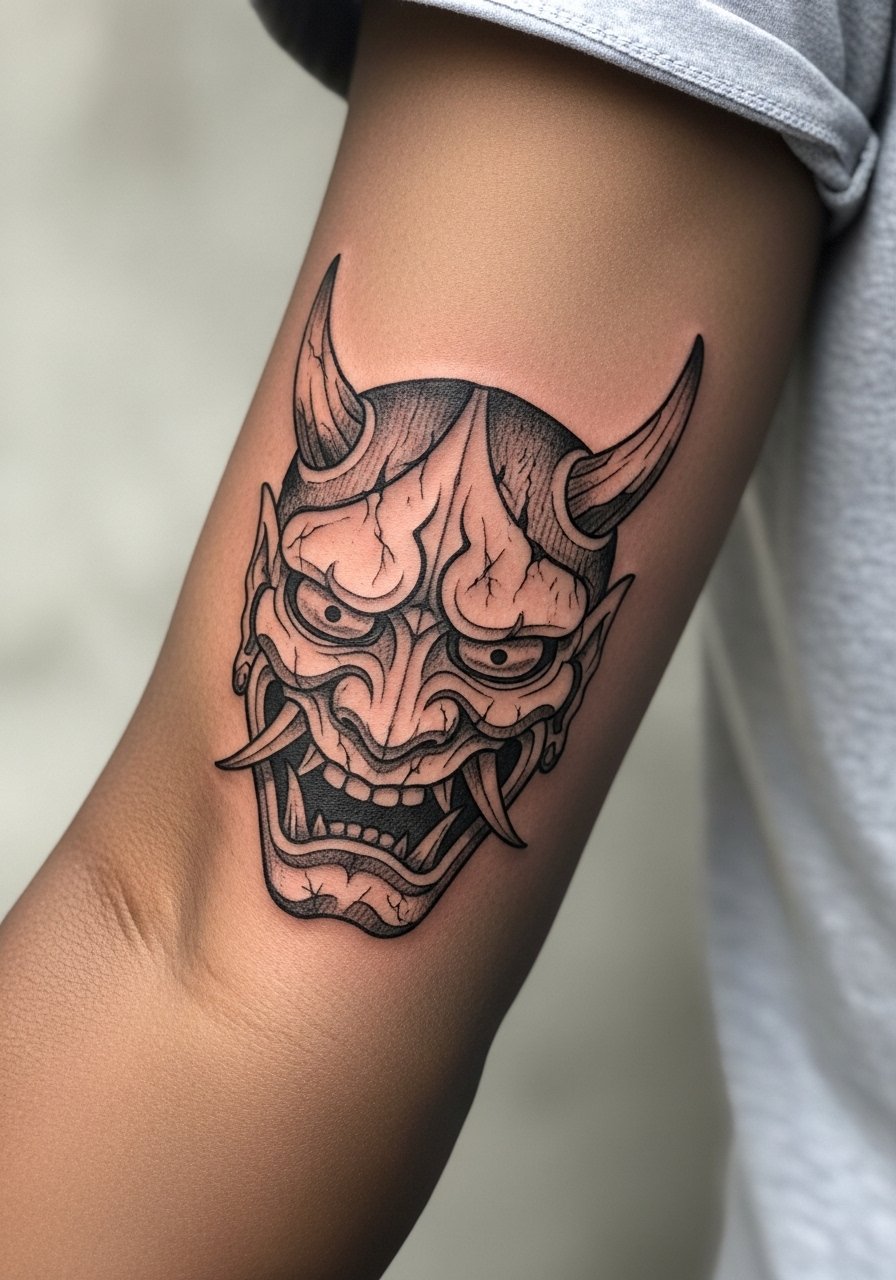
Negative-space technique helps sketch masks breathe and keeps the center clear so the face reads well even as edges soften. Pain is moderate and expect one to two hours for a medium layout. During consult ask for bold negative anchors around the eyes and mouth so the face keeps contrast as the hatched strokes fade. A typical mistake is overdoing gray wash between scratches, which removes the hand-drawn energy. Healed reality at six months shows clear texture and at two years the negative space still reads as separation if you use sunscreen. Pair this with a rolled sleeve linen shirt to show the negative-space contrast when you want to.
11. Sketch Oni Overlaid with Floral Line Work

Mixing florals with an oni mask softens the subject while keeping the sketch energy. Pain on the upper arm is mild and sessions range one to three hours depending on floral density. Tell the artist you want the flowers drawn as loose sketch lines that weave through the mask rather than sitting on top. The mistake is asking for solid, filled florals that compete with the scratchy mask. For aging, fine floral line will need occasional touch-ups if placed in high-friction zones. Complement this design with a short-sleeve cotton shirt so the flowers peek out without crowding the mask.
12. Sketch Oni as a Collarbone Anchor Piece
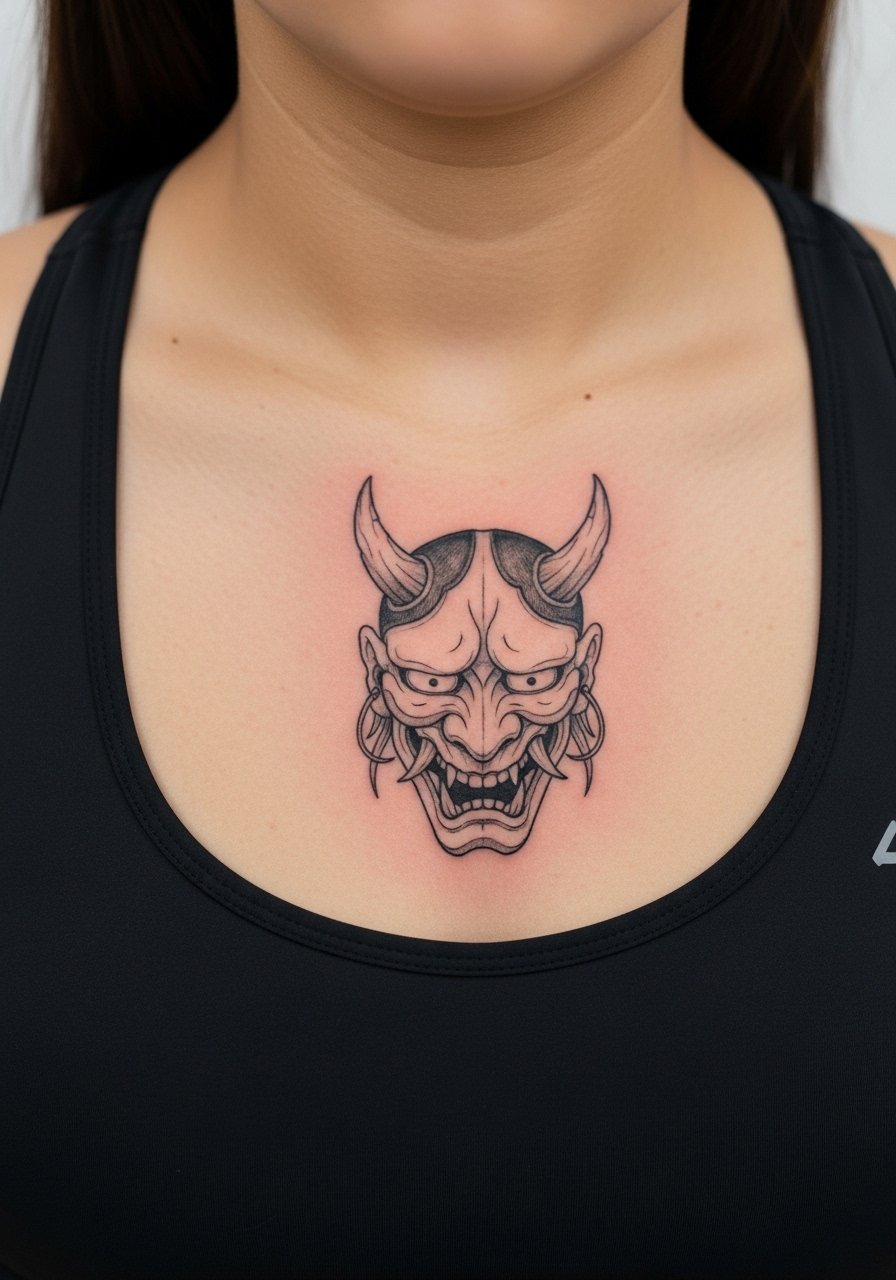
A collarbone anchor design works as a focal point for chest pieces and reads well when slightly offset. Expect moderate pain and one to two hour sessions depending on size. Ask your artist to plan the composition so it follows the clavicle angle, which prevents distortion when you move. A frequent error is compressing the sketch texture into a narrow band that looks static after healing. If you wear necklaces, choose a thin chain so it sits above or below the mask rather than rubbing. A thin chain pendant necklace complements without competing.
13. Finger-Edge Oni Mask Accent
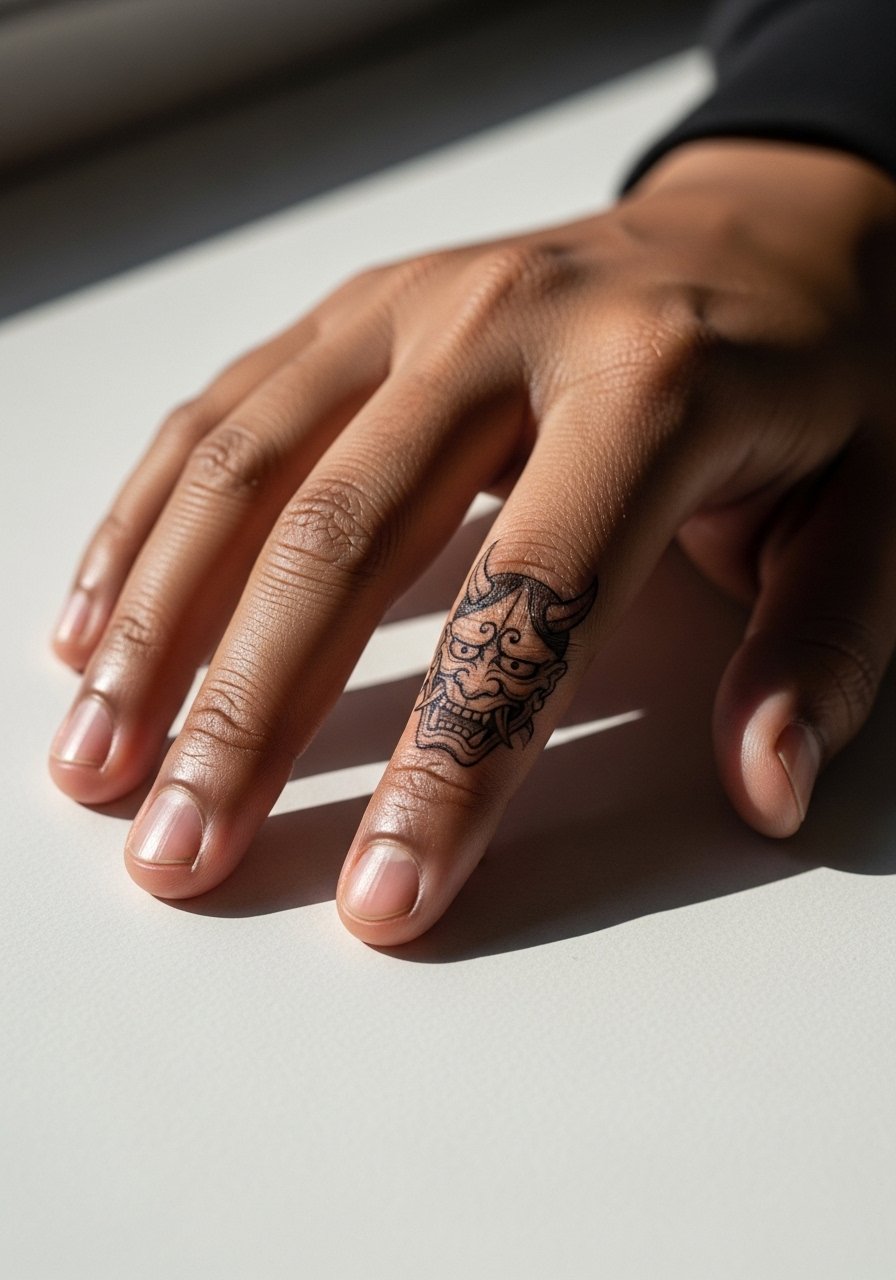
Fingers age tattoos fastest because of washing and constant motion, and pain is sharp though brief. Sessions are short but expect significant fading and a high touch-up likelihood. Ask for thicker anchor lines at the outline and accept that you will likely need a touch-up at year one. A common mistake is planning too much internal detail in a width that cannot hold. If your job requires a polished hand, consider whether a finger piece fits your career path before booking. Show it off with fine rings that sit above the tattoo to avoid rubbing directly on the ink.
14. Sketch Oni on the Back of the Arm, Posterior Tricep

The back of the arm sees less sun and can protect sketch lines, but touch-ups are common because of friction from sleeve seams. Pain for this placement is moderate and sessions range one to two hours. Tell the artist to leave breathing room between hatch lines so the piece does not get lost once the arm relaxes. The error I see is overcompacting the texture near the fold, which leads to early merging. For session comfort, wear a tank top you can lift or lower easily so the artist can reach the area without tugging on fabric.
15. Sternum Sketch Oni, Central Detail
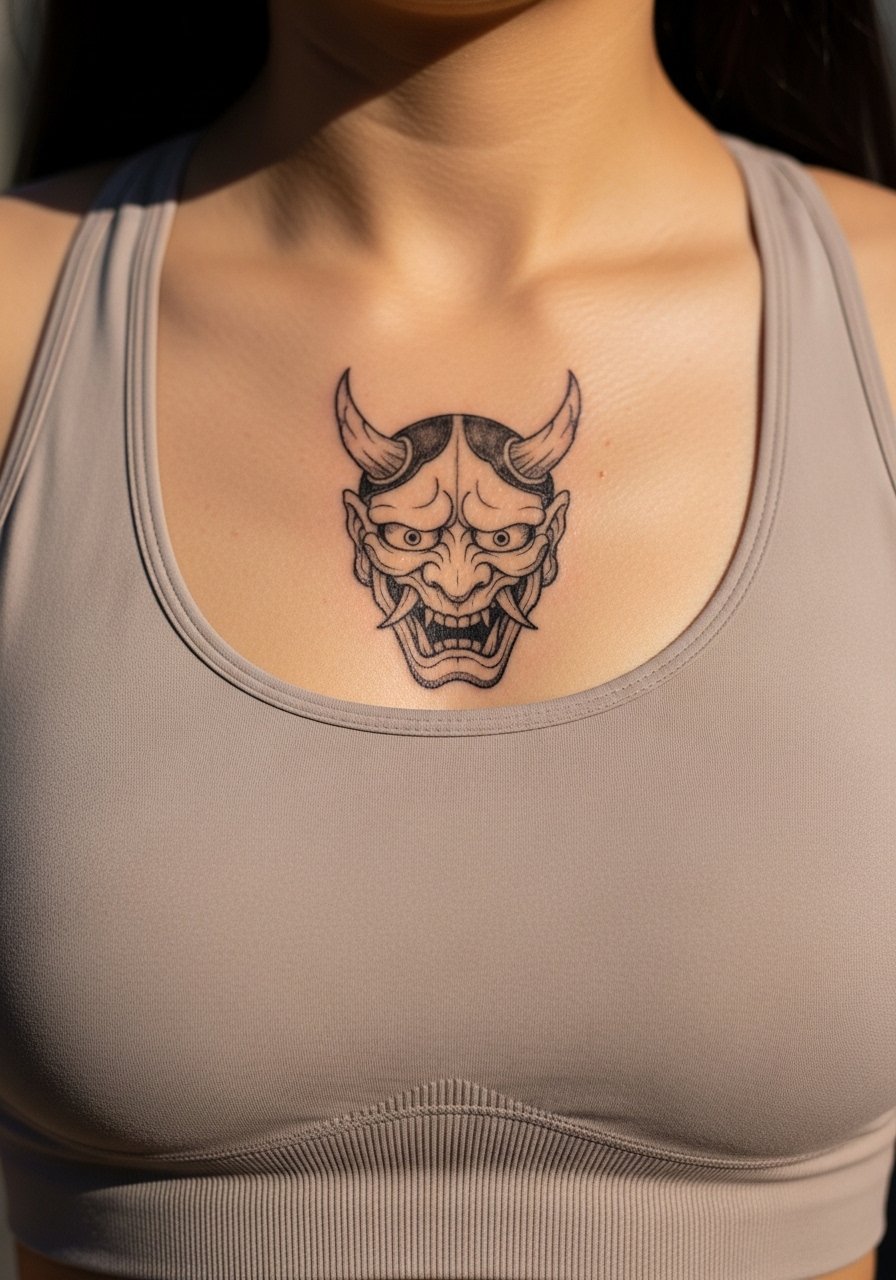
Sternum work is sensitive and often painful. Sessions are one to three hours depending on how much central detail you want. Ask for broader anchor lines around the key facial features so the sketchy interior can fade gracefully without losing expression. There is debate in the community about fine detail in this area. One side says the motion and chest expansion blur thin strokes quickly. The other says that with proper spacing and needle depth, detail can last. Bring this up in the consultation and ask how your artist handles chest movement during healing. Wear a sports bra you can lift or unzip for the session to avoid uncomfortable undressing.
16. Sketch Oni Across the Spine

Spine pieces look dramatic and allow linear sketch strokes to follow the body axis. Pain is high around vertebrae and sessions usually run multiple hours if long. Request that the darkest anchors align with the spine so the vertical flow remains readable even as cross-hatching softens. A mistake is overfilling lateral texture that competes with the vertical motion. Healed results are strong if you avoid tight waistbands that rub. For appointments use a loose button-down shirt you can pull aside without removing clothing entirely.
17. Calf Oni with Motion Lines
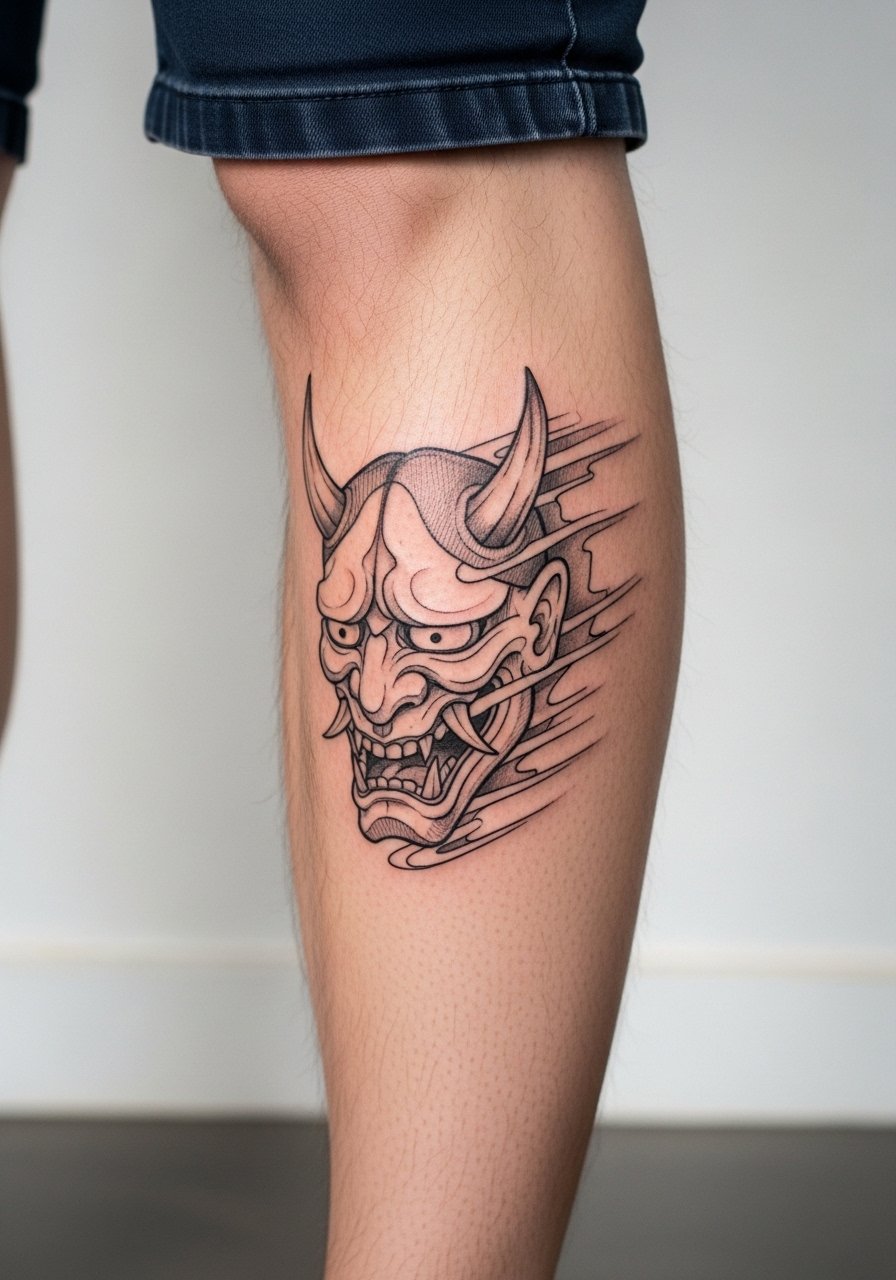
Motion lines make the sketch mask feel alive and the calf is a forgiving zone for this aesthetic. Pain is lower and a session is often around two hours. Ask your artist to curve the strokes with muscle anatomy so the disguise reads as movement rather than arbitrary scribble. A common mistake is placing motion lines that collide with shoe friction areas, which dims edges faster. For showing the piece off, wear a pair of rolled jeans or shorts so the motion reads without interference.
18. Inner Bicep Oni in Light Wash
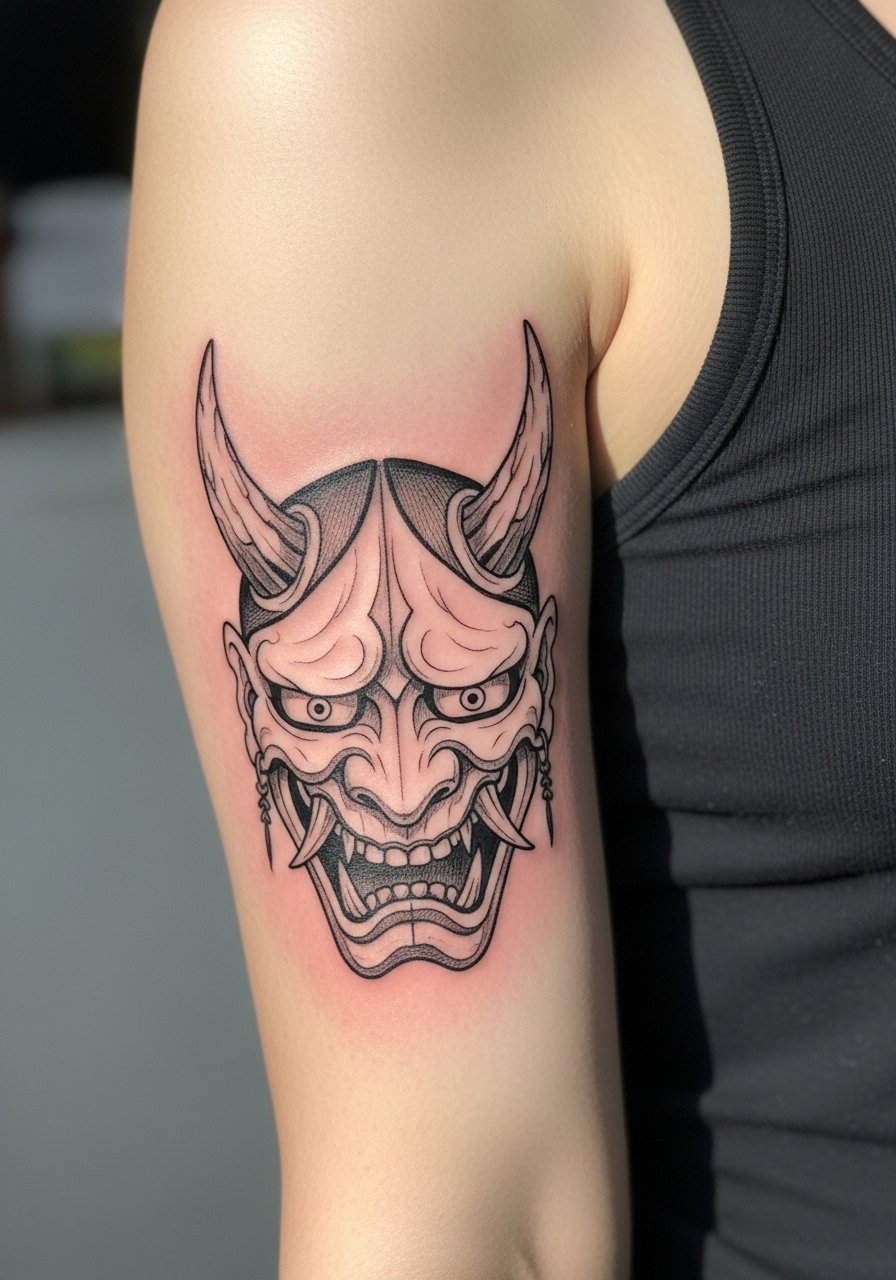
The inner bicep is intimate and accepts soft wash and sketch lines, but it can be sensitive for many. Sessions are often one to two hours. During the consult, ask for softer dot gradients rather than heavy gray fills to keep the drawing quality. A typical mistake is asking for dense saturation where the skin stretches more, which causes pooling or blowout. Expect a touch-up within a couple of years if you frequently flex that muscle. For session ease, wear a sleeveless top that lets you lift the arm without feeling exposed.
19. Ankle Oni with Tiny Scribble Detail
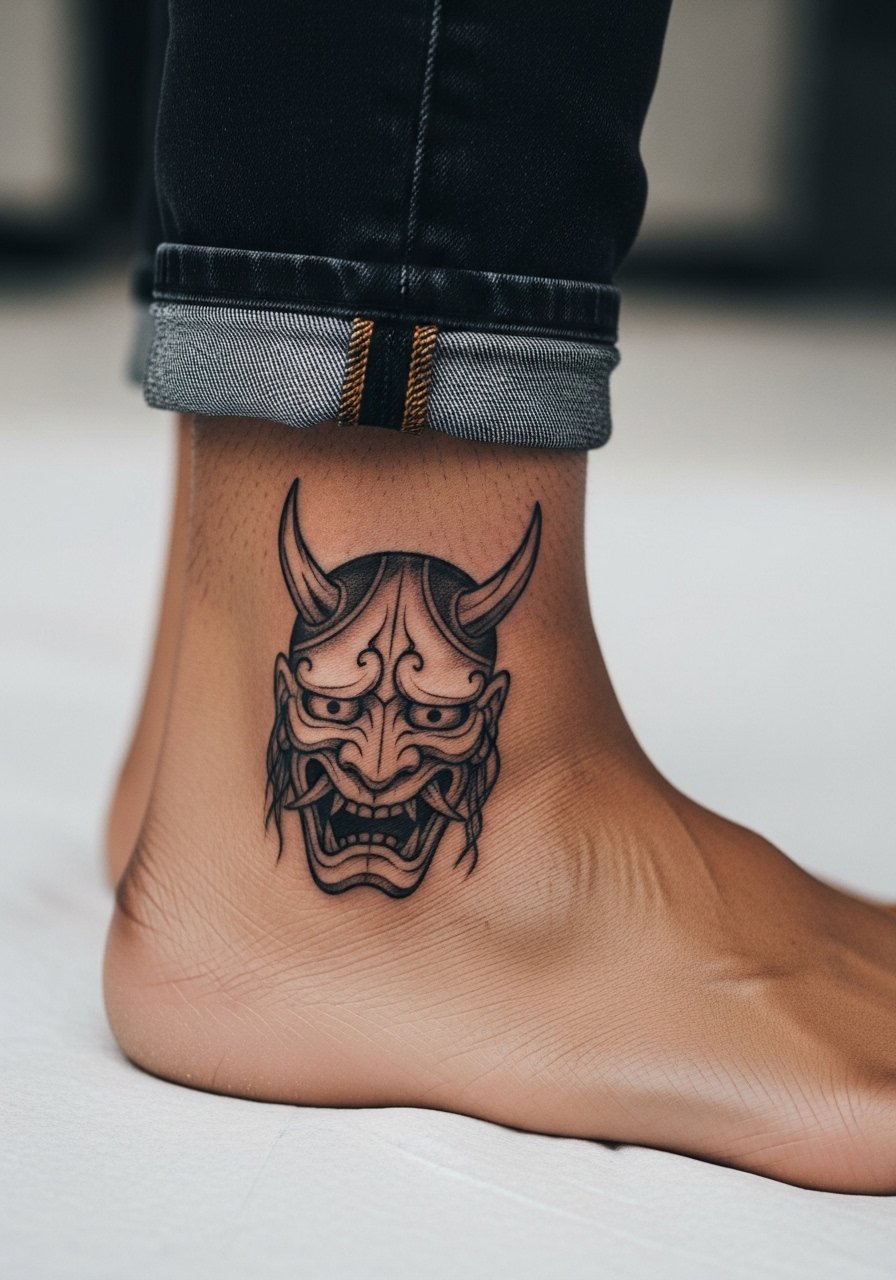
Ankle pieces are small and vulnerable to abrasion from socks and shoes, and they hurt more than you expect. Appointments for small ankle masks are usually under an hour. Ask for slightly bold outline anchors so the scribble interior has protection from early friction. The common error is requesting a dense interior at a tiny scale, which disappears quickly. If you want longevity, plan for a touch-up after the first year. When wearing shoes pick low-cut socks or sandals so the ankle tattoo does not rub.
20. Upper Thigh Oni with Negative Space Highlights

Upper thigh allows for larger scale sketch work and negative highlights that read like sketches on paper. Pain is generally low and sessions vary from one to three hours. Tell your artist to space highlights deliberately so the piece keeps the pencil-on-paper illusion over time. A mistake is cramming detail into a curved upper thigh area near the hip band, which can be irritated by waistbands. For the studio wear, put on high-waisted shorts you can adjust so the artist has access without unnecessary tugging.
21. Sketch Oni on the Lower Back

Lower back pieces let you use sweeping sketch strokes across a broad canvas with moderate pain. Sessions usually take one to three hours. Ask for anchor strokes where the lower back curves so the piece keeps its expression when you sit or bend. The mistake I see is over-detailing near the waistband where friction and clothing abrasion can dim lines. For showing it off, choose low-rise or high-waisted combos that let the tattoo be visible without rubbing. A cropped top works well for that balance.
22. Sketch Oni with Geometric Frame on the Arm
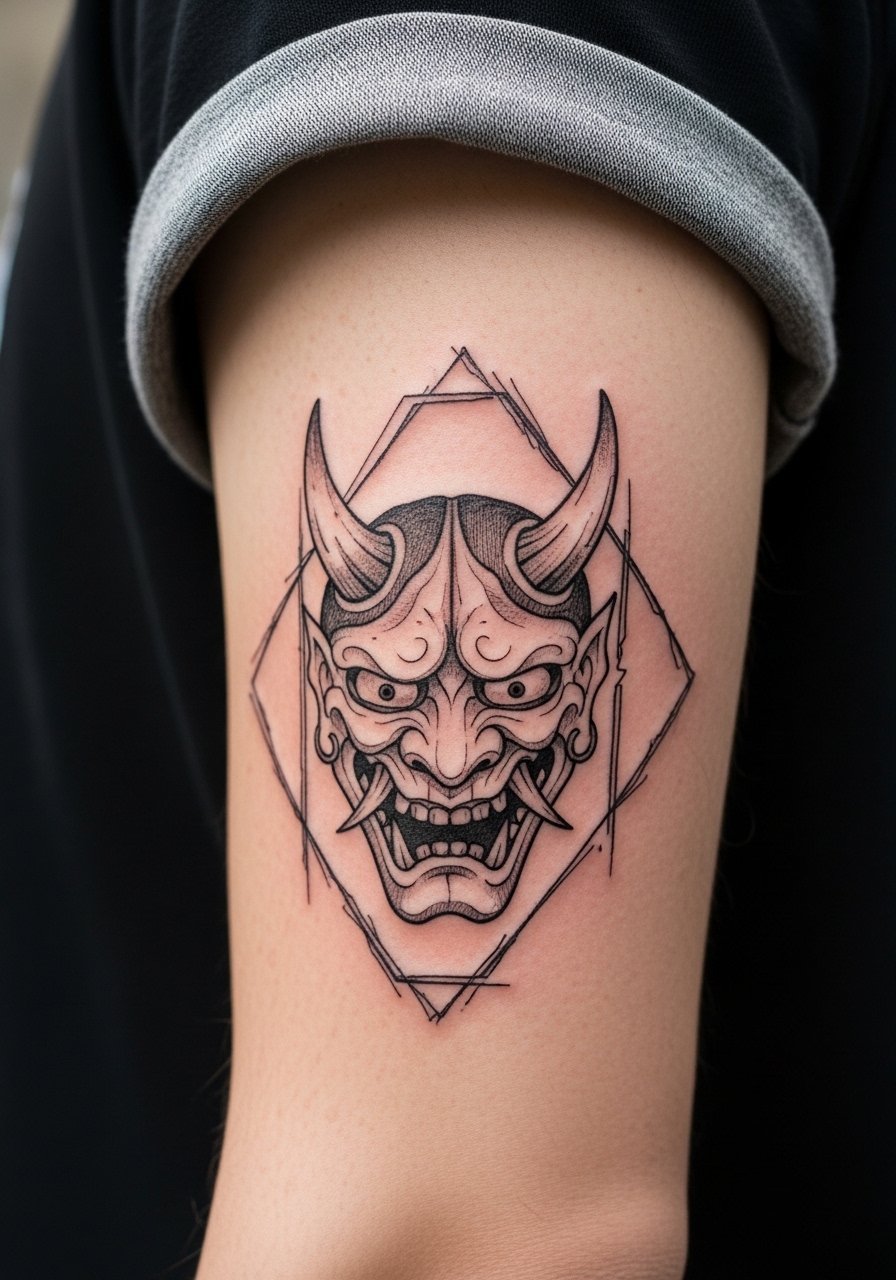
Adding a geometric frame gives the sketch a tidy boundary and keeps the eye on the mask. Pain is mild on the outer arm and sessions are one to two hours. Ask the artist to place the frame anchors so the sketch can bleed slightly into negative space for a hand-drawn feel. A typical error is a frame that is too tight, which traps texture and reads flat when the lines soften. A short-sleeve button shirt worn rolled up shows the frame without making it feel boxed in.
23. Sketch Oni on the Hip with Floral Tassels

Hip tattoos are sensual and private, and the skin there handles sketch texture nicely if the design avoids heavy fill near seams. Pain is moderate and sessions vary by size. During consultation request tassel strokes that hang away from the waistband to avoid rubbing. The mistake is compressing detailed work into the exact spot where jeans sit. If you plan to wear swimsuits, consider how the piece will appear in a high-cut bottom. A high-waisted bikini bottom will show the upper hip without irritating the tattoo while it heals.
24. Sketch Oni Around the Shoulder Cap
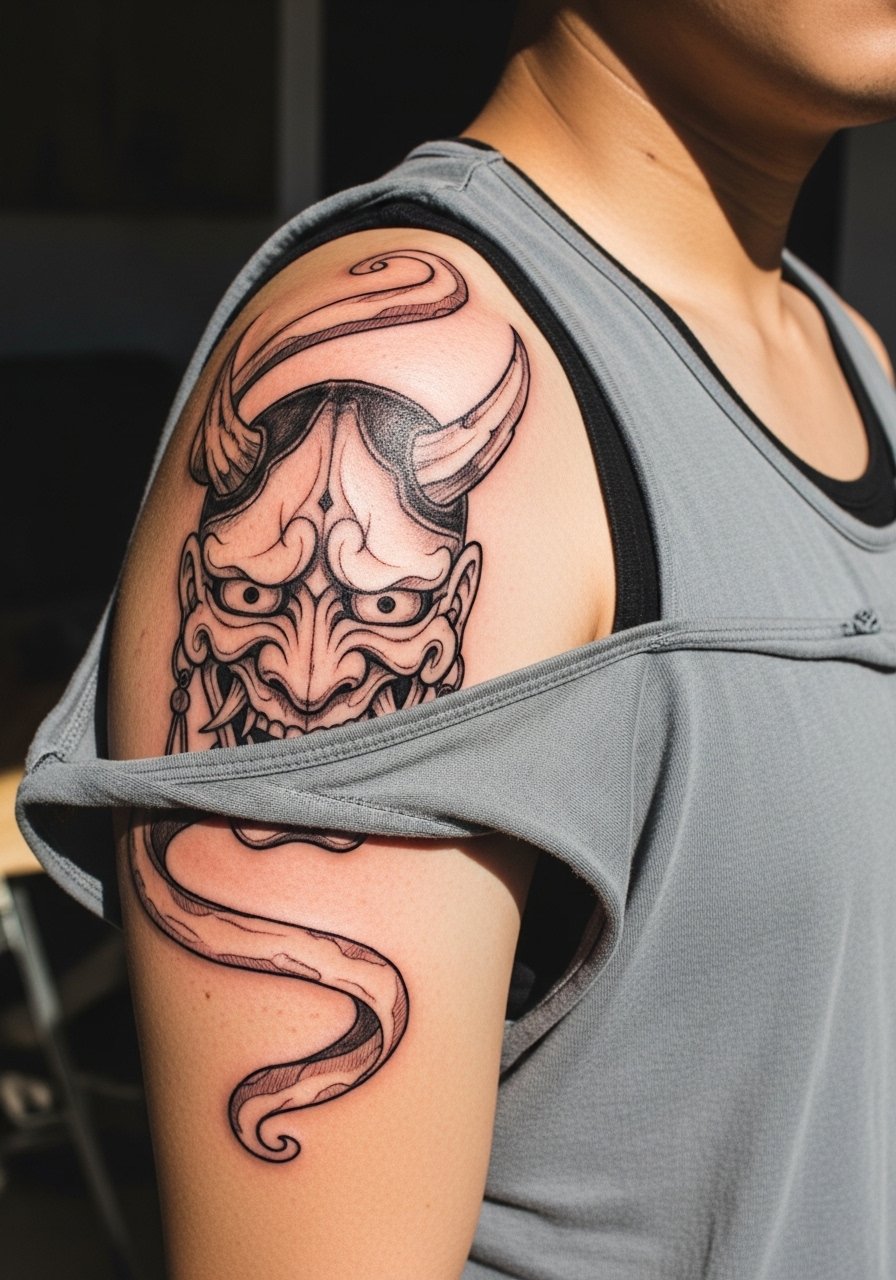
The shoulder cap frames rounded sketch strokes well and hides subtle texture under clothing less often than the inner arm. Pain is mild and sessions are typically one to two hours. Ask for the lines to follow muscle shape to keep the illusion of motion as you move. The common error is forgetting to plan around jacket seams which can abrade edges. For the appointment, wear a loose tank top that you can shift without removing clothing.
25. Hand-Adjacent Oni on the Wrist Cuff
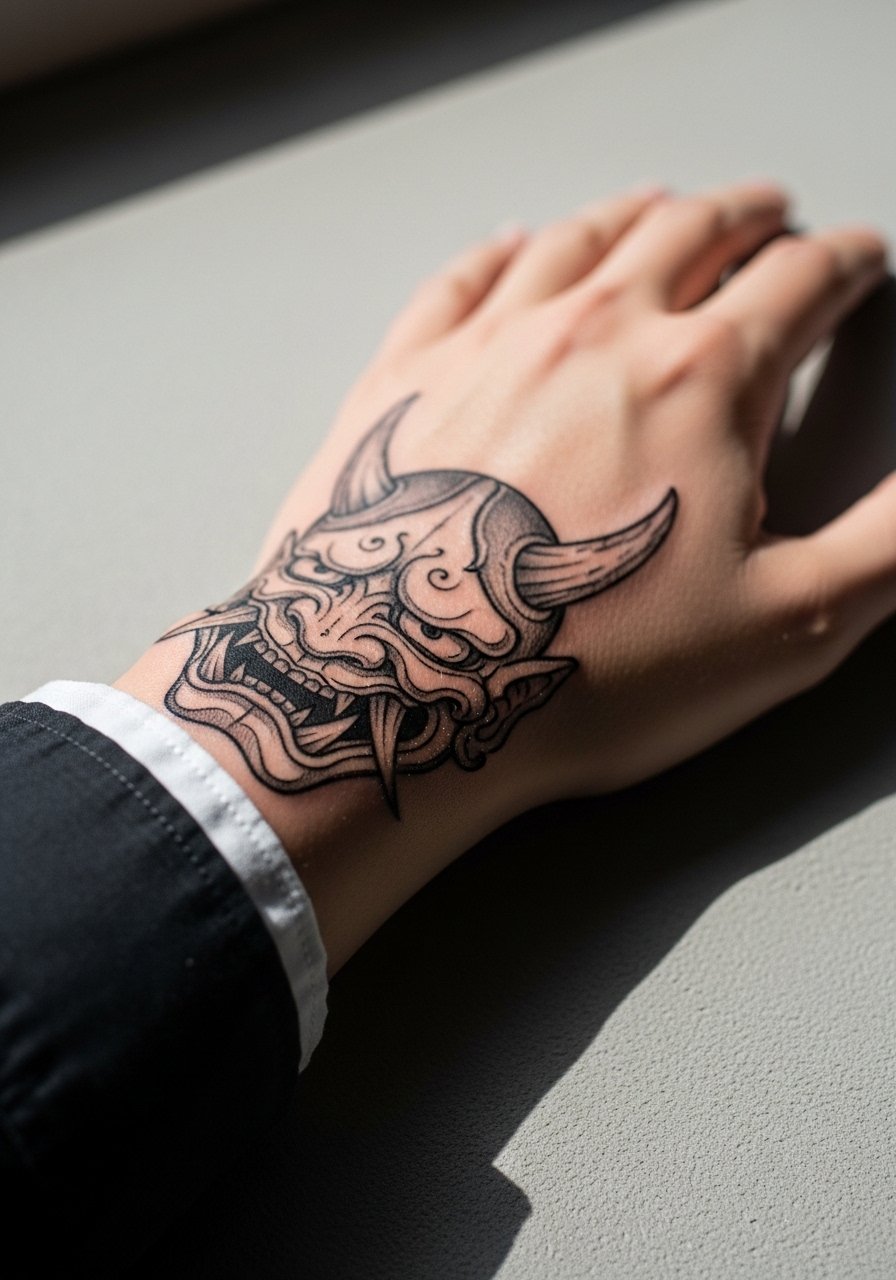
Wrist cuff and hand-adjacent work is visible and vulnerable to washing and sun. Pain is sharp and healing can be uneven. Short sessions work best here, and plan for touch-ups. Request slightly thicker outer lines for a cuff element and accept that the internal sketch will lighten with time. A frequent mistake is overcomplicated interior details in such a small, exposed area. Style it with a minimalist watch that sits above the cuff so the tattoo breathes and the accessory does not rub the ink directly.
26. Sketch Oni as a Sleeve Accent with Negative Clouds
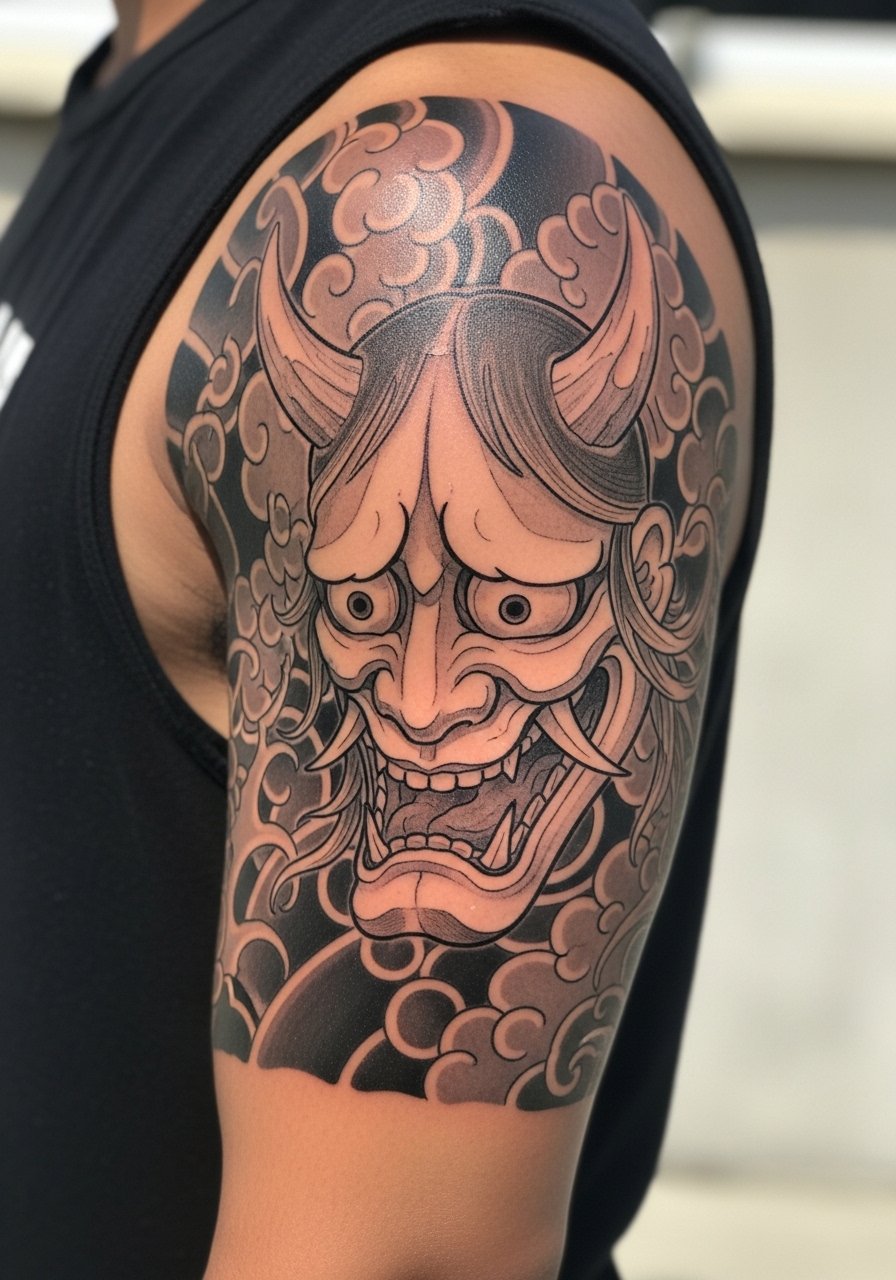
Using an oni mask as a sleeve accent lets you balance bold anchors and airy sketch clouds across the arm. Pain and session time depend on sleeve density and usually require multiple sittings. Ask your artist to place negative clouds strategically to protect central sketch lines from merging. The mistake I often see is cramming too many focal elements without breathing room, which makes the sleeve read busy as it heals. If you plan a sleeve, discuss long-term spacing and touch-up cadence with your artist during the first consult to set expectations.
27. Small Sketch Oni Behind the Ear, Subtle Edge

Behind-the-ear placements are tiny and discreet, and they need careful framing so the mask reads like a sketch rather than an accidental mark. Pain is sharp and quick. Sessions are short. Always describe the exact spot as behind the ear below the hairline during booking because placement matters for both visibility and healing. A mistake is expecting big detail in this micro zone. Keep it small and intentional. Be aware that neck-adjacent tattoos may affect some professional settings, so weigh that before committing.
Frequently Asked Questions
Q: Will sketch-style linework blur faster than solid blackwork on areas like the forearm and wrist?
A: From what I have seen, sketch linework can blur faster if the design relies entirely on ultra-fine strokes with no anchors. Ask your artist to include bolder anchor lines or negative-space breaks so the sketch reads even as hairline strokes soften. The wrist needs particular protection from friction.
Q: How should I prep for a ribcage sketch oni session to reduce pain and preserve detail?
A: Rest well, hydrate, and eat a good meal before you sit. Wear clothing that lifts rather than removes so the artist can expose only the rib zone. A zip-up hoodie or a loose cropped top works for quick access and keeps you comfortable before and after the session.
Q: If I want a sketch oni with floral overlays, what should I ask the artist in the consult?
A: Explain you want the flowers to be sketch-style line work that weaves through the mask rather than opaque florals placed on top. Ask them to show portfolio examples of sketch florals next to masks so you can see how they balance density.
Q: Are touch-ups common for hand and finger sketch tattoos and how often should I expect them?
A: Yes, touch-ups are common for hands and fingers because of constant use and washing. Plan on a touch-up within the first year, and then expect minor maintenance every two to three years depending on exposure.
Q: How do I find an artist who understands sketch style without following a specific handle or name?
A: Look for portfolios with keywords like "sketch style," "pencil effect," "whip shading," and "stipple texture" in directory searches, or browse shop portfolios on local studio sites. Visiting conventions and asking for recommendations at shops you trust is also a reliable path.
