
Fine line tattoos are trending online, but the ribcage has its own rules. The skin here moves with breath and sits close to bone, so what looks delicate on a phone often needs bolder linework or strategic spacing to last. Below are 21 traditional rib designs that take the canvas seriously, with notes on pain, aging, what to ask your artist, and how to show each piece off without stressing the healing window.
1. Snake Coiling Down the Side Ribs

I've seen the snake design chosen for exactly one reason, it moves with the body. Expect a seven out of ten on pain because the needles travel close to bone, and plan for one to two sessions depending on scale. Tell your artist you want bold linework with controlled saturation where scales meet the curve so the pattern reads while you breathe. A common mistake is shrinking the snake to avoid pain, which turns the curve into a cramped blob as the skin stretches. For showing it off, a cropped tank top black frames the side without distracting from the motion. Touch-ups at year three are normal if you pick very fine scales.
2. Roaring Lion Head on Upper Ribs
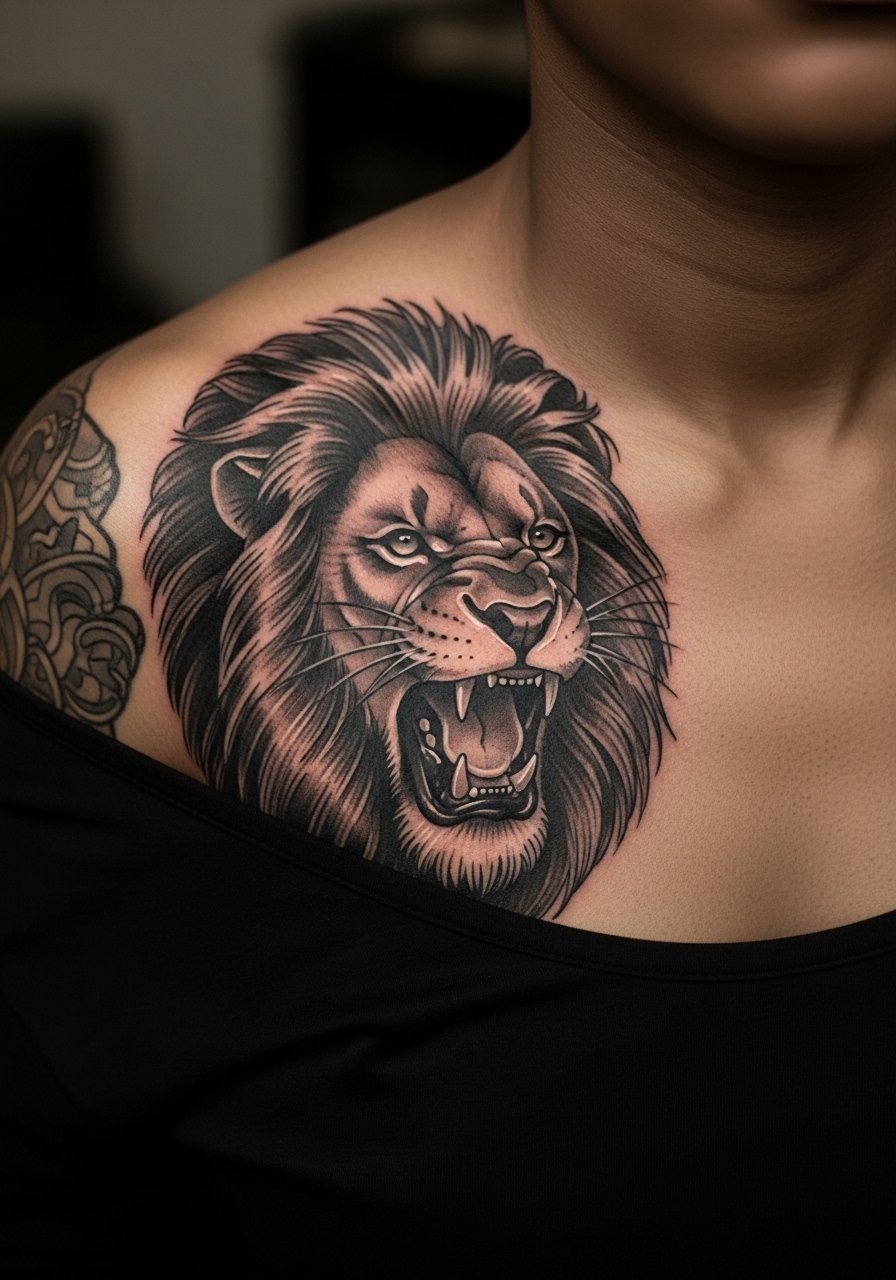
Fair warning, the upper ribs show every breath, so the stencil will look large in the chair. This design reads like a statement when you use solid black shading and confident linework rather than tiny realism details. During consultation ask for reference shots that show the lion at the same width you want, and request the artist preserve guard lines around the face to avoid blowout where whisker marks meet the curve. The session feels intense when the needle follows the rib line, but the result flexes with your chest and looks powerful under a deep v neck tee for evenings out. Expect heavy saturation to age better than hair-fine rendering.
3. Koi Fish Swimming Up From Hip to Mid-Rib
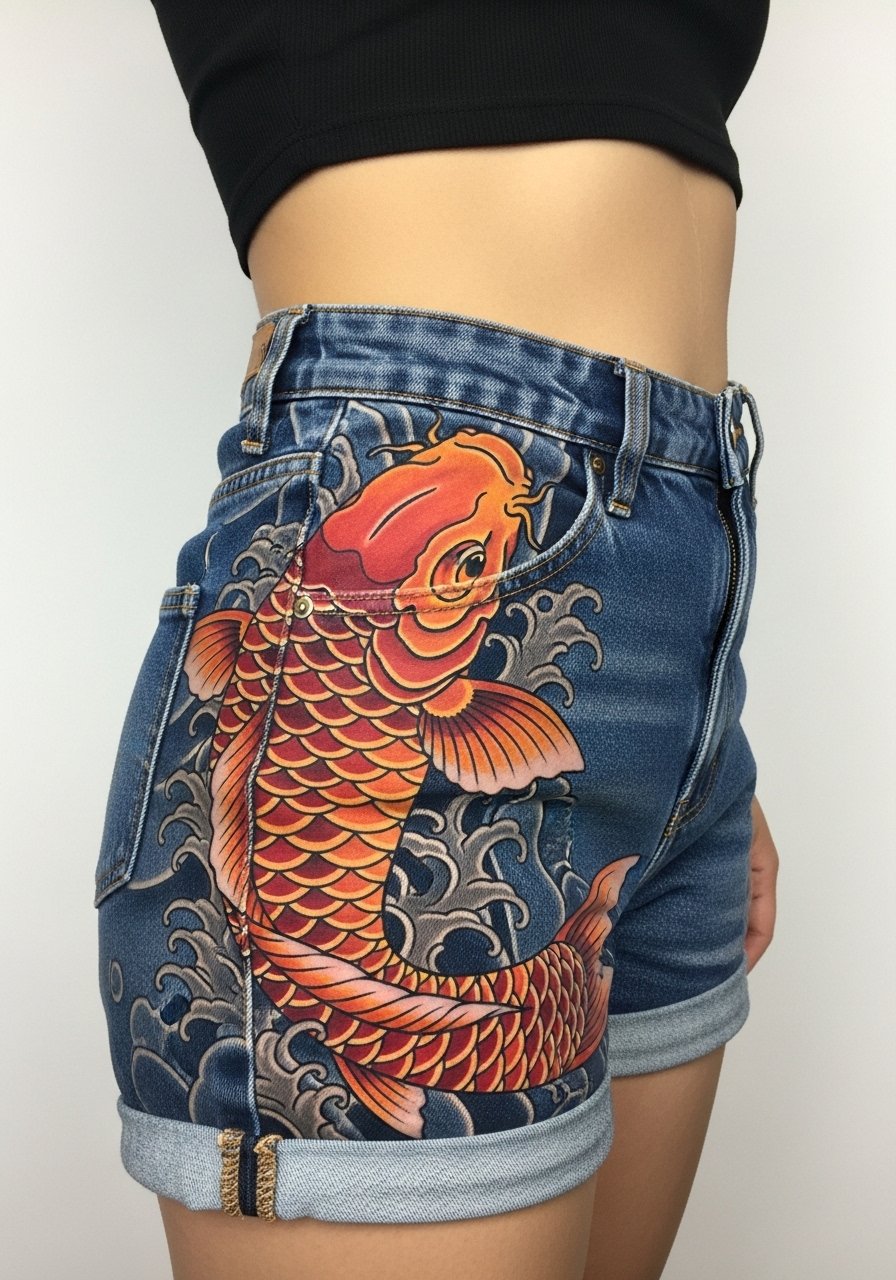
There's a reason koi are classic for ribs, they elongate the torso and match natural curves. This piece often needs two sessions for color saturation and scale detail. When you sit down with your artist, specify scale size and contrast so the orange pops against shadowed ribs. One common mistake is packing too many background elements, which muddies the movement over time. The hip-to-rib sweep shows best with high waisted shorts women and crop tops that reveal the full line. Expect touch-ups for color vibrancy at year two to three depending on sun exposure.
4. Bird in Mid-Flight Along the Ribs
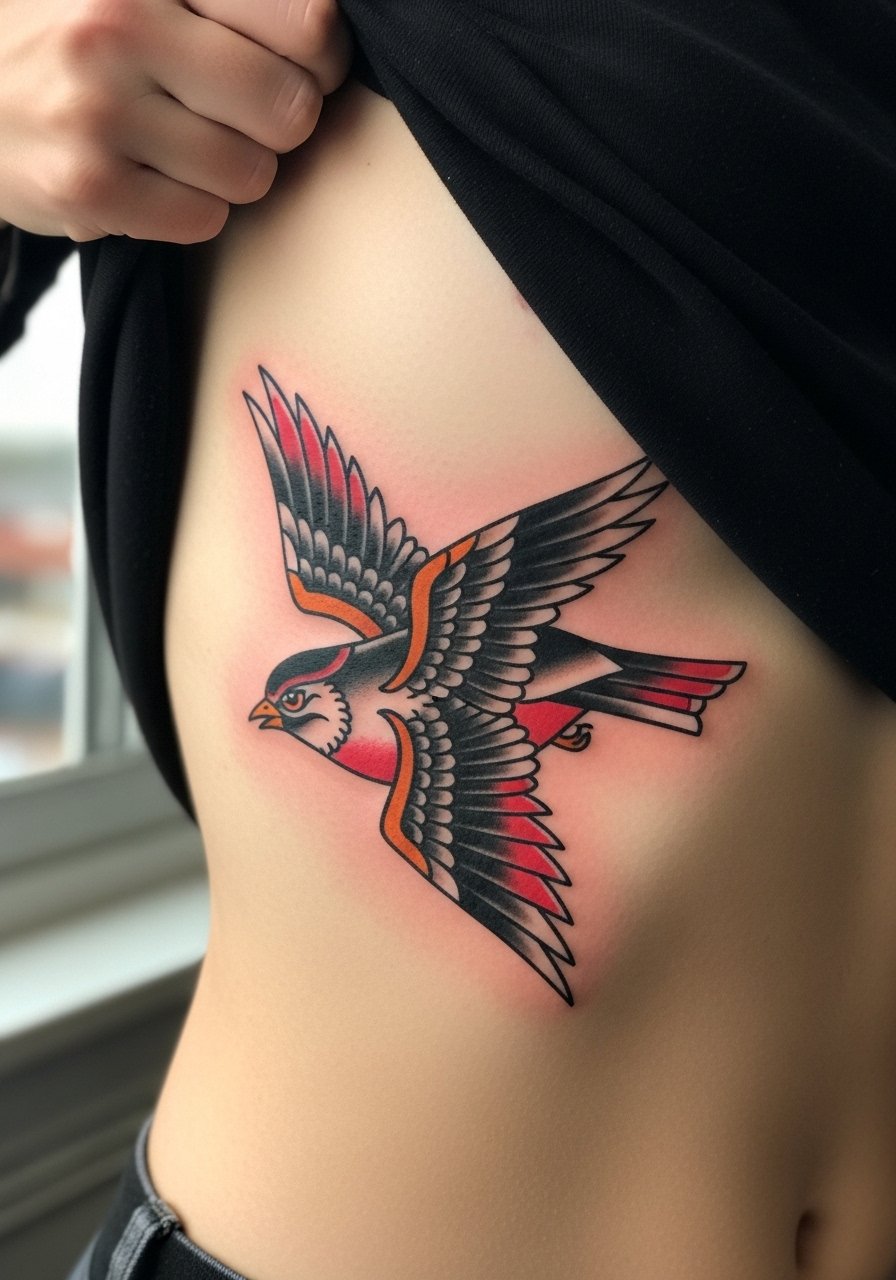
There is something about bold outlines and chest movement that makes flying birds sing on the ribs. Most of these are single-session pieces if you keep the wingspan to 4 to 6 inches. A mistake people make is asking for tiny feather detail that blurs with breath. Tell your artist you want clear directional linework with negative space between feathers so the wings stay defined at six months and beyond. For sessions wear a loose button-up or a loose button down shirt men so the artist can access the full side easily. Aging favors bold shapes over micro-detail in this placement.
5. Baby Elephant with Tribal Accents on Lower Ribs
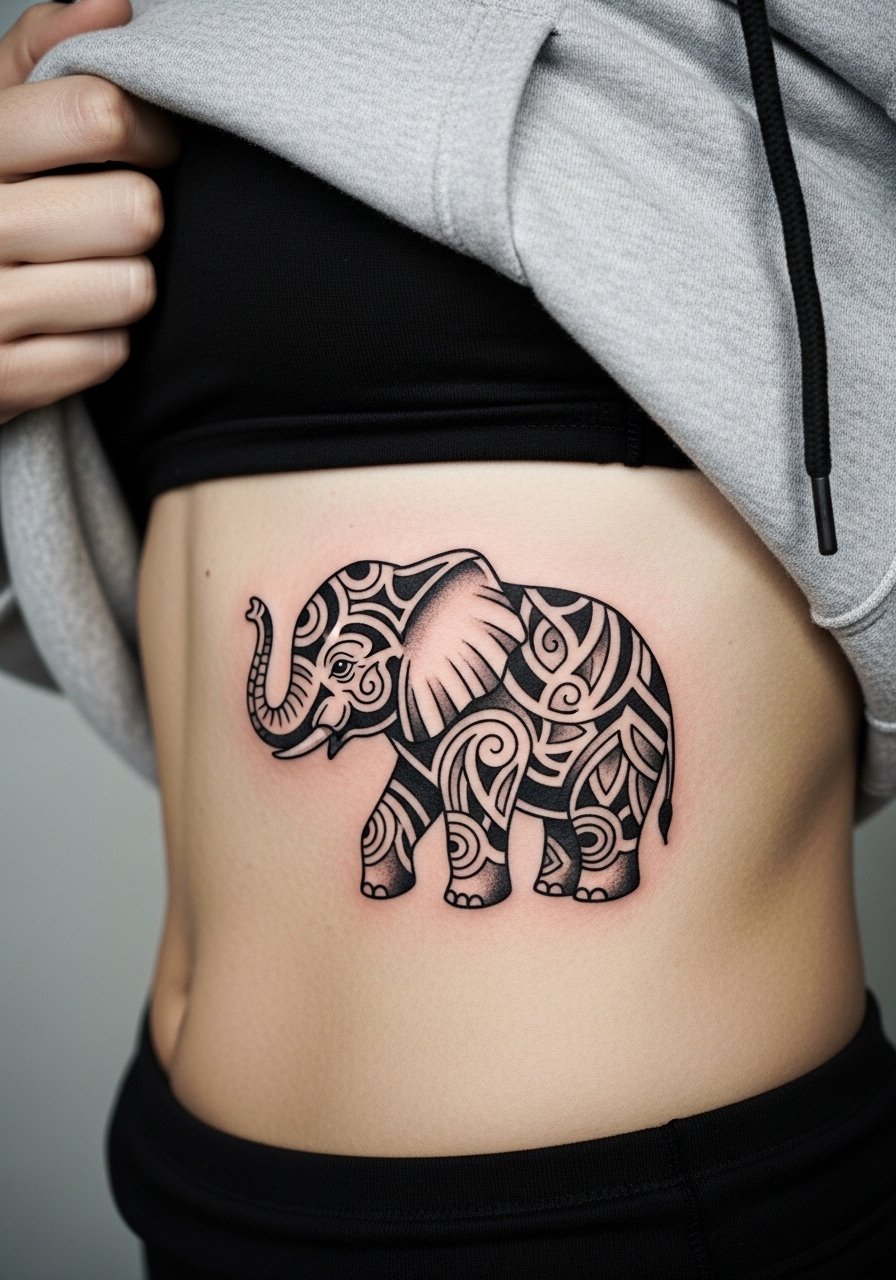
I've seen this one requested in memorial pieces and for family symbolism. Lower ribs mean extra friction from waistbands, so choose thicker lines over hair-fine ones to preserve form. A real mistake is asking for heavy color near the waistband without discussing clothing; the fabric rub shortens vibrancy. For the session, pull down elastic-waist joggers and wear a midriff hoodie you can roll to expose the area comfortably. Expect one to two sessions and a touch-up where tribal fills meet the shaded body zones.
6. Wolf Howling Along the Side Ribs

Controversy here is simple and loud, artists split on detail levels for wolves on ribs. One camp warns that fine fur lines will merge within two years on this moving skin. The other camp argues that with proper needle depth and spacing, stipple shading and whip shading can hold. Ask your artist which approach they prefer and why. Expect a strong pain hit when the needle rides the lower ribs, and plan for a single solid session for the head plus an optional second for shading. For after-recovery styling, a fitted ribbed tank shows the silhouette without crowding the face. Blowout risk is highest where detailed whisker lines meet shadow.
Studio Day Picks
The first six ribs above ask for careful prep, from stencil placement to session day clothing and first-week protection.
- Stencil transfer paper kit. Lets you preview the linework on skin before committing, which is useful for the coiling snake and koi sweep above.
- Topical numbing cream. Applying as instructed takes the edge off during long rib sessions without interfering with linework when used sparingly.
- Thin protective film roll. Shields the new ink from clothing friction during the first few days, especially where bras or waistbands meet the area.
- Fragrance-free gentle body wash. Cleans the healing area without stripping saturation, which helps bold traditional fills settle evenly.
- Aquaphor healing ointment. A thin layer in the first 48 hours keeps the needle channels moist without clogging, helpful for fine line work near the ribs.
7. Samurai Mask Over Upper Ribs and Chest
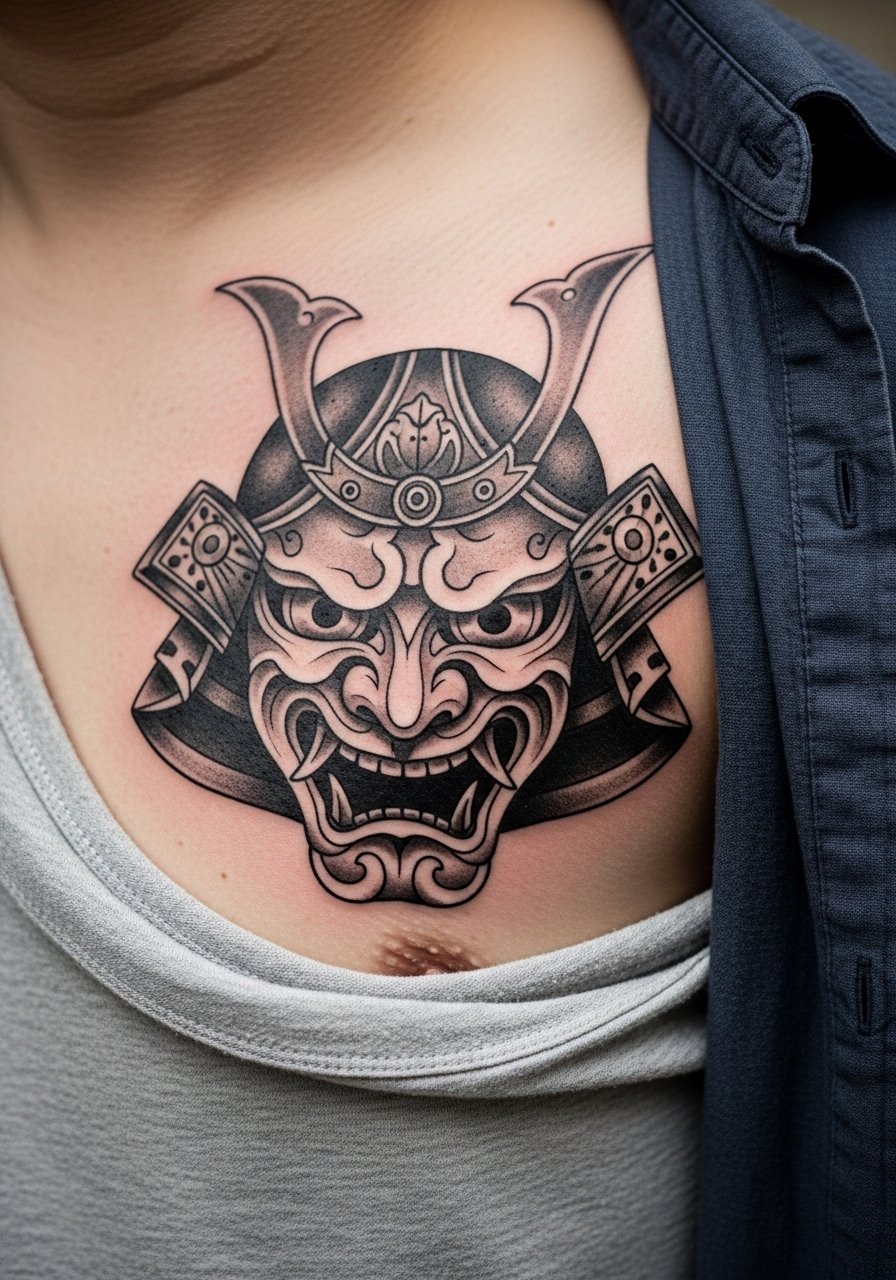
When you want a warrior motif, place the samurai so it reads with your pectoral movement. This often needs two sessions for the heavy contrast and face detail. The common error is compressing the mask too close to the sternum, which creates awkward stretching as you breathe. In the consult specify the chest wrap and ask for separation from the chest hairline. For session comfort, a loose wrap shirt or strapless underlayer makes access easy. Cultural sensitivity matters with samurai imagery, so ask about respectful references rather than copying sacred motifs.
8. Feather Floating Along the Rib Curve

Most people pick feathers for subtle motion, but the ribs test whether fine lines will age. Artists split on fine line here. One group says the feather's barbs need spacing to avoid merging. The other group says a bit of stipple shading and thicker quill lines makes the design age better. Tell your artist you want negative space between barbs and a slightly stronger quill to keep the silhouette at year five. For day-of comfort wear a loose tank or button down shirt you can pull aside. Expect touch-ups at year two for the thinnest strands.
9. Dragon Wrapping From Upper Rib to Hip
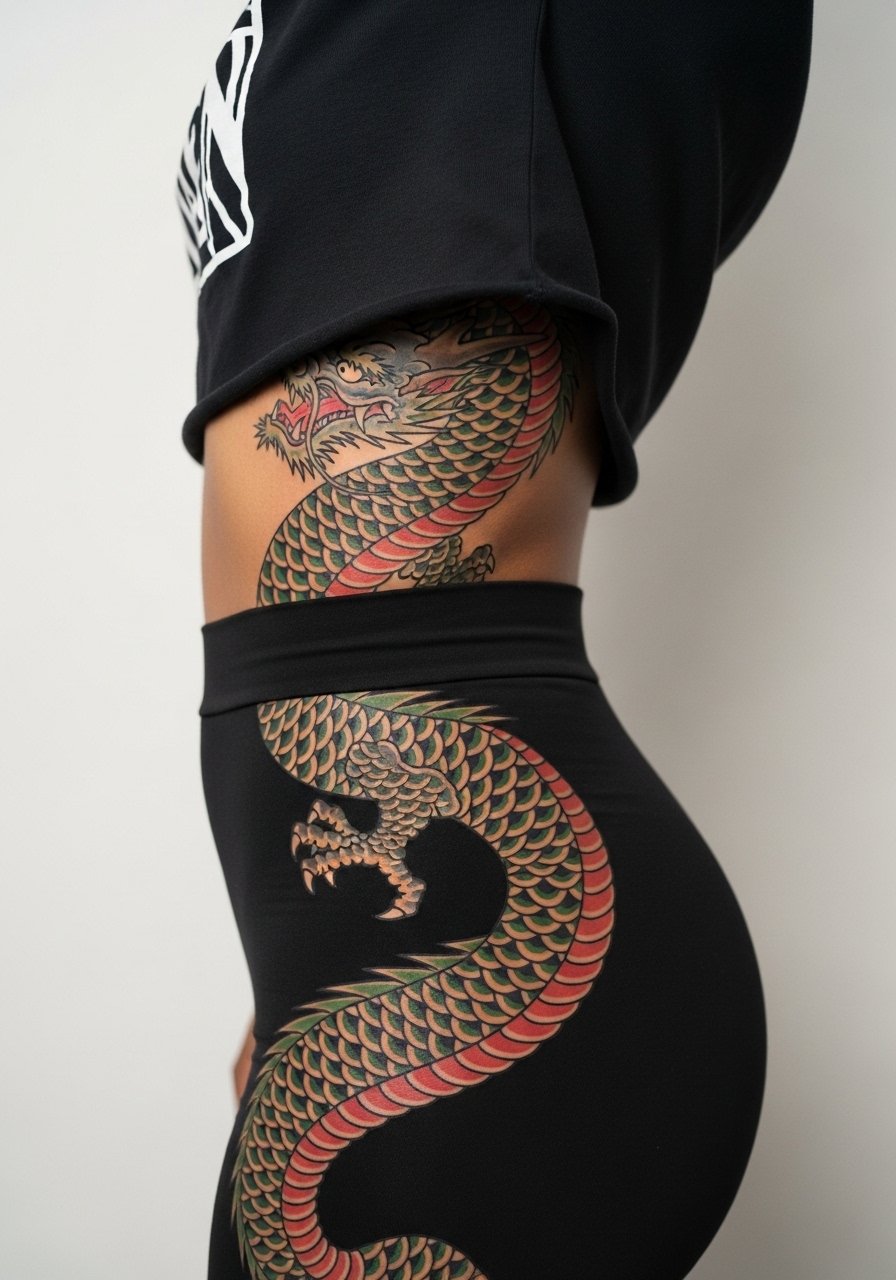
This is a commitment piece and typically runs three or more sessions for color saturation and scale detail. For consultations bring long-form references showing the body arc you want, because scale direction decides whether the flow reads with movement. A mistake is requesting tiny scales across the full span, which requires heavy saturation and eats session time. Wear drawstring lounge pants you can lower slightly at the hip during the appointment. Expect the most dramatic aging if you skip solid outlines; bold blacks help the color survive sunlight and rubbing.
10. Geometric Blackwork Across Front Ribs

The biggest mistake with geometric ribs is going too small. These designs need spacing and consistent linework to avoid merging as the skin flexes. Ask your artist to stencil the piece at full size and check it while you breathe. Visual impact comes from contrast and negative space, not micro-precision. For session wear bring a loose button-down shirt so the artist can access the front rib without tugging your skin. Blowout risk is higher with tight, repetitive lines near bone, so opt for solid black fills where possible.
11. Norse Runes and Ravens on a Vertical Rib Line

Norse motifs work well vertically on ribs because the runes follow the body line. For cultural respect, choose stylized interpretations rather than direct sacred inscriptions. The common error is requesting tiny runes that blur; ask for slightly bolder stroke weight. A session here is often single but may extend if you want shading around the raven. Wear a cropped tank top or high-waisted shorts to make the vertical read uninterrupted. Expect touch-ups where ink meets thicker shadowed skin.
12. Polynesian Tribal Waves Over Lower Ribs
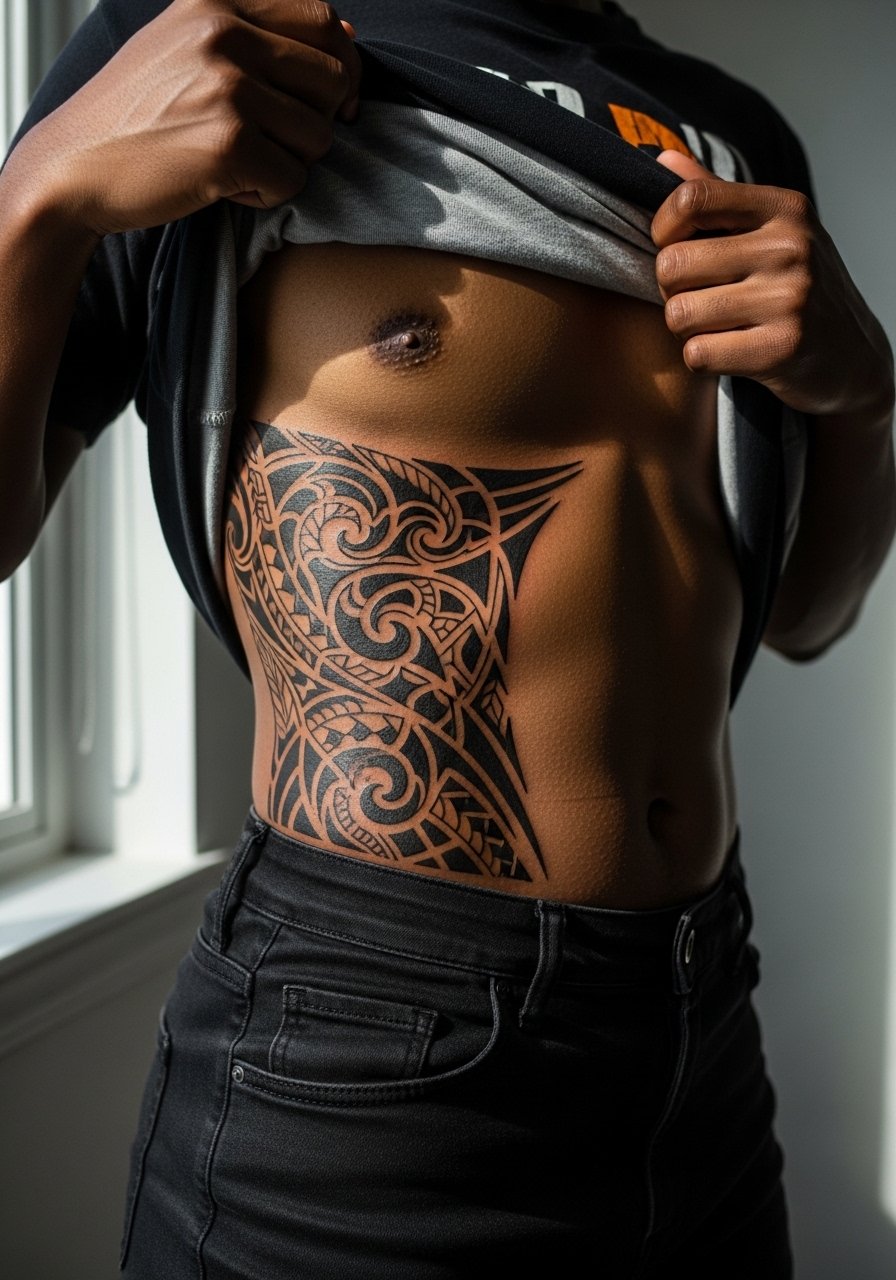
When working with Polynesian patterns, many choose elements tied to family lineage. Keep in mind some communities prefer meaningful motifs only for those within the culture. Ask your artist about respectful adaptation and about spacing so the waves hug the contour without tight repeating loops. Session feeling is wooddrum steady and can be long because of solid fills. For showing it off, high-waisted shorts and a solid crop top keep the pattern clear. Bold lines here age very well compared with micro-detail.
13. Rose and Dagger in Classic American Traditional Style
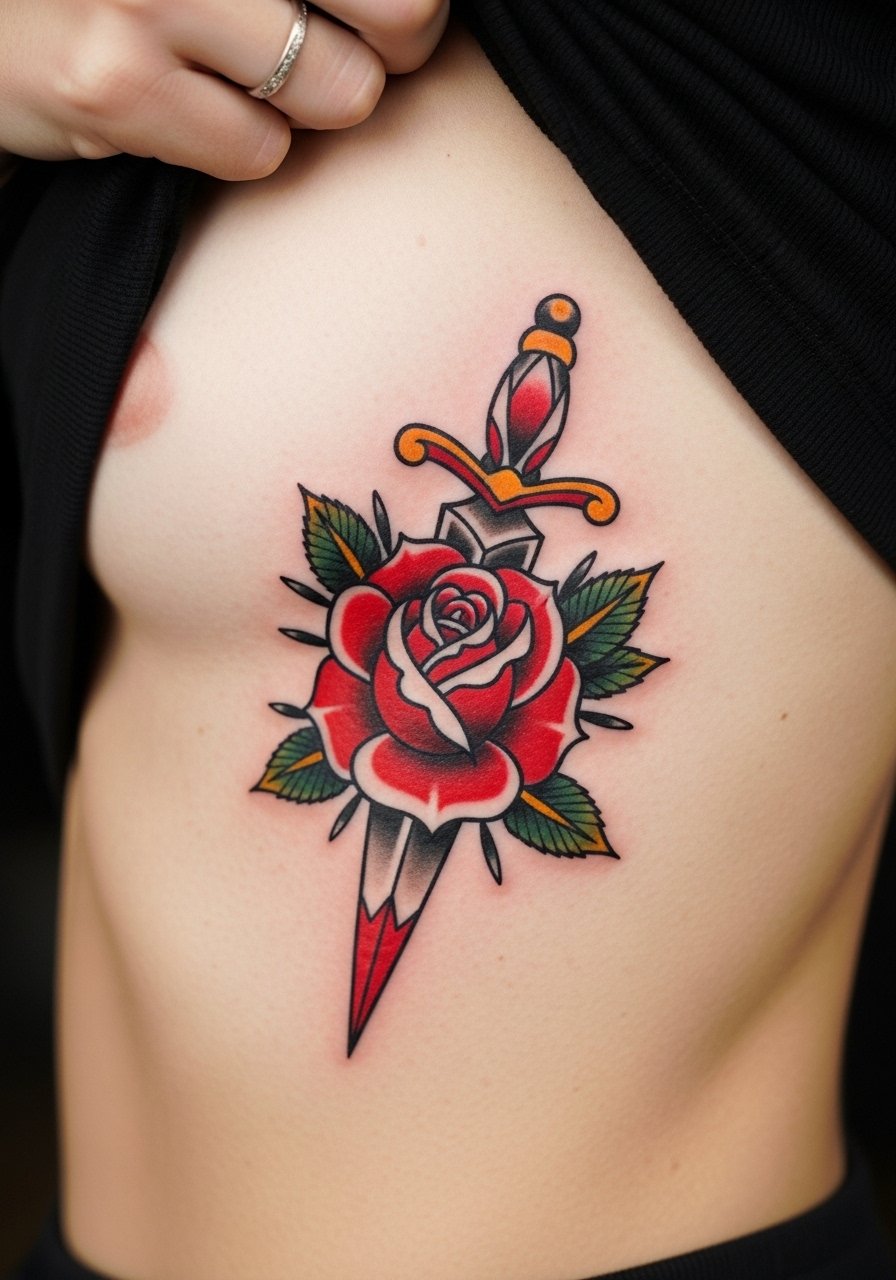
There is value in simplicity on ribs. A single rose and dagger uses bold outlines and solid color blocks that read at distance and survive movement. The usual mistake is asking for tiny thorns and micro-petals that blur when you breathe. Ask your artist for shielded areas of saturation where the dagger crosses the curve to prevent patchy healing. For session wear choose a cropped tank top black so the artist can work without fabric rubbing the area afterward. Expect minimal touch-up needs if you protect the piece from sun.
14. Anchor With Rope Wrapping the Ribs
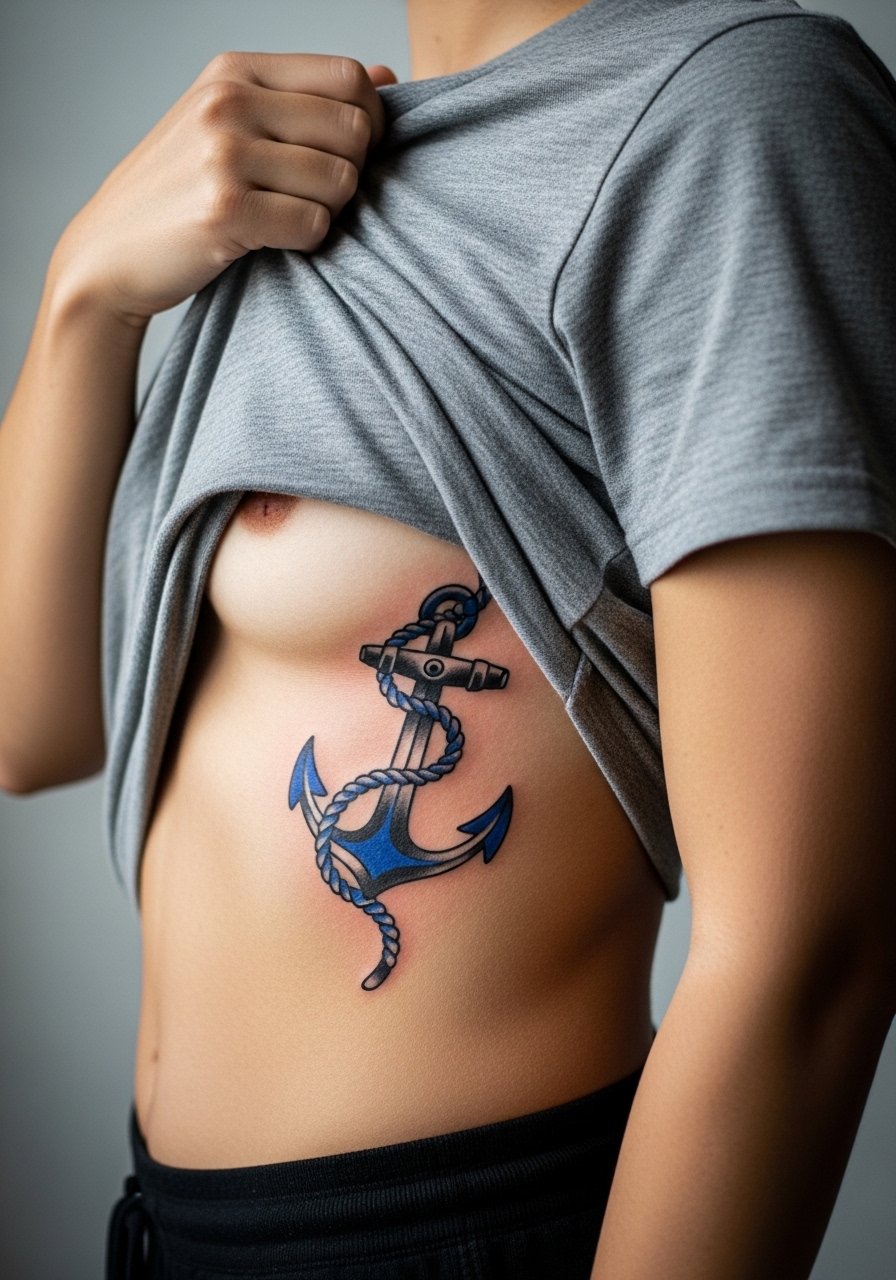
Anchors on ribs are timeless and age predictably when done with solid lines. The session is straightforward but the lower anchor point near the hip can meet waistband friction. Tell your artist to leave a bit of negative space where rope overlaps the curve so the twist reads later. For the appointment bring drawstring lounge pants so the waist sits below the design while it heals. Touch-ups are common at year three if you get a lot of sun exposure.
15. Ship in a Bottle Spanning the Rib Curve
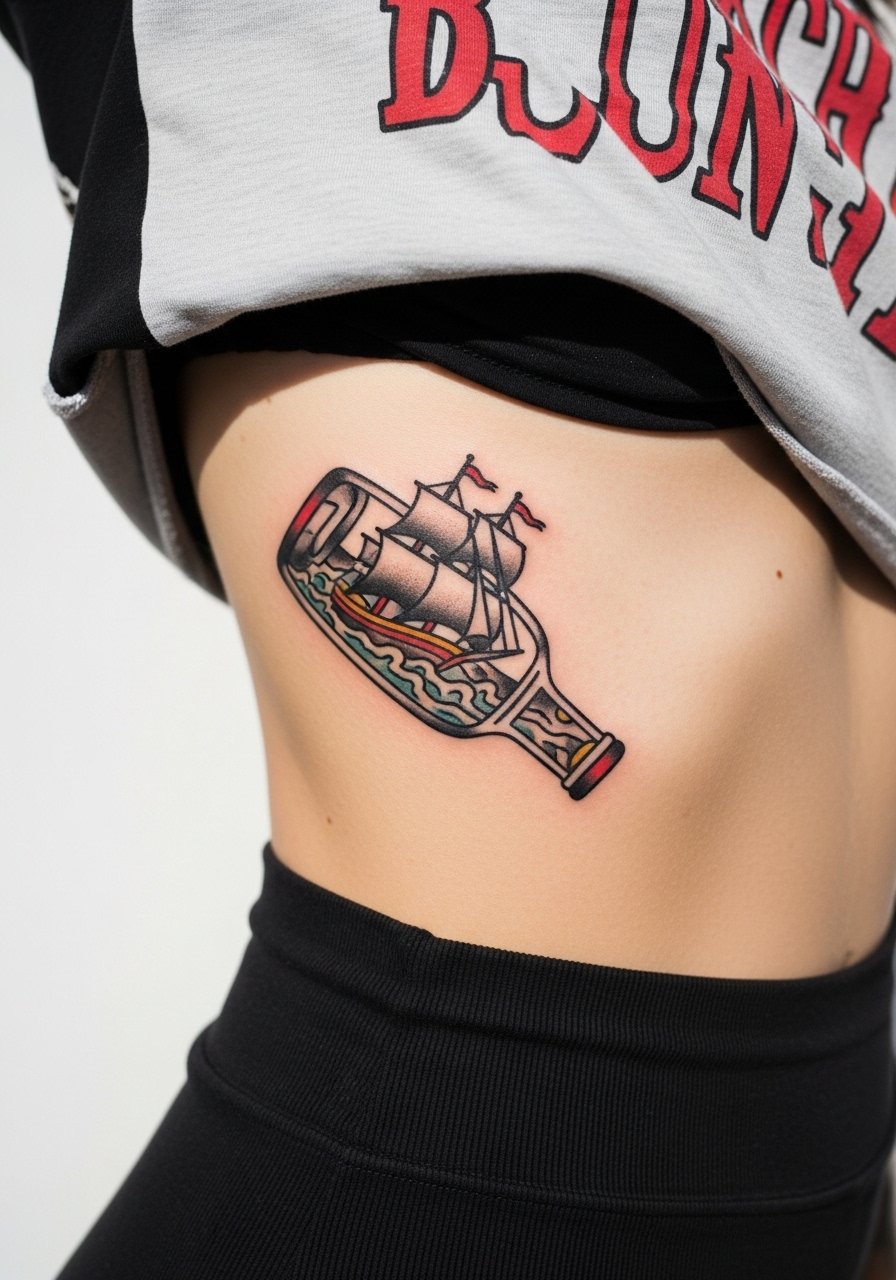
This plays well when you want a contained scene that still follows the curve. The main risk is over-detail inside the bottle. Ask for simplified mast lines and stronger outline contrast so the silhouette reads at six months. The session feels focused because most shading is contained. For after sessions the design pairs with fitted ribbed tanks that show the bottle edge cleanly. Expect a single session for medium-sized pieces and a touch-up on thin mast lines at year two.
16. Skull With Roses Along the Ribs

Skull and roses work on ribs when the skull sits where the ribs create natural hollows. The usual error is crowding too many roses around the curvature, which can hide the skull's form. Ask for clear negative space between blooms and stipple shading behind the skull for depth. For the session wear a loose button-down that allows the artist full access to the side. Expect the roses to need color refreshers sooner than the black skull because reds can fade faster on moving skin.
17. Anchor and Compass Pairing Near the Front Ribs

This motif helps if you want a design that reads both as symbol and as placement architecture. The compass needs precise central alignment or the whole piece feels off when you breathe. Tell your artist you want the north point to sit on a stable plane so the compass does not tilt with posture. For showing it off, a deep v neck tee can frame the piece. Expect a single longer session and a small touch-up to correct any minor asymmetry once healed.
18. Sun and Moon Dual on Opposite Ribs

A paired set like sun and moon plays on symmetry, so bring photos of both sides in the consult. The main mistake is mismatched sizes that compete instead of converse. Ask the artist to stencil both pieces on the body simultaneously so you can compare breathing arcs. For session comfort wear a loose button-down shirt you can open for access. Aging tends to be uniform if the saturation and line weights match across both sides.
19. Sparrow With a Banner Along the Rib Arc
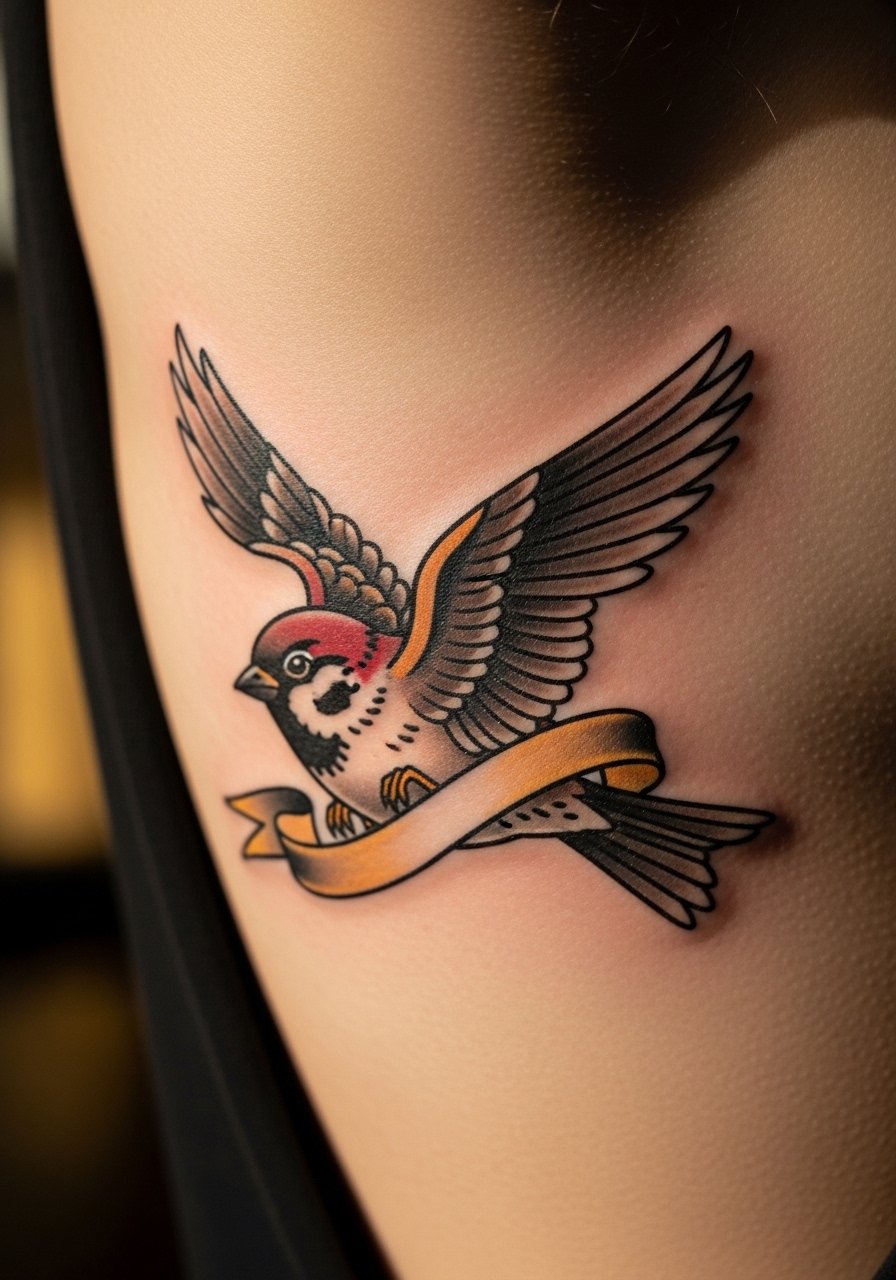
Sparrows are small but need room to breathe, particularly when paired with a banner. The common mistake is asking for tiny script inside a banner; the letters often blur. If you want wording, choose larger type and bold stroke. For session wear a strapless underlayer or an open shirt so the artist has a flat canvas to work on. For showing the piece, a fitted ribbed tank keeps the banner visible without cutting across the bird. Expect a touch-up on the banner text at year two.
20. Classic Flash Rose Cluster Near the Lower Ribs
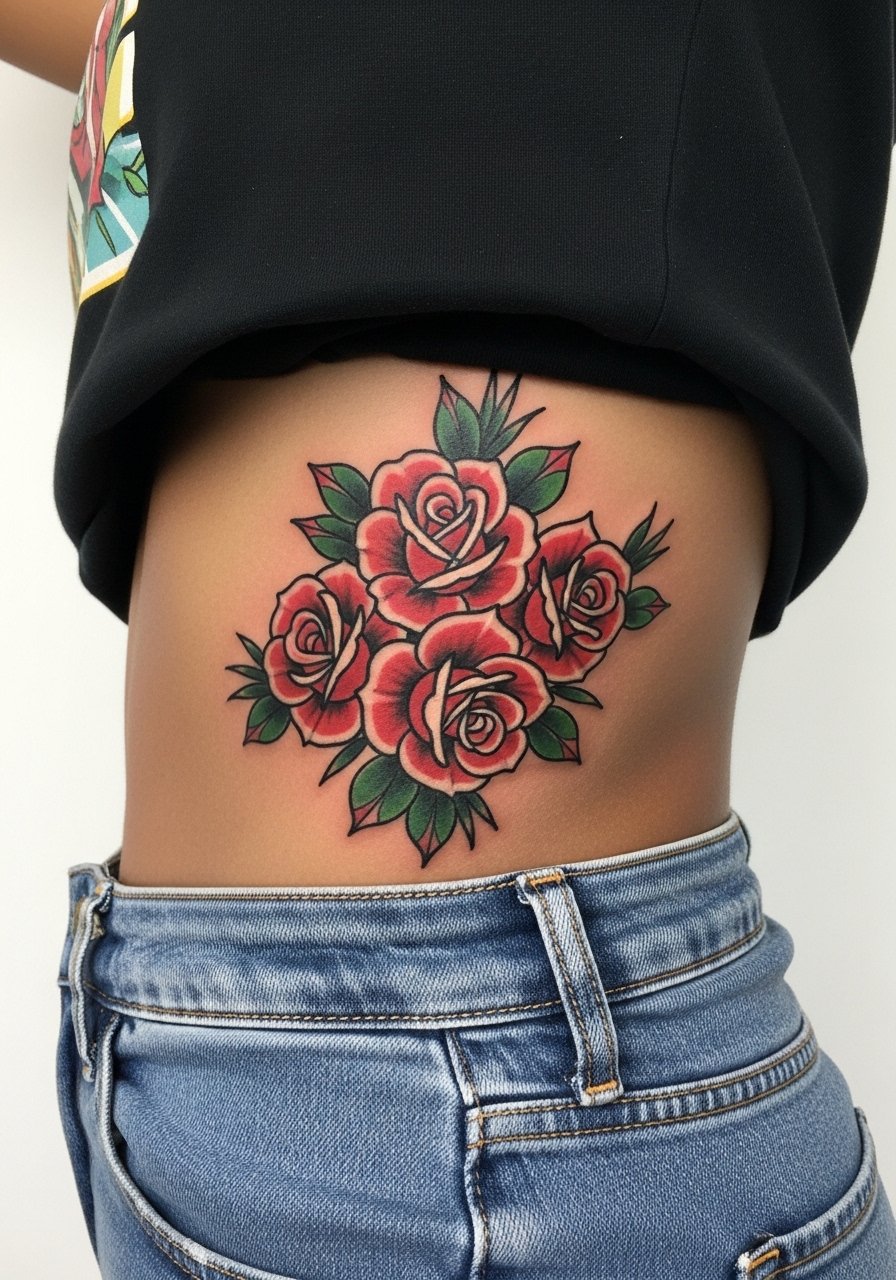
Flash roses are forgiving on ribs when scaled correctly. I advise choosing one or two larger blooms rather than a dense spray so the negative space preserves the petals. During the consult ask for clean separation between blooms and for heavier outline in areas that will contact clothing. For the session wear low-rise jeans or high-waisted shorts you can lower slightly, and consider a high waisted shorts women option for show-off looks later. Saturated color here tends to hold if you protect from sun.
21. Nautical Star Chain Following the Rib Line
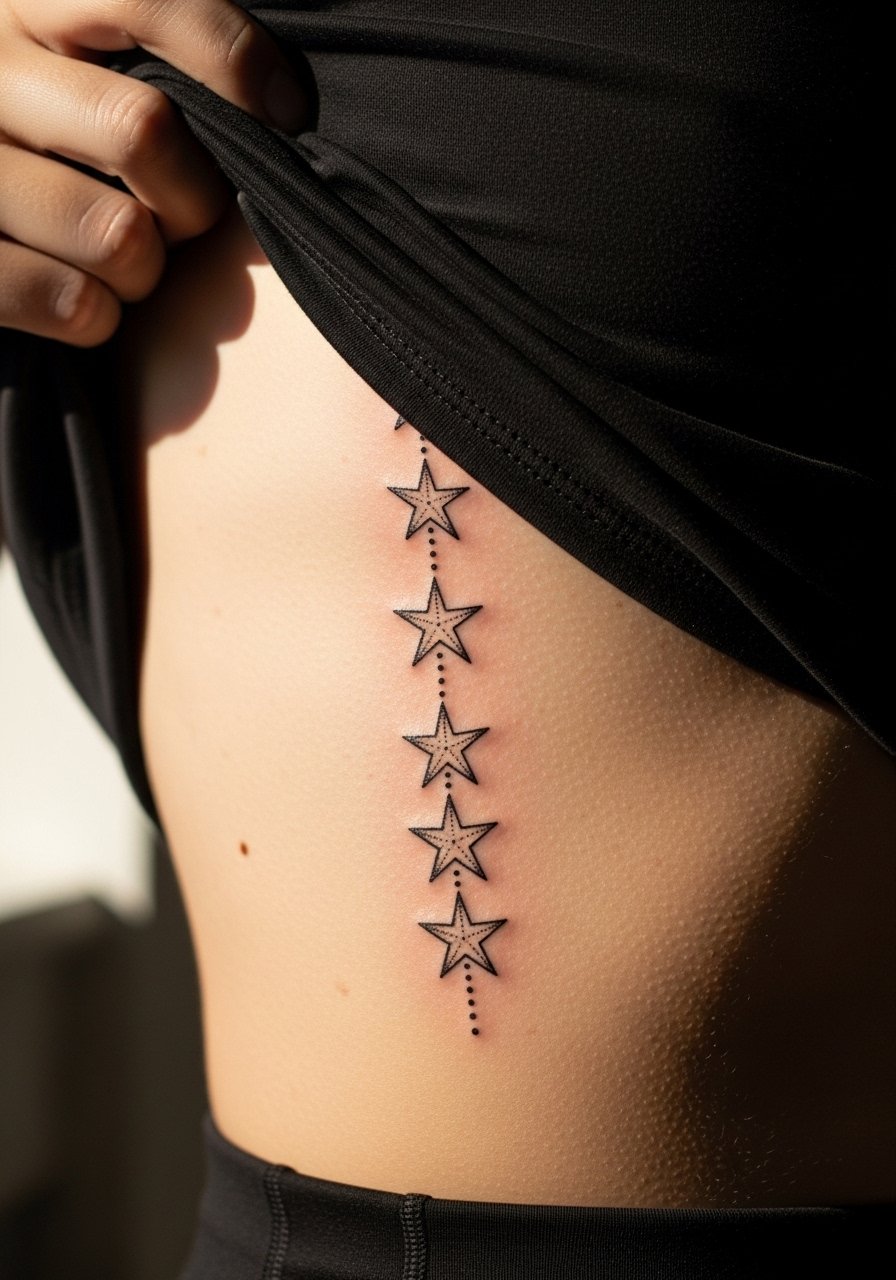
The charm of a star chain is that it can be as minimal or as bold as you want, but on ribs tiny stars need spacing. A frequent mistake is packing too many stars close together, which looks like a line after a year. Tell your artist the exact spacing you want and ask for slightly thicker points on the stars that sit nearest the bone. Session wear is simple, a cropped tank top black keeps the area accessible. Expect a touch-up if one or two points soften during healing.
Frequently Asked Questions
Q: How bad does rib tattoo pain get and how should I prepare?
A: Ribs are widely considered one of the higher-pain placements because the skin is thin and rests near bone. Eat a full meal beforehand, stay hydrated, and plan for sessions under two hours if you are anxious. Numbing creams can help for some people, but discuss their use with your artist because they change skin feel and hemostasis.
Q: Will fine line traditional work blur faster on ribs than bold blackwork?
A: Fine line tends to soften faster on the ribcage because the skin flexes with breath and movement. Bold outlines and careful spacing keep designs readable longer. If you love delicate detail, ask for slightly heavier primary lines and more negative space between grouped elements to extend longevity.
Q: How should I dress for a rib session to make the artist's life easier?
A: Wear clothing you can move or lift without exposing more skin than necessary. For side rib work a cropped tank top black or an open button-down works well. For upper rib or sternum pieces a strapless top can be useful if your artist approves.
Q: Do cultural designs like Polynesian or Japanese motifs require special permissions?
A: There is no universal rule, but many people choose to adapt motifs respectfully rather than copy sacred designs verbatim. Have a conversation with the artist about origin and meaning and consider variations that honor the source instead of direct replicas.
Q: How often will I need touch-ups on rib tattoos compared with arm tattoos?
A: Expect touch-ups on ribs at roughly the same rate or slightly sooner than forearm work if the design relies on thin lines or saturated color. Factors include sun exposure, friction from clothing, and your skin type. Bold blackwork tends to need fewer early touch-ups than micro-detail pieces.
Q: Are there styles I should avoid if I plan weight fluctuation or pregnancy?
A: Large pieces that cross the lower abdomen and floating ribs are more likely to stretch with significant weight changes or pregnancy. If you anticipate those changes, place work on more stable zones of the ribcage or choose designs that still read when stretched, like bold black shapes or geometric patterns.
Q: What should I ask about when booking an artist for a rib piece?
A: Ask about their experience with rib placements, request healed photos of similar work on real bodies, and ask how they plan to space the design to account for breath and curvature. Also ask about session length and typical touch-up timelines so there are no surprises.
