
Fine line wings dominate feeds, but the reality is harsher. Sweat under tight shirts wrecks healing, delicate lines ghost after a summer of gym showers, and first back sessions bring real anxiety when you cannot see your own progress. This piece lays out 17 bold, unusual angel wings for the back that aim to survive sweat, photograph well on darker tones, and map clearly to real session logistics so you know what to ask at booking.
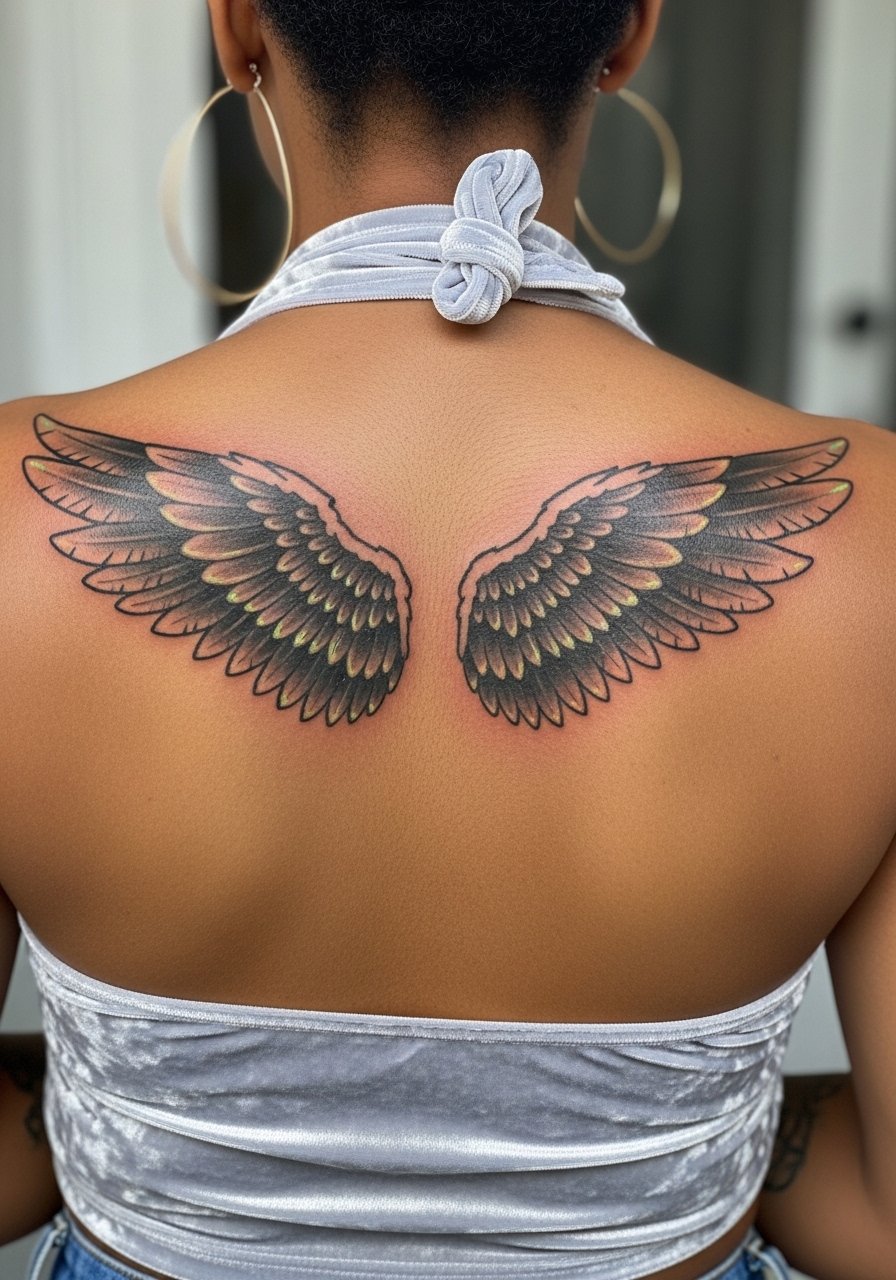
1. Full upper-back micro-realism angel wings with subtle color highlights
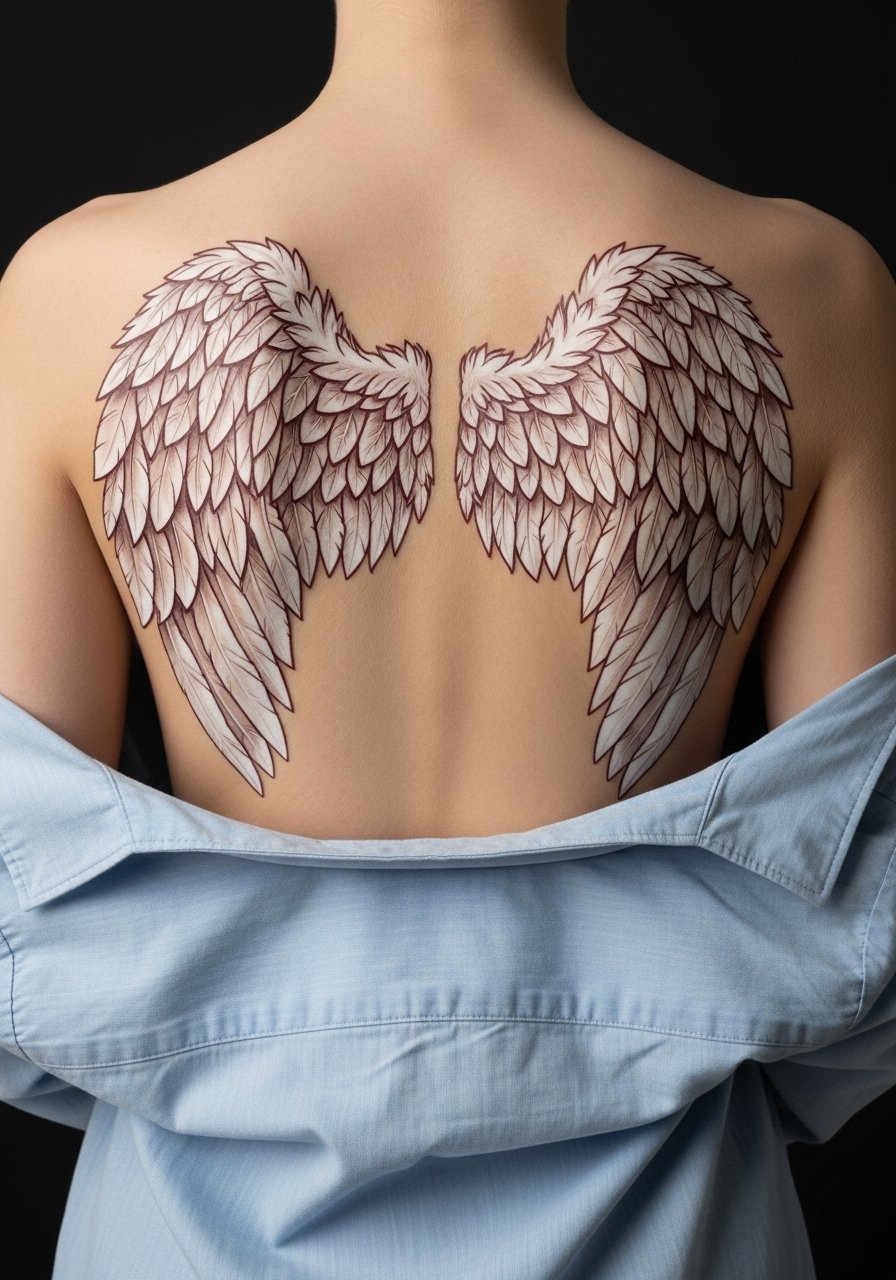
A classic full upper-back realism piece reads huge in photos and still reads clean when healed if you plan the sessions right. Tell your artist you want feather separation and high contrast between the feather vane and the shadow areas so saturation holds up instead of smudging into one gray mass. Expect multiple sessions lying prone, each around three to five hours, and bring a wedge pillow for comfort. Blowout risk is lower here than on ribs, but shallow lines at feather edges fade faster. For show nights, pair this with a low-back silk dress that frames the top of the wings, and wear a loose cotton tank to the session so the artist has easy access.
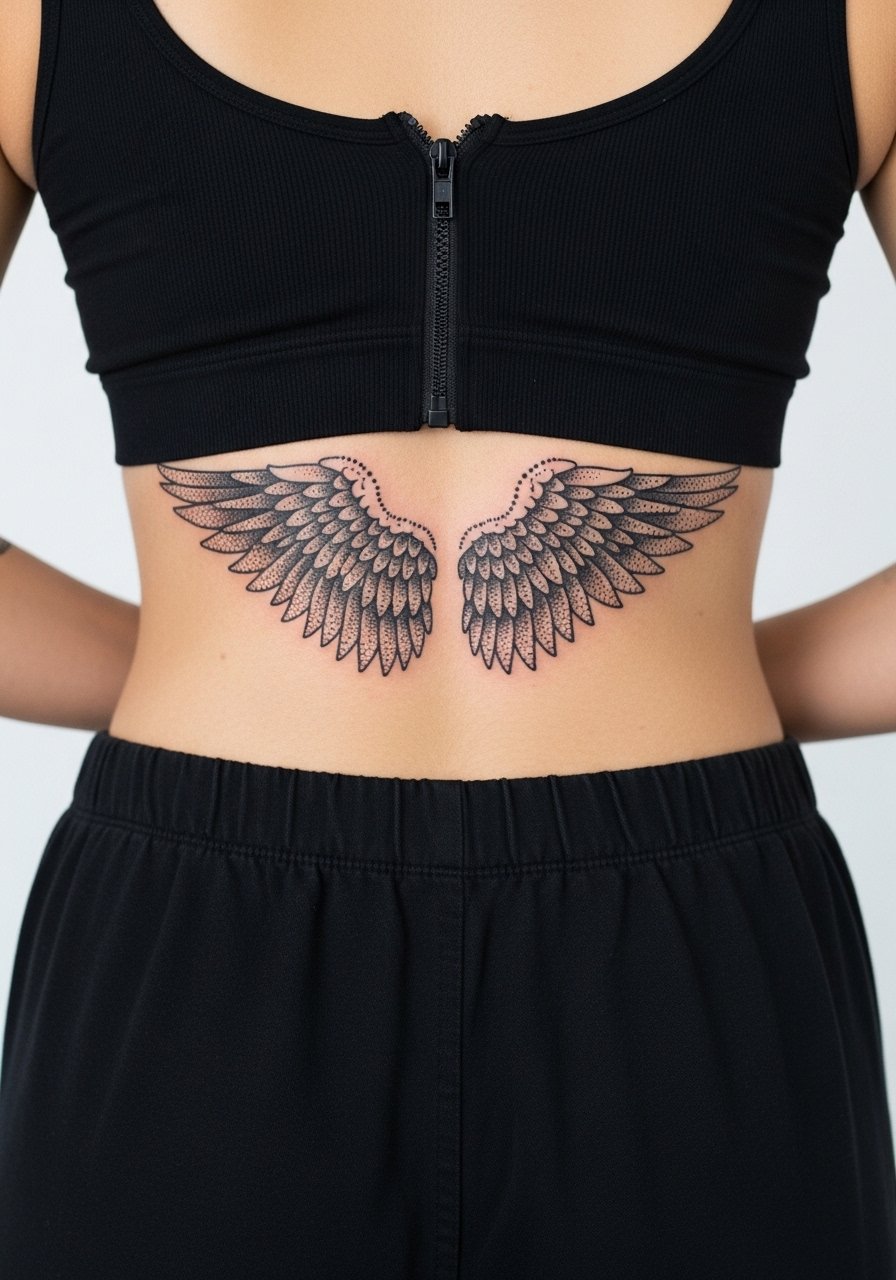
2. Neo-traditional lower-back wings with floral accents
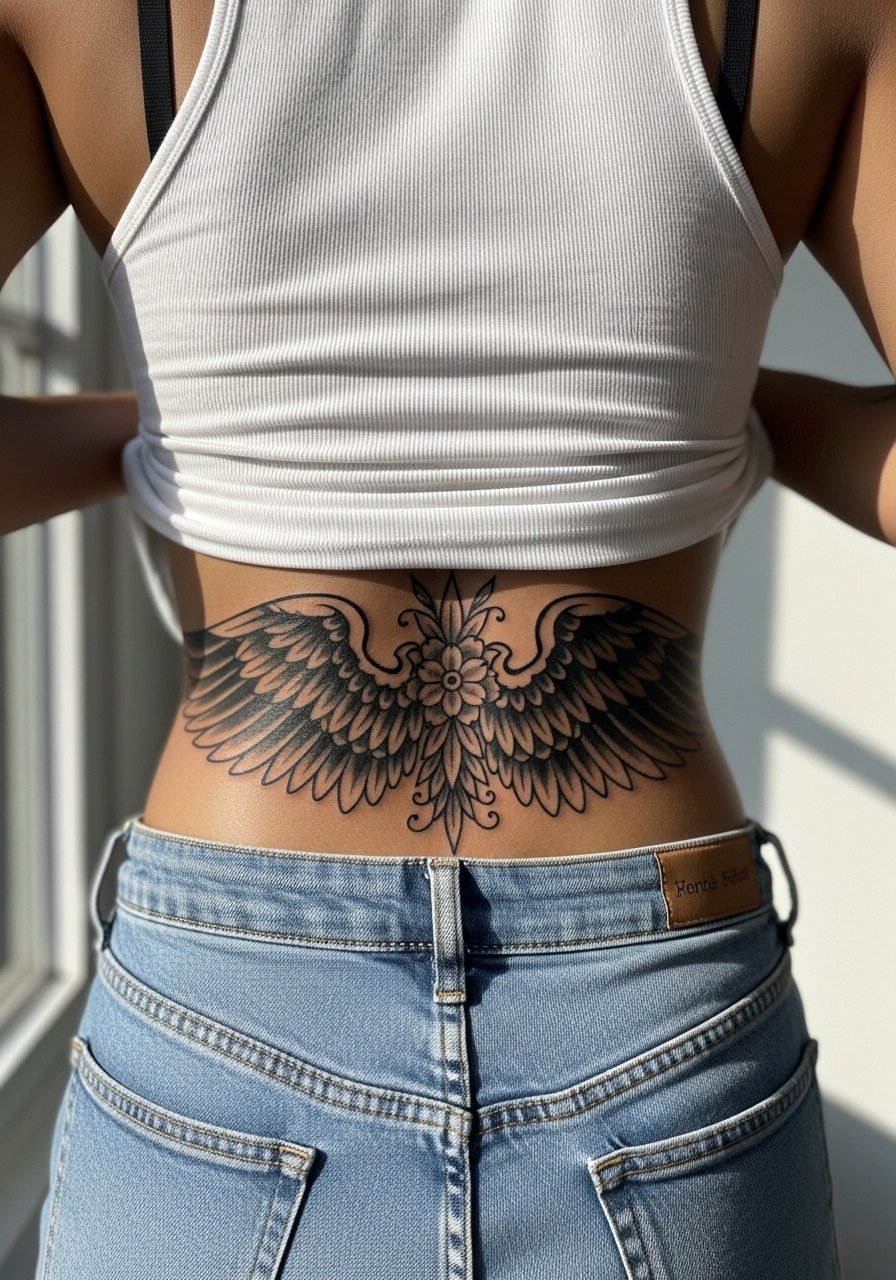
Lower-back neo-traditional wings are bold and hold saturation well when the outlines are slightly thicker. If you are worried about stretch, tell the artist to anchor the design to the pelvis curve and avoid thin filigree across the waistband. Session time tends to be shorter per sitting but expect two to three sessions for color packing. Common mistake is placing the wings too low under a tight waistband, which invites rubbing during healing. For summer shows, this style pops with a backless swimsuit and during the appointment wear drawstring sweatpants so nothing presses on the fresh work.
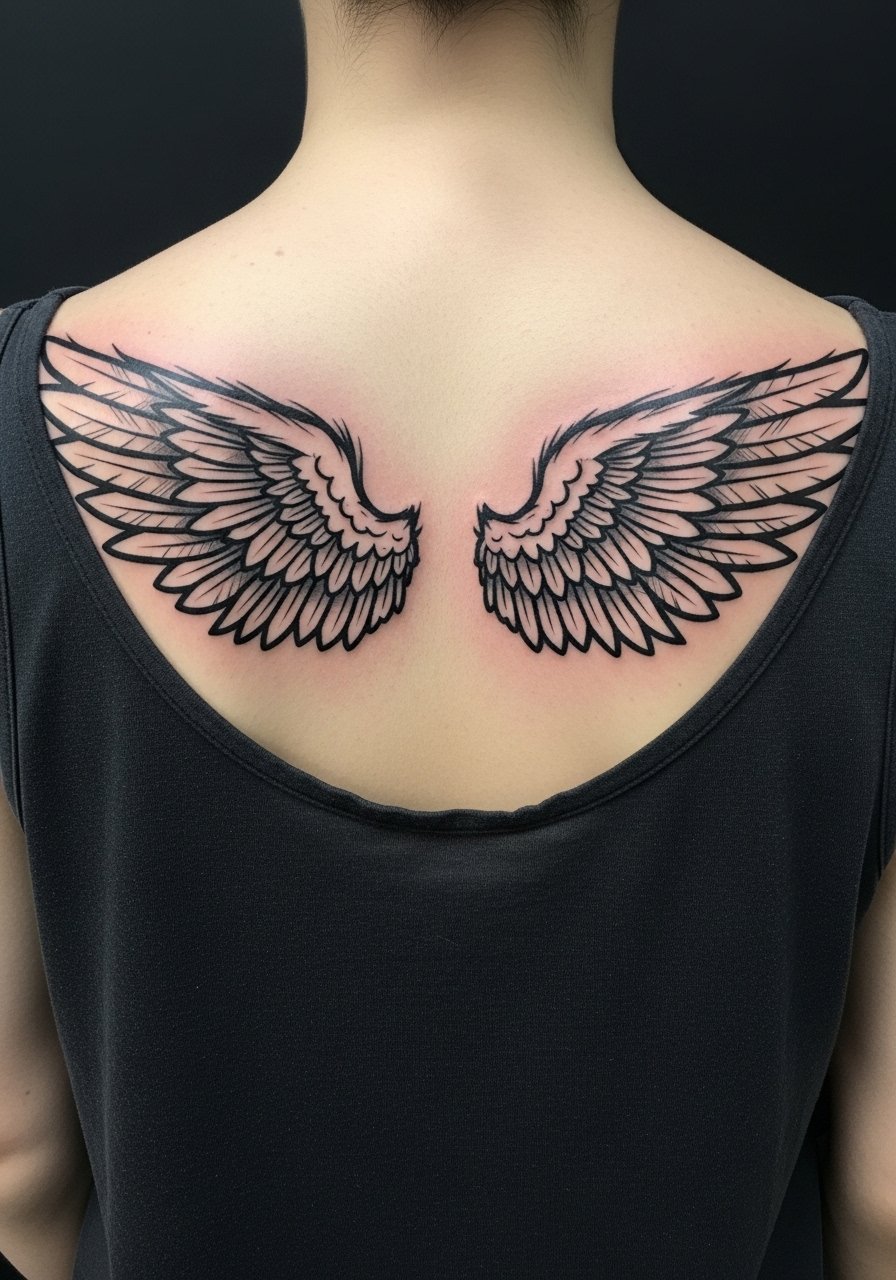
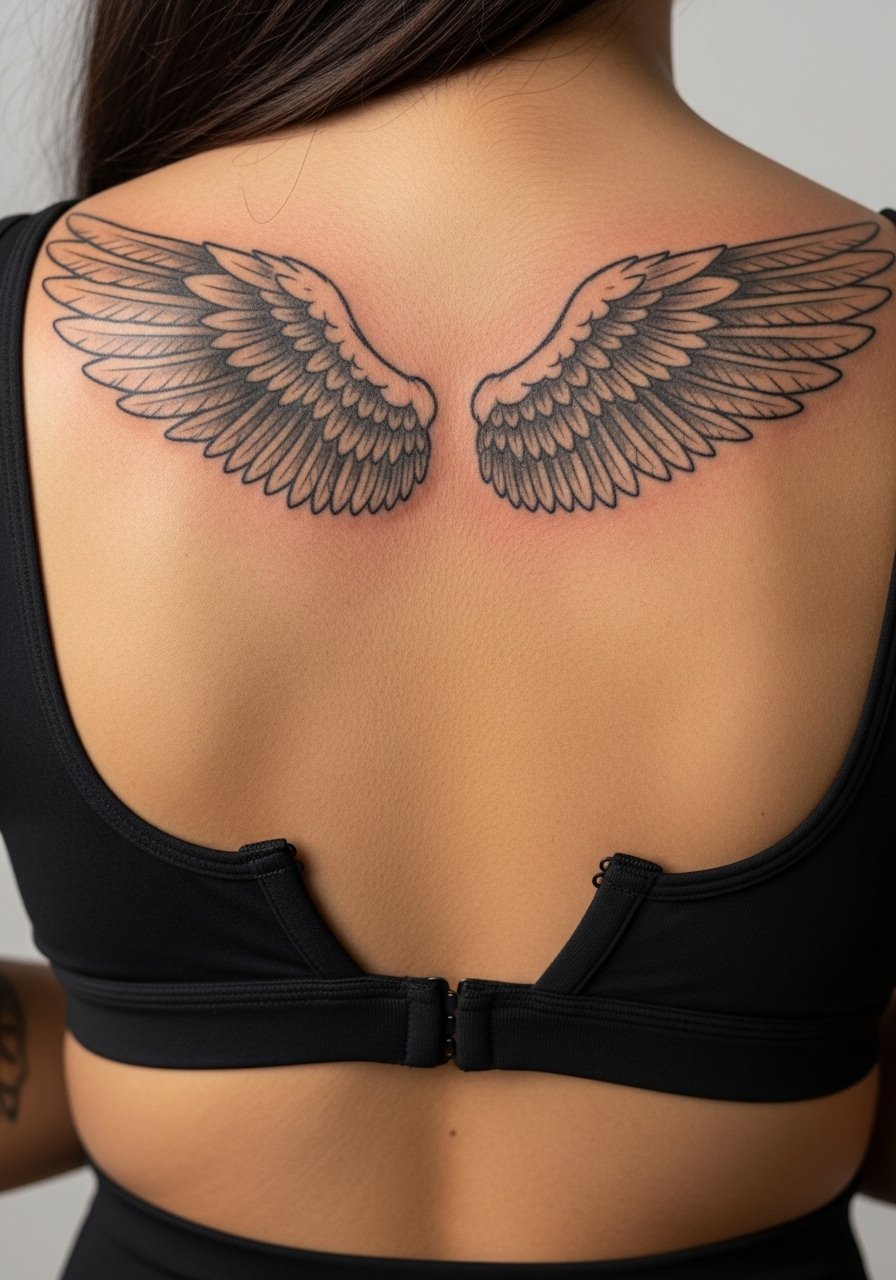
3. Fine line minimalist wings across the shoulder blades
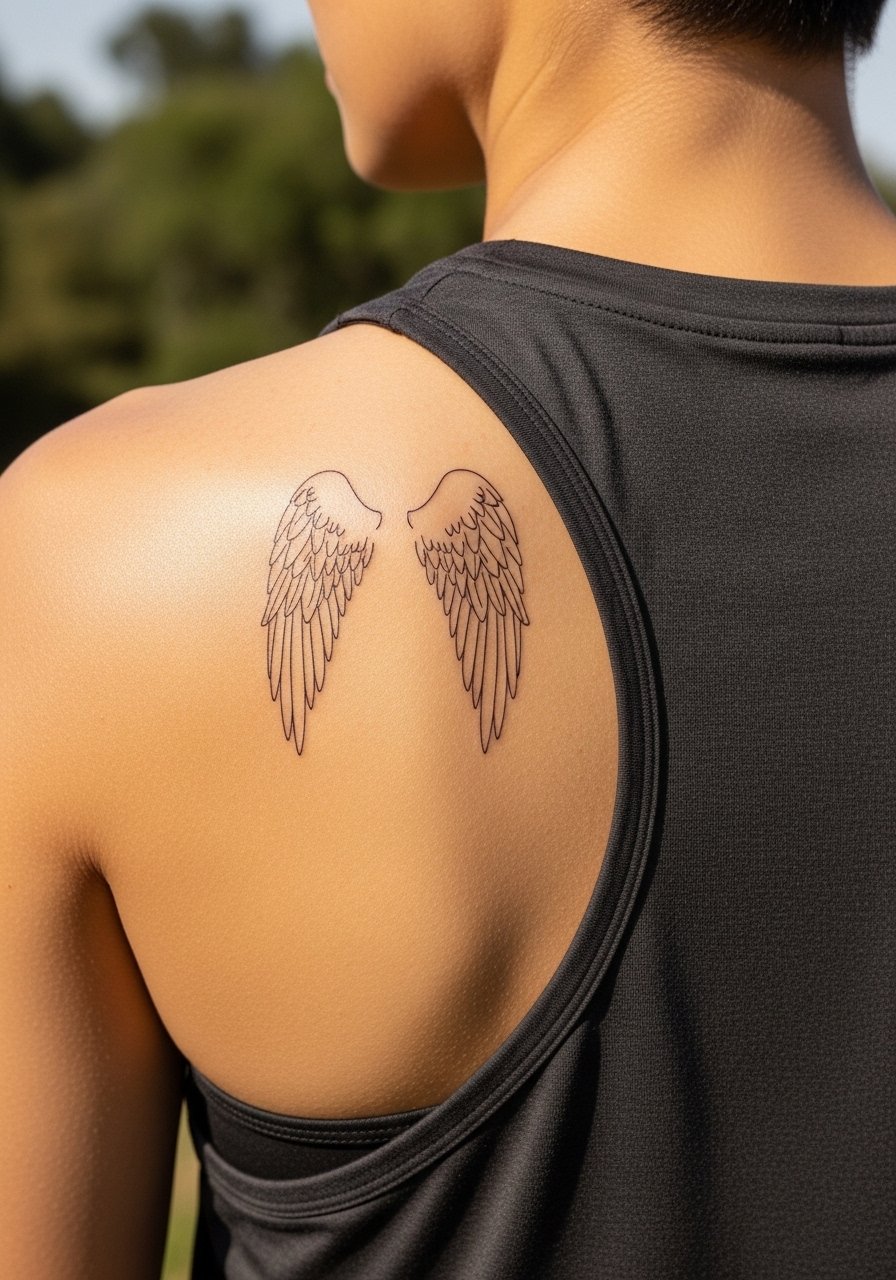
Fair warning about fine line on the back. One camp of artists says single-needle work settles fine with careful depth and spacing. The opposing camp warns that the skin and sun exposure on shoulder blades can fade thin lines quickly. Expect a touch-up at six to twelve months for many fine-line back pieces. When you consult, bring photos that show exact line weight you want and ask for slightly bolder anchor lines where the wing meets the shoulder to prevent ghosting. Session is usually one sitting under two hours. Style this with an off-shoulder sweater for casual days and wear a sleeveless tank to the studio.
4. Blackwork geometric mandala wings spanning the full back
Blackwork mandala wings read as a single, powerful silhouette across the back and age into a graphic statement rather than a blur. This style demands long sessions with heavy saturation, so expect five to seven sessions and deeper needle passes for dense coverage. A common error is packing too many fine negative-space details at small scale. Ask for broader negative-space separations so the mandala breathes over time. For the session, choose a loose button-down you can pull aside, and for nights out pair it with a fitted faux leather jacket that contrasts with the solid black.
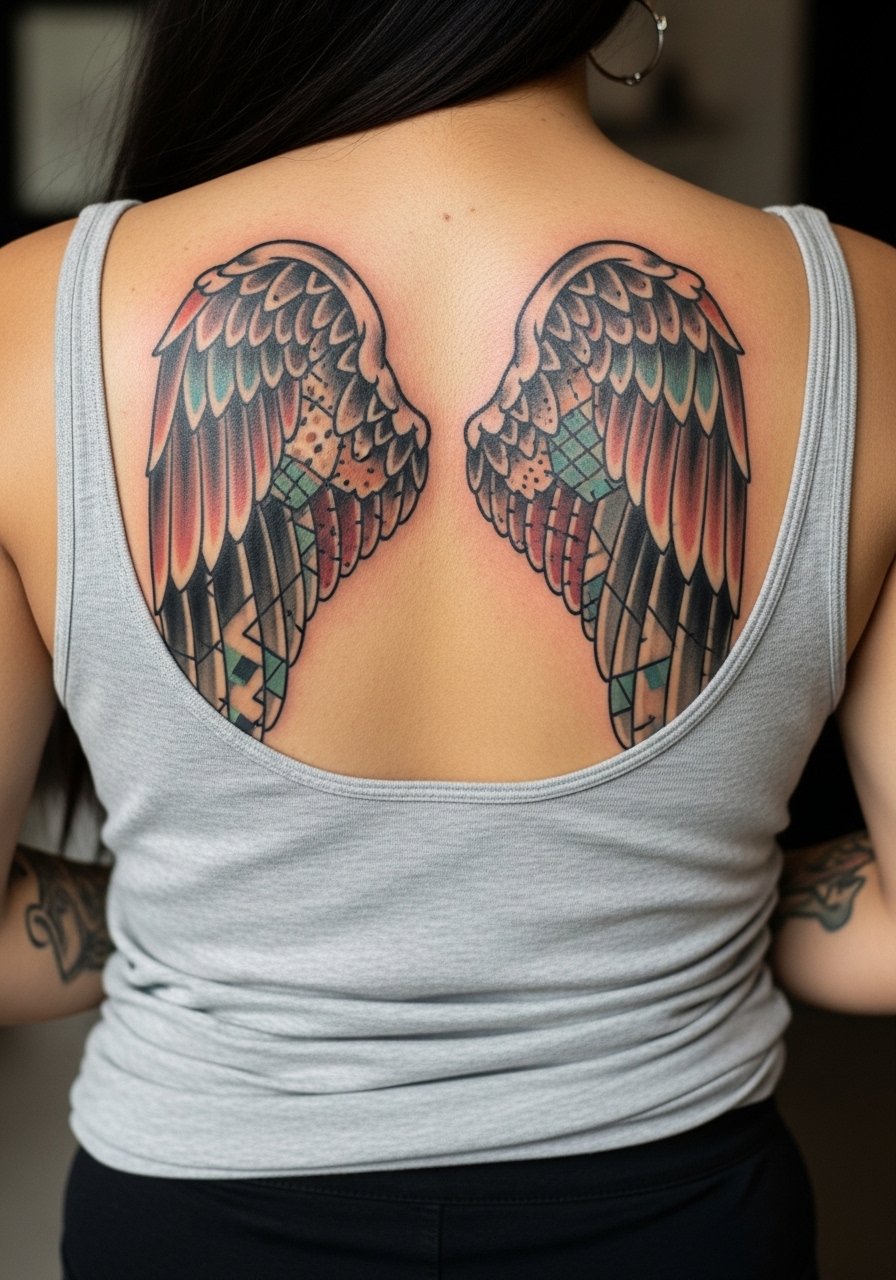
5. Watercolor pastel angel wings on the upper back that peek over straps
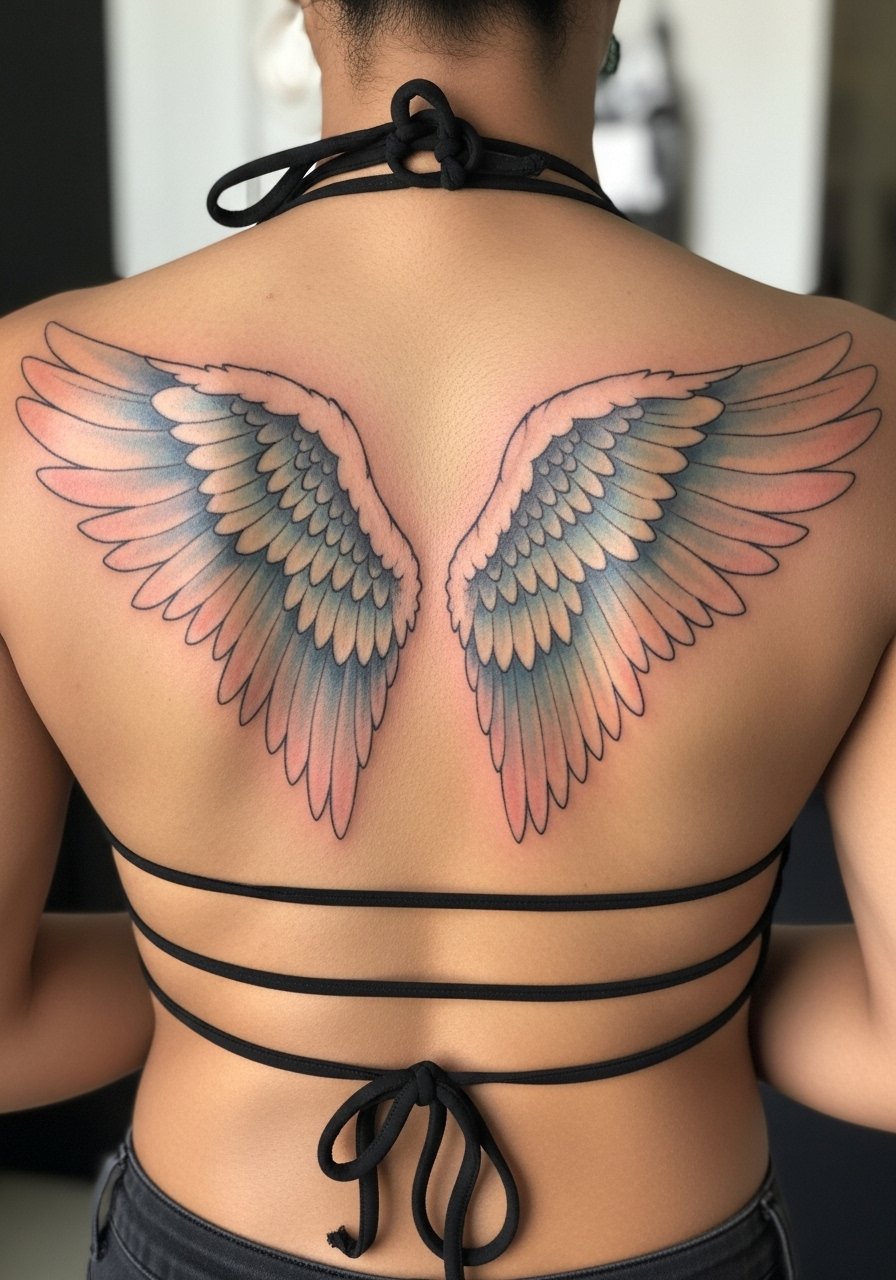
Watercolor wings look painterly fresh but they have real longevity challenges on backs. If you love this look, request bolder outlines or peppered dotwork edges to protect the soft fills, otherwise the pastels can blur into indistinct patches after sun exposure. Plan for touch-ups at year one if you swim or sunbathe frequently. The session feels gentler than heavy blackwork but longer because of layering colors. Show it off with a strappy black halter top and wear a loose button-down shirt to the appointment.
6. Ornamental dotwork wings tracing the spine
For a vertical spine-focused ornamental wing, dotwork and stippling elongate the back visually. Tell your artist you want graduated density from the spine outward so the center keeps contrast as it heals. Blowout risk near the spine is moderate because the skin shifts when bending, so avoid ultra-tight stipple at the center line. Sessions usually break into three sittings with careful micro-shading. This placement sparks a common debate about protective films versus dry healing. One group recommends occlusive film to keep backs sterile. The other group prefers air exposure to avoid trapping sweat. Decide with your artist based on your sweat tendencies and the studio's aftercare routine.
Studio Day Picks
The pieces above include upper-back realism, lower-back neo-traditional, and spine dotwork, so these items smooth session logistics and early healing for those specific placements.
-
Beeskin Tattoo Balm. A matte beeswax balm many prefer in hot, humid weeks because it leaves less greasy residue under tank tops during early healing.
-
Okinawa Tattoo Aftercare Soap. A gentle rice-based wash that calms irritated back skin without the drying lather some traditional soaps create.
-
InkSafe Healing Powder. A dry-healing option that absorbs excess moisture for active people who sweat during the day.
-
Lush Charity Pot Lotion. A lightweight moisturizer some folks dilute for back use because it hydrates without heavy pore-clogging.
-
Hustle Butter Deluxe. A common alternative to heavier ointments that many back-tattoo recipients find less likely to trap sweat and cause follicle congestion.
7. Ignorant style rough-feather wings across the shoulder blades
Ignorant style wings embrace a raw, imperfect texture that ages into character instead of fading into a smudge. The appeal is that small inconsistencies read as intentional. Mention to the artist that you want visible hand-stroke textures, not accidental shaky lines. Sessions are moderate in length and usually split into two sittings. Common mistakes include asking for "messy" without reference images, which can produce uncontrolled blowout risks. For everyday wear pick a one-shoulder top to accent the asymmetry.
8. Hyper-realistic fallen angel wings with shadowed edges on the lower back
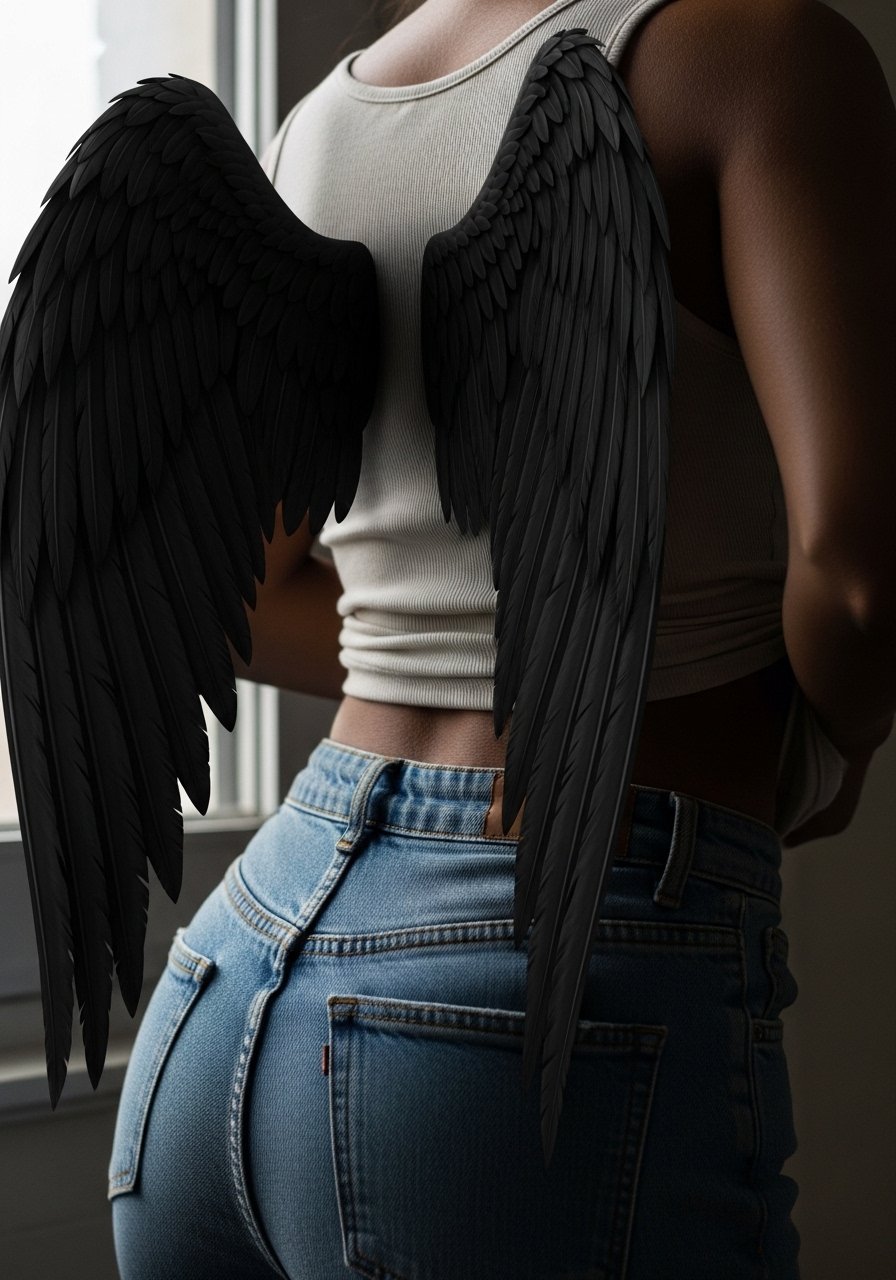
Fallen wings with heavy photoreal shading create narrative depth and are best suited for lower-back placement where there is room to sculpt dramatic shadow. This is a long-term project with many sessions and heavier needle work. Tell your artist the story you want the piece to tell so shading reads like a scene instead of random dark patches. Weight changes can distort lower-back pieces, so if you expect body changes discuss placement tweaks. Expect noticeable tonal shifts by year two unless you commit to periodic touch-ups.
9. Patchwork wings that integrate with existing back tattoos
Collectors often need wings that solve an expansion problem, not ones that start over. When integrating, ask your artist to color-match surrounding fills and to map flow lines so the wings tie into existing motifs. A common mistake is forcing a symmetrical wing over asymmetrical old work, which reads disjointed. Sessions vary depending on how much cover or color blending is required. For locating traveling or guest artists, search tags like #AngelWingsTattoo and filter by city, or use apps that let you sort guest spots and portfolios.
10. Minimalist single-wing feather that cascades down one shoulder blade
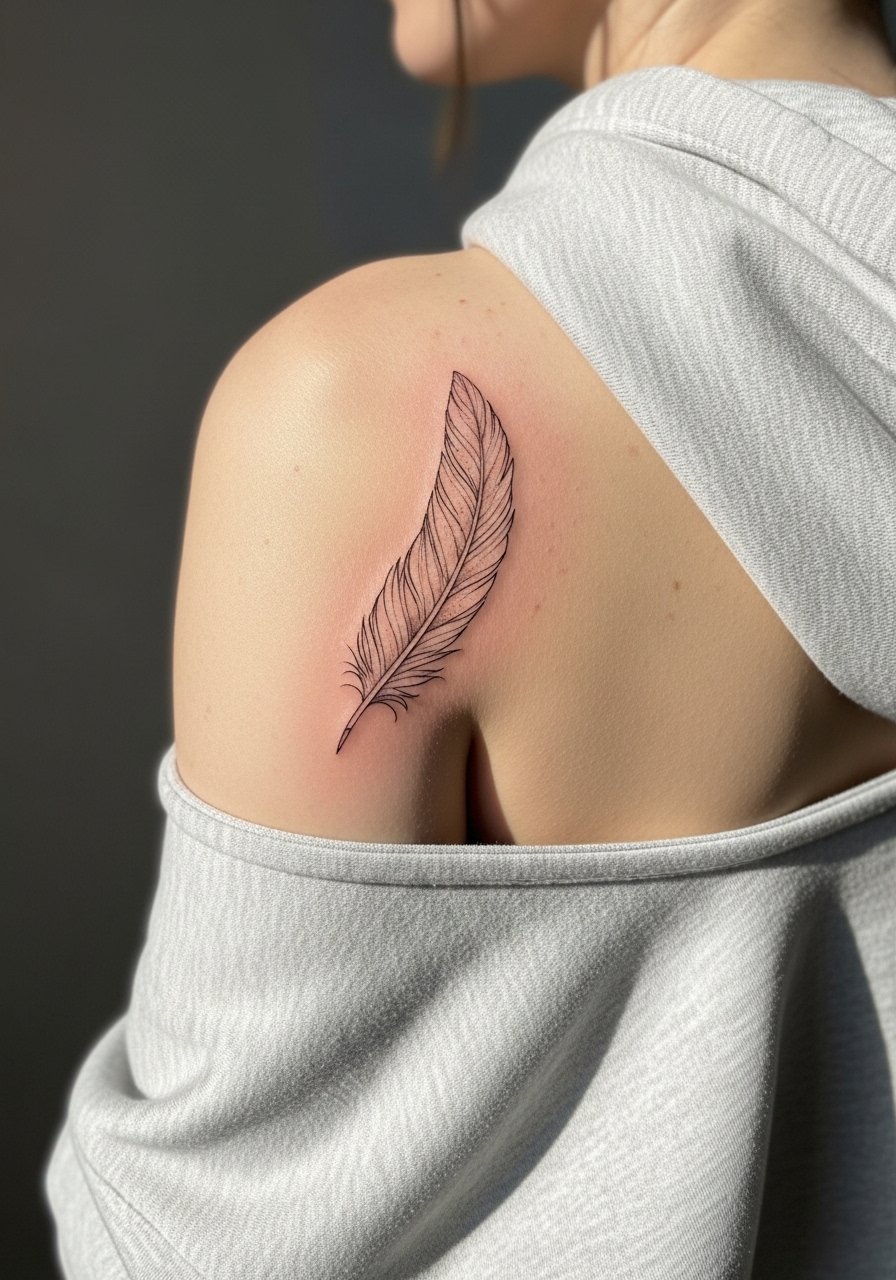
If you want a subtle entry point to back work, a single feather on one shoulder blade gives asymmetry and a hint of wings without committing to full coverage. Ask for a slightly heavier quill line so the feather reads a year in. Session time is short, usually under an hour, with low blowout risk when kept small. Avoid asking for ultra-thin filigree along the feather shaft. Pair it with a raw denim shirt for casual styling and wear a short-sleeve loose tee to the studio.
11. Biomechanical black-and-gray wings for an upper-back sci-fi edge
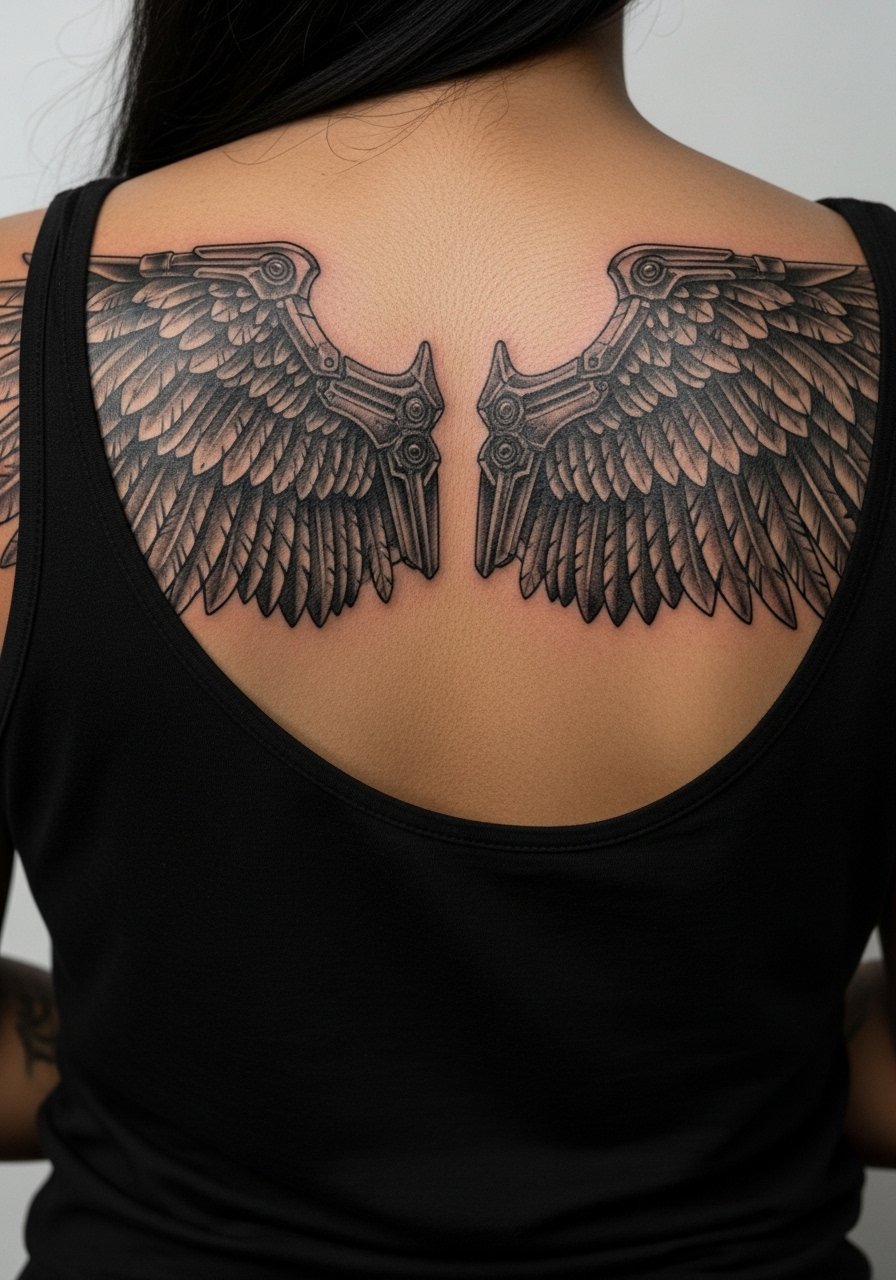
Biomechanical wings mix organic feather textures with mechanical lines and are striking as upper-back statement pieces. Tell the artist you want strong separation between organic and mechanical elements and specify where you want soft shading versus hard edge. Sessions are texture-heavy and feel rougher during the session because of deep shading. Expect the piece to hold well in black and gray when saturation is consistent. This style photographs well under contrasty light and pairs with a racerback tank when you want to show it off.
12. Asymmetrical wings that follow the spine curve for natural flow

Asymmetry can make wings look custom and organic on a curved back. When booking, ask the artist to do a live stencil while you stand and move so the wings follow the spine's natural S-curve. This approach helps avoid a rigid, flattened look. Sessions split into mapping and fill, which reduces surprise misplacement. A common error is forcing mirror symmetry on a body that has natural torso asymmetry. For active clients who practice yoga, request placement that avoids sports-bra straps; show-off pairing is a sheer back blouse.
13. Hidden birth-flower feathers tucked into wing barbs
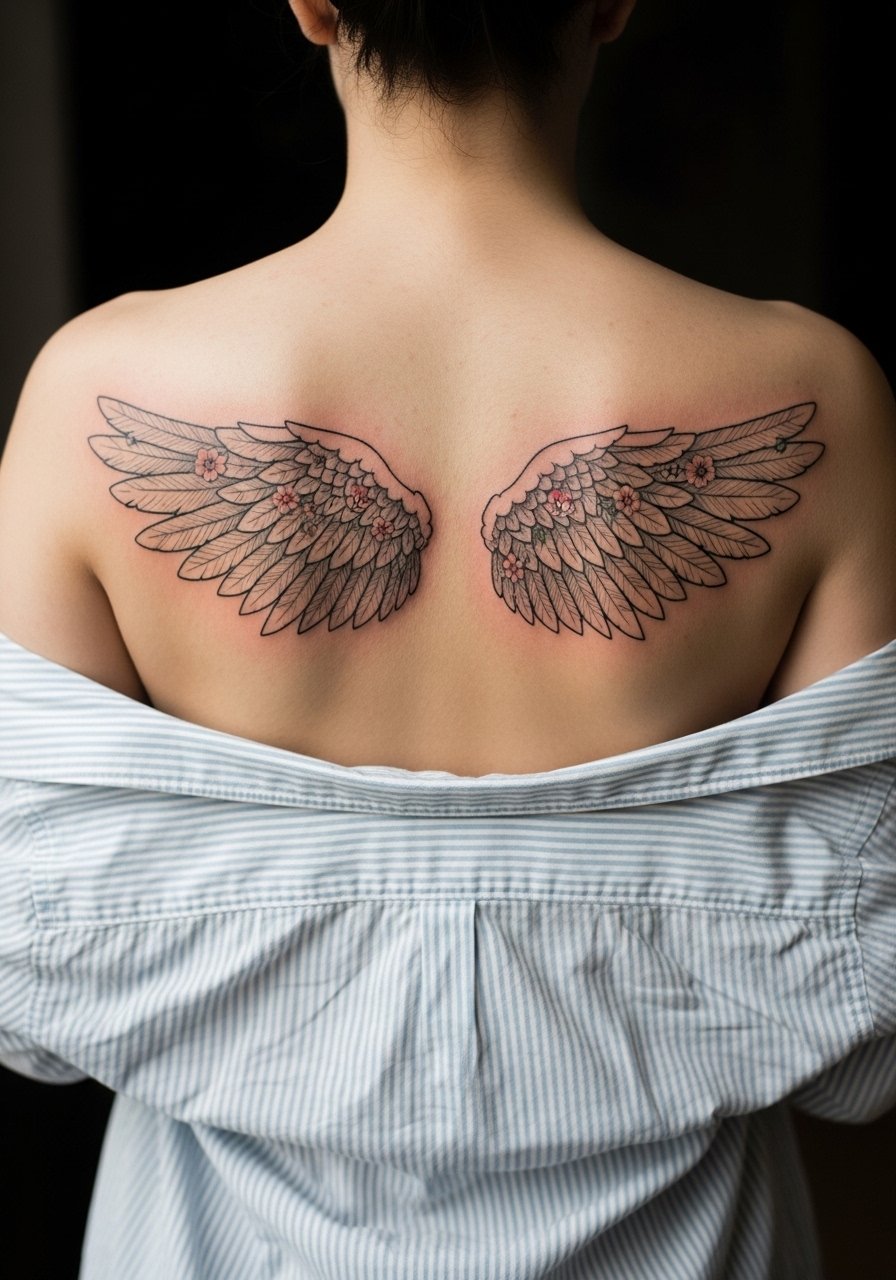
Personalization without obvious dates can be subtle and powerful. Ask the artist to seed a few feathers with tiny birth-flower motifs that read like texture at arm's length and reveal themselves up close. This tactic avoids cluttering the silhouette and preserves longevity because the extra detail sits inside already bold feather edges. Sessions are detail-focused and usually require a second pass for color. For a gentle reveal wear an open-back midi dress.
14. UV-reactive wings that glow under blacklight for nightlife reveals
UV-reactive accents make this a party-piece that remains subtle in daylight but vivid under club lights. Be explicit with your artist about which lines are UV-only and which are standard ink because UV can be softer and needs careful layering. This is niche work with specific touch-up requirements. If you dance or sweat heavily, discuss placement to avoid areas that will be rubbed by clothing. For nights out, a velvet halter top shows the regular art and keeps the UV surprise for dark rooms.
15. Yoga-friendly wings placed to avoid sports-bra friction
If you spend hours in a studio or gym, placement matters more than aesthetics. Designers can shift wing roots slightly higher or toward the shoulder blades so the sports-bra band does not rub the healing area. During consultation bring your favorite athletic tops so the artist can map placement around straps. Expect a comfortable session but plan for light movement restrictions for the first two weeks. For showing it off outside class a front-zip sports bra keeps the center clear.
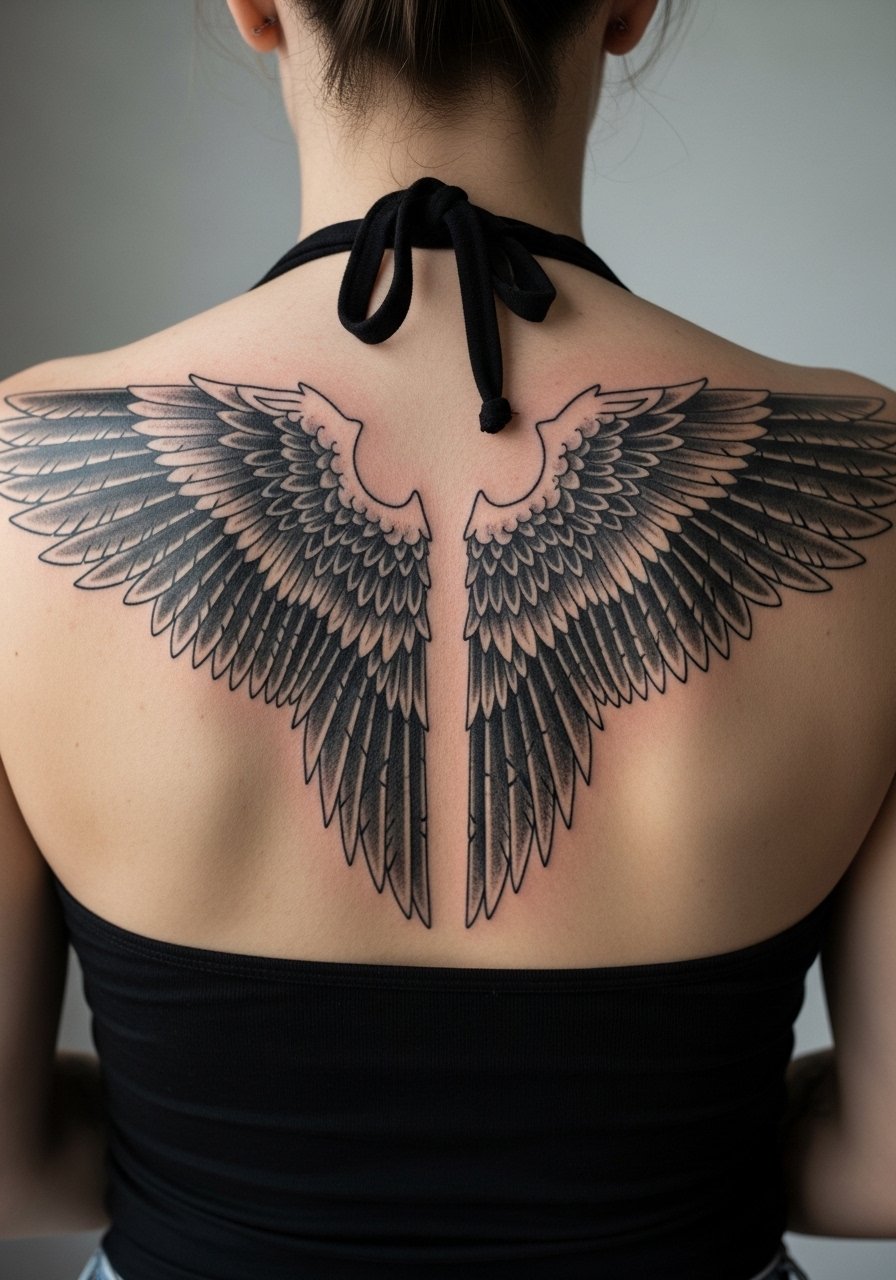
16. Traditional American mid-back wings with a scroll banner
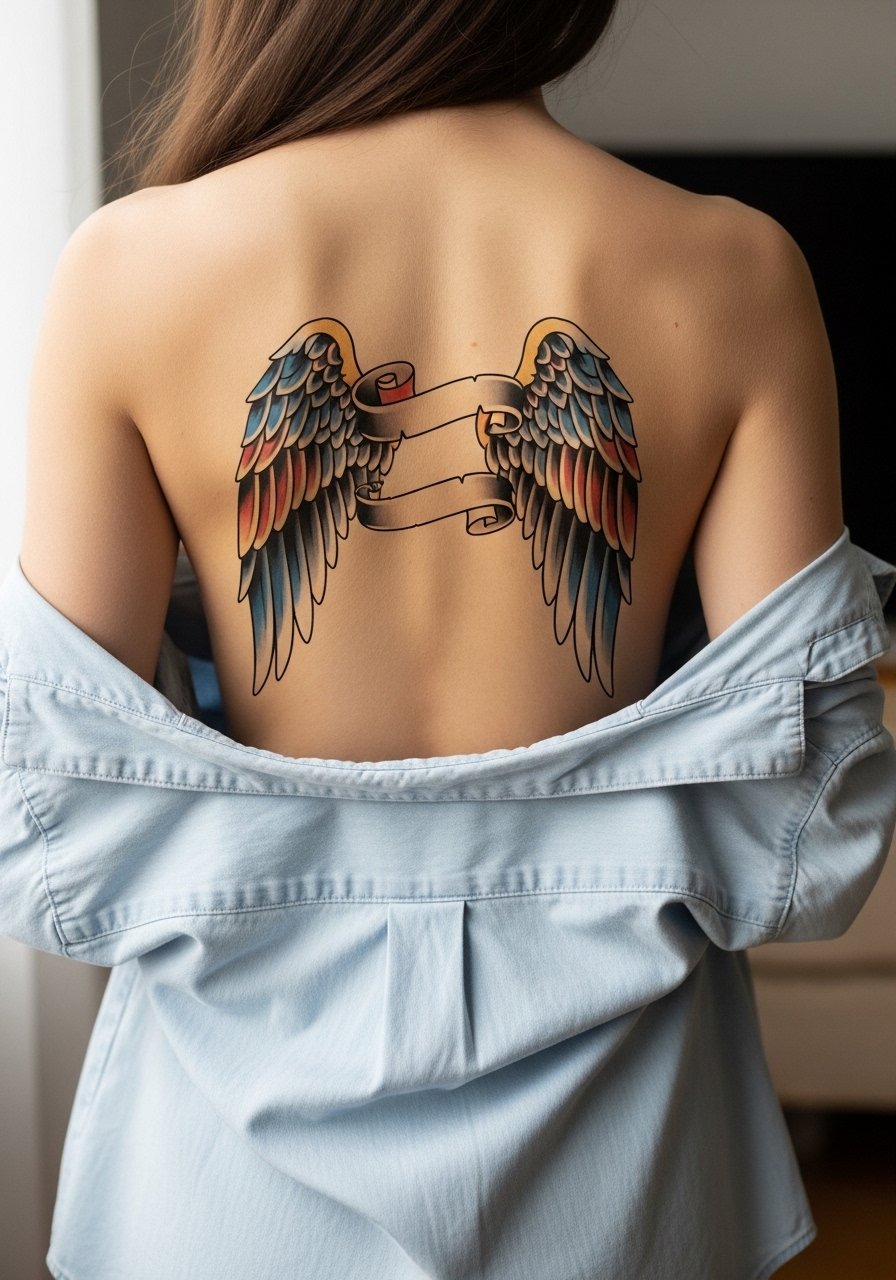
Traditional mid-back wings age predictably because of bold outlines and saturated fills. Request classic saturation and thicker outlines around the wings and banner so the piece keeps its form as the years pass. This style is forgiving of heavier sun exposure compared with fine-line options. Sessions are straightforward and usually two sittings for clean color. For a retro frame wear a crop top and high-waisted jeans to highlight the banner.
17. Small halo dotwork wings just above the upper spine
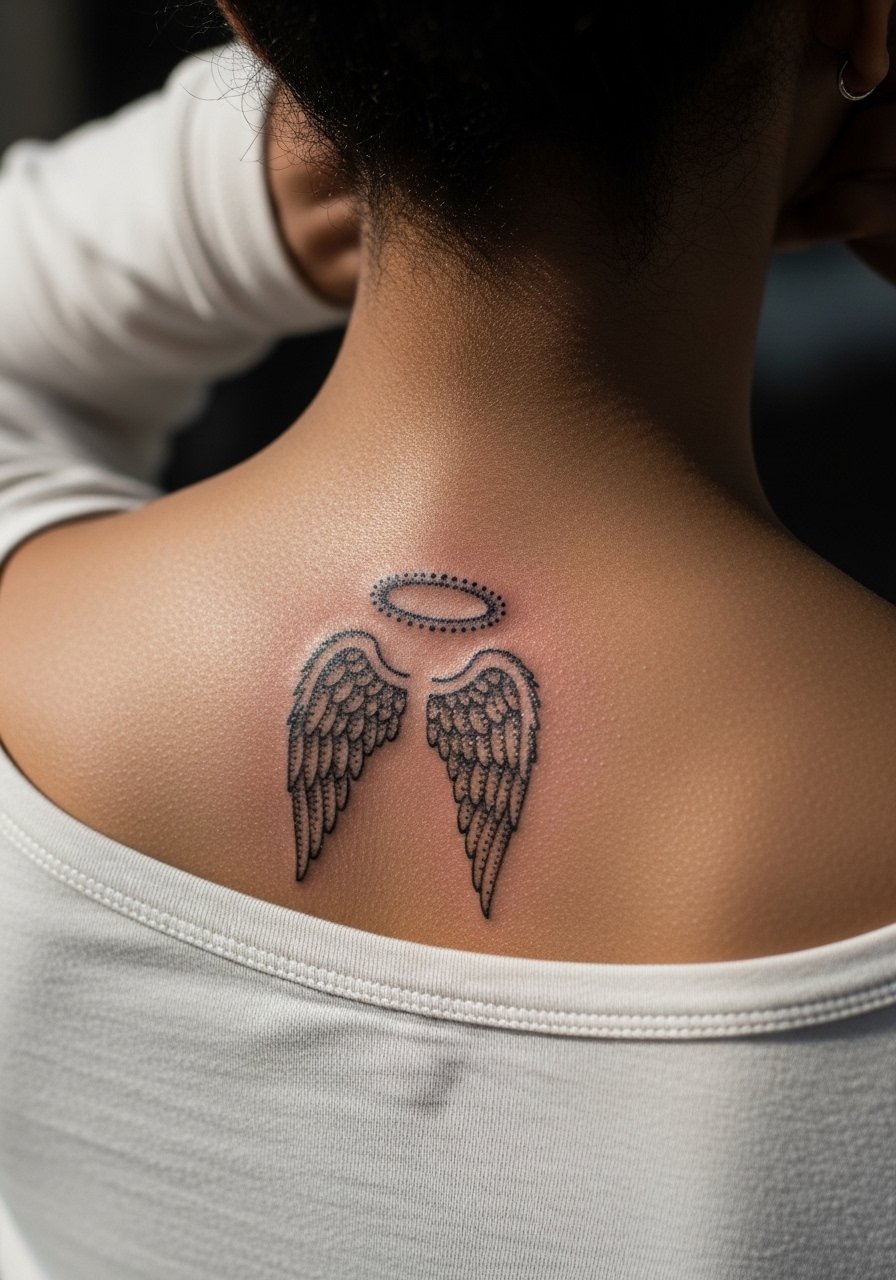
A compact halo or winglet above the spine suits someone testing back work without a big time commitment. Stipple shading creates the halo effect with minimal blowout risk when kept small. Ask for a slightly denser dotwork center so the halo keeps contrast after six months. Sessions are short and healing is quick compared to full-back work. For a polished reveal try an open-back blouse when you want to show the tiny wings.
Frequently Asked Questions
Q: How do fine line shoulder-blade wings hold up on darker skin tones?
A: From what I've seen, fine line can disappear faster on darker tones when the lines are too thin. Ask for slightly heavier anchor lines and high-contrast negative space so the wings read in photos. High-contrast blackwork or selective dotwork often preserves clarity better than faint gray washes.
Q: Should I use a protective film or dry heal for an upper-back dotwork spine piece?
A: Artists split on this. One side prefers protective films to keep the back sterile and limit touching. The other side favors air exposure to avoid trapping sweat and bacteria. Your sweat tendency and the studio's aftercare routine should guide the choice.
Q: What should I wear to my full upper-back realism appointment to make the session easiest?
A: Wear a loose button-down shirt you can slide off one shoulder, or a tank you can pull down at the back. Comfort matters for long prone sessions and it keeps hair products and deodorant off the area.
Q: How much movement restriction should I expect after a lower-back shading session?
A: Plan for limited heavy lifting and high-bend yoga for about ten to fourteen days. Light walking and gentle stretches are usually fine. Follow your studio's specific guidance and avoid tight waistbands that press on the area.
Q: Can wings be designed to avoid stretching with future weight changes?
A: You can reduce stretch risk by choosing upper-back placements and avoiding the area just above the waistband. If you anticipate larger body changes, discuss asymmetrical designs that allow for natural skin shifts instead of forcing perfect symmetry.
Q: How often do blackwork mandala wings need touch-ups compared with watercolor wings?
A: In practice, solid blackwork tends to need fewer touch-ups because heavy saturation holds. Watercolor fills are more vulnerable to sun and often require a color refresh within a year or two if exposed. Discuss a realistic touch-up plan with your artist before booking.
