
Bold color and bold lines have long defined American traditional tattoos, yet minimalist interpretations give the same icons a quieter presence that still reads from across a room. Minimalist American traditional work pares motifs down to clean outlines, tight negative space, and selective saturation so a rose, dagger, or swallow keeps its identity while aging more gracefully. Below are 27 ideas that translate classic imagery into small, wearable pieces and practical notes for booking, styling, and long-term wear.
1. Tiny Anchor on Inner Forearm
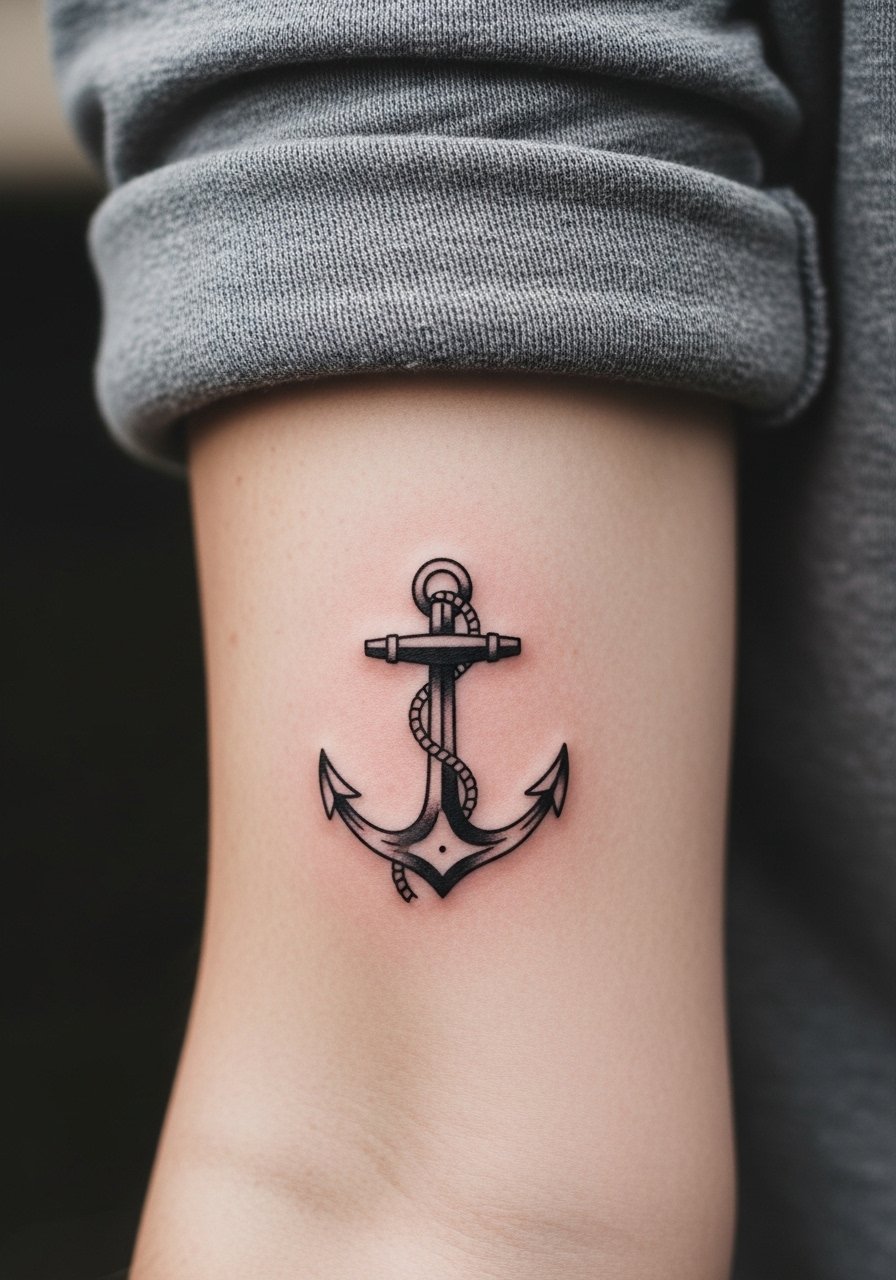
A small anchor uses the classic thick outline but trimmed color to keep it compact. I recommend this for someone who wants a nod to maritime symbolism without a full sleeve. Tell your artist you want bold outer linework with single-color fill and clear negative space inside the shank. Common mistake is shrinking the motif too much which leads to loss of the anchor's silhouette over the years. Pain is low on the inner forearm, session time about 30 to 60 minutes, and touch-ups might be needed around year three if you live in the sun a lot. For showing it off, roll sleeves up and add a minimalist leather cuff watch that frames the forearm without obscuring the design.
2. Micro Rose on Wrist
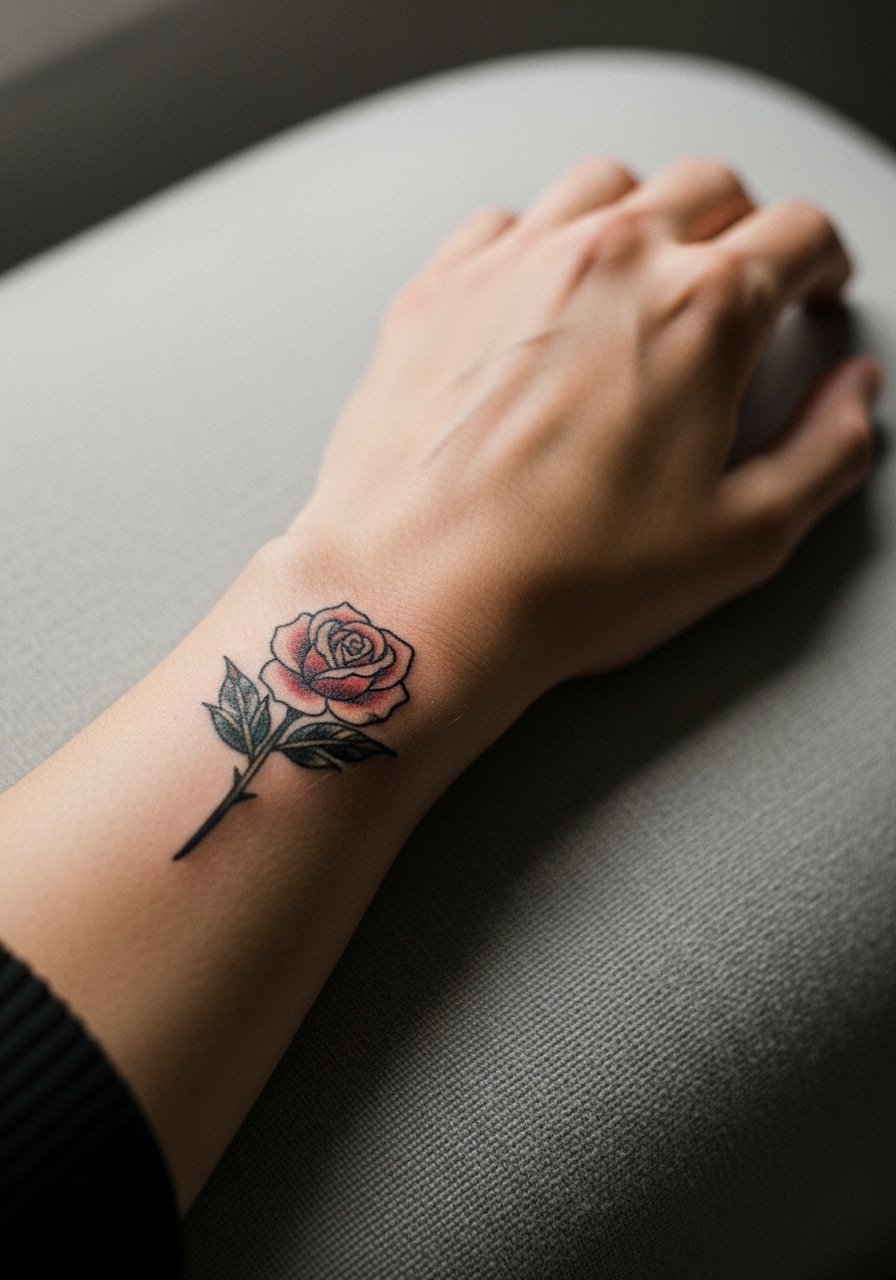
A tiny rose keeps the classic petal shapes and central dot shading but scaled to a compact wrist piece. This placement is very visible and the biggest mistake is going too small with dense shading. Ask for slightly heavier outer linework and minimal inner shading so the petals keep separation as the skin settles. Expect a sharp look at six months and slight softening by year two. Wrist pain is moderate and a studio session runs under an hour. Pair it with a thin chain bracelet that sits next to the tattoo without crowding it.
3. Nautical Star at the Collarbone
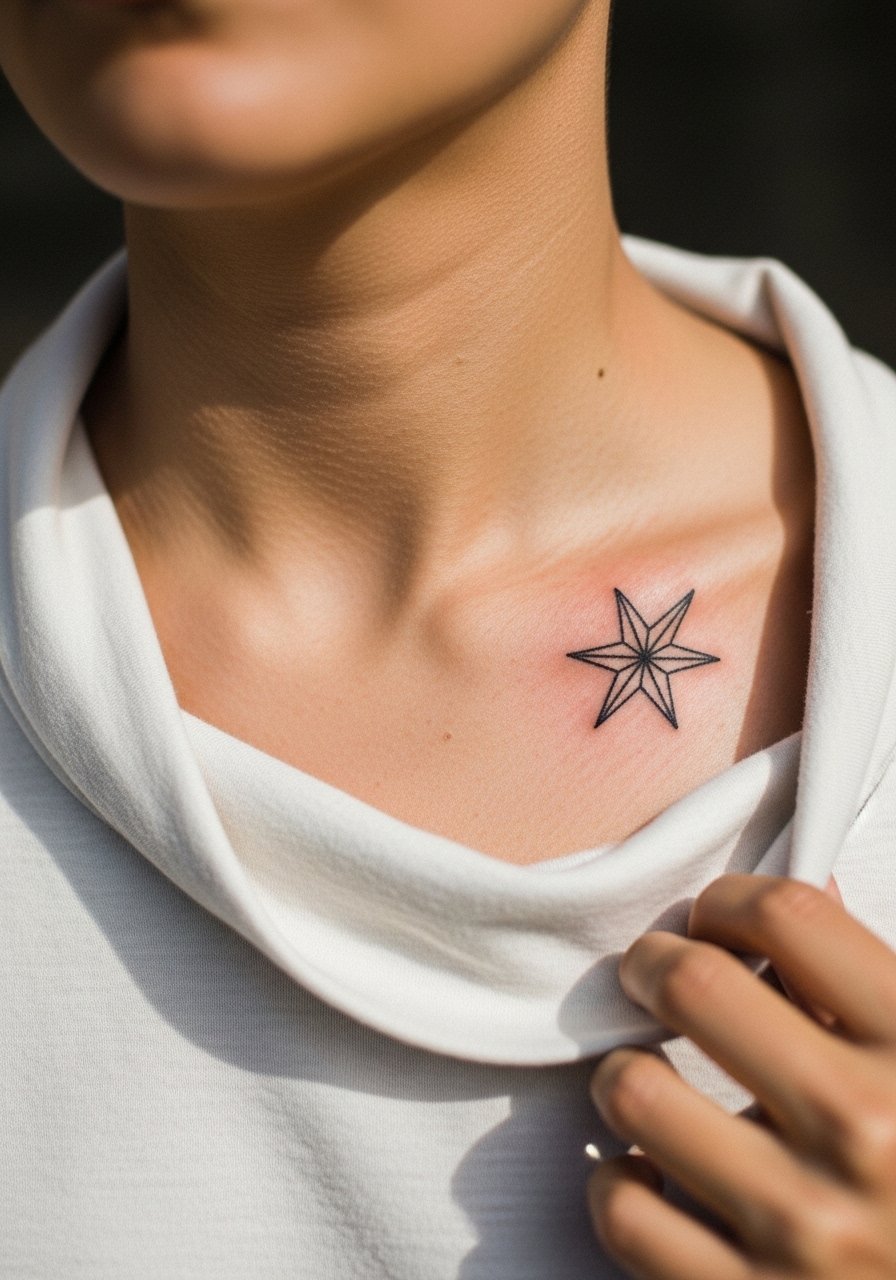
A collarbone star uses bold outer lines and small internal negative triangles to read clean at a distance. Collarbone work can ache during the session but heals into a crisp silhouette with the right placement. Tell your artist to keep the star at least finger-width across so the points do not blur into one another. A common mistake is placing it flush against clothing seams which causes extra friction during healing. Session time is often 30 to 75 minutes. Pair this with an open-neck linen blouse to show the star when you want to.
4. Mini Dagger on Ribcage
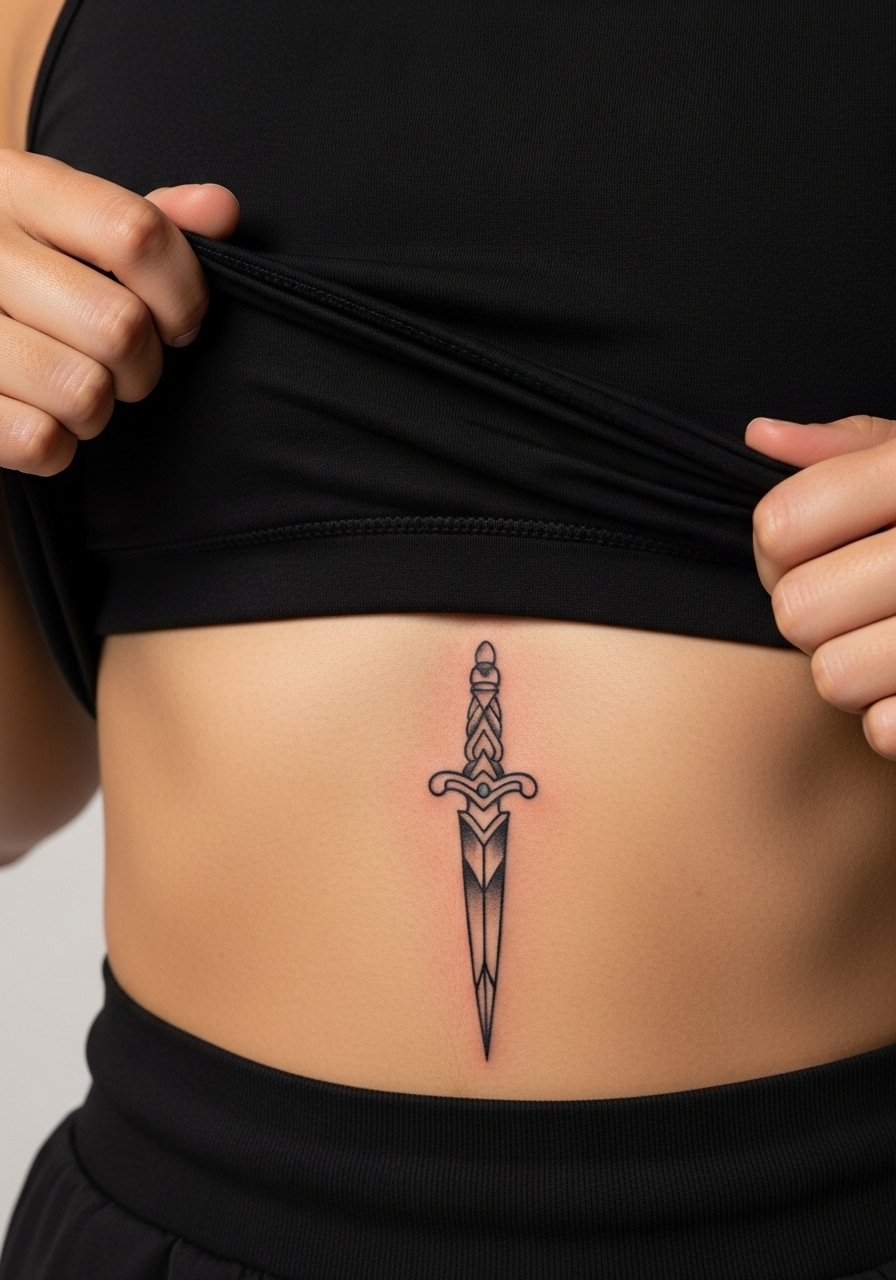
Ribcage daggers read dramatic even when small because of their vertical shape. Fair warning, ribs are one of the higher-pain placements and the session can be stop-start for comfort. Artists split on fine line on ribs. One camp says the skin stretch blurs thin lines within two years. The other camp says proper depth and spacing keeps the lines intact. Ask your artist where they stand and request slightly heavier outer lines if you want longevity. Keep the dagger at a modest scale to avoid dense shading that can cloud over time. Wear a supportive sports bra to the session so the artist can expose only the area needed.
5. Tiny Swallow Behind the Ear
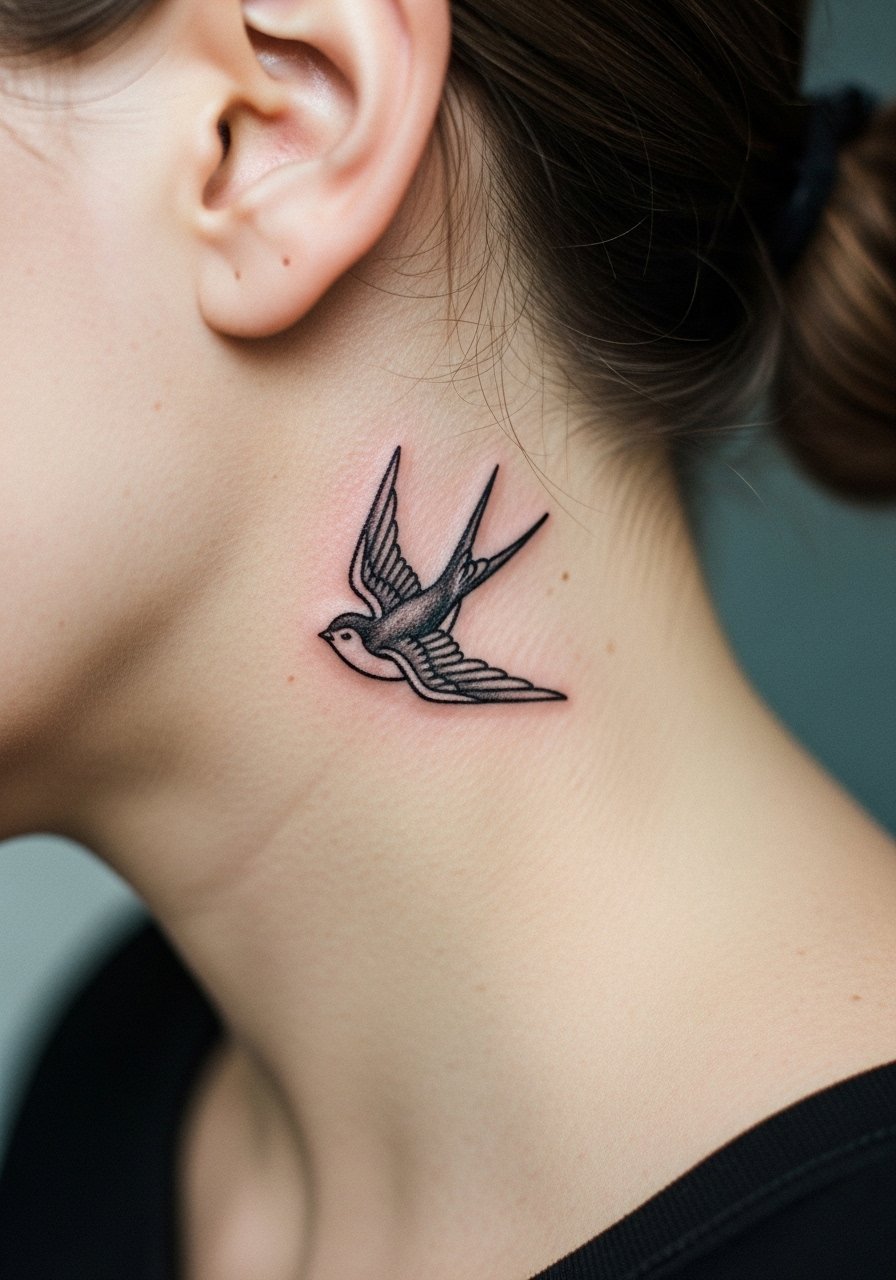
A behind-the-ear swallow is discreet and charming. The space forces a condensed layout so prioritize clear silhouette over internal detail. The main mistake is asking for tiny internal shading which disappears as the skin moves. Session time is short but expect sensitivity near the ear. For booking, bring up hairline considerations so the design sits where hair can partially frame it. Visibility is limited so touch-ups are common at year two. Keep hair slightly tucked for the first week to avoid snagging the area.
6. Minimal Heart with Banner on the Inner Bicep
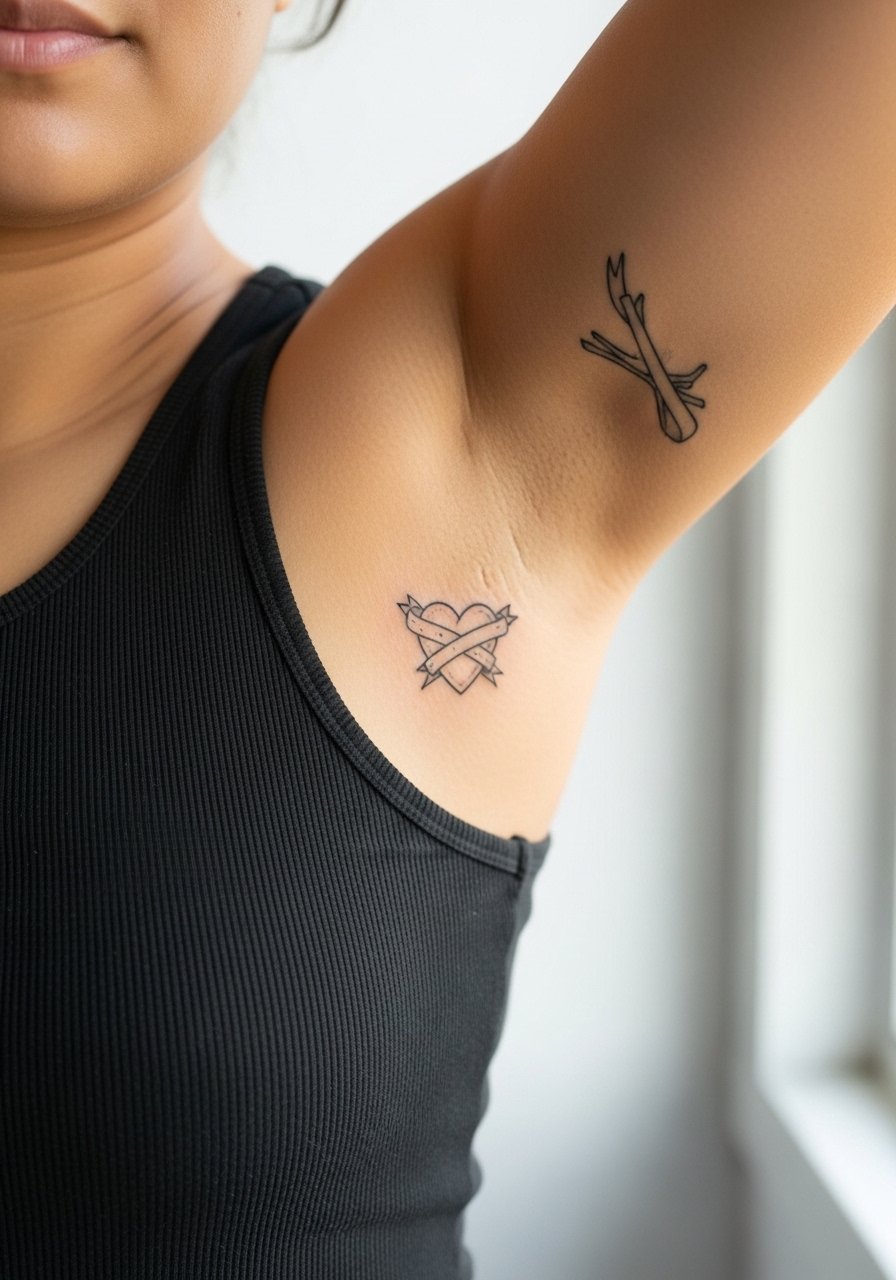
An inner bicep heart keeps the American traditional banner but simplifies the script to one word or initials. This placement is tender during the session and the biggest mistake is asking for very dense lettering inside the banner. Tell your artist you want open spacing and a slightly heavier banner outline so the lettering reads as the skin heals. Expect two to three years before a possible touch-up. For the appointment, wear a loose tank so the artist has easy access, and consider a thin chain pendant that sits above the area if you plan to show it off later.
Studio Day Picks
The designs above include wrists, inner biceps, and a behind-the-ear piece, and each asks for different prep. A few targeted items smooth the session and protect tight linework in the first week.
-
Stencil transfer paper kit. Lets you preview placement and line thickness on skin before the needle touches the area, helpful for wrist and collarbone pieces.
-
Topical numbing cream. Useful for ribcage and inner bicep sessions when sensitivity might force frequent breaks.
-
Thin protective film roll. Keeps small wrist and finger tattoos protected from friction during the first days of healing.
-
Fragrance-free gentle body wash. Cleanses healing areas without stripping moisture from fine line work on arms and chest.
-
Aquaphor healing ointment. A thin layer in the first days helps preserve saturation in small traditional fills without clogging delicate channels.
7. Classic Rose on the Ankle
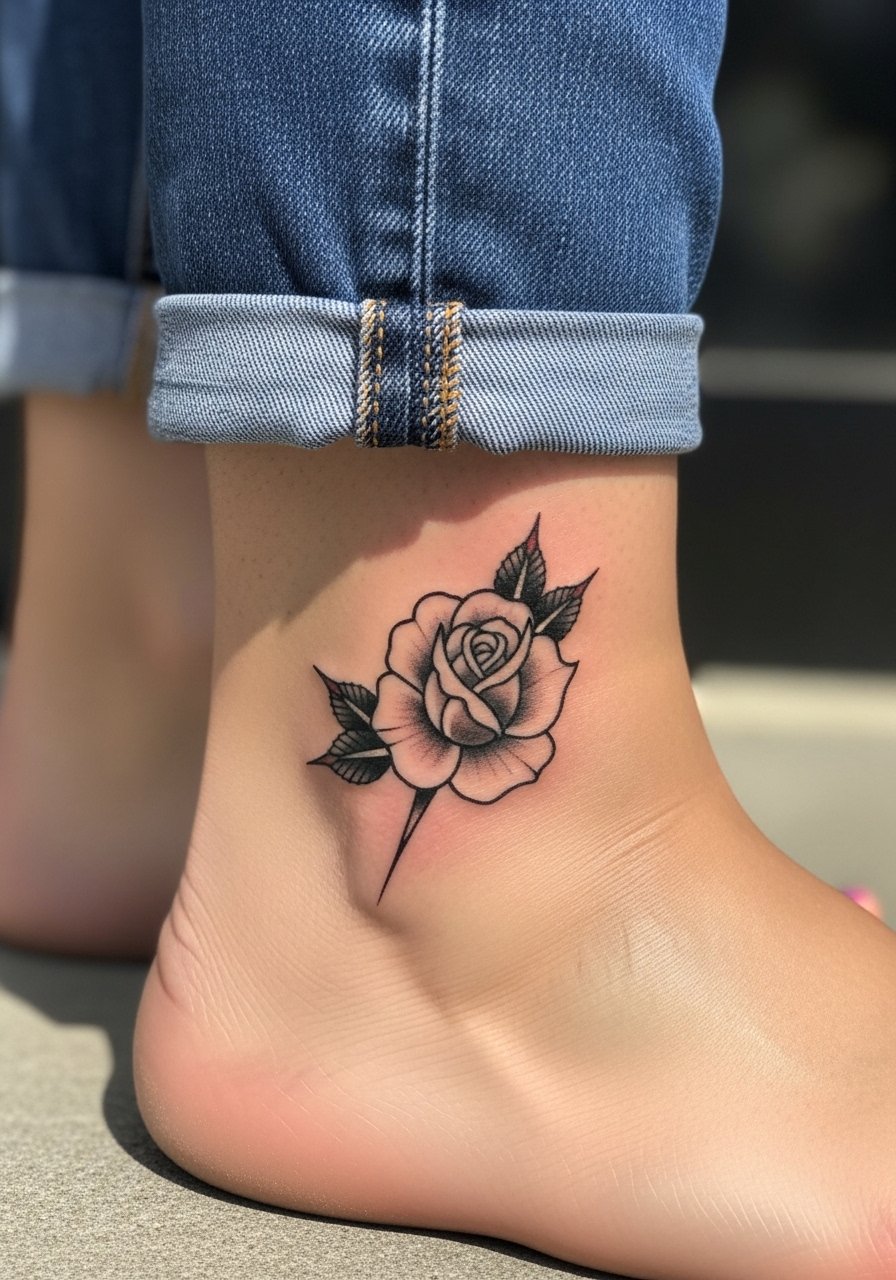
A small rose on the ankle uses bold outline and restrained color blocks so it stays legible. The ankle gets a lot of movement and friction, so the mistake is heavy inner shading that rubs off from socks and shoes. Tell your artist you want tight negative space between petals and durable outer linework. Pain is moderate and a session is usually under an hour. Expect touch-ups at year three in high-friction spots. For showing it off, wear low sneakers or sandals and consider a simple anklet chain that draws attention to the area without rubbing the tattoo.
8. Tiny Skull on the Back of the Hand
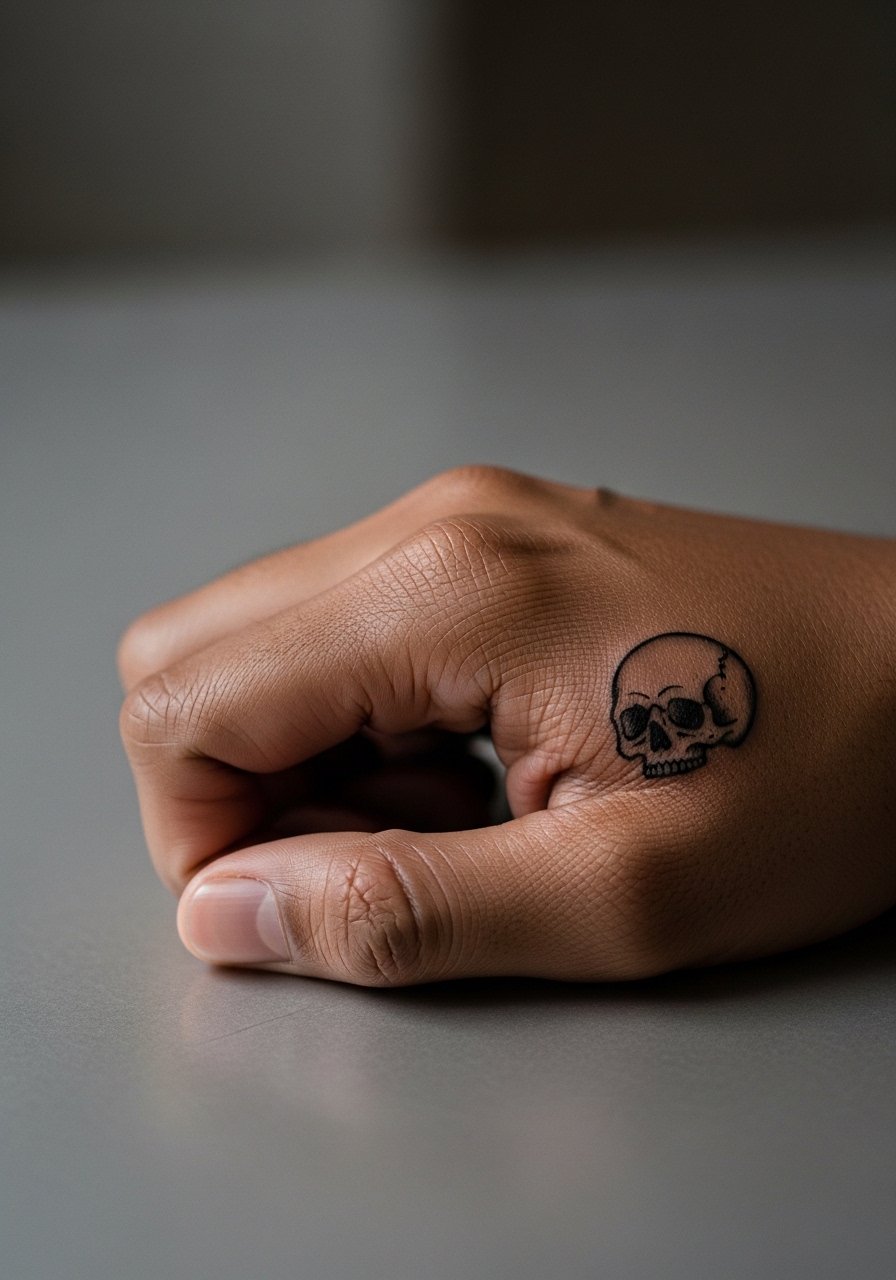
Hand tattoos are visible and contentious in professional settings. The common mistake is treating the hand like forearm skin. Hands suffer heavier wear so thin fills fade fast. Artists split on this topic. One group says hand and finger pieces rarely hold for more than a few years because of constant washing and motion. The other group argues deep saturation and bold outlines can keep simple designs readable longer. Decide based on your job and ask the artist for bolder outlines and minimal interior detail. Session time is short but healing is ongoing. If you plan to use your hands a lot at work, consider a subtle placement instead.
9. Minimal Eagle Shoulder Cap
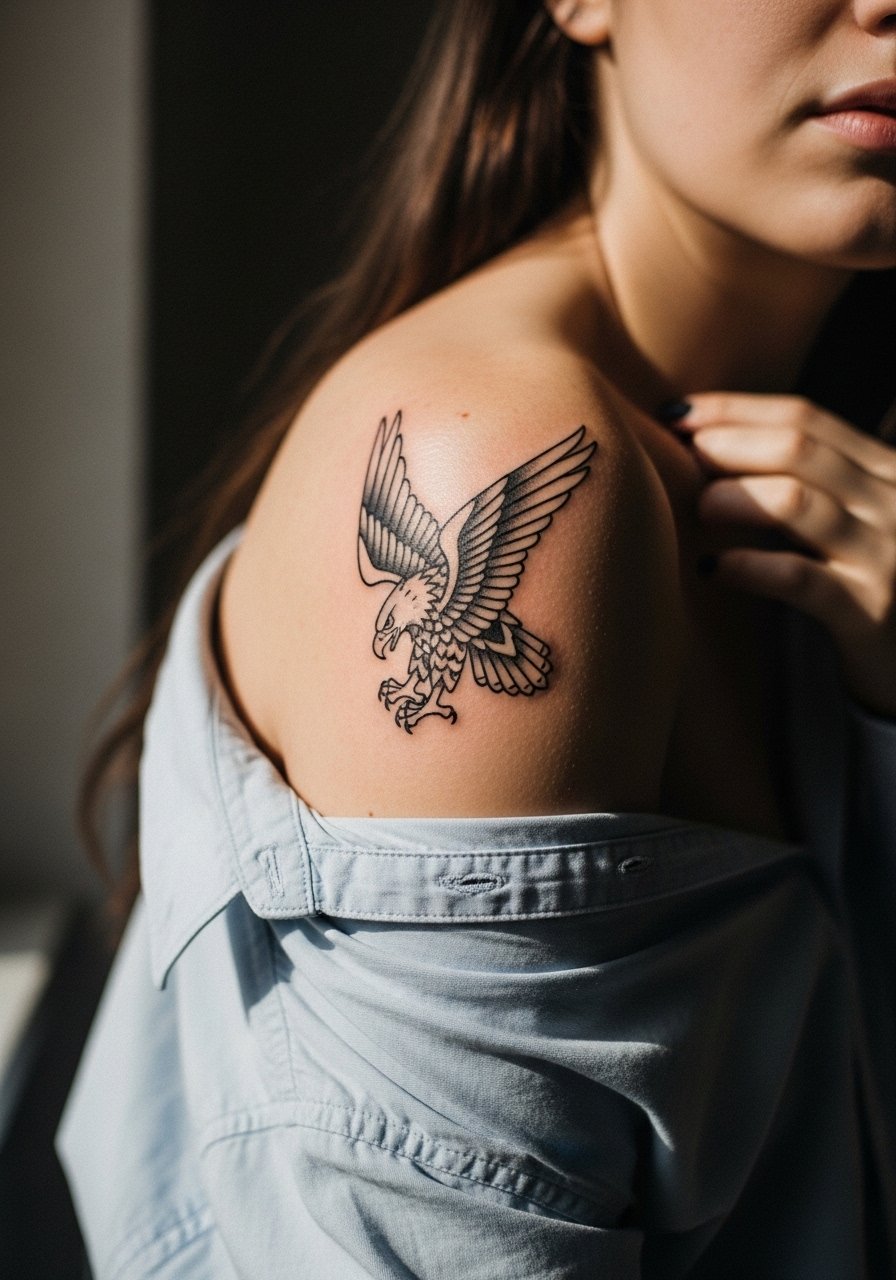
A shoulder eagle translated into minimalist language keeps the wing shape and beak but drops heavy shading for flat fills. The shoulder accepts bolder work well and usually ages into a stable silhouette. Mistakes come from cramming too much wing detail into a small patch. Ask for simplified feathers and clean wing edges so the image remains distinct as your skin moves. Pain is low on the shoulder and a session can be 45 to 90 minutes depending on size. For outfits, a loose button-down shirt you can pull aside is the easiest for a session and frames the tattoo when you wear it open.
10. Tiny Snake Looping the Wrist
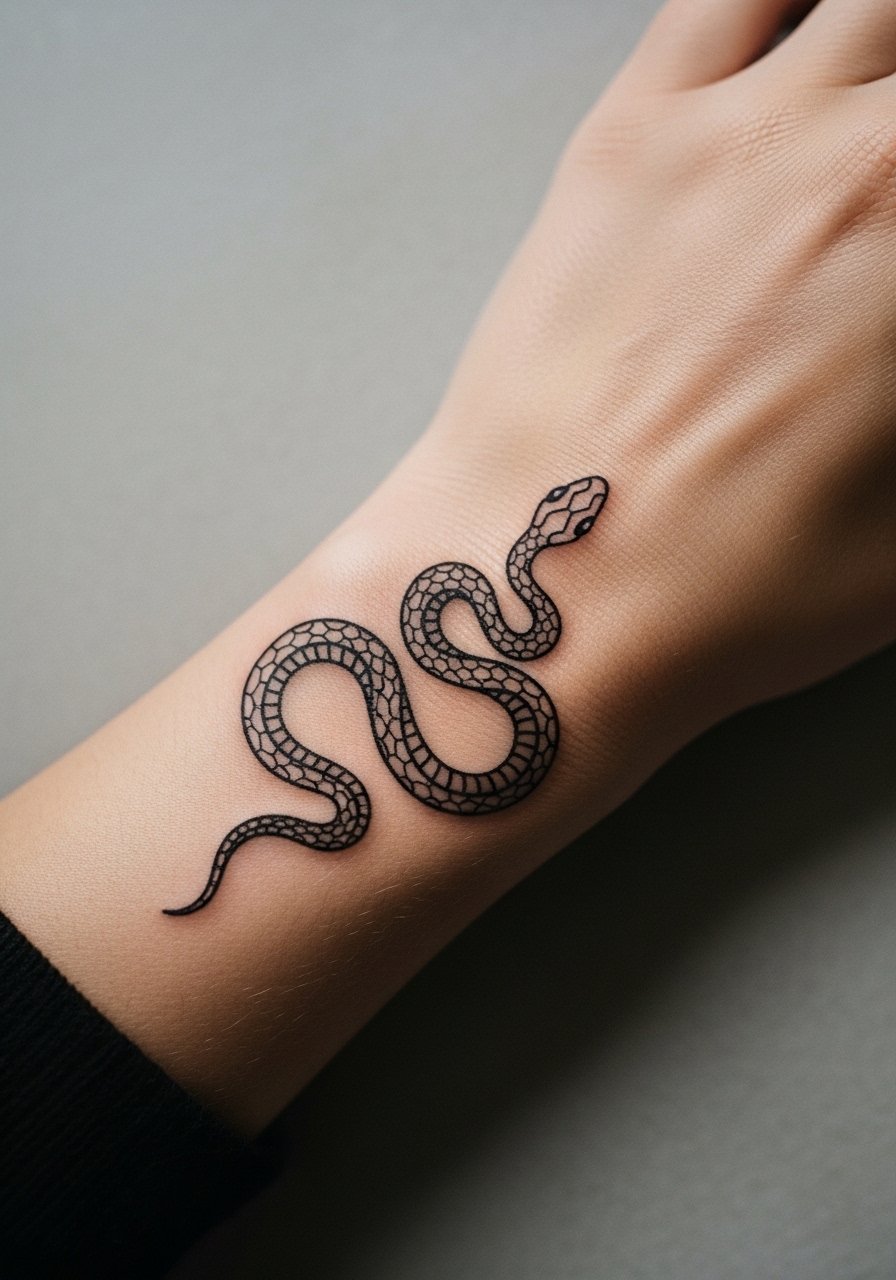
A snake wrapped around the wrist reads well if the head and tail remain distinct. The main mistake is adding dense patterning that disappears as the skin stretches. Tell your artist to keep negative space between coils and to prioritize a clean head silhouette. Wrist skin is thin and slightly sensitive. Session time usually under an hour and you should expect touch-up work by year three. Pair this with a slim stackable bracelet set that complements without covering the head of the snake.
11. Tiny Anchored Heart on the Sternum
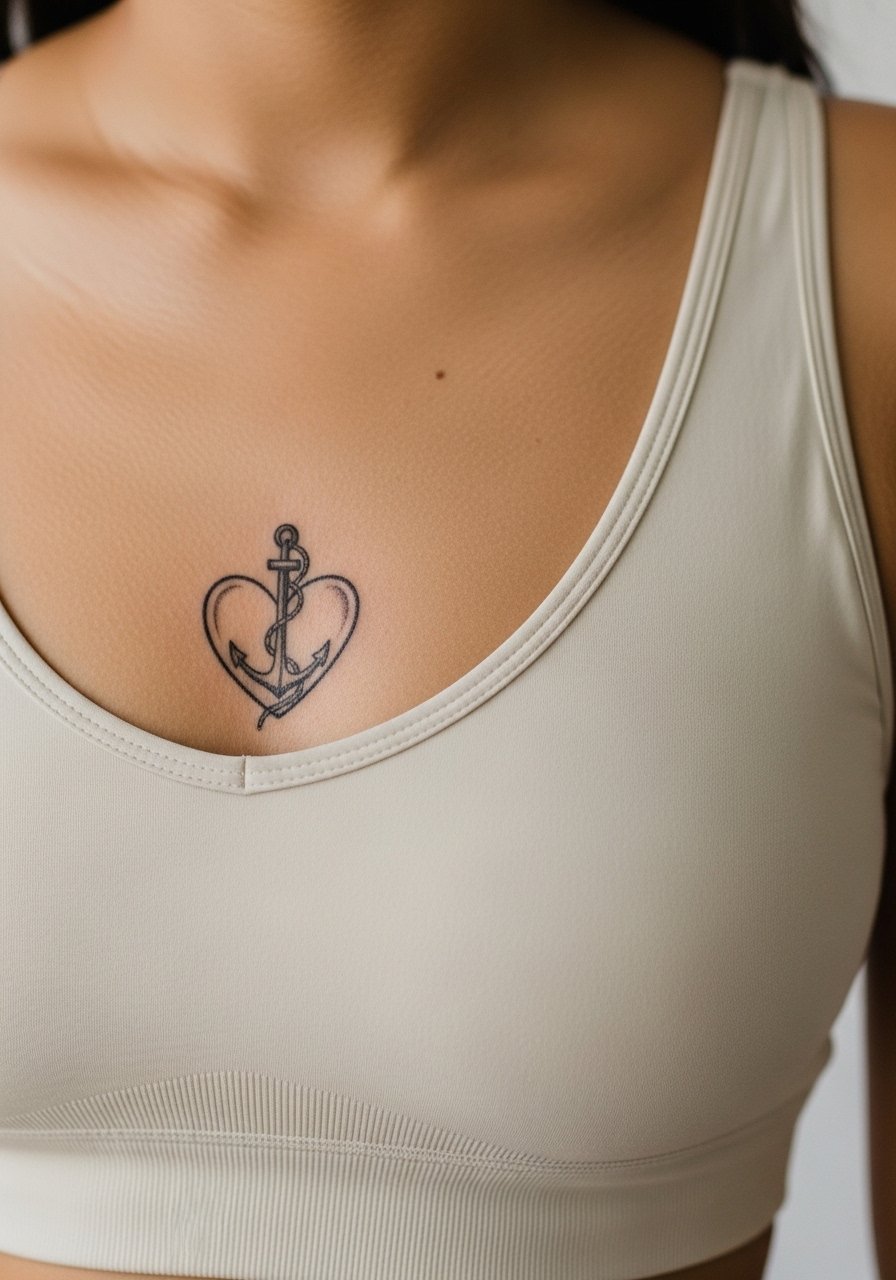
Sternum pieces require clothing considerations because the area is sensitive and moves with breathing. The biggest mistake is asking for tiny text inside a small banner on the sternum. For longevity, request heavier outer outlines and sparse interior details. Sternum sessions can be more painful and often take longer because breaks may be needed. Expect the healed look to settle after a few months but anticipate a touch-up at two to four years depending on care. For the appointment wear a strapless or fitted sports bra to give the artist clear access without exposing more than necessary.
12. Minimal Pin-Up Silhouette on the Thigh
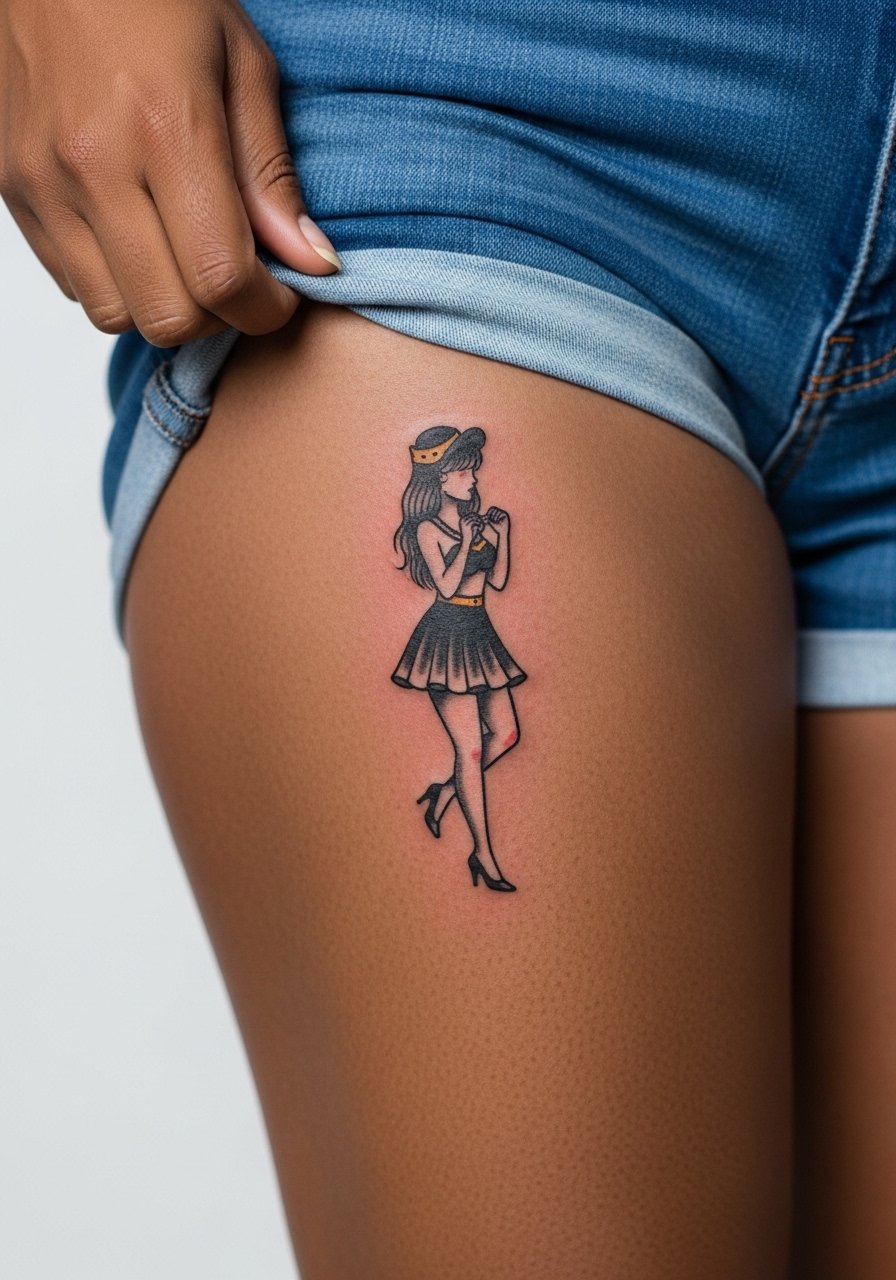
A thigh pin-up reduced to silhouette keeps the pose and a bold outline while removing ornate shading. The thigh gives room to breathe so the common mistake is compressing detail into a tiny area. If you want this to age well, keep the figure at a moderate size and ask for clean contours. Pain is low to moderate on the outer thigh. Sessions are comfortable and can be longer. For the appointment wear high-waisted shorts you can shift easily and consider a loose drawstring linen pant for afterward when you want breathable coverage.
13. Micro Nautical Compass on the Wrist
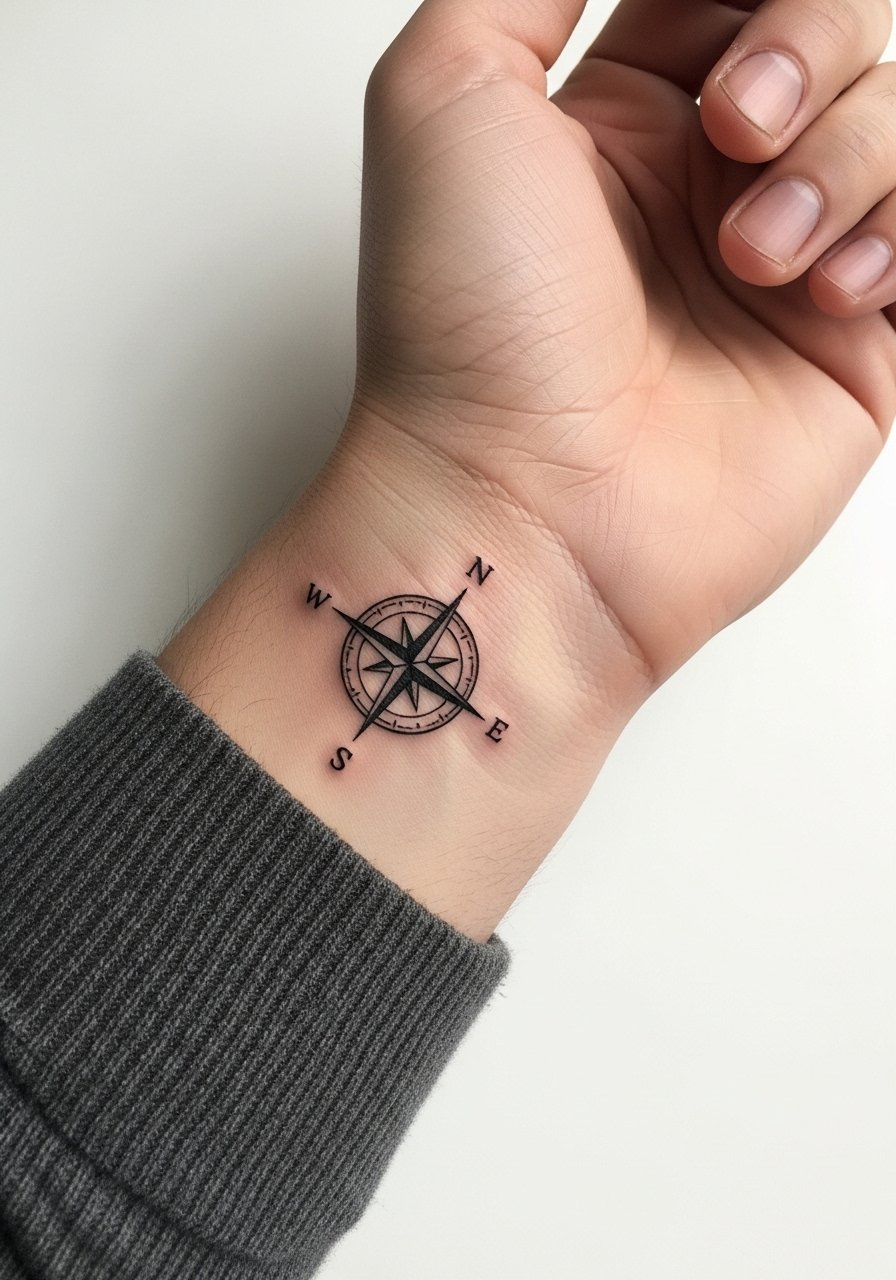
A compass distilled to its core lines makes a clear, symbolic wrist piece. The mistake is overcomplicating the interior with tiny ticks that blur. Request bold cardinal points and minimal interior detail so the compass maintains directionality as it heals. Wrist skin sees constant use, so expect a touch-up in two to three years if you wear watches or bracelets. Session time is brief and pain moderate. For showing it off, a minimalist leather cuff watch looks intentional with the compass when worn on the opposite wrist.
14. Small Traditional Rose Behind Collarbone
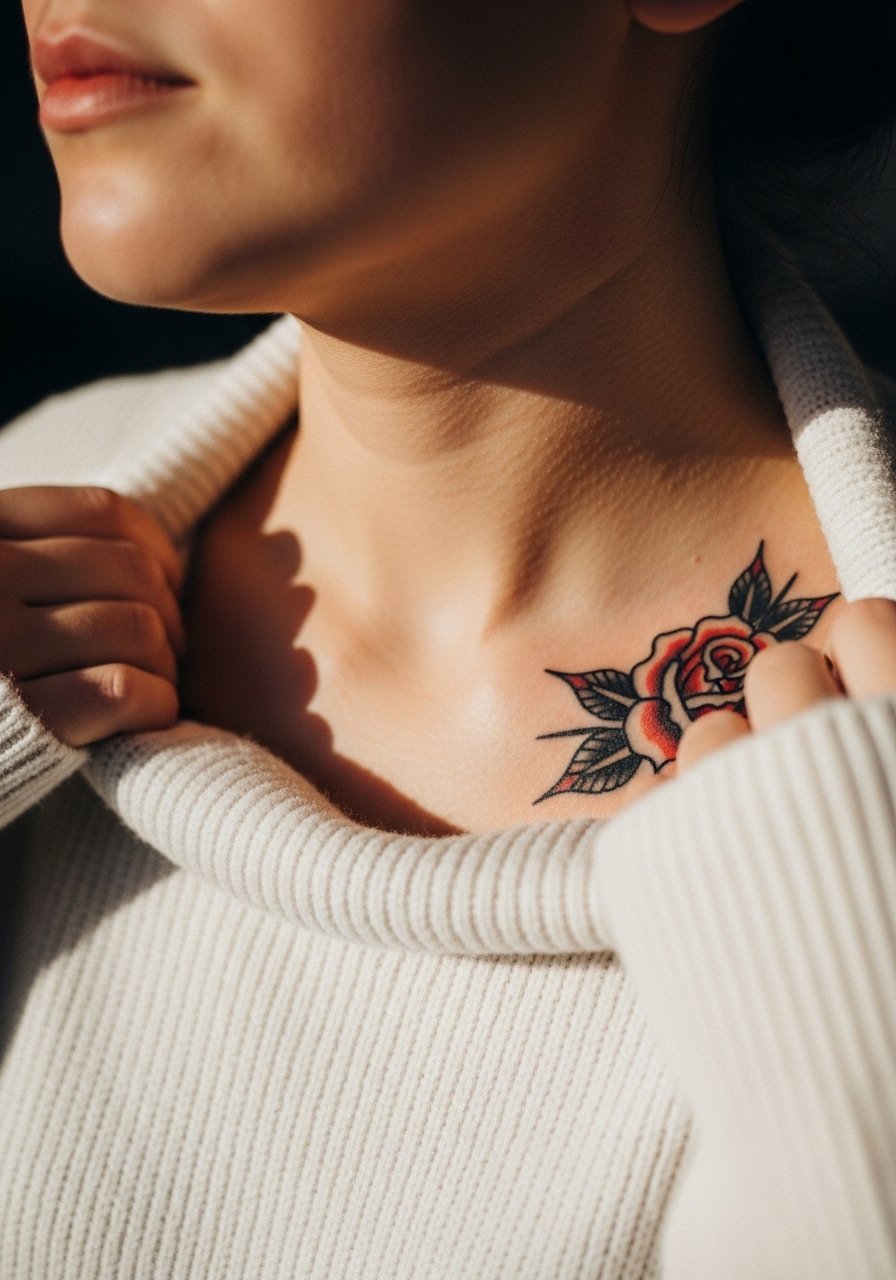
A rose tucked under the collarbone reads as a quiet classic. The usual error is tight shading near the bone which can scar or blur during healing. Ask for more negative space within the petals and slightly heavier outer strokes. Collarbone work can sting because of proximity to bone. Session length is typically under an hour. For outfits try an open-back midi dress or a wide-neck top that frames the piece without rubbing against it.
15. Minimal Ship Wheel on the Calf
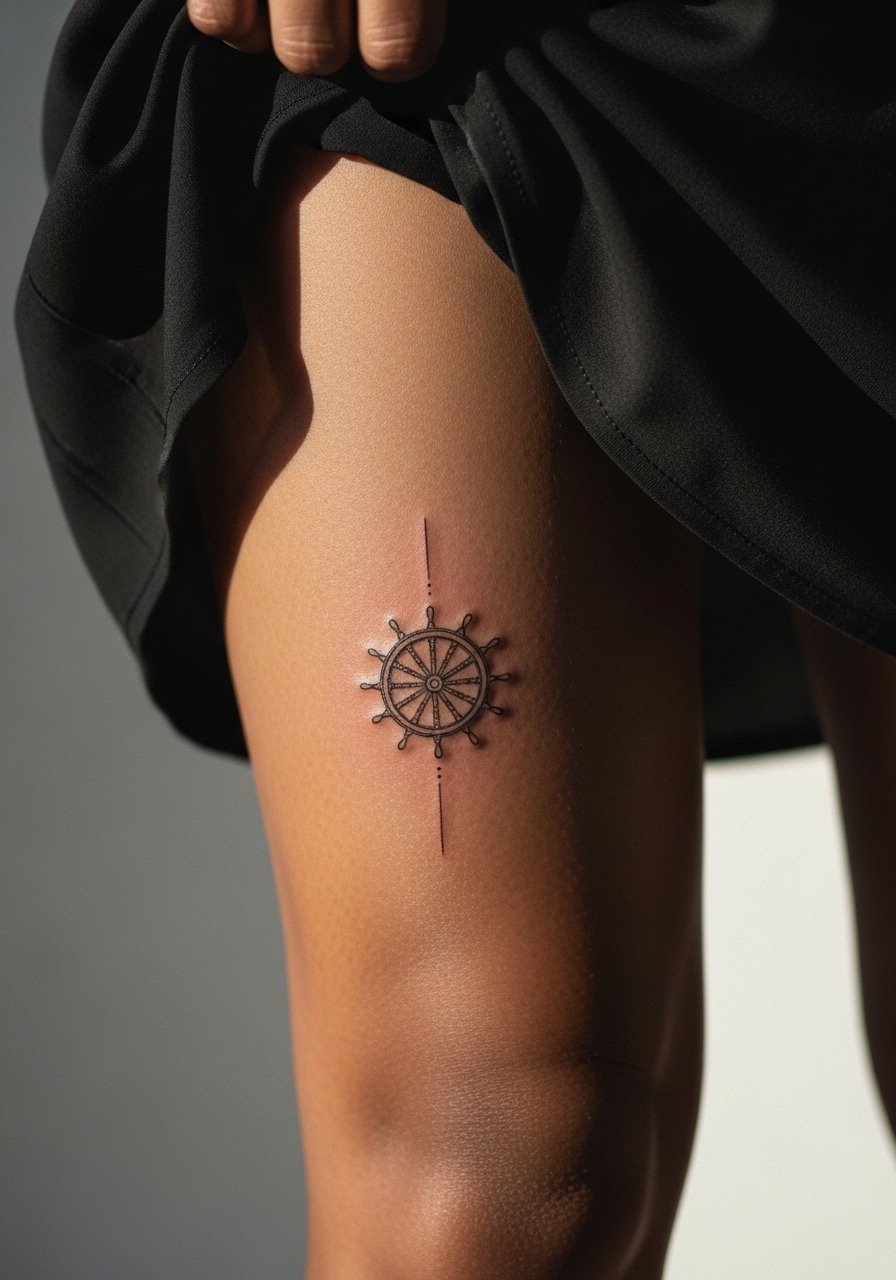
A ship wheel uses radial symmetry that stays readable when simplified. The mistake is crowding spokes near the center which creates a muddy core later. Ask for thicker outer spokes and clear spacing between handles. Calf sessions are tolerable and can be longer in duration. The healed look is resilient because the area sees less friction. For show-off outfits, a skirt with a small side slit reveals the calf without obstructing healing.
16. Tiny Dagger on the Side of the Finger
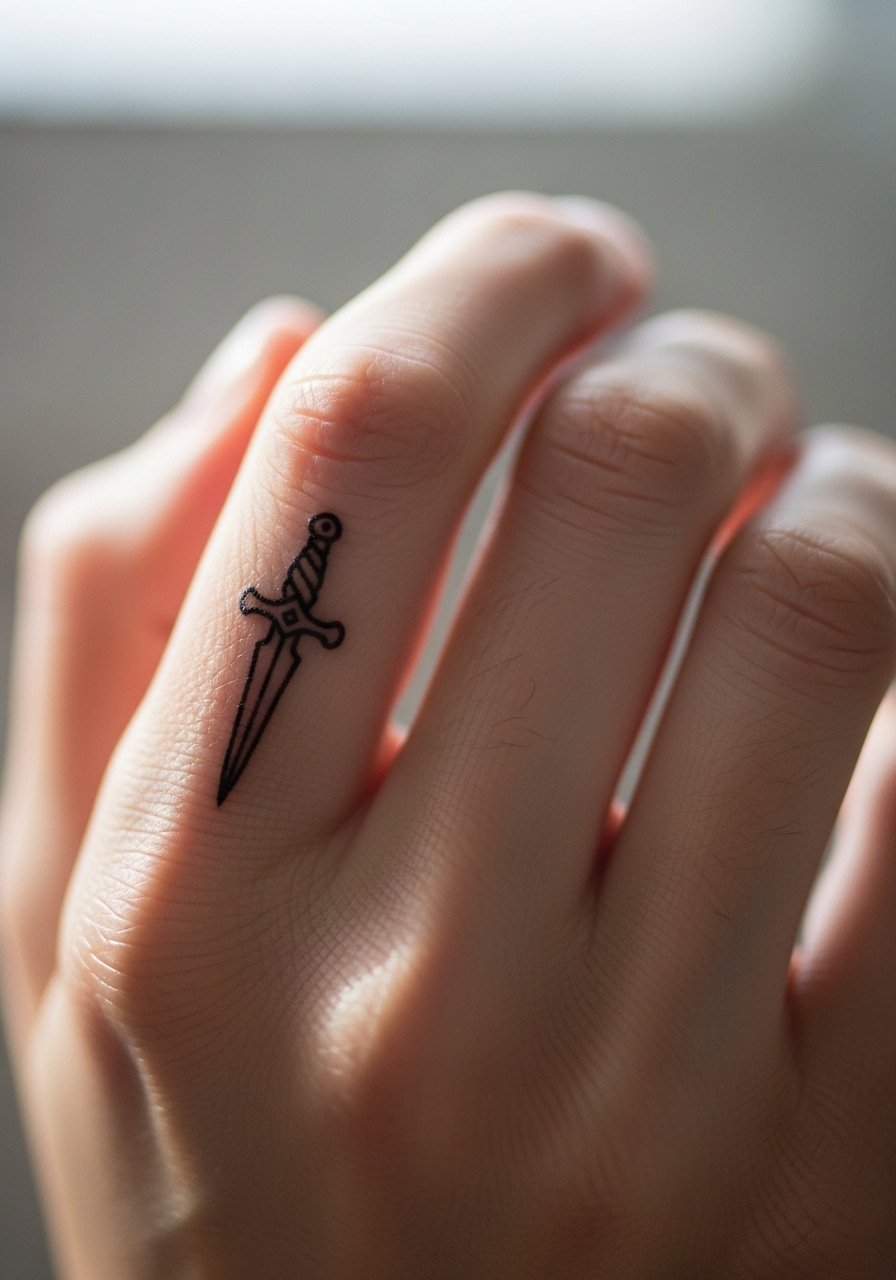
Finger-side daggers are ultra-visible but the skin there is thin and constantly washed. The common mistake is asking for internal shading which disappears quickly. For longevity, request the bold outline only and accept touch-ups will likely be needed within one to two years. Session time is short and pain is moderate to high in this area. If your work requires clean hands, think twice before committing. When you do get it, avoid rings that pinch the tattoo during the first month.
17. Minimal Swallow on the Upper Back
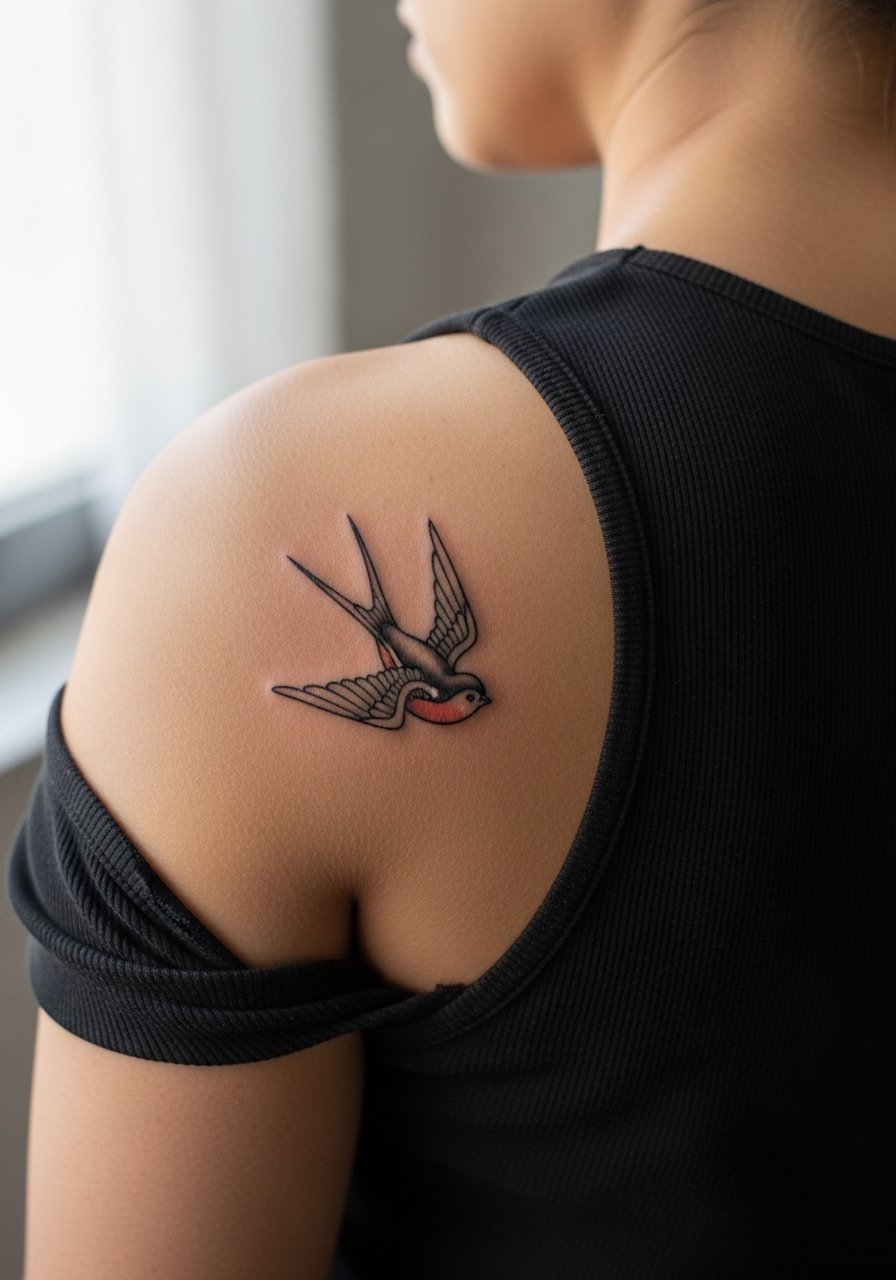
Upper back swallows can be slightly larger and still read as minimalist. The mistake is adding dense internal shading that traps ink as the skin stretches. Ask your artist to keep wing shapes simple and to center the design between the shoulder blades for balance. Pain is low and sessions can be comfortable. Healed results last well with routine sunscreen. For post-session wear a loose button-down shirt you can pull aside without rubbing the area.
18. Tiny Skull and Rose on the Inner Wrist
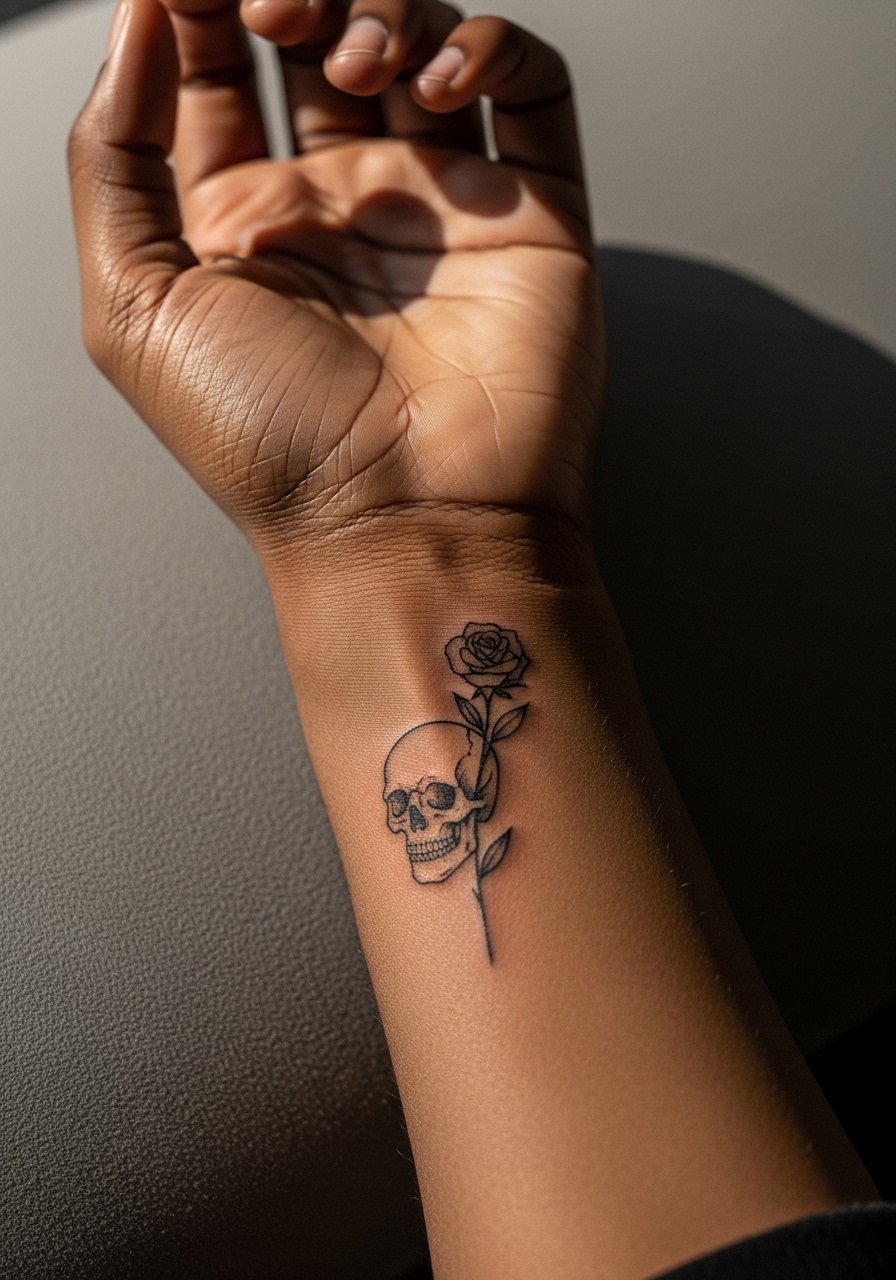
Combining skull and rose in a compact wrist layout needs clear separation so each element reads. Common mistakes are overlapping details that blur into a single dark mass. Tell your artist you want negative space between the two motifs and a thicker outer stroke around each element. Wrist movement causes gradual softening, so expect a touch-up in a few years. Session time is usually under an hour. Pair this with a slim stackable bracelet set on the other wrist to keep attention balanced.
19. Minimal Nautical Flag on the Forearm
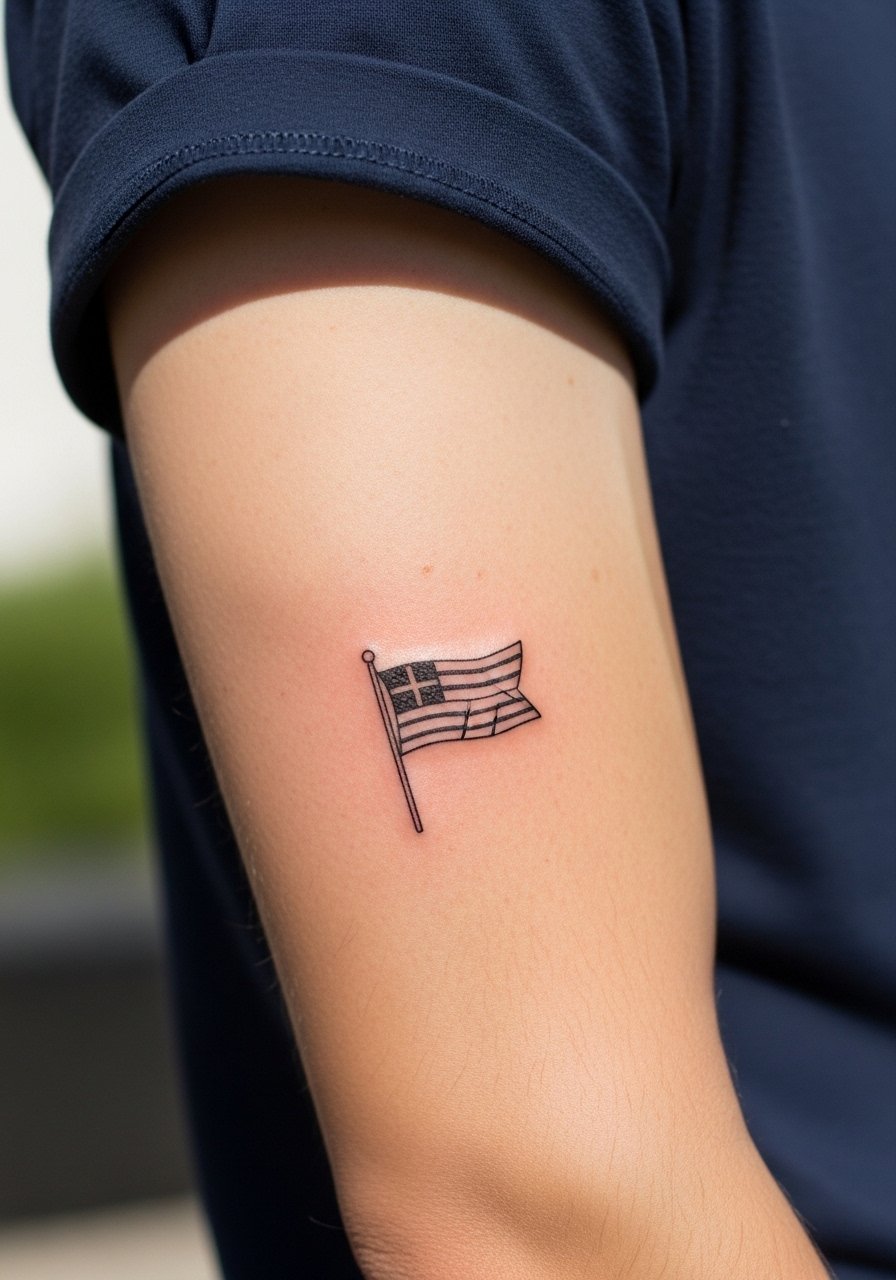
A nautical flag reduced to blocks of color reads clean and symbolic. The common mistake is too-small color blocks that blend after healing. Ask for slightly wider color fields and bold outer lines. Forearm placement is forgiving and ages predictably when you use sunscreen. Session time is short. For an easy session outfit, wear a short-sleeve tee you can roll up to give full access.
20. Tiny Compass Rose on the Side Neck
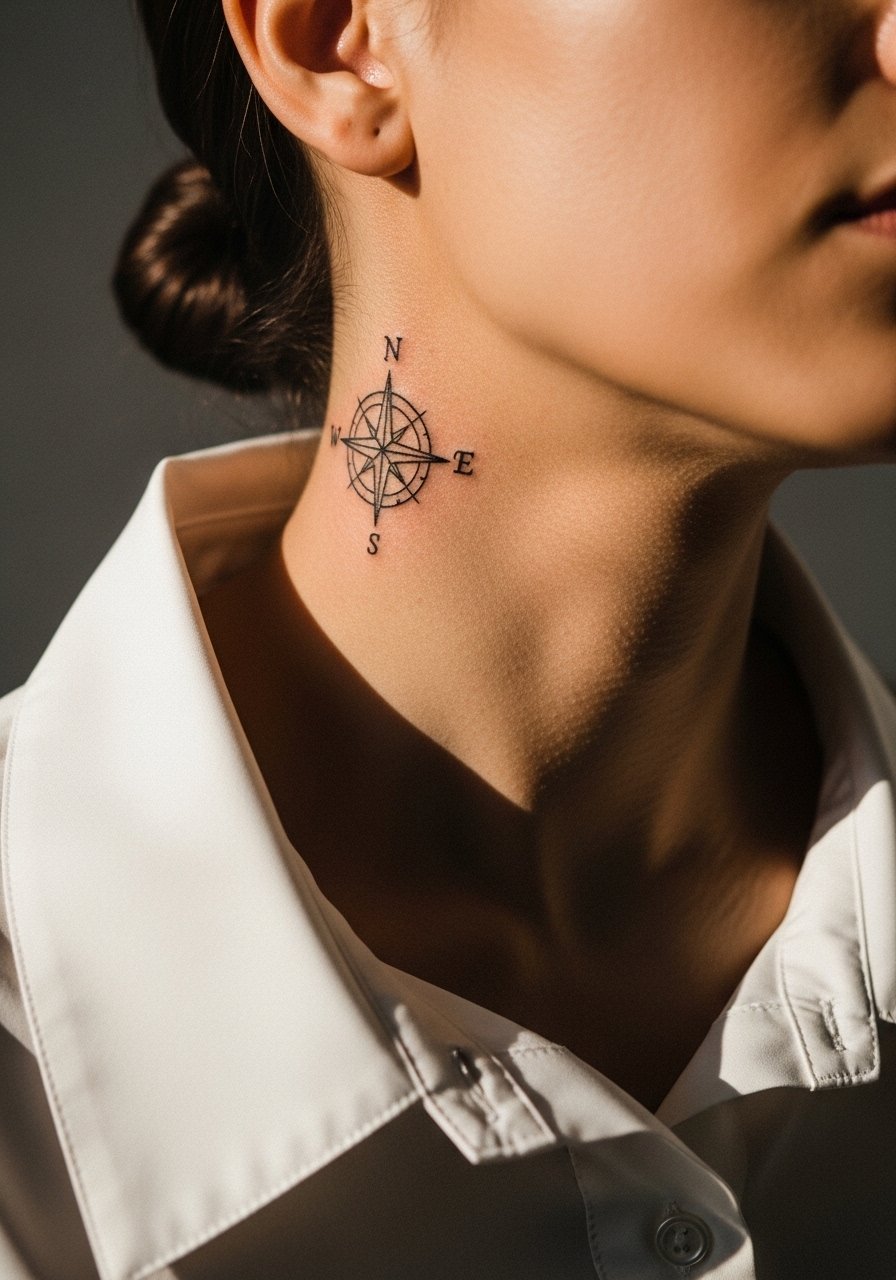
Neck pieces are visible and can affect first impressions. The typical mistake is asking for too-small details that merge with neck movement. Request a slightly larger core and minimal internal ticks so the rose remains legible. Session pain is moderate and healing requires care around clothing collars. For the appointment wear a wide-neck shirt you can loosen and a thin chain pendant rather than tight collars until the area settles.
21. Micro Sparrows Pair on the Wrist
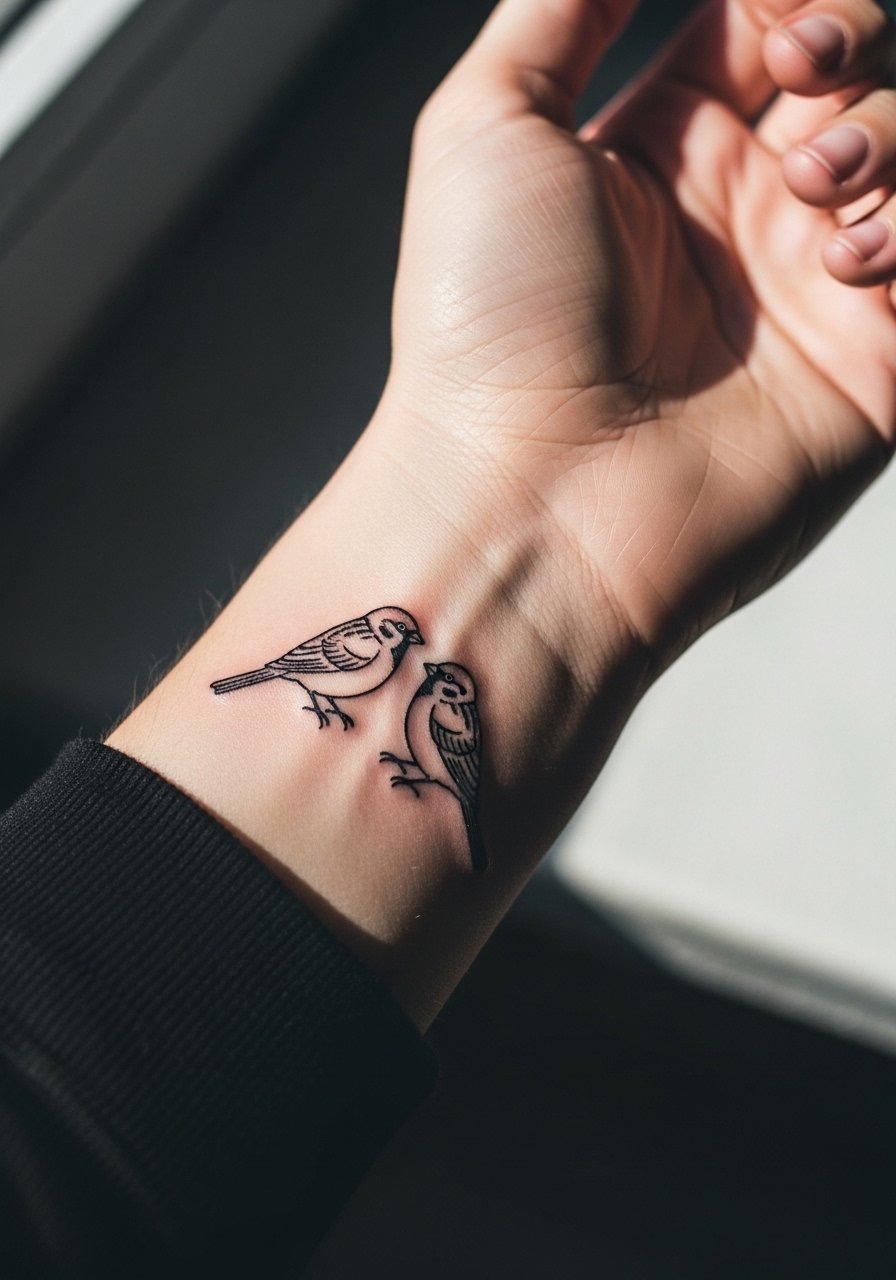
Paired sparrows make a narrative in a small band across the wrist but symmetry is critical. A common error is misplacing the birds so they look cramped when the wrist flexes. Ask for a slight gap between the beaks and simplified feather shapes. Wrist tattoos face frequent washing so expect softening after a few years and plan for a touch-up if you want them sharp. Session time is short. Show them off with a simple racerback tank if your outfit allows.
22. Tiny Anchor and Rope on the Side Ankle
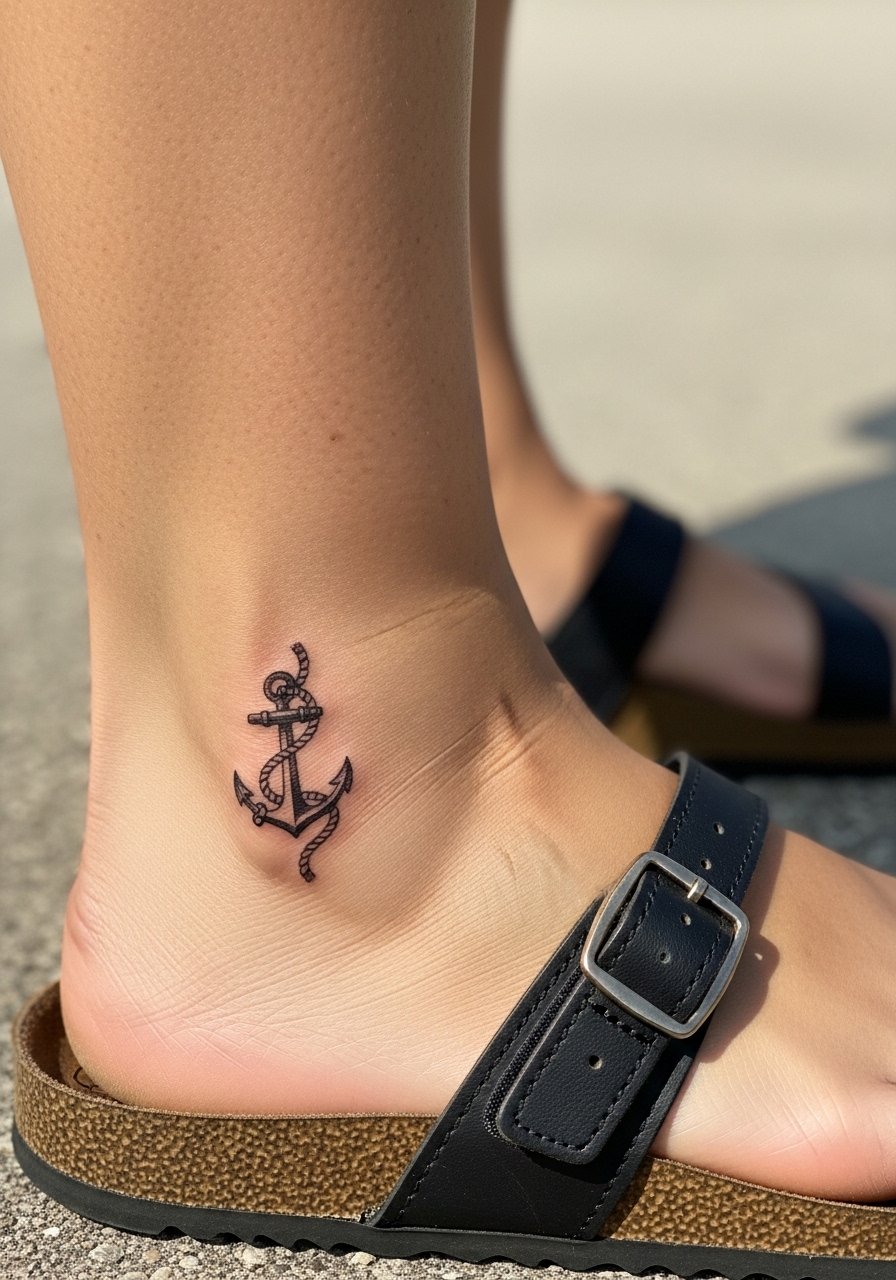
Side ankle anchors are petite and rely on silhouette. The mistake is adding rope texture that loses clarity from shoe rubbing. For longevity, ask for a single-color rope stroke and a bold outer anchor line. Ankle sessions are quick but the area sees abrasion, so expect a touch-up at two to four years. For footwear, choose open sandals or slip-ons during healing and consider an anklet chain that frames the tattoo after it has settled.
23. Minimal Script Heart on the Ribcage
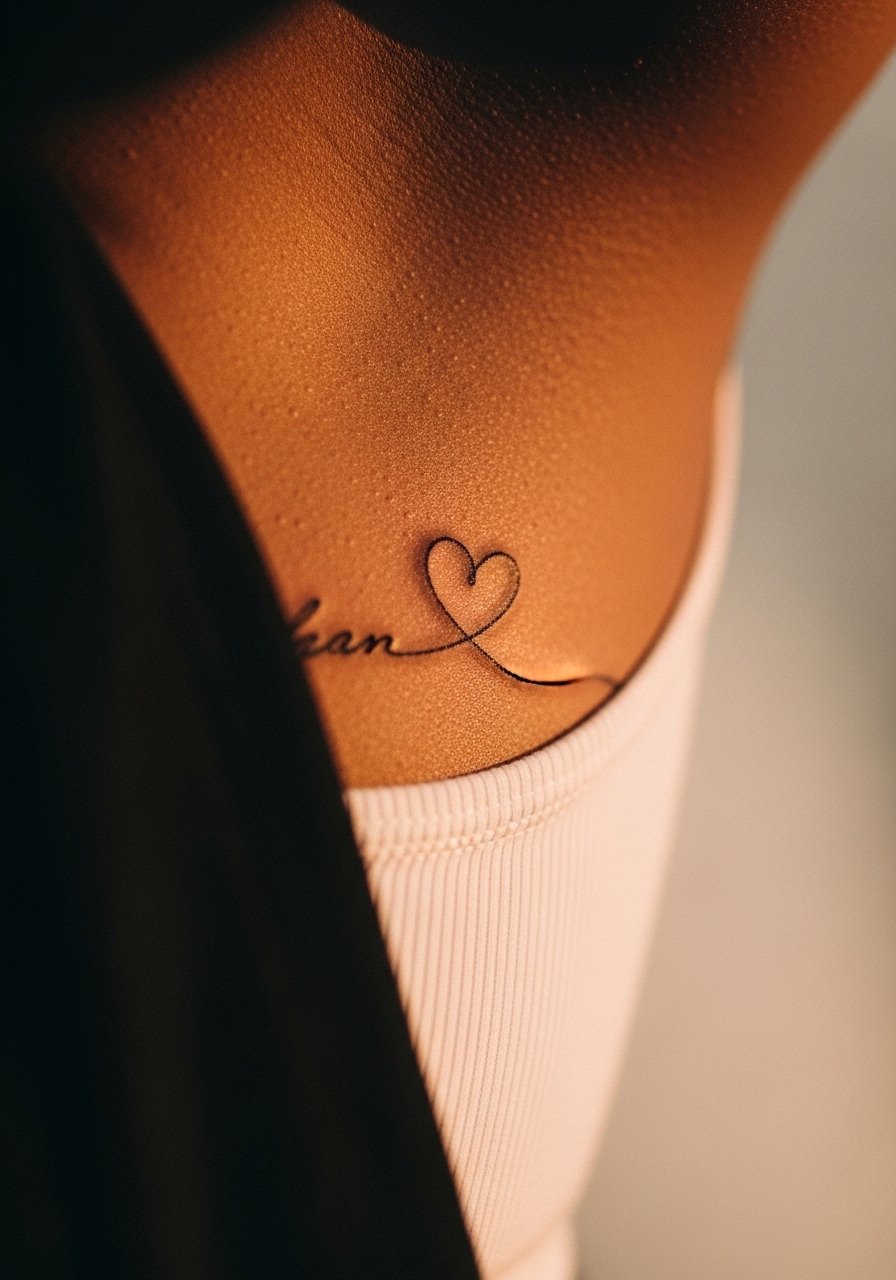
Script on the ribcage sometimes blurs because of motion and thin skin. The key mistake is requesting very fine script without planned spacing. Ask your artist for slightly bolder lettering and a simple heart outline so the phrase stays legible. Ribcage pain is high and sessions may be broken into shorter passes. Expect touch-ups earlier than forearm pieces. For the appointment wear a cropped top you can lift easily and avoid tight clothing afterward.
24. Minimal Rosebud on the Thumb Web
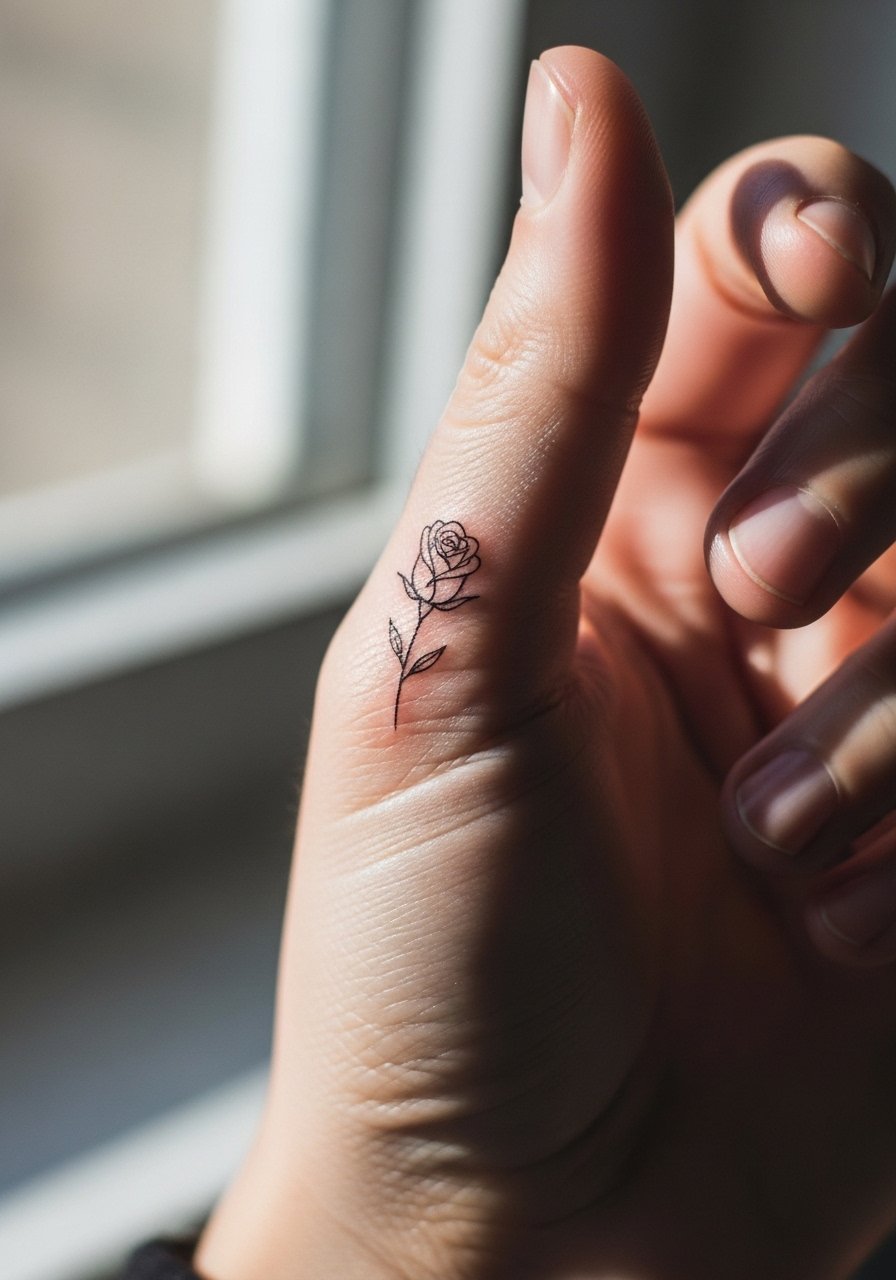
Thumb web tattoos age quickly due to constant movement and friction. The frequent mistake is dense detail in a tiny area. Ask for a simple rosebud outline and accept that touch-ups will be frequent. Session time is short and sensitivity is moderate. If your daily routine includes a lot of hand work, factor in the likelihood of fading. Avoid rings that pinch the area while it heals.
25. Small Nautical Star Behind the Knee
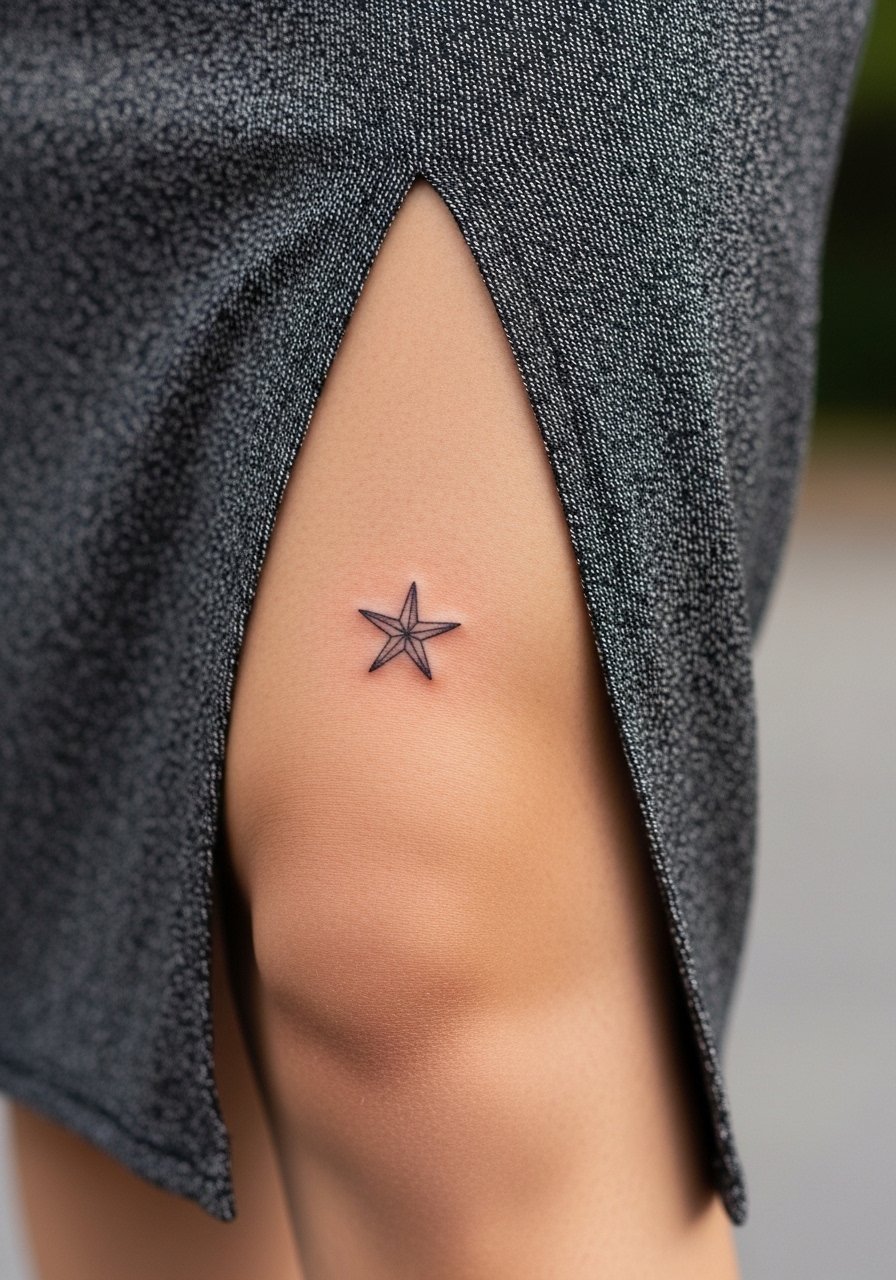
Behind-the-knee placement sees motion and creasing, so small stars there risk softening faster than on a flat plane. The common mistake is choosing too small a size for this fold-prone area. Request a slightly larger star with bold outer lines and expect touch-ups sooner than on the forearm. Sessions can be fiddly because of positioning. For post-session comfort, wear loose bottoms like a side slit skirt that avoids friction.
26. Minimal Bannered Word on the Inner Wrist
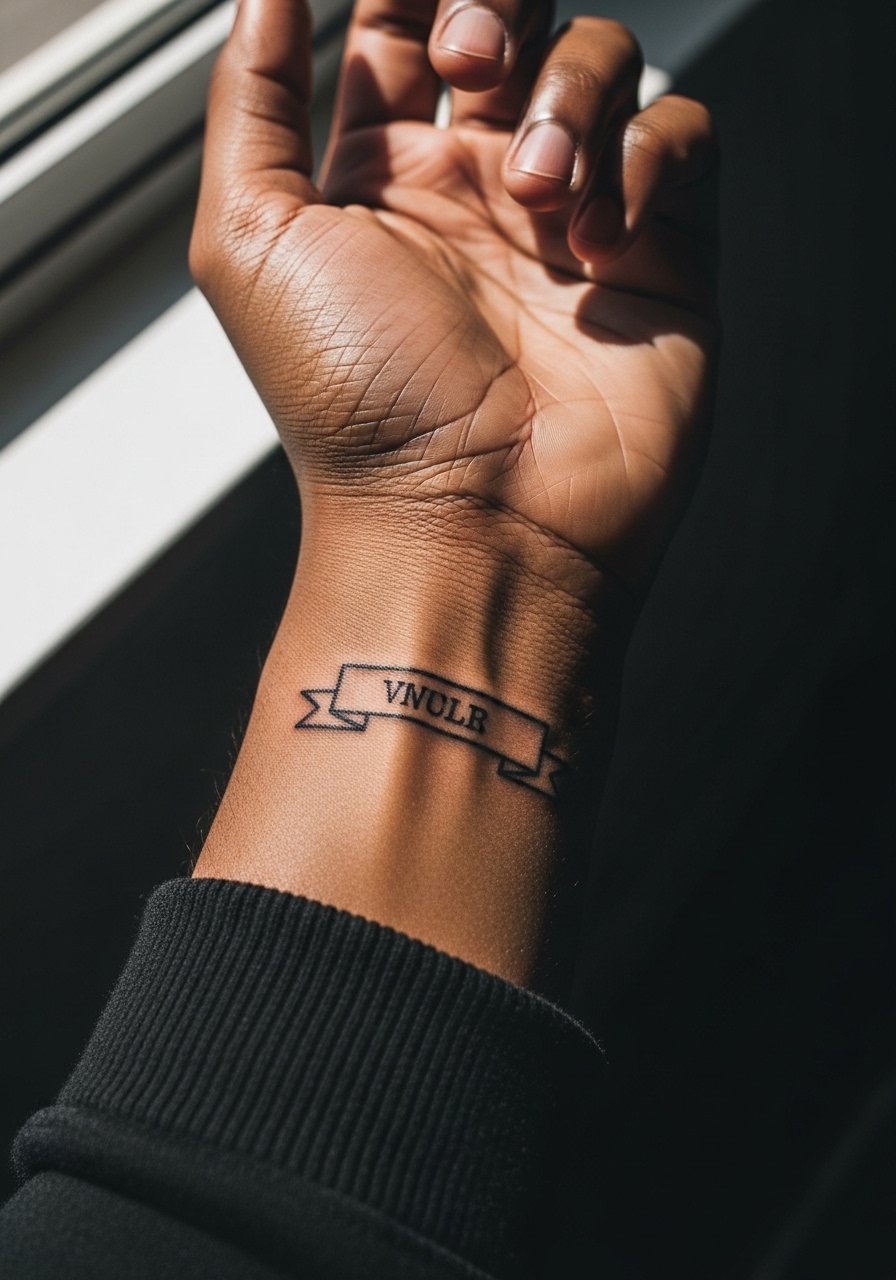
Words on narrow banners need deliberate spacing. The mistake is choosing ornate lettering that collapses as the skin moves. Request simple, slightly condensed lettering and a thick banner outline. Wrist placements are exposed to sun and washing so the font should be readable even after softening. Session time is brief and touch-ups are common. For showing it off, a thin chain bracelet on the opposite wrist keeps the visual field balanced.
27. Minimal Sailboat at the Inner Ankle
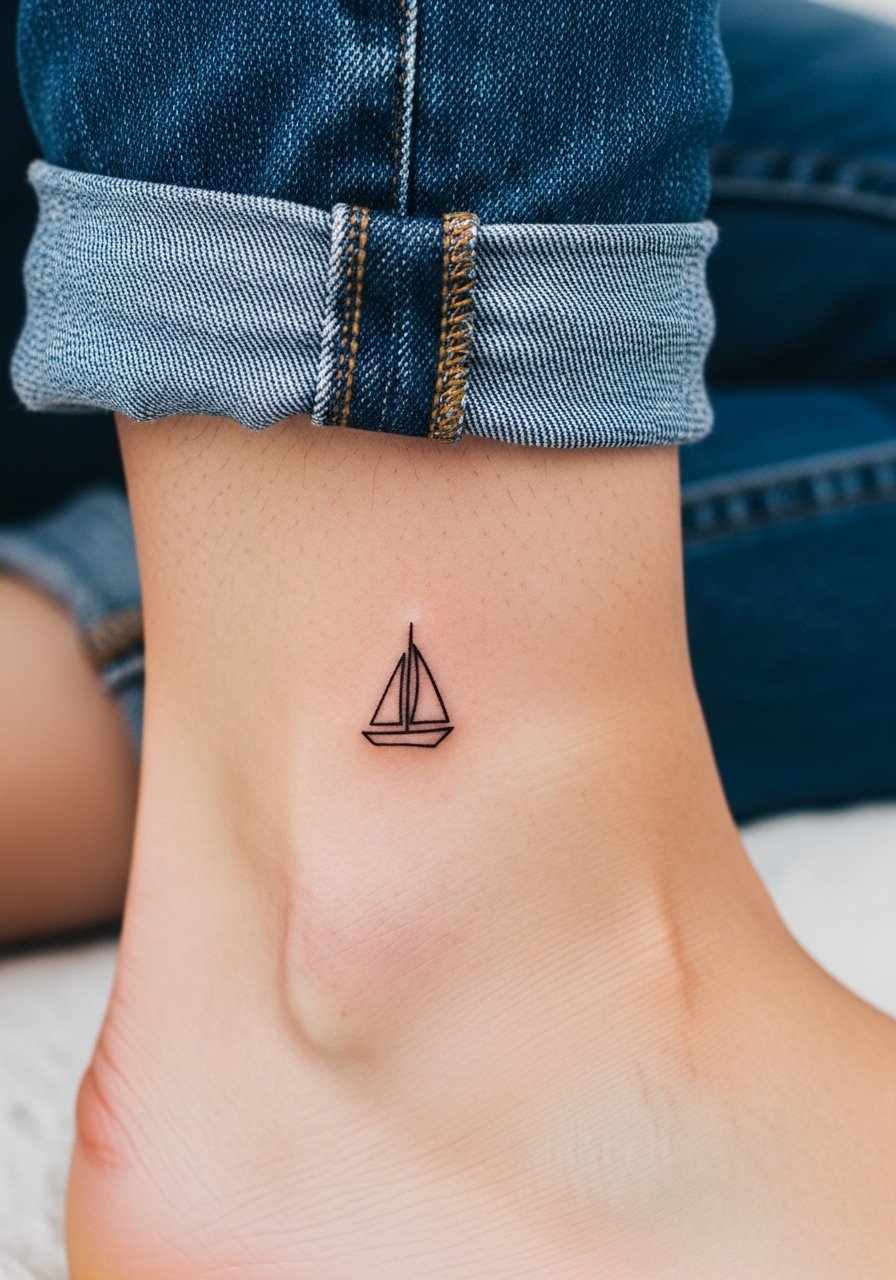
A tiny sailboat uses silhouette to convey shape without interior shading. The usual mistake is adding fine rigging that disappears after healing. Ask for simplified sails and a bold hull outline so the boat reads from a short distance. Ankle skin sees shoe friction, so expect touch-ups in a few years if your footwear rubs the area. Session time is short and pain is low to moderate. Show it off with ankle-baring pants or sandals and a small anklet chain once healed.
Frequently Asked Questions
Q: Will minimalist American traditional pieces hold up better than fine line designs over time?
A: From what I have seen, minimalist traditional pieces with bolder outer lines generally age better than ultra-fine line work. The thicker outlines and limited color fields preserve silhouette as skin shifts. Expect fine line pieces to need touch-ups sooner, especially in high-motion or high-friction areas.
Q: How small is too small for classic motifs like roses or daggers?
A: Too small is when interior elements compress into a single dark spot. For most classic motifs keep at least a finger-width of negative space across the main elements. Ask your artist to mock the stencil on your skin and check legibility in different positions before the needle starts.
Q: Are hand and finger tattoos worth it if I need professional flexibility?
A: Hand and finger tattoos are readable and bold, but they fade faster and can affect first impressions in some fields. One camp says they are an important personal statement. The other camp warns of career implications. Think about your job and comfort with touch-ups before committing.
Q: What should I wear to a session for chest, ribcage, or sternum pieces?
A: For chest and sternum wear a wide-neck shirt or a fitted sports bra you can shift to expose only the necessary area. For ribs bring a cropped top you can lift. Loose, comfortable clothing that does not rub the fresh tattoo is best. A loose button-down shirt works across several placements.
Q: How often should I plan touch-ups for minimalist traditional tattoos?
A: Plan on a potential touch-up around year two to four for small visible pieces like wrists and hands, and later for lower-friction spots like shoulders and calves. Sun exposure, skin type, and daily wear affect timelines so check the healed result around six months and discuss a maintenance plan with your artist.
