
The tattoos that still read crisp a decade later are often the ones that looked simple on day one, not the hyper-detailed pieces that collect likes. Fine line trends photograph beautifully fresh, but they can fade fast on wrists and fingers, artists sometimes ghost bookings for guest spots, and pricing has shifted upward. Read on for 21 vintage lightning bolt ideas that actually age well, where to place them, and what to tell your artist in the chair.
1. Classic Bold Lightning Bolt Flash on the Forearm

This is the sailor-flash bolt everyone imagines when they say vintage lightning, and I steer first-timers here when they want something that holds up. Tell your artist you want strong linework with saturated fill and a slight lift to the outline so the bolt resists blowout. Forearm sessions register around a four out of ten on most pain scales and usually finish in a single session. The common mistake is shrinking the design too small for the bold lines. For showing it off, wear a rolled cuff chambray shirt with sleeves pushed up so the bolt reads from a distance.
2. Vintage Lightning with Banner Scroll on the Shoulder
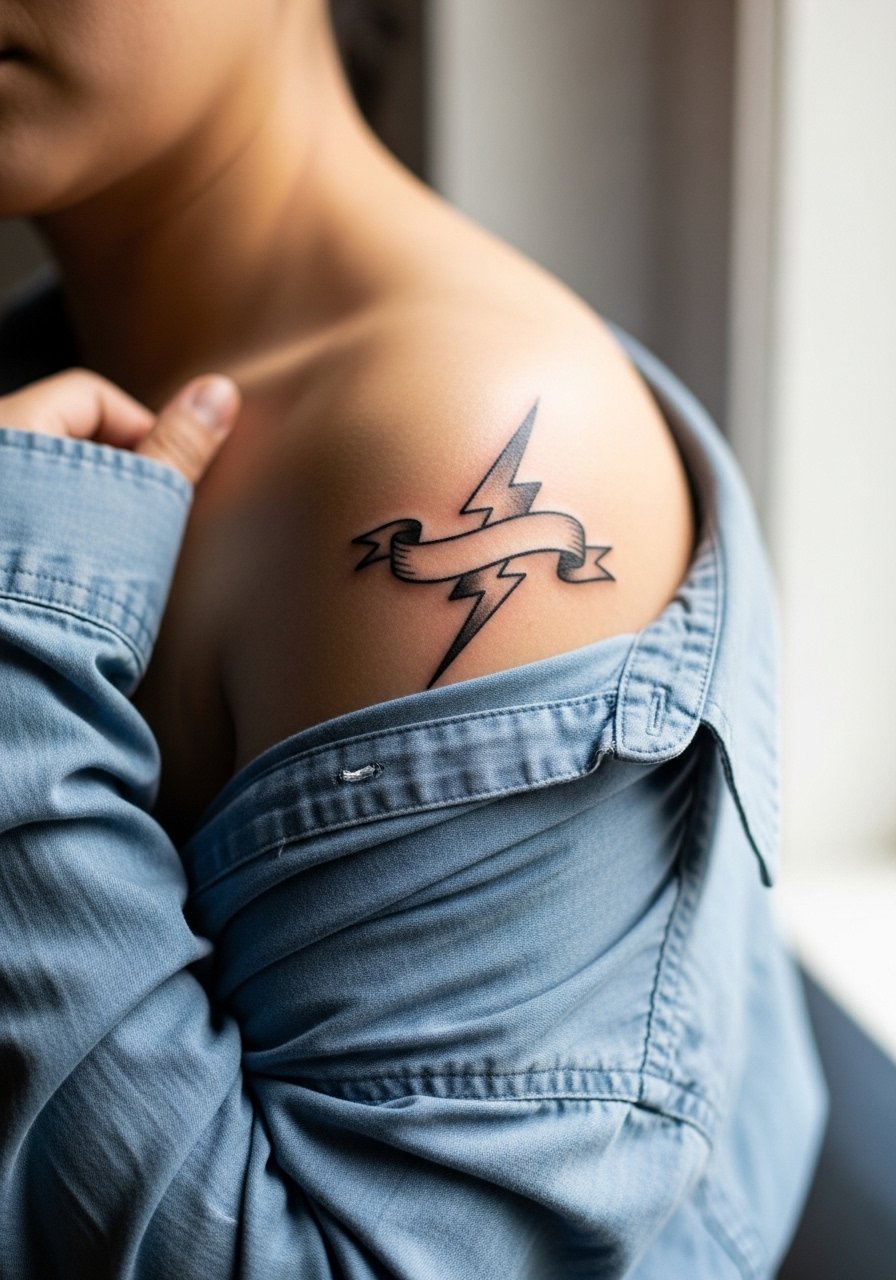
Pairing a bolt with a banner lets you add a date, name, or short phrase in classic flash fashion. Ask for the banner to breathe around the bolt so the typography does not crowd the negative space. Shoulder placement is forgiving for aging because the skin moves less than forearms, and most artists break this into one to two sessions. A typical misstep is demanding tiny script inside a narrow banner. For the appointment slip into a loose button-down shirt you can pull to one side so the artist has clean access.
3. Single Line Lightning Strike on the Wrist
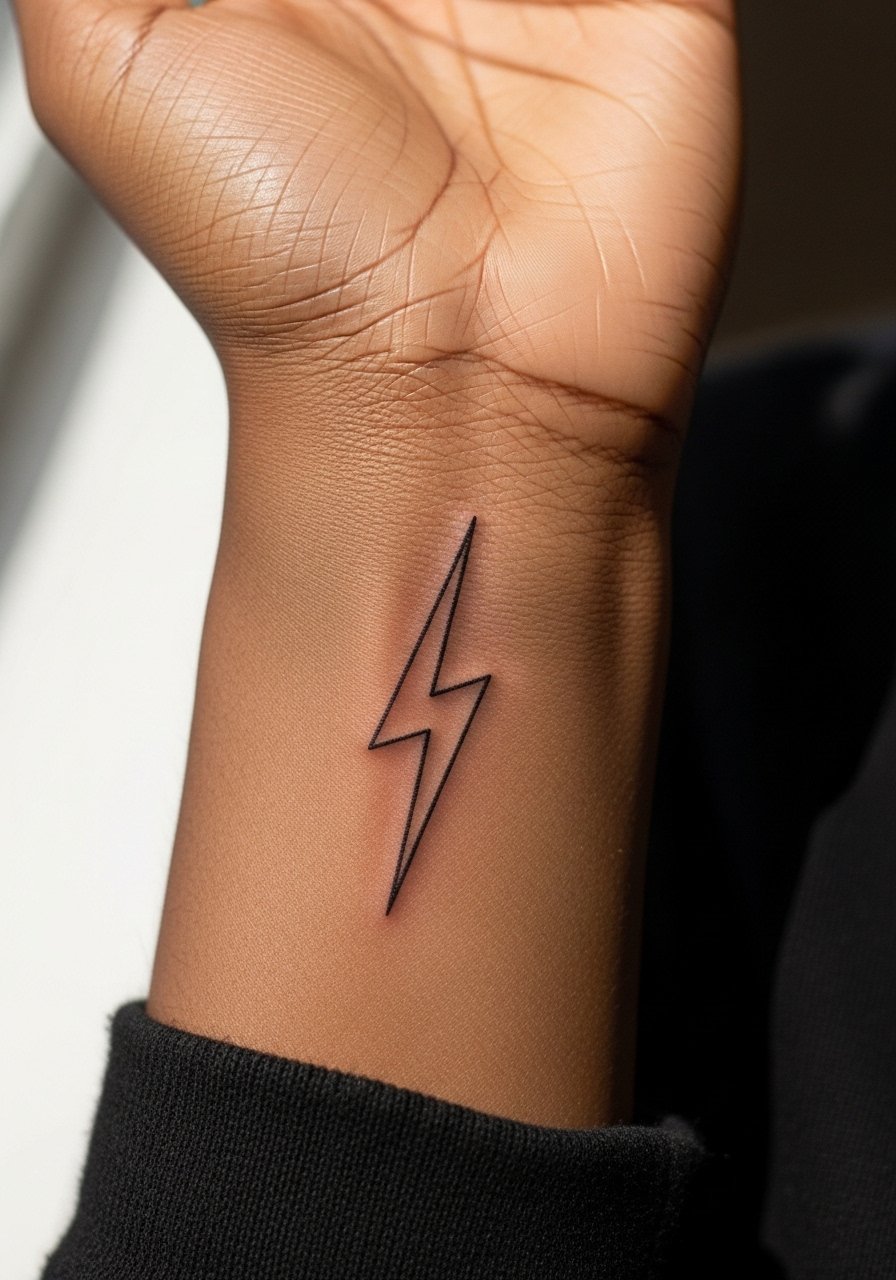
This minimalist bolt reads raw and discreet. If you want a wrist bolt that lasts, tell your artist to go slightly deeper with the needle and avoid an ultra-thin one-pass line. The wrist sees constant washing and friction so expect visible softening by year two and plan a touch-up at that point. The frequent error is asking for hairline precision in a high-movement spot. Wear a thin leather wrap bracelet on the opposite wrist when showing it off, and skip rings during the session for easier access.
4. Distressed Lightning Bolt Texture on the Outer Forearm
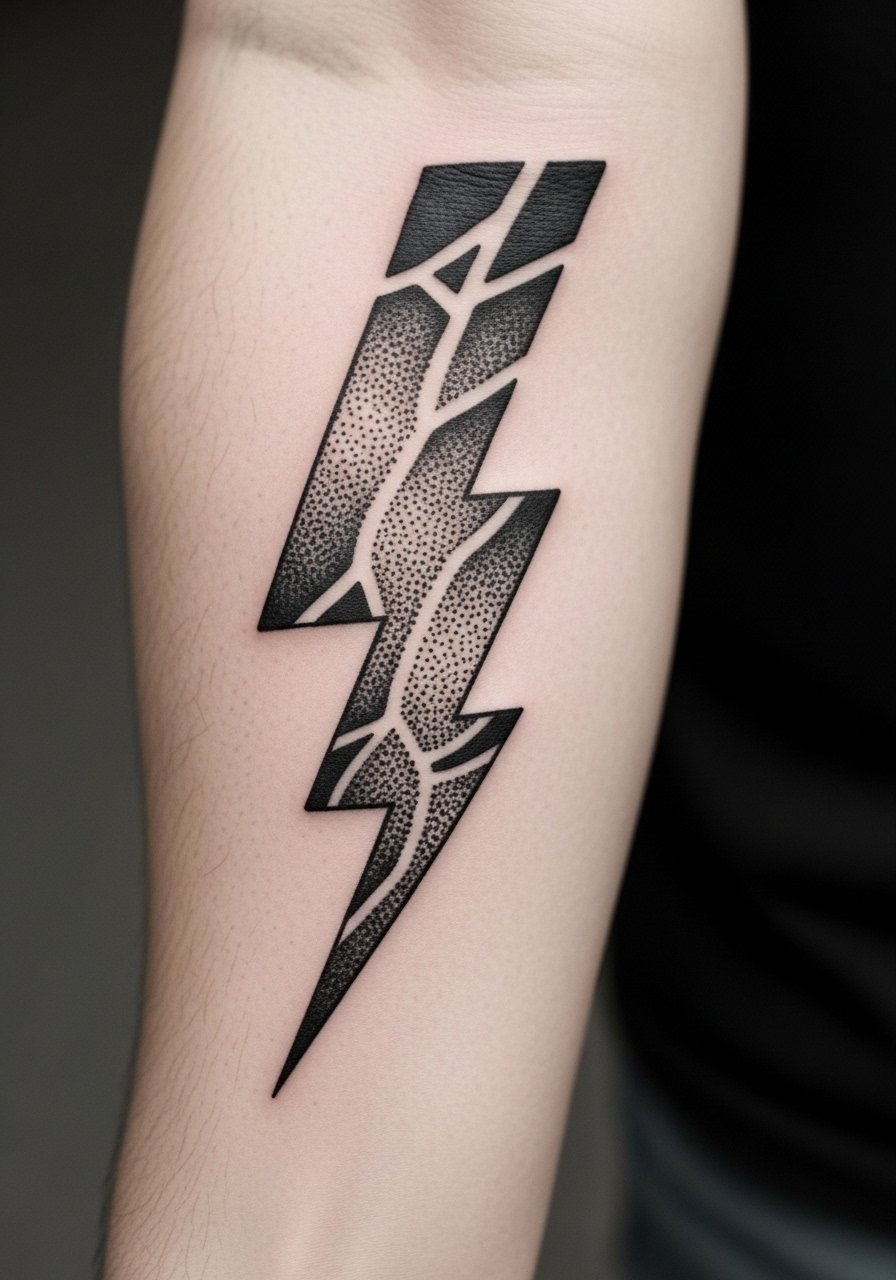
For a punk-leaning, weathered feel, ask for intentional texture and uneven negative space that mimics aged flash sheets. This one holds up well because saturation is heavy and the rough edges age into the skin rather than blur into a soft smudge. The session can run longer, and you should expect two sittings if the piece reaches four inches. A common mistake is asking for a faded look by dialing down saturation in the first session. Get the texture from linework and stipple shading instead, then allow the healing to naturally soften the edges over the first year.
5. Lightning Bolt Piercing a Heart on the Upper Chest
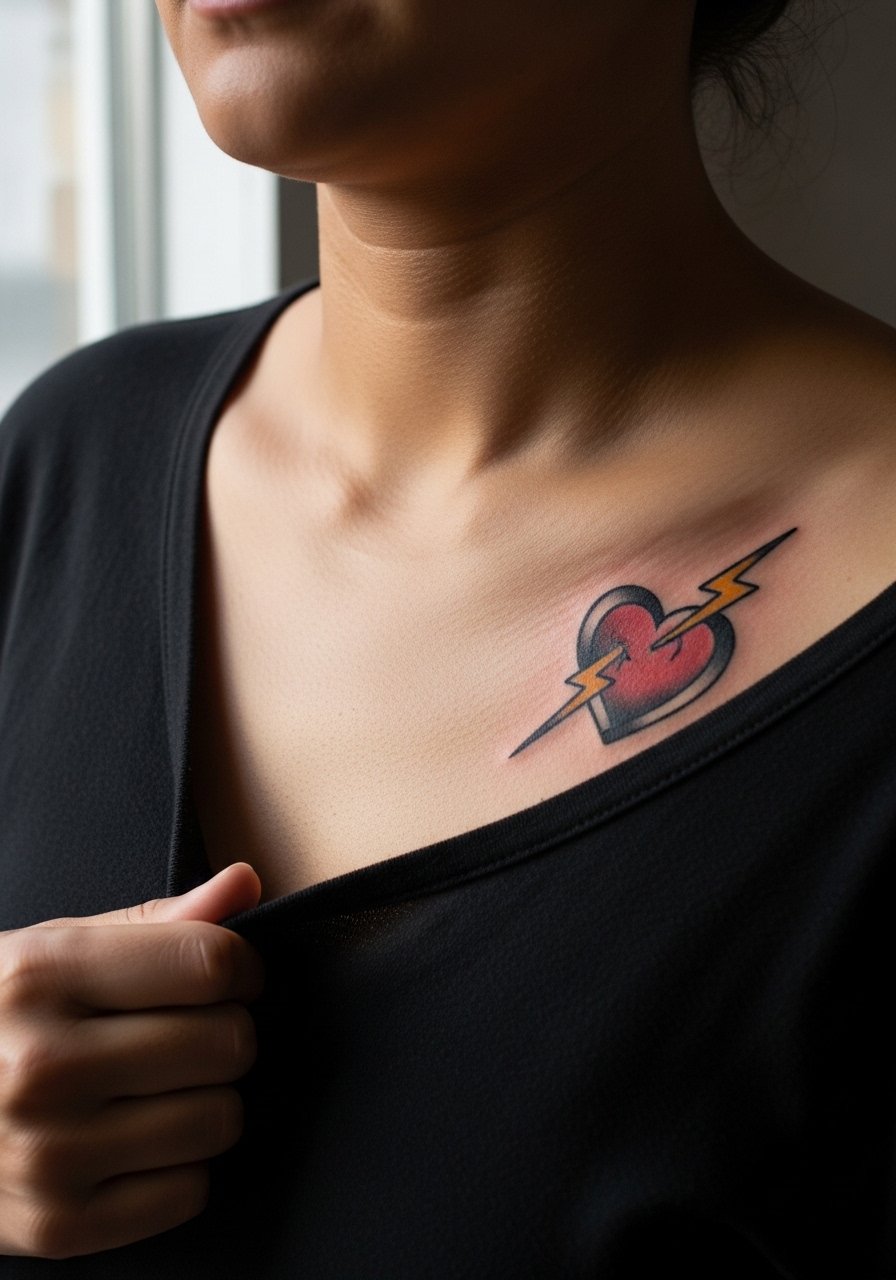
This retro motif pairs stormy energy with romantic symbolism. For chest placement ask for bold outlines and solid red saturation in the heart to keep the shape intact over time. The upper chest can be sensitive but rates lower than ribs. A typical mistake is packing too much filigree into the heart which ages into visual clutter. Be mindful of shirt collars that rub the area during healing and bring a soft top to the session. Note that some workplaces notice chest tattoos more than hidden placements, so weigh visibility against career needs.
6. Forked Lightning Branching on the Upper Arm

Branching bolts give motion and read larger without being wide. On the upper arm they sit well for a two to three session build, with blue highlights placed to suggest electric energy. In consultation say you want the prongs to taper cleanly and the negative space between prongs to remain clear. The usual slip is trying to cram too many forks into a narrow band which leads to early blurring. This placement pairs nicely with a fitted muscle tee for show-off days, and wear a sleeveless top on appointment day so the artist has direct access.
Before You Book
The first six ideas cover wrists, chests, forearms, and upper arms, all of which demand slightly different prep and protection during the first week.
- Stencil transfer paper kit. Lets you preview placement and line weight on skin before the needle hits, which is handy for banner or paired designs above.
- Topical numbing cream. Useful for sensitive wrist or chest sessions when you need the extra tolerance to sit still.
- Thin protective film roll. Keeps forearm and wrist pieces clean from friction during the first few days of healing.
- Fragrance-free gentle body wash. Softly cleanses without irritating fresh lines, particularly helpful for chest and shoulder work.
- Aquaphor healing ointment. A thin layer in the initial days helps lock in moisture for detailed linework while avoiding heavy crusting.
7. Micro Lightning Bolt Outline Behind the Ear
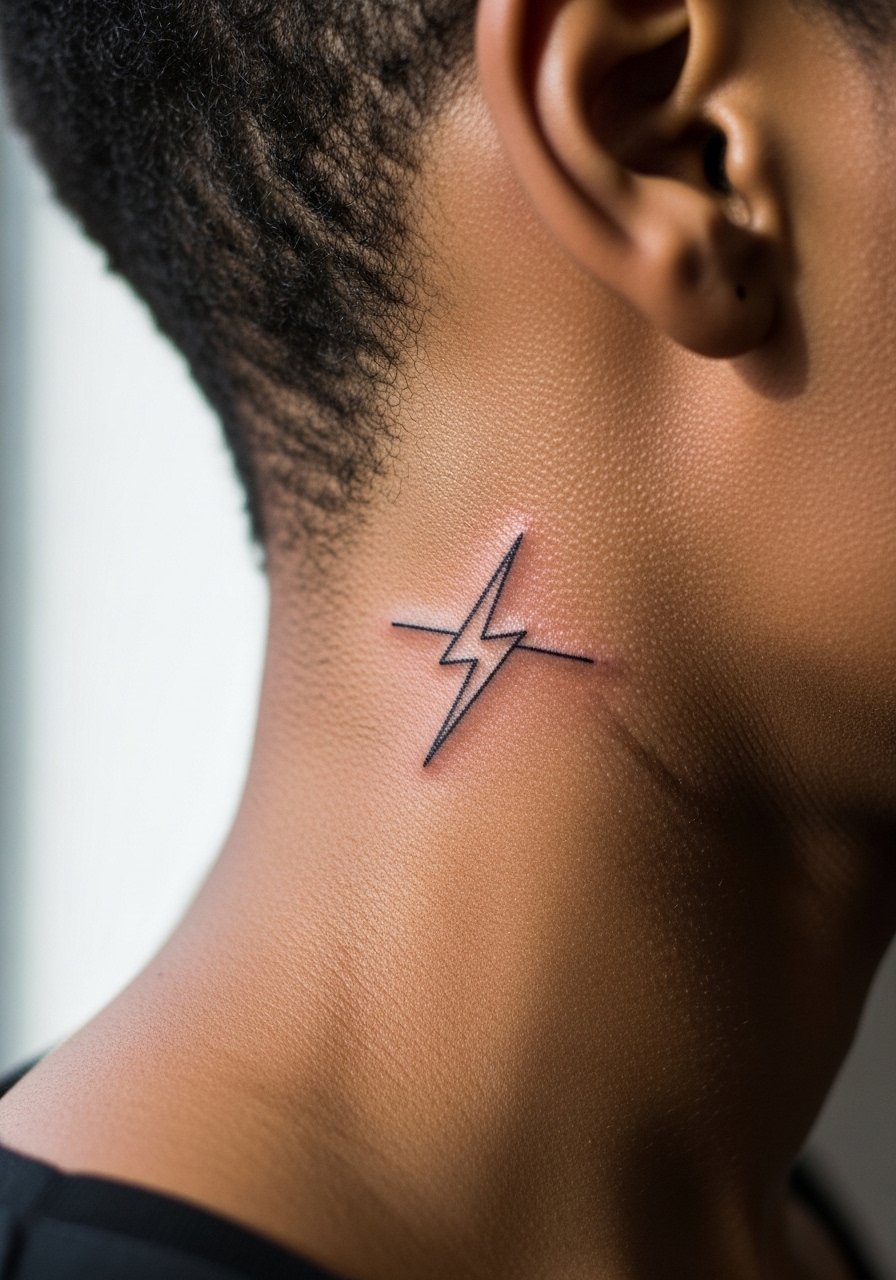
Tiny bolts behind the ear read intimate and modern. That spot heals quickly but the skin is thin, so instruct the artist to use a single-needle approach with slightly increased spacing between strokes. Sessions are short so pain is minimal, but the common error is requesting text or micro shading next to the bolt, which can muddy the area. For the appointment keep hair up and bring a simple clip so the artist can see the area clearly. Behind-the-ear pieces are subtle in photos, so negative-space planning helps visibility on darker tones.
8. Vintage Lightning with Anchor on the Calf
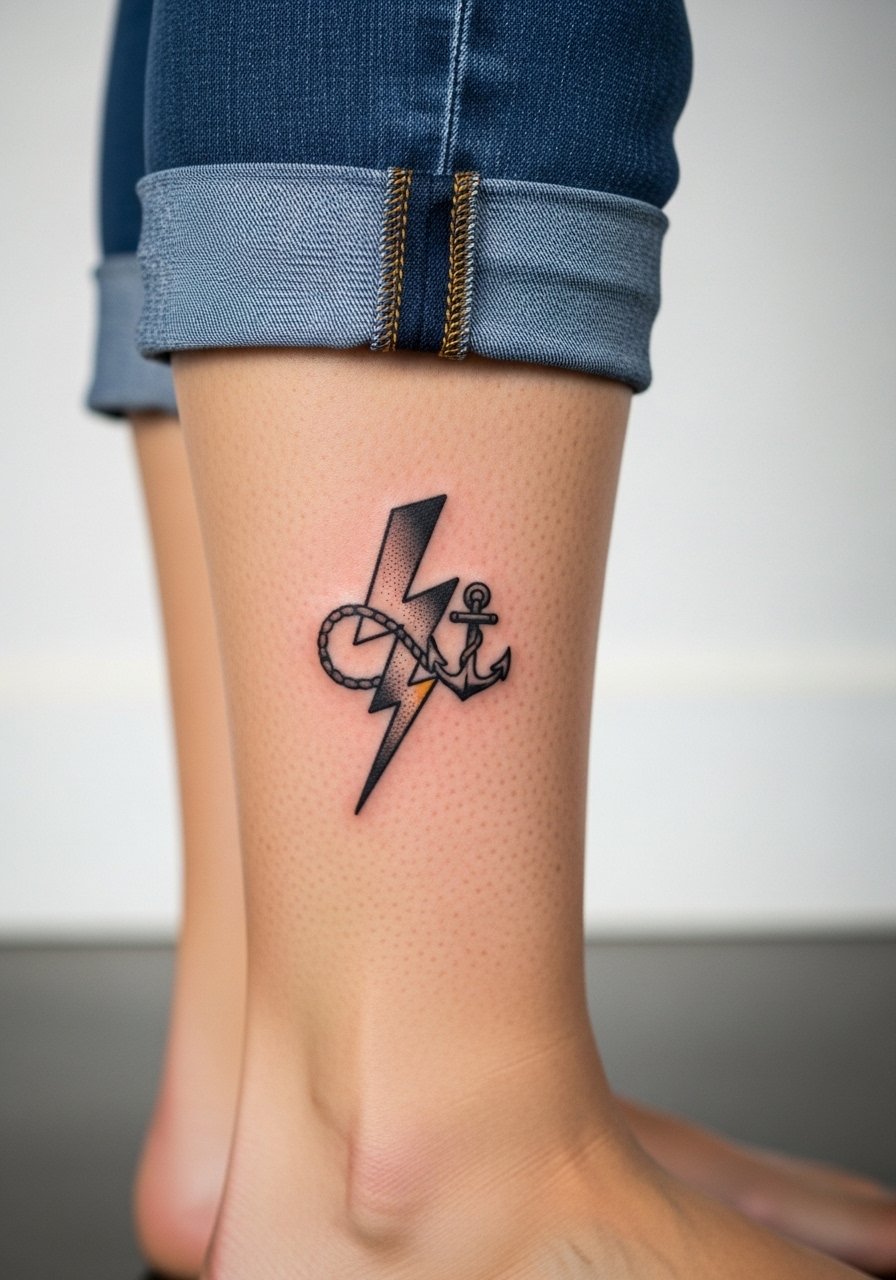
Nautical pairings make sense for adventurous clients who want stability and storm themes together. Calf placements let you go a bit larger and maintain clean linework because the skin there is more stable. Ask for bold outlines and solid fill in the anchor to prevent patchy fading from sun exposure. A misstep is over-detailing the anchor in a small footprint. Show it off with rolled cuff chinos and leather boat shoes on warm days.
9. Shaded Lightning Bolt Gradient on the Inner Bicep

A gradient bolt reads modern while nodding to vintage shading. The inner bicep gives a protected canvas but the area can be tender, so expect a two-session approach and a higher pain rating than the outer arm. The main mistake is using too tight a gradient that relies on micro shading in a high-movement crease. In consultation ask for a gradual fade and test a small swatch if you are concerned about longevity. For casual wear a sleeveless hoodie makes the area easy to show without tight sleeves rubbing the fresh lines.
10. Paired Lightning Bolts Symmetry at the Collarbone

Mirrored bolts frame the collarbone and work well for themes about balance or partnership. The location is visible so precision in linework matters. Ask for equal spacing and matching line weight on both sides during the consult. Collarbone pieces fare well over time if the artist leaves enough negative space to prevent merging. A common error is trying to mirror two bolts while ignoring asymmetry in anatomy, which makes one side sit higher visually. Pair with a v neck tank top for evenings when you want the design to read cleanly.
11. Retro Zigzag Lightning Flash on the Wrist

This hot-rod inspired bolt is all about hard angles and contrast. The wrist placement gives immediate visibility but it ages faster because of motion and sun. Most artists recommend a slightly thicker outline than a pure fine-line to maintain shape past the first two years. A usual mistake is insisting on tiny internal color patches that fade unevenly. For longevity plan a touch-up after the first year and avoid constant sun exposure while the piece settles.
12. Lightning with Swallow Accent on the Forearm
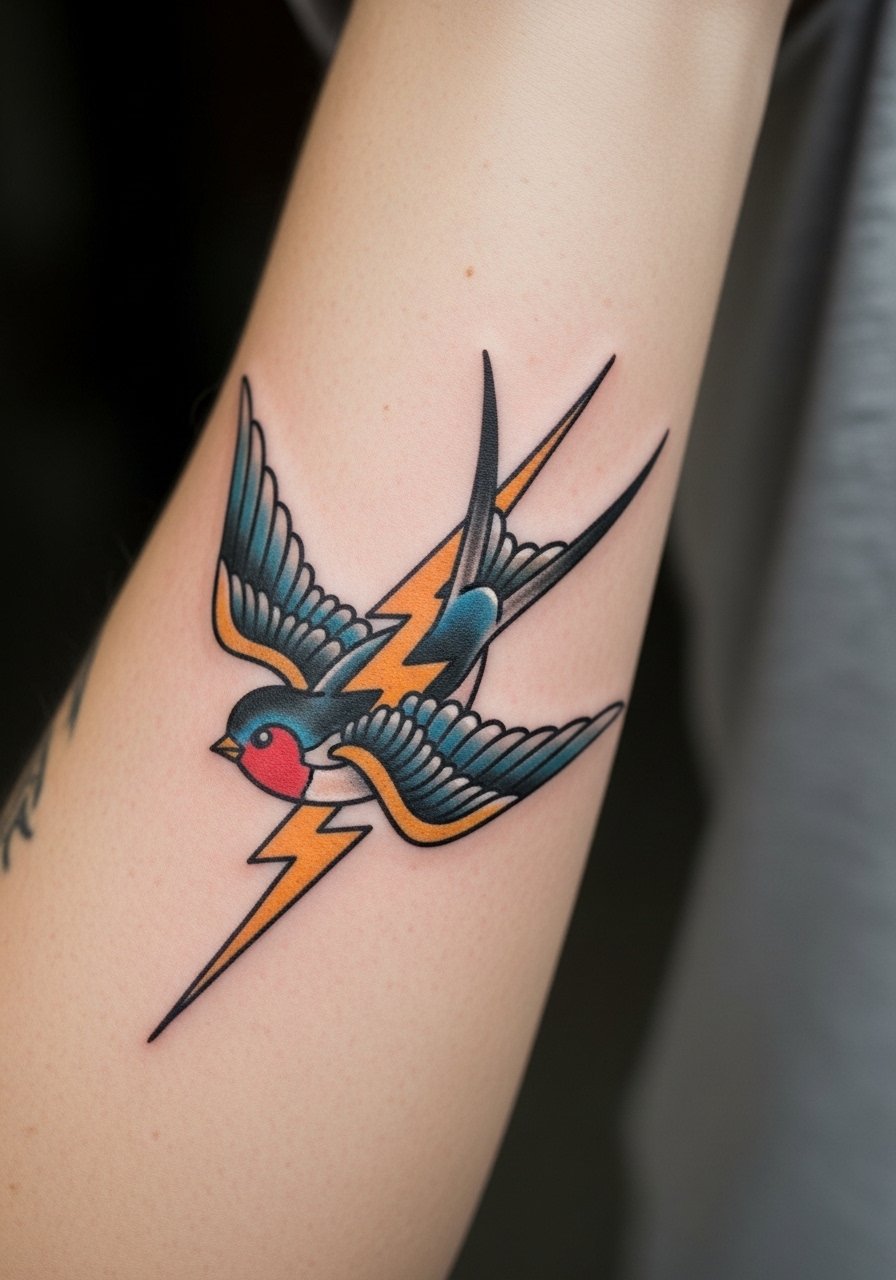
Combining bird motifs with a bolt adds motion and narrative. On the forearm the swallow can wrap around the bolt slightly, but tell your artist to keep clear separation at the point of intersection so the two elements do not blur together in healing. A common failure is packing feathers too tightly next to the bolt. For show-off looks wear a leather cuff bracelet on the opposite arm and roll sleeves for visibility.
13. Forked Collarbone Bolt for Asymmetric Drama
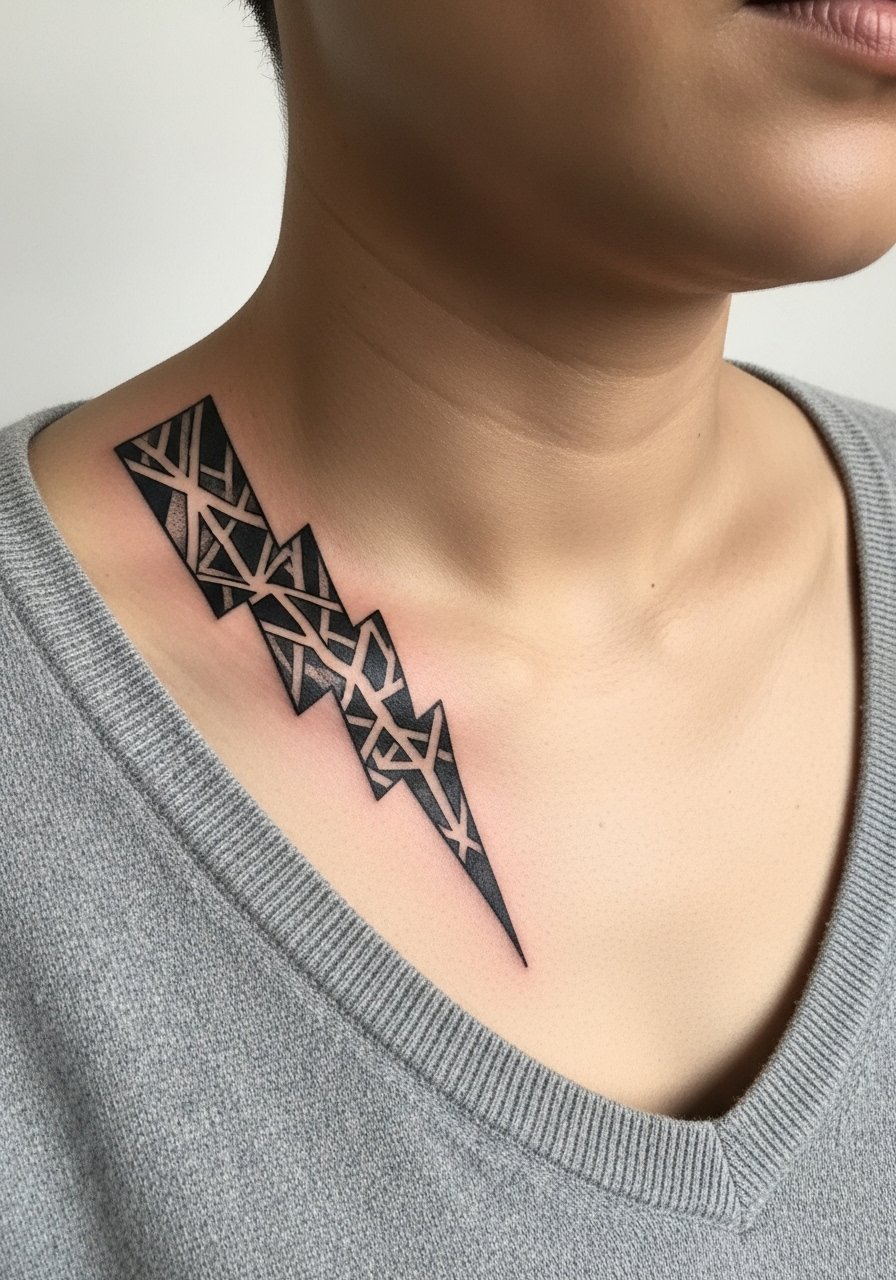
This under-covered idea uses branching to create directional movement across the collarbone. If you want drama ask for one prong to trace the bone line while leaving the opposite side shorter. The collarbone sees less friction than wrists and tends to age predictably when the linework is given room. Expect two sessions if you want shading and negative space details. The usual mistake is forcing mirror symmetry in a place that is naturally asymmetrical. Pair with a low scoop sweater when you want subtle framing.
14. Ornamental Mandala with Central Lightning Bolt on the Upper Back
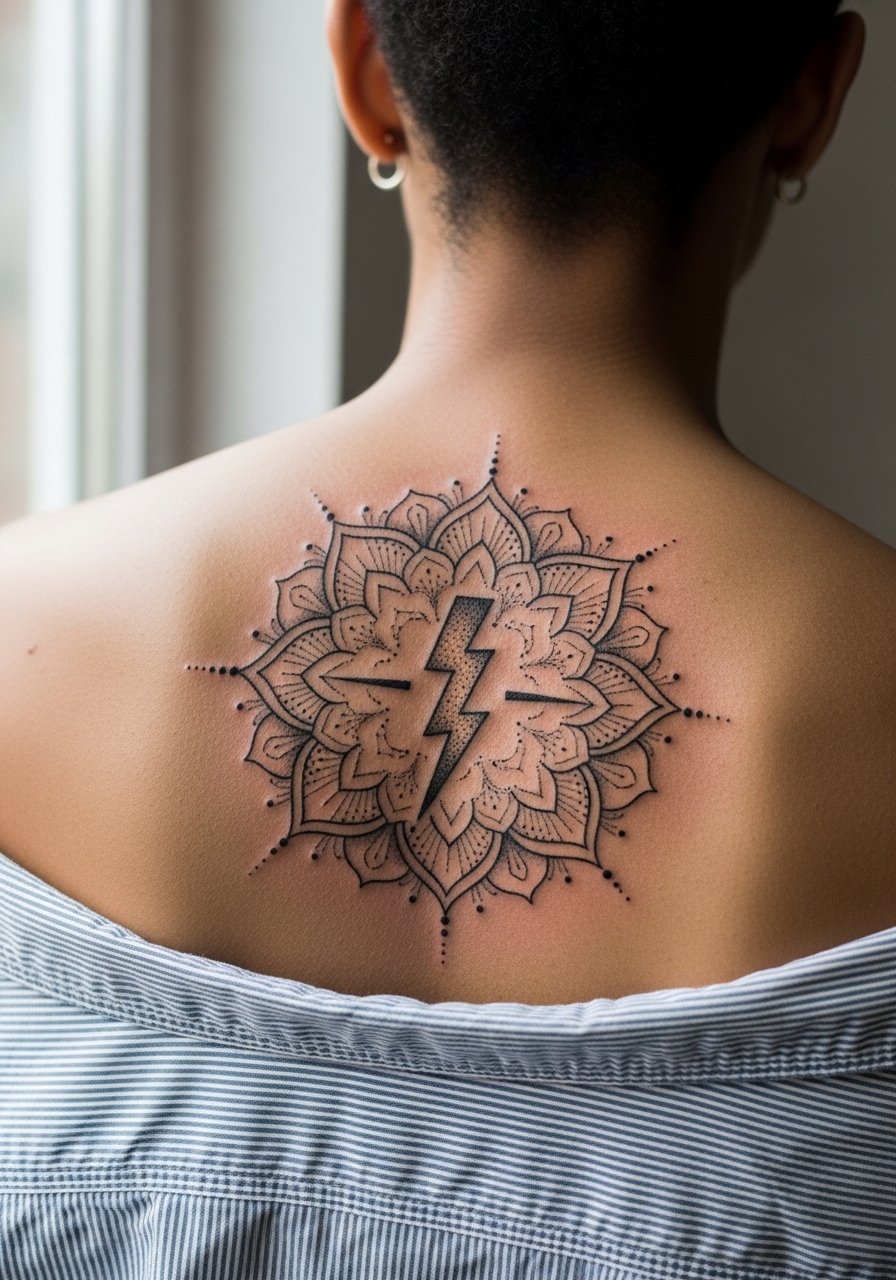
Integrating a bolt into an ornamental mandala gives punch without losing decorative detail. This requires an artist comfortable with stipple shading and dot work so the bolt reads through the pattern. Upper back placement lets you go larger and gives room for spacing that prevents line merging. The common error is microscopically dense dot work too close to the bolt that blurs over time. For cultural-sensitive patterns consider subtle variations rather than direct replicas to respect origin and intent. Wear a loose button-down shirt to the session for easy access.
15. Negative Space Bolt for Darker Skin Tones on the Forearm

Negative space bolts solve contrast issues on medium to dark skin by letting the skin tone form the strike. When requesting this, ask your artist to build a surrounding filled field rather than relying on white ink, which can fade. The main mistake is assuming small negative shapes will read the same at all sizes. These bolts need clear boundaries and slightly larger scale to remain visible in photos. Show it off with a vintage style button shirt with sleeves rolled to the mid-forearm so the negative shape stands out.
16. Punk-Textured Bolt as Cover-Over Element
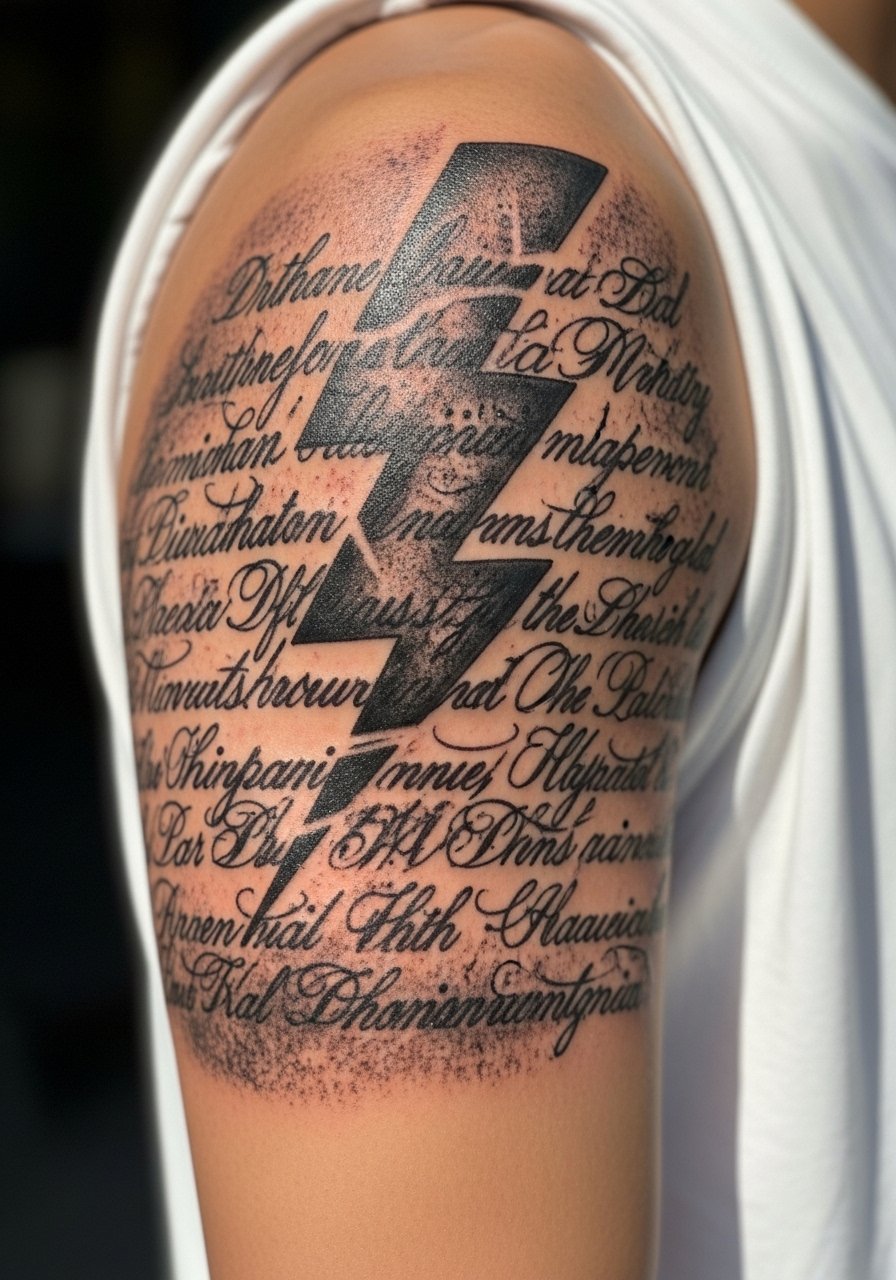
Using a bold, textured bolt as a cover-up tool works well when the existing tattoo has low contrast. The trick is to design the bolt so its darkest fields sit where the old ink is strongest. Expect multiple sessions and honest talk with the artist about realistic coverage. A frequent error is trying to hide light gray lines with only thin shading. Bold black fields and clever negative space choices are the real solution. Plan a touch-up window several months after the last pass to refine edges.
17. Bolt as a Cover-Up Accent Over Faded Script
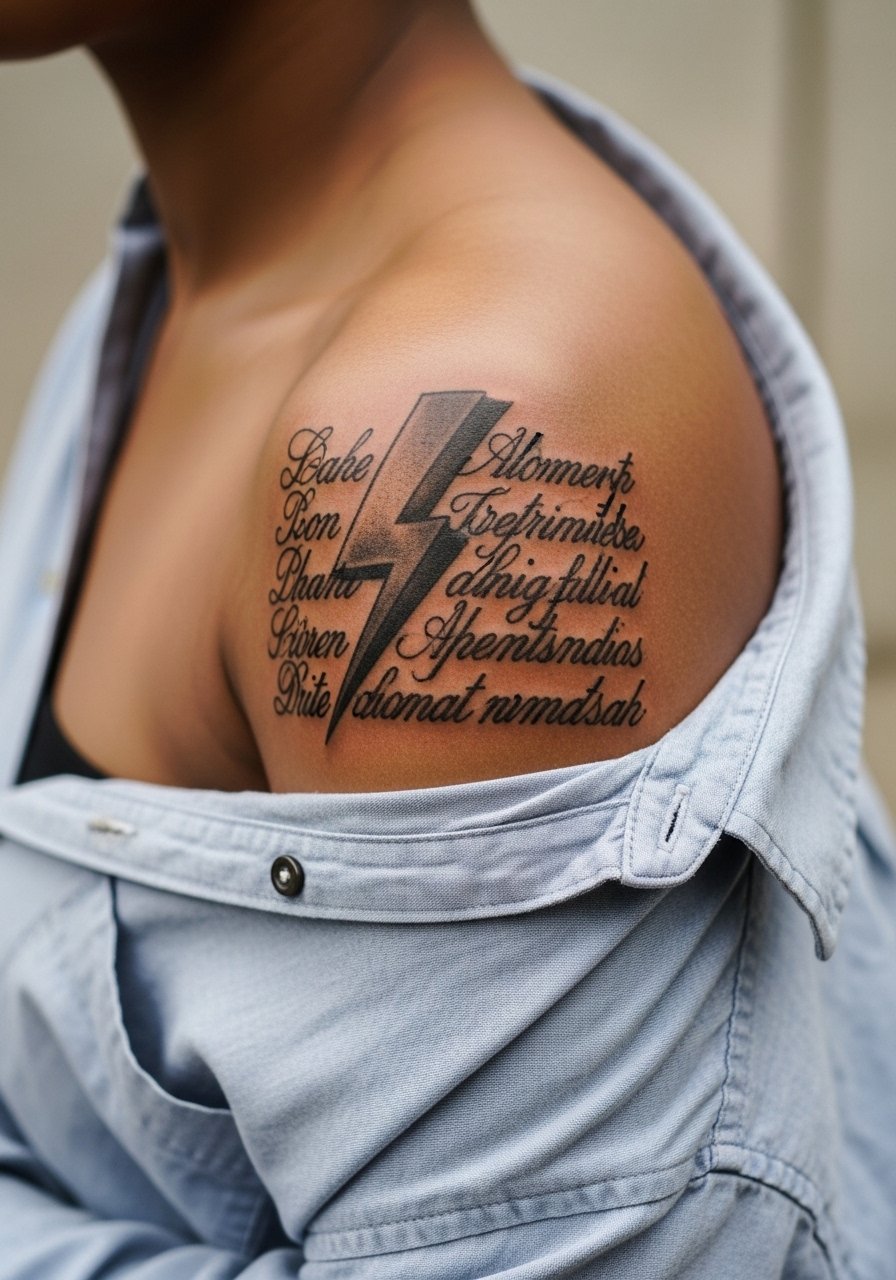
If you have old script you regret, a vintage bolt can be positioned to mask and reframe the piece as intentional design. Tell your artist which parts of the script are most visible so they can map the bolt accordingly. This often needs two sessions and realistic expectations on what can be fully hidden. A misstep is asking for a tiny bolt to cover a large block of text. Think of the bolt as a compositional solution rather than a literal eraser.
18. Micro Ankle Bolt for Discreet Vintage Flair

Ankle micro bolts are low commitment and great for starters, but the area sees a lot of movement and shoe friction. Ask for slightly thicker fine lines than you might on an upper arm and expect some softening by year two. The common mistake is wanting a hairline bolt that becomes invisible after a few months. For showing it off roll trousers to mid-calf or choose sandals with a slim leather sandal look so the bolt stays visible without rubbing.
19. Anchor and Swallow with Bolt for Nautical Storytelling on the Calf

Combine these elements if you want a narrative piece rather than a single emblem. Calf work gives you vertical room for the swallow to appear in flight with the bolt cutting through the composition. During consultation map the negative space so the anchor remains legible at a glance. The usual error is crowding small details into the anchor. For warm-weather display pair the look with rolled shorts and low shoes to let the scene read.
20. Sleeve-Ready Forked Lightning that Guides Motion
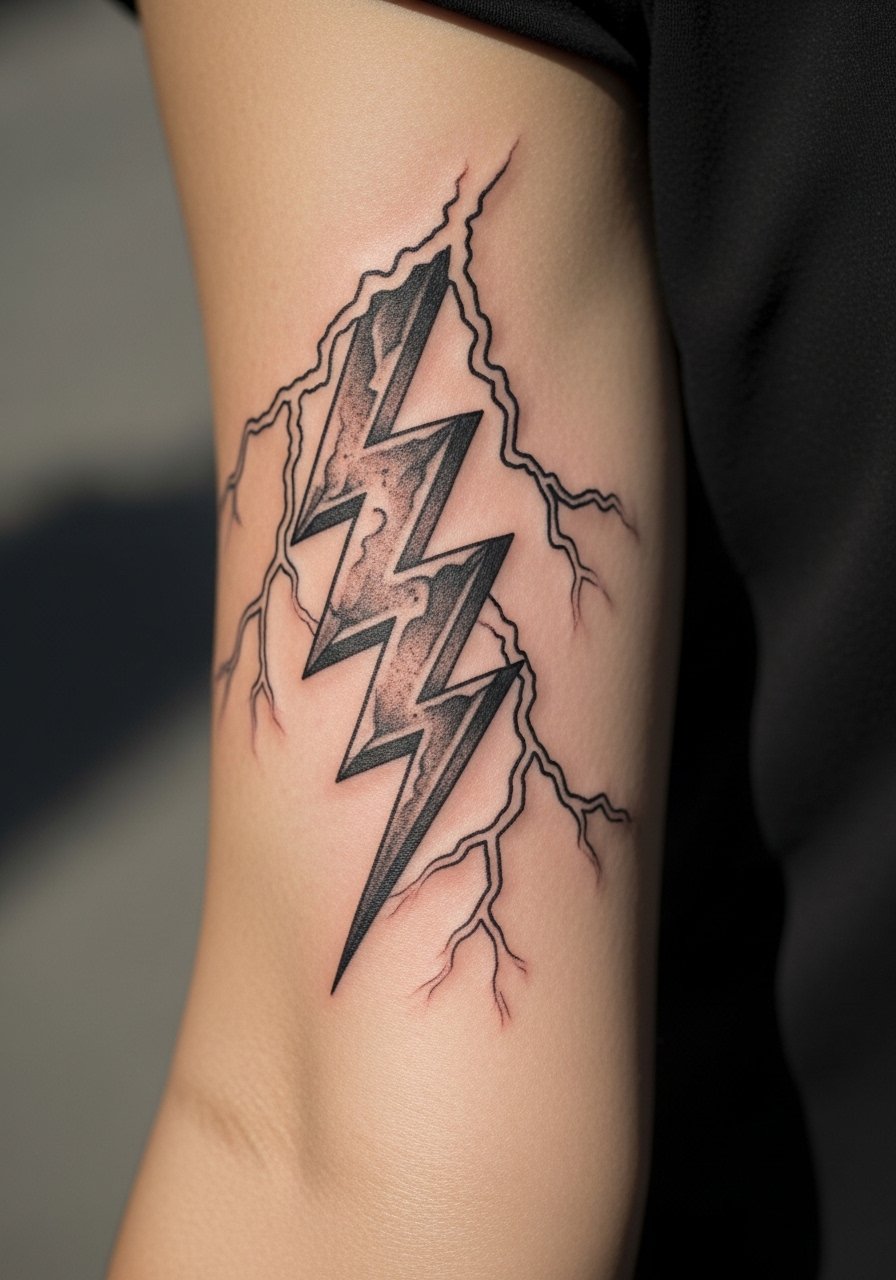
If you want to move toward a sleeve, a branching bolt is a great lead-in because the prongs can guide future elements. This is a multi-session plan and requires clear spacing so future imagery does not crowd the bolt. A common mistake is trying to tie too many unrelated motifs into the first pass. Start with clean forks and leave buffer zones for future fills. Expect a staged touch-up timeline and regular portfolio reviews with your artist to keep cohesion.
21. Tiny Retro Zigzag at the Collarbone Edge
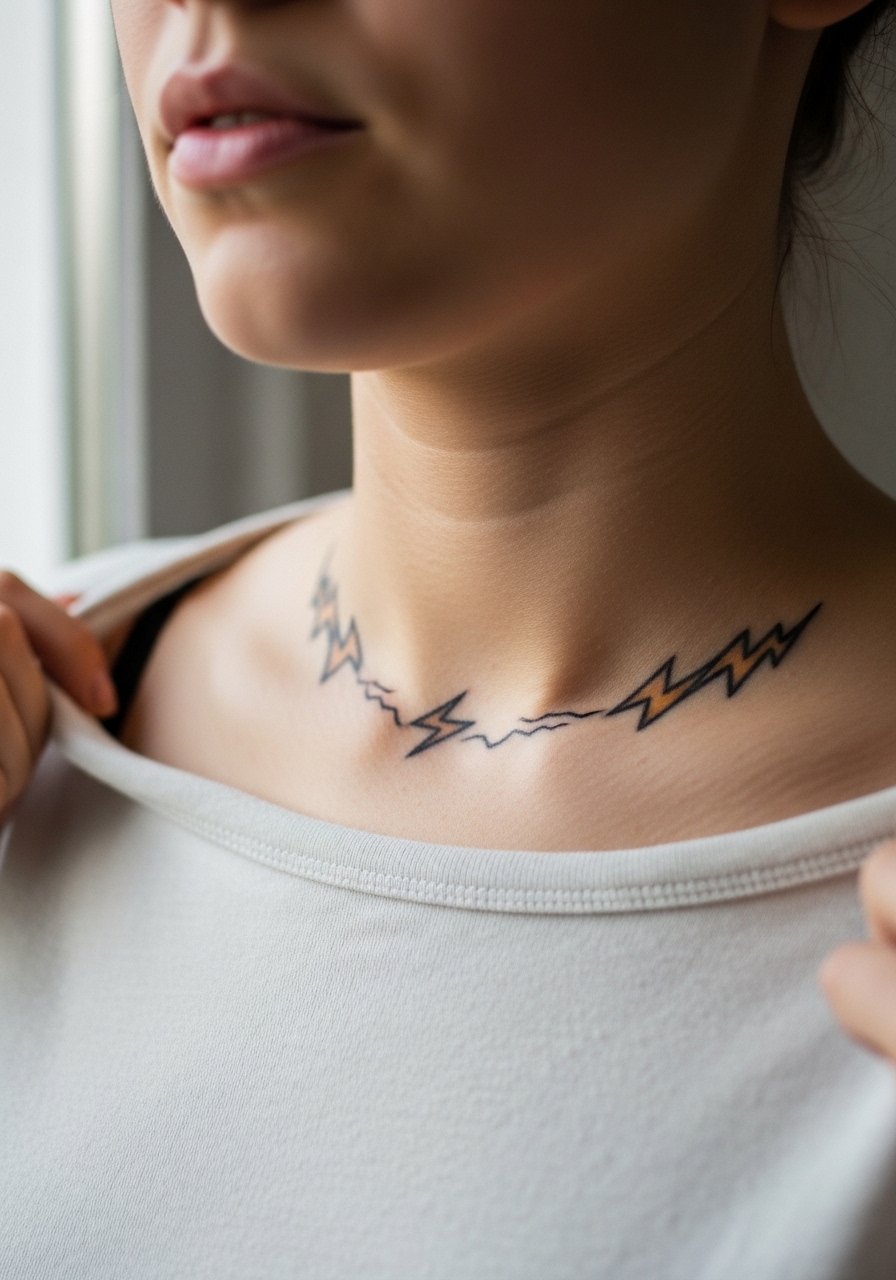
A small zigzag at the collarbone edge is discreet but gives classic hot-rod energy. Ask for a slightly angled placement so it complements the bone structure rather than competing with it. This spot holds well if the linework is allowed a touch more weight than a pure micro. The frequent error is trying to center tiny motifs exactly over the bone which can make them look off-balance. For the session wear a wide-neck shirt you can shift easily so the artist can see the placement.
Frequently Asked Questions
Q: Will a fine line vintage lightning bolt on the wrist blur faster than a bold one on the forearm?
A: Yes, fine line wrist pieces tend to soften sooner because the wrist gets more washing and friction. For a wrist bolt consider slightly increased line weight or plan for a touch-up around year two. For forearm bolts heavier saturation usually means they hold cleaner longer.
Q: How should I handle bookings if the artist is a guest at a convention and might reschedule?
A: Confirm the guest spot two weeks ahead and ask the shop about their cancellation policy. Use booking platforms that show guest schedules or look for shops running flash days, which often have set timings and clear reschedule rules.
Q: How does weight gain affect a forearm lightning bolt versus a collarbone bolt?
A: Forearm skin can stretch and distort larger pieces if your body changes significantly, while collarbone placements sit on more stable planes. If you expect major size changes choose bony or low-friction areas for long-term shape retention.
Q: Are negative space bolts better for darker skin tones, and how do I request one?
A: Negative space often reads better on richer skin tones because the uninked skin forms the shape. Ask your artist to build a surrounding fill or textured field rather than relying on white ink, and plan for slightly larger scale so the strike remains visible.
Q: Should I expect to tip for a small vintage bolt flash piece?
A: Tipping practices vary, but many clients leave a customary amount for quality work. If you want clarity ask the shop about their flash day norms when you book so you know how to budget.
Q: How long should I budget for a forked, multi-prong bolt that might be part of a sleeve plan?
A: Budget multiple sessions. Initial layout and main fills can take two to three sessions depending on size, with touch-ups later. Ask your artist for a session plan during consultation so you can book accordingly.
