
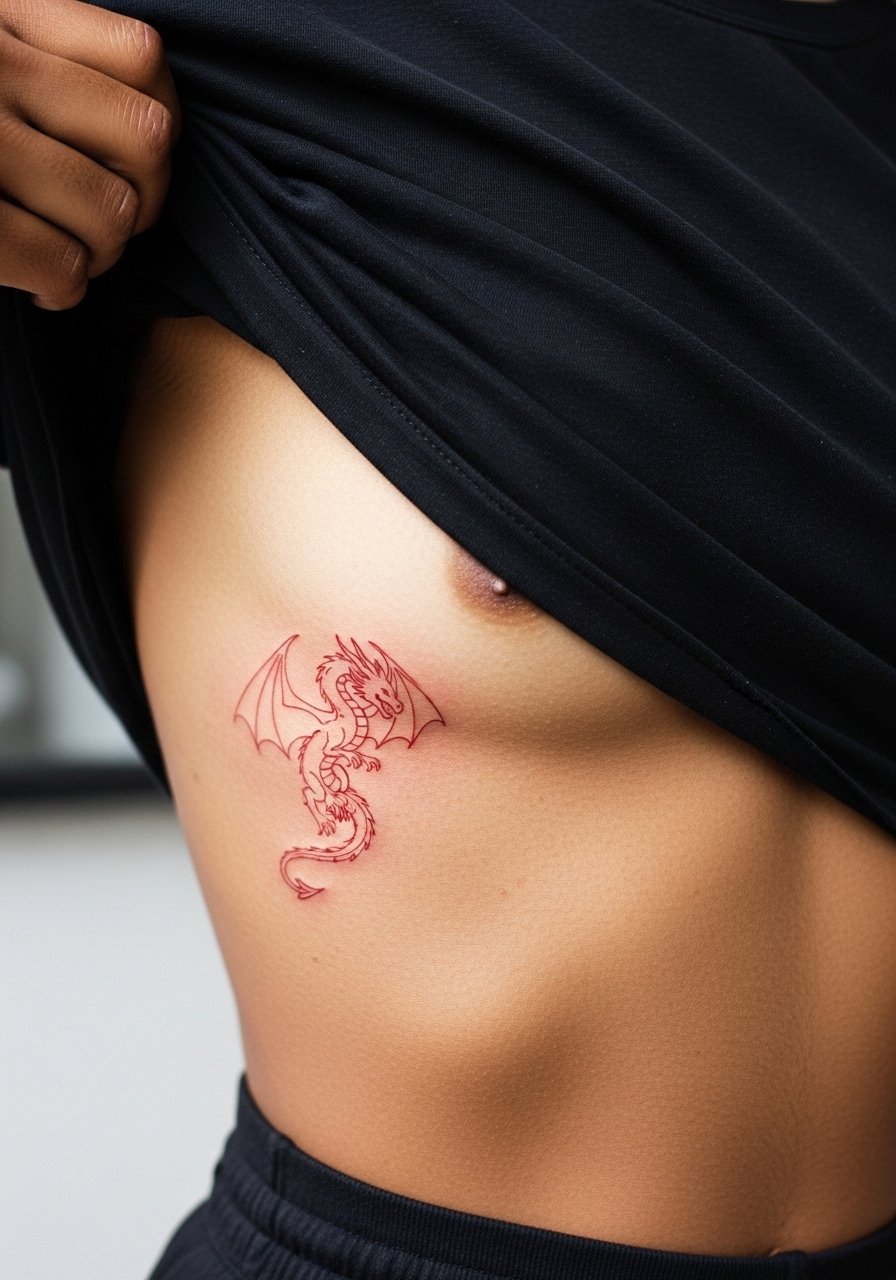
Fine line red dragon outlines are everywhere online right now, and the thing no one tells you is how placement, skin tone, and session prep decide whether that delicate red stays crisp or softens into a blur. I have seen these tradeoffs up close in five shops across Brooklyn and at two conventions, where color choices and sizing decisions make or break the healed look. Read on for 17 red dragon approaches, plus what to wear to the chair and how each option ages so you book a version you actually like for years.
1. Minimalist Red Dragon Wrist Silhouette

Most first-timers pick a wrist silhouette because it reads small without losing impact. Fair warning, the wrist is a high-friction zone that needs bold enough linework to survive daily washing and bracelets. When you consult, ask for slightly thicker single-pass linework and ask the artist to avoid super dense scale detail. Expect a one-hour sit that is sharp at six months and may need a touch-up by year two. For the appointment wear a sleeveless crop top so the artist can work without jewelry in the way. A common mistake is asking for too many tiny scales on a tiny canvas. Keep it simple.
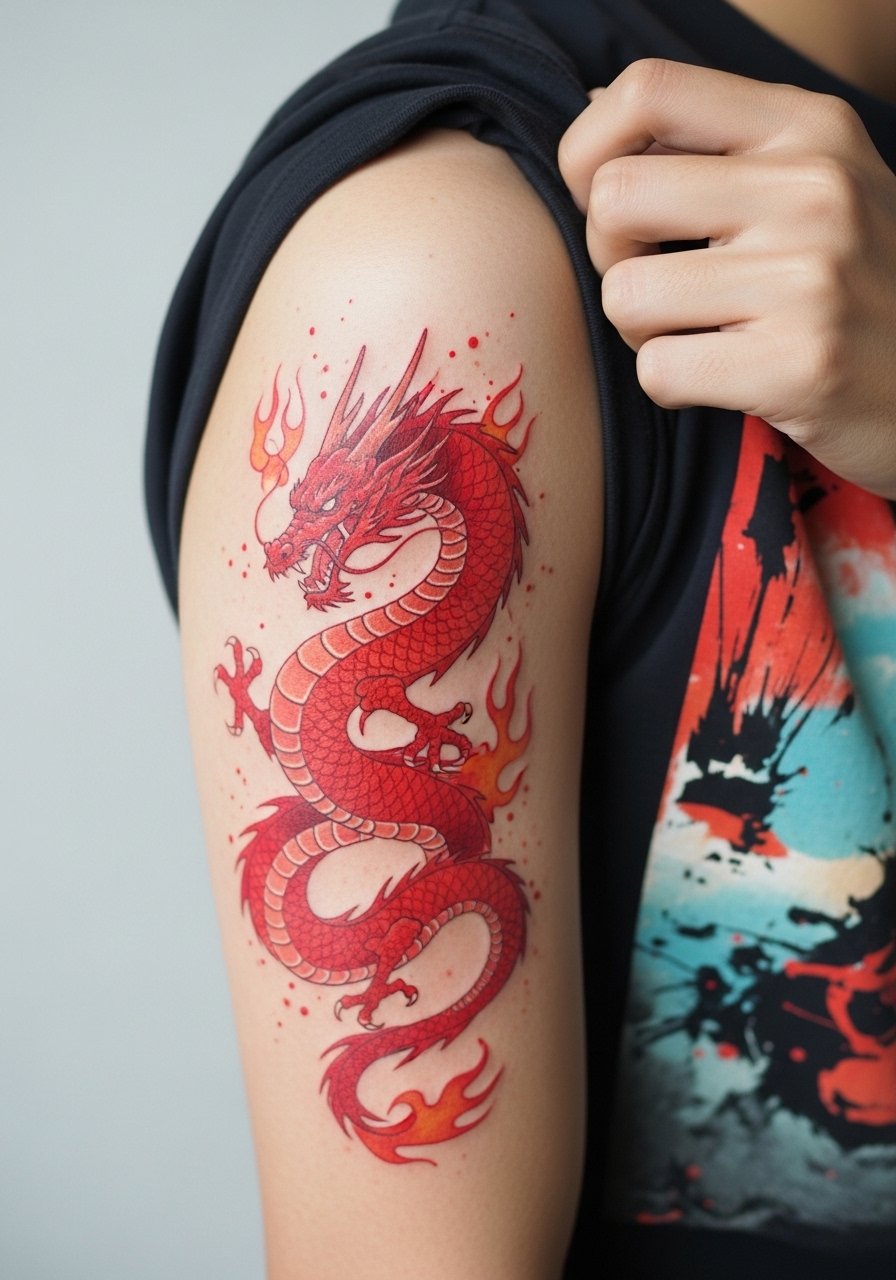
2. Neo-Traditional Red Dragon Coiled Around a Sword, Outer Forearm
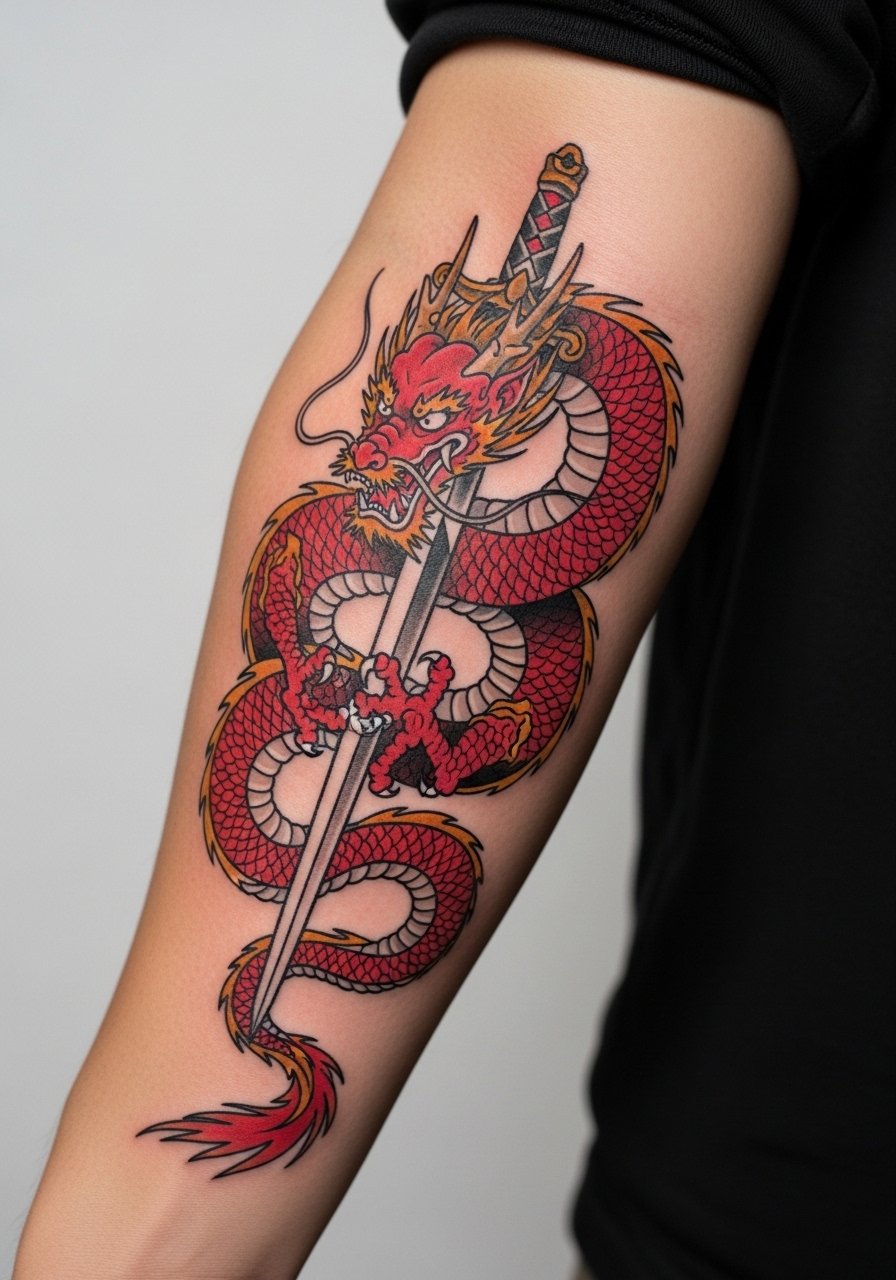
I recommend this if you want color that reads from across a room. Tell your artist you want strong black outlines and controlled saturation, not painterly feathering. The forearm flex can distort coils when the arm bends. Test placement with a temporary stencil in both flexed and relaxed positions. Sessions usually run 2 to 4 hours and are more painful where the bone is shallow near the wrist. For showing off, roll up a denim sleeve and add a leather arm cuff on the opposite arm. The most common mistake is asking for tiny, dense scales that blur when the arm moves.
3. Realistic Red Dragon Head on the Shoulder
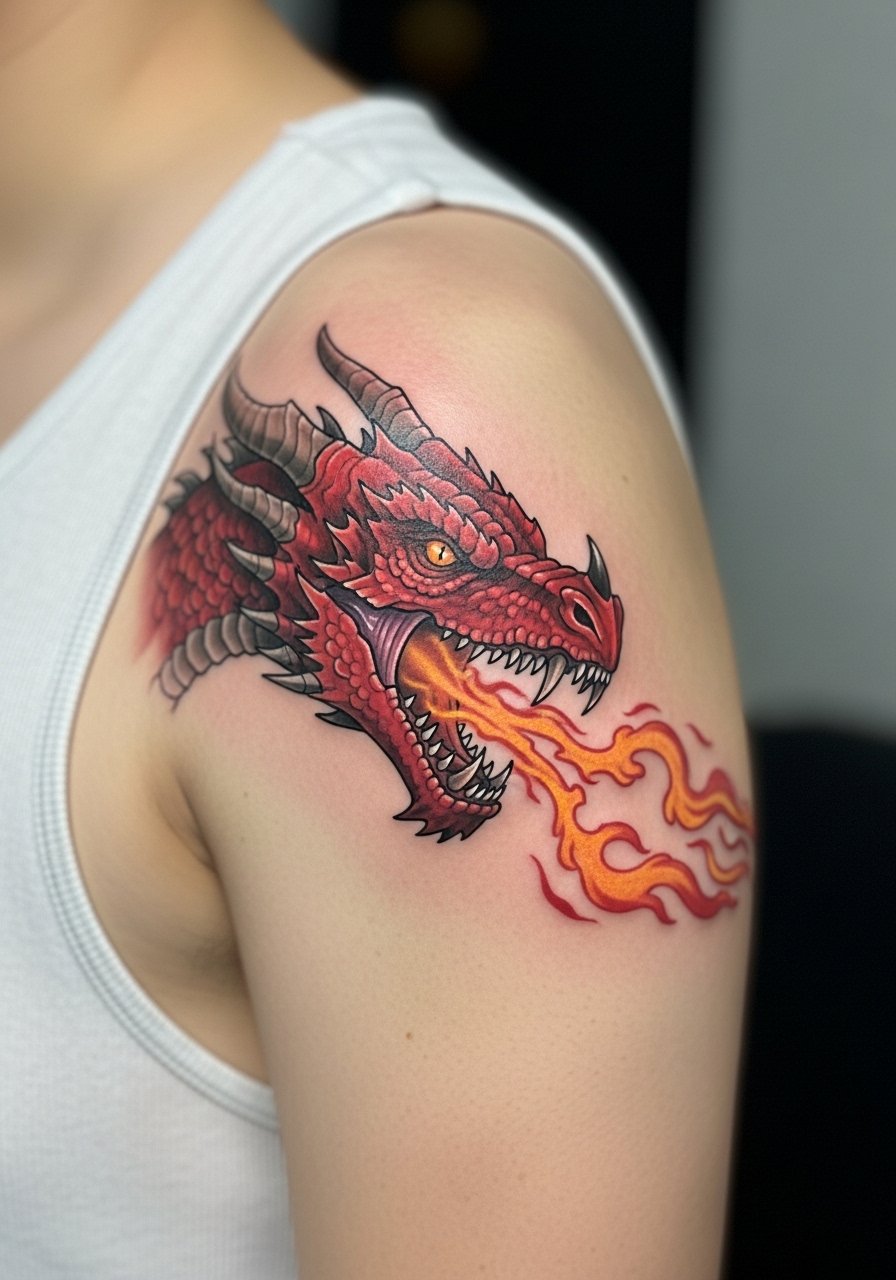
If you want a showpiece that highlights artist skill, the shoulder gives enough surface for texture and flame gradients. Expect medium to high pain for the deeper sits and three to five sessions for complex shading. During consultation, bring multiple head angles and request clear notes on how the artist will translate scale texture without overworking the skin. Shoulders heal well if you avoid tight straps that rub. For the session wear a sleeveless muscle tank so the artist has full mobility. A common aging issue is overworked satin shading that puffs, so ask for layering over multiple sessions not one marathon.
4. Red Dragon Merging with Ocean Wave on the Thigh
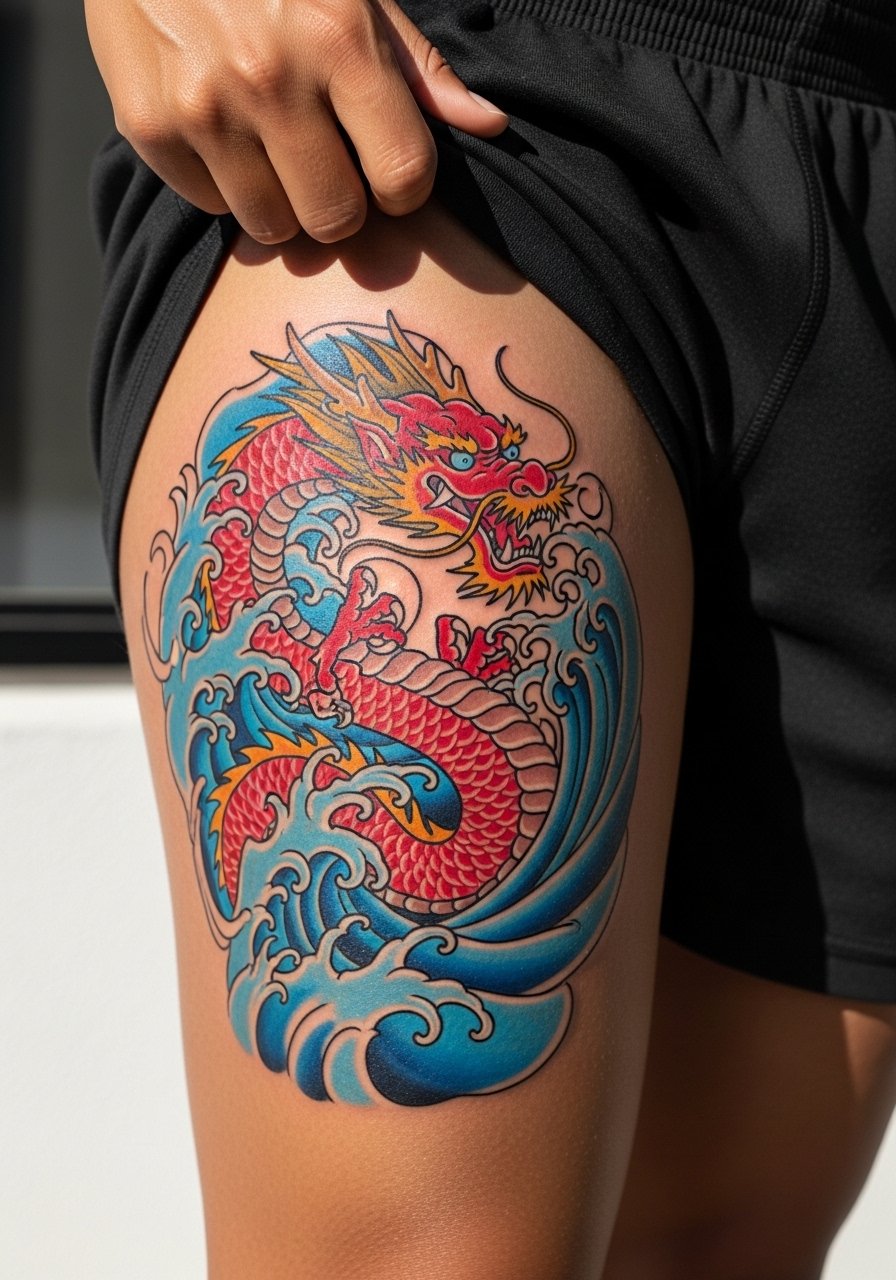
Thigh placement lets you go large without wardrobe fallout. The fire-versus-water composition benefits from negative space so the red does not bleed into the blues. Plan for a three-session schedule and wear loose athletic shorts to the chair. For showing off, style with high cut athletic shorts that reveal the upper thigh when you want it visible. Healing is usually straightforward unless clothing is tight. A real mistake is asking for maximal detail in one sitting, which stresses the tissue and risks excess scabbing. Ask for staged sessions.
5. Traditional Red Dragon Claw Emerging from Clouds on the Chest
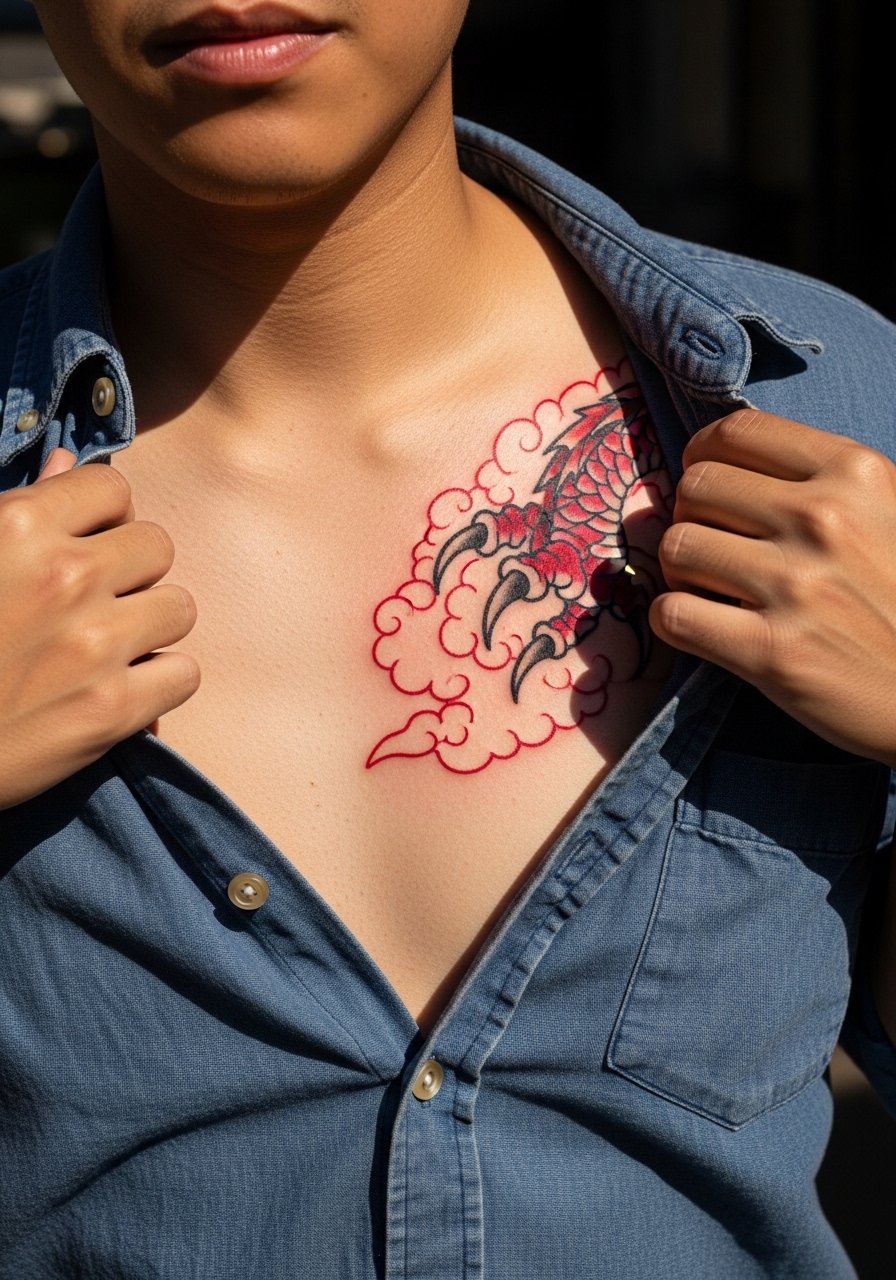
Fair warning, chest sessions bruise more easily because of thin skin. The traditional approach uses bold black outlines and saturated red fills that age well if saturation is applied consistently. Tell your artist you want single-pass fills and clear outline weight to avoid patchy settling. For the session wear an open front vest or loose button-down so they can expose the area without discomfort. A common mistake is requesting complex tiny clouds in a small chest piece. Bigger shapes breathe better over time.
6. Ornamental Red Dragon Tail Wrapping the Ankle
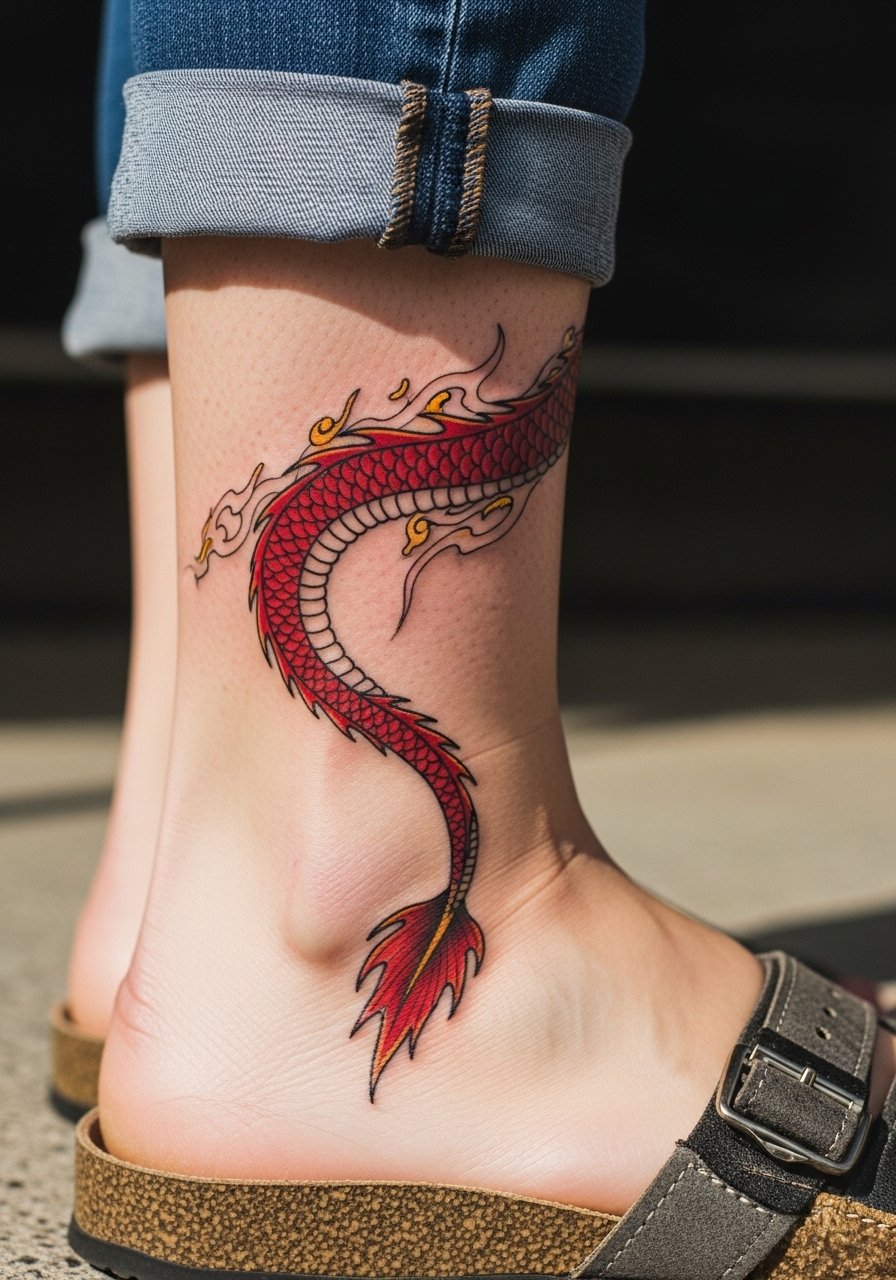
Ankle tattoos face constant friction from shoes and socks in the first month. Ask for slightly bolder linework and a touch of gold accent to lift the red on darker tones. For the session wear cropped jeans or strappy heeled sandals so you can roll pants up easily and avoid pressure on the area afterward. Expect one to two sessions. The frequent mistake is too-fine detail near the bone where blowout risk is higher.
Studio Day Picks
The ankle and chest designs above need different prep than forearm work, so a few targeted items make the session and the first week easier.
-
Stencil transfer paper kit. Lets you preview exact line placement on skin, which is critical for pieces that wrap around the ankle or follow collarbones.
-
Topical numbing cream. Applied before the chair reduces sharpness during hours-long chest or shoulder sessions without changing line quality.
-
Thin protective film roll. Keeps ankle and wrist tattoos clean through the first few days of dressing and light activity.
-
Fragrance-free gentle body wash. Gentle cleansing avoids irritation on newly inked skin, especially under shirts that rub chest or back pieces.
-
Aquaphor healing ointment. A thin layer helps lock moisture in the earliest healing window without clogging needle channels.
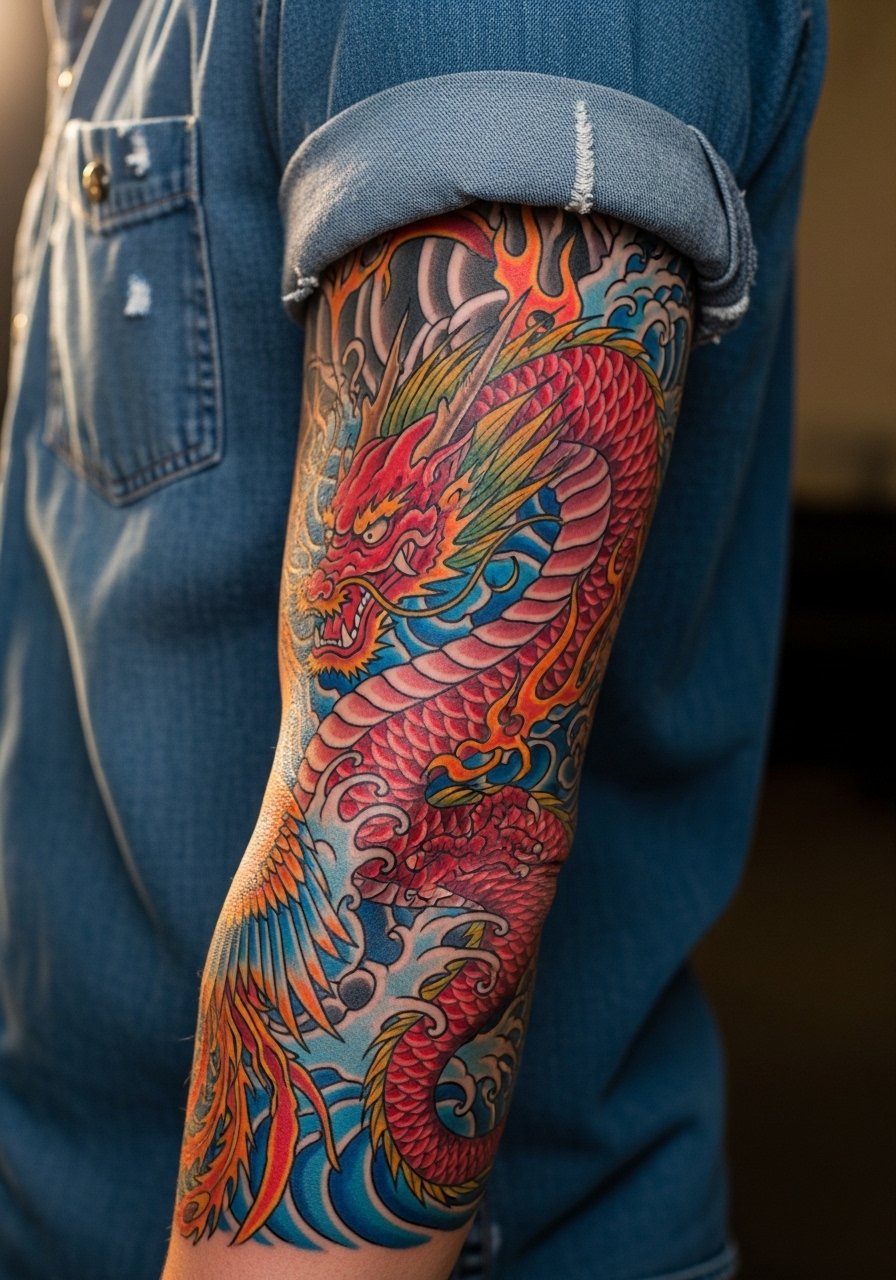
7. Watercolor Red Dragon with Splashed Flames, Upper Arm
Watercolor techniques look painterly but can fade unevenly in high-sun areas. If you like the effect, ask for stronger perimeter linework to maintain shape as the interior blends soften. Upper arm sun exposure is the biggest long-term worry. For the session wear a short sleeve tee or open button-down so the artist can access the area. Expect two sessions and a touch-up around year two depending on your sun habits. The mistake is choosing watercolor with super-thin, unanchored edges that disappear first.
8. Ignorant Style Chunky Red Dragon Face on the Calf
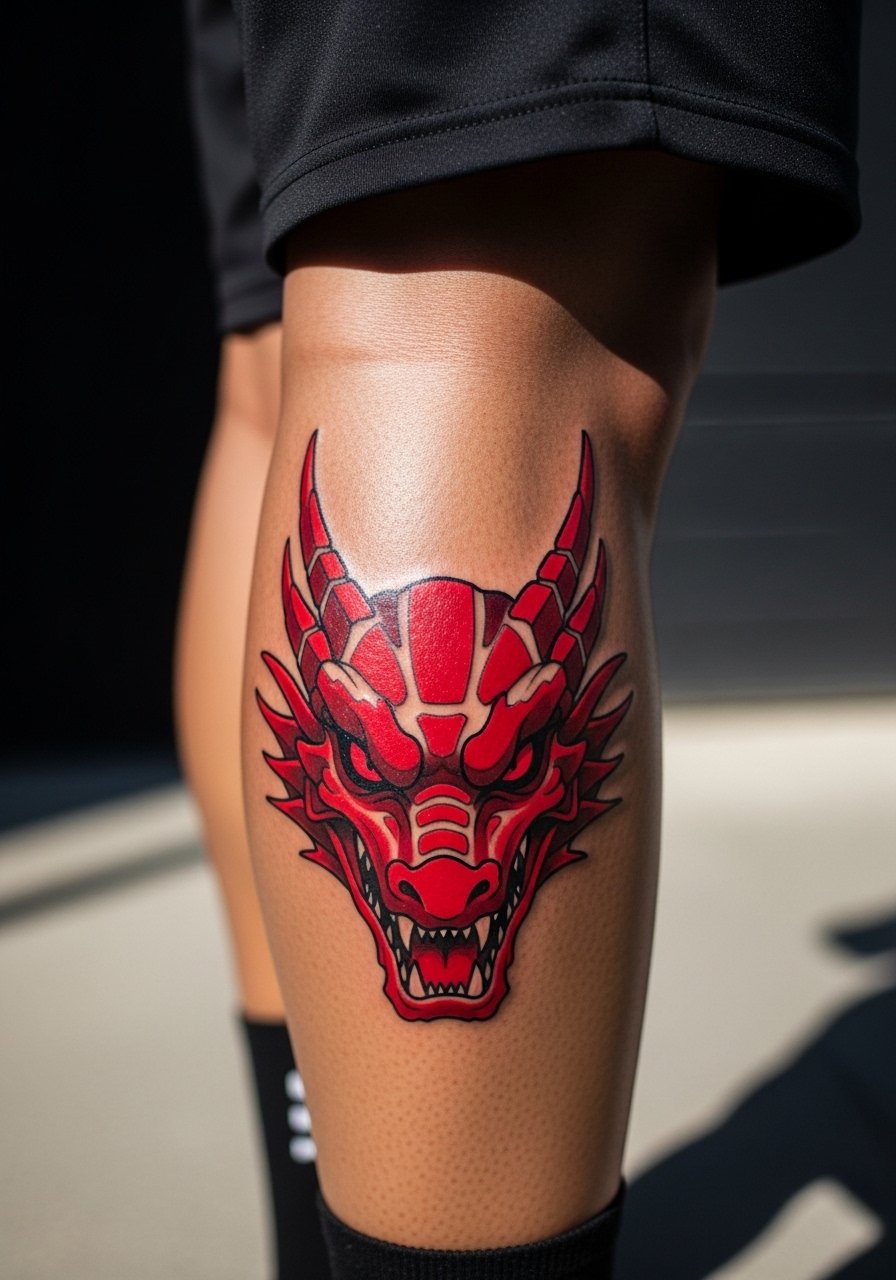
Ignorant style relies on chunky, almost naive shapes that pop on all skin tones. Calf pieces are forgiving and easy to hide if you wear pants. This style usually sits in one session. If you want longevity, ask your artist for saturated blocks with crisp negative-space outlines. For the session wear athletic running shorts so they can roll the leg without pressure. A common mistake is asking for complicated shading in ignorant pieces, which undercuts the bold graphic intent.
9. Fine Line Red Dragon along the Collarbone
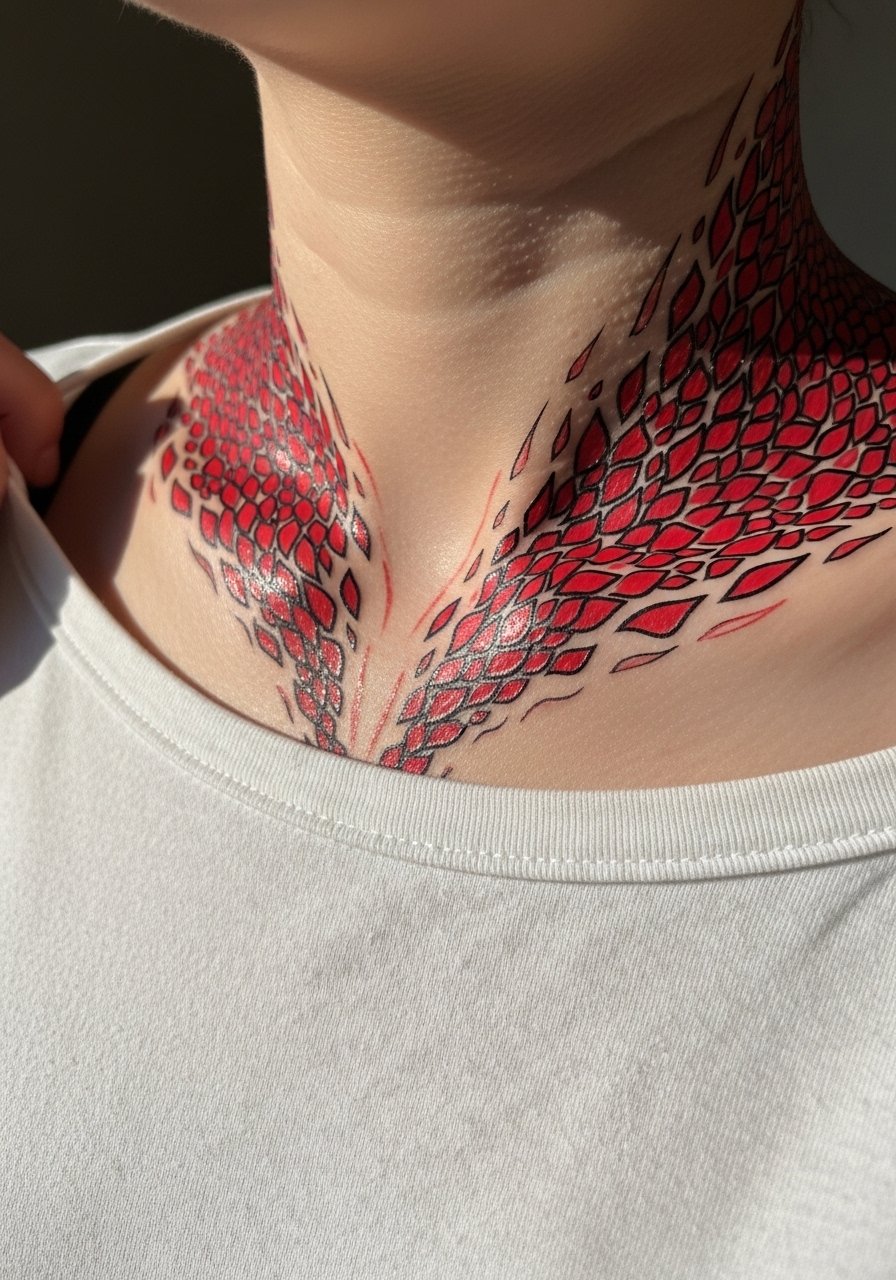
Fine line looks elegant on the collarbone but is where the fine line longevity debate is most visible. Artists split into two camps. One camp warns fine line will blur on the collarbone within two years because of constant motion and sun exposure. The other camp argues that with proper needle depth and spacing, fine line settles just fine. Ask your artist where they stand and for photos of healed pieces on similar placement. Pain is moderate and a single-hour sit is common. For showing off pair with a thin chain pendant necklace that sits above the detail. Avoid cramming too many scales into a small collarbone piece.
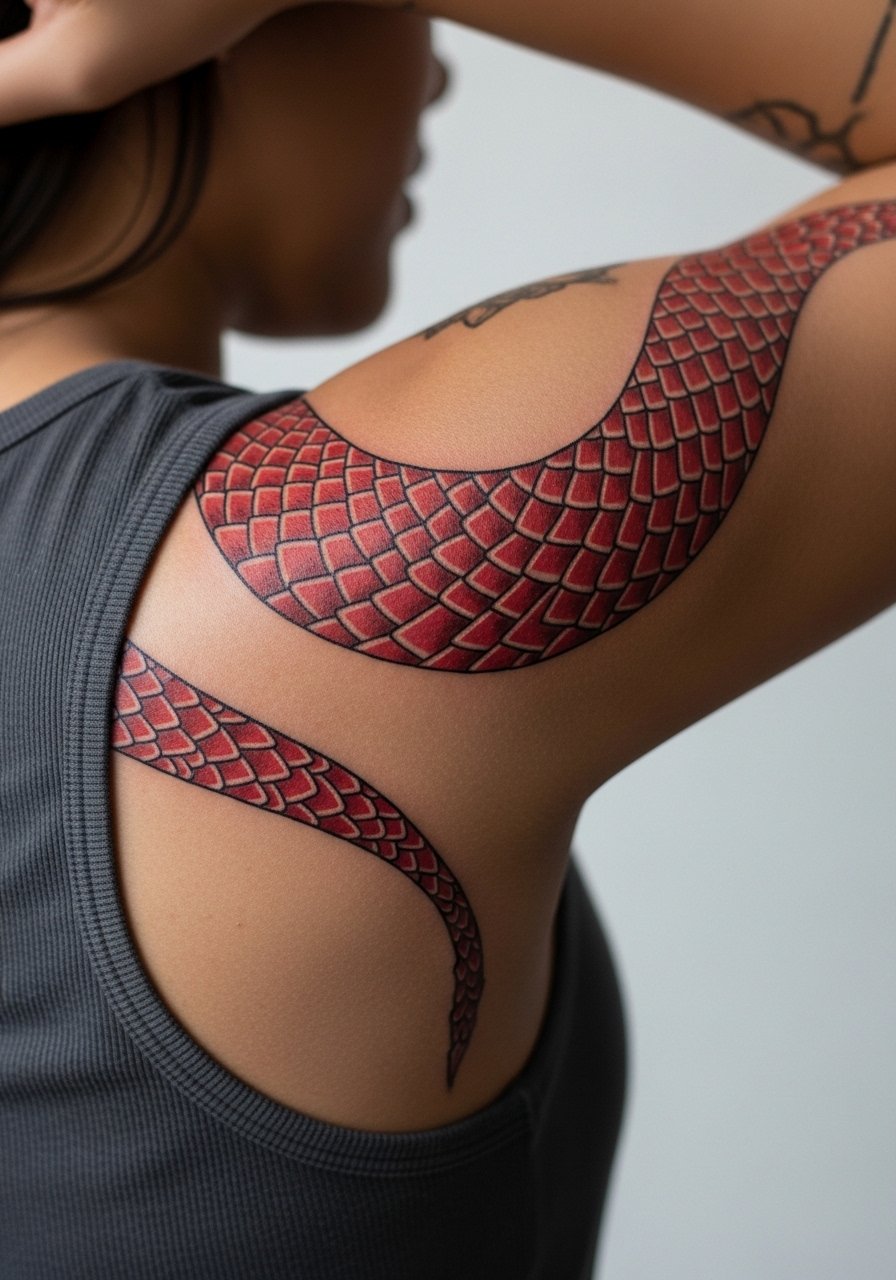
10. Black and Gray Sleeve with Red Tint Highlights
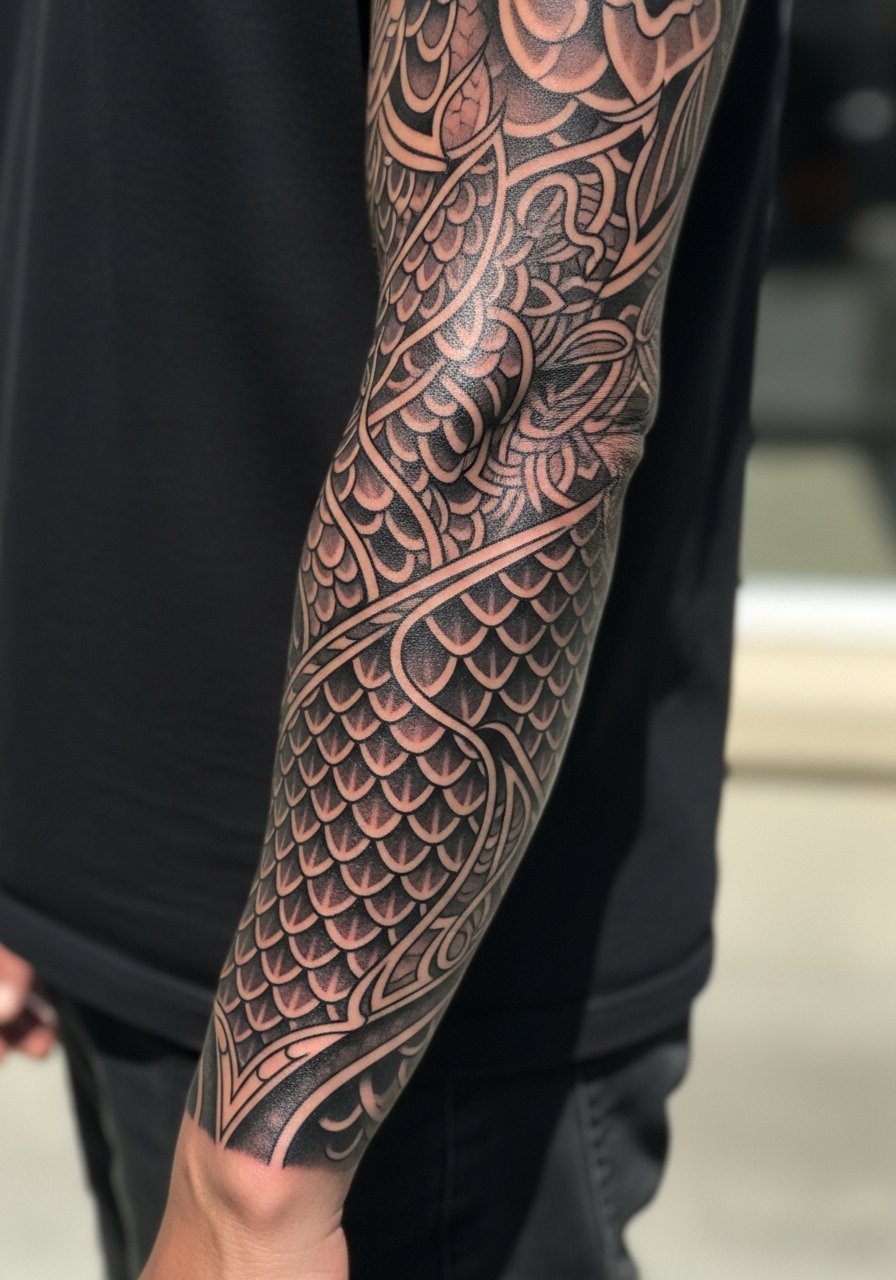
This approach addresses the color-versus-gray controversy head on. Two camps disagree here. Color advocates prefer pure red for the symbolism and visual pop. Grey realism fans favor muted red highlights to cut fade risk. If you lean toward longevity, ask for red as spot color only and stronger saturation in shaded areas. Full sleeves need multiple sessions and careful planning to avoid overworking the skin. Expect touch-ups at year three for the color accents. The big mistake is asking for saturated full-red fills in thin-skinned areas on the inner arm.
11. Minimalist Red Dragon Silhouette on the Ribcage
Fair warning, ribs rank high on pain scales. The silhouette approach minimizes session length but still requires clear spacing so the lines do not merge during healing. Tell your artist to keep the dragon airy with open negative space and to plan for a one-hour sit. For the appointment wear a fitted sports bra you can lift easily to expose the area. A common error is getting tiny dense detail on the rib where skin moves a lot during breathing.
12. Geometric Tribal Red Dragon with Angular Flames on the Back
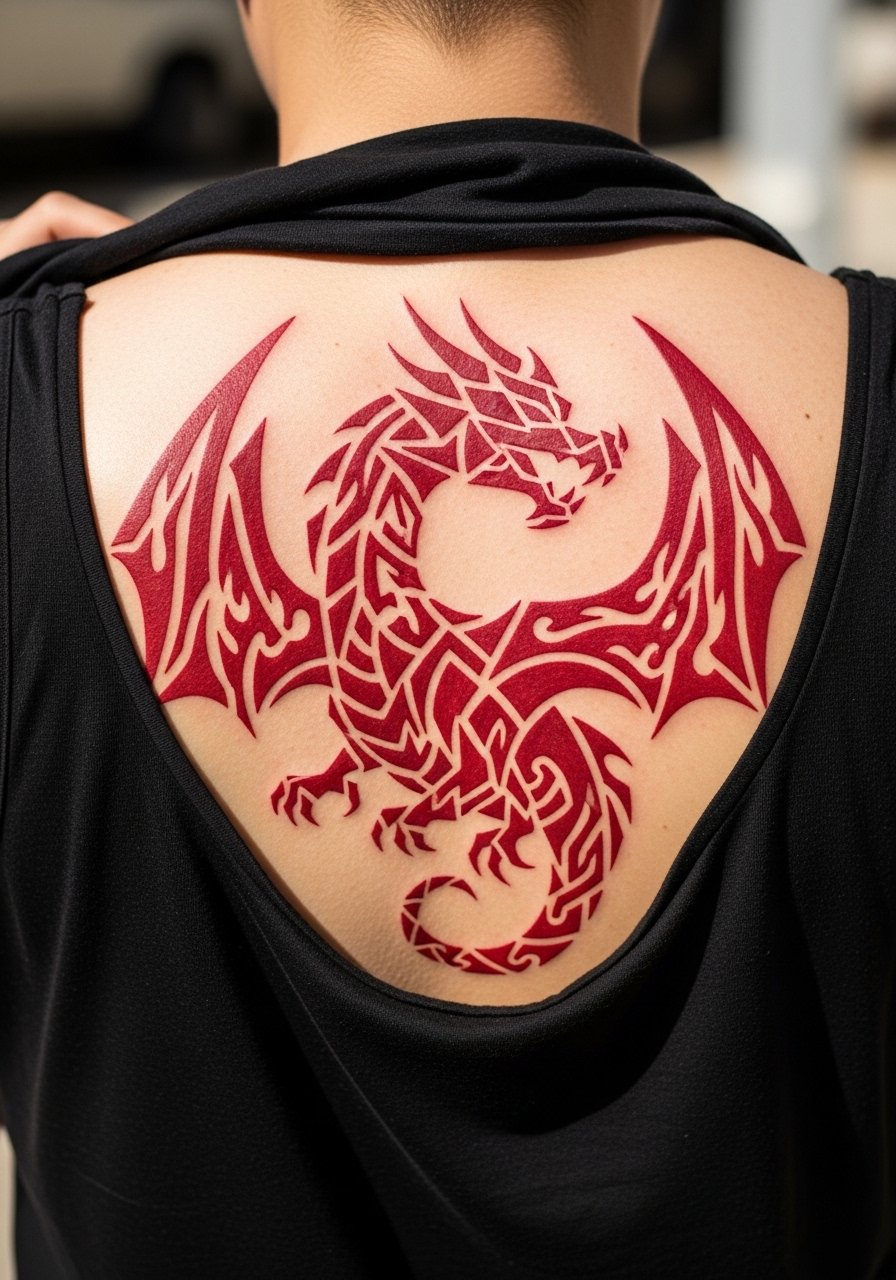
For people who want a masculine edge, geometric tribal patterns can be adapted to follow muscle contours. The key consultation note is to ask the artist to map scale rows to muscle flow so the design does not warp when you move. Back placement means multi-session work and planning for large-scale symmetry. For the session wear a loose muscle tank the artist can slide aside. Avoid asking for perfect mirror symmetry if you want the piece to read natural with body movement.
13. Patchwork Red Dragon Integrated with Other Mythics for a Half-Sleeve
Collectors who build sleeves over time benefit from a patchwork plan that leaves room to link future mythic elements. Tell your artist you intend to add at least two more motifs over five years. Design with connective elements like waves or smoke that can be extended. Sessions are spaced out and may total six or more. For showing off, pair with a rolled sleeve denim shirt. The mistake is booking disparate flash pieces without a connecting motif, which makes later linking awkward.
14. Bookish Tiny Red Dragon for Finger or Behind-the-Ear Accents
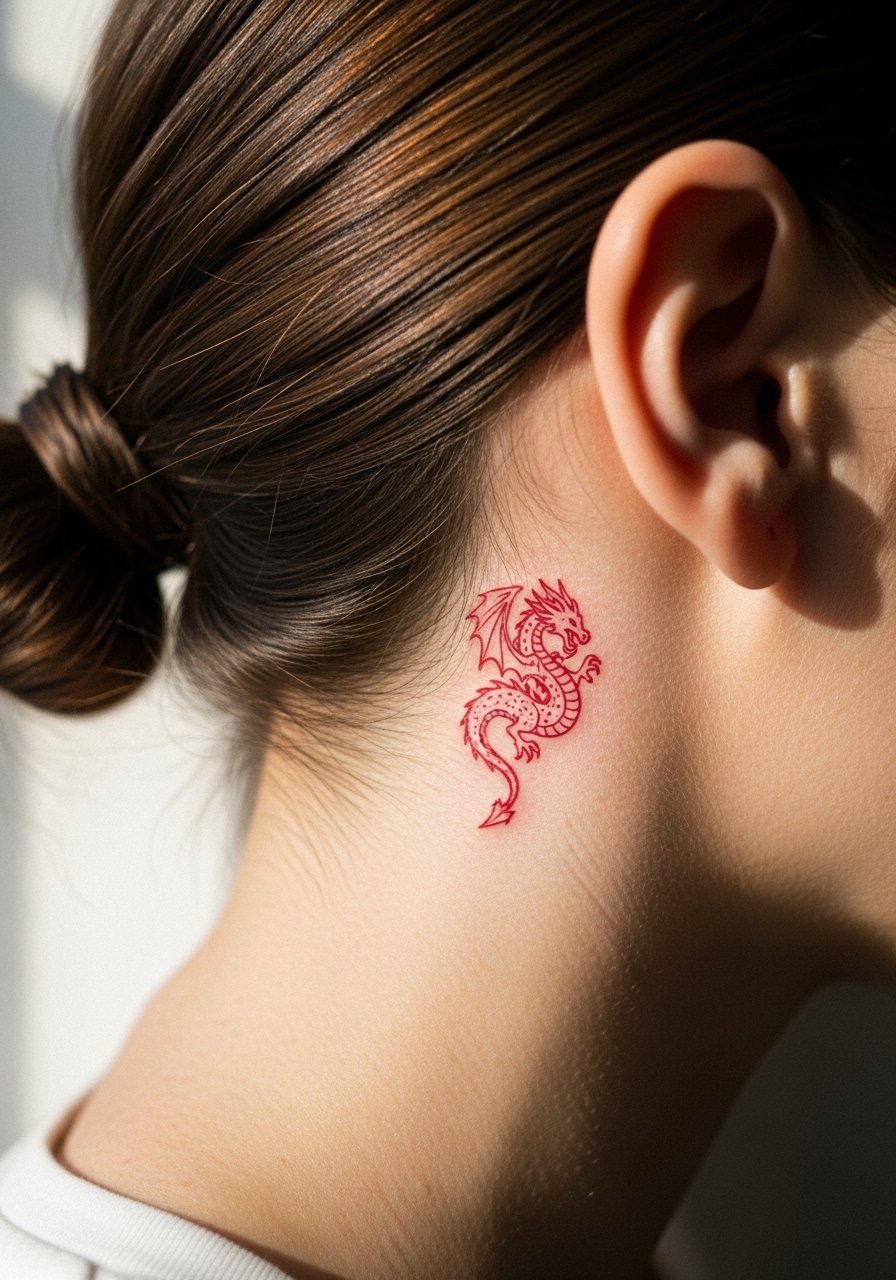
Small mythical designs appeal to readers who want a low-commitment emblem. Behind-the-ear and finger placements require special consideration. Fingers face constant washing and blowout risk. Behind-the-ear needs a steady hand and a discreet session plan. If you pick this, ask for slightly thicker single-line work and plan for touch-ups at year two. For the appointment wear hair up or a wide-neck shirt so the area is visible. A real mistake is expecting the same longevity as an upper-arm piece. Tiny tattoos are maintenance pieces.
15. Red Dragon Climbing the Sternum with Floral Anchors
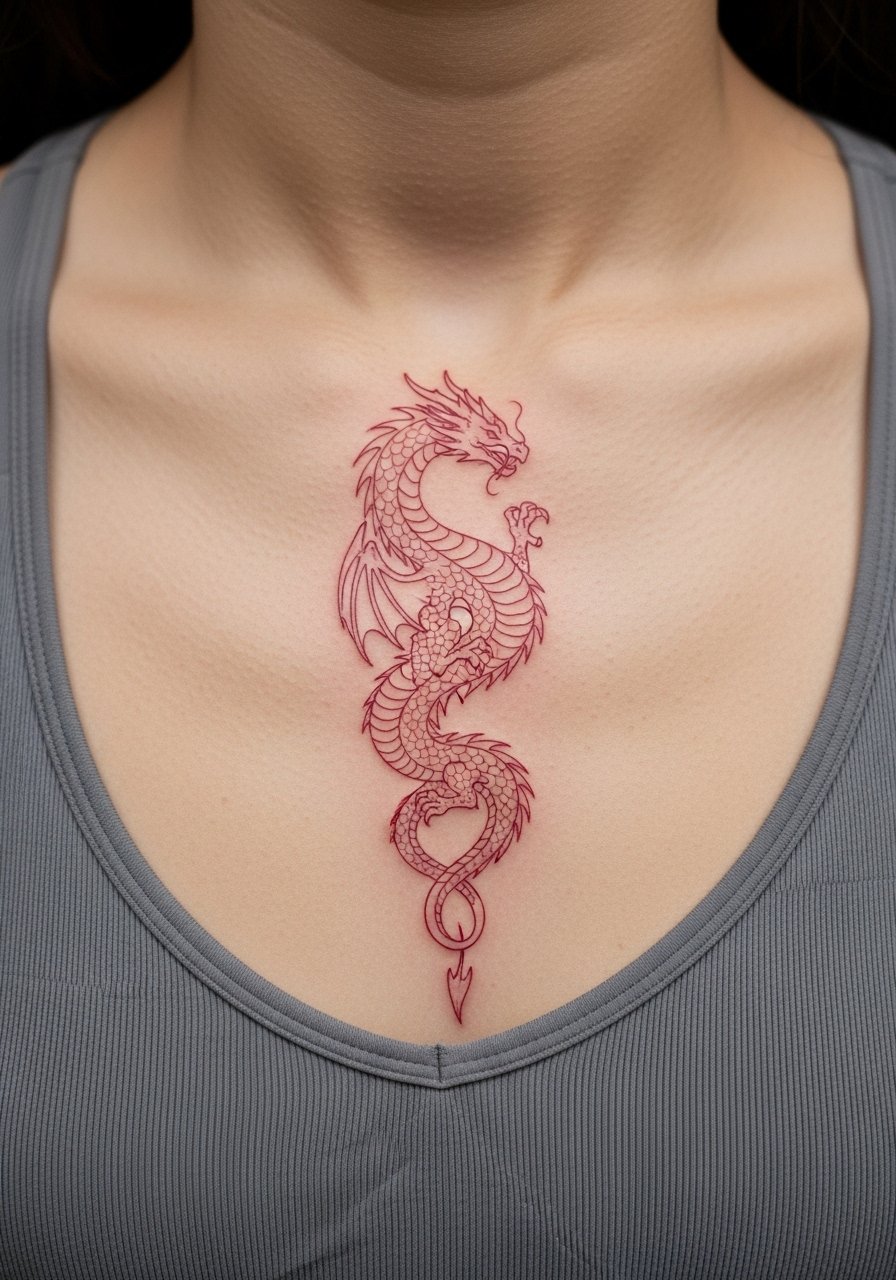
Sternum work needs careful placement because of clothing friction and sensitivity. Choose a fitted sports bra to show the area and to keep pressure even during healing. Ask the artist how the design will sit next to the fabric line to avoid constant rubbing. Expect a multi-hour session and moderate to high pain. The common mistake is placing too much dense red at the sternum center where scabbing is likely to tug. A floral anchor on either side helps disperse stress and frames the dragon.
16. Fine Line Scaled Collar Detail That Wraps the Shoulder Blade
I've seen these in portfolios that span more conservative client needs. Shoulder blade placement allows for elegant wrap without constant sun exposure. Tell your artist to space scales with negative gaps so the pattern reads at distance and does not merge after healing. Sessions are one to two hours. For the chair wear a loose tank top so you can move your arm to help the artist access the blade. The mistake is packing in tiny detail that looks busy once healed.
17. Geometric Red Dragon Tail with Scale Patterned Hip Accent
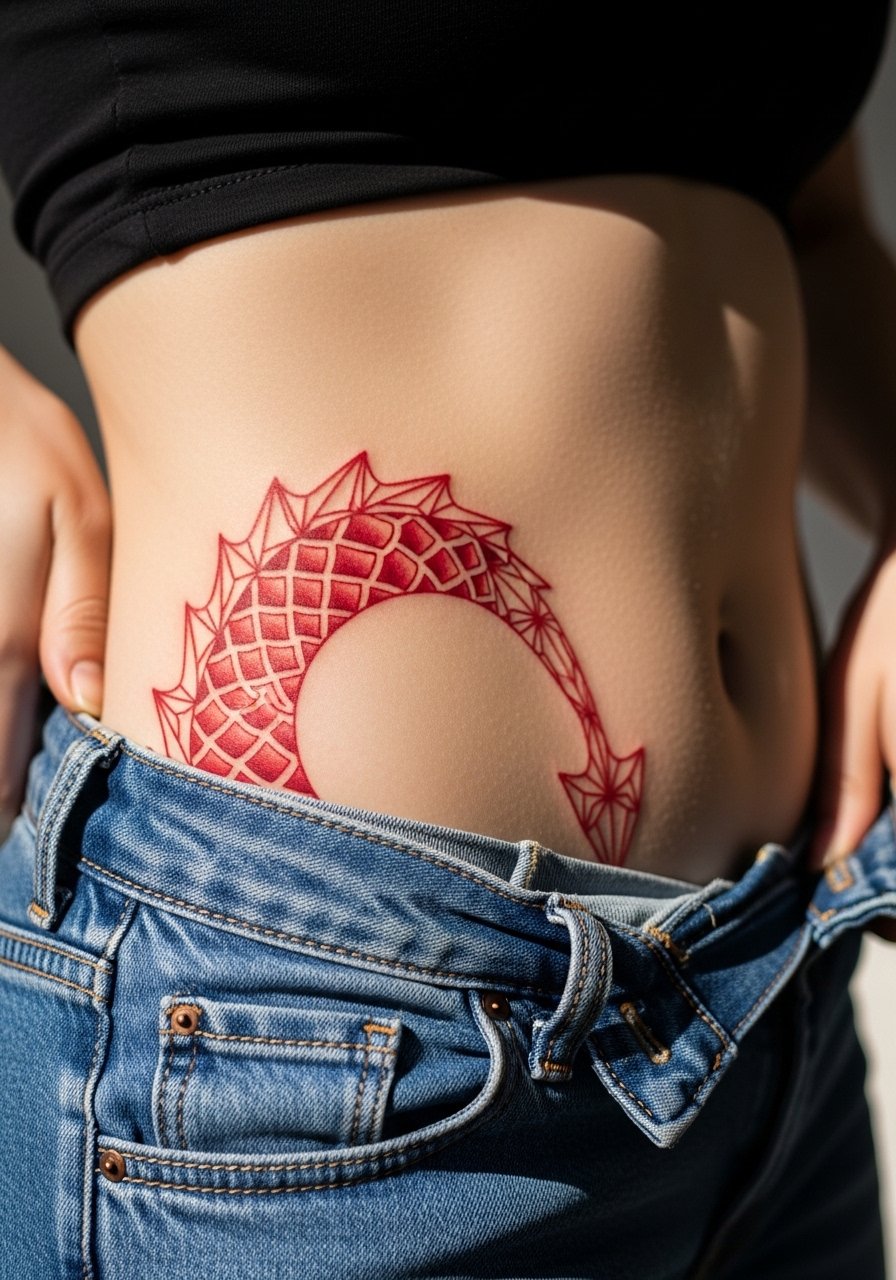
Hip and upper thigh accents offer concealed drama and seasonally revealable impact. For this placement ask for a design that flows with hip curves so the tail looks intentional when you sit or walk. Schedule a session when you can wear loose bottoms afterward. For showing off, a high-waisted denim skirt or a slit maxi pairs well. A common mistake is making the tail too narrow where clothing will rub during healing, which causes disproportionate fading.
Frequently Asked Questions
Q: Will red ink look muddy on darker skin tones?
A: Red behaves differently across melanin levels. I have seen reds pop on darker skin when paired with strong black outlines and a touch of gold for contrast. Ask your artist for bold linework and spot color rather than full-field red fills if you are worried about even retention. Expect touch-ups sooner than for pure black pieces.
Q: How should I plan multi-session back or sleeve work for summer?
A: Large back pieces heal slower in high heat because sweat and friction slow surface recovery. If possible book sessions in cooler months and wear breathable layers afterward. Bring a loose button-down or a low back crop top for post-session show-off and comfort on cooler days.
Q: Do fine line red dragons on ribs blur faster than bold traditional dragons?
A: Artists split into two camps on this. One camp says ribs stretch and blur fine work quickly. The other camp says careful spacing and the right needle depth can make fine line last. The honest answer is it depends on your skin, the artist technique, and whether the piece gets frequent sun or friction. Plan for possible touch-ups.
Q: What should I ask in consultation if I want a patchwork half-sleeve later?
A: Tell the artist your intent to add motifs over time and ask them to leave connective negative space. Ask for a small mockup showing how waves, smoke, or scale rows will bridge future elements. A timeline of sessions helps preserve skin quality between appointments.
Q: Are there wardrobe rules for showing off a thigh dragon that merges with waves?
A: Yes. High-cut shorts or slit skirts frame thigh pieces best and prevent constant rubbing. For the chair bring loose athletic shorts so the artist can access the area without tight fabric pressing the fresh tattoo.
Q: How often will red color need touch-ups compared with black and gray?
A: From what I've seen, red tends to need touch-ups earlier than saturated black. Plan for color refresh at year two to three depending on sun exposure and placement. Choosing spot color accents or red highlights within gray work reduces overall maintenance without losing the red pop.
