
Fine line henna on the hand reads delicate and deliberate when the artist respects negative space and skin texture. Trends push tiny filled motifs onto fingers, and those can blur into muddy stains if applied too thick or left to smudge during the first 48 hours. These 21 hand-focused henna looks show how to ask for crisp contours, where to save negative space, and how to wear the design so it stays legible as it fades.
1. Lacy Filigree Across the Back of the Hand
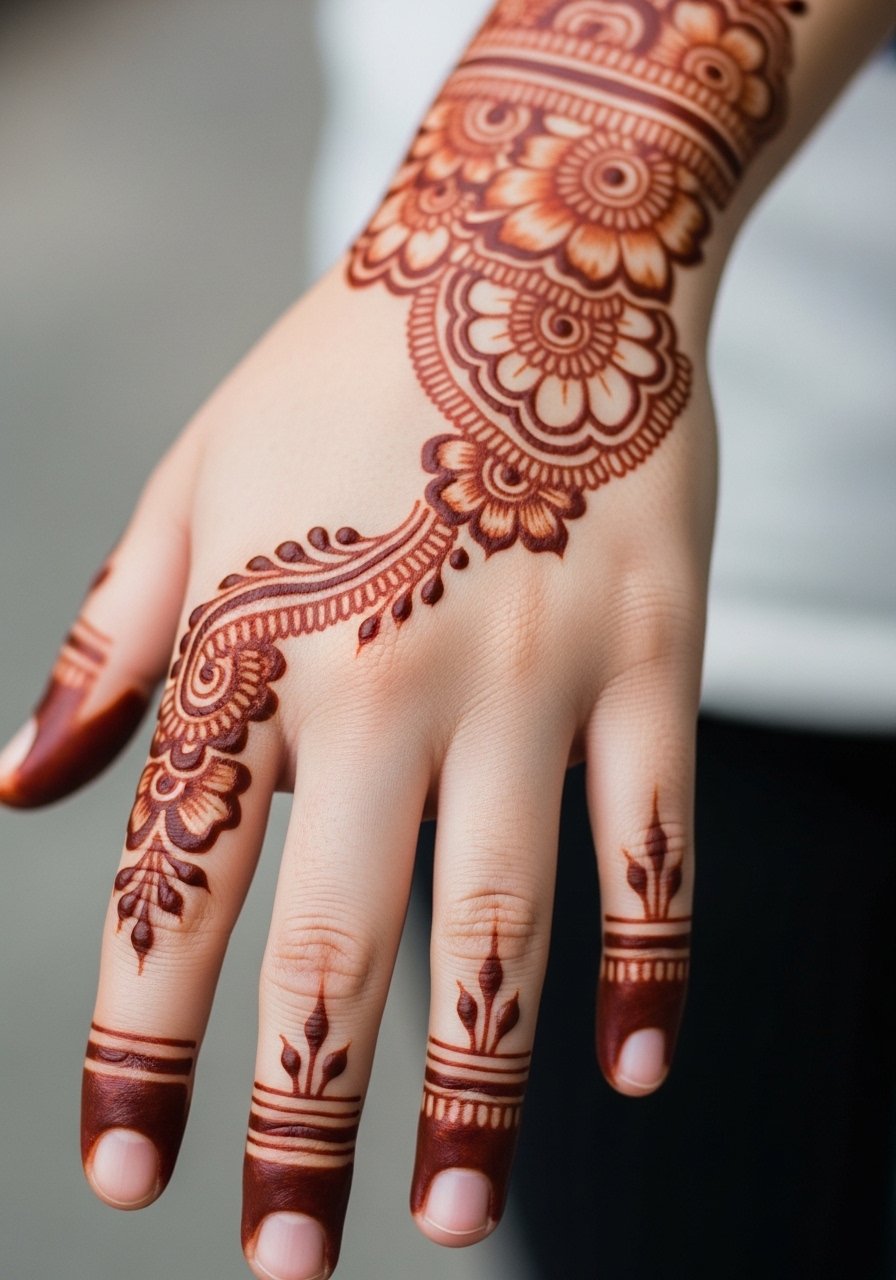
I recommend this when you want coverage without feeling heavy. Tell the artist to leave small gaps between motifs so the pattern does not merge as it fades. A common mistake is asking for saturated, solid fills across the knuckles. That looks striking fresh but often fades into blotchy edges by day five. The session feels like firm pressure more than pain, especially where the skin is taut over the metacarpal bones. Pair it with a stackable gold bracelet when showing it off; a thin bracelet frames the pattern without overshadowing the lace.
2. Minimal Ring Bands on Fingers
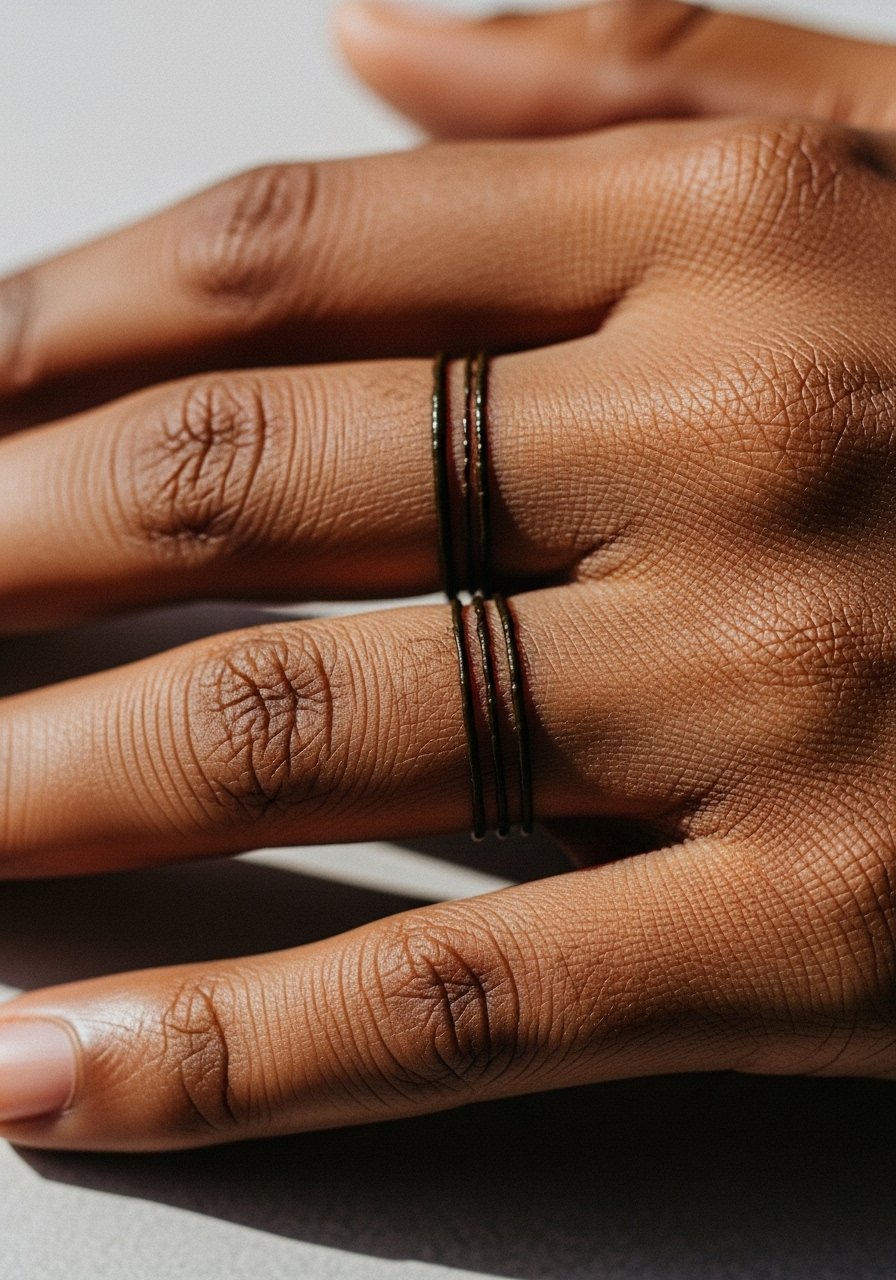
Finger bands are perfect if you want an everyday look that reads like jewelry. In consultation, ask for narrow bands with tiny breaks so oils from hand care do not blur the joins. The frequent mistake is going too dense with paste on fingers. The stain can darken unevenly and then lift in patches after frequent washing. Expect reapplication every 1 to 2 weeks if you want a continuous look. For session comfort, fingers can feel stingier than the back of the hand because of thinner skin. Wear a dainty thin ring over one band after the stain sets to complement the look.
3. Central Mandala at the Base of the Thumb
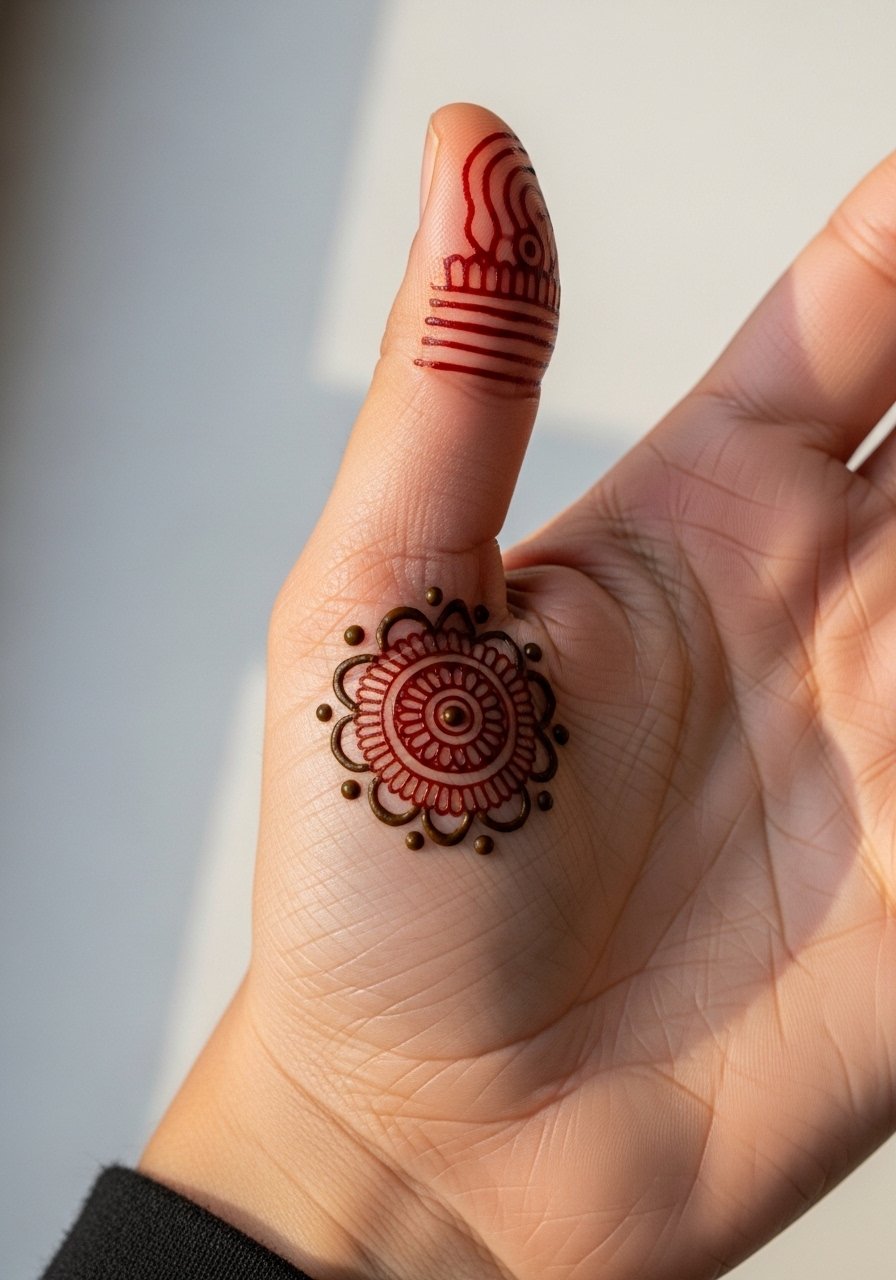
This placement reads as a focal point when you want something compact yet detailed. Ask the applier for concentric spacing rather than heavy petal fills so the inner lines do not merge. A common version that ages poorly packs too many concentric dots close together, which blurs within days. For visibility, it holds up best when the mandala is sized to the palm crease. During the session the curve of the thumb base may make the artist slow down to keep symmetry. Pair with a thin chain pendant if you like small jewelry that keeps attention on the hands.
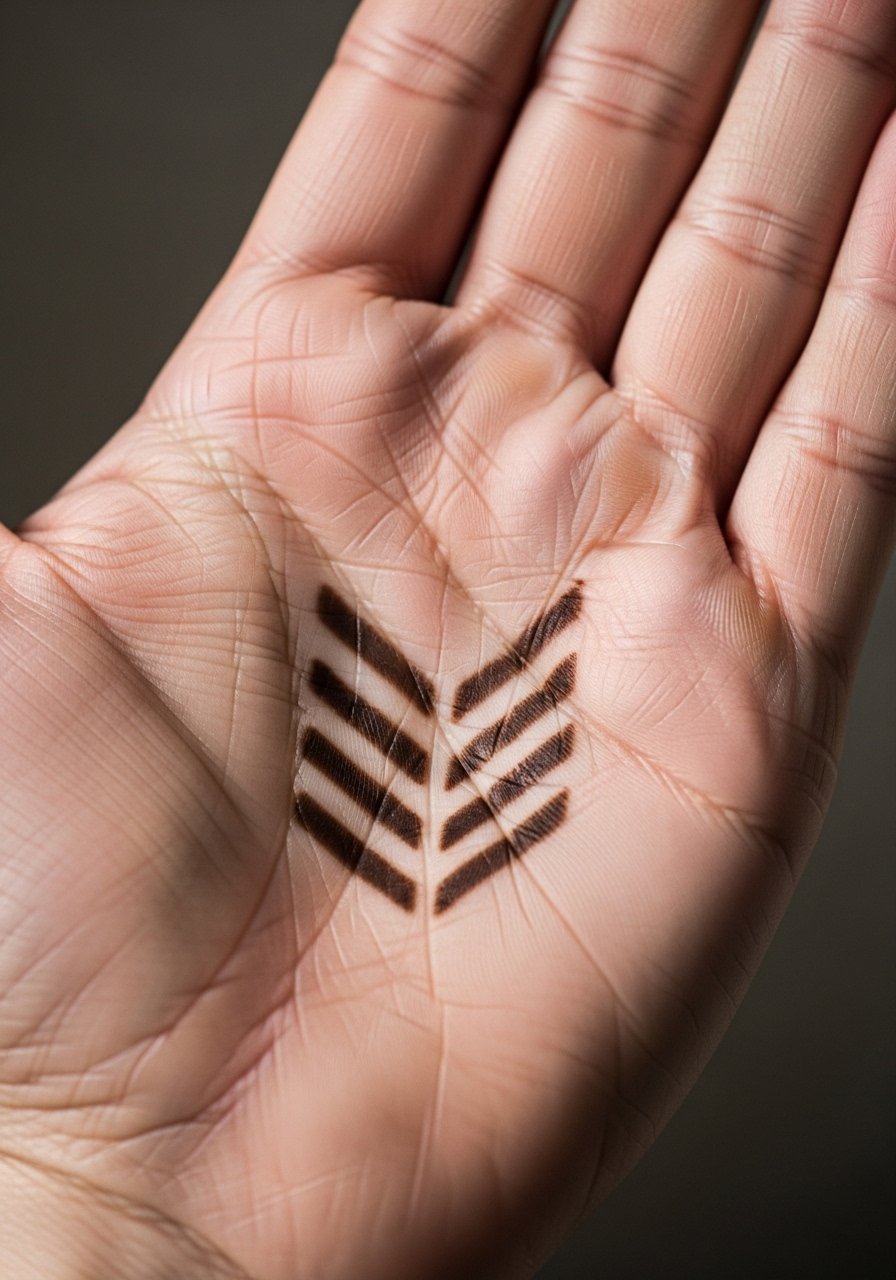
4. Chevron Lines Down the Side of the Hand
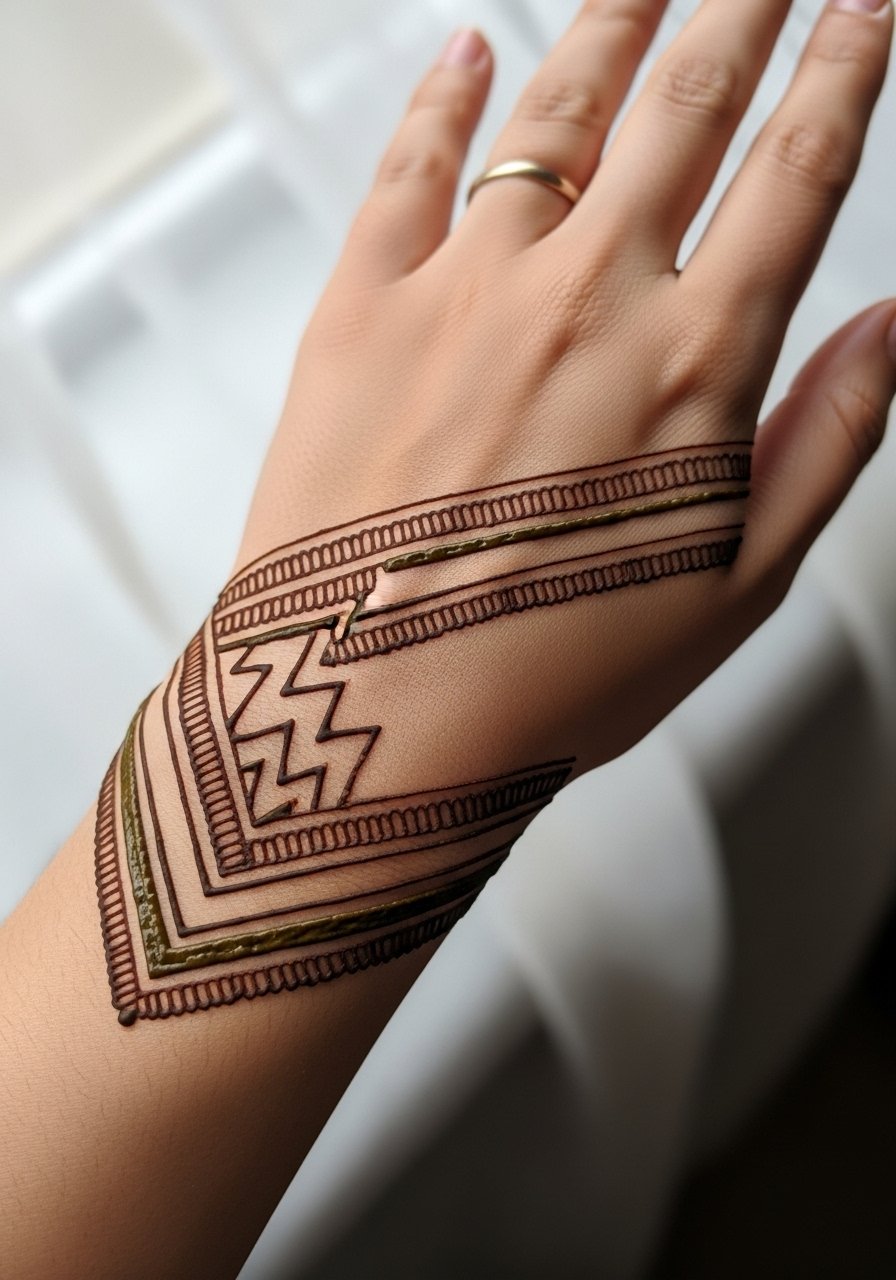
This linear motif is great for people who prefer modern geometry. When you ask for it, request parallel spacing and slightly tapered ends so the lines read clean as the paste lifts. The mistake is asking for perfectly solid thick lines. Those can feather on the sides and look blurred after three days. The session is quick, under thirty minutes for a small run of chevrons, and the wrist area is less sensitive than finger joints. For showing it off, roll up a sleeve and wear a loose button-down shirt with the cuff pushed back so the chevrons are visible.
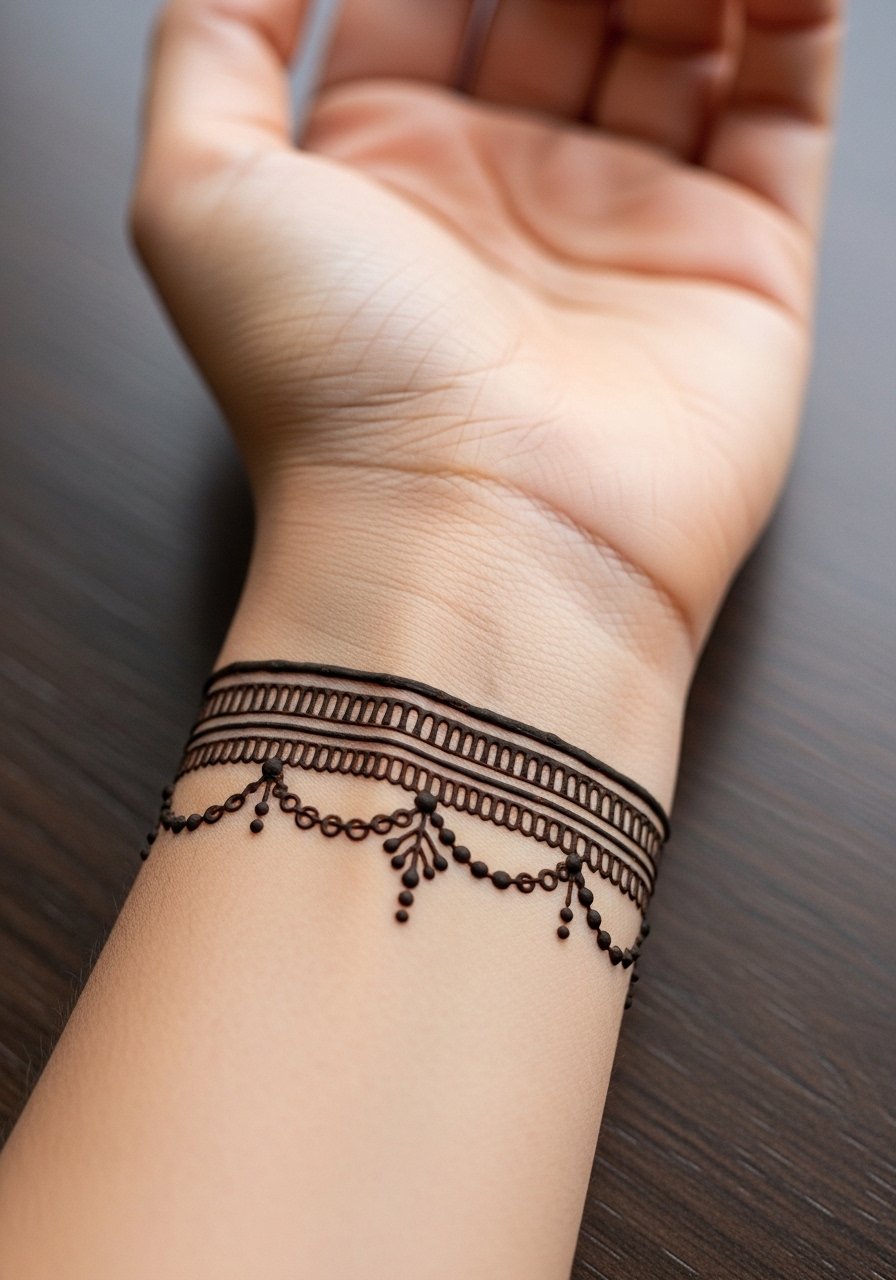
5. Dot-Work Bracelet Around the Wrist
A stippled bracelet gives subtle texture that ages gracefully. During consultation, say you want dots spaced so they break up into negative space as they fade. A common error is requesting packed stippling too close together, which becomes a muddy band after the first week. The wrist tolerates the session well, but hair on the wrist may pick up more paste if you rest your arm. Pair this with a minimalist watch strap that sits above the band so the henna reads like layered jewelry.
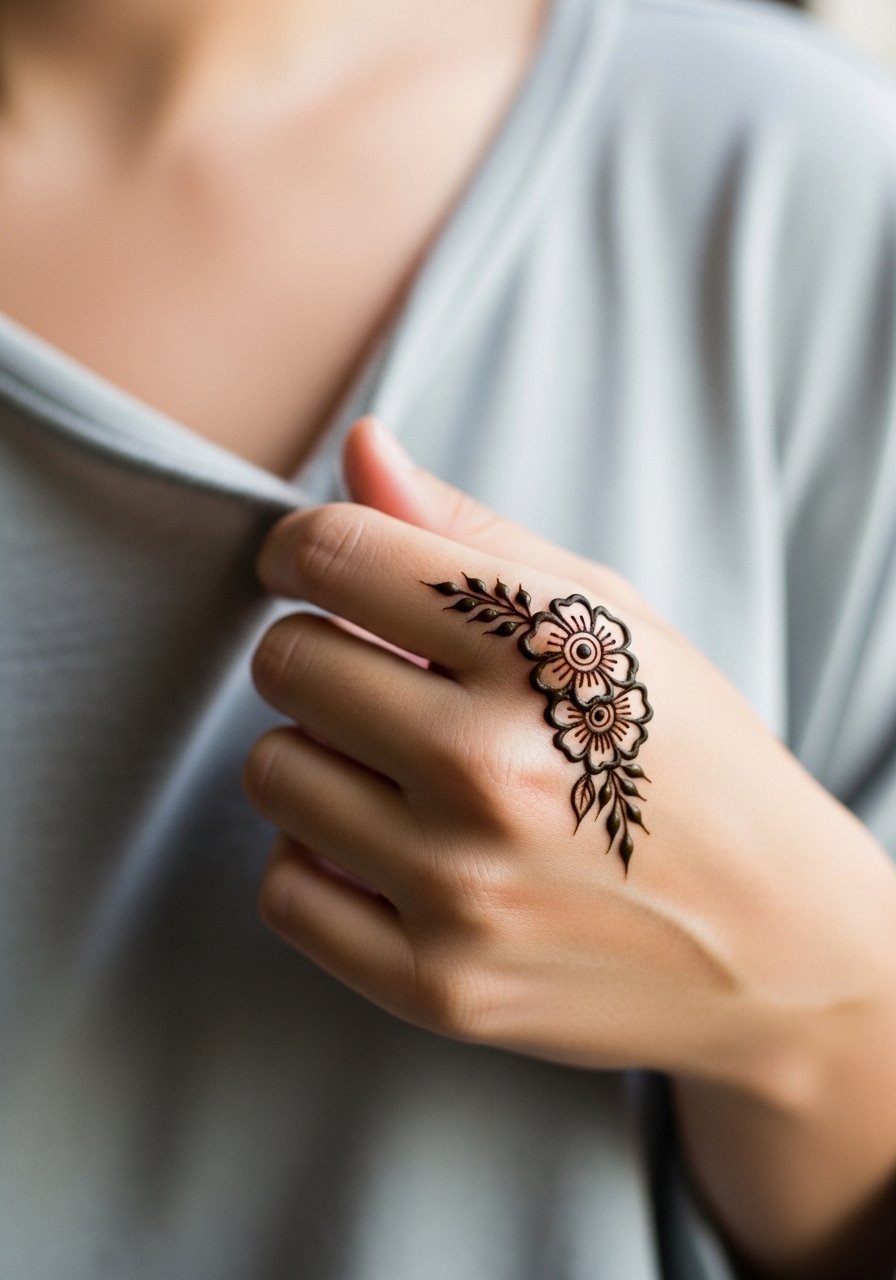
6. Single Floral Motif Over the Knuckle
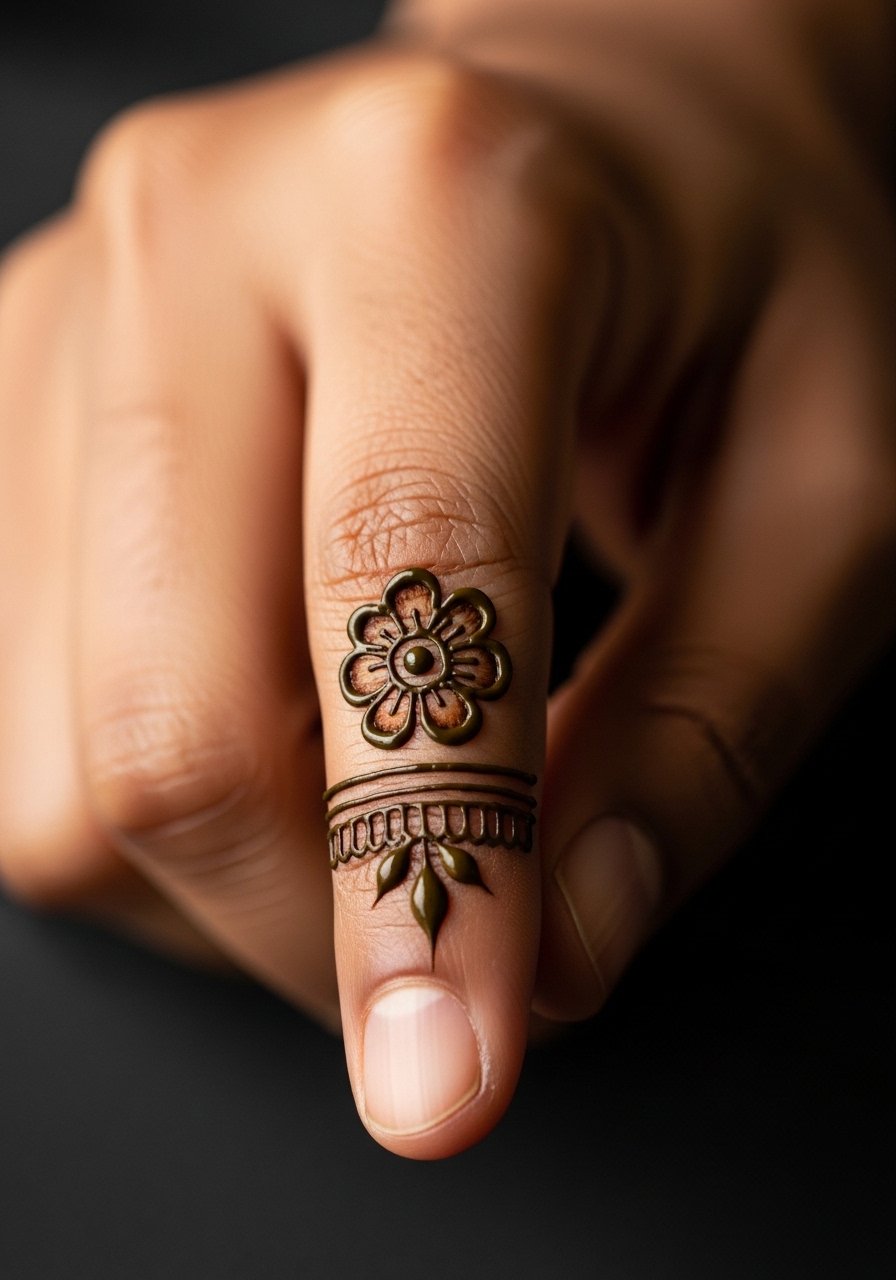
A knuckle bloom is a small statement that works with rings and movement. Tell the artist to keep petal outlines thin and avoid heavy fills that can smudge with knuckle flex. The biggest mistake is placing multiple heavy petals on a knuckle with no breathing room. That tends to lift unevenly when the hand flexes. The session is short but the area feels more sensitive during paste application. For flair, wear a thin midi ring above the knuckle motif once the stain has set.
Studio Day Picks
These first half-hand designs are exposed to friction and soap more than larger forearm pieces, so a few practical items smooth the session and the first week.
-
Stencil transfer paper kit. Useful for previewing the layout on the hand so you can confirm placement before paste touches skin.
-
Topical numbing cream. A small application can ease sensitivity on the knuckles and finger joints for longer sessions.
-
Thin protective film roll. Handy for covering freshly dried henna to prevent accidental smudging during the first night.
-
Fragrance-free body wash. Gentle cleansers reduce irritation when you rinse hands without stripping the fading stain too fast.
-
Aquaphor healing ointment. A thin layer applied to skin not covered by paste can protect adjacent areas and reduce rubbing from jewelry.
7. Palm Negative-Space Medallion
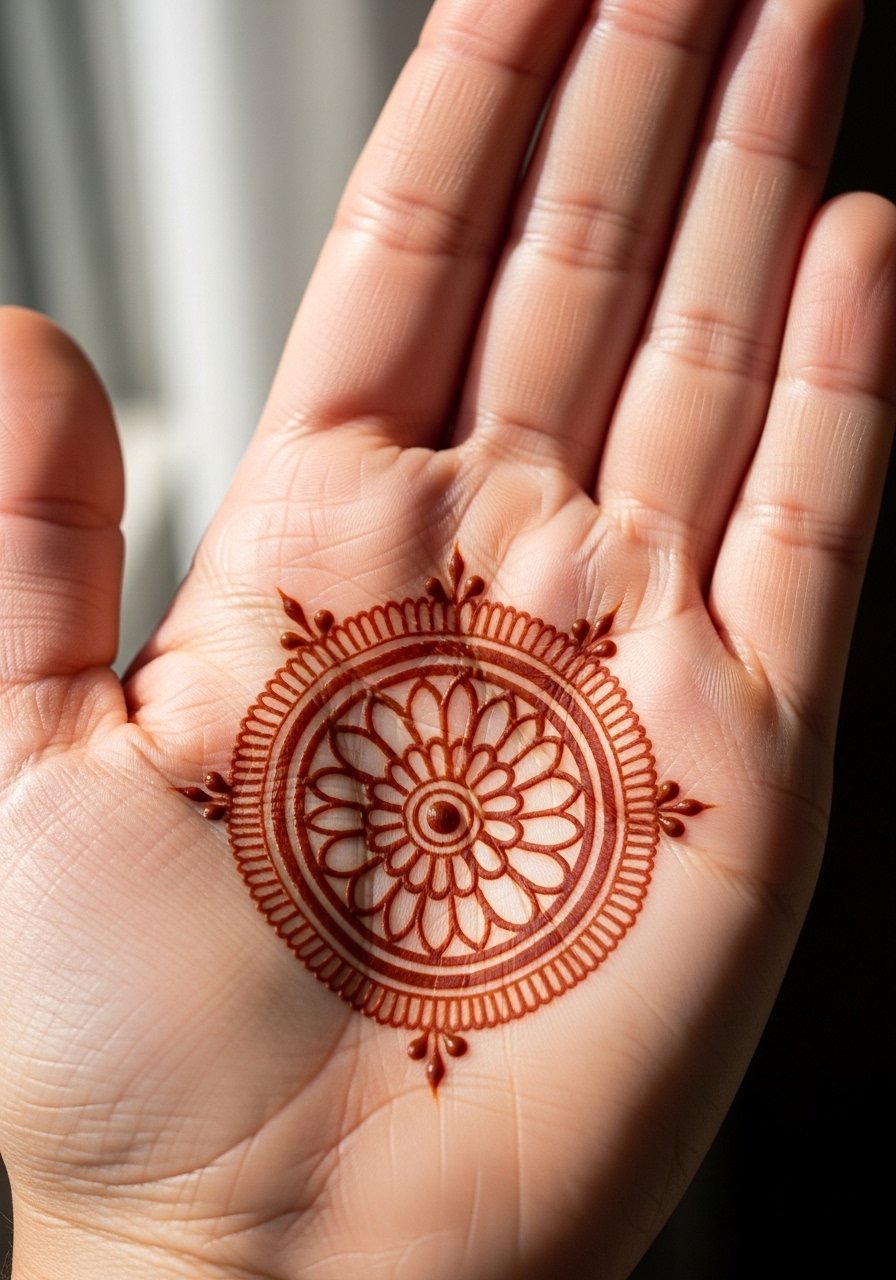
Palms give strong contrast for henna stains because of thicker skin. Ask for intentional negative space so the design reads crisp even as it lightens. A bad version fills the palm densely, which can flake off unevenly and leave patches. The session may feel a bit more intense on the palm due to pressure points, but it is manageable for most people. Expect the darkest color in the first 48 to 72 hours, then gradual fade. For a look that resembles jewelry, carry a racing-style leather cuff only during showing moments and remove frequently to avoid friction.
8. Tiny Script Word Along the Side
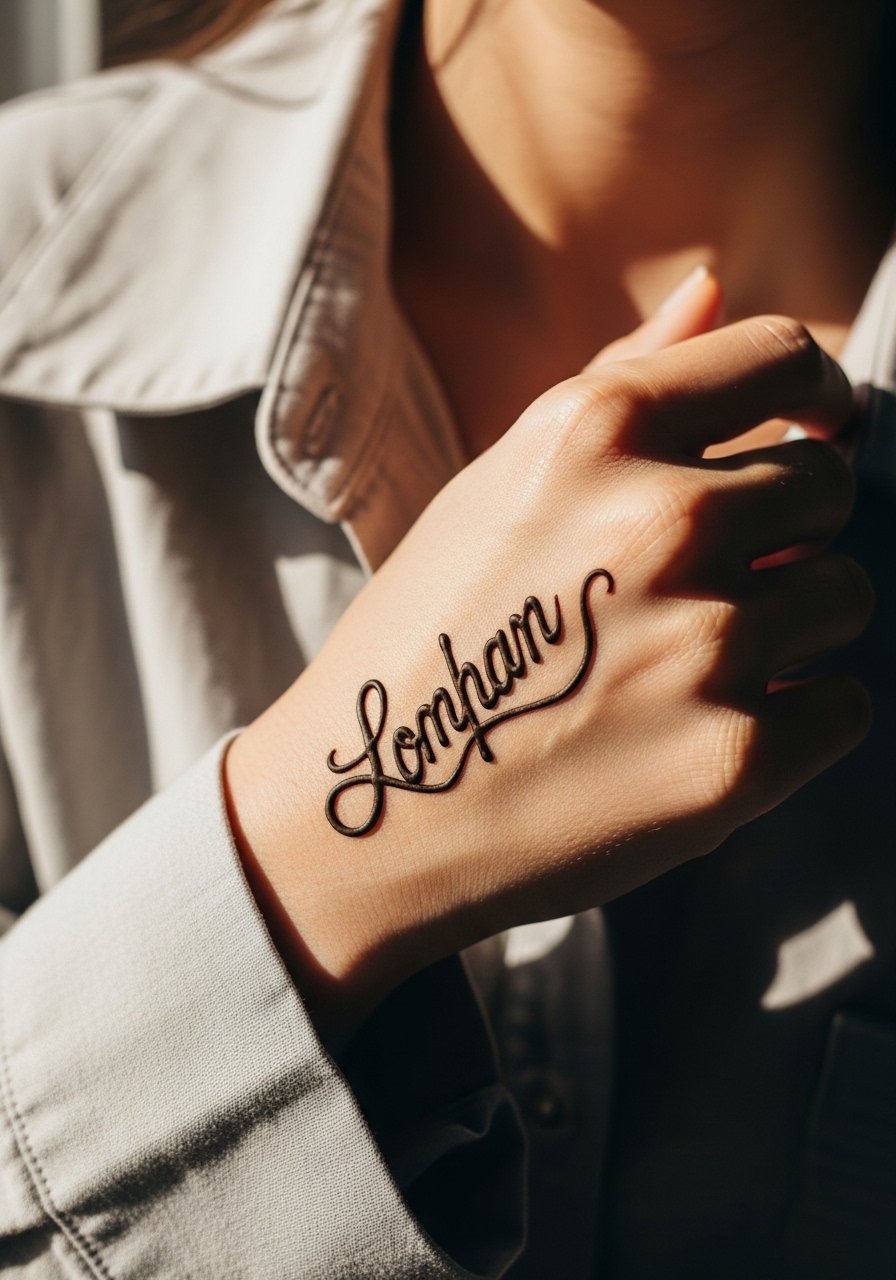
Text works when letters are spaced and sized for the area. Specify exact wording and font weight to the artist because small script can blur. The common mistake is squeezing a long phrase into a narrow space. That leads to illegible smudges. Sessions are quick and the side of the hand feels less sensitive than fingers. For showing it off, pair with a thin chain bracelet that sits lower on the wrist so the script remains visible.
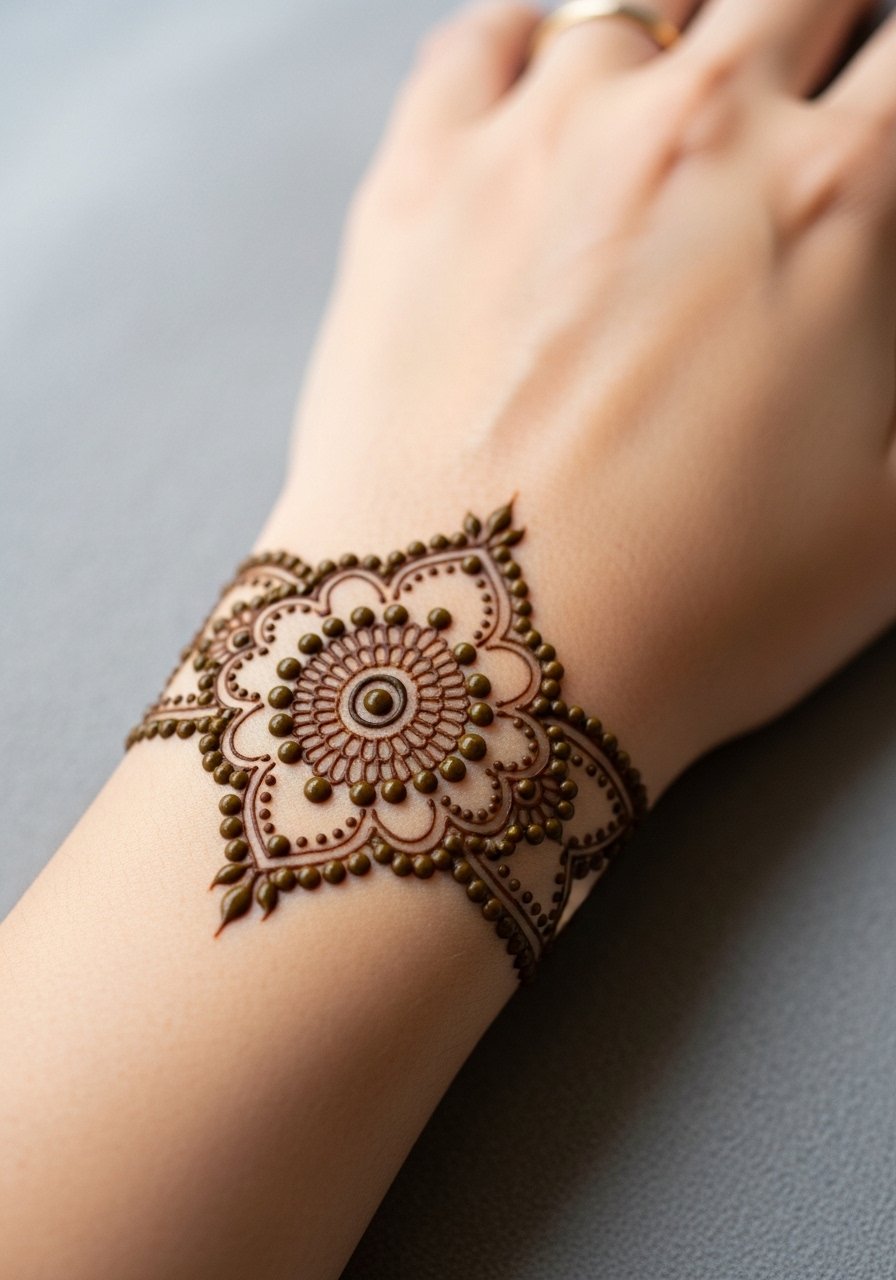
9. Delicate Henna Lace Cuff

This cuff is feminine without being ornate. During consultation, ask for scalloped edges and a clear edge line so the cuff does not blend into the forearm as it fades. Too much dense filling along the cuff leads to an uneven fade pattern. The wrist is tolerant but makes a lot of contact with clothing, so be mindful of friction. For display, stack a thin bangle set above the cuff to mimic layered jewelry.
10. Constellation of Tiny Stars Across Fingers
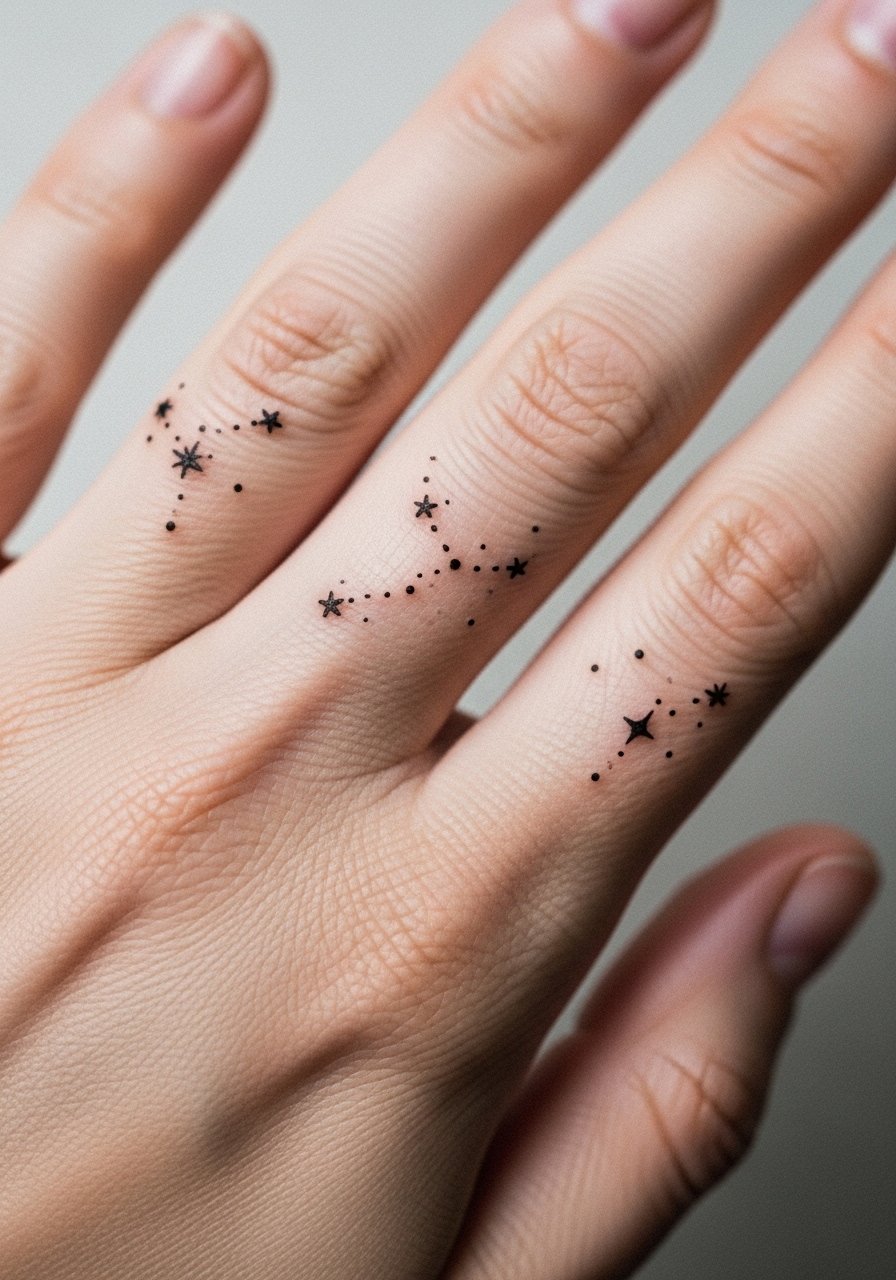
Scattered tiny stars feel whimsical without dominating the hand. Tell the artist you want spacing to allow each star to breathe so the dots do not connect when they fade. A common mistake is clustering stars too closely, which makes them look like a patch after repeated handwashing. The session is brief and generally well tolerated. For subtle shine, wear a thin hammered ring on one finger to accent the constellation.
11. Single Paisley Drifting from Wrist to Hand
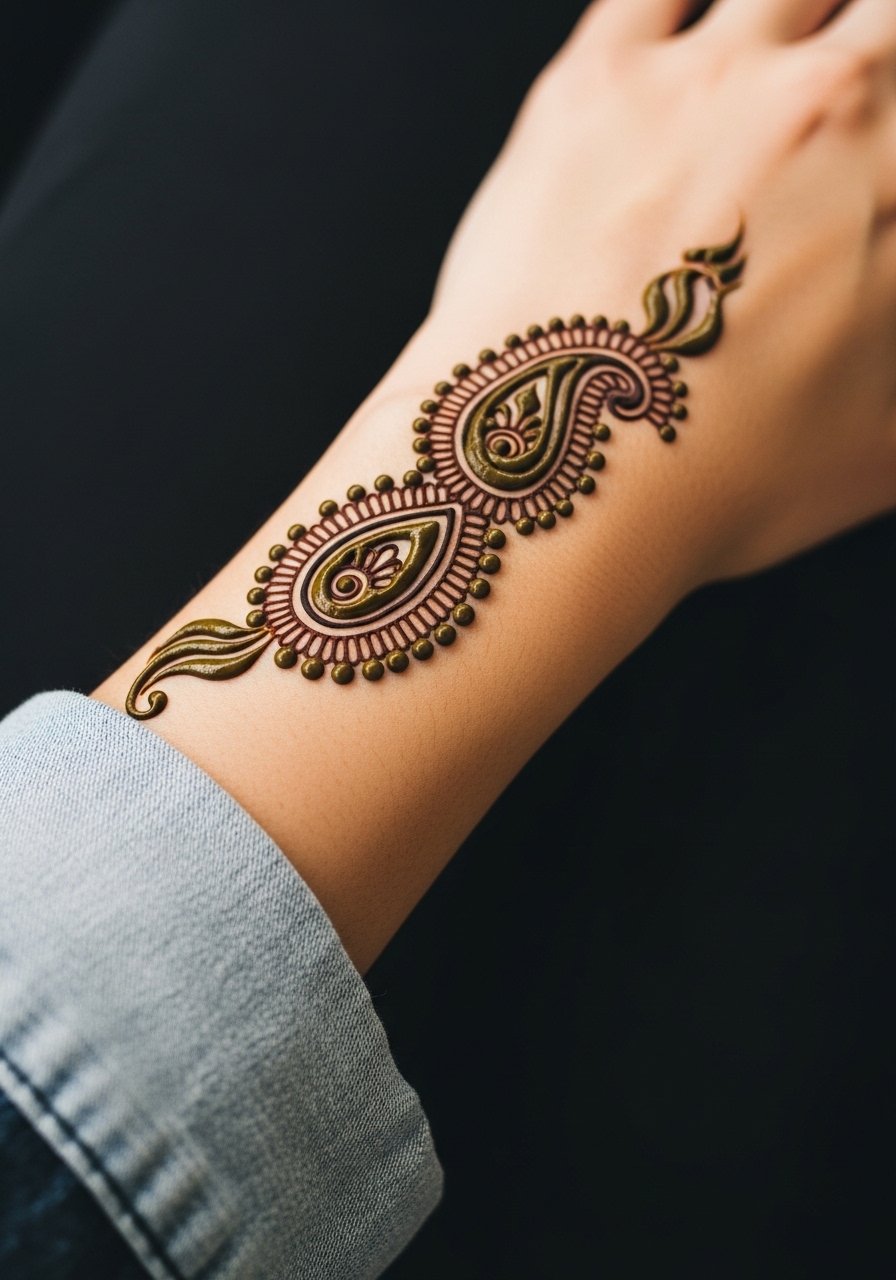
A flowing paisley works when you want motion across the skin. In your consultation, map the curve so it follows tendons rather than crossing them awkwardly. The common pitfall is bending the motif across creases where paste tends to crack. When applied with space, the fading pattern keeps the paisley readable for a full week. Session time is moderate because of the flowing lines. Show it off with a rolled-up linen shirt so the motif is revealed with movement.
12. Geometric Grid Accent at the Wrist
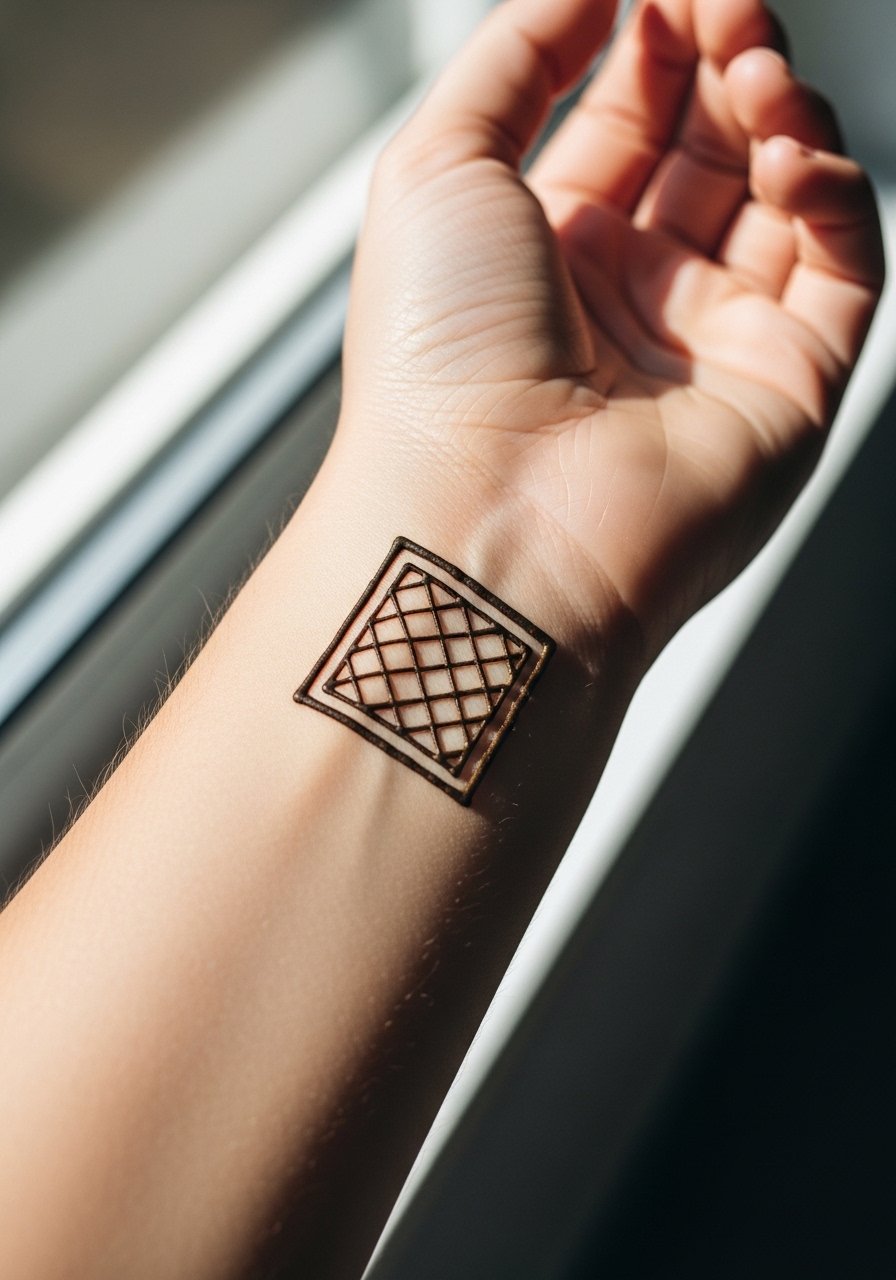
Minimal geometry gives a modern touch. Ask for slightly spaced grid lines so the intersections do not bleed into each other as the stain fades. The rookie move is requesting a very tight grid with many lines per inch. That tends to look like a smudge after a few days. The wrist is easy to protect during healing if you avoid tight accessories. For a cohesive look pair it with a minimal leather bracelet that sits below the grid.
13. Floral Vine Wrapping Between Fingers
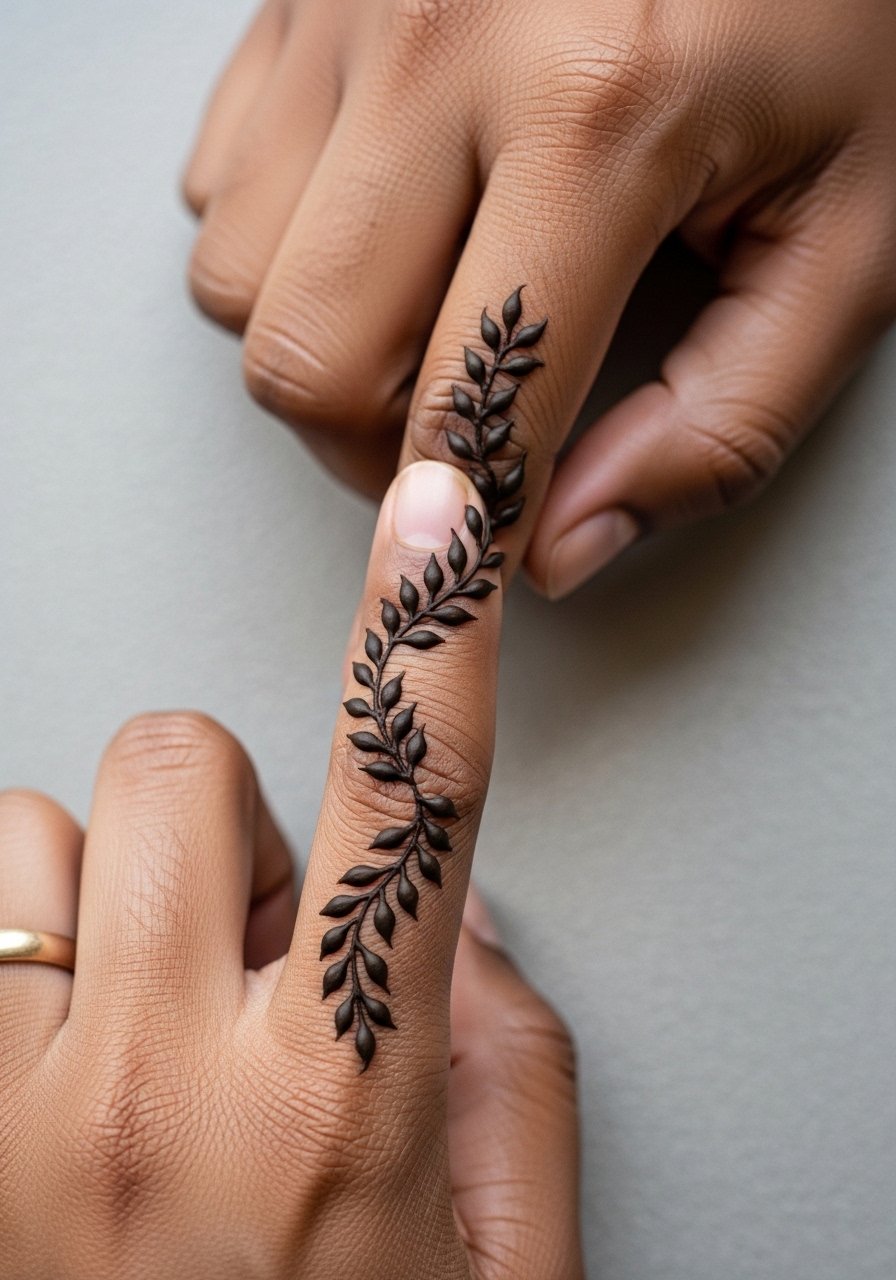
Inter-finger vines are intimate and delicate. Ask for thin stems and small leaves so the pattern remains defined even as oils and soap touch the area. The common mistake is asking for broader leaves that lose shape quickly. The area is exposed to constant movement so expect the stain to soften faster than on the back of the hand. For display keep hands dry for the first two nights and consider a dainty ring set that complements rather than covers the vine.
14. Negative-Space Chevron Palm Accent
Negative-space chevrons read sharp against the palm when negative areas are intentional. Tell the applier to outline the chevrons and avoid heavy paste fills inside the shapes. Packed interior fills have a habit of flaking irregularly and leaving jagged edges. Palms darken quickest but also shed faster. If you want the look to last through an event, schedule the session the day before. For pairing, a thin wrist cuff that sits above the chevrons helps the eye land on the negative shapes.
15. Henna Lace Between Thumb and Index
This placement highlights movement and looks refined when left airy. Instruct the artist to favor linework with small dots rather than solid fills in the webbing. Solid fills here can crack and flake oddly because the skin stretches with every pinch. The session is short but you may feel sharper pressure in the webbing. Add a thin adjustable bracelet to balance the lace when showing it off.
16. Small Geometric Dot Cluster on the Back of Hand
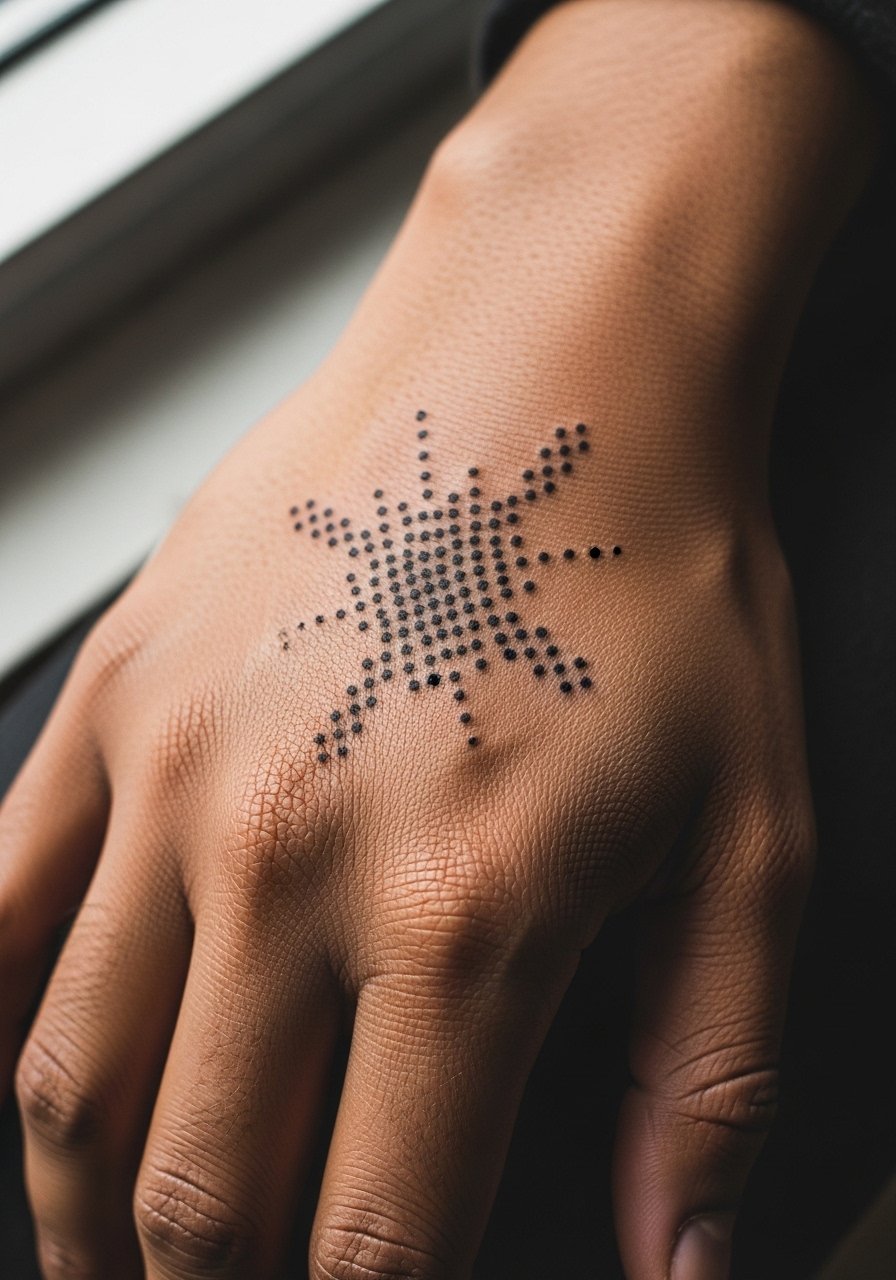
Dot clusters make for understated texture. Ask for equal spacing and a slight gradient in density so it looks intentional as it fades. A frequent mistake is overloading the cluster density which leaves a patchy fade. The back of the hand tolerates dot work well, but frequent exposure to water accelerates fading. Wear a neutral linen sleeve rolled to the elbow when you want to preserve the pattern while still showing the hand.
17. Ornamental Chain Along the Wrist Crease
A chain motif reads like jewelry and is forgiving as it fades if spacing is left between links. Specify distinct link shapes instead of a continuous filled band to prevent blurring. The main mistake is asking for a single thick line that ends up looking uneven after a few washes. Session time is brief and comfort is high around the wrist. Pair with a delicate chain bracelet that echoes the design.
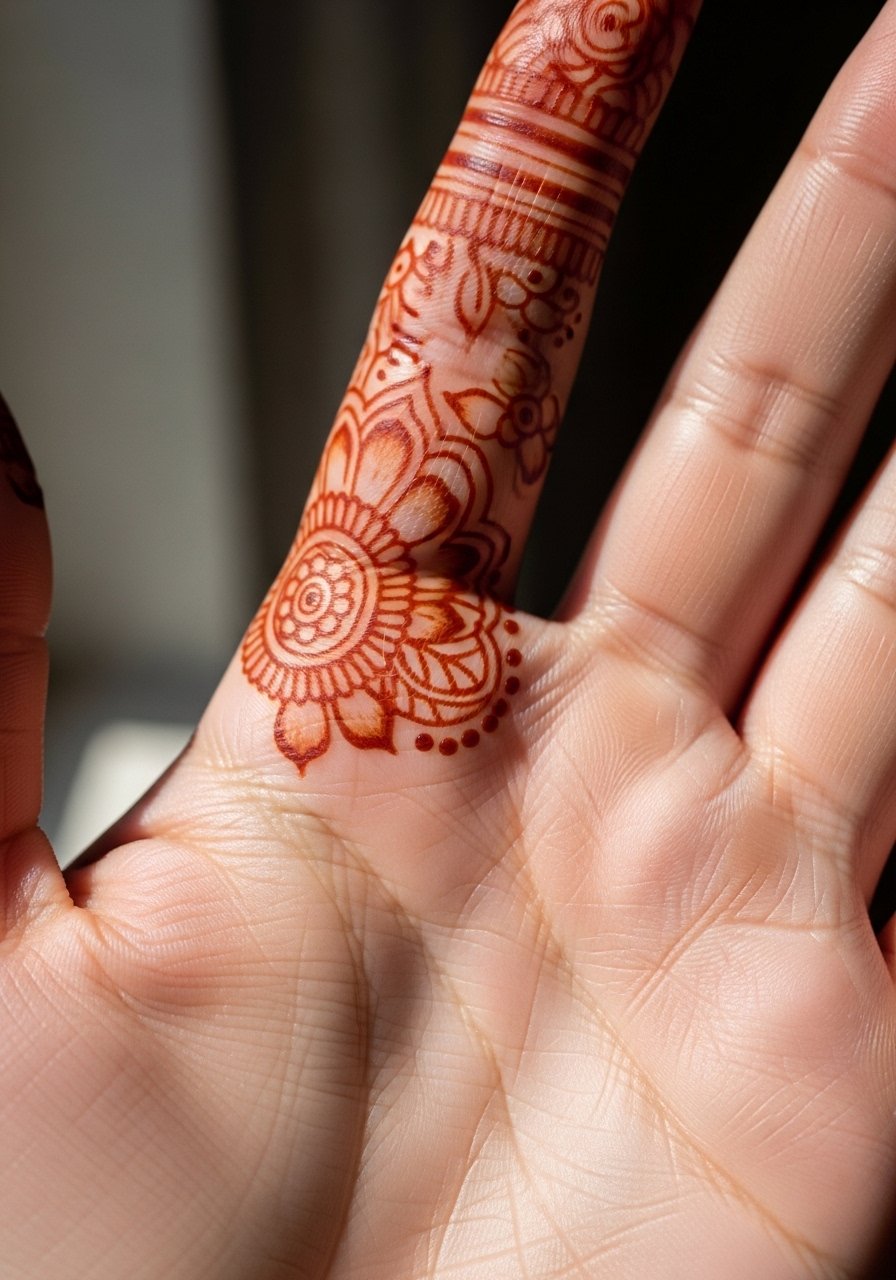
18. Micro-Mandala at the Base of Each Finger
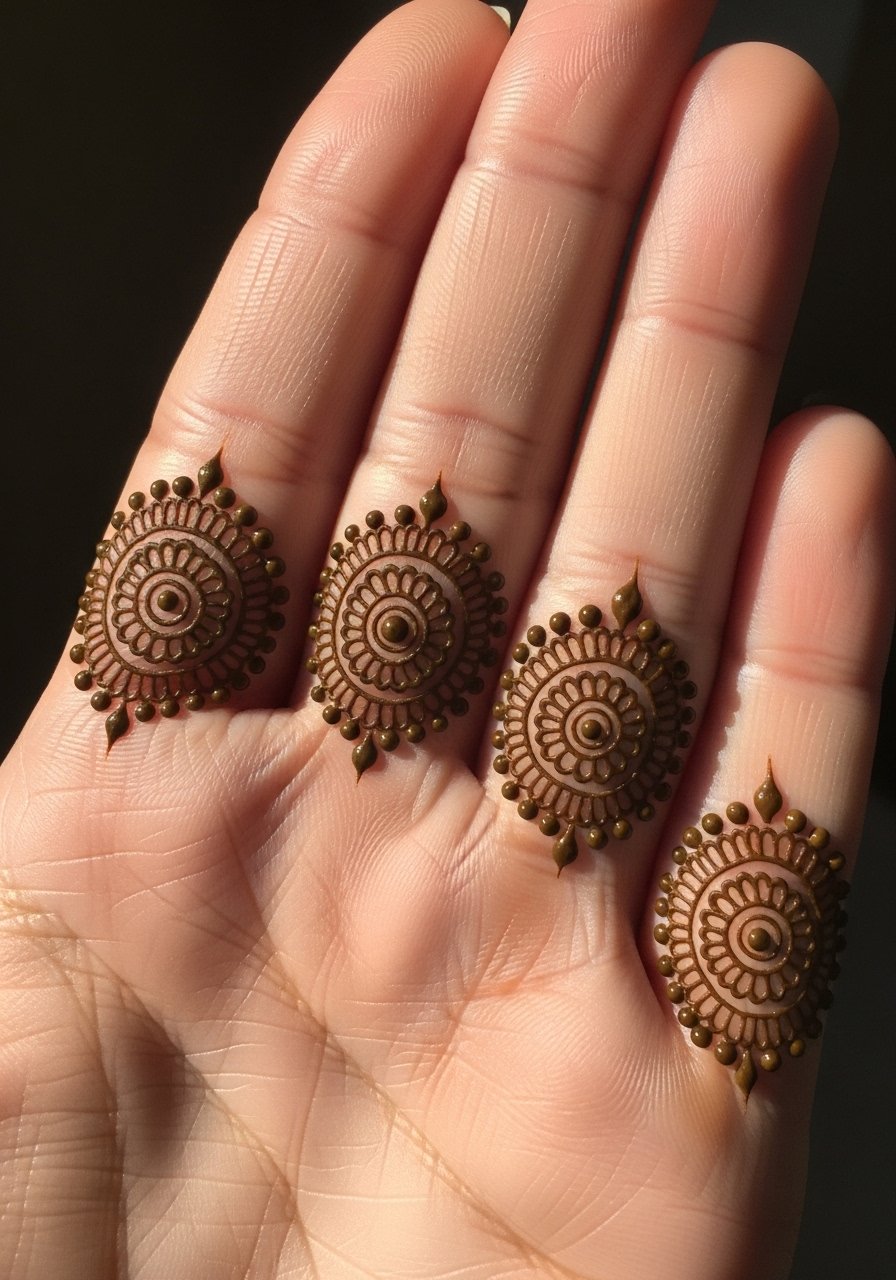
Repeating micro-mandalas create rhythm across the hand. Ask for simplified petal shapes to avoid over-detailing that blurs fast. The error I see is insisting on intricate fills at this small scale. They look crisp for a day but blend into indistinct spots by day four. Sessions take longer if you want symmetry across fingers so plan accordingly. Show them with stacked thin stacking rings that sit above the motifs.
19. Asymmetric Floral Cluster Near the Thumb
Asymmetry feels natural and effortless when petals are spaced for breathability. Tell the artist you want the cluster to taper toward the wrist so it does not crowd the hand center. A mistake is pushing symmetry where it forces the motif to sit across multiple creases. The session is comfortable and visual impact remains even as the stain fades. Pair with a thin beaded bracelet that complements the floral tones.
20. Tiny Arrow Motif Pointing Toward the Fingertips
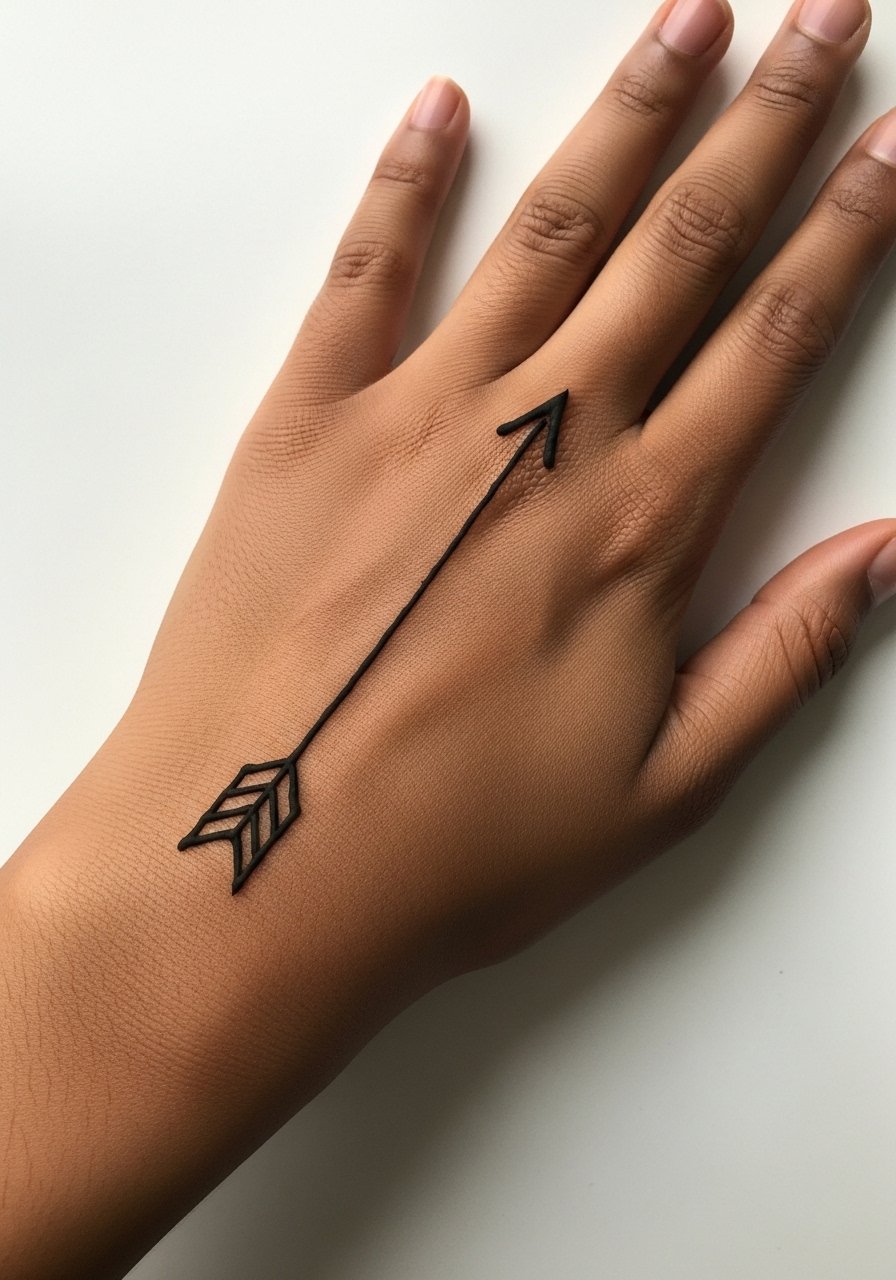
A minimal arrow reads modern and suits people who like directional accents. Ask for a narrow shaft and a small but clear arrowhead so the tip does not bleed into the skin texture. The common mistake is over-thickening the shaft which tends to blur on textured hand skin. The session takes very little time and discomfort is low. For an accessory, add a sleek minimalist watch on the other wrist to balance the look.
21. Henna Vine Halo Around the Wrist and Between Fingers

A halo vine ties several motifs together and looks intentional when the negative space between leaves is respected. Tell the artist to plan gaps so leaves remain distinct during the fade phase. The mistake is a dense continuous vine that flakes unevenly and looks patchy. This longer session is best staged in two short sittings if you have sensitive skin. Wear a soft fabric wrist wrap post-session to protect the halo from accidental rubbing during chores.
Frequently Asked Questions
Q: How long do hand henna designs usually last, and what affects that timeline?
A: Hand henna typically shows its richest color in the first 48 to 72 hours then fades over 1 to 3 weeks. Longevity depends on paste quality, how long the paste stayed on the skin before removal, friction from handwashing, and natural oils on your skin. If you want a longer-lasting look, request a darker paste mix applied with a steady hand and avoid excessive wetting during the first 48 hours.
Q: Is black henna safe for delicate hand designs, or should I avoid it because of allergic concerns?
A: Black henna raises safety concerns for many people. One camp argues it can deliver deeper contrast for fine designs. The other camp warns some black henna mixtures contain additives that increase allergic reactions. If contrast is important, opt for high-quality natural henna and a longer development time rather than a chemical additive. Always test a small patch first.
Q: How do I find a reliable henna artist who understands delicate hand work?
A: Look through local directories, craft fair listings, and relevant hashtags to find artists who show hand work similar to your reference. Read portfolios for crisp negative space and even staining. During consultation ask how long they let the paste dry and whether they mix their own paste. Discovery pathways like community boards and event listings often surface artists focused on clean, delicate work.
Q: Can hand henna designs conflict with cultural respect, and how should I approach culturally specific motifs?
A: People split on this. One camp sees wearing traditional motifs without understanding as appropriation. The other sees cultural sharing as artistic exchange when done respectfully. If a design has clear cultural origin, ask your artist about subtle variations or discuss its meaning. That approach shows awareness without copying sacred symbols.
Q: What should I wear to a henna session for hand and wrist designs?
A: Wear clothing that gives easy access to the hands and wrists without risking paste contact. A loose button-down shirt or a rolled sleeve is practical. Comfortable clothing helps you stay still during longer sessions and keeps fabric away from fresh paste.
Q: Do delicate, fine-patterned henna designs show well on darker skin tones?
A: Yes, fine patterns can be striking on darker skin when the paste is high quality and given time to develop. Contrast is about paste darkness and application technique more than skin tone alone. Request a test spot if you are unsure how a particular mix stains your skin.
Q: How often can I reapply henna to keep a hand design looking fresh?
A: You can reapply as often as you like once the previous stain has sufficiently faded. Many people refresh delicate hand designs every 1 to 3 weeks if they want continuous coverage. Consider lighter reapplications to avoid irritation from frequent paste use.
